RPG项目01_脚本代码
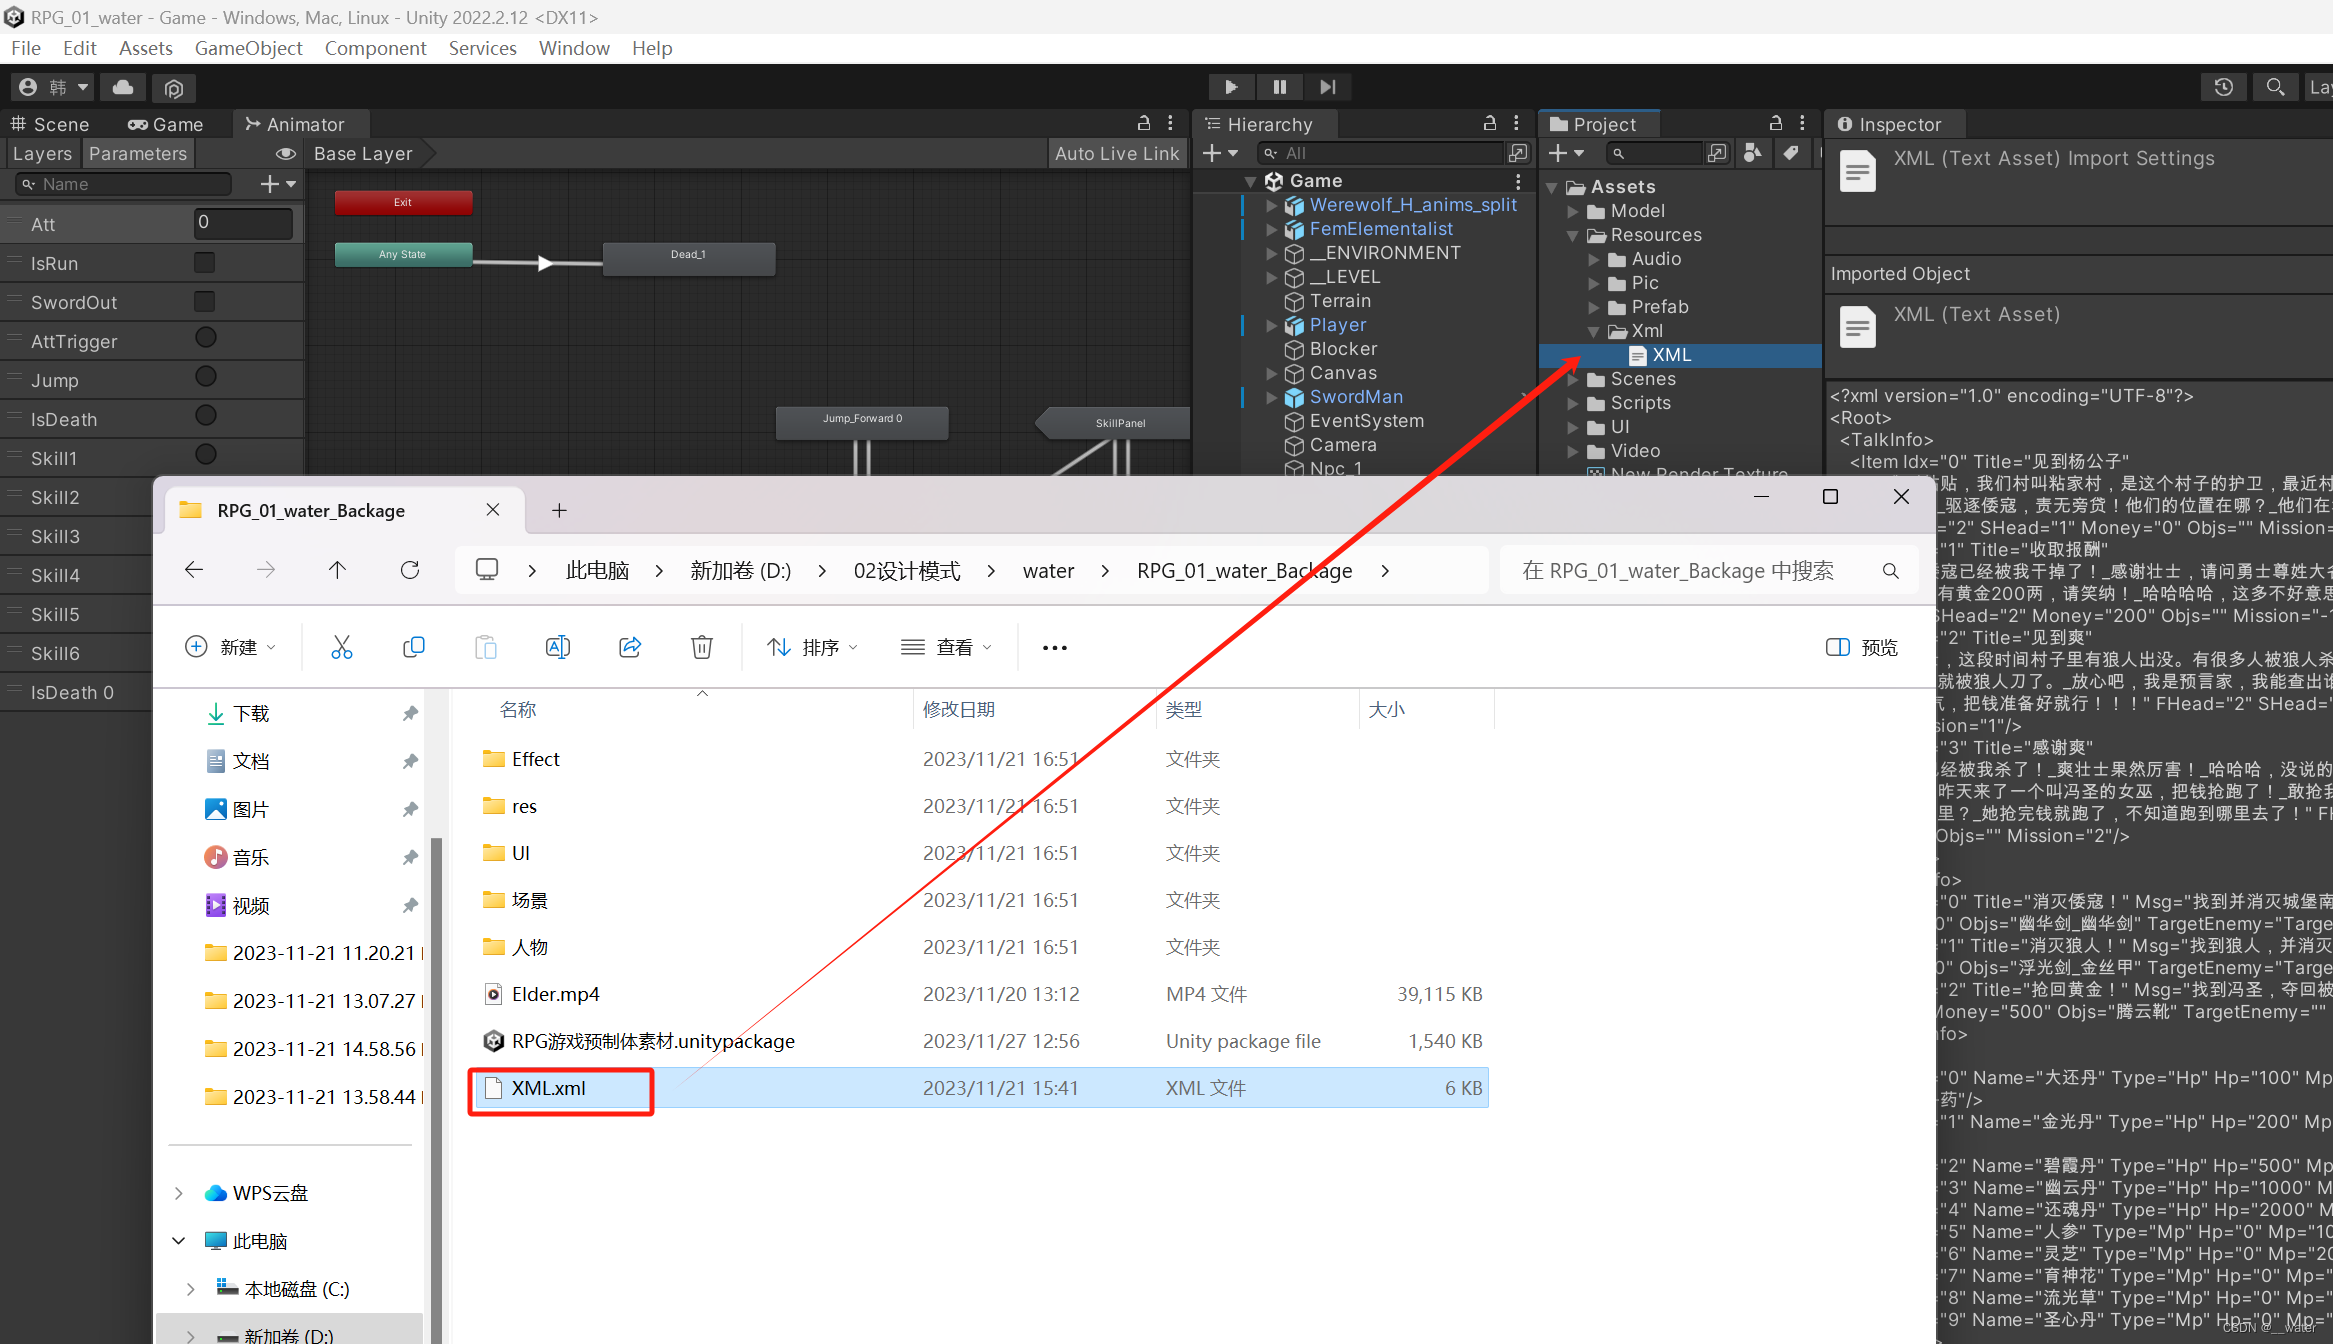
基于“RPG项目01_场景及人物动画管理器”,我们创建一个XML文档
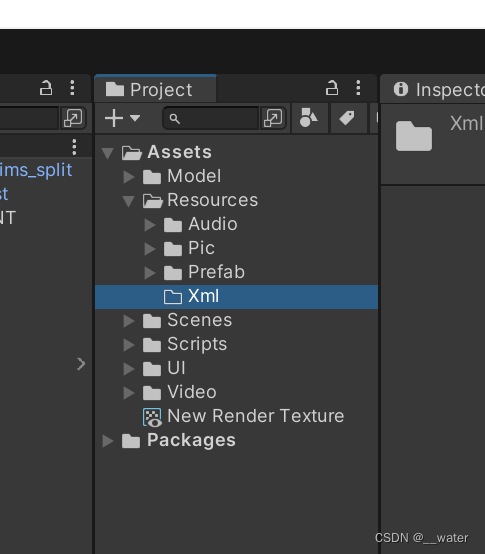
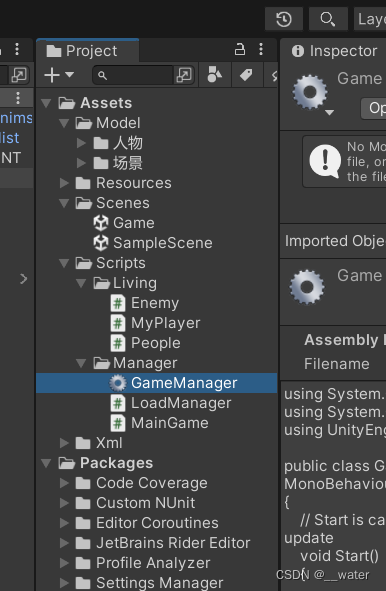
在资源文件夹下创建一个文件夹,

命名为Xml
将Xnl文档拖拽至文件夹中,
再在文件夹的Manager下新建脚本LoadManager

写代码:
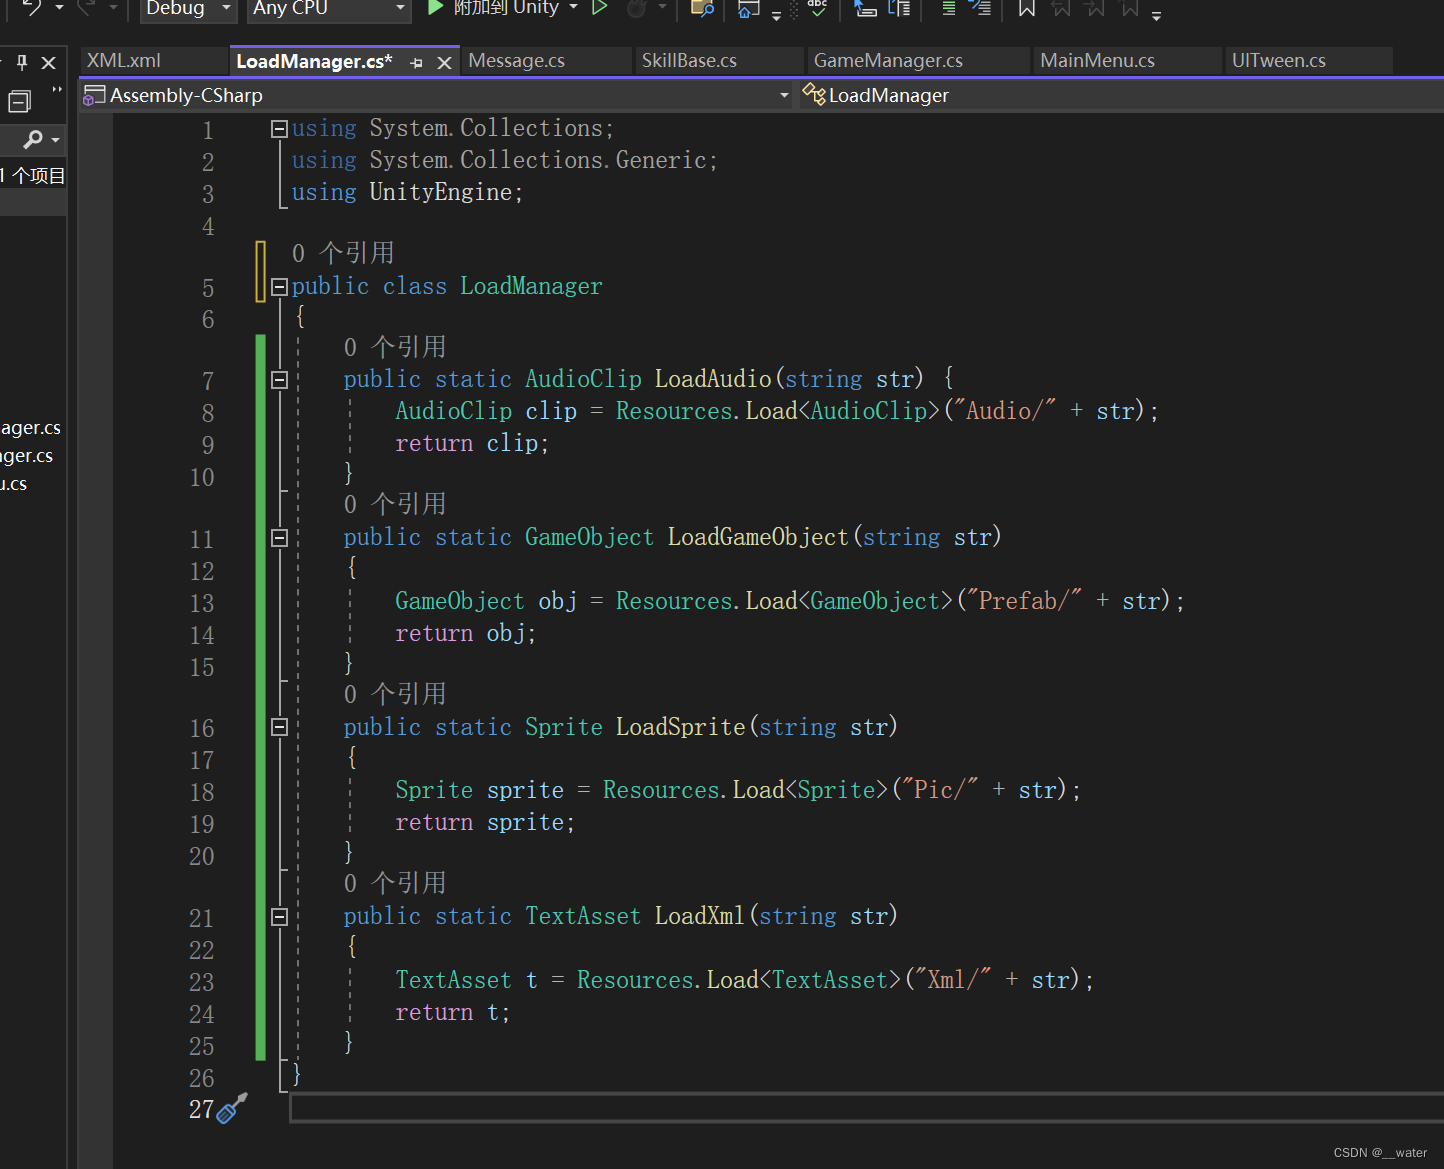
using System.Collections;
using System.Collections.Generic;
using UnityEngine;
public class LoadManager
{
public static AudioClip LoadAudio(string str) {
AudioClip clip = Resources.Load<AudioClip>("Audio/" + str);
return clip;
}
public static GameObject LoadGameObject(string str)
{
GameObject obj = Resources.Load<GameObject>("Prefab/" + str);
return obj;
}
public static Sprite LoadSprite(string str)
{
Sprite sprite = Resources.Load<Sprite>("Pic/" + str);
return sprite;
}
public static TextAsset LoadXml(string str)
{
TextAsset t = Resources.Load<TextAsset>("Xml/" + str);
return t;
}
}
继续在Manager文件夹下创建脚本
新建GameManager脚本:

using System.Collections.Generic;
using System.Xml;
using Unity.VisualScripting;
using UnityEngine;
public enum GameState { Play, Menu };
public class GameManager{
//当只需要一个的时候使用静态类
public static GameState gameState = GameState.Play;
public static void Init()
{
//SetGoods();
}
public static T FindType<T>(Transform t, string n)
{
return t.Find(n).GetComponent<T>();
}
public static T ParseEnum<T>(string value)
{
return (T)System.Enum.Parse(typeof(T), value, true);
}
}
继续在Manager文件夹下创建脚本
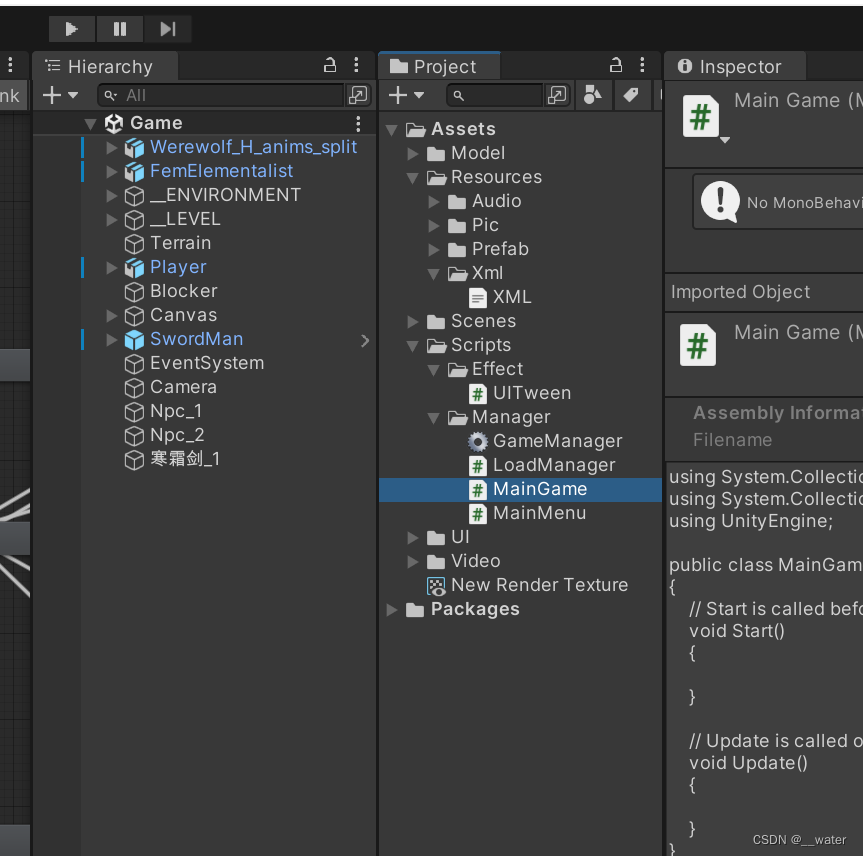
写代码:
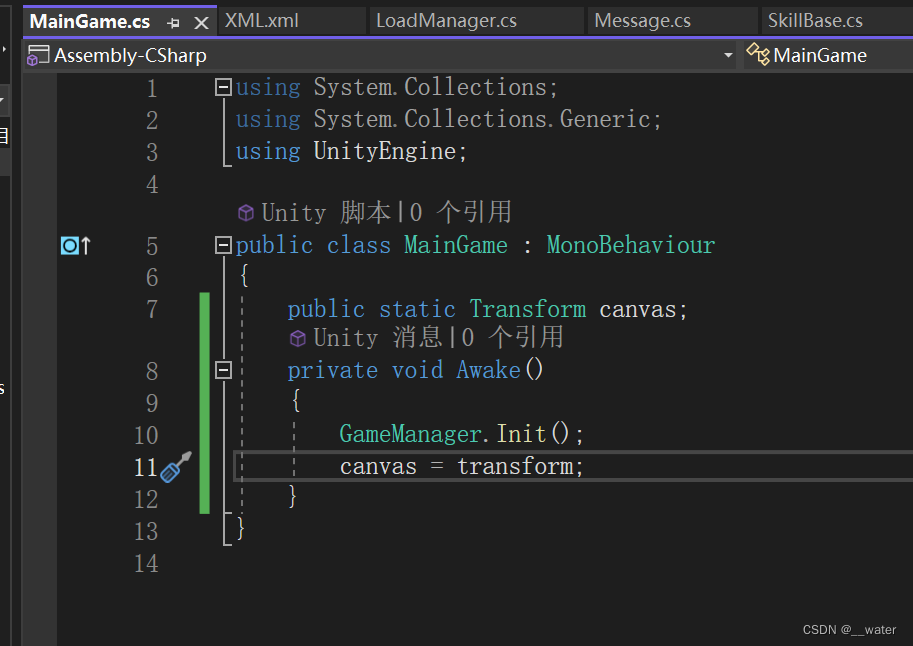
using System.Collections;
using System.Collections.Generic;
using UnityEngine;
public class MainGame : MonoBehaviour
{
public static Transform canvas;
private void Awake()
{
GameManager.Init();
canvas = transform;
}
}
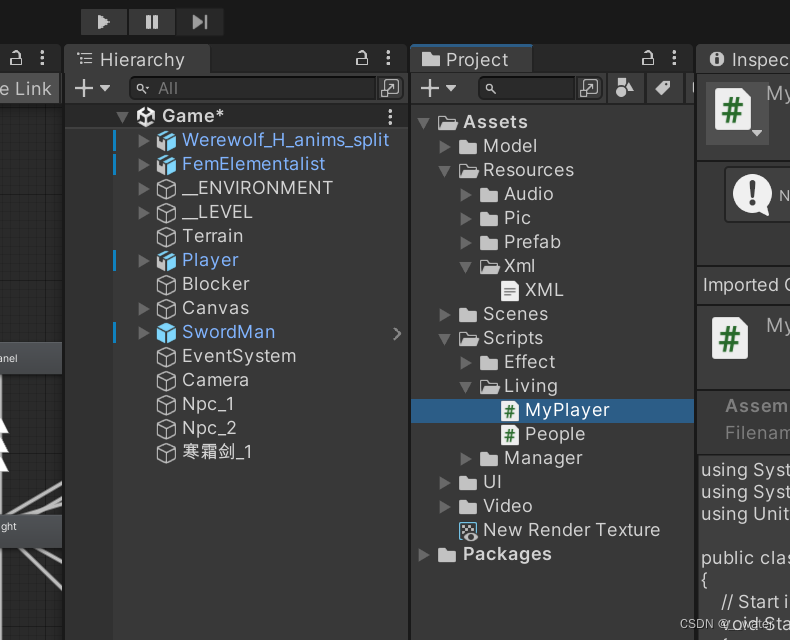
再在Scripts脚本文件夹下新建文件夹命名为:Living(活着的生物)
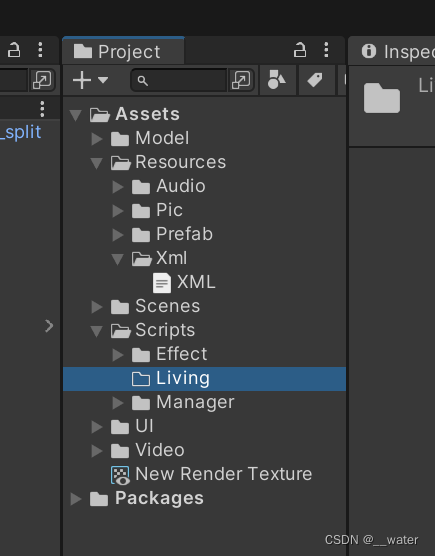
在Living创建基类People(狼人也是人)

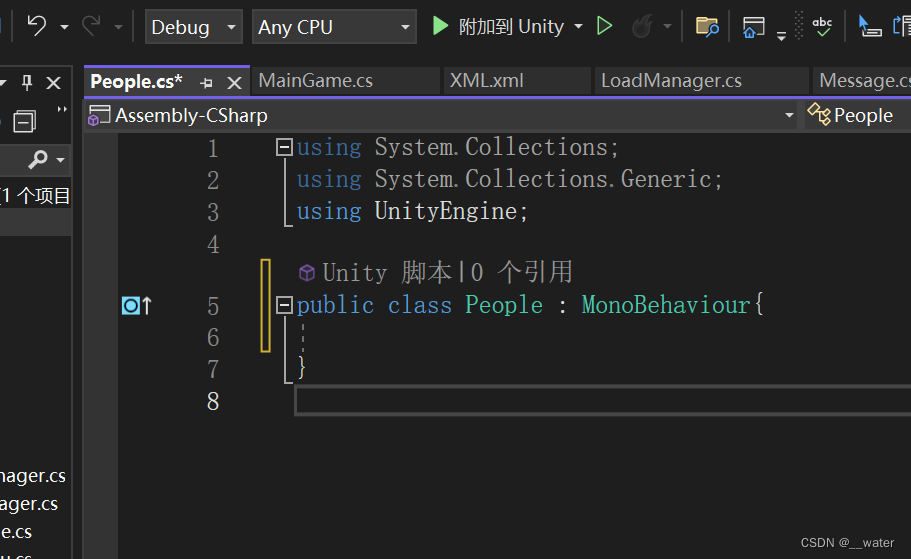
using System.Collections;
using System.Collections.Generic;
using UnityEngine;
public class People : MonoBehaviour{
}
再创建两个子类:
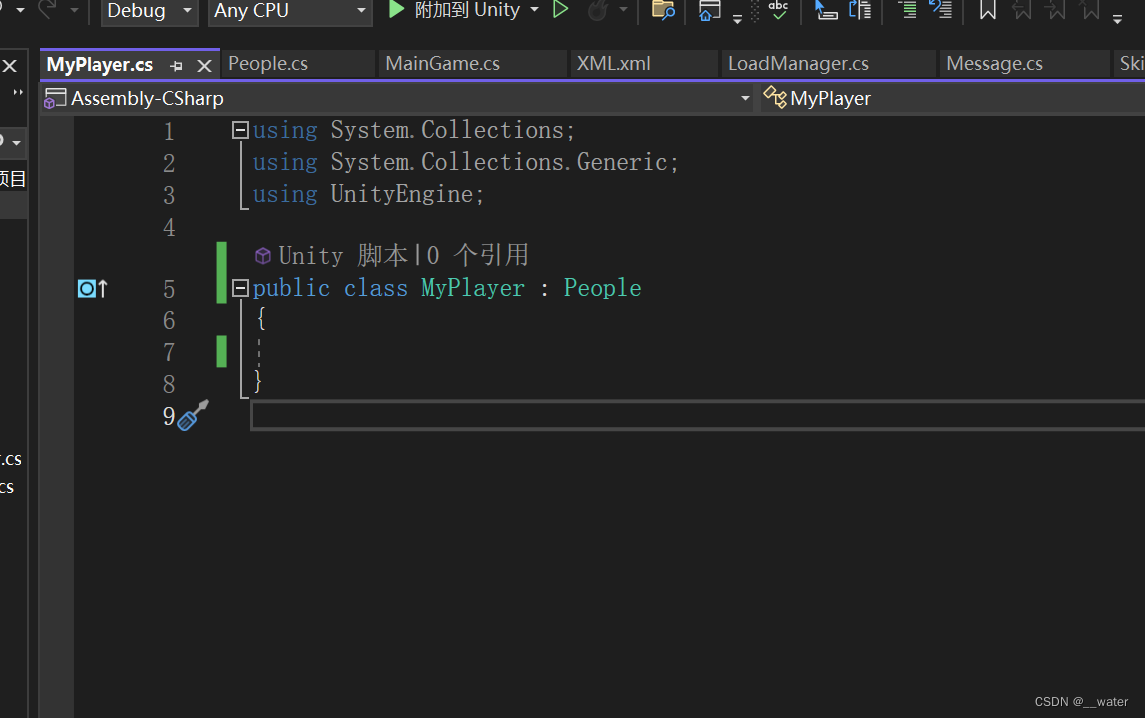
using System.Collections;
using System.Collections.Generic;
using UnityEngine;
public class MyPlayer : People
{
}
第二个子类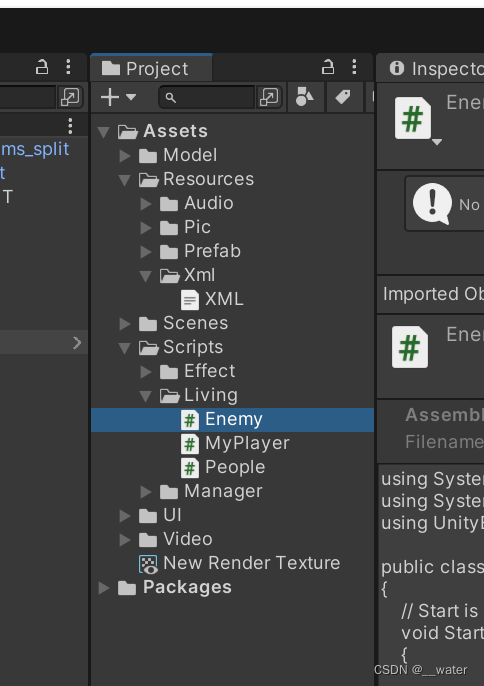
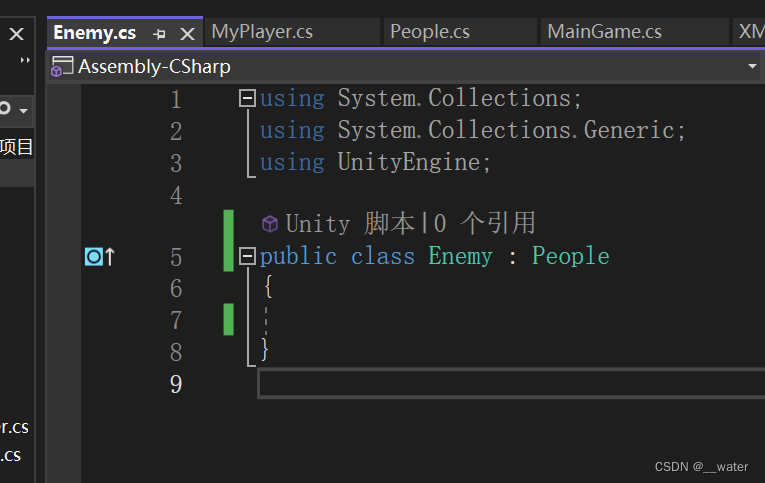
using System.Collections;
using System.Collections.Generic;
using UnityEngine;
public class Enemy : People
{
}
重新修改MainGame代码:
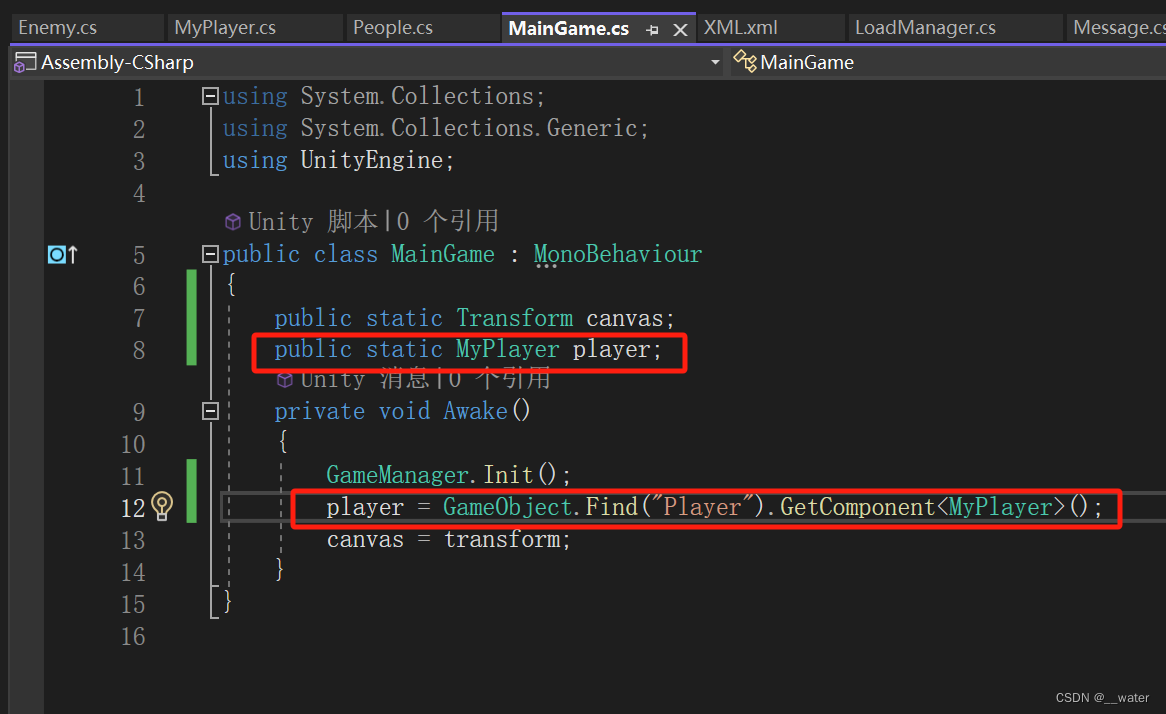
using System.Collections;
using System.Collections.Generic;
using UnityEngine;
public class MainGame : MonoBehaviour
{
public static Transform canvas;
public static MyPlayer player;
private void Awake()
{
GameManager.Init();
player = GameObject.Find("Player").GetComponent<MyPlayer>();
canvas = transform;
}
}
接下来挂载脚本: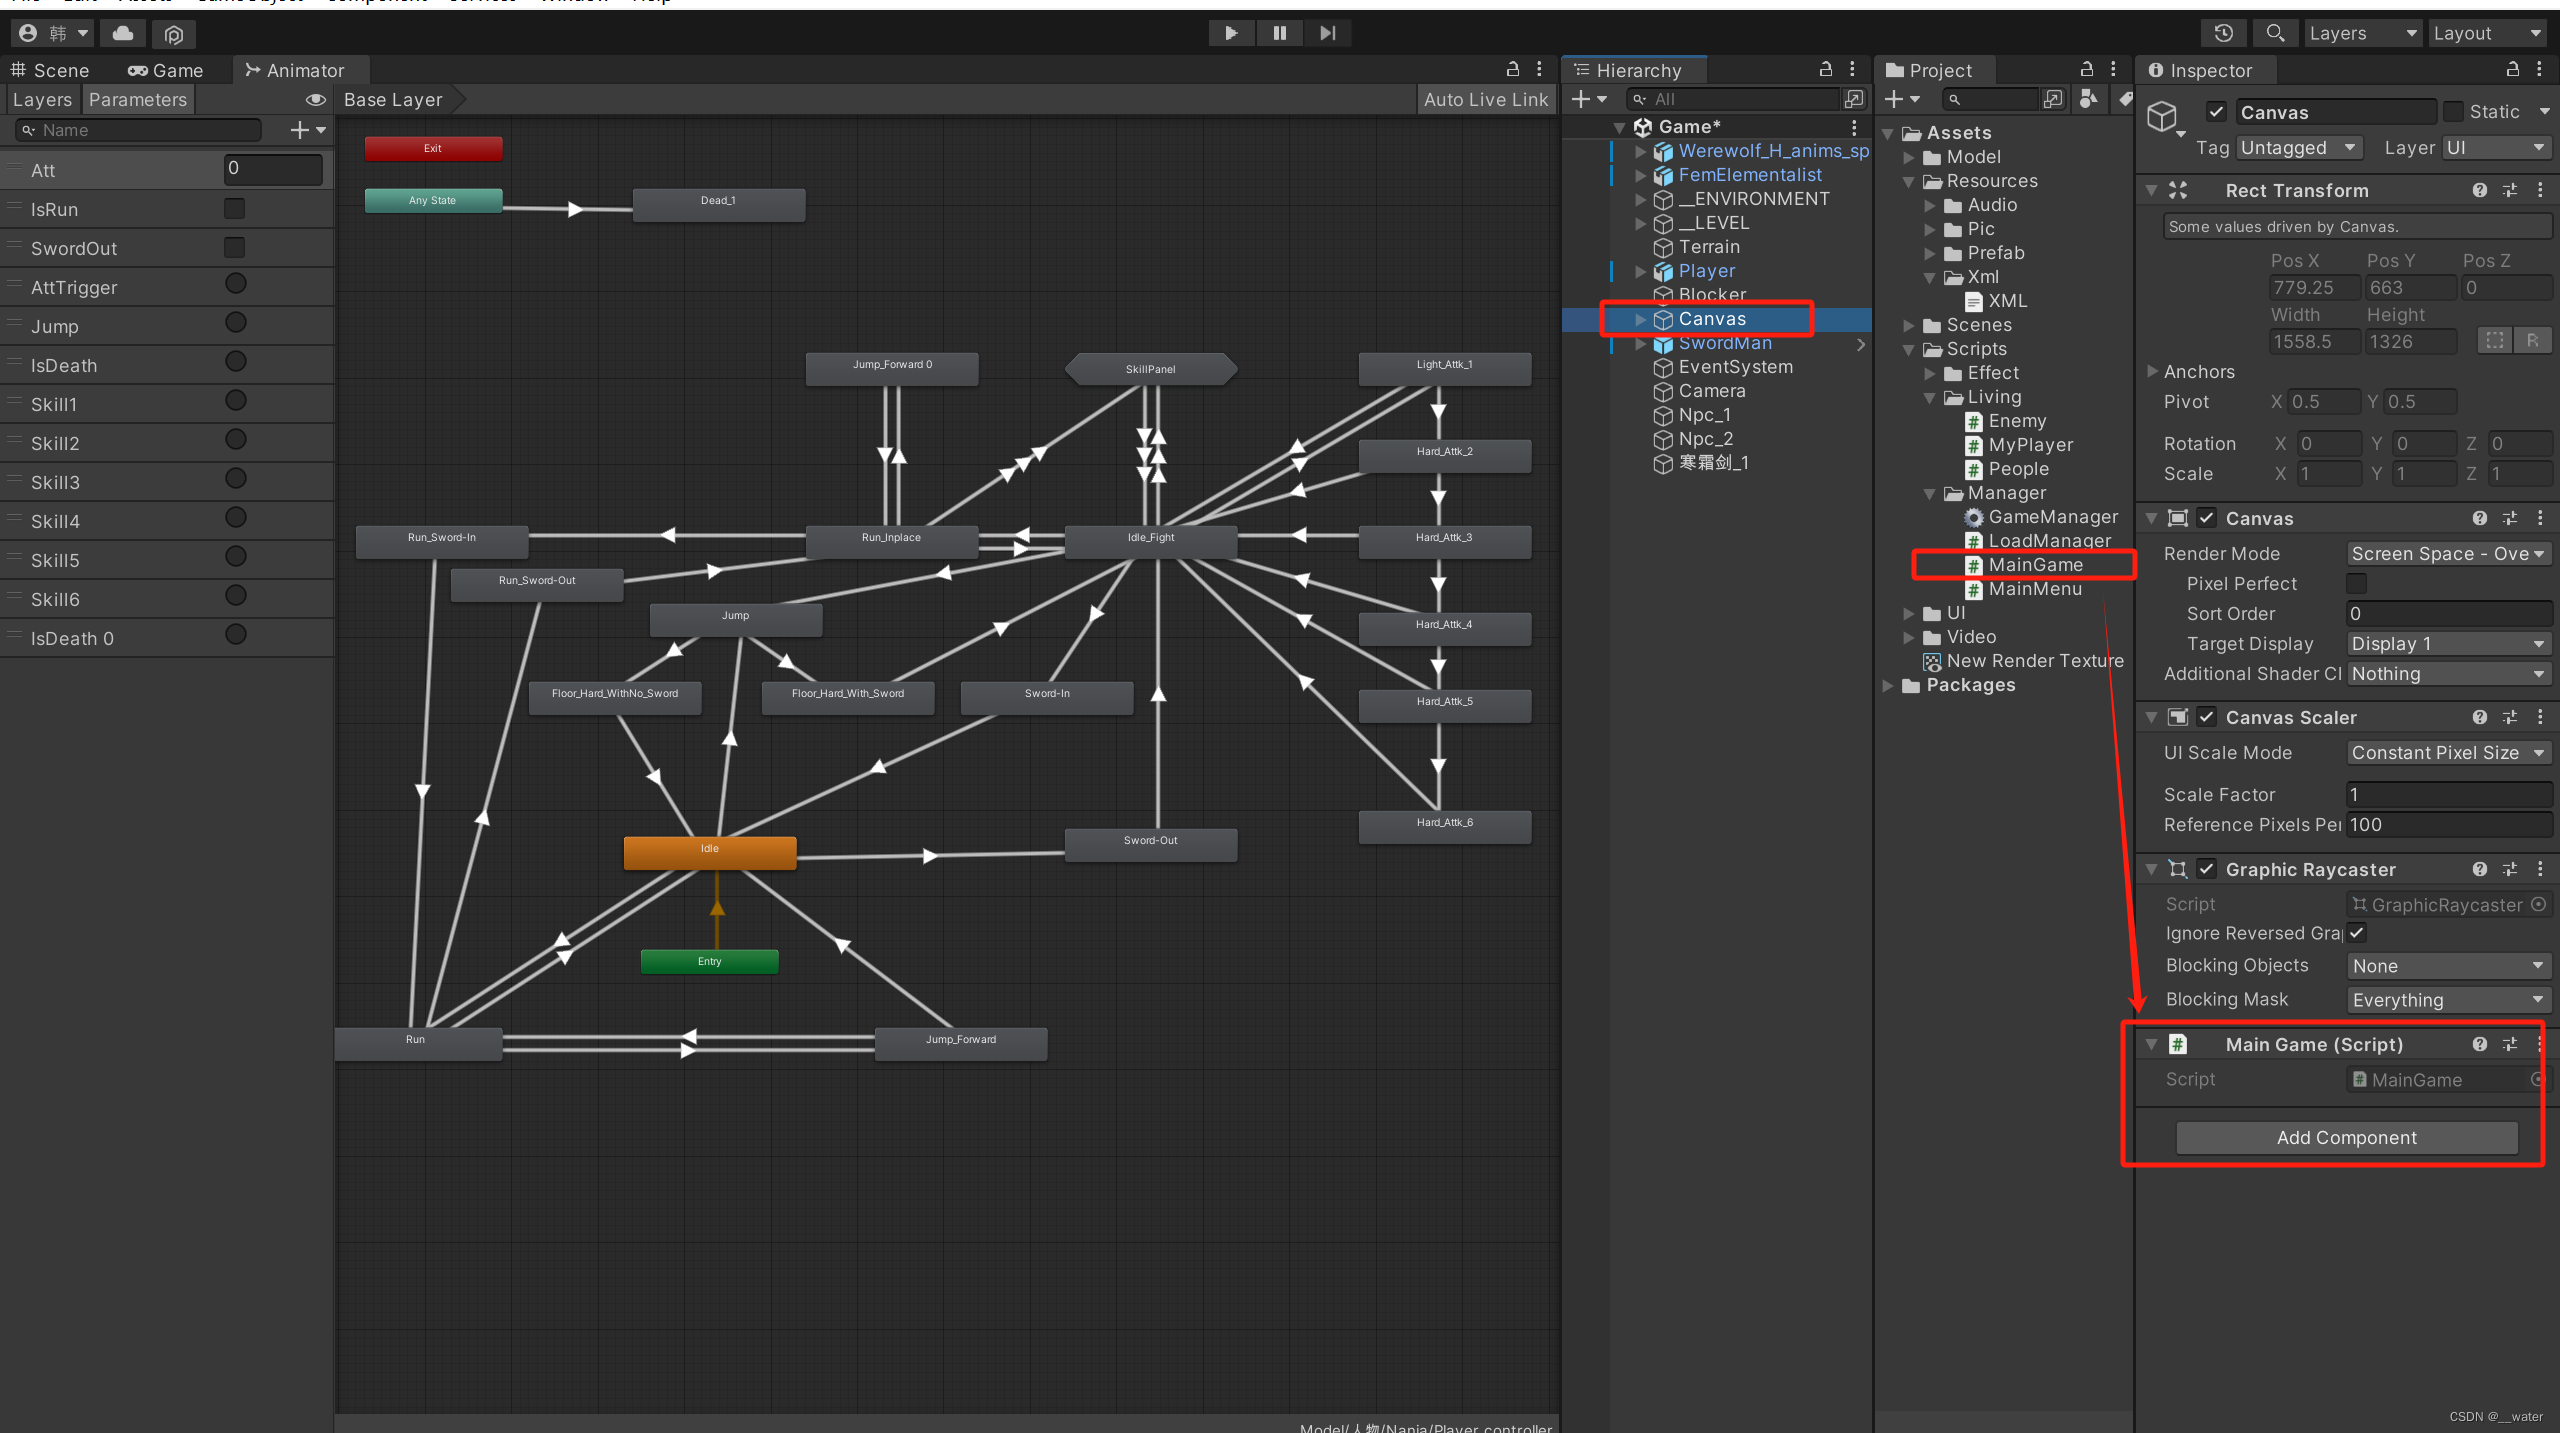
再挂载人物脚本:

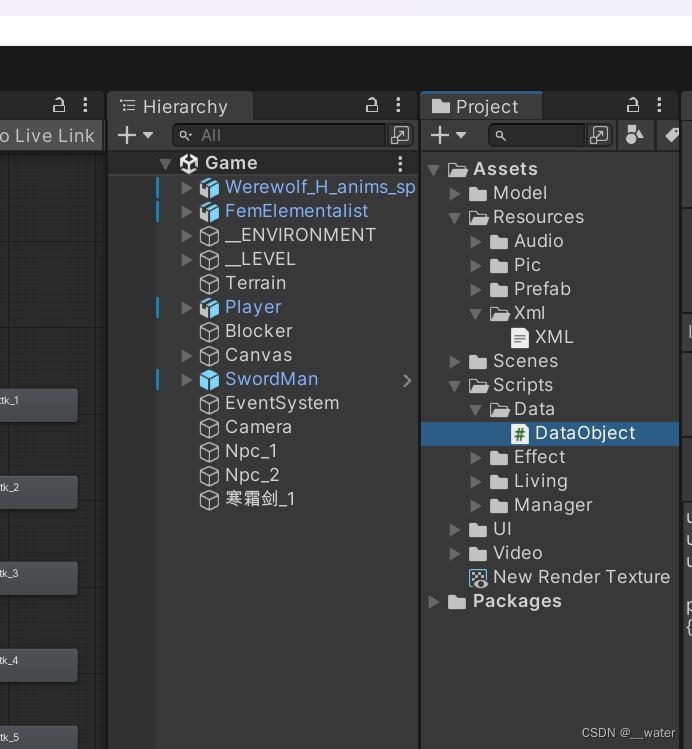
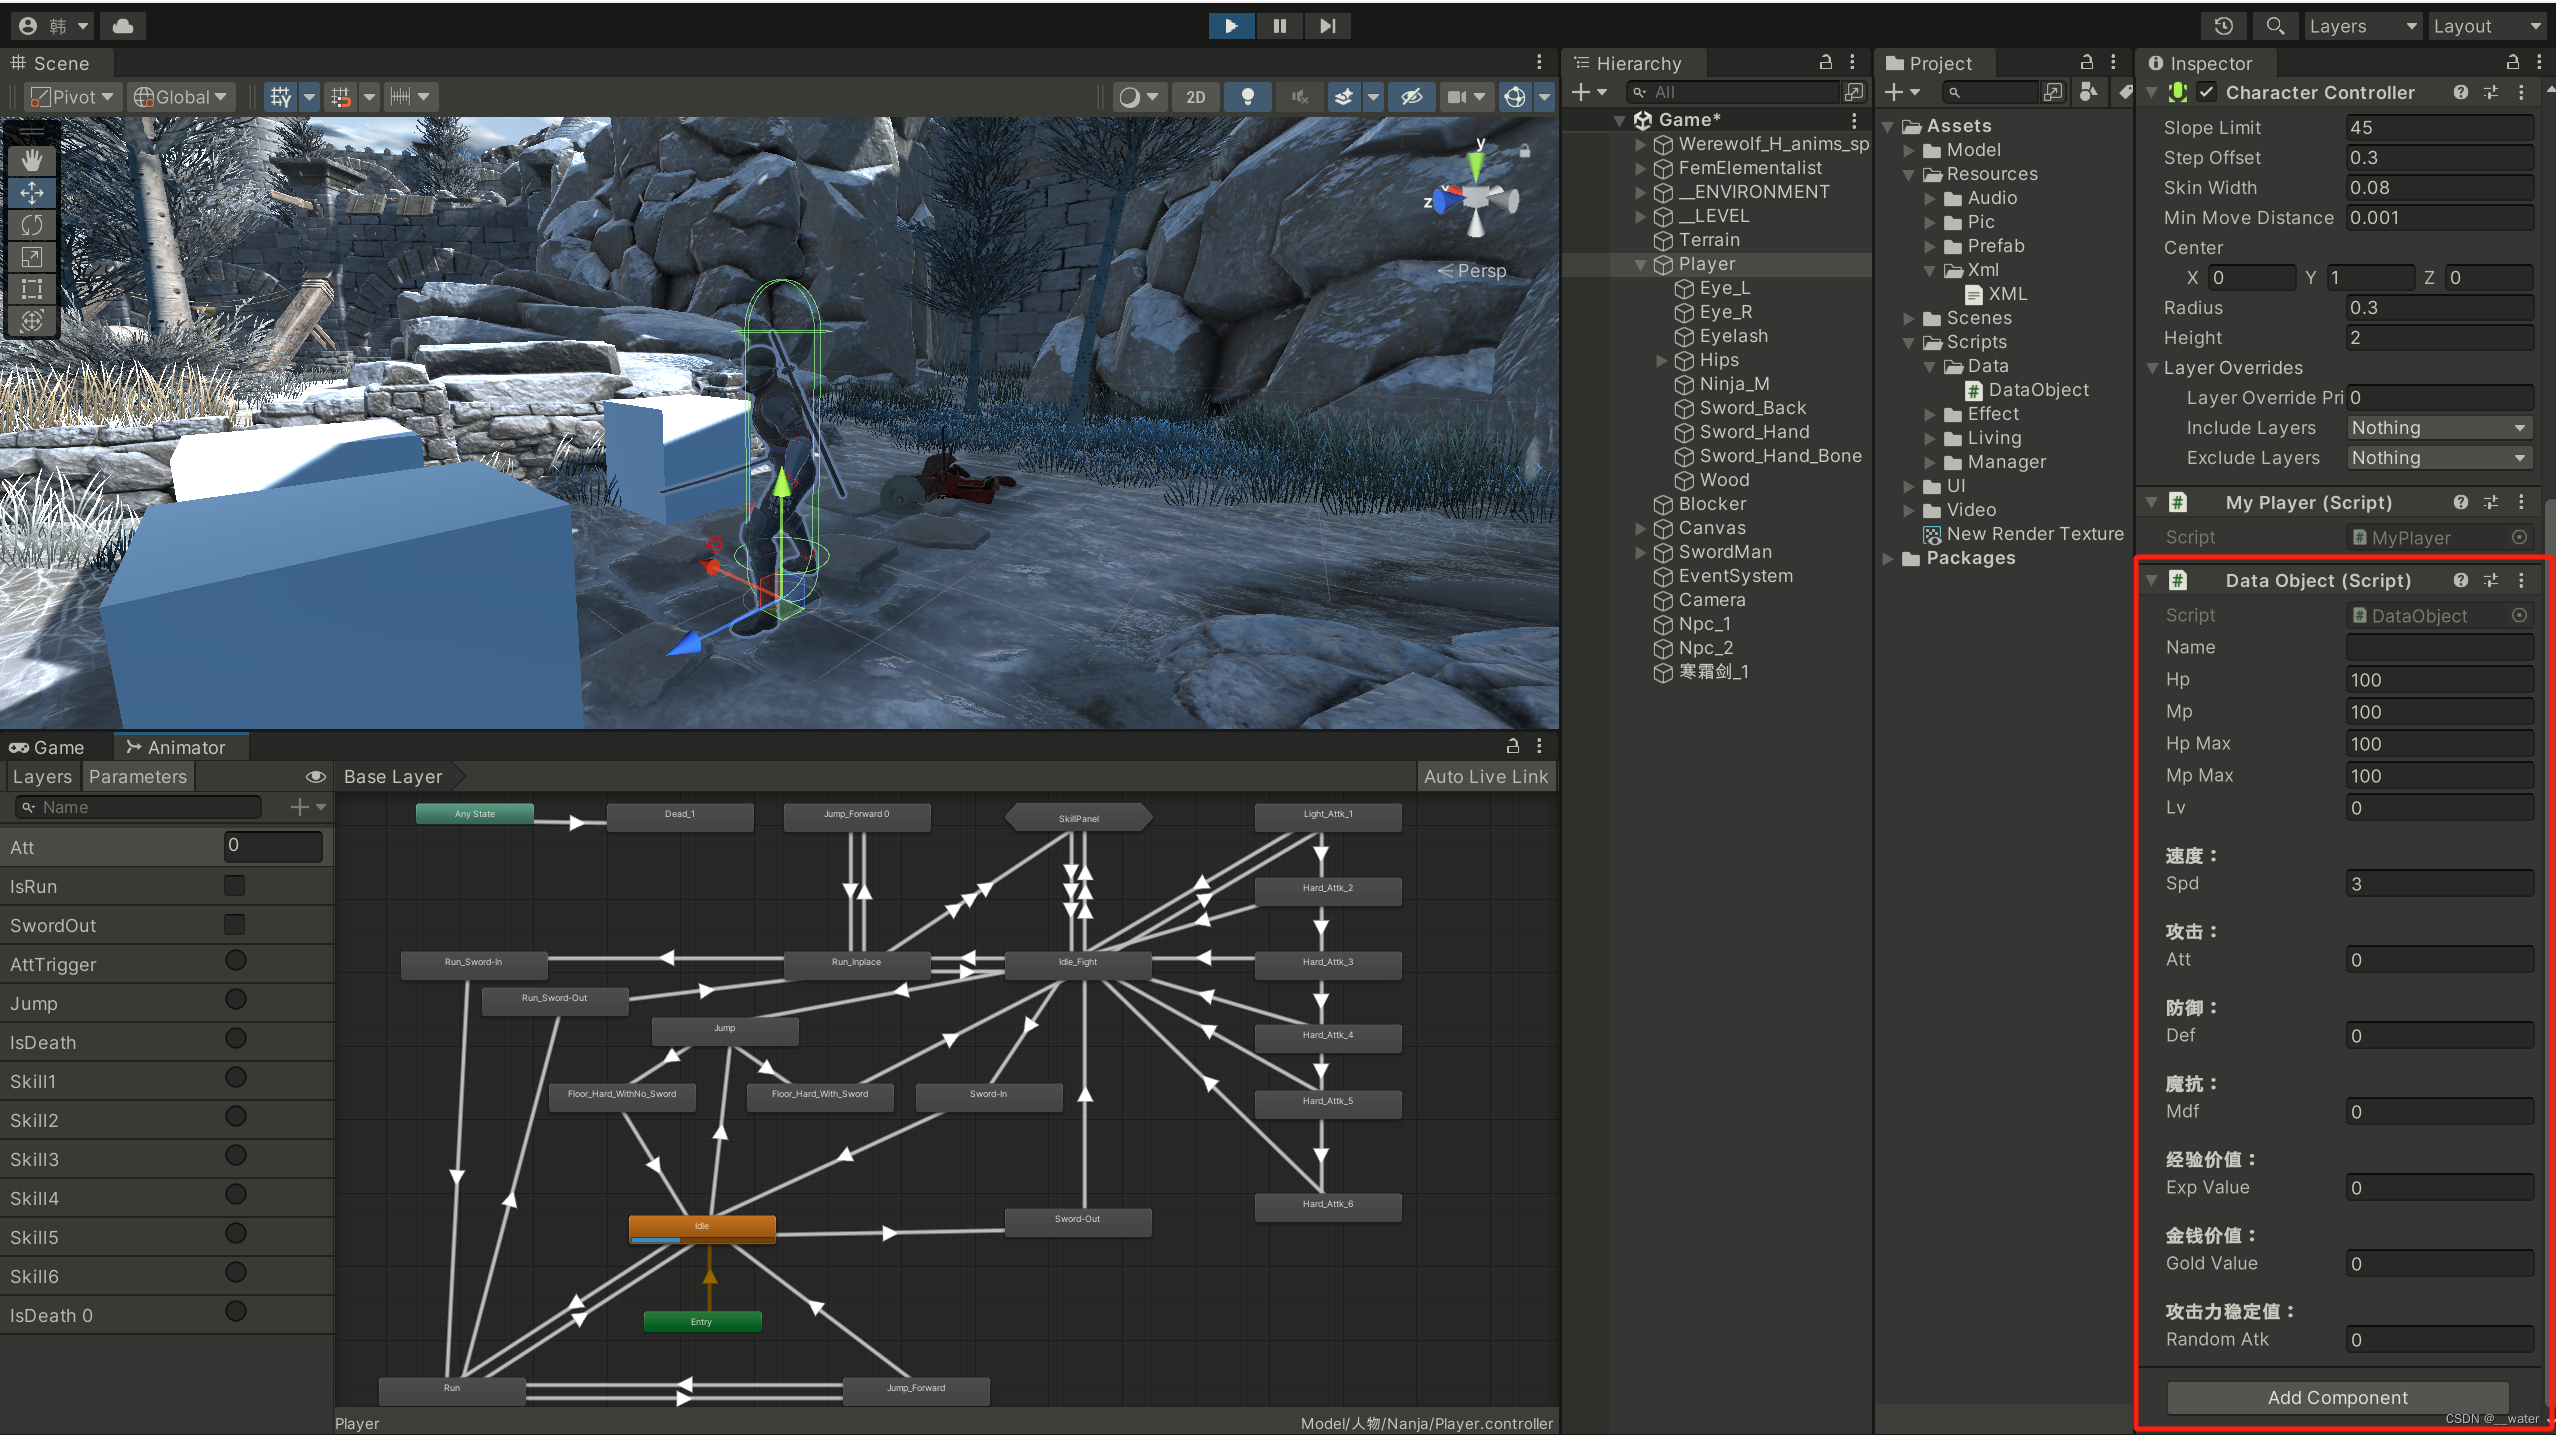
新建脚本文件夹Data

新建脚本DataObject
写代码(数据类:为角色提供数据):

using System.Collections;
using System.Collections.Generic;
using UnityEngine;
public class DataObject : MonoBehaviour
{
public string _name;
public int hp = 100;
public int mp = 100;
public int hpMax = 100;
public int mpMax = 100;
public int lv;
[Header("速度:")]
public float spd = 3;
[Header("攻击:")]
public int att;
[Header("防御:")]
public int def;
[Header("魔抗:")]
public int mdf;
[Header("经验价值:")]
public int expValue;
[Header("金钱价值:")]
public int goldValue;
[Header("攻击力稳定值:")]
public int randomAtk;
}
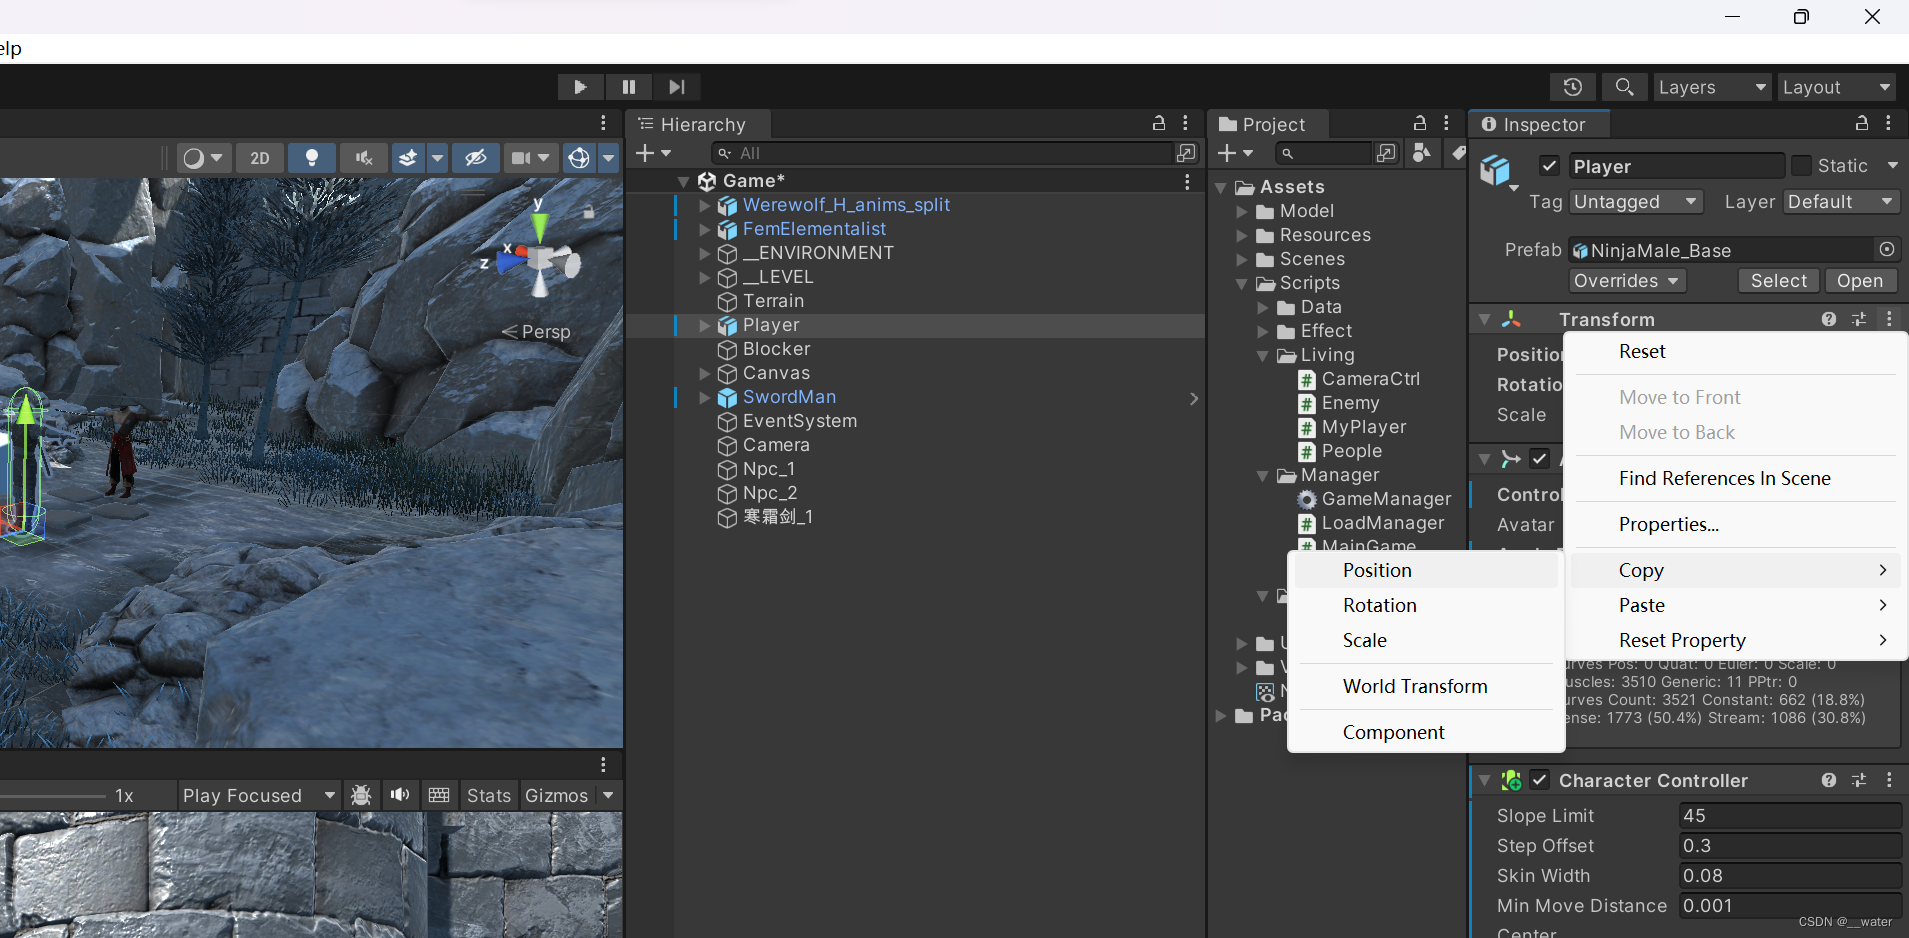
将DataObject脚本挂载到Player人物上

运行
在文件夹下创建SkillBase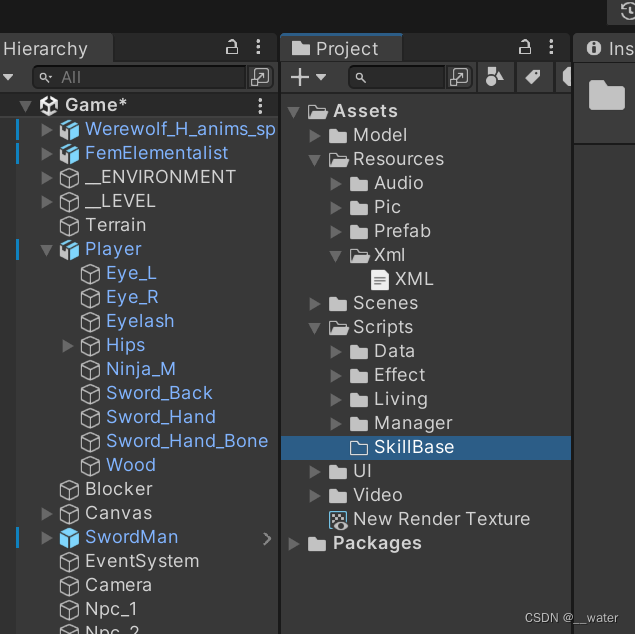
写代码:
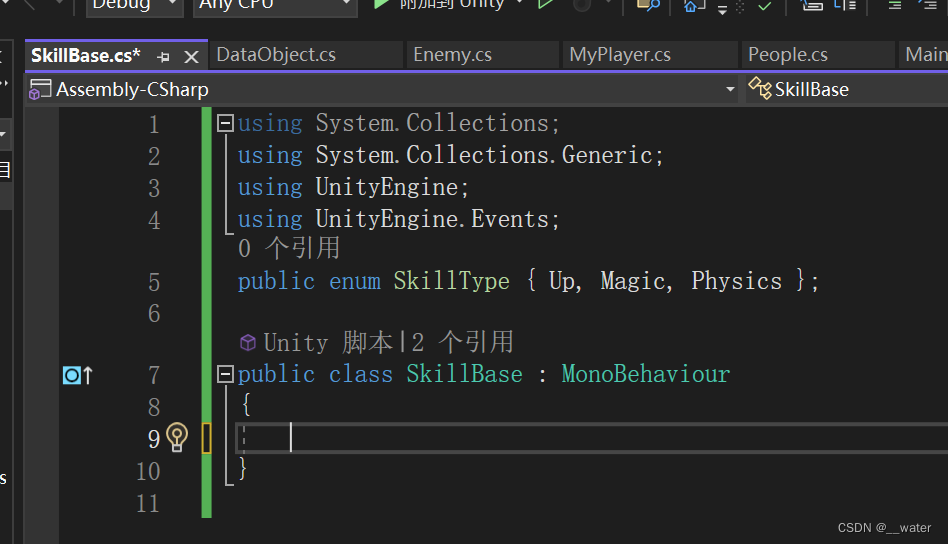
using System.Collections;
using System.Collections.Generic;
using UnityEngine;
using UnityEngine.Events;
public enum SkillType { Up, Magic, Physics };
public class SkillBase : MonoBehaviour
{
}
修改People代码:
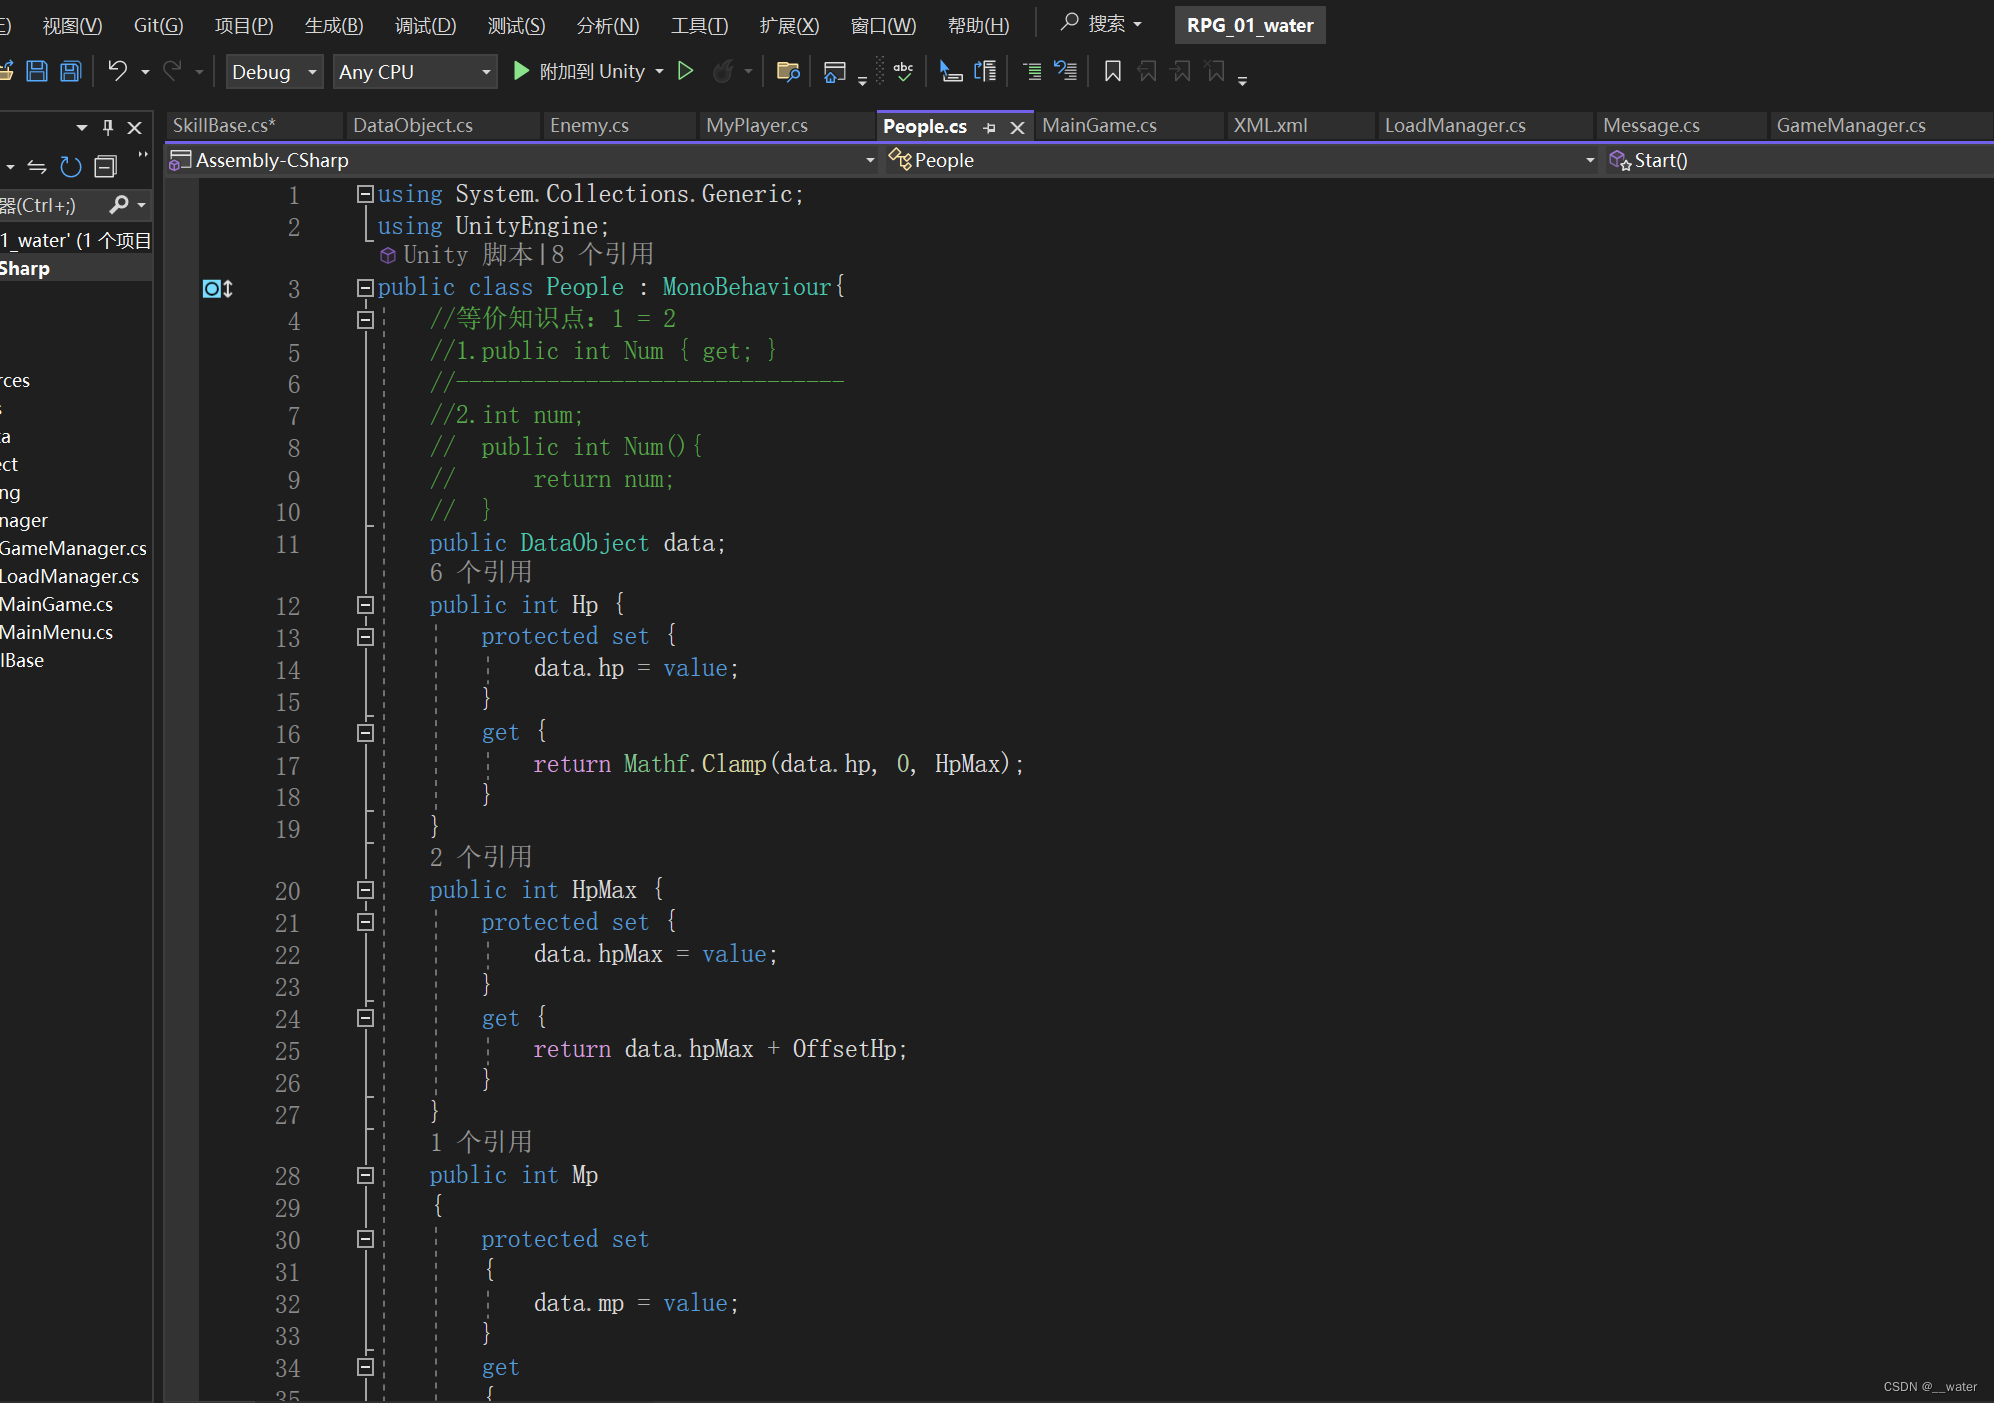
using System.Collections.Generic;
using UnityEngine;
public class People : MonoBehaviour{
//等价知识点:1 = 2
//1.public int Num { get; }
//------------------------------
//2.int num;
// public int Num(){
// return num;
// }
public DataObject data;
public int Hp {
protected set {
data.hp = value;
}
get {
return Mathf.Clamp(data.hp, 0, HpMax);
}
}
public int HpMax {
protected set {
data.hpMax = value;
}
get {
return data.hpMax + OffsetHp;
}
}
public int Mp
{
protected set
{
data.mp = value;
}
get
{
return Mathf.Clamp(data.mp, 0, MpMax);
}
}
public int MpMax
{
protected set
{
data.mpMax = value;
}
get
{
return data.mpMax + OffsetMp;
}
}
public float Spd {
protected set {
data.spd = value;
}
get {
return data.spd + OffsetSpd;
}
}
public int Att
{
protected set
{
data.att = value;
}
get
{
return (int)(data.att * GetRandomRate()) + OffsetAtt;
}
}
public int Def
{
protected set
{
data.def = value;
}
get
{
return data.def + OffsetDef;
}
}
public int Mdf
{
protected set
{
data.mdf = value;
}
get
{
return data.mdf + OffsetMdf;
}
}
public int lv
{
protected set => data.lv = value;
get => data.lv;
}
public int Exp { set; get; }
public bool IsDeath { set; get; }
public People Target { get; set; }
public Animator Anim { get; set; }
protected int OffsetHp { set; get; }
protected int OffsetMp { set; get; }
protected int OffsetSpd { set; get; }
protected int OffsetAtt { set; get; }
protected int OffsetDef { set; get; }
protected int OffsetMdf { set; get; }
public Transform attPoint;
public delegate void Fun(People p);
protected event Fun Dead;
protected Dictionary<int, SkillBase> skills = new Dictionary<int, SkillBase>();
#region 初始化
protected virtual void InitValue()
{
Anim = GetComponent<Animator>();
data = GetComponent<DataObject>();
Dead = Death;
}
protected virtual void InitSkill()
{
}
#endregion
#region 事件
public void AddEventHandle(Fun funback)
{
Dead += funback;
}
public void RemoveEventHandle(Fun funback)
{
Dead -= funback;
}
protected virtual void Death(People p)
{
IsDeath = true;
Anim.SetTrigger("IsDeath");
p.Victory(this);
Invoke("Over", 5);
}
protected virtual void Victory(People p)
{
}
protected void Over()
{
print("over");
}
#endregion
#region 战斗伤害
protected float GetRandomRate()
{
return (Random.Range(-data.randomAtk, data.randomAtk + 1) + 100) * 0.01f;
}
public virtual void BePhysicsHit(int value, People p)
{
if (IsDeath)
{
return;
}
Hp -= value - Def;
UpdateUI();
if (Hp <= 0)
{
Dead(p);
}
}
public virtual void BeMagicHit(int value, People p)
{
if (IsDeath)
{
return;
}
Hp -= value - Mdf;
UpdateUI();
if (Hp <= 0)
{
Dead(p);
}
}
#endregion
#region Hp/Mp
public virtual void AddHp(int value)
{
Hp += value;
UpdateUI();
}
public virtual void AddMp(int value)
{
Mp += value;
UpdateUI();
}
public float GetHpRation()
{
return (float)Hp / HpMax;
}
#endregion
protected void Start()
{
InitSkill();
InitValue();
}
protected virtual void UpdateUI()
{
}
}
知识点:Image的冷却填充作用
创建两个Image父子物体:
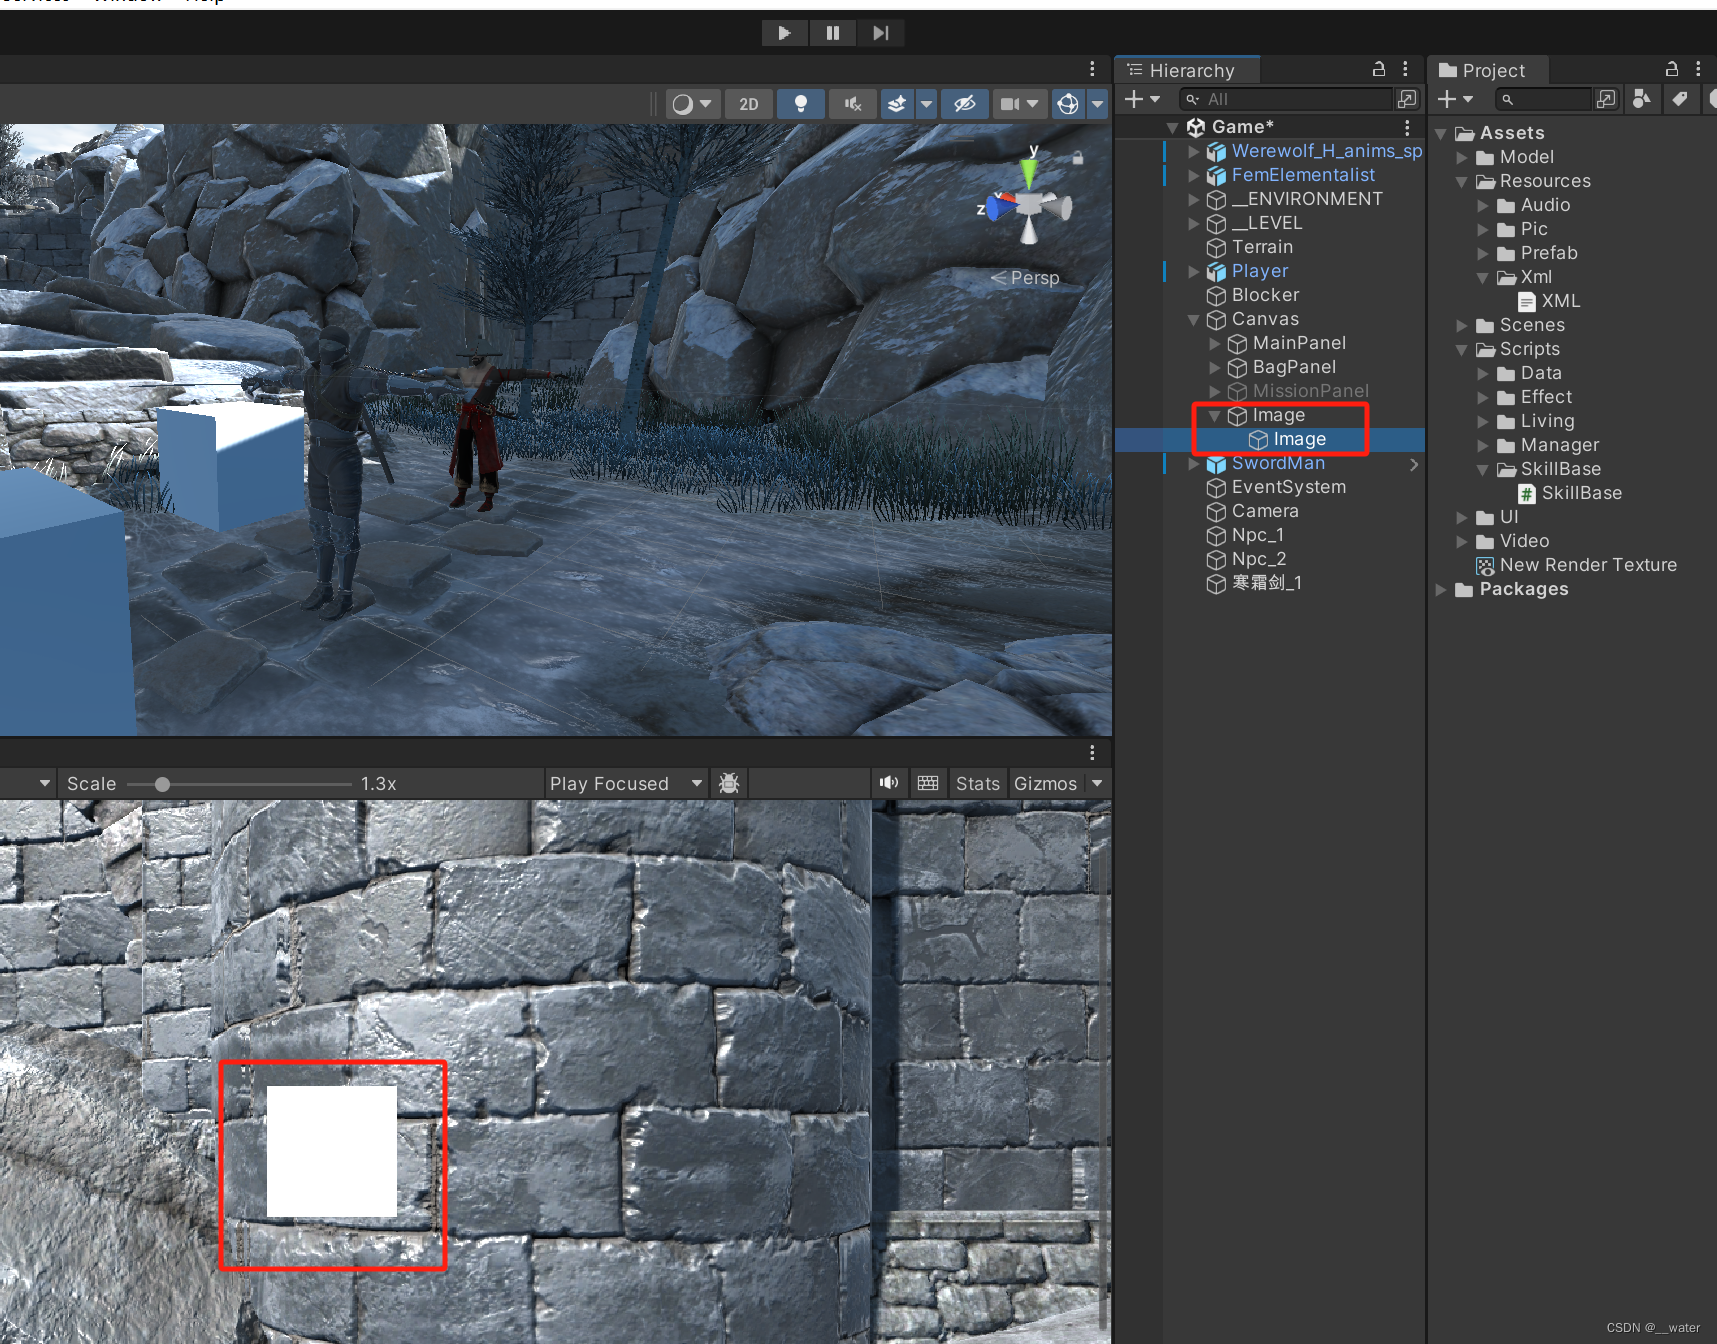
将父物体放置一个图片,
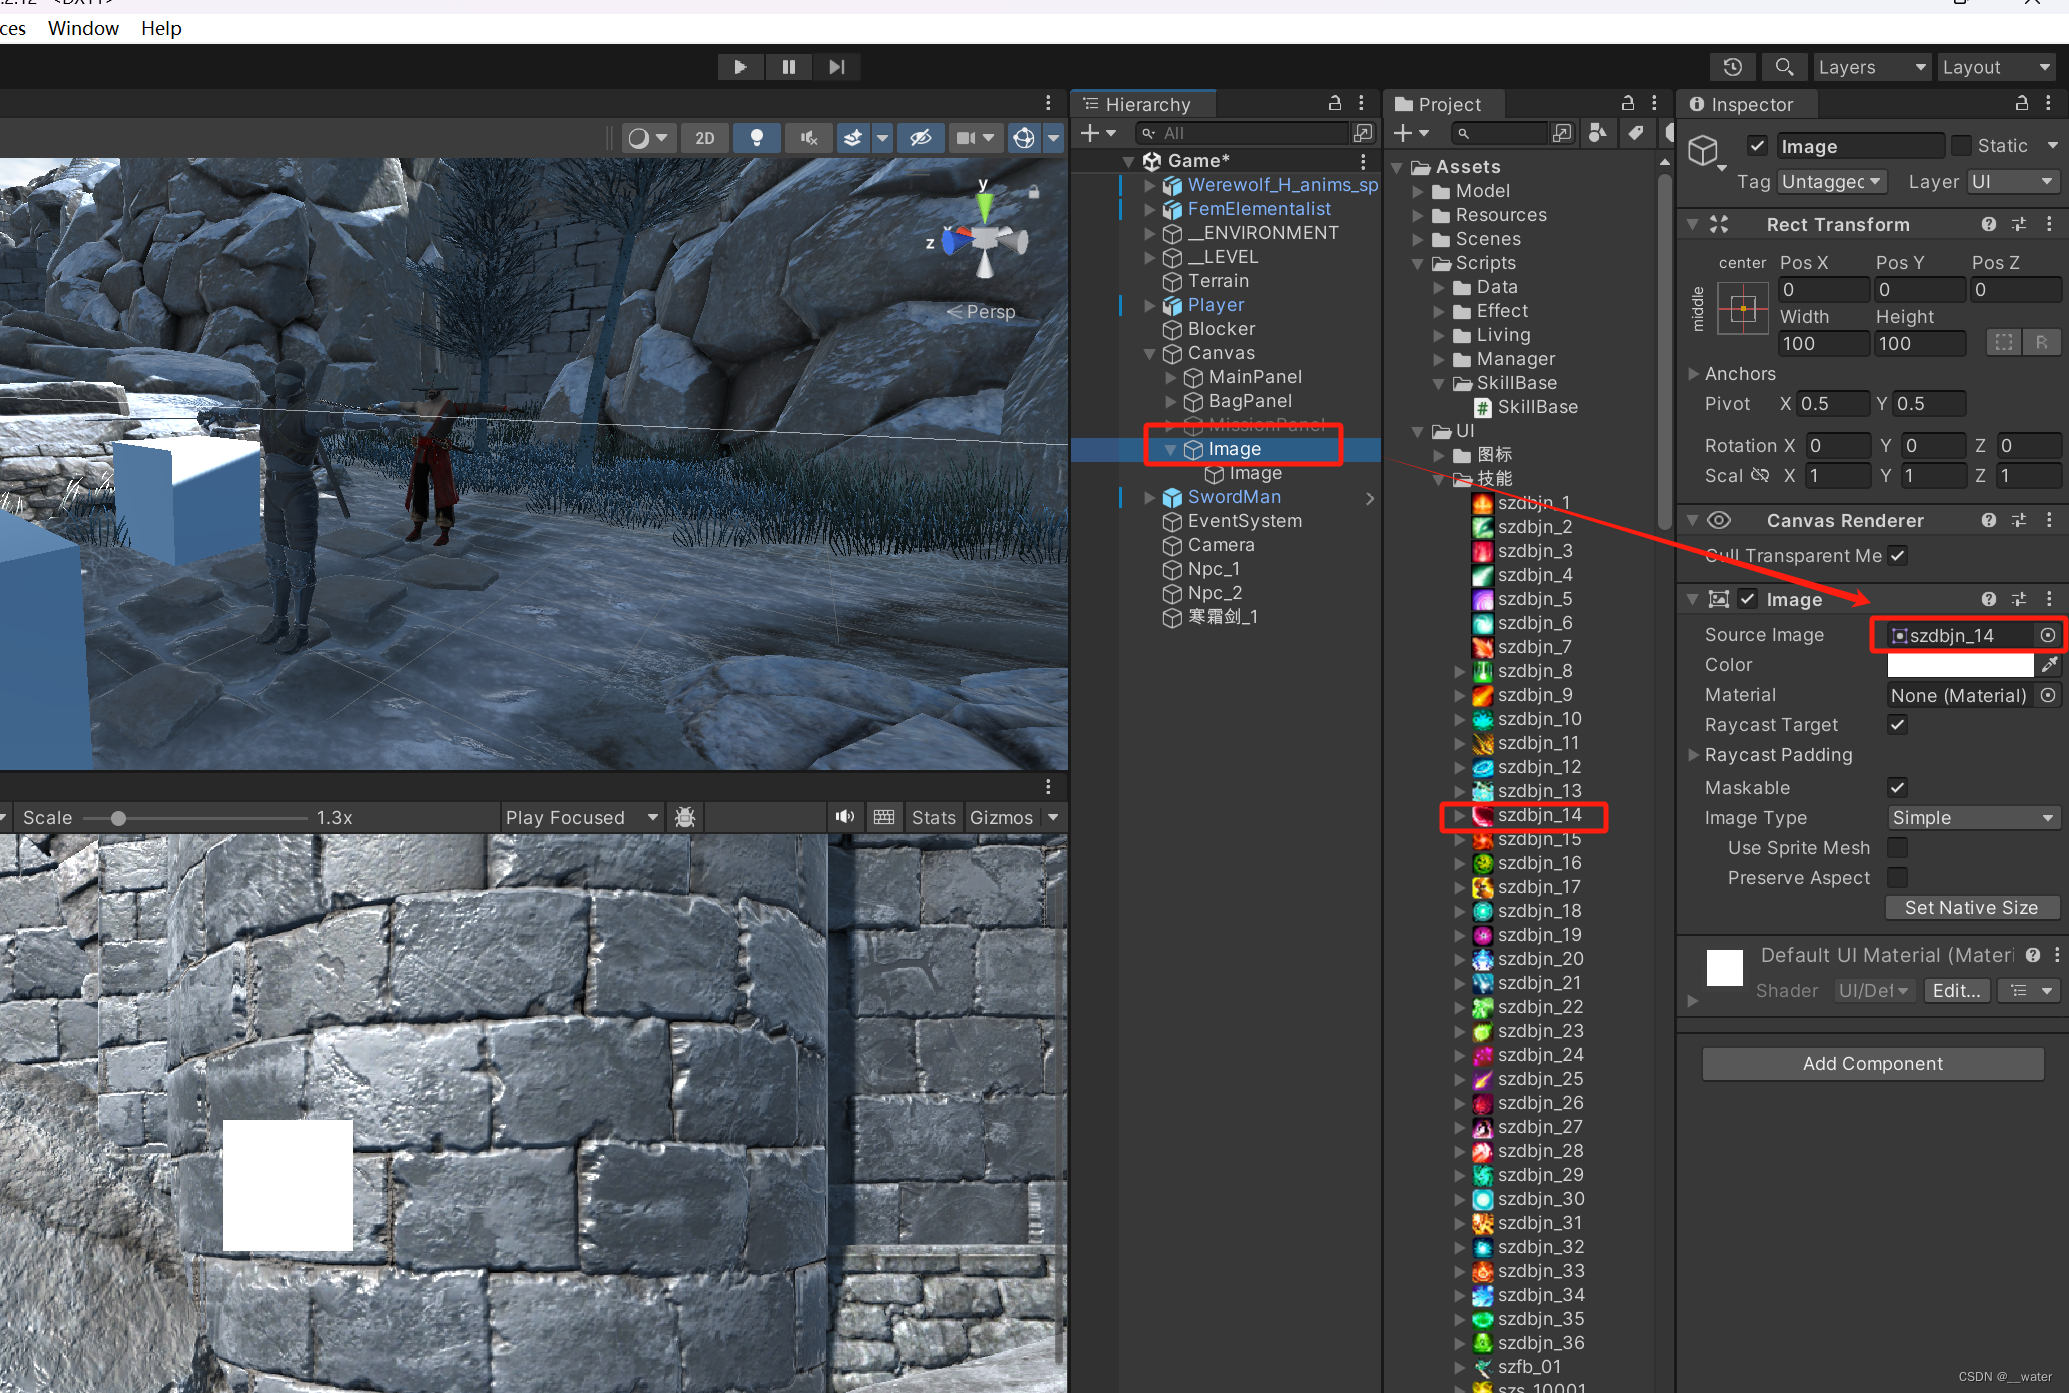
对子物体添加一个半透明画面
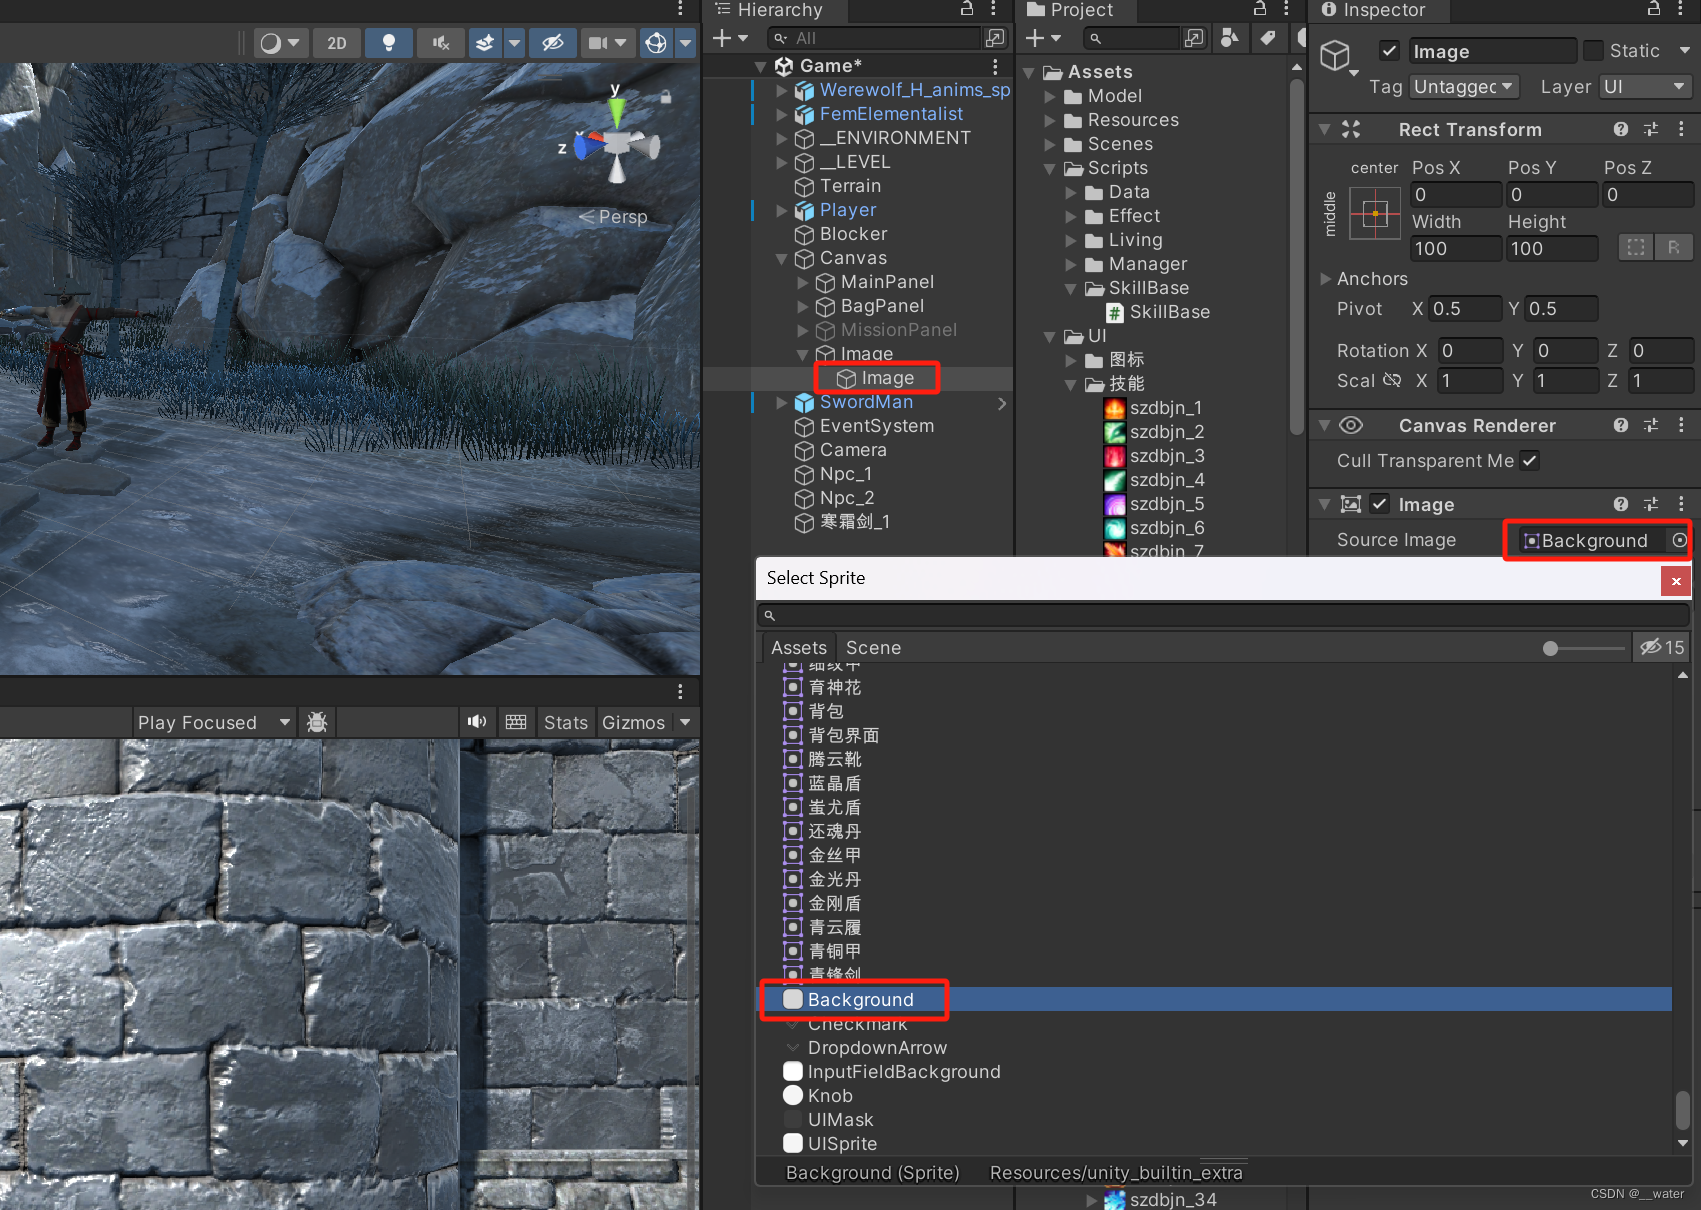
调节子物体颜色及半透明度
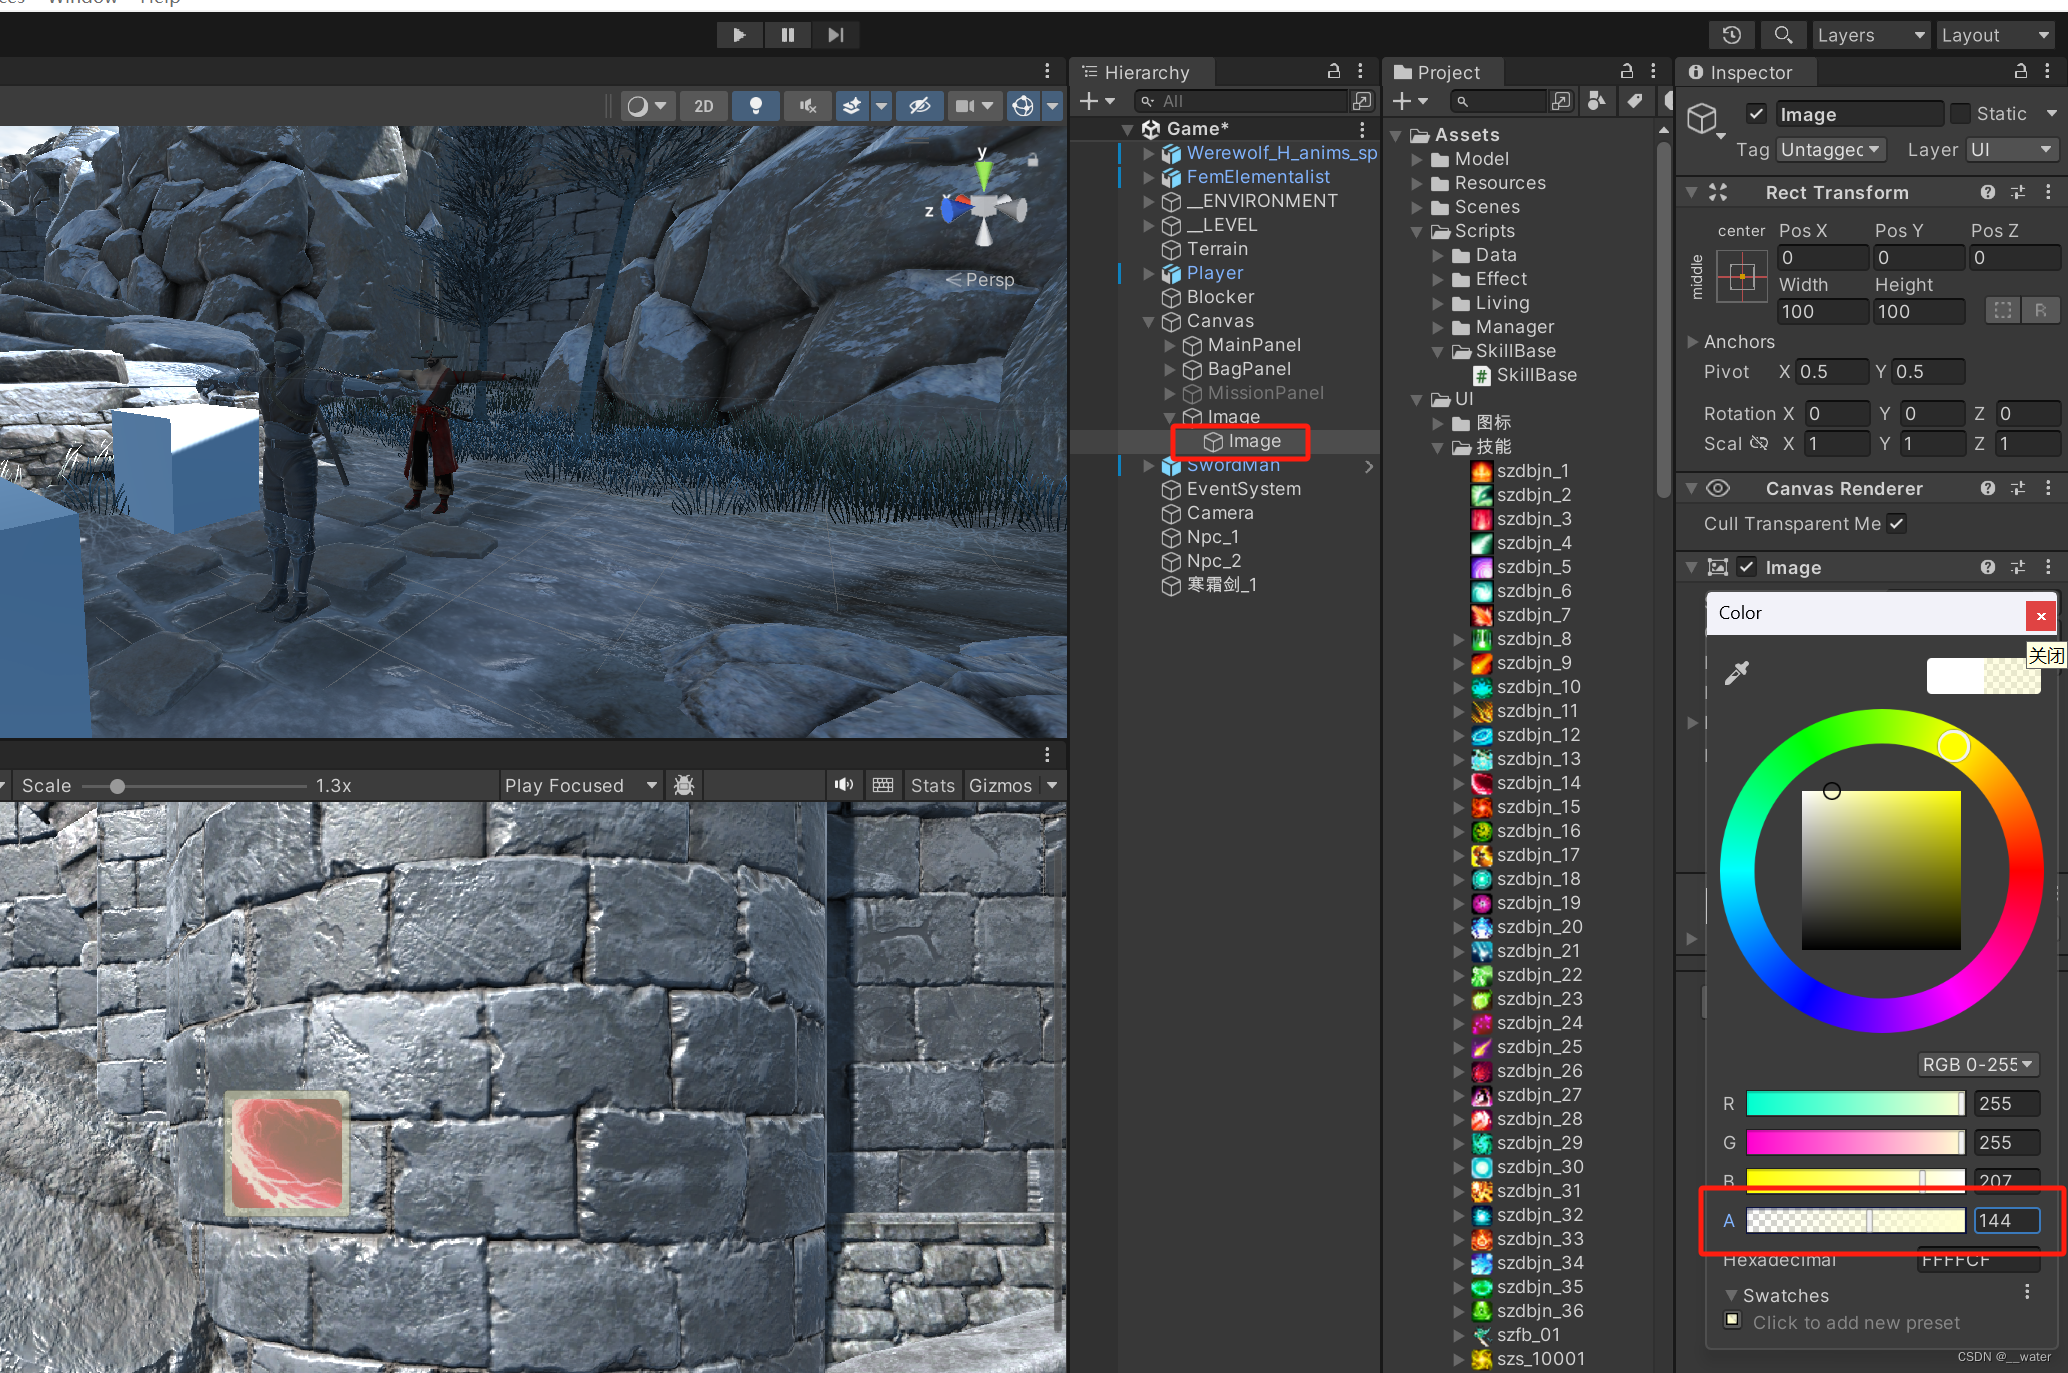
类型选择为填充Fill
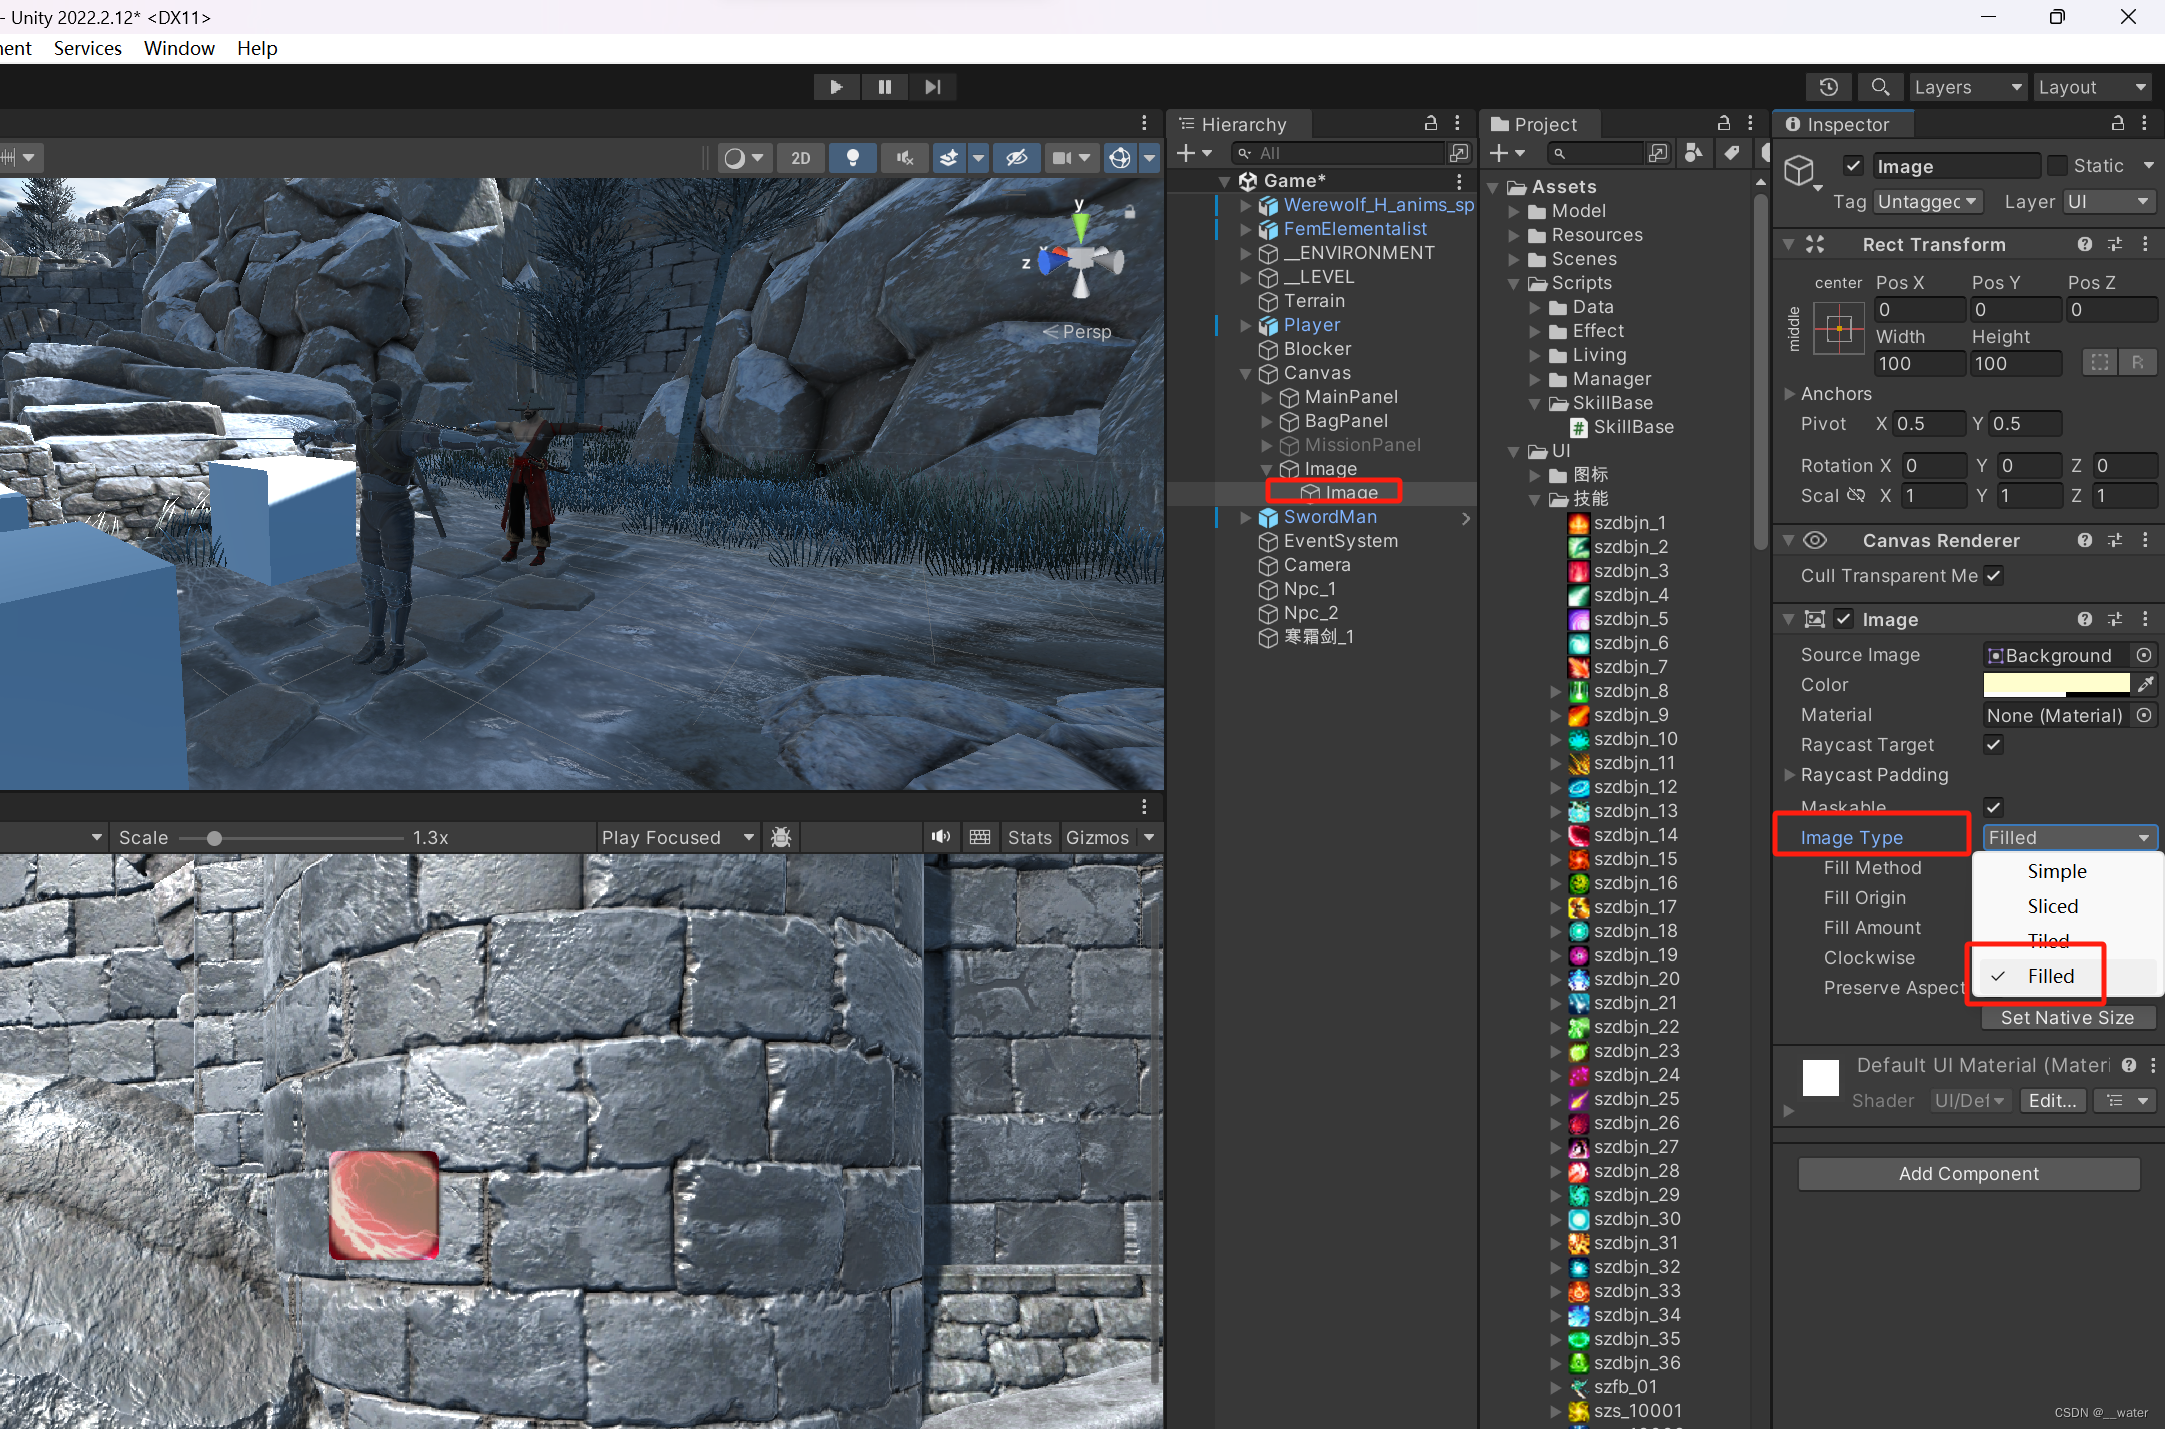
调节即可制作冷却
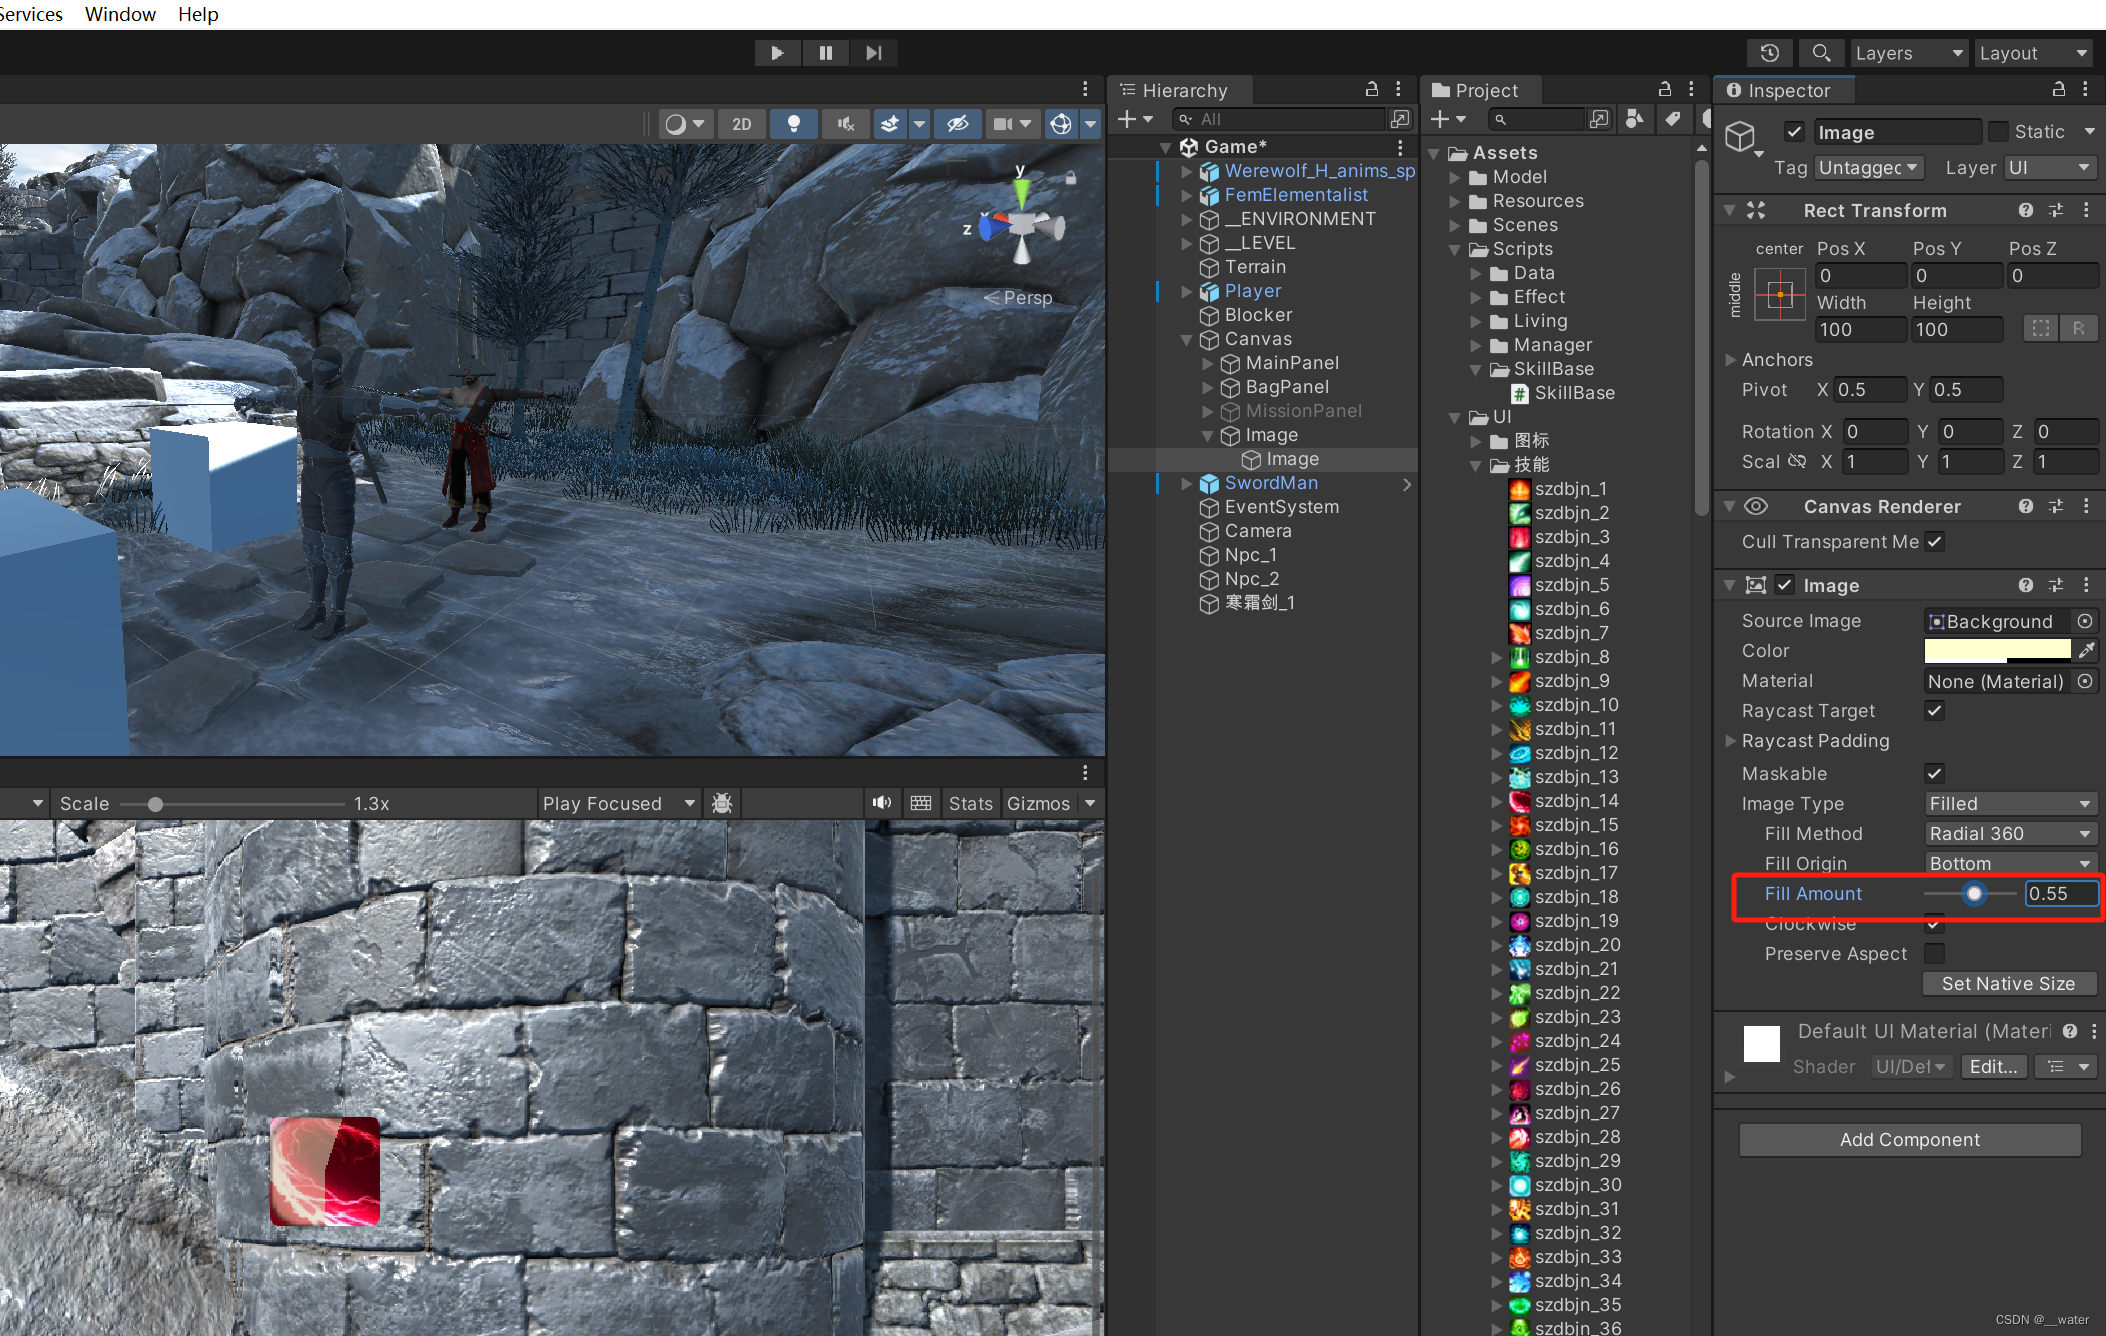
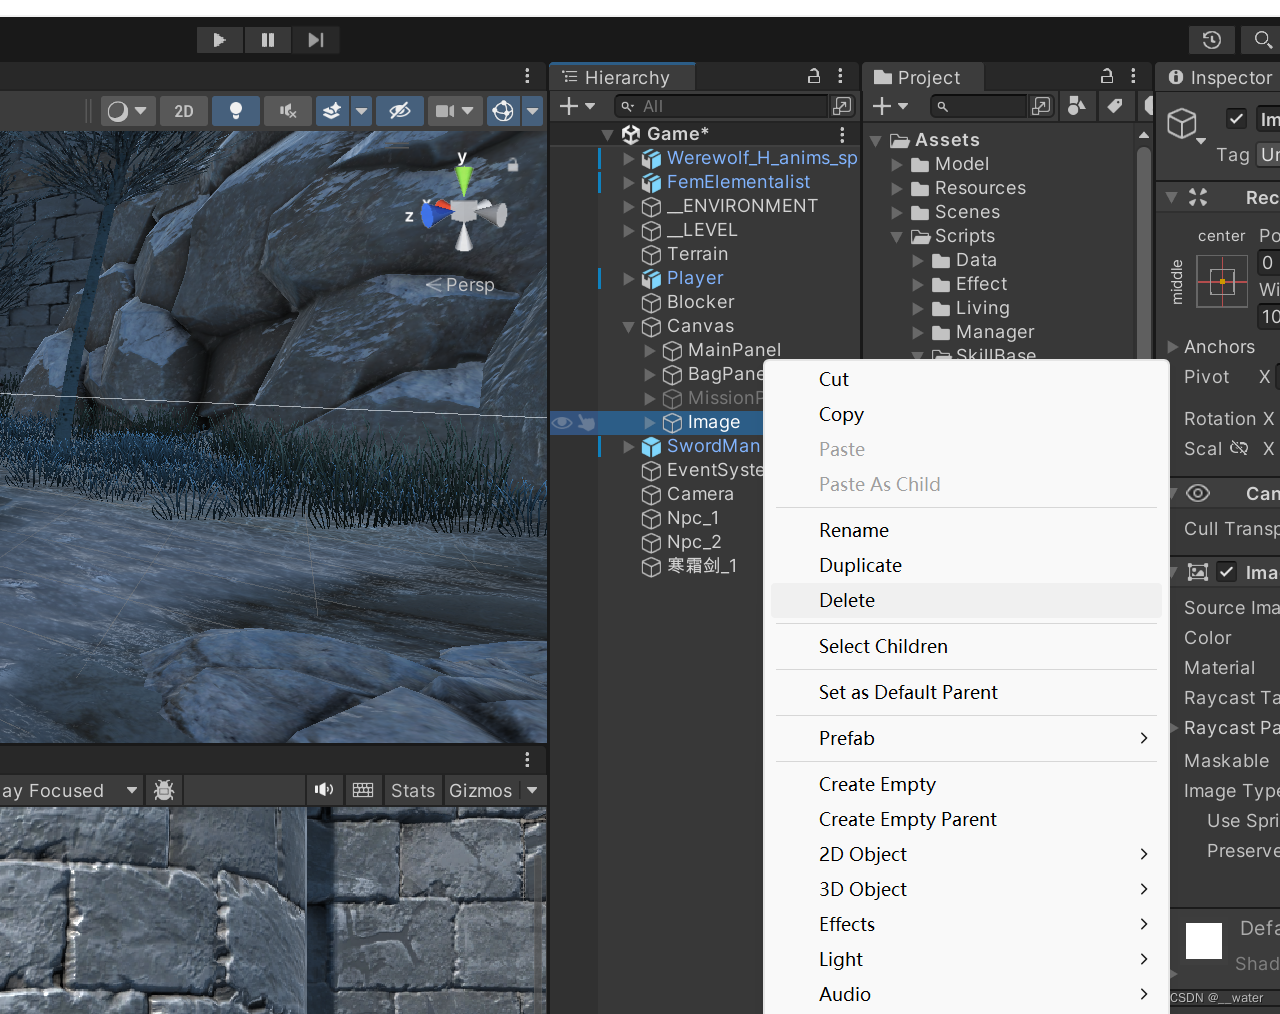
知识点结束,可以把Image删了
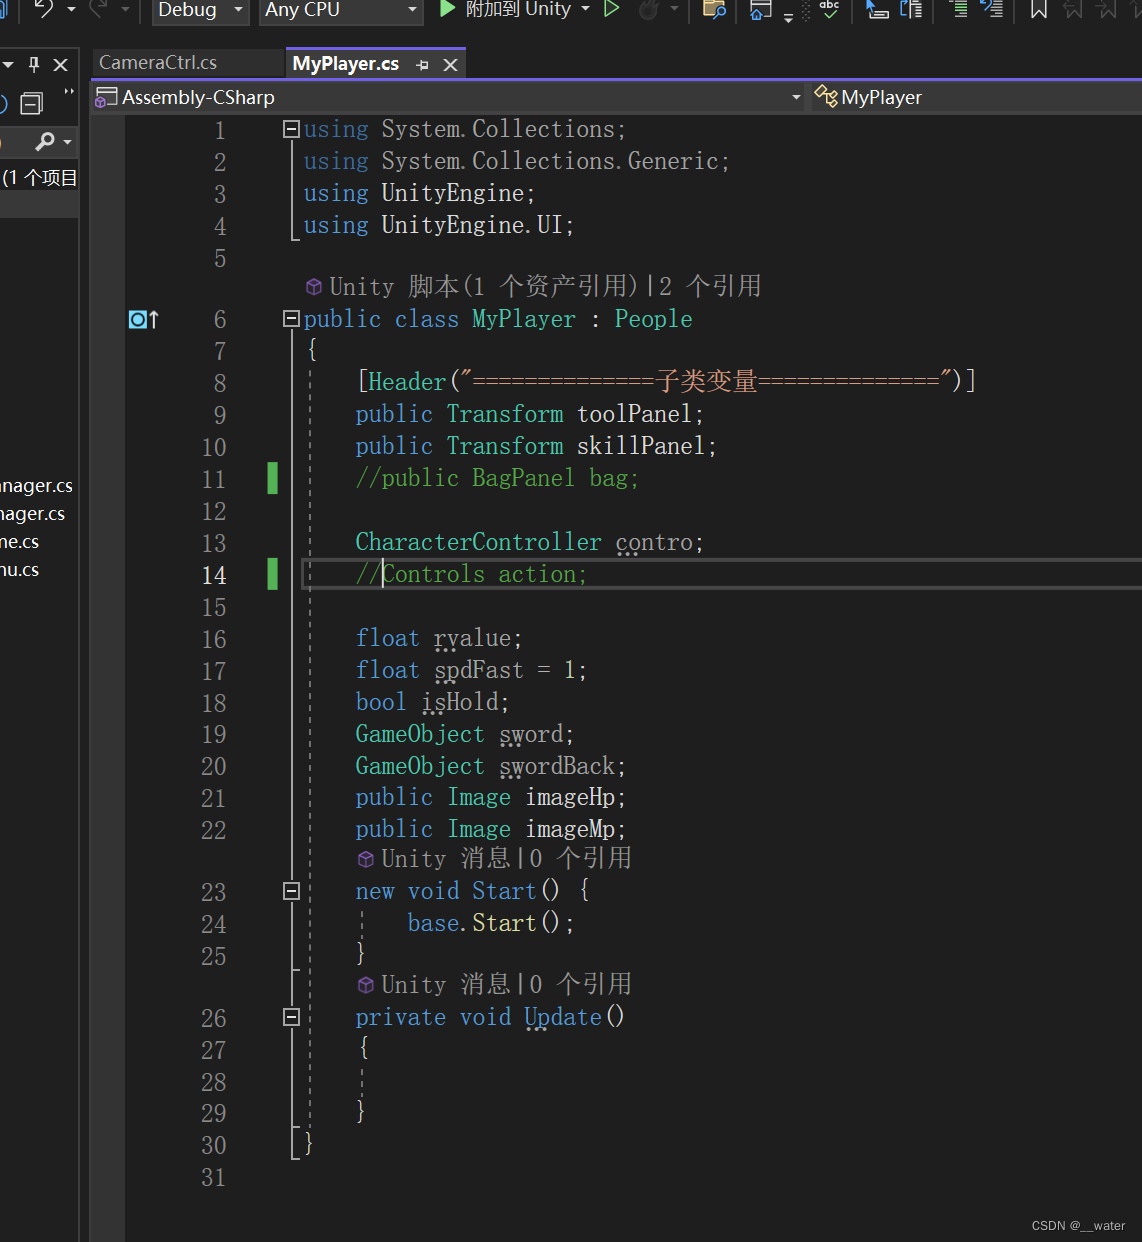
修改MyPlayer脚本代码:
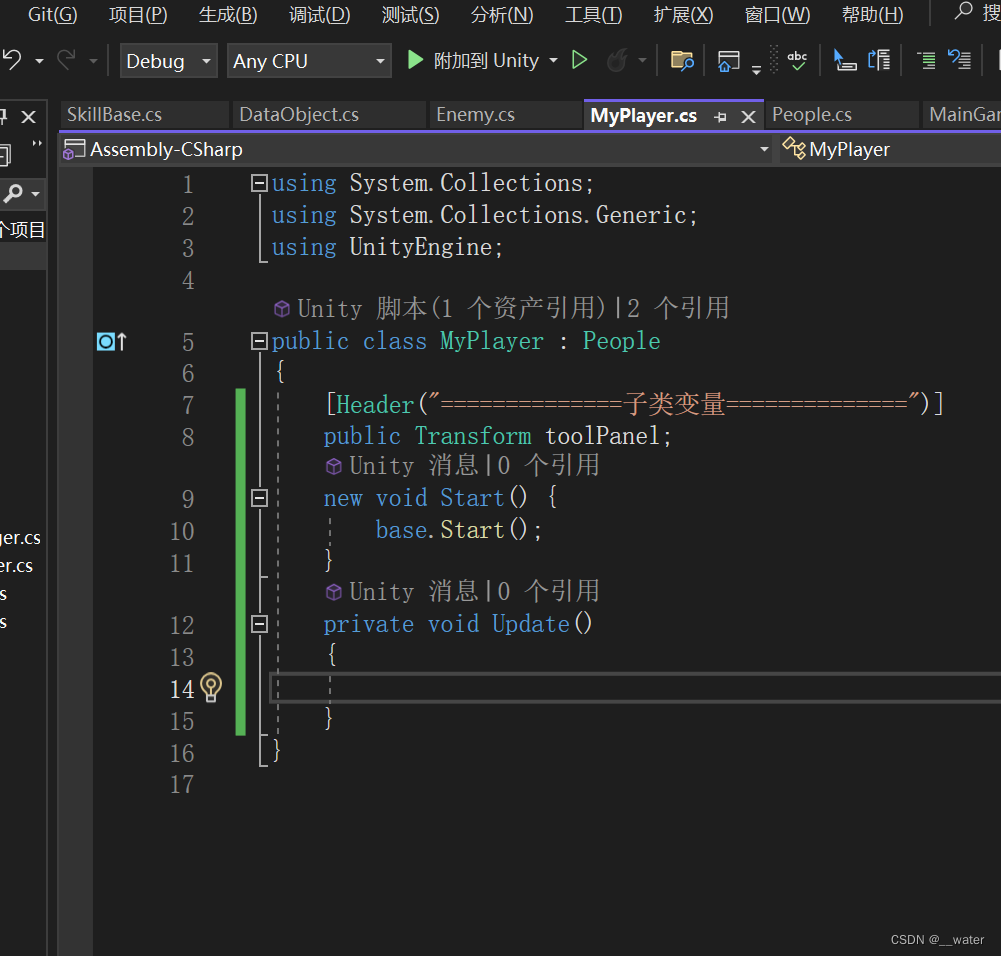
using System.Collections;
using System.Collections.Generic;
using UnityEngine;
public class MyPlayer : People
{
[Header("==============子类变量==============")]
public Transform toolPanel;
new void Start() {
base.Start();
}
private void Update()
{
}
}
在Living脚本文件夹下新建脚本CameraCtrl
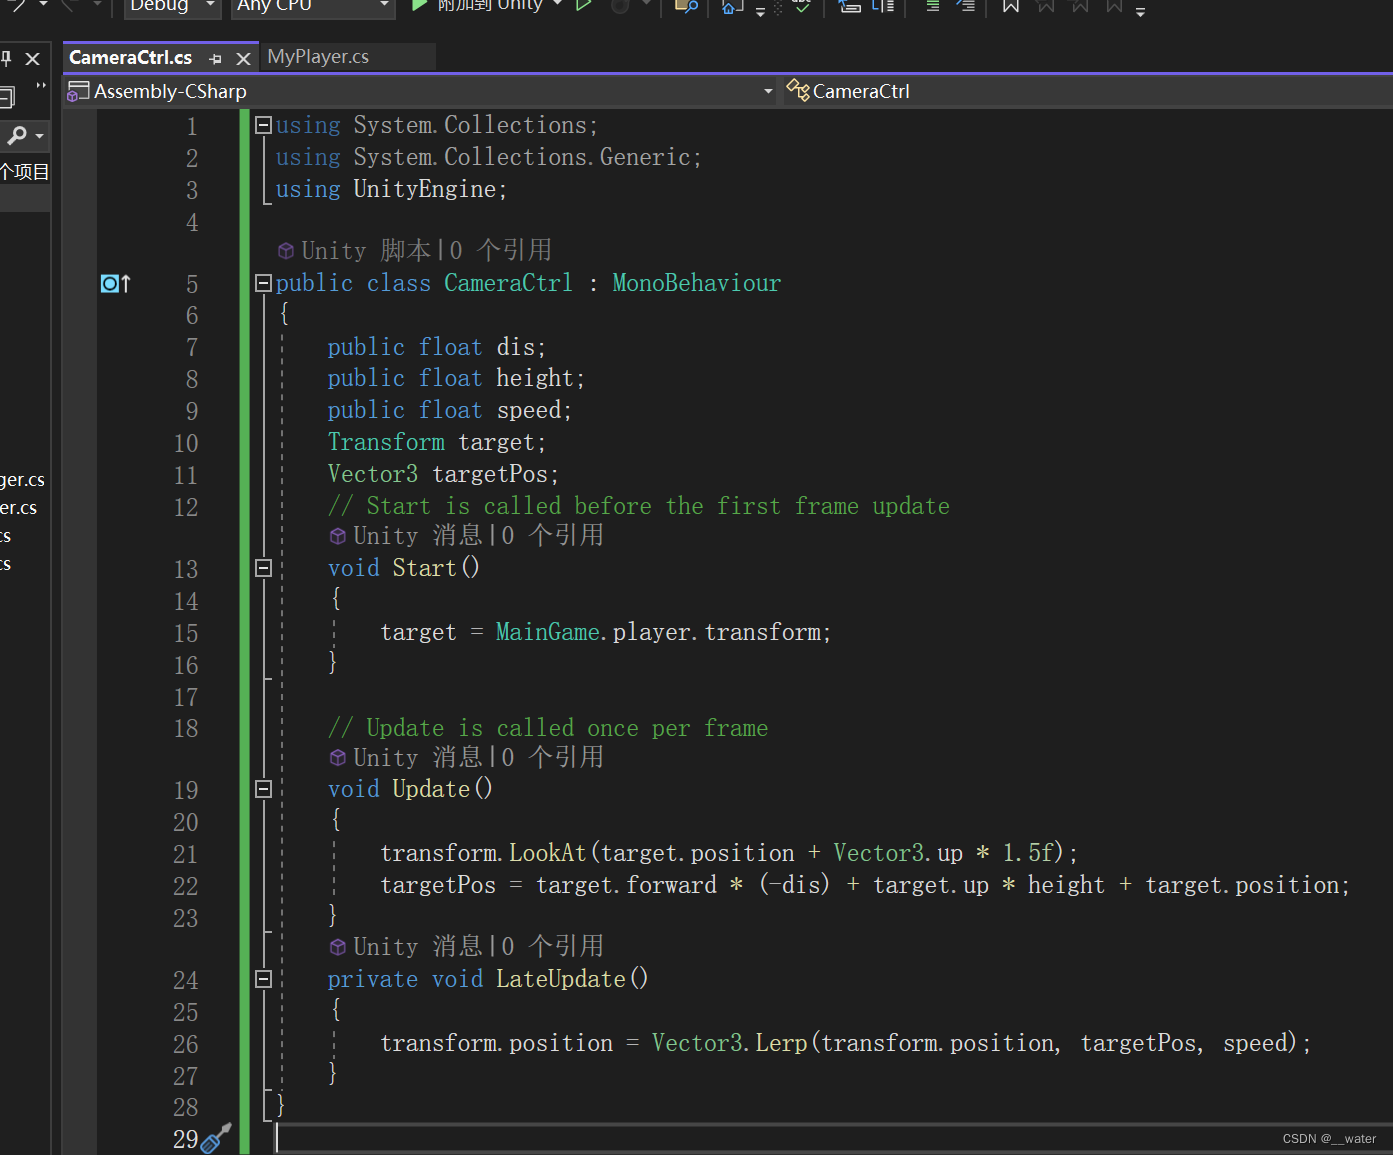
using System.Collections;
using System.Collections.Generic;
using UnityEngine;
public class CameraCtrl : MonoBehaviour
{
public float dis;
public float height;
public float speed;
Transform target;
Vector3 targetPos;
// Start is called before the first frame update
void Start()
{
target = MainGame.player.transform;
}
// Update is called once per frame
void Update()
{
transform.LookAt(target.position + Vector3.up * 1.5f);
targetPos = target.forward * (-dis) + target.up * height + target.position;
}
private void LateUpdate()
{
transform.position = Vector3.Lerp(transform.position, targetPos, speed);
}
}
更新MyPlayer代码:
再将CameraCtrl摄像机跟随代码挂载在Camera摄像机上
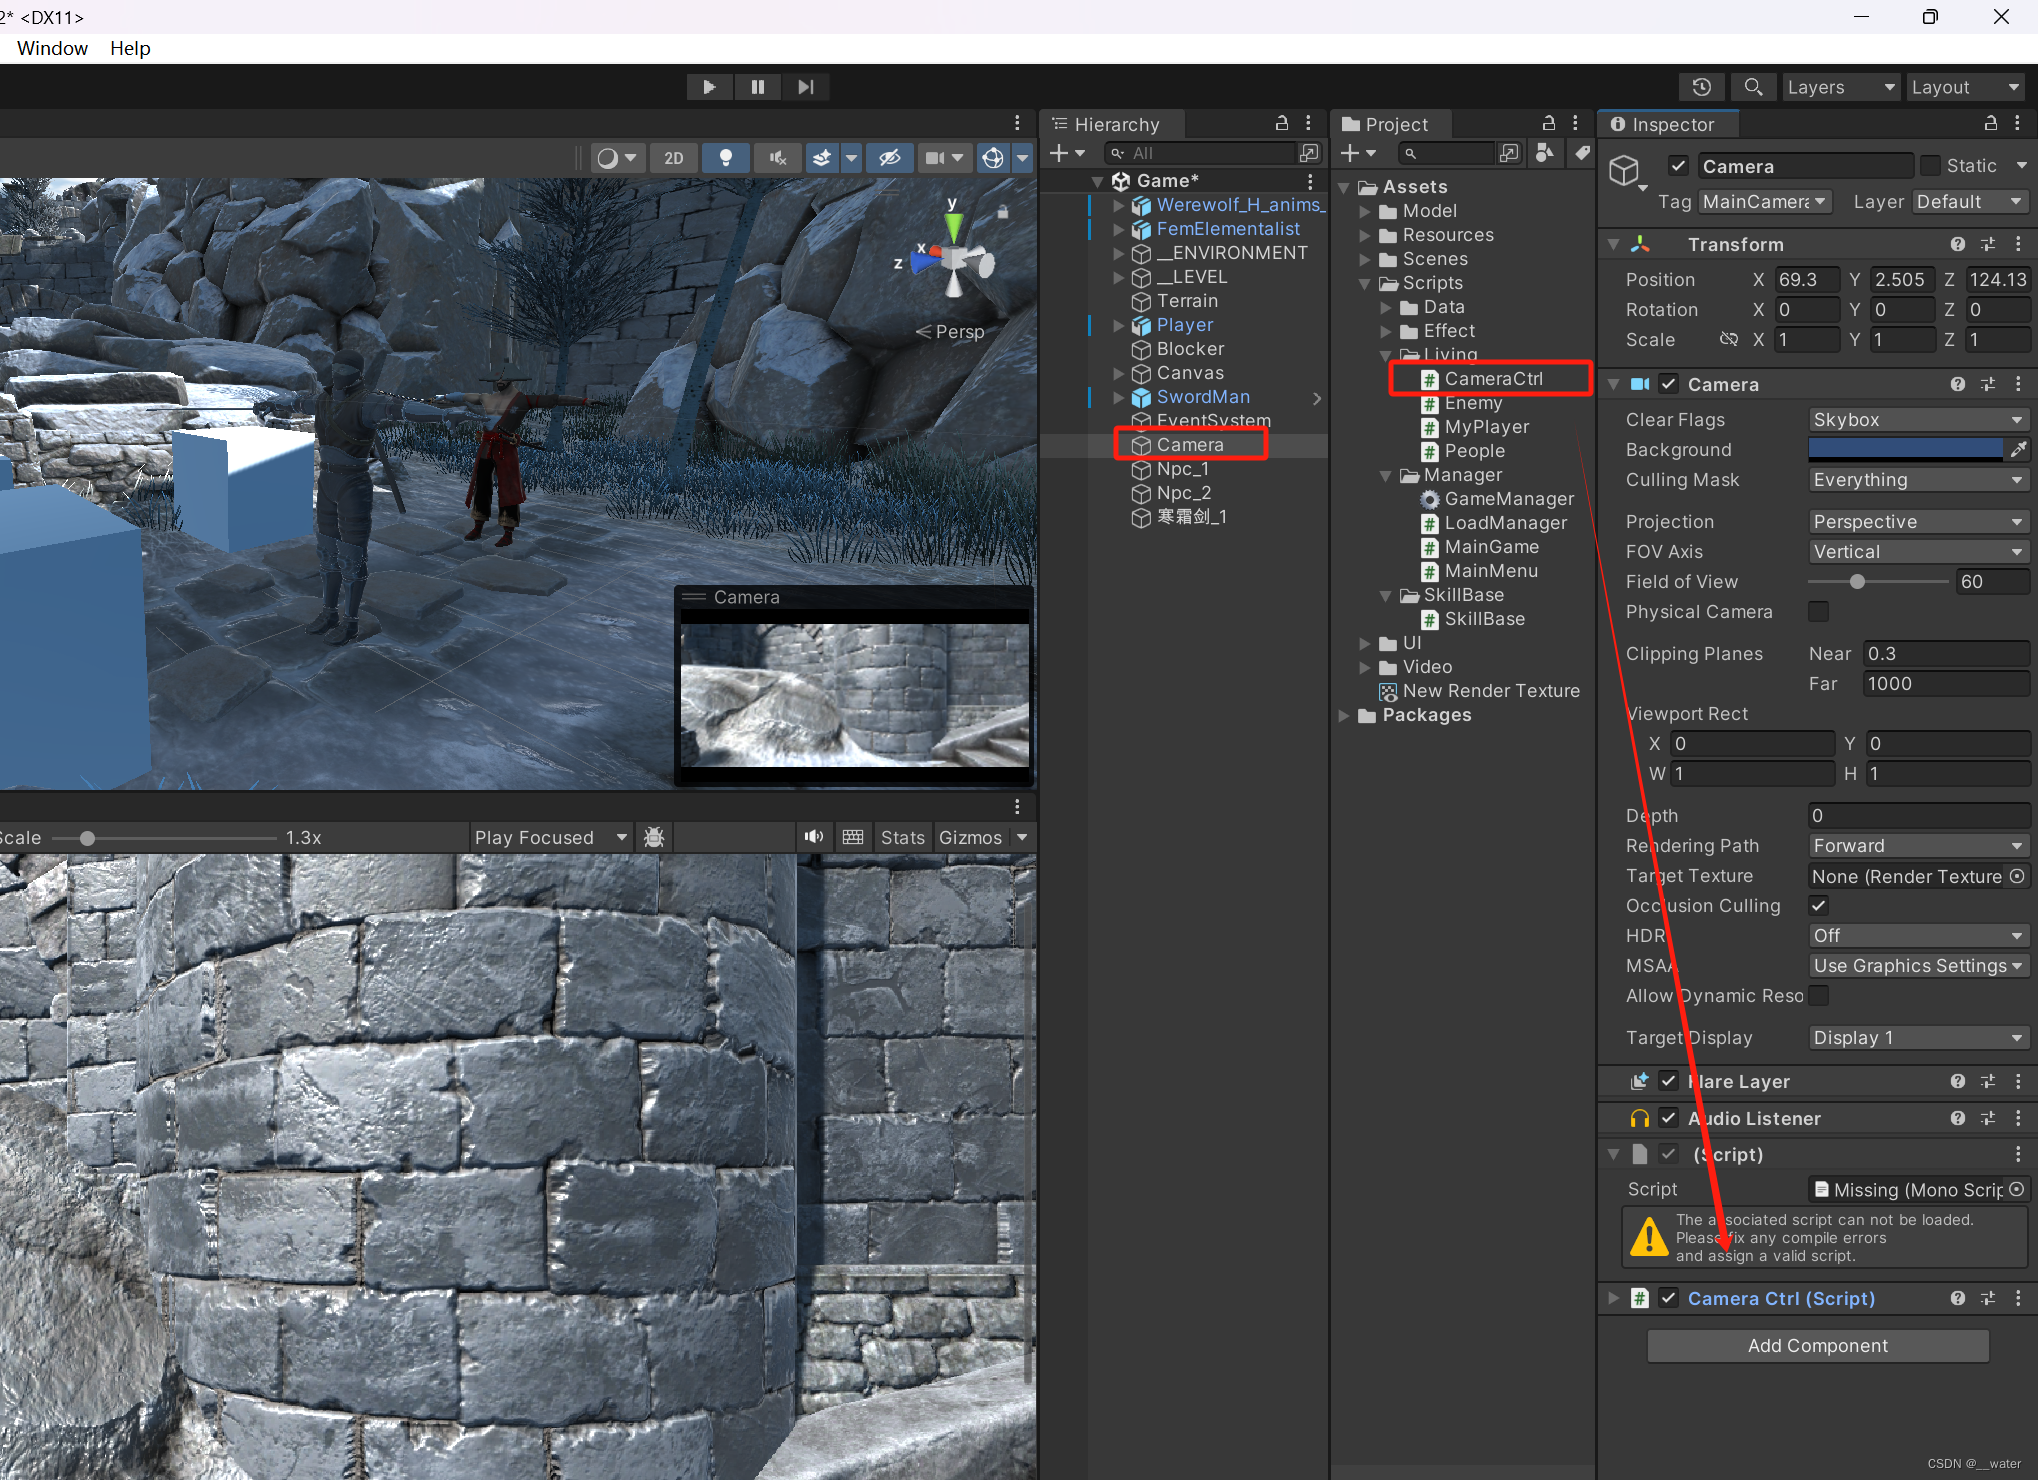
调节CameraCtrl数值后运行
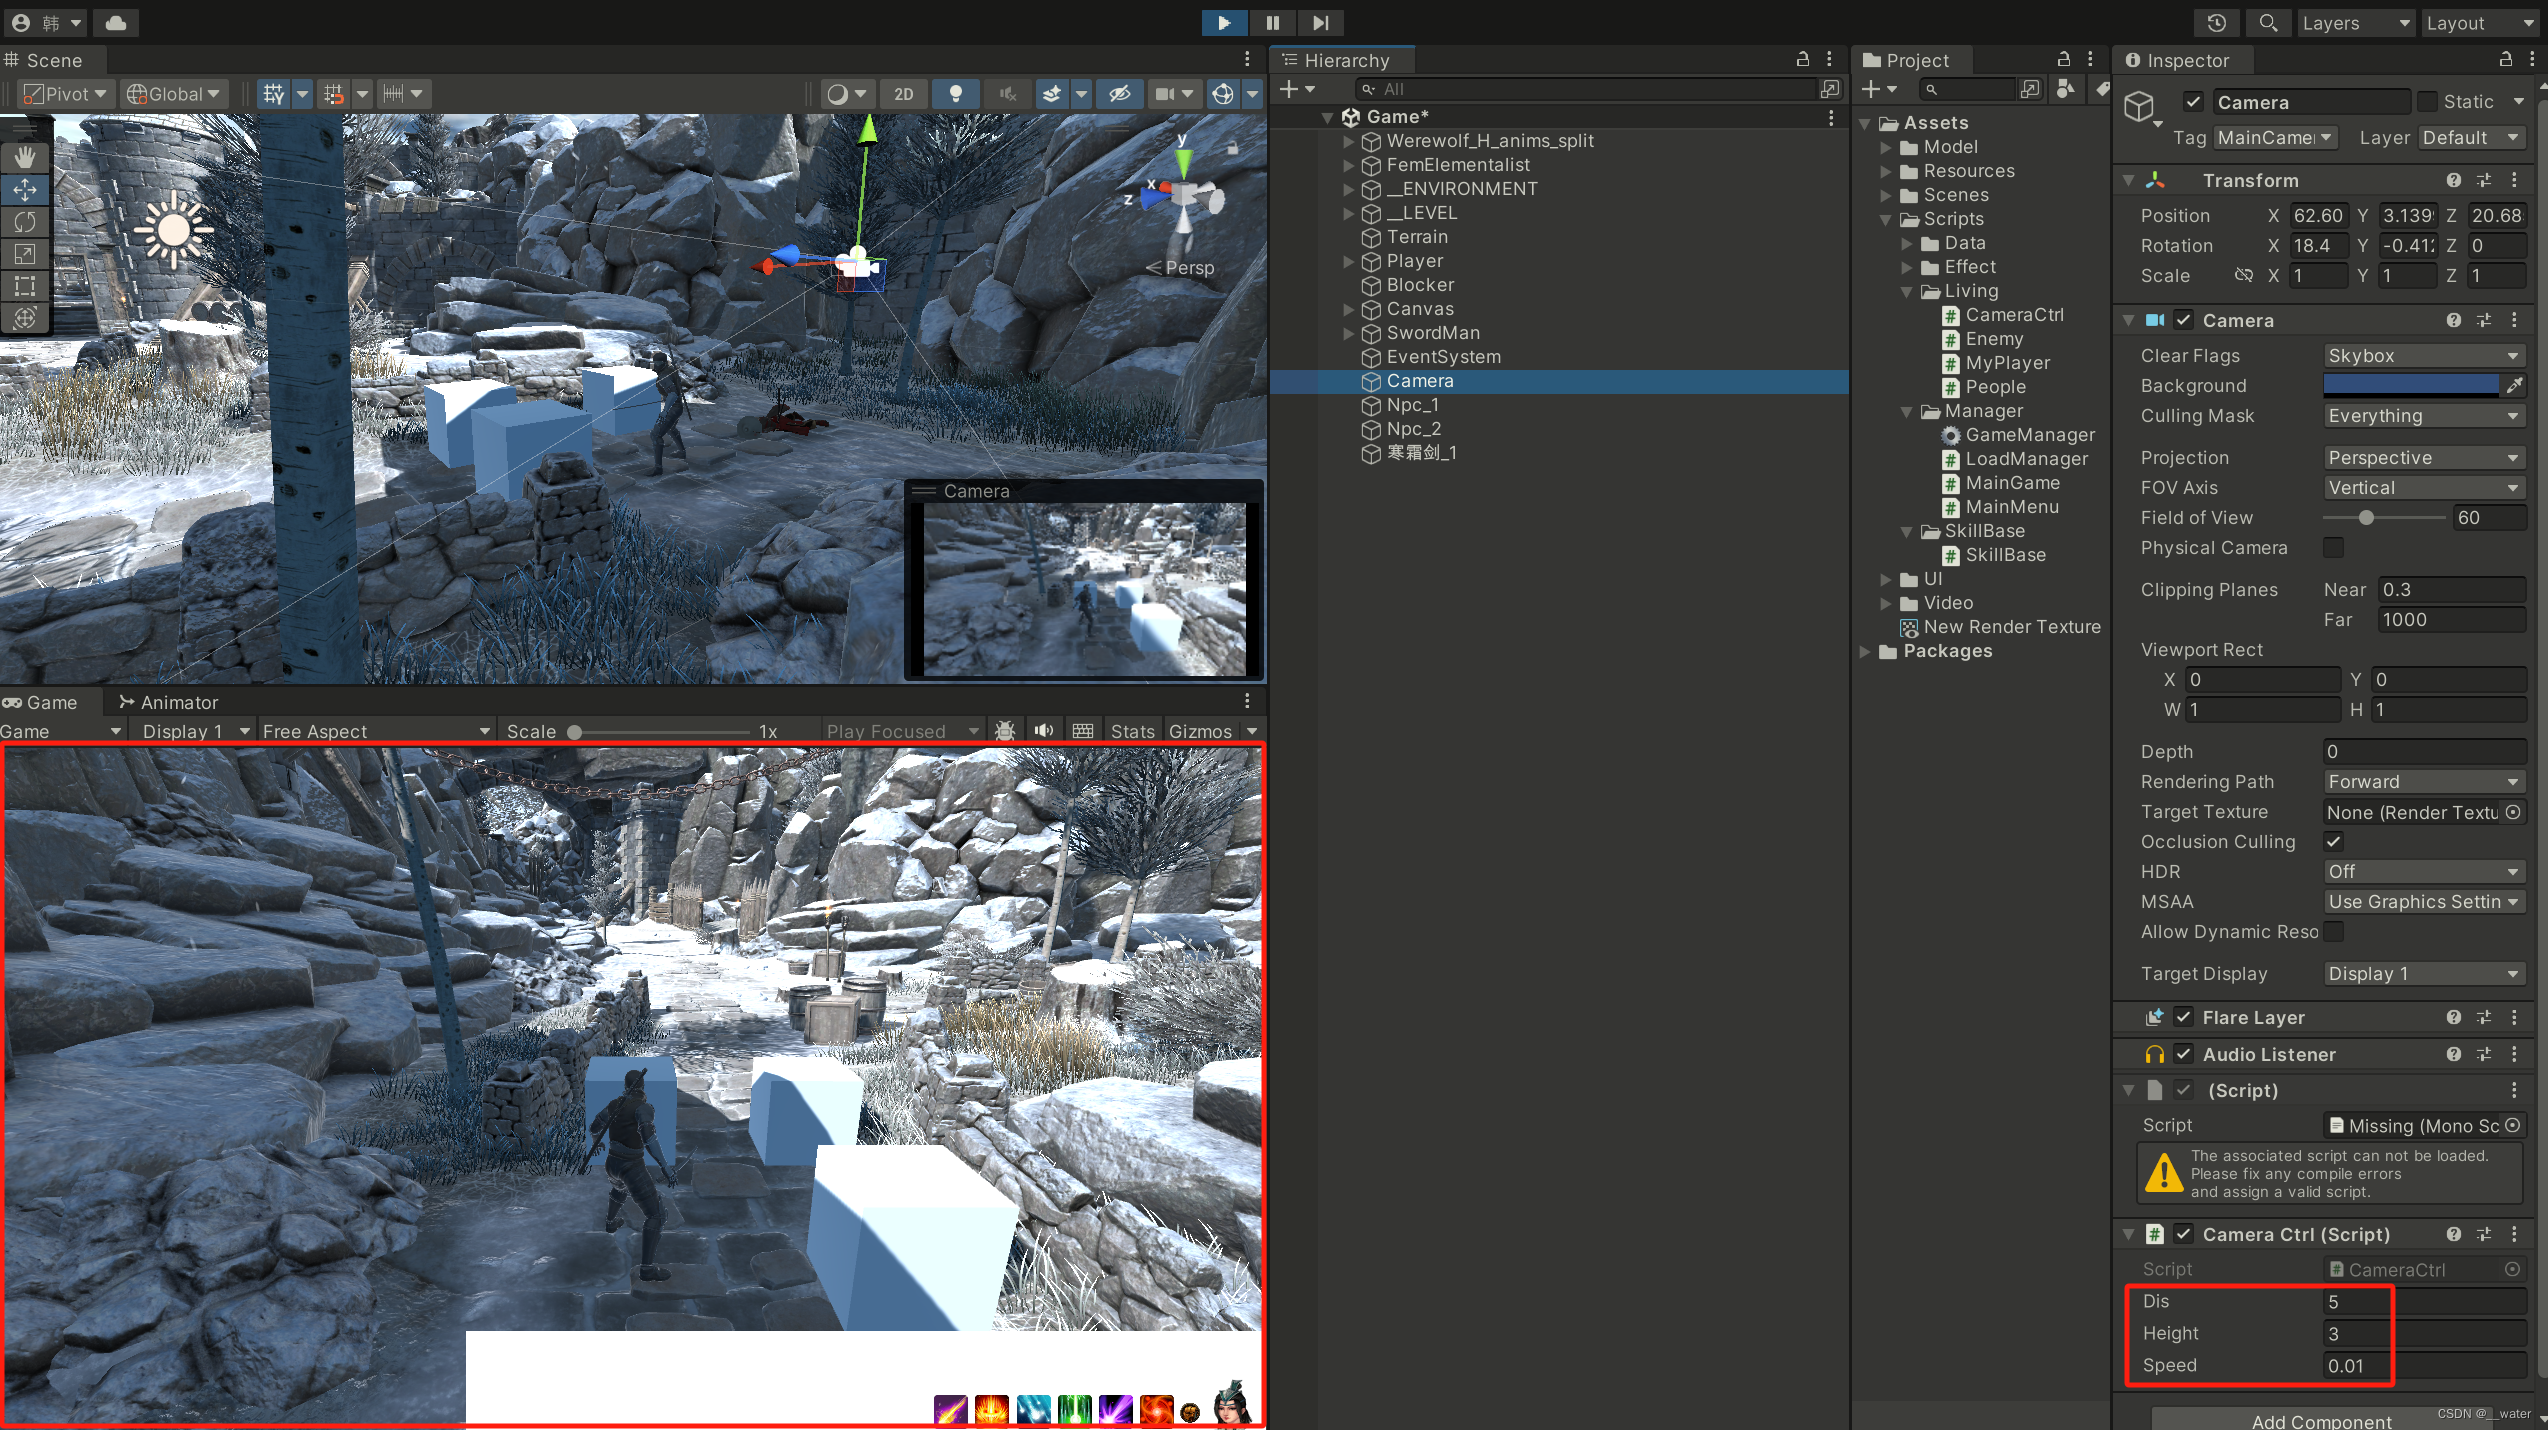
如果不想运行时摄像机千里跟随,就可以将角色的位置复制给摄像机:
最后设置一下设摄像机的y轴调高一点
完成阶段代码
相关文章:
RPG项目01_脚本代码
基于“RPG项目01_场景及人物动画管理器”,我们创建一个XML文档 在资源文件夹下创建一个文件夹, 命名为Xml 将Xnl文档拖拽至文件夹中, 再在文件夹的Manager下新建脚本LoadManager 写代码: using System.Collections; using System…...

目标检测YOLO实战应用案例100讲-交通目标数据集构建及高性能检测算法研究与应用
目录 前言 国内外研究现状 目标检测研究现状 目标检测数据集研究现状...

浅谈Vue.js的计算属性computed
什么是computed属性 computed 属性用于声明计算属性,这些属性的值是基于其他响应式属性计算而来的,当依赖的响应式属性发生变化时,计算属性会自动重新计算。 与Vue.js 2相比,Vue.js 3的 computed 属性语法稍有变化,不…...
Linux常用指令详解
目录 前言: Linux的目录结构 Linux常用指令简介 whoami指令 ls指令 pwd指令 cd指令 tree指令 touch指令 mkdir指令 rmdir指令与rm指令 man指令 cp(copy)指令 mv(move)指令 cat指令 重定向及重定向的类型…...
)
Nginx(性能优化)
到这里文章的篇幅较长了,最后再来聊一下关于Nginx的性能优化,主要就简单说说收益最高的几个优化项,在这块就不再展开叙述了,毕竟影响性能都有多方面原因导致的,比如网络、服务器硬件、操作系统、后端服务、程序自身、数…...

机器学习笔记 - 如何在Python中对网格和点云进行体素化?
一、简述 本文主要是为了了解如何生成体素表示,体素之于3D就像像素之于2D。体素本质上是 3D 像素,但它们不是正方形,而是完美的立方体。 理论上,体素是复制现实的完美建模技术。 这里我们要了解四个广泛流行的 Python 库(Open3D、Trimesh、PyVista、pyntcloud )生成点云…...

冒个泡!OceanBase亮相 2023 新加坡金融科技节
近日,OceanBase 亮相 Singapore Fintech Festival 2023(2023 新加坡金融科技节)!本届新加坡金融科技节于 2023 年 11 月 15 日至 17 日在新加坡博览展览中心举行,展会期间,OceanBase 得到了众多金融科技机构…...
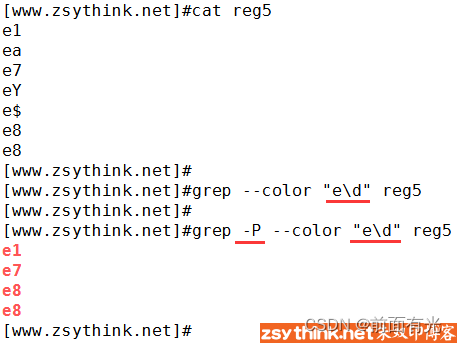
正则表达式(5):常用符号
正则表达式(5):常用符号 小结 本博文转载自 在本博客中,”正则表达式”为一系列文章,如果你想要从头学习怎样在Linux中使用正则,可以参考此系列文章,直达链接如下: 在Linux中使用正…...

Web安全漏洞分析-XSS(下)
随着互联网的迅猛发展,Web应用的普及程度也愈发广泛。然而,随之而来的是各种安全威胁的不断涌现,其中最为常见而危险的之一就是跨站脚本攻击(Cross-Site Scripting,简称XSS)。XSS攻击一直以来都是Web安全领…...

金南瓜SECS/GEM C# SDK 快速使用指南
本文对如何使用金南瓜SECS/GEM C# SDK 快速创建一个满足SECS/GEM通信要求的应用程序,只需简单3步完成。 第一步:创建C# .NET程序 示例使用Visual Studio 2010,使用者可以选择更高级版本 Visual Studio 第二步:添加DLL库引用&am…...

在一个没有超级用户的mongodb 生产库上如何添加超级用户
说来这个问题,都觉得不可思议,一个数据库怎么没有超级用户呢,我们知道,MYSQL,PG,ORACLE等,创建好后,都有一个默认的超级用户,MONGODB也有超级用户,但需要自己…...

排序算法之二:冒泡排序
冒泡排序的思路 冒泡排序是交换排序 基本思想:所谓交换,就是根据序列中两个记录键值的比较结果来对换这两个记录在序列中的位置,交换排序的特点是:将键值较大的记录向序列的尾部移动,键值较小的记录向序列的前部移动…...
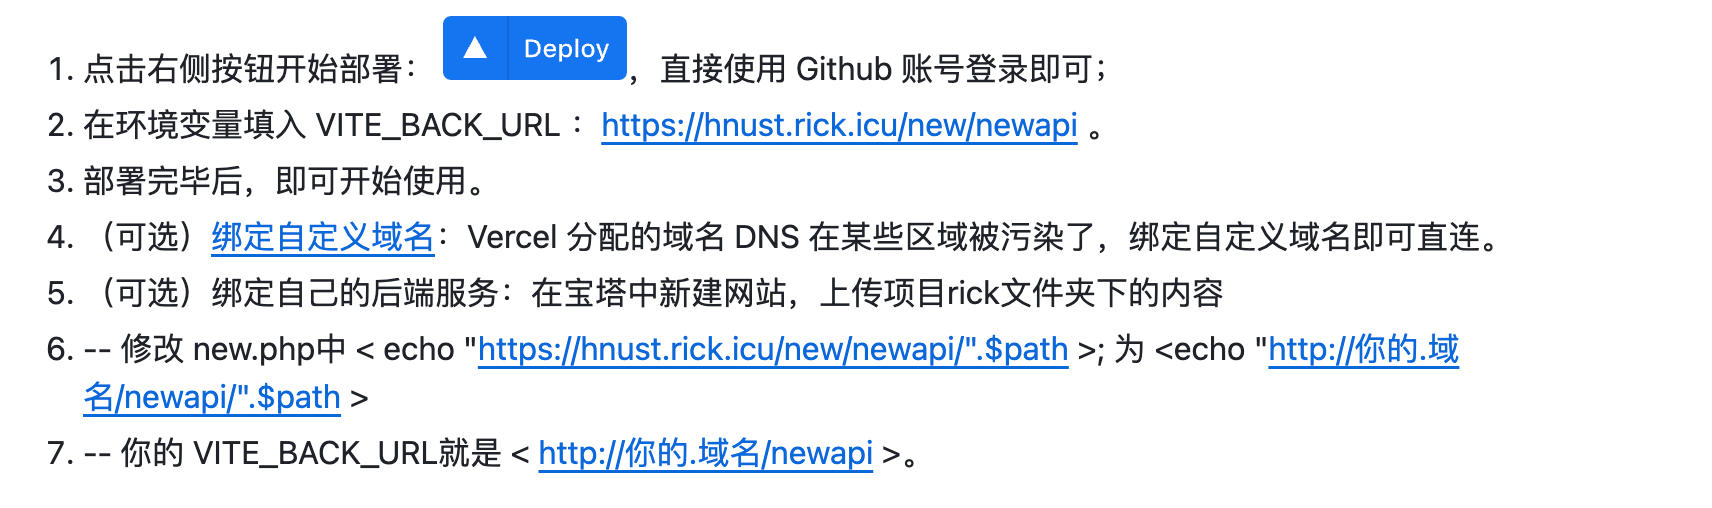
一键搭建你的hnust请假条
hnust请假条 湖南科技大学请假条生成器 https://hnust.rick.icu/new (直接使用) Hnust Leave Note 去github https://github.com/rickhqh/hnust_leave_note 效果展示 界面展示效果图 v2.0 更新 vant和vue重构了整个源码同步学校新版请假条样式修复了…...

C练习题13
单项选择题(本大题共20小题,每小题2分,共40分。在每小题给出的四个备选项中,选出一个正确的答案,并将所选项前的字母填写在答题纸的相应位置上。) 1.结构化程序由三种基本结构组成、三种基本结构组成的算法是() A.可以完成任何复杂的任务 B. 只能完成部分复杂的任务 C. 只能完…...

交易历史记录20231206 记录
昨日回顾: select top 10000 * from dbo.CODEINFO A left join dbo.全部A股20231206010101 B ON A.CODE B.代码 left join dbo.全部A股20231206CONF D on A.CODED.代码left join dbo.全部A股20231206 G on A.CODEG.代码 left…...
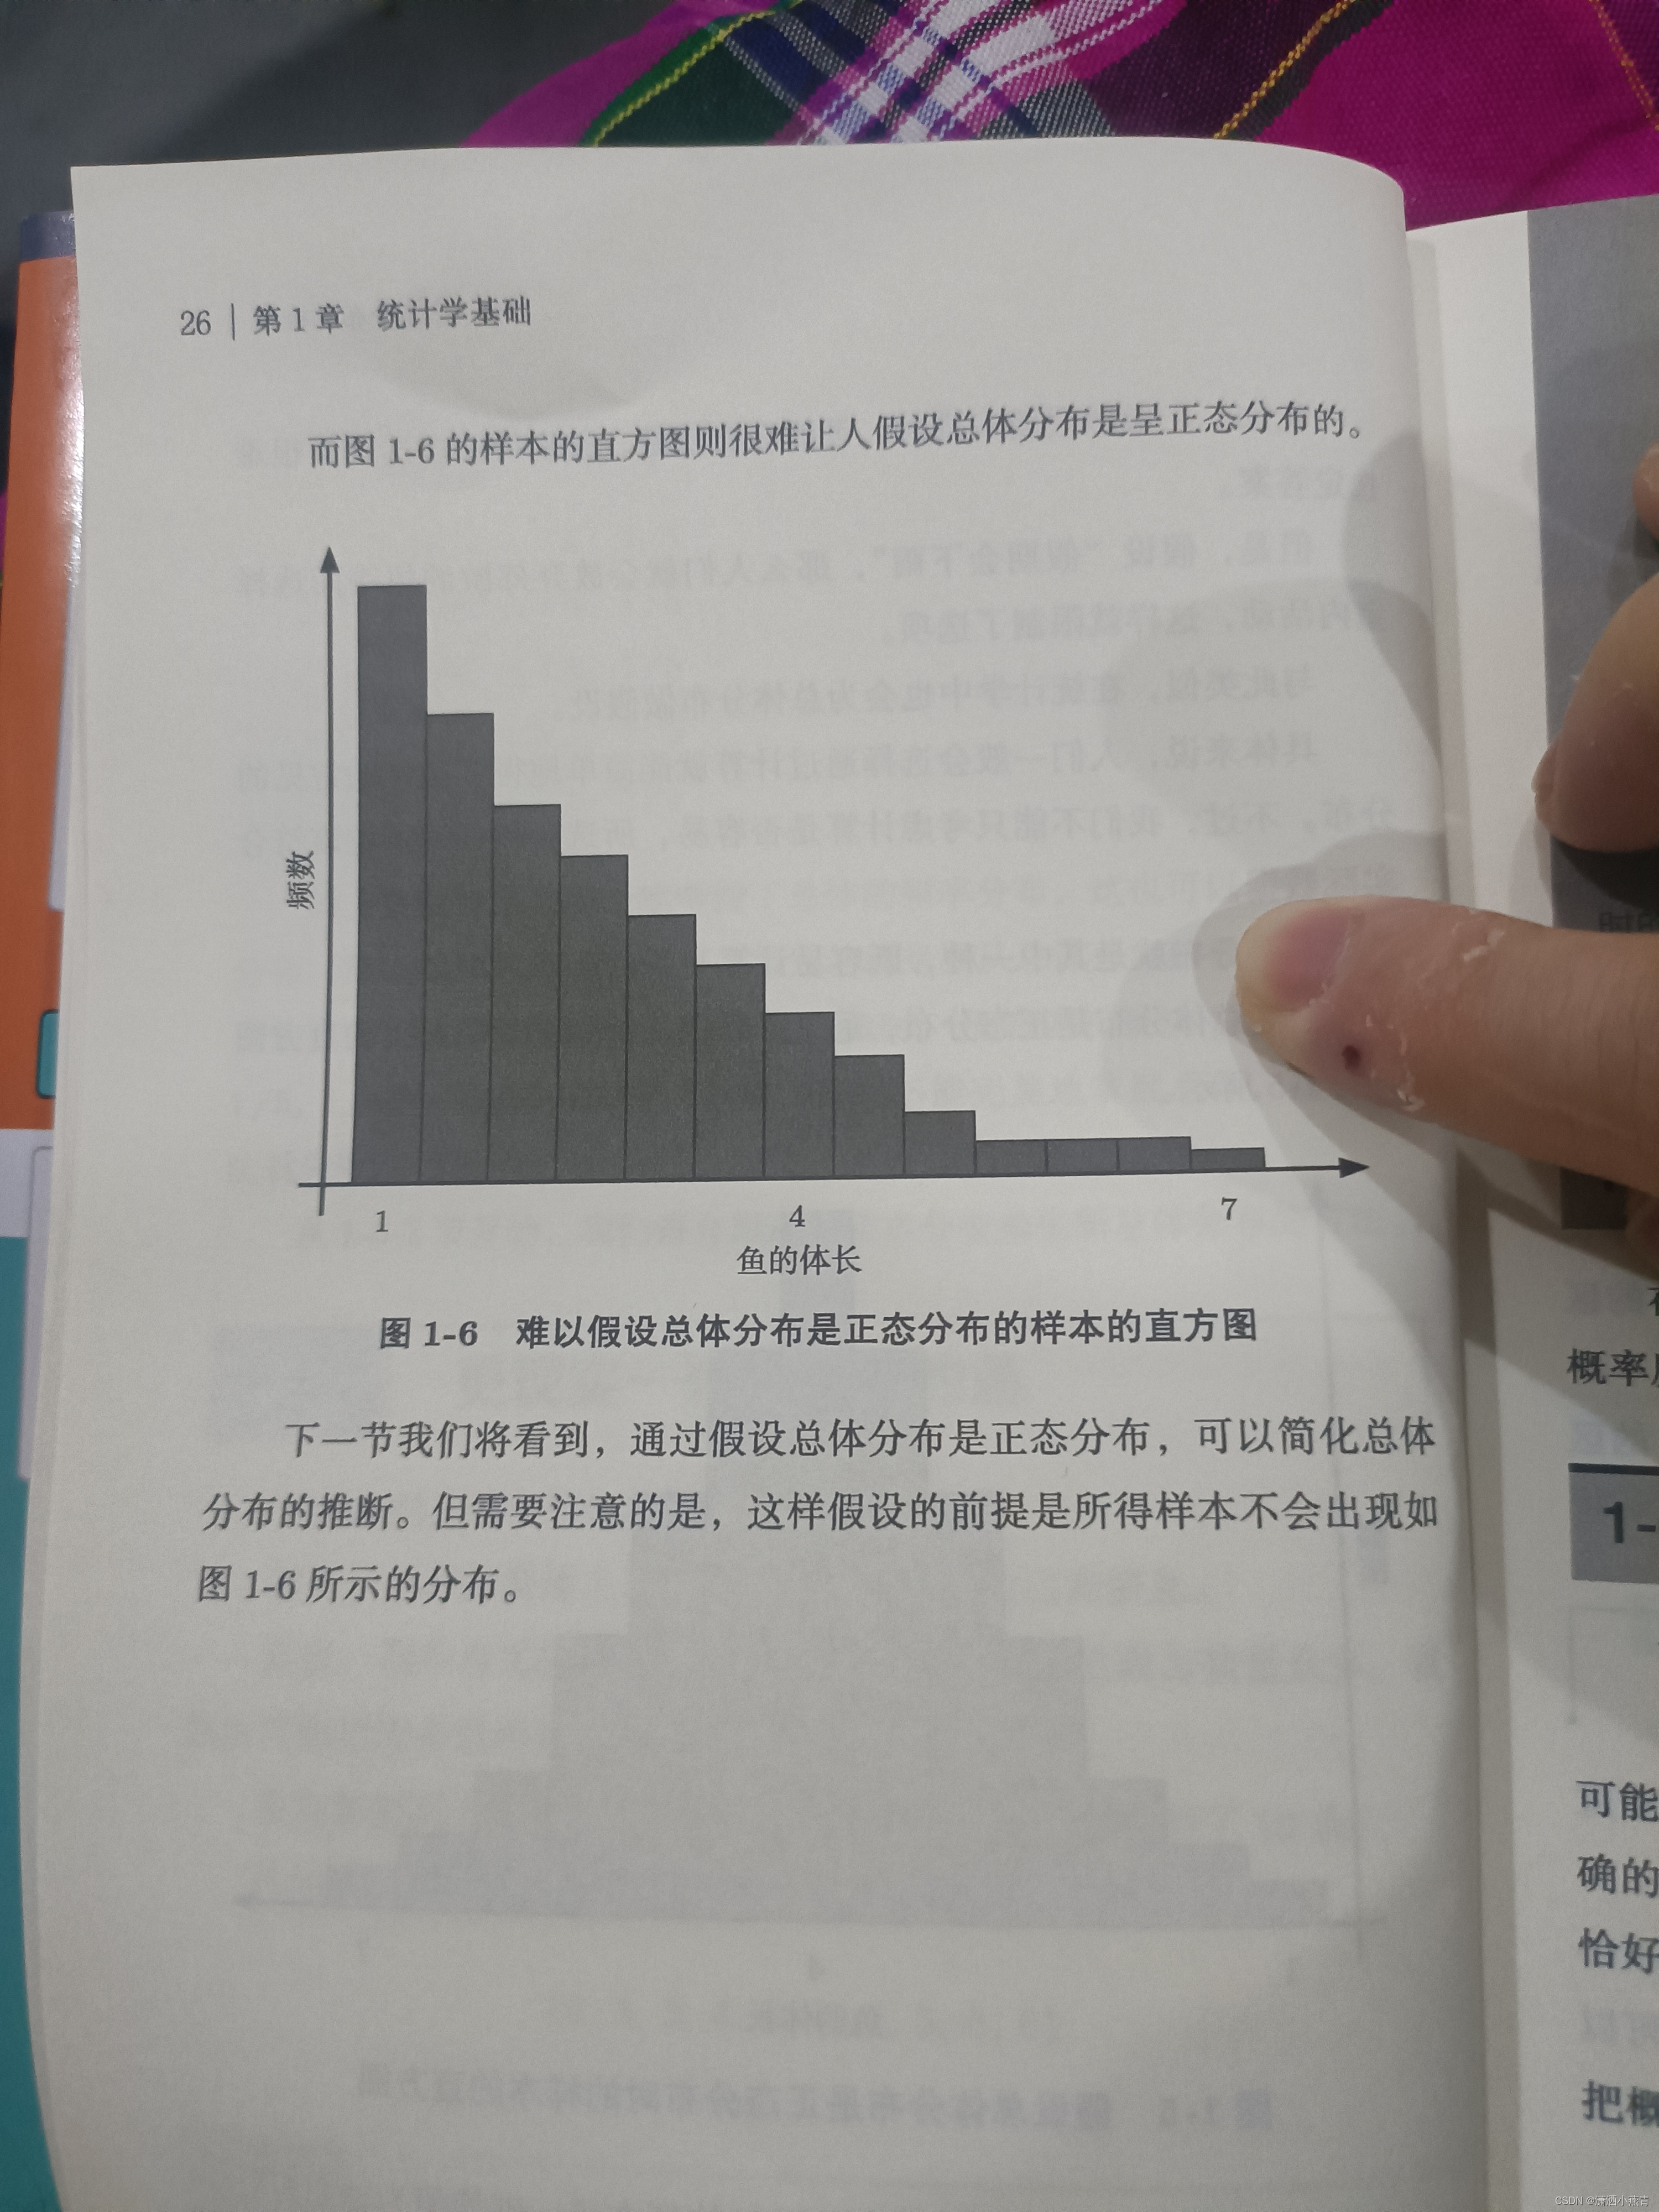
1-5总体分布的推断
...

深信服技术认证“SCSA-S”划重点:XSS漏洞
为帮助大家更加系统化地学习网络安全知识,以及更高效地通过深信服安全服务认证工程师考核,深信服特别推出“SCSA-S认证备考秘笈”共十期内容,“考试重点”内容框架,帮助大家快速get重点知识~ 划重点来啦 *点击图片放大展示 深信服…...

MIT6S081-Lab2总结
大家好,我叫徐锦桐,个人博客地址为www.xujintong.com,github地址为https://github.com/xjintong。平时记录一下学习计算机过程中获取的知识,还有日常折腾的经验,欢迎大家访问。 Lab2就是了解一下xv6的系统调用流程&…...
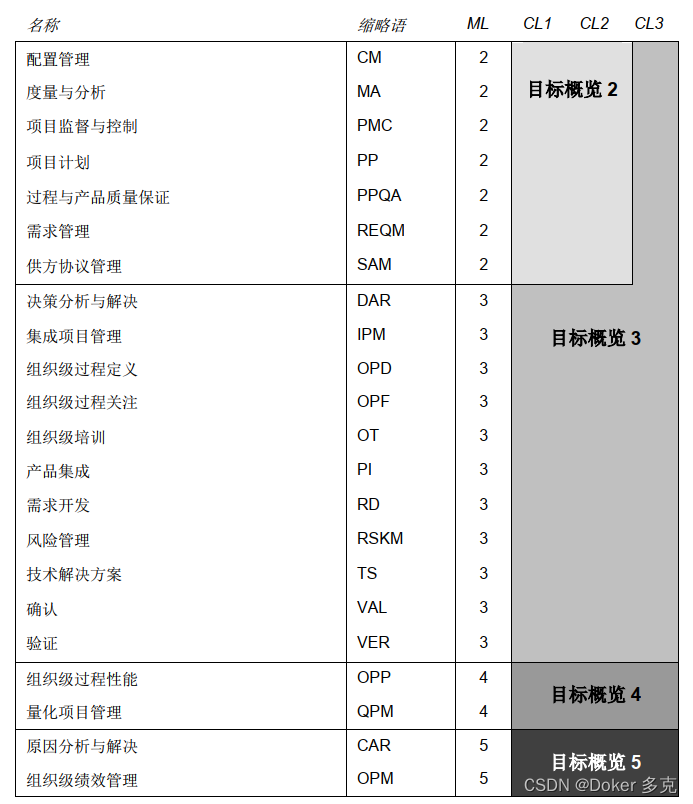
CMMI5大成熟度等级和4大过程域
CMMI(Capability Maturity Model Integration,能力成熟度模型集成)模型系列是帮助组织改进其过程的最佳实践的集合。这些模型由来自产业界、政府以及软件工程研究所(Software Engineering Institute, SEI)的…...
c++新经典模板与泛型编程:const修饰符的移除与增加
const修饰符的移除 让你来写移除const修饰符,你会怎么样来写? 😂😂trait类模板,如下 #include <iostream>// 泛化版本 template<typename T> struct RemoveConst {using type T; };// 特化版本 template…...

Ultimate ASI Loader 专业指南:深入解析游戏MOD加载器的完整配置与开发
Ultimate ASI Loader 专业指南:深入解析游戏MOD加载器的完整配置与开发 【免费下载链接】Ultimate-ASI-Loader The Ultimate ASI Loader is a proxy DLL that loads custom .asi libraries into any game process. 项目地址: https://gitcode.com/gh_mirrors/ul/U…...

用Circuit JS在线模拟器,5分钟搞定欧姆定律和LRC振荡电路实验
用Circuit JS在线模拟器,5分钟搞定欧姆定律和LRC振荡电路实验 在电子工程和物理教学中,理论公式与实验验证的结合一直是提升学习效率的关键。传统实验室受限于设备、场地和时间,而Circuit JS这款基于浏览器的开源电路模拟器,恰好填…...

3步解决Windows热键冲突:Hotkey Detective强力侦测工具指南
3步解决Windows热键冲突:Hotkey Detective强力侦测工具指南 【免费下载链接】hotkey-detective A small program for investigating stolen key combinations under Windows 7 and later. 项目地址: https://gitcode.com/gh_mirrors/ho/hotkey-detective 你是…...

别再傻傻用FFT了!用MATLAB的czt函数5分钟搞定频谱细化,精准定位98Hz和99Hz信号
别再被FFT分辨率坑了!MATLAB工程师的频谱细化实战指南 当你在分析一段包含98Hz和99Hz混合信号的频谱时,是否遇到过这样的尴尬:明明知道有两个频率成分存在,但FFT给出的结果却像被打了马赛克,两个峰值糊成一团…...

国产多模态大模型:产业协同全景与实战指南
国产多模态大模型:产业协同全景与实战指南 引言 在人工智能浪潮席卷全球的背景下,国产多模态大模型正从技术探索迈向广泛的产业协同应用。与只能处理文本或图像的单一模态模型相比,多模态大模型能同时理解、关联和生成文本、图像、音频、视频…...

Beam Search不是训练用的!搞懂它在NLP模型评估中的正确打开方式
Beam Search在NLP模型评估中的正确实践指南 当你在调试一个文本生成模型时,是否遇到过这样的困惑:训练时指标表现优异,实际生成时却频频输出不连贯的句子?这往往源于对序列生成任务中关键环节——推理阶段解码策略的误解。许多开发…...

保姆级教程:用STM32+ESP8266+微信小程序,5分钟搞定Onenet数据上传与设备控制
零基础实战:STM32ESP8266微信小程序极速对接Onenet全指南 在物联网技术快速普及的今天,许多嵌入式开发者都希望快速搭建一个完整的智能设备系统。本文将带你用最简单的方式,通过STM32微控制器、ESP8266 WiFi模块和微信小程序,实现…...

【NotebookLM林业科研提效指南】:3大AI笔记工作流重构传统林学研究范式
更多请点击: https://codechina.net 第一章:NotebookLM林业科学研究 NotebookLM 是 Google 推出的基于 AI 的研究协作者工具,专为文献理解与知识整合设计。在林业科学研究中,它可高效处理林学专著、野外调查报告、遥感解译文档、…...

LabVIEW编程整洁之道:提升代码可读性与可维护性的实战技巧
1. 项目概述:从“能用”到“好用”的进阶之路在LabVIEW这个图形化编程环境里摸爬滚打十几年,我见过太多工程师能把功能做出来,但做出来的程序却像一团乱麻——前面板控件堆叠、程序框图连线交错、结构嵌套深不见底。这样的程序,别…...

【亲测免费】 基于深度学习的计算机视觉PPT
基于深度学习的计算机视觉PPT 【下载地址】基于深度学习的计算机视觉PPT 本仓库提供了一份名为“基于深度学习的计算机视觉PPT”的资源文件,该文件详细介绍了计算机视觉的基本概念、理论基础以及深度学习在计算机视觉中的应用。计算机视觉是一门研究如何使机器“看”…...