基于QTreeWidget实现带Checkbox的多级组织结构选择树
基于QTreeWidget实现带Checkbox的多级组织结构选择树
采用基于QWidget+Mingw实现的原生的组织结构树
通过QTreeWidget控件实现的带Checkbox多级组织结构树。
Qt相关系列文章:
一、Qt实现的聊天画面消息气泡
二、基于QTreeWidget实现多级组织结构
三、基于QTreeWidget实现带Checkbox的多级组织结构选择树
基于QTreeWidget实现带Checkbox的多级组织结构选择树代码已上传到【https://gitee.com/duyanjun/QT_tree_checkDemo.git】
目录
- 基于QTreeWidget实现带Checkbox的多级组织结构选择树
- 1、效果图
- 2、运行
- 2.1、从git导入
- 2.2、修改头像图片的路径
- 2.3、运行
- 2.4、实现
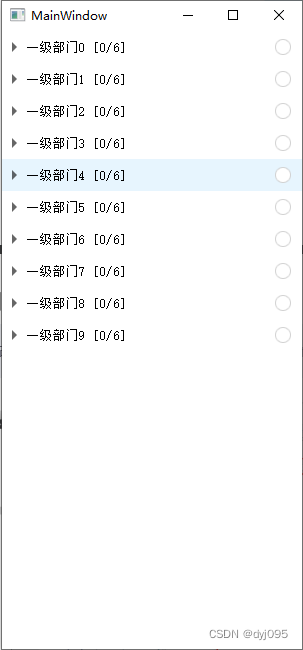
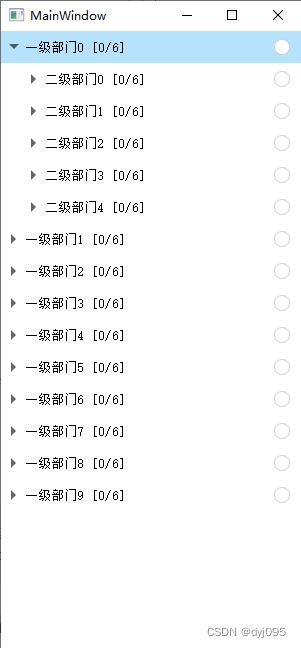
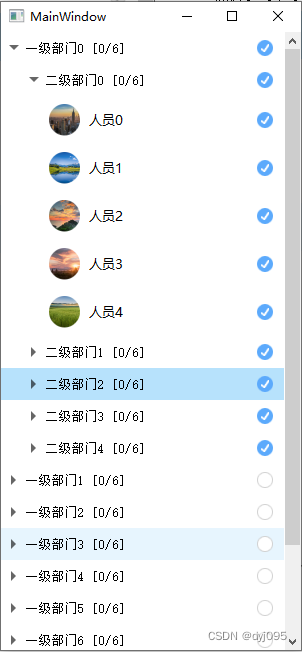
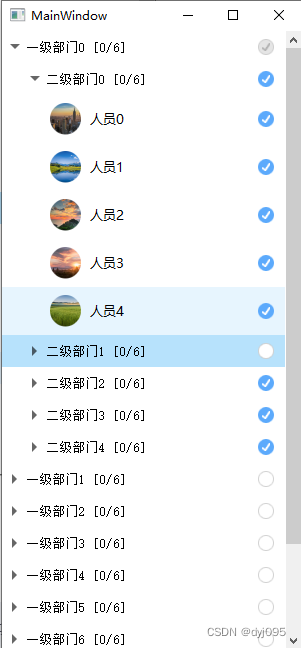
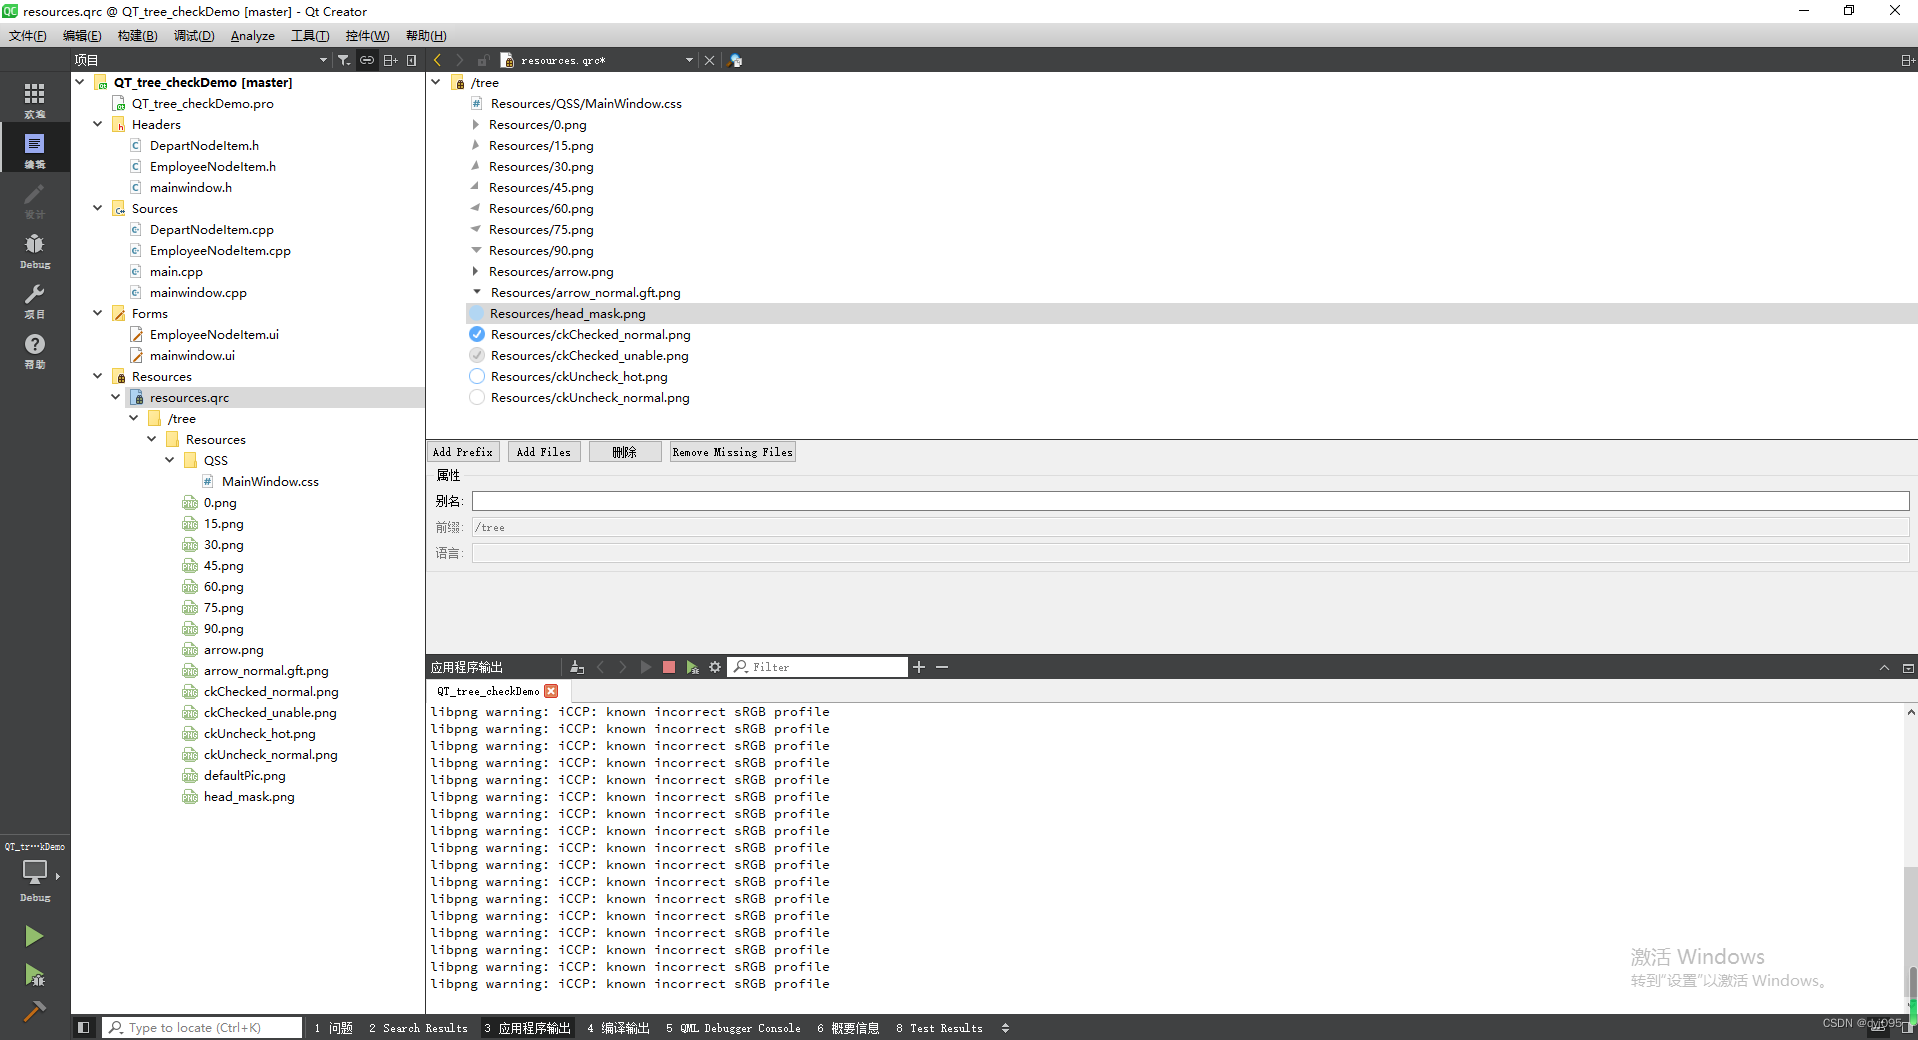
1、效果图
1、支持带复选框多级部门、人员,复选框未选中、选中、半选中状态以及样式自定义,本例中样式中圆形框;
2、每一子级相对上级部门有缩进;
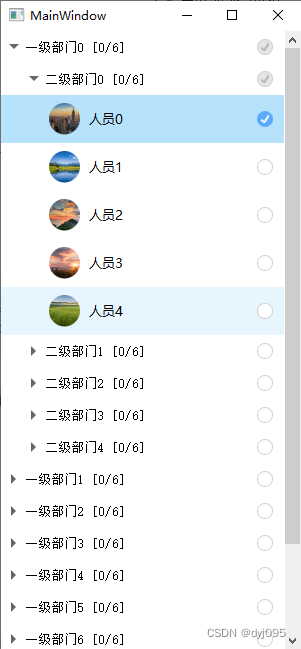
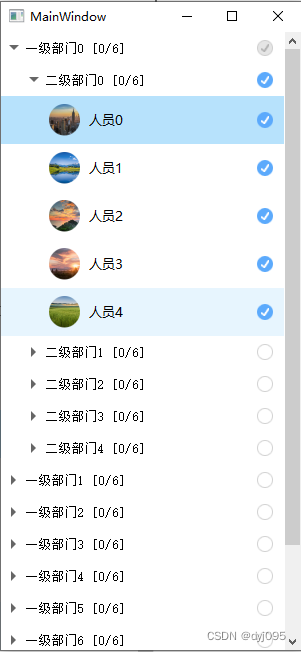
3、支持点击上级部门复选框,关联的下级部门、人员节点也会自动选中/非选中;
4、如果上级部门节点处于选中状态时,取消选中其中部分下级子节点时,上级部门节点的选中状态会自动变更为半选中状态;
2、运行
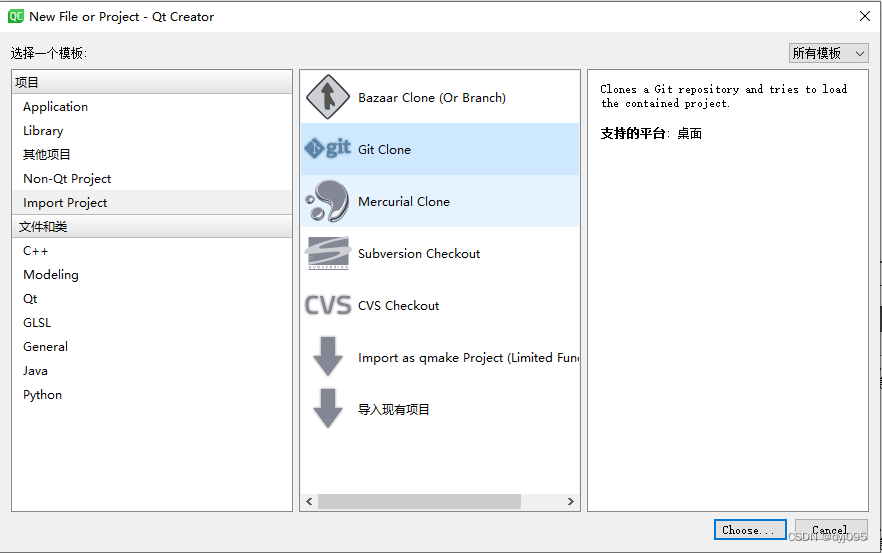
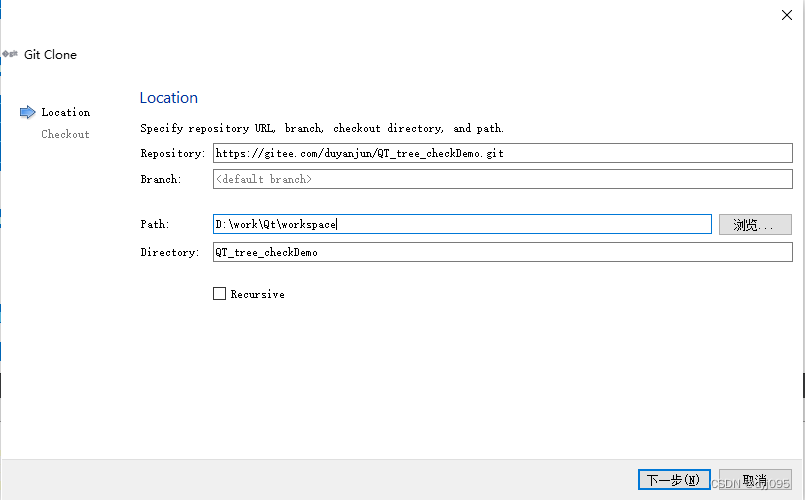
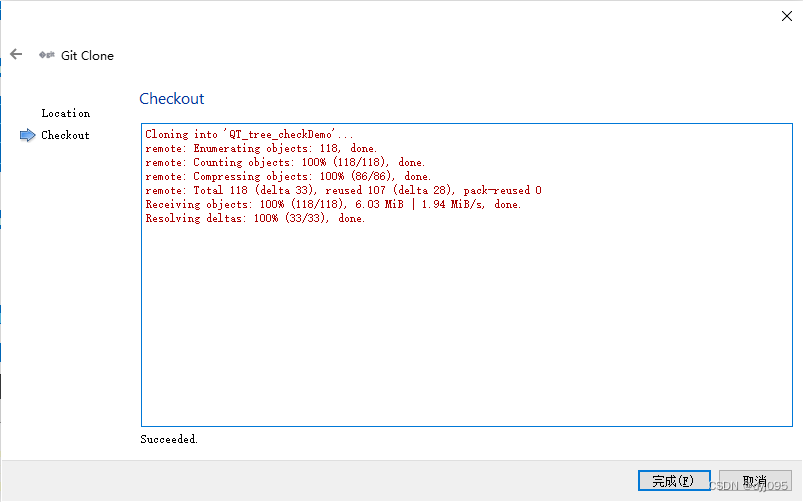
2.1、从git导入
文件 -> 新建文件或项目 -> Import Project -> Git Clone
【https://gitee.com/duyanjun/QT_tree_checkDemo.git】
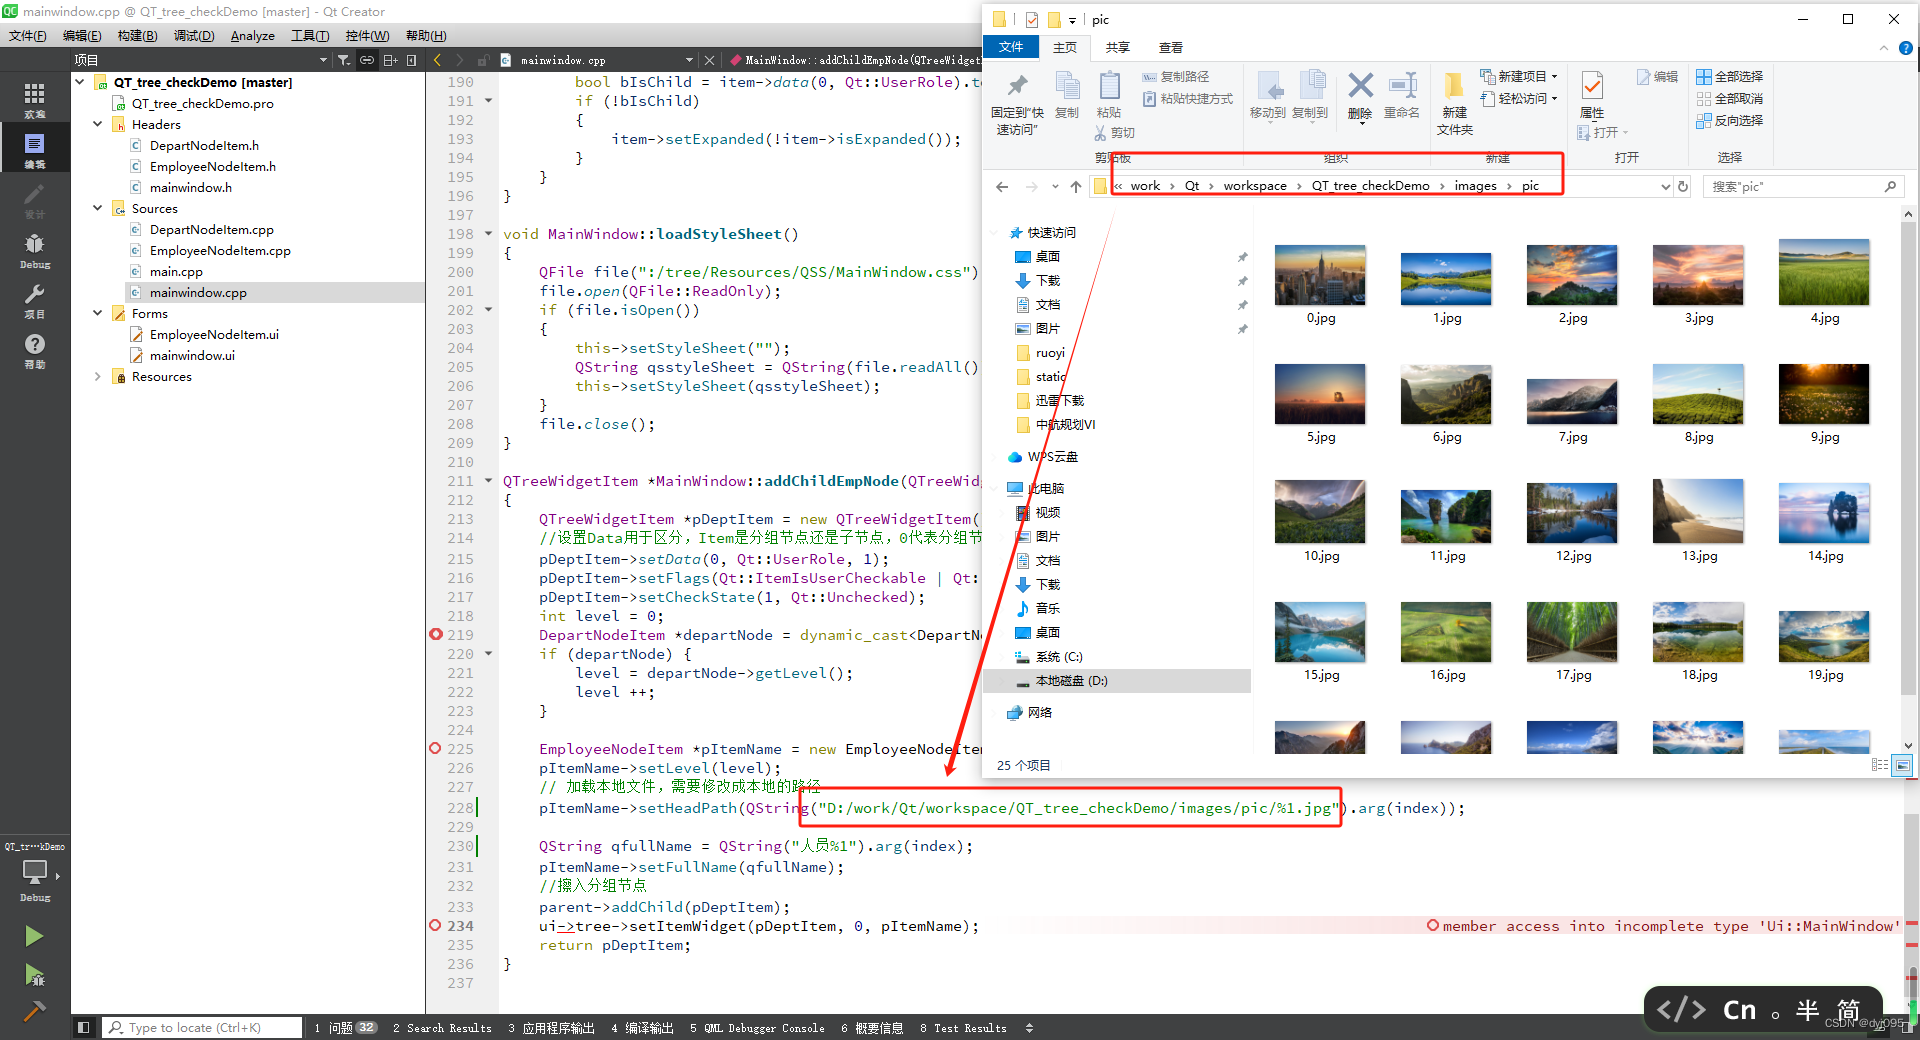
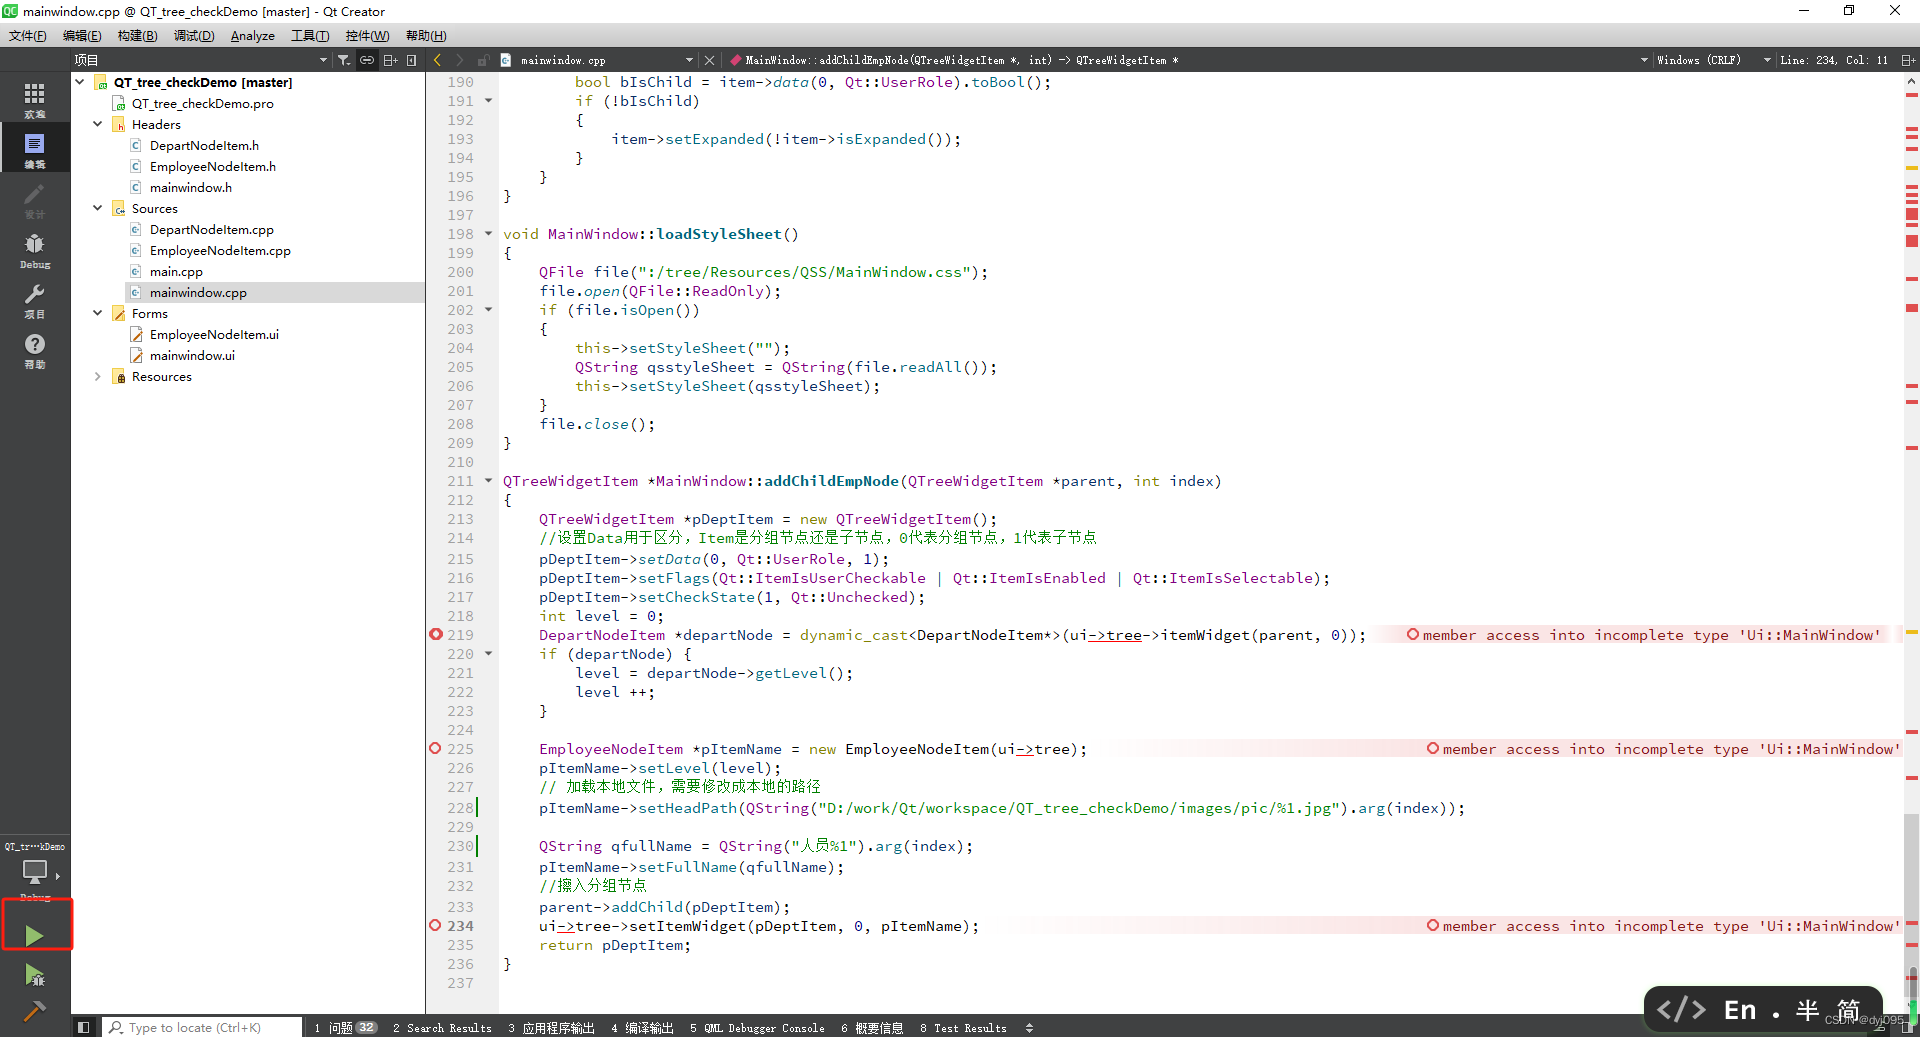
2.2、修改头像图片的路径
运行本Demo需要修改mainwindow.cpp第228行代码中的images目录的绝对路径;
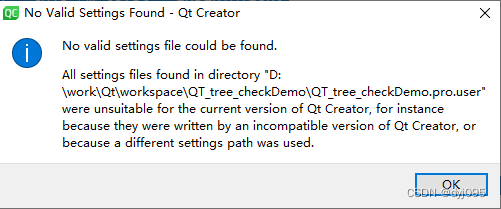
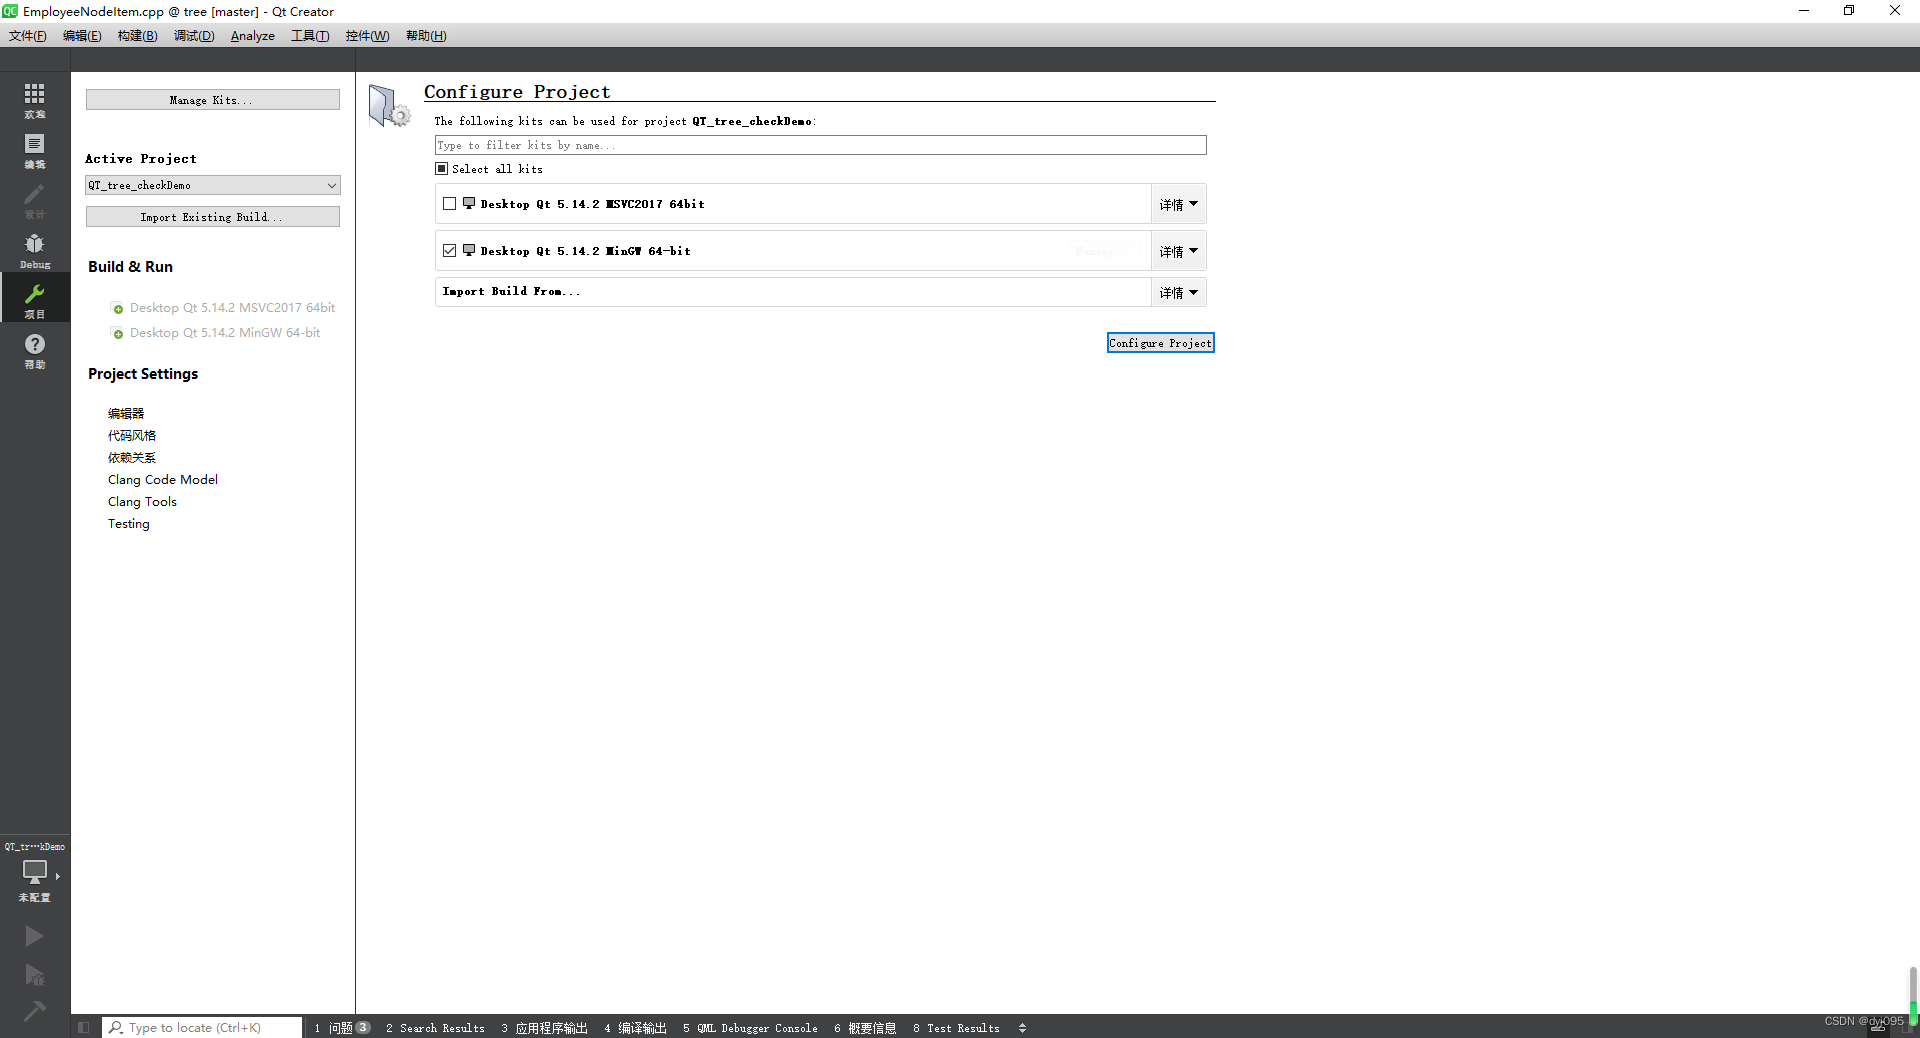
2.3、运行
2.4、实现
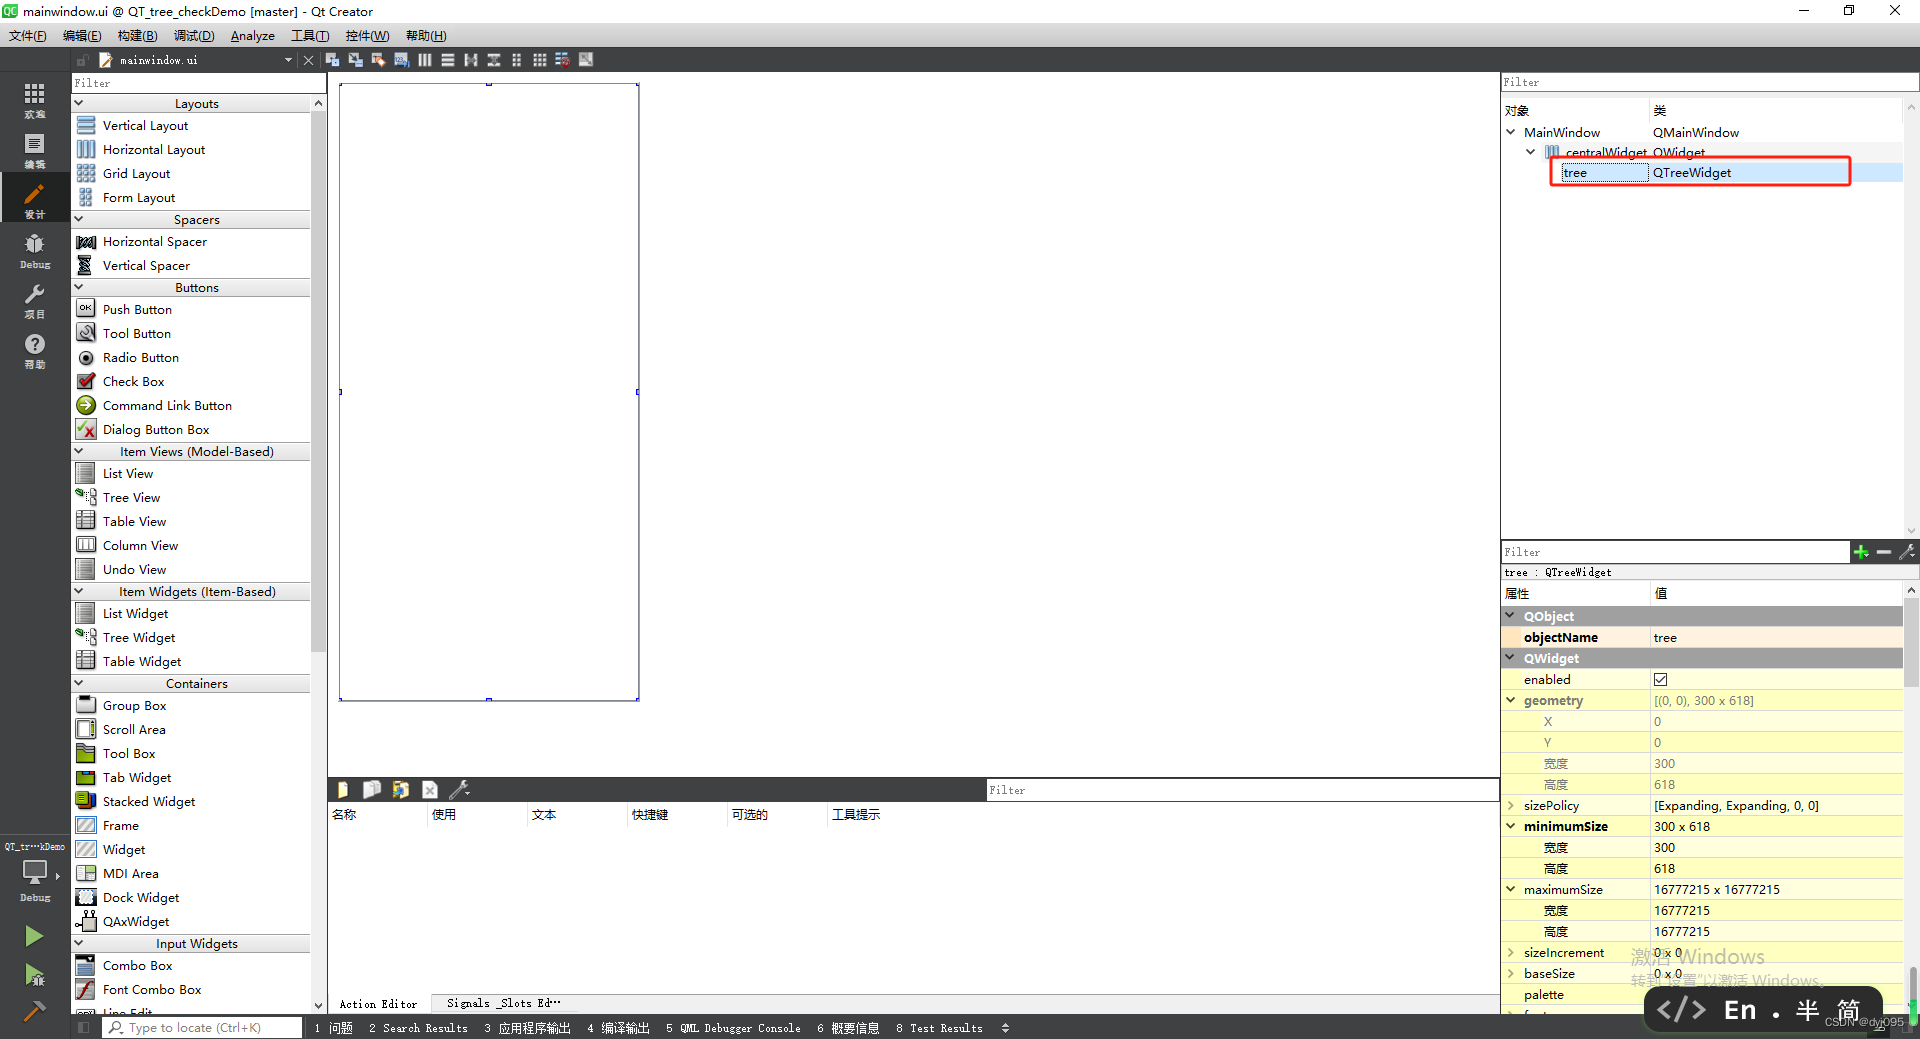
1)、主画面部局
在画面添加QTreeWidget控件
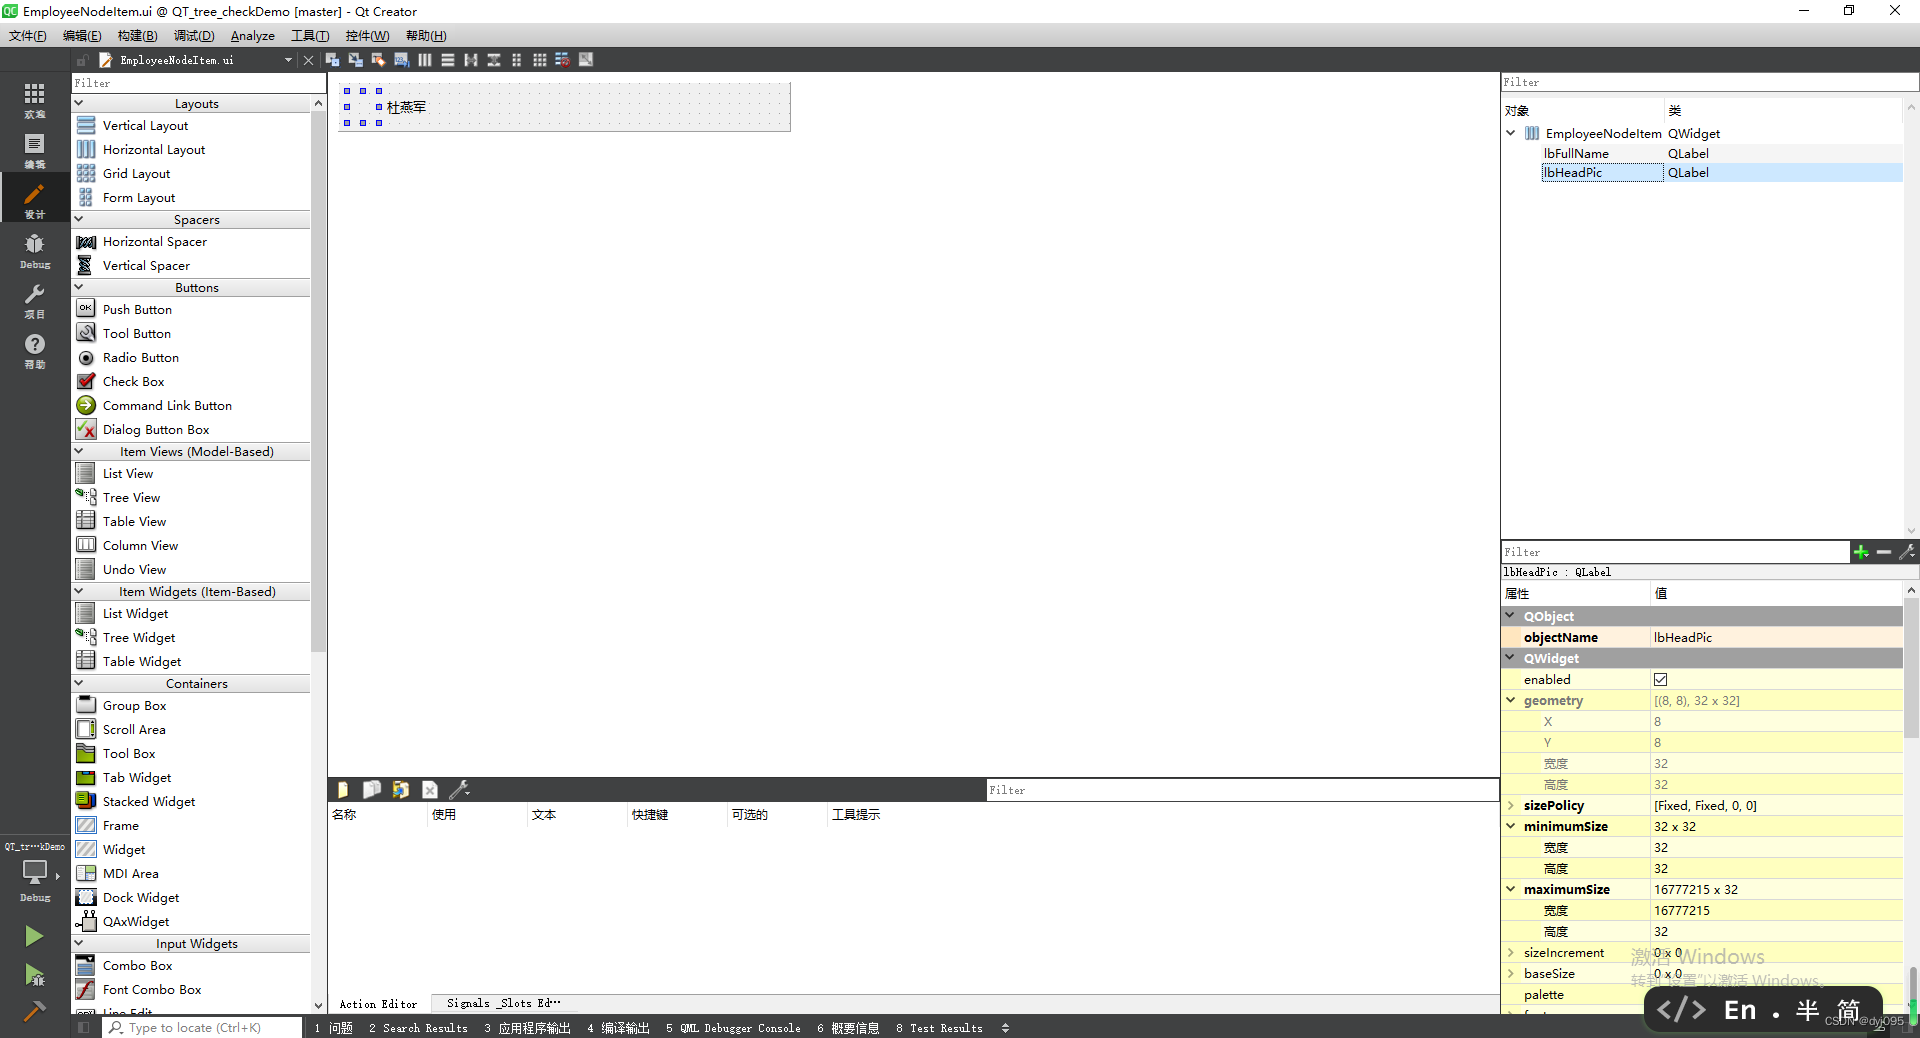
2)、人员节点部局
整体部局采用横向部局,依次是头像和姓名
3)、main.cpp
#include "mainwindow.h"
#include <QApplication>int main(int argc, char *argv[])
{QApplication a(argc, argv);MainWindow w;w.show();return a.exec();
}
4)、MainWindow类
使QTreeWidget显示复选框主要是下面代码起的作用
QTreeWidgetItem *pRootDeptItem = new QTreeWidgetItem();
pRootDeptItem->setChildIndicatorPolicy(QTreeWidgetItem::ShowIndicator);
//设置Data用于区分,Item是分组节点还是子节点,0代表分组节点,1代表子节点
pRootDeptItem->setData(0, Qt::UserRole, 0);
pRootDeptItem->setFlags(Qt::ItemIsUserCheckable | Qt::ItemIsEnabled | Qt::ItemIsSelectable);
pRootDeptItem->setCheckState(1, Qt::Unchecked);
resources.qrc
MainWindow.css
#tree{outline:0px;
}
#tree
{border-style:none;
}#tree::item
{color:rgba(255, 255, 255, 0);
}#tree::item:selected:active
{background-color: rgba(135, 206, 250, 153);
}#tree::item:selected:!active, QTreeView::item:hover
{background-color: rgba(135, 206, 250, 50);
}
#tree::indicator{width: 16px;height: 16px;
}
#tree::indicator:checked{image: url(:/tree/Resources/ckChecked_normal.png);
}
#tree::indicator:unchecked{image: url(:/tree/Resources/ckUncheck_normal.png);
}
#tree::indicator:indeterminate{image: url(:/tree/Resources/ckChecked_unable.png);
}
mainwindow.h
#ifndef MAINWINDOW_H
#define MAINWINDOW_H#include <QMainWindow>
#include <QTreeWidgetItem>namespace Ui {
class MainWindow;
}class MainWindow : public QMainWindow
{Q_OBJECTpublic:MainWindow(QWidget *parent = 0);~MainWindow();void init();void updateParentItem(QTreeWidgetItem* item);void setParentPartiallyChecked(QTreeWidgetItem *itm);QTreeWidgetItem* addChildNode(QTreeWidgetItem *parent, int index, QString namePre);QTreeWidgetItem* addChildEmpNode(QTreeWidgetItem *parent, int index);public slots://申明信号与槽,当树形控件的子选项被改变时执行void treeItemChanged(QTreeWidgetItem* item , int column);void onItemExpanded(QTreeWidgetItem * item);void onItemCollapsed(QTreeWidgetItem * item);void onItemClicked(QTreeWidgetItem * item, int column);private:void loadStyleSheet();
private:Ui::MainWindow *ui;
};#endif // MAINWINDOW_H
mainwindow.cpp
#include "mainwindow.h"
#include "ui_mainwindow.h"
#include "DepartNodeItem.h"
#include "EmployeeNodeItem.h"#include <QFile>
#include <QDebug>MainWindow::MainWindow(QWidget *parent) :QMainWindow(parent),ui(new Ui::MainWindow)
{ui->setupUi(this);loadStyleSheet();init();connect(ui->tree, SIGNAL(itemChanged(QTreeWidgetItem*,int)), this, SLOT(treeItemChanged(QTreeWidgetItem*,int)));
}MainWindow::~MainWindow()
{delete ui;
}void MainWindow::init()
{ui->tree->setHeaderHidden(true);// 1.创建表格ui->tree->setColumnCount(2);// 2.拿到表头QHeaderView *head = ui->tree->header();// 3.设置不能拉伸的列的宽度,设置哪一列能拉伸head->setSectionResizeMode(0,QHeaderView::Stretch);head->setSectionResizeMode(1, QHeaderView::Fixed);ui->tree->setColumnWidth(1, 30);// 4.(最重要的一步)去掉默认的拉伸最后列属性head->setStretchLastSection(false);//展开和收缩时信号,以达到变更我三角图片;connect(ui->tree, SIGNAL(itemClicked(QTreeWidgetItem *, int)), this, SLOT(onItemClicked(QTreeWidgetItem *, int)));connect(ui->tree, SIGNAL(itemExpanded(QTreeWidgetItem *)), this, SLOT(onItemExpanded(QTreeWidgetItem *)));connect(ui->tree, SIGNAL(itemCollapsed(QTreeWidgetItem *)), this, SLOT(onItemCollapsed(QTreeWidgetItem *)));for(int i = 0; i < 10; i++){// 一级部门节点QTreeWidgetItem *pRootDeptItem = new QTreeWidgetItem();pRootDeptItem->setChildIndicatorPolicy(QTreeWidgetItem::ShowIndicator);//设置Data用于区分,Item是分组节点还是子节点,0代表分组节点,1代表子节点pRootDeptItem->setData(0, Qt::UserRole, 0);pRootDeptItem->setFlags(Qt::ItemIsUserCheckable | Qt::ItemIsEnabled | Qt::ItemIsSelectable);pRootDeptItem->setCheckState(1, Qt::Unchecked);DepartNodeItem *pItemName = new DepartNodeItem(ui->tree);pItemName->setLevel(0);int nMyFriendNum = 6;QString qsGroupName = QString("一级部门%3 [%1/%2]").arg(0).arg(nMyFriendNum).arg(i);pItemName->setText(qsGroupName);//插入分组节点ui->tree->addTopLevelItem(pRootDeptItem);ui->tree->setItemWidget(pRootDeptItem, 0, pItemName);for(int j = 0; j < 5; j++){//addChildEmpNode(pRootDeptItem, j);}for(int j = 0; j < 5; j++){QString name = QString("二级部门%1").arg(j);QTreeWidgetItem *childItem = addChildNode(pRootDeptItem, i * 10 + j,name);for(int g = 0; g < 5; g++){addChildEmpNode(childItem, g);}}}
}QTreeWidgetItem* MainWindow::addChildNode(QTreeWidgetItem *parent, int index, QString namePre)
{QTreeWidgetItem *pDeptItem = new QTreeWidgetItem();pDeptItem->setChildIndicatorPolicy(QTreeWidgetItem::ShowIndicator);//设置Data用于区分,Item是分组节点还是子节点,0代表分组节点,1代表子节点pDeptItem->setData(0, Qt::UserRole, 0);DepartNodeItem *pItemName = new DepartNodeItem(ui->tree);pDeptItem->setFlags(Qt::ItemIsUserCheckable | Qt::ItemIsEnabled | Qt::ItemIsSelectable);pDeptItem->setCheckState(1, Qt::Unchecked);int level = 0;DepartNodeItem *departNode = dynamic_cast<DepartNodeItem*>(ui->tree->itemWidget(parent, 0));if (departNode) {level = departNode->getLevel();level ++;}pItemName->setLevel(level);int nMyFriendNum = 6;QString qsGroupName = QString("%4%3 [%1/%2]").arg(0).arg(nMyFriendNum).arg(index).arg(namePre);pItemName->setText(qsGroupName);//擦入分组节点parent->addChild(pDeptItem);ui->tree->setItemWidget(pDeptItem, 0, pItemName);return pDeptItem;
}void MainWindow::updateParentItem(QTreeWidgetItem *item)
{QTreeWidgetItem *parent = item->parent();if(parent == NULL){return ;}int selectedCount = 0;int childCount = parent->childCount();//判断有多少个子项被选中for(int i=0; i<childCount; i++) {QTreeWidgetItem* childItem = parent->child(i);if(childItem->checkState(1) == Qt::Checked) {selectedCount++;}}if(selectedCount <= 0)  //如果没有子项被选中,父项设置为未选中状态{parent->setCheckState(1,Qt::Unchecked);}else if(selectedCount>0 && selectedCount<childCount)    //如果有部分子项被选中,父项设置为部分选中状态,即用灰色显示{parent->setCheckState(1,Qt::PartiallyChecked);// 重点:针对半选中状态的设置需要单独调用setParentPartiallyChecked后返回,否则上级节点的状态及当前节点的下级第一个节点的状态会不正确setParentPartiallyChecked(parent);return;}else if(selectedCount == childCount)    //如果子项全部被选中,父项则设置为选中状态{parent->setCheckState(1,Qt::Checked);}updateParentItem(parent);
}void MainWindow::setParentPartiallyChecked(QTreeWidgetItem *itm)
{QTreeWidgetItem *parent = itm->parent();if(parent) {parent->setCheckState(1,Qt::PartiallyChecked);setParentPartiallyChecked(parent);}
}void MainWindow::treeItemChanged(QTreeWidgetItem *item, int column)
{if(Qt::Checked == item->checkState(1)){int count = item->childCount(); //返回子项的个数if(count >0) {for(int i=0; i<count; i++) {item->child(i)->setCheckState(1,Qt::Checked);}} else {updateParentItem(item);}} else if(Qt::Unchecked == item->checkState(1)) {int count = item->childCount();if(count > 0) {for(int i=0; i<count; i++) {item->child(i)->setCheckState(1,Qt::Unchecked);}} else {updateParentItem(item);}}
}
void MainWindow::onItemExpanded(QTreeWidgetItem * item)
{bool bIsChild = item->data(0, Qt::UserRole).toBool();if (!bIsChild) {DepartNodeItem *departNode = dynamic_cast<DepartNodeItem*>(ui->tree->itemWidget(item, 0));if (departNode) {departNode->setExpanded(true);}}}void MainWindow::onItemCollapsed(QTreeWidgetItem * item)
{bool bIsChild = item->data(0, Qt::UserRole).toBool();if (!bIsChild) {DepartNodeItem *departNode = dynamic_cast<DepartNodeItem*>(ui->tree->itemWidget(item, 0));if (departNode) {departNode->setExpanded(false);}}
}void MainWindow::onItemClicked(QTreeWidgetItem * item, int column)
{if (column == 0) {bool bIsChild = item->data(0, Qt::UserRole).toBool();if (!bIsChild){item->setExpanded(!item->isExpanded());}}
}void MainWindow::loadStyleSheet()
{QFile file(":/tree/Resources/QSS/MainWindow.css");file.open(QFile::ReadOnly);if (file.isOpen()){this->setStyleSheet("");QString qsstyleSheet = QString(file.readAll());this->setStyleSheet(qsstyleSheet);}file.close();
}QTreeWidgetItem *MainWindow::addChildEmpNode(QTreeWidgetItem *parent, int index)
{QTreeWidgetItem *pDeptItem = new QTreeWidgetItem();//设置Data用于区分,Item是分组节点还是子节点,0代表分组节点,1代表子节点pDeptItem->setData(0, Qt::UserRole, 1);pDeptItem->setFlags(Qt::ItemIsUserCheckable | Qt::ItemIsEnabled | Qt::ItemIsSelectable);pDeptItem->setCheckState(1, Qt::Unchecked);int level = 0;DepartNodeItem *departNode = dynamic_cast<DepartNodeItem*>(ui->tree->itemWidget(parent, 0));if (departNode) {level = departNode->getLevel();level ++;}EmployeeNodeItem *pItemName = new EmployeeNodeItem(ui->tree);pItemName->setLevel(level);// 加载本地文件,需要修改成本地的路径pItemName->setHeadPath(QString("D:/work/Qt/workspace/QT_tree_checkDemo/images/pic/%1.jpg").arg(index));QString qfullName = QString("人员%1").arg(index);pItemName->setFullName(qfullName);//擦入分组节点parent->addChild(pDeptItem);ui->tree->setItemWidget(pDeptItem, 0, pItemName);return pDeptItem;
}
5)、DepartNodeItem类
DepartNodeItem.h
#ifndef DEPARTNODEITEM_H
#define DEPARTNODEITEM_H#include <QLabel>
#include <QPaintEvent>
#include <QPropertyAnimation>#define INDENTATION 20class DepartNodeItem : public QLabel
{Q_OBJECTQ_PROPERTY(int rotation READ rotation WRITE setRotation)
public:DepartNodeItem(QWidget *parent = 0);~DepartNodeItem();void setText(const QString& title);void setExpanded(bool expand);int getIndentation();void setLevel(int level);int getLevel();QString getName();private:int rotation();void setRotation(int rotation);private:void paintEvent(QPaintEvent *event);private:QPropertyAnimation *m_animation;QString m_name;QString m_id;int m_rotation;int m_indentation;int m_level;
};#endif // DEPARTNODEITEM_H
DepartNodeItem.cpp
#include "DepartNodeItem.h"#include <QPainter>
#include <QDebug>DepartNodeItem::DepartNodeItem(QWidget *parent): QLabel(parent),m_rotation(0),m_level(0),m_indentation(0)
{setFixedHeight(32);setSizePolicy(QSizePolicy::Expanding, QSizePolicy::Fixed);m_animation = new QPropertyAnimation(this, "rotation");m_animation->setDuration(50);m_animation->setEasingCurve(QEasingCurve::InQuad);
}
DepartNodeItem::~DepartNodeItem()
{m_animation = NULL;delete m_animation;
}void DepartNodeItem::setText(const QString &title)
{m_name = title;update();
}void DepartNodeItem::setExpanded(bool expand)
{if (expand) {m_animation->setEndValue(90);} else {m_animation->setEndValue(0);}m_animation->start();
}int DepartNodeItem::getIndentation()
{return this->m_indentation;
}void DepartNodeItem::setLevel(int level)
{this->m_level = level;this->m_indentation = this->m_level * INDENTATION;
}int DepartNodeItem::getLevel()
{return this->m_level;
}QString DepartNodeItem::getName()
{return this->m_name;
}int DepartNodeItem::rotation()
{return m_rotation;
}void DepartNodeItem::setRotation(int rotation)
{m_rotation = rotation;update();
}void DepartNodeItem::paintEvent(QPaintEvent *event)
{QPainter painter(this);{painter.setRenderHint(QPainter::TextAntialiasing, true);QFont font;font.setPointSize(10);painter.setFont(font);int txtX = m_indentation + 24;painter.drawText(txtX, 0, this->width() - txtX, this->height(), Qt::AlignLeft | Qt::AlignVCenter, m_name);}{painter.setRenderHint(QPainter::SmoothPixmapTransform, true);painter.save();QPixmap pixmap(":/tree/Resources/arrow.png");QPixmap tmpPixmap(pixmap.size());tmpPixmap.fill(Qt::transparent);QPainter p(&tmpPixmap);p.setRenderHint(QPainter::SmoothPixmapTransform, true);// 旋转m_rotation角度p.translate(pixmap.width() /2, pixmap.height() /2);p.rotate(m_rotation);p.drawPixmap(0 - pixmap.width() /2, 0 - pixmap.height() / 2,pixmap);painter.drawPixmap(m_indentation+6, (this->height() - pixmap.height()) / 2, tmpPixmap);painter.restore();}QLabel::paintEvent(event);
}
6)、EmployeeNodeItem类
EmployeeNodeItem.h
#ifndef EMPLOYEENODEITEM_H
#define EMPLOYEENODEITEM_H#include <QWidget>
#include <QPaintEvent>
#include <QPixmap>
#include <QSize>#define INDENTATION 20
#define HEAD_LABEL_WIDTH 32namespace Ui {
class EmployeeNodeItem;
}class EmployeeNodeItem : public QWidget
{Q_OBJECTpublic:EmployeeNodeItem(QWidget *parent = 0);~EmployeeNodeItem();public:void setFullName(const QString& fullName);void setHeadPixmap(const QPixmap& headPath);void setHeadPath(const QString& headPath);QSize getHeadLabelSize() const;int getIndentation();int getLevel();void setLevel(int level);QString getFullName();private:void initControl();QPixmap getRoundImage(const QPixmap &src, QPixmap& mask, QSize masksize);private:void paintEvent(QPaintEvent *event);
private:Ui::EmployeeNodeItem *ui;int m_indentation;int m_level;int m_headLabelWidth;QString m_fullName;
};#endif // EMPLOYEENODEITEM_H
EmployeeNodeItem.cpp
#include "EmployeeNodeItem.h"
#include "ui_EmployeeNodeItem.h"#include <QDebug>
#include <QPainter>EmployeeNodeItem::EmployeeNodeItem(QWidget *parent) :QWidget(parent),ui(new Ui::EmployeeNodeItem),m_headLabelWidth(0),m_level(0),m_indentation(0),m_fullName("")
{ui->setupUi(this);initControl();
}EmployeeNodeItem::~EmployeeNodeItem()
{delete ui;
}void EmployeeNodeItem::setFullName(const QString &fullName)
{m_fullName = fullName;ui->lbFullName->setText(fullName);
}void EmployeeNodeItem::setHeadPixmap(const QPixmap &headPath)
{ui->lbHeadPic->setPixmap(headPath);
}void EmployeeNodeItem::setHeadPath(const QString &headPath)
{/*ui->lbHeadPic->setScaledContents(true);QString style = ui->lbHeadPic->styleSheet();style.append("image:url(").append(headPath).append(");");qDebug() << style;ui->lbHeadPic->setStyleSheet(style);*/// 方式3.加载QPixmapQPixmap pixmap1;pixmap1.load(headPath);QPixmap pixmap2;pixmap2.load(":/tree/Resources//head_mask.png");//qDebug() << "m_level:" << m_level << "  m_indentation:" << m_indentation << " m_headLabelWidth:" << m_headLabelWidth << "  " << HEAD_LABEL_WIDTH;QPixmap roundPic = this->getRoundImage(pixmap1, pixmap2, QSize(m_headLabelWidth,HEAD_LABEL_WIDTH));this->setHeadPixmap(roundPic);
}QSize EmployeeNodeItem::getHeadLabelSize() const
{return ui->lbHeadPic->size();
}int EmployeeNodeItem::getIndentation()
{return this->m_indentation;}int EmployeeNodeItem::getLevel()
{return this->m_level;
}void EmployeeNodeItem::setLevel(int level)
{this->m_level = level;this->m_indentation = this->m_level * INDENTATION;this->m_headLabelWidth = this->m_indentation + HEAD_LABEL_WIDTH;ui->lbHeadPic->setMinimumWidth(m_indentation);
}QString EmployeeNodeItem::getFullName()
{return m_fullName;
}void EmployeeNodeItem::initControl()
{}QPixmap EmployeeNodeItem::getRoundImage(const QPixmap &src, QPixmap &mask, QSize masksize)
{if (masksize == QSize(0, 0)){masksize = mask.size();}else{mask = mask.scaled(masksize, Qt::KeepAspectRatio, Qt::SmoothTransformation);}QImage resultImage(masksize, QImage::Format_ARGB32_Premultiplied);QPainter painter(&resultImage);painter.setCompositionMode(QPainter::CompositionMode_Source);painter.fillRect(resultImage.rect(), Qt::transparent);painter.setCompositionMode(QPainter::CompositionMode_SourceOver);painter.drawPixmap(m_indentation, 0, mask);painter.setCompositionMode(QPainter::CompositionMode_SourceIn);painter.drawPixmap(m_indentation, 0, src.scaled(masksize, Qt::KeepAspectRatio, Qt::SmoothTransformation));painter.end();return QPixmap::fromImage(resultImage);
}void EmployeeNodeItem::paintEvent(QPaintEvent *event)
{QWidget::paintEvent(event);
}
相关文章:
基于QTreeWidget实现带Checkbox的多级组织结构选择树
基于QTreeWidget实现带Checkbox的多级组织结构选择树 采用基于QWidgetMingw实现的原生的组织结构树 通过QTreeWidget控件实现的带Checkbox多级组织结构树。 Qt相关系列文章: 一、Qt实现的聊天画面消息气泡 二、基于QTreeWidget实现多级组织结构 三、基于QTreeWidget…...

探索 Vim:一个强大的文本编辑器
引言: Vim(Vi IMproved)是一款备受推崇的文本编辑器,拥有强大的功能和高度可定制性,提供丰富的编辑和编程体验。本文将探讨 Vim 的基本概念、使用技巧以及为用户带来的独特优势。 简介和发展 1. Vim 的简介和历史 V…...
—容器探针)
K8S(十)—容器探针
这里写目录标题 容器探针(probe)检查机制探测结果探测类型何时该使用存活态探针?何时该使用就绪态探针?何时该使用启动探针? 使用exechttptcpgrpc使用命名端口 使用启动探针保护慢启动容器定义就绪探针配置探针HTTP 探测TCP 探测探针层面的…...

[C错题本]
1.int,short,long都是signed的 但是char可能是signed 也可能是unsigned的——《C Primer》 2.在16位的PC中 char类型占1个字节 int占2个字节 long int占4个字节 float占四个字节 double占八个字节 3.自增运算符和自减运算符即使是在判断条件中使用也会实际生效 int i 1; int…...
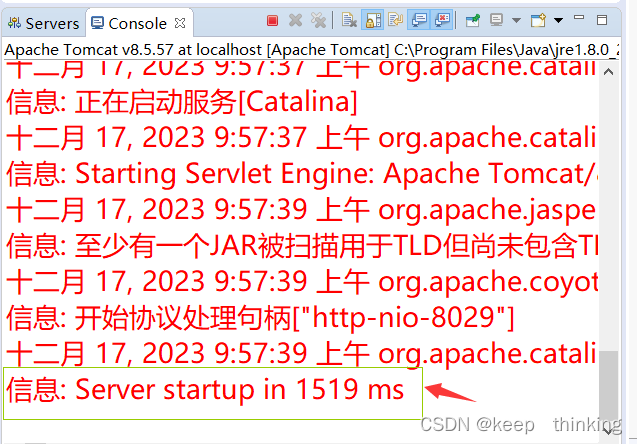
tomcat启动异常:子容器启动失败(a child container failed during start)
最近在使用eclipse启动Tomcat时,发现一个问题,启动以前的项目突然报子容器启动异常。 异常信息如下: 严重: 子容器启动失败 java.util.concurrent.ExecutionException: org.apache.catalina.LifecycleException: 无法启动组件[org.apache.…...
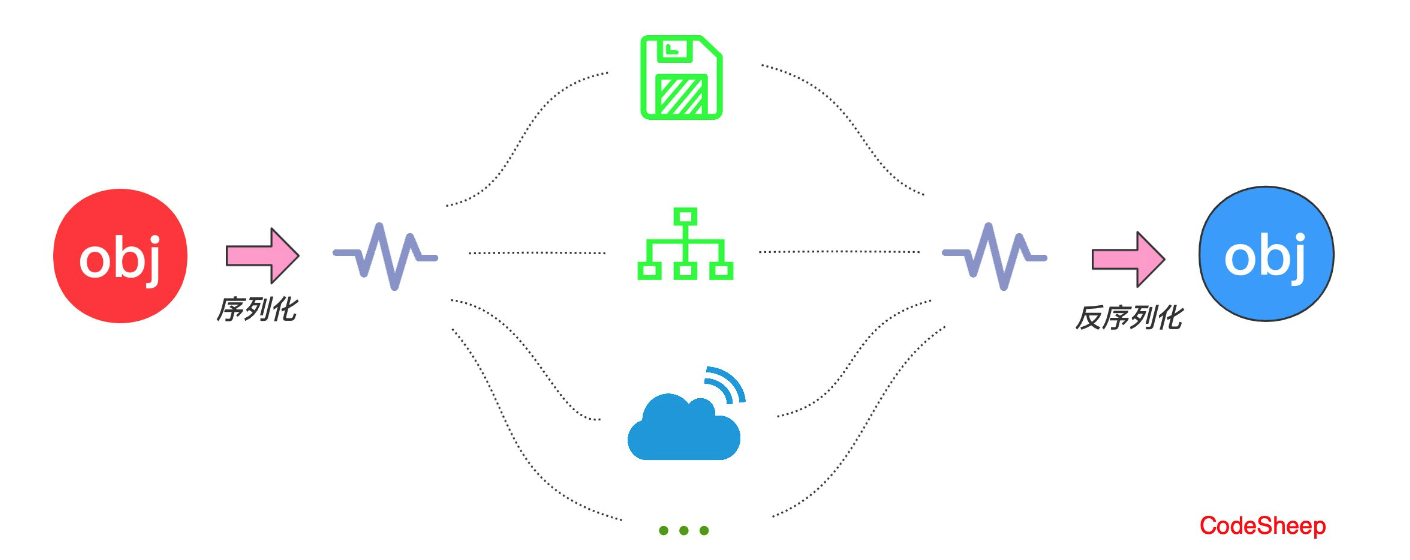
JAVA序列化(创建可复用的 Java 对象)
JAVA 序列化(创建可复用的 Java 对象) 保存(持久化)对象及其状态到内存或者磁盘 Java 平台允许我们在内存中创建可复用的 Java 对象,但一般情况下,只有当 JVM 处于运行时,这些对象才可能存在,即,这些对象的生命周期不…...

如何使用自动化工具编写测试用例?
以下为作者观点,仅供参考: 在快速变化的软件开发领域,保证应用程序的可靠性和质量至关重要。随着应用程序复杂性和规模的不断增加,仅手动测试无法满足行业需求。 这就是测试自动化发挥作用的地方,它使软件测试人员能…...

redis底层数据结构之skiplist实现
skiplist实现 skiplist跳跃表,是一种有序数据结构,通过在每个节点中维持多个指向其他节点的指针,来达到快速访问节点的目的,redis使用skiplist作为zsort的底层实现之一 结构很像树形结构 typedef struct zskiplistNode { // 对象…...
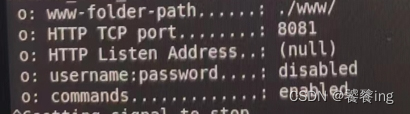
mjpg-streamer配置其它端口访问视频
环境 树莓派4B ubuntu 20.04 U口摄像头 确认摄像头可访问 lsusb查看 在dev下可查看到video* sudo mplayer tv://可打开摄像头并访问到视频 下载mjpg-streamer并编译安装 在github下载zip包,下载的源码,需要编译安装 unzip解压 cd mjpg-streamer/mjp…...
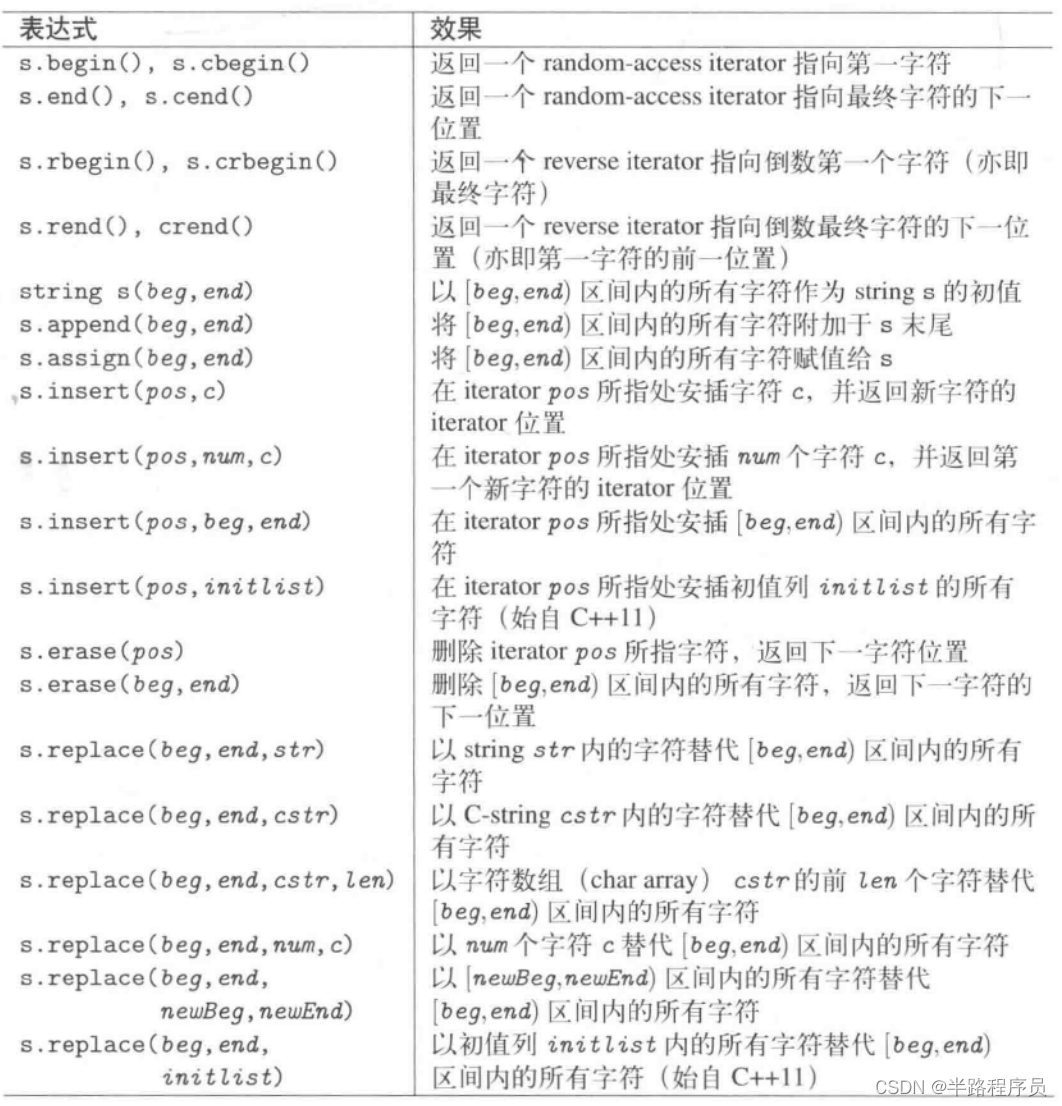
C++相关闲碎记录(15)
1、string字符串 #include <iostream> #include <string> using namespace std;int main (int argc, char** argv) {const string delims(" \t,.;");string line;// for every line read successfullywhile (getline(cin,line)) {string::size_type beg…...
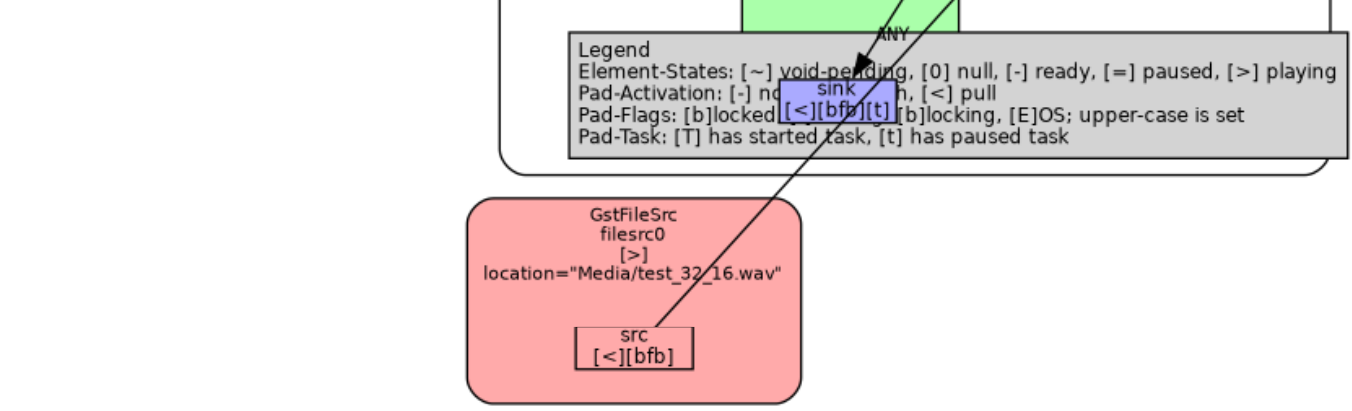
汽车IVI中控开发入门及进阶(十一):ALSA音频
前言 汽车中控也被称为车机、车载多媒体、车载娱乐等,其中音频视频是非常重要的部分,音频比如播放各种格式的音乐文件、播放蓝牙接口的音乐、播放U盘或TF卡中的音频文件,如果有视频文件也可以放出音频,看起来很简单,在windows下音乐播放器很多,直接打开文件就能播放各…...
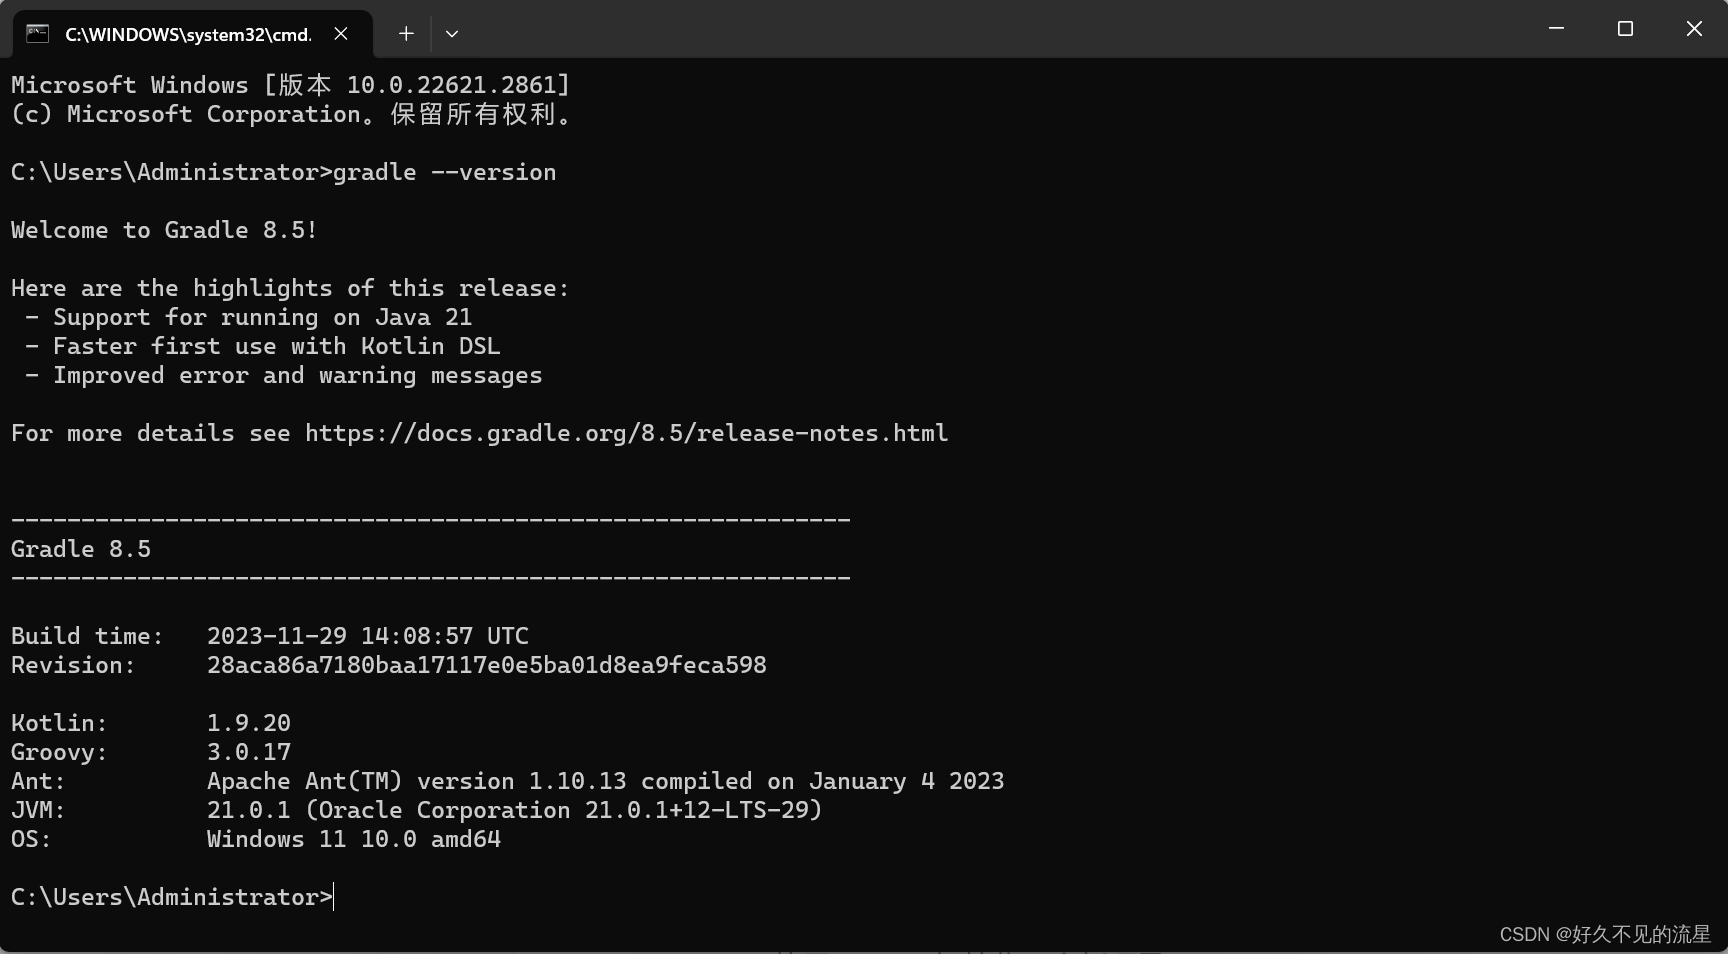
Gradle 之初体验
文章目录 1.安装1)检查 JDK2)下载 Gradle3)解压 Gradle4)环境变量5)验证安装 2.优势总结 Gradle 是一款强大而灵活的构建工具,用于自动化构建、测试和部署项目。它支持多语言、多项目和多阶段的构建&#x…...
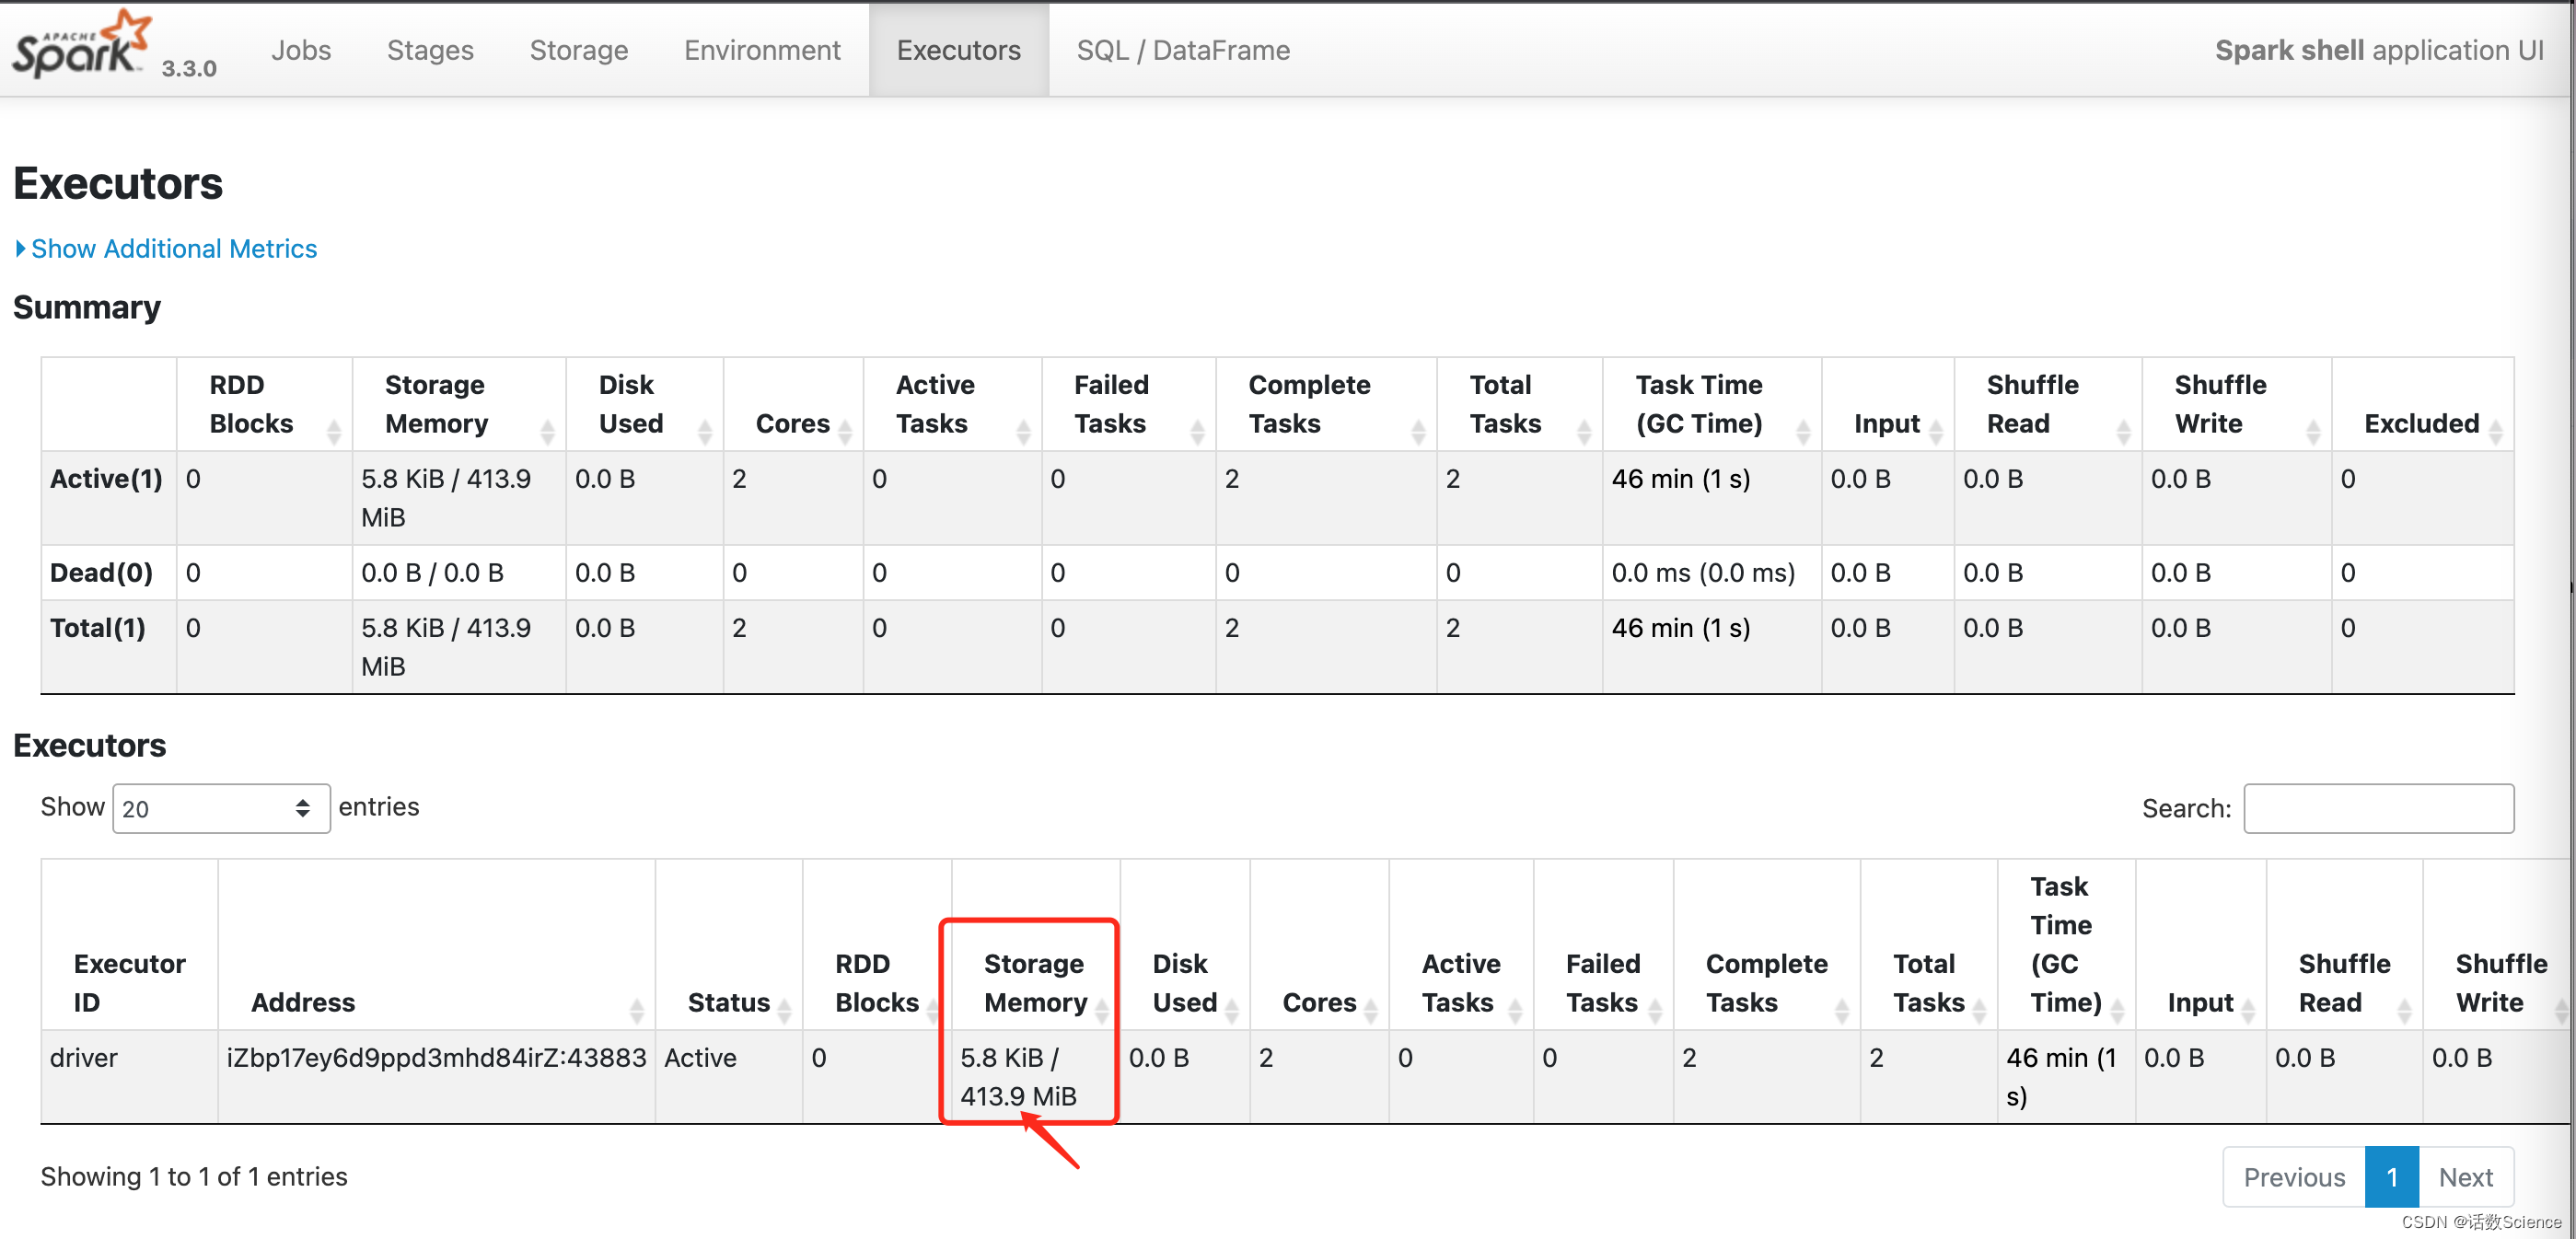
【Spark精讲】Spark内存管理
目录 前言 Java内存管理 Java运行时数据区 Java堆 新生代与老年代 永久代 元空间 垃圾回收机制 JVM GC的类型和策略 Minor GC Major GC 分代GC Full GC Minor GC 和 Full GC区别 Executor内存管理 内存类型 堆内内存 堆外内存 内存管理模式 静态内存管理 …...

C语言实现Hoare版快速排序(递归版)
Hoare版 快速排序是由Hoare发明的,所以我们先来讲创始人的想法。我们直接切入主题,Hoare版快速排序的思想是将一个值设定为key,这个值不一定是第一个,如果你选其它的值作为你的key,那么你的思路也就要转换一下…...

git 避免输入用户名 密码 二进制/文本 文件冲突解决
核心概念介绍 工作区是你当前正在进行编辑和修改的文件夹,可见的。 暂存区位于.git/index(git add放入)。 代码库(工作树)位于.git(git commit将暂存区中的更改作为一个提交保存到代码库中,并清空暂存区) 避免输入用户 密码: 方式一: ht…...
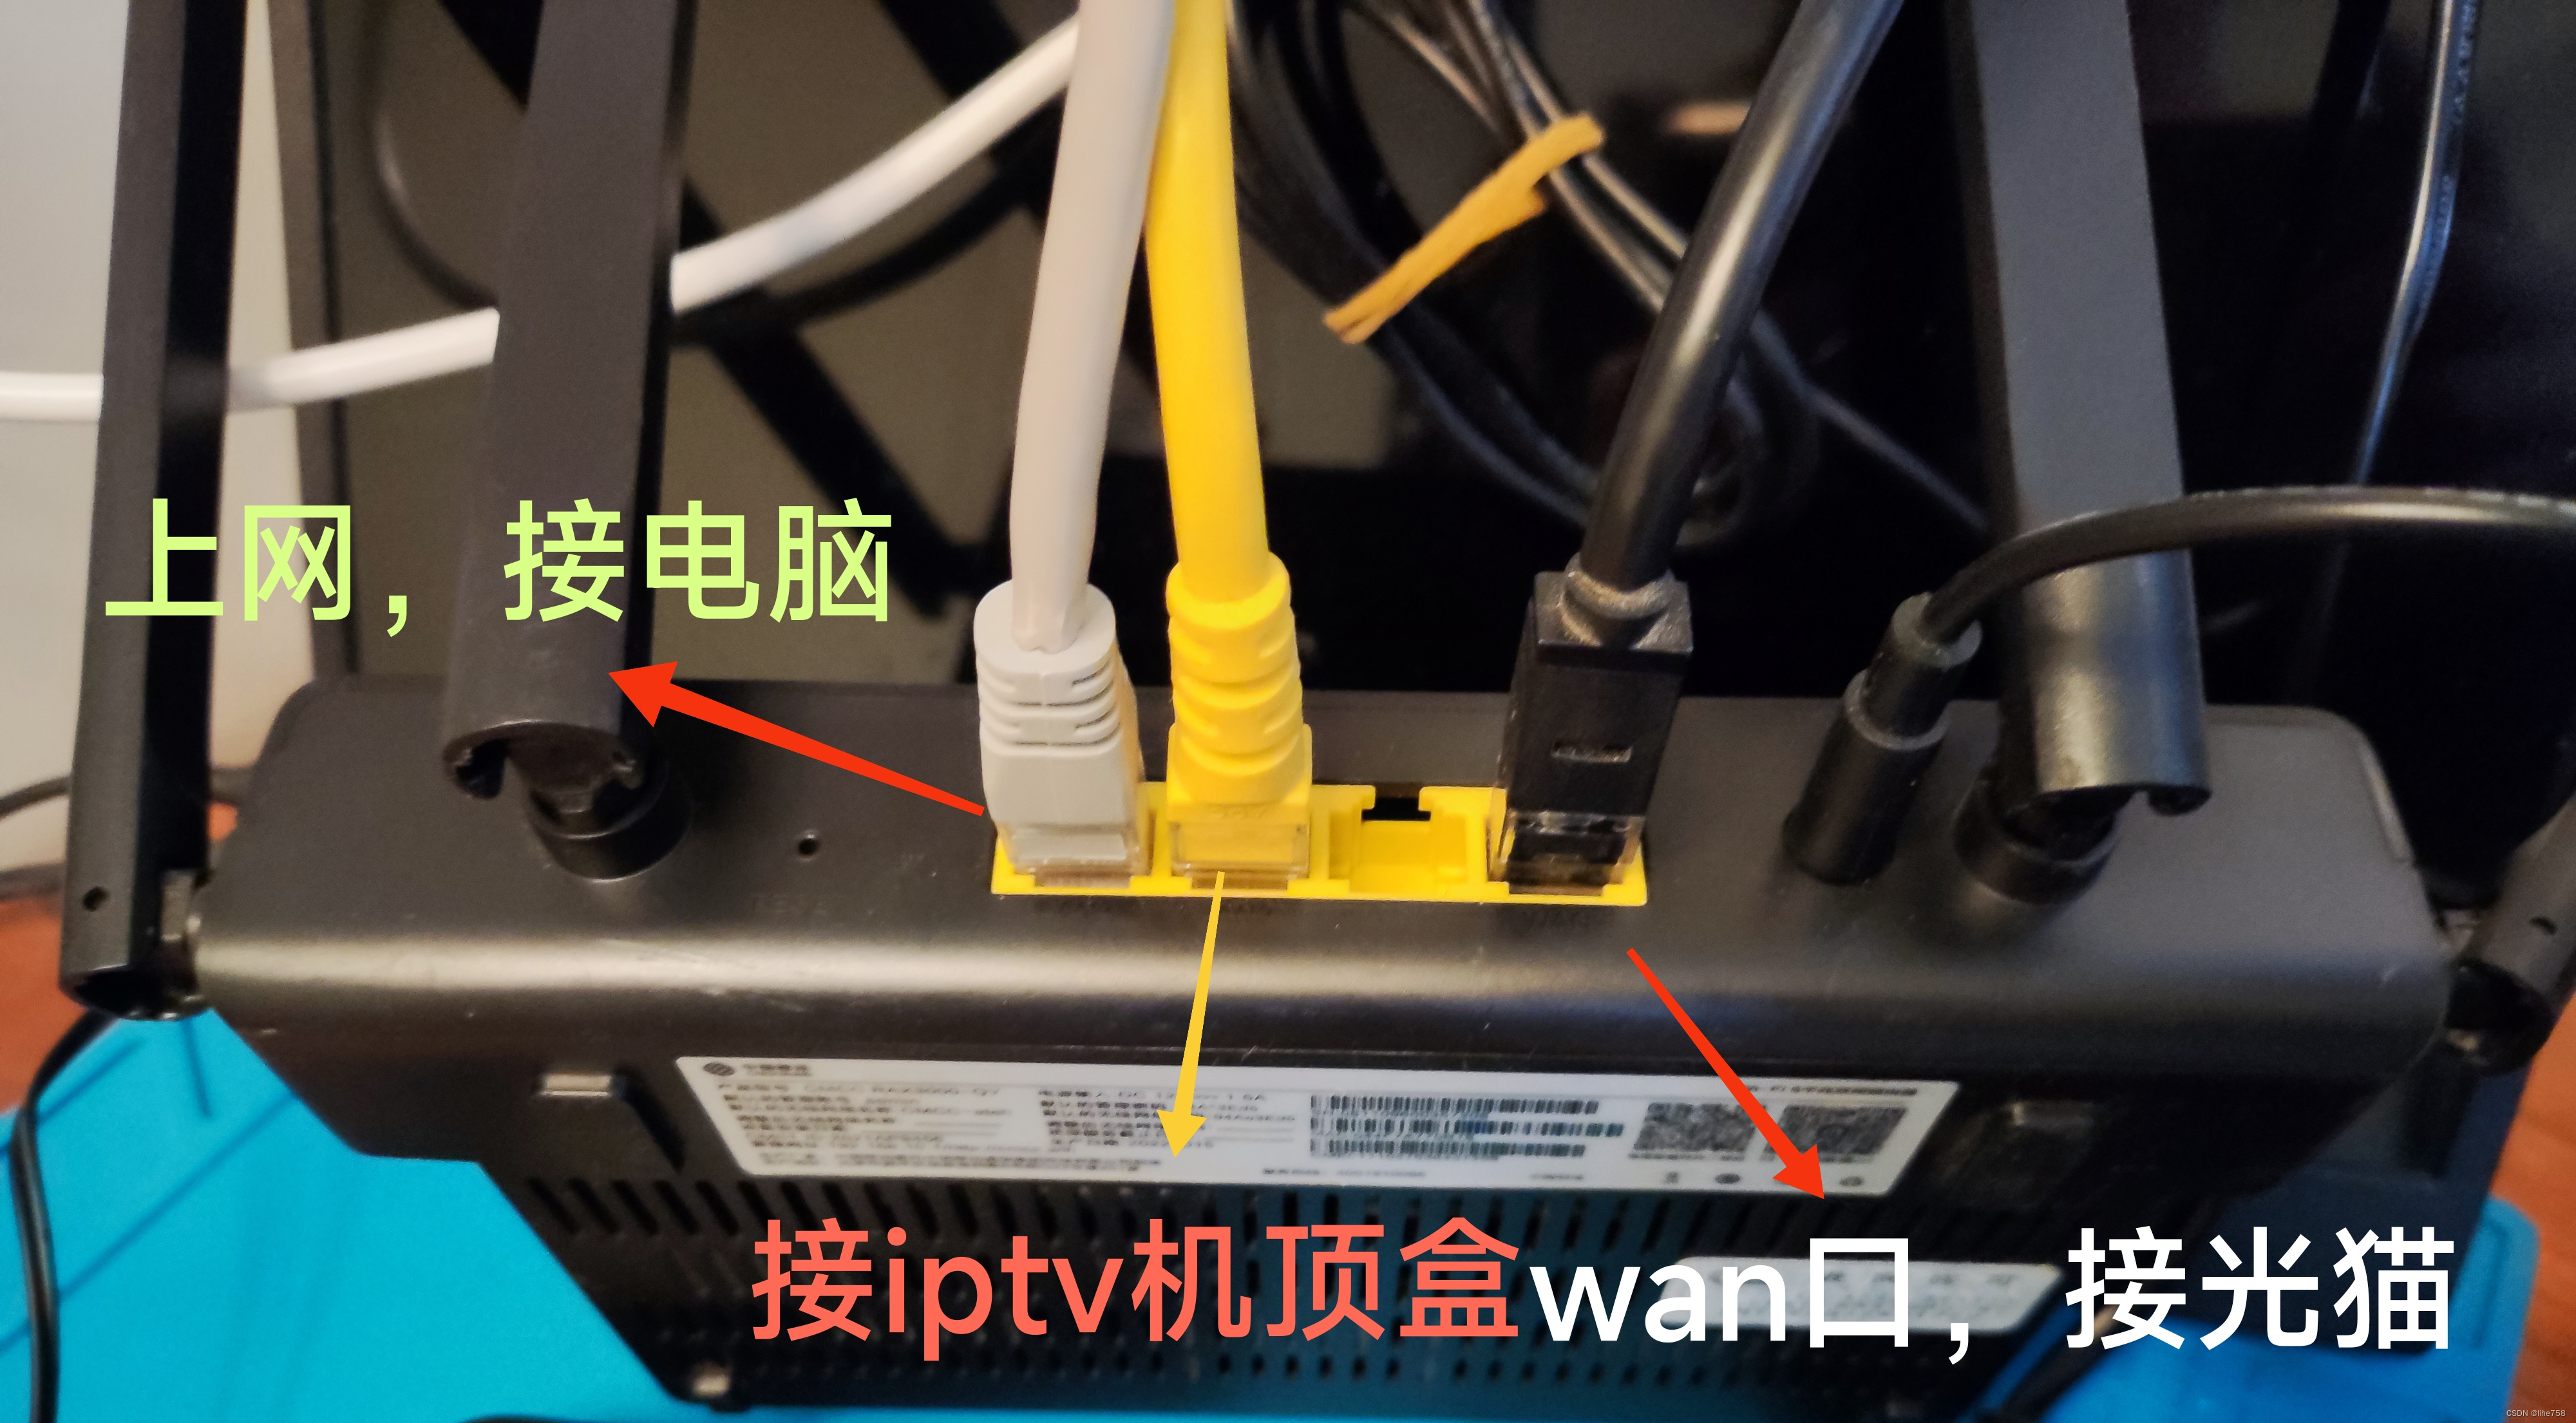
[OpenWrt]RAX3000一根线实现上网和看IPTV
背景: 1.我家电信宽带IPTV 2.入户光猫,桥接模式 3.光猫划分vlan,将上网信号IPTV信号,通过lan口(问客服要光猫超级管理员密码,具体教程需要自行查阅,关键是要设置iptv在客户侧的vlan id&#…...
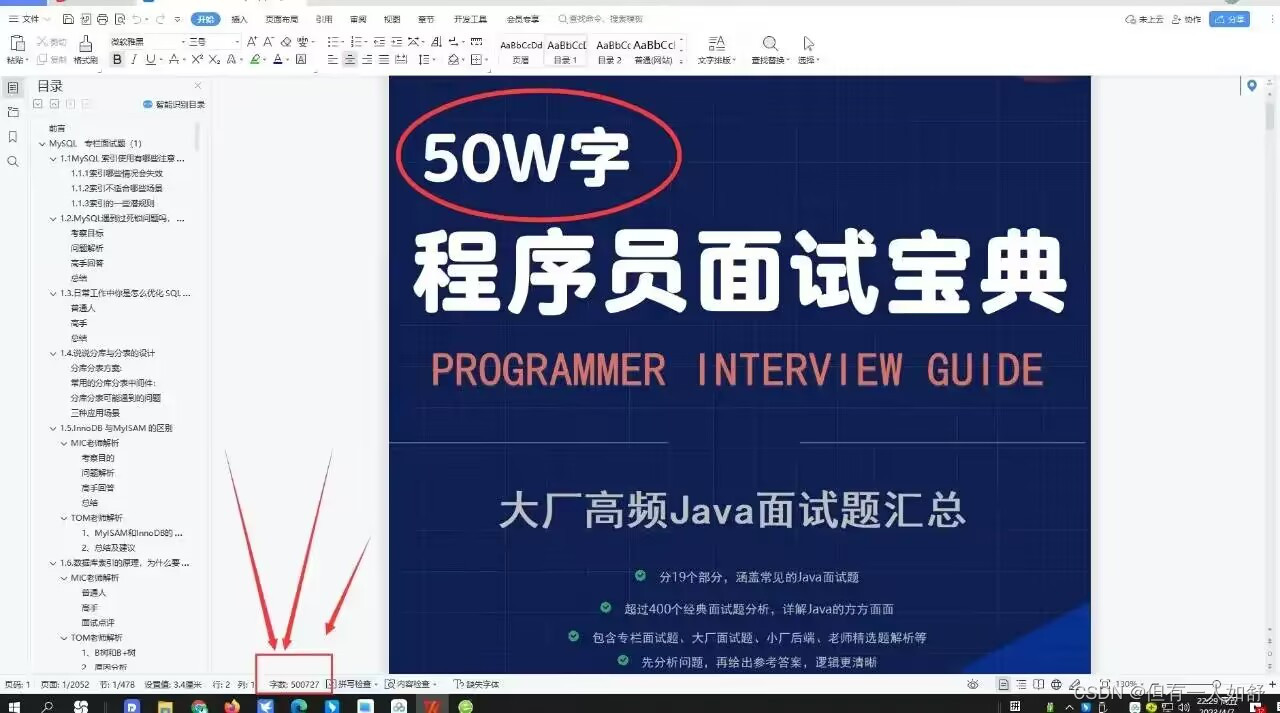
最新50万字312道Java经典面试题52道场景题总结(附答案PDF)
最近有很多粉丝问我,有什么方法能够快速提升自己,通过阿里、腾讯、字节跳动、京东等互联网大厂的面试,我觉得短时间提升自己最快的手段就是背面试题;花了3个月的时间将市面上所有的面试题整理总结成了一份50万字的300道Java高频面…...

html.parser --- 简单的 HTML 和 XHTML 解析器
源代码: Lib/html/parser.py 这个模块定义了一个 HTMLParser 类,为 HTML(超文本标记语言)和 XHTML 文本文件解析提供基础。 class html.parser.HTMLParser(*, convert_charrefsTrue) 创建一个能解析无效标记的解析器实例。 如果…...

赵传和源代码就是设计-UMLChina建模知识竞赛第4赛季第23轮
参考潘加宇在《软件方法》和UMLChina公众号文章中发表的内容作答。在本文下留言回答。 只要最先答对前3题,即可获得本轮优胜。第4题为附加题,对错不影响优胜者的判定,影响的是优胜者的得分。 所有题目的回答必须放在同一条消息中࿰…...
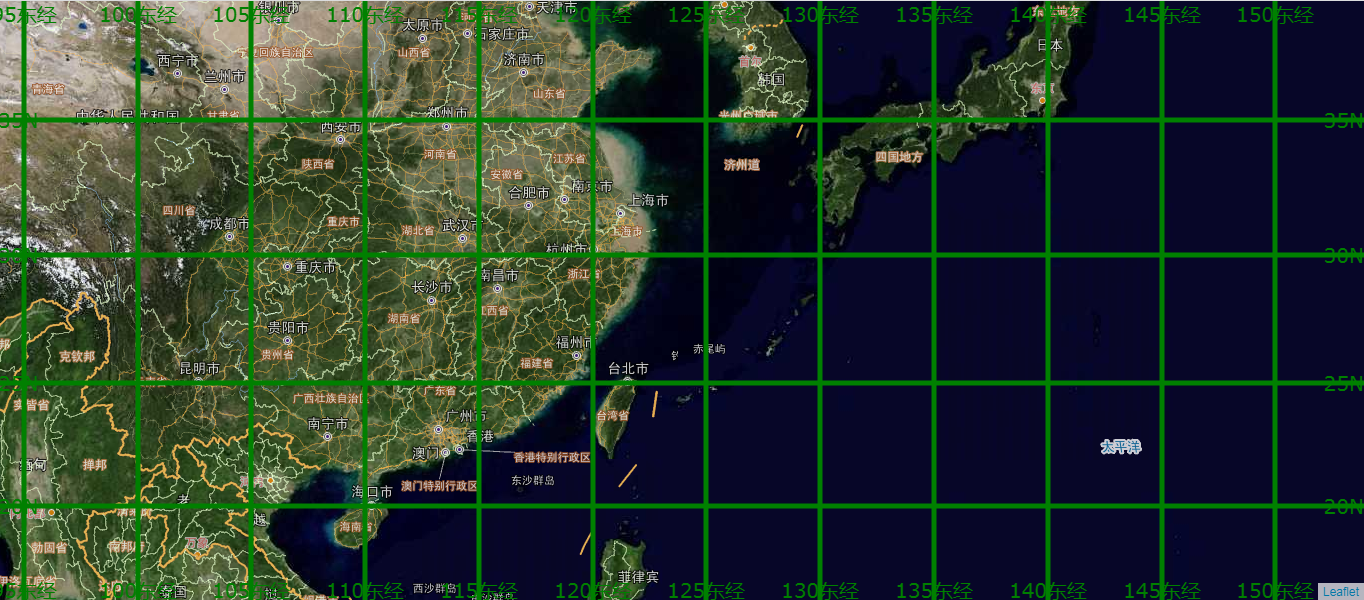
Leaflet.Graticule源码分析以及经纬度汉化展示
目录 前言 一、源码分析 1、类图设计 2、时序调用 3、调用说明 二、经纬度汉化 1、改造前 2、汉化 3、改造效果 总结 前言 在之前的博客基于Leaflet的Webgis经纬网格生成实践中,已经深入介绍了Leaflet.Graticule的实际使用方法和进行了简单的源码分析。认…...

【大白话说Java面试题 第49题】【JVM篇】第9题:什么是双亲委派机制?介绍一下运作过程。?
📌 PDF:大白话说Java面试题 — 02-JVM篇 第9题:什么是双亲委派机制?介绍一下运作过程。 📚 回答: 核心概念: 双亲委派机制 是 JVM 中类加载器的工作模式,用于保证类加载的安全性和…...

ComfyUI-FramePackWrapper:8GB显存也能流畅生成高质量AI视频的终极方案
ComfyUI-FramePackWrapper:8GB显存也能流畅生成高质量AI视频的终极方案 【免费下载链接】ComfyUI-FramePackWrapper 项目地址: https://gitcode.com/gh_mirrors/co/ComfyUI-FramePackWrapper 你是否曾因显存不足而无法体验AI视频生成的魅力?现在…...

AI提示工程与创意工作流:Claude+Cursor高效协作心法
1. 项目概述与核心价值 最近在GitHub上看到一个挺有意思的项目,叫 zupp6869/claude-cursor-tips-for-creatives 。光看名字,你可能觉得这又是一个关于AI代码助手Cursor的普通教程合集。但如果你点进去,特别是你本身从事创意、设计、内容创作…...

大语言模型越狱攻击:真实世界提示词生态与防御策略分析
1. 项目概述:一次对“越狱”提示词的田野调查如果你在过去一年里深度使用过ChatGPT、Claude或者国内的文心一言、通义千问这类大语言模型,大概率遇到过这样的情况:你问了一个稍微敏感点的问题,比如“如何制作一个恶作剧软件”&…...

【JWT】JWS与JWE实战解析:从结构差异到安全选型指南
1. JWT、JWS与JWE的核心概念解析 第一次接触JWT相关技术时,我也曾被各种缩写搞得晕头转向。直到在真实项目中踩过几次坑,才真正理解它们之间的关系。简单来说,JWT就像是一个快递包裹,而JWS和JWE则是两种不同的包装方式——前者像…...

家庭网络技术演进:从CES看有线与无线技术的融合与竞争
1. 家庭网络技术演进:从CES看有线与无线的融合与竞争每年一月的拉斯维加斯,CES(国际消费电子展)都是科技行业的风向标。对于像我这样长期关注网络技术的从业者来说,CES不仅是新产品的秀场,更是观察底层技术…...

第八部分-企业级实践——37. 容器编排选型
37. 容器编排选型 1. 容器编排概述 容器编排平台负责管理容器的整个生命周期,包括部署、扩缩容、负载均衡、服务发现、滚动更新等。Docker Swarm 和 Kubernetes 是目前主流的容器编排方案。 ┌──────────────────────────────────…...

Python 3.14.5 发布:多项改进,垃圾回收器回滚,还有这些新特性!
Python 3.14.5 发布Python 3.14.5 现已发布,这是 3.14 的第五个维护版本。自 3.14.4 以来,包含约 154 项错误修复、构建改进和文档更改。垃圾回收器回滚值得注意的是,Python 3.14.5 中的垃圾回收器 (GC) 发生了变化。由于一些原因,…...

终极指南:如何用免费3D模型库打造你的Cherry MX个性化键帽
终极指南:如何用免费3D模型库打造你的Cherry MX个性化键帽 【免费下载链接】cherry-mx-keycaps 3D models of Chery MX keycaps 项目地址: https://gitcode.com/gh_mirrors/ch/cherry-mx-keycaps 想为你的机械键盘打造一套独一无二的键帽吗?Cherr…...

解锁Windows文件管理的隐藏力量:FileMeta元数据管理完整指南
解锁Windows文件管理的隐藏力量:FileMeta元数据管理完整指南 【免费下载链接】FileMeta Enable Explorer in Vista, Windows 7 and later to see, edit and search on tags and other metadata for any file type 项目地址: https://gitcode.com/gh_mirrors/fi/Fi…...