Spring之容器:IOC(2)
学习的最大理由是想摆脱平庸,早一天就多一份人生的精彩;迟一天就多一天平庸的困扰。各位小伙伴,如果您:
想系统/深入学习某技术知识点…
一个人摸索学习很难坚持,想组团高效学习…
想写博客但无从下手,急需写作干货注入能量…
热爱写作,愿意让自己成为更好的人…
文章目录
- 前言
- 7、实验六:为数组类型属性赋值
- 8、实验七:为集合类型属性赋值
- ①为List集合类型属性赋值
- ②为Map集合类型属性赋值
- ③引用集合类型的bean
- 9、实验八:p命名空间
- 10、实验九:引入外部属性文件
- 总结
前言
7、实验六:为数组类型属性赋值
8、实验七:为集合类型属性赋值
①为List集合类型属性赋值
②为Map集合类型属性赋值
③引用集合类型的bean
9、实验八:p命名空间
10、实验九:引入外部属性文件
7、实验六:为数组类型属性赋值
8、实验七:为集合类型属性赋值
①为List集合类型属性赋值
②为Map集合类型属性赋值
③引用集合类型的bean
9、实验八:p命名空间
10、实验九:引入外部属性文件
7、实验六:为数组类型属性赋值
①修改Student类
在Student类中添加以下代码:
private String[] hobbies;public String[] getHobbies() {return hobbies;
}public void setHobbies(String[] hobbies) {this.hobbies = hobbies;
}
②配置bean
<bean id="studentFour" class="com.gedeshidai.spring.bean6.Student"><property name="id" value="1004"></property><property name="name" value="赵六"></property><property name="age" value="26"></property><property name="sex" value="女"></property><!-- ref属性:引用IOC容器中某个bean的id,将所对应的bean为属性赋值 --><property name="clazz" ref="clazzOne"></property><property name="hobbies"><array><value>抽烟</value><value>喝酒</value><value>烫头</value></array></property>
</bean>
8、实验七:为集合类型属性赋值
①为List集合类型属性赋值
在Clazz类中添加以下代码:
private List<Student> students;public List<Student> getStudents() {return students;
}public void setStudents(List<Student> students) {this.students = students;
}
配置bean:
<bean id="clazzTwo" class="com.gedeshidai.spring6.bean.Clazz"><property name="clazzId" value="4444"></property><property name="clazzName" value="Javaee0222"></property><property name="students"><list><ref bean="studentOne"></ref><ref bean="studentTwo"></ref><ref bean="studentThree"></ref></list></property>
</bean>
若为Set集合类型属性赋值,只需要将其中的list标签改为set标签即可
②为Map集合类型属性赋值
创建教师类Teacher:
package com.gedeshidai.spring6.bean;
public class Teacher {private Integer teacherId;private String teacherName;public Integer getTeacherId() {return teacherId;}public void setTeacherId(Integer teacherId) {this.teacherId = teacherId;}public String getTeacherName() {return teacherName;}public void setTeacherName(String teacherName) {this.teacherName = teacherName;}public Teacher(Integer teacherId, String teacherName) {this.teacherId = teacherId;this.teacherName = teacherName;}public Teacher() {}@Overridepublic String toString() {return "Teacher{" +"teacherId=" + teacherId +", teacherName='" + teacherName + '\'' +'}';}
}
在Student类中添加以下代码:
private Map<String, Teacher> teacherMap;public Map<String, Teacher> getTeacherMap() {return teacherMap;
}public void setTeacherMap(Map<String, Teacher> teacherMap) {this.teacherMap = teacherMap;
}
配置bean:
<bean id="teacherOne" class="com.atguigu.spring6.bean.Teacher"><property name="teacherId" value="10010"></property><property name="teacherName" value="大宝"></property>
</bean><bean id="teacherTwo" class="com.gedeshidaia.spring6.bean.Teacher"><property name="teacherId" value="10086"></property><property name="teacherName" value="二宝"></property>
</bean><bean id="studentFour" class="com.atguigu.spring6.bean.Student"><property name="id" value="1004"></property><property name="name" value="赵六"></property><property name="age" value="26"></property><property name="sex" value="女"></property><!-- ref属性:引用IOC容器中某个bean的id,将所对应的bean为属性赋值 --><property name="clazz" ref="clazzOne"></property><property name="hobbies"><array><value>抽烟</value><value>喝酒</value><value>烫头</value></array></property><property name="teacherMap"><map><entry><key><value>10010</value></key><ref bean="teacherOne"></ref></entry><entry><key><value>10086</value></key><ref bean="teacherTwo"></ref></entry></map></property>
</bean>
③引用集合类型的bean
<!--list集合类型的bean-->
<util:list id="students"><ref bean="studentOne"></ref><ref bean="studentTwo"></ref><ref bean="studentThree"></ref>
</util:list>
<!--map集合类型的bean-->
<util:map id="teacherMap"><entry><key><value>10010</value></key><ref bean="teacherOne"></ref></entry><entry><key><value>10086</value></key><ref bean="teacherTwo"></ref></entry>
</util:map>
<bean id="clazzTwo" class="com.atguigugu.spring6.bean.Clazz"><property name="clazzId" value="4444"></property><property name="clazzName" value="Javaee0222"></property><property name="students" ref="students"></property>
</bean>
<bean id="studentFour" class="com.gedeshidai.spring6.bean.Student"><property name="id" value="1004"></property><property name="name" value="赵六"></property><property name="age" value="26"></property><property name="sex" value="女"></property><!-- ref属性:引用IOC容器中某个bean的id,将所对应的bean为属性赋值 --><property name="clazz" ref="clazzOne"></property><property name="hobbies"><array><value>抽烟</value><value>喝酒</value><value>烫头</value></array></property><property name="teacherMap" ref="teacherMap"></property>
</bean>
使用util:list、util:map标签必须引入相应的命名空间
<?xml version="1.0" encoding="UTF-8"?>
<beans xmlns="http://www.springframework.org/schema/beans"xmlns:xsi="http://www.w3.org/2001/XMLSchema-instance"xmlns:util="http://www.springframework.org/schema/util"xsi:schemaLocation="http://www.springframework.org/schema/utilhttp://www.springframework.org/schema/util/spring-util.xsdhttp://www.springframework.org/schema/beanshttp://www.springframework.org/schema/beans/spring-beans.xsd">
9、实验八:p命名空间
引入p命名空间
<?xml version="1.0" encoding="UTF-8"?>
<beans xmlns="http://www.springframework.org/schema/beans"xmlns:xsi="http://www.w3.org/2001/XMLSchema-instance"xmlns:util="http://www.springframework.org/schema/util"xmlns:p="http://www.springframework.org/schema/p"xsi:schemaLocation="http://www.springframework.org/schema/utilhttp://www.springframework.org/schema/util/spring-util.xsdhttp://www.springframework.org/schema/beanshttp://www.springframework.org/schema/beans/spring-beans.xsd">
引入p命名空间后,可以通过以下方式为bean的各个属性赋值
<bean id="studentSix" class="com.atguigu.spring6.bean.Student"p:id="1006" p:name="小明" p:clazz-ref="clazzOne" p:teacherMap-ref="teacherMap"></bean>
10、实验九:引入外部属性文件
①加入依赖
 <!-- MySQL驱动 -->
<dependency><groupId>mysql</groupId><artifactId>mysql-connector-java</artifactId><version>8.0.30</version>
</dependency><!-- 数据源 -->
<dependency><groupId>com.alibaba</groupId><artifactId>druid</artifactId><version>1.2.15</version>
</dependency>
②创建外部属性文件
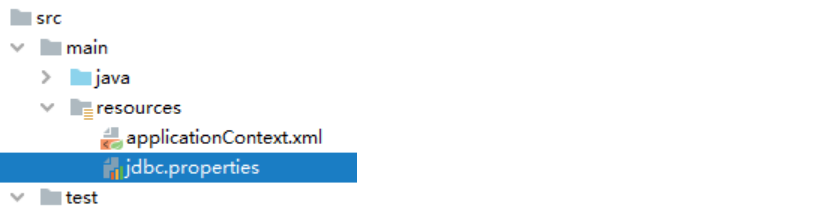
jdbc.user=root
jdbc.password=gedeshidai
jdbc.url=jdbc:mysql://localhost:3306/ssm?serverTimezone=UTC
jdbc.driver=com.mysql.cj.jdbc.Driver
③引入属性文件
引入context 名称空间
<?xml version="1.0" encoding="UTF-8"?>
<beans xmlns="http://www.springframework.org/schema/beans"xmlns:xsi="http://www.w3.org/2001/XMLSchema-instance"xmlns:context="http://www.springframework.org/schema/context"xsi:schemaLocation="http://www.springframework.org/schema/beanshttp://www.springframework.org/schema/beans/spring-beans.xsdhttp://www.springframework.org/schema/contexthttp://www.springframework.org/schema/context/spring-context.xsd"></beans>
<!-- 引入外部属性文件 -->
<context:property-placeholder location="classpath:jdbc.properties"/>
注意:在使用 context:property-placeholder 元素加载外包配置文件功能前,首先需要在 XML 配置的一级标签 中添加 context 相关的约束。
④配置bean
<bean id="druidDataSource" class="com.alibaba.druid.pool.DruidDataSource"><property name="url" value="${jdbc.url}"/><property name="driverClassName" value="${jdbc.driver}"/><property name="username" value="${jdbc.user}"/><property name="password" value="${jdbc.password}"/>
</bean>
⑤测试
@Test
public void testDataSource() throws SQLException {ApplicationContext ac = new ClassPathXmlApplicationContext("spring-datasource.xml");DataSource dataSource = ac.getBean(DataSource.class);Connection connection = dataSource.getConnection();System.out.println(connection);
}
总结
以上就是Spring之容器:IOC(2)的相关知识点,希望对你有所帮助。
积跬步以至千里,积怠惰以至深渊。时代在这跟着你一起努力哦!
相关文章:
Spring之容器:IOC(2)
学习的最大理由是想摆脱平庸,早一天就多一份人生的精彩;迟一天就多一天平庸的困扰。各位小伙伴,如果您: 想系统/深入学习某技术知识点… 一个人摸索学习很难坚持,想组团高效学习… 想写博客但无从下手,急需…...

Spring 依赖查找知识点总结
前言 源码在我github的guide-spring仓库中,可以克隆下来 直接执行。 我们本文主要来介绍依赖查找的使用示例 依赖查找 什么是依赖查找 依赖查找并不是 Spring 框架特有的概念,它是一种在软件开发中获取依赖对象的方式。它通常用于获取运行时需要的服…...

html5新增特性
对于这行代码,要写在html页面的最前端: <!DOCTYPE html> 为什么要写在前面? 这是声明,是html5的新特性 对于html4来说,它有三种声明格式,而html5只需要统一声明,用来告诉浏览器文档使用…...

4、APScheduler: 详解Scheduler种类用法、常见错误与解决方法【Python3测试任务管理总结】
调度器(Scheduler)是将其他组件绑在一起的关键。通常在应用程序中只运行一个调度器。应用程序开发者通常不直接处理作业存储(job stores)、执行器(executors)或触发器(triggers)。相反,调度器提供了适当的接口来处理所有这些。通过调度器配置作业存储和执行器,以及添…...
微服务实战系列之ZooKeeper(实践篇)
前言 关于ZooKeeper,博主已完整的通过庖丁解牛式的“解法”,完成了概述。我想掌握了这些基础原理和概念后,工作的问题自然迎刃而解,甚至offer也可能手到擒来,真实一举两得,美极了。 为了更有直观的体验&a…...
C++ 开发中为什么要使用继承
为何继承 实验介绍 继承是 C++ 中的特性之一,使用继承能够有效减轻工作量,使得开发更加高效。 知识点 什么是继承为何继承继承的内容权限关键字什么是继承 生活中继承是指孩子继承父亲的财产等。C++ 使用了这一思想,却又与生活中的继承不一样。 在使用继承时,派生类是…...

2020蓝桥杯c组纸张大小
题目名字 纸张大小 题目链接 题意 给一张纸,通过不断折叠,求最终长宽,给十个数字,输入哪个数字就求哪次折叠的长宽,其实就是,每次折叠后长度的一半变为宽度,原来的宽度变成长度 思路 因为数字…...
【Image】图像处理
计算机视觉 CV Perception 如自动驾驶领域。 只要是从所谓的图像当中去抽取信息的过程,我们都叫做Perception。 视觉检测可以涵盖二维检测,如车辆、人和信号灯的检测。另外,还可以控制三维信息,直接在三维空间中操作数据。 SL…...
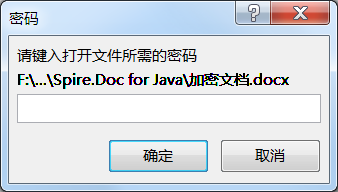
JAVA对文档加密
当 Word 文档中包含无法公开的机密信息时,我们可以对其进行加密,使其在没有密码的情况下无法打开。本文将向您介绍如何使用 Spire.Doc for Java 加密 Word 文档和移除 Word 密码保护。 加密 Word 文档删除 Word 密码保护 安装 Spire.Doc for Java 首先…...

EmbedAI:一个可以上传文件训练自己ChatGPT的AI工具,妈妈再也不用担心我的GPT不会回答问题
功能介绍: 个性化定制:提供灵活的训练选项,用户能够通过文件、网站、Notion文档甚至YouTube等多种数据源对ChatGPT进行训练,以满足不同领域和需求的个性化定制。广泛应用场景:ChatGPT支持多种用例,包括智能…...
runCatching异常捕获onSuccess/onFailure返回函数,Kotlin
runCatching异常捕获onSuccess/onFailure返回函数,Kotlin fun test(a: Int, b: Int) {runCatching {a / b}.onSuccess {println("onSuccess: $it")return ok(it)}.onFailure {println("onFailure: $it")return fail(it)} }fun ok(o: Any) {prin…...
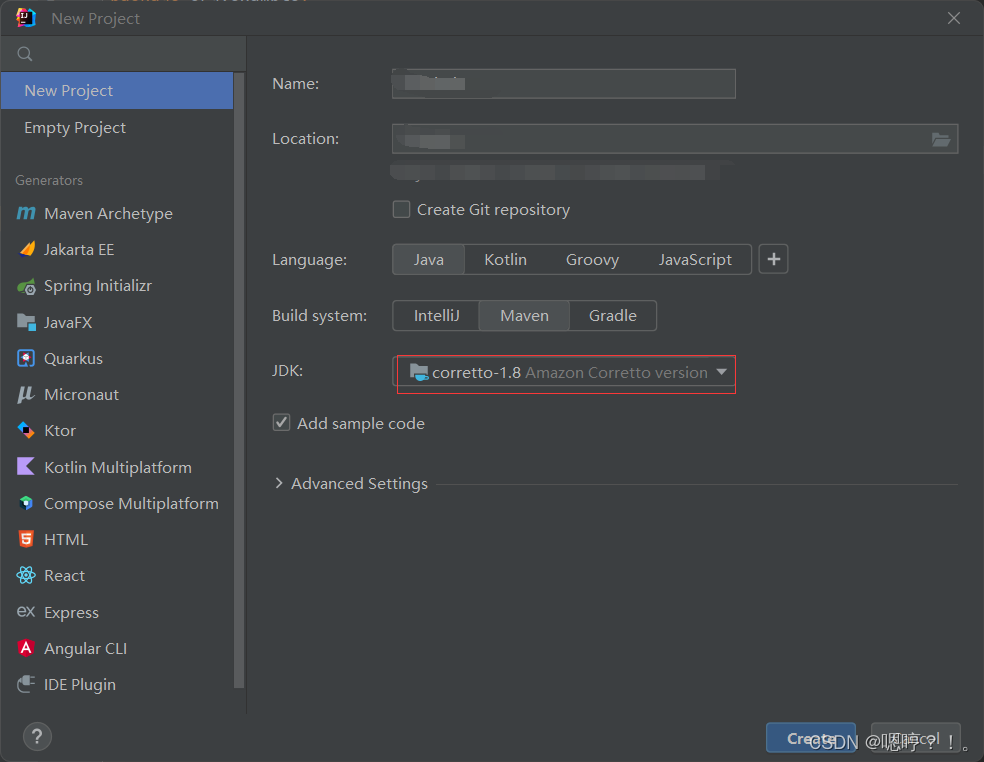
IDEA报错处理
问题1 IDEA 新建 Maven 项目没有文件结构 pom 文件为空 将JDK换成1.8后解决。 网络说法:别用 java18,换成 java17 或者 java1.8 都可以,因为 java18 不是 LTS 版本,有着各种各样的问题。。...
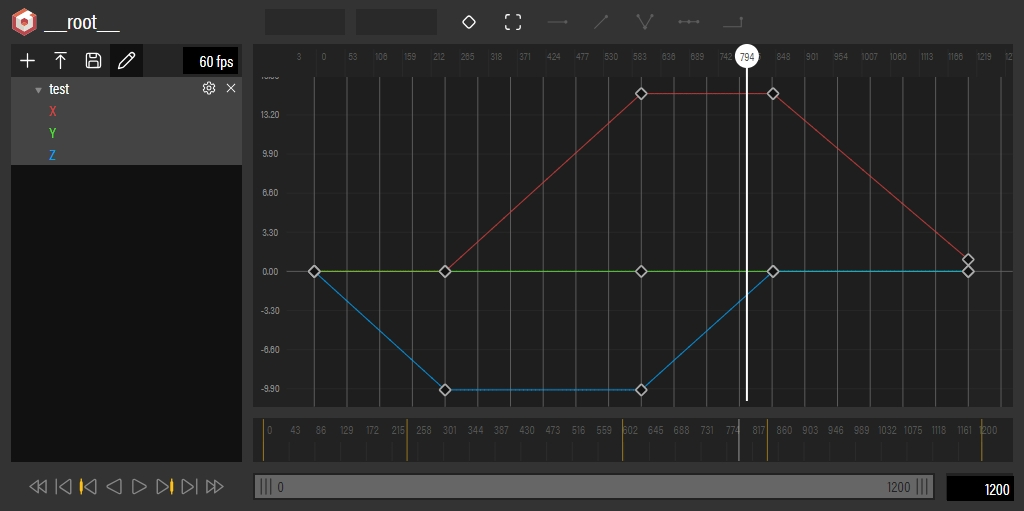
使用动画曲线编辑器打造炫酷的3D可视化ACE
前言 在制作3D可视化看板时,除了精细的模型结构外,炫酷的动画效果也是必不可少的。无论是复杂的还是简单的动画效果,要实现100%的自然平滑都是具有挑战性的工作。这涉及到物理引擎的计算和对动画效果的数学建模分析。一般来说,只…...

使用 React 和 ECharts 创建地球模拟扩散和飞线效果
在本博客中,我们将学习如何使用 React 和 ECharts 创建一个酷炫的地球模拟扩散效果。我们将使用 ECharts 作为可视化库,以及 React 来构建我们的应用。地球贴图在文章的结尾。 最终效果 准备工作 首先,确保你已经安装了 React,并…...

http状态码(一)400报错
一 400报错汇总 ① 综述 一、4xx状态码报错说明: 客户端行为导致的报错二、通用的4xxHTTP报错1) 4002) 4013) 4034) 4045) 405 --> 不允许方法,可能跨域或者nginx限制请求方法6) 4087) 4138) 419三、ngin自身定义的4xx报错495、496、497、498、4…...

【深度学习目标检测】五、基于深度学习的安全帽识别(python,目标检测)
深度学习目标检测方法则是利用深度神经网络模型进行目标检测,主要有以下几种: R-CNN系列:包括R-CNN、Fast R-CNN、Faster R-CNN等,通过候选区域法生成候选目标区域,然后使用卷积神经网络提取特征,并通过分类…...

芒果RT-DETR改进实验:深度集成版目标检测 RT-DETR 热力图来了!支持自定义数据集训练出来的模型
💡该教程为改进RT-DETR指南,属于《芒果书》📚系列,包含大量的原创改进方式🚀 💡🚀🚀🚀内含改进源代码 按步骤操作运行改进后的代码即可💡更方便的统计更多实验数据,方便写作 芒果RT-DETR改进实验:深度集成版目标检测 RT-DETR 热力图来了!支持自定义数据集…...

c语言实验八
实验1:在主函数中输入num个字符串,写一个函数,从传入的num个字符串中找出最长的一个字符串,并通过形参指针max传回该串地址,在主函数中输出。(注意:用****作为结束输入的标志。) #i…...
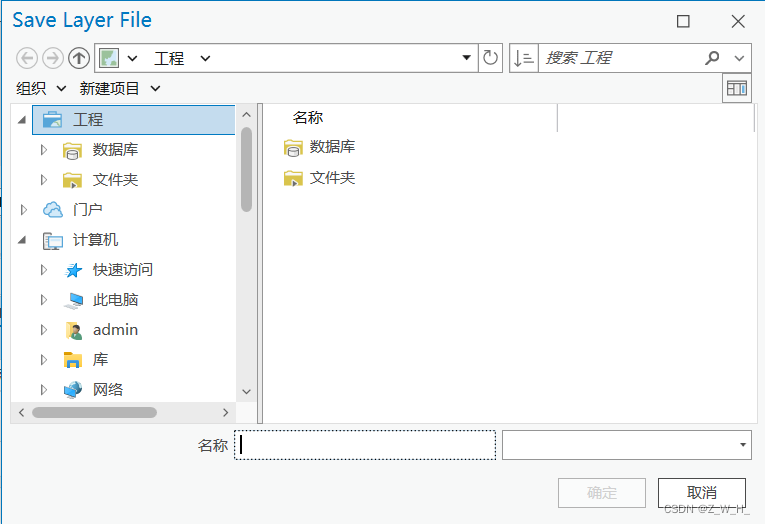
ArcGIS Pro SDK文件选择对话框
文件保存对话框 // 获取默认数据库var gdbPath Project.Current.DefaultGeodatabasePath;//设置文件的保存路径SaveItemDialog saveLayerFileDialog new SaveItemDialog(){Title "Save Layer File",OverwritePrompt true,//获取或设置当同名文件已存在时是否出现…...

ACT、NAT、NATPT和EASY-IP
目录 一、ACL 1.ACL 2.ACL的两种应用匹配机制 3.ACL的基本类型 4.ACL命令操作 5.ACL实验: 4.ACL的应用原则: 5.匹配原则: 二、NAT 1.NAT的原理及作用: 2.NAT分类 3.NAT配置 三、EASY-ip实验 四、NATPT 五、通配符 …...

量子计算基础:从比特到量子比特的革命
1. 量子计算基础:从比特到量子比特的革命 在传统计算机中,信息的基本单位是比特(bit),它只能处于0或1两种状态之一。而量子计算的核心突破在于引入了量子比特(qubit)的概念,它能够同…...

2026届必备的五大AI科研神器实际效果
Ai论文网站排名(开题报告、文献综述、降aigc率、降重综合对比) TOP1. 千笔AI TOP2. aipasspaper TOP3. 清北论文 TOP4. 豆包 TOP5. kimi TOP6. deepseek 人工智能技术迅猛发展,论文AI工具在学术研究领域正慢慢变成重要辅助,…...
LLM实战指南:从Transformer原理到微调部署的完整学习路径
1. 项目概述:一个面向实践者的LLM学习路线图最近在GitHub上看到一个叫mlabonne/llm-course的项目,热度非常高。点进去一看,这其实不是一个传统意义上的“课程”,而更像一份由社区驱动的、持续更新的“大型语言模型实战指南”。它的…...

从PyAutoGUI到OpenClaw:构建健壮桌面自动化的状态驱动技能库
1. 项目概述:当自动化脚本拥有“鹰爪”最近在GitHub上看到一个挺有意思的项目,叫Ikaros-521/openclaw-pyautogui-skill。光看名字,就透着一股“硬核”和“实用”的气息。Ikaros(伊卡洛斯)是希腊神话里那位用蜡和羽毛造…...

apk 包管理器完全指南:Alpine Linux 的轻量级利器
一、apk 体系架构全景 apk(Alpine Package Keeper)是 Alpine Linux 的核心包管理工具,与 Debian 的 APT 相比,它遵循极简主义设计哲学:代码量少、依赖解析简单、资源占用极低。这使得 Alpine 成为 Docker 容器的默认基…...

基于SpringBoot的汽车美容养护管理系统的设计与开发
一、选题依据和意义 (一)选题依据 随着国内汽车保有量持续攀升,汽车后市场规模不断扩大,汽车美容养护行业迎来快速发展期,但行业整体仍存在管理效率低下、服务流程不规范等问题[1]。传统管理模式依赖人工记录客户信息…...

Android本地代理服务器droidproxy:原理、部署与流量分析实战
1. 项目概述与核心价值最近在折腾Android应用网络调试和流量分析时,发现了一个挺有意思的开源项目——anand-92/droidproxy。简单来说,这是一个运行在Android设备上的HTTP/HTTPS代理服务器。你可能觉得,代理工具不是满大街都是吗?…...

SISSO 终极指南:数据驱动建模的强大工具
SISSO 终极指南:数据驱动建模的强大工具 【免费下载链接】SISSO A data-driven method combining symbolic regression and compressed sensing for accurate & interpretable models. 项目地址: https://gitcode.com/gh_mirrors/si/SISSO SISSO…...

零基础转行信息安全,老师傅来支招
现在这个环境下,转行做信息安全的人已经越来越少了,但还是有热爱这一行的人。 今天,我们以零基础入行为例,按照下面的成长路径,来分析分析从2025年的招聘数据来看,需要哪些能力。 对零基础转行的人来说&a…...

直播抠图技术100谈之25---调色中曲线是最优解
为什么曲线调色是最优解 蓝松抠图在即将发布的版本中特意重写了曲线调节,把达芬奇的二级曲线重新做了一遍,并模仿达芬奇的节点图做了自己的节点图。我们为什么要重新设计曲线,因为我们认为调色中曲线是最优解; 结论 在所有调色手段…...