用Flask搭建简单的web模型部署服务
目录结构如下:
分类模型web部署
classification.py
import os
import cv2
import numpy as np
import onnxruntime
from flask import Flask, render_template, request, jsonifyapp = Flask(__name__)onnx_session = onnxruntime.InferenceSession("mobilenet_v2.onnx", providers=['CPUExecutionProvider'])input_name = []
for node in onnx_session.get_inputs():input_name.append(node.name)output_name = []
for node in onnx_session.get_outputs():output_name.append(node.name)def allowed_file(filename):return '.' in filename and filename.rsplit('.', 1)[1] in set(['bmp', 'jpg', 'JPG', 'png', 'PNG'])def preprocess(image):if image.shape[0] < image.shape[1]: #h<wimage = cv2.resize(image, (int(256*image.shape[1]/image.shape[0]), 256))else:image = cv2.resize(image, (256, int(256*image.shape[0]/image.shape[1])))crop_size = min(image.shape[0], image.shape[1])left = int((image.shape[1]-crop_size)/2)top = int((image.shape[0]-crop_size)/2)image_crop = image[top:top+crop_size, left:left+crop_size]image_crop = cv2.resize(image_crop, (224,224))image_crop = image_crop[:,:,::-1].transpose(2,0,1).astype(np.float32)   #BGR2RGB和HWC2CHWimage_crop[0,:] = (image_crop[0,:] - 123.675) / 58.395   image_crop[1,:] = (image_crop[1,:] - 116.28) / 57.12image_crop[2,:] = (image_crop[2,:] - 103.53) / 57.375return  np.expand_dims(image_crop, axis=0)  @app.route('/classification', methods=['POST', 'GET'])  # 添加路由
def classification():if request.method == 'POST':f = request.files['file']if not (f and allowed_file(f.filename)):return jsonify({"error": 1001, "msg": "only support image formats: .bmp .png .PNG .jpg .JPG"})basepath = os.path.dirname(__file__)  # 当前文件所在路径upload_path = os.path.join(basepath, 'static/images/temp.jpg')  # 注意:没有的文件夹一定要先创建,不然会提示没有该路径f.save(upload_path)image = cv2.imread(upload_path)     tensor = preprocess(image)inputs = {}for name in input_name:inputs[name] = tensor   outputs = onnx_session.run(None, inputs)[0]label = np.argmax(outputs)score = np.exp(outputs[0][label]) / np.sum(np.exp(outputs), axis=1)return render_template('classification.html', label=label, score=score[0])return render_template('upload.html')if __name__ == '__main__':app.run(host='0.0.0.0', port=8000, debug=True)
classification.html
<!DOCTYPE html>
<html lang="en">
<head><meta charset="UTF-8">
</head>
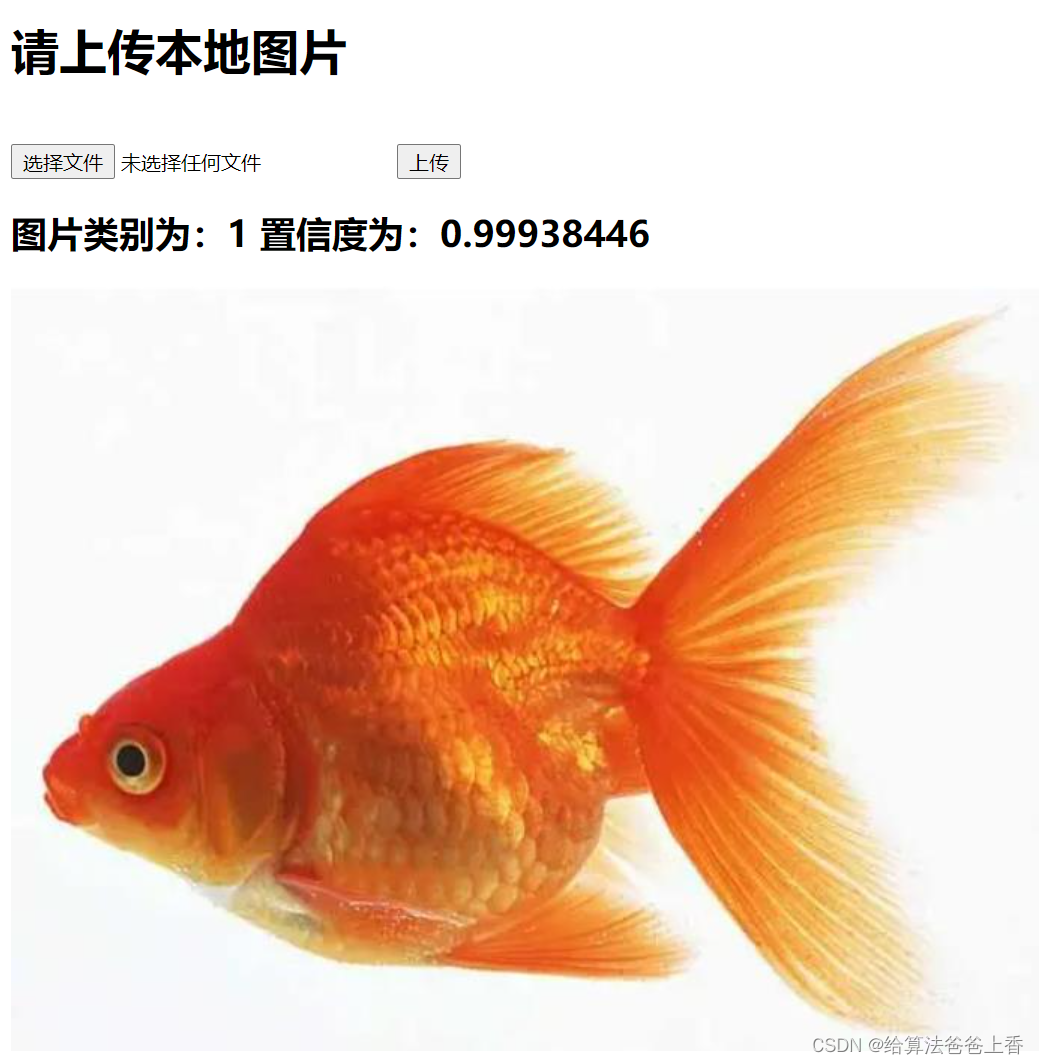
<body><h1>请上传本地图片</h1><form action="" enctype='multipart/form-data' method='POST'><input type="file" name="file" style="margin-top:20px;"/><input type="submit" value="上传" class="button-new" style="margin-top:15px;"/></form><h2>图片类别为:{{label}} 置信度为:{{score}} </h2><img src="{{ url_for('static', filename= './images/temp.jpg') }}" alt="你的图片被外星人劫持了~~"/>
</body>
</html>
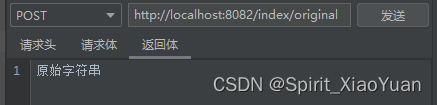
运行程序,在浏览器输入http://127.0.0.1:8000/classification,效果展示:
检测模型web部署
detection.py
import os
import cv2
import numpy as np
import onnxruntime
from flask import Flask, render_template, request, jsonifyapp = Flask(__name__)class_names = ['person', 'bicycle', 'car', 'motorcycle', 'airplane', 'bus', 'train', 'truck', 'boat', 'traffic light','fire hydrant', 'stop sign', 'parking meter', 'bench', 'bird', 'cat', 'dog', 'horse', 'sheep', 'cow','elephant', 'bear', 'zebra', 'giraffe', 'backpack', 'umbrella', 'handbag', 'tie', 'suitcase', 'frisbee','skis', 'snowboard', 'sports ball', 'kite', 'baseball bat', 'baseball glove', 'skateboard', 'surfboard','tennis racket', 'bottle', 'wine glass', 'cup', 'fork', 'knife', 'spoon', 'bowl', 'banana', 'apple','sandwich', 'orange', 'broccoli', 'carrot', 'hot dog', 'pizza', 'donut', 'cake', 'chair', 'couch','potted plant', 'bed', 'dining table', 'toilet', 'tv', 'laptop', 'mouse', 'remote', 'keyboard', 'cell phone','microwave', 'oven', 'toaster', 'sink', 'refrigerator', 'book', 'clock', 'vase', 'scissors', 'teddy bear','hair drier', 'toothbrush'] #coco80类别
input_shape = (640, 640)
score_threshold = 0.2
nms_threshold = 0.5
confidence_threshold = 0.2   onnx_session = onnxruntime.InferenceSession("yolov5n.onnx", providers=['CPUExecutionProvider'])input_name = []
for node in onnx_session.get_inputs():input_name.append(node.name)output_name = []
for node in onnx_session.get_outputs():output_name.append(node.name)def allowed_file(filename):return '.' in filename and filename.rsplit('.', 1)[1] in set(['bmp', 'jpg', 'JPG', 'png', 'PNG'])def nms(boxes, scores, score_threshold, nms_threshold):x1 = boxes[:, 0]y1 = boxes[:, 1]x2 = boxes[:, 2]y2 = boxes[:, 3]areas = (y2 - y1 + 1) * (x2 - x1 + 1)keep = []index = scores.argsort()[::-1] while index.size > 0:i = index[0]keep.append(i)x11 = np.maximum(x1[i], x1[index[1:]]) y11 = np.maximum(y1[i], y1[index[1:]])x22 = np.minimum(x2[i], x2[index[1:]])y22 = np.minimum(y2[i], y2[index[1:]])w = np.maximum(0, x22 - x11 + 1)                              h = np.maximum(0, y22 - y11 + 1) overlaps = w * hious = overlaps / (areas[i] + areas[index[1:]] - overlaps)idx = np.where(ious <= nms_threshold)[0]index = index[idx + 1]return keepdef xywh2xyxy(x):y = np.copy(x)y[:, 0] = x[:, 0] - x[:, 2] / 2y[:, 1] = x[:, 1] - x[:, 3] / 2y[:, 2] = x[:, 0] + x[:, 2] / 2y[:, 3] = x[:, 1] + x[:, 3] / 2return ydef filter_box(outputs): #过滤掉无用的框    outputs = np.squeeze(outputs)outputs = outputs[outputs[..., 4] > confidence_threshold]classes_scores = outputs[..., 5:]boxes = []scores = []class_ids = []for i in range(len(classes_scores)):class_id = np.argmax(classes_scores[i])outputs[i][4] *= classes_scores[i][class_id]outputs[i][5] = class_idif outputs[i][4] > score_threshold:boxes.append(outputs[i][:6])scores.append(outputs[i][4])class_ids.append(outputs[i][5])if len(boxes) == 0 :return      boxes = np.array(boxes)boxes = xywh2xyxy(boxes)scores = np.array(scores)indices = nms(boxes, scores, score_threshold, nms_threshold) output = boxes[indices]return outputdef letterbox(im, new_shape=(416, 416), color=(114, 114, 114)):# Resize and pad image while meeting stride-multiple constraintsshape = im.shape[:2]  # current shape [height, width]# Scale ratio (new / old)r = min(new_shape[0] / shape[0], new_shape[1] / shape[1])# Compute paddingnew_unpad = int(round(shape[1] * r)), int(round(shape[0] * r))    dw, dh = (new_shape[1] - new_unpad[0])/2, (new_shape[0] - new_unpad[1])/2  # wh padding top, bottom = int(round(dh - 0.1)), int(round(dh + 0.1))left, right = int(round(dw - 0.1)), int(round(dw + 0.1))if shape[::-1] != new_unpad:  # resizeim = cv2.resize(im, new_unpad, interpolation=cv2.INTER_LINEAR)im = cv2.copyMakeBorder(im, top, bottom, left, right, cv2.BORDER_CONSTANT, value=color)  # add borderreturn imdef scale_boxes(boxes, shape): # Rescale boxes (xyxy) from input_shape to shapegain = min(input_shape[0] / shape[0], input_shape[1] / shape[1])  # gain  = old / newpad = (input_shape[1] - shape[1] * gain) / 2, (input_shape[0] - shape[0] * gain) / 2  # wh paddingboxes[..., [0, 2]] -= pad[0]  # x paddingboxes[..., [1, 3]] -= pad[1]  # y paddingboxes[..., :4] /= gainboxes[..., [0, 2]] = boxes[..., [0, 2]].clip(0, shape[1])  # x1, x2boxes[..., [1, 3]] = boxes[..., [1, 3]].clip(0, shape[0])  # y1, y2return boxesdef draw(image, box_data):box_data = scale_boxes(box_data, image.shape)boxes = box_data[...,:4].astype(np.int32) scores = box_data[...,4]classes = box_data[...,5].astype(np.int32)for box, score, cl in zip(boxes, scores, classes):top, left, right, bottom = boxcv2.rectangle(image, (top, left), (right, bottom), (255, 0, 0), 1)cv2.putText(image, '{0} {1:.2f}'.format(class_names[cl], score), (top, left), cv2.FONT_HERSHEY_SIMPLEX, 0.6, (0, 0, 255), 1)def preprocess(img):input = letterbox(img, input_shape)input = input[:, :, ::-1].transpose(2, 0, 1).astype(dtype=np.float32)input = input / 255.0input = np.expand_dims(input, axis=0)return input@app.route('/detection', methods=['POST', 'GET'])  # 添加路由
def detection():if request.method == 'POST':f = request.files['file']if not (f and allowed_file(f.filename)):return jsonify({"error": 1001, "msg": "only support image formats: .bmp .png .PNG .jpg .JPG"})basepath = os.path.dirname(__file__)  # 当前文件所在路径upload_path = os.path.join(basepath, 'static/images/temp.jpg')  # 注意:没有的文件夹一定要先创建,不然会提示没有该路径f.save(upload_path)image = cv2.imread(upload_path)     tensor = preprocess(image)inputs = {}for name in input_name:inputs[name] = tensor   outputs = onnx_session.run(None, inputs)[0]boxes = filter_box(outputs)if boxes is not None:draw(image, boxes)cv2.imwrite(os.path.join(basepath, 'static/images/temp.jpg'), image)return render_template('detection.html')return render_template('upload.html')if __name__ == '__main__':app.run(host='0.0.0.0', port=8000, debug=True)
detection.html
<!DOCTYPE html>
<html lang="en">
<head><meta charset="UTF-8">
</head>
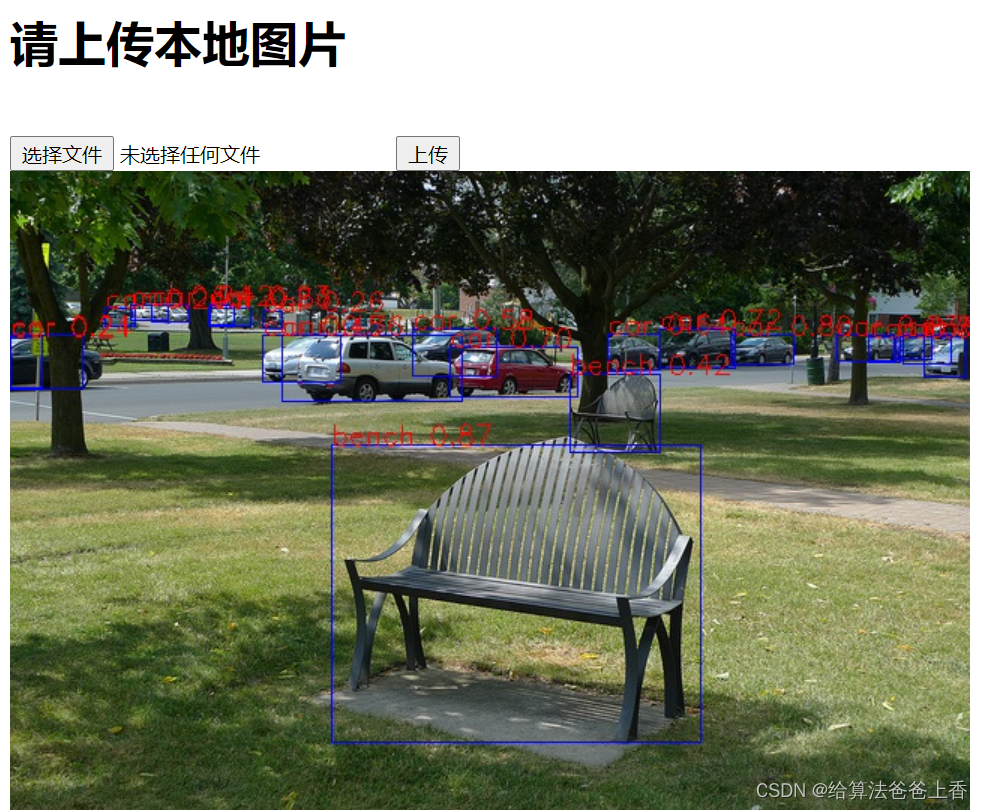
<body><h1>请上传本地图片</h1><form action="" enctype='multipart/form-data' method='POST'><input type="file" name="file" style="margin-top:20px;"/><input type="submit" value="上传" class="button-new" style="margin-top:15px;"/></form><img src="{{ url_for('static', filename= './images/temp.jpg') }}" alt="你的图片被外星人劫持了~~"/>
</body>
</html>
运行程序,在浏览器输入http://127.0.0.1:8000/detection,效果展示:
相关文章:
用Flask搭建简单的web模型部署服务
目录结构如下: 分类模型web部署 classification.py import os import cv2 import numpy as np import onnxruntime from flask import Flask, render_template, request, jsonifyapp Flask(__name__)onnx_session onnxruntime.InferenceSession("mobilen…...
lM-ICP)
PCL 点云匹配 3 之 (非线性迭代点云匹配)lM-ICP
一、IM迭代法 PCL IterativeClosestPointNonLinear 非线性L-M迭代法-CSDN博客 Matlab 非线性迭代法(3)阻尼牛顿法 L-M-CSDN博客 MATLAB实现最小二乘法_matlab最小二乘法-CSDN博客...

【C语言】SCU安全项目2-BufBomb
目录 关键代码解读: getxs() getbuf() test() 核心思路 具体操作1 具体操作2 前段时间忙于强网杯、英语4级和一些其他支线,有点摸不清头绪了,特别是qwb只有一个输出,太过坐牢,决定这个安全项目做完后就继续投身…...
C++第一讲之初入C++
注:本文是对于学完C语言再学C同学的讲解,主要补充C与C语言不同之处,如果你没学过C语言,不建议观看本文。 一.C简介 我们都知道C语言是过程性语言(强调的是实现过程),即对计算机语言要处理的两…...
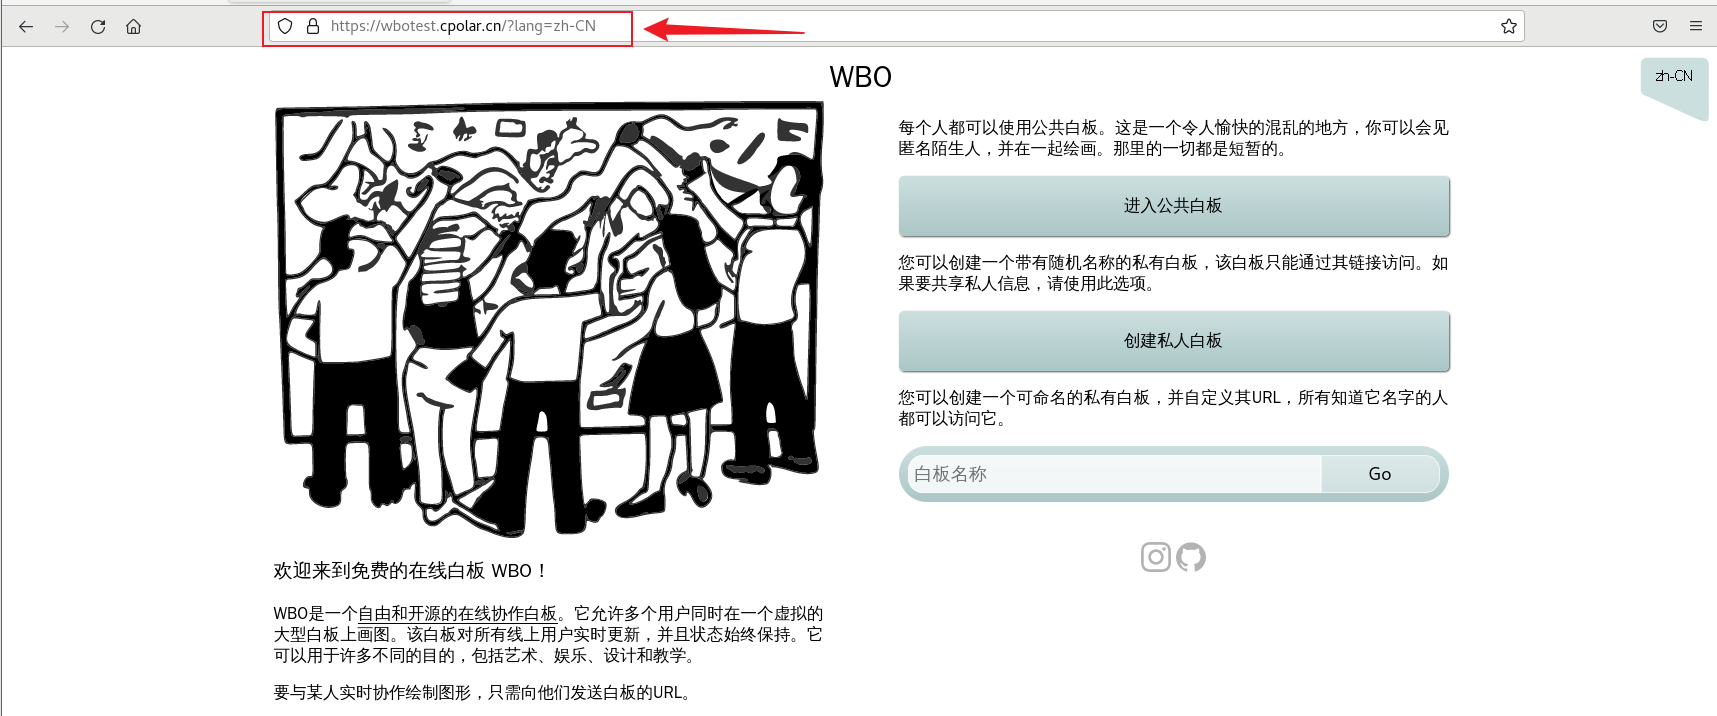
如何实现公网访问本地内网搭建的WBO白板远程协作办公【内网穿透】
最近,我发现了一个超级强大的人工智能学习网站。它以通俗易懂的方式呈现复杂的概念,而且内容风趣幽默。我觉得它对大家可能会有所帮助,所以我在此分享。点击这里跳转到网站。 文章目录 前言1. 部署WBO白板2. 本地访问WBO白板3. Linux 安装cp…...
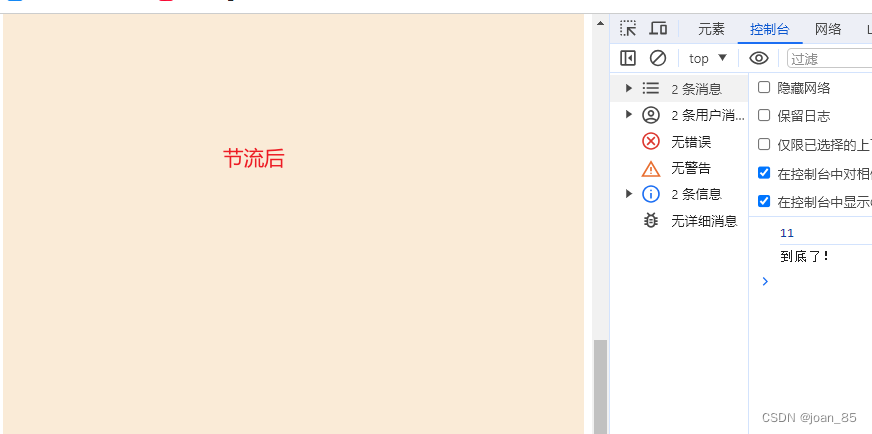
js知识点1:防抖节流
js知识点1:防抖节流 防抖节流 防抖节流,本质上是优化高频率执行代码的一种手段 定义: 防抖: n 秒后再执行该事件,若在 n 秒内被重复触发,则重新计时 节流: n 秒内只运行一次,若在 n 秒内重复触发࿰…...
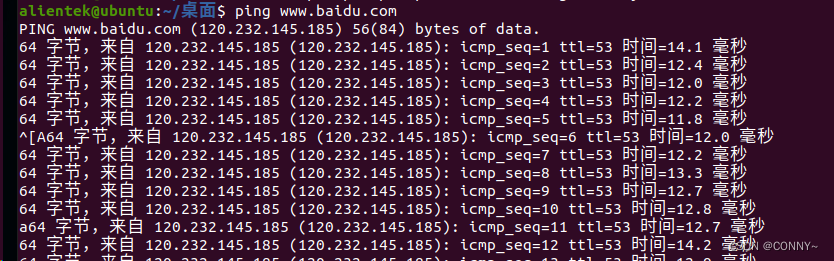
虚拟机下Ubuntu上网设置
文章目录 一、虚拟机上网的两种方式1.1 NAT模式(Network Address Translation)1.2 桥接模式(Bridge Mode)1.3 简介 二、实际配置2.1 NAT模式配置2.2 桥接模式配置 之前跟着博客配了好几个也没用,后来自己慢慢模式实践测…...
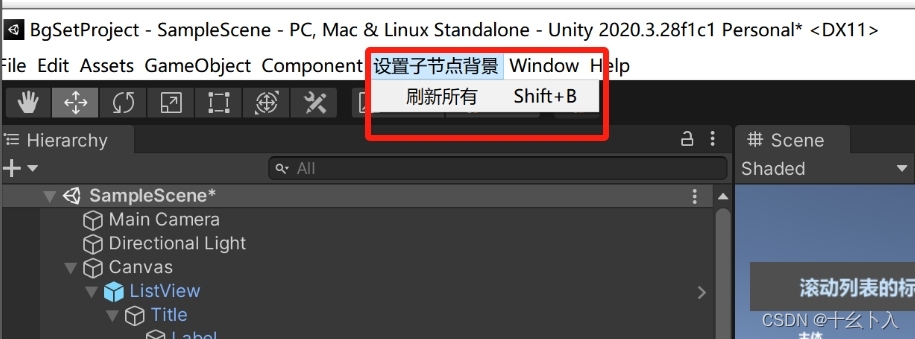
Unity3d C#利用Editor编辑器拓展实现配置UI背景样式一键设置UI背景样式功能(含源码)
前言 在开发UI滚动列表的时候,经常会有每项的背景图不统一的情况,会间隔重复的情况居多。这种情况下,手动去设置间隔一行的背景图或者颜色是比较麻烦的。在此背景下,笔者尝试写个小工具,在搭建UI时配置一下循环背景的…...

【微服务】服务间调用
当我们的应用从一个大单体拆分成多个微服务之后,服务间调用有多少种方式?服务间调用如果出现超时,如果避免雪崩,即如何做限流熔断机制,原理是什么? 服务间调用方式 OpenFeign 使用Feign进行服务间调用,我们会在启动类加@EnableFeignClients启用。 package org.sprin…...

一句话分清C/C++声明和定义
定义告诉编译器在在哪个位置存储变量,声明没有 声明:告诉编译器,变量类型和名字 定义:告诉编译器变量存储的位置。 举例子 int i; // 这是声明定义。声明:告诉编译器变量类型int,变量名字i, // 定义&…...

《哥德尔证明》阅读笔记——初等命题逻辑的一致性证明过程
前言 前两节主要阐述了公理系统的发展历史,一致性问题的提出,以及希尔伯特的洞见,本节将给出哥德尔证明所需的最后一次具体背景阐述,包含两个问题:一是罗素所著的《数学原理》是为何而写?二是从数学原理中…...

迪文屏开发保姆级教程—弹出键盘录入ASCII字符
本篇文章主要介绍了在DGBUS平台上使用文本录入键盘录入ASCII字符,数字和字母的教程。 文本录入键盘支持录入ASCII字符,数字和字母。 官方开发指南PDF:(不方便下载的私聊我发给你) https://download.csdn.net/download…...
)
Java,处理字符串的案例()
场景 为了得到一个都是英雄名字的字符数组,需要对如下字符串进行处理 疾风剑豪,影流之主,封魔剑魂,暗裔剑魔,无极剑圣,无双剑姬,武器大师,德邦总管,蛮族之王࿰…...

微信小程序更新机制
1/同步更新 1、定期检查更新时; 2、长期未使用,首次进入会同步更新,但在弱网或者下载新版本失败的情况下,还会使用旧版本。 2/异步更新: 启动时异步更新 3/开发者手动触发更新 在启动时异步更新的情况下,…...

CentOS 7 部署 Nacos-2.3.0 (单机版)
CentOS 7 部署 Nacos-2.3.0 (单机版) 1. 下载 Nacos 安装包 历史版本:https://github.com/alibaba/nacos/releases/ 我选的是 2.3.0 版本,https://github.com/alibaba/nacos/releases/download/2.3.0/nacos-server-2.3.0.tar.g…...
Springboot优雅实现对接口返回统一封装
前端在调用后端接口时往往不同的接口返回的数据是不一样的,但是通常我们会与前端约定一个固定的返回格式,通过固定的格式告诉他们什么时候接口是返回成功,什么时候返回失败,返回成功后他们如何拿到接口返回的数据去渲染前端页面。…...
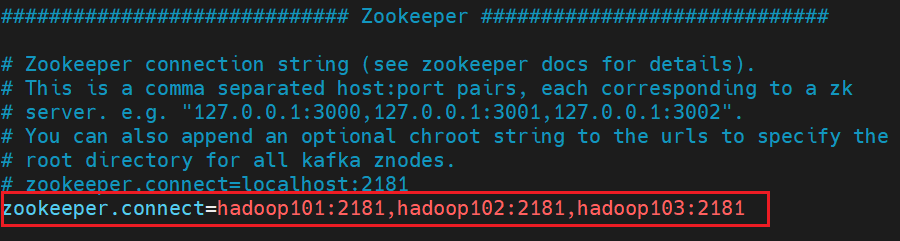
Kafka 安装与部署
目录 Kafka 下载 (1)将 kafka_2.11-2.4.1.tgz 上传至 /opt/software/ (2)解压安装包至 /opt/module/ [huweihadoop101 ~]$ cd /opt/software/ [huweihadoop101 software]$ tar -zxvf kafka_2.11-2.4.1.tgz -C ../module/&#…...

计算 N*4*4 位姿形状的逆变换,在N*3*4位姿后补充 [0,0,0,1]
针对 [N,4,4] shape 的 poses,函数 ComputeInversePoses 返回 相同 shape,但是每个 pose 都是前面的 逆 pose。 针对 [N,3,4] shape 的 poses,函数 AddIdentityToPoses 返回 在每个 [3,4] pose下加上 [0,0,0,1] 后的pose,返回的…...
人工智能可以战胜人类智慧大脑么?
引言 在当今快速发展的科技时代,人工智能的进步日新月异,引发了一场深刻的讨论:能否有一天,人工智能能够超越甚至战胜人类智慧?这个问题涉及到人类认知的广泛领域,牵涉到人类思维的深层次特质以及AI技术在…...

【数据结构和算法】 K 和数对的最大数目
其他系列文章导航 Java基础合集数据结构与算法合集 设计模式合集 多线程合集 分布式合集 ES合集 文章目录 其他系列文章导航 文章目录 前言 一、题目描述 二、题解 2.1 方法一:双指针排序 三、代码 3.1 方法一:双指针排序 3.2 方法二࿱…...

电子显微镜波传递函数与Ptychographic重建技术解析
1. 电子显微成像中的波传递函数解析 波传递函数(Wave Transfer Function, WTF)是理解电子显微镜成像机制的核心数学工具。这个复数值函数描述了电子波与样品相互作用后,在空间频率域中的相位和振幅变化情况。在透射电子显微镜(TEM…...

如何一次性解决Windows系统DLL缺失问题:VisualCppRedist AIO终极指南
如何一次性解决Windows系统DLL缺失问题:VisualCppRedist AIO终极指南 【免费下载链接】vcredist AIO Repack for latest Microsoft Visual C Redistributable Runtimes 项目地址: https://gitcode.com/gh_mirrors/vc/vcredist 你是否曾经在安装新游戏或软件时…...

从Anthropic论文到工程落地:Harness engineering结合claude code,讲解四层前端架构规范
AI 时代,许多人都体验过了vibecoding,但结果不同。 😀 同一个需求,不同的人用 AI 写,出来的代码质量可能差很远。 有的人能跑出一个中型功能,PR 干干净净的; 有的人用 AI 写出来的ÿ…...

开源状态监控工具openclaw-status:从原理到部署的完整实践指南
1. 项目概述:一个开源状态监控工具的诞生最近在折腾一个开源项目,叫openclaw-status,是vibe-with-me-tools组织下的一个子项目。简单来说,这是一个用于监控和展示各种服务、应用、设备状态的工具。听起来是不是有点像那些商业化的…...

2026年AI大模型API聚合平台技术横评:五大可靠选择与工程化选型参考
从GPT-5.5、Claude Opus 4.7到Gemini 3.1 Pro,新一代大模型迭代迅速,但在开发落地过程中,“接入复杂、成本高昂、网络波动”成为了许多开发团队面临的实际挑战。结合近期技术测试与行业观察,本文尝试从开发者工程实践的视角&#…...

5个维度深度解析:如何实现高性能黑苹果系统的架构设计与优化策略
5个维度深度解析:如何实现高性能黑苹果系统的架构设计与优化策略 【免费下载链接】Hackintosh 国光的黑苹果安装教程:手把手教你配置 OpenCore 项目地址: https://gitcode.com/gh_mirrors/hac/Hackintosh 在传统PC硬件与macOS系统兼容性的技术挑战…...

ElevenLabs账号被限频?紧急修复手册:3分钟绕过Rate Limit限制,解锁Pro级语音并发权限
更多请点击: https://intelliparadigm.com 第一章:ElevenLabs超写实语音生成教程 ElevenLabs 是当前业界领先的 AI 语音合成平台,其模型在语调自然度、情感表达力与跨语言一致性方面表现卓越。本章将指导你完成从 API 接入到高质量语音生成的…...

ClawGuard:为Clawdbot AI智能体打造的安全监控与熔断防护系统
1. 项目概述:ClawGuard 是什么,以及为什么你需要它如果你正在使用或开发基于 Clawdbot 框架的 AI 智能体,那么“安全”和“可控”这两个词,大概率已经在你脑海里盘旋过无数次了。我接触过不少团队,从最初的兴奋于 AI 智…...

告别TwinCAT:手把手教你用LinuxCNC+IGH搭建开源EtherCAT运动控制平台
告别商业软件束缚:LinuxCNCIGH开源运动控制平台实战指南 在工业自动化和运动控制领域,商业软件长期占据主导地位,但高昂的授权费用和封闭的生态系统让许多工程师和创客望而却步。开源运动控制平台的出现打破了这一局面,为追求灵活…...
)
紧急预警:Midjourney即将下架Nihonga相关风格标签?(内部消息+已存档的5类不可再生提示词组合,仅限今日开放获取)
更多请点击: https://intelliparadigm.com 第一章:Nihonga风格在Midjourney中的历史定位与美学内核 Nihonga(日本画)作为明治维新后确立的现代民族绘画体系,以天然矿物颜料、金箔银箔、胶质媒介及传统和纸为物质基础&…...