Apache-iotdb物联网数据库的安装及使用
一、简介
>Apache IoTDB (Database for Internet of Things) is an IoT native database with high performance for data management and analysis, deployable on the edge and the cloud. Due to its light-weight architecture, high performance and rich feature set together with its deep integration with Apache Hadoop, Spark and Flink, Apache IoTDB can meet the requirements of massive data storage, high-speed data ingestion and complex data analysis in the IoT industrial fields.
>Apache IoTDB(物联网数据库)是一款专为物联网设计的高性能数据库,适用于数据管理和分析,既可在边缘部署,也可在云端部署。由于其轻量级架构、高性能以及丰富的功能集,加上与Apache Hadoop、Spark和Flink的深度集成,Apache IoTDB可以满足物联网工业领域对海量数据存储、高速数据摄取和复杂数据分析的需求。
官网:https://iotdb.apache.org/
二、安装(单机版)
官方文档参考:https://iotdb.apache.org/UserGuide/latest/QuickStart/QuickStart.html
1.安装前置条件
Java >= 1.8 (Please make sure the environment path has been set)
Set the max open files num as 65535 to avoid “too many open files” problem。
#jdk 安装1.8或以上,略#修改文件句柄数量
##临时设置
sudo sysctl -w net.core.somaxconn=65535
##永久设置
vi /etc/sysctl.conf 后加入参数
net.core.somaxconn=65535
然后执行
sysctl -p
下面的这些我为了保险也设置了一下
####
cat >> /etc/security/limits.conf << EOF
* soft nofile 65536
* hard nofile 65536
* soft nproc 65536
* hard nproc 65536
EOF####
sed -i 's/^*          soft    nproc     65536$/*          soft    nproc     65536/' /etc/security/limits.d/20-nproc.conf####
cat >> /etc/sysctl.conf << EOF
vm.max_map_count=655360
EOFsysctl -p
1.下载及解压到安装目录
下载:
>wget https://www.apache.org/dyn/closer.cgi/iotdb/1.3.0/apache-iotdb-1.3.0-all-bin.zip
解压:
#解压到/home/testuser目录下
unzip apache-iotdb-1.3.0-all-bin.zip -d /home/testuser
2.启动
# Unix/OS X
> cd /home/testuser/apache-iotdb-1.3.0-all-bin
> bash sbin/start-standalone.sh# Windows
> sbin\start-standalone.bat
3.停止
# Unix/OS X
> bash sbin/stop-standalone.sh# Windows
> sbin\stop-standalone.bat
二、安装(集群版)
官网文档:https://iotdb.apache.org/UserGuide/latest/QuickStart/ClusterQuickStart.html
1.集群安装规划
服务安装规划
| IP | Role |
|---|---|
| 192.168.56.101 | ConfigNode,DataNode |
| 192.168.56.102 | ConfigNode,DataNode |
| 192.168.56.103 | ConfigNode,DataNode |
端口规划
| Service | ConfigNode | DataNode |
|---|---|---|
| Port | 10710,10720 | 6667,10730,10740,10750,10760 |
2.前置条件(所有机器上执行)
Java >= 1.8 (Please make sure the environment path has been set)
Set the max open files num as 65535 to avoid “too many open files” problem。
#jdk 安装1.8或以上,略#修改文件句柄数量
##临时设置
sudo sysctl -w net.core.somaxconn=65535
##永久设置
vi /etc/sysctl.conf 后加入参数
net.core.somaxconn=65535
然后执行
sysctl -p
下面的这些我为了保险也设置了一下
####
cat >> /etc/security/limits.conf << EOF
* soft nofile 65536
* hard nofile 65536
* soft nproc 65536
* hard nproc 65536
EOF####
sed -i 's/^*          soft    nproc     65536$/*          soft    nproc     65536/' /etc/security/limits.d/20-nproc.conf####
cat >> /etc/sysctl.conf << EOF
vm.max_map_count=655360
EOFsysctl -p
3.下载及解压(所有机器上执行)
下载:
>wget https://www.apache.org/dyn/closer.cgi/iotdb/1.3.0/apache-iotdb-1.3.0-all-bin.zip
解压:
#解压到/home/testuser目录下
unzip apache-iotdb-1.3.0-all-bin.zip -d /home/testuser
4.配置
(1)192.168.56.101
iotdb-confignode.properties:
cn_internal_address=192.168.56.101
cn_seed_config_node=192.168.56.101:10710
iotdb-datanode.properties:
dn_rpc_address=192.168.56.101
dn_internal_address=192.168.56.101
dn_seed_config_node=192.168.56.101:10710
(2)192.168.56.102
iotdb-confignode.properties:
cn_internal_address=192.168.56.102
cn_seed_config_node=192.168.56.101:10710
iotdb-datanode.properties:
dn_rpc_address=192.168.56.102
dn_internal_address=192.168.56.102
dn_seed_config_node=192.168.56.101:10710
(3)192.168.56.103
iotdb-confignode.properties:
cn_internal_address=192.168.56.103
cn_seed_config_node=192.168.56.101:10710
iotdb-datanode.properties:
dn_rpc_address=192.168.56.103
dn_internal_address=192.168.56.103dn_seed_config_node=192.168.56.101:10710
注意:上面的配置cn_target_config_node_list,cn_seed_config_node,三台上使用的都是种子节点的IP:192.168.56.101
5.启动集群
(1)防火墙开放
需要开放6667,10710,10720,10730,10740,10750,10760 这些端口的访问权限,我这里使用的是firewalld,你也可以使用iptables
firewall-cmd --permanent --add-rich-rule="rule family="ipv4" source address="192.168.56.101" port protocol="tcp" port="6667" accept"
firewall-cmd --permanent --add-rich-rule="rule family="ipv4" source address="192.168.56.101" port protocol="tcp" port="10710" accept"
firewall-cmd --permanent --add-rich-rule="rule family="ipv4" source address="192.168.56.101" port protocol="tcp" port="10720" accept"
firewall-cmd --permanent --add-rich-rule="rule family="ipv4" source address="192.168.56.101" port protocol="tcp" port="10730" accept"
firewall-cmd --permanent --add-rich-rule="rule family="ipv4" source address="192.168.56.101" port protocol="tcp" port="10740" accept"
firewall-cmd --permanent --add-rich-rule="rule family="ipv4" source address="192.168.56.101" port protocol="tcp" port="10750" accept"
firewall-cmd --permanent --add-rich-rule="rule family="ipv4" source address="192.168.56.101" port protocol="tcp" port="10760" accept"firewall-cmd --permanent --add-rich-rule="rule family="ipv4" source address="192.168.56.102" port protocol="tcp" port="6667" accept"
firewall-cmd --permanent --add-rich-rule="rule family="ipv4" source address="192.168.56.102" port protocol="tcp" port="10710" accept"
firewall-cmd --permanent --add-rich-rule="rule family="ipv4" source address="192.168.56.102" port protocol="tcp" port="10720" accept"
firewall-cmd --permanent --add-rich-rule="rule family="ipv4" source address="192.168.56.102" port protocol="tcp" port="10730" accept"
firewall-cmd --permanent --add-rich-rule="rule family="ipv4" source address="192.168.56.102" port protocol="tcp" port="10740" accept"
firewall-cmd --permanent --add-rich-rule="rule family="ipv4" source address="192.168.56.102" port protocol="tcp" port="10750" accept"
firewall-cmd --permanent --add-rich-rule="rule family="ipv4" source address="192.168.56.102" port protocol="tcp" port="10760" accept"firewall-cmd --permanent --add-rich-rule="rule family="ipv4" source address="192.168.56.103" port protocol="tcp" port="6667" accept"
firewall-cmd --permanent --add-rich-rule="rule family="ipv4" source address="192.168.56.103" port protocol="tcp" port="10710" accept"
firewall-cmd --permanent --add-rich-rule="rule family="ipv4" source address="192.168.56.103" port protocol="tcp" port="10720" accept"
firewall-cmd --permanent --add-rich-rule="rule family="ipv4" source address="192.168.56.103" port protocol="tcp" port="10730" accept"
firewall-cmd --permanent --add-rich-rule="rule family="ipv4" source address="192.168.56.103" port protocol="tcp" port="10740" accept"
firewall-cmd --permanent --add-rich-rule="rule family="ipv4" source address="192.168.56.103" port protocol="tcp" port="10750" accept"
firewall-cmd --permanent --add-rich-rule="rule family="ipv4" source address="192.168.56.103" port protocol="tcp" port="10760" accept"firewall-cmd --reload
(2)启动集群
启动第一个节点(start the first node,192.168.56.101):
#1.启动第一个节点(start the first node,192.168.56.101)
cd /home/testuser/apache-iotdb-1.3.0-all-bin
sbin/start-standalone.sh
tail -f logs/log_datanode_all.log
启动其他节点start service ConfigNode and DataNode in other nodes,192.168.56.101,192.168.56.103
cd /home/testuser/apache-iotdb-1.3.0-all-bin
sbin/start-standalone.sh
tail -f logs/log_datanode_all.log
(3)检查集群
#随便找哪一台集群机器,执行命令,下面的 -h 后的ip可以是集群中的任何一个ip
cd /home/testuser/apache-iotdb-1.3.0-all-bin
./sbin/start-cli.sh -h 192.168.56.101#查看集群状态
show cluster;IoTDB> show cluster;
+------+----------+-------+---------------+------------+-------+---------+
|NodeID|  NodeType| Status|InternalAddress|InternalPort|Version|BuildInfo|
+------+----------+-------+---------------+------------+-------+---------+
|     0|ConfigNode|Running| 192.168.56.101|       10710|  1.3.0|  fe787ca|
|     2|ConfigNode|Running| 192.168.56.102|       10710|  1.3.0|  fe787ca|
|     4|ConfigNode|Running| 192.168.56.103|       10710|  1.3.0|  fe787ca|
|     1|  DataNode|Running| 192.168.56.101|       10730|  1.3.0|  fe787ca|
|     3|  DataNode|Running| 192.168.56.102|       10730|  1.3.0|  fe787ca|
|     5|  DataNode|Running| 192.168.56.103|       10730|  1.3.0|  fe787ca|
+------+----------+-------+---------------+------------+-------+---------+
Total line number = 6
It costs 0.317s
6.扩容
Expand means add services of ConfigNode or DataNode into an existing IoTDB cluster.
1.配置
iotdb-confignode.properties:
cn_internal_address=192.168.56.104
cn_seed_config_node=192.168.56.101:10710
iotdb-datanode.properties:
dn_rpc_address=192.168.56.104
dn_internal_address=192.168.56.104dn_seed_config_node=192.168.56.101:10710
2.防火墙加入
在原来的集群的三台机上执行
firewall-cmd --permanent --add-rich-rule="rule family="ipv4" source address="192.168.56.104" port protocol="tcp" port="6667" accept"
firewall-cmd --permanent --add-rich-rule="rule family="ipv4" source address="192.168.56.104" port protocol="tcp" port="10710" accept"
firewall-cmd --permanent --add-rich-rule="rule family="ipv4" source address="192.168.56.104" port protocol="tcp" port="10720" accept"
firewall-cmd --permanent --add-rich-rule="rule family="ipv4" source address="192.168.56.104" port protocol="tcp" port="10730" accept"
firewall-cmd --permanent --add-rich-rule="rule family="ipv4" source address="192.168.56.104" port protocol="tcp" port="10740" accept"
firewall-cmd --permanent --add-rich-rule="rule family="ipv4" source address="192.168.56.104" port protocol="tcp" port="10750" accept"
firewall-cmd --permanent --add-rich-rule="rule family="ipv4" source address="192.168.56.104" port protocol="tcp" port="10760" accept"firewall-cmd --reload
同时,新加的那台机器也需要执行启动集群步骤中的防火墙开放操作,让几台机器之间的端口能互通
3.启动
cd /home/testuser/apache-iotdb-1.3.0-all-bin
sbin/start-standalone.sh
tail -f logs/log_datanode_all.log
查看启动后是否已加入集群
IoTDB> show cluster;
+------+----------+-------+---------------+------------+-------+---------+
|NodeID|  NodeType| Status|InternalAddress|InternalPort|Version|BuildInfo|
+------+----------+-------+---------------+------------+-------+---------+
|     0|ConfigNode|Running| 192.168.56.101|       10710|  1.3.0|  fe787ca|
|     2|ConfigNode|Running| 192.168.56.103|       10710|  1.3.0|  fe787ca|
|     4|ConfigNode|Running| 192.168.56.102|       10710|  1.3.0|  fe787ca|
|     6|ConfigNode|Running| 192.168.56.104|       10710|  1.3.0|  fe787ca|
|     1|  DataNode|Running| 192.168.56.101|       10730|  1.3.0|  fe787ca|
|     3|  DataNode|Running| 192.168.56.103|       10730|  1.3.0|  fe787ca|
|     5|  DataNode|Running| 192.168.56.102|       10730|  1.3.0|  fe787ca|
|     7|  DataNode|Running| 192.168.56.104|       10730|  1.3.0|  fe787ca|
+------+----------+-------+---------------+------------+-------+---------+
Total line number = 8
It costs 0.013s
7.缩容
Shrink means removing a service from the IoTDB cluster.
以对192.168.56.102进行移除为例:
(1)移除ConfigNode,shrink service ConfigNode
cd /home/testuser/apache-iotdb-1.3.0-all-bin
# way 1: shrink with ip:port
sbin/remove-confignode.sh 192.168.56.102:10710# way 2: shrink with NodeID of `show cluster`
sbin/remove-confignode.sh 6
(2)移除DataNode,shrink service DataNode
cd /home/testuser/apache-iotdb-1.3.0-all-bin
# way 1: shrink with ip:port
sbin/remove-datanode.sh 192.168.56.102:6667# way 2: shrink with NodeID of `show cluster`
sbin/remove-confignode.sh 7
(3)检查,check the result
IoTDB> show cluster
+------+----------+-------+---------------+------------+-------+---------+
|NodeID|  NodeType| Status|InternalAddress|InternalPort|Version|BuildInfo|
+------+----------+-------+---------------+------------+-------+---------+
|     0|ConfigNode|Running| 192.168.56.101|       10710|  1.3.0|  fe787ca|
|     2|ConfigNode|Running| 192.168.56.103|       10710|  1.3.0|  fe787ca|
|     6|ConfigNode|Running| 192.168.56.104|       10710|  1.3.0|  fe787ca|
|     1|  DataNode|Running| 192.168.56.101|       10730|  1.3.0|  fe787ca|
|     3|  DataNode|Running| 192.168.56.103|       10730|  1.3.0|  fe787ca|
|     7|  DataNode|Running| 192.168.56.104|       10730|  1.3.0|  fe787ca|
+------+----------+-------+---------------+------------+-------+---------+
Total line number = 6
8.【reference】Cleanup,如果想清除集群数据重新初始化
如果想重新初始化集群,结束所有进程,然后删除data和logs目录,并重新启动即可。
(1).结束进程
End processes of ConfigNode and DataNode
# 1. Stop services ConfigNode and DataNode
sbin/stop-standalone.sh# 2. Check whether there are IoTDB processes left or not
jps
# 或者
ps -ef|grep iotdb# 3. If there is any IoTDB process left, kill it
kill -9 <pid>
# If there is only 1 IoTDB instance, execue command below to remove all IoTDB process
ps -ef|grep iotdb|grep -v grep|tr -s '  ' ' ' |cut -d ' ' -f2|xargs kill -9
(2).清除数据
Remove directories of data and logs
cd /home/testuser/apache-iotdb-1.3.0-all-bin
rm -rf data logs
三、简单使用
1.简单命令
#连接登录:
> bash sbin/start-cli.sh -h 127.0.0.1 -p 6667 -u root -pw root#创建数据库
IoTDB> create database root.ln#查看数据库
IoTDB> SHOW DATABASES#创建timeseries
IoTDB> CREATE TIMESERIES root.ln.wf01.wt01.status WITH DATATYPE=BOOLEAN, ENCODING=PLAIN
IoTDB> CREATE TIMESERIES root.ln.wf01.wt01.temperature WITH DATATYPE=FLOAT, ENCODING=RLE#查看timeseries
IoTDB> SHOW TIMESERIES
IoTDB> SHOW TIMESERIES root.ln.wf01.wt01.status#插入数据
IoTDB> INSERT INTO root.ln.wf01.wt01(timestamp,status) values(100,true);
IoTDB> INSERT INTO root.ln.wf01.wt01(timestamp,status,temperature) values(200,false,20.71)#查询数据
IoTDB> SELECT * FROM root.ln.wf01.wt01#退出登录
IoTDB> quit
IoTDB> exit
2.修改root密码
IoTDB > ALTER USER root SET PASSWORD 'newpwd';
四、API调用
(1)Java Native
https://iotdb.apache.org/UserGuide/latest/API/Programming-Java-Native-API.html#session-pool-for-native-api
引入maven
<dependencies><dependency><groupId>org.apache.iotdb</groupId><artifactId>iotdb-session</artifactId><version>1.3.0</version></dependency>
</dependencies>
Session初始化测试
一般不使用,采用本机localhost和6667端口及默认账号密码root/root初始化Session
// use default configuration Session session = new Session.Builder().build();System.out.println(session);session.open();session.close();
通过Session.Builder构造器初始化Session,采用默认的账号root和默认密码root,指定IP和端口
// initialize with a single nodeSession session = new Session.Builder().host(host).port(port).build();session.open();System.out.println(session);session.close();
采用自定义的账号和密码码初始化Session
Session session = new Session.Builder().host(host).port(port).username("root").password("123456").build();
有多个节点的情况下,通过Session.Builder构造器初始化Session
// initialize with multiple nodesList<String> nodeUrls = new ArrayList<>();nodeUrls.add("192.168.56.101:6667");nodeUrls.add("192.168.56.102:6667");nodeUrls.add("192.168.56.103:6667");Session session = new Session.Builder().nodeUrls(nodeUrls).username("root").password("123456").build();
数据库管理测试
创建数据库
String storageGroupId = "root.group1";session.setStorageGroup(storageGroupId);
删除数据库
String storageGroupId = "root.group1";session.deleteStorageGroup(storageGroupId);
删除多个
List<String> storageGroupIds = new ArrayList<String>();storageGroupIds.add("root.group1");storageGroupIds.add("root.group2");session.deleteStorageGroups(storageGroupIds);
Timeseries Test
创建Timeseries
session.createTimeseries("root.sestest.wf01.wt01.s0", TSDataType.INT32, TSEncoding.RLE, CompressionType.SNAPPY);session.createTimeseries("root.sestest.wf01.wt01.s1", TSDataType.INT32, TSEncoding.RLE, CompressionType.SNAPPY);
删除Timeseries
//可以传一个timeseries//session.deleteTimeseries("root.sestest.wf01.wt01.s0");//session.deleteTimeseries("root.sestest.wf01.wt01.s1");//也可以传多个timeseriesList<String> timeseries = new ArrayList<String>();timeseries.add("root.sestest.wf01.wt01.s0");timeseries.add("root.sestest.wf01.wt01.s1");session.deleteTimeseries(timeseries);
检查是否存在
String timeseries = "root.sestest.wf01.wt01.s0";System.out.println(session.checkTimeseriesExists(timeseries));
Tablet Insert
/*** 插入Tablet* @throws StatementExecutionException* @throws IoTDBConnectionException*/@Testpublic void insertTabletTest() throws StatementExecutionException, IoTDBConnectionException {int BATCH_INSERT_SIZE = 10000;long TOTAL_INSERT_ROW_COUNT = 20003L;session.setFetchSize(2048);session.open(false);/** 一个Tablet例子:* deviceID: root.ln.wf01.wt01* time status, temperature, speed* 1 true 1.0 1* 2 false 2.0 2* 3 true 3.0 3*/// 设置设备名字,设备下面的传感器名字,各个传感器的类型List<MeasurementSchema> schemaList = new ArrayList<>();schemaList.add(new MeasurementSchema("status", TSDataType.BOOLEAN));schemaList.add(new MeasurementSchema("temperature", TSDataType.DOUBLE));schemaList.add(new MeasurementSchema("speed", TSDataType.INT64));Tablet tablet = new Tablet("root.ln.wf01.wt02", schemaList, BATCH_INSERT_SIZE);// 以当前时间戳作为插入的起始时间戳long timestamp = System.currentTimeMillis();long row = 0;for (row = 0; row < TOTAL_INSERT_ROW_COUNT; row++) {int rowIndex = tablet.rowSize++;tablet.addTimestamp(rowIndex, timestamp);// 随机生成数据tablet.addValue("status", rowIndex, (row & 1) == 0);tablet.addValue("temperature", rowIndex, (double) row);tablet.addValue("speed", rowIndex, row);if (tablet.rowSize == tablet.getMaxRowNumber()) {session.insertTablet(tablet);tablet.reset();System.out.println("已经插入了:" + (row + 1) + "行数据");}timestamp++;}// 插入剩余不足 BATCH_INSERT_SIZE的数据if (tablet.rowSize != 0) {session.insertTablet(tablet);tablet.reset();System.out.println("已经插入了:" + (row) + "行数据");}}
Record Insert Test
@Testpublic void insertRecordTest() throws IoTDBConnectionException, StatementExecutionException {//session.setStorageGroup("root.group1");String deviceId = "root.group1.device1";List<String> measurements = new ArrayList<>();measurements.add("s0");measurements.add("s1");measurements.add("s2");List<TSDataType> types = new ArrayList<>();types.add(TSDataType.INT32);types.add(TSDataType.INT32);types.add(TSDataType.INT32);List<Object> values = new ArrayList<>();values.add(1);values.add(2);values.add(3);long timestamp = System.currentTimeMillis();session.insertRecord(deviceId, timestamp, measurements, types, values);}
DeleteData Test
删除数据测试
/*** 删除数据测试,* 参数timestamp为long类型,表示要删除的数据的时间,在这时间或这时间之前的数据将删除* Delete data before or equal to a timestamp of one or several timeseries* @throws StatementExecutionException */@Testpublic void deleteDataTest() throws StatementExecutionException {String deviceId = "root.group1.device2.s0";long timestamp = System.currentTimeMillis();System.out.println(timestamp);try {session.deleteData(deviceId, timestamp);} catch (IoTDBConnectionException e) {e.printStackTrace();}}
批量删除数据测试
/*** 批量删除数据测试,* 参数timestamp为long类型,表示要删除的数据的时间,在这时间或这时间之前的数据将删除* Delete data before or equal to a timestamp of one or several timeseries* @throws StatementExecutionException*/@Testpublic void deleteDatasTest() throws StatementExecutionException {List<String> paths = new ArrayList<String>();paths.add("root.group1.device2.s0");paths.add("root.group1.device2.s1");paths.add("root.group1.device2.s2");//删除当前时间以前的数据long timestamp = System.currentTimeMillis();try {session.deleteData(paths, timestamp);} catch (IoTDBConnectionException e) {e.printStackTrace();}}
查询测试QueryTest
查询数据
使用session.executeRawDataQuery方法
/*** 查询数据*/@Testpublic void executeRawDataQueryTest() throws StatementExecutionException, IoTDBConnectionException {List<String> paths = new ArrayList<>();paths.add("root.ln.wf01.wt01.temperature");paths.add("root.ln.wf01.wt01.speed");paths.add("root.ln.wf01.wt01.status");String startDateTimeStr = "2024-01-01 00:00:00"; LocalDateTime ldt = LocalDateTime.parse(startDateTimeStr,DateTimeFormatter.ofPattern("yyyy-MM-dd HH:mm:ss"));Date date = Date.from(ldt.atZone( ZoneId.systemDefault()).toInstant());long startTime = date.getTime();//当前时间long endTime = System.currentTimeMillis();SessionDataSet sessionDataSet = session.executeRawDataQuery(paths, startTime, endTime);while(sessionDataSet.hasNext()) {RowRecord rowRecord = sessionDataSet.next();System.out.println(rowRecord);}}
查询最新数据
使用session.executeLastDataQuery方法
/*** 查询最新数据* 查询指定时间以后的最新数据* @throws StatementExecutionException* @throws IoTDBConnectionException*/@Testpublic void executeLastDataQueryTest() throws StatementExecutionException, IoTDBConnectionException {List<String> paths = new ArrayList<>();paths.add("root.ln.wf01.wt01.temperature");paths.add("root.ln.wf01.wt01.speed");paths.add("root.ln.wf01.wt01.status");//查询指定时间以后的最新数据,这里指定时间为"2024-01-01 00:00:00";String startDateTimeStr = "2024-01-01 00:00:00"; LocalDateTime ldt = LocalDateTime.parse(startDateTimeStr,DateTimeFormatter.ofPattern("yyyy-MM-dd HH:mm:ss"));Date date = Date.from(ldt.atZone( ZoneId.systemDefault()).toInstant());long startTime = date.getTime();SessionDataSet sessionDataSet = session.executeLastDataQuery(paths, startTime);while(sessionDataSet.hasNext()) {RowRecord rowRecord = sessionDataSet.next();System.out.println(rowRecord);}}
IoTDB-SQL Interface(根据sql查询数据)
使用session.executeQueryStatement方法
/*** IoTDB-SQL Interface* Sql语句接口,* @throws StatementExecutionException* @throws IoTDBConnectionException*/@Testpublic void executeQueryStatement() throws StatementExecutionException, IoTDBConnectionException {SessionDataSet sessionDataSet = session.executeQueryStatement("select * from root.ln.wf01.wt03");while(sessionDataSet.hasNext()) {RowRecord rowRecord = sessionDataSet.next();System.out.println(rowRecord);}}
IoTDB-SQL Interface(根据sql更新数据)
使用session.executeNonQueryStatement方法
@Testpublic void executeNonQueryStatement() throws StatementExecutionException, IoTDBConnectionException {session.executeNonQueryStatement("INSERT INTO root.ln.wf01.wt03(timestamp,status) values(200,true);");}
五、源码下载
github: https://github.com/jxlhljh/iotdbTest.git
gitee: https://gitee.com/jxlhljh/iotdbTest.git
相关文章:

Apache-iotdb物联网数据库的安装及使用
一、简介 >Apache IoTDB (Database for Internet of Things) is an IoT native database with high performance for data management and analysis, deployable on the edge and the cloud. Due to its light-weight architecture, high performance and rich feature set…...

项目管理流程
优质博文 IT-BLOG-CN 一、简介 项目是为提供某项独特产品【独特指:创造出与以往不同或者多个方面与以往有所区别产品或服务,所以日复一日重复的工作就不属于项目】、服务或成果所做的临时性【临时性指:项目有明确的开始时间和明确的结束时间,不会无限期…...
0004.电脑开机提示按F1
常用的电脑主板不知道什么原因,莫名其妙的启动不了了。尝试了很多方法,没有奏效。没有办法我就只能把硬盘拆了下来,装到了另一台电脑上面。但是开机以后却提示F1,如下图: 根据上面的提示,应该是驱动有问题…...

中国电子学会2022年12月份青少年软件编程Scratch图形化等级考试试卷一级真题(含答案)
一、单选题(共25题,共50分) 1. 小明想在开始表演之前向大家问好并做自我介绍,应运行下列哪个程序?(2分) A. B. C. D. 2. 舞台有两个不同的背景,小猫角色的哪个积木能够切换舞台背景?(2分) A. B. C. D. 3. …...
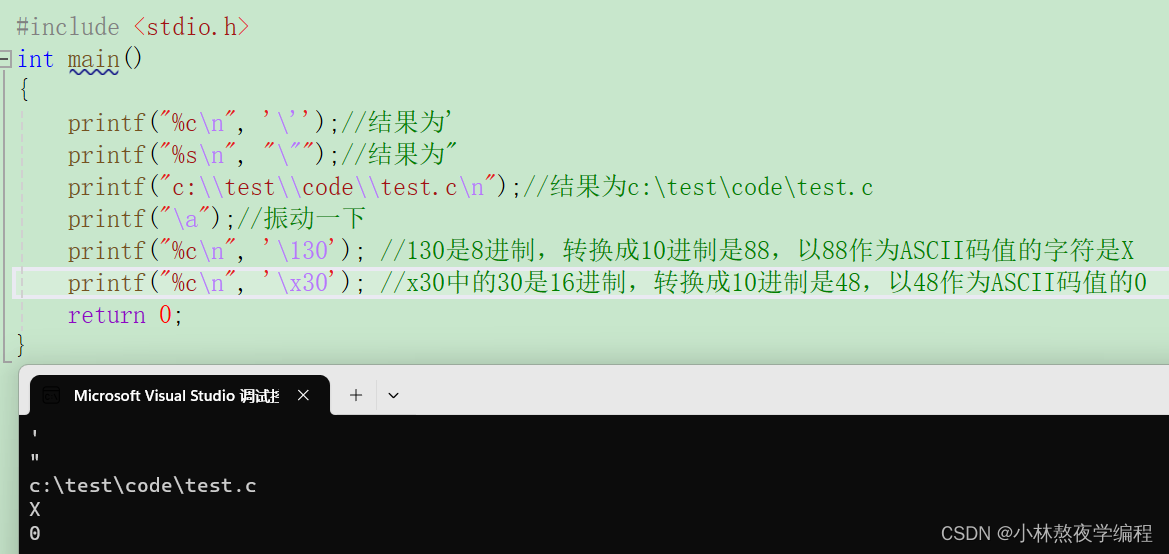
C语言第二弹---C语言基本概念(下)
✨个人主页: 熬夜学编程的小林 💗系列专栏: 【C语言详解】 【数据结构详解】 C语言基本概念 1、字符串和\02、转义字符3、语句和语句分类3.1、空语句3.2、表达式语句3.3、函数调⽤语句3.4、复合语句3.5、控制语句 4、注释4.1、注释的两种形…...
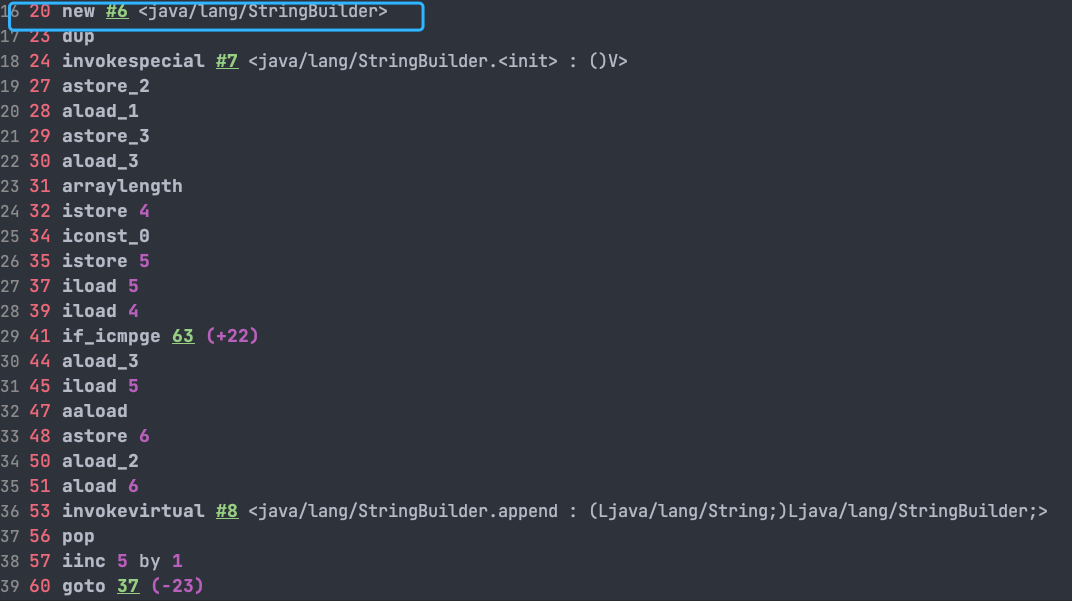
Java 基础面试题 String(一)
Java 基础面试题 String(一) 文章目录 Java 基础面试题 String(一)String、StringBuffer、StringBuilder 的区别?String 为什么是不可变的?字符串拼接用“” 还是 StringBuilder? 文章来自Java Guide 用于学习如有侵…...

QT中QApplication对象有且只有一个
QT中QApplication对象有且只有一个 QApplication对象 QApplication对象 QApplication是应用程序对象 #include <QApplication> int main(int argc,char* argv[]); {//a对象在一个程序中有且只有一个,QT中要求必须有一个QApplication a(argc,argv…...

HTML CSS 发光字头特效
效果展示: 代码: <html><head> </head><style>*{margin: 0;padding: 0;}body {text-align: center;}h1{/* border: 3px solid rgb(201, 201, 201); */margin-bottom: 20px;}.hcqFont {position: relative;letter-spacing: 0.07…...
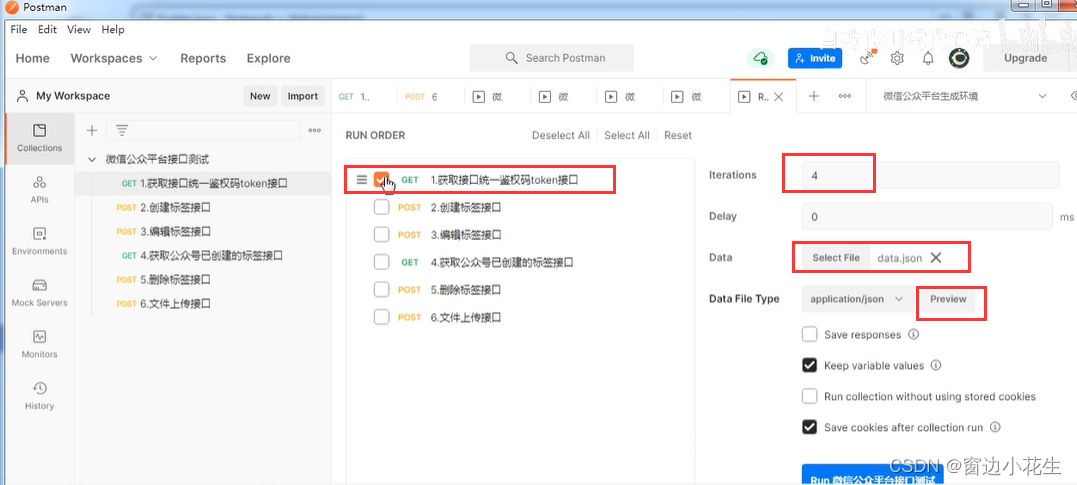
4.postman批量运行及json、cvs文件运行
一、批量运行collection 1.各个接口设置信息已保存,在collection中点击run collection 2.编辑并运行集合 集合运行时,单独上传图片时报错。需修改postman设置 二、csv文件运行 可新建记事本,输入测试数据,后另存为新的文本文件&…...

Superset二次开发之集成链路追踪TraceID技术
config.py ##时间-日志级别-完整路径-文件名字-文件行-函数名字-信息 LOG_FORMAT = "%(asctime)s:%(levelname)s:%(pathname)s:%(module)s:%(lineno)d:%(funcName)s:%(message)s" 字符串详细信息 格式字符串作用%(name)s日志记录器的名称(记录通道)%(levelno)s日…...
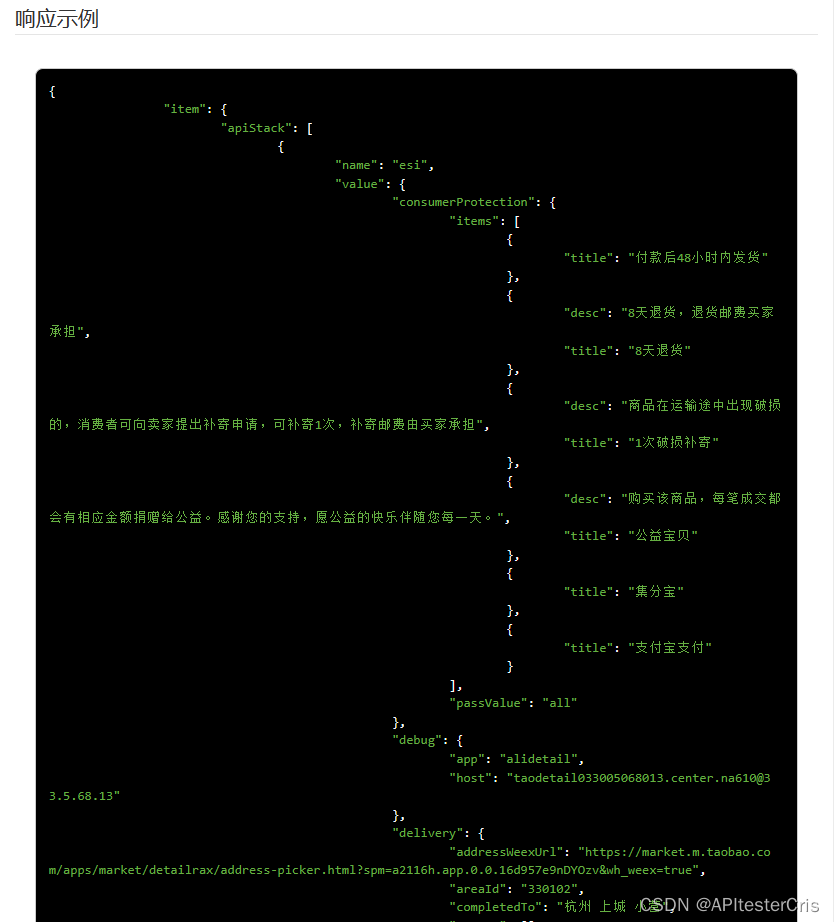
商品详情APP端原数据淘宝数据采集API接口代码接入示例
商品详情APP端原数据API接口(接口接入入口)的作用是提供APP端商品的详细信息,包括价格、描述、图片、折后价、优惠券信息等。通过调用这个API接口,开发者可以获取到APP端商品详情相关的数据,从而进行数据分析ÿ…...

企业官网搭建:打造专业形象的关键步骤
企业官网是企业在数字世界中的门面,搭建一个专业、功能齐全的官网对于企业的形象和业务发展至关重要。以下是一些关键的步骤: 一、确定目标和需求 明确网站的目标、受众和主要功能,为设计和内容提供指导。 二、域名和主机选择 选择易于记忆和…...

Vue2移动端项目使用$router.go(-1)不生效问题记录
目录 1、this.$router.go(-1) 改成 this.$router.back() 2、存储 from.path,使用 this.$router.push 3、hash模式中使用h5新增的onhashchange事件做hack处理 4、this.$router.go(-1) 之前添加一个 replace 方法 问题背景 : 在 Vue2 的一个移动端开发…...
ChatGPT与文心一言:AI助手之巅的对决
随着科技的飞速发展,人工智能助手已经渗透到我们的日常生活和工作中。 而在这个充满竞争的领域里,ChatGPT和文心一言无疑是最引人注目的两款产品。它们各自拥有独特的优势,但在智能回复、语言准确性、知识库丰富度等方面却存在差异。那么&am…...

前端实现贪吃蛇功能
大家都玩过贪吃蛇小游戏,控制一条蛇去吃食物,然后蛇在吃到食物后会变大。本篇博客将会实现贪吃蛇小游戏的功能。 1.实现效果 2.整体布局 /*** 游戏区域样式*/ const gameBoardStyle {gridTemplateColumns: repeat(${width}, 1fr),gridTemplateRows: re…...

文件操作(上)
目录 文件的必要性: 文件分类: 程序文件: 数据文件: 文件的打开与关闭: fopen函数分析: 编辑 FILE*: char*filename: char*mode: fclose函数: 应用: 文件编译 Fgetc Fputc 应用…...

用CHAT写年终总结
问CHAT:写一份政企经理年度总结 CHAT回复:尊敬的同事和领导: 大家好,我是负责政企业务的经理,全年一直坚守在销售一线,为公司带来更多的企业客户并拓展业务领域。感谢领导和同事在工作中的大力支持与热情协…...
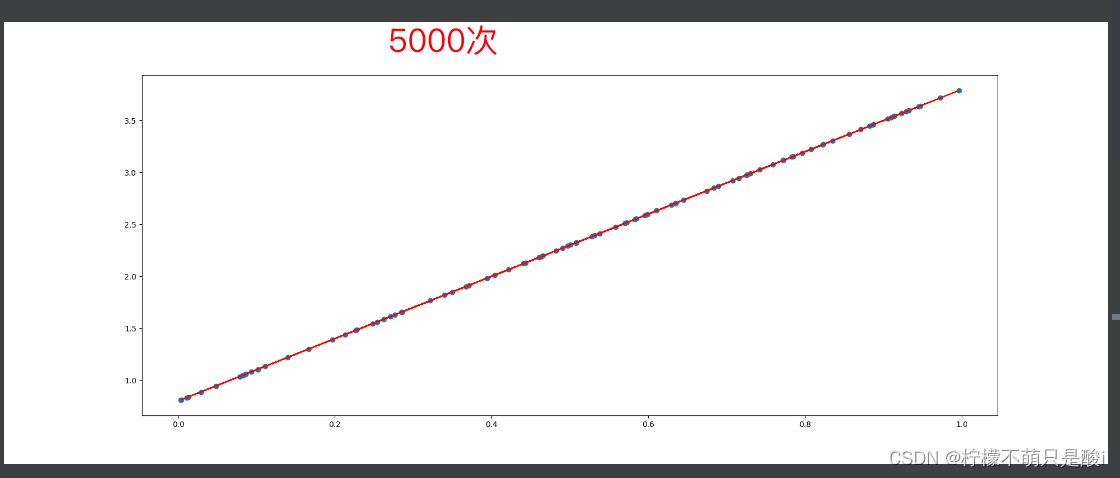
day01 深度学习介绍
目录 1.1深度学习介绍 1.2神经网络NN 1、概念: 2、神经元 3、(单层)神经网络 4、感知机(两层) 5、多层神经网络 6、激活函数 (1)饱和与非饱和激活函数 (2)饱和激活…...
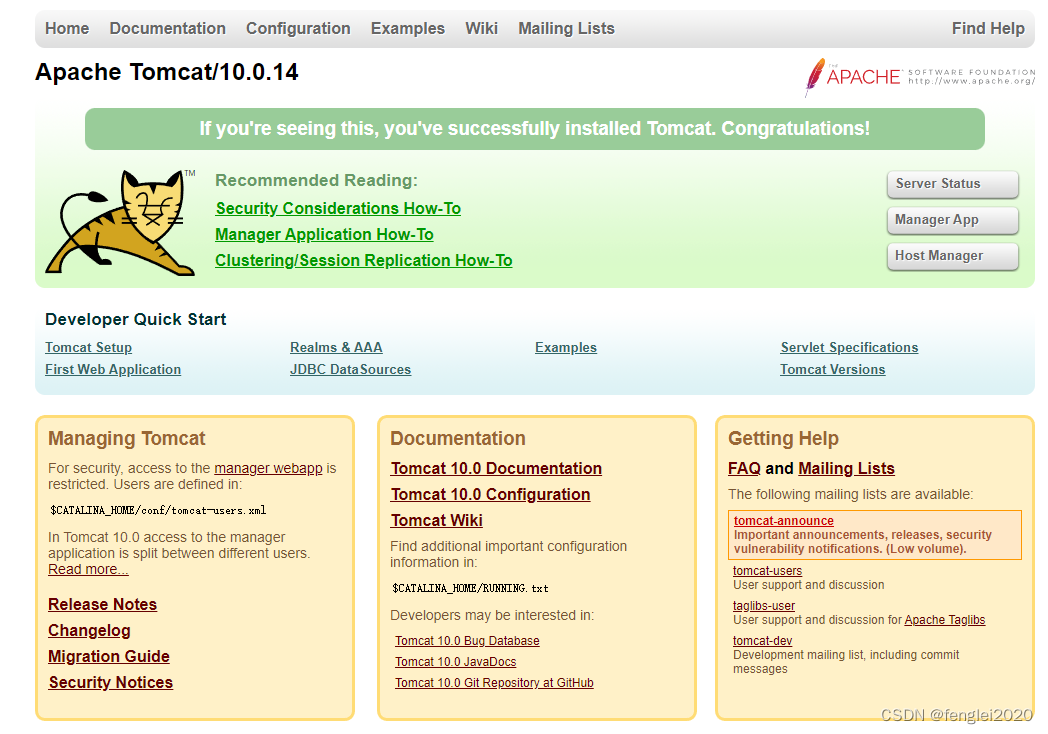
k8s 部署 Nginx 并代理到tomcat
一、已有信息 [rootmaster nginx]# kubectl get nodes -o wide [rootmaster nginx]# kubectl get svc NAME TYPE CLUSTER-IP EXTERNAL-IP PORT(S) AGE kubernetes ClusterIP 10.96.0.1 <none> 443/TCP 2…...

医学图像的数据增强技术 --- 切割-拼接数据增强(CS-DA)
医学图像的新型数据增强技术 CS-DA 核心思想自然图像和医学图像之间的关键差异CS-DA 步骤确定增强后的数据数量 代码复现 CS-DA 核心思想 论文链接:https://arxiv.org/ftp/arxiv/papers/2210/2210.09099.pdf 大多数用于医学分割的数据增强技术最初是在自然图像上开…...
)
2026年唯一通过广电AIGC内容安全认证的3款视频生成工具(附检测报告编号+审核链路图解)
更多请点击: https://kaifayun.com 第一章:2026年AI视频生成工具排行榜 2026年,AI视频生成技术已迈入“语义帧精控”与“跨模态时序对齐”新阶段。主流工具普遍支持 毫秒级动作锚点标注、 物理引擎协同渲染及 多镜头逻辑自动剪辑,…...

观察使用Token Plan套餐前后月度AI调用成本的变化趋势
🚀 告别海外账号与网络限制!稳定直连全球优质大模型,限时半价接入中。 👉 点击领取海量免费额度 观察使用Token Plan套餐前后月度AI调用成本的变化趋势 对于频繁调用大模型API的开发者或团队而言,成本的可预测性与可控…...
)
Android 14开发避坑:用audit2allow搞定SELinux权限拒绝(Python 2.7环境配置详解)
Android 14开发实战:用audit2allow精准解决SELinux权限问题 在Android系统开发中,SELinux权限问题就像一道无形的墙,经常让开发者陷入"明明代码没问题,为什么功能就是不工作"的困境。特别是升级到Android 14后ÿ…...

嵌入式边缘AI论坛参会全攻略:从技术趋势到实战社交
1. 论坛核心价值与参会目标拆解“6天倒计时!”这个标题,精准地抓住了所有技术从业者在面对一个高价值行业活动时,那种既兴奋又略带紧迫感的共同心理。这不仅仅是一个简单的会议通知,它更像是一份来自同行的“战前简报”。对于嵌入…...
)
Steam账号被盗,手机邮箱都失效?别慌!我用支付宝账单截图成功找回(附详细客服案件创建流程)
Steam账号终极找回指南:当手机邮箱全失效时的支付宝账单申诉法 凌晨三点,盯着屏幕上"未找到关联账户"的红色提示,手指在键盘上悬停了十分钟——这是许多Steam玩家遭遇账号全维度被盗时的真实噩梦。当盗号者不仅修改了密码…...

基于SUMO与PPO的智能换道决策实战:从环境构建到模型部署
1. 环境准备与基础配置 在开始构建智能换道决策系统之前,我们需要先搭建好开发环境。这里我推荐使用Anaconda来管理Python环境,它能很好地解决不同项目之间的依赖冲突问题。我习惯为每个项目创建独立的环境,比如这次我们可以命名为"sumo…...

为什么92.7%的临床研究者用错Perplexity药物检索?——2024年真实审计案例暴露的4个致命盲区
更多请点击: https://intelliparadigm.com 第一章:Perplexity药物信息检索的临床价值与审计背景 在精准医疗快速演进的当下,临床决策对实时、可信、上下文感知的药物信息依赖日益加深。Perplexity作为基于推理增强型大语言模型的信息检索系统…...

告别论文焦虑:百考通AI,让你的本科毕业论文像“闯关升级”一样简单
又到了一年毕业季,对于广大本科生而言,那座名为“毕业论文”的大山,是否又一次压得你喘不过气?面对空白的Word文档,你是否感到无从下手?导师的催促、复杂的格式、浩如烟海的文献、以及令人心慌的查重……这…...

2026亲测10大论文降AI工具,免费好用的都在这了
说实话,咱们26届熬过初稿真的挺不容易,万一终审抽检没过就太冤了,谁都不想在最后关头被卡住。身边有不少同学试图手动去改,结果原格式全乱了,踩过坑才 知道找对工具到底有多重要。 提升内容原创度很关键,终…...

DWT-DCT-SVD水印实战:如何保护你的摄影作品版权?一个摄影师的数字水印方案
摄影师必备:用DWT-DCT-SVD技术为作品穿上隐形防弹衣 清晨的阳光透过窗帘缝隙洒进工作室,摄影师林默正在整理昨晚拍摄的一组城市夜景。这组照片耗费了他整整三周时间——等待完美天气、调试设备、后期修图。当他准备将作品上传到个人作品集网站时&#x…...