快速学习Spring
Spring 简介
Spring 是一个开源的轻量级、非侵入式的 JavaEE 框架,它为企业级 Java 应用提供了全面的基础设施支持。Spring 的设计目标是简化企业应用的开发,并解决 Java 开发中常见的复杂性和低效率问题。

Spring常用依赖
<dependencies><!-- Spring 核心容器,包括 ApplicationContext 等 --><dependency><groupId>org.springframework</groupId><artifactId>spring-context</artifactId><version>5.3.14</version> <!-- 替换为您需要的版本号 --></dependency><!-- Spring AOP 相关依赖 --><dependency><groupId>org.springframework</groupId><artifactId>spring-aop</artifactId><version>5.3.14</version> <!-- 替换为您需要的版本号 --></dependency><!-- Spring 对 JDBC 的支持 --><dependency><groupId>org.springframework</groupId><artifactId>spring-jdbc</artifactId><version>5.3.14</version> <!-- 替换为您需要的版本号 --></dependency><!-- Spring 对事务的支持 --><dependency><groupId>org.springframework</groupId><artifactId>spring-tx</artifactId><version>5.3.14</version> <!-- 替换为您需要的版本号 --></dependency>
</dependencies>
Spring 优点
- IoC 容器:Spring 的核心是一个 IoC(Inversion of Control,控制反转)容器,它负责管理应用中的组件(Bean),并通过依赖注入将它们装配在一起。这种方式降低了类之间的耦合度,使得代码更易于维护和测试。
- AOP 支持:Spring 提供了 AOP(Aspect-Oriented Programming,面向切面编程)的支持,可以方便地实现横切关注点的功能,如事务管理、日志记录等,从而提高代码的模块化和可重用性。
- 事务管理:Spring 提供了强大且灵活的事务管理支持,可以通过声明式事务或编程式事务来管理数据库事务,确保数据操作的一致性和可靠性。
- 数据访问:Spring 提供了对 JDBC、ORM(如 Hibernate、MyBatis)、NoSQL 数据库(如 MongoDB、Redis)等数据访问技术的集成支持,简化了数据访问层的开发。
- MVC 框架:Spring MVC 是一个基于前端控制器模式的 Web MVC 框架,提供了灵活的配置和强大的扩展性,帮助开发者构建响应式和可扩展的 Web 应用程序。
- 集成支持:Spring 提供了对各种第三方框架和技术的集成支持,如 JMS、JMX、Quartz 等,使得整合其他技术变得更加简单。
- 测试支持:Spring 提供了测试类和测试环境的支持,可以轻松编写单元测试、集成测试和端到端测试,帮助开发者保持代码质量和可靠性。
一、第一个Spring项目
1.1 创建项目工程
首先我们使用IDEA开发工具或Eclipse去创建一个名为 “first-spring”的maven项目。
1.2 导入依赖
在pom.xml中导入依赖
<dependencies><dependency><groupId>org.springframework</groupId><artifactId>spring-context</artifactId><version>5.3.14</version></dependency></dependencies>1.3 编写代码
在java包下创建一个名为pojo实体类包中创建一个 User类
public class User {private String name;public String getName() {return name;}public void setName(String name) {this.name = name;}@Overridepublic String toString() {return "User{" +"name='" + name + '\'' +'}';}
}
1.4 创建Spring文件
在resources包下创建spring文件,名为 application-context.xml
<?xml version="1.0" encoding="UTF-8"?>
<beans xmlns="http://www.springframework.org/schema/beans"xmlns:xsi="http://www.w3.org/2001/XMLSchema-instance"xsi:schemaLocation="http://www.springframework.org/schema/beanshttp://www.springframework.org/schema/beans/spring-beans.xsd"></beans>
1.4.1 bean标签
bean 标签就是用来创建 Java对象的。
属性有
id: 就是对象的唯一名字
class: 是对象类具体的位置
<property>: property 标签是bean中的设置属性,可以将特定的值或引用注入到bean的属性中。
<bean id="user" class="com.na.pojo.User"><property name="name" value="香菜的开发日记"/></bean>以上就是通过bean去创建了一个User对象,并且为name 赋特定的值。
1.5 运行测试
创建一个名为 MyTest的类。
public class MyTest {public static void main(String[] args) {// 获取 Spring 的上下文对象ApplicationContext applicationContext = new ClassPathXmlApplicationContext("application-context.xml");// 在Spring当中去寻找对象// getBean("user") user就是我们在xml文件中 bean标签的 id属性值User user = (User) applicationContext.getBean("user");System.out.println(user.toString());}
}
二、依赖注入
在依赖注入中,不必创建对象,但必须描述如何创建它们。
通常依赖主义可以捅咕哦三种方式完成。即:
2.1 构造函数注入
2.1.1 更新User类
在User类代码中添加一个有参构造方法
public class User {private String name;public User(String name) {this.name = name;}public String getName() {return name;}public void setName(String name) {this.name = name;}@Overridepublic String toString() {return "User{" +"name='" + name + '\'' +'}';}
}
2.1.2 更新application-context
编写application-context.xml 文件
2.1.3 根据下标设置
constructor-arg 构造函数标签
参数:
index 下标数值
value 具体内容值
<?xml version="1.0" encoding="UTF-8"?>
<beans xmlns="http://www.springframework.org/schema/beans"xmlns:xsi="http://www.w3.org/2001/XMLSchema-instance"xsi:schemaLocation="http://www.springframework.org/schema/beanshttp://www.springframework.org/schema/beans/spring-beans.xsd"><!-- 根据下标参数设置值 --><bean id="user" class="com.na.pojo.User"><constructor-arg index="0" value="香菜的开发日记"/></bean></beans>
2.1.4 根据参数名设置
constructor-arg 构造函数标签
参数:
name 参数名称
value 具体内容值
<?xml version="1.0" encoding="UTF-8"?>
<beans xmlns="http://www.springframework.org/schema/beans"xmlns:xsi="http://www.w3.org/2001/XMLSchema-instance"xsi:schemaLocation="http://www.springframework.org/schema/beanshttp://www.springframework.org/schema/beans/spring-beans.xsd"><!-- 根据参数名字设置 --><bean id="user" class="com.na.pojo.User"><constructor-arg name="name" value="香菜的开发日记"/></bean></beans>
2.1.5 根据参数类型设置
constructor-arg 构造函数标签
参数:
type 参数类型
value 具体内容值
<?xml version="1.0" encoding="UTF-8"?>
<beans xmlns="http://www.springframework.org/schema/beans"xmlns:xsi="http://www.w3.org/2001/XMLSchema-instance"xsi:schemaLocation="http://www.springframework.org/schema/beanshttp://www.springframework.org/schema/beans/spring-beans.xsd"><!-- 根据参数类型设置 --><bean id="user" class="com.na.pojo.User"><constructor-arg type="java.lang.String" value="香菜的开发日记"/></bean></beans>
2.1.5 运行测试
public class MyTest {public static void main(String[] args) {// 获取 Spring 的上下文对象ApplicationContext applicationContext = new ClassPathXmlApplicationContext("application-context.xml");// 在Spring当中去寻找对象// getBean("user") user就是我们在xml文件中 bean标签的 id属性值User user = (User) applicationContext.getBean("user");System.out.println(user.toString());}
}
2.2 setter注入
setter注入,要求属性要有set方法。
2.2.1 编写实体类
在pojo包中创建Address实体类
public class Address {private String address;private String phone;public String getAddress() {return address;}public void setAddress(String address) {this.address = address;}public String getPhone() {return phone;}public void setPhone(String phone) {this.phone = phone;}@Overridepublic String toString() {return "Address{" +"address='" + address + '\'' +", phone='" + phone + '\'' +'}';}
}
在创建User实体类
public class User {private String name;private Address address;public User(String name) {this.name = name;}public String getName() {return name;}public void setName(String name) {this.name = name;}public Address getAddress() {return address;}public void setAddress(Address address) {this.address = address;}@Overridepublic String toString() {return "User{" +"name='" + name + '\'' +", address=" + address +'}';}
}
2.2.2 为User中的name进行值注入
在application-context.xml 文件进行编写bean
<?xml version="1.0" encoding="UTF-8"?>
<beans xmlns="http://www.springframework.org/schema/beans"xmlns:xsi="http://www.w3.org/2001/XMLSchema-instance"xsi:schemaLocation="http://www.springframework.org/schema/beanshttp://www.springframework.org/schema/beans/spring-beans.xsd"><!-- 为User实体中的name进行注入值 --><bean id="user" class="com.na.pojo.User"><property name="name" value="香菜"/></bean></beans>
2.2.3 为User实体中的address进行注入
因为User实体中的address 是Address类型的,那就是说我们还需要创建一个Address的bean对象。 在与User的bean对象进行一个引用。
property 标签当中有一个 ref属性, ref属性就是去引用其他bean对象。
用法:
<property ref="引用bean的id值"/>
<?xml version="1.0" encoding="UTF-8"?>
<beans xmlns="http://www.springframework.org/schema/beans"xmlns:xsi="http://www.w3.org/2001/XMLSchema-instance"xsi:schemaLocation="http://www.springframework.org/schema/beanshttp://www.springframework.org/schema/beans/spring-beans.xsd"><!-- Address实体对象 --><bean id="address" class="com.na.pojo.Address"><property name="phone" value="123456789"/><property name="address" value="黑龙江"/></bean><!-- User实体对象 --><bean id="user" class="com.na.pojo.User"><property name="name" value="小明"/><!-- 引用Address实体对象--><property name="address" ref="address"/></bean>
</beans>
2.2.4 运行测试
public class MyTest {public static void main(String[] args) {// 获取 Spring 的上下文对象ApplicationContext applicationContext = new ClassPathXmlApplicationContext("application-context.xml");User user = (User) applicationContext.getBean("user");System.out.println(user.toString());}
}
2.2.5 数组注入
创建一个Books实体
public class Books {private String[] books;public String[] getBooks() {return books;}public void setBooks(String[] books) {this.books = books;}@Overridepublic String toString() {return "Books{" +"books=" + Arrays.toString(books) +'}';}
}
在application-context.xml 文件中为Books创建bean对象并且注入值
array 数组注入标签
配合value标签来使用
<?xml version="1.0" encoding="UTF-8"?>
<beans xmlns="http://www.springframework.org/schema/beans"xmlns:xsi="http://www.w3.org/2001/XMLSchema-instance"xsi:schemaLocation="http://www.springframework.org/schema/beanshttp://www.springframework.org/schema/beans/spring-beans.xsd"><bean id="books" class="com.na.pojo.Books"><property name="books"><!-- 为数组注入值 --><array><value>Java编程思想</value><value>数据结构与算法分析</value></array></property></bean>
</beans>
运行测试
public class MyArrayTest {public static void main(String[] args) {ClassPathXmlApplicationContext applicationContext = new ClassPathXmlApplicationContext("application-context.xml");Books books = (Books) applicationContext.getBean("books");System.out.println(books.toString());}
}
2.2.6 List注入
创建一个Musics实体类
public class Musics {private List<String> musics;public List<String> getMusics() {return musics;}public void setMusics(List<String> musics) {this.musics = musics;}@Overridepublic String toString() {return "Musics{" +"musics=" + musics +'}';}
}
在application-context.xml 文件中为Musics创建bean对象。
list 标签
配合value标签使用
<?xml version="1.0" encoding="UTF-8"?>
<beans xmlns="http://www.springframework.org/schema/beans"xmlns:xsi="http://www.w3.org/2001/XMLSchema-instance"xsi:schemaLocation="http://www.springframework.org/schema/beanshttp://www.springframework.org/schema/beans/spring-beans.xsd"><bean id="musics" class="com.na.pojo.Musics"><property name="musics"><list><value>The Hardest Part</value><value>Energy</value></list></property></bean></beans>
运行测试
public class MyArrayTest {public static void main(String[] args) {ApplicationContext applicationContext = new ClassPathXmlApplicationContext("application-context.xml");Books books = (Books) applicationContext.getBean("books");System.out.println(books.toString());}
}
2.3 接口注入
在 service 包中创建一个 UserDao 和 UserService
public class UserDao {public void getUserById() {System.out.println("我是测试用户数据-1");}
}
public class UserService{private UserDao userDao;public UserService(UserDao userDao) {this.userDao = userDao;}public void setUserDao(UserDao userDao) {this.userDao = userDao;}public void getUserById(){userDao.getUserById();}
}
在application-context.xml文件中编写bean
<?xml version="1.0" encoding="UTF-8"?>
<beans xmlns="http://www.springframework.org/schema/beans"xmlns:xsi="http://www.w3.org/2001/XMLSchema-instance"xsi:schemaLocation="http://www.springframework.org/schema/beanshttp://www.springframework.org/schema/beans/spring-beans.xsd"><bean id="userDao" class="com.na.service.UserDao"/><bean id="userService" class="com.na.service.UserService"><property name="userDao" ref="userDao"/></bean></beans>
运行测试
public class MyUserTest {public static void main(String[] args) {UserDao userDao = new UserDao();UserService userService = new UserService();userService.setUserDao(userDao);userService.getUserById();}
}
如何区分构造函数注入和setter注入
| 构造函数注入 | setter注入 |
| 没有部分注入 | 有部分注入 |
| 不会覆盖setter 属性 | 会覆盖setter 属性 |
| 任意修改都会创建一个新实例 | 任意修改不会创建一个新实例 |
| 使用与设置很多属性 | 使用与设置少量属性 |
三、c命名空间和p命名空间
这个例子还是使用上面service中的代码
3.1 c命名空间
使用构造函数注入的方式,通过在 XML 配置文件中直接指定构造函数参数的值或引用。下面是一个示例:
<?xml version="1.0" encoding="UTF-8"?>
<beans xmlns="http://www.springframework.org/schema/beans"xmlns:c="http://www.springframework.org/schema/c"xmlns:xsi="http://www.w3.org/2001/XMLSchema-instance"xsi:schemaLocation="http://www.springframework.org/schema/beanshttp://www.springframework.org/schema/beans/spring-beans.xsd"><bean id="userDao" class="com.na.service.UserDao"/><bean id="userService" class="com.na.service.UserService" c:userDao-ref="userDao"/></beans>
3.2 p命名空间
使用属性注入的方式,通过在 XML 配置文件中指定属性的值或引用。下面是一个示例:
<?xml version="1.0" encoding="UTF-8"?>
<beans xmlns="http://www.springframework.org/schema/beans"xmlns:c="http://www.springframework.org/schema/c"xmlns:p="http://www.springframework.org/schema/p"xmlns:xsi="http://www.w3.org/2001/XMLSchema-instance"xsi:schemaLocation="http://www.springframework.org/schema/beanshttp://www.springframework.org/schema/beans/spring-beans.xsd"><bean id="userDao" class="com.na.service.UserDao"/><bean id="userService" class="com.na.service.UserService" p:userDao-ref="userDao"/></beans>
四、Bean自动装配
4.1 在xml中进行配置
在 XML 配置文件中,可以使用
<bean>标签来配置 Bean 的自动装配方式。
4.1.1 默认的自动装配方式(no):通过 autowire 属性将自动装配设置为 no,即不进行自动装配。
<bean id="userService" class="com.na.service.UserService" autowire="no"><!-- 手动配置依赖注入 -->
</bean>
4.1.2 按名称自动装配(byName)
通过
autowire属性将自动装配设置为byName,Spring 会根据 Bean 的名称自动匹配并进行装配。
<bean id="userDao" class="com.na.service.UserDao"/><bean id="userService" class="com.na.service.UserService" autowire="byName"><!-- userDao 将会自动注入 -->
</bean>
4.1.3 按类型自动装配(byType)
通过 autowire 属性将自动装配设置为 byName,Spring 会根据 Bean 的名称自动匹配并进行装配。
<bean id="userService" class="com.na.service.UserService" autowire="byType"><!-- userDao 将会自动注入 -->
</bean><bean id="userDaO" class="com.na.service.UserDao" />
4.1.4 构造函数自动装配(constructor):通过 autowire 属性将自动装配设置为 constructor,Spring 会根据构造函数的参数类型自动查找并进行装配。
<bean id="userService" class="com.na.service.UserService" autowire="constructor"><!-- 构造函数参数将会自动注入 -->
</bean><bean id="userDaO" class="com.na.service.UserDao" />
4.2 在java中进行配置
4.3 隐示进行bean配置
未完待续
相关文章:
快速学习Spring
Spring 简介 Spring 是一个开源的轻量级、非侵入式的 JavaEE 框架,它为企业级 Java 应用提供了全面的基础设施支持。Spring 的设计目标是简化企业应用的开发,并解决 Java 开发中常见的复杂性和低效率问题。 Spring常用依赖 <dependencies><!-…...
c语言操作符(上)
目录 编辑 原码、反码、补码 1、正数 2、负数 3、二进制计算1-1 移位操作符 1、<<左移操作符 2、>>右移操作符 位操作符&、|、^、~ 1、&按位与 2、|按位或 3、^按位异或 特点 4、~按位取反 原码、反码、补码 1、正数 原码 反码 补码相同…...

vue3 可视化大屏自适应屏幕组件
首先定义了一个名叫ScreenContainerOptions的组件,需要传的参数如下 export type ScreenContainerOptions {width?: string | numberheight?: string | numberscreenFit?: boolean // 是否开启屏幕自适应,不然会按比例显示 } 组件的主要代码如下 …...

SpringCloud入门概述
1. 介绍 Spring Cloud 1.1 什么是 Spring Cloud Spring Cloud 是一个基于 Spring Boot 的微服务架构开发工具集,它为开发者提供了一系列开箱即用的工具和库,用于构建分布式系统中的微服务架构。Spring Cloud 提供了诸如服务发现、配置中心、负载均衡、…...

刷题计划_冲绿名
现在 rating 是 1104 准备刷 100道 1200的题,把实力提升到 1200 ,上一个绿名 每一个分数段的题都写一百道,争取早日上蓝 现在 虽然 cf 里面显示写了一些这个分数段的题,但是自己训练的时候,其实是没有训练一道这个分…...

【微信小程序开发】小程序版的防抖节流应该怎么写
由于微信小程序与普通网页的开发、编译、运行机制都有所不同,在防抖节流的方法使用上也就需要我们做一些比较棘手的适配操作。常见的H5开发的防抖节流此处就不再分享了,网上有太多的教程,或者直接问那群AI即可。 OK,言归正传&…...
单片机学习笔记---蜂鸣器播放提示音音乐(天空之城)
目录 蜂鸣器播放提示音 蜂鸣器播放音乐(天空之城) 准备工作 主程序 中断函数 上一节讲了蜂鸣器驱动原理和乐理基础知识,这一节开始代码演示! 蜂鸣器播放提示音 先创建工程:蜂鸣器播放提示音 把我们之前模块化的…...
软件实例分享,茶楼收银软件管理系统,支持计时计费商品销售会员管理定时语音提醒功能
软件实例分享,茶楼收银软件管理系统,支持计时计费商品销售会员管理定时语音提醒功能 一、前言 以下软件教程以 佳易王茶社计时计费管理系统软件V18.0为例说明 软件文件下载可以点击最下方官网卡片——软件下载——试用版软件下载 问:这个软…...
clang前端
Clang可以处理C、C和Objective-C源代码 Clang简介 Clang可能指三种不同的实体: 前端(在Clang库中实现)编译驱动程序(在clang命令和Clang驱动程序库中实现)实际的编译器(在clang-ccl命令中实现࿰…...
ARM:AI 的翅膀,还能飞多久?
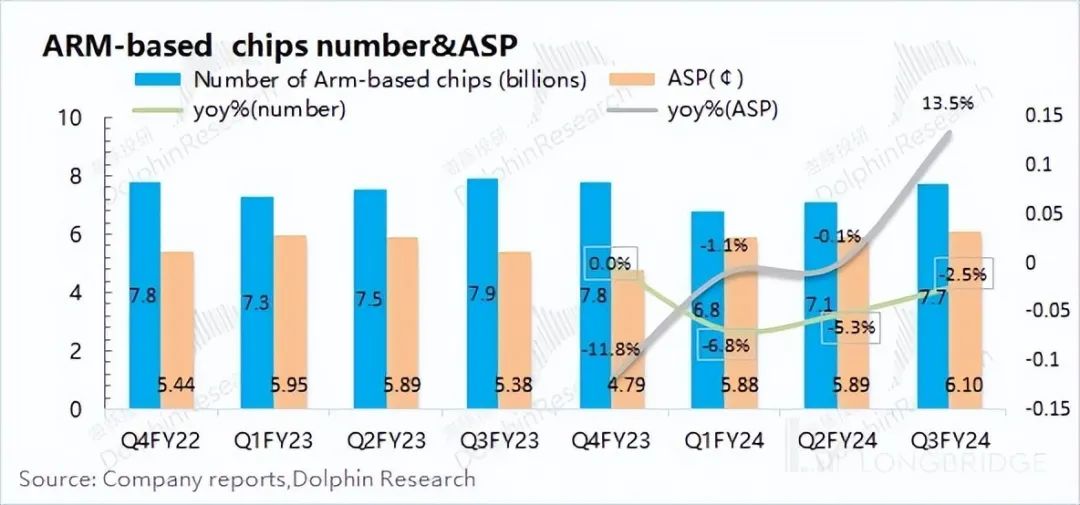
ARM(ARM.O)于北京时间 2024 年 2 月 8 日上午的美股盘后发布了 2024 年第三财年报告(截止 2023 年 12 月),要点如下: 1、整体业绩:收入再创新高。ARM 在 2024 财年第三季度(即 23Q4…...
【C语言】常见字符串函数的功能与模拟实现
目录 1.strlen() 模拟实现strlen() 2.strcpy() 模拟实现strcpy() 3.strcat() 模拟实现strcat() 4.strcmp() 模拟实现strcmp() 5.strncpy() 模拟实现strncpy() 6.strncat() 模拟实现strncat() 7.strncmp() 模拟实现strncmp() 8.strstr() 模拟实现strstr() 9.str…...

pyGMT初步使用
文章目录 安装显示地图保存地图 安装 GMT,即Generic Mapping Tools,通用制图工具,是GIS领域应用最广泛的制图软件之一,用于绘制地图、图形以及进行地球科学数据分析和可视化。而pyGMT即其为python提供的函数接口,故而…...
神经网络 | CNN 与 RNN——深度学习主力军
Hi,大家好,我是半亩花海。本文主要将卷积神经网络(CNN)和循环神经网络(RNN)这两个深度学习主力军进行对比。我们知道,从应用方面上来看,CNN 用于图像识别较多,而 RNN 用于…...
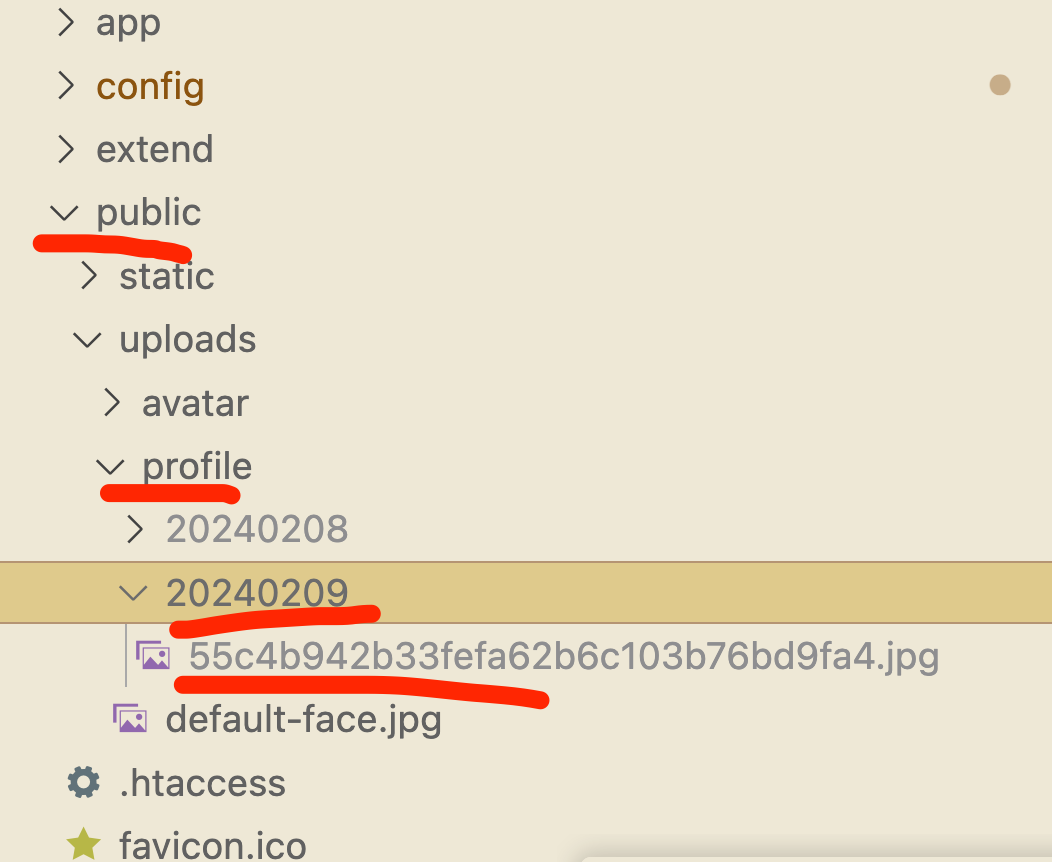
thinkphp6入门(20)-- 如何上传图片、文件
1. 配置文件 设置上传的路径 对应文件夹 2. 前端 <div class"card-body"><h1 class"card-title">用户头像</h1><img src"../../../uploads/{$user.avatar_photo_path}" alt"avatar" height"100"/&g…...
【Linux技术宝典】深入理解Linux基本指令:命令行新手指南
📷 江池俊: 个人主页 🔥个人专栏: ✅数据结构冒险记 ✅Linux技术宝典 🌅 有航道的人,再渺小也不会迷途。 文章目录 一、Linux下基本指令1. ls 指令2. pwd指令3. clear指令4. cd指令什么是家目录…...
C++:Level1阶段测试
总结。 只要你看过我的文章,哪怕只是一半,一定能够过关! 准备好开始测试氻吗? 选择题,每题4分,共40分 1、 DevC的项目创建按钮是_____ A、文件[F]” → “新建[N]” → “项目[P]... B、工具[T]” → …...

autojs自动化刷视频脚本
视频展示 视频 //悬浮窗 // var window floaty.rawWindow( // <frame gravity"center" bg"#ff00ff"> // <button id"action" w"300dp" h"300dp"> // 按钮 // </button> // </fram…...

鲁南制药“健康幸福中国年”主题航班,开启探寻健康与幸福的旅程
“小年,小年,过了今天就是年。”提到过年,北方人的“过年”是从腊月二十三的“小年”开始的,而南方地区是在明天。虽然时间不同,但是浓浓的年味是一样的,红彤彤是主色调,喜洋洋是主乐曲…...

CISA知识点
审计流程21%;运营和业务恢复23%;保护资产27%;IT治理17%;开发12%。 领域1-信息系统审计流程 规划-现场工作-报告 (1)审计规划 了解业务使命、目标、目的和流程 找到相关规定 实施风险分析(…...
C语言求解猴子分桃子
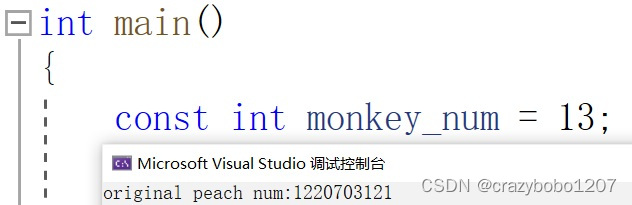
问题:海滩上有一堆桃子,五只猴子来分。第一只猴子把这堆桃子平均分为五份,多了一个,这只 猴子把多的一个扔入海中,拿走了一份。第二只猴子把剩下的桃子又平均分成五份,又多了 一个,它同样把多的…...

Android MediaCodec解码实战:从H.264文件到ImageView,同步与异步模式代码对比与避坑指南
Android MediaCodec解码实战:同步与异步模式深度解析与性能优化 在移动端视频处理领域,Android MediaCodec作为系统级硬件加速接口,一直是开发者实现高效视频解码的首选方案。但面对同步与异步两种工作模式的选择,许多中高级开发者…...

向量:一篇文章带你看清数学中最有“方向感“的概念
一、先讲一个让我"开窍"的故事 高中时第一次接触向量,老师在黑板上画了一个箭头,说:“这就是向量。” 我看着那个箭头,心想:这有什么稀奇的?不就是带方向的线段吗? 然后老师开始讲向量…...

从零到一:vue-print-nb插件在Vue项目中的实战打印方案
1. 为什么选择vue-print-nb插件 在Vue项目中实现打印功能,开发者通常会面临多种选择。传统的window.print()方法虽然简单,但存在明显的局限性:无法精确控制打印区域、难以自定义打印样式、对移动端支持不佳等。这时候,一个专门为V…...

ARMv8.3指针认证技术原理与安全实践
1. AArch64指针认证技术深度解析指针认证(Pointer Authentication)是ARMv8.3-A引入的关键安全特性,通过在指针的高位比特中嵌入加密签名(Pointer Authentication Code, PAC)来验证指针的完整性。这项技术能有效防御ROP…...

别再用理想模型了!用TINA-TI仿真μA741驱动容性负载,实测振铃现象与消除方案
别再用理想模型了!用TINA-TI仿真μA741驱动容性负载,实测振铃现象与消除方案 在模拟电路设计中,运放驱动容性负载时的稳定性问题堪称工程师的"头号公敌"。许多初学者在仿真阶段使用理想模型验证电路功能时一切正常,却在…...

LeetCode 所有路径题解
LeetCode 所有路径题解 题目描述 给定一个有向无环图,找到所有从源节点到目标节点的路径。 示例: 输入:graph [[1,2],[3],[3],[]]输出:[[0,1,3],[0,2,3]] 解题思路 方法:回溯 思路: 使用回溯算法遍历所有可…...

告别折腾:用 apt 和 Qt 官方安装器两种方式在 Debian 上搞定 Qt 5.15.2 开发环境
在 Debian 上搭建 Qt 5.15.2 开发环境的双轨方案 对于需要在 Debian 系统上建立 Qt 开发环境的工程师来说,选择正确的安装方式往往比安装本身更重要。本文将深入探讨两种主流方案:Debian 官方仓库的 apt 安装和 Qt 官方在线安装器,帮助您根据…...

指纹浏览器缓存机制原理与环境数据安全管控策略
引言绝大多数使用者在日常运用指纹浏览器搭建独立虚拟浏览环境时,重点注意力都集中在硬件指纹修改、代理网络绑定、基础参数调试等显性操作之上,往往忽略了软件内部缓存运行机制带来的各类隐性影响。虚拟环境运行过程中自动生成的页面缓存、站点数据、本…...

3步解决B站缓存视频播放难题:m4s-converter使用指南
3步解决B站缓存视频播放难题:m4s-converter使用指南 【免费下载链接】m4s-converter 一个跨平台小工具,将bilibili缓存的m4s格式音视频文件合并成mp4 项目地址: https://gitcode.com/gh_mirrors/m4/m4s-converter 你是否曾为B站缓存视频无法在其他…...

LeetCode 每日一题笔记 日期:2026.05.16 题目:154. 寻找旋转排序数组中的最小值 II
LeetCode 每日一题笔记 0. 前言 日期:2026.05.16题目:154. 寻找旋转排序数组中的最小值 II难度:困难标签:数组、二分查找 1. 题目理解 问题描述: 给定一个可能存在重复元素的升序数组,经过1~n次旋转后&…...