GIS之深度学习10:运行Faster RCNN算法
(未完成,待补充)
获取Faster RCNN源码
(开源的很多,论文里也有,在这里不多赘述)
替换自己的数据集(图片+标签文件)
(需要使用labeling生成标签文件)
打开终端,进入gpupytorch环境
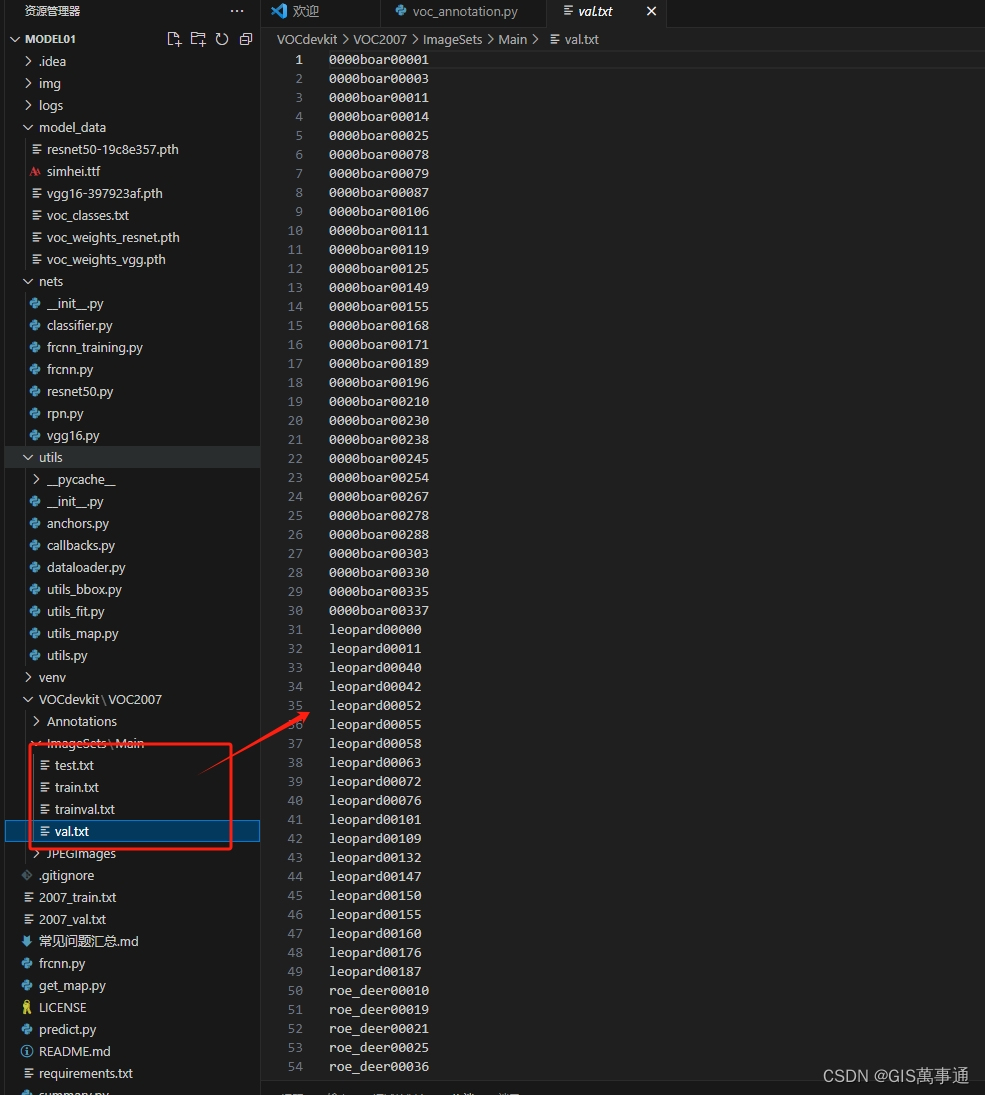
运行voc_annotation.py文件生成与训练文件
E:\DeepLearningModel\Model01>activate gpupytorch(gpupytorch) E:\DeepLearningModel\Model01>python voc_annotation.py
D:\Anaconda\envs\gpupytorch\lib\site-packages\numpy\_distributor_init.py:30: UserWarning: loaded more than 1 DLL from .libs:
D:\Anaconda\envs\gpupytorch\lib\site-packages\numpy\.libs\libopenblas.PYQHXLVVQ7VESDPUVUADXEVJOBGHJPAY.gfortran-win_amd64.dll
D:\Anaconda\envs\gpupytorch\lib\site-packages\numpy\.libs\libopenblas64__v0.3.21-gcc_10_3_0.dllwarnings.warn("loaded more than 1 DLL from .libs:\n%s" %
Generate txt in ImageSets.
train and val size 777
train size 699
Generate txt in ImageSets done.
Generate 2007_train.txt and 2007_val.txt for train.
结果所示:
(gpupytorch) E:\DeepLearningModel\Model01>python voc_annotation.py
D:\Anaconda\envs\gpupytorch\lib\site-packages\numpy\_distributor_init.py:30: UserWarning: loaded more than 1 DLL from .libs:
D:\Anaconda\envs\gpupytorch\lib\site-packages\numpy\.libs\libopenblas.PYQHXLVVQ7VESDPUVUADXEVJOBGHJPAY.gfortran-win_amd64.dll
D:\Anaconda\envs\gpupytorch\lib\site-packages\numpy\.libs\libopenblas64__v0.3.21-gcc_10_3_0.dllwarnings.warn("loaded more than 1 DLL from .libs:\n%s" %
Generate txt in ImageSets.
train and val size 777
train size 699
Generate txt in ImageSets done.
Generate 2007_train.txt and 2007_val.txt for train.
Generate 2007_train.txt and 2007_val.txt for train done.
|  leopard | 174 |
|     boar | 491 |
| roe_deer | 352 |(gpupytorch) E:\DeepLearningModel\Model01>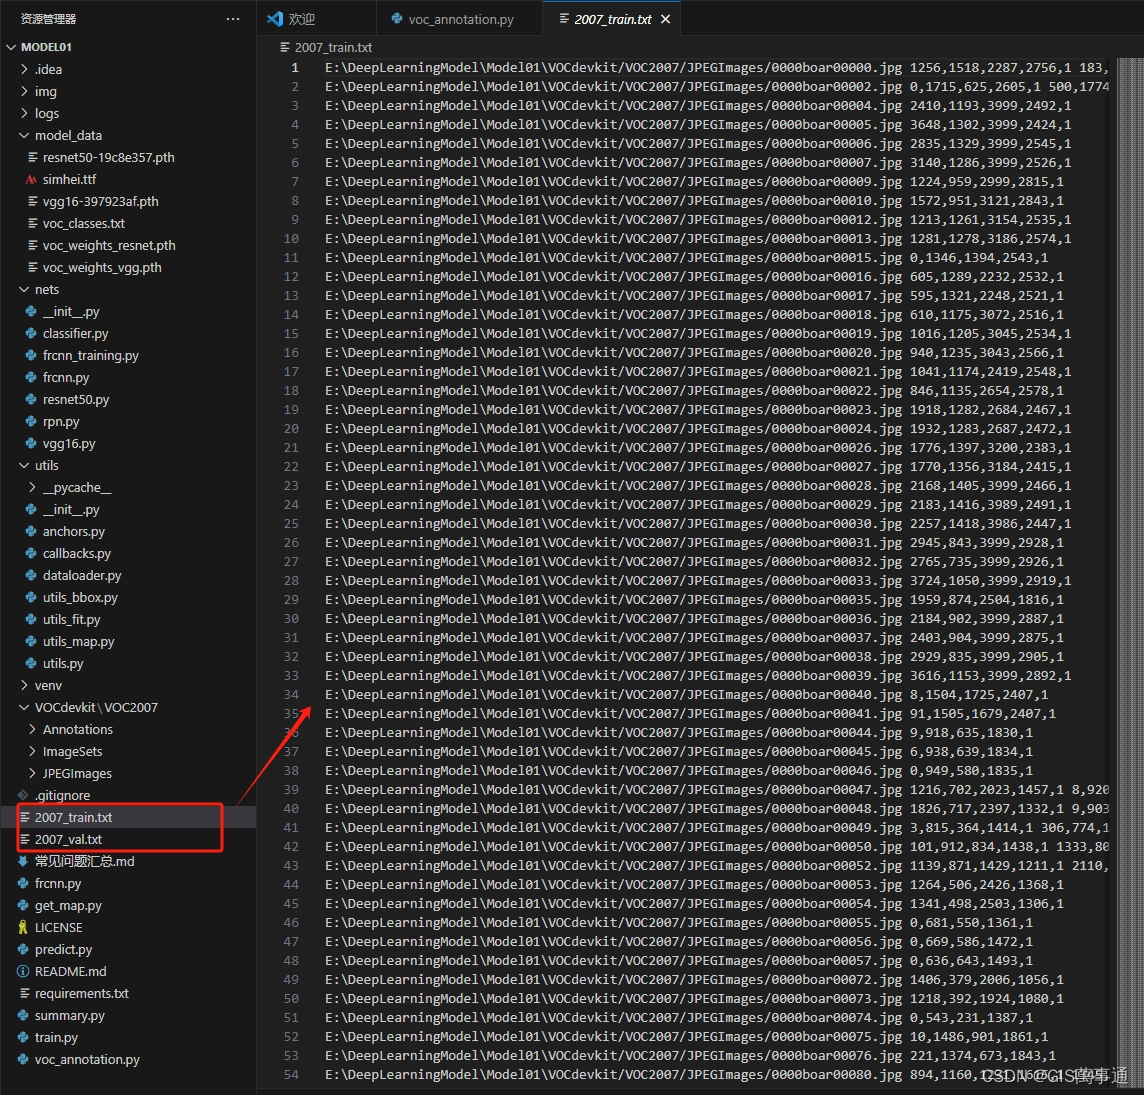
运行:train.py文件
import colorsys
import os
import timeimport numpy as np
import torch
import torch.nn as nn
from PIL import Image, ImageDraw, ImageFontfrom nets.frcnn import FasterRCNN
from utils.utils import (cvtColor, get_classes, get_new_img_size, resize_image,preprocess_input, show_config)
from utils.utils_bbox import DecodeBoxclass FRCNN(object):_defaults = {"model_path"    : 'logs/loss_2024_03_05_22_26_24.pth',"classes_path"  : 'model_data/voc_classes.txt',"backbone"      : "resnet50","confidence"    : 0.5,"nms_iou"       : 0.3,'anchors_size'  : [8, 16, 32],"cuda"          : True,}@classmethoddef get_defaults(cls, n):if n in cls._defaults:return cls._defaults[n]else:return "Unrecognized attribute name '" + n + "'"def __init__(self, **kwargs):self.__dict__.update(self._defaults)for name, value in kwargs.items():setattr(self, name, value)self._defaults[name] = value self.class_names, self.num_classes  = get_classes(self.classes_path)self.std    = torch.Tensor([0.1, 0.1, 0.2, 0.2]).repeat(self.num_classes + 1)[None]if self.cuda:self.std    = self.std.cuda()self.bbox_util  = DecodeBox(self.std, self.num_classes)#---------------------------------------------------#hsv_tuples = [(x / self.num_classes, 1., 1.) for x in range(self.num_classes)]self.colors = list(map(lambda x: colorsys.hsv_to_rgb(*x), hsv_tuples))self.colors = list(map(lambda x: (int(x[0] * 255), int(x[1] * 255), int(x[2] * 255)), self.colors))self.generate()show_config(**self._defaults)#---------------------------------------------------##   载入模型#---------------------------------------------------#def generate(self):self.net    = FasterRCNN(self.num_classes, "predict", anchor_scales = self.anchors_size, backbone = self.backbone)device      = torch.device('cuda' if torch.cuda.is_available() else 'cpu')self.net.load_state_dict(torch.load(self.model_path, map_location=device))self.net    = self.net.eval()print('{} model, anchors, and classes loaded.'.format(self.model_path))if self.cuda:self.net = nn.DataParallel(self.net)self.net = self.net.cuda()#---------------------------------------------------##   检测图片#---------------------------------------------------#def detect_image(self, image, crop = False, count = False):#---------------------------------------------------##   计算输入图片的高和宽#---------------------------------------------------#image_shape = np.array(np.shape(image)[0:2])#---------------------------------------------------##   计算resize后的图片的大小,resize后的图片短边为600#---------------------------------------------------#input_shape = get_new_img_size(image_shape[0], image_shape[1])#---------------------------------------------------------##   在这里将图像转换成RGB图像,防止灰度图在预测时报错。#   代码仅仅支持RGB图像的预测,所有其它类型的图像都会转化成RGB#---------------------------------------------------------#image       = cvtColor(image)#---------------------------------------------------------##   给原图像进行resize,resize到短边为600的大小上#---------------------------------------------------------#image_data  = resize_image(image, [input_shape[1], input_shape[0]])#---------------------------------------------------------##   添加上batch_size维度#---------------------------------------------------------#image_data  = np.expand_dims(np.transpose(preprocess_input(np.array(image_data, dtype='float32')), (2, 0, 1)), 0)with torch.no_grad():images = torch.from_numpy(image_data)if self.cuda:images = images.cuda()#-------------------------------------------------------------##   roi_cls_locs  建议框的调整参数#   roi_scores    建议框的种类得分#   rois          建议框的坐标#-------------------------------------------------------------#roi_cls_locs, roi_scores, rois, _ = self.net(images)#-------------------------------------------------------------##   利用classifier的预测结果对建议框进行解码,获得预测框#-------------------------------------------------------------#results = self.bbox_util.forward(roi_cls_locs, roi_scores, rois, image_shape, input_shape, nms_iou = self.nms_iou, confidence = self.confidence)#---------------------------------------------------------##   如果没有检测出物体,返回原图#---------------------------------------------------------#           if len(results[0]) <= 0:return imagetop_label   = np.array(results[0][:, 5], dtype = 'int32')top_conf    = results[0][:, 4]top_boxes   = results[0][:, :4]#---------------------------------------------------------##   设置字体与边框厚度#---------------------------------------------------------#font        = ImageFont.truetype(font='model_data/simhei.ttf', size=np.floor(3e-2 * image.size[1] + 0.5).astype('int32'))thickness   = int(max((image.size[0] + image.size[1]) // np.mean(input_shape), 1))#---------------------------------------------------------##   计数#---------------------------------------------------------#if count:print("top_label:", top_label)classes_nums    = np.zeros([self.num_classes])for i in range(self.num_classes):num = np.sum(top_label == i)if num > 0:print(self.class_names[i], " : ", num)classes_nums[i] = numprint("classes_nums:", classes_nums)#---------------------------------------------------------##   是否进行目标的裁剪#---------------------------------------------------------#if crop:for i, c in list(enumerate(top_label)):top, left, bottom, right = top_boxes[i]top     = max(0, np.floor(top).astype('int32'))left    = max(0, np.floor(left).astype('int32'))bottom  = min(image.size[1], np.floor(bottom).astype('int32'))right   = min(image.size[0], np.floor(right).astype('int32'))dir_save_path = "img_crop"if not os.path.exists(dir_save_path):os.makedirs(dir_save_path)crop_image = image.crop([left, top, right, bottom])crop_image.save(os.path.join(dir_save_path, "crop_" + str(i) + ".png"), quality=95, subsampling=0)print("save crop_" + str(i) + ".png to " + dir_save_path)#---------------------------------------------------------##   图像绘制#---------------------------------------------------------#for i, c in list(enumerate(top_label)):predicted_class = self.class_names[int(c)]box             = top_boxes[i]score           = top_conf[i]top, left, bottom, right = boxtop     = max(0, np.floor(top).astype('int32'))left    = max(0, np.floor(left).astype('int32'))bottom  = min(image.size[1], np.floor(bottom).astype('int32'))right   = min(image.size[0], np.floor(right).astype('int32'))label = '{} {:.2f}'.format(predicted_class, score)draw = ImageDraw.Draw(image)label_size = draw.textsize(label, font)label = label.encode('utf-8')# print(label, top, left, bottom, right)if top - label_size[1] >= 0:text_origin = np.array([left, top - label_size[1]])else:text_origin = np.array([left, top + 1])for i in range(thickness):draw.rectangle([left + i, top + i, right - i, bottom - i], outline=self.colors[c])draw.rectangle([tuple(text_origin), tuple(text_origin + label_size)], fill=self.colors[c])draw.text(text_origin, str(label,'UTF-8'), fill=(0, 0, 0), font=font)del drawreturn imagedef get_FPS(self, image, test_interval):#---------------------------------------------------##   计算输入图片的高和宽#---------------------------------------------------#image_shape = np.array(np.shape(image)[0:2])input_shape = get_new_img_size(image_shape[0], image_shape[1])#---------------------------------------------------------##   在这里将图像转换成RGB图像,防止灰度图在预测时报错。#   代码仅仅支持RGB图像的预测,所有其它类型的图像都会转化成RGB#---------------------------------------------------------#image       = cvtColor(image)#---------------------------------------------------------##   给原图像进行resize,resize到短边为600的大小上#---------------------------------------------------------#image_data  = resize_image(image, [input_shape[1], input_shape[0]])#---------------------------------------------------------##   添加上batch_size维度#---------------------------------------------------------#image_data  = np.expand_dims(np.transpose(preprocess_input(np.array(image_data, dtype='float32')), (2, 0, 1)), 0)with torch.no_grad():images = torch.from_numpy(image_data)if self.cuda:images = images.cuda()roi_cls_locs, roi_scores, rois, _ = self.net(images)#-------------------------------------------------------------##   利用classifier的预测结果对建议框进行解码,获得预测框#-------------------------------------------------------------#results = self.bbox_util.forward(roi_cls_locs, roi_scores, rois, image_shape, input_shape, nms_iou = self.nms_iou, confidence = self.confidence)t1 = time.time()for _ in range(test_interval):with torch.no_grad():roi_cls_locs, roi_scores, rois, _ = self.net(images)#-------------------------------------------------------------##   利用classifier的预测结果对建议框进行解码,获得预测框#-------------------------------------------------------------#results = self.bbox_util.forward(roi_cls_locs, roi_scores, rois, image_shape, input_shape, nms_iou = self.nms_iou, confidence = self.confidence)t2 = time.time()tact_time = (t2 - t1) / test_intervalreturn tact_time#---------------------------------------------------##   检测图片#---------------------------------------------------#def get_map_txt(self, image_id, image, class_names, map_out_path):f = open(os.path.join(map_out_path, "detection-results/"+image_id+".txt"),"w")#---------------------------------------------------##   计算输入图片的高和宽#---------------------------------------------------#image_shape = np.array(np.shape(image)[0:2])input_shape = get_new_img_size(image_shape[0], image_shape[1])#---------------------------------------------------------##   在这里将图像转换成RGB图像,防止灰度图在预测时报错。#   代码仅仅支持RGB图像的预测,所有其它类型的图像都会转化成RGB#---------------------------------------------------------#image       = cvtColor(image)#---------------------------------------------------------##   给原图像进行resize,resize到短边为600的大小上#---------------------------------------------------------#image_data  = resize_image(image, [input_shape[1], input_shape[0]])#---------------------------------------------------------##   添加上batch_size维度#---------------------------------------------------------#image_data  = np.expand_dims(np.transpose(preprocess_input(np.array(image_data, dtype='float32')), (2, 0, 1)), 0)with torch.no_grad():images = torch.from_numpy(image_data)if self.cuda:images = images.cuda()roi_cls_locs, roi_scores, rois, _ = self.net(images)#-------------------------------------------------------------##   利用classifier的预测结果对建议框进行解码,获得预测框#-------------------------------------------------------------#results = self.bbox_util.forward(roi_cls_locs, roi_scores, rois, image_shape, input_shape, nms_iou = self.nms_iou, confidence = self.confidence)#--------------------------------------##   如果没有检测到物体,则返回原图#--------------------------------------#if len(results[0]) <= 0:return top_label   = np.array(results[0][:, 5], dtype = 'int32')top_conf    = results[0][:, 4]top_boxes   = results[0][:, :4]for i, c in list(enumerate(top_label)):predicted_class = self.class_names[int(c)]box             = top_boxes[i]score           = str(top_conf[i])top, left, bottom, right = boxif predicted_class not in class_names:continuef.write("%s %s %s %s %s %s\n" % (predicted_class, score[:6], str(int(left)), str(int(top)), str(int(right)),str(int(bottom))))f.close()return
终端/编码器运行:
E:\DeepLearningModel\Model01>activate gpupytorch(gpupytorch) E:\DeepLearningModel\Model01>python train.py
D:\Anaconda\envs\gpupytorch\lib\site-packages\numpy\_distributor_init.py:30: UserWarning: loaded more than 1 DLL from .libs:
D:\Anaconda\envs\gpupytorch\lib\site-packages\numpy\.libs\libopenblas.PYQHXLVVQ7VESDPUVUADXEVJOBGHJPAY.gfortran-win_amd64.dll
D:\Anaconda\envs\gpupytorch\lib\site-packages\numpy\.libs\libopenblas64__v0.3.21-gcc_10_3_0.dllwarnings.warn("loaded more than 1 DLL from .libs:\n%s" %
Number of devices: 1
initialize network with normal type
Load weights model_data/voc_weights_resnet.pth.Successful Load Key: ['extractor.0.weight', 'extractor.1.weight', 'extractor.1.bias', 'extractor.1.running_mean', 'extractor.1.running_var', 'extractor.1.num_batches_tracked', 'extractor.4.0.conv1.weight', 'extractor.4.0.bn1.weight', 'extractor.4.0.bn1.bias', 'extractor.4.0.bn1.running_mean', 'extractor.4.0.bn1.running_var', 'extractor.4.0.bn1.num_batches_tracked', 'extractor.4.0.conv2.weight', 'extractor.4.0.bn2.weight', 'extractor.4.0.bn2.bias', 'extractor.4.0.bn2.running_mean', 'extractor.4.0.bn2.running_var', 'e ……
Successful Load Key Num: 324Fail To Load Key: ['head.cls_loc.weight', 'head.cls_loc.bias', 'head.score.weight', 'head.score.bias'] ……
Fail To Load Key num: 4温馨提示,head部分没有载入是正常现象,Backbone部分没有载入是错误的。
Configurations:
----------------------------------------------------------------------
|                     keys |                                   values|
----------------------------------------------------------------------
|             classes_path |               model_data/voc_classes.txt|
|               model_path |        model_data/voc_weights_resnet.pth|
|              input_shape |                               [600, 600]|
|               Init_Epoch |                                        0|
|             Freeze_Epoch |                                       50|
|           UnFreeze_Epoch |                                      100|
|        Freeze_batch_size |                                        4|
|      Unfreeze_batch_size |                                        2|
|             Freeze_Train |                                     True|
|                  Init_lr |                                   0.0001|
|                   Min_lr |                   1.0000000000000002e-06|
|           optimizer_type |                                     adam|
|                 momentum |                                      0.9|
|            lr_decay_type |                                      cos|
|              save_period |                                        5|
|                 save_dir |                                     logs|
|              num_workers |                                        4|
|                num_train |                                      699|
|                  num_val |                                       78|
----------------------------------------------------------------------
Start Train
Epoch 1/100:   0%|                                                               | 0/174 [00:00<?, ?it/s<class 'dict'>]D:\Anaconda\envs\gpupytorch\lib\site-packages\numpy\_distributor_init.py:30: UserWarning: loaded more than 1 DLL from .libs:
D:\Anaconda\envs\gpupytorch\lib\site-packages\numpy\.libs\libopenblas.PYQHXLVVQ7VESDPUVUADXEVJOBGHJPAY.gfortran-win_amd64.dll
查看结果:
Calculate Map.
96.35% = boar AP        ||      score_threhold=0.5 : F1=0.81 ; Recall=97.92% ; Precision=69.12%
94.74% = leopard AP     ||      score_threhold=0.5 : F1=0.90 ; Recall=94.74% ; Precision=85.71%
94.97% = roe_deer AP    ||      score_threhold=0.5 : F1=0.86 ; Recall=96.88% ; Precision=77.50%
mAP = 95.35%
Get map done.
Epoch:100/100
Total Loss: 0.505 || Val Loss: 0.621
Save best model to best_epoch_weights.pth
相关文章:
GIS之深度学习10:运行Faster RCNN算法
(未完成,待补充) 获取Faster RCNN源码 (开源的很多,论文里也有,在这里不多赘述) 替换自己的数据集(图片标签文件) (需要使用labeling生成标签文件…...

appium2的一些配置
appium-desktop不再维护之后,需要使用appium2。 1、安装appium2 命令行输入npm i -g appium。安装之后输入appium或者appium-server即可启动appium 2、安装安卓/ios的驱动 安卓:appium driver install uiautomator2 iOS:appium driver i…...
基于springboot+vue实现高校学生党员发展管理系统项目【项目源码+论文说明】
基于springboot实现高校学生党员发展管理系统演示 摘要 随着高校学生规模的不断扩大,高校内的党员统计及发展管理工作面临较大的压力,高校信息化建设的不断优化发展也进一步促进了系统平台的应用,借助系统平台可以实现更加高效便捷的党员信息…...
Java代码审计安全篇-常见Java SQL注入
前言: 堕落了三个月,现在因为被找实习而困扰,着实自己能力不足,从今天开始 每天沉淀一点点 ,准备秋招 加油 注意: 本文章参考qax的网络安全java代码审计,记录自己的学习过程,还希望…...

C#实现快速排序算法
C#实现快速排序算法 以下是C#中的快速排序算法实现示例: using System;class QuickSort {// 快速排序入口函数public static void Sort(int[] array){QuickSortRecursive(array, 0, array.Length - 1);}// 递归函数实现快速排序private static void QuickSortRecu…...
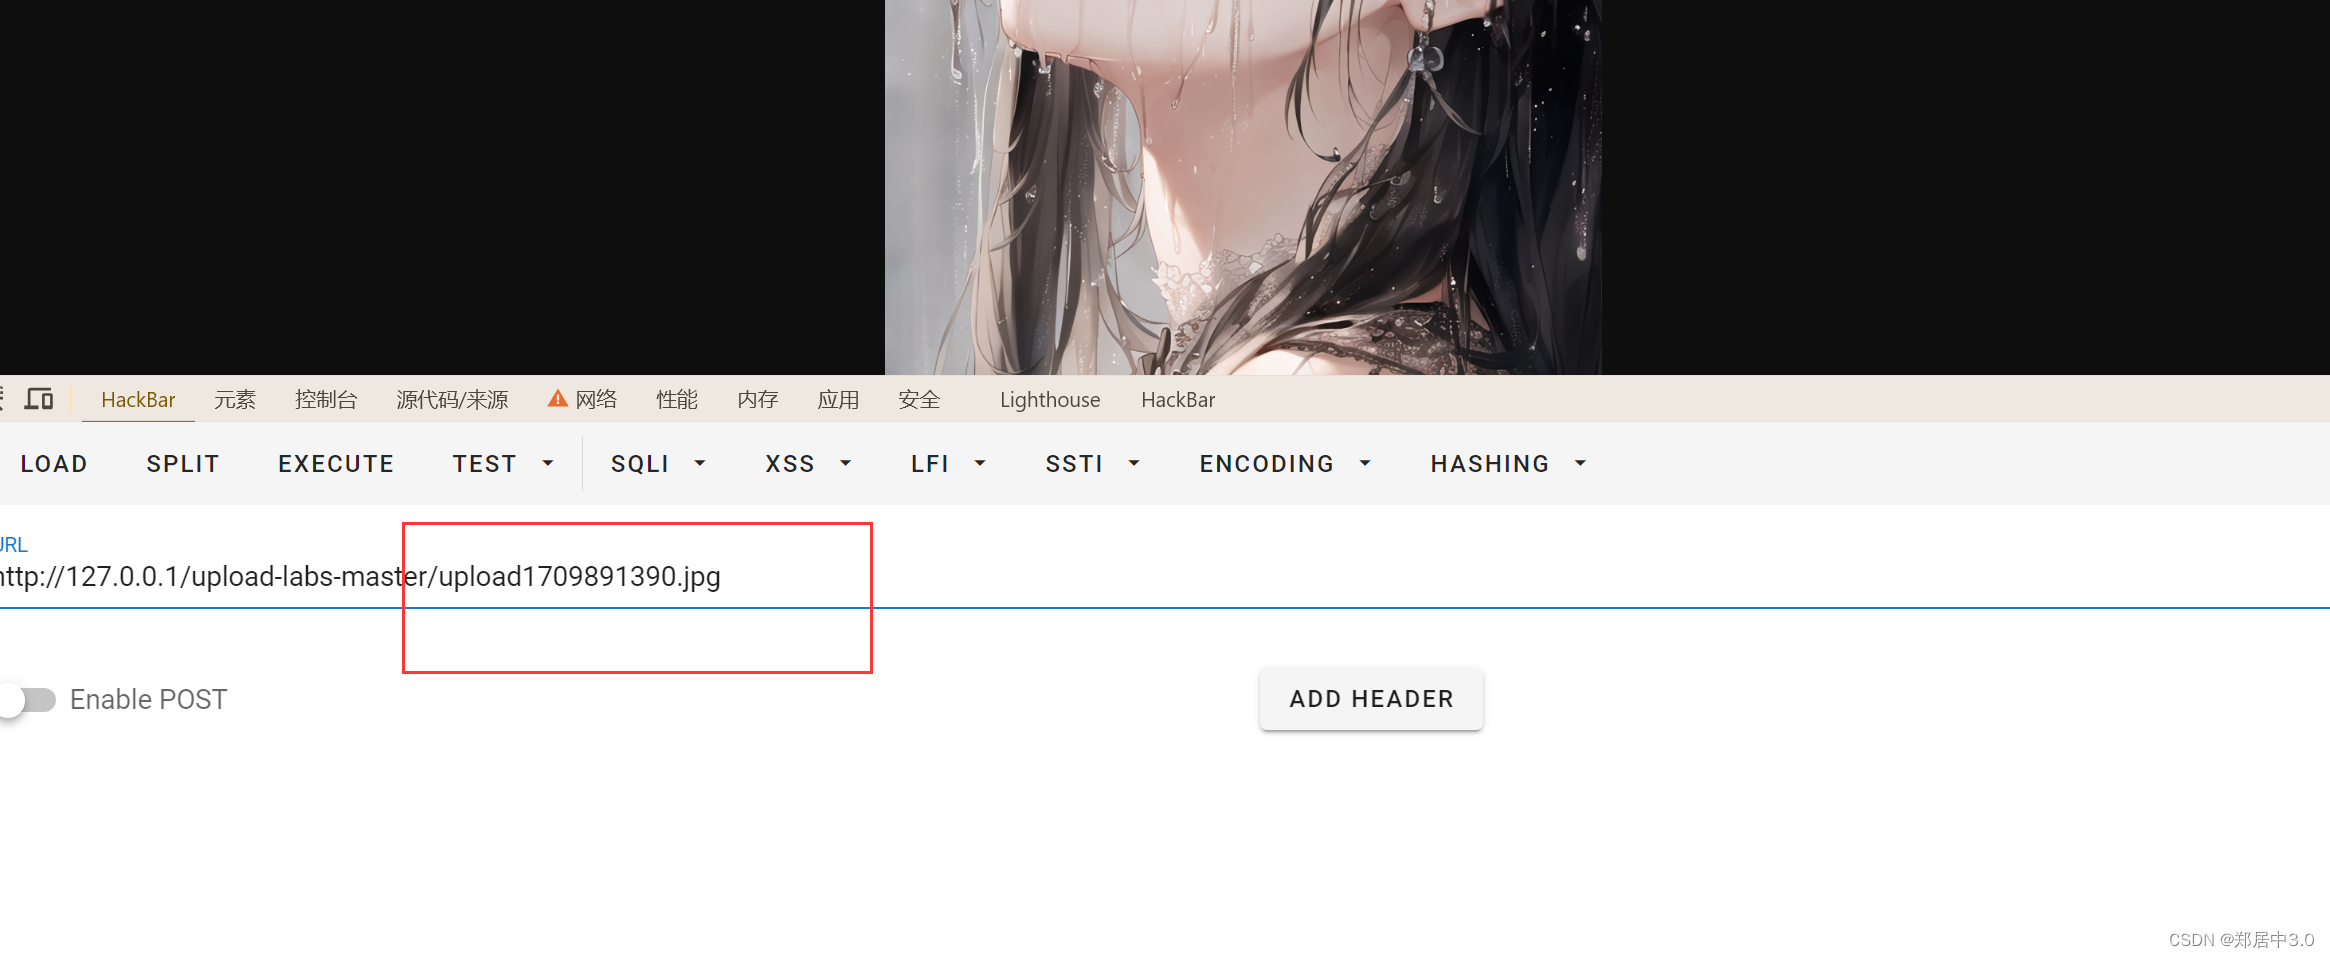
upload-labs通关记录
文章目录 前言 1.pass-012.pass-023.pass-034.pass-045.pass-056.pass-067.pass-078.pass-089.pass-0910.pass-1011.pass-1112.pass-1213.pass-1314.pass-1415.pass-1516.pass-1617.pass-1718.pass-1819.pass-19 前言 本篇文章记录upload-labs中,所有的通过技巧和各…...
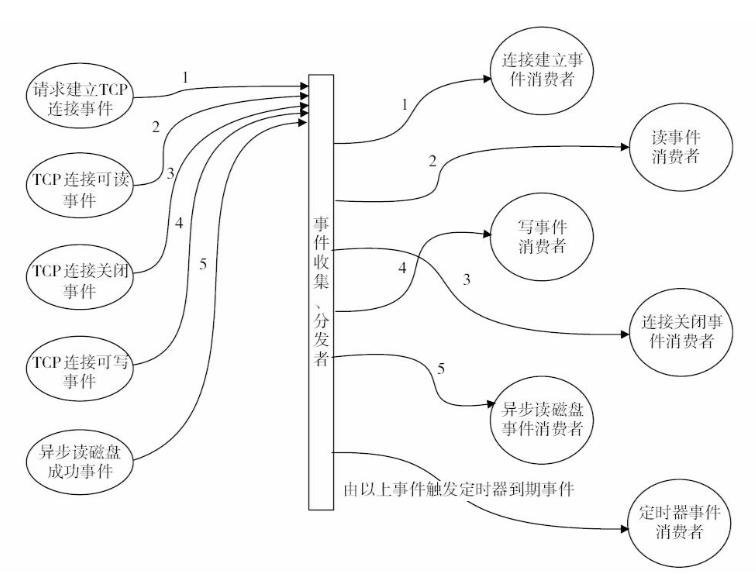
Nginx实现高并发
注:文章是4年前在自己网站上写的,迁移过来了。现在看我之前写的这篇文章,描述得不是特别详细,但描述了Nginx的整体架构思想。如果对Nginx玩得透得或者想了解深入的,可以在网上找找其他的文章。 ......................…...

华为荣耀终端机试真题
文章目录 一 、字符展开(200分)1.1 题目描述1.2 解题思路1.3 解题代码二、共轭转置处理(100分)2.1 题目描述2.3 源码内容一 、字符展开(200分) 1.1 题目描述 // 64 位输出请用 printf(“%lld”)给定一个字符串,字符串包含数字、大小写字母以及括号(包括大括号、中括号…...
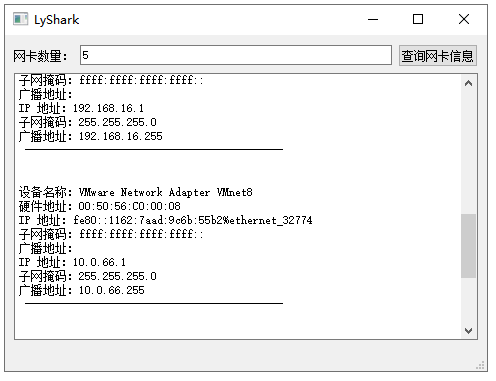
C++ Qt开发:QNetworkInterface网络接口组件
Qt 是一个跨平台C图形界面开发库,利用Qt可以快速开发跨平台窗体应用程序,在Qt中我们可以通过拖拽的方式将不同组件放到指定的位置,实现图形化开发极大的方便了开发效率,本章将重点介绍如何运用QNetworkInterface组件实现查询详细的…...
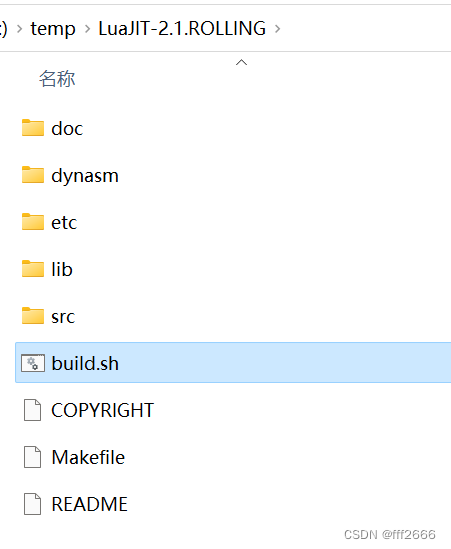
Luajit 2023移动版本编译 v2.1.ROLLING
文章顶部有编好的 2.1.ROLLING 2023/08/21版本源码 Android 64 和 iOS 64 luajit 目前最新的源码tag版本为 v2.1.ROLLING on Aug 21, 2023应该是修正了很多bug, 我是出现下面问题才编的. cocos2dx-lua 游戏 黑屏 并报错: [LUA ERROR] bad light userdata pointer 编…...

c++ 常用新特性总结【c++11】,【c++14】,【c++17】,【c++20】
文章目录 常用的c11新特性1.自动推导类型(auto)2.lambda表达式3.智能指针4.范围for循环5.右值引用 - 移动语义6.类型别名7.constexpr8.static_assert(静态断言)9.nullptr10.列表初始化11.继承构造函数12.显示虚函数重载(override)13.final14.变长模板参数15.新的容器与算法16.强…...
Feign实现微服务间远程调用续;基于Redis实现消息队列用于延迟任务的处理,Redis分布式锁的实现;(黑马头条Day05)
目录 延迟任务和定时任务 使用Redis设计延迟队列原理 点评项目中选用list和zset两种数据结构进行实现 如何缓解Redis内存的压力同时保证Redis中任务能够被正确消费不丢失 系统流程设计 使用Feign实现微服务间的任务消费以及文章自动审核 系统微服务功能介绍 提交文章-&g…...

CSS 常见属性设置
一. 文本属性 1.1. 装饰线 text-decoration text-decoration有如下常见取值: none:无任何装饰线(可以去除a元素默认的下划线)underline:下划线overline:上划线line-through:中划线(删除线&…...
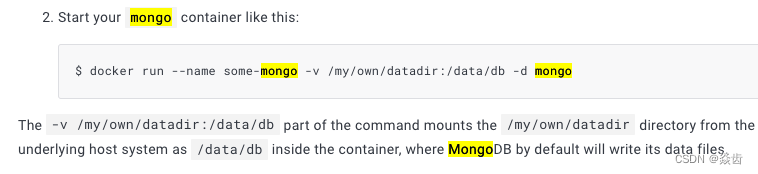
docker学习入门
1、docker简介 docker官网: www.docker.com dockerhub官网: hub.docker.com docker文档官网:docs.docker.com Docker是基于Go语言实现的云开源项目。 Docker的主要目标是:Build, Ship and Run Any App, Anywhere(构建&…...
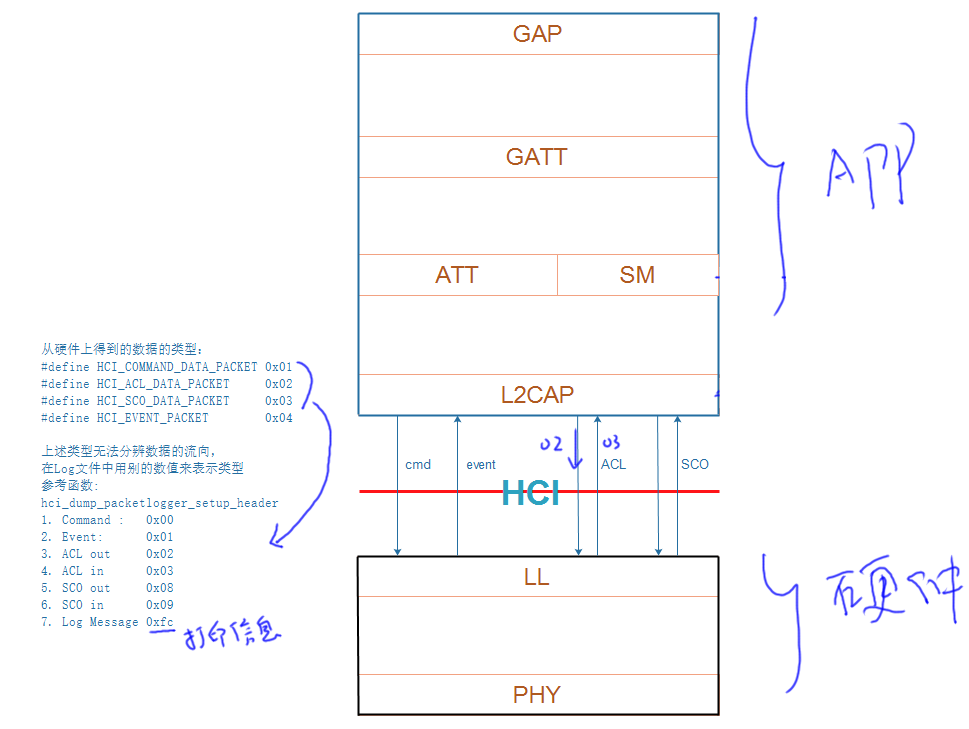
蓝牙系列七:开源蓝牙协议栈BTStack数据处理
继续蓝牙系列的研究。 在上篇博客,通过阅读BTStack的源码,大体了解了其框架,对于任何一个BTStack的应用程序都有一个main函数,这个main函数是统一的。这个main函数做了某些初始化之后,最终会调用到应用程序提供的btstack_main,在btstack_main里面首先做一些初始化,然后…...

数据仓库作业一:第1章 绪论
目录 一、给出下列英文短语或缩写的中文名称,并简述其含义。二、简述操作型数据与分析型数据的主要区别。三、简述数据仓库的定义。四、简述数据仓库的特征。五、简述主题的定义。六、简述元数据的概念。七、简述数据挖掘的主要任务。八、简述数据挖掘的主要步骤。九…...

spring aop中获取request和response
Spring AOP 操作中如何使用request和response 实际使用时,如果方法一不行,请使用方法二 方法一 HttpServletRequest request ((ServletRequestAttributes) RequestContextHolder.getRequestAttributes()).getRequest(); HttpServletResponse respons…...
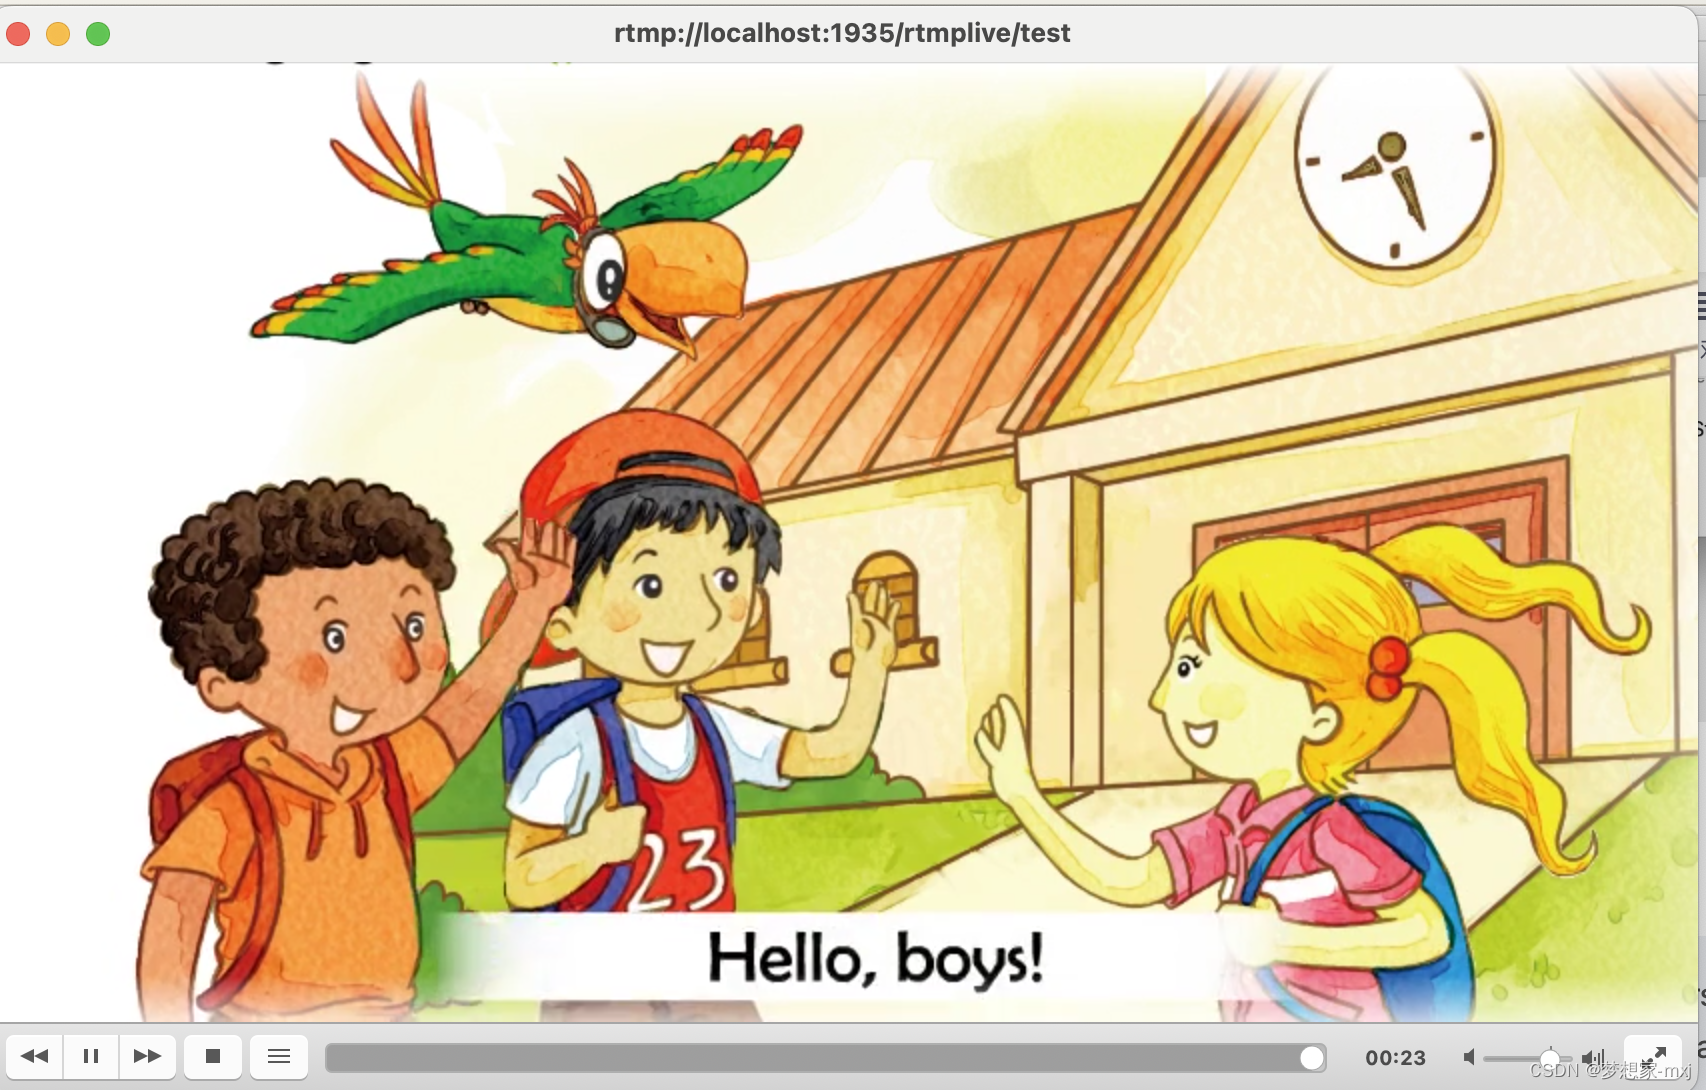
在Mac上安装nginx+rtmp 本地服务器
需要使用终端命令,如果没有Homebrew,要安装Homebrew,执行: ruby -e "$(curl -fsSL https://raw.githubusercontent.com/Homebrew/install/master/install)" 一、安装Nginx 1、先clone Nginx项目到本地: brew tap de…...
解决ChatGPT发送消息没有反应
ChatGPT发消息没反应 今天照常使用ChatGPT来帮忙码代码,结果发现发出去的消息完全没有反应,即不给我处理,也没有抱任何的错误,按浏览器刷新,看起来很正常,可以查看历史对话,但是再次尝试还是一…...
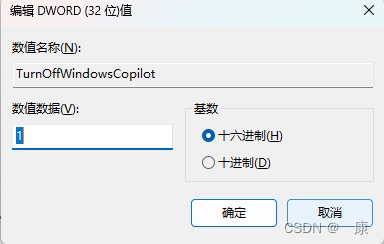
windows关闭copilot预览版
如果用户不想在windows系统当中启用Copilot,可以通过以下三种方式禁用。 第一种:隐藏Copilot 按钮 右键点击任务栏,取消勾选“显示 Copilot(预览版)按钮”,任务栏则不再显示,用户可以通过快捷键…...

技术工厂中的对象生产与配置管理
技术工厂中的对象生产与配置管理 在数字化与智能化快速发展的今天,技术工厂已成为现代工业的核心。对象生产与配置管理作为技术工厂的关键环节,直接影响生产效率、资源利用率和产品质量。通过智能化的对象生产与动态化的配置管理,企业能够实…...
)
2048游戏AI通关秘籍:手把手教你用Minimax算法实现自动游戏(Python版)
2048游戏AI通关秘籍:用Minimax算法打造智能玩家(Python实战) 每次打开2048游戏,看着那些数字方块在棋盘上滑动合并,你是否好奇过——如果让程序自己玩这个游戏,它能达到什么水平?今天我们就用P…...

终极免费PCB查看器:5分钟掌握OpenBoardView,轻松破解电路板设计难题
终极免费PCB查看器:5分钟掌握OpenBoardView,轻松破解电路板设计难题 【免费下载链接】OpenBoardView View .brd files 项目地址: https://gitcode.com/gh_mirrors/op/OpenBoardView 你是否曾面对复杂的.brd电路板文件感到无从下手?或者…...

逆向实战:我是如何一步步破解Vaptcha手势验证码的图片乱序算法的
验证码逆向工程实战:从乱序图片到完整还原的技术探秘 验证码系统作为网络安全的第一道防线,其设计思路与破解方法一直是安全研究的热点领域。手势验证码因其交互友好性被广泛应用,但其中蕴含的防护机制却鲜有深入解析。本文将从一个真实的逆向…...
)
告别ISE14.7:手把手教你将老FPGA工程无损迁移到Vivado(含UCF转XDC技巧)
从ISE到Vivado:FPGA工程迁移全流程实战指南 在FPGA开发领域,Xilinx的ISE 14.7曾经是许多工程师的标配工具,但随着Vivado的成熟,越来越多的项目需要迁移到这个更现代化的平台上。本文将带你一步步完成这个看似复杂的过程ÿ…...

用MCNP模拟NaI探测器:从137铯源设置到能谱分析的全流程实战
用MCNP模拟NaI探测器:从137铯源设置到能谱分析的全流程实战 在核技术研究领域,精确模拟探测器响应是实验设计的关键环节。NaI(Tl)闪烁体探测器因其高探测效率和良好的能量分辨率,成为测量伽马射线的首选设备之一。本文将带你完成一个完整的MC…...
)
别再傻傻分不清了!手把手教你识别和配置真正的WeMos D1开发板(附一键安装包)
从零玩转WeMos D1开发板:硬件鉴别与极速开发环境搭建指南 第一次拿到印着"D1 wifi"字样的开发板时,我和大多数初学者一样陷入了困惑——这到底是不是传说中的WeMos D1?市面上各种仿制版和变种让人眼花缭乱,而官方文档复…...

从Java全栈到前端框架:一位工程师的面试实录
从Java全栈到前端框架:一位工程师的面试实录 今天,我作为一位拥有5年经验的Java全栈开发工程师,迎来了在一家知名互联网大厂的面试。这次面试由一位资深技术面试官主持,他以专业严谨的态度引导我逐步展示自己的技能和项目经验。 …...

如何轻松编辑暗黑破坏神2存档:d2s-editor可视化编辑器完整指南
如何轻松编辑暗黑破坏神2存档:d2s-editor可视化编辑器完整指南 【免费下载链接】d2s-editor 项目地址: https://gitcode.com/gh_mirrors/d2/d2s-editor 还在为复杂的暗黑破坏神2存档文件格式而烦恼吗?d2s-editor为您提供了一个直观、易用的Web界…...

rtrvr.ai AI 子程序:零 token 成本自动化脚本,解决网络智能体认证难题!
rtrvr.ai 产品介绍rtrvr.ai 提供多种产品服务,包括博客、预约演示、定价、API 文档、扩展程序、云端服务等。AI 子程序功能特点只需录制一次浏览器任务,就能将其作为可调用工具进行回放,零 token 成本,100% 确定性,认证…...