Qt开发 | Qt界面布局 | 水平布局 | 竖直布局 | 栅格布局 | 分裂器布局 | setLayout使用 | 添加右键菜单 | 布局切换与布局删除重构
文章目录
- 一、Qt界面布局
- 二、Qt水平布局--QHBoxLayout
- 三、Qt竖直布局
- 四、Qt栅格布局
- 五、分裂器布局代码实现
- 六、setLayout使用说明
- 七、布局切换与布局删除重构
- 1.如何添加右键菜单
- 2.布局切换与布局删除重构
一、Qt界面布局
Qt的界面布局类型可分为如下几种
-
水平布局(Horizontal Layout):
水平布局将控件水平排列。控件按照从左到右的顺序排列,可以设置控件之间的间距。
-
竖直布局(Vertical Layout):
竖直布局将控件垂直排列。控件按照从上到下的顺序排列,也可以设置控件之间的间距。
-
栅格布局(Grid Layout):
栅格布局将控件排列在网格中。你可以指定控件的行和列,以及行和列的间距。栅格布局非常适合需要将控件整齐排列在表格中的场景。
-
分裂器布局(Splitter Layout):
分裂器布局允许用户通过拖动分隔条来调整相邻控件的大小。这种布局通常用于需要动态调整空间分配的界面,例如在文本编辑器中调整工具栏和文本区域的大小。
除了这些基本布局,Qt 还提供了其他一些布局管理器,例如:
- 表单布局(Form Layout):用于创建表单界面,控件和标签按照两列排列。
- 堆栈布局(Stack Layout):允许在同一个空间内堆叠多个控件,并且一次只能显示一个。
- 工具箱布局(Tool Box Layout):类似于网页上的选项卡,允许用户在多个页面之间切换。
ui设计器设计界面很方便,为什么还要手写代码?
- 更好的控制布局
- 更好的设置qss
- 代码复用
二、Qt水平布局–QHBoxLayout
介绍手写水平布局,不使用ui设计器来设置布局,因此,可将ui文件等删掉
-
创建水平布局
#include <QHBoxLayout> QHBoxLayout *pHLay = new QHBoxLayout(父窗口指针); //一般填this -
相关方法
- addWidget:在布局中添加一个控件
- addLayout:在布局里添加布局
- setMargin:设置水平布局最外边界与相邻空间左上右下的间隙,这时左上右下的间隙相同;如果想设置成不同,可以使用setContentMargins方法
- setSpacing:设置相邻控件之间的间隙,默认值大概是7
- addSpacing:在setSpacing的基础上进行相加,例如:addSpacing(-7),相当于两个控件之间没有距离;addSpacing(13)相当于setSpacing(20);
- addStretch:在水平布局时添加一个水平的伸缩空间(QSpacerItem),在竖直布局时,添加一个竖直的伸缩空间
示例:
xx.h:
#pragma once#include <QtWidgets/QWidget>class ch2_3_hLayout : public QWidget
{Q_OBJECTpublic:ch2_3_hLayout(QWidget *parent = Q_NULLPTR);};
xx.cpp
#include "ch2_3_hLayout.h"
#include <QHBoxLayout>
#include <QLabel>
#include <QLineEdit>
#include <QPushButton>
#include <QDebug>ch2_3_hLayout::ch2_3_hLayout(QWidget *parent): QWidget(parent)
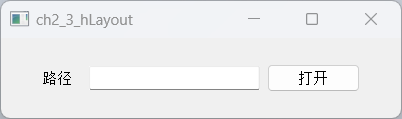
{this->resize(400, 80);//新建三个控件QLabel* pPath = new QLabel(this);pPath->setObjectName("pPath");//pPath->setFixedSize(40, 32);pPath->setText(u8"路径");QLineEdit* pEdit = new QLineEdit(this);pEdit->setObjectName("pEdit");//pEdit->setFixedSize(100, 32);pEdit->setMinimumWidth(50);QPushButton* pBtn = new QPushButton(this);pBtn->setObjectName("pBtn");//pBtn->setFixedSize(50, 32);pBtn->setText(u8"打开");//创建水平布局QHBoxLayout* pHLay = new QHBoxLayout(this);//pHLay->setMargin(0); //设置水平布局最外边界与相邻空间左上右下的间隙//pHLay->setContentsMargins(0, 100, 10, 0); //设置左上右下的间隙//将三个控件添加到水平布局中pHLay->addStretch(); //添加水平弹簧pHLay->addWidget(pPath);pHLay->addSpacing(10); //添加相邻两个控件间的间隙pHLay->addWidget(pEdit);pHLay->addWidget(pBtn);pHLay->addStretch();
}
main.cpp:
#include "ch2_3_hLayout.h"
#include <QtWidgets/QApplication>int main(int argc, char *argv[])
{QApplication a(argc, argv);ch2_3_hLayout w;w.show();return a.exec();
}
运行结果:
三、Qt竖直布局
-
创建水平布局
#include <QVBoxLayout> QVBoxLayout *pMainVLay = new QVBoxLayout(父窗口指针); //一般填this -
相关方法:与水平布局类似
- addWidget:在布局中添加一个控件
- addLayout:在布局里添加布局
- setMargin:设置水平布局最外边界与相邻空间左上右下的间隙,这时左上右下的间隙相同;如果想设置成不同,可以使用setContentMargins方法
- setSpacing:设置相邻控件之间的间隙,默认值大概是7
- addSpacing:在setSpacing的基础上进行相加,例如:addSpacing(-7),相当于两个控件之间没有距离;addSpacing(13)相当于setSpacing(20);
- addStretch:在水平布局时添加一个水平的伸缩空间(QSpacerItem),在竖直布局时,添加一个竖直的伸缩空间
示例:
xx.h:
#ifndef WIDGET_H
#define WIDGET_H#include <QWidget>class Widget : public QWidget
{Q_OBJECTpublic:Widget(QWidget *parent = nullptr);~Widget();
};
#endif // WIDGET_H
xx.cpp:
#include "widget.h"
#include <QPushButton>
#include <QVBoxLayout>Widget::Widget(QWidget *parent): QWidget(parent)
{//新建三个按钮QPushButton *pBtn1 = new QPushButton(this);pBtn1->setObjectName("pBtn1");pBtn1->setText("pBtn1");// pBtn1->setFixedSize(40, 32);QPushButton *pBtn2 = new QPushButton(this);pBtn2->setObjectName("pBtn2");pBtn2->setText("pBtn2");// pBtn1->setFixedSize(40, 32);QPushButton *pBtn3 = new QPushButton(this);pBtn3->setObjectName("pBtn3");pBtn3->setText("pBtn3");// pBtn1->setFixedSize(40, 32);//新建竖直布局QVBoxLayout *pVLay = new QVBoxLayout(this);// pVLay->setMargin(100);// pVLay->setContentsMargins(80, 70, 60, 50);pVLay->addWidget(pBtn1);pVLay->addSpacing(10);pVLay->addWidget(pBtn2);pVLay->addSpacing(50);pVLay->addWidget(pBtn3);
}Widget::~Widget()
{}
main.cpp:
#include "widget.h"#include <QApplication>int main(int argc, char *argv[])
{QApplication a(argc, argv);Widget w;w.show();return a.exec();
}
运行结果:

四、Qt栅格布局
-
创建栅格布局
#include <QGridLayout> QGridLayout *pGridLayout = new QGridLayout(this); -
相关方法:与水平布局类似
-
栅格布局添加控件
class Q_WIDGETS_EXPORT QGridLayout : public QLayout {//...inline void addWidget(QWidget *w) { QLayout::addWidget(w); }//基于行、列、对齐方式来添加控件void addWidget(QWidget *, int row, int column, Qt::Alignment = Qt::Alignment());//基于行、列、跨多少行、跨多少列、对齐方式来添加控件void addWidget(QWidget *, int row, int column, int rowSpan, int columnSpan, Qt::Alignment = Qt::Alignment());//基于行、列、对齐方式来添加子布局void addLayout(QLayout *, int row, int column, Qt::Alignment = Qt::Alignment());void addLayout(QLayout *, int row, int column, int rowSpan, int columnSpan, Qt::Alignment = Qt::Alignment());//... } -
栅格布局设置间隙
-
设置水平间距
pGridLayout->setHorizontalSpacing(10); -
设置垂直间距
pGridLayout->setVerticalSpacing(10);
-
-
示例:
xx.h:
#ifndef WIDGET_H
#define WIDGET_H#include <QWidget>class Widget : public QWidget
{Q_OBJECTpublic:Widget(QWidget *parent = nullptr);~Widget();
};
#endif // WIDGET_H
xx.cpp:
#include "widget.h"
#include <QGridLayout>
#include <QPushButton>
#include <QLabel>
#include <QLineEdit>
#include <QCheckBox>
#include <QDebug>Widget::Widget(QWidget *parent): QWidget(parent)
{//无边框窗口且可以最大化与最小化this->setWindowFlags(Qt::FramelessWindowHint | Qt::WindowMinMaxButtonsHint);/**新建控件**///头像QLabel* pImageLabel = new QLabel(this);QPixmap pixMap(":/resources/user_image.png");pImageLabel->setFixedSize(150, 150);pixMap.scaled(pImageLabel->size(), Qt::KeepAspectRatio);pImageLabel->setPixmap(pixMap);pImageLabel->setScaledContents(true);//用户名QLineEdit* pUserNameLineEdit = new QLineEdit(this);pUserNameLineEdit->setFixedSize(300, 50);pUserNameLineEdit->setPlaceholderText("QQ号码/手机/邮箱"); //设置提示信息//密码QLineEdit* pPwdLineEdit = new QLineEdit(this);pPwdLineEdit->setFixedSize(300, 50);pPwdLineEdit->setPlaceholderText("密码");pPwdLineEdit->setEchoMode(QLineEdit::Password); //密码模式//找回密码QPushButton* pForgetButton = new QPushButton(this);pForgetButton->setText("找回密码");pForgetButton->setFixedWidth(80);//记住密码QCheckBox* pRemCheckBox = new QCheckBox(this);pRemCheckBox->setText("记住密码");//自动登陆QCheckBox* pAutoLoginCheckBox = new QCheckBox(this);pAutoLoginCheckBox->setText("自动登陆");//登陆QPushButton* pLoginBtn = new QPushButton(this);pLoginBtn->setFixedHeight(48);pLoginBtn->setText("登陆");//注册账号QPushButton* pRegisterBtn = new QPushButton(this);pRegisterBtn->setFixedHeight(48);pRegisterBtn->setText("注册账号");//新建栅格布局QGridLayout* pGridLayout = new QGridLayout(this);pGridLayout->addWidget(pImageLabel, 0, 0, 3, 1);pGridLayout->addWidget(pUserNameLineEdit, 0, 1, 1, 2);pGridLayout->addWidget(pPwdLineEdit, 1, 1, 1, 2);pGridLayout->addWidget(pForgetButton, 2, 1, 1, 1);pGridLayout->addWidget(pRemCheckBox, 2, 2, 1, 1, Qt::AlignLeft | Qt::AlignVCenter);pGridLayout->addWidget(pAutoLoginCheckBox, 2, 2, 1, 1, Qt::AlignRight | Qt::AlignVCenter);pGridLayout->addWidget(pLoginBtn, 3, 1, 1, 2);pGridLayout->addWidget(pRegisterBtn, 4, 1, 1, 2);//设置水平布局与垂直布局pGridLayout->setHorizontalSpacing(20);//pGridLayout->setVerticalSpacing(20);pGridLayout->setContentsMargins(30, 30, 30, 30);
}Widget::~Widget() {}
main.cpp
#include "widget.h"#include <QApplication>int main(int argc, char *argv[])
{QApplication a(argc, argv);Widget w;w.show();return a.exec();
}
运行结果:

五、分裂器布局代码实现
在Qt设计器中使用两个按钮实现分裂器

-
水平分裂器
QSplitter* pHSplitter = new QSplitter(Qt::Horizontal, this); -
竖直分裂器
QSplitter* pVSplitter = new QSplitter(Qt::Vertical, pHSplitter); -
分裂器也是
QWidget的子类,因此,分裂器也有addWidget方法,而布局也可以使用addWidget往布局里添加分裂器。
示例:
xx.h:
#ifndef WIDGET_H
#define WIDGET_H#include <QWidget>class Widget : public QWidget
{Q_OBJECTpublic:Widget(QWidget *parent = nullptr);~Widget();
};
#endif // WIDGET_H
xx.cpp:
#include "widget.h"
#include <QHBoxLayout>
#include <QSplitter>
#include <QTextBrowser>Widget::Widget(QWidget *parent): QWidget(parent)
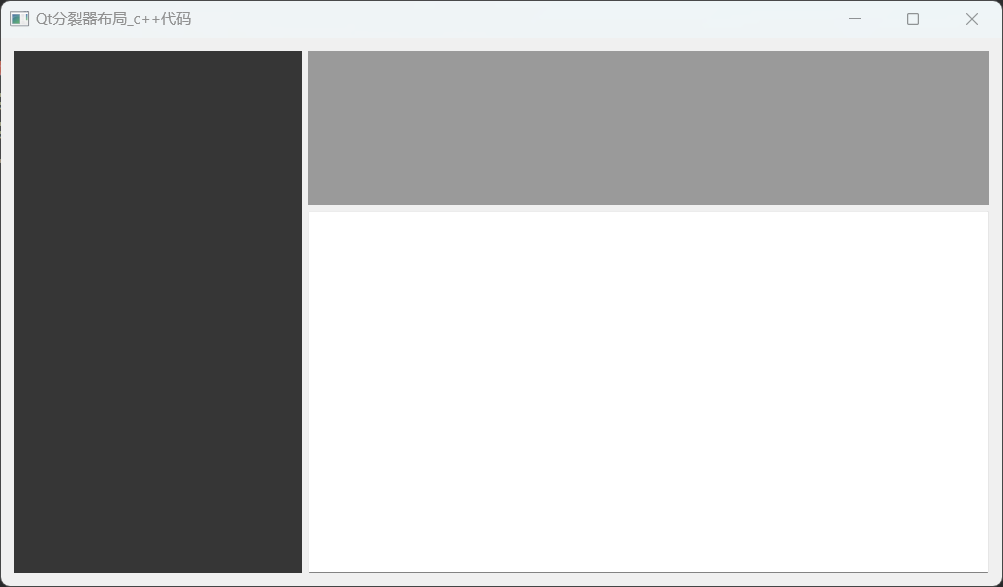
{this->setWindowTitle("Qt分裂器布局_c++代码");QHBoxLayout* pHboxLayout = new QHBoxLayout(this);//整体的水平分裂器QSplitter* pHSplitter = new QSplitter(Qt::Horizontal, this);//左侧widgetQWidget* pLeftWidget = new QWidget(this);pLeftWidget->setStyleSheet("background-color:rgb(54, 54, 54)");pLeftWidget->setMinimumWidth(200);//分裂器添加widgetpHSplitter->addWidget(pLeftWidget);//右侧的竖直分裂器QSplitter* pVSplitter = new QSplitter(Qt::Vertical, pHSplitter);//在拖动到位并弹起鼠标后再显式分隔条pVSplitter->setOpaqueResize(false);//右侧顶部widgetQWidget* pRightTopWidget = new QWidget(this);pRightTopWidget->setStyleSheet("background-color:rgb(154, 154, 154)");//右侧底部窗体QTextBrowser* pRightBottom = new QTextBrowser(this);pVSplitter->addWidget(pRightTopWidget);pVSplitter->addWidget(pRightBottom);pHSplitter->addWidget(pVSplitter);//布局添加分裂器pHboxLayout->addWidget(pHSplitter);//设置整体布局//this->setLayout(pHboxLayout);
}Widget::~Widget() {}
main.cpp:
#include "widget.h"#include <QApplication>int main(int argc, char *argv[])
{QApplication a(argc, argv);Widget w;w.show();return a.exec();
}
运行结果:
六、setLayout使用说明
QWidget::setLayout(QLayout *layout) 是 Qt 框架中的一个成员函数,用于为窗口小部件(widget)设置布局管理器(layout manager)。
- 设置此窗口小部件的布局管理器为
layout。 - 如果此窗口小部件上已经安装了布局管理器,
QWidget不会允许你安装另一个。你必须首先删除现有的布局管理器(由layout()返回),然后才能使用新的布局调用setLayout()。 - 如果
layout是另一个窗口小部件上的布局管理器,setLayout()将重新为其设置父级,并使其成为此窗口小部件的布局管理器。
示例:
QVBoxLayout *layout = new QVBoxLayout;
layout->addWidget(formWidget);
setLayout(layout);
还可以通过将窗口小部件作为参数传递给布局的构造函数来设置布局,这样窗口小部件就会自动接管布局的所有权。
七、布局切换与布局删除重构
1.如何添加右键菜单
-
菜单事件
void contextMenuEvent(QContextMenuEvent* event) override; -
设置菜单策略
this->setContextMenuPolicy(Qt::DefaultContextMenu); -
创建菜单
void Widget::initMenu() {m_pMenu = new QMenu(this);QAction *pAction1 = new QAction("查看");QAction *pAction2 = new QAction("排序方式");QAction *pAction3 = new QAction("刷新");m_pMenu->addAction(pAction1);m_pMenu->addAction(pAction2);m_pMenu->addAction(pAction3); } -
弹出菜单
void Widget::contextMenuEvent(QContextMenuEvent* event)
{m_pMenu->exec(QCursor::pos());
}
示例:
xx.h:
#ifndef WIDGET_H
#define WIDGET_H#include <QWidget>
#include <QMenu>class Widget : public QWidget
{Q_OBJECTpublic:Widget(QWidget *parent = nullptr);~Widget();//菜单事件void contextMenuEvent(QContextMenuEvent* event) override;void initMenu();    //创建菜单private:QMenu* m_pMenu = nullptr;
};
#endif // WIDGET_H
xx.cpp:
#include "widget.h"
#include <QAction>
#include <QMessageBox>Widget::Widget(QWidget *parent): QWidget(parent)
{this->setWindowFlags(Qt::FramelessWindowHint | Qt::WindowMinMaxButtonsHint);//设置菜单策略this->setContextMenuPolicy(Qt::DefaultContextMenu);initMenu(); //初始化菜单
}Widget::~Widget() {}void Widget::contextMenuEvent(QContextMenuEvent* event)
{m_pMenu->exec(QCursor::pos());
}void Widget::initMenu()
{m_pMenu = new QMenu(this);QAction *pAction1 = new QAction("查看");QAction *pAction2 = new QAction("排序方式");QAction *pAction3 = new QAction("刷新");m_pMenu->addAction(pAction1);m_pMenu->addAction(pAction2);m_pMenu->addAction(pAction3);connect(pAction1, &QAction::triggered, [=]{QMessageBox::information(this, "title", "查看");});
}
main.cpp:
#include "widget.h"#include <QApplication>int main(int argc, char *argv[])
{QApplication a(argc, argv);Widget w;w.show();return a.exec();
}
运行结果:

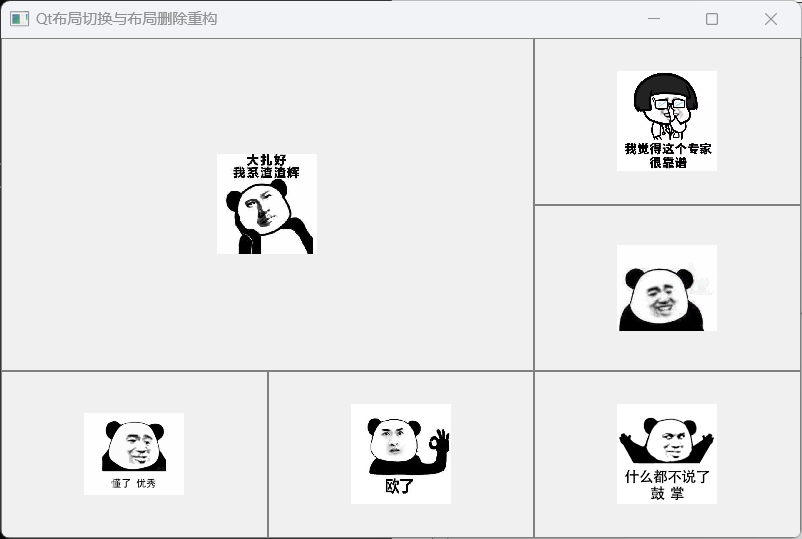
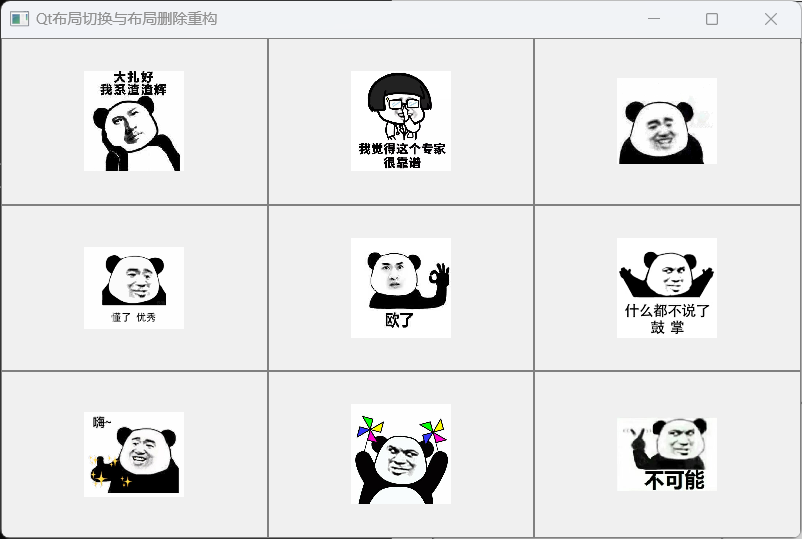
2.布局切换与布局删除重构
通过右键菜单项,实现布局的切换与布局删除重构。
示例:
SwitchWidget.h:
#pragma once#include <QtWidgets/QWidget>
#include <QLabel>
#include <QList>
#include <QMenu>// 视频分屏类型
enum VideoLayoutType
{OneVideo = 0,TwoVideo,ThreeVideo,FourVideo,FiveVideo,SixVideo,SeventVideo,EightVideo,NineVideo,
};class SwitchWidget : public QWidget
{Q_OBJECTpublic:SwitchWidget(QWidget* parent = nullptr);~SwitchWidget();private:void initWidget();void initMenu();void contextMenuEvent(QContextMenuEvent* event) override;  //菜单事件void switchLayout(VideoLayoutType type);    //切换不同布局private:QList<QLabel*> m_videoLabelList;    //用于保存视频区域QMenu* m_switchMenu;
};
SwitchWidget.cpp:
#pragma execution_character_set("utf-8")
#include "SwitchWidget.h"
#include <QGridLayout>
#include <QContextMenuEvent>
#include <QDebug>SwitchWidget::SwitchWidget(QWidget* parent): QWidget(parent)
{this->setWindowTitle(u8"Qt布局切换与布局删除重构");initWidget();this->resize(QSize(800, 500));this->setContextMenuPolicy(Qt::DefaultContextMenu); //设置菜单策略
}SwitchWidget::~SwitchWidget() {}void SwitchWidget::initWidget() //初始化界面
{initMenu(); //初始化菜单for (int i = 0; i < 9; i++){QLabel* label = new QLabel();label->setStyleSheet(QString("QLabel{background-image:url(:/SwitchWidget/resources/%1.png); \border:1px solid gray; \background-position:center; \background-repeat:no-repeat; \}").arg(QString::number(i + 1)));m_videoLabelList.append(label);}switchLayout(VideoLayoutType::OneVideo);
}void SwitchWidget::initMenu() //初始化菜单
{m_switchMenu = new QMenu(this);m_switchMenu->addAction(u8"一分屏");m_switchMenu->addAction(u8"四分屏");m_switchMenu->addAction(u8"五分屏");m_switchMenu->addAction(u8"六分屏");m_switchMenu->addAction(u8"九分屏");QMap<QString, int> strTypeMap;strTypeMap["一分屏"] = VideoLayoutType::OneVideo;strTypeMap["四分屏"] = VideoLayoutType::FourVideo;strTypeMap["五分屏"] = VideoLayoutType::FiveVideo;strTypeMap["六分屏"] = VideoLayoutType::SixVideo;strTypeMap["九分屏"] = VideoLayoutType::NineVideo;//信号槽connect(m_switchMenu, &QMenu::triggered, this, [=](QAction* action) {QString strText = action->text();qDebug() << "strText = " << strText;qDebug() << strTypeMap[strText];VideoLayoutType type = static_cast<VideoLayoutType>(strTypeMap[strText]);qDebug() << "type = " << type;switchLayout(type);});
}void SwitchWidget::contextMenuEvent(QContextMenuEvent* event) //菜单事件
{m_switchMenu->exec(QCursor::pos()); //弹出菜单--使用当前鼠标位置来执行菜单
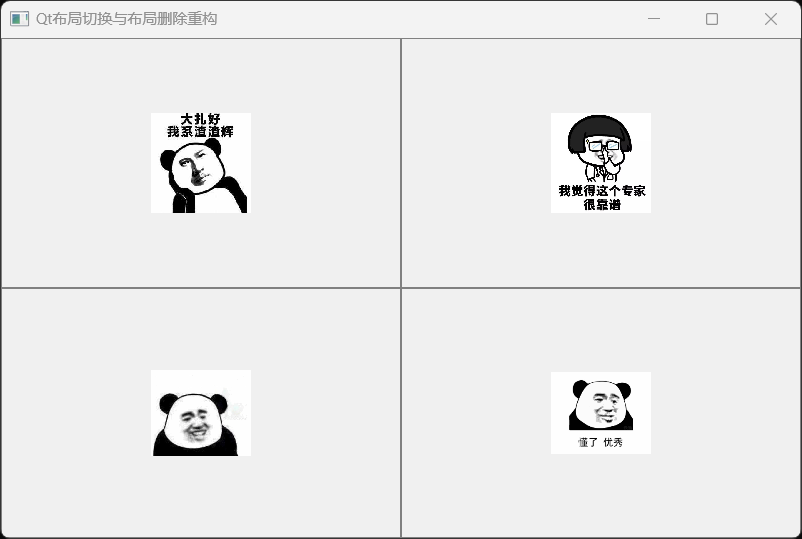
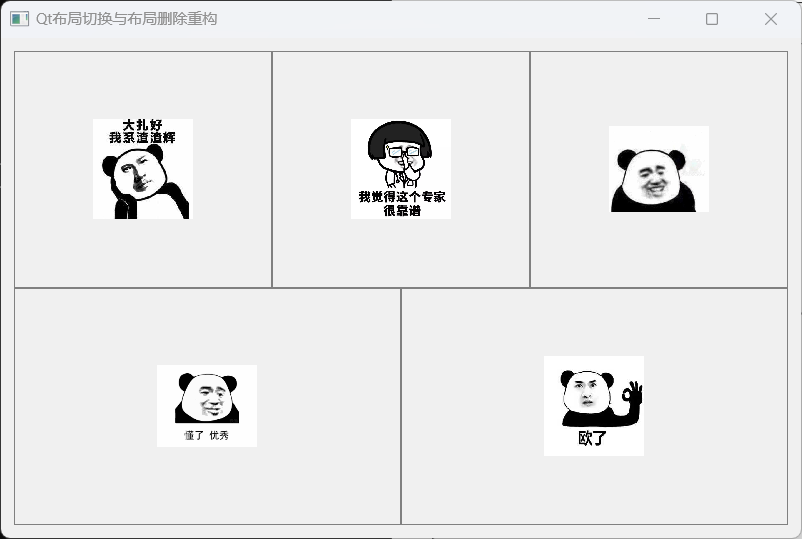
}void SwitchWidget::switchLayout(VideoLayoutType type) //切换不同布局
{QLayout* layout = this->layout(); //获取当前窗口的布局//当切换布局时,若布局不为空,则清空布局内的所有元素if (layout){QLayoutItem* child; //布局中的子项//删除布局中的所有子项while ((child = layout->takeAt(0)) != 0){//调用 setParent(NULL) 方法将控件的父对象设置为 NULL。这样做可以防止控件在从布局中删除后界面上仍然显示。if (child->widget()){child->widget()->setParent(NULL);}delete child;}delete layout;}//设置新的布局switch (type){case OneVideo:{qDebug() << "OneVideo\n";QGridLayout* gLayout = new QGridLayout(this);gLayout->addWidget(m_videoLabelList[0]);gLayout->setMargin(0);}break;case FourVideo:{qDebug() << "FourVideo\n";QGridLayout* gLayout = new QGridLayout(this);gLayout->setSpacing(0);gLayout->setMargin(0);for (int i = 0; i < 4; i++){gLayout->addWidget(m_videoLabelList[i], i / 2, i % 2);}}break;case FiveVideo:{qDebug() << "FiveVideo\n";QVBoxLayout* pVLay = new QVBoxLayout(this);pVLay->setSpacing(0);QHBoxLayout* pHTopLay = new QHBoxLayout(this);pHTopLay->setSpacing(0);for (int i = 0; i < 3; i++){pHTopLay->addWidget(m_videoLabelList[i]);}QHBoxLayout* pHBottomLay = new QHBoxLayout(this);pHBottomLay->setSpacing(0);for (int i = 3; i < 5; i++){pHBottomLay->addWidget(m_videoLabelList[i]);}pVLay->addLayout(pHTopLay);pVLay->addLayout(pHBottomLay);}break;case SixVideo:{QGridLayout* gLayout = new QGridLayout(this);gLayout->addWidget(m_videoLabelList[0], 0, 0, 2, 2);gLayout->addWidget(m_videoLabelList[1], 0, 2);gLayout->addWidget(m_videoLabelList[2], 1, 2);gLayout->addWidget(m_videoLabelList[3], 2, 0);gLayout->addWidget(m_videoLabelList[4], 2, 1);gLayout->addWidget(m_videoLabelList[5], 2, 2);gLayout->setSpacing(0);gLayout->setMargin(0);}break;case NineVideo:{QGridLayout* gLayout = new QGridLayout(this);gLayout->setSpacing(0);gLayout->setMargin(0);for (int i = 0; i < 9; i++){gLayout->addWidget(m_videoLabelList[i], i / 3, i % 3);}}break;default:break;}}
main.cpp:
#include "SwitchWidget.h"
#include <QtWidgets/QApplication>int main(int argc, char *argv[])
{QApplication a(argc, argv);SwitchWidget w;w.show();return a.exec();
}
运行结果:
相关文章:
Qt开发 | Qt界面布局 | 水平布局 | 竖直布局 | 栅格布局 | 分裂器布局 | setLayout使用 | 添加右键菜单 | 布局切换与布局删除重构
文章目录 一、Qt界面布局二、Qt水平布局--QHBoxLayout三、Qt竖直布局四、Qt栅格布局五、分裂器布局代码实现六、setLayout使用说明七、布局切换与布局删除重构1.如何添加右键菜单2.布局切换与布局删除重构 一、Qt界面布局 Qt的界面布局类型可分为如下几种 水平布局(…...

LW-DETR: A Transformer Replacement to YOLO for Real-Time Detection
LW-DETR: A Transformer Replacement to YOLO for Real-Time Detection 论文链接:http://arxiv.org/abs/2406.03459 代码链接:https://github.com/Atten4Vis/LW-DETR 一、摘要 介绍了一种轻量级检测变换器LWDETR,它在实时物体检测方面超越…...

前端技术(二)——javasctipt 介绍
一、javascript基础 1. javascript简介 ⑴ javascript的起源 ⑵ javascript 简史 ⑶ javascript发展的时间线 ⑷ javascript的实现 ⑸ js第一个代码 <!DOCTYPE html> <html lang"en"> <head><meta charset"UTF-8"><title>…...
FireFox 编译指南2024 Windows10篇-环境准备(一)
1. 引言 在开源浏览器项目中,Firefox因其高性能和灵活性而备受开发者青睐。为了在本地环境中编译和定制Firefox,开发者需要做好充分的环境准备工作。这不仅是编译成功的基础,也是后续调试、优化和二次开发的关键步骤。 编译Firefox是一个复…...

Spring Boot中的热部署配置
Spring Boot中的热部署配置 大家好,我是免费搭建查券返利机器人省钱赚佣金就用微赚淘客系统3.0的小编,也是冬天不穿秋裤,天冷也要风度的程序猿!今天我们将探讨如何在Spring Boot项目中实现热部署配置,提升开发效率和项…...

用ChatGPT快速打造一个专业WordPress网站
作为一个使用HostEase多年的老用户,我想和大家分享一下如何利用HostEase和ChatGPT快速构建一个WordPress网站的经验。这不仅仅是一个简单的操作步骤,更是一次从零到有的实战经历。希望我的分享能给你们带来一些实用的帮助。 获取主机服务和域名 首先&a…...

dsp入门
安装环境 安装 ccs5.5安装 BIOS-MCSDK 多核软件开发包安装 仿真器驱动 工程创建与导入工程 创建工程 创建工程填信息添加.cmd文件,配置内存编译 导入工程 导入 配置工程 选择properties 环境变量 头文件 库文件 仿真器 添加仿真器 先调出仿真器界面创建仿…...

Java并发编程-Atomiclnteger、LongAdder等原子类的使用及案例实战
文章目录 i++和Atomiclnteger之间的差别分析以及使用介绍i++AtomicInteger使用介绍i++ 示例AtomicInteger 示例总结Atomiclnteger中的CAS无锁化原理和思路介绍CAS 原理AtomicInteger 的 CAS 应用无锁化思路Atomiclnteger源码剖析:仅限JDK内部使用的Unsafe类`Unsafe` 类的关键作…...
九浅一深Jemalloc5.3.0 -- ②浅*size class
目前市面上有不少分析Jemalloc老版本的博文,但5.3.0却少之又少。而且5.3.0的架构与之前的版本也有较大不同,本着“与时俱进”、“由浅入深”的宗旨,我将逐步分析Jemalloc5.3.0的实现。 另外,单讲实现代码是极其枯燥的,…...

JavaScript——属性的增删改查
目录 任务描述 相关知识 属性的获取 方式一 方式二 属性的修改与新增 删除属性 编程要求 任务描述 Luma Restaurant 以前的财务人员在统计销售额的时候不小心把数据弄错了,现在的财务人员想通过一个 JavaScript 函数方便的修改数据,并署上自己的…...

51单片机第15步_串口多机通讯使用CRC8校验
本章重点介绍串口多机通讯使用CRC8校验。 数据格式:"$123xxxx*crc8\r\n"; 如:"$1234567890ABCDEF*06\r\n" 如:"$1231234567890*31\r\n" crc8是CRC校验值,为十六进制的ASCII码,不包含$和校验值前面的那个* #include <REG51.h> //包含…...

WPF----进度条ProgressBar(渐变色)
ProgressBar 是一种用于指示进程或任务的进度的控件,通常在图形用户界面(GUI)中使用。它提供了一种视觉反馈,显示任务的完成程度,帮助用户了解任务的进展情况。 基本特性 Minimum 和 Maximum 属性: 这些属…...
)
Apipost接口测试工具的原理及应用详解(四)
本系列文章简介: 随着软件行业的快速发展,API(应用程序编程接口)作为不同软件组件之间通信的桥梁,其重要性日益凸显。API的质量直接关系到软件系统的稳定性、性能和用户体验。因此,对API进行严格的测试成为…...

【图论】200. 岛屿问题
200. 岛屿问题 难度:中等 力扣地址:https://leetcode.cn/studyplan/top-100-liked/ 问题描述 给你一个由 1(陆地)和 0(水)组成的的二维网格,请你计算网格中岛屿的数量。 岛屿总是被水包围&…...

AI学习指南机器学习篇-随机森林的优缺点
AI学习指南机器学习篇-随机森林的优缺点 引言 机器学习是人工智能领域的重要分支,其中随机森林(Random Forest)算法以其高性能和广泛应用而备受瞩目。然而,就像任何其他算法一样,随机森林也有其优缺点。本文将深入探讨随机森林算法的优势和…...
)
基于boost::beast的http服务器(上)
文章目录 1.beast网落库介绍2.相关类及api3.异步读写的处理3.1异步写案例3.2异步读案例 1.beast网落库介绍 Beast网络库是一个基于Boost库的C网络库,特别用于开发高性能的网络应用程序。它提供了一组易于使用的API,主要用于处理HTTP和WebSocket协议&…...
)
深度学习之近端策略优化(Proximal Policy Optimization,PPO)
PPO(Proximal Policy Optimization,近端策略优化)是深度强化学习中的一种算法,属于策略梯度方法中的一种。PPO通过优化策略来最大化累积奖励,具有稳定性好、易于调参等优点,是目前广泛应用的一种深度强化学习算法。下面介绍PPO的基本原理和流程。 PPO基本原理 PPO算法的…...
用pycharm进行python爬虫的步骤
使用 pycharm 进行 python 爬虫的步骤:下载并安装 pycharm。创建一个新项目。安装 requests 和 beautifulsoup 库。编写爬虫脚本,包括获取页面内容、解析 html 和提取数据的代码。运行爬虫脚本。保存和处理提取到的数据。 用 PyCharm 进行 Python 爬虫的…...

重写功能 rewrite
Nginx服务器利用 ngx_http_rewrite_module 模块解析和处理rewrite请求,此功能依靠 PCRE(perl compatible regular expression),因此编译之前要安装PCRE库,rewrite是nginx服务器的重要功能之 一,用于实现URL的重写,URL的…...

ISO19110操作要求类中/req/operation/operation-attributes的详细解释
/req/operation/operation-attributes 要求: 只有要素属性(feature attributes)可以通过‘observesValueOf’、‘triggeredByValuesOf’或‘affectsValuesOf’关联角色与要素操作(feature operations)关联。 具体解释 定义 要…...

3分钟快速上手:用MoneyPrinterTurbo一键生成AI短视频的完整指南
3分钟快速上手:用MoneyPrinterTurbo一键生成AI短视频的完整指南 【免费下载链接】MoneyPrinterTurbo 利用AI大模型,一键生成高清短视频 Generate short videos with one click using AI LLM. 项目地址: https://gitcode.com/GitHub_Trending/mo/MoneyP…...

大模型低显存优化实战:量化、KV Cache与动态加载技术解析
1. 项目概述:低显存环境下的OpenClaw模型优化实战最近在GitHub上看到一个挺有意思的项目,标题是“openclaw-lowmem-optimization”。光看名字,就能猜到这大概是在做一件什么事:针对OpenClaw这个模型,进行低显存&#x…...

3分钟掌握B站视频下载神器BilibiliDown:跨平台免费开源下载工具
3分钟掌握B站视频下载神器BilibiliDown:跨平台免费开源下载工具 【免费下载链接】BilibiliDown (GUI-多平台支持) B站 哔哩哔哩 视频下载器。支持稍后再看、收藏夹、UP主视频批量下载|Bilibili Video Downloader 😳 项目地址: https://gitcode.com/gh_…...

Nornir网络自动化监控插件:集成Sentry实现异常告警与上下文追踪
1. 项目概述:一个为Nornir网络自动化框架量身定制的告警与监控插件 如果你和我一样,长期使用Nornir框架来管理成百上千的网络设备,那你一定遇到过这样的场景:一个精心编写的自动化任务在测试环境跑得飞快,一旦放到生产…...

Python实时通信实战:Flask-SocketIO深度解析
Python实时通信实战:Flask-SocketIO深度解析 引言 在Python开发中,实时通信是构建现代Web应用的核心技术。作为一名从Rust转向Python的后端开发者,我深刻体会到Flask-SocketIO在实时通信方面的优势。Flask-SocketIO为Flask应用提供了WebSocke…...

掌握TA-Lib Python技术分析库:从入门到精通的完整指南 [特殊字符]
掌握TA-Lib Python技术分析库:从入门到精通的完整指南 🚀 【免费下载链接】ta-lib-python Python wrapper for TA-Lib (http://ta-lib.org/). 项目地址: https://gitcode.com/gh_mirrors/ta/ta-lib-python TA-Lib Python技术分析库是金融量化交易…...
)
零代码也能做游戏?用UE5蓝图系统10分钟做个会转的潜艇(附完整资产包)
零代码游戏开发:用UE5蓝图10分钟打造动态潜艇 当第一次打开虚幻引擎5时,许多初学者会被其庞大的功能体系所震撼——从影视级的光照系统到数百万面的高精度模型渲染,这款引擎几乎能实现任何你能想象到的视觉效果。但更令人惊喜的是,…...

虚拟机开发环境中如何通过Taotoken管理多个项目的API Key与用量
🚀 告别海外账号与网络限制!稳定直连全球优质大模型,限时半价接入中。 👉 点击领取海量免费额度 虚拟机开发环境中如何通过Taotoken管理多个项目的API Key与用量 应用场景类,开发者在同一虚拟机中维护多个不同项目&am…...

Fast-Planner核心思想拆解:从B样条优化到时间重分配,如何让无人机飞得更快更稳?
Fast-Planner核心思想解析:从B样条优化到时间重分配的无人机高速运动规划 无人机在复杂环境中的高速飞行一直是运动规划领域的重大挑战。传统方法往往在速度提升后出现轨迹抖动或避障失效的问题,而Fast-Planner通过创新的算法架构实现了"又快又稳&q…...

WinRAR隐藏技能:除了.rar和.zip,批处理还能压成啥?附参数避坑指南
WinRAR命令行进阶指南:解锁隐藏压缩格式与参数避坑实战 在大多数用户的认知里,WinRAR只是个能处理.rar和.zip文件的图形化工具。但它的命令行版本却隐藏着一个完全不同的世界——支持超过20种压缩格式转换、批量自动化处理、甚至能实现文件系统级操作。本…...