C#通过MXComponent与三菱PLC通信
1,MXComponent安装包与手册。
https://download.csdn.net/download/lingxiao16888/89767137
2,使用管理员权限打开MXComponent,并进行配置。


3,引用相应的类库。
//通信类库
ActUtlTypeLib.dll或者ActProgType.dll
注明:ActUtlTypeLib.dll与ActProgType.dll的区别是:ActUtlTypeLib.dll完全依赖CommunicationSetupUtility软件的配置,只需要通过CommunicationSetupUtility配置中提供的逻辑站号即可实现与PLC的连接。ActProgType.dll需要自行在C#代码中设置通信的方式,目标,物理连接方式等才可实现与PLC的连接。//错误代码解析库
ActSupportMsgLib.dll
解析返回的代码(代码类型为int)。正常返回0,异常返回非0数字,通过该类库提供的函数解析出该代码的具体意思。//类型或者控件所在的位置
以上类库均位于MXComponent安装目录的\Act\Control\下,例如:D:\Program Files\MXComponent\Act\Control
4,应用
1,引用相关命令控件,创建相关类。
ActUtlTypeLib.ActUtlTypeClass PLC = new ActUtlTypeLib.ActUtlTypeClass();ActSupportMsgLib.ActMLSupportMsgClass support = new ActSupportMsgLib.ActMLSupportMsgClass();2,读取PLC CPU信息。
//获取当前PLC型号信息string cpuName;int cpuCode;result = PLC.GetCpuType(out cpuName, out cpuCode);if (result == 0){lblCPUModel.Text = cpuName;lblCPUCode.Text = "0x" + cpuCode.ToString("X8");AddLog(0, "已成功获取PLC CPU信息");}else{AddLog(1, "获取PLC CPU信息失败,原因:" + GetErrorMessage(result));}效果

3,读写PLC当前时钟。
注明:模拟状态不支持时钟写入。
private void btnReadPLCTime_Click(object sender, EventArgs e){short year, month, day, dayOfWeek, hour, minute, second;int result = PLC.GetClockData(out year, out month, out day, out dayOfWeek, out hour, out minute, out second);if (result == 0){lblPLCDateTime.Text = $"PLC时钟:{year}/{month}/{day} {hour}:{minute}:{second} 星期{dayOfWeek}";}else{string msg = GetErrorMessage(result);AddLog(2, "读取PLC时钟错误,原因:" + msg);}}private void btnWritePLCTime_Click(object sender, EventArgs e){//向PLC写入时钟DateTime dt = dateTimePicker1.Value;int result = PLC.SetClockData((short)dt.Year, (short)dt.Month, (short)dt.Day, (short)dt.DayOfWeek, (short)dt.Hour, (short)dt.Minute, (short)dt.Second);if (result == 0){AddLog(0, "PLC时钟设置成功!");}else{string msg = GetErrorMessage(result);AddLog(2, "PLC时钟设置失败,原因:" + msg);}}效果:

4,远程控制PLC状态(Run,Stop,Pause)
private void plcSwitch_Click(object sender, EventArgs e){//参数IOperator:0 远程Run;1 远程 Stop;2 远程Pauseint result = PLC.SetCpuStatus(plcSwitch.CurrentPosition);if (result != 0){string msg;msg = GetErrorMessage(result);AddLog(2, "PLC状态切换失败,原因:" + msg);}else{switch (plcSwitch.CurrentPosition){case 0://自动led_PLC.LEDBackColor = Color.Green;break;case 1://Stopled_PLC.LEDBackColor = Color.Red;break;default://pauseled_PLC.LEDBackColor = Color.Orange;break;}}}
效果:

5,连续的块数据读取。
private void btnReadDeviceBlock_Click(object sender, EventArgs e){//以4个byte为单位的int块读取if (Verification(txt_ReadBlockAddress, txt_ReadBlockSize)){int num = int.Parse(txt_ReadBlockSize.Text.Trim());short[] arr = new short[num];int result = PLC.ReadDeviceBlock2(txt_ReadBlockAddress.Text.Trim(), num, out arr[0]);if (result == 0){string msg = $"{txt_ReadBlockAddress.Text}连续{num}个地址值为:{string.Join(",", arr)}";AddLog(0, msg);}else{string msg = GetErrorMessage(result);AddLog(2, txt_ReadBlockAddress.Text + "块读取失败,原因:" + msg);}}}private void btnWriteDeviceBlock_Click(object sender, EventArgs e){if (Verification(txt_WriteBlockAddress, txt_WriteBlockValue)){int num;if (!int.TryParse(txt_WriteBlockSize.Text.Trim(), out num)){MessageBox.Show("请输入正确的数量!");return;}int[] arr = txt_WriteBlockValue.Lines.Select(item => Convert.ToInt32(item)).ToArray();int result = PLC.WriteDeviceBlock(txt_ReadBlockAddress.Text.Trim(), num, ref arr[0]);if (result == 0){string msg = $"从{txt_ReadBlockAddress.Text}开始连续写入{num}个地址值为:{string.Join(",", arr)}";AddLog(0, msg);}else{string msg = GetErrorMessage(result);AddLog(2, txt_ReadBlockAddress.Text + "块写入失败,原因:" + msg);}}}注意事项:使用块连续读写时是以1个word为基准,例如读取数量为1,起始地址为M0的软元件时,返回的是M0-M15的集合;读取数量为1,起始地址为D0的寄存器时返回的时D0。这有别与后面出现的GetDevice()方法。6,非连续的块数据读写。
private void btnReadDeviceRandom_Click(object sender, EventArgs e){if (Verification(txt_ReadRandomAddress, txt_ReadRandomSize)){int num;if (!int.TryParse(txt_ReadRandomSize.Text.Trim(), out num)){MessageBox.Show("只能为正整数");return;}//对地址进行离散读取,例如一次读取D0,D2,D3,D6等非连续地址string[] arr = txt_ReadRandomAddress.Lines;short[] values = new short[arr.Length];string addres = string.Join("\n", arr);//地址间使用\n进行分割//注意这里特意使用ReadDeviceRandom2,而不是ReadDeviceRandom,//就是为表示两者除了读取的值,除类型(一个是Int 一个是Short)不同外其他都一样int result = PLC.ReadDeviceRandom2(addres, num, out values[0]);if (result == 0){//读取成功string[] strs = arr.Where((item, index) => index < num).Select((item, index) => $"{item}={values[index]}").ToArray();AddLog(0, "读取成功:" + string.Join(",", strs));}else{string msg = GetErrorMessage(result);AddLog(2, "离散读取地址值失败,失败原因:" + msg);}}}private void btnWriteDeviceRandom_Click(object sender, EventArgs e){if (Verification(txt_WriteRandomAddress, txt_WriteRandomValue)){string[] address = txt_WriteRandomAddress.Lines;int[] values = txt_WriteRandomValue.Lines.Select(item => Convert.ToInt32(item)).ToArray();//各地址之间使用\n进行分割string addStr = string.Join("\n", address);int result = PLC.WriteDeviceRandom(addStr, values.Length, ref values[0]);if (result == 0){AddLog(0, "成功写入值。");}else{string msg = GetErrorMessage(result);AddLog(2, "离散写入失败,失败原因:" + msg);}}}7,对单个软元件或者寄存器进行读写。
private void btnGetDevice_Click(object sender, EventArgs e){//获取单个寄存器的值if (!Regex.IsMatch(txt_ReadDeviceAddress.Text.Trim(), @"^[a-zA-Z]+\d+(\.\d+)?$")){MessageBox.Show("地址格式错误!");txt_ReadDeviceAddress.Focus();return;}short value;int result = PLC.GetDevice2(txt_ReadDeviceAddress.Text.Trim(), out value);if (result == 0){string msg = $"读取成功,{value}";AddLog(0, msg);}else{string msg = GetErrorMessage(result);AddLog(2, "读取失败,原因:" + msg);}}private void btnSetDevice_Click(object sender, EventArgs e){//对单个寄存器进行写入if (Verification(txt_WriteDeviceAddress, txt_WriteDeviceValue)){int value = int.Parse(txt_WriteDeviceValue.Text.Trim());int result = PLC.SetDevice(txt_WriteDeviceAddress.Text, value);if (result == 0){AddLog(0, "成功写入!");}else{string msg = GetErrorMessage(result);AddLog(2, "写入失败,原因:" + msg);}}}8,对缓冲区进行读写。
private void btnReadBuffer_Click(object sender, EventArgs e){//缓冲区地址读取int ioNum, num, address;if (!int.TryParse(txt_ReadBufferStartIO.Text.Trim(), out ioNum)){MessageBox.Show("起始地址格式错误");return;}if (!int.TryParse(txt_ReadBufferSize.Text.Trim(), out num)){MessageBox.Show("数量格式错误");return;}if (!int.TryParse(txt_ReadBufferStartAddress.Text.Trim(), out address)){MessageBox.Show("地址格式错误,地址只能为数字");return;}short[] values = new short[num];int result = PLC.ReadBuffer(ioNum, address, num, out values[0]);if (result == 0){string msg = $"缓冲区读取成功:{string.Join(",", values)}";AddLog(0, msg);}else{string msg = GetErrorMessage(result);AddLog(2, "缓冲区读取失败,原因:" + msg);}}private void btnWriteBuffer_Click(object sender, EventArgs e){//缓冲区地址写入int ioNum, address;if (!int.TryParse(txt_WriteBufferIO.Text.Trim(), out ioNum)){MessageBox.Show("起始地址格式错误");return;}if (!int.TryParse(txt_WriteBufferAddress.Text.Trim(), out address)){MessageBox.Show("地址格式错误,地址只能为数字");return;}if (string.IsNullOrEmpty(txt_WriteBufferValue.Text.Trim())){MessageBox.Show("请勿写入空值");return;}foreach (var item in txt_WriteBufferValue.Lines){if (!Regex.IsMatch(item, @"^\d+(\r|\n|\r\n)?$")){MessageBox.Show("写入的数据格式错误,写入的数据只能是short.");return;}}short[] values = txt_WriteBufferValue.Lines.Select(item => Convert.ToInt16(item)).ToArray();int result = PLC.WriteBuffer(ioNum, address, values.Length, ref values[0]);if (result == 0){string msg = $"缓冲区成功写入。";AddLog(0, msg);}else{string msg = GetErrorMessage(result);AddLog(2, "缓冲区写入失败,原因:" + msg);}}效果

9,软元件登录,解除。
private void btn_AddEntryDevice_Click(object sender, EventArgs e){//软元件之间使用\n进行分割if (string.IsNullOrEmpty(txt_EntryDevices.Text.Trim())){MessageBox.Show("登录的软元件不能为空");return;}foreach (var item in txt_EntryDevices.Lines){if (!Regex.IsMatch(item, @"[a-zA-Z]+\d+(\.\d+)?")){MessageBox.Show("登录的软元件格式错误!");return;}}//周期,单位为秒,范围为1s-1hour超过这个范围将报异常int cycle;if (!int.TryParse(txt_Cycle.Text, out cycle)){MessageBox.Show("周期值只能为正正数");return;}//规定需要使用\n进行分割string devices = string.Join("\n", txt_EntryDevices.Lines);//登录的软元件数量,单次登录的软元件数量不能超过20个。int num = txt_EntryDevices.Lines.Length;//----------------------------------------//登录软元件触发OnDeviceStatus的条件,例如M0,对应的条件设置为1,则只有当M0为1(即ON)时才定时触发该事件int[] entryDeviceConditionList = new int[num];for (int i = 0; i < txt_EntryDeviceCondition.Lines.Length; i++){if (i < num){entryDeviceConditionList[i] = Convert.ToInt32(txt_EntryDeviceCondition.Lines[i]);}}int result = PLC.EntryDeviceStatus(devices, num, cycle, ref entryDeviceConditionList[0]);if (result == 0){AddLog(0, "软元件登录成功");foreach (var item in txt_EntryDevices.Lines){lst_EntryDevice.Items.Add(item);}}else{string msg = GetErrorMessage(result);AddLog(2, $"软元件登录失败,原因:{msg}");}}private void btn_RemoveEntryDevice_Click(object sender, EventArgs e){int result= PLC.FreeDeviceStatus();if (result == 0){AddLog(0, "软元件释放成功");lst_EntryDevice.Items.Clear();}else{string msg = GetErrorMessage(result);AddLog(2, $"软元件释放失败,原因:{msg}");}}10,项目编译注意事项
如果出现编译异常,提示需要注册等信息,请将项目属性->生成->目标平台 设置为x86,再重新编译。5,Demo代码。

using System;
using System.Collections.Generic;
using System.ComponentModel;
using System.Data;
using System.Drawing;
using System.Linq;
using System.Text;
using System.Threading.Tasks;
using System.Windows.Forms;
using System.Text.RegularExpressions;
namespace Demo
{public partial class Form1 : Form{ActUtlTypeLib.ActUtlTypeClass PLC = new ActUtlTypeLib.ActUtlTypeClass();ActSupportMsgLib.ActMLSupportMsgClass support = new ActSupportMsgLib.ActMLSupportMsgClass();public Form1(){InitializeComponent();AddLog(0, "应用启动!");groupBox1.Enabled = false;groupBox2.Enabled = false;groupBox3.Enabled = false;PLC.OnDeviceStatus += PLC_OnDeviceStatus;}private void PLC_OnDeviceStatus(string szDevice, int lData, int lReturnCode){//登录软元件的所触发的事件if (lReturnCode == 0){AddLog(0, $"登录的软元件:{szDevice}={lData}");}else{string msg = GetErrorMessage(lReturnCode);AddLog(2, $"登录的软元件异常,原因:{msg}");}}private void btnConnect_Click(object sender, EventArgs e){if (string.IsNullOrEmpty(txt_Station.Text.Trim())){MessageBox.Show("逻辑站点不能为空");return;}int stationNum;if (int.TryParse(txt_Station.Text.Trim(), out stationNum)){if (stationNum < 0){MessageBox.Show("逻辑站点必须为正数");return;}}else{MessageBox.Show("逻辑站点必须为正数");return;}if (btnConnect.Text.Equals("连接")){PLC.ActLogicalStationNumber = stationNum;PLC.ActPassword = txt_Pwd.Text.Trim();int result = PLC.Open();if (result == 0){AddLog(0, "PLC已成功连接!");btnConnect.Text = "断开";btnConnect.BackColor = Color.Green;groupBox1.Enabled = true;groupBox2.Enabled = true;groupBox3.Enabled = true;//获取当前PLC型号信息string cpuName;int cpuCode;result = PLC.GetCpuType(out cpuName, out cpuCode);if (result == 0){lblCPUModel.Text = cpuName;lblCPUCode.Text = "0x" + cpuCode.ToString("X8");AddLog(0, "已成功获取PLC CPU信息");}else{AddLog(1, "获取PLC CPU信息失败,原因:" + GetErrorMessage(result));}}else{string msg = GetErrorMessage(result);AddLog(2, "PLC 连接失败!原因:" + msg);}}else{int result = PLC.Close();if (result == 0){lblCPUCode.Text = "";lblCPUModel.Text = "";lblPLCDateTime.Text = "";groupBox1.Enabled = false;groupBox2.Enabled = false;groupBox3.Enabled = false;AddLog(0, "PLC已断开连接");btnConnect.Text = "连接";btnConnect.BackColor = Color.DarkKhaki;}else{string msg = GetErrorMessage(result);AddLog(2, "PLC 断开连接失败!原因:" + msg);}}}private void btnReadPLCTime_Click(object sender, EventArgs e){short year, month, day, dayOfWeek, hour, minute, second;int result = PLC.GetClockData(out year, out month, out day, out dayOfWeek, out hour, out minute, out second);if (result == 0){lblPLCDateTime.Text = $"PLC时钟:{year}/{month}/{day} {hour}:{minute}:{second} 星期{dayOfWeek}";}else{string msg = GetErrorMessage(result);AddLog(2, "读取PLC时钟错误,原因:" + msg);}}private void plcSwitch_Click(object sender, EventArgs e){//参数IOperator:0 远程Run;1 远程 Stop;2 远程Pauseint result = PLC.SetCpuStatus(plcSwitch.CurrentPosition);if (result != 0){string msg;msg = GetErrorMessage(result);AddLog(2, "PLC状态切换失败,原因:" + msg);}else{switch (plcSwitch.CurrentPosition){case 0://自动led_PLC.LEDBackColor = Color.Green;break;case 1://Stopled_PLC.LEDBackColor = Color.Red;break;default://pauseled_PLC.LEDBackColor = Color.Orange;break;}}}private void btnWritePLCTime_Click(object sender, EventArgs e){//向PLC写入时钟DateTime dt = dateTimePicker1.Value;int result = PLC.SetClockData((short)dt.Year, (short)dt.Month, (short)dt.Day, (short)dt.DayOfWeek, (short)dt.Hour, (short)dt.Minute, (short)dt.Second);if (result == 0){AddLog(0, "PLC时钟设置成功!");}else{string msg = GetErrorMessage(result);AddLog(2, "PLC时钟设置失败,原因:" + msg);}}/// <summary>/// 根据错误代码获取错误信息/// </summary>/// <param name="errorCode"></param>/// <returns></returns>string GetErrorMessage(int errorCode){object str;support.GetErrorMessage(errorCode, out str);if (str != null){return System.Text.RegularExpressions.Regex.Replace(str.ToString(), @"\r|\n", "");}return "";}void AddLog(int level, string msg){ListViewItem item = new ListViewItem();item.ImageIndex = level;item.SubItems.Add(DateTime.Now.ToString("yyyy/MM/dd HH:mm:ss"));item.SubItems.Add(msg);listView1.Items.Add(item);listView1.EnsureVisible(listView1.Items.Count - 1);}private void btnReadDeviceBlock_Click(object sender, EventArgs e){//以4个byte为单位的int块读取if (Verification(txt_ReadBlockAddress, txt_ReadBlockSize)){int num = int.Parse(txt_ReadBlockSize.Text.Trim());short[] arr = new short[num];int result = PLC.ReadDeviceBlock2(txt_ReadBlockAddress.Text.Trim(), num, out arr[0]);if (result == 0){string msg = $"{txt_ReadBlockAddress.Text}连续{num}个地址值为:{string.Join(",", arr)}";AddLog(0, msg);}else{string msg = GetErrorMessage(result);AddLog(2, txt_ReadBlockAddress.Text + "块读取失败,原因:" + msg);}}}private void btnWriteDeviceBlock_Click(object sender, EventArgs e){if (Verification(txt_WriteBlockAddress, txt_WriteBlockValue)){int num;if (!int.TryParse(txt_WriteBlockSize.Text.Trim(), out num)){MessageBox.Show("请输入正确的数量!");return;}int[] arr = txt_WriteBlockValue.Lines.Select(item => Convert.ToInt32(item)).ToArray();int result = PLC.WriteDeviceBlock(txt_ReadBlockAddress.Text.Trim(), num, ref arr[0]);if (result == 0){string msg = $"从{txt_ReadBlockAddress.Text}开始连续写入{num}个地址值为:{string.Join(",", arr)}";AddLog(0, msg);}else{string msg = GetErrorMessage(result);AddLog(2, txt_ReadBlockAddress.Text + "块写入失败,原因:" + msg);}}}bool Verification(TextBox tb01, TextBox tb02){//第一个必须为有效的PLC地址,第一个必须为数字if (string.IsNullOrEmpty(tb01.Text.Trim())){MessageBox.Show("不能为空!");tb01.Focus();return false;}if (string.IsNullOrEmpty(tb02.Text.Trim())){MessageBox.Show("不能为空!");tb02.Focus();return false;}foreach (var item in tb01.Lines){if (!Regex.IsMatch(item, @"^[a-zA-Z]+\d+(\.\d+)?(\r|\n|\r\n)?$")){MessageBox.Show("地址格式错误!");tb01.Focus();return false;}}foreach (var item in tb02.Lines){double val;if (!double.TryParse(item, out val)){MessageBox.Show("数据格式错误!");tb02.Focus();return false;}}return true;}private void btnReadDeviceRandom_Click(object sender, EventArgs e){if (Verification(txt_ReadRandomAddress, txt_ReadRandomSize)){int num;if (!int.TryParse(txt_ReadRandomSize.Text.Trim(), out num)){MessageBox.Show("只能为正整数");return;}//对地址进行离散读取,例如一次读取D0,D2,D3,D6等非连续地址string[] arr = txt_ReadRandomAddress.Lines;short[] values = new short[arr.Length];string addres = string.Join("\n", arr);//地址间使用\n进行分割//注意这里特意使用ReadDeviceRandom2,而不是ReadDeviceRandom,//就是为表示两者除了读取的值,除类型(一个是Int 一个是Short)不同外其他都一样int result = PLC.ReadDeviceRandom2(addres, num, out values[0]);if (result == 0){//读取成功string[] strs = arr.Where((item, index) => index < num).Select((item, index) => $"{item}={values[index]}").ToArray();AddLog(0, "读取成功:" + string.Join(",", strs));}else{string msg = GetErrorMessage(result);AddLog(2, "离散读取地址值失败,失败原因:" + msg);}}}private void btnWriteDeviceRandom_Click(object sender, EventArgs e){if (Verification(txt_WriteRandomAddress, txt_WriteRandomValue)){string[] address = txt_WriteRandomAddress.Lines;int[] values = txt_WriteRandomValue.Lines.Select(item => Convert.ToInt32(item)).ToArray();//各地址之间使用\n进行分割string addStr = string.Join("\n", address);int result = PLC.WriteDeviceRandom(addStr, values.Length, ref values[0]);if (result == 0){AddLog(0, "成功写入值。");}else{string msg = GetErrorMessage(result);AddLog(2, "离散写入失败,失败原因:" + msg);}}}private void btnGetDevice_Click(object sender, EventArgs e){//获取单个寄存器的值if (!Regex.IsMatch(txt_ReadDeviceAddress.Text.Trim(), @"^[a-zA-Z]+\d+(\.\d+)?$")){MessageBox.Show("地址格式错误!");txt_ReadDeviceAddress.Focus();return;}short value;int result = PLC.GetDevice2(txt_ReadDeviceAddress.Text.Trim(), out value);if (result == 0){string msg = $"读取成功,{value}";AddLog(0, msg);}else{string msg = GetErrorMessage(result);AddLog(2, "读取失败,原因:" + msg);}}private void btnSetDevice_Click(object sender, EventArgs e){//对单个寄存器进行写入if (Verification(txt_WriteDeviceAddress, txt_WriteDeviceValue)){int value = int.Parse(txt_WriteDeviceValue.Text.Trim());int result = PLC.SetDevice(txt_WriteDeviceAddress.Text, value);if (result == 0){AddLog(0, "成功写入!");}else{string msg = GetErrorMessage(result);AddLog(2, "写入失败,原因:" + msg);}}}private void btnReadBuffer_Click(object sender, EventArgs e){//缓冲区地址读取int ioNum, num, address;if (!int.TryParse(txt_ReadBufferStartIO.Text.Trim(), out ioNum)){MessageBox.Show("起始地址格式错误");return;}if (!int.TryParse(txt_ReadBufferSize.Text.Trim(), out num)){MessageBox.Show("数量格式错误");return;}if (!int.TryParse(txt_ReadBufferStartAddress.Text.Trim(), out address)){MessageBox.Show("地址格式错误,地址只能为数字");return;}short[] values = new short[num];int result = PLC.ReadBuffer(ioNum, address, num, out values[0]);if (result == 0){string msg = $"缓冲区读取成功:{string.Join(",", values)}";AddLog(0, msg);}else{string msg = GetErrorMessage(result);AddLog(2, "缓冲区读取失败,原因:" + msg);}}private void btnWriteBuffer_Click(object sender, EventArgs e){//缓冲区地址写入int ioNum, address;if (!int.TryParse(txt_WriteBufferIO.Text.Trim(), out ioNum)){MessageBox.Show("起始地址格式错误");return;}if (!int.TryParse(txt_WriteBufferAddress.Text.Trim(), out address)){MessageBox.Show("地址格式错误,地址只能为数字");return;}if (string.IsNullOrEmpty(txt_WriteBufferValue.Text.Trim())){MessageBox.Show("请勿写入空值");return;}foreach (var item in txt_WriteBufferValue.Lines){if (!Regex.IsMatch(item, @"^\d+(\r|\n|\r\n)?$")){MessageBox.Show("写入的数据格式错误,写入的数据只能是short.");return;}}short[] values = txt_WriteBufferValue.Lines.Select(item => Convert.ToInt16(item)).ToArray();int result = PLC.WriteBuffer(ioNum, address, values.Length, ref values[0]);if (result == 0){string msg = $"缓冲区成功写入。";AddLog(0, msg);}else{string msg = GetErrorMessage(result);AddLog(2, "缓冲区写入失败,原因:" + msg);}}private void btn_AddEntryDevice_Click(object sender, EventArgs e){//软元件之间使用\n进行分割if (string.IsNullOrEmpty(txt_EntryDevices.Text.Trim())){MessageBox.Show("登录的软元件不能为空");return;}foreach (var item in txt_EntryDevices.Lines){if (!Regex.IsMatch(item, @"[a-zA-Z]+\d+(\.\d+)?")){MessageBox.Show("登录的软元件格式错误!");return;}}//周期,单位为秒,范围为1s-1hour超过这个范围将报异常int cycle;if (!int.TryParse(txt_Cycle.Text, out cycle)){MessageBox.Show("周期值只能为正正数");return;}//规定需要使用\n进行分割string devices = string.Join("\n", txt_EntryDevices.Lines);//登录的软元件数量,单次登录的软元件数量不能超过20个。int num = txt_EntryDevices.Lines.Length;//----------------------------------------//登录软元件触发OnDeviceStatus的条件,例如M0,对应的条件设置为1,则只有当M0为1(即ON)时才定时触发该事件int[] entryDeviceConditionList = new int[num];for (int i = 0; i < txt_EntryDeviceCondition.Lines.Length; i++){if (i < num){entryDeviceConditionList[i] = Convert.ToInt32(txt_EntryDeviceCondition.Lines[i]);}}int result = PLC.EntryDeviceStatus(devices, num, cycle, ref entryDeviceConditionList[0]);if (result == 0){AddLog(0, "软元件登录成功");foreach (var item in txt_EntryDevices.Lines){lst_EntryDevice.Items.Add(item);}}else{string msg = GetErrorMessage(result);AddLog(2, $"软元件登录失败,原因:{msg}");}}private void btn_RemoveEntryDevice_Click(object sender, EventArgs e){int result=   PLC.FreeDeviceStatus();if (result == 0){AddLog(0, "软元件释放成功");lst_EntryDevice.Items.Clear();}else{string msg = GetErrorMessage(result);AddLog(2, $"软元件释放失败,原因:{msg}");}}}
}
6,Demo链接。
https://download.csdn.net/download/lingxiao16888/89767457
相关文章:

C#通过MXComponent与三菱PLC通信
1,MXComponent安装包与手册。 https://download.csdn.net/download/lingxiao16888/89767137 2,使用管理员权限打开MXComponent,并进行配置。 3,引用相应的类库。 //通信类库 ActUtlTypeLib.dll或者ActProgType.dll 注明&#x…...

深度学习实战91-利用时空特征融合模型的城市网络流量预测分析与应用
大家好,我是微学AI,今天给大家介绍一下深度学习实战91-利用时空特征融合模型的城市网络流量预测分析与应用。本文围绕基于时空特征融合的城市网络流量预测展开。介绍了城市网络流量预测的重要性和现实需求,以及时空特征融合模型,包括其原理和优势。然后展示所使用的数据集,…...

GlusterFS 分布式文件系统
一、GlusterFS 概述 1.1 什么是GlusterFS GlusterFS 是一个开源的分布式文件系统,它可以将多个存储服务器结合在一起,创建一个大的存储池,供客户端使用。它不需要单独的元数据服务器,这样可以提高系统的性能和可靠性。由于没有…...

论文学习笔记6:Relation-Aware Heterogeneous Graph Neural Network for Fraud Detection
文章目录 Abstract一、Introduction二、Preliminaries2.1Problem Definition2.2Related Works 三、Proposed Method3.1Model Architecture3.2Computation Graph Pre-process3.3Heterogeneous Propagation Abstract 欺诈检测是金融和社交媒体领域的一项重要数据挖掘任务。传统的…...

无人机光电吊舱的技术!!
1. 成像技术 可见光成像:通过高分辨率相机捕捉地面或空中目标的清晰图像,提供直观的视觉信息。 红外热成像:利用红外辐射探测目标的温度分布,实现夜间或恶劣天气条件下的隐蔽目标发现。 多光谱成像:通过不同波段的光…...

C++——判断year是不是闰年。
没注释的源代码 #include <iostream> using namespace std; void Y(int y); int main() { int year; cout<<"请输入一个年份:"; cin>>year; Y(year); return 0; } void Y(int y) { if(((y%40)&&(y%100!0))||(y%…...
31. 三维向量Vector3与模型位置
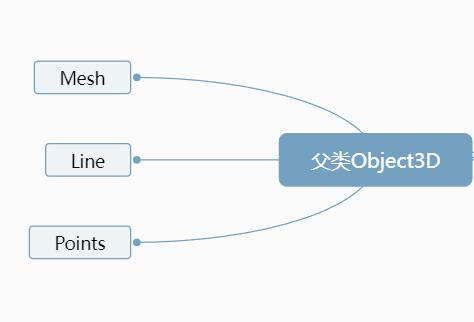
点模型Points、线模型Line、网格网格模型Mesh等模型对象的父类都是Object3D (opens new window),如果想对这些模型进行旋转、缩放、平移等操作,如何实现,可以查询Threejs文档Object3D (opens new window)对相关属性和方法的介绍。 三维向量Ve…...

C# Action和delegate区别及示例代码
Action和delegate类似但没有返回值 Action和delegate在C#编程语言中有明显的区别,主要体现在它们的定义、用途和特性上。 1. 定义 Delegate:Delegate是C#中用于定义方法签名的类型,它允许将方法作为参数传递,或者将方法赋值给变…...

深度优先搜索: 探索图结构的括号化旅程
深度优先搜索: 探索图结构的括号化旅程 图的括号化结构示例图深度优先搜索的伪代码C语言实现解释运行结果总结在解决图相关问题时,深度优先搜索(DFS)是一种非常有用的算法。DFS 通过递归或使用栈的方式遍历图的节点,尽可能深地搜索每一个分支,然后回溯以搜索其他未访问的节…...

LINUX网络编程:传输层
目录 1.端口号 1.1知名端口号 1.2注意 2.UDP协议 2.1UDP报头的格式 2.2UDP的特点 2.3UDP的缓冲区 1.端口号 端口号的作用标识一个网络中主机的一个进程。 网络之间通信无非就是,发送端和接受端进程之间的通信,所以通过ip地址找到目标主机之后&am…...

PyTorch框架
PyTorch是一个开源的深度学习框架,由Facebook AI Research(FAIR)团队开发,自2017年发布以来,凭借其出色的灵活性、易用性和强大的功能,在深度学习和机器学习领域得到了广泛的应用和认可。以下是对PyTorch框…...

分布式系统实战经验
分布式系统是现代软件架构的核心部分,它通过多个计算节点协同工作来处理大规模数据和请求,提供高可用性、可扩展性和容错能力。在实际开发和运维中,构建分布式系统需要考虑多方面的挑战。以下是一些在分布式系统中的实战经验: 1.…...

软考(中级-软件设计师)(0919)
软考 一、软件设计师-历年考试考点分布情况-上午-计算机与软件工程知识 知识点分数说明比例软件工程基础知识11开发模型、设计原则、测试方法、质量特性、CMM、Pert图、风险管理14.67%面向对象12面向对象基本概念、面向对象分析与设计、UML、常见算法16.00%数据结构与算法10…...

WhaleStudio 与飞腾 S5000C 处理器完成产品兼容测试!
中秋佳节后喜讯传来!经过飞腾信息技术有限公司和北京白鲸开源科技有限公司的联合严格测试,白鲸开源 WhaleStudio 套件 V2.6 版本已在飞腾信息技术有限公司的腾云 S5000C 处理器平台上成功安装并稳定运行。 这标志着白鲸开源商业与飞腾的合作进入了一个新…...

【Arduino】Arduino使用USB-TTL无法下载程序问题
问题描述 自己绘制了一套基于Arduino MEGA的电路,没有在板子上面绘制CH340的标准下载电路,只保留了UART0的插针用于调试和下载程序。 使用ISP烧录完bootloader后,发现无法使用USB-TTL工具烧录程序 问题解决过程 在网上搜索了相关资料&…...

使用源代码编译R包的过程
R包的安装方式可以归纳为 源代码安装 和 二进制文件安装 两类: 源代码安装 是指从包的源代码进行编译安装。包括:① 通过CRAN安装源代码版本的包(如果没有二进制版本,或者指定了安装源代码)。② 从GitHub、Bioconducto…...
基于JavaWeb开发的java springboot+mybatis电影售票网站管理系统前台+后台设计和实现
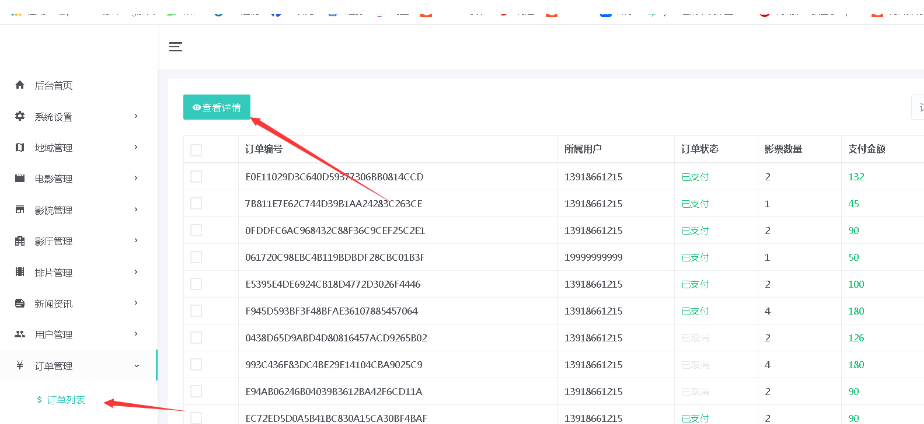
基于JavaWeb开发的java springbootmybatis电影售票网站管理系统前台后台设计和实现 🍅 作者主页 网顺技术团队 🍅 欢迎点赞 👍 收藏 ⭐留言 📝 🍅 文末获取源码联系方式 📝 🍅 查看下方微信号获…...

【论文阅读】Face2Diffusion for Fast and Editable Face Personalization
code:mapooon/Face2Diffusion: [CVPR 2024] Face2Diffusion for Fast and Editable Face Personalization https://arxiv.org/abs/2403.05094 (github.com) 论文 介绍 目标:向 T2I 模型不知道的图像中插入特定概念(例如某人的脸ÿ…...

金钥匙系列:Kubernetes (K8s) 服务集群技术栈学习路线
维护Kubernetes (K8s) 服务集群是一个复杂且多层次的技术任务,涉及容器化技术、集群管理、网络、安全、监控等多个领域。为了成为一名优秀的K8s集群维护工程师,技术栈需要广泛且深入。本文将为你详细介绍从零开始到深入掌握K8s集群维护的职业技术栈学习路…...

centos远程桌面连接windows
CentOS是一款广泛使用的Linux发行版,特别是在服务器领域。很多企业和个人用户会选择远程连接到CentOS进行操作和维护。虽然CentOS自带了一些远程桌面解决方案,但它们在使用上存在一些局限性。接下来,我将介绍如何实现CentOS的远程桌面连接&am…...
国防科技大学计算机基础课程笔记02信息编码
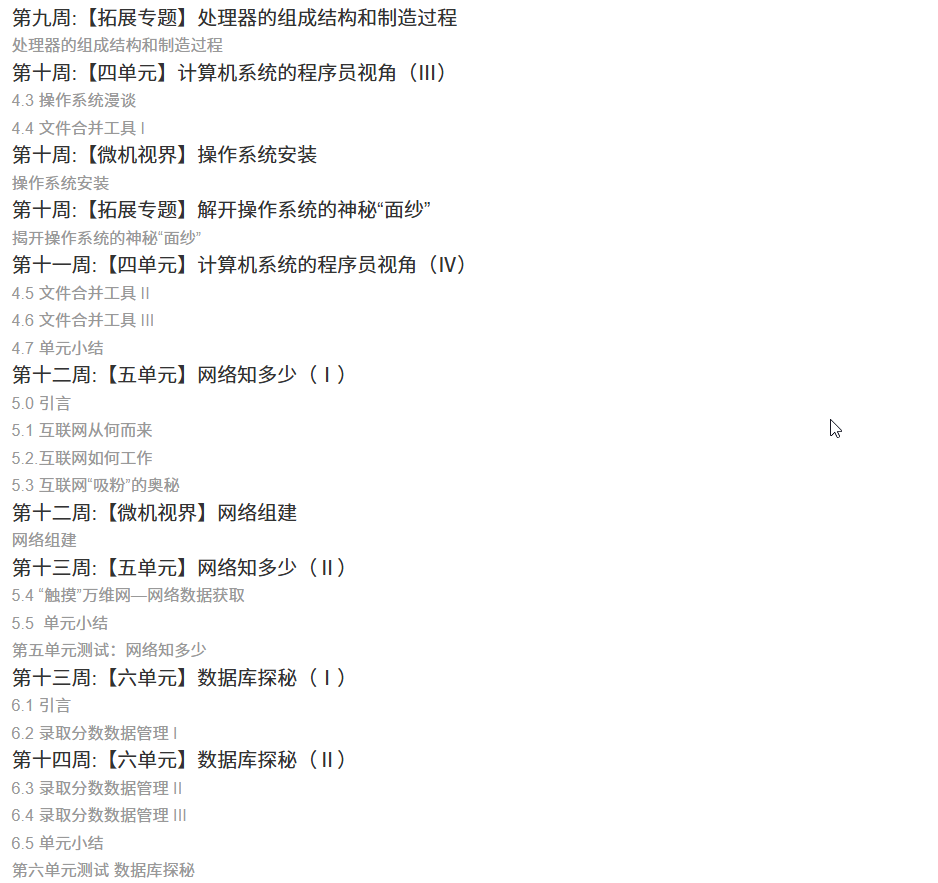
1.机内码和国标码 国标码就是我们非常熟悉的这个GB2312,但是因为都是16进制,因此这个了16进制的数据既可以翻译成为这个机器码,也可以翻译成为这个国标码,所以这个时候很容易会出现这个歧义的情况; 因此,我们的这个国…...
基于FPGA的PID算法学习———实现PID比例控制算法
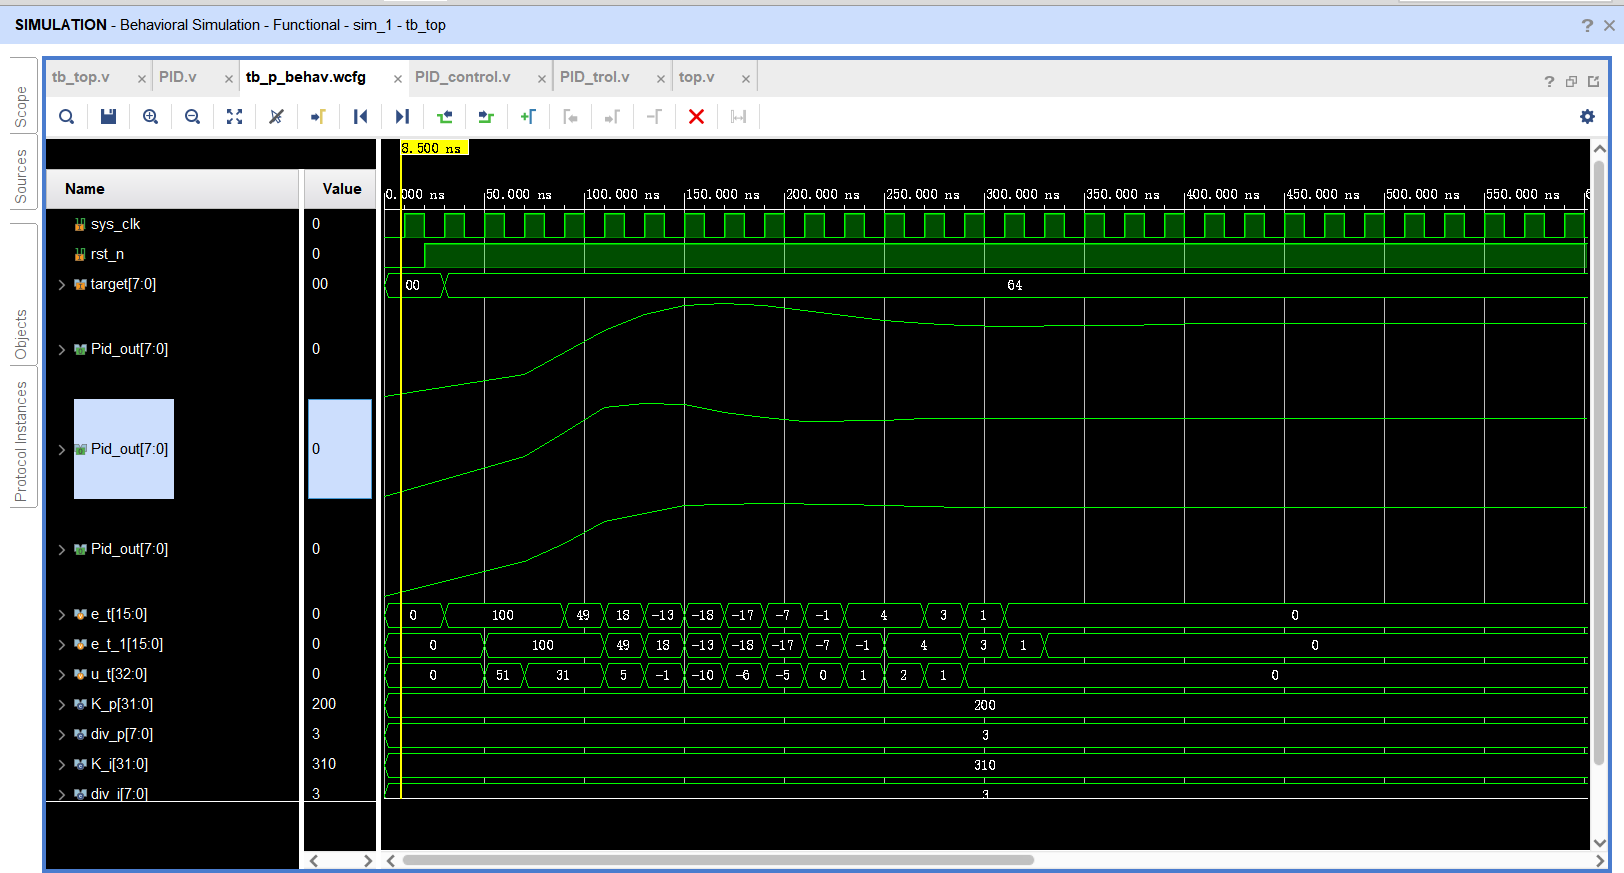
基于FPGA的PID算法学习 前言一、PID算法分析二、PID仿真分析1. PID代码2.PI代码3.P代码4.顶层5.测试文件6.仿真波形 总结 前言 学习内容:参考网站: PID算法控制 PID即:Proportional(比例)、Integral(积分&…...

基于服务器使用 apt 安装、配置 Nginx
🧾 一、查看可安装的 Nginx 版本 首先,你可以运行以下命令查看可用版本: apt-cache madison nginx-core输出示例: nginx-core | 1.18.0-6ubuntu14.6 | http://archive.ubuntu.com/ubuntu focal-updates/main amd64 Packages ng…...

转转集团旗下首家二手多品类循环仓店“超级转转”开业
6月9日,国内领先的循环经济企业转转集团旗下首家二手多品类循环仓店“超级转转”正式开业。 转转集团创始人兼CEO黄炜、转转循环时尚发起人朱珠、转转集团COO兼红布林CEO胡伟琨、王府井集团副总裁祝捷等出席了开业剪彩仪式。 据「TMT星球」了解,“超级…...

多模态商品数据接口:融合图像、语音与文字的下一代商品详情体验
一、多模态商品数据接口的技术架构 (一)多模态数据融合引擎 跨模态语义对齐 通过Transformer架构实现图像、语音、文字的语义关联。例如,当用户上传一张“蓝色连衣裙”的图片时,接口可自动提取图像中的颜色(RGB值&…...
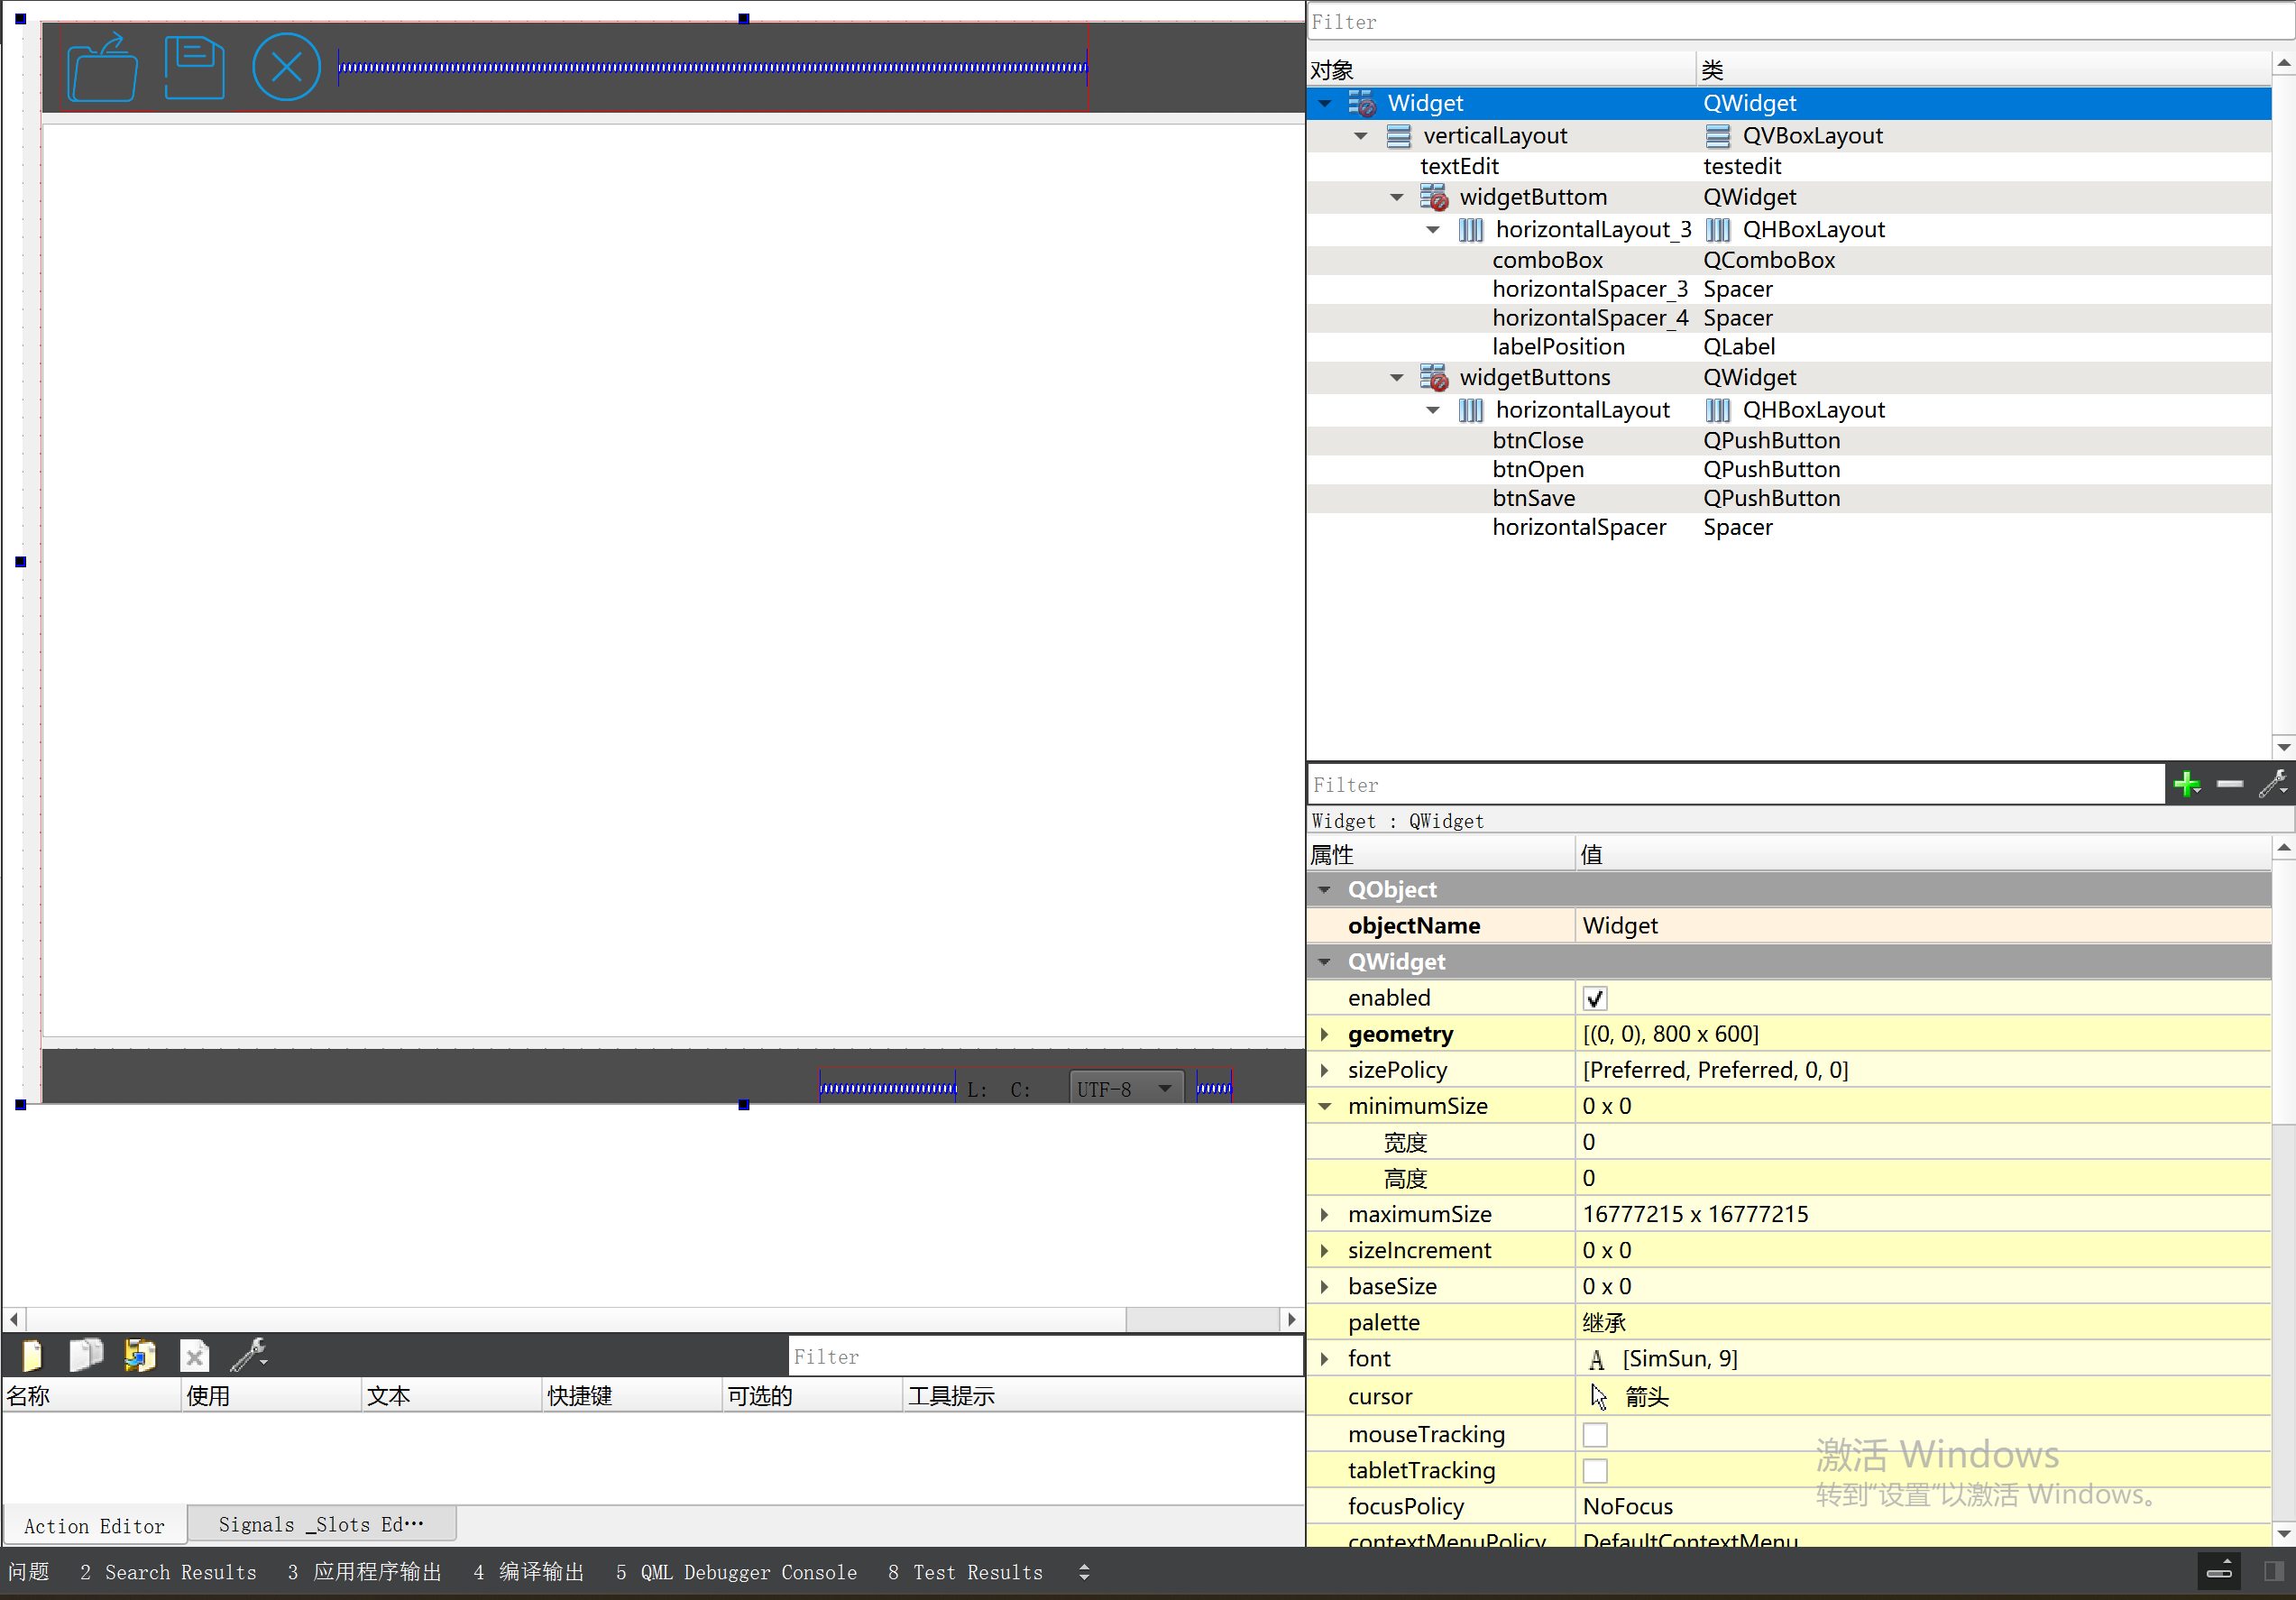
P3 QT项目----记事本(3.8)
3.8 记事本项目总结 项目源码 1.main.cpp #include "widget.h" #include <QApplication> int main(int argc, char *argv[]) {QApplication a(argc, argv);Widget w;w.show();return a.exec(); } 2.widget.cpp #include "widget.h" #include &q…...

土地利用/土地覆盖遥感解译与基于CLUE模型未来变化情景预测;从基础到高级,涵盖ArcGIS数据处理、ENVI遥感解译与CLUE模型情景模拟等
🔍 土地利用/土地覆盖数据是生态、环境和气象等诸多领域模型的关键输入参数。通过遥感影像解译技术,可以精准获取历史或当前任何一个区域的土地利用/土地覆盖情况。这些数据不仅能够用于评估区域生态环境的变化趋势,还能有效评价重大生态工程…...
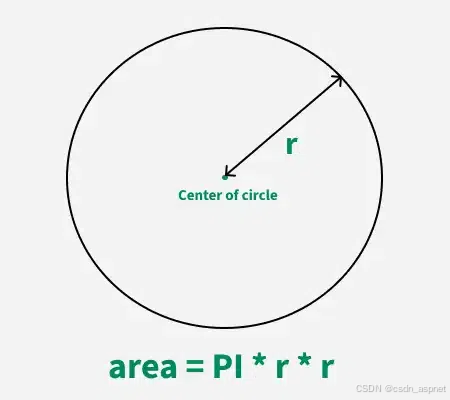
C++ 求圆面积的程序(Program to find area of a circle)
给定半径r,求圆的面积。圆的面积应精确到小数点后5位。 例子: 输入:r 5 输出:78.53982 解释:由于面积 PI * r * r 3.14159265358979323846 * 5 * 5 78.53982,因为我们只保留小数点后 5 位数字。 输…...

力扣-35.搜索插入位置
题目描述 给定一个排序数组和一个目标值,在数组中找到目标值,并返回其索引。如果目标值不存在于数组中,返回它将会被按顺序插入的位置。 请必须使用时间复杂度为 O(log n) 的算法。 class Solution {public int searchInsert(int[] nums, …...

DingDing机器人群消息推送
文章目录 1 新建机器人2 API文档说明3 代码编写 1 新建机器人 点击群设置 下滑到群管理的机器人,点击进入 添加机器人 选择自定义Webhook服务 点击添加 设置安全设置,详见说明文档 成功后,记录Webhook 2 API文档说明 点击设置说明 查看自…...
