「OC」present和push操作区别以及混合推出的实现
「OC」present和push操作区别以及混合推出的实现
文章目录
- 「OC」present和push操作区别以及混合推出的实现
- 前言
- present
- 用途
- while循环越级返回
- 通知越级返回
- 添加present动画
- push
- 模态视图和push视图混合跳转
- 操作一:控制器A`present`控制器B,控制器B再将控制器C`push`出来
- 操作二:控制器1push出控制器2,控制器2present控制器3,使用代理直接返回控制器1
- 总结
前言
在viewController的生命周期之中,我们探究了present以及push不同操作之中,生命周期的方法调用,以及在暑假的时候学习了如何实现自定义模态视图和自定义模态视图动画。因此我继续探究present以及push操作的相关区别,以及学习如何实现视图的混合推出。
present
用途
用简单的几行代码先展示present的用途
ViewController* vc = [[ViewController alloc] init];
[self presentViewController:vc2 animated:YES completion:nil];
对应的dismiss方法
[self dismissViewControllerAnimated:YES completion:nil];
对于我们的present来说,我们的返回和进入都是逐级进行的,代码如下
ViewController1.h:
#import <UIKit/UIKit.h>@interface ViewController1 : UIViewController@end
ViewController1.m:
#import "ViewController1.h"
#import "ViewController2.h"@implementation ViewController1- (void)viewDidLoad {[super viewDidLoad];UIButton *presentButton = [UIButton buttonWithType:UIButtonTypeSystem];[presentButton setTitle:@"Present ViewController2" forState:UIControlStateNormal];[presentButton addTarget:self action:@selector(presentViewController2) forControlEvents:UIControlEventTouchUpInside];presentButton.frame = CGRectMake(100, 100, 200, 50);[self.view addSubview:presentButton];
}- (void)presentViewController2 {ViewController2 *vc2 = [[ViewController2 alloc] init];[self presentViewController:vc2 animated:YES completion:nil];
}@end
ViewController2.h:
#import <UIKit/UIKit.h>@interface ViewController2 : UIViewController@end
ViewController2.m:
#import "ViewController2.h"
#import "ViewController3.h"@implementation ViewController2- (void)viewDidLoad {[super viewDidLoad];UIButton *presentButton = [UIButton buttonWithType:UIButtonTypeSystem];[presentButton setTitle:@"Present ViewController3" forState:UIControlStateNormal];[presentButton addTarget:self action:@selector(presentViewController3) forControlEvents:UIControlEventTouchUpInside];presentButton.frame = CGRectMake(100, 200, 200, 50);[self.view addSubview:presentButton];
}- (void)presentViewController3 {ViewController3 *vc3 = [[ViewController3 alloc] init];[self presentViewController:vc3 animated:YES completion:nil];
}@end
ViewController3.h:
#import <UIKit/UIKit.h>@interface ViewController3 : UIViewController@end
ViewController3.m:
#import "ViewController3.h"@implementation ViewController3- (void)viewDidLoad {[super viewDidLoad];UIButton *dismissButton = [UIButton buttonWithType:UIButtonTypeSystem];[dismissButton setTitle:@"Dismiss" forState:UIControlStateNormal];[dismissButton addTarget:self action:@selector(dismissViewController) forControlEvents:UIControlEventTouchUpInside];dismissButton.frame = CGRectMake(100, 300, 200, 50);[self.view addSubview:dismissButton];
}- (void)dismissViewController {[self.presentingViewController dismissViewControllerAnimated:YES completion:nil];
}@end
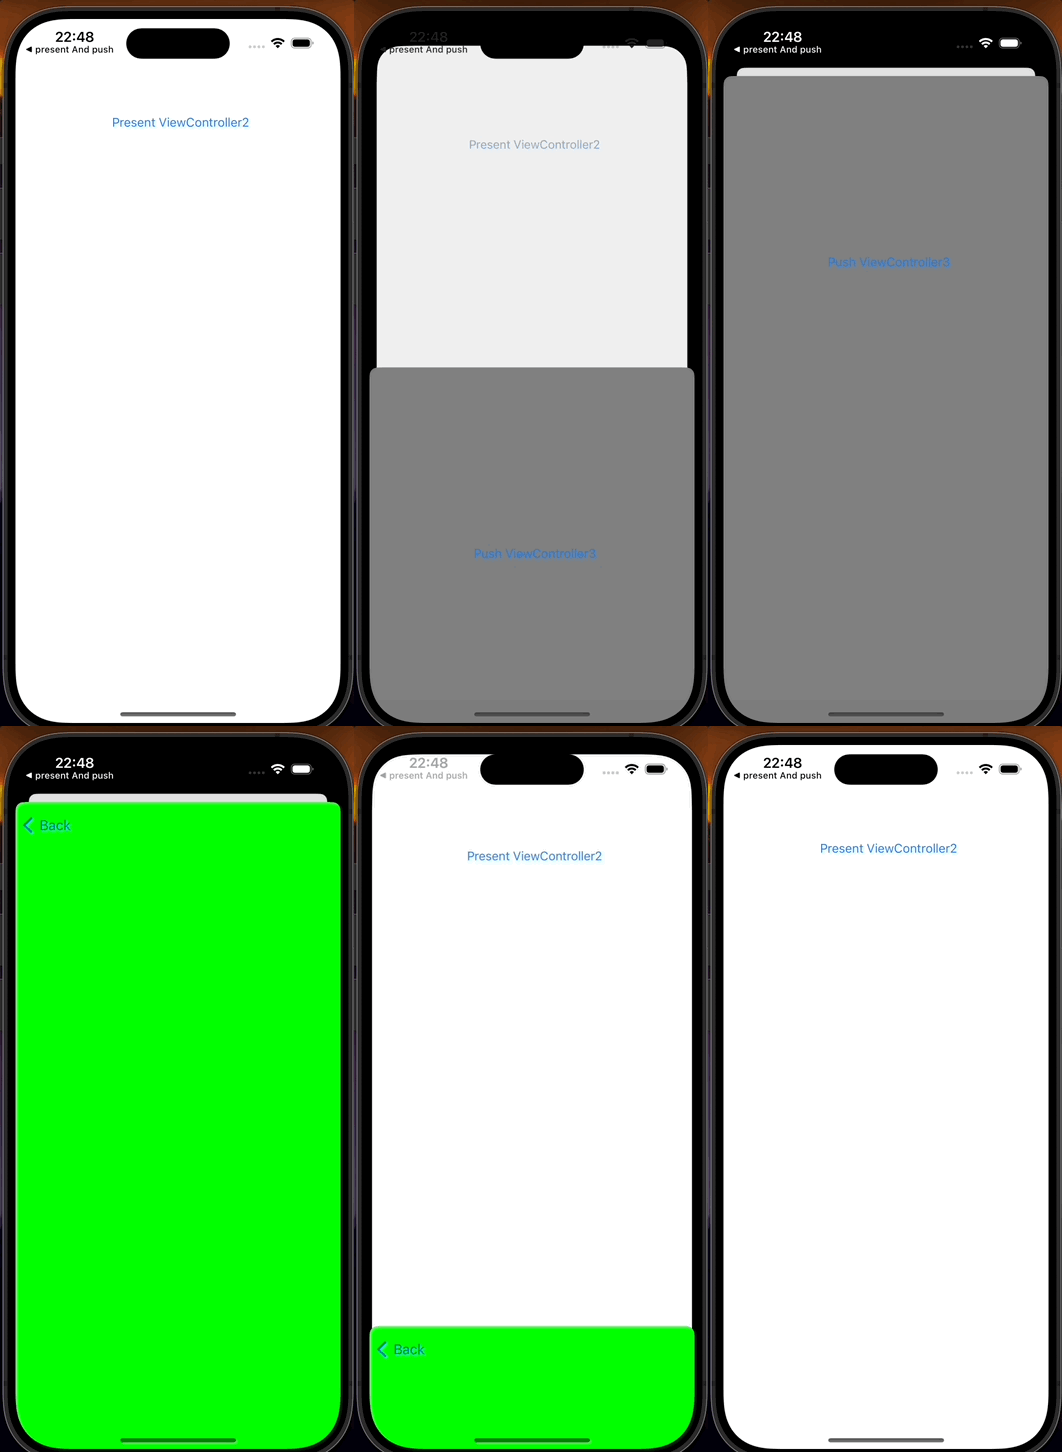
在这个示例中,控制器1包含一个按钮,点击后会present出控制器2。控制器2也包含一个按钮,点击后会present出控制器3。在控制器3中,点击按钮会通过dismiss方式逐级返回到前一个控制器,直到回到控制器1。
但是我们也可以用代码直接进行返回,这就要说到我们暑假自定义模态视图学习的关于presentedViewController以及presentingViewController的相关概念,即执行推出操作的上文来说为presentedViewController为被它推出的下文,执行推出操作的下文的presentingViewController为上文。
while循环越级返回
我已开始的设想是使用while循环,直到到达想要的控制器,我使用isKindOfClass的方法
- (void)touchesBegan:(NSSet<UITouch *> *)touches withEvent:(UIEvent *)event{UIViewController *currentViewController = self.presentingViewController;while (currentViewController) {if ([currentViewController isKindOfClass:[ViewController class]]) {// 找到所需的视图控制器ViewController *desiredViewController = (ViewController *)currentViewController;// 在这里执行dismiss操作[desiredViewController dismissViewControllerAnimated:YES completion:nil];break;}currentViewController = currentViewController.presentingViewController;}
}
实现的也是如下效果
 、
、
通知越级返回
可是这样直接进行遍历似乎还是有点麻烦,只要present的视图够多或者足够复杂的话,这样似乎会对性能造成一定的损伤,于是我用上了前段时间学习的通知传值来解决这个问题
- 在需要直接返回的地方发送通知,可以是任何一个视图控制器
[[NSNotificationCenter defaultCenter] postNotificationName:@"DirectReturnNotification" object:nil userInfo:@{@"targetViewController": @"ViewController1"}];
- 在需要响应直接返回的视图控制器中,监听通知并执行相应的返回操作。
[[NSNotificationCenter defaultCenter] addObserver:self selector:@selector(handle:) name:@"DirectReturnNotification" object:nil];
}- 接着写一下接受到通知之后的相关方法,我们这里用
targetViewController的字符串区别一下不同的控制器
- (void)handleDirectReturnNotification:(NSNotification *)notification {NSString *targetViewController = notification.userInfo[@"targetViewController"];if ([targetViewController isEqualToString:@"ViewController2"]) {[self dismissViewControllerAnimated:YES completion:nil];}
}- (void)handleDirectReturnNotification:(NSNotification *)notification {NSString *targetViewController = notification.userInfo[@"targetViewController"];if ([targetViewController isEqualToString:@"ViewController1"]) {[self dismissViewControllerAnimated:YES completion:nil];}
}
- 控制器3的完整代码如下
#import "ViewController3.h"@interface ViewController3 ()@end@implementation ViewController3- (void)viewDidLoad {[super viewDidLoad];self.view.backgroundColor = [UIColor greenColor];UIButton *returnButton1 = [UIButton buttonWithType:UIButtonTypeSystem];[returnButton1 setTitle:@"Direct Return to ViewController1" forState:UIControlStateNormal];[returnButton1 addTarget:self action:@selector(returnToViewController1) forControlEvents:UIControlEventTouchUpInside];returnButton1.frame = CGRectMake(100, 300, 200, 50);[self.view addSubview:returnButton1];UIButton *returnButton = [UIButton buttonWithType:UIButtonTypeSystem];[returnButton setTitle:@"Direct Return to ViewController2" forState:UIControlStateNormal];[returnButton addTarget:self action:@selector(returnToViewController2) forControlEvents:UIControlEventTouchUpInside];returnButton.frame = CGRectMake(100, 500, 200, 50);[self.view addSubview:returnButton];
}
- (void)returnToViewController1 {// 发送通知,指示需要直接返回到ViewController1[[NSNotificationCenter defaultCenter] postNotificationName:@"DirectReturnNotification" object:nil userInfo:@{@"targetViewController": @"ViewController1"}];
}
- (void)returnToViewController2 {// 发送通知,指示需要直接返回到ViewController1[[NSNotificationCenter defaultCenter] postNotificationName:@"DirectReturnNotification" object:nil userInfo:@{@"targetViewController": @"ViewController2"}];
}@end
完整示例如下
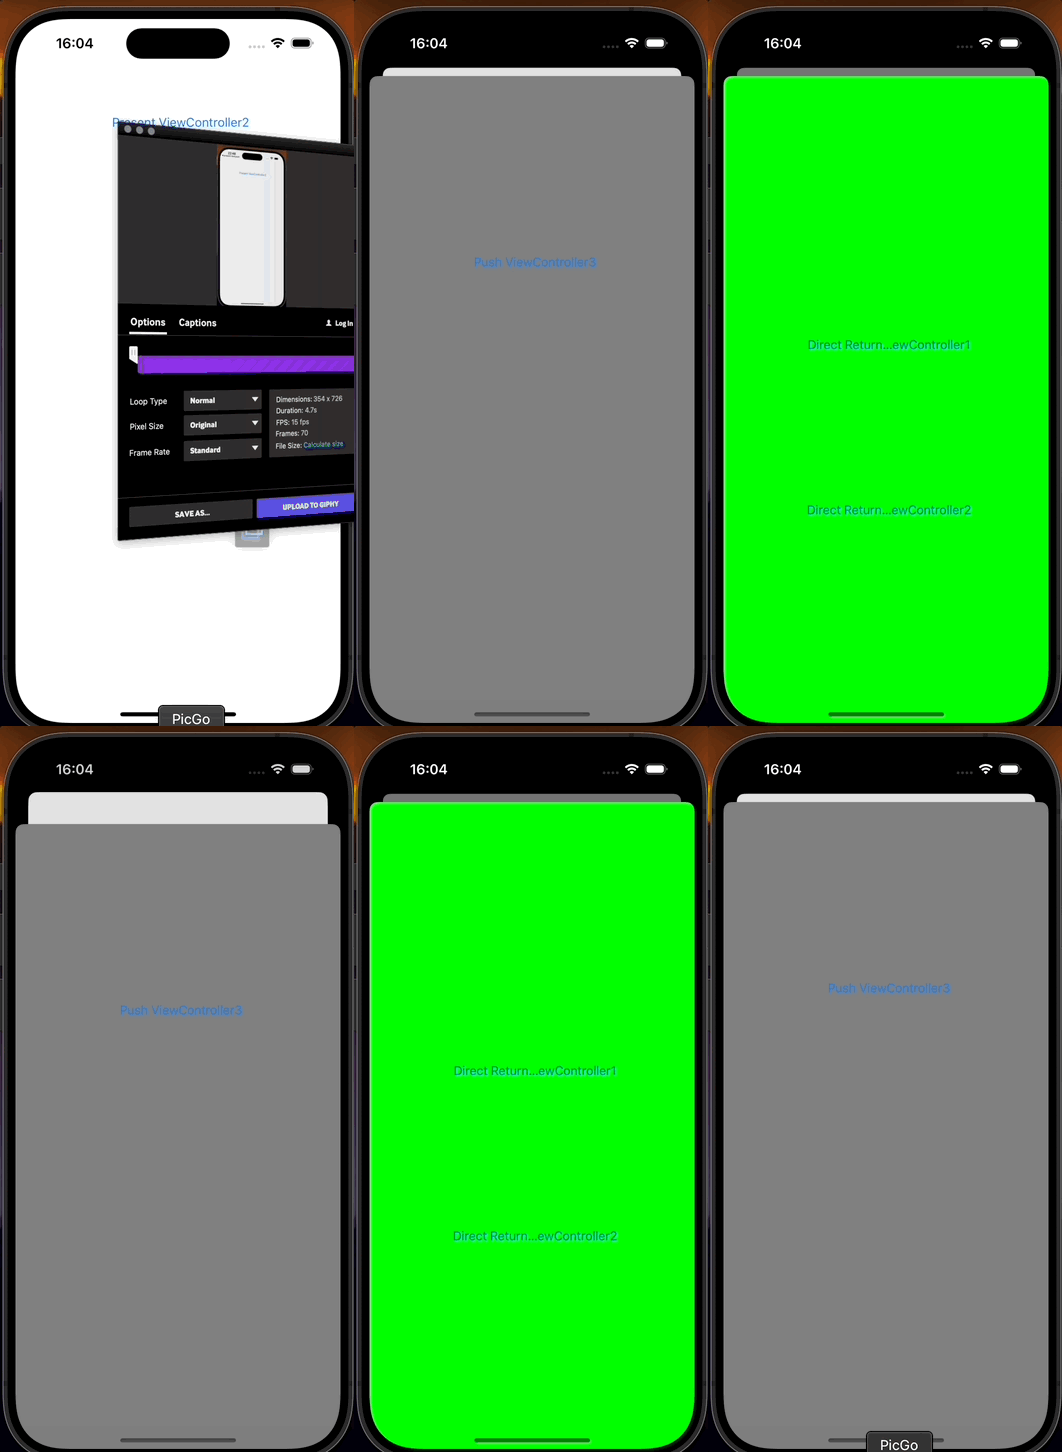
注:在学习过程之中,我又了解到如果使用消息传值的方法去实现直接跳转的方法,会提高那个代码的耦合性,那这个越级直接dismiss的方法可能需要我们通过实际运用的情况来选择我们需要的方法
添加present动画
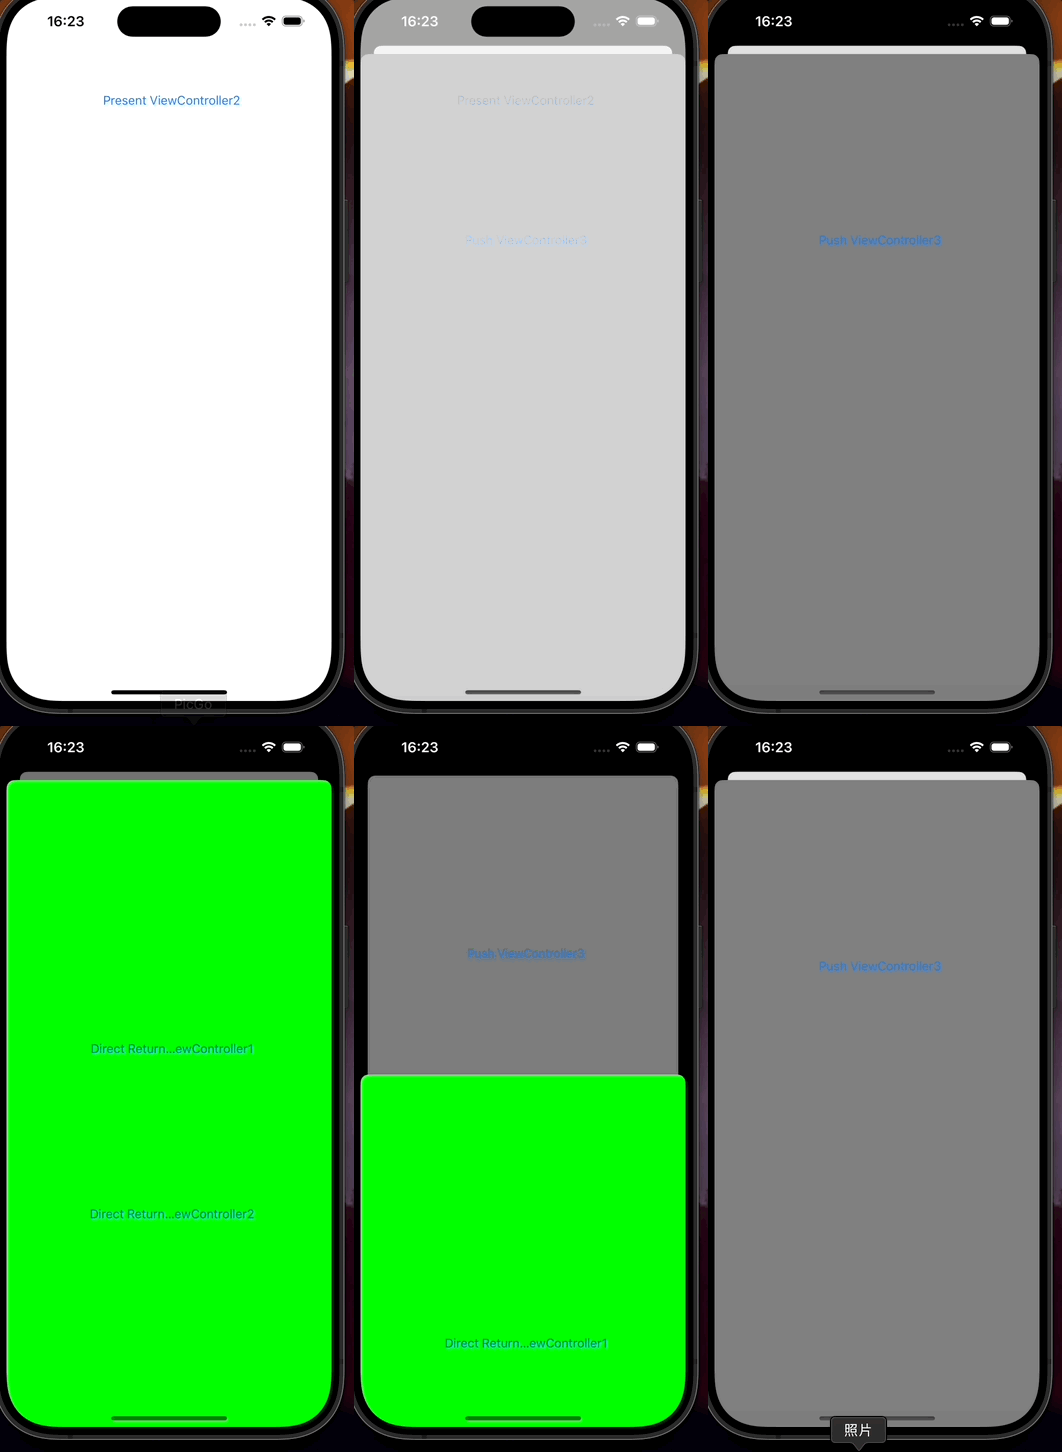
在present的过程之中我们也可以添加我们想要的动画使得present的过程更加流畅,这段代码我们放在视图即将present的操作之前,并且取消present操作之中允许动画的属性。
CATransition * transition = [CATransition animation];transition.type = @"moveOut";transition.subtype = @"fromCenter";transition.duration = 0.3;//移除当前window的layer层的动画[self.view.window.layer removeAllAnimations];//将定制好的动画添加到当前控制器window的layer层[self.view.window.layer addAnimation:transition forKey:nil];ViewController3 *vc3 = [[ViewController3 alloc] init];[self presentViewController:vc3 animated:NO completion:nil];
效果如下
push
push就是我们在栈之中操作push,因此我们可以知道这个操作跳转的控制器,实际上就是用一个类似栈的结构去存储这些个控制器,接下来是一个代码示例
ViewController* vc = [[ViewController4 alloc] init];
[self.navigationController pushViewController:vc animated:YES];
我们可以看到,与present操作不同,我们是使用导航控制器(即self.navigationController)来实现push的方法,我们使用push的方法将当前的控制器推进导航控制器之中栈,这个栈我们可以通过self.navigationController的属性来找到
self.navigationController.viewControllers
对应的消失视图的方法为pop方法如下
[self.navigationController popViewControllerAnimated:YES];
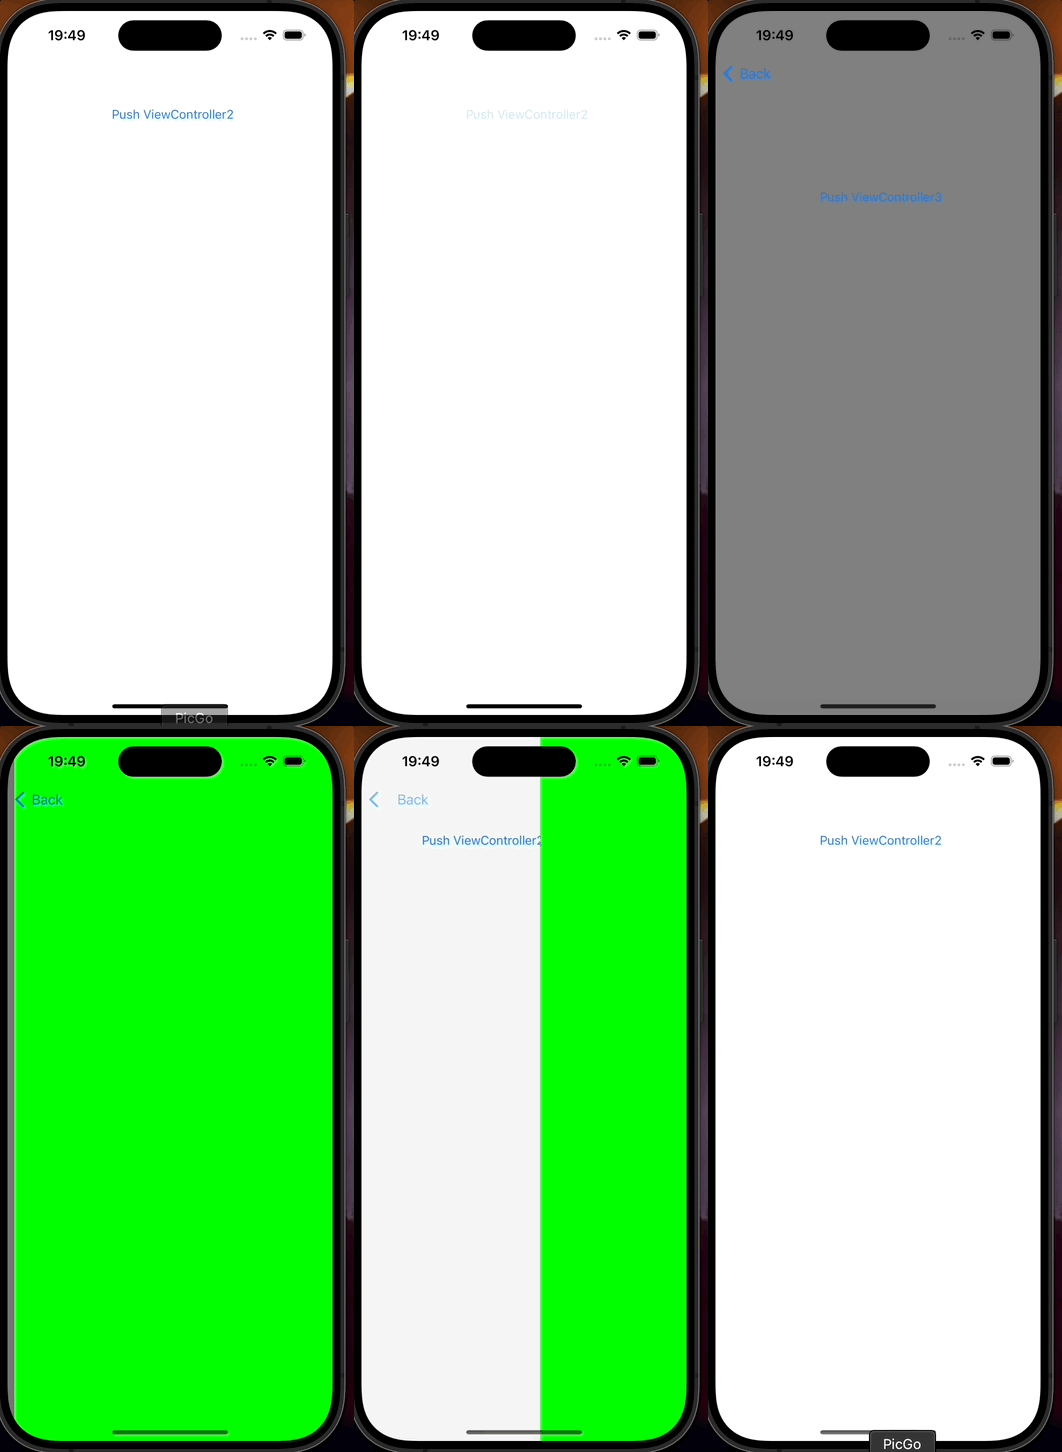
但是和present的另一个不同点,由于使用一个数组模拟栈,所以我们其实可以很容易拿到对应层的控制器,即pop是可以不逐级返回的
[self.navigationController popToRootViewControllerAnimated:YES];//直接返回到根视图
[self.navigationController popToViewController:viewController animated:YES];//返回指定的某一层视图控制器
在关于返回指定的某一层之中,我们可以较为简单的访问导航控制器的栈的下标self.navigationController.viewControllers[i],或者使用在present处的方法使用isKindOfClass来找到对应的controller
对应代码功能在此不多做赘述,贴出以供参考:
- ViewController1
#import "ViewController1.h"
#import "ViewController2.h"@implementation ViewController1- (void)viewDidLoad {[super viewDidLoad];UIButton *pushButton = [UIButton buttonWithType:UIButtonTypeSystem];[pushButton setTitle:@"Push to ViewController2" forState:UIControlStateNormal];[pushButton addTarget:self action:@selector(pushToViewController2) forControlEvents:UIControlEventTouchUpInside];pushButton.frame = CGRectMake(100, 300, 200, 50);[self.view addSubview:pushButton];
}- (void)pushToViewController2 {ViewController2 *viewController2 = [[ViewController2 alloc] init];[self.navigationController pushViewController:viewController2 animated:YES];
}@end
- ViewController2
#import "ViewController2.h"
#import "ViewController3.h"@implementation ViewController2- (void)viewDidLoad {[super viewDidLoad];UIButton *pushButton = [UIButton buttonWithType:UIButtonTypeSystem];[pushButton setTitle:@"Push to ViewController3" forState:UIControlStateNormal];[pushButton addTarget:self action:@selector(pushToViewController3) forControlEvents:UIControlEventTouchUpInside];pushButton.frame = CGRectMake(100, 300, 200, 50);[self.view addSubview:pushButton];
}- (void)pushToViewController3 {ViewController3 *viewController3 = [[ViewController3 alloc] init];[self.navigationController pushViewController:viewController3 animated:YES];
}@end
- ViewController3
#import "ViewController3.h"@implementation ViewController3- (void)viewDidLoad {[super viewDidLoad];self.view.backgroundColor = [UIColor greenColor];
}- (void)touchesBegan:(NSSet<UITouch *> *)touches withEvent:(UIEvent *)event {[self.navigationController popToRootViewControllerAnimated:YES];
}@end
模态视图和push视图混合跳转
简单了解了push和present的相关操作,我们实际应该当中都会
操作一:控制器Apresent控制器B,控制器B再将控制器Cpush出来
似乎这个操作很简单,我一开始就写出了以下代码
ViewController1.h:
#import <UIKit/UIKit.h>@interface ViewController1 : UIViewController@end
ViewController1.m:
#import "ViewController1.h"
#import "ViewController2.h"@implementation ViewController1- (void)viewDidLoad {[super viewDidLoad];UIButton *presentButton = [UIButton buttonWithType:UIButtonTypeSystem];[presentButton setTitle:@"Present ViewController2" forState:UIControlStateNormal];[presentButton addTarget:self action:@selector(presentViewController2) forControlEvents:UIControlEventTouchUpInside];presentButton.frame = CGRectMake(100, 100, 200, 50);[self.view addSubview:presentButton];
}- (void)presentViewController2 {ViewController2 *vc2 = [[ViewController2 alloc] init];[self presentViewController:vc2 animated:YES completion:nil];
}@end
ViewController2.h:
#import <UIKit/UIKit.h>@interface ViewController2 : UIViewController@end
ViewController2.m:
#import "ViewController2.h"
#import "ViewController3.h"@implementation ViewController2- (void)viewDidLoad {[super viewDidLoad];UIButton *pushButton = [UIButton buttonWithType:UIButtonTypeSystem];[pushButton setTitle:@"Push ViewController3" forState:UIControlStateNormal];[pushButton addTarget:self action:@selector(pushViewController3) forControlEvents:UIControlEventTouchUpInside];pushButton.frame = CGRectMake(100, 200, 200, 50);[self.view addSubview:pushButton];
}- (void)pushViewController3 {ViewController3 *vc3 = [[ViewController3 alloc] init];[self.navigationController pushViewController:vc3 animated:YES];
}@end
ViewController3.h:
#import <UIKit/UIKit.h>@interface ViewController3 : UIViewController@end
ViewController3.m:
#import "ViewController3.h"@implementation ViewController3- (void)viewDidLoad {[super viewDidLoad];self.view.backgroundColor = [UIColor yellowColor];
}@end
但是当我们进行尝试的时候就会发现,在模态视图之中没有办法直接将控制器push出来,十分奇怪,而后查询了相关资料,因为我们实现push的操作需要使用导航栏控制器,而对于控制器2来说它自己只是作为模态视图被临时present出来,它并没有对应的导航栏控制器可以实现push操作,那其实解决方法很简单,我们在控制器2在推出的时候用一个导航栏控制器包装一下即可,即在控制器1之中修改,控制器3即可被正确的push出来
- (void)presentViewController2 {ViewController2 *vc2 = [[ViewController2 alloc] init];UINavigationController *nav2 = [[UINavigationController alloc] initWithRootViewController:vc2];[self presentViewController:nav2 animated:YES completion:nil];
}
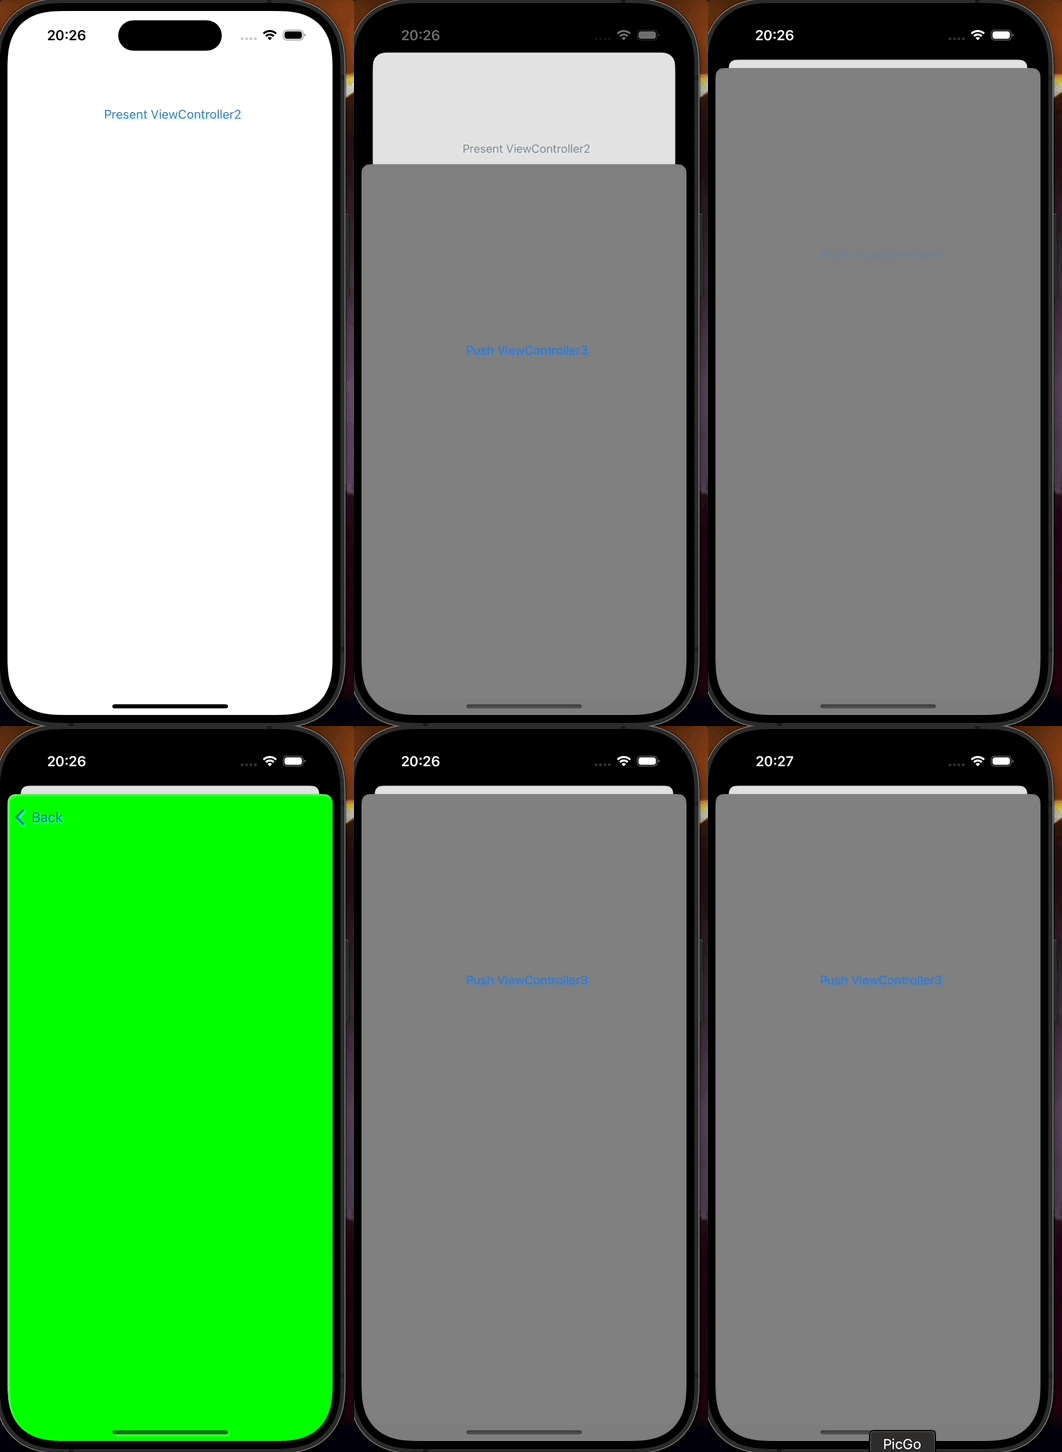
注:如果我们想直接返回控制器1,只需要在控制器3之中使用一下方法即可:
[self.navigationController dismissViewControllerAnimated:YES completion:nil];
操作二:控制器1push出控制器2,控制器2present控制器3,使用代理直接返回控制器1
在 iOS 开发中,如果您想要在控制器3中直接返回到控制器1,可以使用代理模式或者闭包回调来实现。下面是一个简单的示例,演示了如何在控制器3中通过代理模式实现直接返回到控制器1的操作。
- ViewController1
#import "ViewController2.h"
#import "ViewController3.h"
#import "returnDelegate.h"
@interface ViewController2 ()<returnDelegate>@end@implementation ViewController1- (void)viewDidLoad {[super viewDidLoad];UIButton *pushButton = [UIButton buttonWithType:UIButtonTypeSystem];[pushButton setTitle:@"Push to ViewController2" forState:UIControlStateNormal];[pushButton addTarget:self action:@selector(pushToViewController2) forControlEvents:UIControlEventTouchUpInside];pushButton.frame = CGRectMake(100, 300, 200, 50);[self.view addSubview:pushButton];
}- (void)pushToViewController2 {ViewController2 *viewController2 = [[ViewController2 alloc] init];[self.navigationController pushViewController:viewController2 animated:YES];
}@end
- ViewController2
#import "ViewController2.h"
#import "ViewController3.h"@implementation ViewController2- (void)viewDidLoad {[super viewDidLoad];UIButton *presentButton = [UIButton buttonWithType:UIButtonTypeSystem];[presentButton setTitle:@"Present ViewController3" forState:UIControlStateNormal];[presentButton addTarget:self action:@selector(presentViewController3) forControlEvents:UIControlEventTouchUpInside];presentButton.frame = CGRectMake(100, 300, 200, 50);[self.view addSubview:presentButton];
}- (void)presentViewController3 {ViewController3 *viewController3 = [[ViewController3 alloc] init];viewController3.delegate = self;UINavigationController *navController = [[UINavigationController alloc] initWithRootViewController:viewController3];[self presentViewController:navController animated:YES completion:nil];
}- (void)returnToViewController1 {[self.navigationController popToRootViewControllerAnimated:YES];
}@end
- ViewController3
#import "ViewController3.h"
#import "ViewController2.h"
@interface ViewController3 ()
@property(nonatomic, weak) ViewController2 *delegate;
@end@implementation ViewController3- (void)viewDidLoad {[super viewDidLoad];self.view.backgroundColor = [UIColor greenColor];UIButton *returnButton = [UIButton buttonWithType:UIButtonTypeSystem];[returnButton setTitle:@"Return to ViewController1" forState:UIControlStateNormal];[returnButton addTarget:self action:@selector(returnToViewController1) forControlEvents:UIControlEventTouchUpInside];returnButton.frame = CGRectMake(100, 300, 200, 50);[self.view addSubview:returnButton];
}- (void)returnToViewController1 {if (self.delegate && [self.delegate respondsToSelector:@selector(returnToViewController1)]) {[self.delegate returnToViewController1];[self dismissViewControllerAnimated:NO completion:nil];}
}@end
- retrunDelegate
#ifndef returnDelegate_h
#define returnDelegate_h
@class ViewController2;@protocol returnDelegate <NSObject>- (void)returnToViewController1;@end
在这个示例中,ViewController2通过present方式展示ViewController3,并在ViewController2中实现了一个代理方法returnToViewController1,用来返回到ViewController1。在ViewController3中点击按钮后,会通过代理将操作传递给ViewController2,从而实现直接返回到ViewController1的功能。

总结
本文总结了present和push的相关区别以及如何去实现push和present如何在有需求是实现混合转场的操作。
相关文章:

「OC」present和push操作区别以及混合推出的实现
「OC」present和push操作区别以及混合推出的实现 文章目录 「OC」present和push操作区别以及混合推出的实现前言present用途while循环越级返回通知越级返回添加present动画 push模态视图和push视图混合跳转操作一:控制器Apresent控制器B,控制器B再将控制…...

【高分系列卫星简介】
高分系列卫星是中国国家高分辨率对地观测系统(简称“高分工程”)的重要组成部分,旨在提供全球范围内的高分辨率遥感数据,广泛应用于环境监测、灾害应急、城市规划、农业估产等多个领域。以下是对高分系列卫星及其数据、相关参数和…...

八股文-多线程、并发
八股文-多线程、并发 最近学到了一种方法,可以用于简历项目经验编写以及面试题目的回答 STAR法则:在什么背景下,你需要解决什么问题,你做了啥,得到了什么结果 情境(Situation): 描…...

xtu oj 折纸
折纸# 题目描述# 一个长为a,宽为b矩形的纸,我们沿b边(左边)的中点与右上顶点的边折叠,求左上顶点在折叠以后离下边的距离? 输入# 第一行是一个整数T(1≤T≤10000),表示样例的个数。 以后每行一个样例,为两个整数1≤a,b≤1000。…...

传知代码-多示例AI模型实现病理图像分类
代码以及视频讲解 本文所涉及所有资源均在传知代码平台可获取 概述 本文将基于多示例深度学习EPLA模型实现对乳腺癌数据集BreaKHis_v1的分类。EPLA模型是处理组织病理学图像的经典之作。EPLA模型是基于多示例学习来进行了,那么多示例学习模型对处理病理学图像具有…...

Java知识点小结3:内存回收
文章目录 对象引用强引用软引用(SoftReference)弱引用(WeakReference)考一考 虚引用(PhantomReference)总结 垃圾回收新生代老年代永生代 内存管理小技巧尽量使用直接量使用StringBuilder和StringBuffer进行…...

LeetCode746:使用花费最小爬楼梯
题目链接:746. 使用最小花费爬楼梯 - 力扣(LeetCode) 代码如下 class Solution { public:int minCostClimbingStairs(vector<int>& cost) {int m cost.size();if(m 1) return min(cost[1], cost[0]);if(m 0) return cost[0]…...

列表、数组排序总结:Collections.sort()、list.sort()、list.stream().sorted()、Arrays.sort()
列表类型 一.Collections.sort() Collections.sort()用于List类型的排序,其提供了两个重载方法: 1.sort(List<T> list) (1)List指定泛型时只能指定引用数据类型,也就是说无法用于基本数据类型的排序。 &am…...

【资料分析】刷题日记3
第一套 √ 考点:基期比重差很温柔的题 普通专科女生 占比 52.5% - 1.7% 50.8% 成人本专科女生 占比 57.8% - 4.6% 53.2% 相比降低了2.4% 知比重和部分量,求整体在花生老师的解法中体会啥叫适当约分 0.1899 / 47.8% / 87.5% 》0.19 / (4…...

基于SpringBoot+Vue的商场停车场管理系统
作者:计算机学姐 开发技术:SpringBoot、SSM、Vue、MySQL、JSP、ElementUI、Python、小程序等,“文末源码”。 专栏推荐:前后端分离项目源码、SpringBoot项目源码、SSM项目源码 系统展示 【2025最新】基于JavaSpringBootVueMySQL的…...

4. 密码协议
4. 密码协议 (1) 协议的基本概念 协议是一种在两个或多个参与者之间进行通信的规范,它定义了参与者之间的交互方式、消息格式和通信过程。协议的目的是确保通信的可靠性和安全性,防止信息被篡改、伪造或泄露。 (2) 密码协议分类及基本密码协议 密码协议是用于加密和解密数…...

基于嵌入式的智能物流柜( 触摸屏/0.96寸oled屏)
演示 智能物流柜(基础版) 智能物流柜(升级版) 前言 这是本人在大二在学校接的一个简单的实验室项目,之前发布了一个,由于那是在暑假,家里器材有限,代码敲完之后,用面包板…...

VSCode创建C++项目和编译多文件
前言 在刚安装好VSCode后,我简单尝试了仅main.cpp单文件编译代码,没有问题,但是当我尝试多文件编译时,就出现了无法识别cpp文件。 内容 创建项目 首先点击左上角“文件”;在菜单中选择“打开文件夹”;在…...

7个提升网站分页体验的 CSS 和 JavaScript 代码片段
文章目录 前言正文1.简洁直观的悬停分页效果2.实时显示页码的分页3.适合响应式设计的多功能分页4.专为移动设备优化的分页5.无数字的极简分页设计6.触屏友好的分页7.结合无限滚动与分页的设计 总结 前言 分页是内容丰富的网站中不可缺少的导航工具,能帮助用户更轻松…...

C++——用带有默认参数的函数实现,求两个整数或三个整数中的最大数。
没注释的源代码 #include <iostream> using namespace std; int max(int a,int b,int c0); int main() { int a,b,c; cout<<"请输入三个整数:"; cin>>a>>b>>c; cout<<"三个整数的最大值是&am…...

对商品分类系统的若干问题的思考
科学研究的目的就是研究事物的特征,并根据共同的特征加以分类 商品分类是商业,制造业中最普遍的活动,几乎所有的企业,电商平台都要对销售的商品,使用的原材料(BOM)进行分类和编号。 商品分类貌似…...

javascript中Number 类型 在实际开发中常用的一些操作方法
在 JavaScript 中,Number 类型是非常基础的数据类型之一,用于表示整数和浮点数。除了基本的算术运算外,还有许多内置的方法可以帮助你处理数字。下面列举了一些在实际开发中常用的 Number 类型的操作方法: 1. 转换方法 Number()…...

部分解决FDTD安装后,matlab指令fopen报错
今天在新的win11电脑上安装FDTD时,发现在C:\Program Files目录中并没有Lumerical文件夹,把激活文件粘贴过去后虽然能正常启动,但对于matlab link FDTD过程中无法响应以下代码: setenv(PATH, [getenv(PATH) ;C:\Program Files\Lum…...

[python3] 处理函数的重试
tenacity是一个 Python 库,用于简化重试逻辑的实现。它提供了装饰器和工具函数,使得在函数执行失败时可以自动重试。以下是对tenacity库的详细介绍: 一、安装 可以使用pip安装tenacity: pip install tenacity二、主要概念和功能…...

鸿蒙开发之ArkTS 界面篇 一
建好一个工程后,右侧可以预览,看到效果,效率十分可以,如图: State message: string 鸿蒙开发入门篇; 这个字符串改成什么,右侧就显示什么 Entry是类装饰器,可以简单的理解为程序入口的必须的装饰器&…...

Docker 离线安装指南
参考文章 1、确认操作系统类型及内核版本 Docker依赖于Linux内核的一些特性,不同版本的Docker对内核版本有不同要求。例如,Docker 17.06及之后的版本通常需要Linux内核3.10及以上版本,Docker17.09及更高版本对应Linux内核4.9.x及更高版本。…...
shell脚本--常见案例
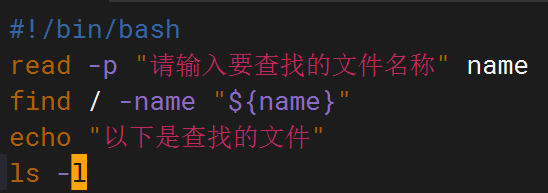
1、自动备份文件或目录 2、批量重命名文件 3、查找并删除指定名称的文件: 4、批量删除文件 5、查找并替换文件内容 6、批量创建文件 7、创建文件夹并移动文件 8、在文件夹中查找文件...
抖音增长新引擎:品融电商,一站式全案代运营领跑者
抖音增长新引擎:品融电商,一站式全案代运营领跑者 在抖音这个日活超7亿的流量汪洋中,品牌如何破浪前行?自建团队成本高、效果难控;碎片化运营又难成合力——这正是许多企业面临的增长困局。品融电商以「抖音全案代运营…...

渲染学进阶内容——模型
最近在写模组的时候发现渲染器里面离不开模型的定义,在渲染的第二篇文章中简单的讲解了一下关于模型部分的内容,其实不管是方块还是方块实体,都离不开模型的内容 🧱 一、CubeListBuilder 功能解析 CubeListBuilder 是 Minecraft Java 版模型系统的核心构建器,用于动态创…...
:邮件营销与用户参与度的关键指标优化指南)
精益数据分析(97/126):邮件营销与用户参与度的关键指标优化指南
精益数据分析(97/126):邮件营销与用户参与度的关键指标优化指南 在数字化营销时代,邮件列表效度、用户参与度和网站性能等指标往往决定着创业公司的增长成败。今天,我们将深入解析邮件打开率、网站可用性、页面参与时…...
中的KV缓存压缩与动态稀疏注意力机制设计)
大语言模型(LLM)中的KV缓存压缩与动态稀疏注意力机制设计
随着大语言模型(LLM)参数规模的增长,推理阶段的内存占用和计算复杂度成为核心挑战。传统注意力机制的计算复杂度随序列长度呈二次方增长,而KV缓存的内存消耗可能高达数十GB(例如Llama2-7B处理100K token时需50GB内存&a…...
华硕a豆14 Air香氛版,美学与科技的馨香融合
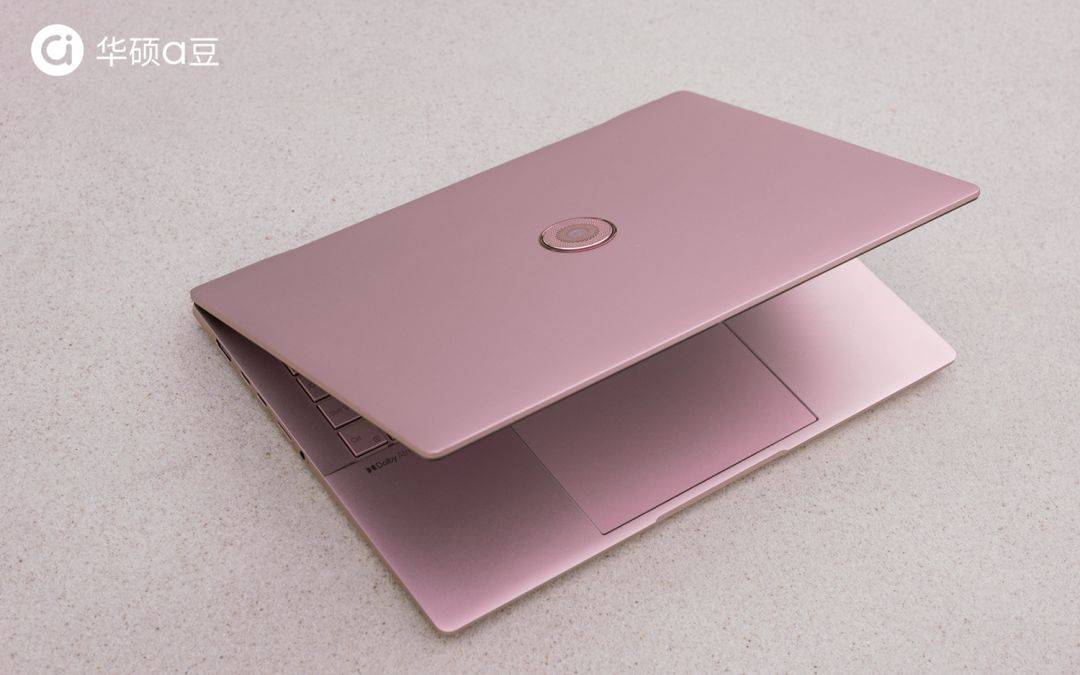
在快节奏的现代生活中,我们渴望一个能激发创想、愉悦感官的工作与生活伙伴,它不仅是冰冷的科技工具,更能触动我们内心深处的细腻情感。正是在这样的期许下,华硕a豆14 Air香氛版翩然而至,它以一种前所未有的方式&#x…...

vulnyx Blogger writeup
信息收集 arp-scan nmap 获取userFlag 上web看看 一个默认的页面,gobuster扫一下目录 可以看到扫出的目录中得到了一个有价值的目录/wordpress,说明目标所使用的cms是wordpress,访问http://192.168.43.213/wordpress/然后查看源码能看到 这…...
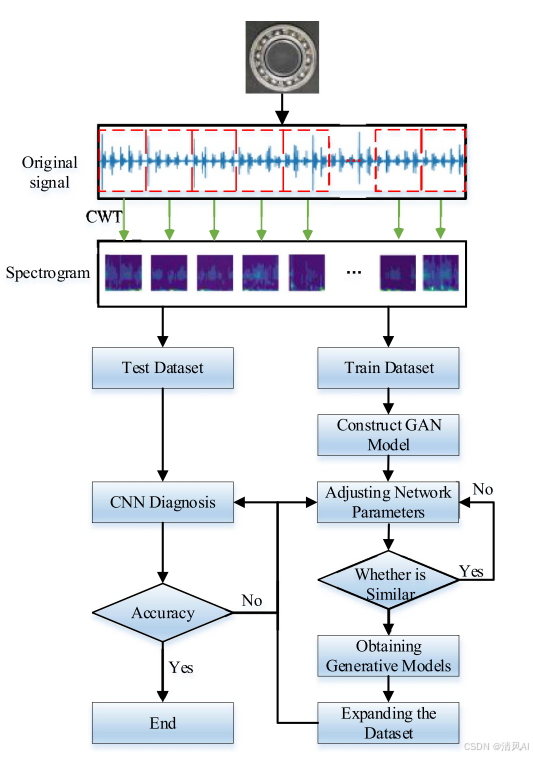
基于IDIG-GAN的小样本电机轴承故障诊断
目录 🔍 核心问题 一、IDIG-GAN模型原理 1. 整体架构 2. 核心创新点 (1) 梯度归一化(Gradient Normalization) (2) 判别器梯度间隙正则化(Discriminator Gradient Gap Regularization) (3) 自注意力机制(Self-Attention) 3. 完整损失函数 二…...

Webpack性能优化:构建速度与体积优化策略
一、构建速度优化 1、升级Webpack和Node.js 优化效果:Webpack 4比Webpack 3构建时间降低60%-98%。原因: V8引擎优化(for of替代forEach、Map/Set替代Object)。默认使用更快的md4哈希算法。AST直接从Loa…...
