【超详细】基于YOLOv8训练无人机视角Visdrone2019数据集
主要内容如下:
1、Visdrone2019数据集介绍
2、下载、制作YOLO格式训练集
3、模型训练及预测
4、Onnxruntime推理
运行环境:Python=3.8(要求>=3.8),torch1.12.0+cu113(要求>=1.8),onnxruntime-gpu==1.12.0
原始数据集百度AI stduio下载链接:https://aistudio.baidu.com/datasetdetail/115729
Visdrone-YOLO格式数据集下载链接:https://aistudio.baidu.com/datasetdetail/295374
训练资源占用:bacth=16,workers=8,yolov8s显存需16G,bacth=8的话8G够用,RTX4080大约1min一个epoch。
往期内容:
【超详细】跑通YOLOv8之深度学习环境配置1-Anaconda安装
【超详细】跑通YOLOv8之深度学习环境配置2-CUDA安装
【超详细】跑通YOLOv8之深度学习环境配置3-YOLOv8安装
【超详细】基于YOLOv8的PCB缺陷检测
【超详细】基于YOLOv8改进1-Drone-YOLO复现
1 数据集介绍
1.1 简介
VisDrone数据集是由天津大学等团队开源的一个大型无人机视角的数据集,官方提供的数据中训练集是6471、验证集是548、测试集1610张。数据集共提供了以下12个类,分别是:‘忽略区域’, ‘pedestrian’, ‘people’, ‘bicycle’, ‘car’, ‘van’,‘truck’, ‘tricycle’, ‘awning-tricycle’, ‘bus’, ‘motor’, ‘others’,其中忽略区域、others是非有效目标区域,本项目中予以忽略;
1.2 示例

1.3 标签格式

**标签含义:**
1. 边界框左上角的x坐标
2. 边界框左上角的y坐标
3. 边界框的宽度
4. 边界框的高度
5. GROUNDTRUTH文件中的分数设置为1或0。1表示在计算中考虑边界框,而0表示将忽略边界框。
6.  类别:忽略区域(0)、行人(1)、人(2)、自行车(3)、汽车(4)、面包车(5)、卡车(6)、三轮车(7)、雨篷三轮车(8)、公共汽车(9)、摩托车(10),其他(11)。
7. GROUNDTRUTH文件中的得分表示对象部分出现在帧外的程度(即,无截断=0(截断比率0%),部分截断=1(截断比率1%°´50%))。
8. GROUNDTRUTH文件中的分数表示被遮挡的对象的分数(即,无遮挡=0(遮挡比率0%),部分遮挡=1(遮挡比率1%°´50%),重度遮挡=2(遮挡率50%~100%))。
2 下载和制作YOLO格式数据集
2.1 下载原始数据集
百度AI stduio下载链接:https://aistudio.baidu.com/datasetdetail/115729
注意:可直接下载已完成转换的YOLO格式数据进行训练,可跳过该阶段,直接训练!链接为:https://aistudio.baidu.com/datasetdetail/295374

下载解压:

注意:由于格式不是YOLO直接可以训练的格式,所以需进行转换!!!
2.2 制作YOLO格式数据集
(1)新建visdrone2yolo.py脚本,脚本内容如下:
(2)修改路径参数–dir_path的值,即自己下载路径;
(2)结果会在原始每个文件夹下生成一个label文件夹,即YOLO格式标签;
import os
from pathlib import Path
import argparsedef visdrone2yolo(dir):from PIL import Imagefrom tqdm import tqdmdef convert_box(size, box):# Convert VisDrone box to YOLO xywh boxdw = 1. / size[0]dh = 1. / size[1]return (box[0] + box[2] / 2) * dw, (box[1] + box[3] / 2) * dh, box[2] * dw, box[3] * dh(dir / 'labels').mkdir(parents=True, exist_ok=True)  # make labels directorypbar = tqdm((dir / 'annotations').glob('*.txt'), desc=f'Converting {dir}')for f in pbar:img_size = Image.open((dir / 'images' / f.name).with_suffix('.jpg')).sizelines = []with open(f, 'r') as file:  # read annotation.txtfor row in [x.split(',') for x in file.read().strip().splitlines()]:if row[4] == '0':  # VisDrone 'ignored regions' class 0continuecls = int(row[5]) - 1  # 类别号-1box = convert_box(img_size, tuple(map(int, row[:4])))lines.append(f"{cls} {' '.join(f'{x:.6f}' for x in box)}\n")with open(str(f).replace(os.sep + 'annotations' + os.sep, os.sep + 'labels' + os.sep), 'w') as fl:fl.writelines(lines)  # write label.txtif __name__ == '__main__':# Create an argument parser to handle command-line argumentsparser = argparse.ArgumentParser()parser.add_argument('--dir_path', type=str, default=r'E:\datasets\visdrone2019', help='visdrone数据集路径')args = parser.parse_args()dir = Path(args.dir_path)# Convertfor d in 'VisDrone2019-DET-train', 'VisDrone2019-DET-val', 'VisDrone2019-DET-test-dev':visdrone2yolo(dir / d)  # convert VisDrone annotations to YOLO labels
3 模型训练及预测
3.1 模型训练
3.1.1 修改数据集配置文件
文件路径:ultralytics-main\ultralytics\cfg\datasets\VisDrone.yaml

3.1.2 创建模型训练脚本
(1)训练方式1-脚本训练
在ultralytics-main目录新建一个train.py脚本,内容如下:
注意:如爆显存,降低batch大小!!!
【如下配置显存需16G,bacth=8的话8G够用,RTX4080大约1min一个epoch】
from ultralytics import YOLOif __name__ == '__main__':# Load a model# model = YOLO("yolov8n.yaml") # build a new model from scratchmodel = YOLO("yolov8s.pt") # load a pretrained model (recommended for training)# Use the modelmodel.train(data="VisDrone.yaml", imgsz=640, batch=16, workers=8, cache=True, epochs=100) # train the modelmetrics = model.val() # evaluate model performance on the validation set# results = model("ultralytics\\assets\\bus.jpg") # predict on an imagepath = model.export(format="onnx", opset=13) # export the model to ONNX format
(2)训练方式2-终端命令行
cd ../ultralytics-main
yolo task=detect mode=train model=yolov8s.pt data=ultralytics/cfg/datasets/VisDrone.yaml batch=16 epochs=100 imgsz=640 workers=8 cache=True device=0
3.1.3 数据分布情况可视化
特点:类别不均衡、小目标较多(640*640输入精度不会太高,可提高输入分辨率,如1280、1536等)。

3.1.4 训练结果可视化
训练100epoch结果如下,增加epoch还能提升。

3.2 模型预测
在ultralytics-main目录新建一个predict.py脚本,内容如下:
from ultralytics import YOLOif __name__ == '__main__':# Load a modelmodel = YOLO(r"E:\Code\ultralytics-main\runs\detect\train\weights\best.pt") # load modelmodel.predict(source=r"E:\datasets\visdrone2019\VisDrone2019-DET-test-dev\images\0000006_01111_d_0000003.jpg", save=True, save_conf=True, save_txt=True, name='output')结果如下:

4 Onnxruntime推理
在ultralytics-main目录新建一个onnx_infer.py脚本,内容如下:
注意:如导出动态onnx,model.export(format=“onnx”, opset=13, dynamic=True)
import argparse
import time
import cv2
import numpy as npimport onnxruntime as ort  # 使用onnxruntime推理用上,pip install onnxruntime-gpu==1.12.0 -i  https://pypi.tuna.tsinghua.edu.cn/simple,默认安装CPU
import os
os.environ['CUDA_VISIBLE_DEVICES'] = '0'class YOLOv8:"""YOLOv8 object detection model class for handling inference and visualization."""def __init__(self, onnx_model, imgsz=(640, 640)):"""Initialization.Args:onnx_model (str): Path to the ONNX model."""# 构建onnxruntime推理引擎self.ort_session = ort.InferenceSession(onnx_model,providers=['CUDAExecutionProvider', 'CPUExecutionProvider']if ort.get_device() == 'GPU' else ['CPUExecutionProvider'])print(ort.get_device())# Numpy dtype: support both FP32 and FP16 onnx modelself.ndtype = np.half if self.ort_session.get_inputs()[0].type == 'tensor(float16)' else np.singleself.model_height, self.model_width = imgsz[0], imgsz[1]  # 图像resize大小def __call__(self, im0, conf_threshold=0.4, iou_threshold=0.45):"""The whole pipeline: pre-process -> inference -> post-process.Args:im0 (Numpy.ndarray): original input image.conf_threshold (float): confidence threshold for filtering predictions.iou_threshold (float): iou threshold for NMS.Returns:boxes (List): list of bounding boxes."""# 前处理Pre-processt1 = time.time()im, ratio, (pad_w, pad_h) = self.preprocess(im0)pre_time = round(time.time() - t1, 3)# print('det预处理时间:{:.3f}s'.format(time.time() - t1))# 推理 inferencet2 = time.time()preds = self.ort_session.run(None, {self.ort_session.get_inputs()[0].name: im})[0]# print('det推理时间:{:.2f}s'.format(time.time() - t2))det_time = round(time.time() - t2, 3)# 后处理Post-processt3 = time.time()boxes = self.postprocess(preds,im0=im0,ratio=ratio,pad_w=pad_w,pad_h=pad_h,conf_threshold=conf_threshold,iou_threshold=iou_threshold,)# print('det后处理时间:{:.3f}s'.format(time.time() - t3))post_time = round(time.time() - t3, 3)return boxes, (pre_time, det_time, post_time)# 前处理,包括:resize, pad, HWC to CHW,BGR to RGB,归一化,增加维度CHW -> BCHWdef preprocess(self, img):"""Pre-processes the input image.Args:img (Numpy.ndarray): image about to be processed.Returns:img_process (Numpy.ndarray): image preprocessed for inference.ratio (tuple): width, height ratios in letterbox.pad_w (float): width padding in letterbox.pad_h (float): height padding in letterbox."""# Resize and pad input image using letterbox() (Borrowed from Ultralytics)shape = img.shape[:2]  # original image shapenew_shape = (self.model_height, self.model_width)r = min(new_shape[0] / shape[0], new_shape[1] / shape[1])ratio = r, rnew_unpad = int(round(shape[1] * r)), int(round(shape[0] * r))pad_w, pad_h = (new_shape[1] - new_unpad[0]) / 2, (new_shape[0] - new_unpad[1]) / 2  # wh paddingif shape[::-1] != new_unpad:  # resizeimg = cv2.resize(img, new_unpad, interpolation=cv2.INTER_LINEAR)top, bottom = int(round(pad_h - 0.1)), int(round(pad_h + 0.1))left, right = int(round(pad_w - 0.1)), int(round(pad_w + 0.1))img = cv2.copyMakeBorder(img, top, bottom, left, right, cv2.BORDER_CONSTANT, value=(114, 114, 114))  # 填充# Transforms: HWC to CHW -> BGR to RGB -> div(255) -> contiguous -> add axis(optional)img = np.ascontiguousarray(np.einsum('HWC->CHW', img)[::-1], dtype=self.ndtype) / 255.0img_process = img[None] if len(img.shape) == 3 else imgreturn img_process, ratio, (pad_w, pad_h)# 后处理,包括:阈值过滤与NMSdef postprocess(self, preds, im0, ratio, pad_w, pad_h, conf_threshold, iou_threshold):"""Post-process the prediction.Args:preds (Numpy.ndarray): predictions come from ort.session.run().im0 (Numpy.ndarray): [h, w, c] original input image.ratio (tuple): width, height ratios in letterbox.pad_w (float): width padding in letterbox.pad_h (float): height padding in letterbox.conf_threshold (float): conf threshold.iou_threshold (float): iou threshold.Returns:boxes (List): list of bounding boxes."""x = preds  # outputs: predictions (1, 84, 8400)# Transpose the first output: (Batch_size, xywh_conf_cls, Num_anchors) -> (Batch_size, Num_anchors, xywh_conf_cls)x = np.einsum('bcn->bnc', x)  # (1, 8400, 84)# Predictions filtering by conf-thresholdx = x[np.amax(x[..., 4:], axis=-1) > conf_threshold]# Create a new matrix which merge these(box, score, cls) into one# For more details about `numpy.c_()`: https://numpy.org/doc/1.26/reference/generated/numpy.c_.htmlx = np.c_[x[..., :4], np.amax(x[..., 4:], axis=-1), np.argmax(x[..., 4:], axis=-1)]# NMS filtering# 经过NMS后的值, np.array([[x, y, w, h, conf, cls], ...]), shape=(-1, 4 + 1 + 1)x = x[cv2.dnn.NMSBoxes(x[:, :4], x[:, 4], conf_threshold, iou_threshold)]# 重新缩放边界框,为画图做准备if len(x) > 0:# Bounding boxes format change: cxcywh -> xyxyx[..., [0, 1]] -= x[..., [2, 3]] / 2x[..., [2, 3]] += x[..., [0, 1]]# Rescales bounding boxes from model shape(model_height, model_width) to the shape of original imagex[..., :4] -= [pad_w, pad_h, pad_w, pad_h]x[..., :4] /= min(ratio)# Bounding boxes boundary clampx[..., [0, 2]] = x[:, [0, 2]].clip(0, im0.shape[1])x[..., [1, 3]] = x[:, [1, 3]].clip(0, im0.shape[0])return x[..., :6]  # boxeselse:return []if __name__ == '__main__':# Create an argument parser to handle command-line argumentsparser = argparse.ArgumentParser()parser.add_argument('--det_model', type=str, default=r"E:\Code\ultralytics-main\runs\detect\train\weights\best.onnx", help='Path to ONNX model')parser.add_argument('--source', type=str, default=str(r'E:\datasets\visdrone2019\VisDrone2019-DET-test-dev\images'), help='Path to input image')parser.add_argument('--out_path', type=str, default=str(r'E:\Code\ultralytics-main\runs/res'), help='结果保存文件夹')parser.add_argument('--imgsz_det', type=tuple, default=(640, 640), help='Image input size')parser.add_argument('--classes', type=list, default=['pedestrian', 'people', 'bicycle', 'car', 'van', 'truck', 'tricycle', 'awning-tricycle', 'bus', 'motor'], help='类别')parser.add_argument('--conf', type=float, default=0.25, help='Confidence threshold')parser.add_argument('--iou', type=float, default=0.6, help='NMS IoU threshold')args = parser.parse_args()if not os.path.exists(args.out_path):os.mkdir(args.out_path)print('开始运行:')# Build modeldet_model = YOLOv8(args.det_model, args.imgsz_det)color_palette = np.random.uniform(0, 255, size=(len(args.classes), 3))  # 为每个类别生成调色板for i, img_name in enumerate(os.listdir(args.source)):try:t1 = time.time()# Read image by OpenCVimg = cv2.imread(os.path.join(args.source, img_name))# 检测Inferenceboxes, (pre_time, det_time, post_time) = det_model(img, conf_threshold=args.conf, iou_threshold=args.iou)print('{}/{} ==>总耗时间: {:.3f}s, 其中, 预处理: {:.3f}s, 推理: {:.3f}s, 后处理: {:.3f}s, 识别{}个目标'.format(i+1, len(os.listdir(args.source)), time.time() - t1, pre_time, det_time, post_time, len(boxes)))for (*box, conf, cls_) in boxes:cv2.rectangle(img, (int(box[0]), int(box[1])), (int(box[2]), int(box[3])),color_palette[int(cls_)], 2, cv2.LINE_AA)cv2.putText(img, f'{args.classes[int(cls_)]}: {conf:.3f}', (int(box[0]), int(box[1] - 9)),cv2.FONT_HERSHEY_SIMPLEX, 1, (0, 0, 255), 2, cv2.LINE_AA)cv2.imwrite(os.path.join(args.out_path, img_name), img)except Exception as e:print(e)
资源占用:显存不到2G,RTX4080推理耗时20几毫秒。

结果可视化如下:

相关文章:

【超详细】基于YOLOv8训练无人机视角Visdrone2019数据集
主要内容如下: 1、Visdrone2019数据集介绍 2、下载、制作YOLO格式训练集 3、模型训练及预测 4、Onnxruntime推理 运行环境:Python3.8(要求>3.8),torch1.12.0cu113(要求>1.8),…...

VUE项目在Linux子系统部署
1、导读 环境:Windows 11、python 3.12.3、Django 4.2.11、 APScheduler 3.10.4 vue 背景:换系统需要重新安装,避免后期忘记,此处记录一下啊 事件:20240922 说明:使用node启动,非nginx&…...
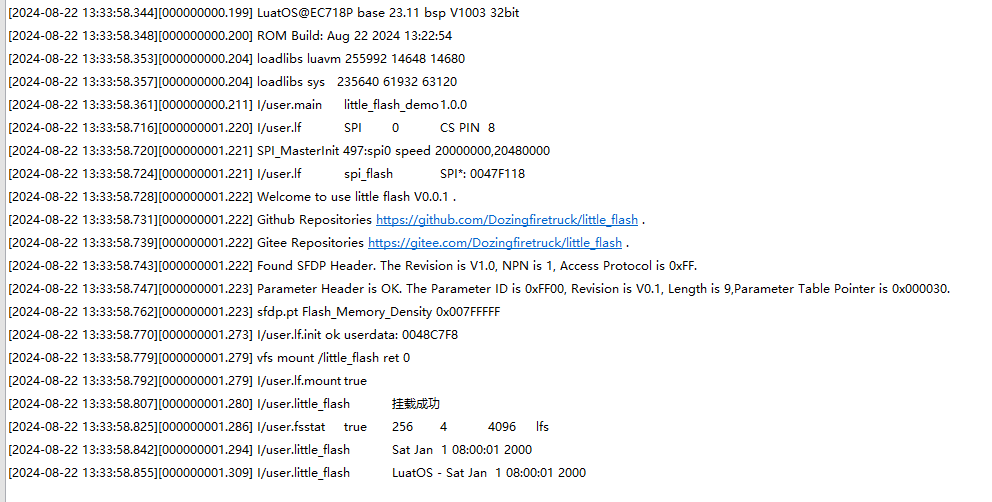
开源 | 如何在产品上扩展大储存?合宙LuatOS外挂SPI Flash库轻松搞定
我们都知道芯片的储存都是寸土寸金的,当你的产品需要存储照片、音频、文档等资源的时候,有没有眉头一紧?内部不够只能外扩,但是外扩要编写各种驱动,还有Flash替换,这都要消耗头发啊! 但&#x…...

20 基于STM32的温度、电流、电压检测proteus仿真系统(OLED、DHT11、继电器、电机)
目录 一、主要功能 二、硬件资源 三、程序编程 四、实现现象 一、主要功能 基于STM32F103C8T6 采用DHT11读取温度、滑动变阻器模拟读取电流、电压。 通过OLED屏幕显示,设置电流阈值为80,电流小阈值为50,电压阈值为60,温度阈值…...

spring自定义属性编辑器
文章目录 spring自定义属性编辑器步骤 spring自定义属性编辑器 属性编辑器是用来解析bean的配置文件中的属性标签的,spring的BeanWrapperImpl默认会注册CustomCollectionEditor(集合)、CustomMapEditor(Map)、CurrencyEditor(货币)、ByteArrayPropertyEditor等&…...

在VMware16中安装Windows 10:完整教程
在VMware中安装Windows 10:完整教程 1.安装环境准备2.创建虚拟机 1.安装环境准备 1.虚拟机: VMware-workstation-full-16.2.2-19200509 2.系统镜像:win10 2.创建虚拟机 1.自定义 2.下一步 3.稍后安装系统 3.默认下一步 4.虚拟机取名和选择存放路径(按需更改…...

MATLAB系列09:图形句柄
MATLAB系列09:图形句柄 9. 图形句柄9.1 MATLAB图形系统9.2 对象句柄9.3 对象属性的检测和更改9.3.1 在创建对象时改变对象的属性9.3.2 对象创建后改变对象的属性 9.4 用 set 函数列出可能属性值9.5 自定义数据9.6 对象查找9.7 用鼠标选择对象9.8 位置和单位9.8.1 图…...

把设计模式用起来!(4) 用不好模式?之原理不明
(清华大学出版社 《把设计模式用起来》书稿试读) 上一篇:把设计模式用起来!(3)用不好模式?之时机不对 为什么用不好设计模式?——原理不明 难搞的顾客:“抹这种霜&#…...

安卓13去掉下拉菜单的Dump SysUI 堆的选项 android13删除Dump SysUI 堆
总纲 android13 rom 开发总纲说明 文章目录 1.前言2.问题分析3.代码分析3.1 位置13.2 位置24.代码修改5.编译6.彩蛋1.前言 客户需要去掉下拉菜单里面的Dump SysUI 堆图标,不让使用这个功能。 2.问题分析 android的下拉菜单在systemui里面,这里我们只需要定位到对应的添加代…...

vue3常用的组件间通信
一 props props 可以实现父子组件通信,props数据是只读。 1. 基本用法 在父组件中,你可以这样传递 props: <template><ChildComponent message"Hello, Vue 3!" /> </template><script setup> import C…...

Windows 查找特定进程的ID并杀死
"*分析用户信息.py*" 换为自己的文件名 Get-WmiObject Win32_Process | Where-Object { $_.CommandLine -like "*分析用户信息.py*" } 查找后 内容如下 __GENUS : 2 __CLASS : Win32_Process __SUPERCLASS …...

Snapchat API 访问:Objective-C 实现示例
Snapchat 是一个流行的社交媒体平台,它允许用户发送和接收短暂存在的图片和视频。对于开发者来说,访问 Snapchat API 可以为应用程序添加独特的社交功能。本文将介绍如何在 Objective-C 中实现对 Snapchat API 的访问,并提供一个详细的代码示…...

ps证件照蓝底换白底
ps证件照蓝底换白底 1、打开 Photoshop,导入需要处理的照片。 2、左侧工具栏中选择“魔棒工具”,点击证件照的背景区域进行选择。 3、使用快捷键 Shift F5 或者从顶部菜单选择“编辑” -> “填充”,在弹出的对话框中选择“填充内容”中…...

阿里云kafka消息写入topic失败
1. 问题现象描述 20240918,14:22,测试反馈说kafka有问题,生产者写入消息的时候报错,并发了一张日志截图,主要报错如下: to topic xxxx: org.apache.kafka.common.errors.TimeoutException: Expiring 1 record(s) for x…...

图像放大效果示例【JavaScript】
实现效果: 当鼠标悬停在小图(缩略图)上时,大图(预览图)会随之更新为相应的小图,并高亮当前悬浮的小图的父元素。 代码: 1. HTML部分 <!DOCTYPE html> <html lang"z…...

【C#生态园】云端之C#:全面解析6种云服务提供商的SDK
C#开发者必读:深度比较6种云服务SDK 前言 随着云计算技术的迅猛发展,越来越多的企业和开发者选择将应用程序部署到公共云平台上。针对C#开发者而言,各大云服务提供商纷纷推出了适用于C#的SDK,以便开发者能够更轻松地与其云服务进…...

远程升级又双叒叕失败?背后原因竟然是。。。
最近又遇到了远程升级接连失败的情况,耐心和信心都备受折磨! 事情是这样的:有客户反馈在乡村里频繁出现掉线的情况,不敢耽搁,赶紧联系小伙伴排查测试,最后发现,只有去年某一批模块在当下环境才…...

【测试】——Selenium API (万字详解)
📖 前言:本文详细介绍了如何利用Selenium进行Web自动化测试,包括定位元素(如cssSelector和xpath)、常用操作函数(如点击、输入等)、窗口管理、键盘鼠标事件和浏览器导航,以及处理弹窗…...
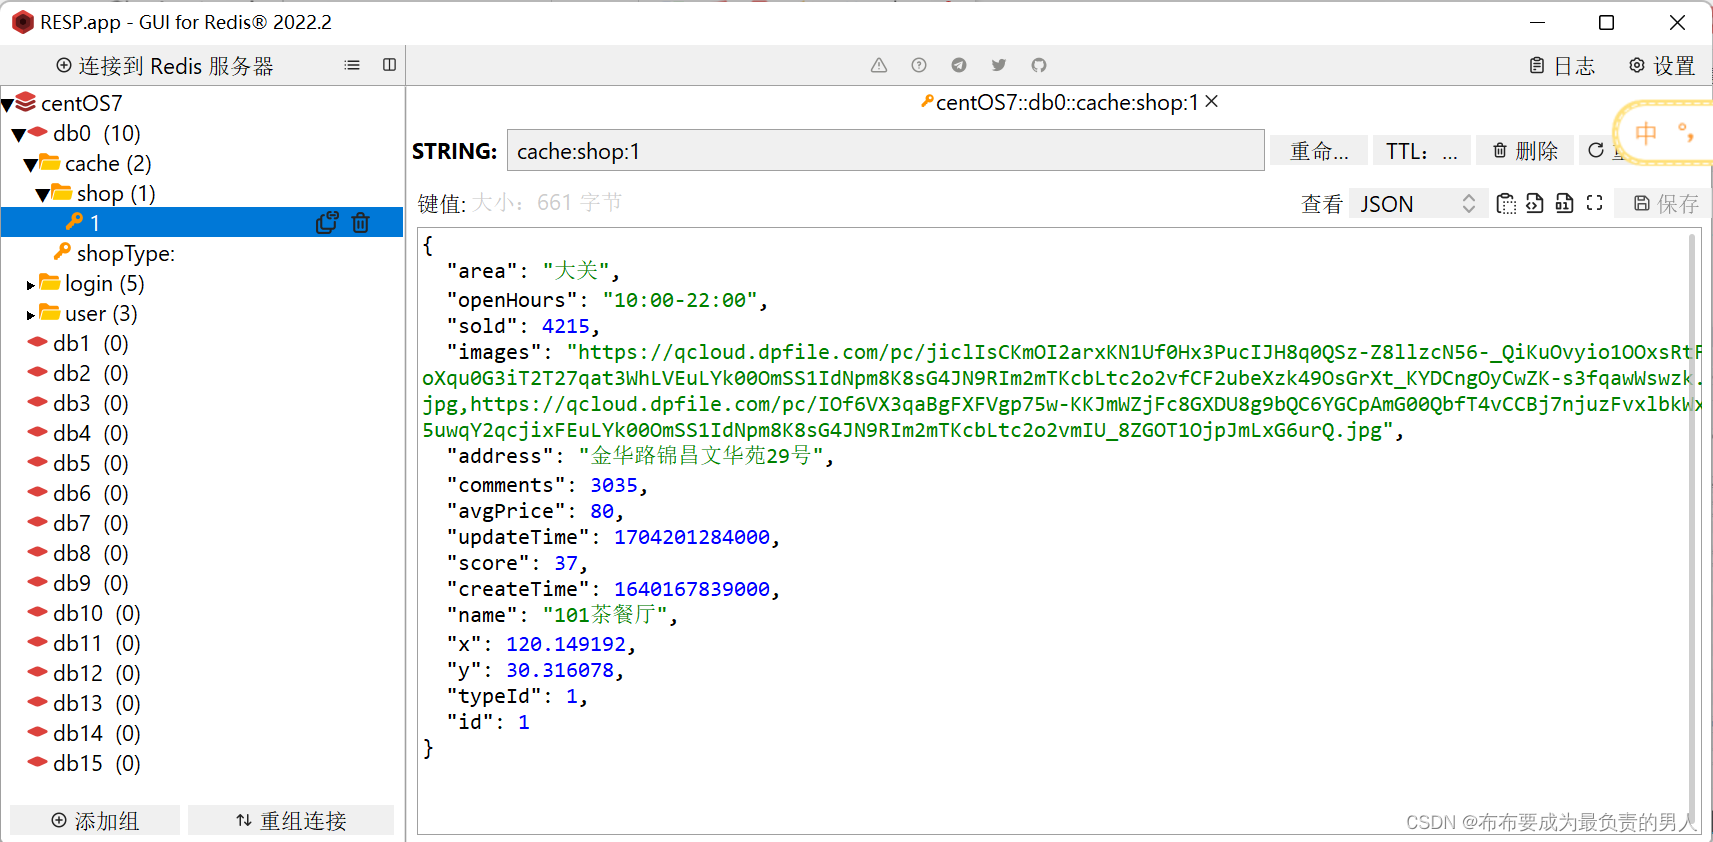
Redis:原理+项目实战——Redis实战3(Redis缓存最佳实践(问题解析+高级实现))
👨🎓作者简介:一位大四、研0学生,正在努力准备大四暑假的实习 🌌上期文章:Redis:原理项目实战——Redis实战2(Redis实现短信登录(原理剖析代码优化)&#x…...

刚刚,Stable Diffusion 2024升级,最强Ai绘画整合包、部署教程(解压即用)
2024Ai技术大爆发的元年 目前两款Ai神器大火 一款是大名鼎鼎的Chat GPT 另外一款—Stable Diffusion 堪称全球最强Ai绘画工具 Stable Diffusion Ai绘画2024版本更新啦! 从4.8.7更新至**4.9版本!**更新优化和大模型增加,无需安装…...

手游刚开服就被攻击怎么办?如何防御DDoS?
开服初期是手游最脆弱的阶段,极易成为DDoS攻击的目标。一旦遭遇攻击,可能导致服务器瘫痪、玩家流失,甚至造成巨大经济损失。本文为开发者提供一套简洁有效的应急与防御方案,帮助快速应对并构建长期防护体系。 一、遭遇攻击的紧急应…...

从WWDC看苹果产品发展的规律
WWDC 是苹果公司一年一度面向全球开发者的盛会,其主题演讲展现了苹果在产品设计、技术路线、用户体验和生态系统构建上的核心理念与演进脉络。我们借助 ChatGPT Deep Research 工具,对过去十年 WWDC 主题演讲内容进行了系统化分析,形成了这份…...
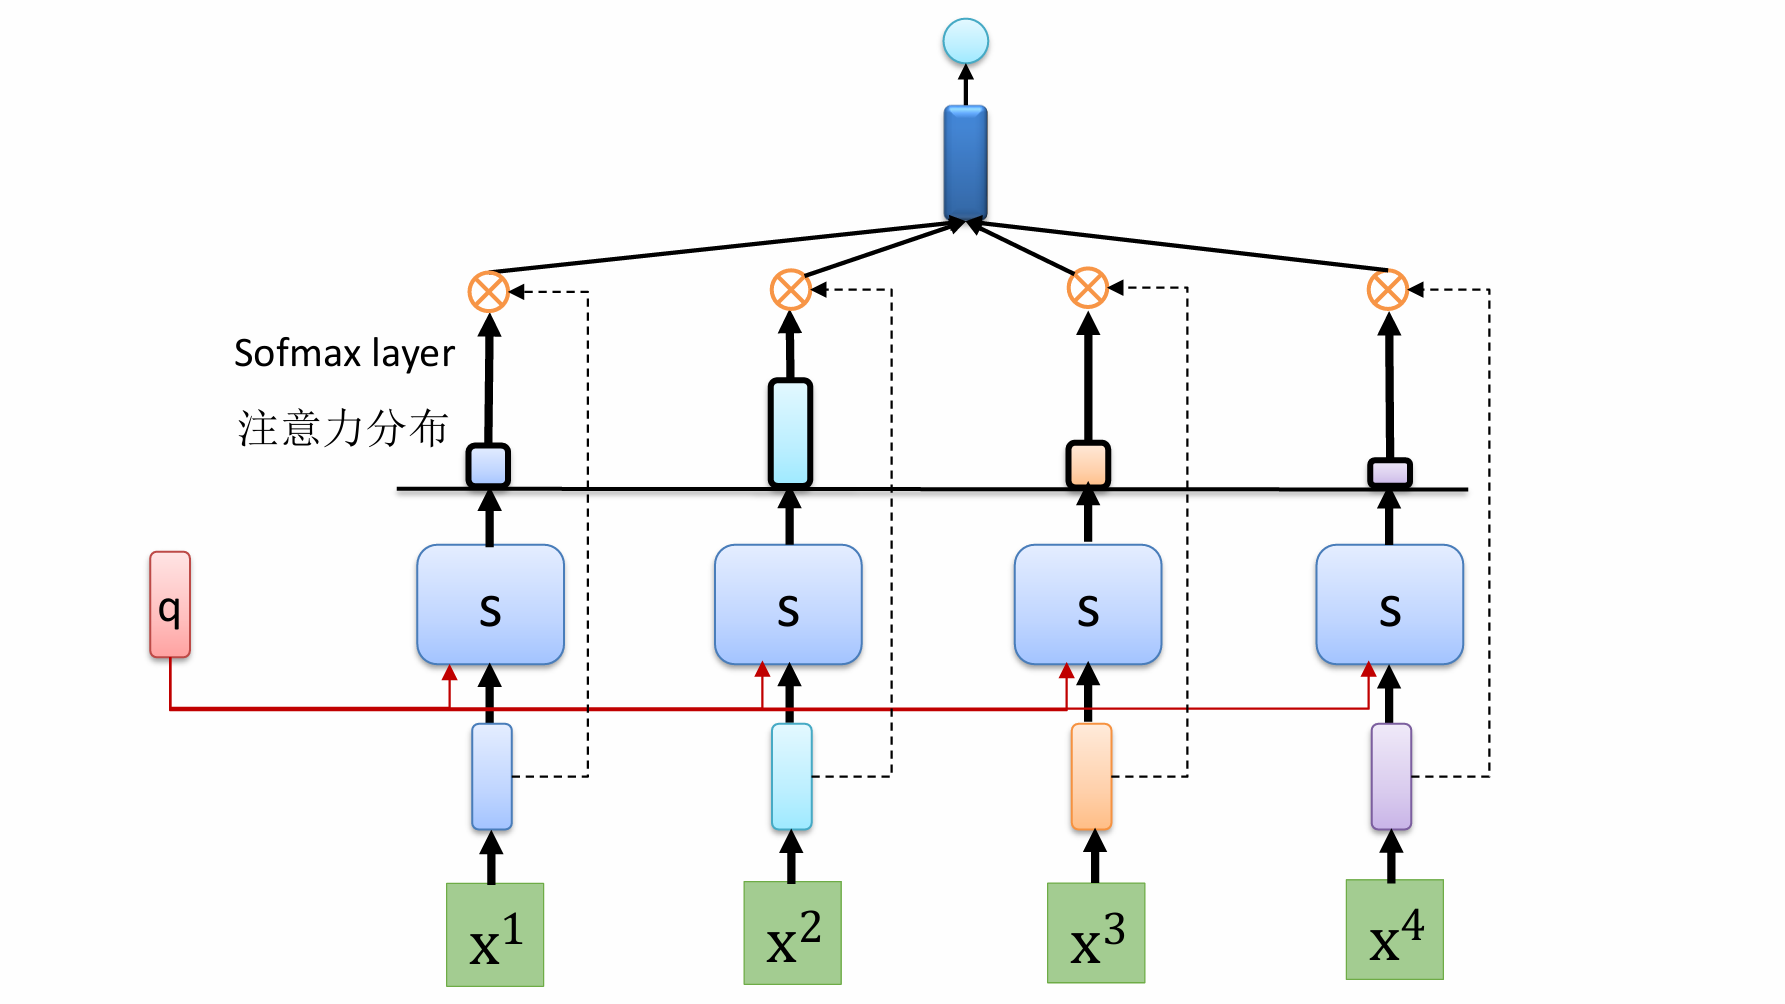
自然语言处理——循环神经网络
自然语言处理——循环神经网络 循环神经网络应用到基于机器学习的自然语言处理任务序列到类别同步的序列到序列模式异步的序列到序列模式 参数学习和长程依赖问题基于门控的循环神经网络门控循环单元(GRU)长短期记忆神经网络(LSTM)…...

【论文阅读28】-CNN-BiLSTM-Attention-(2024)
本文把滑坡位移序列拆开、筛优质因子,再用 CNN-BiLSTM-Attention 来动态预测每个子序列,最后重构出总位移,预测效果超越传统模型。 文章目录 1 引言2 方法2.1 位移时间序列加性模型2.2 变分模态分解 (VMD) 具体步骤2.3.1 样本熵(S…...
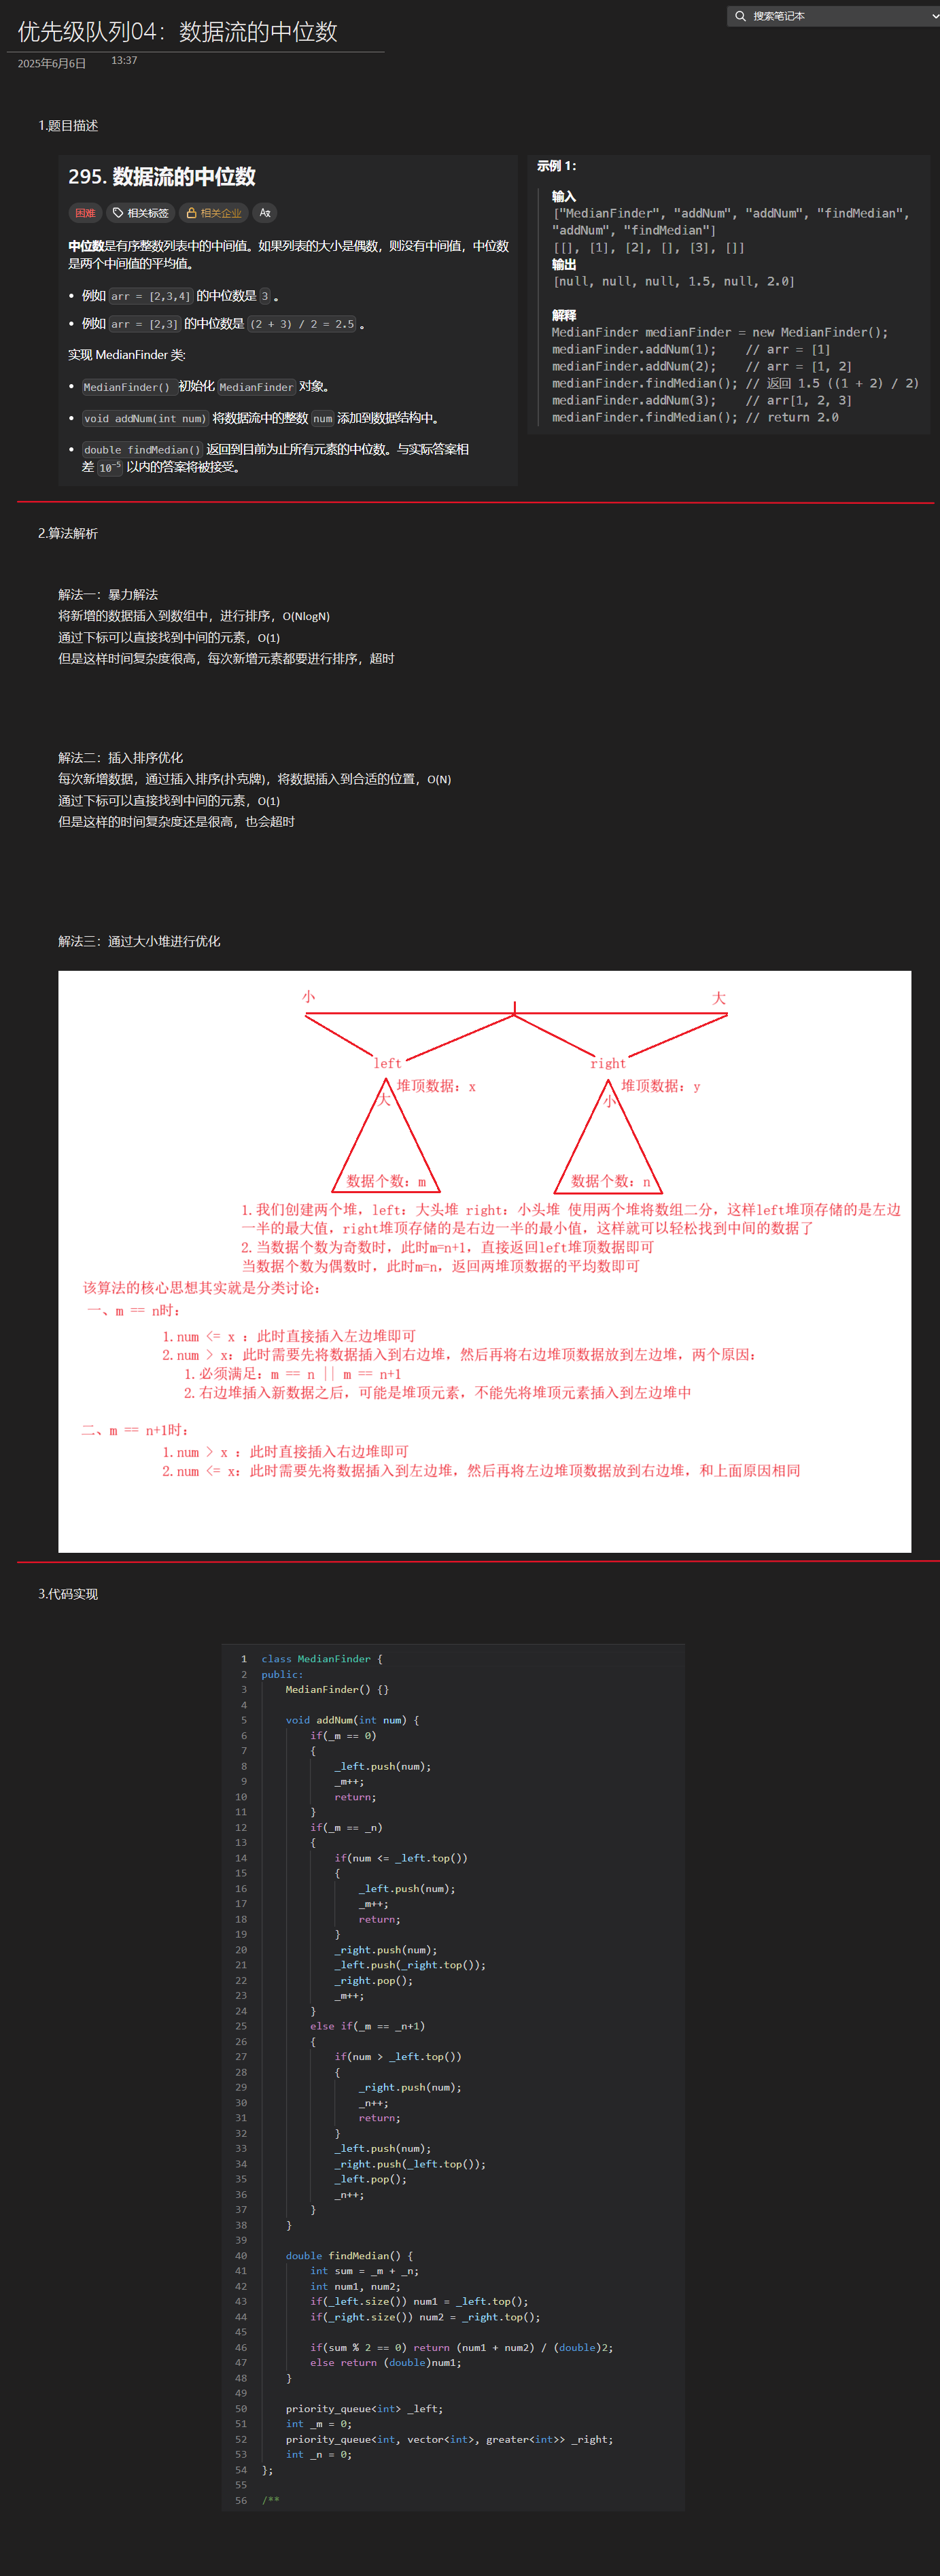
优选算法第十二讲:队列 + 宽搜 优先级队列
优选算法第十二讲:队列 宽搜 && 优先级队列 1.N叉树的层序遍历2.二叉树的锯齿型层序遍历3.二叉树最大宽度4.在每个树行中找最大值5.优先级队列 -- 最后一块石头的重量6.数据流中的第K大元素7.前K个高频单词8.数据流的中位数 1.N叉树的层序遍历 2.二叉树的锯…...
Mobile ALOHA全身模仿学习
一、题目 Mobile ALOHA:通过低成本全身远程操作学习双手移动操作 传统模仿学习(Imitation Learning)缺点:聚焦与桌面操作,缺乏通用任务所需的移动性和灵活性 本论文优点:(1)在ALOHA…...

C#中的CLR属性、依赖属性与附加属性
CLR属性的主要特征 封装性: 隐藏字段的实现细节 提供对字段的受控访问 访问控制: 可单独设置get/set访问器的可见性 可创建只读或只写属性 计算属性: 可以在getter中执行计算逻辑 不需要直接对应一个字段 验证逻辑: 可以…...

MySQL 8.0 事务全面讲解
以下是一个结合两次回答的 MySQL 8.0 事务全面讲解,涵盖了事务的核心概念、操作示例、失败回滚、隔离级别、事务性 DDL 和 XA 事务等内容,并修正了查看隔离级别的命令。 MySQL 8.0 事务全面讲解 一、事务的核心概念(ACID) 事务是…...

4. TypeScript 类型推断与类型组合
一、类型推断 (一) 什么是类型推断 TypeScript 的类型推断会根据变量、函数返回值、对象和数组的赋值和使用方式,自动确定它们的类型。 这一特性减少了显式类型注解的需要,在保持类型安全的同时简化了代码。通过分析上下文和初始值,TypeSc…...
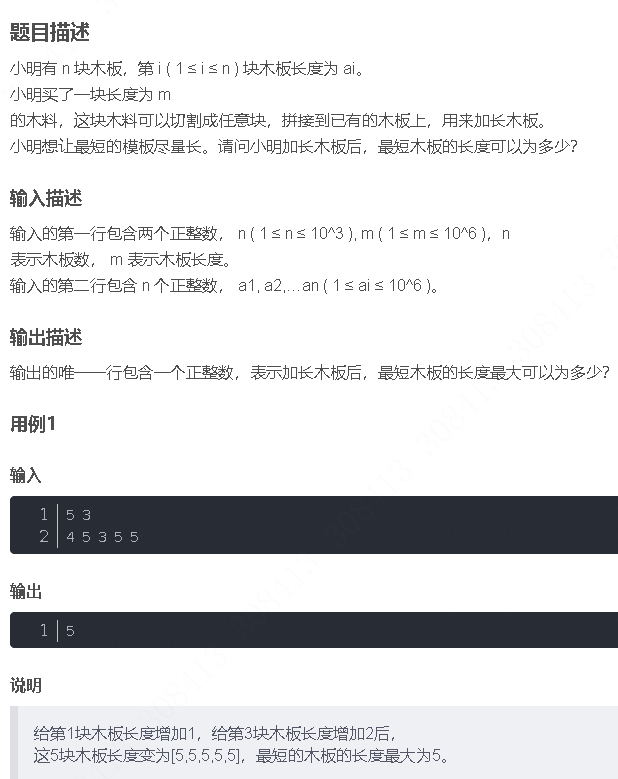
华为OD机试-最短木板长度-二分法(A卷,100分)
此题是一个最大化最小值的典型例题, 因为搜索范围是有界的,上界最大木板长度补充的全部木料长度,下界最小木板长度; 即left0,right10^6; 我们可以设置一个候选值x(mid),将木板的长度全部都补充到x,如果成功…...
