C++模拟实现list:list、list类的初始化和尾插、list的迭代器的基本实现、list的完整实现、测试、整个list类等的介绍
文章目录
- 前言
- 一、list
- 二、list类的初始化和尾插
- 三、list的迭代器的基本实现
- 四、list的完整实现
- 五、测试
- 六、整个list类
- 总结
前言
C++模拟实现list:list、list类的初始化和尾插、list的迭代器的基本实现、list的完整实现、测试、整个list类等的介绍
一、list
list本质上是一个双向带头循环链表。
实现list类,需要节点类(clase list_node)、迭代器(class __list_iterator);
节点类(clase list_node): 定义每个节点的结构;
迭代器(class __list_iterator): 使用节点的指针封装出一个类,可以使用运算符重载的形式更好的访问链表;
二、list类的初始化和尾插
namespace hhb
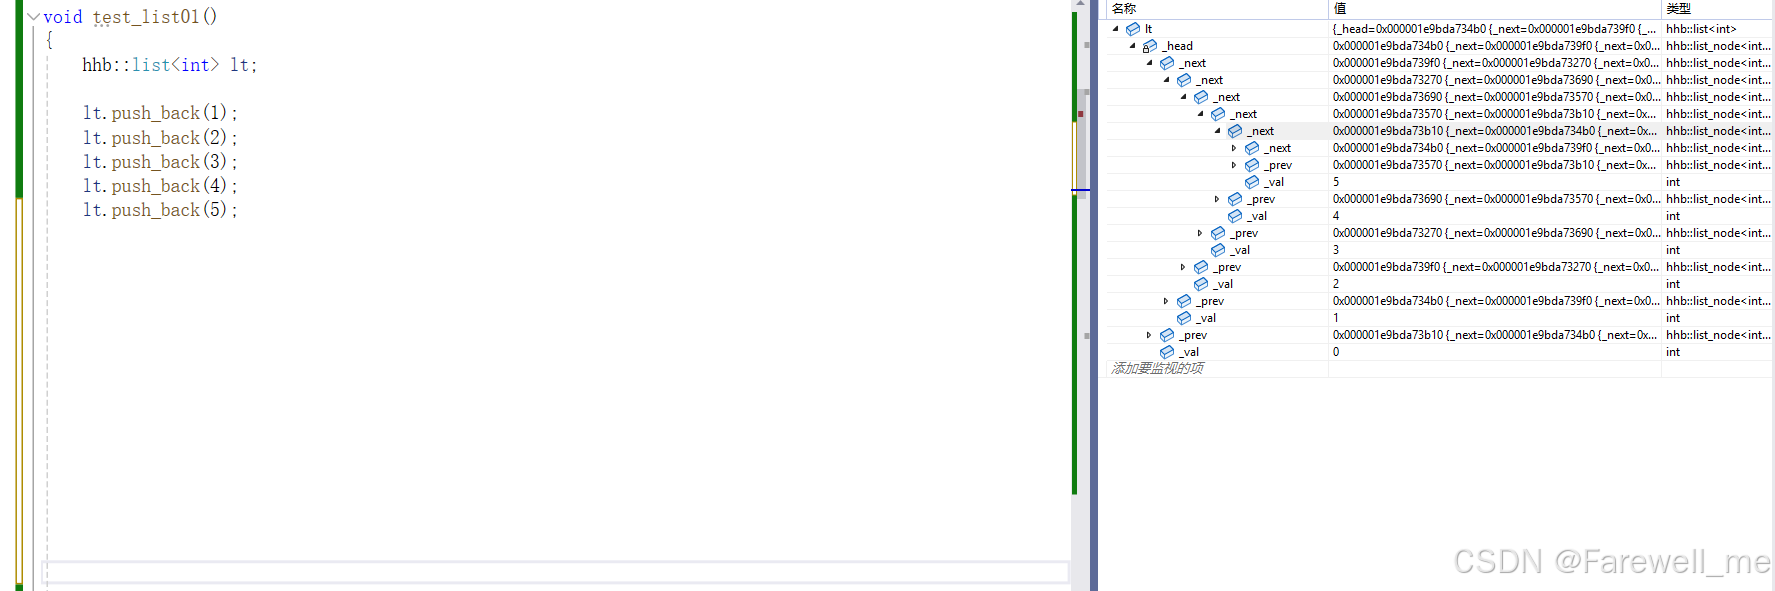
{// 节点template <class T>struct list_node{list_node(const T& val = T()): _next(nullptr), _prev(nullptr), _val(val){}list_node<T>* _next;list_node<T>* _prev;T _val;};// 链表template<class T> class list{typedef list_node<T> Node;public:list(){_head = new Node;_head->_next = _head;_head->_prev = _head;}void push_back(const T& x){Node* newNode = new Node(x);Node* tail = _head->_prev;newNode->_next = _head;newNode->_prev = tail;tail->_next = newNode;_head->_prev = newNode;}private:Node* _head;};
}
三、list的迭代器的基本实现
- 使用链表节点的指针封装出一个类,是list链表的访问可以向vector一样使用++等操作访问
- vector和list的使用,虽然在形式上一样,但是他们的底层是不一样的
- (*)vector迭代器是对指针的解引用
- (*)list迭代器是调用operator(解引用操作符)函数重载,本质是不一样的
对于const迭代器,是operator(*)和 operator(->)的运算符重载函数的返回值不一样,因此需要增加两个模板参数
- 即: (T& 和 T*)
// 迭代器
template <class T, class Ref, class Ptr>
struct __list_iterator
{typedef list_node<T> Node;typedef __list_iterator<T, Ref, Ptr> self;
public:__list_iterator(Node* node):_node(node){}Ref operator*(){return _node->_val;}Ptr operator->(){return &_node->_val;}self& operator++(){_node = _node->_next;return *this;}self operator++(int){self tmp(*this);_node = _node->_next;return tmp;}self& operator--(){_node = _node->_prev;return *this;}self operator--(int){self tmp(*this);_node = _node->_prev;return tmp;}bool operator!=(const self& it) const{return _node != it._node;}bool operator==(const self& it) const{return _node == it._node;}Node* _node;
};
- operator->运算符重载编译器会进行优化, 如下:
struct A
{
public:A(int a1 = 0, int a2 = 0): _a1(a1), _a2(a2){}int _a1;int _a2;
};
void test_list02()
{hhb::list<A> lt;lt.push_back(A(1, 1));lt.push_back(A(2, 2));lt.push_back(A(3, 3));lt.push_back(A(4, 4));lt.push_back(A(5, 5));hhb::list<A>::iterator it = lt.begin();while (it != lt.end()){//cout << (*it)._a1 << " " << (*it)._a2 << " " << endl;cout << it->_a1 << " " << it->_a2 << " " << endl;// 此处编译器进行了优化, it->返回的是T* 也就是 A*, 如果要访问A的成员// 按道理来讲,应该是 (it->)->_a1 / (it->)->_a2 来进行访问++it;}cout << endl;}
四、list的完整实现
- list需要有size()的接口,所以需要对链表节点个数进行计数,增加一个成员变量_size.
- 实现insert()和erase()接口后,push_back()和push_front()、pop_back()和pop_front()接口都可以复用接口。
- clear()只清除(不包含哨兵位的头节点)数据,不销毁链表
- 析构函数调用clear()后,释放_head节点(哨兵位的头节点)
- 拷贝构造函数在拷贝之前,一定要先自己初始化(创建哨兵位的头节点)
- 赋值(=)运算符重载使用现代写法,拷贝构造加交换函数加自动调用析构函数。
	// 链表template<class T> class list{typedef list_node<T> Node;public:typedef __list_iterator<T, T&, T*> iterator;typedef __list_iterator<T, const T&, const T*> const_iterator;iterator begin(){return _head->_next;}iterator end(){return _head;}const_iterator begin() const{return _head->_next;}const_iterator end() const{return _head;}void emptyInit(){_head = new Node;_head->_next = _head;_head->_prev = _head;_size = 0;}list(){emptyInit();}list(const list<T>& lt){emptyInit();for (auto e : lt){push_back(e);}}void swap(list<T>& lt){std::swap(_head, lt._head);std::swap(_size, lt._size);}list<T> operator=(list<T> lt){swap(lt);return *this;}~list(){clear();delete _head;_head = nullptr;_size = 0;}void push_back(const T& x){//Node* newNode = new Node(x);//Node* tail = _head->_prev;//newNode->_next = _head;//newNode->_prev = tail;//tail->_next = newNode;//_head->_prev = newNode;insert(end(), x);}void push_front(const T& x){insert(begin(), x);}void pop_back(){erase(--end());}void pos_front(){erase(begin());}iterator insert(iterator pos, const T& x){Node* newNode = new Node(x);Node* cur = pos._node;Node* prev = cur->_prev;newNode->_next = cur;newNode->_prev = prev;cur->_prev = newNode;prev->_next = newNode;++_size;return newNode;}iterator erase(iterator pos){assert(pos != end());Node* cur = pos._node;Node* prev = cur->_prev;Node* next = cur->_next;prev->_next = next;next->_prev = prev;delete cur;cur = nullptr;--_size;return next;}//size_t size()//{//	int sz = 0;//	iterator it = begin();//	while (it != end())//	{//		sz++;//		++it;//	}//	//	return sz;//}size_t size(){return _size;}void clear(){iterator it = begin();while (it != end()){it = erase(it);}_size = 0;}private:Node* _head;size_t _size;};
}
五、测试
- 测试push_back, pop_back可以顺便测试insert, erase函数, 所以不单独测试insert和erase函数
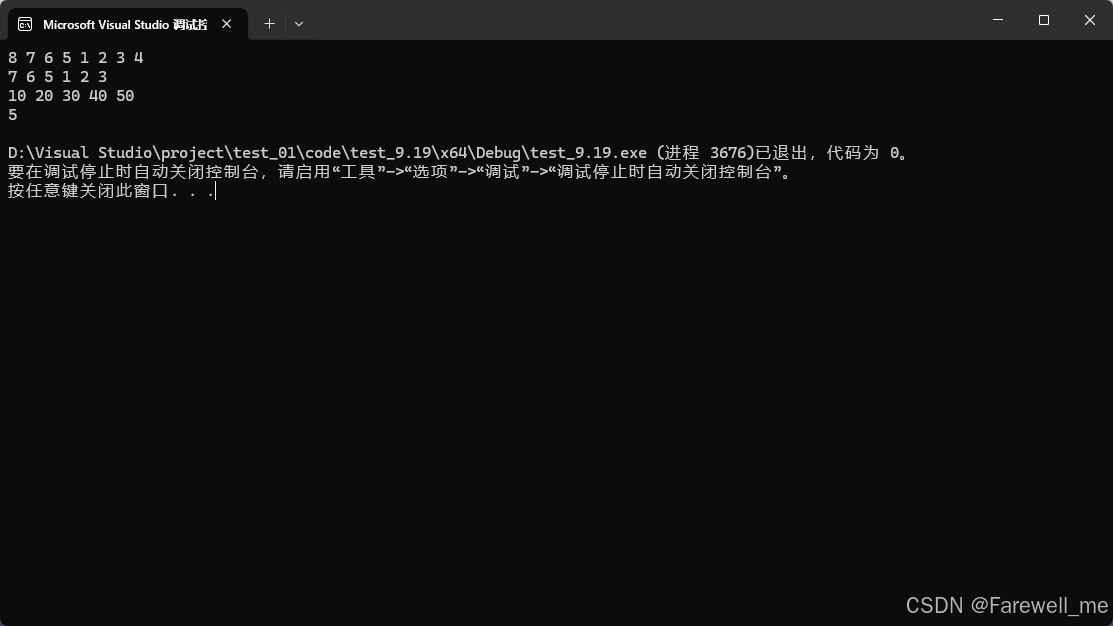
void test_list03()
{hhb::list<int> lt;lt.push_back(1);lt.push_back(2);lt.push_back(3);lt.push_back(4);lt.push_front(5);lt.push_front(6);lt.push_front(7);lt.push_front(8);for (auto e : lt){cout << e << " ";}cout << endl;lt.pop_back();lt.pos_front();for (auto e : lt){cout << e << " ";}cout << endl;lt.clear();lt.push_back(10);lt.push_back(20);lt.push_back(30);lt.push_back(40);lt.push_back(50);for (auto e : lt){cout << e << " ";}cout << endl;cout << lt.size() << endl;}
- 测试拷贝构造和赋值运算符重载
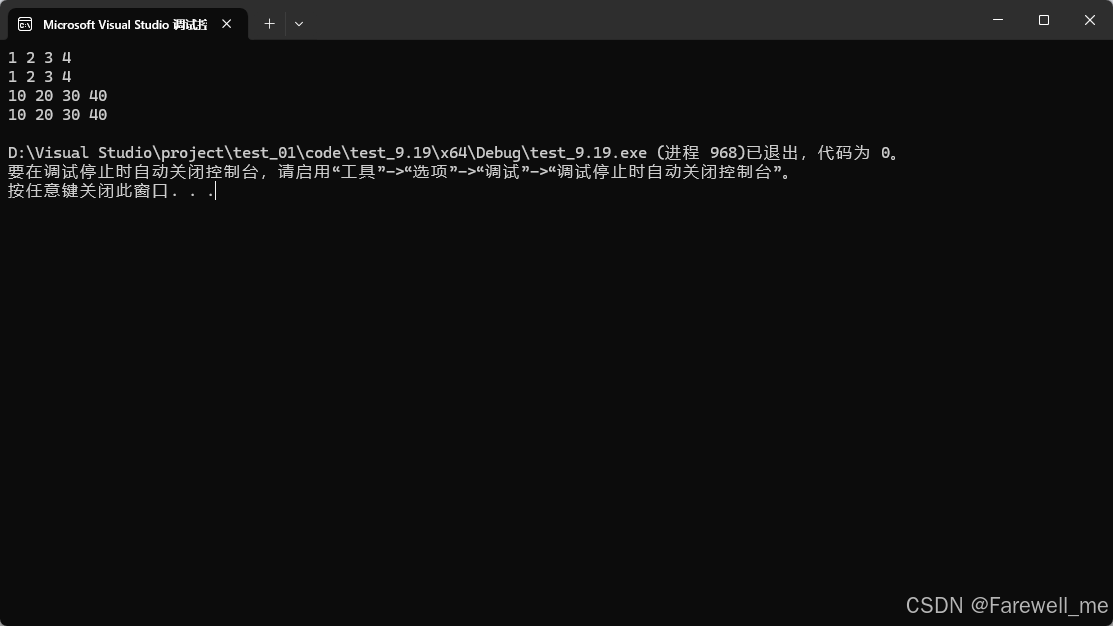
void test_list04()
{hhb::list<int> lt;lt.push_back(1);lt.push_back(2);lt.push_back(3);lt.push_back(4);for (auto e : lt){cout << e << " ";}cout << endl;hhb::list<int> lt1(lt);for (auto e : lt1){cout << e << " ";}cout << endl;hhb::list<int> lt2;lt2.push_back(10);lt2.push_back(20);lt2.push_back(30);lt2.push_back(40);lt1 = lt2;for (auto e : lt1){cout << e << " ";}cout << endl;for (auto e : lt2){cout << e << " ";}cout << endl;}
六、整个list类
// list.h
#pragma once#include <assert.h>
namespace hhb
{// 节点template <class T>struct list_node{list_node(const T& val = T()): _next(nullptr), _prev(nullptr), _val(val){}list_node<T>* _next;list_node<T>* _prev;T _val;};// 迭代器template <class T, class Ref, class Ptr>struct __list_iterator{typedef list_node<T> Node;typedef __list_iterator<T, Ref, Ptr> self;public:__list_iterator(Node* node):_node(node){}Ref operator*(){return _node->_val;}Ptr operator->(){return &_node->_val;}self& operator++(){_node = _node->_next;return *this;}self operator++(int){self tmp(*this);_node = _node->_next;return tmp;}self& operator--(){_node = _node->_prev;return *this;}self operator--(int){self tmp(*this);_node = _node->_prev;return tmp;}bool operator!=(const self& it) const{return _node != it._node;}bool operator==(const self& it) const{return _node == it._node;}Node* _node;};// 链表template<class T> class list{typedef list_node<T> Node;public:typedef __list_iterator<T, T&, T*> iterator;typedef __list_iterator<T, const T&, const T*> const_iterator;iterator begin(){return _head->_next;}iterator end(){return _head;}const_iterator begin() const{return _head->_next;}const_iterator end() const{return _head;}void emptyInit(){_head = new Node;_head->_next = _head;_head->_prev = _head;_size = 0;}list(){emptyInit();}list(const list<T>& lt){emptyInit();for (auto e : lt){push_back(e);}}void swap(list<T>& lt){std::swap(_head, lt._head);std::swap(_size, lt._size);}list<T> operator=(list<T> lt){swap(lt);return *this;}~list(){clear();delete _head;_head = nullptr;_size = 0;}void push_back(const T& x){//Node* newNode = new Node(x);//Node* tail = _head->_prev;//newNode->_next = _head;//newNode->_prev = tail;//tail->_next = newNode;//_head->_prev = newNode;insert(end(), x);}void push_front(const T& x){insert(begin(), x);}void pop_back(){erase(--end());}void pos_front(){erase(begin());}iterator insert(iterator pos, const T& x){Node* newNode = new Node(x);Node* cur = pos._node;Node* prev = cur->_prev;newNode->_next = cur;newNode->_prev = prev;cur->_prev = newNode;prev->_next = newNode;++_size;return newNode;}iterator erase(iterator pos){assert(pos != end());Node* cur = pos._node;Node* prev = cur->_prev;Node* next = cur->_next;prev->_next = next;next->_prev = prev;delete cur;cur = nullptr;--_size;return next;}//size_t size()//{//	int sz = 0;//	iterator it = begin();//	while (it != end())//	{//		sz++;//		++it;//	}//	//	return sz;//}size_t size(){return _size;}void clear(){iterator it = begin();while (it != end()){it = erase(it);}_size = 0;}private:Node* _head;size_t _size;};
}
- 整个测试
#define _CRT_SECURE_NO_WARNINGS#include <iostream>
#include <list>
using namespace std;
#include "list.h"void print1(const hhb::list<int>& lt)
{hhb::list<int>::const_iterator it = lt.begin();while (it != lt.end()){cout << *it << " ";++it;}cout << endl;
}void test_list01()
{hhb::list<int> lt;lt.push_back(1);lt.push_back(2);lt.push_back(3);lt.push_back(4);lt.push_back(5);hhb::list<int>::iterator it = lt.begin();while (it != lt.end()){cout << *it << " ";++it;}cout << endl;for (auto e : lt){cout << e << " ";}cout << endl;print1(lt);
}struct A
{
public:A(int a1 = 0, int a2 = 0): _a1(a1), _a2(a2){}int _a1;int _a2;
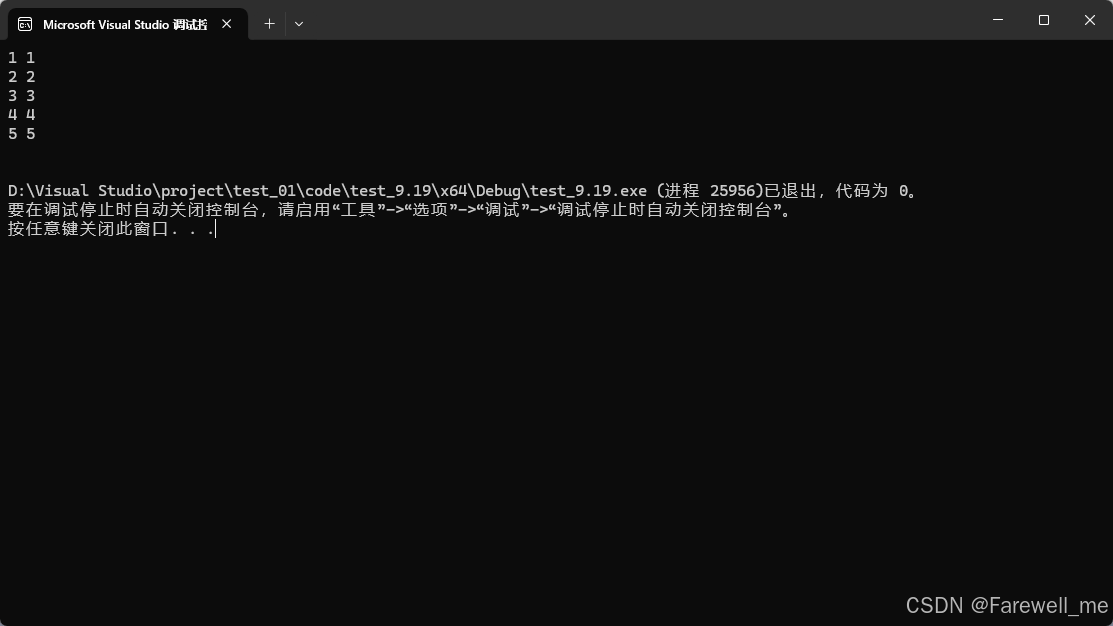
};void test_list02()
{hhb::list<A> lt;lt.push_back(A(1, 1));lt.push_back(A(2, 2));lt.push_back(A(3, 3));lt.push_back(A(4, 4));lt.push_back(A(5, 5));hhb::list<A>::iterator it = lt.begin();while (it != lt.end()){//cout << (*it)._a1 << " " << (*it)._a2 << " " << endl;cout << it->_a1 << " " << it->_a2 << " " << endl;// 此处编译器进行了优化, it->返回的是T* 也就是 A*, 如果要访问A的成员// 按道理来讲,应该是 (it->)->_a1 / (it->)->_a2 来进行访问++it;}cout << endl;}void test_list03()
{hhb::list<int> lt;lt.push_back(1);lt.push_back(2);lt.push_back(3);lt.push_back(4);lt.push_front(5);lt.push_front(6);lt.push_front(7);lt.push_front(8);for (auto e : lt){cout << e << " ";}cout << endl;lt.pop_back();lt.pos_front();for (auto e : lt){cout << e << " ";}cout << endl;lt.clear();lt.push_back(10);lt.push_back(20);lt.push_back(30);lt.push_back(40);lt.push_back(50);for (auto e : lt){cout << e << " ";}cout << endl;cout << lt.size() << endl;}void test_list04()
{hhb::list<int> lt;lt.push_back(1);lt.push_back(2);lt.push_back(3);lt.push_back(4);for (auto e : lt){cout << e << " ";}cout << endl;hhb::list<int> lt1(lt);for (auto e : lt1){cout << e << " ";}cout << endl;hhb::list<int> lt2;lt2.push_back(10);lt2.push_back(20);lt2.push_back(30);lt2.push_back(40);lt1 = lt2;for (auto e : lt1){cout << e << " ";}cout << endl;for (auto e : lt2){cout << e << " ";}cout << endl;}int main()
{//test_list01();test_list02();//test_list03();//test_list04();return 0;
}
总结
C++模拟实现list:list、list类的初始化和尾插、list的迭代器的基本实现、list的完整实现、测试、整个list类等的介绍
相关文章:
C++模拟实现list:list、list类的初始化和尾插、list的迭代器的基本实现、list的完整实现、测试、整个list类等的介绍
文章目录 前言一、list二、list类的初始化和尾插三、list的迭代器的基本实现四、list的完整实现五、测试六、整个list类总结 前言 C模拟实现list:list、list类的初始化和尾插、list的迭代器的基本实现、list的完整实现、测试、整个list类等的介绍 一、list list本…...
Offer60:n个骰子的点数
题目:把n个骰子扔在地上,所有骰子朝上一面的点数之和为s。输入n,打印出s的所有可能的值出现的概率。 分析:要解决这个问题,我们需要先统计出每个点数出现的次数,然后把每个点数出现的次数除以,就能求出每个点数出现的概率了。我们…...

几种常见的索引类型扫描
第一种:index unique scan 索引唯一扫描,当可以优化器发现某个查询条件可以利用到主键、唯一键、具有外键约束的列,或者只是访问其中某行索引所在的数据的时候,优化器会选择这种扫描类型。第二种:index range scan 索…...

苹果CMS插件:优化蜘蛛访问内容,提升百度收录率
确保蜘蛛抓取原始内容 专为苹果CMS设计的广告管理插件,能够智能识别搜索引擎蜘蛛与普通访客,确保蜘蛛访问时展示原始内容,从而提升被百度等搜索引擎收录的几率。 广告显示提升收益 对于普通访客,该插件则优先显示广告内容&#…...

后端开发刷题 | 没有重复项数字的全排列
描述 给出一组数字,返回该组数字的所有排列 例如: [1,2,3]的所有排列如下 [1,2,3],[1,3,2],[2,1,3],[2,3,1],[3,1,2], [3,2,1]. (以数字在数组中的位置靠前为优先级,按字典序排列输出。) 数据范围:数字…...

Python中的“打开与关闭文件”:从入门到精通
引言 在日常生活中,我们经常会遇到需要读取或保存信息的情况,比如记录笔记、保存配置信息或者处理大量的数据文件等。对于程序员来说,如何高效、安全地管理这些信息显得尤为重要。Python中的文件操作功能强大且易于使用,可以帮助…...
9.23 My_string.cpp
my_string.h #ifndef MY_STRING_H #define MY_STRING_H#include <iostream> #include <cstring>using namespace std;class My_string { private:char *ptr; //指向字符数组的指针int size; //字符串的最大容量int len; //字符串当前…...
【android10】【binder】【3.向servicemanager注册服务】
系列文章目录 可跳转到下面链接查看下表所有内容https://blog.csdn.net/handsomethefirst/article/details/138226266?spm1001.2014.3001.5501文章浏览阅读2次。系列文章大全https://blog.csdn.net/handsomethefirst/article/details/138226266?spm1001.2014.3001.5501 目录 …...
Java — LeetCode 面试经典150题(一)
双指针 125.验证回文串 题目 如果在将所有大写字符转换为小写字符、并移除所有非字母数字字符之后,短语正着读和反着读都一样。则可以认为该短语是一个 回文串 。 字母和数字都属于字母数字字符。 给你一个字符串 s,如果它是 回文串 ,返回…...

Python酷玩之旅_mysql-connector
前言 Python作为数据科学、机器学习等领域的必选武器,备受各界人士的喜爱。当你面对不同类型、存储于各类介质的数据时,第一时间是不是要让它亮个相?做个统计,画个图表,搞个报表… 等等。 正如Java中的JdbcDriver一样…...
7.搭建个人金融数据库之快速获取股票列表和基本信息!
前边我们提过,免费的数据一般来自于爬虫,获取难度和维护成本都比较高,其实不太适合小白用户。所以非必要情况下,我们尽量不用这种方式来获取数据。 我自己用的比较多的是tushare,一般来说有它也就够了,大…...
Nginx基础详解1(单体部署与集群部署、负载均衡、正反代理、nginx安装)
本阶段的任务 1.学会集群的操作概念 2.完成对Nginx的入门操作 3.使用Nginx实现集群和负载均衡 4.使用Nginx实现高可用的方案 目录 1.单体部署与集群部署 1.1单体部署的概念 1.2单体部署的优缺点 1.3集群部署的概念 1.4集群部署的优缺点 1.5集群部署需要注意的点 1.…...

等保一体机如何帮你应对网络攻击
等保一体机如何帮你应对网络攻击 在当今信息化时代,网络安全已成为企业和组织面临的重要挑战。随着网络攻击手段的不断升级,传统的安全防护措施已难以应对复杂多变的威胁。等保一体机作为一种集成化的安全防护解决方案,能够有效帮助企业应对…...

CVE-2024-1112 Resource Hacker 缓冲区溢出分析
漏洞简述 CVE-2024-1112 是 Resource Hacker 软件的一个缓冲区溢出漏洞。该漏洞存在于版本 3.6.0.92 中。由于软件在处理命令行中的文件路径时未对文件字符串长度进行限制,过长的字符串参数导致内存被过度写入,从而引发缓冲区溢出。 漏洞复现 构造长度…...

WebGL渲染与创建2D内容
目录 创建画布2D渲染修改顶点着色器光照深度测试混合模式WebGL是一个强大的工具,可以用来在Web浏览器中创建复杂的3D图形。虽然它的设计初衷是为了3D渲染,但也可以用于创建2D内容。通过巧妙地利用几何、投影和纹理,我们可以构建出各种2D图形。 创建画布 首先,我们需要在H…...
ArcGIS Desktop使用入门(三)图层右键工具——拓扑(下篇:地理数据库拓扑)
系列文章目录 ArcGIS Desktop使用入门(一)软件初认识 ArcGIS Desktop使用入门(二)常用工具条——标准工具 ArcGIS Desktop使用入门(二)常用工具条——编辑器 ArcGIS Desktop使用入门(二&#x…...
LeetCode题练习与总结:二叉树的最近公共祖先--236
一、题目描述 给定一个二叉树, 找到该树中两个指定节点的最近公共祖先。 百度百科中最近公共祖先的定义为:“对于有根树 T 的两个节点 p、q,最近公共祖先表示为一个节点 x,满足 x 是 p、q 的祖先且 x 的深度尽可能大(一个节点也…...

uni-app 多环境配置
前后端分离模式下,不同的环境如开发环境(dev)、测试环境(test)、生产环境(prod)等,不同环境后端数据库、api地址等可能都不同 。 uni-app中只有development和production两个环境 以配…...
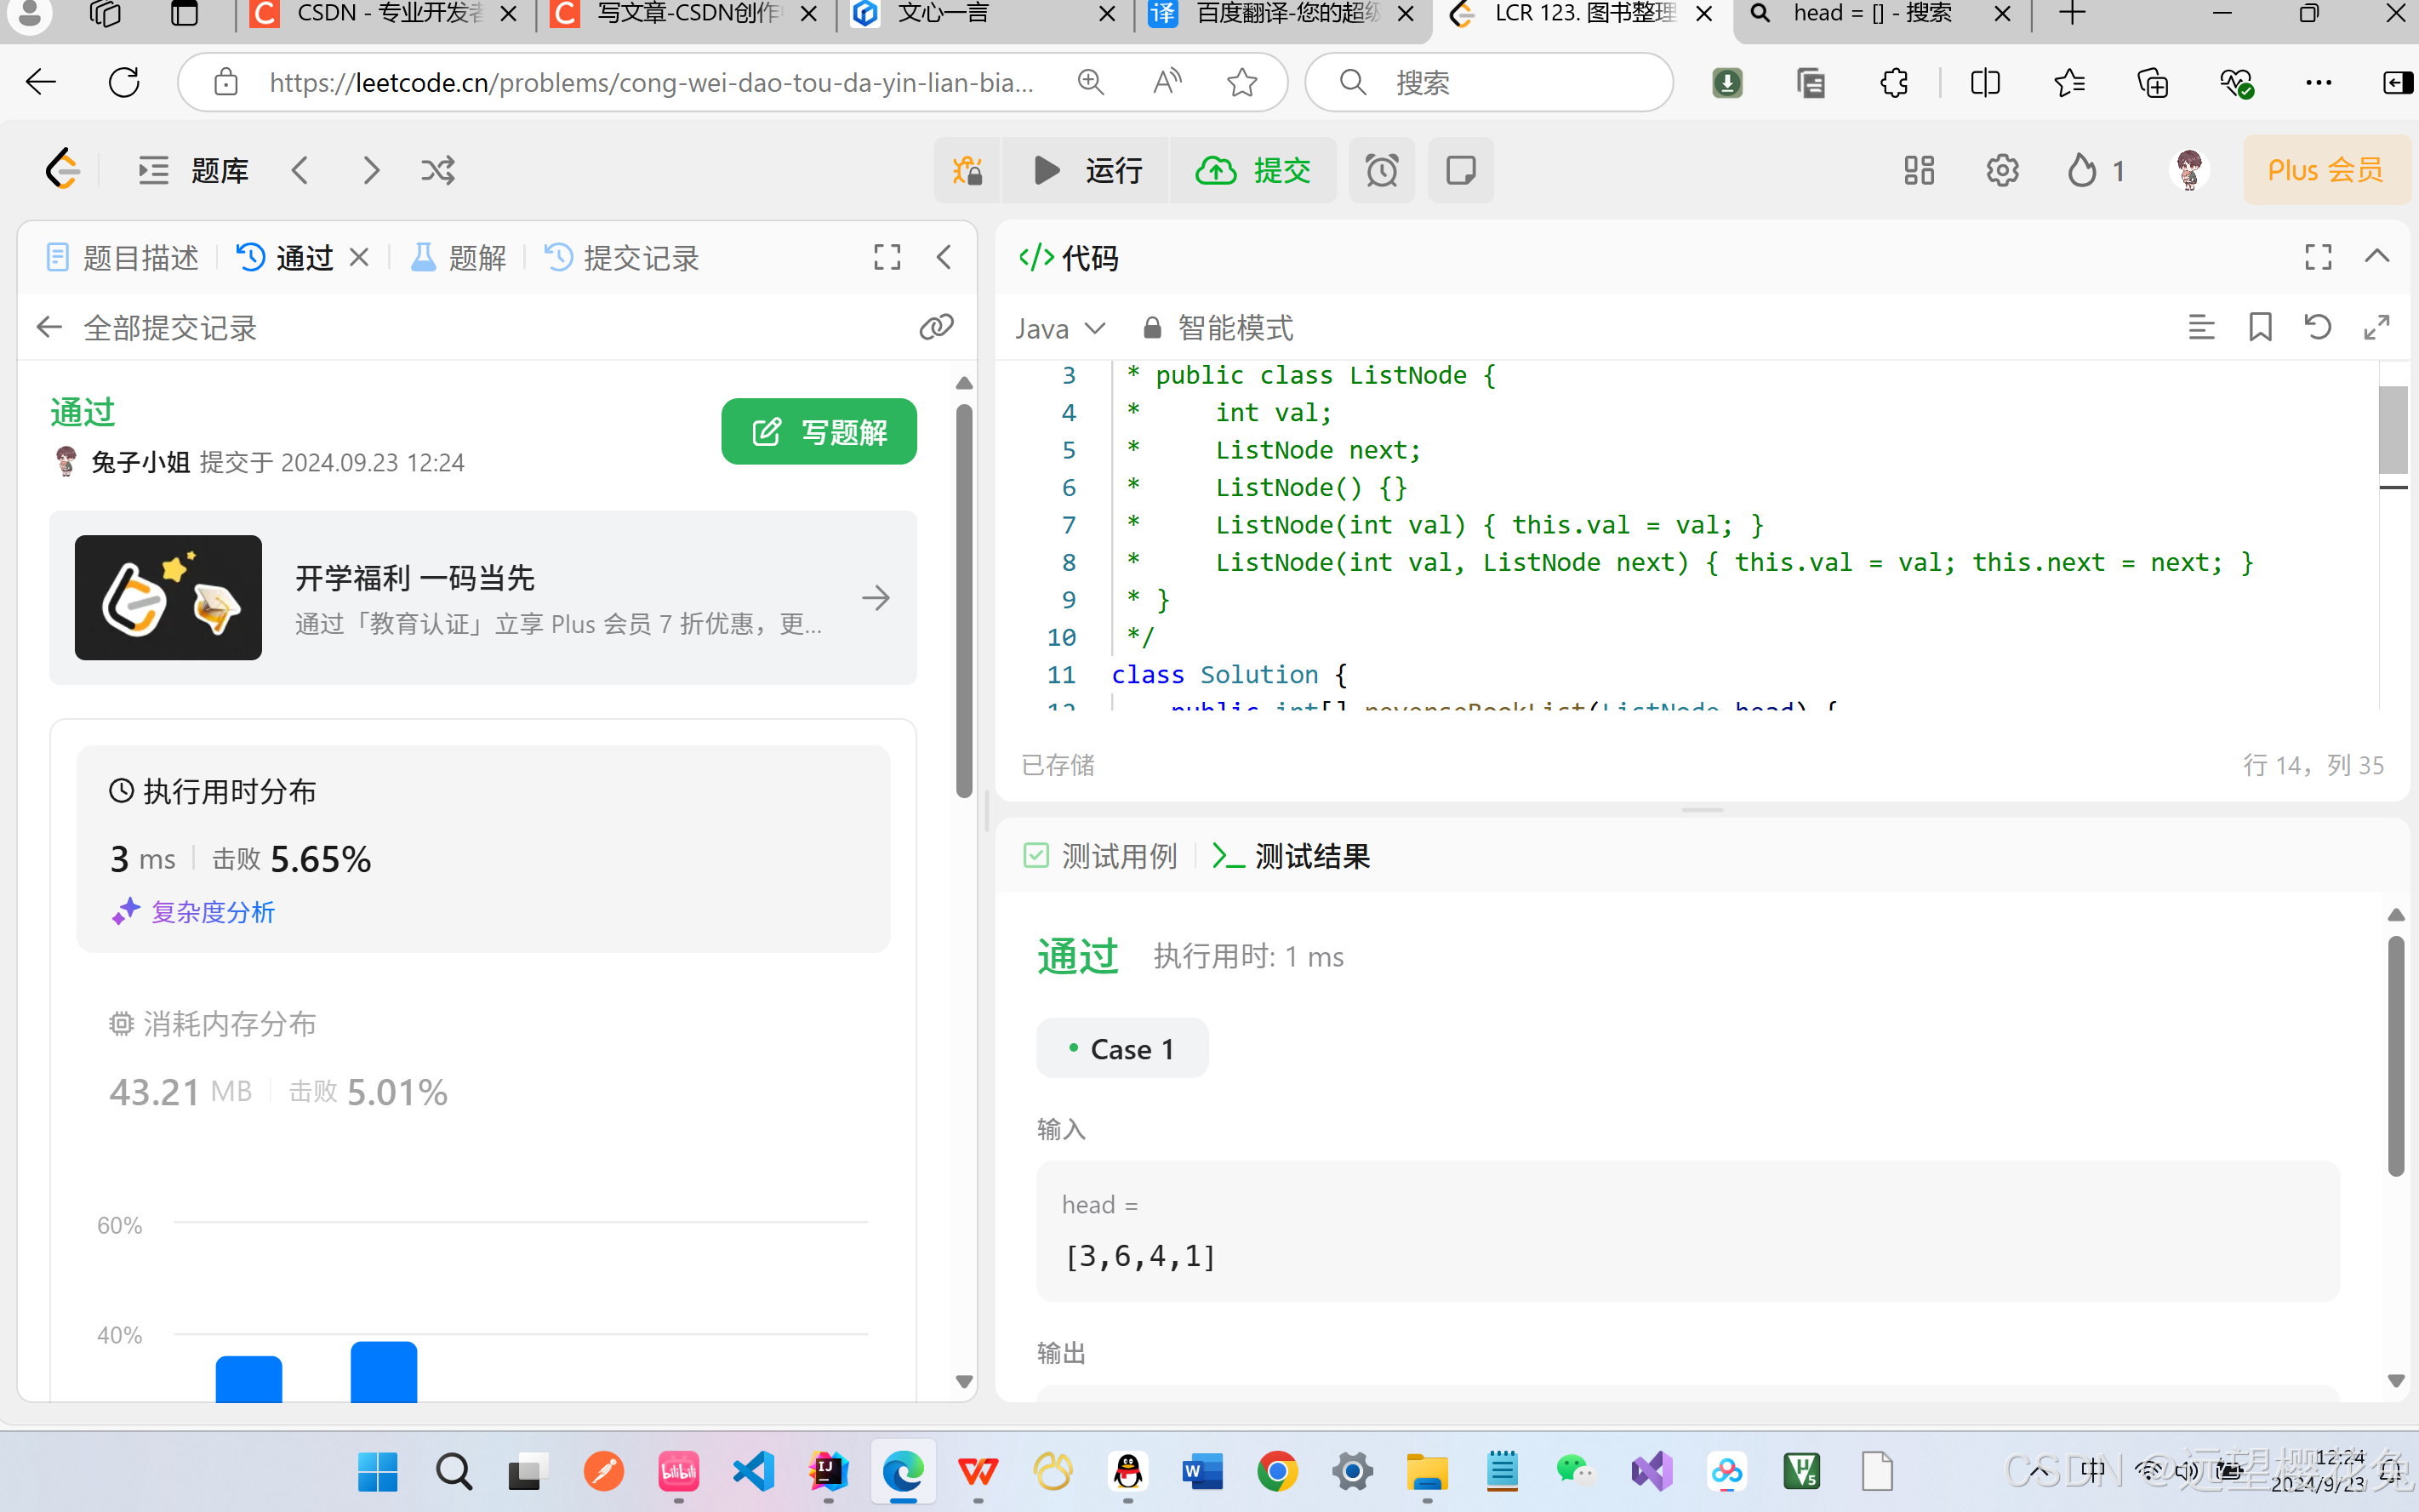
【d48】【Java】【力扣】LCR 123. 图书整理 I
思路 方法1:放进list,将list倒置,利用stream,将list改为int类型 方法2:递归:递归通用思路;明确每一层做什么确定返回值确定什么地方接收下层的返回值 每一层:调用下层,然后把自己…...

【MySQL】InnoDB 索引为什么使用B+树而不用跳表?
在MySQL中,为了加速查询,使用B树来构建索引,将查询性能从O(n)优化到O(log n)。虽然跳表同样提供O(log n)的查询效率并且实现相对简单,但B树更适合MySQL的索引使用,原因包括: B树和跳表的区别 B树和跳表的…...

模糊逻辑与神经网络在PMSM控制中的协同优化
1. 模糊逻辑与神经网络在PMSM控制中的协同机制永磁同步电机(PMSM)作为高精度驱动系统的核心部件,其速度控制性能直接影响电动汽车、工业机器人等关键设备的动态响应。传统PID控制在面对参数变化和外部扰动时表现乏力,而滑模控制(SMC)虽具有强鲁棒性&…...

Python中PCA降维技术详解与应用实战
1. 主成分分析(PCA)在Python中的降维应用在机器学习项目中,我们经常会遇到高维数据集。想象一下,你正在处理一个包含20个特征的数据集,就像试图在一个20维的空间中寻找模式——这几乎超出了人类直观理解的范围。这就是…...

【电力系统】基于粒子群算法PSO的太阳能风能水力混合抽水蓄能系统研究附Matlab代码
✅作者简介:热爱科研的Matlab仿真开发者,擅长数据处理、建模仿真、程序设计、完整代码获取、论文复现及科研仿真。🍎 往期回顾关注个人主页:Matlab科研工作室🍊个人信条:格物致知,完整Matlab代码及仿真咨询…...

2026年京东方代理杭州立煌科技BOE工业液晶屏最新选型与实测指南
① 核心参数解析:3.5 至 55 寸全尺寸覆盖能力 在工业显示项目的选型初期,尺寸往往是第一道筛选门槛,但“有尺寸”和“能商用”之间隔着巨大的参数鸿沟。杭州立煌科技作为 BOE 京东方等一线品牌的深度代理商,其核心价值在于提供了从…...

sort函数和数据结构
一.sort函数原型:①默认排序(升序)first代表排序范围内的第一个位置的指针或迭代器。last代表排序范围内最后一个位置下一个的指针或迭代器。例1.②自定义排序comp是一个比较函数活一个函数对象。比较函数接受两个比较值,返回一个布尔值。例2.注…...

生成式AI如何革新汽车软件测试?
1. 汽车行业软件测试的范式转变在传统汽车制造时代,机械性能是核心竞争力,而今天这个指标已经变成了"代码行数"。现代高端智能汽车的代码量已突破1亿行,是波音787客机的16倍。这种软件爆炸式增长带来了一个关键痛点:如何…...

告别数据丢失!深入解析M24C08 EEPROM的页写缓冲与自定时写入周期
告别数据丢失!深入解析M24C08 EEPROM的页写缓冲与自定时写入周期 在嵌入式系统开发中,数据可靠性往往决定着产品的成败。想象这样一个场景:你的设备刚刚完成了一次关键数据写入,系统立即读取验证却发现数据异常——这不是代码逻辑…...

MCP协议火了:我用它5分钟就打通了所有AI工具的上下文
说实话,我之前一直在头疼一个问题:不同的AI工具之间上下文完全不通,每次换个工具都得重新粘贴一遍历史对话,太麻烦了。 直到上周接触到MCP(Model Context Protocol)协议,才发现这东西简直是神器…...

Hearthstone-Script:炉石传说游戏自动化脚本的终极技术解析
Hearthstone-Script:炉石传说游戏自动化脚本的终极技术解析 【免费下载链接】Hearthstone-Script Hearthstone script(炉石传说脚本) 项目地址: https://gitcode.com/gh_mirrors/he/Hearthstone-Script Hearthstone-Script是一款基于J…...
)