C2W4.LAB.Word_Embedding.Part1
理论课:C2W4.Word Embeddings with Neural Networks
文章目录
- Word Embeddings First Steps: Data Preparation
- Cleaning and tokenization
- Sliding window of words
- Transforming words into vectors for the training set
- Mapping words to indices and indices to words
- Getting one-hot word vectors
- Getting context word vectors
- Building the training set
- Intro to CBOW model
- The continuous bag-of-words model
- Activation functions
- ReLU
- Softmax
- Dimensions: 1-D arrays vs 2-D column vectors
理论课: C2W4.Word Embeddings with Neural Networks
Word Embeddings First Steps: Data Preparation
先导入包
import re
import nltk#nltk.download('punkt')import emoji
#pip install emoji -i https://pypi.tuna.tsinghua.edu.cn/simple
import numpy as np
from nltk.tokenize import word_tokenize
from utils2 import get_dict
在数据准备阶段,从文本语料库开始,完成:
- 清理和标记语料库。
- 提取上下文词和中心词对,这些词对将构成 CBOW 模型的训练数据集。上下文单词是输入模型的特征,中心词是模型学习预测的目标值。
- 创建上下文单词(特征)和中心词(目标)的简单向量表示,供 CBOW 模型的神经网络使用。
Cleaning and tokenization
为了演示清理和标记化过程,先创建一个包含表情符号和各种标点符号的语料库。
# Define a corpus
corpus = 'Who ❤️ "word embeddings" in 2020? I do!!!'
先用句号替换所有中断的标点符号(如逗号和感叹号)。
# Print original corpus
print(f'Corpus:  {corpus}')# Do the substitution
data = re.sub(r'[,!?;-]+', '.', corpus)# Print cleaned corpus
print(f'After cleaning punctuation:  {data}')
结果:
Corpus:  Who ❤️ "word embeddings" in 2020? I do!!!
After cleaning punctuation:  Who ❤️ "word embeddings" in 2020. I do.
接下来,使用 NLTK 将语料分割成单个标记。
# Print cleaned corpus
print(f'Initial string:  {data}')# Tokenize the cleaned corpus
data = nltk.word_tokenize(data)# Print the tokenized version of the corpus
print(f'After tokenization:  {data}')
结果
Initial string:  Who ❤️ "word embeddings" in 2020. I do.
After tokenization:  ['Who', '❤️', '``', 'word', 'embeddings', "''", 'in', '2020', '.', 'I', 'do', '.']
最后去掉数字和句号以外的标点符号,并将所有剩余标记转换为小写。
#emoji.get_emoji_regexp().search(ch)这个函数已经被移除,自己定义了一个
def get_emoji_regexp():# Sort emoji by length to make sure multi-character emojis are# matched firstemojis = sorted(emoji.EMOJI_DATA, key=len, reverse=True)pattern = u'(' + u'|'.join(re.escape(u) for u in emojis) + u')'return re.compile(pattern)
# Print the tokenized version of the corpus
print(f'Initial list of tokens:  {data}')# Filter tokenized corpus using list comprehension
data = [ ch.lower() for ch in dataif ch.isalpha()or ch == '.'or get_emoji_regexp().search(ch)#or emoji.get_emoji_regexp().search(ch)这个函数已经被移除,上面自己定义了一个]# Print the tokenized and filtered version of the corpus
print(f'After cleaning:  {data}')
结果:

注意,表情符号和其他普通单词一样被视为标记。
将以上步骤封装在一个函数中,从而简化清理和标记化过程。
# Define the 'tokenize' function that will include the steps previously seen
def tokenize(corpus):data = re.sub(r'[,!?;-]+', '.', corpus)data = nltk.word_tokenize(data)  # tokenize string to wordsdata = [ ch.lower() for ch in dataif ch.isalpha()or ch == '.'or get_emoji_regexp().search(ch)]return data
测试一下结果:
# Define new corpus
corpus = 'I am happy because I am learning'# Print new corpus
print(f'Corpus:  {corpus}')# Save tokenized version of corpus into 'words' variable
words = tokenize(corpus)# Print the tokenized version of the corpus
print(f'Words (tokens):  {words}')
结果:
Corpus: I am happy because I am learning
Words (tokens): [‘i’, ‘am’, ‘happy’, ‘because’, ‘i’, ‘am’, ‘learning’]
# Run this with any sentence
tokenize("Now it's your turn: try with your own sentence!")
结果:
[‘now’, ‘it’, ‘your’, ‘turn’, ‘try’, ‘with’, ‘your’, ‘own’, ‘sentence’, ‘.’]
Sliding window of words
上面函数将语料库转换成了一个干净的标记列表,接下来要在这个列表上滑动一个单词窗口。以便于为每个窗口提取中心词和上下文词。
# Define the 'get_windows' function
def get_windows(words, C):i = Cwhile i < len(words) - C:center_word = words[i]context_words = words[(i - C):i] + words[(i+1):(i+C+1)]yield context_words, center_wordi += 1
该函数的第一个参数是单词(或标记)列表。第二个参数 C 是上下文的一半大小。对于给定的中心词,上下文词是由中心词左边的 C 词和右边的 C 词组成的。
下面是使用该函数从标记列表中提取上下文词和中心词的方法。这些上下文词和中心词将构成训练集,用于训练 CBOW 模型。
# Print 'context_words' and 'center_word' for the new corpus with a 'context half-size' of 2
for x, y in get_windows(['i', 'am', 'happy', 'because', 'i', 'am', 'learning'], 2):print(f'{x}\t{y}')
结果:
[‘i’, ‘am’, ‘because’, ‘i’] happy
[‘am’, ‘happy’, ‘i’, ‘am’] because
[‘happy’, ‘because’, ‘am’, ‘learning’] i
对于第一个样本,上下文单词为:“i”, “am”, “because”, “i”
要预测的中心词是:“happy”
再试滑动窗口为1的例子:
# Print 'context_words' and 'center_word' for any sentence with a 'context half-size' of 1
for x, y in get_windows(tokenize("Now it's your turn: try with your own sentence!"), 1):print(f'{x}\t{y}')
结果:
[‘now’, ‘your’] it
[‘it’, ‘turn’] your
[‘your’, ‘try’] turn
[‘turn’, ‘with’] try
[‘try’, ‘your’] with
[‘with’, ‘own’] your
[‘your’, ‘sentence’] own
[‘own’, ‘.’] sentence
Transforming words into vectors for the training set
Mapping words to indices and indices to words
上下文、中心词都用独热编码表示。要创建独热编码,可以先将每个唯一的单字映射到一个唯一的整数(或索引)。这里提供了一个辅助函数 get_dict,它可以创建一个将单词映射到整数并返回的 Python 词典。
# Get 'word2Ind' and 'Ind2word' dictionaries for the tokenized corpus
word2Ind, Ind2word = get_dict(words)
print(word2Ind)
结果:
{‘am’: 0, ‘because’: 1, ‘happy’: 2, ‘i’: 3, ‘learning’: 4}
可以用这个词典获得某个单词对应的索引:
# Print value for the key 'i' within word2Ind dictionary
print("Index of the word 'i':  ",word2Ind['i'])
结果:
Index of the word ‘i’: 3
Ind2word字典打印结果:
{0: ‘am’, 1: ‘because’, 2: ‘happy’, 3: ‘i’, 4: ‘learning’}
根据索引查找单词:
# Print value for the key '2' within Ind2word dictionary
print("Word which has index 2:  ",Ind2word[2] )
结果:
Word which has index 2: happy
最后,保存词库的大小。
# Save length of word2Ind dictionary into the 'V' variable
V = len(word2Ind)# Print length of word2Ind dictionary
print("Size of vocabulary: ", V)
结果:
Size of vocabulary: 5
Getting one-hot word vectors
对于某个整数 n n n,很容易转化为独热编码,这里的整数 n n n对应的就是单词的索引,例如单词happy的索引是2.。
# Save index of word 'happy' into the 'n' variable
n = word2Ind['happy']# Print index of word 'happy'
n
做独热编码很简单,先要创建词表大小的数组,且初始值为0:
# Create vector with the same length as the vocabulary, filled with zeros
center_word_vector = np.zeros(V)# Print vector
center_word_vector
结果:
array([0., 0., 0., 0., 0.])
可以查看数组(或者说向量)大小与词表大小是否一致:
# Assert that the length of the vector is the same as the size of the vocabulary
len(center_word_vector) == V
结果:True
然后将数组中对应索引位置设置为1:
# Replace element number 'n' with a 1
center_word_vector[n] = 1
# Print vector
center_word_vector
结果:array([0., 0., 1., 0., 0.])
将以上步骤整合到一个方便的函数中,该函数的参数包括:要编码的单词、将单词映射到索引的字典,以及词汇量的大小。
# Define the 'word_to_one_hot_vector' function that will include the steps previously seen
def word_to_one_hot_vector(word, word2Ind, V):one_hot_vector = np.zeros(V)one_hot_vector[word2Ind[word]] = 1return one_hot_vector
测试该函数:
# Print output of 'word_to_one_hot_vector' function for word 'happy'
word_to_one_hot_vector('happy', word2Ind, V)
结果:array([0., 0., 1., 0., 0.])
Getting context word vectors
要创建代表上下文单词的向量,需要计算代表单个单词的独热向量的平均值。
先从上下文单词列表开始。
# Define list containing context words
context_words = ['i', 'am', 'because', 'i']
使用上面的函数完成每个单词独热编码的构建
# Create one-hot vectors for each context word using list comprehension
context_words_vectors = [word_to_one_hot_vector(w, word2Ind, V) for w in context_words]# Print one-hot vectors for each context word
context_words_vectors
结果:
[array([0., 0., 0., 1., 0.]),
array([1., 0., 0., 0., 0.]),
array([0., 1., 0., 0., 0.]),
array([0., 0., 0., 1., 0.])]
使用mean函数求和上下文单词的向量平均值:
# Compute mean of the vectors using numpy
np.mean(context_words_vectors, axis=0)
结果:array([0.25, 0.25, 0. , 0.5 , 0. ])
注意:这里的axis=0是对行求平均。
现在创建 context_words_to_vector 函数完成上面的操作,该函数接收上下文单词列表、单词索引词典和词汇量大小,并输出上下文单词的向量表示。
# Define the 'context_words_to_vector' function that will include the steps previously seen
def context_words_to_vector(context_words, word2Ind, V):context_words_vectors = [word_to_one_hot_vector(w, word2Ind, V) for w in context_words]context_words_vectors = np.mean(context_words_vectors, axis=0)return context_words_vectors
测试:
# Print output of 'context_words_to_vector' function for context words: 'i', 'am', 'because', 'i'
context_words_to_vector(['i', 'am', 'because', 'i'], word2Ind, V)
结果:array([0.25, 0.25, 0. , 0.5 , 0. ])
再测试另外一组上下文:
# Print output of 'context_words_to_vector' function for context words: 'am', 'happy', 'i', 'am'
context_words_to_vector(['am', 'happy', 'i', 'am'], word2Ind, V)
结果:array([0.5 , 0. , 0.25, 0.25, 0. ])
Building the training set
CBOW 模型创建训练集,先从语料库的分词处理开始。
# Print corpus
words
结果 :
[‘i’, ‘am’, ‘happy’, ‘because’, ‘i’, ‘am’, ‘learning’]
使用滑动窗口函数 (get_windows)来提取上下文单词和中心词,然后使用word_to_one_hot_vector和context_words_to_vector将这些单词集转换为基本的向量表示
# Print vectors associated to center and context words for corpus
for context_words, center_word in get_windows(words, 2):  # reminder: 2 is the context half-sizeprint(f'Context words:  {context_words} -> {context_words_to_vector(context_words, word2Ind, V)}')print(f'Center word:  {center_word} -> {word_to_one_hot_vector(center_word, word2Ind, V)}')print()
结果:
Context words: [‘i’, ‘am’, ‘because’, ‘i’] -> [0.25 0.25 0. 0.5 0. ]
Center word: happy -> [0. 0. 1. 0. 0.]
Context words: [‘am’, ‘happy’, ‘i’, ‘am’] -> [0.5 0. 0.25 0.25 0. ]
Center word: because -> [0. 1. 0. 0. 0.]
Context words: [‘happy’, ‘because’, ‘am’, ‘learning’] -> [0.25 0.25 0.25 0. 0.25]
Center word: i -> [0. 0. 0. 1. 0.]
这里使用单个示例进行单次迭代训练,但在本周的作业中,将使用多次迭代和批量示例来训练 CBOW 模型。下面是如何使用 Python 生成器函数:
# Define the generator function 'get_training_example'
def get_training_example(words, C, word2Ind, V):for context_words, center_word in get_windows(words, C):yield context_words_to_vector(context_words, word2Ind, V), word_to_one_hot_vector(center_word, word2Ind, V)
该函数的输出可以通过迭代得到连续的上下文词向量和中心词向量:
# Print vectors associated to center and context words for corpus using the generator function
for context_words_vector, center_word_vector in get_training_example(words, 2, word2Ind, V):print(f'Context words vector:  {context_words_vector}')print(f'Center word vector:  {center_word_vector}')print()
结果:
Context words vector: [0.25 0.25 0. 0.5 0. ]
Center word vector: [0. 0. 1. 0. 0.]
Context words vector: [0.5 0. 0.25 0.25 0. ]
Center word vector: [0. 1. 0. 0. 0.]
Context words vector: [0.25 0.25 0.25 0. 0.25]
Center word vector: [0. 0. 0. 1. 0.]
训练数据准备完成。
Intro to CBOW model
本节介绍词袋模型,以及它的激活函数。
The continuous bag-of-words model
词袋模型结构如下图所示:

输入层(Input layer):包含中心词(Center word)和上下文词(Context words)。在CBOW模型中,上下文词用于预测中心词。
隐藏层(Hidden layer):这一层接收输入层的词向量,并通过权重矩阵(weights)和偏置(biases)进行变换。权重矩阵 W W W 和偏置向量 b b b 用于将输入层的词向量转换为隐藏层的表示。
激活函数(ReLU):隐藏层的输出通常会通过一个非线性激活函数,如ReLU(Rectified Linear Unit),以增加模型的非线性能力。
输出层(Output layer):隐藏层的输出被传递到输出层,这里通常会应用一个softmax函数,将输出转换为概率分布。这个概率分布表示的是词汇表中每个词成为中心词的概率。
权重和偏置(weights and biases):图中的 W 1 W_1 W1 和 W 2 W_2 W2 表示权重矩阵, b 1 b_1 b1和 b 2 b_2 b2 表示偏置。在训练过程中,这些参数会被优化以最小化预测误差。
输出(Output):图中的 y ^ \hat{y} y^ 表示模型的输出,它是通过将输入层的词向量与权重矩阵相乘,加上偏置,然后通过激活函数和softmax函数得到的。
训练示例(Training example):图中的 “I am happy because I am learning” 展示了一个训练示例,其中 “happy” 是中心词,而 “I”, “am”, “because”, “I”, “learning” 是上下文词。
损失函数(Loss function):虽然图中没有直接显示,但在训练过程中,模型会使用交叉熵损失函数来计算预测概率分布和真实分布之间的差异,并据此更新权重和偏置。
优化(Optimization):训练过程中,通过梯度下降或其他优化算法来更新权重和偏置,以最小化损失函数。
Activation functions
ReLU
ReLU函数的数学形式为:
z 1 = W 1 x + b 1 h = R e L U ( z 1 ) \begin{align} \mathbf{z_1} &= \mathbf{W_1}\mathbf{x} + \mathbf{b_1} \tag{1} \\ \mathbf{h} &= \mathrm{ReLU}(\mathbf{z_1}) \tag{2} \\ \end{align} z1h=W1x+b1=ReLU(z1)(1)(2)
下面使用随机种子来计算一下看看结果:
import numpy as np
# Define a random seed so all random outcomes can be reproduced
np.random.seed(10)# Define a 5X1 column vector using numpy
z_1 = 10*np.random.rand(5, 1)-5# Print the vector
z_1
结果:
array([[ 2.71320643],[-4.79248051],[ 1.33648235],[ 2.48803883],[-0.01492988]])
注意,使用 numpy 的 random.rand 函数会返回一个数组,数组中的值取自 [0, 1] 上的均匀分布。Numpy 允许矢量化,因此每个值都会乘以 10,然后再减去 5。
ReLU函数对于负值是取0。先复制一份z1,作为mask
# Create copy of vector and save it in the 'h' variable
h = z_1.copy()
# Determine which values met the criteria (this is possible because of vectorization)
h < 0
结果:
array([[False],
[ True],
[False],
[False],
[ True]])
然后将负值设置为0,其他的保持不变:
# Slice the array or vector. This is the same as applying ReLU to it
h[h < 0] = 0
# Print the vector after ReLU
h
结果:
array([[2.71320643],
[0. ],
[1.33648235],
[2.48803883],
[0. ]])
现在把以上内容做成函数:
# Define the 'relu' function that will include the steps previously seen
def relu(z):result = z.copy()result[result < 0] = 0return result
测试:
# Define a new vector and save it in the 'z' variable
z = np.array([[-1.25459881], [ 4.50714306], [ 2.31993942], [ 0.98658484], [-3.4398136 ]])# Apply ReLU to it
relu(z)
结果:
array([[0. ],
[4.50714306],
[2.31993942],
[0.98658484],
[0. ]])
Softmax
第二个激活函数是 softmax。该函数用于使用以下公式计算神经网络输出层的值:
z 2 = W 2 h + b 2 y ^ = s o f t m a x ( z 2 ) \begin{align} \mathbf{z_2} &= \mathbf{W_2}\mathbf{h} + \mathbf{b_2} \tag{3} \\ \mathbf{\hat y} &= \mathrm{softmax}(\mathbf{z_2}) \tag{4} \\ \end{align} z2y^=W2h+b2=softmax(z2)(3)(4)
要计算一个向量 z \mathbf{z} z 的 softmax,所得向量的 i i i-th 分量由以下公式给出:
softmax ( z ) i = e z i ∑ j = 1 V e z j (5) \textrm{softmax}(\textbf{z})_i = \frac{e^{z_i} }{\sum\limits_{j=1}^{V} e^{z_j} } \tag{5} softmax(z)i=j=1∑Vezjezi(5)
下面是计算实例:
# Define a new vector and save it in the 'z' variable
z = np.array([9, 8, 11, 10, 8.5])# Print the vector
z
结果:
array([ 9. , 8. , 11. , 10. , 8.5])
计算每个元素的分子和分母的指数。
# Save exponentials of the values in a new vector
e_z = np.exp(z)# Print the vector with the exponential values
e_z
结果:
array([ 8103.08392758, 2980.95798704, 59874.1417152 , 22026.46579481,
4914.7688403 ])
分母等于这些指数之和。
# Save the sum of the exponentials
sum_e_z = np.sum(e_z)# Print sum of exponentials
sum_e_z
结果:
97899.41826492078
最后计算第一个元素的 softmax ( z ) \textrm{softmax}(\textbf{z}) softmax(z):
# Print softmax value of the first element in the original vector
e_z[0]/sum_e_z
结果:
0.08276947985173956
要计算所有元素,可使用numpy的向量化操作:
# Define the 'softmax' function that will include the steps previously seen
def softmax(z):e_z = np.exp(z)sum_e_z = np.sum(e_z)return e_z / sum_e_z
测试函数:
# Print softmax values for original vector
softmax([9, 8, 11, 10, 8.5])
array([0.08276948, 0.03044919, 0.61158833, 0.22499077, 0.05020223])
softmax的结果累加和为1。
Dimensions: 1-D arrays vs 2-D column vectors
在处理前向传播、反向传播和梯度下降之前,先熟悉一下向量的维度。
先创建一个长度为 V V V的向量,并用0填充
# Define V. Remember this was the size of the vocabulary in the previous lecture notebook
V = 5# Define vector of length V filled with zeros
x_array = np.zeros(V)# Print vector
x_array
结果:array([0., 0., 0., 0., 0.])
从数组的 .shape 属性可以看出,这是一个一维数组(向量)。
# Print vector's shape
x_array.shape
结果:(5,)
要在接下来的步骤中执行矩阵乘法,实际上需要将列向量表示为一列一列的矩阵。在 numpy 中,该矩阵表示为二维数组。将一维向量转换为二维列矩阵的最简单方法是将其 .shape 属性设置为行和列数,如:
# Copy vector
x_column_vector = x_array.copy()# Reshape copy of vector
x_column_vector.shape = (V, 1)  # alternatively ... = (x_array.shape[0], 1)# Print vector
x_column_vector
array([[0.],
[0.],
[0.],
[0.],
[0.]])
该数组大小为:
# Print vector's shape
x_column_vector.shape
结果:(5, 1)
相关文章:

C2W4.LAB.Word_Embedding.Part1
理论课:C2W4.Word Embeddings with Neural Networks 文章目录 Word Embeddings First Steps: Data PreparationCleaning and tokenizationSliding window of wordsTransforming words into vectors for the training setMapping words to indices and indices to w…...

hive初体验
1.首先,确保启动了Metastore服务。 runjar就是metastore进程 2.进入hive客户端: 命令:hive 3.操作:没有指定数据库时默认在default 一:创建表:CREATE TABLE test(id INT, name STRING, gender STRING); 完成,show tables看一下 也可以通过hdfs文件系统查看,默认路径…...
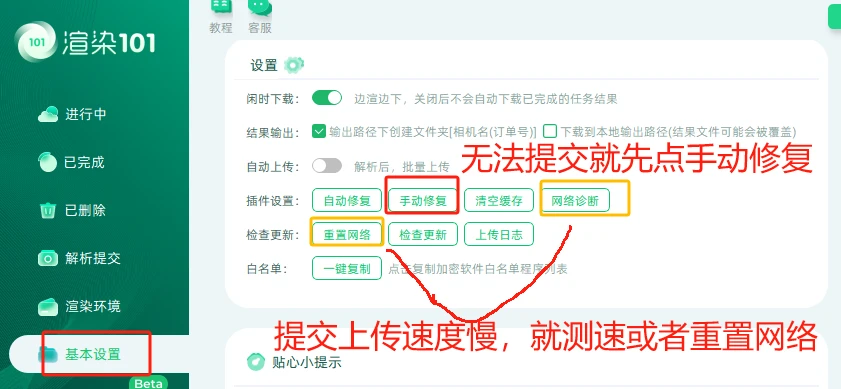
云渲染主要是分布式(分机)渲染,如何使用blender云渲染呢?
云渲染主要是分布式(分机)渲染,比如一个镜头同时开20-100张3090显卡的机器渲染,就能同时渲染20-100帧,渲染不仅不占用自己电脑,效率也将增加几十上百倍! blender使用教程如下: 第一…...

WordPress与WP Engine:关键事件时间线
WordPress与WP Engine:关键事件时间线 以下时间线突出了9月和10月之间这场不断升级的WordPress与WP Engine冲突中的关键事件: 9月21日:Matt Mullenweg发布了一篇名为“WP Engine不是WordPress”的博客。 9月22日:Mullenweg批评…...
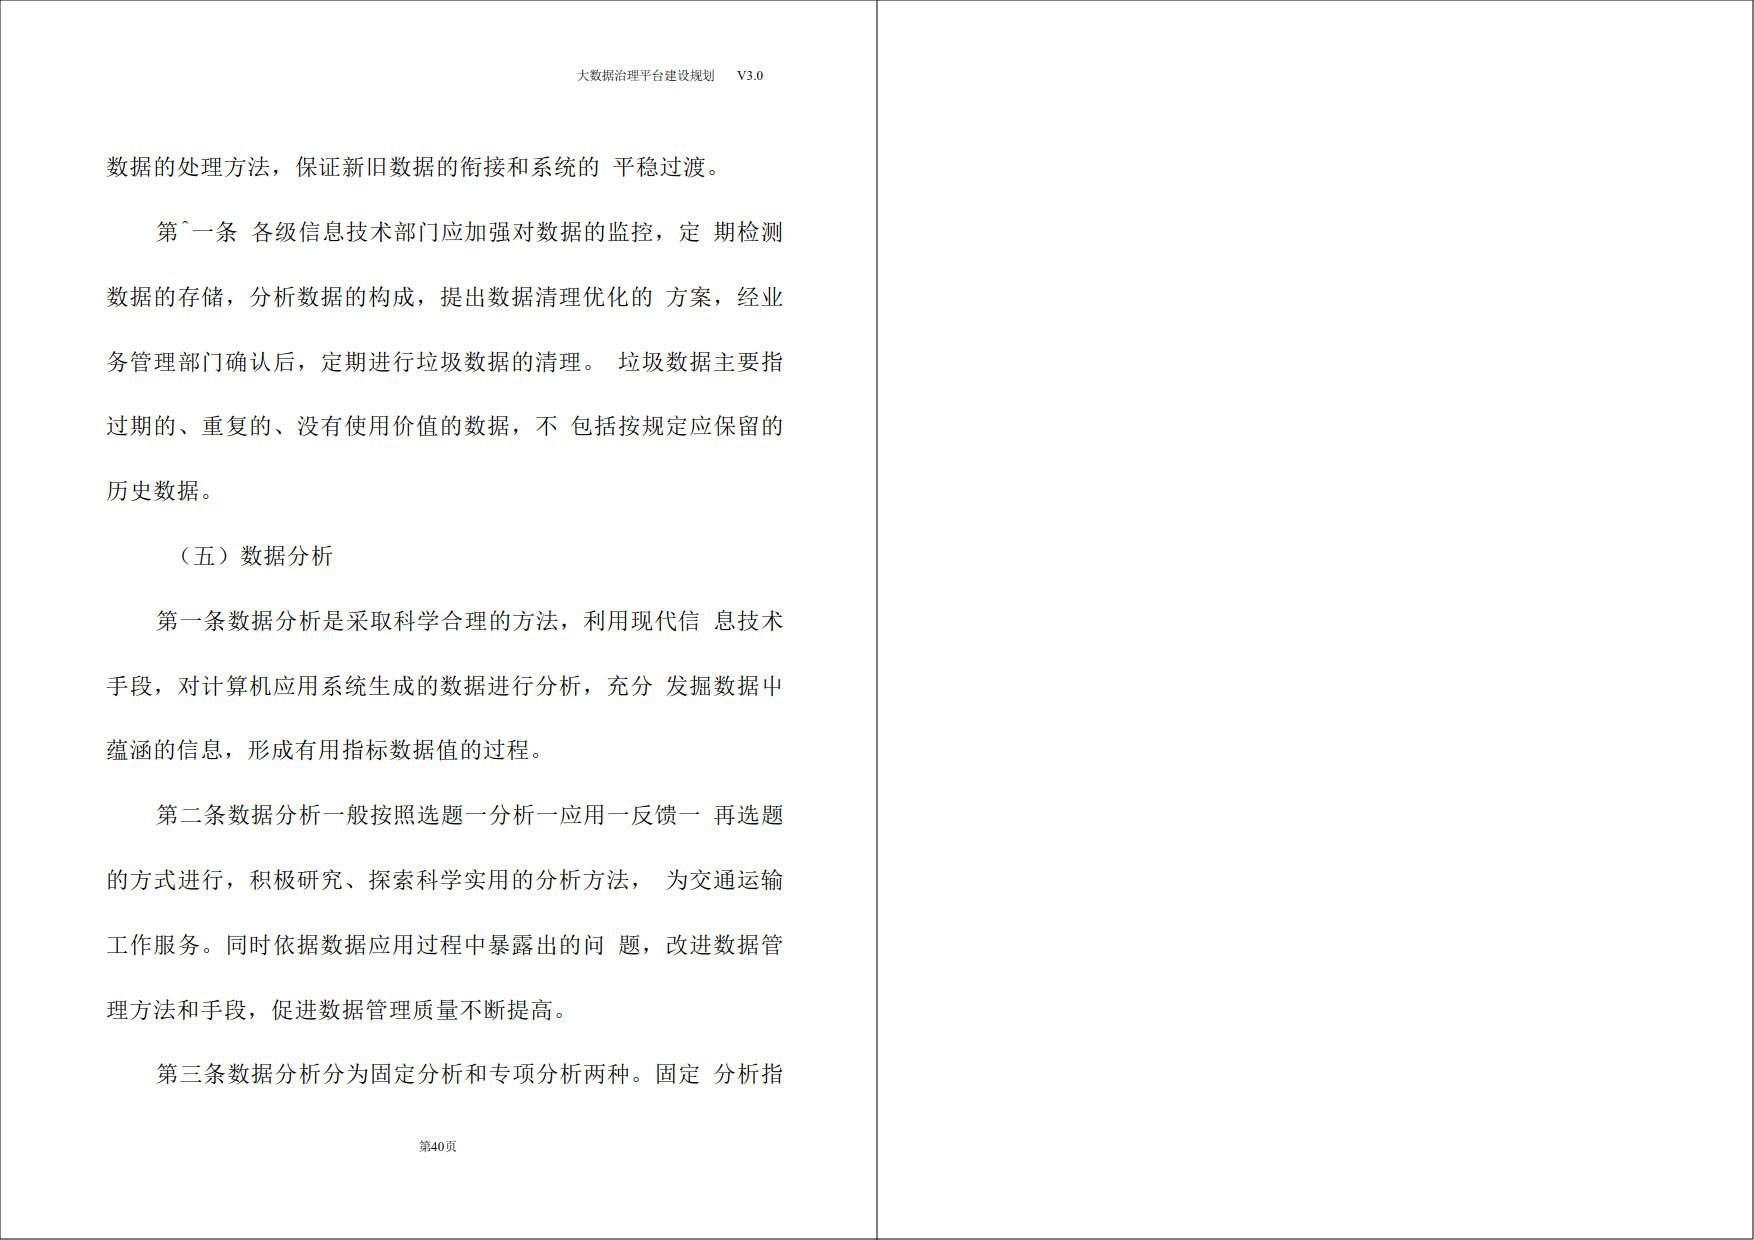
大数据治理平台建设规划方案(71页WORD)
随着信息化时代的到来,大数据已成为企业管理和决策的重要基础。然而,大数据的快速增长和复杂性给数据的管理和治理带来了巨大挑战。为了有效应对这些挑战,构建一个高效、稳定的大数据治理平台显得尤为重要。 文档介绍: 该平台旨在…...

Maven 项目管理工具
目录 Maven简介 Maven快速上手 Maven详细介绍 Maven工作机制 Maven安装及配置 使用IDEA创建Maven Web工程 Maven简介 Maven是 Apache 开源组织奉献的一个开源项目,可以翻译为“专家”或“内行”。 Maven 的本质是一个项目管理工具,将项目开发和管…...

ubuntu开机启动jar
要在Ubuntu系统上开机启动一个jar文件,你可以创建一个systemd服务单元。以下是创建服务并设置开机启动的步骤: 创建一个新的systemd服务文件。 打开一个新的服务文件,例如/etc/systemd/system/your-service.service,使用你喜欢的…...

【目标检测02】非极大值抑制 NMS
文章目录 1. 前言2. 原理3. 代码实现 1. 前言 在检测图像中的目标时,一个目标可能会被预测出多个矩形框,而实际上我们只需要一个,如何消除冗余的边界框呢?一种方简单的方案是提升置信度的阈值,过滤掉低置信度的边界框…...

104协议调试工具
在学习104协议过程中,通过直接阅读协议的学习方式会略有枯燥,这里把常用的104调试、测试工具介绍给大家,以便快速的进行模拟通信来更好的了解、学习104协议。 通信协议分析及仿真软件是非常重要的测试工具,该软件支持 101,104,mo…...

日常记录:es TransportClient添加证书处理
背景 最近在搞es登录,不知道是不是低版本问题(6.8.12),开启登录之后springboot连接es,es一直报Caused by: io.netty.handler.ssl.NotSslRecordException: not an SSL/TLS record: 45530000002c000000000000009108004d3…...

apply call bind 简介
Function.prototype.call(thisArg [, arg1, arg2, …]) call() 简述 call() 方法 调用一个函数, 其具有一个指定的 this 值和分别地提供的参数(参数的列表)。当第一个参数为 null、undefined 的时候, 默认 this 上下文指向window。 call() 简单实例 const name …...
数据结构 单调栈
应用情景 求当前元素 前面/后面,第一个比它 小/大 的元素的 值/下标/下标距离 优点 剔除重复寻路操作,将暴力 O(n^2) 优化到 O(n) 性质 从栈底开始,元素 单调递增/单调递减 单调性视具体情景而定 (找较大值还是较小值、找的方向) 思路…...
:MongoDB的设置)
【NodeJS】NodeJS+mongoDB在线版开发简单RestfulAPI (七):MongoDB的设置
本项目旨在学习如何快速使用 nodejs 开发后端api,并为以后开展其他项目的开启提供简易的后端模版。(非后端工程师) 由于文档是代码写完之后,为了记录项目中需要注意的技术点,因此文档的叙述方式并非开发顺序࿰…...

基于flask和neo4j的医疗知识图谱展示问答系统
如果你仍在为毕业设计的选题发愁,或者想通过技术项目提升专业实力,这个基于Flask和Neo4j的医疗知识图谱展示与问答系统,绝对是个不错的选择! 项目亮点大揭秘: 知识图谱与问答结合:我们采用了医疗场景下的知…...

Python——脚本实现datax全量同步mysql到hive
文章目录 前言一、展示脚本二、使用准备1、安装python环境2、安装EPEL3、安装脚本执行需要的第三方模块 三、脚本使用方法1、配置脚本2、创建.py文件3、执行脚本4、测试生成json文件是否可用 前言 在我们构建离线数仓时或者迁移数据时,通常选用sqoop和datax等工具进…...

Python爬虫教程:从入门到精通
Python爬虫教程:从入门到精通 前言 在信息爆炸的时代,数据是最宝贵的资源之一。Python作为一种简洁而强大的编程语言,因其丰富的库和框架,成为了数据爬取的首选工具。本文将带您深入了解Python爬虫的基本概念、实用技巧以及应用…...

pytorh学习笔记——cifar10(四)用VGG训练
1、新建train.py,执行脚本训练模型: import os import timeimport torch import torch.nn as nn import torchvisionfrom vggNet import VGGbase, VGGNet from load_cifar import train_loader, test_loader import warnings import tensorboardX# 忽略…...

CRLF、UTF-8这些编辑器右下角的选项的意思
经常使用编辑器的小伙伴应该经常能看到右下角会有这么两个选项,下图是VScode中的示例,那么这两个到底是啥作用呢? 目录 字符编码ASCII 字符集GBK 字符集Unicode 字符集UTF-8 编码 换行 字符编码 此部分参考博文 在计算机中,所有…...

【C++干货篇】——类和对象的魅力(四)
【C干货篇】——类和对象的魅力(四) 1.取地址运算符的重载 1.1const 成员函数 将const修饰的成员函数称之为const成员函数,const修饰成员函数放到成员函数参数列表的后面。const实际修饰该成员函数隐含的this指针(this指向的对…...

基于java的诊所管理系统源码,SaaS门诊信息系统,二次开发的不二选择
门诊管理系统源码,诊所系统源码,saas服务模式 医疗信息化的新时代已经到来,诊所管理系统作为诊所管理和运营的核心工具,不仅提升了医疗服务的质量和效率,也为患者提供了更加便捷和舒适的就医体验,同时还推动…...
:手搓截屏和帧率控制)
Python|GIF 解析与构建(5):手搓截屏和帧率控制
目录 Python|GIF 解析与构建(5):手搓截屏和帧率控制 一、引言 二、技术实现:手搓截屏模块 2.1 核心原理 2.2 代码解析:ScreenshotData类 2.2.1 截图函数:capture_screen 三、技术实现&…...
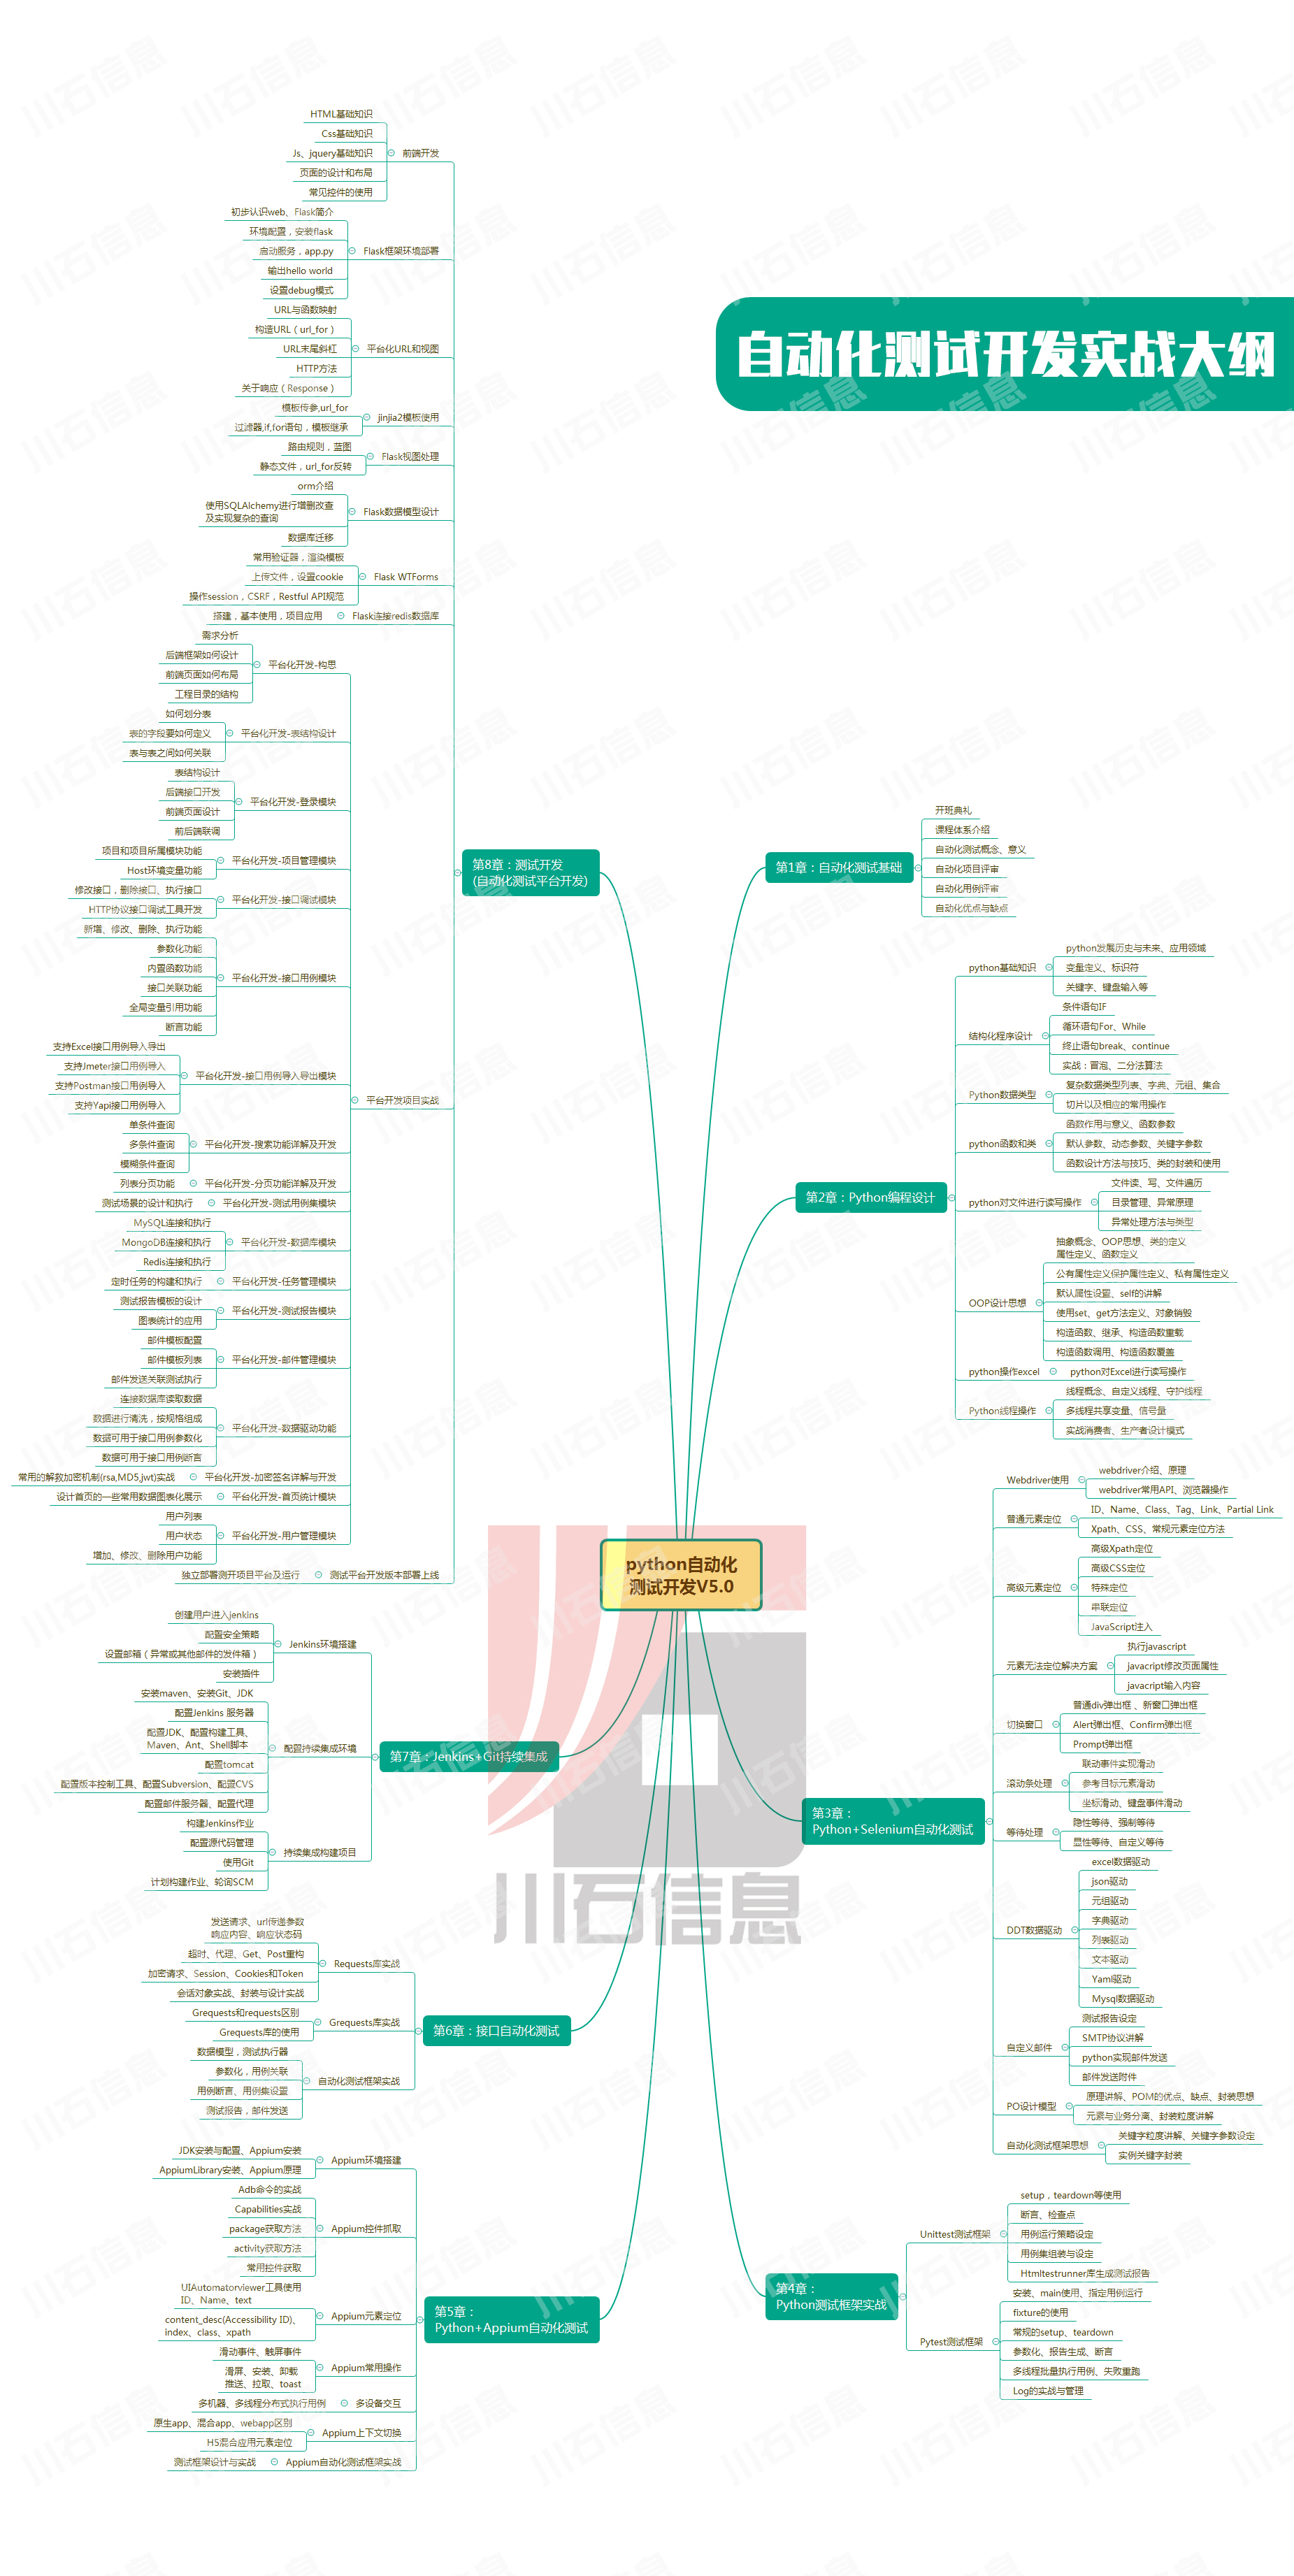
接口测试中缓存处理策略
在接口测试中,缓存处理策略是一个关键环节,直接影响测试结果的准确性和可靠性。合理的缓存处理策略能够确保测试环境的一致性,避免因缓存数据导致的测试偏差。以下是接口测试中常见的缓存处理策略及其详细说明: 一、缓存处理的核…...
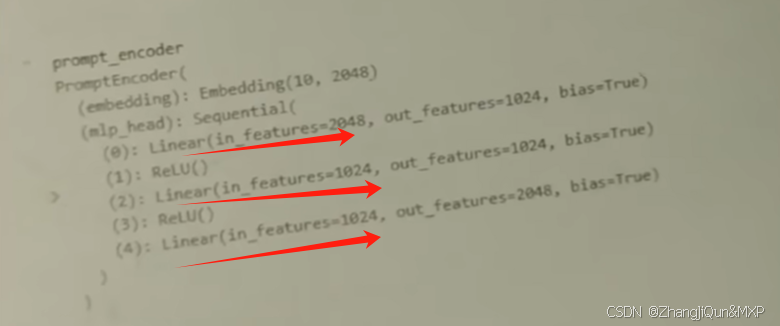
Prompt Tuning、P-Tuning、Prefix Tuning的区别
一、Prompt Tuning、P-Tuning、Prefix Tuning的区别 1. Prompt Tuning(提示调优) 核心思想:固定预训练模型参数,仅学习额外的连续提示向量(通常是嵌入层的一部分)。实现方式:在输入文本前添加可训练的连续向量(软提示),模型只更新这些提示参数。优势:参数量少(仅提…...
微信小程序云开发平台MySQL的连接方式
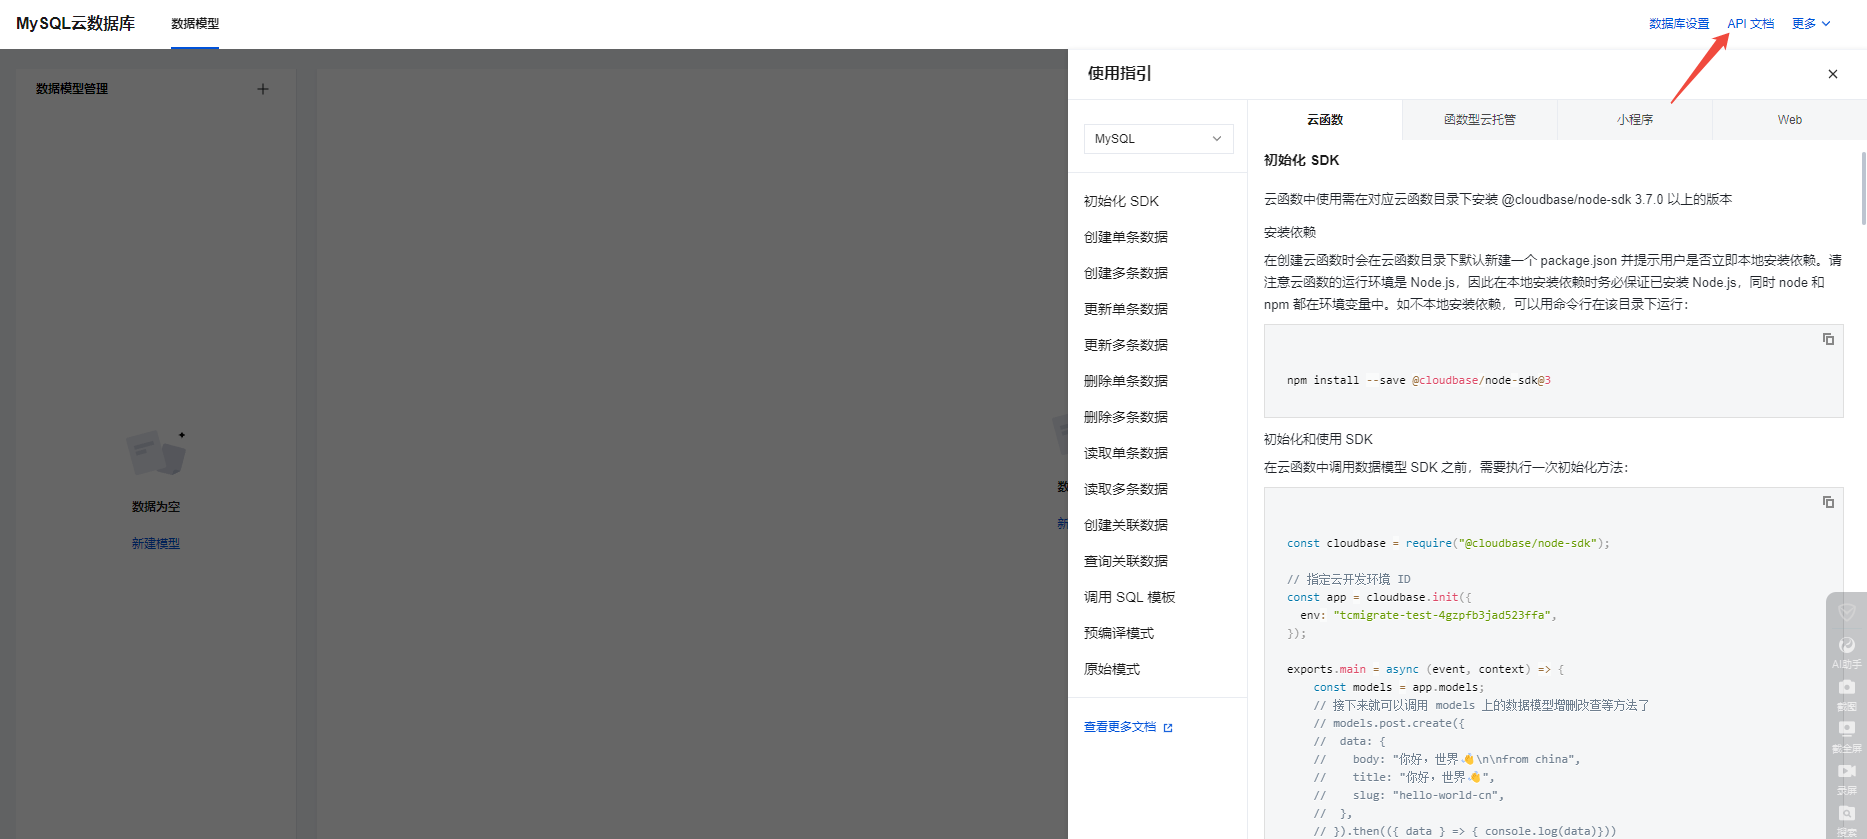
注:微信小程序云开发平台指的是腾讯云开发 先给结论:微信小程序云开发平台的MySQL,无法通过获取数据库连接信息的方式进行连接,连接只能通过云开发的SDK连接,具体要参考官方文档: 为什么? 因为…...

数据库分批入库
今天在工作中,遇到一个问题,就是分批查询的时候,由于批次过大导致出现了一些问题,一下是问题描述和解决方案: 示例: // 假设已有数据列表 dataList 和 PreparedStatement pstmt int batchSize 1000; // …...

Go语言多线程问题
打印零与奇偶数(leetcode 1116) 方法1:使用互斥锁和条件变量 package mainimport ("fmt""sync" )type ZeroEvenOdd struct {n intzeroMutex sync.MutexevenMutex sync.MutexoddMutex sync.Mutexcurrent int…...
Golang——9、反射和文件操作
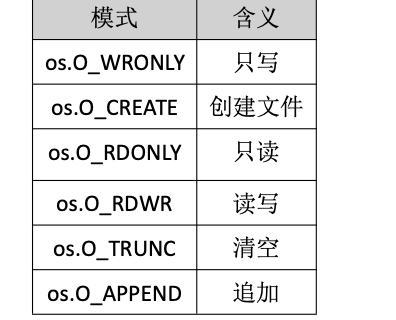
反射和文件操作 1、反射1.1、reflect.TypeOf()获取任意值的类型对象1.2、reflect.ValueOf()1.3、结构体反射 2、文件操作2.1、os.Open()打开文件2.2、方式一:使用Read()读取文件2.3、方式二:bufio读取文件2.4、方式三:os.ReadFile读取2.5、写…...

【Linux】自动化构建-Make/Makefile
前言 上文我们讲到了Linux中的编译器gcc/g 【Linux】编译器gcc/g及其库的详细介绍-CSDN博客 本来我们将一个对于编译来说很重要的工具:make/makfile 1.背景 在一个工程中源文件不计其数,其按类型、功能、模块分别放在若干个目录中,mak…...
2.3 物理层设备
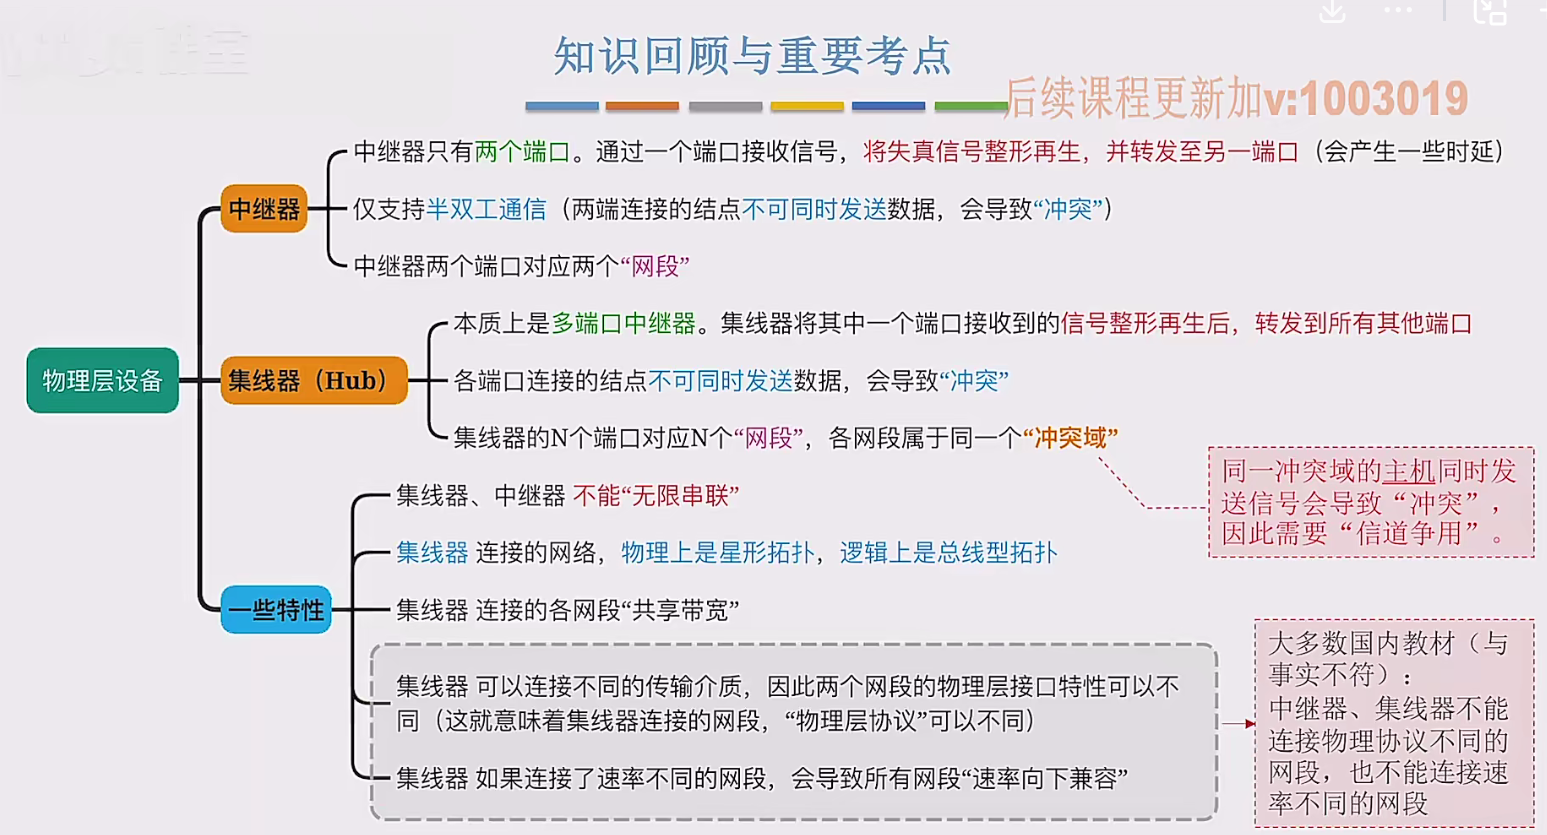
在这个视频中,我们要学习工作在物理层的两种网络设备,分别是中继器和集线器。首先来看中继器。在计算机网络中两个节点之间,需要通过物理传输媒体或者说物理传输介质进行连接。像同轴电缆、双绞线就是典型的传输介质,假设A节点要给…...

机器学习的数学基础:线性模型
线性模型 线性模型的基本形式为: f ( x ) ω T x b f\left(\boldsymbol{x}\right)\boldsymbol{\omega}^\text{T}\boldsymbol{x}b f(x)ωTxb 回归问题 利用最小二乘法,得到 ω \boldsymbol{\omega} ω和 b b b的参数估计$ \boldsymbol{\hat{\omega}}…...
