Qt 中使用 ffmpeg 获取采集卡数据录制视频
作者:billy
版权声明:著作权归作者所有,商业转载请联系作者获得授权,非商业转载请注明出处
前言
之前做了一个功能,从采集卡获取数据然后录制成视频,结果发现录制的视频内存占用非常大,1分钟的视频大概有 800MB 内存。在帧率和分辨率已确定的情况下,只能通过调整比特率来减少内存占用,但是设置比特率在不同编码器和平台支持情况都有所不同,有些编码器甚至不支持直接设置比特率,所以博主想起了 ffmpeg 这个神器。
这里先介绍一下视频的相关参数:
在用户视角:
清晰度 = 比特率(码率) / 分辨率
流畅度 = 帧率在开发者视角:
影响内存的:主要是分辨率
影响 CPU 的:码率和编码格式
影响 GPU 的:分辨率和编码格式
影响体积大小和带宽:码率
ffmpeg 库功能测试
首先在网上找到了 ffmpeg 库的 windows 安装包来做下测试
百度网盘下载链接:ffmpeg(windows安装包)
提取码:fkmn
下载完成之后可以直接使用 bin\ffmpeg.exe 在命令行做测试,把 ffmpeg\bin 路径添加到环境变量中
-
确认 ffmpeg 版本和配置:
ffmpeg -version -
列举所有设备:
ffmpeg -list_devices true -f dshow -i dummy
对已录制的内存占用较大的视频进行压缩:
- 设置码率:
ffmpeg -i input.mp4 -b:v 1000k output.mp4 - 设置分辨率:
ffmpeg -i input.mp4 -s 640x360 output.mp4 - 设置帧率:
ffmpeg -i input.mp4 -r 30 output.mp4 - 综合调整:
ffmpeg -i input.mp4 -b:v 800k -s 640x360 -r 30 output.mp4
也可以用 python 跑脚本:
import subprocess
def compress_video(input_file, output_file, bitrate='1000k'):command = ['ffmpeg','-i', input_file,'-b:v', bitrate,output_file]try:subprocess.run(command, check=True)print(f"视频压缩成功,输出文件为: {output_file}")except subprocess.CalledProcessError as e:print(f"视频压缩失败: {e}")# 使用示例
input_file = 'input.mp4'
output_file = 'output.mp4'
compress_video(input_file, output_file, bitrate='800k')
再测试一下直接打开设备录制视频
ffmpeg -f dshow -i video="@device_pnp_\\?\usb#vid_2b89&pid_5647&mi_00#7&223c07ce&0&0000#{65e8773d-8f56-11d0-a3b9-00a0c9223196}\global" -c:v libx264 -max_delay 10000 -b:v 1000k -bufsize 200k -r 30 output.mp4 -y命令解释
-c:v libx264: 指定使用libx264编码器进行视频编码。
-max_delay 10000: 设置编码器的最大延迟为10000毫秒(10秒)。这有助于控制视频编码的缓冲延迟。
-b:v 1000k: 设置视频比特率为1000 kbps(千比特每秒)。
-bufsize 200k: 设置编码器的缓冲区大小为200 kbps。这个参数用于控制编码器在遇到高负载或低负载时的比特率变化。
-r 30: 设置帧率为30帧每秒。
output.mp4: 输出文件名。
-y: 覆盖输出文件,如果文件已存在。
测试结果为用 ffmpeg 压缩过的视频内存占用率非常小,码率越小内存就越小。但是对于客户来说他不会使用命令行去做压缩,所以最终方案还是直接使用 ffmpeg 库来录制视频。
Qt 中集成 ffmpeg 库来录制视频
首先在网上下载编译完成的 ffmpeg 库,博主用的是 Qt 5.15.2 和 vs2019
百度网盘下载链接:ffmpeg(库文件)
提取码: cqwx
把库集成到 Qt 中:
INCLUDEPATH += $$PWD/ffmpeg/includeLIBS += -L$$PWD/ffmpeg/lib/ -lavcodec
LIBS += -L$$PWD/ffmpeg/lib/ -lavdevice
LIBS += -L$$PWD/ffmpeg/lib/ -lavfilter
LIBS += -L$$PWD/ffmpeg/lib/ -lavformat
LIBS += -L$$PWD/ffmpeg/lib/ -lavutil
LIBS += -L$$PWD/ffmpeg/lib/ -lpostproc
LIBS += -L$$PWD/ffmpeg/lib/ -lswresample
LIBS += -L$$PWD/ffmpeg/lib/ -lswscale
实现拍照和录屏的功能:
extern "C"
{
#include <libavformat/avformat.h>
#include <libavcodec/avcodec.h>
#include <libavutil/avutil.h>
#include <libavutil/imgutils.h>
#include <libswscale/swscale.h>
#include <libavdevice/avdevice.h>
}void showErrorInfo(int ret)
{static char errbuf[AV_ERROR_MAX_STRING_SIZE];memset(errbuf, 0, AV_ERROR_MAX_STRING_SIZE);av_strerror(ret, errbuf, AV_ERROR_MAX_STRING_SIZE);qDebug() << "Error info:" << errbuf;
}void videoRecord()
{avformat_network_init();avdevice_register_all();// 遍历所有设备类型// const AVInputFormat *iformat = nullptr;// while ((iformat = av_input_audio_device_next(iformat))) {//     qDebug() << "Audio input device: " << iformat->name << " - " << iformat->long_name;// }// iformat = nullptr;// while ((iformat = av_input_video_device_next(iformat))) {//     qDebug() << "Video input device: " << iformat->name << " - " << iformat->long_name;// }const AVInputFormat *iformat_dshow = av_find_input_format("dshow");if (!iformat_dshow){qDebug() << "Could not find input format !";return;}// 用于存储设备列表的上下文AVDeviceInfoList *deviceList = nullptr;int ret = avdevice_list_input_sources(iformat_dshow, nullptr, nullptr, &deviceList);if (ret < 0) {qDebug() << "Could not list input sources !";showErrorInfo(ret);return;}// 设备名称std::string deviceName = "";// 遍历设备列表// qDebug() << "Available DirectShow devices:";for (int i = 0; i < deviceList->nb_devices; ++i){AVDeviceInfo *device = deviceList->devices[i];// qDebug() << "Device" << i << ":" << device->device_description << "(" << device->device_name << ")";// 获取绿联采集卡的设备名称QString description = QString(device->device_description);if ( description.contains("UGREEN") ) {deviceName = "video=" + description.toStdString();break;}}// 释放设备列表avdevice_free_list_devices(&deviceList);//------------------------------// 创建 AVFormatContextAVFormatContext *inputFormatContext = avformat_alloc_context();if (!inputFormatContext) {qDebug() << "Could not allocate AVFormatContext !";return;}// 设置附加参数AVDictionary *options = nullptr;int framerate = 30;av_dict_set(&options, "rtbufsize", "100M", 0);  // 设置缓冲区大小av_dict_set(&options, "framerate", "30", 0);    // 设置帧率// 打开输入设备ret = avformat_open_input(&inputFormatContext, deviceName.c_str(), iformat_dshow, &options);if (ret < 0) {qDebug() << "Could not open input device !";showErrorInfo(ret);return;}// 打印输入设备的信息// av_dump_format(inputFormatContext, 0, deviceName.c_str(), 0);// 查找输入流信息ret = avformat_find_stream_info(inputFormatContext, nullptr);if (ret < 0) {qDebug() << "Could not find stream information !";showErrorInfo(ret);return;}// 查找视频流int videoStreamIndex = -1;for (unsigned int i = 0; i < inputFormatContext->nb_streams; i++){if (inputFormatContext->streams[i]->codecpar->codec_type == AVMEDIA_TYPE_VIDEO) {videoStreamIndex = i;break;}}if (videoStreamIndex == -1) {qDebug() << "Could not find video stream !";return;}// 获取视频流参数AVCodecParameters *inputCodecParameters = inputFormatContext->streams[videoStreamIndex]->codecpar;// 查找输入解码器const AVCodec *inputCodec = avcodec_find_decoder(inputCodecParameters->codec_id);if (!inputCodec) {qDebug() << "Could not find codec !";return ;}// 创建输入解码器上下文AVCodecContext *inputCodecContext = avcodec_alloc_context3(inputCodec);if (!inputCodecContext) {qDebug() << "Could not allocate codec context !";return;}// 将视频流参数复制到输入解码器上下文ret = avcodec_parameters_to_context(inputCodecContext, inputCodecParameters);if (ret < 0) {qDebug() << "Could not copy codec parameters to context !";showErrorInfo(ret);return;}// 打开输入解码器ret = avcodec_open2(inputCodecContext, inputCodec, nullptr);if (ret < 0) {qDebug() << "Could not open codec !";showErrorInfo(ret);return;}//------------------------------// 分配帧和数据包AVFrame *frame = av_frame_alloc();AVPacket *packet = av_packet_alloc();if (!frame || !packet) {qDebug() << "Could not alloc frame and packet !";return;}// 分配图像转换上下文SwsContext *swsContext = sws_getContext(inputCodecContext->width, inputCodecContext->height, inputCodecContext->pix_fmt,inputCodecContext->width, inputCodecContext->height, AV_PIX_FMT_RGB24,SWS_BILINEAR, nullptr, nullptr, nullptr);if (!swsContext) {qDebug() << "Could not initialize SwsContext !";return;}// 分配 RGB 帧AVFrame *rgbFrame = av_frame_alloc();int numBytes = av_image_get_buffer_size(AV_PIX_FMT_RGB24, inputCodecContext->width, inputCodecContext->height, 1);uint8_t *buffer = (uint8_t *)av_malloc(numBytes * sizeof(uint8_t));av_image_fill_arrays(rgbFrame->data, rgbFrame->linesize, buffer, AV_PIX_FMT_RGB24,inputCodecContext->width, inputCodecContext->height, 1);// 读取帧数据(保存10张图片)int frameCount = 0;while (av_read_frame(inputFormatContext, packet) >= 0 && frameCount < 11){// 确保帧的数据类型和解码器的数据类型一致if (packet->stream_index == videoStreamIndex){// 发送数据包到解码器ret = avcodec_send_packet(inputCodecContext, packet);if (ret < 0) {qDebug() << "Error sending packet to decoder !";showErrorInfo(ret);continue;}// 接收解码后的帧while (avcodec_receive_frame(inputCodecContext, frame) == 0){// 舍弃第一帧if ( frameCount == 0 ) {frameCount++;continue;}// 转换图像格式sws_scale(swsContext, frame->data, frame->linesize, 0, inputCodecContext->height,rgbFrame->data, rgbFrame->linesize);// 创建 QImageQImage image(rgbFrame->data[0], inputCodecContext->width, inputCodecContext->height, QImage::Format_RGB888);// 保存图像QString fileName = QString("frame_%1.jpg").arg(frameCount++);if (!image.save(fileName)) {qDebug() << "Error saving image:" << fileName;} else {qDebug() << "Image saved:" << fileName;}}}av_packet_unref(packet);}//------------------------------// 输出格式上下文AVFormatContext *outputFormatContext = nullptr;const char *outputFileName = "output.mp4";// 创建输出格式上下文ret = avformat_alloc_output_context2(&outputFormatContext, nullptr, nullptr, outputFileName);if (!outputFormatContext) {qDebug() << "Could not create output context !";showErrorInfo(ret);return;}// 查找输出编码器const AVCodec *outputCodec = avcodec_find_encoder(AV_CODEC_ID_H264);if (!outputCodec) {qDebug() << "Could not find output codec !";return;}// 创建输出流AVStream *outputStream = avformat_new_stream(outputFormatContext, outputCodec);if (!outputStream) {qDebug() << "Could not create output stream !";return;}// 打开输出编码器上下文AVCodecContext *outputCodecContext = avcodec_alloc_context3(outputCodec);if (!outputCodecContext) {qDebug() << "Could not allocate output codec context !";return;}// 设置输出编码器参数outputCodecContext->codec_id = outputCodec->id;outputCodecContext->codec_type = AVMEDIA_TYPE_VIDEO;outputCodecContext->pix_fmt = AV_PIX_FMT_YUV420P;outputCodecContext->width = 1920;                                       // 设置分辨率outputCodecContext->height = 1080;outputCodecContext->time_base = {1, framerate};                         // 设置帧率outputCodecContext->framerate = {framerate, 1};outputCodecContext->bit_rate = 2000000;                                 // 设置比特率outputCodecContext->rc_buffer_size = 2 * outputCodecContext->bit_rate;  // 设置缓冲区大小为码率的两倍outputCodecContext->gop_size = 10;                                      // 设置关键帧间隔outputCodecContext->max_b_frames = 1;if (outputFormatContext->oformat->flags & AVFMT_GLOBALHEADER) {outputCodecContext->flags |= AV_CODEC_FLAG_GLOBAL_HEADER;}// 打开输出编码器ret = avcodec_open2(outputCodecContext, outputCodec, nullptr);if (ret < 0) {qDebug() << "Could not open output codec !";showErrorInfo(ret);return;}// 复制输出编码器参数到输出流avcodec_parameters_from_context(outputStream->codecpar, outputCodecContext);outputStream->time_base = outputCodecContext->time_base;//------------------------------// 打开输出文件if (!(outputFormatContext->oformat->flags & AVFMT_NOFILE)) {ret = avio_open(&outputFormatContext->pb, outputFileName, AVIO_FLAG_WRITE);if (ret < 0) {qDebug() << "Could not open output file !";showErrorInfo(ret);return;}}// 写入文件头ret = avformat_write_header(outputFormatContext, nullptr);if (ret < 0) {qDebug() << "Could not write header !";showErrorInfo(ret);return;}// 分配帧和数据包AVFrame *inputFrame = av_frame_alloc();AVPacket *inputPacket = av_packet_alloc();AVFrame *outputFrame = av_frame_alloc();AVPacket *outputPacket = av_packet_alloc();if (!inputFrame || !inputPacket || !outputFrame || !outputPacket) {qDebug() << "Could not alloc frame and packet !";return;}// 分配图像转换上下文SwsContext *swsContext2 = sws_getContext(inputCodecContext->width, inputCodecContext->height, inputCodecContext->pix_fmt,outputCodecContext->width, outputCodecContext->height, outputCodecContext->pix_fmt,SWS_BILINEAR, nullptr, nullptr, nullptr);if (!swsContext2) {qDebug() << "Could not initialize SwsContext !";return;}// 分配输出帧数据outputFrame->format = AV_PIX_FMT_YUV420P;outputFrame->width = inputCodecContext->width;outputFrame->height = inputCodecContext->height;ret = av_frame_get_buffer(outputFrame, 0);if (ret < 0) {qDebug() << "Could not get frame buffer !";showErrorInfo(ret);return;}// 录屏60秒,帧率30,保存1800帧数据int frameCount2 = 0;while (av_read_frame(inputFormatContext, inputPacket) >= 0 && frameCount2 < 1800){// 确保帧的数据类型和解码器的数据类型一致if (inputPacket->stream_index == videoStreamIndex){// 发送输入数据包到解码器ret = avcodec_send_packet(inputCodecContext, inputPacket);if (ret < 0) {qDebug() << "Error sending packet to decoder !";showErrorInfo(ret);continue;}// 接收解码后的帧while (avcodec_receive_frame(inputCodecContext, inputFrame) == 0){// 转换图像格式sws_scale(swsContext2, inputFrame->data, inputFrame->linesize, 0, inputCodecContext->height,outputFrame->data, outputFrame->linesize);outputFrame->pts = frameCount2++;qDebug() << "frameCount2: " << frameCount2;// 发送输出帧到输出编码器ret = avcodec_send_frame(outputCodecContext, outputFrame);if (ret < 0) {qDebug() << "Error sending frame to encoder !";showErrorInfo(ret);continue;}// 接收编码后的数据包while (avcodec_receive_packet(outputCodecContext, outputPacket) == 0){av_packet_rescale_ts(outputPacket, outputCodecContext->time_base, outputStream->time_base);outputPacket->stream_index = outputStream->index;// 写入数据包到输出文件ret = av_interleaved_write_frame(outputFormatContext, outputPacket);if (ret < 0) {qDebug() << "Error writing packet to output file";showErrorInfo(ret);continue;}av_packet_unref(outputPacket);}}}av_packet_unref(inputPacket);}// 刷新编码器avcodec_send_frame(outputCodecContext, nullptr);while (avcodec_receive_packet(outputCodecContext, outputPacket) == 0){av_packet_rescale_ts(outputPacket, outputCodecContext->time_base, outputStream->time_base);outputPacket->stream_index = outputStream->index;ret = av_interleaved_write_frame(outputFormatContext, outputPacket);if (ret < 0) {qDebug() << "Error writing packet to output file";showErrorInfo(ret);}av_packet_unref(outputPacket);}// 写入文件尾av_write_trailer(outputFormatContext);// 释放资源av_frame_free(&inputFrame);av_frame_free(&outputFrame);av_packet_free(&inputPacket);av_packet_free(&outputPacket);sws_freeContext(swsContext2);avcodec_free_context(&outputCodecContext);avformat_free_context(outputFormatContext);if (outputFormatContext && !(outputFormatContext->oformat->flags & AVFMT_NOFILE)) {avio_closep(&outputFormatContext->pb);}av_free(buffer);av_frame_free(&rgbFrame);av_frame_free(&frame);av_packet_free(&packet);sws_freeContext(swsContext);avcodec_free_context(&inputCodecContext);avformat_close_input(&inputFormatContext);avformat_free_context(inputFormatContext);av_dict_free(&options);avformat_network_deinit();
}
相关文章:

Qt 中使用 ffmpeg 获取采集卡数据录制视频
作者:billy 版权声明:著作权归作者所有,商业转载请联系作者获得授权,非商业转载请注明出处 前言 之前做了一个功能,从采集卡获取数据然后录制成视频,结果发现录制的视频内存占用非常大,1分钟的…...

Python爬虫TLS
TLS指纹校验原理和绕过 浏览器可以正常访问,但是用requests发送请求失败。 后端是如何监测得呢?为什么浏览器可以返回结果,而requests模块不行呢? https://cn.investing.com/equities/amazon-com-inc-historical-data 1.指纹校…...
【Linux AnolisOS】配置Linux固定ip地址。然后在Windows上连接使用linux中docker容器里的redis和nacos。
1.关于将虚拟机ip地址更改为静态地址 ,跟着下面这个视频搞的,不想看文章的可以看视频。 第四章-07-配置Linux固定IP地址哔哩哔哩bilibili 当用的centos9 视频里让我们打开网络配置文件 vim /etc/sysconfig/network-scripts/ifcfg-ens33 但是我打开时…...

IDEA中查询Maven项目的依赖树
在Maven项目中,查看项目的依赖树是一个常见的需求,特别是当你需要了解项目中直接或间接依赖了哪些库及其版本时。你可以通过命令行使用Maven的dependency:tree插件来做到这一点。这个命令会列出项目中所有依赖的树状结构。 打开idea项目的终端ÿ…...

【Ubuntu】GPU显存被占用,但显示没有使用GPU的进程
文章目录 一、问题描述二、解决方案2.1 寻找问题进程2.2 尝试杀死相关进程2.3 投放核弹,一键全杀2.4 再次查看GPU使用情况 参考资料 一、问题描述 今天使用服务器的时候发现gpu被占了很多内存,但是使用 nvidia-smi 命令并没有发现占这么多显存的进程&am…...

【并发编程】Java并发编程核心包
1、简介 java.util.concurrent 是 Java 并发编程的核心包,提供了丰富的工具和框架来支持多线程编程、并发任务执行、线程安全集合、同步机制等。 2、线程池Thread Pool 线程池是并发编程中最重要的工具之一,用于管理和复用线程,避免频繁创…...

Unity 淡入淡出
淡入(Fade in):类似打开幕布 淡出(Fade out):类似关上幕布 方案一 使用Dotween(推荐) using DG.Tweening; using UnityEngine; using UnityEngine.UI;public class Test : MonoB…...
完整的 LoRA 模型训练步骤:如何使用 Kohya_ss 进行 LoRA 训练
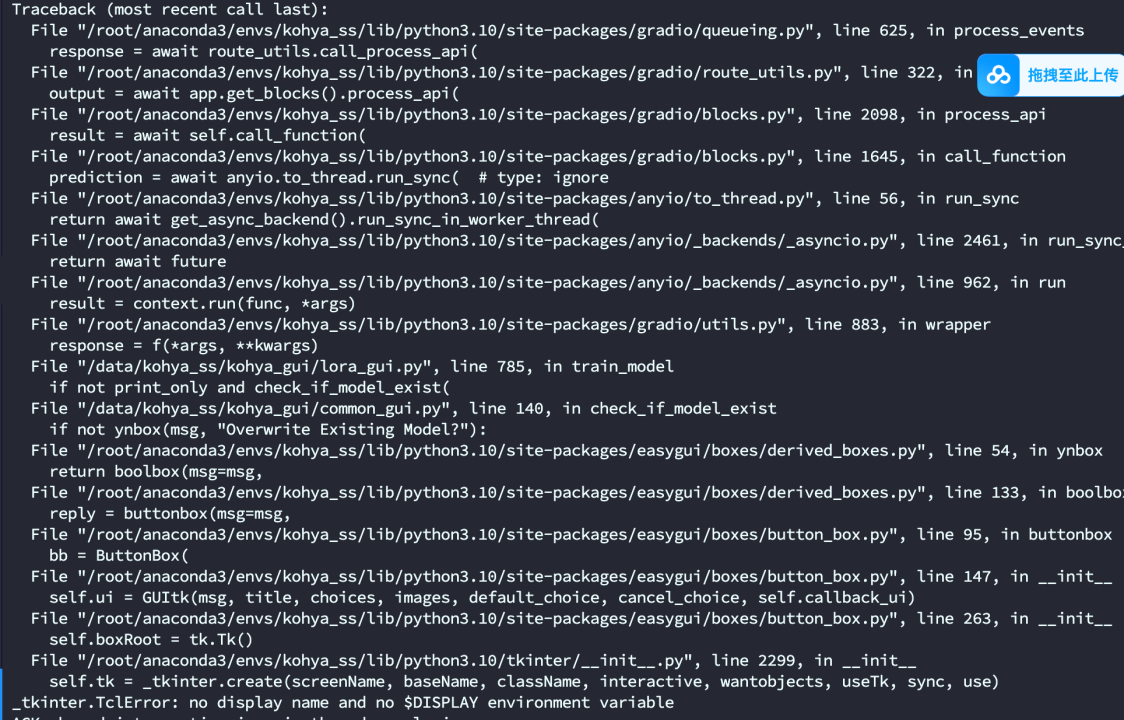
完整的 LoRA 模型训练步骤:如何使用 Kohya_ss 进行 LoRA 训练 一、环境配置1. 安装 Python 和虚拟环境2. 克隆 Kohya_ss 仓库3. 安装依赖4. 启动 GUI lora训练1. 准备数据 图片处理打标签2. 配置 LoRA 训练2.2 配置图片文件夹和输出目录 训练解决方法: 使…...

视觉分析之边缘检测算法
9.1 Roberts算子 Roberts算子又称为交叉微分算法,是基于交叉差分的梯度算法,通过局部差分计算检测边缘线条。 常用来处理具有陡峭的低噪声图像,当图像边缘接近于正45度或负45度时,该算法处理效果更理想。 其缺点是对边缘的定位…...
git输错用户名或者密码
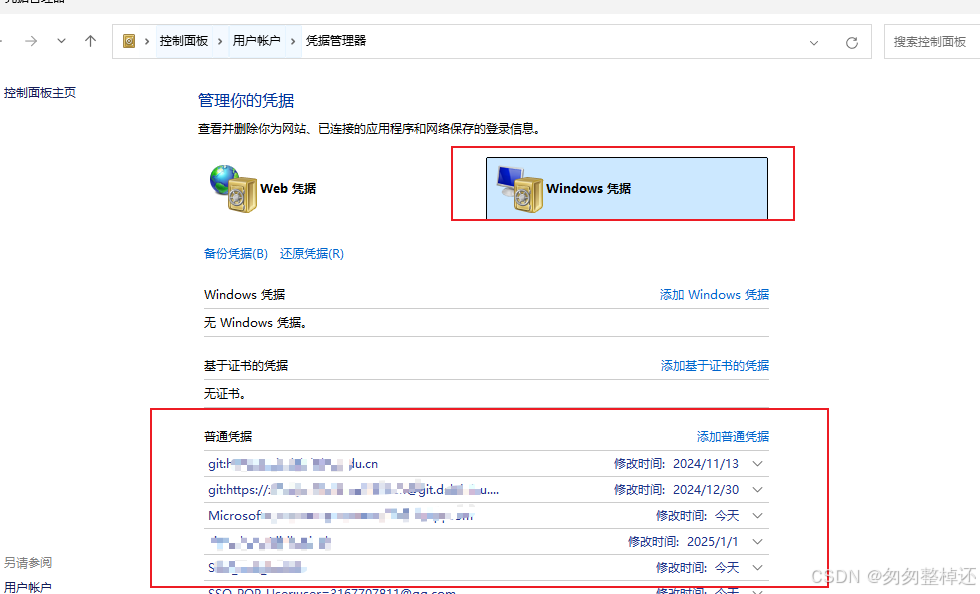
git push时候跳出window弹窗,输入用户名和密码,如果错误,会有如下情况: $ git push -u origin “master” remote: [session-6c466aa6] rain: Incorrect username or password (access token) fatal: Authentication failed for ‘…...

【Unity Shader编程】之图元装配与光栅化
执行方式:自动完成 图元装配自动化流程 顶点坐标存入装配区 → 按绘制模式连接顶点 → 生成完整几何图元 示例:gl.drawArrays(gl.TRIANGLES, 0, 3)自动生成三角形 会自动自动裁剪超出屏幕范围(NDC空间外)的三角形,仅保…...

以ChatGPT为例解析大模型背后的技术
目录 1、大模型分类 2、为什么自然语言处理可计算? 2.1、One-hot分类编码(传统词表示方法) 2.2、词向量 3、Transformer架构 3.1、何为注意力机制? 3.2、注意力机制在 Transformer 模型中有何意义? 3.3、位置编…...

网页版的俄罗斯方块
1、新建一个txt文件 2、打开后将代码复制进去保存 <!DOCTYPE html> <html lang"en"><head><meta charset"UTF-8"><meta name"viewport" content"widthdevice-width, initial-scale1.0"><title>俄…...

Linux运维_Dockerfile_打包Moby-26.1.4编译dockerd环境
Linux运维_Dockerfile_打包Moby-26.1.4编译dockerd环境 Dockerfile 是一个文本文件, 包含了构建 Docker 镜像的所有指令。 Dockerfile 是一个用来构建镜像的文本文件, 文本内容包含了一条条构建镜像所需的指令和说明。 通过定义一系列命令和参数, Dockerfile 指导 Docker 构…...

数据中心储能蓄电池状态监测管理系统 组成架构介绍
安科瑞刘鸿鹏 摘要 随着数据中心对供电可靠性要求的提高,蓄电池储能系统成为关键的后备电源。本文探讨了蓄电池监测系统在数据中心储能系统中的重要性,分析了ABAT系列蓄电池在线监测系统的功能、技术特点及其应用优势。通过蓄电池监测系统的实施&#…...

layui.table.exportFile 导出数据并清除单元格中的空格
Layui在执行数据导出的时候,会出现部分数据单元格中有空格的情况,下面的方法可以去除掉单元格中的空格,供大家参考!! function table_export(id,title) {//根据传入tableID获取表头var headers $("div[lay-id" id "] .layu…...

vue-指令
前端开发Vue的指令 Vue.js 提供了丰富的指令系统,用于扩展HTML的功能和行为。这些指令可以分为内置指令和自定义指令两大类。以下是对Vue.js中常见指令的详细解释和示例: 1. 内置指令 1.1 插值表达式 用法:{{ expression }}示例ÿ…...

跟着李沐老师学习深度学习(十三)
现代循环神经网络 循环神经网络中梯度异常在实践中的意义引发了一些问题: 早期观测值影响重大:早期观测值对预测所有未来观测值极为重要,如序列中第一个观测值包含校验和,需在序列末尾辨别其是否正确,若无特殊机制存…...

鸿蒙与跨端迁移的重要性
鸿蒙操作系统(HarmonyOS)是由华为公司开发的一款面向未来的全场景分布式操作系统。它旨在提供一个统一的平台,支持各种设备之间的无缝协作和数据共享,从而为用户提供更加连贯和高效的体验。在鸿蒙的生态系统中,跨端迁移…...

成员函数定义后面加const是什么功能:C++中const成员函数的作用
成员函数定义后面加const是什么功能:C中const成员函数的作用 前言C中const成员函数的作用总结 前言 在PX4的代码中的位置控制模块中,有这样一个成员函数 void getAttitudeSetpoint(vehicle_attitude_setpoint_s &attitude_setpoint) const;该函数的…...

DS4Windows终极指南:3步让PS手柄在Windows上完美运行游戏
DS4Windows终极指南:3步让PS手柄在Windows上完美运行游戏 【免费下载链接】DS4Windows Like those other ds4tools, but sexier 项目地址: https://gitcode.com/gh_mirrors/ds/DS4Windows 还在为PC游戏无法识别你的PlayStation手柄而烦恼吗?每次连…...

VS Code写LaTeX效率翻倍秘籍:除了编译,这些Snippets和PDF同步技巧你可能还不知道
VS Code写LaTeX效率翻倍秘籍:除了编译,这些Snippets和PDF同步技巧你可能还不知道 如果你已经用VS Code写LaTeX有一段时间了,可能已经熟悉了基本的编译和预览功能。但要让VS Code真正成为你的高效科研写作利器,还需要掌握一些进阶…...

Oumuamua-7b-RP企业应用:游戏本地化测试与AI陪练场景落地实践
Oumuamua-7b-RP企业应用:游戏本地化测试与AI陪练场景落地实践 1. 项目概述 Oumuamua-7b-RP 是一款基于Mistral-7B架构的日语角色扮演专用大语言模型Web界面,专为游戏开发和本地化测试场景设计。该模型通过沉浸式角色对话体验,为游戏企业提供…...

开源漫画下载神器:3步实现E-Hentai漫画批量下载自动化
开源漫画下载神器:3步实现E-Hentai漫画批量下载自动化 【免费下载链接】E-Hentai-Downloader Download E-Hentai archive as zip file 项目地址: https://gitcode.com/gh_mirrors/eh/E-Hentai-Downloader 在数字漫画收藏的世界里,找到一款高效、免…...

Xbox成就解锁终极指南:免费工具如何轻松实现全成就目标
Xbox成就解锁终极指南:免费工具如何轻松实现全成就目标 【免费下载链接】Xbox-Achievement-Unlocker Achievement unlocker for xbox games (barely works but it does) 项目地址: https://gitcode.com/gh_mirrors/xb/Xbox-Achievement-Unlocker 还在为那些耗…...

青龙面板依赖终极解决方案:3分钟告别“Module Not Found“错误
青龙面板依赖终极解决方案:3分钟告别"Module Not Found"错误 【免费下载链接】QLDependency 青龙面板全依赖一键安装脚本 / Qinglong Pannel Dependency Install Scripts. 项目地址: https://gitcode.com/gh_mirrors/ql/QLDependency 你是否曾经在…...
)
VSCode AI本地化配置实战手册(含Ollama+Cursor+Tabby三平台对比实测)
更多请点击: https://intelliparadigm.com 第一章:VSCode AI本地化配置全景概览 在本地环境中为 VSCode 集成 AI 能力,核心在于解耦云端依赖、保障数据隐私,并实现模型轻量化运行。当前主流方案依托 Ollama CodeLLaMA / Phi-3 …...

AgentScope Runtime Java实战:AI智能体安全部署与生产级工程化指南
1. 项目概述与核心价值最近在折腾AI智能体应用,从原型验证到生产部署,中间那道“鸿沟”可把我折腾得够呛。相信很多同行也有同感:本地跑个LangChain或AgentScope的Demo,调用几个API,看起来挺美;但一旦想把智…...

2024 AI普惠化趋势:Qwen轻量模型中小企业落地实战分析
2024 AI普惠化趋势:Qwen轻量模型中小企业落地实战分析 1. 项目背景与核心价值 2024年,AI技术正从"高大上"走向"平民化",越来越多的中小企业开始寻求低成本、高效率的AI解决方案。阿里通义千问开源的Qwen1.5-0.5B-Chat模…...
【后端开发】@Transactional 不是不能用,而是很多人根本用不明白
文章目录前言1 先搞清楚:Spring 事务到底在帮我们做什么2. 用一个订单流程,看懂 Transactional 为什么会失效2.1 方法自调用:你以为调用了事务方法,其实绕过了代理2.2 异常被吞掉:你以为失败了,Spring 以为…...