3、Kubernetes 集群部署 Prometheus 和 Grafana
Kubernetes 集群部署 Prometheus 和 Grafana
- node-exporter 安装
- Prometheus 安装和配置
- Prometheus 配置热加载
- Grafana 安装
- 部署
- Grafana 配置
实验环境
控制节点/master01 192.168.110.10
工作节点/node01 192.168.110.20
工作节点/node02 192.168.110.30
node-exporter 安装
#创建监控 namespace
kubectl create ns monitor-sa#部署 node-exporter
mkdir /opt/prometheus
cd /opt/prometheus/vim node-export.yaml
---
apiVersion: apps/v1
kind: DaemonSet				#可以保证 k8s 集群的每个节点都运行完全一样的 pod
metadata:name: node-exporternamespace: monitor-salabels:name: node-exporter
spec:selector:matchLabels:name: node-exportertemplate:metadata:labels:name: node-exporterspec:hostPID: truehostIPC: truehostNetwork: truecontainers:- name: node-exporterimage: prom/node-exporter:v0.16.0ports:- containerPort: 9100resources:requests:cpu: 0.15		#这个容器运行至少需要0.15核cpusecurityContext:privileged: true	#开启特权模式args:- --path.procfs- /host/proc- --path.sysfs- /host/sys- --collector.filesystem.ignored-mount-points- '"^/(sys|proc|dev|host|etc)($|/)"'volumeMounts:- name: devmountPath: /host/dev- name: procmountPath: /host/proc- name: sysmountPath: /host/sys- name: rootfsmountPath: /rootfstolerations:- key: "node-role.kubernetes.io/master"operator: "Exists"effect: "NoSchedule"volumes:- name: prochostPath:path: /proc- name: devhostPath:path: /dev- name: syshostPath:path: /sys- name: rootfshostPath:path: /kubectl apply -f node-export.yamlkubectl get pods -n monitor-sa -o wide[root@master01 prometheus]# kubectl get pods -n monitor-sa -o wide
NAME                  READY   STATUS    RESTARTS   AGE     IP               NODE             NOMINATED NODE   READINESS GATES
node-exporter-4mjm8   1/1     Running   5          3m40s   192.168.110.30   192.168.110.30   <none>           <none>
node-exporter-kzbpv   1/1     Running   5          3m40s   192.168.110.20   192.168.110.20   <none>           <none>
通过 node-exporter 采集数据
node-exporter 默认的监听端口是 9100,可以执行 curl http://主机ip:9100/metrics 获取到主机的所有监控数据
curl -Ls http://192.168.110.20:9100/metrics | grep node_cpu_seconds
curl -Ls http://192.168.110.20:9100/metrics | grep node_load[root@node02 ~]# curl -Ls http://192.168.110.20:9100/metrics | grep node_cpu_seconds
# HELP node_cpu_seconds_total Seconds the cpus spent in each mode.
# TYPE node_cpu_seconds_total counter
node_cpu_seconds_total{cpu="0",mode="idle"} 67314.31
node_cpu_seconds_total{cpu="0",mode="iowait"} 5.25
... ...
node_cpu_seconds_total{cpu="3",mode="system"} 768.89
node_cpu_seconds_total{cpu="3",mode="user"} 143.63
[root@node02 ~]# curl -Ls http://192.168.110.20:9100/metrics | grep node_load
# HELP node_load1 1m load average.
# TYPE node_load1 gauge
node_load1 0.41
# HELP node_load15 15m load average.
# TYPE node_load15 gauge
node_load15 0.75
# HELP node_load5 5m load average.
# TYPE node_load5 gauge
node_load5 0.62
Prometheus 安装和配置
创建 sa 账号,对 sa 做 rbac 授权
#创建一个 sa 账号 monitor
kubectl create serviceaccount monitor -n monitor-sa
#把 sa 账号 monitor 通过 clusterrolebing 绑定到 clusterrole 上
kubectl create clusterrolebinding monitor-clusterrolebinding -n monitor-sa --clusterrole=cluster-admin  --serviceaccount=monitor-sa:monitor
创建一个 configmap 存储卷,用来存放 prometheus 配置信息
vim prometheus-cfg.yaml
---
kind: ConfigMap
apiVersion: v1
metadata:labels:app: prometheusname: prometheus-confignamespace: monitor-sa
data:prometheus.yml: |global:                     #指定prometheus的全局配置,比如采集间隔,抓取超时时间等scrape_interval: 15s      #采集目标主机监控数据的时间间隔,默认为1mscrape_timeout: 10s       #数据采集超时时间,默认10sevaluation_interval: 1m 	#触发告警生成alert的时间间隔,默认是1mscrape_configs:             #配置数据源,称为target,每个target用job_name命名。又分为静态配置和服务发现- job_name: 'kubernetes-node'kubernetes_sd_configs:    # *_sd_configs 指定的是k8s的服务发现- role: node              #使用node角色,它使用默认的kubelet提供的http端口来发现集群中每个node节点relabel_configs:	        #重新标记- source_labels: [__address__]    #配置的原始标签,匹配地址regex: '(.*):10250'             #匹配带有10250端口的urlreplacement: '${1}:9100'        #把匹配到的ip:10250的ip保留target_label: __address__       #新生成的url是${1}获取到的ip:9100action: replace         #动作替换- action: labelmapregex: __meta_kubernetes_node_label_(.+)    #匹配到下面正则表达式的标签会被保留,如果不做regex正则的话,默认只是会显示instance标签- job_name: 'kubernetes-node-cadvisor'    #抓取cAdvisor数据,是获取kubelet上/metrics/cadvisor接口数据来获取容器的资源使用情况kubernetes_sd_configs:- role:  nodescheme: httpstls_config:ca_file: /var/run/secrets/kubernetes.io/serviceaccount/ca.crtbearer_token_file: /var/run/secrets/kubernetes.io/serviceaccount/tokenrelabel_configs:- action: labelmap    #把匹配到的标签保留regex: __meta_kubernetes_node_label_(.+)    #保留匹配到的具有__meta_kubernetes_node_label的标签- target_label: __address__                   #获取到的地址:__address__="192.168.80.20:10250"replacement: kubernetes.default.svc:443     #把获取到的地址替换成新的地址kubernetes.default.svc:443- source_labels: [__meta_kubernetes_node_name]regex: (.+)                                 #把原始标签中__meta_kubernetes_node_name值匹配到target_label: __metrics_path__              #获取__metrics_path__对应的值replacement: /api/v1/nodes/${1}/proxy/metrics/cadvisor	#把metrics替换成新的值api/v1/nodes/<node_name>/proxy/metrics/cadvisor#${1}是__meta_kubernetes_node_name获取到的值#最后通过https://<apiserver_address>/api/v1/nodes/<node_name>/proxy/metrics/cadvisor来获取对应节点cadvisor监控数据- job_name: 'kubernetes-apiserver'kubernetes_sd_configs:- role: endpoints                             #使用k8s中的endpoint服务发现,采集apiserver 6443端口获取到的数据scheme: httpstls_config:ca_file: /var/run/secrets/kubernetes.io/serviceaccount/ca.crtbearer_token_file: /var/run/secrets/kubernetes.io/serviceaccount/tokenrelabel_configs:- source_labels: [__meta_kubernetes_namespace, __meta_kubernetes_service_name, __meta_kubernetes_endpoint_port_name]    #[endpoint这个对象的名称空间,endpoint对象的服务名,exnpoint的端口名称]action: keep    #采集满足条件的实例,其他实例不采集regex: default;kubernetes;https    #正则匹配到的默认空间下的service名字是kubernetes,协议是https的endpoint类型保留下来- job_name: 'kubernetes-service-endpoints'kubernetes_sd_configs:- role: endpointsrelabel_configs:- source_labels: [__meta_kubernetes_service_annotation_prometheus_io_scrape]action: keepregex: true#重新打标仅抓取到的具有"prometheus.io/scrape: true"的annotation的端点, 意思是说如果某个service具有prometheus.io/scrape = true的annotation声明则抓取,annotation本身也是键值结构, 所以这里的源标签设置为键,而regex设置值true,当值匹配到regex设定的内容时则执行keep动作也就是保留,其余则丢弃。- source_labels: [__meta_kubernetes_service_annotation_prometheus_io_scheme]action: replacetarget_label: __scheme__regex: (https?)#重新设置scheme,匹配源标签__meta_kubernetes_service_annotation_prometheus_io_scheme也就是prometheus.io/scheme annotation,如果源标签的值匹配到regex,则把值替换为__scheme__对应的值。- source_labels: [__meta_kubernetes_service_annotation_prometheus_io_path]action: replacetarget_label: __metrics_path__regex: (.+)#应用中自定义暴露的指标,也许你暴露的API接口不是/metrics这个路径,那么你可以在这个POD对应的service中做一个 "prometheus.io/path = /mymetrics" 声明,上面的意思就是把你声明的这个路径赋值给__metrics_path__, 其实就是让prometheus来获取自定义应用暴露的metrices的具体路径, 不过这里写的要和service中做好约定,如果service中这样写 prometheus.io/app-metrics-path: '/metrics' 那么你这里就要__meta_kubernetes_service_annotation_prometheus_io_app_metrics_path这样写。- source_labels: [__address__, __meta_kubernetes_service_annotation_prometheus_io_port]action: replacetarget_label: __address__regex: ([^:]+)(?::\d+)?;(\d+)replacement: $1:$2#暴露自定义的应用的端口,就是把地址和你在service中定义的 "prometheus.io/port = <port>" 声明做一个拼接, 然后赋值给__address__,这样prometheus就能获取自定义应用的端口,然后通过这个端口再结合__metrics_path__来获取指标,如果__metrics_path__值不是默认的/metrics那么就要使用上面的标签替换来获取真正暴露的具体路径。- action: labelmap        #保留下面匹配到的标签regex: __meta_kubernetes_service_label_(.+)- source_labels: [__meta_kubernetes_namespace]action: replace        #替换__meta_kubernetes_namespace变成kubernetes_namespacetarget_label: kubernetes_namespace- source_labels: [__meta_kubernetes_service_name]action: replacetarget_label: kubernetes_namekubectl apply -f prometheus-cfg.yaml
通过 deployment 部署 prometheus
#将 prometheus 调度到 node1 节点,在 node1 节点创建 prometheus 数据存储目录
mkdir /data && chmod 777 /data#通过 deployment 部署 prometheus
vim prometheus-deploy.yaml
---
apiVersion: apps/v1
kind: Deployment
metadata:name: prometheus-servernamespace: monitor-salabels:app: prometheus
spec:replicas: 1selector:matchLabels:app: prometheuscomponent: server#matchExpressions:#- {key: app, operator: In, values: [prometheus]}#- {key: component, operator: In, values: [server]}template:metadata:labels:app: prometheuscomponent: serverannotations:prometheus.io/scrape: 'false'spec:nodeName: 192.168.110.20              #指定pod调度到哪个节点上	serviceAccountName: monitorcontainers:- name: prometheusimage: prom/prometheus:v2.2.1imagePullPolicy: IfNotPresentcommand:- prometheus- --config.file=/etc/prometheus/prometheus.yml- --storage.tsdb.path=/prometheus        #数据存储目录- --storage.tsdb.retention=720h          #数据保存时长- --web.enable-lifecycle                 #开启热加载ports:- containerPort: 9090protocol: TCPvolumeMounts:- mountPath: /etc/prometheus/prometheus.ymlname: prometheus-configsubPath: prometheus.yml- mountPath: /prometheus/name: prometheus-storage-volumevolumes:- name: prometheus-configconfigMap:name: prometheus-configitems:- key: prometheus.ymlpath: prometheus.ymlmode: 0644- name: prometheus-storage-volumehostPath:path: /datatype: Directorykubectl apply -f prometheus-deploy.yamlkubectl get pods -o wide -n monitor-sa [root@master01 prometheus]# kubectl get pods -o wide -n monitor-sa
NAME                                 READY   STATUS    RESTARTS   AGE   IP               NODE             NOMINATED NODE   READINESS GATES
node-exporter-4mjm8                  1/1     Running   5          15m   192.168.110.30   192.168.110.30   <none>           <none>
node-exporter-kzbpv                  1/1     Running   5          15m   192.168.110.20   192.168.110.20   <none>           <none>
prometheus-server-75fb7f8fc6-9rrl7   0/1     Pending   0          49s   <none>           node01           <none>           <none>
给 prometheus pod 创建一个 service
vim prometheus-svc.yaml
---
apiVersion: v1
kind: Service
metadata:name: prometheusnamespace: monitor-salabels:app: prometheus
spec:type: NodePortports:- port: 9090targetPort: 9090protocol: TCPnodePort: 31000selector:app: prometheuscomponent: serverkubectl apply -f prometheus-svc.yamlkubectl get pods -o wide -n monitor-sa
kubectl get svc -n monitor-sa[root@master01 prometheus]# kubectl get pods -o wide -n monitor-sa
NAME                                 READY   STATUS    RESTARTS   AGE     IP               NODE             NOMINATED NODE   READINESS GATES
node-exporter-7lfl8                  1/1     Running   9          2d12h   192.168.110.20   192.168.110.20   <none>           <none>
node-exporter-hnpm2                  1/1     Running   0          2d12h   192.168.110.30   192.168.110.30   <none>           <none>
prometheus-server-84b77ffcf8-mj5rp   1/1     Running   0          5m22s   10.244.60.102    192.168.110.20   <none>           <none>
[root@master01 prometheus]# kubectl get svc -n monitor-sa
NAME         TYPE       CLUSTER-IP   EXTERNAL-IP   PORT(S)          AGE
prometheus   NodePort   10.0.0.113   <none>        9090:31000/TCP   5d5h
如发现镜像拉取失败导致无法建立 pod 检查docker 版本,要使用19.xx.x-22.xx.x 版
通过上面可以看到 service 在 node 节点上映射的端口是 31000,这样我们访问 k8s 集群的 node 节点的 ip:31000,就可以访问到 prometheus 的 web ui 界面了。
浏览器访问 http://192.168.110.20:31000
点击页面的Status->Targets,如看到所有 Target 状态都为 UP,说明我们配置的服务发现可以正常采集数据

查询 K8S 集群中一分钟之内每个 Pod 的 CPU 使用率
sum by (name)( rate(container_cpu_usage_seconds_total{image!=“”, name!=“”}[1m] ) )

Prometheus 配置热加载
为了每次修改配置文件可以热加载prometheus,也就是不停止prometheus就可以使配置生效。想要使配置生效可用如下热加载命令:
kubectl get pods -n monitor-sa -o wide -l app=prometheus[root@master01 prometheus]# kubectl get pods -n monitor-sa -o wide -l app=prometheus
NAME                                 READY   STATUS    RESTARTS   AGE   IP              NODE             NOMINATED NODE   READINESS GATES
prometheus-server-84b77ffcf8-mj5rp   1/1     Running   0          13m   10.244.60.102   192.168.110.20   <none>           <none>
想要使配置生效可用如下命令热加载
curl -X POST -Ls http://10.244.60.102:9090/-/reload
查看 log
kubectl logs -n monitor-sa prometheus-server-84b77ffcf8-mj5rp | grep "Loading configuration file" [root@master01 prometheus]# kubectl logs -n monitor-sa prometheus-server-84b77ffcf8-mj5rp | grep "Loading configuration file"
level=info ts=2025-02-19T14:18:55.772194011Z caller=main.go:588 msg="Loading configuration file" filename=/etc/prometheus/prometheus.yml
一般热加载速度比较慢,可以暴力重启prometheus,如修改上面的 prometheus-cfg.yaml 文件之后,可用如下命令:
可执行先强制删除,然后再通过 apply 更新
kubectl delete -f prometheus-cfg.yaml
kubectl delete -f prometheus-deploy.yaml
kubectl apply -f prometheus-cfg.yaml
kubectl apply -f prometheus-deploy.yaml
Grafana 安装
部署
vim grafana.yaml
---
apiVersion: apps/v1
kind: Deployment
metadata:name: monitoring-grafananamespace: kube-system
spec:replicas: 1selector:matchLabels:task: monitoringk8s-app: grafanatemplate:metadata:labels:task: monitoringk8s-app: grafanaspec:containers:- name: grafanaimage: grafana/grafana:5.0.4ports:- containerPort: 3000protocol: TCPvolumeMounts:- mountPath: /etc/ssl/certsname: ca-certificatesreadOnly: true- mountPath: /varname: grafana-storageenv:- name: INFLUXDB_HOSTvalue: monitoring-influxdb- name: GF_SERVER_HTTP_PORTvalue: "3000"# The following env variables are required to make Grafana accessible via# the kubernetes api-server proxy. On production clusters, we recommend# removing these env variables, setup auth for grafana, and expose the grafana# service using a LoadBalancer or a public IP.- name: GF_AUTH_BASIC_ENABLEDvalue: "false"- name: GF_AUTH_ANONYMOUS_ENABLEDvalue: "true"- name: GF_AUTH_ANONYMOUS_ORG_ROLEvalue: Admin- name: GF_SERVER_ROOT_URL# If you're only using the API Server proxy, set this value instead:# value: /api/v1/namespaces/kube-system/services/monitoring-grafana/proxyvalue: /volumes:- name: ca-certificateshostPath:path: /etc/ssl/certs- name: grafana-storageemptyDir: {}
---
apiVersion: v1
kind: Service
metadata:labels:# For use as a Cluster add-on (https://github.com/kubernetes/kubernetes/tree/master/cluster/addons)# If you are NOT using this as an addon, you should comment out this line.kubernetes.io/cluster-service: 'true'kubernetes.io/name: monitoring-grafananame: monitoring-grafananamespace: kube-system
spec:# In a production setup, we recommend accessing Grafana through an external Loadbalancer# or through a public IP.# type: LoadBalancer# You could also use NodePort to expose the service at a randomly-generated port# type: NodePortports:- port: 80targetPort: 3000selector:k8s-app: grafanatype: NodePortkubectl apply -f grafana.yamlkubectl get pods -n kube-system -l task=monitoring -o wide
kubectl get svc -n kube-system | grep grafana  [root@master01 prometheus]# kubectl get pods -n kube-system -l task=monitoring -o wide
NAME                                 READY   STATUS    RESTARTS   AGE    IP              NODE             NOMINATED NODE   READINESS GATES
monitoring-grafana-fd8554c5c-nffvn   1/1     Running   0          3m6s   10.244.60.107   192.168.110.20   <none>           <none>
[root@master01 prometheus]# kubectl get svc -n kube-system | grep grafana           monitoring-grafana   NodePort    10.0.0.231   <none>        80:35196/TCP             3m12s
Grafana 配置
浏览器访问http://192.168.110.20:35196 ,登陆 grafana
开始配置 grafana 的 web 界面:选择 Add data source
【Name】设置成 Prometheus
【Type】选择 Prometheus
【URL】设置成 http://prometheus.monitor-sa.svc:9090 #使用service的集群内部端口配置服务端地址
点击 【Save & Test】

导入监控模板
官方链接搜索:https://grafana.com/dashboards?dataSource=prometheus&search=kubernetes
监控 node 状态
点击左侧+号选择【Import】
点击【Upload .json File】导入 node_exporter.json 模板
【Prometheus】选择 Prometheus
点击【Import】

监控 容器 状态
点击左侧+号选择【Import】
点击【Upload Upload .json File】导入 docker 模板
【Prometheus】选择 Prometheus
点击【Import】

k8s 部署 kube-state-metrics 组件
(1)安装 kube-state-metrics 组件
#创建 sa,并对 sa 授权
vim kube-state-metrics-rbac.yaml
---
apiVersion: v1
kind: ServiceAccount
metadata:name: kube-state-metricsnamespace: kube-system
---
apiVersion: rbac.authorization.k8s.io/v1
kind: ClusterRole
metadata:name: kube-state-metrics
rules:
- apiGroups: [""]resources: ["nodes", "pods", "services", "resourcequotas", "replicationcontrollers", "limitranges", "persistentvolumeclaims", "persistentvolumes", "namespaces", "endpoints"]verbs: ["list", "watch"]
- apiGroups: ["extensions"]resources: ["daemonsets", "deployments", "replicasets"]verbs: ["list", "watch"]
- apiGroups: ["apps"]resources: ["statefulsets"]verbs: ["list", "watch"]
- apiGroups: ["batch"]resources: ["cronjobs", "jobs"]verbs: ["list", "watch"]
- apiGroups: ["autoscaling"]resources: ["horizontalpodautoscalers"]verbs: ["list", "watch"]
---
apiVersion: rbac.authorization.k8s.io/v1
kind: ClusterRoleBinding
metadata:name: kube-state-metrics
roleRef:apiGroup: rbac.authorization.k8s.iokind: ClusterRolename: kube-state-metrics
subjects:
- kind: ServiceAccountname: kube-state-metricsnamespace: kube-systemkubectl apply -f kube-state-metrics-rbac.yaml#安装 kube-state-metrics 组件和 service
vim kube-state-metrics-deploy.yaml
---
apiVersion: apps/v1
kind: Deployment
metadata:name: kube-state-metricsnamespace: kube-system
spec:replicas: 1selector:matchLabels:app: kube-state-metricstemplate:metadata:labels:app: kube-state-metricsspec:serviceAccountName: kube-state-metricscontainers:- name: kube-state-metricsimage: quay.io/coreos/kube-state-metrics:v1.9.0ports:- containerPort: 8080
---
apiVersion: v1
kind: Service
metadata:annotations:prometheus.io/scrape: 'true'name: kube-state-metricsnamespace: kube-systemlabels:app: kube-state-metrics
spec:ports:- name: kube-state-metricsport: 8080protocol: TCPselector:app: kube-state-metricskubectl apply -f kube-state-metrics-deploy.yaml
kubectl get pods,svc -n kube-system -l app=kube-state-metrics[root@master01 prometheus]# kubectl get pods,svc -n kube-system -l app=kube-state-metrics
NAME                                      READY   STATUS    RESTARTS   AGE
pod/kube-state-metrics-58d4957bc5-2vx5j   1/1     Running   0          9sNAME                         TYPE        CLUSTER-IP   EXTERNAL-IP   PORT(S)    AGE
service/kube-state-metrics   ClusterIP   10.0.0.41    <none>        8080/TCP   9s
(2)Grafana 配置
#监控 k8s 群集状态
点击左侧+号选择【Import】
点击【Upload .json File】导入 kubernetes-cluster-prometheus_rev4.json 模板
【Prometheus】选择 Prometheus
点击【Import】

监控 k8s 群集性能状态
点击左侧+号选择【Import】
点击【Upload .json File】导入 kubernetes-cluster-monitoring-via-prometheus_rev3.json 模板
【Prometheus】选择 Prometheus
点击【Import】

相关文章:

3、Kubernetes 集群部署 Prometheus 和 Grafana
Kubernetes 集群部署 Prometheus 和 Grafana node-exporter 安装Prometheus 安装和配置Prometheus 配置热加载Grafana 安装部署Grafana 配置 实验环境 控制节点/master01 192.168.110.10 工作节点/node01 192.168.110.20 工作节点/node02 192.168.110.30 node-exporter 安装 #…...

【C语言】第八期——指针
目录 1 初始指针 2 获取变量的地址 3 定义指针变量、取地址、取值 3.1 定义指针变量 3.2 取地址、取值 4 对指针变量进行读写操作 5 指针变量作为函数参数 6 数组与指针 6.1 指针元素指向数组 6.2 指针加减运算(了解) 6.2.1 指针加减具体数字…...

如何在 Mac 上安装并配置 JDK 环境变量
如何在Mac上安装并配置JDK环境变量 在开发过程中,许多应用和框架都需要使用Java,尤其是使用Java开发的应用程序。如果你是Mac用户,以下是安装并配置JDK环境变量的步骤,确保你能顺利运行Java程序。 步骤 1:下载JDK 访…...

【git-hub项目:YOLOs-CPP】本地实现05:项目移植
ok,经过前3个博客,我们实现了项目的跑通。 但是,通常情况下,我们的项目都是需要在其他电脑上也跑通,才对。 然而,经过测试,目前出现了2 个bug。 项目一键下载【⬇️⬇️⬇️】: 精…...

LeetCode 热题 100 206. 反转链表
LeetCode 热题 100 | 206. 反转链表 大家好,今天我们来解决一道经典的算法题——反转链表。这道题在 LeetCode 上被标记为简单难度,要求我们将一个单链表反转,并返回反转后的链表。下面我将详细讲解解题思路,并附上 Python 代码实…...

2025年02月21日Github流行趋势
项目名称:source-sdk-2013 项目地址url:https://github.com/ValveSoftware/source-sdk-2013项目语言:C历史star数:7343今日star数:929项目维护者:JoeLudwig, jorgenpt, narendraumate, sortie, alanedwarde…...

WebXR教学 03 项目1 旋转彩色方块
一、项目结构 webgl-cube/ ├── index.html ├── main.js ├── package.json └── vite.config.js二、详细实现步骤 初始化项目 npm init -y npm install three vite --save-devindex.html <!DOCTYPE html> <html lang"en"> <head><…...

深入解析JVM垃圾回收机制
1 引言 本节常见面试题 如何判断对象是否死亡(两种方法)。简单的介绍一下强引用、软引用、弱引用、虚引用(虚引用与软引用和弱引用的区别、使用软引用能带来的好处)。如何判断一个常量是废弃常量如何判断一个类是无用的类垃圾收…...

【简单】209.长度最小的子数组
题目描述 给定一个含有 n 个正整数的数组和一个正整数 target 。 找出该数组中满足其总和大于等于 target 的长度最小的 子数组 [numsl, numsl1, …, numsr-1, numsr] ,并返回其长度。如果不存在符合条件的子数组,返回0。 示例 1: 输入&am…...

细说 Java 引用(强、软、弱、虚)和 GC 流程(二)
一、前文回顾 在 细说Java 引用(强、软、弱、虚)和 GC 流程(一) 我们对Java 引用有了总体的认识,本文将继续深入分析 Java 引用在 GC 时的一些细节。 还是从我们在前文中提到的引用流程图里说起,这里不清…...

CSS通过webkit-scrollbar设置滚动条样式
查看::-webkit-scrollbar-*各项关系 以下图为例,可以分别定义滚动条背景、滚动轨道、滚动滑块的样式。 需要先给外部容器设置高度,再设置overflow: auto,最后设置三个webkit属性。 <!DOCTYPE html> <html lang"en">…...

Win10配置VSCode的C/C++编译环境
GNU(编译器工具集合)包含了g、gcc和gdb等编译器。MinGW(Minimalist GNU for Windows)是一个适用于Windows操作系统的最小化的GNU工具集,它包括了GCC编译器(包括g)以及其他一些必要的库和工具。M…...
查找-排序)
数据结构与算法再探(七)查找-排序
查找 一、二分查找 二分查找是一种高效的查找算法,适用于在已排序的数组或列表中查找特定元素。它通过将搜索范围逐步减半来快速定位目标元素。理解二分查找的“不变量”和选择左开右闭区间的方式是掌握这个算法的关键。 二分查找关键点 不变量 在二分查找中&a…...

【C语言】指针(5)
前言:上篇文章的末尾我们使用了转移表来解决代码冗余的问题,那我们还有没有什么办法解决代码冗余呢?有的这就是接下来要说的回调函数。 往期文章: 指针1 指针2 指针3 指针4 文章目录 一,回调函数二,qsort实现快速排序1…...

大数据组件(四)快速入门实时数据湖存储系统Apache Paimon(2)
Paimon的下载及安装,并且了解了主键表的引擎以及changelog-producer的含义参考: 大数据组件(四)快速入门实时数据湖存储系统Apache Paimon(1) 利用Paimon表做lookup join,集成mysql cdc等参考: 大数据组件(四)快速入门实时数据…...

PLC通讯
PPI通讯 是西门子公司专为s7-200系列plc开发的通讯协议。内置于s7-200 CPU中。PPI协议物理上基于RS-485口,通过屏蔽双绞线就可以实现PPI通讯。PPI协议是一种主-从协议。主站设备发送要求到从站设备,从站设备响应,从站不能主动发出信息。主站…...

前端js进阶,ES6语法,包详细
进阶ES6 作用域的概念加深对js理解 let、const申明的变量,在花括号中会生成块作用域,而var就不会生成块作用域 作用域链本质上就是底层的变量查找机制 作用域链查找的规则是:优先查找当前作用域先把的变量,再依次逐级找父级作用域直到全局…...

Scrum方法论指导下的Deepseek R1医疗AI部署开发
一、引言 1.1 研究背景与意义 在当今数智化时代,软件开发方法论对于项目的成功实施起着举足轻重的作用。Scrum 作为一种广泛应用的敏捷开发方法论,以其迭代式开发、快速反馈和高效协作的特点,在软件开发领域占据了重要地位。自 20 世纪 90 …...

LINUX安装使用Redis
参考 Install Redis on Linux | Docs 安装命令 sudo apt-get install -y lsb-release curl gpgcurl -fsSL https://packages.redis.io/gpg | sudo gpg --dearmor -o /usr/share/keyrings/redis-archive-keyring.gpgsudo chmod 644 /usr/share/keyrings/redis-archive-keyrin…...

基于java新闻管理系统,推荐一款开源cms内容管理系统ruoyi-fast-cms
一、项目概述 1.1 项目背景 在信息高速流通的当下,新闻媒体行业每天都要处理和传播海量信息。传统的新闻管理模式依赖人工操作,在新闻采集、编辑、发布以及后续管理等环节中,不仅效率低下,而且容易出现人为失误。同时࿰…...
wordpress后台更新后 前端没变化的解决方法
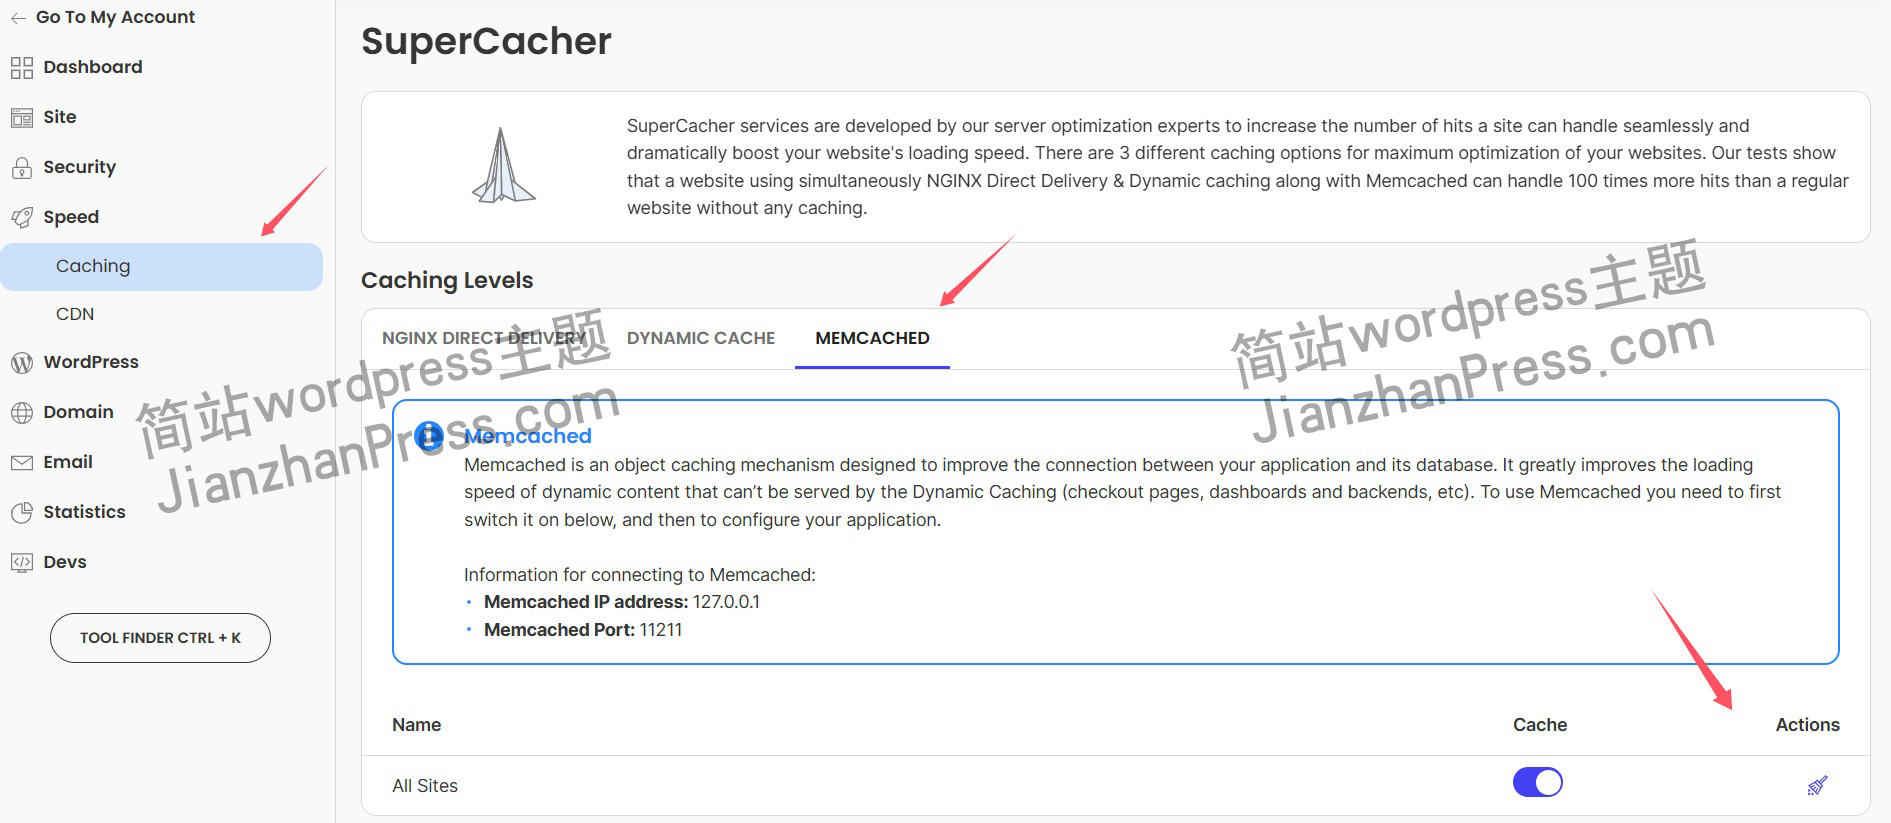
使用siteground主机的wordpress网站,会出现更新了网站内容和修改了php模板文件、js文件、css文件、图片文件后,网站没有变化的情况。 不熟悉siteground主机的新手,遇到这个问题,就很抓狂,明明是哪都没操作错误&#x…...
XML Group端口详解
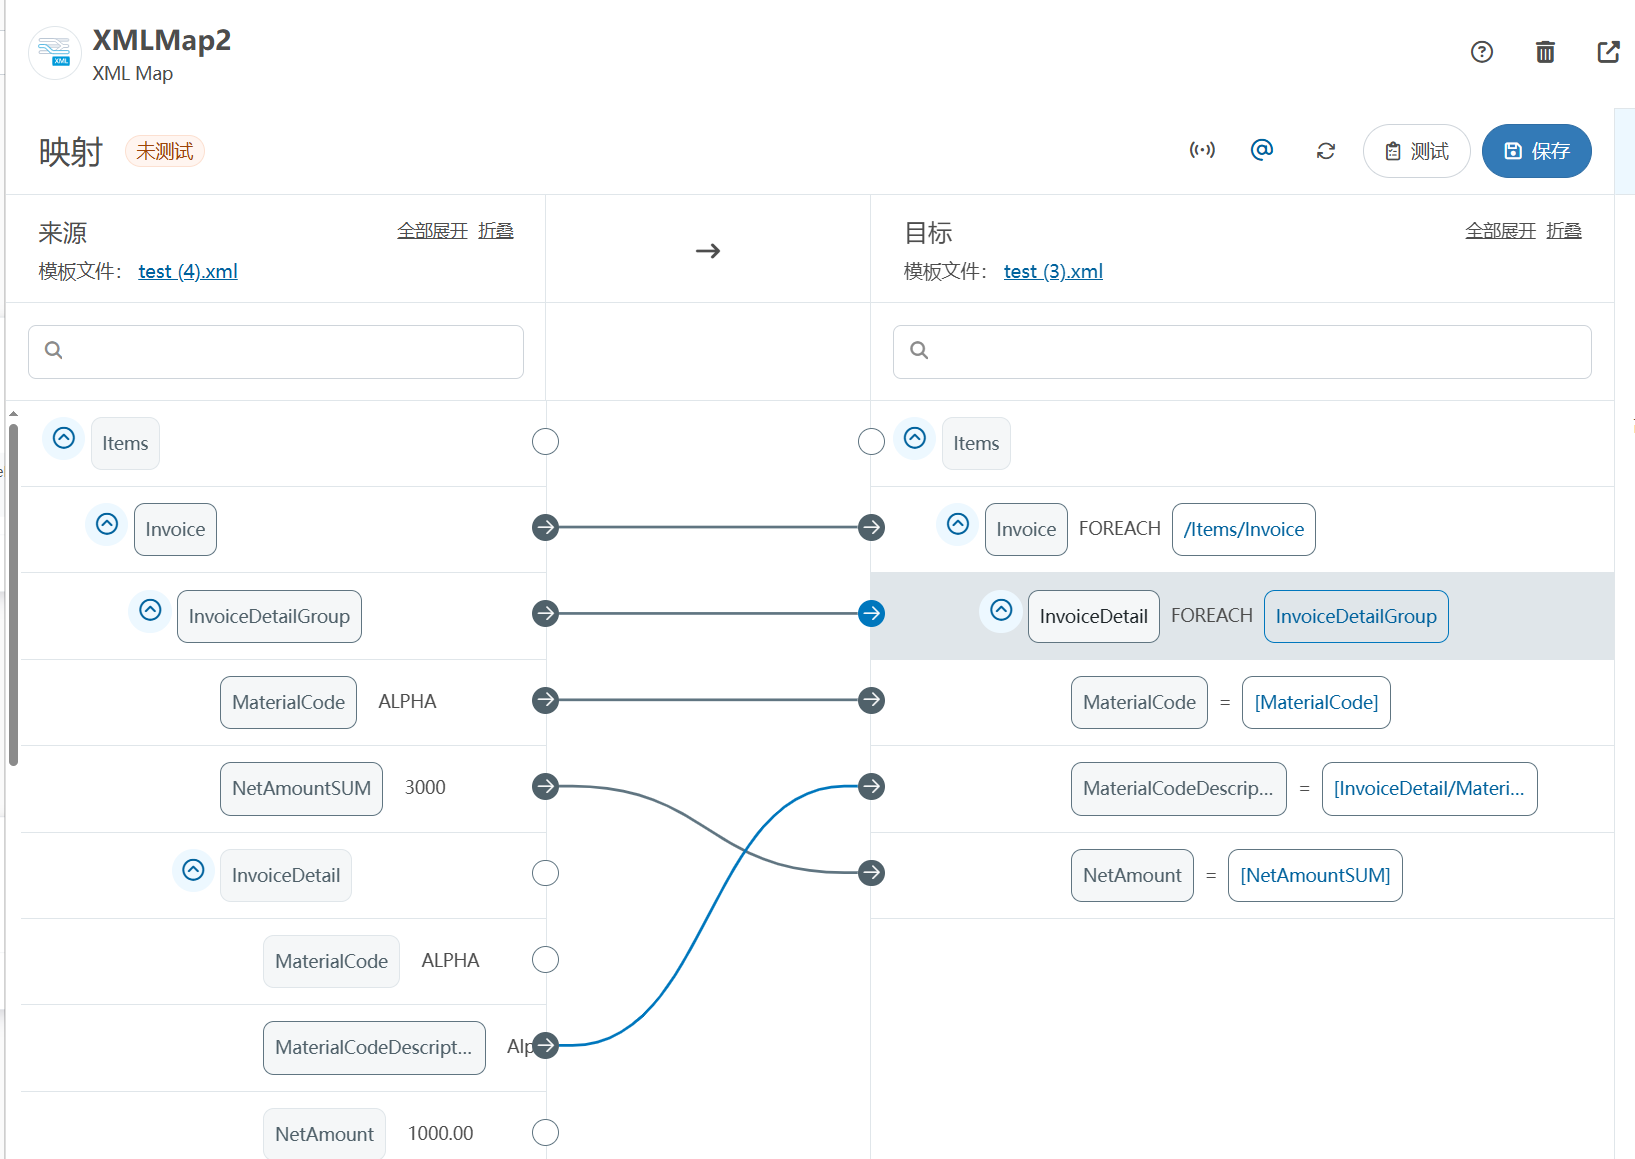
在XML数据映射过程中,经常需要对数据进行分组聚合操作。例如,当处理包含多个物料明细的XML文件时,可能需要将相同物料号的明细归为一组,或对相同物料号的数量进行求和计算。传统实现方式通常需要编写脚本代码,增加了开…...

龙虎榜——20250610
上证指数放量收阴线,个股多数下跌,盘中受消息影响大幅波动。 深证指数放量收阴线形成顶分型,指数短线有调整的需求,大概需要一两天。 2025年6月10日龙虎榜行业方向分析 1. 金融科技 代表标的:御银股份、雄帝科技 驱动…...
家政维修平台实战20:权限设计
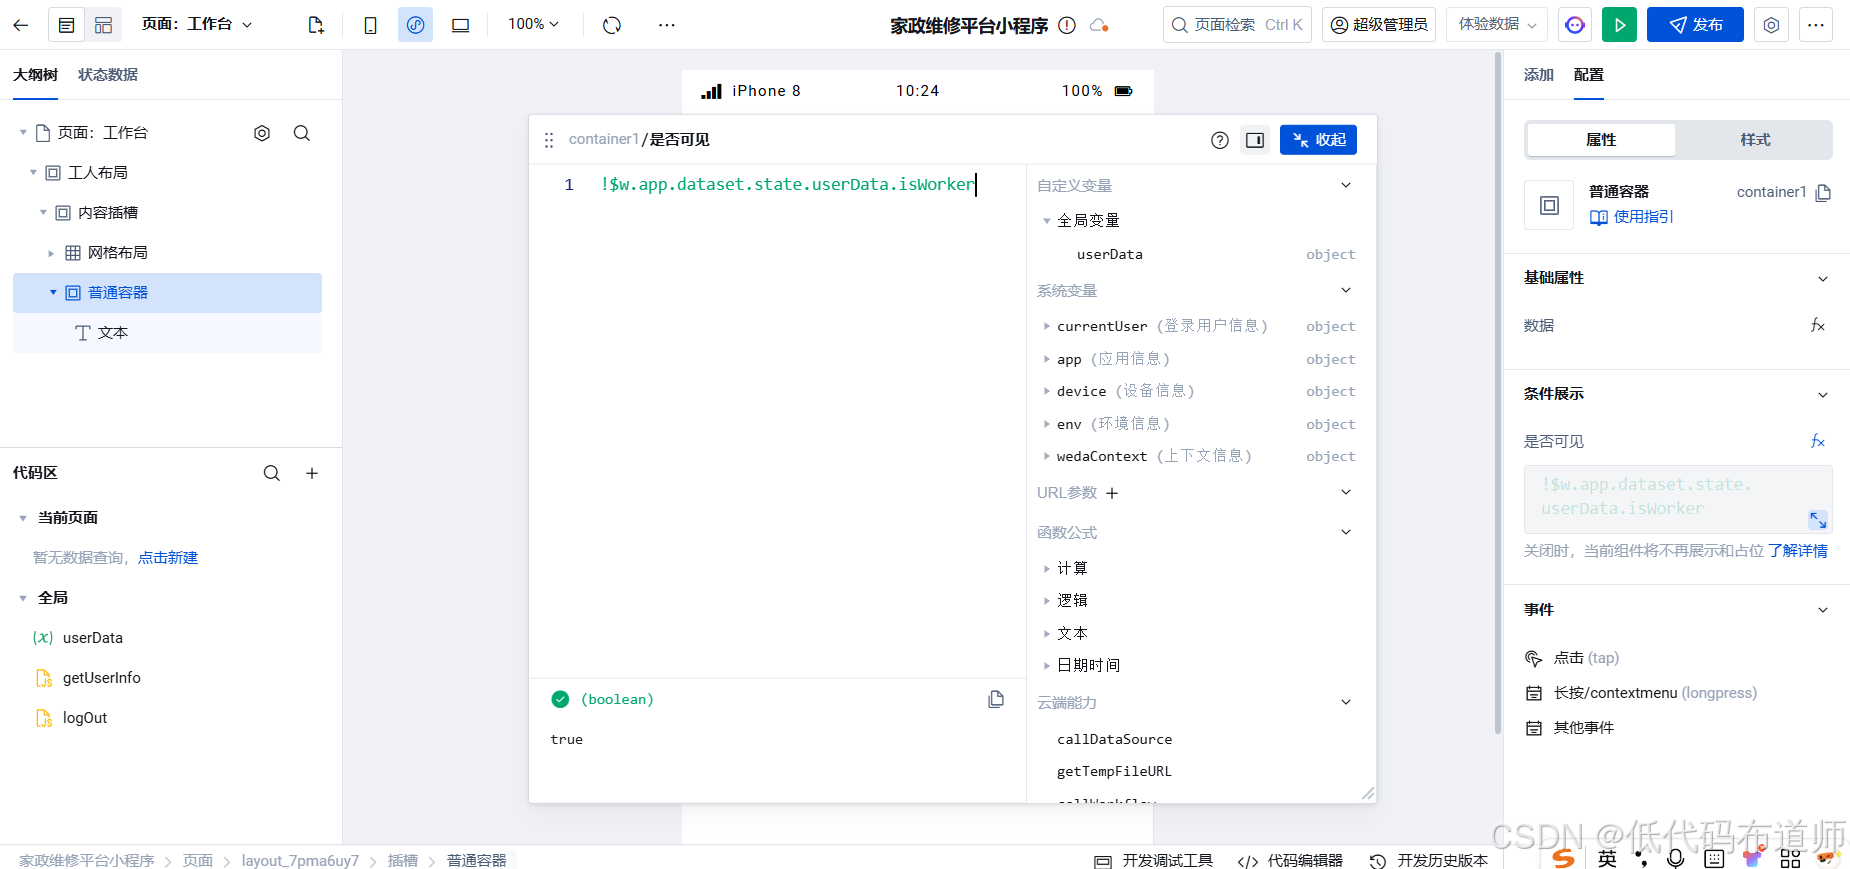
目录 1 获取工人信息2 搭建工人入口3 权限判断总结 目前我们已经搭建好了基础的用户体系,主要是分成几个表,用户表我们是记录用户的基础信息,包括手机、昵称、头像。而工人和员工各有各的表。那么就有一个问题,不同的角色…...
什么是库存周转?如何用进销存系统提高库存周转率?
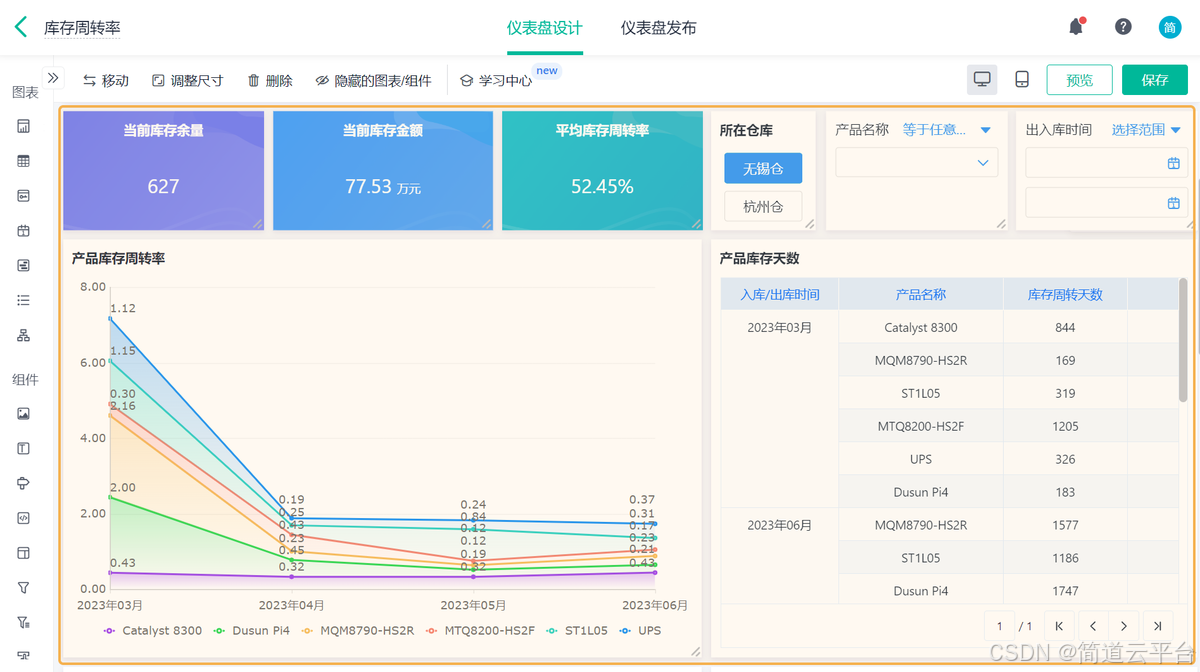
你可能听说过这样一句话: “利润不是赚出来的,是管出来的。” 尤其是在制造业、批发零售、电商这类“货堆成山”的行业,很多企业看着销售不错,账上却没钱、利润也不见了,一翻库存才发现: 一堆卖不动的旧货…...
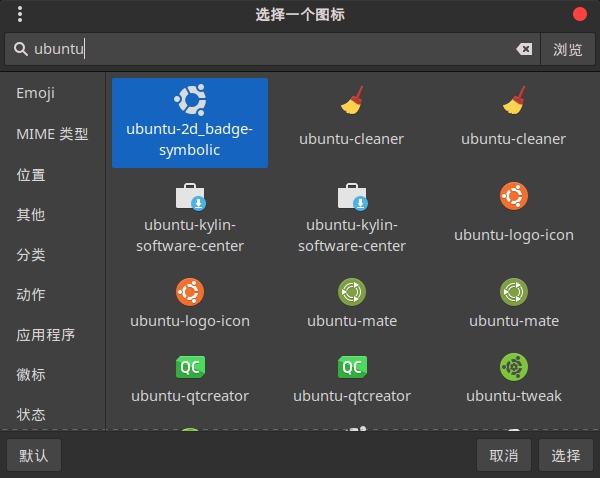
Cinnamon修改面板小工具图标
Cinnamon开始菜单-CSDN博客 设置模块都是做好的,比GNOME简单得多! 在 applet.js 里增加 const Settings imports.ui.settings;this.settings new Settings.AppletSettings(this, HTYMenusonichy, instance_id); this.settings.bind(menu-icon, menu…...
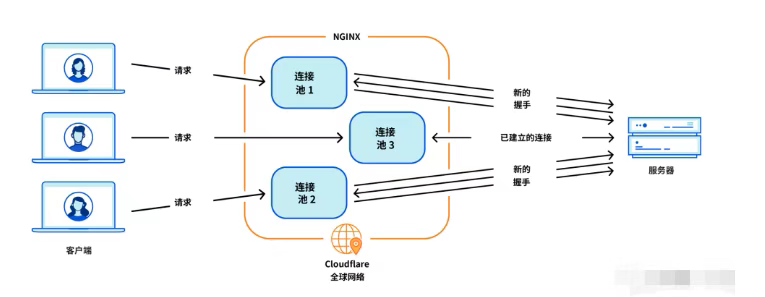
Cloudflare 从 Nginx 到 Pingora:性能、效率与安全的全面升级
在互联网的快速发展中,高性能、高效率和高安全性的网络服务成为了各大互联网基础设施提供商的核心追求。Cloudflare 作为全球领先的互联网安全和基础设施公司,近期做出了一个重大技术决策:弃用长期使用的 Nginx,转而采用其内部开发…...
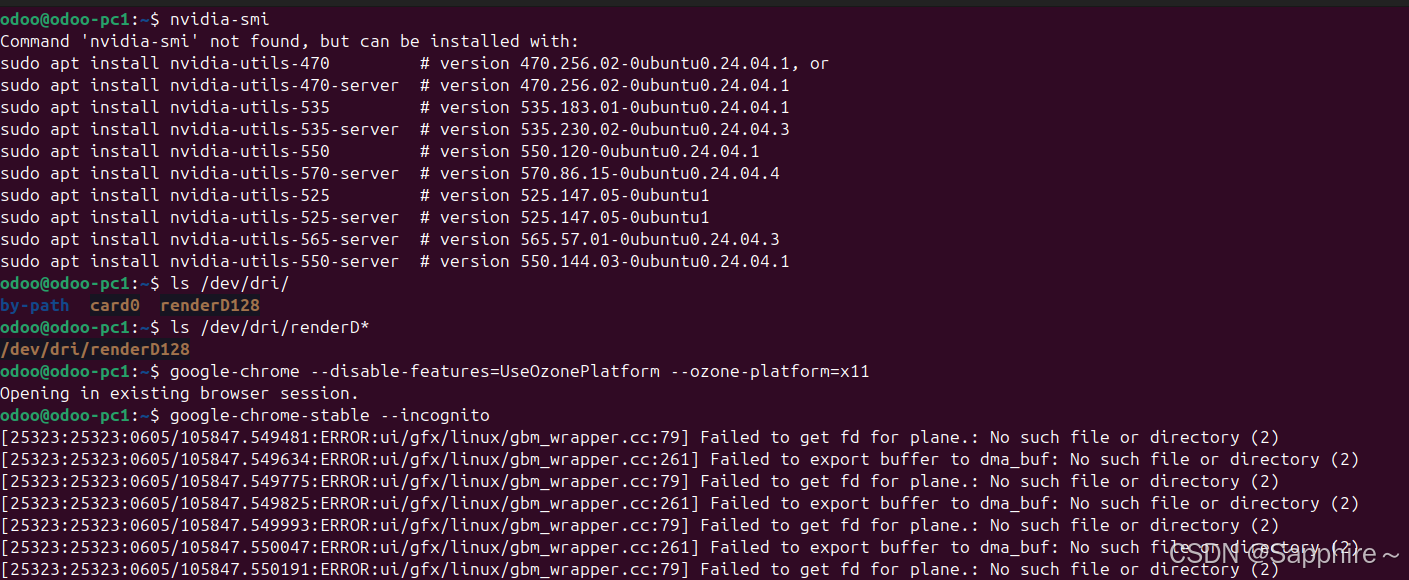
Linux-07 ubuntu 的 chrome 启动不了
文章目录 问题原因解决步骤一、卸载旧版chrome二、重新安装chorme三、启动不了,报错如下四、启动不了,解决如下 总结 问题原因 在应用中可以看到chrome,但是打不开(说明:原来的ubuntu系统出问题了,这个是备用的硬盘&a…...

Java多线程实现之Thread类深度解析
Java多线程实现之Thread类深度解析 一、多线程基础概念1.1 什么是线程1.2 多线程的优势1.3 Java多线程模型 二、Thread类的基本结构与构造函数2.1 Thread类的继承关系2.2 构造函数 三、创建和启动线程3.1 继承Thread类创建线程3.2 实现Runnable接口创建线程 四、Thread类的核心…...
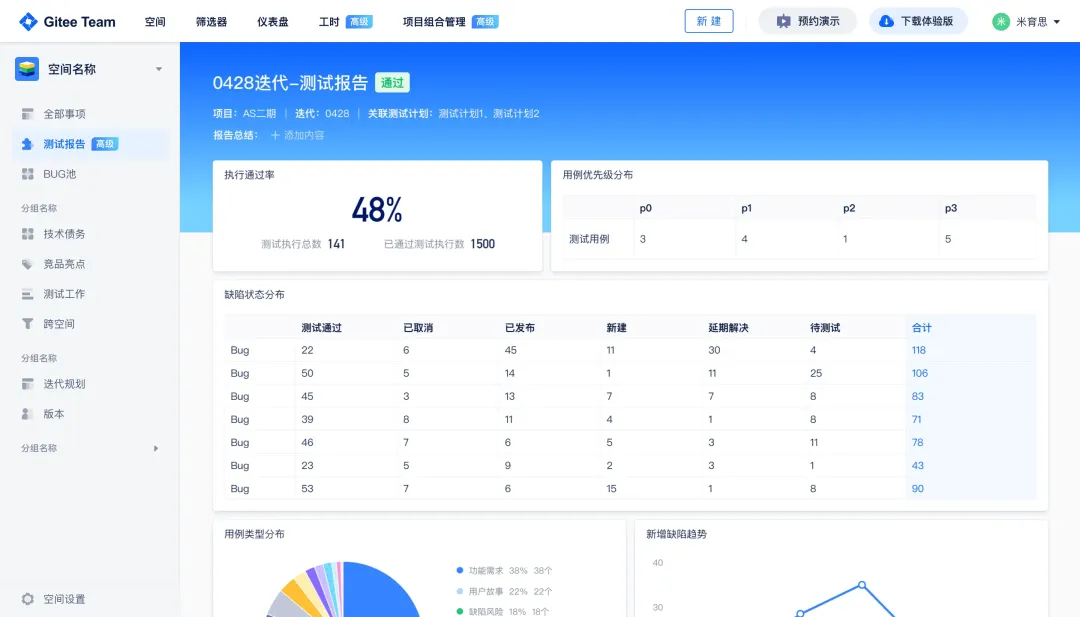
关键领域软件测试的突围之路:如何破解安全与效率的平衡难题
在数字化浪潮席卷全球的今天,软件系统已成为国家关键领域的核心战斗力。不同于普通商业软件,这些承载着国家安全使命的软件系统面临着前所未有的质量挑战——如何在确保绝对安全的前提下,实现高效测试与快速迭代?这一命题正考验着…...
