Android 自定义View 之 简易输入框
简易输入框
- 前言
- 正文
- ① 构造方法
- ② XML样式
- ③ 测量
- ④ 绘制
- 1. 绘制方框
- 2. 绘制文字
- ⑤ 输入
- 1. 键盘布局
- 2. 键盘接口
- 3. 键盘弹窗
- 4. 显示键盘
- 5. 相关API
- 四、使用自定义View
- 五、源码
前言
在日常工作开发中,我们时长会遇到各种各样的需求,不部分需求是可以通过Android 原生的View来解决,而有一些是无法解决的,这时候我们就需要自定义View,我们先来看看本文中这个自定义View的演示效果图。

正文
依然在EasyView中进行创建,在com.easy.view下新建一个EasyEditText,继承自View ,实现里面的构造方法。
① 构造方法
然后我们继承自View,重写里面的构造方法,代码如下:
public class EasyEditText extends View implements NumberKeyboardListener {private Context mContext;public EasyEditText(Context context) {this(context, null);}public EasyEditText(Context context, @Nullable AttributeSet attrs) {this(context, attrs, 0);}public EasyEditText(Context context, @Nullable AttributeSet attrs, int defStyleAttr) {super(context, attrs, defStyleAttr);mContext = context;}
}
下面就可以增加样式了。
② XML样式
在设置样式之前需要先知道我们的自定义View要做什么,这是一个简易输入框,可以用来做验证码输入或者密码输入,输入框4~6个,主要就是数字输入,在attrs.xml文件中,里面我们可以写自定义的样式,代码如下所示:
<!--简易输入框--><declare-styleable name="EasyEditText"><!-- 方框大小,宽高一致 --><attr name="boxWidth" /><!-- 方框背景颜色 --><attr name="boxBackgroundColor" /><!-- 方框描边颜色 --><attr name="boxStrokeColor" /><!-- 方框焦点描边颜色 --><attr name="boxFocusStrokeColor" format="color|reference"/><!-- 方框描边宽度 --><attr name="boxStrokeWidth" /><!--文字颜色--><attr name="textColor" /><!--文字大小--><attr name="textSize" /><!-- 方框数量 4-6 个--><attr name="boxNum" format="integer"/><!--是否密文--><attr name="ciphertext" format="boolean"/></declare-styleable>
因为在此之前我还有三个View的样式,所以重复的样式就抽离了出来,可以参见源码了解。
下面我们回到View中去使用,先声明变量,代码如下:
/*** 方框大小,因为它是相同的宽度和高度,它只需要一个值*/private int mBoxWidth;/*** 方框背景颜色*/private int mBoxBackgroundColor;/*** 方框默认描边颜色*/private int mBoxStrokeColor;/*** 方框获取焦点描点颜色*/private int mBoxFocusStrokeColor;/*** 方框描边大小*/private final int mBoxStrokeWidth;/*** 文字颜色*/private int mTextColor;/*** 文字大小*/private float mTextSize;/*** 方框数量,最少4个 - 最多6个*/private int mBoxNum;/*** 方框之间的间距*/private int mBoxMargin = 4;/*** 方框画笔*/private Paint mBoxPaint;/*** 方框描边画笔*/private Paint mBoxStrokePaint;/*** 文字画笔*/private Paint mTextPaint;/*** 文字矩形*/private final Rect mTextRect = new Rect();/*** 方框圆角*/private float mBoxCornerRadius = 8f;/*** 描边圆角*/private float strokeRadius;/*** 输入长度*/private final int mInputLength;/*** 输入数组*/private final String[] inputArray;/*** 当前输入位置*/private int currentInputPosition = 0;/*** 焦点边框列表*/private final List<RectF> focusList = new ArrayList<>();/*** 是否获取焦点*/private boolean isFocus = false;/*** 是否密文显示*/private boolean ciphertext = false;/*** 密文显示 **/private String ciphertextContent = "*";
然后修改第三个构造函数,代码如下所示:
public EasyEditText(Context context, @Nullable AttributeSet attrs, int defStyleAttr) {super(context, attrs, defStyleAttr);mContext = context;@SuppressLint("CustomViewStyleable")TypedArray typedArray = context.obtainStyledAttributes(attrs, R.styleable.EasyEditText);mBoxWidth = (int) typedArray.getDimensionPixelSize(R.styleable.EasyEditText_boxWidth, 48);mBoxBackgroundColor = typedArray.getColor(R.styleable.EasyEditText_boxBackgroundColor, ContextCompat.getColor(context, R.color.white));mBoxStrokeColor = typedArray.getColor(R.styleable.EasyEditText_boxStrokeColor, ContextCompat.getColor(context, R.color.box_default_stroke_color));mBoxFocusStrokeColor = typedArray.getColor(R.styleable.EasyEditText_boxFocusStrokeColor, ContextCompat.getColor(context, R.color.box_default_stroke_color));mBoxStrokeWidth = (int) typedArray.getDimensionPixelSize(R.styleable.EasyEditText_boxStrokeWidth, 2);mTextColor = typedArray.getColor(R.styleable.EasyEditText_textColor, ContextCompat.getColor(context, R.color.tx_default_color));mTextSize = typedArray.getDimensionPixelSize(R.styleable.EasyEditText_textSize, (int) TypedValue.applyDimension(TypedValue.COMPLEX_UNIT_SP, 14, getResources().getDisplayMetrics()));int number = typedArray.getInteger(R.styleable.EasyEditText_boxNum, 4);ciphertext = typedArray.getBoolean(R.styleable.EasyEditText_ciphertext, false);mBoxNum = (number > 6 || number < 4) ? 4 : number;mInputLength = mBoxNum;inputArray = new String[mInputLength];typedArray.recycle();//初始化画笔initPaint();}
这里通过EasyEditText得到TypedArray,通过TypedArray获取EasyEditText中的属性,然后进行赋值,需要注意的是这里对于输入框的大小处理,输入框个数就是输入的长度,然后初始化画笔,新增initPaint()方法,代码如下:
private void initPaint() {//设置边框画笔mBoxPaint = new Paint();mBoxPaint.setAntiAlias(true);// anti-aliasingmBoxPaint.setColor(mBoxBackgroundColor);//Set colormBoxPaint.setStyle(Paint.Style.FILL);//Style filling//设置描边画笔mBoxStrokePaint = new Paint();mBoxStrokePaint.setAntiAlias(true);mBoxStrokePaint.setColor(mBoxStrokeColor);mBoxStrokePaint.setStyle(Paint.Style.STROKE);//Style strokemBoxStrokePaint.setStrokeWidth(mBoxStrokeWidth);//Stroke width//设置文字画笔mTextPaint = new Paint();mTextPaint.setAntiAlias(true);mTextPaint.setStyle(Paint.Style.FILL);mTextPaint.setColor(mTextColor);mTextPaint.setTextSize(mTextSize);//Text sizemTextPaint.setTextAlign(Paint.Align.CENTER);//Center the text}
③ 测量
我们通过变量和属性得知了方框个数,和方框间的间距,然后我们重写onMeasure()方法,代码如下:
/*** View的测量** @param widthMeasureSpec 宽度测量* @param heightMeasureSpec 高度测量*/@Overrideprotected void onMeasure(int widthMeasureSpec, int heightMeasureSpec) {super.onMeasure(widthMeasureSpec, heightMeasureSpec);int width = 0;int margin = EasyUtils.dp2px(mContext, mBoxMargin);switch (MeasureSpec.getMode(widthMeasureSpec)) {case MeasureSpec.UNSPECIFIED:case MeasureSpec.AT_MOST: //wrap_contentwidth = mBoxWidth * mBoxNum + margin * (mBoxNum - 1);break;case MeasureSpec.EXACTLY: //match_parentwidth = MeasureSpec.getSize(widthMeasureSpec);mBoxWidth = (width - margin * (mBoxNum - 1)) / mBoxNum;break;}//设置测量后的值setMeasuredDimension(width, mBoxWidth);}
④ 绘制
测量好了之后,下面就可以开始绘制了,绘制就相当于在纸上画画,而画画呢,首先要有画笔,首先声明变量,代码如下:
private Paint mBoxPaint;private Paint mBoxStrokePaint;private Paint mTextPaint;private final Rect mTextRect = new Rect();
然后我们需要对3个画笔(方框、方框边框、文字)进行设置,因为绘制文字稍微有一些不同,所以加了一个Rect,下面我们在View中新增一个初始化画笔的方法,代码如下所示:
/*** 初始化画笔*/private void initPaint() {//设置方框画笔mBoxPaint = new Paint();mBoxPaint.setAntiAlias(true);// 抗锯齿mBoxPaint.setColor(mBoxBackgroundColor);//设置颜色mBoxPaint.setStyle(Paint.Style.FILL);//风格填满//设置方框描边画笔mBoxStrokePaint = new Paint();mBoxStrokePaint.setAntiAlias(true);mBoxStrokePaint.setColor(mBoxStrokeColor);mBoxStrokePaint.setStyle(Paint.Style.STROKE);//风格描边mBoxStrokePaint.setStrokeWidth(mBoxStrokeWidth);//描边宽度//设置文字画笔mTextPaint = new Paint();mTextPaint.setAntiAlias(true);mTextPaint.setStyle(Paint.Style.FILL);mTextPaint.setColor(mTextColor);mTextPaint.setTextSize(mTextSize);//文字大小mTextPaint.setTextAlign(Paint.Align.CENTER);//文字居中对齐}
然后在第三个构造方法中去调用,如下图所示:

下面要进行绘制了。
@Overrideprotected void onDraw(Canvas canvas) {//绘制边框drawBox(canvas);//绘制文字drawText(canvas);}
这里绘制分为两步,绘制方框和绘制文字。
1. 绘制方框
首先是绘制方框,在自定义View中新增一个drawBox()方法,代码如下:
/*** 绘制方框*/private void drawBox(Canvas canvas) {//每个方框的间距int margin = EasyUtils.dp2px(mContext, mBoxMargin);int radius = EasyUtils.dp2px(mContext, mBoxCornerRadius);//Draw a rounded rectangle borderfloat strokeWidth = mBoxStrokeWidth / 2;for (int i = 0; i < mBoxNum; i++) {//To draw a rectangular box, you need the positions of the left, top, right and bottom pointsfloat left = i * mBoxWidth + i * margin;float top = 0f;float right = (i + 1) * mBoxWidth + i * margin;float bottom = mBoxWidth;RectF rectF = new RectF(left, top, right, bottom);//画一个圆角矩形框canvas.drawRoundRect(rectF, radius, radius, mBoxPaint);RectF strokeRectF = new RectF(left + strokeWidth, top + strokeWidth, right - strokeWidth, bottom - strokeWidth);//添加到列表focusList.add(strokeRectF);}for (int i = 0; i < mBoxNum; i++) {strokeRadius = radius - strokeWidth;//根据当前绘制位置和是否获取焦点设置画笔颜色if (i <= currentInputPosition && isFocus) {mBoxStrokePaint.setColor(mBoxFocusStrokeColor);} else {mBoxStrokePaint.setColor(mBoxStrokeColor);}//绘制边框canvas.drawRoundRect(focusList.get(i), strokeRadius, strokeRadius, mBoxStrokePaint);}}
这里首先绘制圆角背景,然后通过绘制背景的参数得到绘制的边框,将边框保存起来,再根据当前绘制位置和是否获取焦点设置画笔颜色,这样就可以实现当前输入框的颜色变化,比如我没有输入的时候是黑色边框,当我输入第一个值的时候,第一个输入框的边框颜色变成绿色,输入完第一个,第二个框的边框变成绿色,表示你应该输入第二个框了,这样可以友好的提示用户。
2. 绘制文字
现在方框有了,而文字绘制我们需要绘制在方框的中间,自定义View中新增一个drawText()方法。
/*** 绘制文字*/private void drawText(Canvas canvas) {int boxMargin = EasyUtils.dp2px(mContext, mBoxMargin);for (int i = 0; i < inputArray.length; i++) {if (inputArray[i] != null) {//绘制的文字String content = ciphertext ? ciphertextContent : inputArray[i];//获取绘制的文字边界mTextPaint.getTextBounds(content, 0, content.length(), mTextRect);//绘制的位置int offset = (mTextRect.top + mTextRect.bottom) / 2;//绘制文字,需要确定起始点的X、Y的坐标点float x = (float) (getPaddingLeft() + mBoxWidth * i + boxMargin * i + mBoxWidth / 2);float y = (float) (getPaddingTop() + mBoxWidth / 2) - offset;//绘制文字canvas.drawText(content, x, y, mTextPaint);}}}
绘制文字和之前的MacAddressEditText中的操作差不多,我就不重复说了,下面我们来看输入。
⑤ 输入
绘制的处理已经完成了,简易地址输入框我们之前说了只输入数字,输入的数据就是:0、1、2、3、4、5、6、7、8、9,那么为了方便,我打算自己做一个键盘来进行输入。
1. 键盘布局
首先在layout下创建一个lay_number_keyboard.xml,用于作为键盘的布局,代码如下所示:
<?xml version="1.0" encoding="utf-8"?>
<androidx.constraintlayout.widget.ConstraintLayout xmlns:android="http://schemas.android.com/apk/res/android"xmlns:app="http://schemas.android.com/apk/res-auto"android:layout_width="match_parent"android:layout_height="wrap_content"android:background="#eff4f9"><Buttonandroid:id="@+id/btn_1"android:layout_width="0dp"android:layout_height="48dp"android:layout_marginStart="8dp"android:layout_marginLeft="8dp"android:layout_marginTop="8dp"android:backgroundTint="@color/key_bg_color"android:insetTop="0dp"android:insetBottom="0dp"android:text="@string/num_1"android:textColor="@color/key_tx_color"android:textSize="16sp"app:layout_constraintEnd_toStartOf="@+id/btn_2"app:layout_constraintHorizontal_bias="0.5"app:layout_constraintStart_toStartOf="parent"app:layout_constraintTop_toTopOf="parent" /><Buttonandroid:id="@+id/btn_2"android:layout_width="0dp"android:layout_height="48dp"android:layout_marginStart="4dp"android:layout_marginLeft="4dp"android:backgroundTint="@color/key_bg_color"android:insetTop="0dp"android:insetBottom="0dp"android:text="@string/num_2"android:textColor="@color/key_tx_color"android:textSize="16sp"app:layout_constraintEnd_toStartOf="@+id/btn_3"app:layout_constraintHorizontal_bias="0.5"app:layout_constraintStart_toEndOf="@+id/btn_1"app:layout_constraintTop_toTopOf="@+id/btn_1" /><Buttonandroid:id="@+id/btn_3"android:layout_width="0dp"android:layout_height="48dp"android:layout_marginStart="4dp"android:layout_marginLeft="4dp"android:layout_marginEnd="8dp"android:layout_marginRight="8dp"android:backgroundTint="@color/key_bg_color"android:insetTop="0dp"android:insetBottom="0dp"android:text="@string/num_3"android:textColor="@color/key_tx_color"android:textSize="16sp"app:layout_constraintEnd_toEndOf="parent"app:layout_constraintHorizontal_bias="0.5"app:layout_constraintStart_toEndOf="@+id/btn_2"app:layout_constraintTop_toTopOf="@+id/btn_2" /><Buttonandroid:id="@+id/btn_4"android:layout_width="0dp"android:layout_height="48dp"android:layout_marginTop="4dp"android:backgroundTint="@color/key_bg_color"android:insetTop="0dp"android:insetBottom="0dp"android:text="@string/num_4"android:textColor="@color/key_tx_color"android:textSize="16sp"app:layout_constraintEnd_toStartOf="@+id/btn_5"app:layout_constraintHorizontal_bias="0.5"app:layout_constraintStart_toStartOf="@+id/btn_1"app:layout_constraintTop_toBottomOf="@+id/btn_1" /><Buttonandroid:id="@+id/btn_5"android:layout_width="0dp"android:layout_height="48dp"android:layout_marginStart="4dp"android:layout_marginLeft="4dp"android:backgroundTint="@color/key_bg_color"android:insetTop="0dp"android:insetBottom="0dp"android:text="@string/num_5"android:textColor="@color/key_tx_color"android:textSize="16sp"app:layout_constraintEnd_toStartOf="@+id/btn_6"app:layout_constraintHorizontal_bias="0.5"app:layout_constraintStart_toEndOf="@+id/btn_4"app:layout_constraintTop_toTopOf="@+id/btn_4" /><Buttonandroid:id="@+id/btn_6"android:layout_width="0dp"android:layout_height="48dp"android:layout_marginStart="4dp"android:layout_marginLeft="4dp"android:layout_marginEnd="8dp"android:layout_marginRight="8dp"android:backgroundTint="@color/key_bg_color"android:insetTop="0dp"android:insetBottom="0dp"android:text="@string/num_6"android:textColor="@color/key_tx_color"android:textSize="16sp"app:layout_constraintEnd_toEndOf="parent"app:layout_constraintHorizontal_bias="0.5"app:layout_constraintStart_toEndOf="@+id/btn_5"app:layout_constraintTop_toTopOf="@+id/btn_5" /><Buttonandroid:id="@+id/btn_7"android:layout_width="0dp"android:layout_height="48dp"android:layout_marginTop="4dp"android:backgroundTint="@color/key_bg_color"android:insetTop="0dp"android:insetBottom="0dp"android:text="@string/num_7"android:textColor="@color/key_tx_color"android:textSize="16sp"app:layout_constraintEnd_toStartOf="@+id/btn_8"app:layout_constraintHorizontal_bias="0.5"app:layout_constraintStart_toStartOf="@+id/btn_4"app:layout_constraintTop_toBottomOf="@+id/btn_4" /><Buttonandroid:id="@+id/btn_8"android:layout_width="0dp"android:layout_height="48dp"android:layout_marginStart="4dp"android:layout_marginLeft="4dp"android:backgroundTint="@color/key_bg_color"android:insetTop="0dp"android:insetBottom="0dp"android:text="@string/num_8"android:textColor="@color/key_tx_color"android:textSize="16sp"app:layout_constraintEnd_toStartOf="@+id/btn_9"app:layout_constraintHorizontal_bias="0.5"app:layout_constraintStart_toEndOf="@+id/btn_7"app:layout_constraintTop_toTopOf="@+id/btn_7" /><Buttonandroid:id="@+id/btn_9"android:layout_width="0dp"android:layout_height="48dp"android:layout_marginStart="4dp"android:layout_marginLeft="4dp"android:backgroundTint="@color/key_bg_color"android:insetTop="0dp"android:insetBottom="0dp"android:text="@string/num_9"android:textColor="@color/key_tx_color"android:textSize="16sp"app:layout_constraintEnd_toEndOf="@+id/btn_6"app:layout_constraintHorizontal_bias="0.5"app:layout_constraintStart_toEndOf="@+id/btn_8"app:layout_constraintTop_toTopOf="@+id/btn_8" /><Buttonandroid:id="@+id/btn_del"android:layout_width="0dp"android:layout_height="48dp"android:layout_marginTop="4dp"android:layout_marginBottom="8dp"android:backgroundTint="@color/key_bg_color"android:insetTop="0dp"android:insetBottom="0dp"android:text="@string/delete"android:textColor="@color/key_tx_color"android:textSize="16sp"app:layout_constraintBottom_toBottomOf="parent"app:layout_constraintEnd_toStartOf="@+id/btn_0"app:layout_constraintHorizontal_bias="0.5"app:layout_constraintStart_toStartOf="@+id/btn_7"app:layout_constraintTop_toBottomOf="@+id/btn_7" /><Buttonandroid:id="@+id/btn_0"android:layout_width="0dp"android:layout_height="48dp"android:layout_marginStart="4dp"android:layout_marginLeft="4dp"android:backgroundTint="@color/key_bg_color"android:insetTop="0dp"android:insetBottom="0dp"android:text="@string/num_0"android:textColor="@color/key_tx_color"android:textSize="16sp"app:layout_constraintEnd_toStartOf="@+id/btn_complete"app:layout_constraintHorizontal_bias="0.5"app:layout_constraintStart_toEndOf="@+id/btn_del"app:layout_constraintTop_toTopOf="@+id/btn_del" /><com.google.android.material.button.MaterialButtonandroid:id="@+id/btn_complete"android:layout_width="0dp"android:layout_height="48dp"android:layout_marginStart="4dp"android:layout_marginLeft="4dp"android:backgroundTint="@color/key_complete_bg_color"android:insetTop="0dp"android:insetBottom="0dp"android:text="@string/complete"android:textColor="@color/white"android:textSize="16sp"app:iconGravity="start|end"app:layout_constraintEnd_toEndOf="@+id/btn_9"app:layout_constraintHorizontal_bias="0.5"app:layout_constraintStart_toEndOf="@+id/btn_0"app:layout_constraintTop_toTopOf="@+id/btn_0" /></androidx.constraintlayout.widget.ConstraintLayout>
布局的预览效果如下图所示:

这个布局从使用上来说就很简单了,基本上一目了然,这里我们可以写一个接口用来处理键盘上按钮点击的事件。
2. 键盘接口
在com.llw.easyview下新建一个NumberKeyboardListener接口,代码如下所示:
public interface NumberKeyboardListener {/*** 数字字符* @param num 0~9*/void onNum(String num);/*** 删除*/void onDelete();/*** 完成*/void onComplete();/*** 弹窗关闭*/void onDialogDismiss();/*** 弹窗显示*/void onDialogShow();
}
现在接口有了,接口中的方法基本上覆盖了键盘上所有按钮点击时触发的事件处理,然后是处理弹窗关闭和显示,为什么要有这个关闭和显示呢,因为要获取是否输入的状态,下面我们来写一个弹窗,用来点击简易输入框时弹出这个键盘。
3. 键盘弹窗
这个弹窗,我就写在EasyUtils类中了,在里面新增如下方法代码:
/*** 显示数字键盘弹窗** @param listener 数字键盘监听*/public static void showNumKeyboardDialog(@NonNull Context context, @NonNull NumberKeyboardListener listener) {BottomSheetDialog dialog = new BottomSheetDialog(context);//从xml中获取布局视图View view = LayoutInflater.from(context).inflate(R.layout.lay_number_keyboard, null, false);//单击按钮触发接口回调view.findViewById(R.id.btn_0).setOnClickListener(v -> listener.onNum("0"));view.findViewById(R.id.btn_1).setOnClickListener(v -> listener.onNum("1"));view.findViewById(R.id.btn_2).setOnClickListener(v -> listener.onNum("2"));view.findViewById(R.id.btn_3).setOnClickListener(v -> listener.onNum("3"));view.findViewById(R.id.btn_4).setOnClickListener(v -> listener.onNum("4"));view.findViewById(R.id.btn_5).setOnClickListener(v -> listener.onNum("5"));view.findViewById(R.id.btn_6).setOnClickListener(v -> listener.onNum("6"));view.findViewById(R.id.btn_7).setOnClickListener(v -> listener.onNum("7"));view.findViewById(R.id.btn_8).setOnClickListener(v -> listener.onNum("8"));view.findViewById(R.id.btn_9).setOnClickListener(v -> listener.onNum("9"));view.findViewById(R.id.btn_del).setOnClickListener(v -> listener.onDelete());view.findViewById(R.id.btn_complete).setOnClickListener(v -> {listener.onComplete();dialog.dismiss();});//点击外面消失dialog.setCancelable(true);//设置内容视图dialog.setContentView(view);if (dialog.getWindow() != null) {//设置弹出窗口背景透明WindowManager.LayoutParams params = dialog.getWindow().getAttributes();params.dimAmount = 0.0f;dialog.getWindow().setAttributes(params);}dialog.setOnShowListener(dialog1 -> listener.onDialogShow());dialog.setOnCancelListener(dialog12 -> listener.onDialogDismiss());dialog.setOnDismissListener(dialog13 -> listener.onDialogDismiss());dialog.show();}
这里就是一个底部弹窗,然后设置布局视图,设置接口回调,设置背景透明,最后显示出来。那么下一步要做的就是点击输入框调用这个弹窗显示键盘。
4. 显示键盘
在View中是可以获取到点击触摸事件的,那么我们可以在自定义View中新增如下代码:
/*** 触摸事件*/@SuppressLint("ClickableViewAccessibility")@Overridepublic boolean onTouchEvent(MotionEvent event) {if (event != null) {if (event.getAction() == MotionEvent.ACTION_DOWN) {//显示数字键盘EasyUtils.showNumKeyboardDialog(mContext, this);return true;}}return super.onTouchEvent(event);}
这里的代码就是当我们的手机点击这个简易输入框的时候,会先触发触摸事件,然后才是点击事件,而在这里我们就是在触摸到的时候显示键盘弹窗,然后返回 true,这里就会进行事件的拦截,这里的这个this,就是我们当前的自定义View需要实现的回调接口,将鼠标放在这个this后面,然后Alt + Enter的组合键,会出现弹窗,如下图所示:
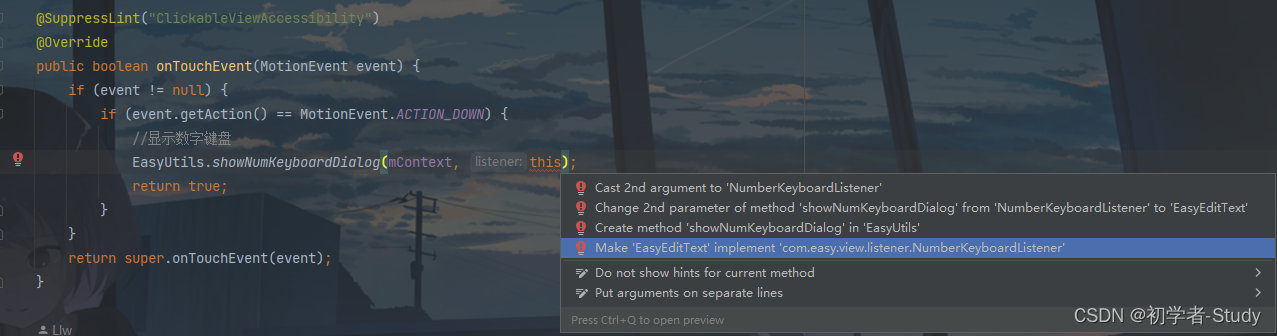
这里点击第四项,会出现一个弹窗,勾选上所有的方法,然后点OK就可以快速实现这个接口的回调,重写接口的方法,你会看到自定义View新增了5个方法,代码如下:
@Overridepublic void onNum(String num) {if (currentInputPosition == mInputLength) return;inputArray[currentInputPosition] = num;currentInputPosition++;//Refresh ViewpostInvalidate();}@Overridepublic void onDelete() {if (currentInputPosition == 0) return;currentInputPosition--;inputArray[currentInputPosition] = null;//Refresh ViewpostInvalidate();}@Overridepublic void onComplete() {Log.d("TAG", "onComplete: " + getText());}@Overridepublic void onDialogShow() {isFocus = true;postInvalidate();}@Overridepublic void onDialogDismiss() {isFocus = false;postInvalidate();} 当调用postInvalidate()方法时会重新进行绘制,则按照之前的逻辑就行了。
5. 相关API
下面再增加几个可供代码调用的API方法,如下所示:
/*** 设置输入框个数*/public void setBoxNum(int num) {if (num < 4 || num > 6) {throw new IllegalArgumentException("The number of input boxes ranges from 4 to 6");}mBoxNum = num;}/*** 获取输入总长度*/public int getBoxNum() {return mBoxNum;}/*** 设置是否密文* @param flag true 密文、false 明文*/public void setCiphertext(boolean flag) {ciphertext = flag;postInvalidate();}/*** 设置密文时显示的内容* @param content 密文内容,默认是 **/public void setCiphertextContent(String content) {if (content == null) return;if (content.isEmpty()) return;if (content.length() > 1) return;ciphertextContent = content;}/*** 获取输入内容*/public String getText() {StringBuilder builder = new StringBuilder();for (String number : inputArray) {if (number == null) continue;if (number.isEmpty()) continue;builder.append(number);}return builder.toString();}四、使用自定义View
关于使用,我在些这个文章的时候这个自定义View已经加入到仓库中了,可以通过引入依赖的方式,例如在app模块中使用,则打开app模块下的build.gradle,在dependencies{}闭包下添加即可,之后记得要Sync Now。
dependencies {implementation 'io.github.lilongweidev:easyview:1.0.3'
}
或者你在自己的项目中完成了刚才上述的所有步骤,那么你就不用引入依赖了,直接调用就好了,不过要注意更改对应的包名,否则会爆红的。
可以使用了,修改activity_easy_edittext.xml中的代码,如下所示:
<?xml version="1.0" encoding="utf-8"?>
<LinearLayout xmlns:android="http://schemas.android.com/apk/res/android"xmlns:app="http://schemas.android.com/apk/res-auto"xmlns:tools="http://schemas.android.com/tools"android:layout_width="match_parent"android:layout_height="match_parent"android:gravity="center"android:orientation="vertical"tools:context=".used.EasyEditTextActivity"><!--简易输入框--><com.easy.view.EasyEditTextandroid:id="@+id/et_content"android:layout_width="wrap_content"android:layout_height="wrap_content"app:boxBackgroundColor="@color/white"app:boxFocusStrokeColor="@color/green"app:boxNum="6"app:boxStrokeColor="@color/black"app:boxStrokeWidth="2dp"app:boxWidth="48dp"app:ciphertext="false"app:textColor="@color/black"app:textSize="16sp" /><CheckBoxandroid:id="@+id/cb_flag"android:layout_width="wrap_content"android:layout_height="wrap_content"android:layout_marginTop="30dp"android:text="明文" /><Buttonandroid:id="@+id/btn_get_content"android:layout_width="wrap_content"android:layout_height="wrap_content"android:layout_marginTop="12dp"android:text="获取内容" />
</LinearLayout>
如果你发现XML预览不了,看不到这个自定义View,就Rebuild Project一下,就能看到了,预览效果如下图所示:

下面进入到EasyEditTextActivity中去使用,修改代码如下所示:
public class EasyEditTextActivity extends EasyActivity<ActivityEasyEdittextBinding> {@Overrideprotected void onCreate() {getSupportActionBar().setDisplayHomeAsUpEnabled(true);binding.cbFlag.setOnCheckedChangeListener((buttonView, isChecked) -> {binding.etContent.setCiphertext(isChecked);binding.cbFlag.setText(isChecked ? "密文" : "明文");});//输入框binding.btnGetContent.setOnClickListener(v -> {String content = binding.etContent.getText();if (content.isEmpty()) {showMsg("请输入内容");return;}if (content.length() < binding.etContent.getBoxNum()) {showMsg("请输入完整内容");return;}showMsg("输入内容为:" + content);});}
}
这里的代码就很简单,获取View,然后点击按钮时获取输入框的值,获取到值显示在按钮上,下面运行测试一下。
五、源码
如果对你有所帮助的话,不妨 Star 或 Fork,山高水长,后会有期~
源码地址:EasyView
相关文章:
Android 自定义View 之 简易输入框
简易输入框 前言正文① 构造方法② XML样式③ 测量④ 绘制1. 绘制方框2. 绘制文字 ⑤ 输入1. 键盘布局2. 键盘接口3. 键盘弹窗4. 显示键盘5. 相关API 四、使用自定义View五、源码 前言 在日常工作开发中,我们时长会遇到各种各样的需求,不部分需求是可以通…...

SpringMVC的基础知识
创建SpringMVC项目 SpringMVC项目其实和SpingBoot项目差不多,就多引入了一个SpringWeb项目而已拉 可以看这篇博客,创建的就是一个SpringMVC项目--创建项目の博客 SpringMVC是啥 Spring是啥相信大家都了解 啥是MVC呢?MVC是Model View Controller的缩写 我们分开看这三个词Model…...

OpenPCDet系列 | 4.2 DataAugmentor点云数据增强模块解析
文章目录 DataAugmentor模块解析1. gt_sampling2. random_world_flip3. random_world_rotation4. random_world_scaling5. limit_period DataAugmentor模块解析 在pointpillars算法中,具体的数据增强方法配置是在yaml中的DATA_CONFIG.DATA_AUGMENTOR进行配置&#…...

精准测试之过程与实践 | 京东云技术团队
作者:京东工业 宛煜昕 一、怎样的技术 •百度百科: 精准测试是一套计算机测试辅助分析系统。 精准测试的核心组件包含的软件测试示波器、用例和代码的双向追溯、智能回归测试用例选取、覆盖率分析、缺陷定位、测试用例聚类分析、测试用例自动生成系统…...
类ChatGPT逐行代码解读(1/2):从零实现Transformer、ChatGLM-6B
前言 最近一直在做类ChatGPT项目的部署 微调,关注比较多的是两个:一个LLaMA,一个ChatGLM,会发现有不少模型是基于这两个模型去做微调的,说到微调,那具体怎么微调呢,因此又详细了解了一下微调代…...
车道线检测
前言 目前,车道线检测技术已经相当成熟,主要应用在自动驾驶、智能交通等领域。下面列举一些当下最流行的车道线检测方法: 基于图像处理的车道线检测方法。该方法是通过图像处理技术从摄像头传回的图像中提取车道线信息的一种方法,…...

云渲染靠谱吗,使用云渲染会不会被盗作品?
云渲染靠谱吗、安全吗?如果使用 云渲染会不会被盗作品......Renderbus瑞云渲染作为一个正经的云渲染平台,也时不时会收到这类疑问,首先,瑞云渲染是肯定靠谱的,各位可以放心使用。另外小编也将在本篇教你如何辨别云渲染平台是否安全…...
什么是FPGA?关于FPGA基础知识 一起来了解FPGA lattice 深力科 MachXO3系列 LCMXO3LF-9400C-5BG256C
什么是FPGA?关于FPGA基础知识 一起来了解FPGA lattice 深力科 MachXO3系列 LCMXO3LF-9400C-5BG256C FPGA基础知识:FPGA是英文Field-Programmable Gate Array的缩写,即现场可编程门阵列,它是在PAL、GAL、CPLD等可编程器…...

有什么好用的云渲染?
在CG制作流程中,离线渲染一直是必要且耗时的环节。你的场景越复杂,渲染出现问题的可能性就越大,尤其是当你独自工作,没有人给你建议的时候,灯光、模型、场景任何一个环节渲染时出现问题都可能让你焦头烂额,…...
什么是医学影像PACS系统?PACS系统功能有哪些?作用有哪些?对接哪些设备?业务流程是什么?
一、什么是医学影像PACS系统 PACS:为Picture Archive and CommunicationSystem的缩写,是图象归档和通讯系统。PACS系统应用在医院影像科室的系统,主要的任务就是把日常产生的各种医学影像(包括核磁,CT,超声…...

分布式缓存:什么是它以及为什么需要它?
前言 随着网络的快速发展,分布式应用变得越来越普遍。这种类型的应用程序需要访问多个组件和服务,而这些组件可能分散在不同的物理位置上。在这种情况下,由于网络通信的高延迟和低带宽,性能问题变得尤为明显。为解决这一问题&…...
MySQL基础(二十二)逻辑架构
1.逻辑架构剖析 1.1 第1层:连接层 系统(客户端)访问MySQL服务器前,做的第一件事就是建立TCP连接。 经过三次握手建立连接成功后,MySQL服务器对TCP传输过来的账号密码做身份认证、权限获取。 用户名或密码不对&#…...

《Kubernetes证书篇:使用TLS bootstrapping简化kubelet证书制作》
一、背景 Master apiserver启用TLS认证后,Node节点kubelet和kube-proxy要与kube-apiserver进行通信,必须使用CA签发的有效证书才可以,当Node节点很多时,这种客户端证书颁发需要大量工作,同样也会增加集群扩展复杂度。 …...

vue+elementui+nodejs机票航空飞机航班查询与推荐
语言 node.js 框架:Express 前端:Vue.js 数据库:mysql 数据库工具:Navicat 开发软件:VScode )本系统主要是为旅客提供更为便利的机票预定方式,同时提高民航的预定机票的工作效率。通过网络平台实现信息化和网络化&am…...

将ssh发布密钥添加到服务器的ssh授权密钥中,但是为什么我仍然无法ssh登录到此服务器?
我已经将ssh发布密钥添加到服务器的ssh授权密钥中,但是为什么我仍然无法ssh登录到此服务器? 即使将ssh公钥添加到服务器的授权密钥中,您也可能无法通过SSH登录到服务器,这有几个原因: 1.服务器的authorized_keys文件的权限不正确…...

LeetCode——子串能表示从 1 到 N 数字的二进制串
1016. 子串能表示从 1 到 N 数字的二进制串 - 力扣(Leetcode) 目录 一、题目 二、题目解读 三、代码 一、题目 给定一个二进制字符串 s 和一个正整数 n,如果对于 [1, n] 范围内的每个整数,其二进制表示都是 s 的 子字符串 &…...
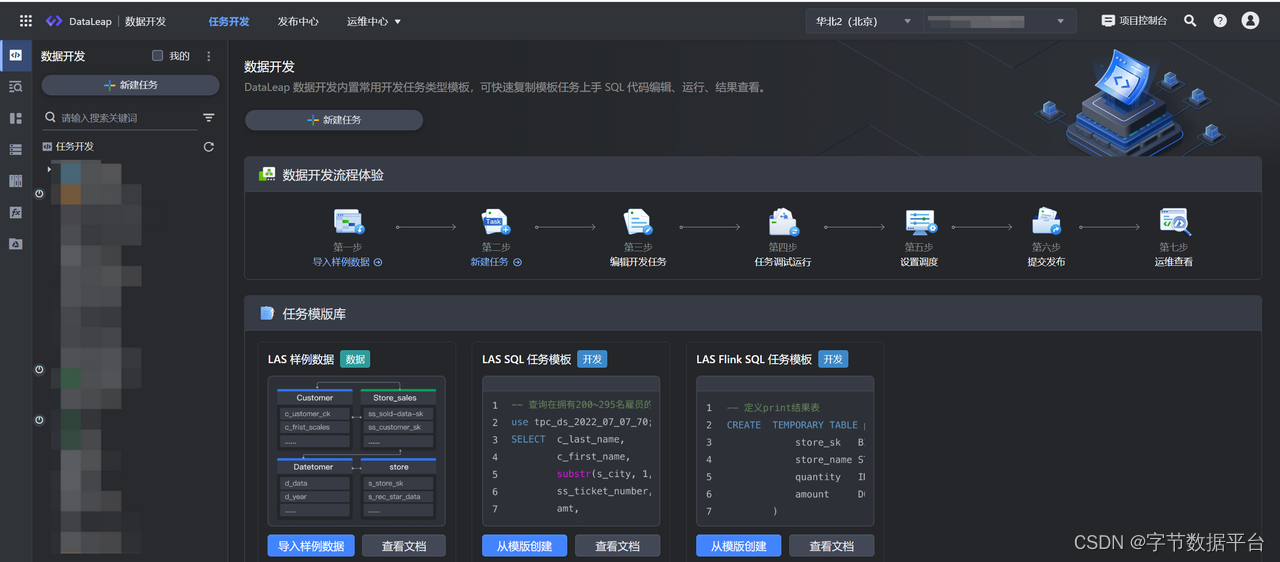
看火山引擎DataLeap如何做好电商治理(二):案例分析与解决方案
接上篇,以短视频优质项目为例,火山引擎DataLeap平台治理团队会去对每天发布的这种挂购物车车短视频打上标签,识别这些短视频它是优质的还是低质的,以及具体原因。一个视频经过这个模型识别之后,会给到奖惩中心去做相应…...

MySQL笔记-多表查询
本文标签 : 多表查询 事务四大特性 并发事务问题 事务隔离级别 文章目录 目录 文章目录 一、多表查询 1.多表关系 2.多表查询概念 3.多表查询的分类 4.内连接 5.外连接 6.自连接 7.联合查询 8.子查询 1.标量子查询 2.列子查询 3.行子查询 4.表子查询 9.多表查询案例练习 二…...
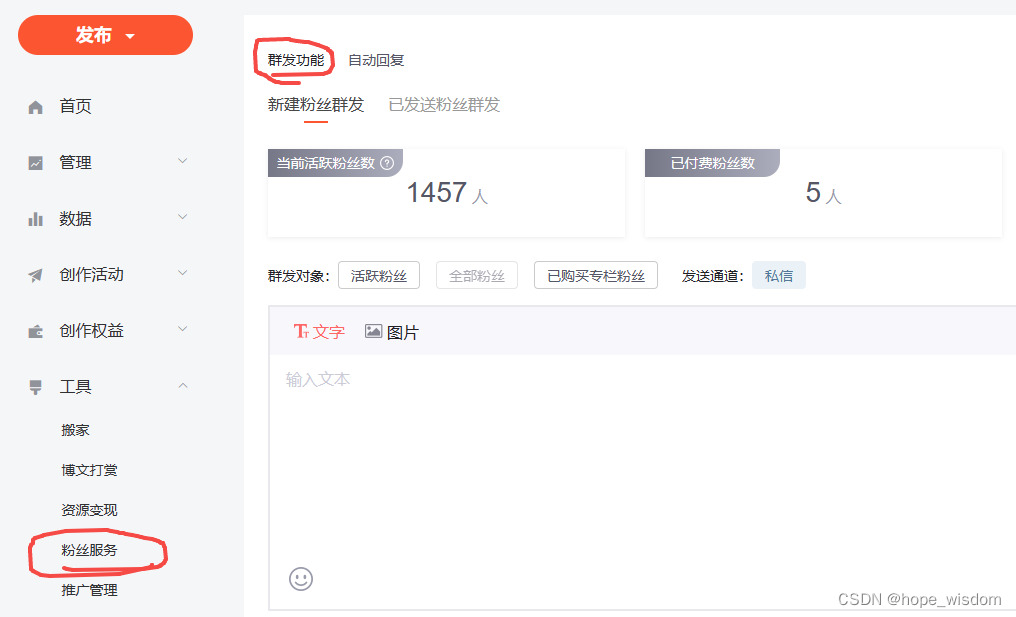
如何用100天时间,让CSDN的粉丝数从0狂飙到10000
2022年10月7日,正式开通了CSDN账号。但因为工作忙的原因,一直没有时间写博客文章,也没有投入精力在CSDN上。理所当然的,我的粉丝数量很稳定,一直保持着0的记录。 2023年春节假期过后,有点空闲时间了&#x…...

各种同质图神经网络模型的理论和节点表征学习任务的集合包rgb_experiment
诸神缄默不语-个人CSDN博文目录 最近更新时间:2023.5.10 最早更新时间:2023.5.10 本文仅考虑同质图setting下的模型。 对于异质图场景,可以参考我写的另一篇博文:异质图神经网络(持续更新ing…) node2ve…...

Stitches项目架构分析:RequireJS模块化设计与Grunt构建流程完全指南 [特殊字符]
Stitches项目架构分析:RequireJS模块化设计与Grunt构建流程完全指南 🚀 【免费下载链接】stitches HTML5 Sprite Sheet Generator 项目地址: https://gitcode.com/gh_mirrors/sti/stitches Stitches是一个基于HTML5的雪碧图生成器,它采…...
)
Veo 2提示词效能跃迁实战(工业级Prompt链构建全图谱)
更多请点击: https://codechina.net 第一章:Veo 2提示词编写的核心范式演进 Veo 2作为新一代视频生成模型,其提示词(prompt)工程已从早期的“关键词堆叠”转向结构化、语义分层与意图对齐的复合范式。这一演进并非简…...
 —— SPI相关概念)
STM32单片机学习(27) —— SPI相关概念
文章目录概述SPI通信的核心特性I2C和SPI的简单对比SPI学习的补充说明SPI硬件电路设计SPI的四条通信线SPI通信的片选线低电平选中不支持广播通信SPI通信的时序结构(重点)SPI通信的比特序通信空闲状态,SPI时钟极性采样时机,SPI时钟相…...

从‘文件夹’到对象列表:手把手教你用MinIO Java Client实现灵活的文件查询与过滤
从‘文件夹’到对象列表:手把手教你用MinIO Java Client实现灵活的文件查询与过滤在当今数据驱动的时代,对象存储已成为现代应用架构中不可或缺的一部分。MinIO作为高性能、兼容S3协议的开源对象存储解决方案,凭借其轻量级和易用性赢得了众多…...

Unity UI交互进阶:手把手教你打造一个支持单击、双击、长按的万能按钮组件
Unity UI交互进阶:手把手教你打造一个支持单击、双击、长按的万能按钮组件在游戏开发中,UI交互的流畅性和多样性直接影响玩家的游戏体验。想象一下,当你在开发一个RPG游戏的背包系统时,需要实现道具的单击查看详情、双击快速使用、…...

HarmonyOS 6学习:解决图片放大后无法移动至边缘的matrix4矩阵变换技巧
从"卡在中间"到"自由拖拽":一次完整的图片缩放平移边界问题攻关在HarmonyOS 6应用开发中,我最近遇到了一个看似简单却让人头疼的图片查看器问题:用户双指放大图片后,想要拖动查看边缘细节,却发现图…...

OpenCore Legacy Patcher完全指南:3步让旧款Mac焕发新生的终极方案
OpenCore Legacy Patcher完全指南:3步让旧款Mac焕发新生的终极方案 【免费下载链接】OpenCore-Legacy-Patcher Experience macOS just like before 项目地址: https://gitcode.com/GitHub_Trending/op/OpenCore-Legacy-Patcher 你是否拥有一台性能尚可但已被…...

国内大学生常用的AI写作辅助平台有哪些?
国内高校学生常用的 AI 写作辅助平台,以本土化全流程工具为主,结合通用大模型与专项功能模块,覆盖选题构思、大纲搭建、初稿撰写、语言润色、降重处理、查重检测及格式排版等关键环节,以下是主流平台详解与对比: 一、本…...

2026论文顶级降AI率工具大曝光:一键把AIGC率降至安全线!
步入2026年,学术圈的规则已经彻底变了味。过去那种只盯着查重率的“降重焦虑”早就被更可怕的“降AI焦虑”取代了。AI检测算法越来越聪明,高校审核标准也越来越严苛,光是把重复率压下去已经完全不够用了。现在摆在学生和科研人员面前的难题是…...

别再把大模型当搜索框了:一文讲透 LLM 的基本原理、能力边界与局限性
写在前面很多人把大语言模型当成“会聊天的搜索引擎”,结果一上线就遇到幻觉、口径不稳、上下文丢失、成本失控。真正理解 LLM,要先抓住一句话:它是基于 Transformer 的概率生成模型,核心能力来自海量预训练、上下文学习与后训练对…...