Learn RabbitMQ with SpringBoot
文章目录
- What is RabbitMQ?
- RabbitMQ Core concept
- RabbitMQ Architecture
- Install and setup RabbitMQ using Docker
- Explore RabbitMQ using management UI
- Create and setup Springboot3 project in intellij
- Springboot and RabbitMQ Basic Message
- Connection between Springboot and RabbitMQ
- Create core component
- Create RabbitMQProducer
- Create REST API to send message
- create RabbitMQConsumer
- Springboot and RabbitMQ Json Message
- Create Json object
- add config
- Produce json message
- Create API to send json object
- Consum json message
What is RabbitMQ?
RabbitMQ Core concept
RabbitMQ Architecture
Install and setup RabbitMQ using Docker
# notice: select 3.11.15-management, it will have web management web page
docker pull rabbitmq:3.11.15-management
docker run --rm  -it -p 15672:15672 -p 5672:5672 rabbitmq:3.11.0
Explore RabbitMQ using management UI
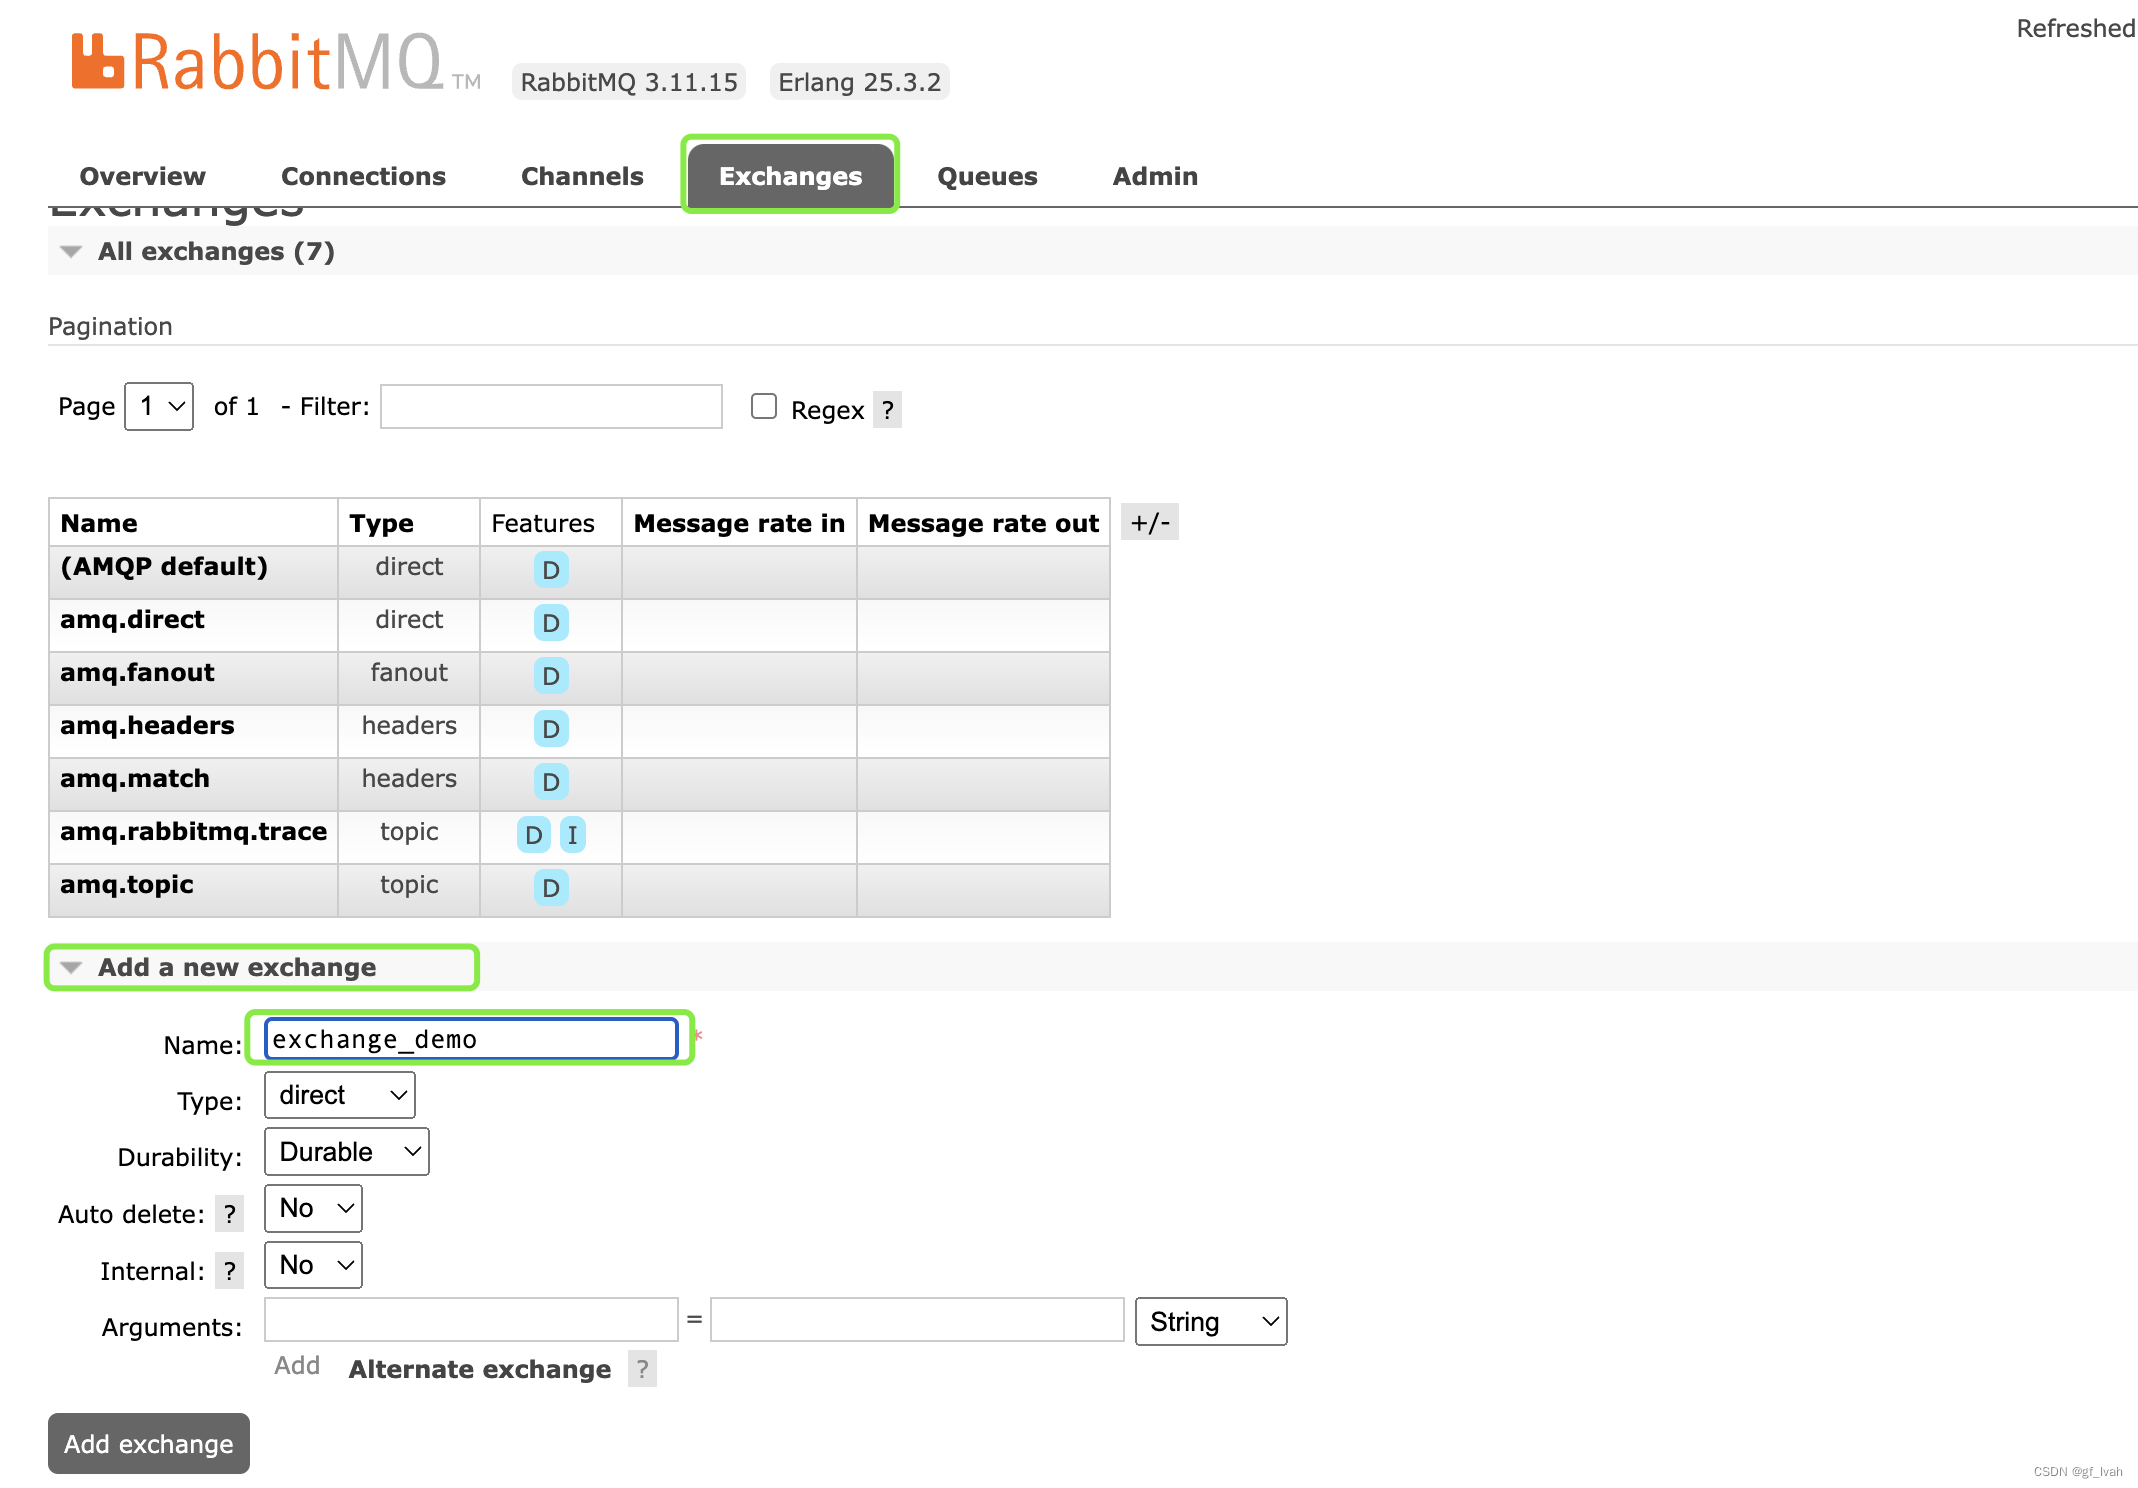
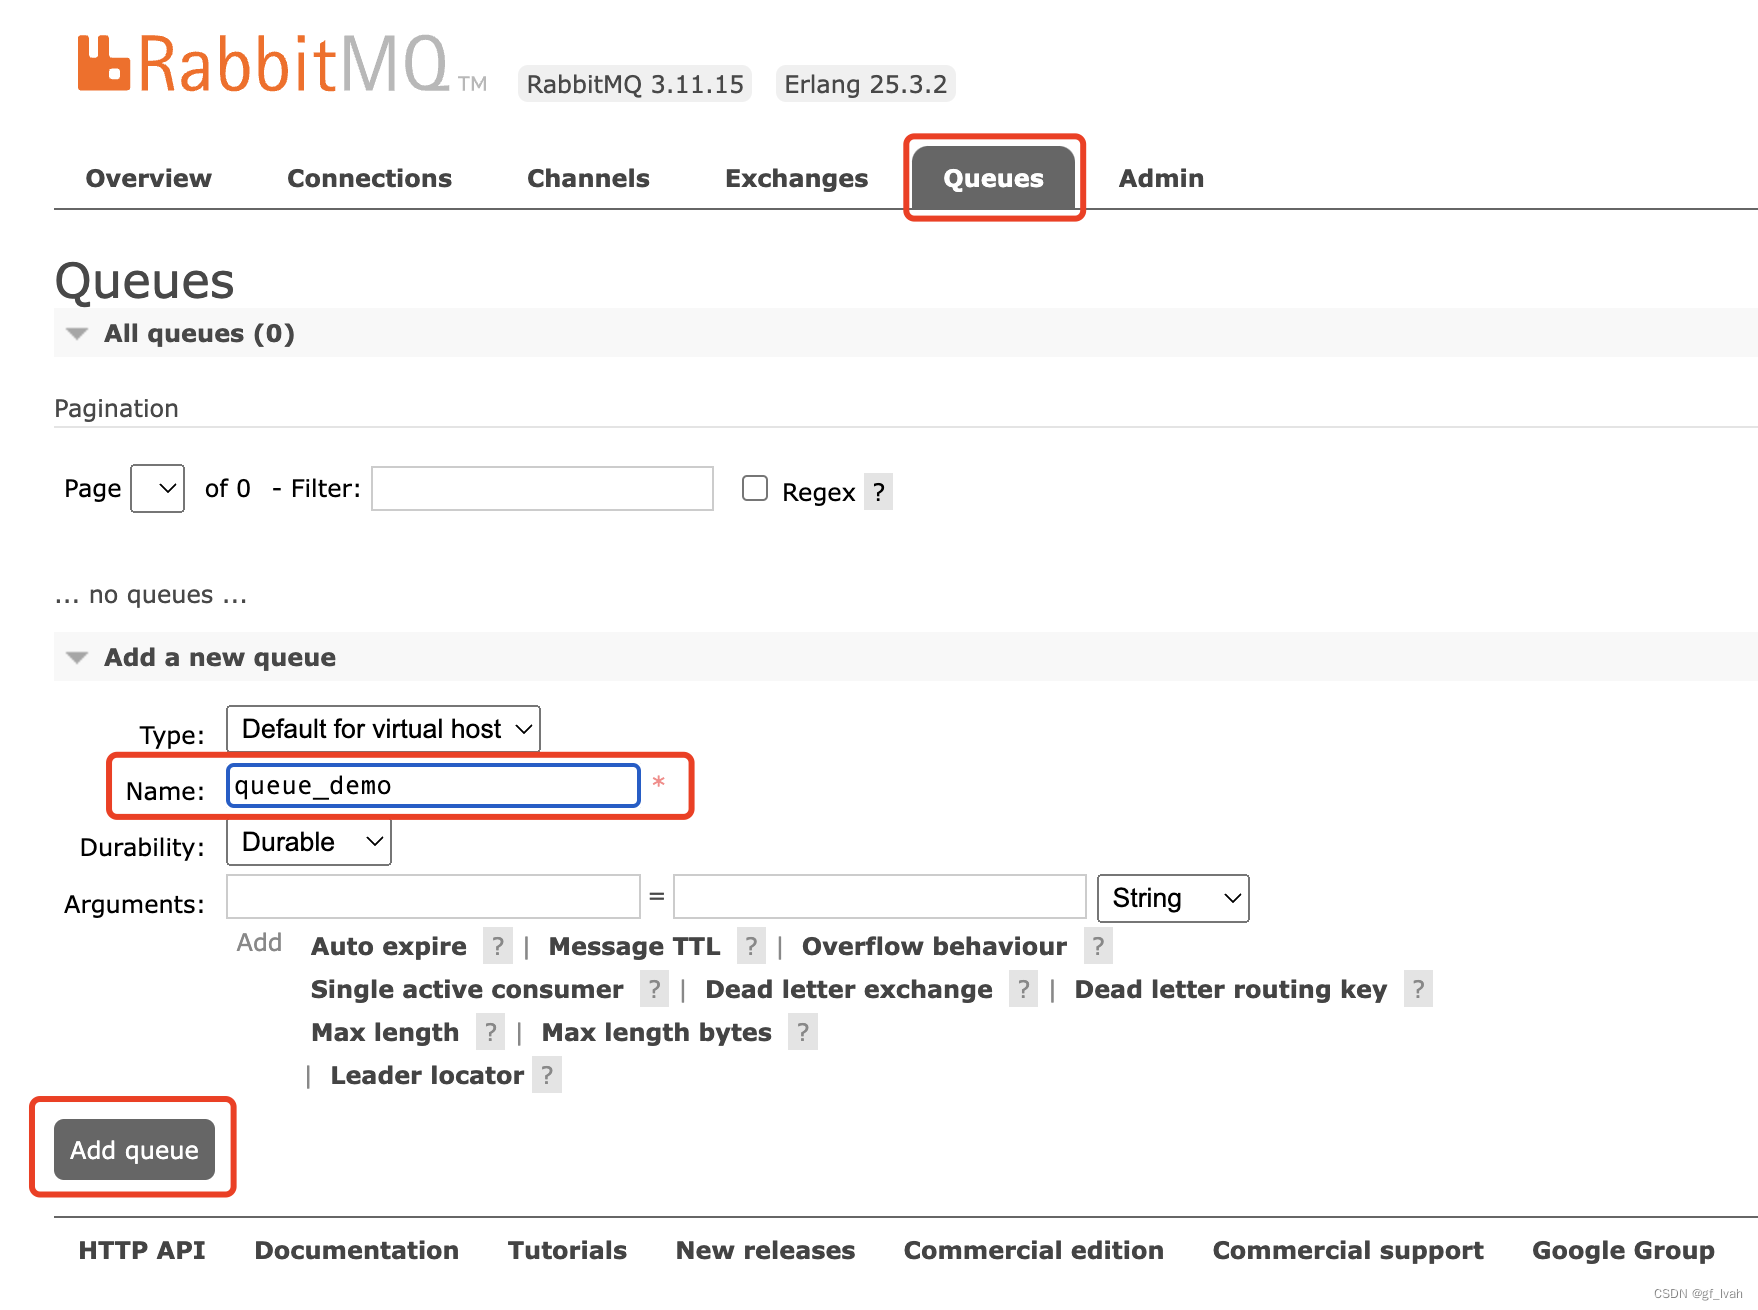
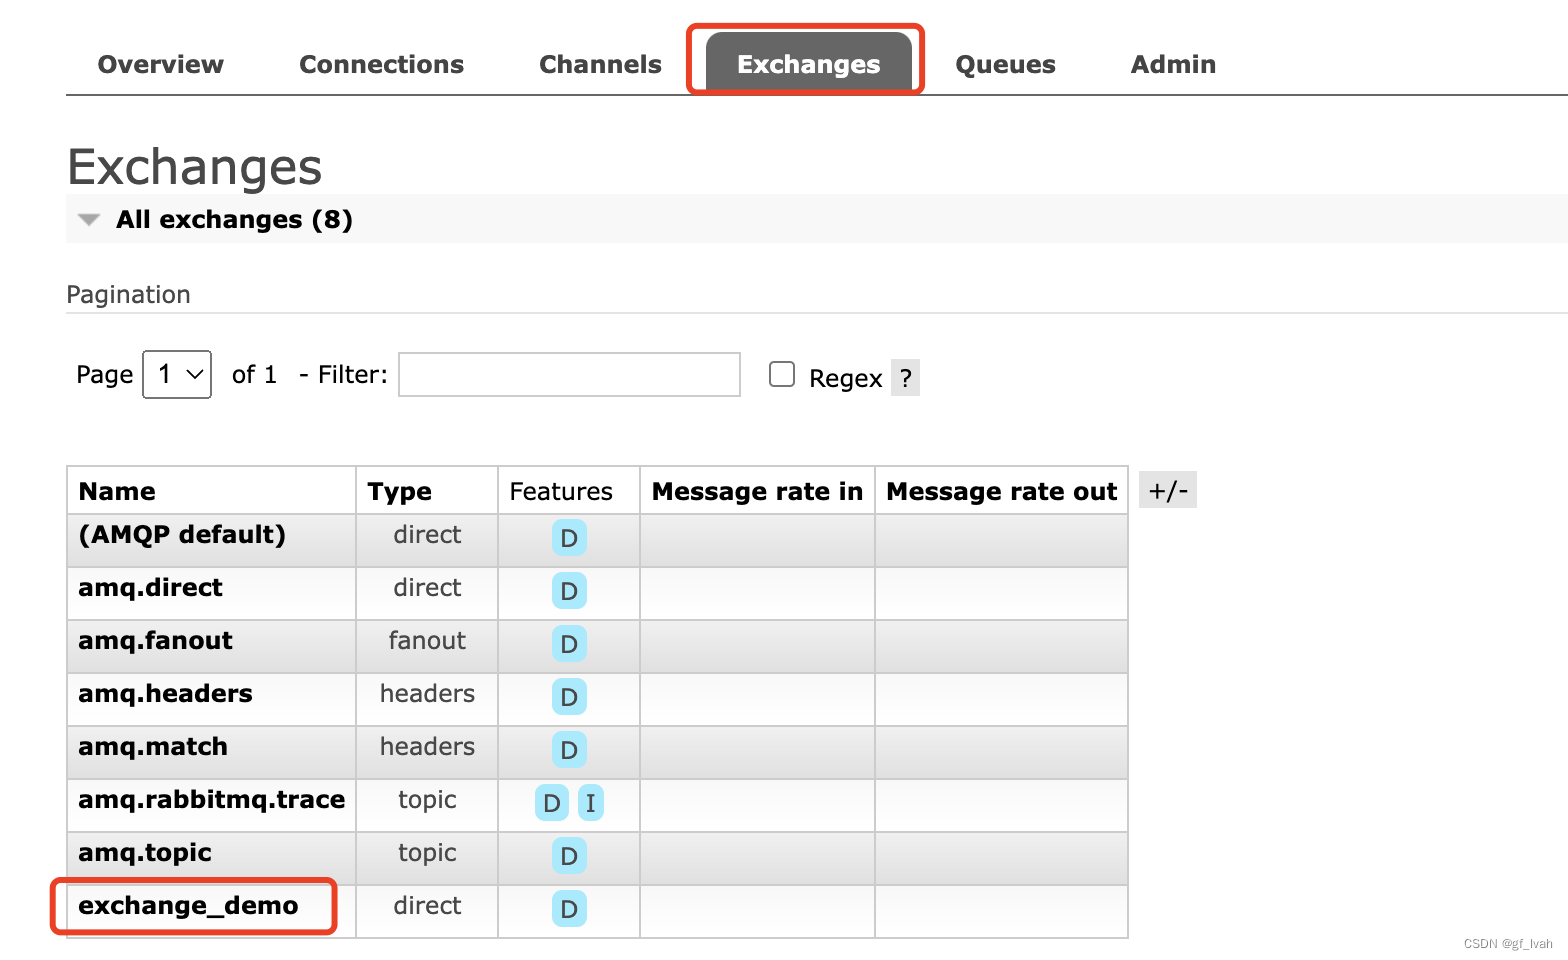
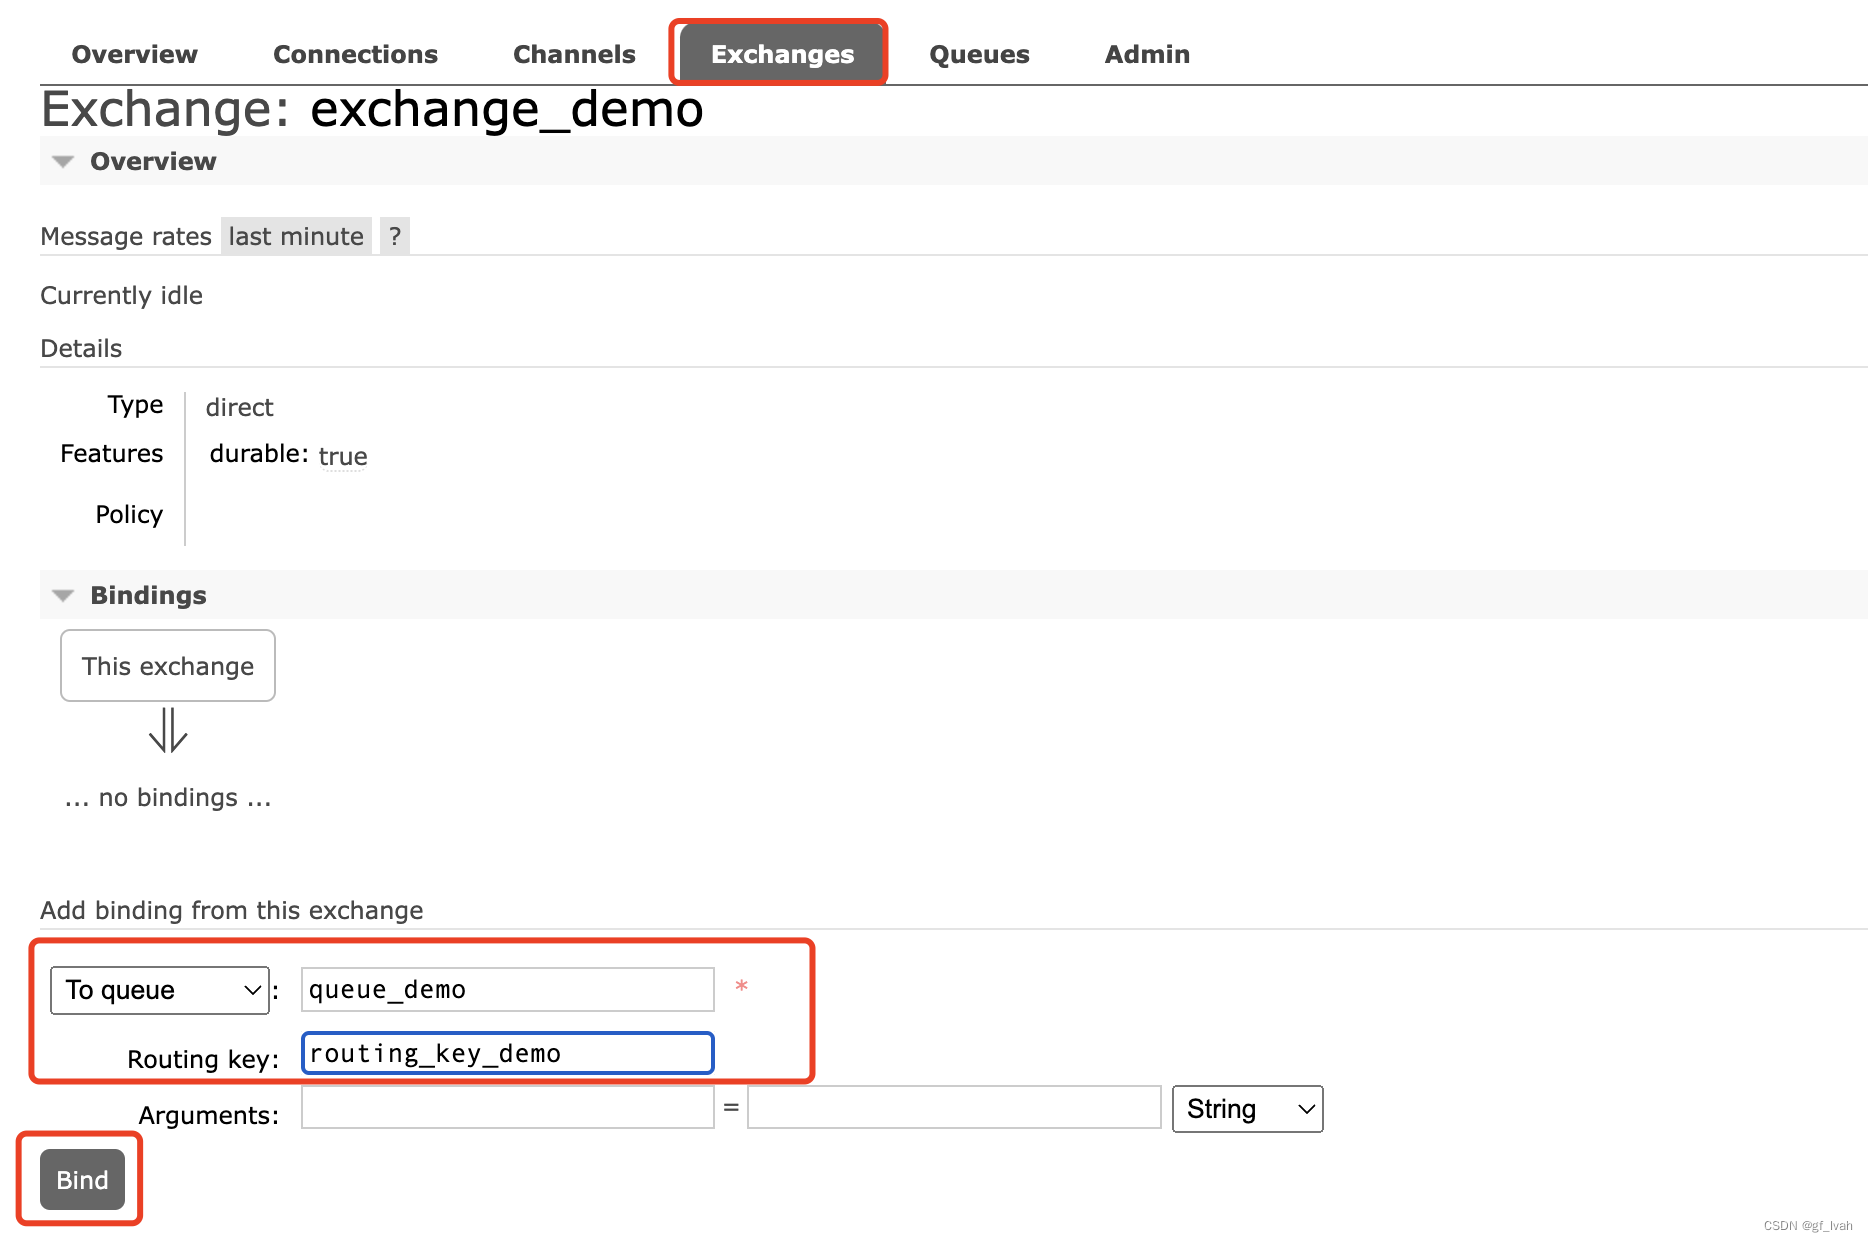
when we first login, username is guest and password is guest. Then we do some common operations in the dashboard.
- create exchange
- create queue
- binding exchange with queue using routing key
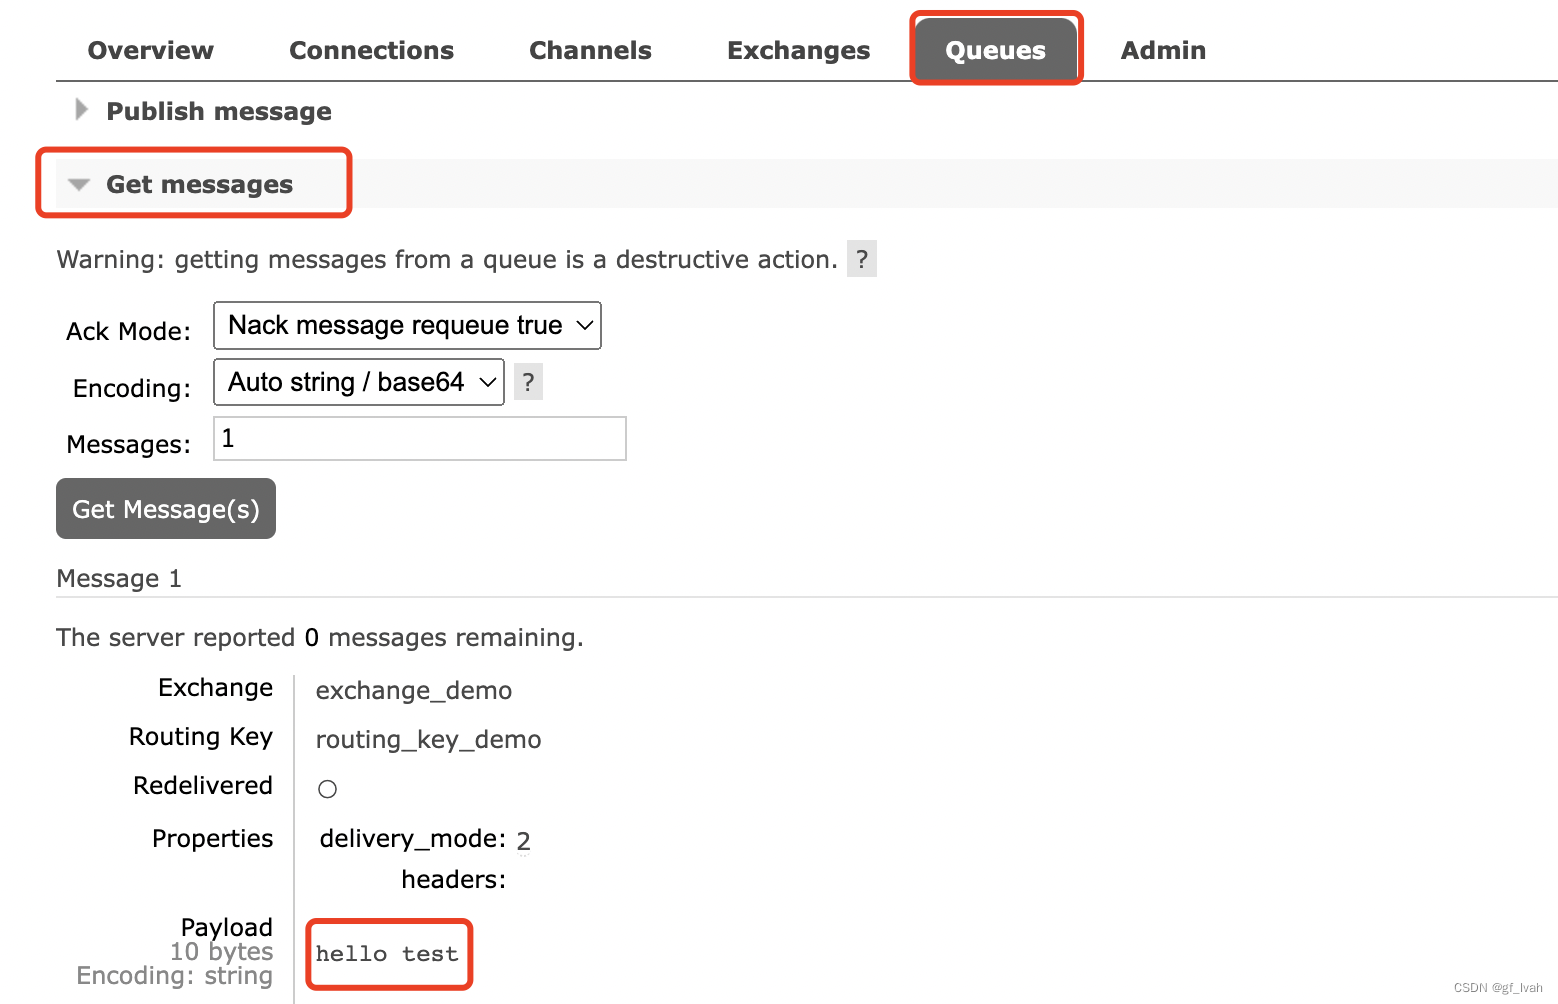
After finish all the operations, we can test whether it is work here. So publish a message to exchange, if we can get message in queue, we can think it works.

Create and setup Springboot3 project in intellij
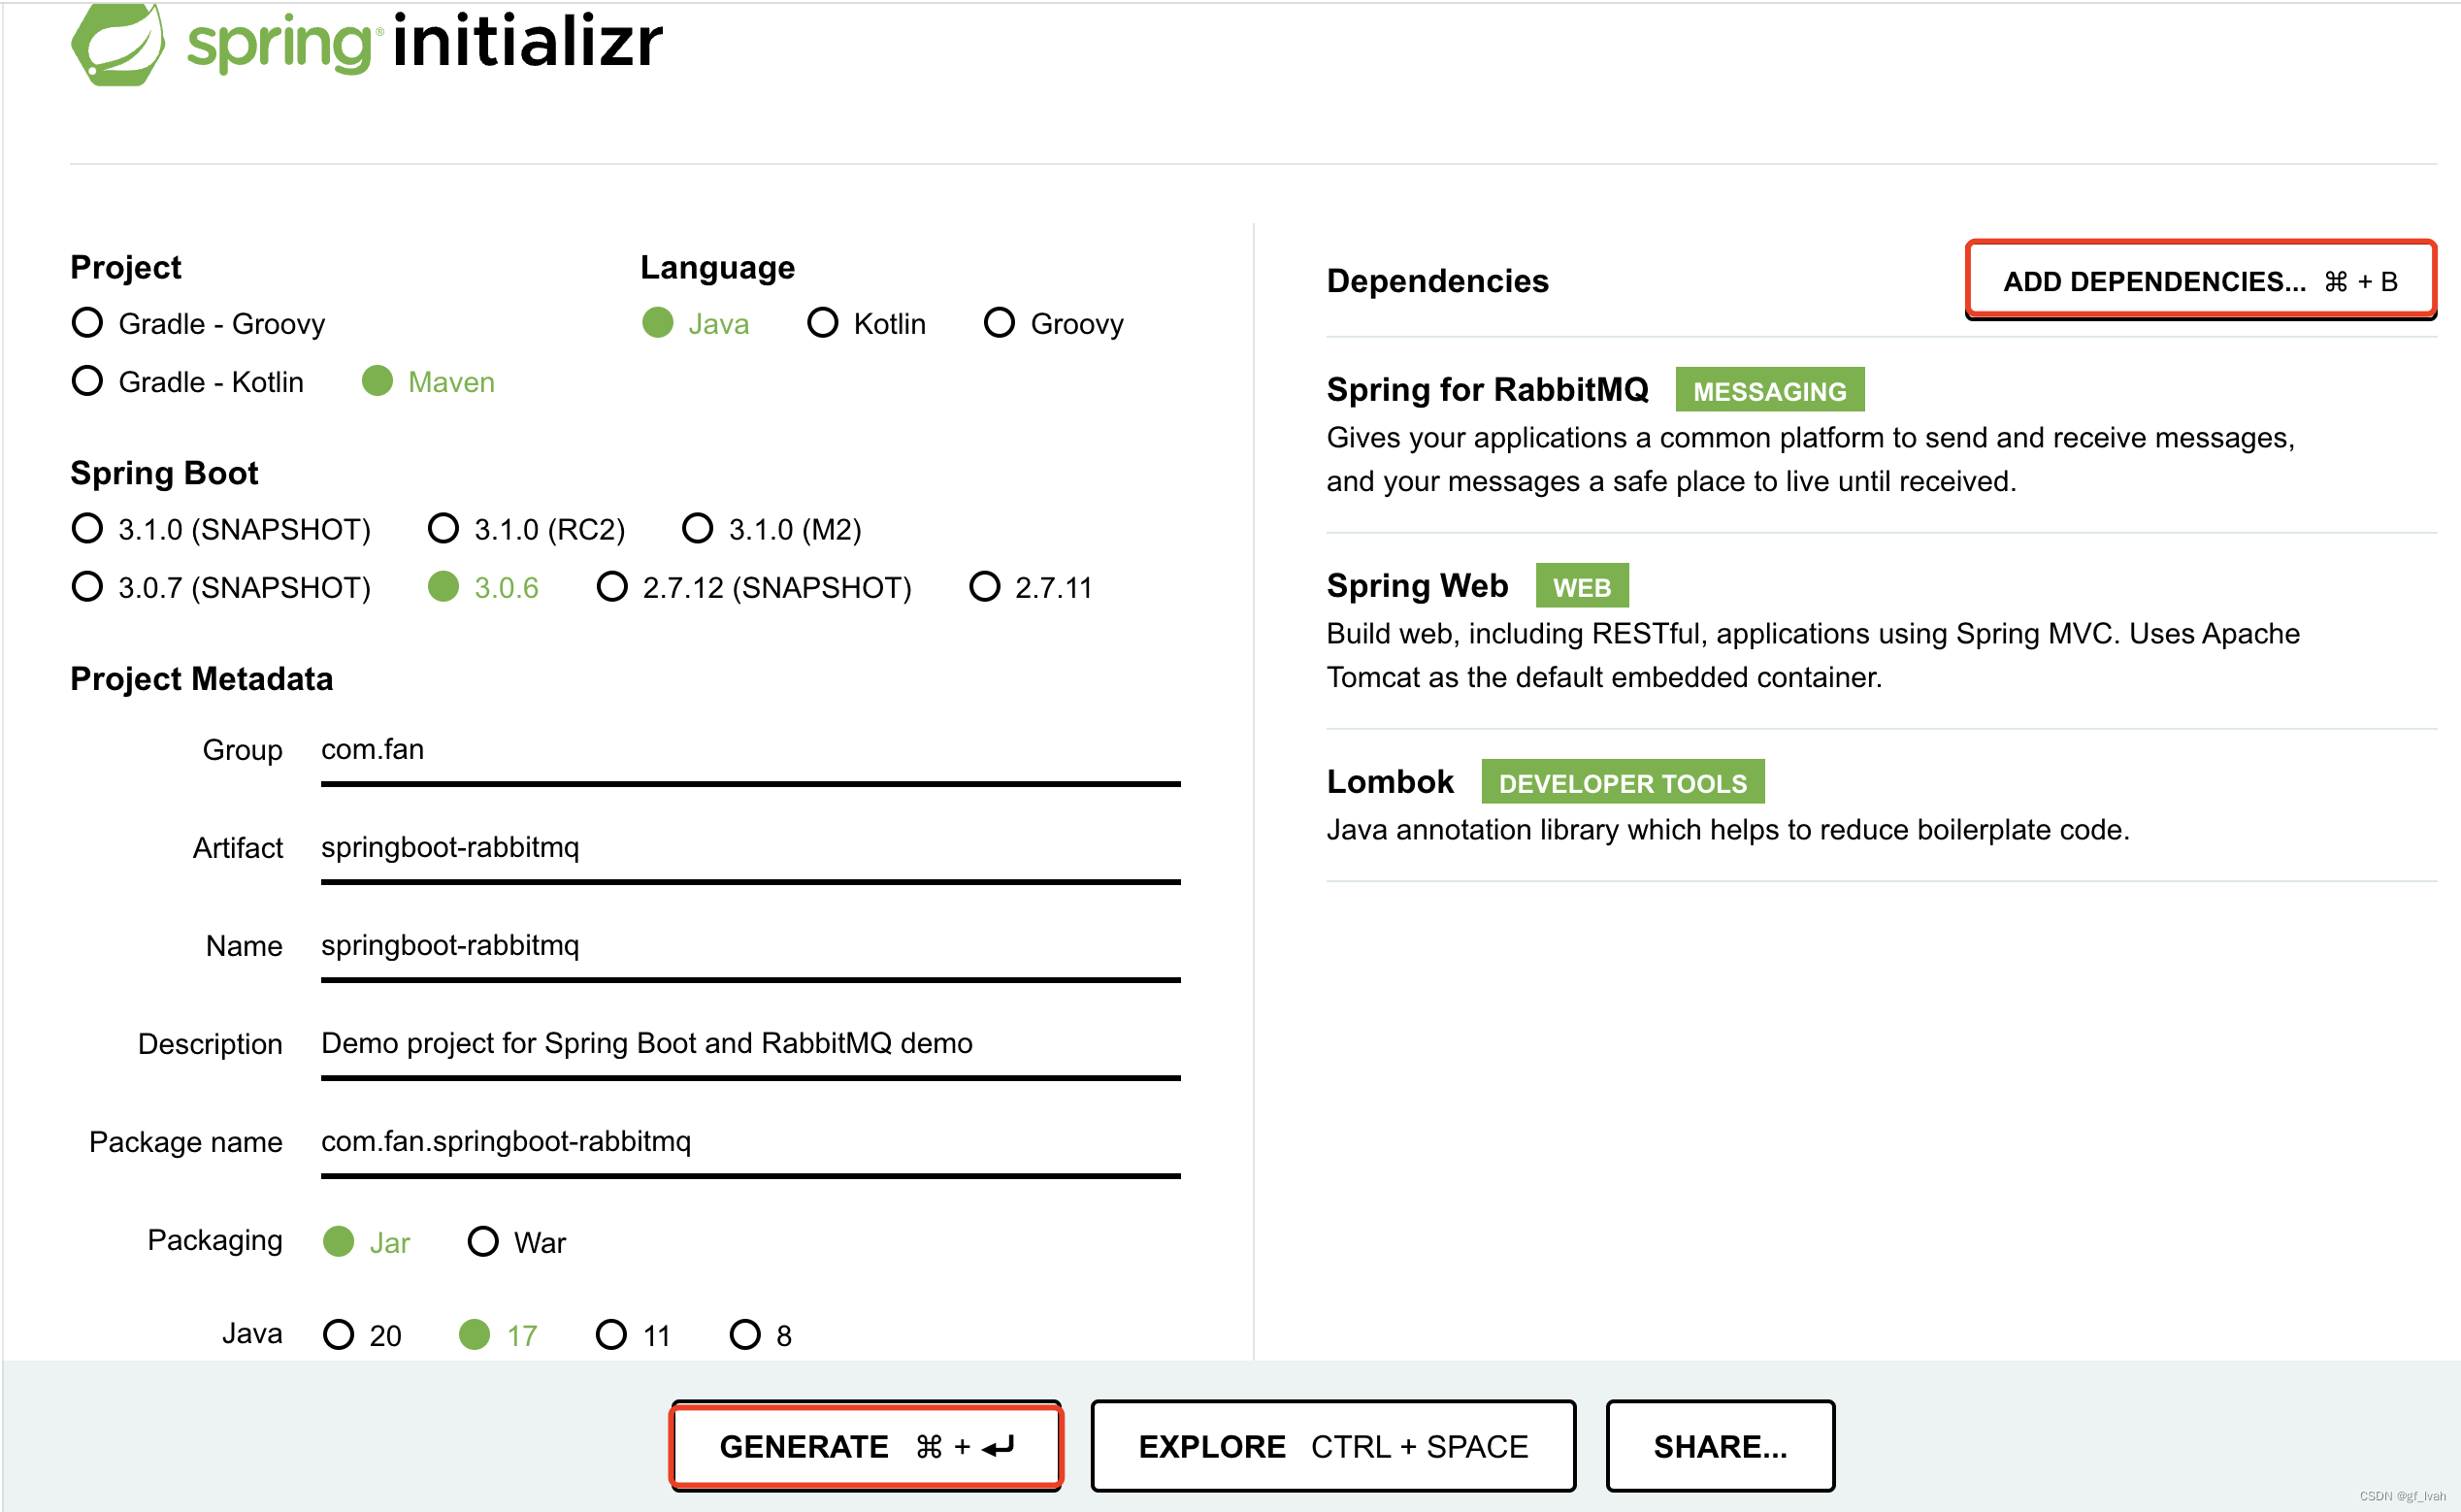
First, using spring initializr to quick create and bootstrap spring boot project.
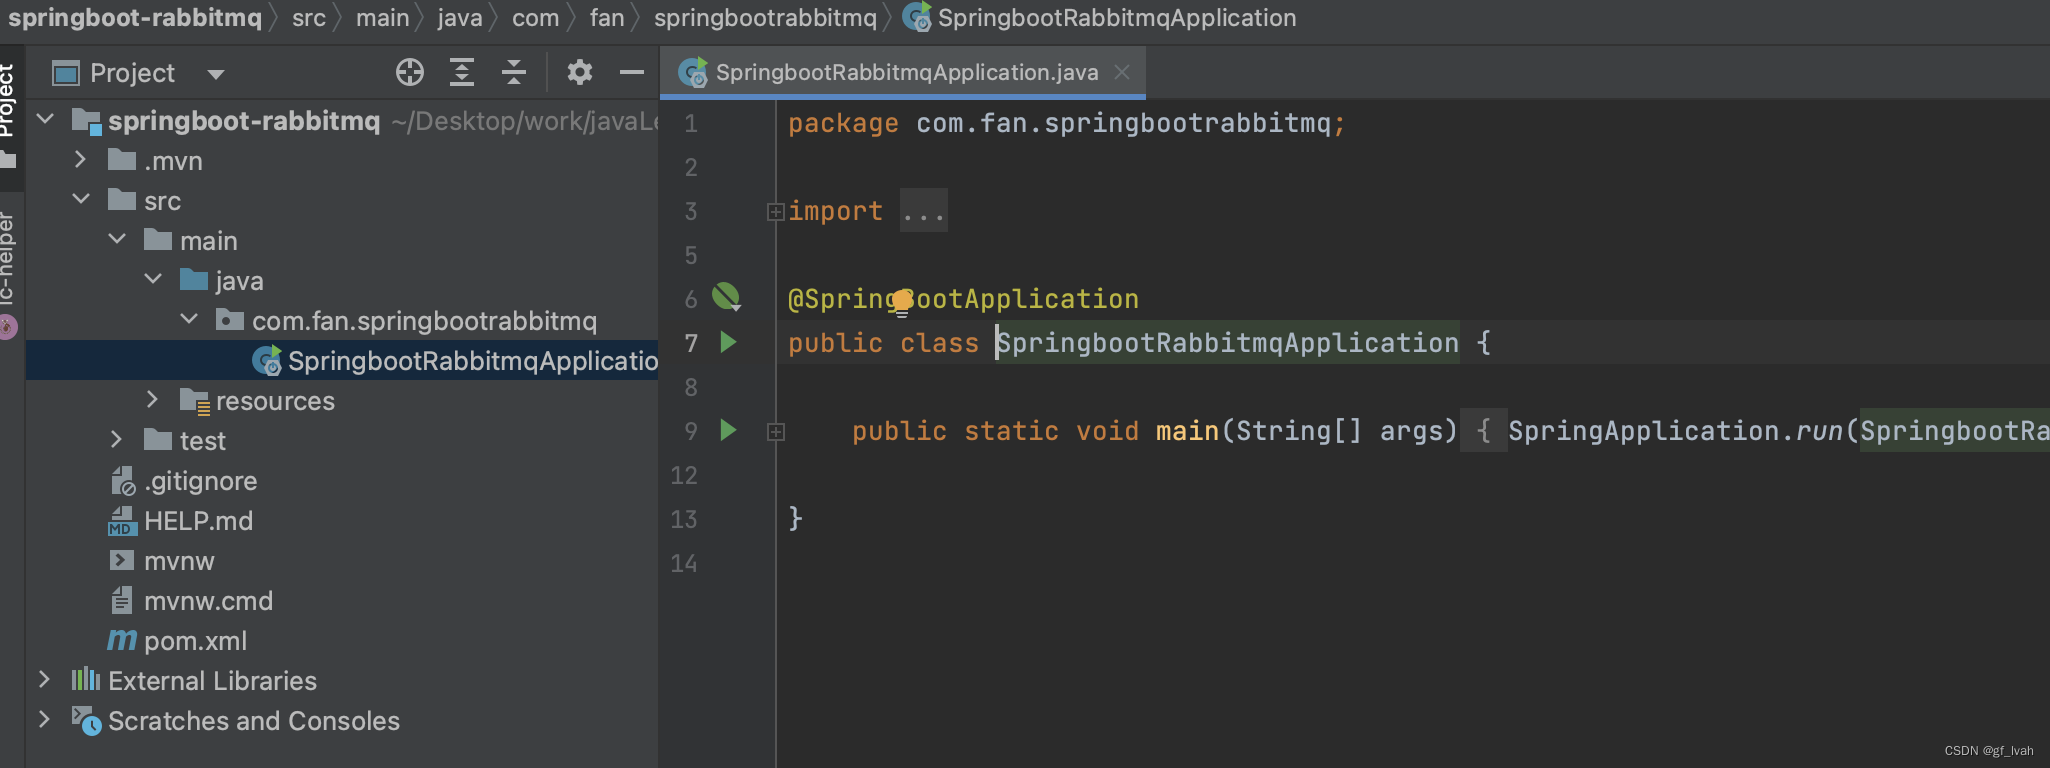
Second, using intellij open the project.
Springboot and RabbitMQ Basic Message
Connection between Springboot and RabbitMQ
Springboot autoconfiguration for spring AMQP(RabbitMQ). We get a connection to our RabbitMQ broker on port 5672 using the default username and password of "guest".
Define these proprtties in a application.properties.
spring.rabbitmq.host=localhost
spring.rabbitmq.port=5672
spring.rabbitmq.username=guest
spring.rabbitmq.password=guest
Create core component
- setup queue name, exchange name and routing key name in
application.properties.
spring.rabbitmq.queue_name=fan_queue
spring.rabbitmq.exchange_name=fan_exchange
spring.rabbitmq.routing_key=fan_routing_key
- write the java code to create queue, exchange and binding.
// file path: com/fan/springbootrabbitmq/config
package com.fan.springbootrabbitmq.config;import org.springframework.amqp.core.*;
import org.springframework.beans.factory.annotation.Value;
import org.springframework.context.annotation.Bean;
import org.springframework.context.annotation.Configuration;@Configuration
public class RabbitMQConfig {@Value("${spring.rabbitmq.queue_name}")private String queueName;@Value("${spring.rabbitmq.exchange_name}")private String exchangeName;@Value("${spring.rabbitmq.routing_key}")private String routingKey;// spring bean for rabbitmq queue@Beanpublic Queue queue() {return new Queue(queueName);}// spring bean for rabbitmq exchange@Beanpublic TopicExchange exchange() {return new TopicExchange(exchangeName);}// binding between queue and exchange using routing key@Beanpublic Binding binding() {return BindingBuilder.bind(queue()).to(exchange()).with(routingKey);}
}
- rerun the project and check whether there are error, if no error, it works.
Create RabbitMQProducer
// file path:  com/fan/springbootrabbitmq/publisher/RabbitMQProducer.java
package com.fan.springbootrabbitmq.publisher;import org.slf4j.Logger;
import org.slf4j.LoggerFactory;
import org.springframework.amqp.rabbit.core.RabbitTemplate;
import org.springframework.beans.factory.annotation.Value;
import org.springframework.stereotype.Service;@Service
public class RabbitMQProducer {@Value("${spring.rabbitmq.exchange_name}")private String exchangeName;@Value("${spring.rabbitmq.routing_key}")private String routingKey;// use RabbitTemplate to send the messages. it auto config for us, we just need to inject and use it.private final RabbitTemplate rabbitTemplate;private static final Logger LOGGER = LoggerFactory.getLogger(RabbitMQProducer.class);public RabbitMQProducer(RabbitTemplate rabbitTemplate) {this.rabbitTemplate = rabbitTemplate;}public void sendMessage(String message) {LOGGER.info(String.format("Message sent => %s", message));rabbitTemplate.convertAndSend(exchangeName, routingKey, message);}
}
Create REST API to send message
// file path: com/fan/springbootrabbitmq/controller/RabbitMQController.java
package com.fan.springbootrabbitmq.controller;import com.fan.springbootrabbitmq.publisher.RabbitMQProducer;
import org.springframework.http.ResponseEntity;
import org.springframework.stereotype.Service;
import org.springframework.web.bind.annotation.GetMapping;
import org.springframework.web.bind.annotation.RequestMapping;
import org.springframework.web.bind.annotation.RequestParam;
import org.springframework.web.bind.annotation.RestController;@RestController
@RequestMapping("/api/v1")
public class RabbitMQController {private RabbitMQProducer producer;public RabbitMQController(RabbitMQProducer producer) {this.producer = producer;}@GetMapping("/publish")public ResponseEntity<String> publish(@RequestParam("message") String message) {producer.sendMessage(message);return ResponseEntity.ok("Message sent to rabbitmq...");}
}
how to test?
- send api request to send message to rabbitmq:
http://localhost:8080/api/v1/publish?message=xxx - check in the dashboard:
http://localhost:15672/
create RabbitMQConsumer
// file path: com/fan/springbootrabbitmq/publisher/RabbitMQConsumer.java
package com.fan.springbootrabbitmq.publisher;import org.slf4j.Logger;
import org.slf4j.LoggerFactory;
import org.springframework.amqp.rabbit.annotation.RabbitListener;
import org.springframework.stereotype.Service;@Service
public class RabbitMQConsumer {private static final Logger LOGGER = LoggerFactory.getLogger(RabbitMQProducer.class);@RabbitListener(queues = "${spring.rabbitmq.queue_name}")public void consum(String message) {LOGGER.info(String.format("Message received => %s", message));}}
after finish this part, rerun the project and send a request for sending message to rabbitmq, and then you can see the result in peoject like this:
[ntContainer#0-1] c.f.s.publisher.RabbitMQProducer         : Message sent => hello1
[ntContainer#0-1] c.f.s.publisher.RabbitMQProducer         : Message received => hello1
Springboot and RabbitMQ Json Message
Create Json object
// file path: com/fan/springbootrabbitmq/dto/User.java
package com.fan.springbootrabbitmq.dto;import lombok.AllArgsConstructor;
import lombok.Data;
import lombok.NoArgsConstructor;@Data
@AllArgsConstructor
@NoArgsConstructor
public class User {private Long id;private String firstName;private String lastName;
}
add config
// file path: com/fan/springbootrabbitmq/config/RabbitMQConfig.java// add this attributes to RabbitMQConfig class@Value("${spring.rabbitmq.json.queue_name}")private String queueJsonName;@Value("${spring.rabbitmq.json.routing_key}")private String routingJsonKey;// add this methods to RabbitMQConfig class@Beanpublic Queue jsonQueue() {return new Queue(queueJsonName);}@Beanpublic MessageConverter converter(){return new Jackson2JsonMessageConverter();}@Beanpublic AmqpTemplate amqpTemplate(ConnectionFactory connectionFactory){RabbitTemplate rabbitTemplate = new RabbitTemplate(connectionFactory);rabbitTemplate.setMessageConverter(converter());return rabbitTemplate;}@Beanpublic Binding jsonBinding() {return BindingBuilder.bind(jsonQueue()).to(exchange()).with(routingJsonKey);}
Produce json message
// file path: com/fan/springbootrabbitmq/publisher/RabbitMQJsonProducer.java
package com.fan.springbootrabbitmq.publisher;import com.fan.springbootrabbitmq.dto.User;
import org.slf4j.Logger;
import org.slf4j.LoggerFactory;
import org.springframework.amqp.rabbit.core.RabbitTemplate;
import org.springframework.beans.factory.annotation.Value;
import org.springframework.stereotype.Service;@Service
public class RabbitMQJsonProducer {@Value("${spring.rabbitmq.exchange_name}")private String exchangeName;@Value("${spring.rabbitmq.routing_key}")private String routingKey;// use RabbitTemplate to send the messages. it auto config for us, we just need to inject and use it.private final RabbitTemplate rabbitTemplate;private static final Logger LOGGER = LoggerFactory.getLogger(RabbitMQJsonProducer.class);public RabbitMQJsonProducer(RabbitTemplate rabbitTemplate) {this.rabbitTemplate = rabbitTemplate;}public void sendJsonMessage(User user) {LOGGER.info(String.format("Message sent => %s", user.toString()));rabbitTemplate.convertAndSend(exchangeName, routingKey, user);}
}
Create API to send json object
// file path: com/fan/springbootrabbitmq/publisher/RabbitMQJsonProducer.java
package com.fan.springbootrabbitmq.publisher;import com.fan.springbootrabbitmq.dto.User;
import org.slf4j.Logger;
import org.slf4j.LoggerFactory;
import org.springframework.amqp.rabbit.core.RabbitTemplate;
import org.springframework.beans.factory.annotation.Value;
import org.springframework.stereotype.Service;@Service
public class RabbitMQJsonProducer {@Value("${spring.rabbitmq.exchange_name}")private String exchangeName;@Value("${spring.rabbitmq.json.routing_key}")private String routingJsonKey;// use RabbitTemplate to send the messages. it auto config for us, we just need to inject and use it.private final RabbitTemplate rabbitTemplate;private static final Logger LOGGER = LoggerFactory.getLogger(RabbitMQJsonProducer.class);public RabbitMQJsonProducer(RabbitTemplate rabbitTemplate) {this.rabbitTemplate = rabbitTemplate;}public void sendJsonMessage(User user) {LOGGER.info(String.format("Message sent => %s", user.toString()));rabbitTemplate.convertAndSend(exchangeName, routingJsonKey, user);}
}
Consum json message
file path: com/fan/springbootrabbitmq/publisher/RabbitMQJsonConsumer.java
package com.fan.springbootrabbitmq.publisher;import com.fan.springbootrabbitmq.dto.User;
import org.slf4j.Logger;
import org.slf4j.LoggerFactory;
import org.springframework.amqp.rabbit.annotation.RabbitListener;
import org.springframework.stereotype.Service;@Service
public class RabbitMQJsonConsumer {private static final Logger LOGGER = LoggerFactory.getLogger(RabbitMQProducer.class);@RabbitListener(queues = "${spring.rabbitmq.json.queue_name}")public void consum(User user) {LOGGER.info(String.format("Message received => %s", user.toString()));}}
相关文章:

Learn RabbitMQ with SpringBoot
文章目录 What is RabbitMQ?RabbitMQ Core conceptRabbitMQ ArchitectureInstall and setup RabbitMQ using DockerExplore RabbitMQ using management UICreate and setup Springboot3 project in intellijSpringboot and RabbitMQ Basic MessageConnection between Springbo…...

定时器 POSIX Timer定时器和setitimer定时器
POSIX 可移植 POSIX:可移植操作系统接口(Portable Operating System Interface of UNIX,缩写为 POSIX 。 POSIX Timer C API 总结POSIX系统的C标准库: 函数描述clock_settime()通过指定Value设置clock的分辨率clock_gettime()…...
DeSD:用于3D医学图像分割的深度自蒸馏自监督学习
文章目录 DeSD: Self-Supervised Learning with Deep Self-Distillation for 3D Medical Image Segmentation摘要本文方法Deep Self-DistillationDownstream Transfer Learning 实验结果 DeSD: Self-Supervised Learning with Deep Self-Distillation for 3D Medical Image Seg…...
)
MySQL数据库——MySQL创建触发器(CREATE TRIGGER)
触发器是与 MySQL 数据表有关的数据库对象,在满足定义条件时触发,并执行触发器中定义的语句集合。触发器的这种特性可以协助应用在数据库端确保数据的完整性。 基本语法 在 MySQL 5.7 中,可以使用 CREATE TRIGGER 语句创建触发器。 语法格…...
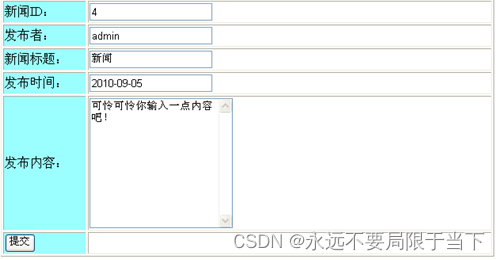
Java实现网上人才招聘系统【附源码】
网上人才招聘系统 1、概述 3 2、系统分析 4 2.1、问题定义 4 2.2、可行性研究 4 2.2.1、可行性需求分析 4 2.2.2、数据流分析 5 2.2.3、数据字典 6 2.2.4、程序流程图 6 2.2.4、开发进度计划 6 2.3、需求分析 7 2.3.1、功能需求分析 7 2.3.2、数据需求分析 10 2.3.3、性能需求…...

jmeter接口测试项目实战详解,零基础也能学,源码框架都给你
目录 1.什么是jmeter? 2.jmeter能做什么? 3.jmeter环境搭建 3.1前提: 3.2jmeter下载: 3.3jmeter环境搭建: 3.3.1mac当中jmeter环境搭建: 3.4jmeter基本配置 3.4.1.切换语言 3.4.2.安装插件 4.jmet…...
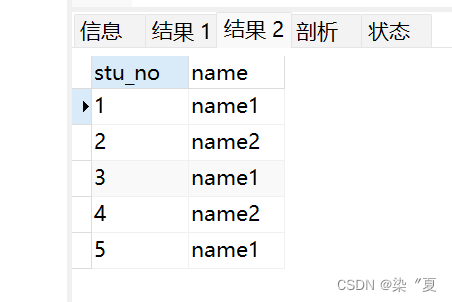
MySQL中去重 distinct 和 group by 是如何去重的
1:测试数据 CREATE TABLE student (stu_no VARCHAR(40) NOT NULL,name VARCHAR(100) NOT NULL );insert into student values(1,name1); insert into student values(2,name2); insert into student values(3,name1); insert into student values(4,name2); i…...

在职读研是理想还是情怀?你想要的都将在社科大能源管理硕士项目实现
在职读研是理想还是情怀呢,每个读研人的想法不同,原因也有所不同。但选择在职继续攻读硕士学位的群体也有着共同点,他们都是想拥有高学历,拥有高目标的一群人。探寻新的起点和终点是他们想所要追求的。不管读研的初心是什么&#…...

携手共建数字钢铁,Hightopo亮相第三届钢铁展洽会
4 月 26 日备受期待的第三届钢铁展洽会在日照盛大召开。图扑软件作为智慧钢铁行业领先的 2D 和 3D 图形界面可视化解决方案提供商,受邀参与此次展会。 图扑软件携智慧钢铁三维可视化监控体系亮相“钢铁展洽会”,向众多钢铁企业展示了一系列图扑 HT 数字…...

Leetcode2383. 赢得比赛需要的最少训练时长
Every day a Leetcode 题目来源:2383. 赢得比赛需要的最少训练时长 解法1:模拟 可以分开考虑在比赛开始前,需要最少增加的精力和经验数量。 每次遇到一个对手,当前精力值都需要严格大于当前对手,否则需要增加精力值…...
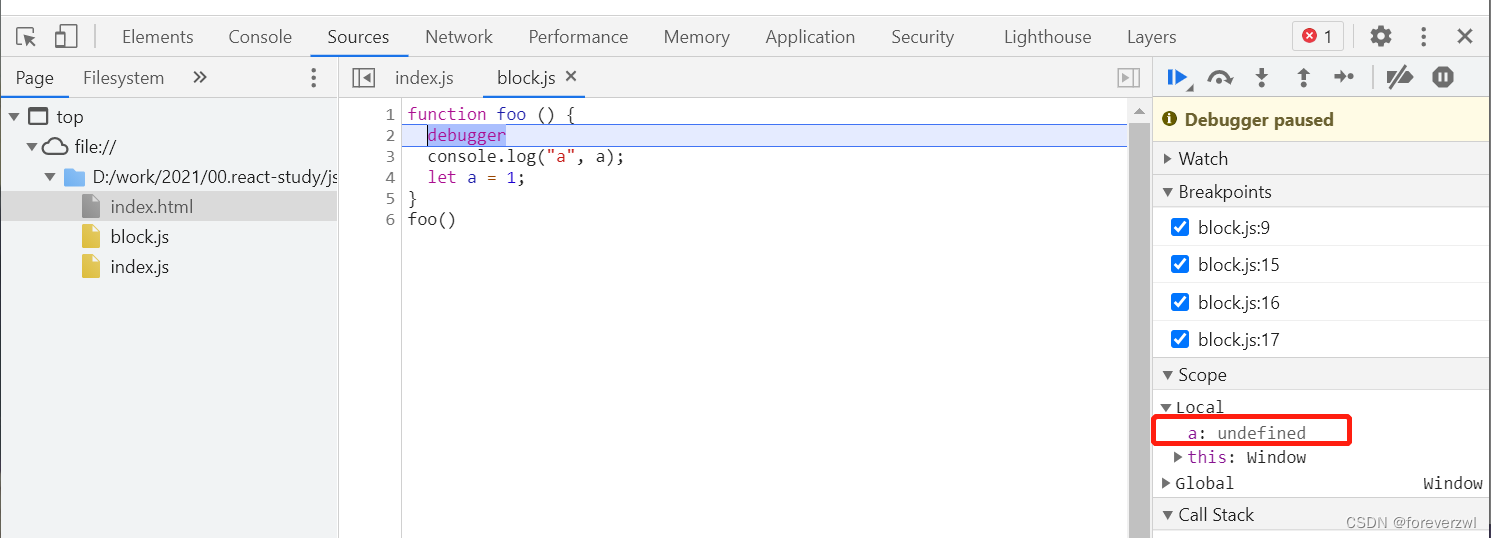
js代码执行过程、调用栈、执行上下文
参考资料 极客时间课程《浏览器工作原理与实践》 – 李兵 一、js代码执行过程 (一)javascript代码的执行流程 浏览器执行javascript代码的流程如下图所示: javascript的执行机制是:先编译,再执行。在编译阶段生成了…...
)
互联网摸鱼日报(2023-05-12)
互联网摸鱼日报(2023-05-12) InfoQ 热门话题 建设和改进持续业务交付能力| BizDevOps 公开课 一部手机就可运行,精通Python等20种语言!谷歌终于能与OpenAI 打擂台了,全新PaLM 2比肩GPT-4 蚂蚁数科开发者…...
)
【Python从入门到实践3.1】扑克发牌知识点(range函数,def函数,else语句配合使用,random库,列表推导式)
扑克发牌知识点 range函数def函数else语句配合使用:random库列表推导式 本篇博文需要特别感谢"Python从入门到精通"课程中一位同学对扑克发牌程序做出的知识点分析,本博文的内容大多也是从这位同学的分析而来. range函数 Range()函数: *返回一…...

Spring Cloud第二季--Spring Cloud Bus
文章目录 Spring Clud Bus什么是总线基本原理 牛刀小试 Spring Clud Bus 在Spring Cloud学习–配置中心(Config)中实现了集中管理微服务配置、不同环境不同配置、运行期间也可动态调整、配置修改后可以自动更新的需求,但同时也有一个弊端&am…...

Unittest自动化测试之unittestunittest_生成测试报告
unittest_生成测试报告 测试报告为测试结果的统计即展示,是自动化测试不可或缺的一部分,利用unittest 可以生成测试报告 方式一、使用第三方 HTMLTestRunner 执行测试用例集,生成网页版测试报告(推荐) HTMLTestRunn…...

一个查询IP地理信息和CDN提供商的离线终端工具
Nali 功能 支持多种数据库 纯真 IPv4 离线数据库ZX IPv6 离线数据库Geoip2 城市数据库 (可选)IPIP 数据库 (可选)ip2region 数据库 (可选)DB-IP 数据库 (可选)IP2Location DB3 LITE 数据库 (可选) CDN 服务提供商查询支持管道处理支持交互式查询同时支持IPv4和IPv6支持多语言…...

RflySim平台使用篇 | Rflysim3D软件使用系列教程(二)
导读: RflySim3D(支持体验版)和RflySimUE5(支持完整版)为本平台核心三维显示软件, 分别基于UE4 和UE5 引擎开发,具备高逼真虚拟现实显示效果。本视频主要讲解了如何将自定义的三维场景如何加载到RflySim3D…...

2023 年第五届河南省 CCPC 大学生程序设计竞赛
题目地址 题目PDF地址 题解地址 Problem A. 小水獭游河南 ∣ a ∣ ≤ ∣ Σ ∣ 26 ,暴力枚举 a 判断 b 是否为是回文串即可,时间复杂度 O ( ∣ Σ ∣ ∣ s ∣ ) 。 |a| ≤ |Σ| 26,暴力枚举 a 判断 b 是否为是回文串即可,时间…...

nginx liunx最新版本安装flask部署
一、nginx安装 1.进入Nginx官网的资源下载页:http://nginx.org/en/download.html 2.下载nginx-1.22.1.tar.gz, 3解压: tar -zxvf nginx-1.22.1.tar.gz解压完成后会在当前目录下得到一个新的nginx文件夹 4.终端进入nginx文件夹目录&#x…...
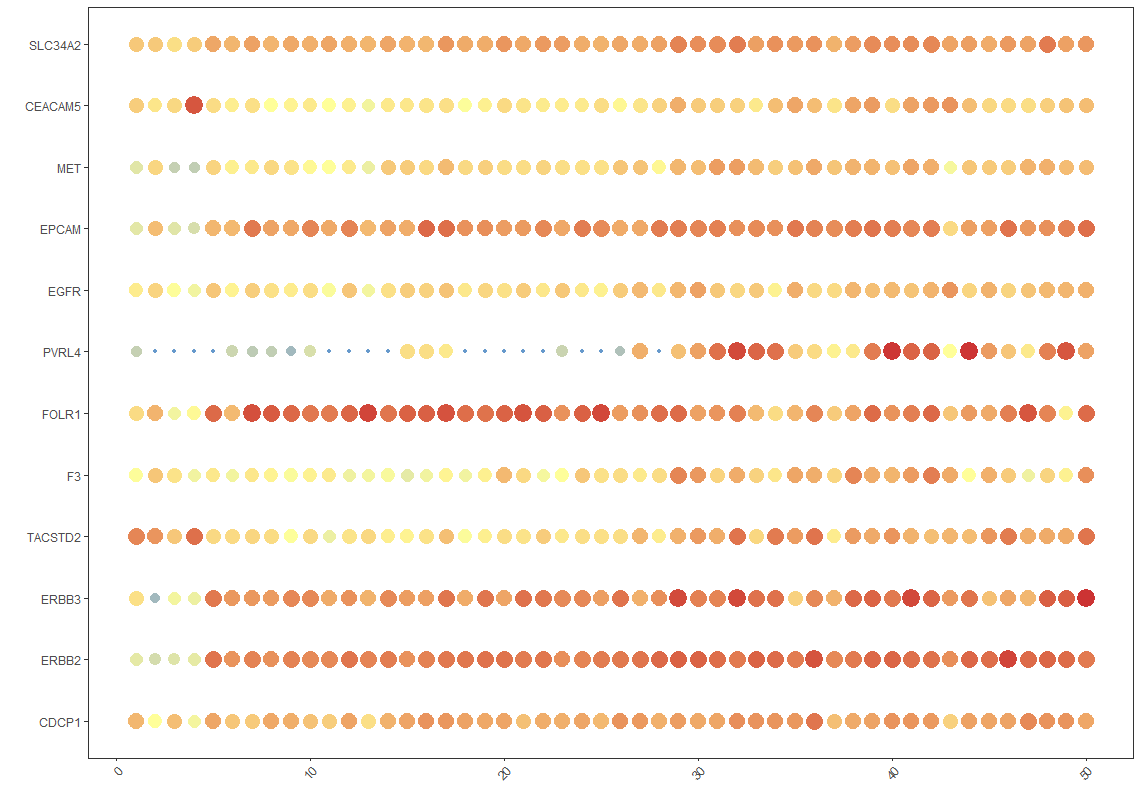
热图 -- pheatmap or ggplot2
文章目录 brief数据准备 pheatmap实例最朴素的方式数据缩放取消聚类更改每个小方格的大小聚类以及聚类方式和参数修改热图呈现的颜色修改legend ggplot2实例ggplot2实例变式添加 group bar做成dotplot pheatmap 多图组合问题 brief 这里主要记录了pheatmap 以及 ggplot2实现热…...

SciencePlots——绘制论文中的图片
文章目录 安装一、风格二、1 资源 安装 # 安装最新版 pip install githttps://github.com/garrettj403/SciencePlots.git# 安装稳定版 pip install SciencePlots一、风格 简单好用的深度学习论文绘图专用工具包–Science Plot 二、 1 资源 论文绘图神器来了:一行…...
)
Spring Boot 实现流式响应(兼容 2.7.x)
在实际开发中,我们可能会遇到一些流式数据处理的场景,比如接收来自上游接口的 Server-Sent Events(SSE) 或 流式 JSON 内容,并将其原样中转给前端页面或客户端。这种情况下,传统的 RestTemplate 缓存机制会…...
)
【位运算】消失的两个数字(hard)
消失的两个数字(hard) 题⽬描述:解法(位运算):Java 算法代码:更简便代码 题⽬链接:⾯试题 17.19. 消失的两个数字 题⽬描述: 给定⼀个数组,包含从 1 到 N 所有…...

可靠性+灵活性:电力载波技术在楼宇自控中的核心价值
可靠性灵活性:电力载波技术在楼宇自控中的核心价值 在智能楼宇的自动化控制中,电力载波技术(PLC)凭借其独特的优势,正成为构建高效、稳定、灵活系统的核心解决方案。它利用现有电力线路传输数据,无需额外布…...
Java-41 深入浅出 Spring - 声明式事务的支持 事务配置 XML模式 XML+注解模式
点一下关注吧!!!非常感谢!!持续更新!!! 🚀 AI篇持续更新中!(长期更新) 目前2025年06月05日更新到: AI炼丹日志-28 - Aud…...

Neo4j 集群管理:原理、技术与最佳实践深度解析
Neo4j 的集群技术是其企业级高可用性、可扩展性和容错能力的核心。通过深入分析官方文档,本文将系统阐述其集群管理的核心原理、关键技术、实用技巧和行业最佳实践。 Neo4j 的 Causal Clustering 架构提供了一个强大而灵活的基石,用于构建高可用、可扩展且一致的图数据库服务…...

HarmonyOS运动开发:如何用mpchart绘制运动配速图表
##鸿蒙核心技术##运动开发##Sensor Service Kit(传感器服务)# 前言 在运动类应用中,运动数据的可视化是提升用户体验的重要环节。通过直观的图表展示运动过程中的关键数据,如配速、距离、卡路里消耗等,用户可以更清晰…...
LINUX 69 FTP 客服管理系统 man 5 /etc/vsftpd/vsftpd.conf
FTP 客服管理系统 实现kefu123登录,不允许匿名访问,kefu只能访问/data/kefu目录,不能查看其他目录 创建账号密码 useradd kefu echo 123|passwd -stdin kefu [rootcode caozx26420]# echo 123|passwd --stdin kefu 更改用户 kefu 的密码…...

NPOI操作EXCEL文件 ——CAD C# 二次开发
缺点:dll.版本容易加载错误。CAD加载插件时,没有加载所有类库。插件运行过程中用到某个类库,会从CAD的安装目录找,找不到就报错了。 【方案2】让CAD在加载过程中把类库加载到内存 【方案3】是发现缺少了哪个库,就用插件程序加载进…...
基础)
6个月Python学习计划 Day 16 - 面向对象编程(OOP)基础
第三周 Day 3 🎯 今日目标 理解类(class)和对象(object)的关系学会定义类的属性、方法和构造函数(init)掌握对象的创建与使用初识封装、继承和多态的基本概念(预告) &a…...
