SpringBoot整合RabbitMQ
SpringBoot整合RabbitMQ,生产者
(1)创建maven项目
(2)引入依赖
<parent><groupId>org.springframework.boot</groupId><artifactId>spring-boot-starter-parent</artifactId><version>2.2.2.RELEASE</version>
</parent><dependencies><!-- spring的上下文 --><dependency><groupId>org.springframework</groupId><artifactId>spring-context</artifactId></dependency><!-- spring整合amqp插件包 --><dependency><groupId>org.springframework.boot</groupId><artifactId>spring-boot-starter-amqp</artifactId></dependency><!-- 单元测试包 --><dependency><groupId>junit</groupId><artifactId>junit</artifactId></dependency><dependency><groupId>org.springframework</groupId><artifactId>spring-test</artifactId><scope>test</scope></dependency></dependencies>
(3)创建 rabbitmq.properties 配置文件
rabbitmq.host=127.0.0.1
rabbitmq.port=5672
rabbitmq.username=guest
rabbitmq.password=guest
rabbitmq.virtual-host=/
(4)创建 spring-rabbitmq-producer.xml 配置文件
<?xml version="1.0" encoding="UTF-8"?>
<beans xmlns="http://www.springframework.org/schema/beans"xmlns:xsi="http://www.w3.org/2001/XMLSchema-instance"xmlns:context="http://www.springframework.org/schema/context"xmlns:rabbit="http://www.springframework.org/schema/rabbit"xsi:schemaLocation="http://www.springframework.org/schema/beanshttp://www.springframework.org/schema/beans/spring-beans.xsdhttp://www.springframework.org/schema/contexthttps://www.springframework.org/schema/context/spring-context.xsdhttp://www.springframework.org/schema/rabbithttp://www.springframework.org/schema/rabbit/spring-rabbit.xsd"><!-- 加载配置文件 --><context:property-placeholder location="classpath:rabbitmq.properties"/><!-- 定义rabbitmq连接工厂 --><rabbit:connection-factory id="connectionFactory"host="${rabbitmq.host}"port="${rabbitmq.port}"username="${rabbitmq.username}"password="${rabbitmq.password}"virtual-host="${rabbitmq.virtual-host}"/><!-- 定义管理交换机、队列 --><rabbit:admin connection-factory="connectionFactory"/><!-- 定义持久化队列,不存在则自动创建。不绑定到交换机则绑定到默认交换机。默认交换机类型为direct,名字为:“”,路由键为队列的名称 --><rabbit:queue id="spring_queue" name="spring_queue" auto-declare="true"/><!-- 广播,所有独立额都能收到消息 --><!-- 定义广播交换机中的持久化队列,不存在则自动创建 --><rabbit:queue id="spring_fanout_queue_1" name="spring_fanout_queue_1" auto-declare="true"/><rabbit:queue id="spring_fanout_queue_2" name="spring_fanout_queue_2" auto-declare="true"/><!-- 定义广播交换机,并绑定上述两个队列 --><rabbit:fanout-exchange id="spring_fanout_exchange"  name="spring_fanout_exchange" auto-declare="true"><rabbit:bindings><rabbit:binding queue="spring_fanout_queue_1"/><rabbit:binding queue="spring_fanout_queue_2"/></rabbit:bindings></rabbit:fanout-exchange><!-- 通配符,*匹配一个单词,#匹配多个单词 --><!-- 定义广播交换机中的持久化队列,不存在则自动创建 --><rabbit:queue id="spring_topic_queue_start" name="spring_topic_queue_start" auto-declare="true"/><rabbit:queue id="spring_topic_queue_swell" name="spring_topic_queue_swell" auto-declare="true"/><rabbit:queue id="spring_topic_queue_well2" name="spring_topic_queue_well2" auto-declare="true"/><rabbit:topic-exchange id="spring_topic_exchange"  name="spring_topic_exchange" auto-declare="true"><rabbit:bindings><rabbit:binding pattern="juexing.*" queue="spring_topic_queue_start" /><rabbit:binding pattern="juexing.#" queue="spring_topic_queue_swell"/><rabbit:binding pattern="test.#" queue="spring_topic_queue_well2"/></rabbit:bindings></rabbit:topic-exchange><!-- 定义rabbitTemplate对象操作可以在代码中方便发送消息 --><rabbit:template id="rabbitTemplate" connection-factory="connectionFactory"/>
</beans>
(5)编写测试代码,发送消息
package com.juexing;import org.junit.Test;
import org.junit.runner.RunWith;
import org.springframework.amqp.rabbit.core.RabbitTemplate;
import org.springframework.beans.factory.annotation.Autowired;
import org.springframework.test.context.ContextConfiguration;
import org.springframework.test.context.junit4.SpringJUnit4ClassRunner;@RunWith(SpringJUnit4ClassRunner.class)
@ContextConfiguration(locations="classpath:spring-rabbitmq-producer.xml")
public class ProducerTest {@Autowiredprivate RabbitTemplate rabbitTemplate;@Testpublic void testHelloWorld(){rabbitTemplate.convertAndSend("spring_queue", "hello world spring...");}@Testpublic void testFanout(){rabbitTemplate.convertAndSend("spring_fanout_exchange", "","spring_fanout...");}@Testpublic void testTopic(){rabbitTemplate.convertAndSend("spring_topic_exchange", "juexing.erci","spring_testTopic...");}}
(6)项目结构图展示
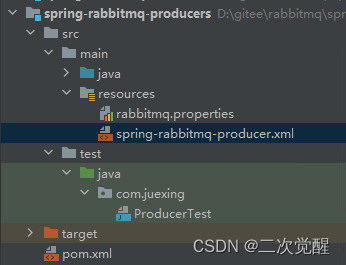
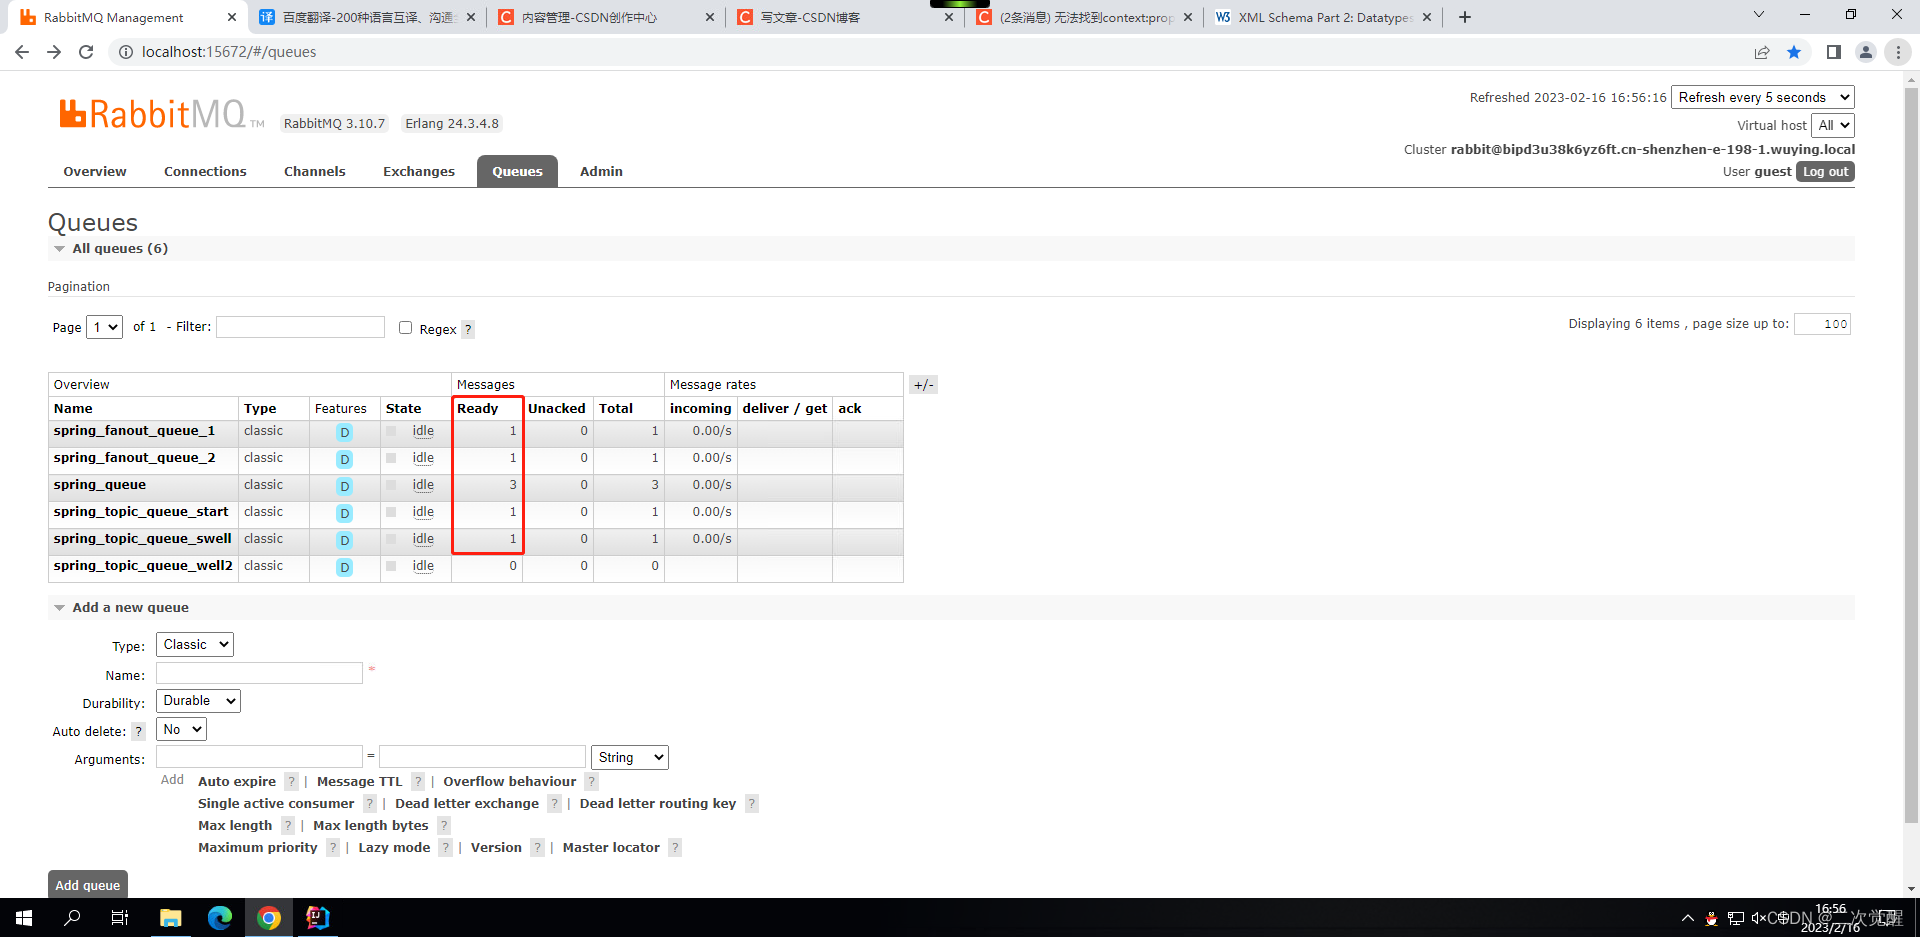
(7)运行测试代码,查看效果
- 两个交换机
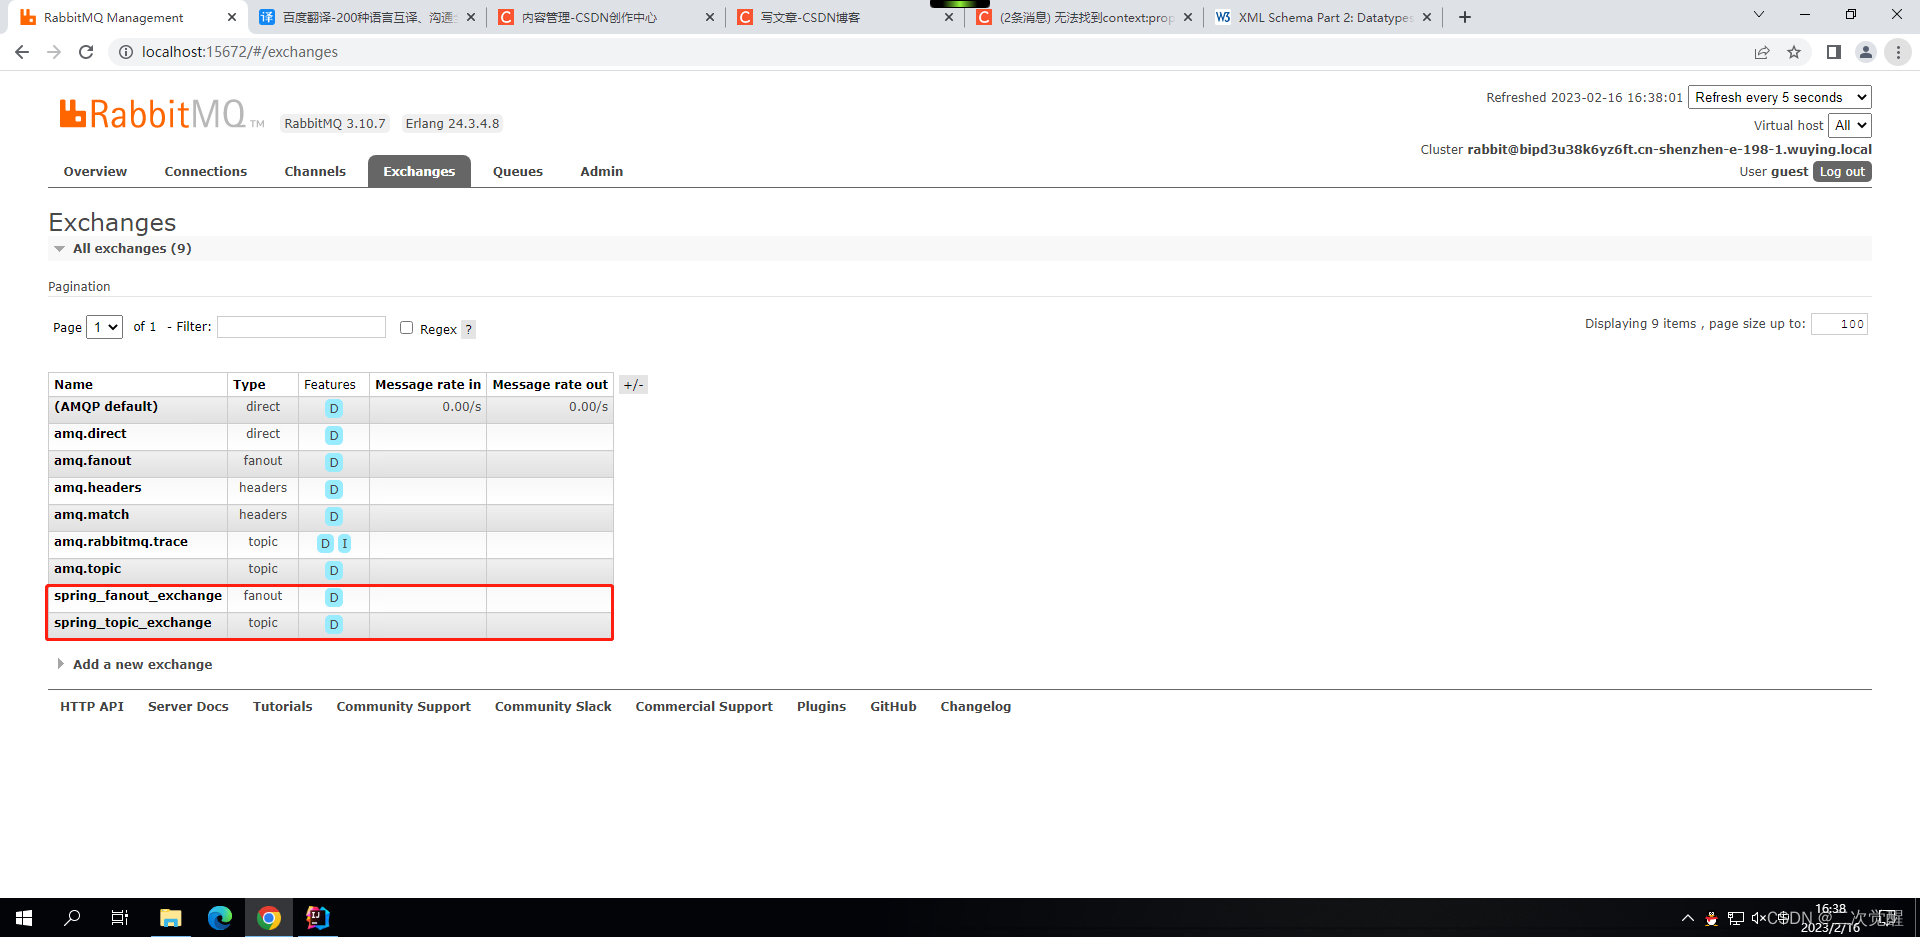
spring_fanout_exchange交换机,绑定了spring_fanout_queue1、spring_fanout_queue2 两个消息队列
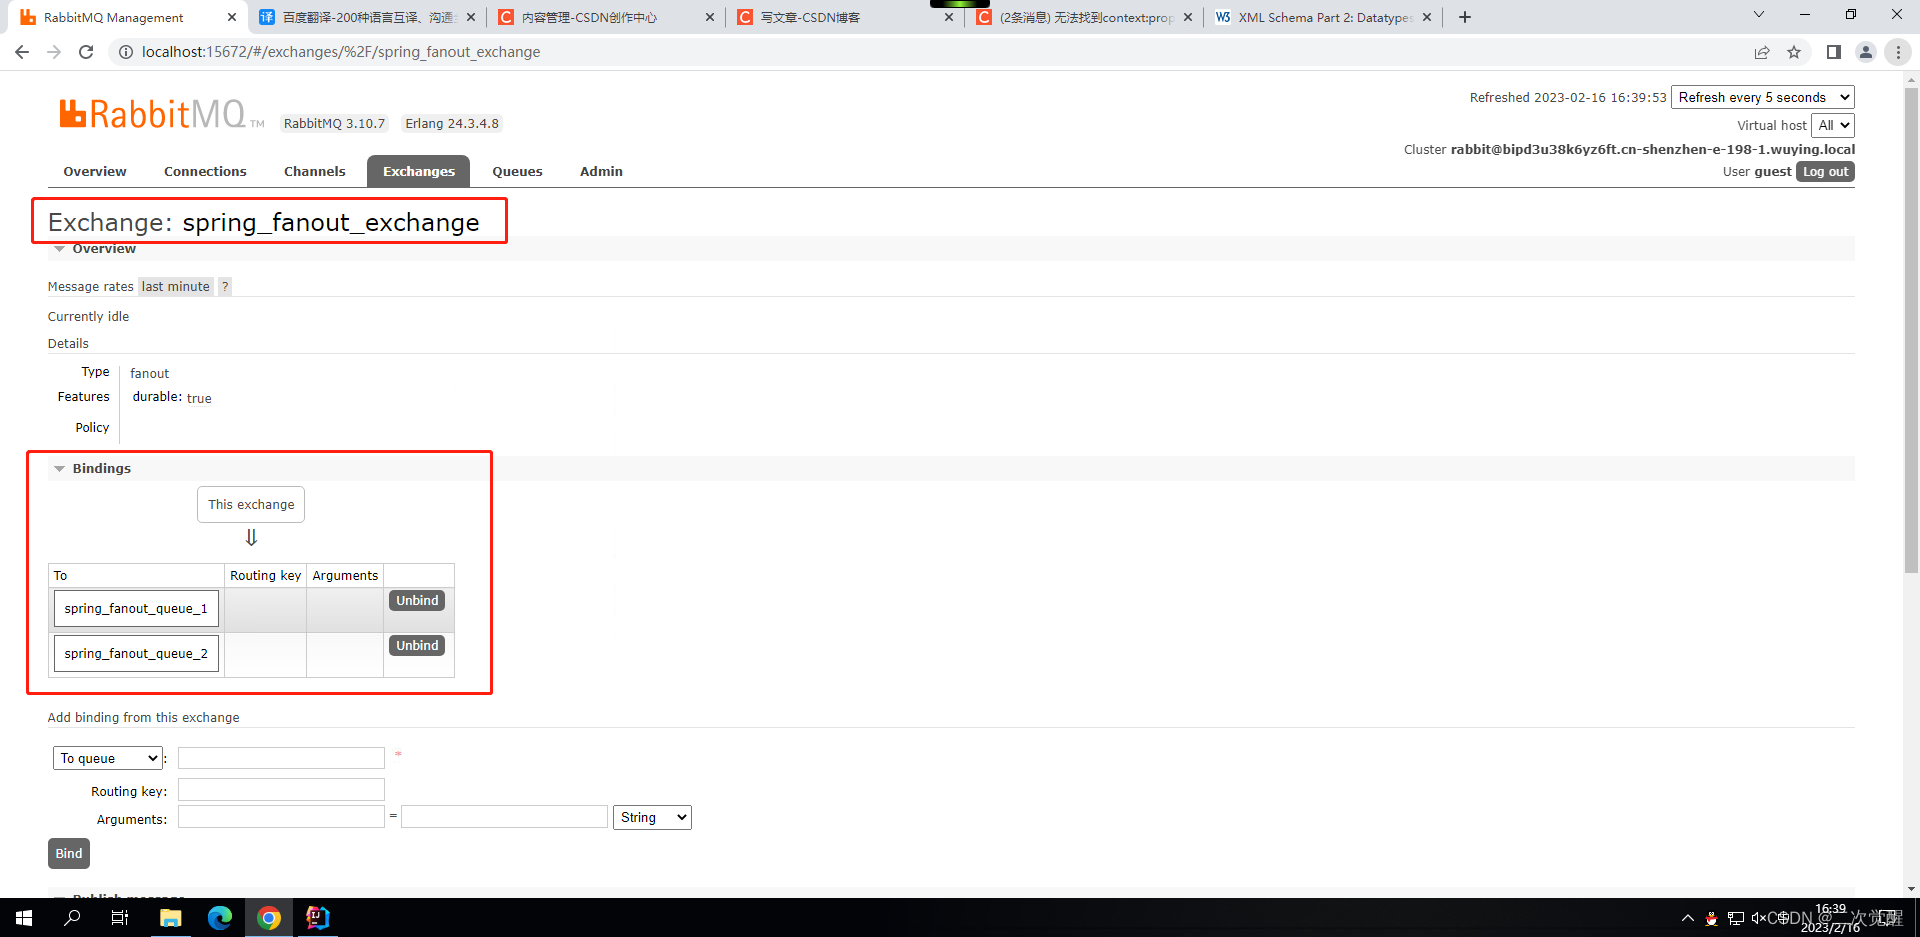
spring_topic_exchange交换机,绑定了spring_topic_queue_start、spring_topic_queue_swell、spring_topic_queue_well2
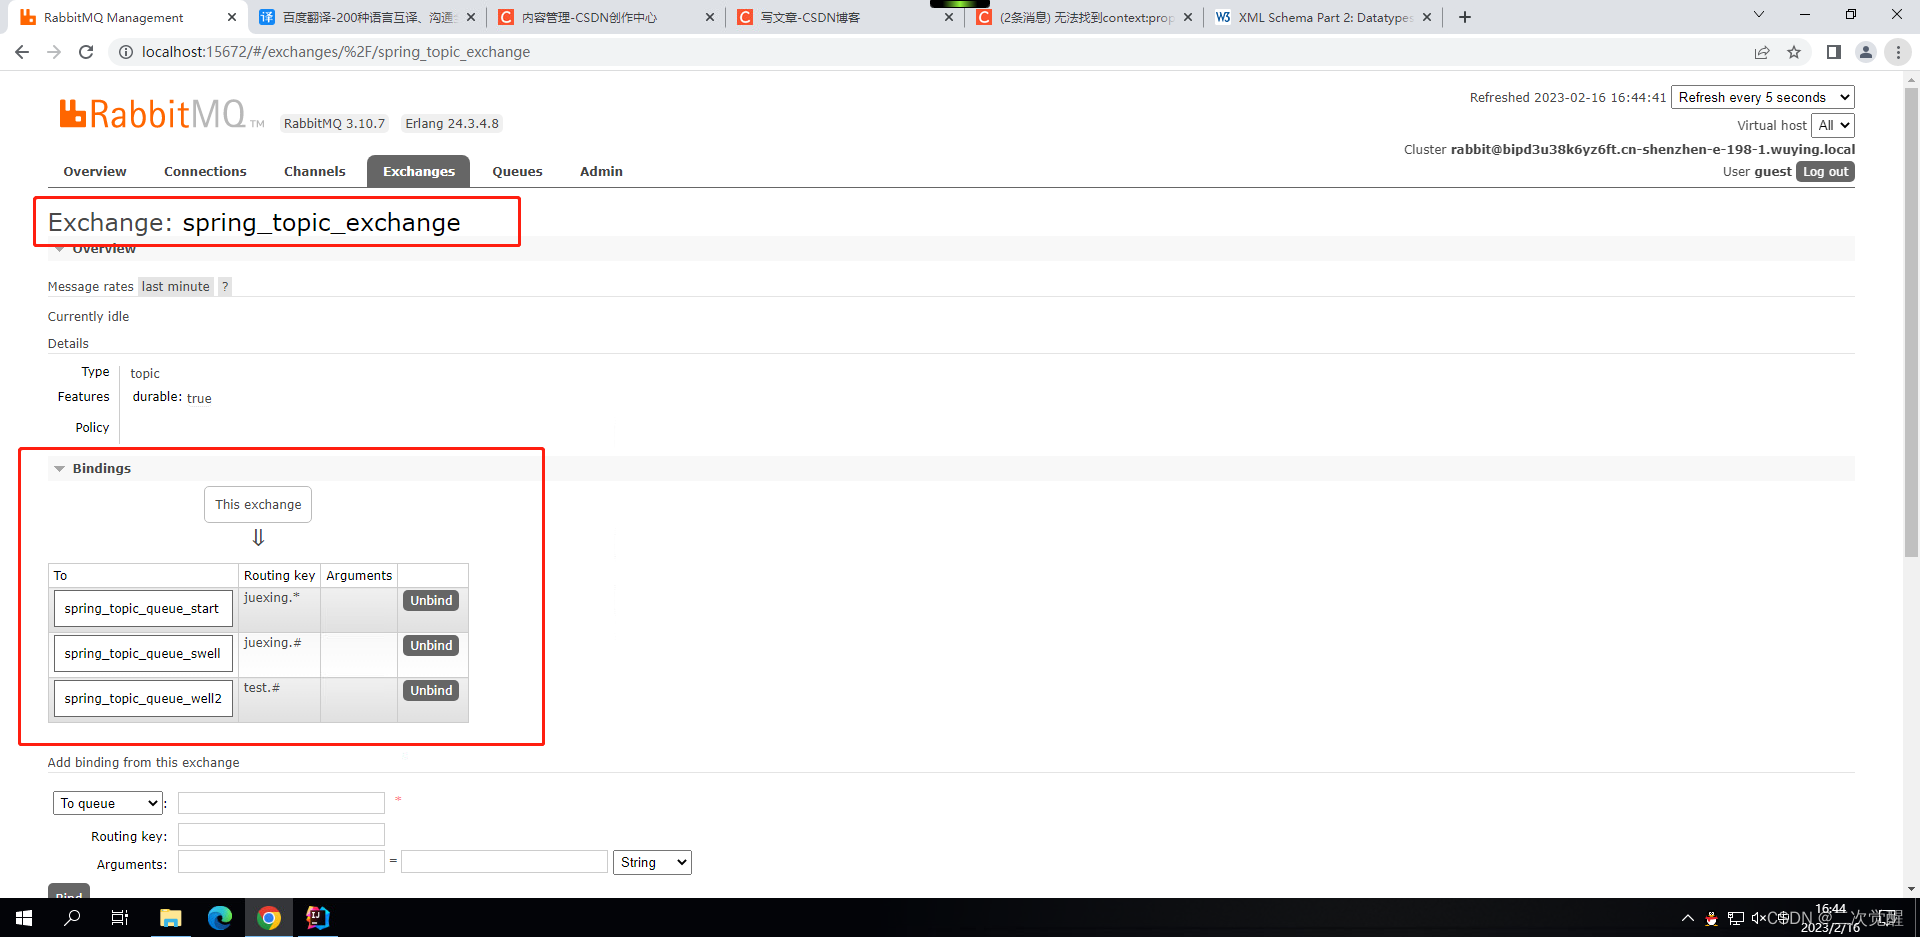
- 6个消息队列,与未消费的消息。
SpringBoot整合RabbitMQ,消费者
(1)创建maven项目
(2)引入依赖
<parent><groupId>org.springframework.boot</groupId><artifactId>spring-boot-starter-parent</artifactId><version>2.2.2.RELEASE</version></parent><dependencies><!-- spring的上下文 --><dependency><groupId>org.springframework</groupId><artifactId>spring-context</artifactId></dependency><!-- spring整合amqp插件包 --><dependency><groupId>org.springframework.amqp</groupId><artifactId>spring-rabbit</artifactId></dependency><!-- 单元测试包 --><dependency><groupId>junit</groupId><artifactId>junit</artifactId></dependency><dependency><groupId>org.springframework</groupId><artifactId>spring-test</artifactId><scope>test</scope></dependency></dependencies>
(3)创建 rabbitmq.properties 配置文件
rabbitmq.host=127.0.0.1
rabbitmq.port=5672
rabbitmq.username=guest
rabbitmq.password=guest
rabbitmq.virtual-host=/
(4)创建 spring-rabbitmq-consumer.xml 配置文件
<?xml version="1.0" encoding="UTF-8"?>
<beans xmlns="http://www.springframework.org/schema/beans"xmlns:xsi="http://www.w3.org/2001/XMLSchema-instance"xmlns:context="http://www.springframework.org/schema/context"xmlns:rabbit="http://www.springframework.org/schema/rabbit"xsi:schemaLocation="http://www.springframework.org/schema/beanshttp://www.springframework.org/schema/beans/spring-beans.xsdhttp://www.springframework.org/schema/contexthttps://www.springframework.org/schema/context/spring-context.xsdhttp://www.springframework.org/schema/rabbithttp://www.springframework.org/schema/rabbit/spring-rabbit.xsd"><!-- 加载配置文件 --><context:property-placeholder location="classpath:rabbitmq.properties"/><!-- 定义rabbitmq连接工厂 --><rabbit:connection-factory id="connectionFactory"host="${rabbitmq.host}"port="${rabbitmq.port}"username="${rabbitmq.username}"password="${rabbitmq.password}"virtual-host="${rabbitmq.virtual-host}"/><bean id="springQueueListener" class="com.juexing.listener.SpringQueueListener"/>
<!--    <bean id="fanoutListener1" class="com.juexing.listener"/>-->
<!--    <bean id="fanoutListener2" class="com.juexing.listener"/>-->
<!--    <bean id="topicListenerStart" class="com.juexing.listener"/>-->
<!--    <bean id="topicListenerSwell" class="com.juexing.listener"/>-->
<!--    <bean id="topicListenerWell2" class="com.juexing.listener"/>--><rabbit:listener-container connection-factory="connectionFactory" auto-declare="true"><rabbit:listener ref="springQueueListener" queue-names="spring_queue"/>
<!--        <rabbit:listener ref="fanoutListener1" queue-names="spring_fanout_queue_1"/>-->
<!--        <rabbit:listener ref="fanoutListener2" queue-names="spring_fanout_queue_2"/>-->
<!--        <rabbit:listener ref="topicListenerStart" queue-names="spring_topic_queue_start"/>-->
<!--        <rabbit:listener ref="topicListenerSwell" queue-names="spring_topic_queue_swell"/>-->
<!--        <rabbit:listener ref="topicListenerWell2" queue-names="spring_topic_queue_well2"/>--></rabbit:listener-container></beans>
(5)编写监听类,消费消息
package com.juexing.listener;import org.springframework.amqp.core.Message;
import org.springframework.amqp.core.MessageListener;public class SpringQueueListener implements MessageListener {@Overridepublic void onMessage(Message message) {//打印消息System.out.println(new String(message.getBody()));}
}
(6)编写测试类
package com.juexing;import org.junit.Test;
import org.junit.runner.RunWith;
import org.springframework.test.context.ContextConfiguration;
import org.springframework.test.context.junit4.SpringJUnit4ClassRunner;@RunWith(SpringJUnit4ClassRunner.class)
@ContextConfiguration(locations="classpath:spring-rabbitmq-consumer.xml")
public class ConsumerTest {@Testpublic void testSpringQueue(){}
}
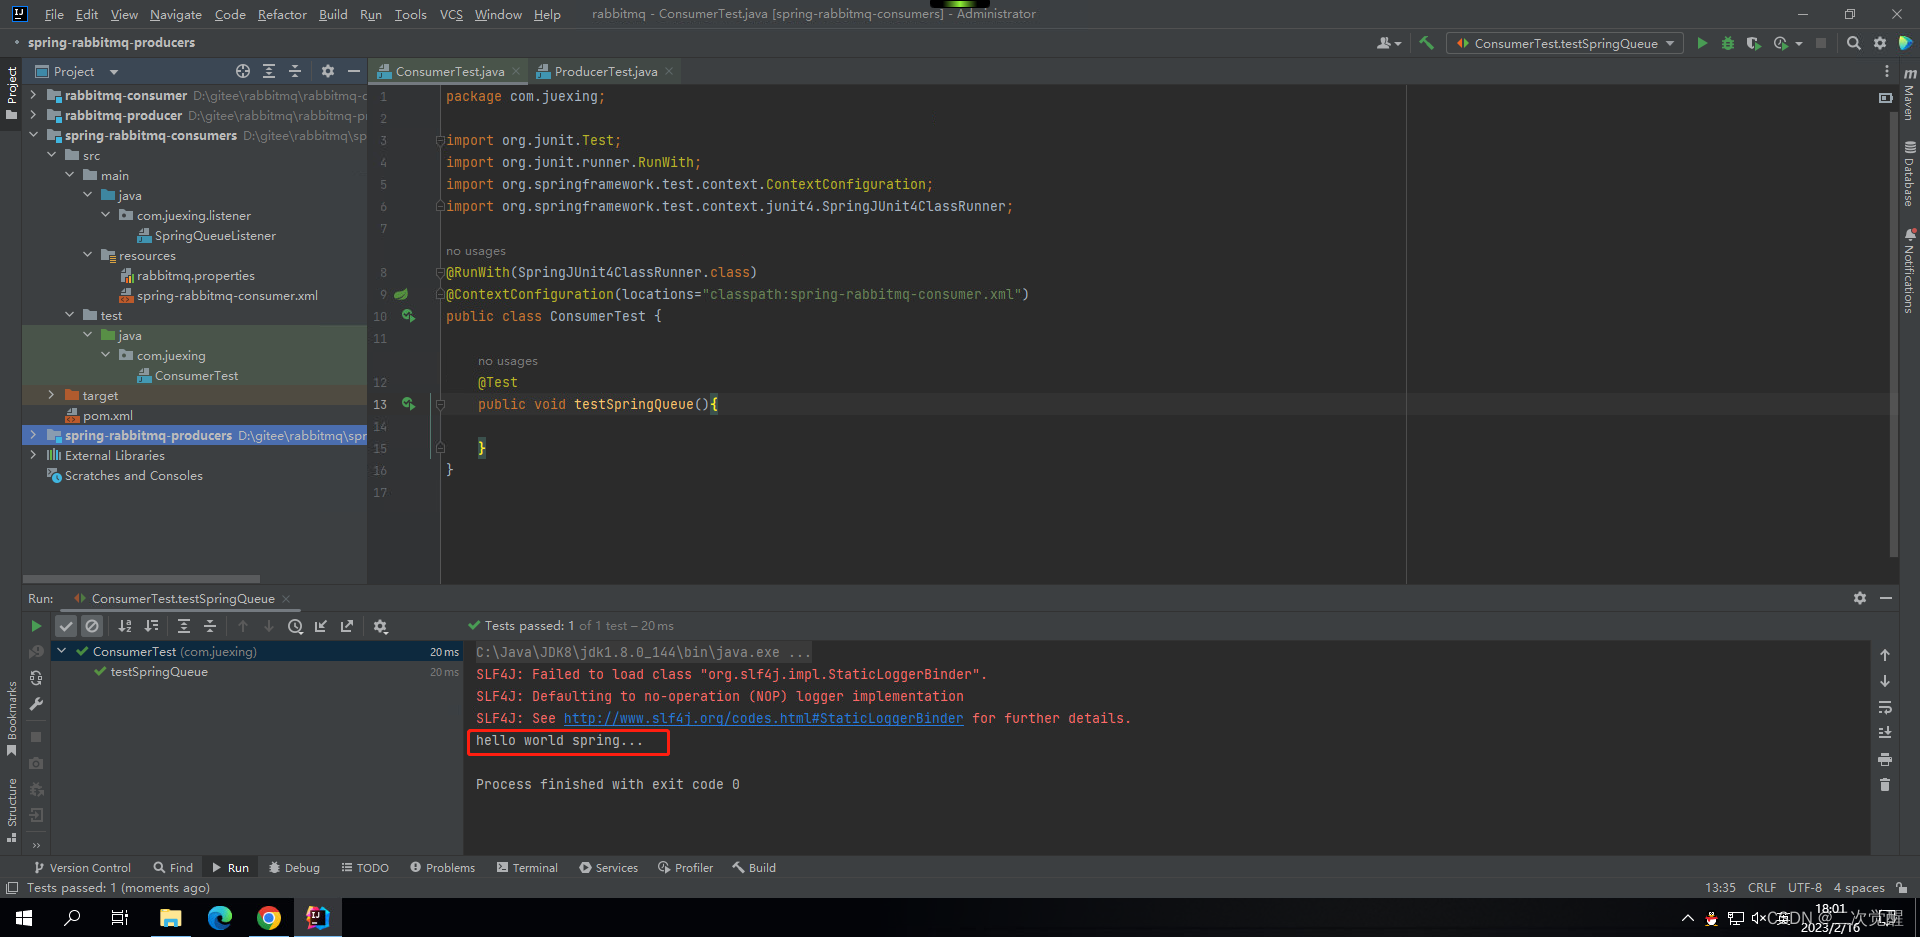
(7)运行测试类,打印消息
相关文章:

SpringBoot整合RabbitMQ
SpringBoot整合RabbitMQ,生产者 (1)创建maven项目 (2)引入依赖 <parent><groupId>org.springframework.boot</groupId><artifactId>spring-boot-starter-parent</artifactId><versi…...
Hive---安装教程
Hive安装教程 Hive属于Hadoop生态圈,所以Hive必须运行在Hadoop上 文章目录Hive安装教程上传安装包解压并且更名修改 /etc/profile创建hive-site.xml将mysql的jar包放入Hive库中开启刷新配置文件hadoop开启mysql初始化启动hive上传安装包 将安装包上传到/opt/insta…...

MySQL作业四
学生表:Student (Sno, Sname, Ssex , Sage, Sdept) 学号,姓名,性别,年龄,所在系 Sno为主键 课程表:Course (Cno, Cname,) 课程号,课程名 Cno为主键 学生选课表:SC (Sno, Cno, Score)…...
云原生安全检测器 Narrows(CNSI)的部署和使用
近日, 云原生安全检测器 Narrows(Cloud Native Security Inspector,简称CNSI)发布了0.2.0版本。 (https://github.com/vmware-tanzu/cloud-native-security-inspector) 此项目旨在对K8s集群中的工作负载进…...
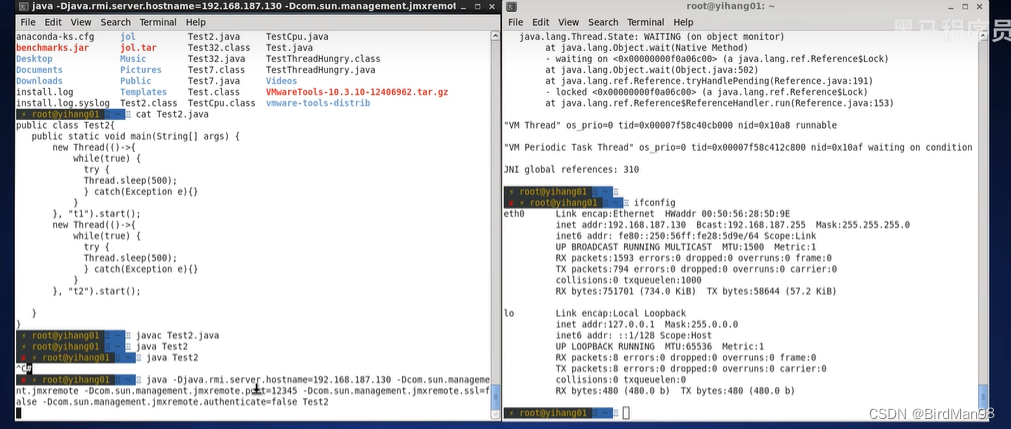
【并发编程】【3】Java线程 创建线程与线程运行
并发编程 3.Java线程 本章内容 创建和运行线程 查看线程 线程 API 线程状态 3.1 创建和运行线程 方法一,直接使用 Thread // 创建线程对象 Thread t new Thread() {public void run() {// 要执行的任务} }; // 启动线程 t.start();例如: // 构…...

Ambire 最新消息——2023 年 1 月
大家好,这里是我们在过去几周所做的一切的快速回顾。 发展 整个钱包的交易模拟和余额预测 我们推出了一项真正改变加密钱包 UX 游戏规则的功能:Ambire 现在向用户显示他们的钱包余额将如何更新,甚至在签署交易之前。 这项新功能可以分解为 Am…...

【kubeflow | 镜像源的解决方法——脚本】
20230214 方式一:获取所有镜像列表,自行外网拉取下载 获取KF所需镜像列表脚本 Offical docs for getting all kubeflow images curl https://gist.githubusercontent.com/Jason-CKY/7d7056ce261c6d606585f05218230037/raw/5c27297efdf6424cd9679b9f7…...
)
function calling convention(函数调用约定)
函数调用约定 函数调用约定,是指当一个函数被调用时,函数的参数会被传递给被调用的函数和返回值会被返回给调用函数。函数的调用约定就是描述参数是怎么传递和由谁平衡...
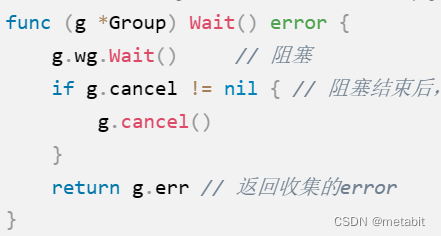
errgroup 原理简析
golang.org/x/sync/errgroup errgroup提供了一组并行任务中错误采集的方案。 先看注释 Package errgroup provides synchronization, error propagation, and Context cancelation for groups of goroutines working on subtasks of a common task. Group 结构体 // A Gro…...

Centos7.6 下 Docker 安装
Docker的自动化安装 官方的一键安装方式: curl -fsSL https://get.docker.com | bash -s docker --mirror Aliyun 国内 daocloud一键安装命令: curl -sSL https://get.daocloud.io/docker | sh Docker手动安装 手动安装Docker分三步:卸…...

C++11--lambda表达式
目录 lambda表达式的概念 lambda表达式语法 lambda表达式的书写格式 捕捉列表 参数列表 mutable 返回值类型 函数体 lambda表达式交换两个数 函数对象与lambda表达式 lambda表达式的概念 lambda表达式是一个匿名函数 它能让代码更加地简洁 提高了代码可读性 首先定义…...
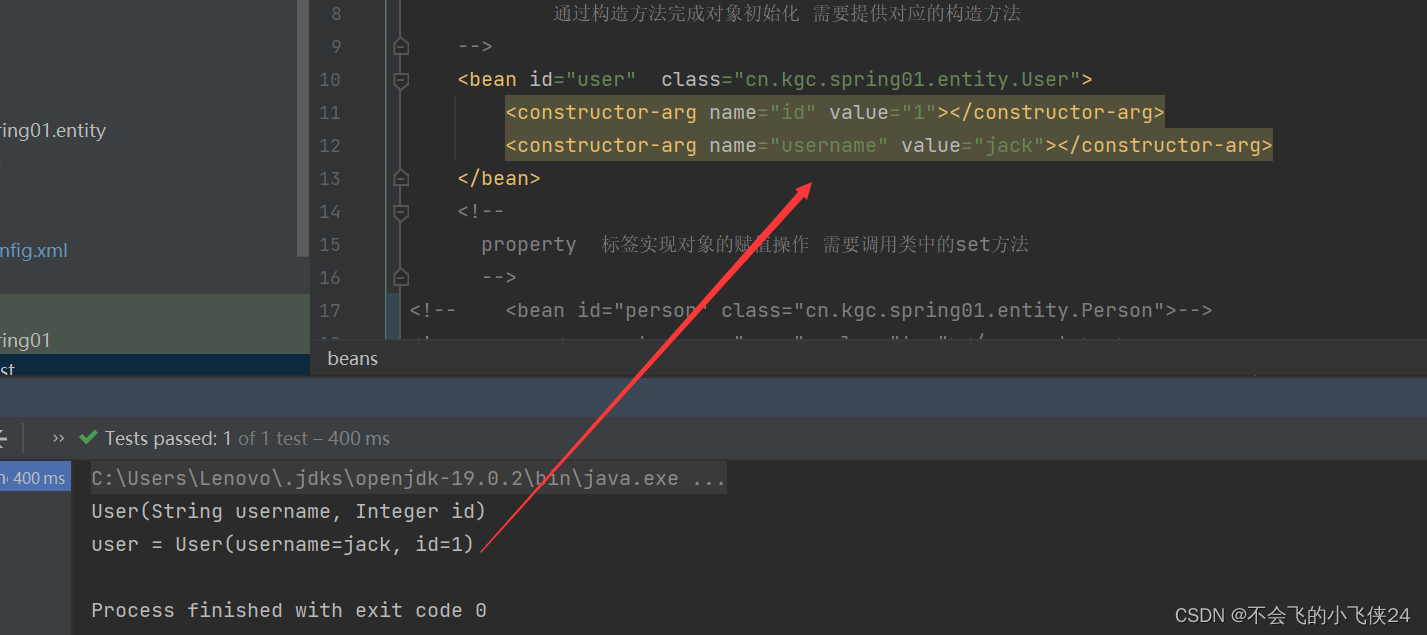
四【Spring框架】
目录一 Spring概述二 .Spring 的体系结构三 Spring的开发环境3.1 配置pom.xml文件四 项目案例:4.1 创建实体类4.2 在pom.xml中引入依赖4.3 配置Spring-config.xml文件4.4 Test✅作者简介:Java-小白后端开发者 🥭公认外号:球场上的…...
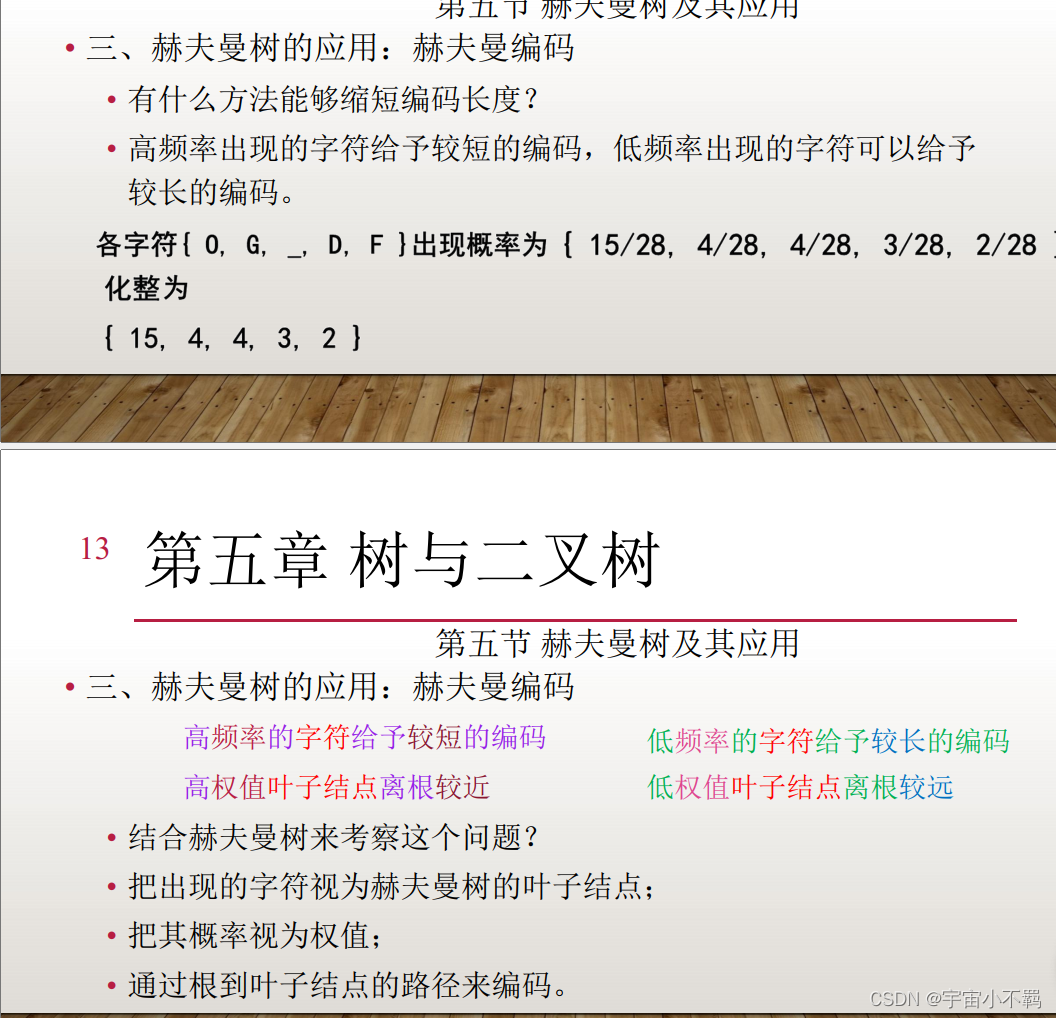
树与二叉树 总复习
一、树的定义 树是一个有n个(n>0)结点的有限集合。 如果n0,称为空树; 如果n>0,称为非空树,有且仅有一个特定的称为根Root的结点(无直接前驱) 如果n>1,除了根节点外&…...
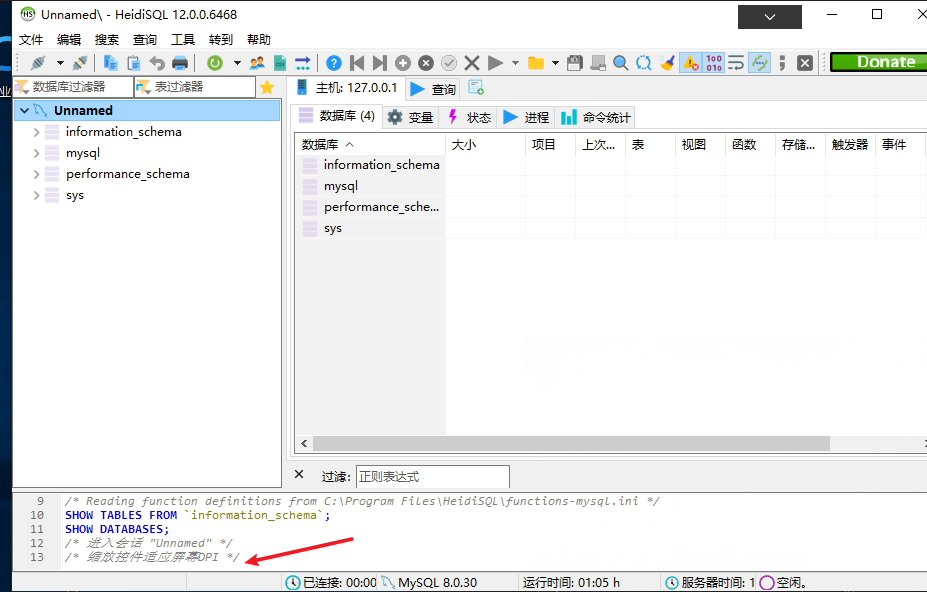
window10安装MySQL数据库
准备好软件MySql的下载参考:(1137条消息) mysql下载与安装过程_weixin_40396510的博客-CSDN博客_mysql数据库下载安装(1137条消息) 安装MySQL的常见问题_二木成林的博客-CSDN博客_sc不是内部或外部命令,也不是可运行的程序解压要C盘(自定义,本…...

羊了个羊游戏开发教程3:卡牌拾取和消除
本文首发于微信公众号: 小蚂蚁教你做游戏。欢迎关注领取更多学习做游戏的原创教程资料,每天学点儿游戏开发知识。嗨!大家好,我是小蚂蚁。终于要写第三篇教程了,中间拖的时间有点儿长,以至于我的好几位学员等…...

SHA1详解
目录 一、介绍 二、与MD5的区别 1、对强行攻击的安全性 2、对密码分析的安全性 3、速度 三、应用 1、文件指纹 2、Git中标识对象 四、算法原理 1、填充消息 2、消息处理 3、数据运算 (1)链接变量 (2)步函数 一、介绍…...

Go并发介绍及其使用
1. goroutine Go语言通过go关键字来启动一个goroutine。注意:go关键字后面必须跟一个函数,不能是语句或者其他东西,函数的返回值被忽略。 goroutine有如下特性: go的执行是非阻塞的,不会等待。go后面的函数的返回值…...
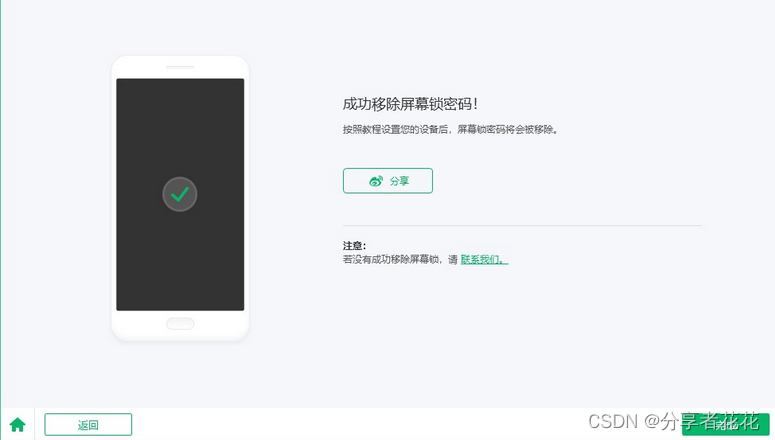
小米手机屏幕解锁技巧精选
手机锁是一种保护存储的用户数据和信息的方法。存储在锁定手机中的所有信息比任何人都可以访问的手机安全得多。但有时,如果用户忘记了这些屏幕锁定,可能会造成麻烦。在此博客中,我们将帮助用户了解如何解锁小米手机。 什么时候需要解锁小米手…...

「SDOI2009」HH去散步
HH去散步 题目限制 内存限制:125.00MB时间限制:1.00s标准输入标准输出 题目知识点 动态规划 dpdpdp矩阵 矩阵乘法矩阵加速矩阵快速幂 思维 构造 题目来源 「SDOI2009」HH去散步 题目 题目背景 HH 有个一成不变的习惯,喜欢在饭后散步…...

用上Visual Studio后,我的世界游戏的构建时间减少了一半
今天我们讲述一个使用 Visual Studio 提升工作效率的案例。 我的世界(Minecraft) 游戏开发商 Mojang Studios 近日联系了 Visual Studio C 团队,因为他们需要将 C 开发扩展到新平台(Linux),同时还希望保留他们现有的技术基础&…...
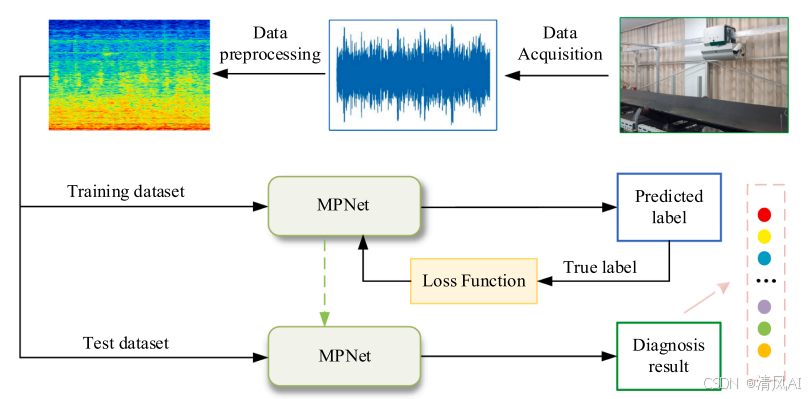
MPNet:旋转机械轻量化故障诊断模型详解python代码复现
目录 一、问题背景与挑战 二、MPNet核心架构 2.1 多分支特征融合模块(MBFM) 2.2 残差注意力金字塔模块(RAPM) 2.2.1 空间金字塔注意力(SPA) 2.2.2 金字塔残差块(PRBlock) 2.3 分类器设计 三、关键技术突破 3.1 多尺度特征融合 3.2 轻量化设计策略 3.3 抗噪声…...
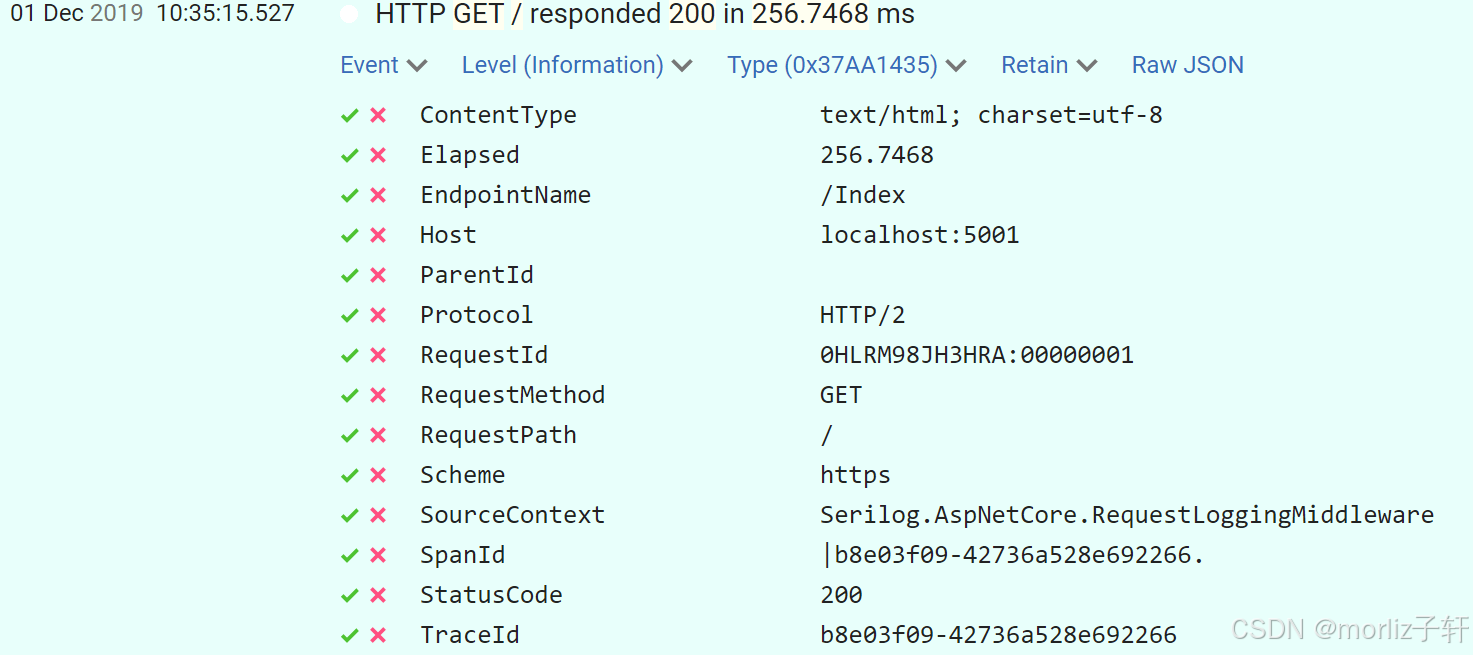
深入浅出Asp.Net Core MVC应用开发系列-AspNetCore中的日志记录
ASP.NET Core 是一个跨平台的开源框架,用于在 Windows、macOS 或 Linux 上生成基于云的新式 Web 应用。 ASP.NET Core 中的日志记录 .NET 通过 ILogger API 支持高性能结构化日志记录,以帮助监视应用程序行为和诊断问题。 可以通过配置不同的记录提供程…...

智慧医疗能源事业线深度画像分析(上)
引言 医疗行业作为现代社会的关键基础设施,其能源消耗与环境影响正日益受到关注。随着全球"双碳"目标的推进和可持续发展理念的深入,智慧医疗能源事业线应运而生,致力于通过创新技术与管理方案,重构医疗领域的能源使用模式。这一事业线融合了能源管理、可持续发…...
(十)学生端搭建
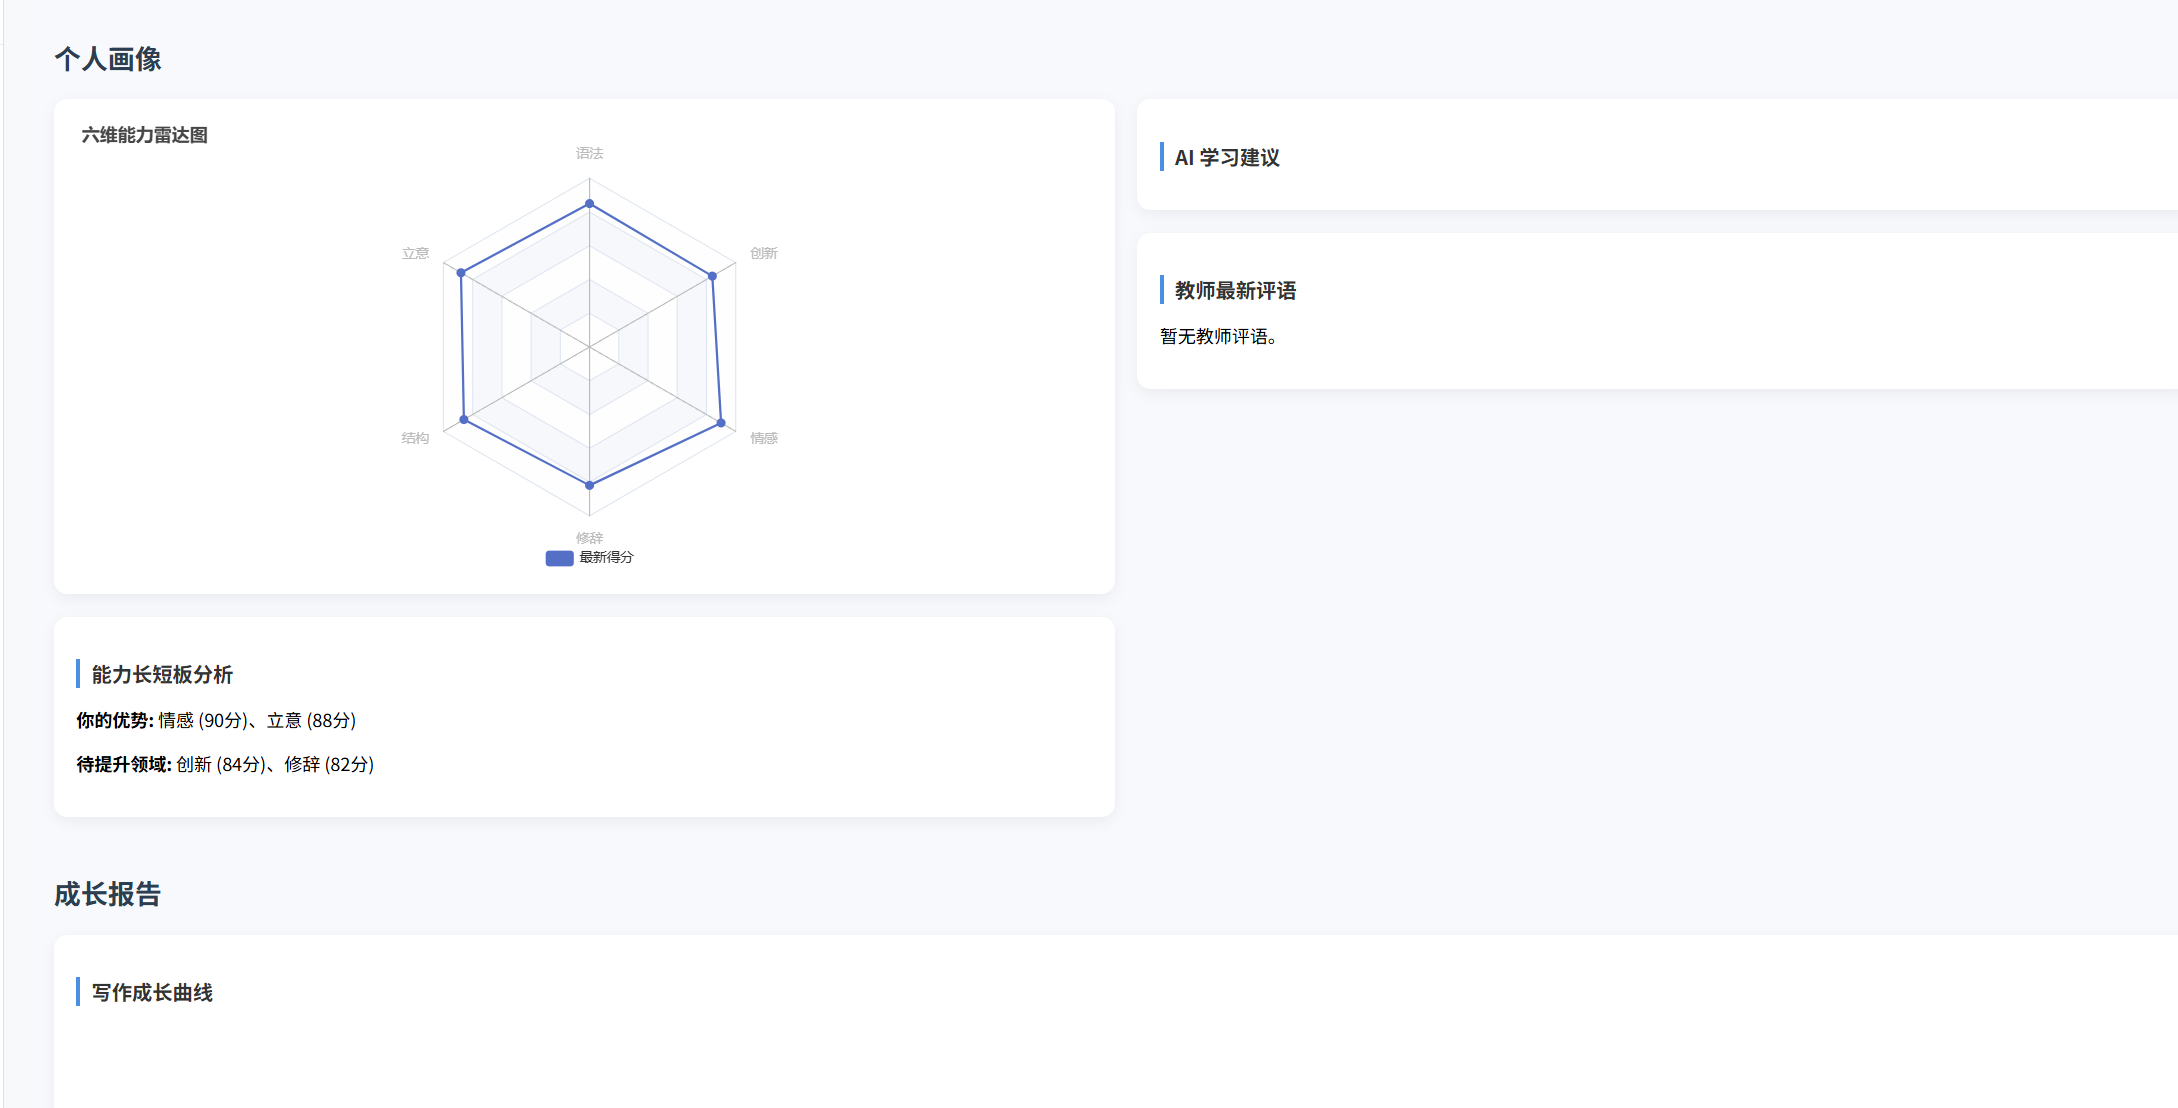
本次旨在将之前的已完成的部分功能进行拼装到学生端,同时完善学生端的构建。本次工作主要包括: 1.学生端整体界面布局 2.模拟考场与部分个人画像流程的串联 3.整体学生端逻辑 一、学生端 在主界面可以选择自己的用户角色 选择学生则进入学生登录界面…...

大语言模型如何处理长文本?常用文本分割技术详解
为什么需要文本分割? 引言:为什么需要文本分割?一、基础文本分割方法1. 按段落分割(Paragraph Splitting)2. 按句子分割(Sentence Splitting)二、高级文本分割策略3. 重叠分割(Sliding Window)4. 递归分割(Recursive Splitting)三、生产级工具推荐5. 使用LangChain的…...

测试markdown--肇兴
day1: 1、去程:7:04 --11:32高铁 高铁右转上售票大厅2楼,穿过候车厅下一楼,上大巴车 ¥10/人 **2、到达:**12点多到达寨子,买门票,美团/抖音:¥78人 3、中饭&a…...
:爬虫完整流程)
Python爬虫(二):爬虫完整流程
爬虫完整流程详解(7大核心步骤实战技巧) 一、爬虫完整工作流程 以下是爬虫开发的完整流程,我将结合具体技术点和实战经验展开说明: 1. 目标分析与前期准备 网站技术分析: 使用浏览器开发者工具(F12&…...
)
Java入门学习详细版(一)
大家好,Java 学习是一个系统学习的过程,核心原则就是“理论 实践 坚持”,并且需循序渐进,不可过于着急,本篇文章推出的这份详细入门学习资料将带大家从零基础开始,逐步掌握 Java 的核心概念和编程技能。 …...
优选算法第十二讲:队列 + 宽搜 优先级队列
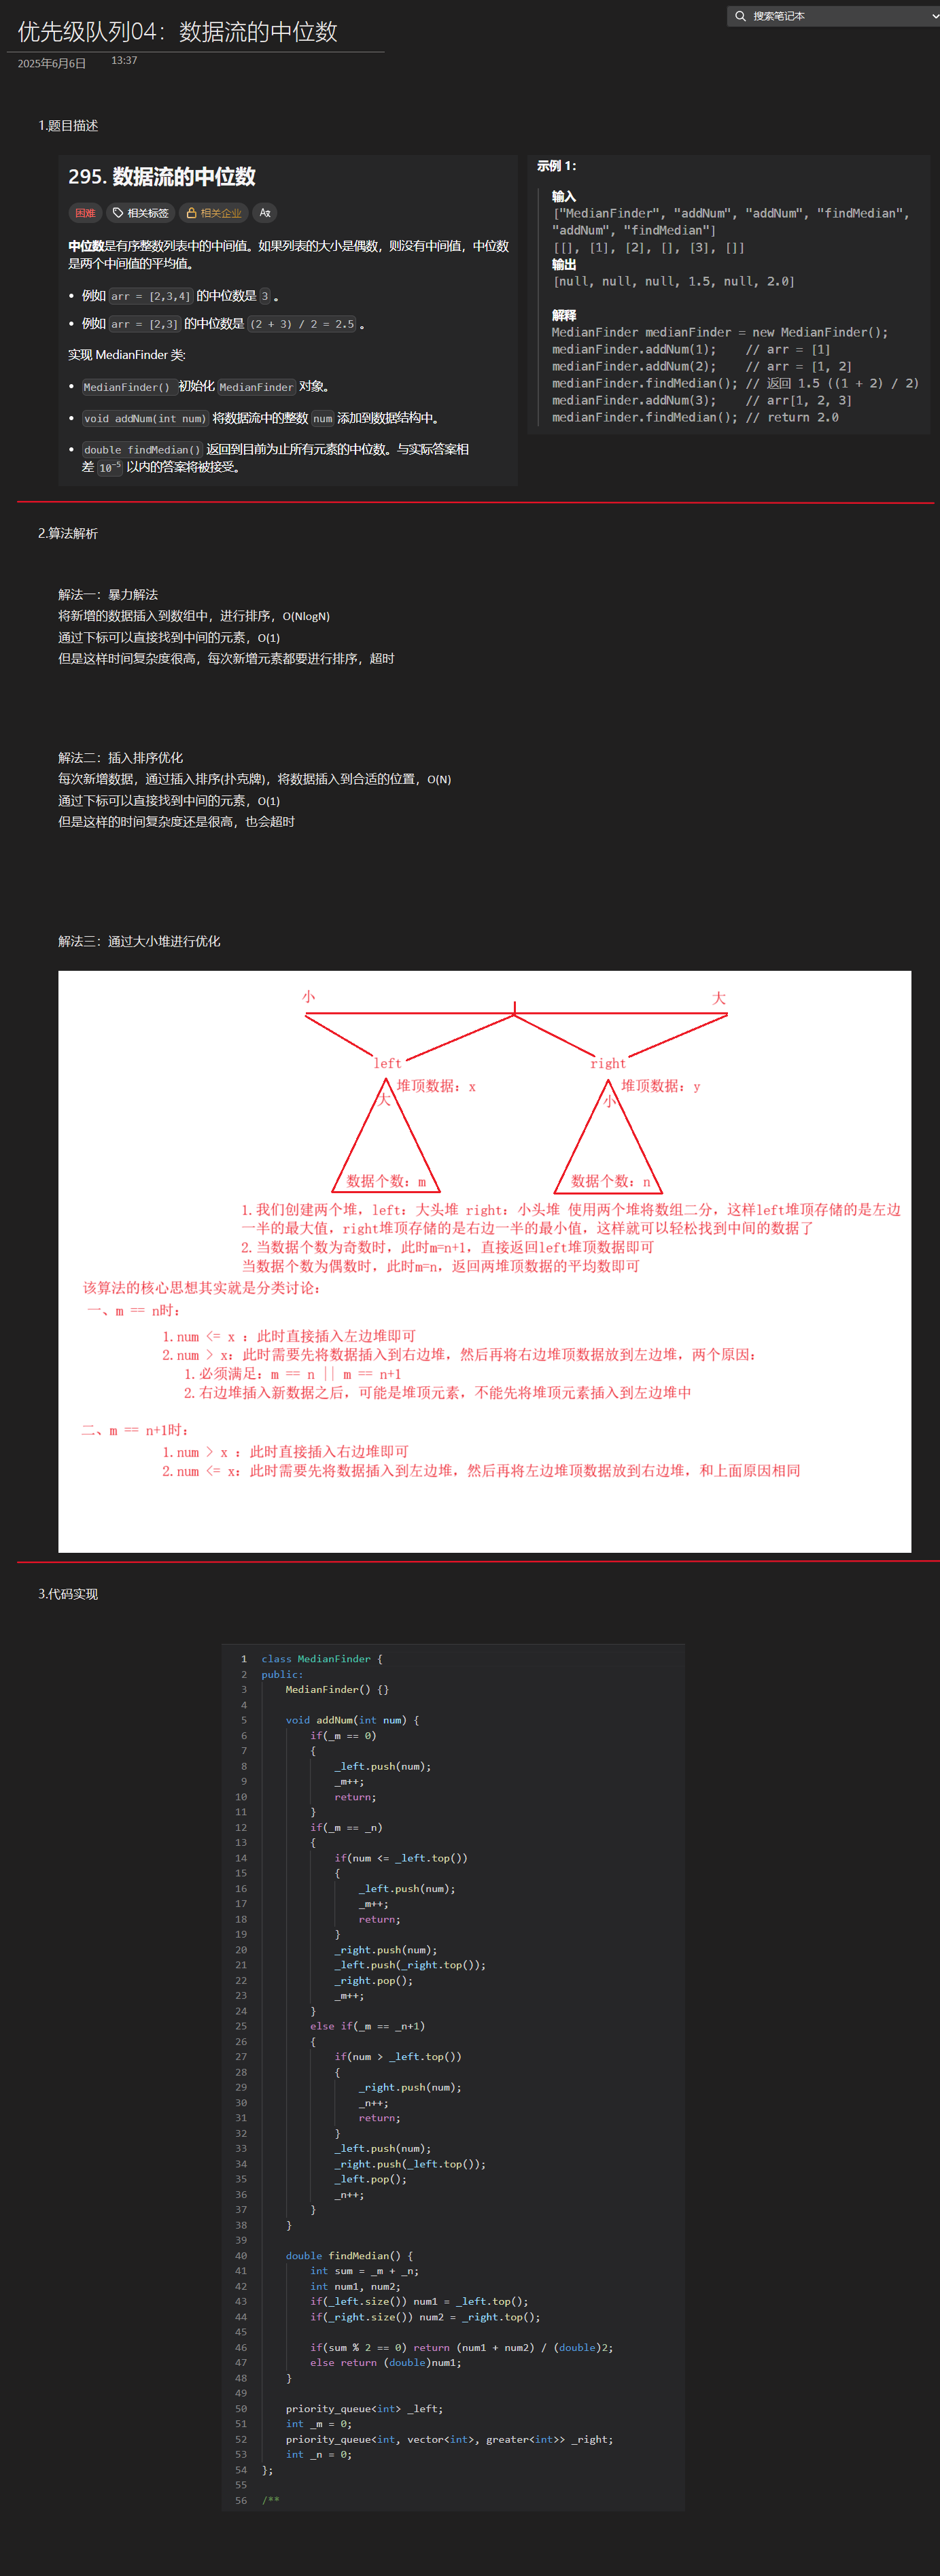
优选算法第十二讲:队列 宽搜 && 优先级队列 1.N叉树的层序遍历2.二叉树的锯齿型层序遍历3.二叉树最大宽度4.在每个树行中找最大值5.优先级队列 -- 最后一块石头的重量6.数据流中的第K大元素7.前K个高频单词8.数据流的中位数 1.N叉树的层序遍历 2.二叉树的锯…...

鸿蒙DevEco Studio HarmonyOS 5跑酷小游戏实现指南
1. 项目概述 本跑酷小游戏基于鸿蒙HarmonyOS 5开发,使用DevEco Studio作为开发工具,采用Java语言实现,包含角色控制、障碍物生成和分数计算系统。 2. 项目结构 /src/main/java/com/example/runner/├── MainAbilitySlice.java // 主界…...
