spring boot--自动化注入组件原理、内嵌tomcat-1
前言
我们知道开发spring boot项目,在启动类上添加注解@SpringBootApplication ,然后引入要自动注入的组件依赖,然后现application.properties中加上相应配置就可以自动注入这个组件,那么下面看看自动注入组件是如何实现的
一、@SpringBootApplication 注解
1、查看SpringBootApplication 类如下:
@Target({ElementType.TYPE})
@Retention(RetentionPolicy.RUNTIME)
@Documented
@Inherited
@SpringBootConfiguration
@EnableAutoConfiguration
@ComponentScan(excludeFilters = {@Filter(type = FilterType.CUSTOM,classes = {TypeExcludeFilter.class}
), @Filter(type = FilterType.CUSTOM,classes = {AutoConfigurationExcludeFilter.class}
)}
)
public @interface SpringBootApplication {
}
2、查看@EnableAutoConfiguration类
@Target({ElementType.TYPE})
@Retention(RetentionPolicy.RUNTIME)
@Documented
@Inherited
@AutoConfigurationPackage
@Import({AutoConfigurationImportSelector.class})
public @interface EnableAutoConfiguration {String ENABLED_OVERRIDE_PROPERTY = "spring.boot.enableautoconfiguration";Class<?>[] exclude() default {};String[] excludeName() default {};
}
这个类又通过@Import({AutoConfigurationImportSelector.class}) 导入了
3、AutoConfigurationImportSelector这个bean,查看这个bean
public class AutoConfigurationImportSelectorimplements DeferredImportSelector, BeanClassLoaderAware, ResourceLoaderAware,BeanFactoryAware, EnvironmentAware, Ordered {}
4、这个AutoConfigurationImportSelector类继承了DeferredImportSelector最终继承了ImportSelector,重写这个类的selectImports方法可以快速导入一个bean,查看selectImports方法
@Overridepublic String[] selectImports(AnnotationMetadata annotationMetadata) {if (!isEnabled(annotationMetadata)) {return NO_IMPORTS;}AutoConfigurationMetadata autoConfigurationMetadata = AutoConfigurationMetadataLoader.loadMetadata(this.beanClassLoader);AnnotationAttributes attributes = getAttributes(annotationMetadata);List<String> configurations = getCandidateConfigurations(annotationMetadata,attributes);configurations = removeDuplicates(configurations);Set<String> exclusions = getExclusions(annotationMetadata, attributes);checkExcludedClasses(configurations, exclusions);configurations.removeAll(exclusions);configurations = filter(configurations, autoConfigurationMetadata);fireAutoConfigurationImportEvents(configurations, exclusions);return StringUtils.toStringArray(configurations);}
5、查看List<String> configurations = getCandidateConfigurations(annotationMetadata, attributes);
这个方法
protected List<String> getCandidateConfigurations(AnnotationMetadata metadata,AnnotationAttributes attributes) {List<String> configurations = SpringFactoriesLoader.loadFactoryNames(getSpringFactoriesLoaderFactoryClass(), getBeanClassLoader());Assert.notEmpty(configurations,"No auto configuration classes found in META-INF/spring.factories. If you "+ "are using a custom packaging, make sure that file is correct.");return configurations;}
6、这个方法最终会调用loadSpringFactories方法,这个方法把META-INF/spring.factories定义的类全部读到出来

# Auto Configure
org.springframework.boot.autoconfigure.EnableAutoConfiguration=\
org.springframework.boot.autoconfigure.admin.SpringApplicationAdminJmxAutoConfiguration,\
org.springframework.boot.autoconfigure.aop.AopAutoConfiguration,\
org.springframework.boot.autoconfigure.amqp.RabbitAutoConfiguration,\
org.springframework.boot.autoconfigure.batch.BatchAutoConfiguration,\
private static Map<String, List<String>> loadSpringFactories(@Nullable ClassLoader classLoader) {MultiValueMap<String, String> result = (MultiValueMap)cache.get(classLoader);if (result != null) {return result;} else {try {Enumeration<URL> urls = classLoader != null ? classLoader.getResources("META-INF/spring.factories") : ClassLoader.getSystemResources("META-INF/spring.factories");LinkedMultiValueMap result = new LinkedMultiValueMap();while(urls.hasMoreElements()) {URL url = (URL)urls.nextElement();UrlResource resource = new UrlResource(url);Properties properties = PropertiesLoaderUtils.loadProperties(resource);Iterator var6 = properties.entrySet().iterator();while(var6.hasNext()) {Entry<?, ?> entry = (Entry)var6.next();List<String> factoryClassNames = Arrays.asList(StringUtils.commaDelimitedListToStringArray((String)entry.getValue()));result.addAll((String)entry.getKey(), factoryClassNames);}}cache.put(classLoader, result);return result;} catch (IOException var9) {throw new IllegalArgumentException("Unable to load factories from location [META-INF/spring.factories]", var9);}}}
7、最终spring会根据这些组件中定义的注入条件将这些组件自动注入,org.springframework.boot.autoconfigure下放了所有自动注入的组件,以aop这个组件为例:
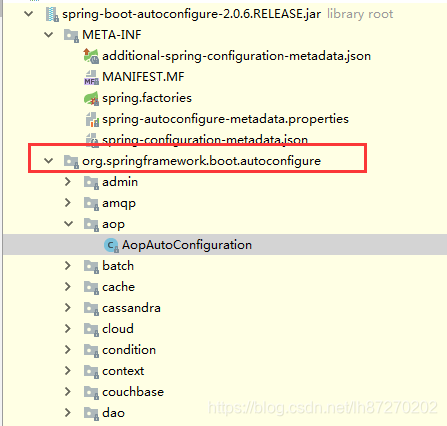
@Configuration
//条件注入,当有 `EnableAspectJAutoProxy.class, Aspect.class, Advice.class,`这些class存在时才注入,也就是说当引入相关依赖包时注入AnnotatedElement.class
@ConditionalOnClass({ EnableAspectJAutoProxy.class, Aspect.class, Advice.class,AnnotatedElement.class })
//当配置文件中有spring.aop 配置时才注入
@ConditionalOnProperty(prefix = "spring.aop", name = "auto", havingValue = "true", matchIfMissing = true)
public class AopAutoConfiguration {@Configuration@EnableAspectJAutoProxy(proxyTargetClass = false)@ConditionalOnProperty(prefix = "spring.aop", name = "proxy-target-class", havingValue = "false", matchIfMissing = false)public static class JdkDynamicAutoProxyConfiguration {}@Configuration@EnableAspectJAutoProxy(proxyTargetClass = true)@ConditionalOnProperty(prefix = "spring.aop", name = "proxy-target-class", havingValue = "true", matchIfMissing = true)public static class CglibAutoProxyConfiguration {}}
二、spring boot内嵌tomcat
最简单的tomcat集成
1、添加pom文件
<dependencies><!--Java语言操作tomcat --><dependency><groupId>org.apache.tomcat.embed</groupId><artifactId>tomcat-embed-core</artifactId><version>8.5.16</version></dependency><!-- tomcat对jsp支持 --><dependency><groupId>org.apache.tomcat</groupId><artifactId>tomcat-jasper</artifactId><version>8.5.16</version></dependency></dependencies>
2、新建一个servlet文件
public class IndexServlet extends HttpServlet {@Overrideprotected void doGet(HttpServletRequest req, HttpServletResponse resp) throws ServletException, IOException {doPost(req, resp);}@Overrideprotected void doPost(HttpServletRequest req, HttpServletResponse resp) throws ServletException, IOException {resp.getWriter().print("this is index... tomcat");}}
3、新建一个启动类
public class DTomcat {private static int PORT = 8080;private static String CONTEX_PATH = "/clock";private static String SERVLET_NAME = "indexServlet";public static void main(String[] args) throws LifecycleException, InterruptedException {// 创建tomcat服务器Tomcat tomcatServer = new Tomcat();// 指定端口号tomcatServer.setPort(PORT);// 是否设置自动部署tomcatServer.getHost().setAutoDeploy(false);// 创建上下文StandardContext standardContex = new StandardContext();standardContex.setPath(CONTEX_PATH);// 监听上下文standardContex.addLifecycleListener(new Tomcat.FixContextListener());// tomcat容器添加standardContextomcatServer.getHost().addChild(standardContex);// 创建ServlettomcatServer.addServlet(CONTEX_PATH, SERVLET_NAME, new IndexServlet());// servleturl映射standardContex.addServletMappingDecoded("/index", SERVLET_NAME);tomcatServer.start();System.out.println("tomcat服务器启动成功..");// 异步进行接收请求tomcatServer.getServer().await();}
}
4、运行main,在浏览器输入:
http://localhost:8080/clock/index
spring boot内嵌tomcat
1、启动一个spring boot项目,查看控制台最下的日志:
可以看出spring boot在启动的时候,启动一个tomcat,实际上它启动的方式也是上面那么启动方式

2、tomcat加载流程
tomcat也是一个组件,那么它的引入方式也是通过spring.factories文件注入的

3、查看ServletWebServerFactoryAutoConfiguration这个类
ServletWebServerFactoryAutoConfiguration这个类用@import快速导入了EmbeddedTomcat类

4、查看EmbeddedTomcat类
这个类注入了TomcatServletWebServerFactory这个bean
@Configuration@ConditionalOnClass({ Servlet.class, Tomcat.class, UpgradeProtocol.class })@ConditionalOnMissingBean(value = ServletWebServerFactory.class, search = SearchStrategy.CURRENT)public static class EmbeddedTomcat {@Beanpublic TomcatServletWebServerFactory tomcatServletWebServerFactory() {return new TomcatServletWebServerFactory();}}
4、查看TomcatServletWebServerFactory类
这个类有一个getWebServer方法如下:
这个方法启动了一个tomcat,那么这个方法是在哪个地方调用的?可以在这个方法上打上断点,查看它的调用链
public WebServer getWebServer(ServletContextInitializer... initializers) {Tomcat tomcat = new Tomcat();File baseDir = this.baseDirectory != null ? this.baseDirectory : this.createTempDir("tomcat");tomcat.setBaseDir(baseDir.getAbsolutePath());Connector connector = new Connector(this.protocol);tomcat.getService().addConnector(connector);this.customizeConnector(connector);tomcat.setConnector(connector);tomcat.getHost().setAutoDeploy(false);this.configureEngine(tomcat.getEngine());Iterator var5 = this.additionalTomcatConnectors.iterator();while(var5.hasNext()) {Connector additionalConnector = (Connector)var5.next();tomcat.getService().addConnector(additionalConnector);}this.prepareContext(tomcat.getHost(), initializers);return this.getTomcatWebServer(tomcat);}
5、在getWebServer()方法,打断点,然后启动spring boot的main方法,查看调用链如下:

6、启动流程分析
查看main里面的run方法,
这个方法主要new 了一个SpringApplication对象,然后执行了run方法
public static ConfigurableApplicationContext run(Class<?>[] primarySources, String[] args) {return (new SpringApplication(primarySources)).run(args);}
SpringApplication结构方法:
加载了相关类,没有执行
public SpringApplication(ResourceLoader resourceLoader, Class<?>... primarySources) {this.resourceLoader = resourceLoader;Assert.notNull(primarySources, "PrimarySources must not be null");//保存主类this.primarySources = new LinkedHashSet<>(Arrays.asList(primarySources));//判断当前是什么类型项目this.webApplicationType = WebApplicationType.deduceFromClasspath();//从类路径下找到META-INF/spring.factories配置的所有ApplicationContextInitializersetInitializers((Collection) getSpringFactoriesInstances(ApplicationContextInitializer.class));//从类路径下找到META-INF/spring.factories配置的所有ApplicationListenersetListeners((Collection) getSpringFactoriesInstances(ApplicationListener.class));this.mainApplicationClass = deduceMainApplicationClass();
}
run方法:
public ConfigurableApplicationContext run(String... args) {StopWatch stopWatch = new StopWatch();stopWatch.start();ConfigurableApplicationContext context = null;Collection<SpringBootExceptionReporter> exceptionReporters = new ArrayList<>();configureHeadlessProperty();//从类路径下META‐INF/spring.factories,取得SpringApplicationRunListeners;SpringApplicationRunListeners listeners = getRunListeners(args);
//回调所有的获取SpringApplicationRunListener.starting()方法listeners.starting();try {//封装命令行参数ApplicationArguments applicationArguments = new DefaultApplicationArguments(args);//准备环境ConfigurableEnvironment environment = prepareEnvironment(listeners,applicationArguments);configureIgnoreBeanInfo(environment);//创回调SpringApplicationRunListener.environmentPrepared();
//表示环境准备完成//打印Banner Banner printedBanner = printBanner(environment);//根据环境创建contextcontext = createApplicationContext();//错误的异常报表exceptionReporters = getSpringFactoriesInstances(SpringBootExceptionReporter.class,new Class[] { ConfigurableApplicationContext.class }, context);//准备上下文环境;//将environment保存到ioc中;//applyInitializers()调用所有的ApplicationContextInitializer的initialize方法
//调用所有的SpringApplicationRunListener的contextPrepared();prepareContext(context, environment, listeners, applicationArguments,printedBanner);
//SpringApplicationRunListener的contextLoaded
//刷新容器
//扫描,创建,加载所有组件;refreshContext(context);afterRefresh(context, applicationArguments);stopWatch.stop();if (this.logStartupInfo) {new StartupInfoLogger(this.mainApplicationClass).logStarted(getApplicationLog(), stopWatch);}//所有的SpringApplicationRunListener回调started方法listeners.started(context);//获取所有的ApplicationRunner和CommandLineRunner进行调用callRunners(context, applicationArguments);}catch (Throwable ex) {handleRunFailure(context, ex, exceptionReporters, listeners);throw new IllegalStateException(ex);}try {//所有的SpringApplicationRunListener的running();listeners.running(context);}catch (Throwable ex) {handleRunFailure(context, ex, exceptionReporters, null);throw new IllegalStateException(ex);}return context;
}
三、spring boot内嵌tomcat,修改web容器
从spring boot启动日志看,我们知道spring boot内嵌的web容器是tomcat,那么如果我们不想用tomcat 也可以换别的web容器
1、修改pom
排除tomcat,引入undertow容器
<dependencies><dependency><groupId>org.springframework.boot</groupId><artifactId>spring-boot-starter-web</artifactId><exclusions><exclusion><groupId>org.springframework.boot</groupId><artifactId>spring-boot-starter-tomcat</artifactId></exclusion></exclusions></dependency><dependency><groupId>org.springframework.boot</groupId><artifactId>spring-boot-starter-undertow</artifactId></dependency></dependencies>
这个再启动spring boot项目用的就是undertow容器
相关文章:

spring boot--自动化注入组件原理、内嵌tomcat-1
前言 我们知道开发spring boot项目,在启动类上添加注解SpringBootApplication ,然后引入要自动注入的组件依赖,然后现application.properties中加上相应配置就可以自动注入这个组件,那么下面看看自动注入组件是如何实现的 一、S…...

短视频矩阵系统源码---开发技术源码能力
短视频矩阵系统开发涉及到多个领域的技术,包括视频编解码技术、大数据处理技术、音视频传输技术、电子商务及支付技术等。因此,短视频矩阵系统开发人员需要具备扎实的计算机基础知识、出色的编程能力、熟练掌握多种开发工具和框架,并掌握音视…...

可观测之调用链Skywalking
简介 分布式系统的应用程序性能监视工具,专为微服务、云原生架构和基于容器(Docker、K8s、Mesos)架构而设计。提供分布式追踪、服务网格遥测分析、度量聚合和可视化一体化解决方案。 多种监控手段。可以通过语言探针和 service mesh 获得监控…...
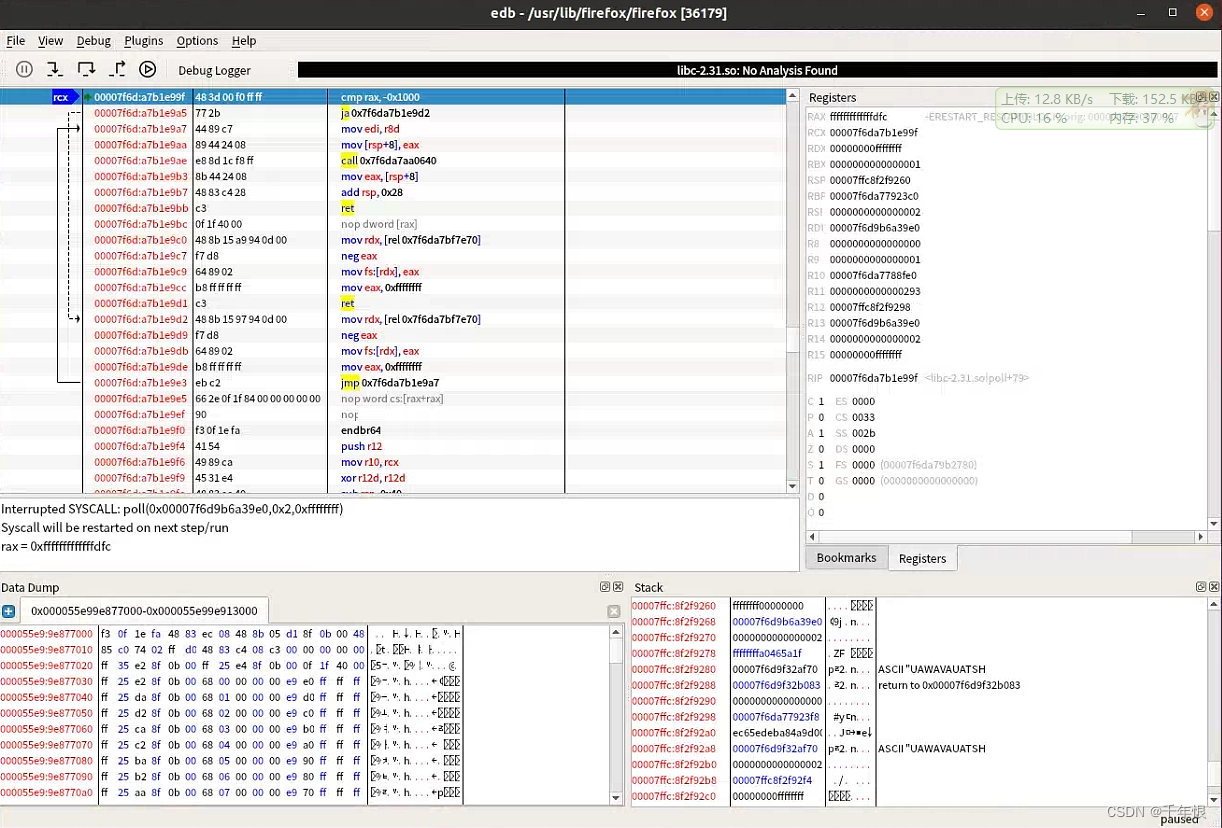
linux上适用的反汇编调试软件(对标od)
ubuntu下类似于od软件 经过搜索,在Ubuntu上选用edb-debugger进行动态调试, 下载链接: https://github.com/eteran/edb-debugger 但是依赖反汇编引擎: https://github.com/capstone-engine/capstone 安装 先安装capstone 先下载release的版本…...
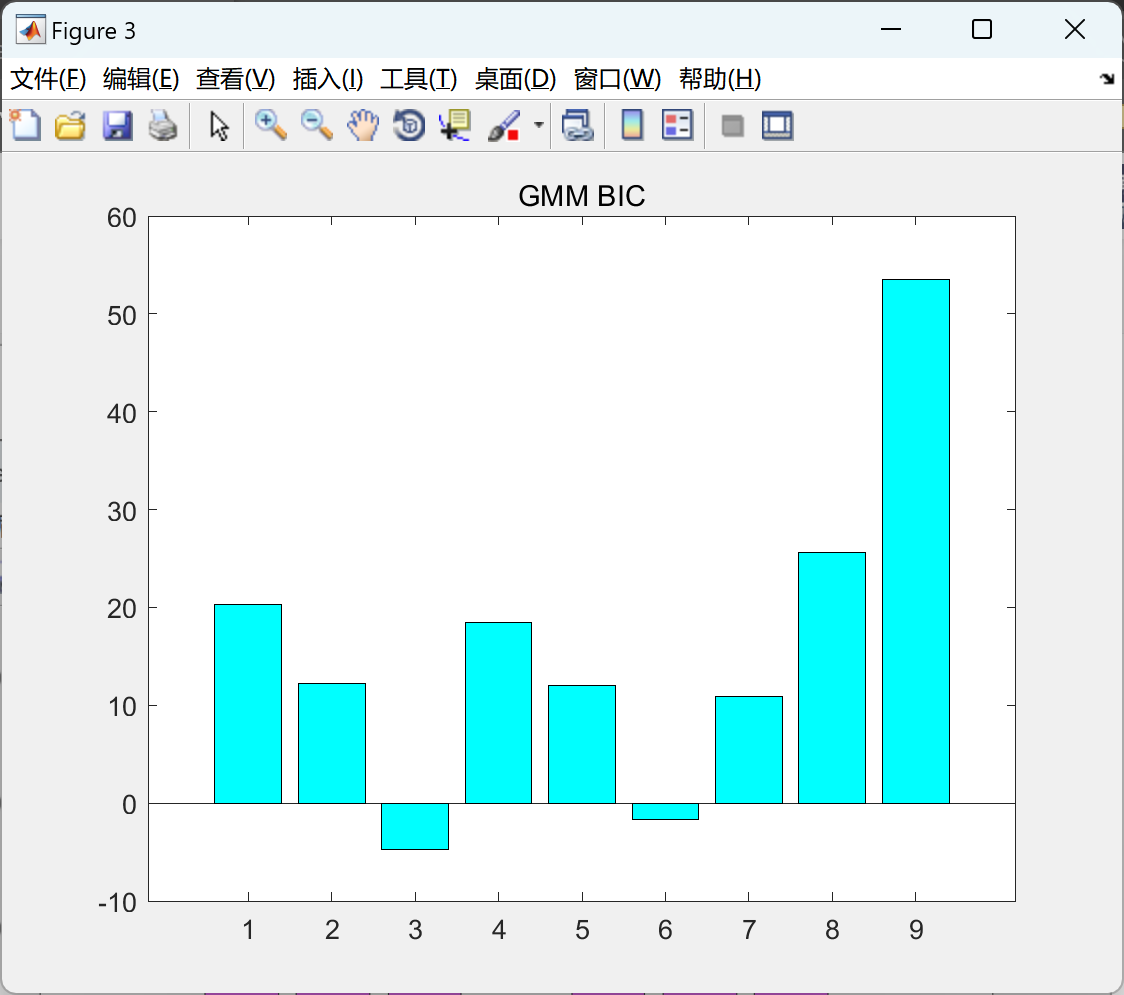
基于高斯混合模型聚类的风电场短期功率预测方法(Pythonmatlab代码实现)
目录 💥1 概述 📚2 运行结果 2.1 Python 2.2 Matlab 🎉3 参考文献 🌈4 Matlab代码、数据、文章讲解 💥1 概述 文献来源: 摘要:对任意来流条件下的风电场发电功率进行准确预测,是提高电网对风电…...
)
【深入了解pytorch】PyTorch循环神经网络(RNN)
【深入了解pytorch】PyTorch循环神经网络(RNN) PyTorch循环神经网络(RNN):概念、工作原理与常见变体循环神经网络概念和工作原理RNN的结构RNN的工作原理LSTM(长短期记忆网络)LSTM的结构LSTM的工作原理GRU(门控循环单元)GRU的结构GRU的工作原理在PyTorch中实现RNN、LST…...
电商运营的方法
1、以后干,不如现在干 1.1 做代理,搞研发 1.2 自建店铺,去看其他店铺的设计样板 1.3 记住网店挣钱三要点:装修,物流,产品资源 1.4 记住你的职责,让别人明白怎么做,仔细看资料,搞清楚细节 2、如何打开机器人 3.设置自动回复 Ctrl + tab 4.如何做基础销量,做一个刷…...

Swift 如何确定 scrollView 已经滑动结束
在 iOS 的 UIScrollView 中,你可以通过实现 UIScrollViewDelegate 的方法来检测滑动结束事件。具体来说,你可以实现以下方法: func scrollViewDidEndDragging(_ scrollView: UIScrollView, willDecelerate decelerate: Bool) {if !decelerat…...
)
html学习2(css、图像)
1、层叠样式表css是为了更好的渲染html元素而引入的。 2、css添加到html的方式,最好的方式是通过外部引用CSS文件 内联样式- 在HTML元素中使用"style" 属性,当特殊的样式需要应用到个别元素时,就可以使用内联样式。 使用内联样式…...

微服务探索之路06篇k8s配置文件Yaml部署Redis使用Helm部署MongoDB和kafka
1 安装Redis 1.1创建配置文件redis.conf 切换到自己的目录下如本文是放在/home/ubuntu下 cd /home/ubuntuvim redis.conf bind 0.0.0.0 protected-mode yes port 6379 requirepass qwe123456 tcp-backlog 511 timeout 0 tcp-keepalive 300 daemonize no pidfile /var/run/r…...
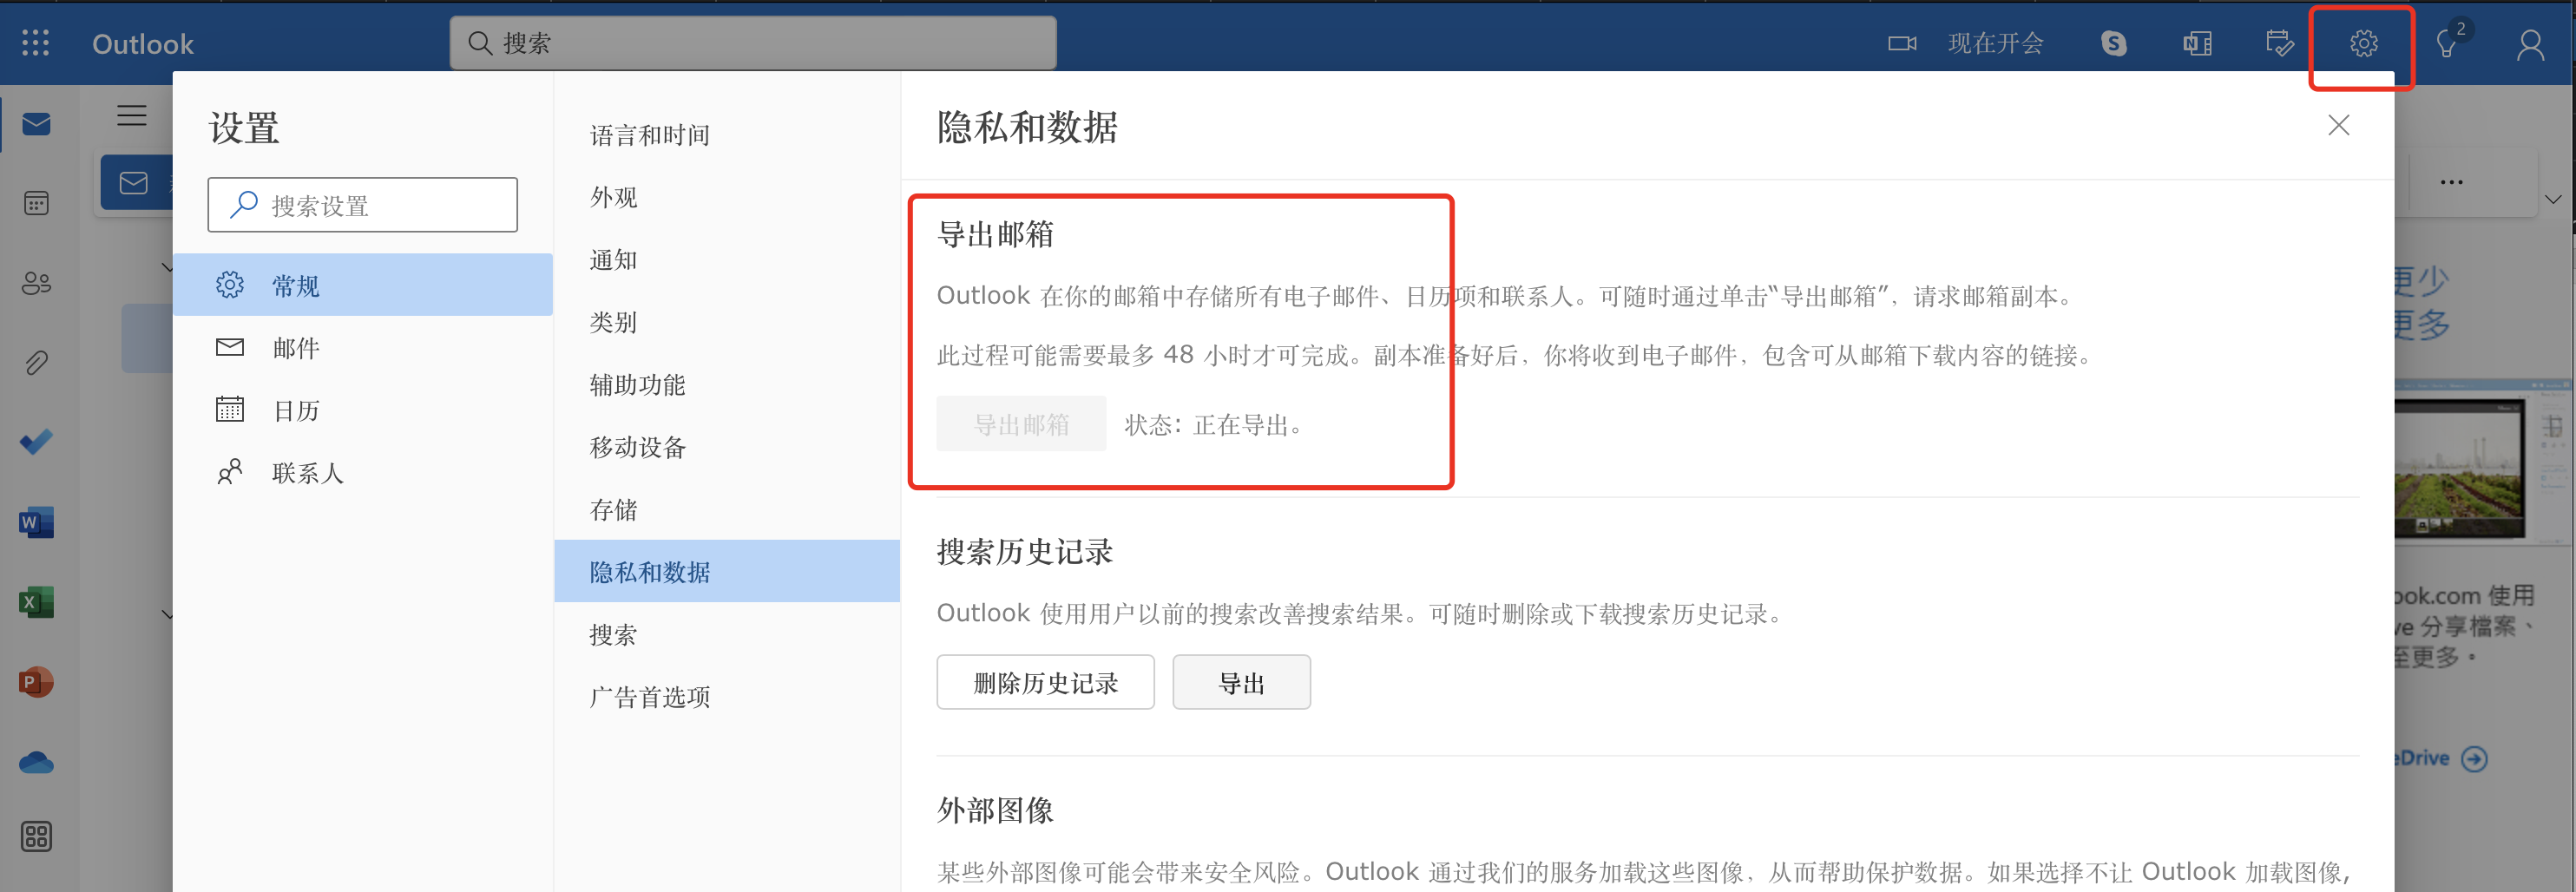
Microsoft todo 数据导出
文章目录 官方说明: https://support.microsoft.com/zh-cn/office/导出您的-microsoft-待办事项帐户-d286b243-affb-4db4-addc-162e16588943 由于 微软待办 会自动与 Outlook 中的任务同步,因此您可以从 Outlook 中导出所有列表和任务。 若要导出列表和…...

SSIS对SQL Server向Mysql数据转发表数据 (二)
1、在SQL Server数据库创建一个数据库表:users USE [Test1] GO/****** Object: Table [dbo].[users] Script Date: 2023/7/27 16:25:11 ******/ SET ANSI_NULLS ON GOSET QUOTED_IDENTIFIER ON GOCREATE TABLE [dbo].[users]([id] [int] IDENTITY(1,1) NOT NUL…...

【Vue3】reactive 直接赋值会导致 Vue 无法正确地监听到属性的变化,从而无法触发视图更新
在 Vue 中,响应式数据的监听和视图更新是通过 Vue 的响应式系统实现的。Vue 3 使用了 Proxy 对象来实现响应式,而 Vue 2 使用了 Object.defineProperty 来实现。 当我们使用 reactive 函数创建响应式对象时,Vue 会将对象的每个属性转换为响应…...

服务器出现丢包的原因103.88.35.x
网站主要目的是达到企业和客户紧密联系,提升客户对企业形象的认知度的效果,若租用的服务器不稳定,不仅影响网站的运行,对于网站搜索引擎优化以及用户体验等也有很大的影响。下面是服务器出现丢包不稳定的原因,一起来看…...
pytest study
pytest 测试用例的识别与运行 测试文件:test_*.py 和 *_test.py 以test开头或结尾的文件 测试用例:Test*类包含的所有 test_*的方法(测试类不能带有__init__方法), 不在class中的所有test_*的方法 def func(x):r…...

0基础学习VR全景平台篇 第73篇:VR直播-如何自定义邀请二维码(直播邀请)
自定义直播邀请二维码是自定义直播间邀请卡上显示的二维码,若上传,那么便会替换掉邀请卡上原有的二维码,原二维码为本场直播活动的二维码。 建议上传的尺寸为300px*300px,可选择开启二维码的弹出效果,开启后࿰…...
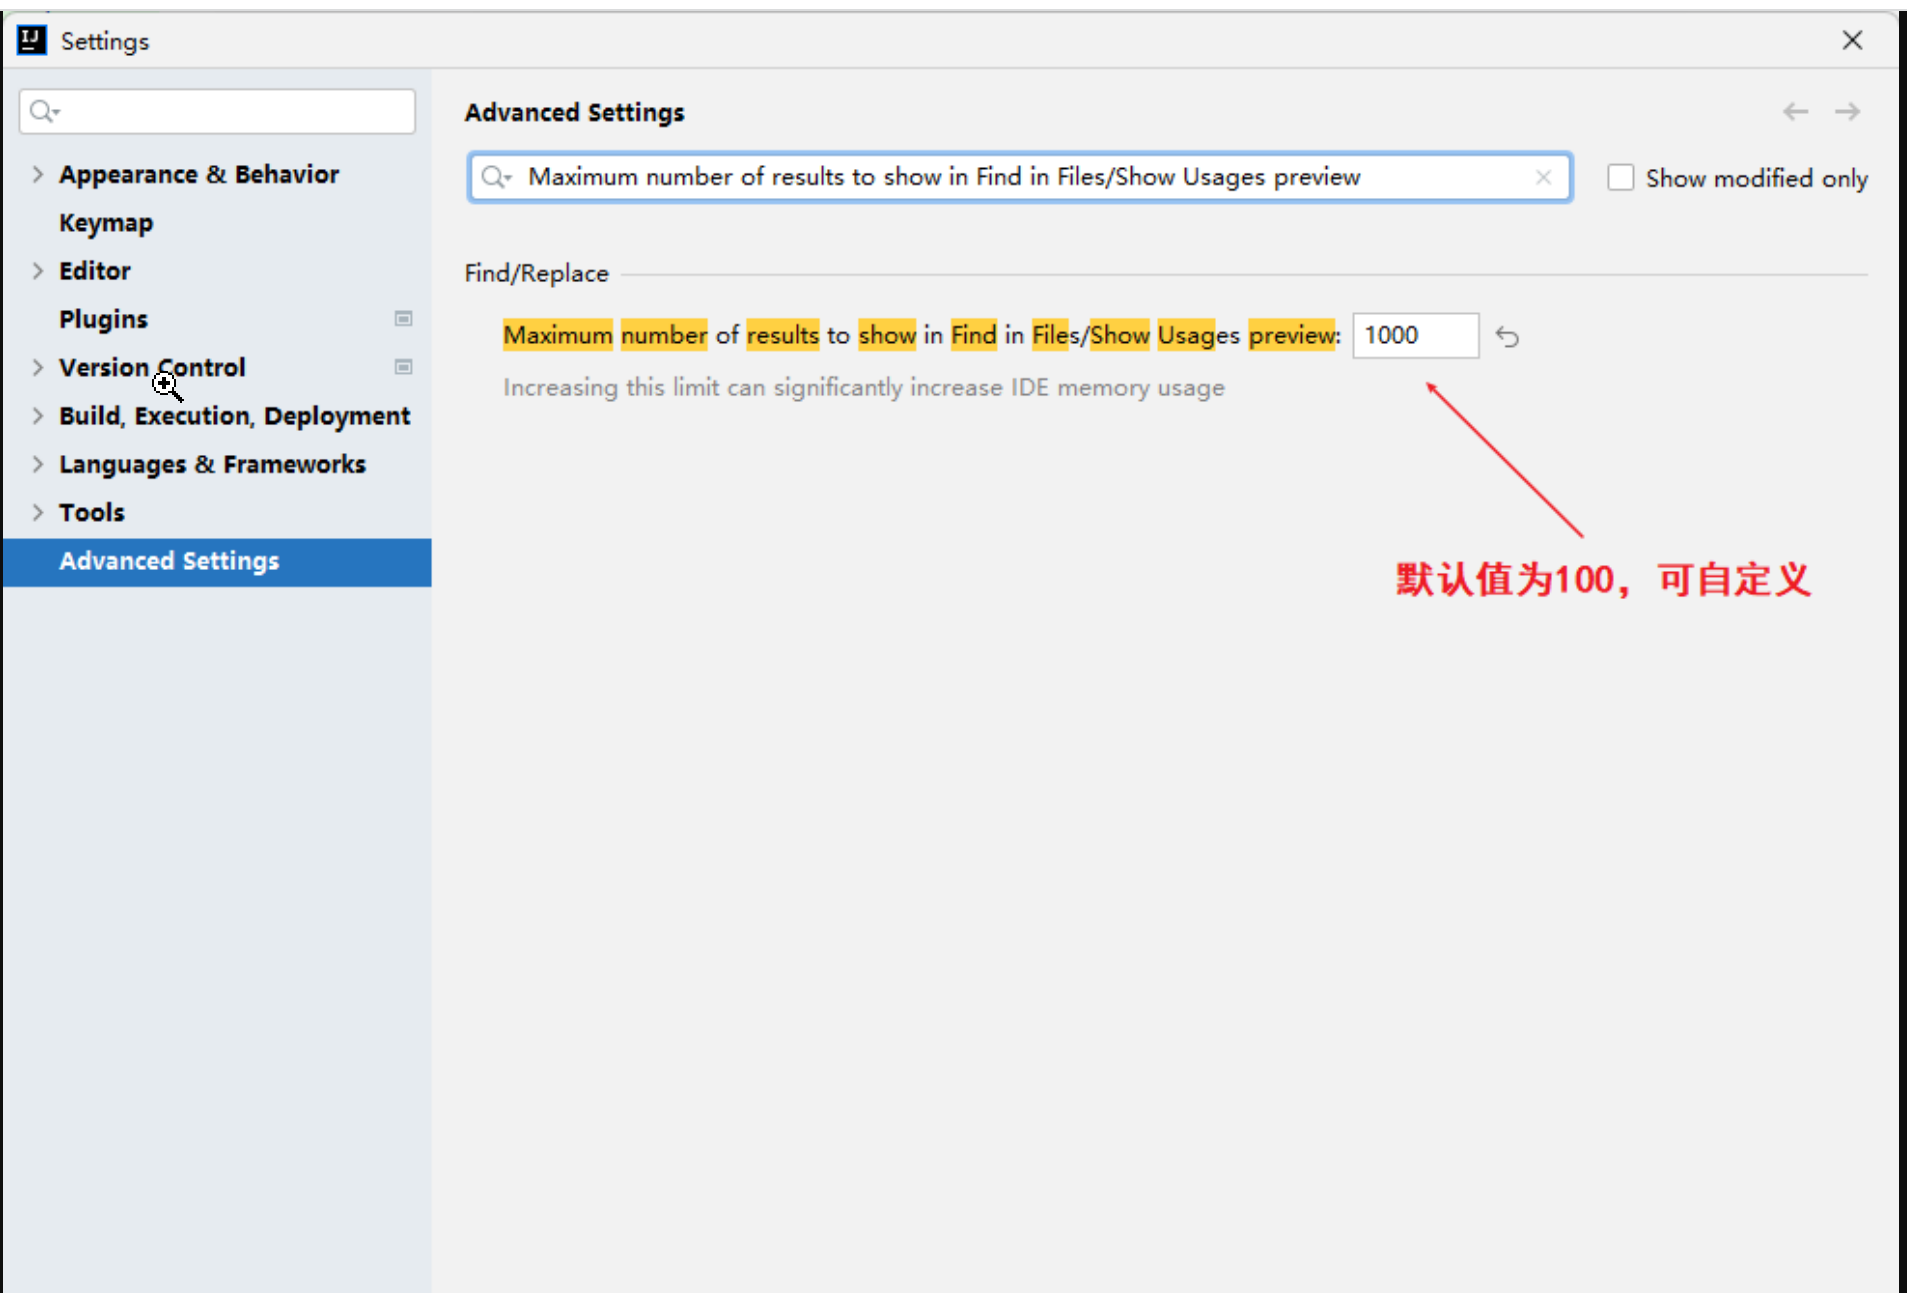
idea常用技巧/idea常见问题
idea常见问题 idea全局搜索默认只显示100条解决方案 如上图,每次搜索时只显示100条,没法展示全。因版本的不同,配置也有些差异,以下也是经过各种搜索整理出了两个方案来解决这个问题。 方案一: 快捷键Ctrl shift a…...
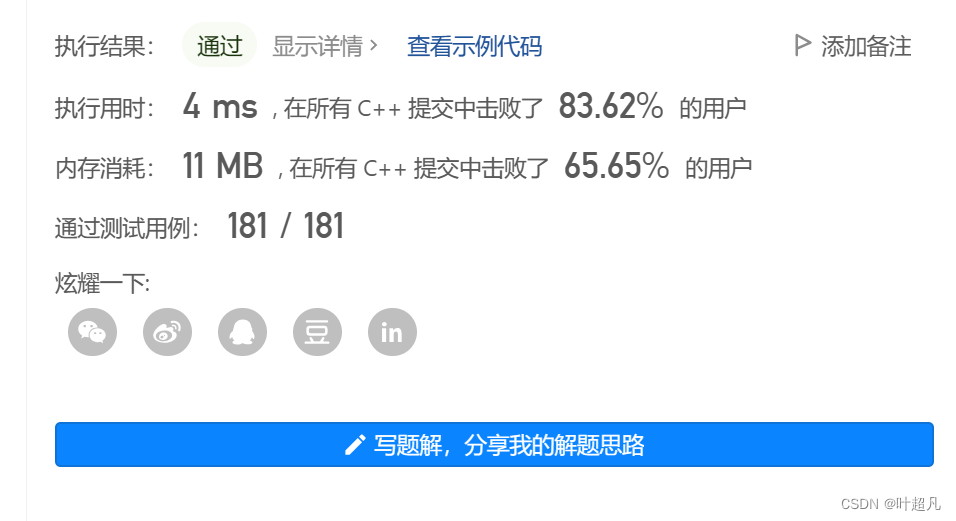
数据结构---并查集
目录标题 为什么会有并查集并查集的原理模拟实现并查集准备工作构造函数FindRootUnionSetCount 并查集实战题目一:省份数量题目解析题目二:等式方程的可满足性题目解析 为什么会有并查集 这里可以使用生活中的一个例子来带着大家理解并查集,…...

iOS transform rotate总结
研究了一下transform的旋转设置,调了半天还以为是旋转写错了,发现是两个不同的view对象写错了,不管怎么说,还是记录一下旋转相关的操作吧。 参数都是弧度。 以一个图片来举例。 let img UIImageView.init() img.image UIImage…...

关于axios请求java接口中的@RequestParam、@PathVariable及@RequestBody不同接参类型的用法
一、前端传json对象,后端指定接收json对象中的哪个参数。 (1)前端请求 axios({//请求方式method:post,//后端接口路径url:http://127.0.0.1:8080/api/deleteUserById,//注意这里使用的是params,该属性负责把属性名和属性值添加到url后面,一般和get配合使…...

KubeSphere 容器平台高可用:环境搭建与可视化操作指南
Linux_k8s篇 欢迎来到Linux的世界,看笔记好好学多敲多打,每个人都是大神! 题目:KubeSphere 容器平台高可用:环境搭建与可视化操作指南 版本号: 1.0,0 作者: 老王要学习 日期: 2025.06.05 适用环境: Ubuntu22 文档说…...
: K8s 核心概念白话解读(上):Pod 和 Deployment 究竟是什么?)
云原生核心技术 (7/12): K8s 核心概念白话解读(上):Pod 和 Deployment 究竟是什么?
大家好,欢迎来到《云原生核心技术》系列的第七篇! 在上一篇,我们成功地使用 Minikube 或 kind 在自己的电脑上搭建起了一个迷你但功能完备的 Kubernetes 集群。现在,我们就像一个拥有了一块崭新数字土地的农场主,是时…...

系统设计 --- MongoDB亿级数据查询优化策略
系统设计 --- MongoDB亿级数据查询分表策略 背景Solution --- 分表 背景 使用audit log实现Audi Trail功能 Audit Trail范围: 六个月数据量: 每秒5-7条audi log,共计7千万 – 1亿条数据需要实现全文检索按照时间倒序因为license问题,不能使用ELK只能使用…...

基于Uniapp开发HarmonyOS 5.0旅游应用技术实践
一、技术选型背景 1.跨平台优势 Uniapp采用Vue.js框架,支持"一次开发,多端部署",可同步生成HarmonyOS、iOS、Android等多平台应用。 2.鸿蒙特性融合 HarmonyOS 5.0的分布式能力与原子化服务,为旅游应用带来…...

Java毕业设计:WML信息查询与后端信息发布系统开发
JAVAWML信息查询与后端信息发布系统实现 一、系统概述 本系统基于Java和WML(无线标记语言)技术开发,实现了移动设备上的信息查询与后端信息发布功能。系统采用B/S架构,服务器端使用Java Servlet处理请求,数据库采用MySQL存储信息࿰…...

云原生安全实战:API网关Kong的鉴权与限流详解
🔥「炎码工坊」技术弹药已装填! 点击关注 → 解锁工业级干货【工具实测|项目避坑|源码燃烧指南】 一、基础概念 1. API网关(API Gateway) API网关是微服务架构中的核心组件,负责统一管理所有API的流量入口。它像一座…...

libfmt: 现代C++的格式化工具库介绍与酷炫功能
libfmt: 现代C的格式化工具库介绍与酷炫功能 libfmt 是一个开源的C格式化库,提供了高效、安全的文本格式化功能,是C20中引入的std::format的基础实现。它比传统的printf和iostream更安全、更灵活、性能更好。 基本介绍 主要特点 类型安全:…...
32单片机——基本定时器
STM32F103有众多的定时器,其中包括2个基本定时器(TIM6和TIM7)、4个通用定时器(TIM2~TIM5)、2个高级控制定时器(TIM1和TIM8),这些定时器彼此完全独立,不共享任何资源 1、定…...

写一个shell脚本,把局域网内,把能ping通的IP和不能ping通的IP分类,并保存到两个文本文件里
写一个shell脚本,把局域网内,把能ping通的IP和不能ping通的IP分类,并保存到两个文本文件里 脚本1 #!/bin/bash #定义变量 ip10.1.1 #循环去ping主机的IP for ((i1;i<10;i)) doping -c1 $ip.$i &>/dev/null[ $? -eq 0 ] &&am…...

C# WPF 左右布局实现学习笔记(1)
开发流程视频: https://www.youtube.com/watch?vCkHyDYeImjY&ab_channelC%23DesignPro Git源码: GitHub - CSharpDesignPro/Page-Navigation-using-MVVM: WPF - Page Navigation using MVVM 1. 新建工程 新建WPF应用(.NET Framework) 2.…...
