【Maven】将普通Eclipse项目改造为Maven项目(非SpringBoot项目)
文章目录
- 将普通Eclipse项目改造为Maven项目(非SpringBoot项目)
- Maven安装与配置
- 项目结构改造
- 父子Pom.xml文件配置(继承与集成)
- 父项目下的pom.xml文件配置
- 普通子模块下的pom.xml配置
- 启动模块的pom.xml配置
- 多模块编译
- 总结
- Maven插件配置
- 一、maven-compiler-plugin
- 功能
- 常用参数
- 配置示例
- 注意事项
- 二、maven-jar-plugin
- 功能
- 常用参数
- 配置示例
- 注意事项
- 三、maven-dependency-plugin
- 功能
- 常用参数
- 配置示例
- 注意事项
- 四、maven-resources-plugin
- 功能
- 常用参数
- 配置示例
- 注意事项
- 五、maven-shade-plugin
- 功能
- 常用参数
- 配置示例
- 注意事项
- 六、maven-assembly-plugin
- 功能
- 常用参数
- 配置示例
- 自定义`assembly.xml`示例
- 注意事项
- 总结
将普通Eclipse项目改造为Maven项目(非SpringBoot项目)
Maven安装与配置
网上资料很多,可自行搜索,不再赘述。
项目结构改造
需要将普通Eclipse项目结构改造为Maven标准结构,如下
src/
|--main/|--java/|--resources/
多模块项目结构
Demo/
|--module1/|--java/|--resources/|--pom.xml
|--module2/|--java/|--resources/|--pom.xml
|--module3/|--java/|--resources/|--pom.xml
|--pom.xml
父子Pom.xml文件配置(继承与集成)
父项目下的pom.xml文件配置
注意事项:
- 为了方便管理子模块的依赖,防止出现依赖冲突,在这里配置好所有模块的依赖项,后面等所有模块配置好后会一起下载依赖项
- 按子模块间的依赖顺序集成子模块,作为后续构建jar包的打包顺序
- 可配置下载依赖的Maven仓库地址
<?xml version="1.0" encoding="UTF-8"?>
<project xmlns="http://maven.apache.org/POM/4.0.0"xmlns:xsi="http://www.w3.org/2001/XMLSchema-instance"xsi:schemaLocation="http://maven.apache.org/POM/4.0.0 http://maven.apache.org/xsd/maven-4.0.0.xsd"><modelVersion>4.0.0</modelVersion><!-- GAV坐标 --><groupId>com.regan</groupId> 	<!-- 公司或组织ID --><artifactId>Demo</artifactId> 	<!-- 项目模块ID --><version>1.0.0</version> 		<!-- 版本号 --><packaging>pom</packaging>      <!-- 打包形式,pom工程 --><name>Demo</name>  			<!-- 项目名称 --><description>Demo</description><!-- 项目描述 --><!-- 自定义属性 --><properties><!-- 应用版本号 --><demo.version>1.0.0</demo.version><!-- 编译版本 --><maven.compiler.source>8</maven.compiler.source><maven.compiler.target>8</maven.compiler.target><!-- 编码格式 --><project.build.sourceEncoding>GBK</project.build.sourceEncoding><project.reporting.outputEncoding>UTF-8</project.reporting.outputEncoding><!-- Java版本 --><java.version>1.8</java.version><!-- 第三方库版本 --><dom4j.version>2.1.3</dom4j.version><fastjson2.version>2.0.53</fastjson2.version><gson.version>2.8.9</gson.version><log4j-core.version>1.2.17</log4j-core.version><junit.version>5.9.2</junit.version><!-- 外部资源路径 --><external-resources-path>${project.basedir}/../..</external-resources-path><!-- maven插件 --><maven-compiler-plugin.version>3.8.1</maven-compiler-plugin.version><maven-jar-plugin.version>3.3.0</maven-jar-plugin.version><maven-shade-plugin.version>3.2.4</maven-shade-plugin.version><maven-dependency-plugin.version>3.6.0</maven-dependency-plugin.version><maven-resources-plugin.version>3.3.1</maven-resources-plugin.version></properties><!-- 依赖项管理 --><dependencyManagement><dependencies><!-- xml解析 --><dependency><groupId>org.dom4j</groupId><artifactId>dom4j</artifactId><version>${dom4j.version}</version></dependency><!-- 阿里json解析器 --><dependency><groupId>com.alibaba.fastjson2</groupId><artifactId>fastjson2</artifactId><version>${fastjson2.version}</version></dependency><!-- json-java object 转换 --><dependency><groupId>com.google.code.gson</groupId><artifactId>gson</artifactId><version>${gson.version}</version></dependency><!-- 日志记录工具 --><dependency><groupId>org.apache.logging.log4j</groupId><artifactId>log4j</artifactId><version>${log4j-core.version}</version></dependency><!-- 编写测试的API --><dependency><groupId>org.junit.jupiter</groupId><artifactId>junit-jupiter-api</artifactId><version>${junit.version}</version><scope>test</scope></dependency><!-- 基础模块 --><dependency><groupId>com.regan</groupId><artifactId>module1</artifactId><version>${demo.version}</version></dependency><!-- 基础工具模块 --><dependency><groupId>com.regan</groupId><artifactId>module2</artifactId><version>${demo.version}</version></dependency><!-- 核心模块 --><dependency><groupId>com.regan</groupId><artifactId>module3</artifactId><version>${demo.version}</version></dependency><!-- 启动模块 --><dependency><groupId>com.regan</groupId><artifactId>demo</artifactId><version>${demo.version}</version></dependency></dependencies></dependencyManagement><!-- 子模块,根据依赖顺序排序 --><modules><module>module1</module><module>module2</module><module>module3</module><module>demo</module></modules><!-- 统一管理插件版本 --><build><!-- 打包后的Jar包名称 --><finalName>Demo-${project.artifactId}-${demo.version}</finalName><pluginManagement><plugins><plugin><groupId>org.apache.maven.plugins</groupId><artifactId>maven-compiler-plugin</artifactId><version>${maven-compiler-plugin.version}</version><configuration><source>${java.version}</source><target>${java.version}</target><encoding>${project.build.sourceEncoding}</encoding></configuration></plugin></plugins></pluginManagement></build><!-- 仓库 --><repositories><repository><id>public</id><name>aliyun nexus</name><url>https://maven.aliyun.com/repository/public</url><releases><enabled>true</enabled></releases></repository></repositories><!-- 插件仓库 --><pluginRepositories><pluginRepository><id>public</id><name>aliyun nexus</name><url>https://maven.aliyun.com/repository/public</url><releases><enabled>true</enabled></releases><snapshots><enabled>false</enabled></snapshots></pluginRepository></pluginRepositories>
</project>
普通子模块下的pom.xml配置
注意事项
- 注意要继承parent
- 依赖的其它模块也要写上
<?xml version="1.0" encoding="UTF-8"?>
<project xmlns="http://maven.apache.org/POM/4.0.0"xmlns:xsi="http://www.w3.org/2001/XMLSchema-instance"xsi:schemaLocation="http://maven.apache.org/POM/4.0.0 http://maven.apache.org/xsd/maven-4.0.0.xsd"><!-- 继承父级 --><parent><groupId>com.regan</groupId><artifactId>Demo</artifactId><version>1.0.0</version></parent><modelVersion>4.0.0</modelVersion><packaging>jar</packaging>  <!-- 子模块打包成Jar包 --><artifactId>module2</artifactId><description>基础模块</description><dependencies><dependency><groupId>org.dom4j</groupId><artifactId>dom4j</artifactId></dependency><!-- 依赖的其它模块 --><dependency><groupId>com.regan</groupId><artifactId>module1</artifactId></dependency></dependencies>
</project>
启动模块的pom.xml配置
注意事项
-
启动模块需要配置程序入口
-
在这里进行打包配置(依赖、资源文件)
-
如果所依赖的资源路径在项目执行路径之外(${project.basedir}),就需要在打包配置时使用
${project.basedir}/..–相当于执行路径下的上一级目录<resources><resource><directory>你的资源路径</directory></resource> </resources>
<?xml version="1.0" encoding="UTF-8"?>
<project xmlns="http://maven.apache.org/POM/4.0.0"xmlns:xsi="http://www.w3.org/2001/XMLSchema-instance"xsi:schemaLocation="http://maven.apache.org/POM/4.0.0 http://maven.apache.org/xsd/maven-4.0.0.xsd"><parent><groupId>com.regan</groupId><artifactId>Demo</artifactId><version>1.0.0</version></parent><modelVersion>4.0.0</modelVersion><packaging>jar</packaging><artifactId>module3</artifactId><properties><external-resources-path>${project.basedir}/../..</external-resources-path></properties><description>启动模块</description><dependencies><!-- xml解析 --><dependency><groupId>org.dom4j</groupId><artifactId>dom4j</artifactId><version>${dom4j.version}</version><scope>system</scope><systemPath>${external-resources-path}/safri_build/dom4j-2.1.1.jar</systemPath></dependency><!-- 日志记录工具 --><dependency><groupId>org.apache.logging.log4j</groupId><artifactId>log4j</artifactId><version>${log4j-core.version}</version><scope>system</scope><systemPath>${external-resources-path}/safri_build/log4j-1.2.17.jar</systemPath></dependency><!-- json库 --><dependency><groupId>org.json</groupId><artifactId>json</artifactId><version>${json.version}</version><scope>system</scope><systemPath>${external-resources-path}/safri_build/json.jar</systemPath></dependency><!-- 语法高亮文本编辑器 --><dependency><groupId>com.fifesoft</groupId><artifactId>rsyntaxtextarea</artifactId><version>${rsyntaxtextarea.version}</version><scope>system</scope><systemPath>${external-resources-path}/safri_build/rsyntaxtextarea-3.5.3.jar</systemPath></dependency><!-- 阿里json解析器 --><dependency><groupId>com.alibaba.fastjson2</groupId><artifactId>fastjson2</artifactId><version>${fastjson2.version}</version><scope>system</scope><systemPath>${external-resources-path}/safri_build/fastjson2-2.0.53.jar</systemPath></dependency><dependency><groupId>com.regan</groupId><artifactId>module1</artifactId></dependency><dependency><groupId>com.regan</groupId><artifactId>module2</artifactId></dependency></dependencies><!-- 配置可执行Jar --><build><!-- 可选:配置从指定目录下开始编译,不拘泥于Maven结构-- <sourceDirectory>src</sourceDirectory> --><plugins><!-- 1. 生成主JAR(不含依赖) --><plugin><groupId>org.apache.maven.plugins</groupId><artifactId>maven-jar-plugin</artifactId><version>${maven-jar-plugin.version}</version><configuration><archive><manifest><addClasspath>true</addClasspath><classpathPrefix>lib/</classpathPrefix><mainClass>cnpo.Demo.app.ApplicationEntrance</mainClass></manifest></archive></configuration></plugin><!-- 2. 复制所有依赖到target/lib --><plugin><groupId>org.apache.maven.plugins</groupId><artifactId>maven-dependency-plugin</artifactId><version>${maven-dependency-plugin.version}</version><executions><execution><id>copy-dependencies</id><phase>package</phase><goals><goal>copy-dependencies</goal></goals><configuration><outputDirectory>${project.build.directory}/lib</outputDirectory><excludeTransitive>false</excludeTransitive><stripVersion>false</stripVersion><overWriteReleases>false</overWriteReleases><overWriteSnapshots>false</overWriteSnapshots><includeScope>runtime</includeScope><includeScope>system</includeScope></configuration></execution></executions></plugin><!-- 3. 处理资源文件 --><plugin><groupId>org.apache.maven.plugins</groupId><artifactId>maven-resources-plugin</artifactId><version>${maven-resources-plugin.version}</version><executions><execution><id>copy-resources</id><phase>process-resources</phase><goals><goal>copy-resources</goal></goals><configuration><outputDirectory>${project.build.directory}</outputDirectory><resources><!-- 资源1 目录 --><resource><directory>${external-resources-path}/images</directory><excludes><exclude>**/*.webg</exclude></excludes><targetPath>images</targetPath></resource><!-- config 目录 --><resource><directory>${external-resources-path}/config</directory><includes><include>**/*.*</include></includes><targetPath>config</targetPath></resource><!-- 单个文件 --><resource><directory>${external-resources-path}/</directory> <!-- 指向父目录 --><includes><include>*.properties</include><include>admin.txt</include></includes></resource></resources></configuration></execution></executions></plugin></plugins></build>
</project>
多模块编译
进行多模块编译主要就是需要在父类pom.xml文件中配置好modules,各子模块的pom.xml文件中配置好依赖模块和依赖包,最后在启动模块下进行Maven插件的配置。可参考上述pom.xml配置文件。
还需要注意的一点是依赖配置:
- 若使用
<systemPath>,需在所有依赖模块中显式重复配置该依赖。
<scope>system</scope>
<systemPath>依赖包路径</systemPath>
注意:这种依赖作用域默认没有依赖传递。
总结
Maven多模块项目主要就是注意父类Pom.xml文件与子模块Pom.xml文件的模块包含关系,以及依赖配置。
Maven插件配置
以下是对Maven核心插件的详细介绍,涵盖参数配置、使用场景及注意事项:
一、maven-compiler-plugin
功能
负责Java源代码的编译,控制编译版本、编码、内存分配等。
常用参数
<source>:指定源代码兼容的Java版本(如1.8)。<target>:指定生成的字节码目标JVM版本。<encoding>:设置字符编码(默认UTF-8)。<fork>:是否启用独立进程编译(默认false)。<compilerArgs>:传递额外编译器参数(如-Xlint:unchecked)。<showWarnings>:是否显示编译警告(默认false)。<release>:兼容特定JDK版本(仅JDK9+支持)。
配置示例
<plugin><groupId>org.apache.maven.plugins</groupId><artifactId>maven-compiler-plugin</artifactId><version>3.8.1</version><configuration><source>1.8</source><target>1.8</target><encoding>UTF-8</encoding><compilerArgs><arg>-Xlint:all</arg></compilerArgs></configuration>
</plugin>
注意事项
- 版本兼容性:
<release>参数仅JDK9+支持,低版本需用<source>/<target>。 - 目标JVM限制:即使设置
<target>为低版本,仍需避免使用高版本API,建议配合bootclasspath或Animal Sniffer插件验证。
二、maven-jar-plugin
功能
生成标准JAR包,配置清单文件(MANIFEST.MF)。
常用参数
<archive>:配置JAR包元数据。<manifest>:定义主类、类路径等。
<mainClass>:指定入口类。<addClasspath>:是否添加类路径(默认false)。<classpathPrefix>:类路径前缀(如lib/)。
<excludes>/<includes>:排除或包含特定文件。
配置示例
<plugin><groupId>org.apache.maven.plugins</groupId><artifactId>maven-jar-plugin</artifactId><version>3.3.0</version><configuration><archive><manifest><addClasspath>true</addClasspath><classpathPrefix>lib/</classpathPrefix><mainClass>com.example.Main</mainClass></manifest></archive><excludes><exclude>**/test/**</exclude></excludes></configuration>
</plugin>
注意事项
- 依赖管理:不会打包依赖库,需配合
maven-dependency-plugin复制依赖到类路径目录。 - 版本冲突:若配置不生效,检查插件版本与Maven/JDK兼容性。
三、maven-dependency-plugin
功能
管理项目依赖,如复制依赖、生成依赖树。
常用参数
<copy-dependencies>目标:<outputDirectory>:依赖复制目标目录(如target/lib)。<excludeTransitive>:是否排除传递依赖(默认false)。<stripVersion>:移除依赖版本号(默认false)。
<dependency:tree>:生成依赖树分析。
配置示例
<plugin><groupId>org.apache.maven.plugins</groupId><artifactId>maven-dependency-plugin</artifactId><version>3.6.0</version><executions><execution><id>copy-dependencies</id><phase>package</phase><goals><goal>copy-dependencies</goal></goals><configuration><outputDirectory>${project.build.directory}/lib</outputDirectory><stripVersion>true</stripVersion></configuration></execution></executions>
</plugin>
注意事项
- 参数兼容性:避免使用旧版本参数(如
overwrite),推荐使用<overWriteIfNewer>。 - 依赖范围:通过
<includeScope>控制复制范围(如runtime)。
四、maven-resources-plugin
功能
处理资源文件,支持过滤、编码、动态替换占位符。
常用参数
<encoding>:资源文件编码(默认${project.build.sourceEncoding})。<resources>:定义资源目录及过滤规则。<filtering>:是否启用占位符替换(默认false)。
<excludes>/<includes>:排除或包含特定资源文件。<escapeString>:转义占位符前缀(如\${}避免替换)。
配置示例
<plugin><groupId>org.apache.maven.plugins</groupId><artifactId>maven-resources-plugin</artifactId><version>3.3.0</version><configuration><encoding>UTF-8</encoding><resources><resource><directory>src/main/resources</directory><filtering>true</filtering><excludes><exclude>**/*.key</exclude></excludes></resource></resources></configuration>
</plugin>
注意事项
- 二进制文件过滤:通过
<nonFilteredFileExtensions>排除二进制文件(如PNG)。 - 目录覆盖:默认包含
src/main/resources,自定义资源目录需显式声明。
五、maven-shade-plugin
功能
生成包含依赖的“胖JAR”(Uber-JAR),解决依赖冲突。
常用参数
<transformers>:合并资源文件(如ManifestResourceTransformer)。<mainClass>:指定入口类。
<filters>:排除签名文件(如META-INF/*.SF)。<relocations>:重定位类路径以避免冲突(如com.google.guava→shaded.com.google.guava)。<createDependencyReducedPom>:是否生成精简POM(默认true)。
配置示例
<plugin><groupId>org.apache.maven.plugins</groupId><artifactId>maven-shade-plugin</artifactId><version>3.5.0</version><executions><execution><phase>package</phase><goals><goal>shade</goal></goals><configuration><transformers><transformer implementation="org.apache.maven.plugins.shade.resource.ManifestResourceTransformer"><mainClass>com.example.Main</mainClass></transformer></transformers><filters><filter><artifact>*:*</artifact><excludes><exclude>META-INF/*.SF</exclude></excludes></filter></filters></configuration></execution></executions>
</plugin>
注意事项
- 资源冲突:多个依赖包含同名资源时需手动合并(如
AppendingTransformer)。 - 体积控制:通过
<minimizeJar>移除未使用的类,但可能破坏反射。
六、maven-assembly-plugin
功能
生成自定义分发包(如ZIP/TAR),包含脚本、配置文件等。
常用参数
<descriptorRefs>:使用预定义描述符(如jar-with-dependencies)。<descriptors>:引用自定义assembly.xml文件。<archive>:配置清单文件(如Main-Class)。<formats>:指定打包格式(如zip、tar.gz)。
配置示例
<plugin><groupId>org.apache.maven.plugins</groupId><artifactId>maven-assembly-plugin</artifactId><version>3.6.0</version><configuration><descriptors><descriptor>src/main/assembly/custom.xml</descriptor></descriptors></configuration><executions><execution><phase>package</phase><goals><goal>single</goal></goals></execution></executions>
</plugin>
自定义assembly.xml示例
<assembly><id>full-distribution</id><formats><format>zip</format></formats><fileSets><fileSet><directory>target</directory><outputDirectory>/</outputDirectory><includes><include>*.jar</include></includes></fileSet><fileSet><directory>src/main/scripts</directory><outputDirectory>/bin</outputDirectory></fileSet></fileSets>
</assembly>
注意事项
- 路径控制:
<includeBaseDirectory>决定是否将文件放入顶级目录。 - 依赖管理:通过
<dependencySets>控制依赖的打包方式(如解压或直接复制)。
总结
| 插件 | 核心用途 | 典型场景 |
|---|---|---|
| maven-compiler-plugin | 控制编译过程 | 多版本JDK兼容、编码调整 |
| maven-jar-plugin | 生成标准JAR包 | 可执行JAR、类路径配置 |
| maven-dependency-plugin | 依赖管理 | 依赖复制、依赖树分析 |
| maven-resources-plugin | 资源文件处理 | 配置文件过滤、编码统一 |
| maven-shade-plugin | 生成胖JAR | 微服务部署、依赖冲突解决 |
| maven-assembly-plugin | 定制化打包分发 | 包含脚本/配置的完整发布包 |
通过合理配置这些插件,可实现从编译到分发的全流程控制,满足复杂项目需求。
相关文章:
)
【Maven】将普通Eclipse项目改造为Maven项目(非SpringBoot项目)
文章目录 将普通Eclipse项目改造为Maven项目(非SpringBoot项目)Maven安装与配置项目结构改造父子Pom.xml文件配置(继承与集成)父项目下的pom.xml文件配置普通子模块下的pom.xml配置启动模块的pom.xml配置 多模块编译总结 Maven插件…...
安装Node.js
1.打开官网,下载安装包 2.安装过程中,全部默认,next. 3.在安装根目录下,新建两个文件夹【node_cache】和【node_global】 4.检测是否安装成功 打开控制台,node -v, npm -v, 显示版本号。 5.配置环境变量 1>从no…...

物联网同RFID功能形态 使用场景的替代品
在物联网(IoT)和自动识别技术领域,除了RFID标签外,还有一些其他技术产品可以在形态和大小上与RFID标签相似,同时提供类似或更强大的功能。以下是几种能够替代RFID标签的产品: 一、NFC标签 NFC(…...

【力扣】堆相关总结
priority_queue std::priority_queue 是 C 标准库中的一个容器适配器,提供了堆(Heap)数据结构的功能。它通常用于实现优先队列,允许你高效地插入元素和访问最大或最小元素。 头文件 #include <queue> 基本定义 std::pri…...

【前端基础】3、HTML的常用元素(h、p、img、a、iframe、div、span)、不常用元素(strong、i、code、br)
HTML结构 一个HTML包含以下部分: 文档类型声明html元素 head元素body元素 例(CSDN): 一、文档类型声明 HTML最一方的文档称为:文档类型声明,用于声明文档类型。即:<!DOCTYPE html>…...
【漫话机器学习系列】113.逻辑回归(Logistic Regression) VS 线性回归(Linear Regression)
逻辑回归 vs 线性回归:详解对比 在机器学习和统计学中,逻辑回归(Logistic Regression) 和 线性回归(Linear Regression) 都是非常常见的模型。尽管它们的数学表达式有一定的相似性,但它们的应用…...

3 算法1-3 回文质数
题目描述 因为 151 既是一个质数又是一个回文数(从左到右和从右到左是看一样的),所以 151 是回文质数。 写一个程序来找出范围 [a,b](5≤a<b≤100,000,000)(一亿)间的所有回文质数。 输入格式 第一行输入两个正…...

Redis---缓存穿透,雪崩,击穿
文章目录 缓存穿透什么是缓存穿透?缓存穿透情况的处理流程是怎样的?缓存穿透的解决办法缓存无效 key布隆过滤器 缓存雪崩什么是缓存雪崩?缓存雪崩的解决办法 缓存击穿什么是缓存击穿?缓存击穿的解决办法 区别对比 在如今的开发中&…...

联合省选 2025 游记
Day 1 不会 LCT,不会字符串,不会博弈 快进到考场 t 1 t1 t1 很快想到枚举中位数再 check,然后就会了,思路很清晰写的很快 t 2 t2 t2 干想 1h 编出来 n m 2 3 nm^{\frac{2}{3}} nm32,然后认为 t 3 t3 t3 会和去年…...

Skywalking介绍,Skywalking 9.4 安装,SpringBoot集成Skywalking
一.Skywalking介绍 Apache SkyWalking是一个开源的分布式追踪与性能监视平台,特别适用于微服务架构、云原生环境以及基于容器(如Docker、Kubernetes)的应用部署。该项目由吴晟发起,并已加入Apache软件基金会的孵化器,…...
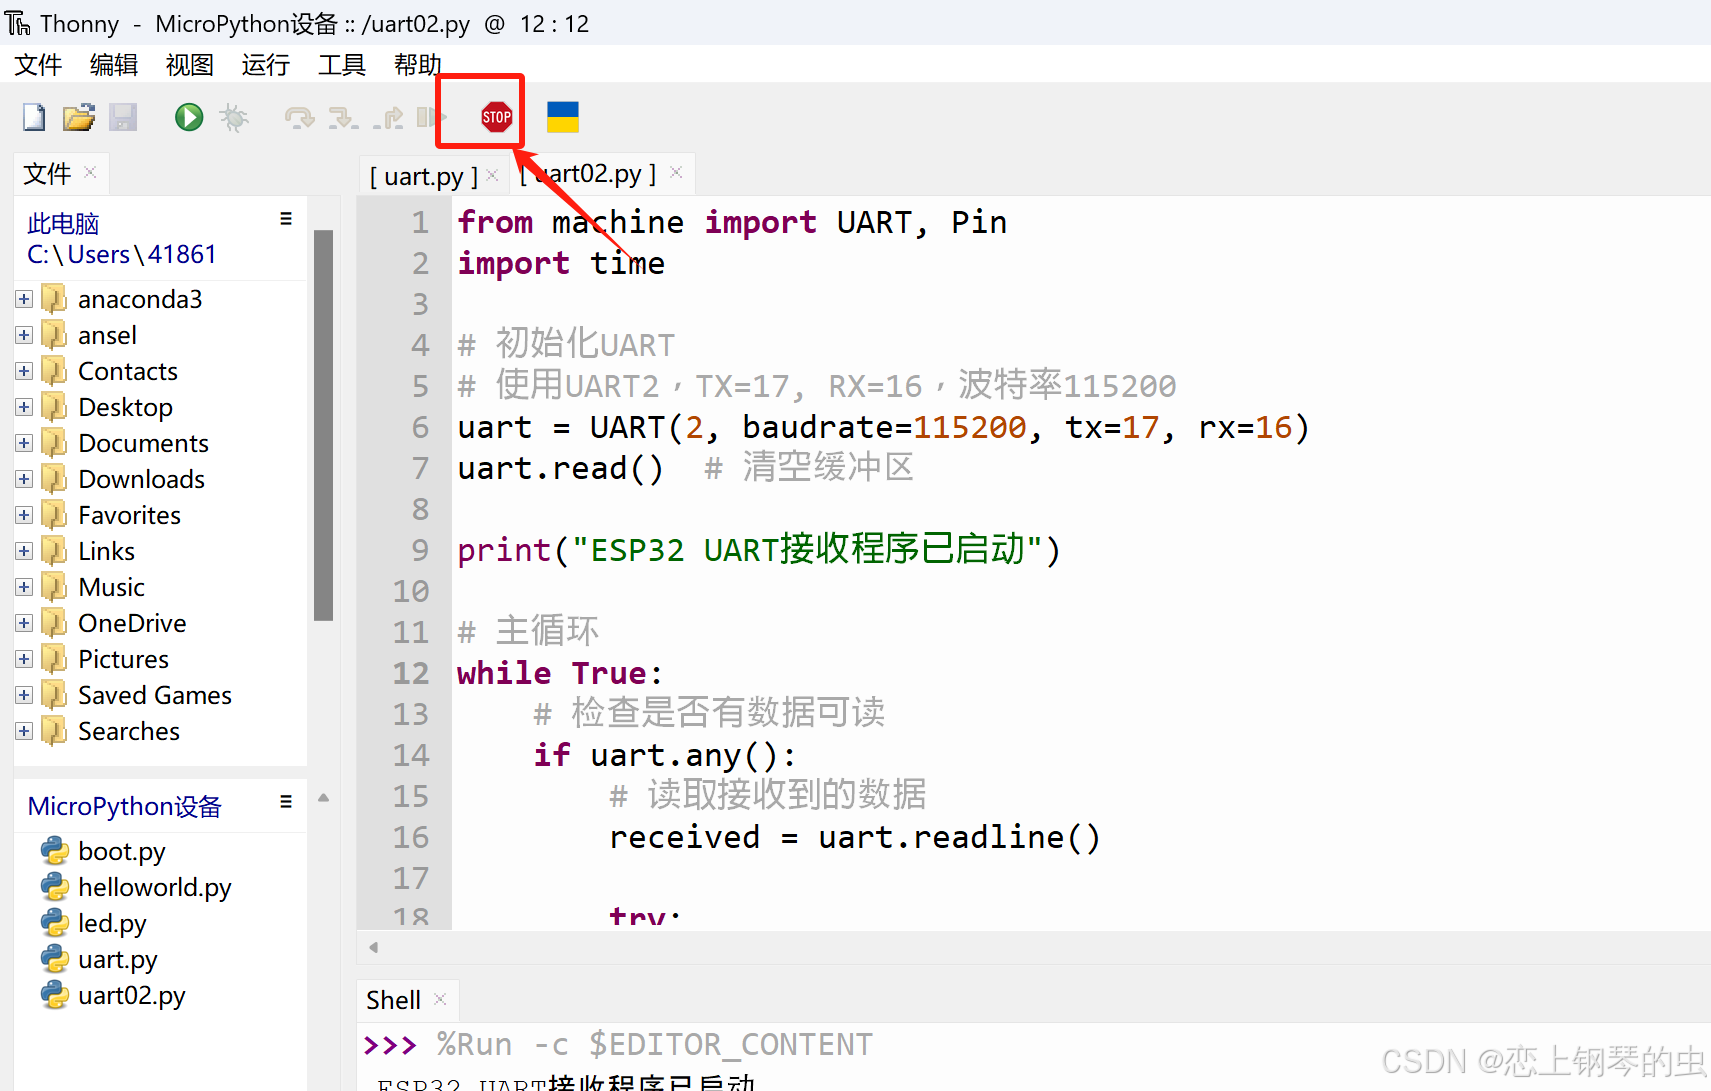
Thonny+MicroPython+ESP32开发环境搭建
1、下载&安装Thonny 安装成功后,会在桌面生成快捷键 双击快捷键,打开程序,界面如下 2、下载MicroPython 下载地址:MicroPython - Python for microcontrollers v1.19版(推荐,此版本稳定): https://do…...

数据结构:反射 和 枚举
目录 一、反射 1、定义 2、反射相关的类 3、Class类 (2)常用获得类中属性相关的方法: (3)获得类中注解相关的方法: (4)获得类中构造器相关的方法: (…...

前缀和算法 算法4
算法题中帮助复习的知识 vector<int > dp( n ,k); n为数组大小 ,k为初始化 哈希表unordered_map<int ,int > hash; hash.find(k)返回值是迭代器 ,找到k返回其迭代器 没找到返回hash.end() hash.count(k)返回值是数字 ,找到k返回1 ,没找到返回0. C和java中 负数…...
USRP7440-通用软件无线电平台
1、产品描述 USRP7440基于第三代XILINX Zynq UltraScale RFSoC架构,它将射频ADC、DAC、ARM、FPGA等集成一体,瞬时带宽可以达到2.5GHz,尤其适合于射频直采应用,比如通信与雷达。 第一代RFSOC高达4GHz • 8x 或 16x 6.554GSPS DAC…...

yunedit-post ,api测试比postman更好
postman应该是大家最熟悉的api测试软件了,但是由于它是外国软件,使用它的高端功能注册和缴费都比较麻烦。生成在线文档分享也经常无法访问被拦截掉。 这里可以推荐一下yunedit-post,该有的功能都有。 https://www.yunedit.com/postdetail …...

windows下玩转vllm:在wsl下安装vllm后续,设置modelscope作为下载源
文章目录 前言所涉及的之前的关键步骤解决模型权重下载网络不通畅的问题vllm和modelscope整合后的bug附录 ImportError: cannot import name _try_login from modelscope.utils.hf_util 全部报错信息前言 之前,咱们说了,由于windows不支持直接部署vllm,所以要么采用wsl,要…...

移动零
一 :题目 二:思路 双指针法: 两个指针将数组划分成三个部分: 解释: ①:所以一开始dest要等于-1,因为没有非零的元素,cur0,因为要从头开始遍历数组 ②:cur为…...

MySQL整体架构
目录 1 客户端 2 服务端 2.1 Server层 2.1.1 连接器 2.1.2 查询缓存 2.1.3 词法器 2.1.4 优化器 2.1.5 执行器 2.2 存储引擎层 1 客户端 ● 客户端为连接MySQL服务端的工具或者驱动,比如JDCB,ODBC等等 ● 用于连接目前服务器,并且发送需要执行…...

Linux之yum详解
—— 小 峰 编 程 目录 1、Linux软件的安装方式 2、什么是yum 3、配置网络yum源 4、yum命令 【语法】 【yum常用命令】 1、Linux软件的安装方式 在CentOS系统中,软件管理方式通常有三种方式: rpm安装 、 yum安装 以及 编译安装 。 2、什么是yum…...
-MySQL数据库基本操作)
大数据学习(52)-MySQL数据库基本操作
&&大数据学习&& 🔥系列专栏: 👑哲学语录: 承认自己的无知,乃是开启智慧的大门 💖如果觉得博主的文章还不错的话,请点赞👍收藏⭐️留言📝支持一下博主哦ᾑ…...

鸿蒙启动页开发
鸿蒙启动页开发 1.1 更改应用名称和图标 1.更改应用图标 找到moudle.json5文件,找到应用启动的EntryAbility下面的icon,将原来的图标改成自己设置的即可 2.更改应用名称 3.效果展示 2.1 广告页面开发 3.1 详细介绍 3.1.1 启动页面 import { PrivacyDialog } fr…...
记忆化搜索(典型算法思想)—— OJ例题算法解析思路
目录 一、509. 斐波那契数 - 力扣(LeetCode) 算法代码: 1. 动态规划 (fib 函数) 初始化: 递推计算: 返回结果: 2. 记忆化搜索 (dfs 函数) 备忘录初始化: 递归终止条件: 递…...

Day11,Hot100(贪心算法)
贪心 (1)121. 买卖股票的最佳时机 第 i 天卖出的最大利润,即在前面最低价的时候买入 class Solution:def maxProfit(self, prices: List[int]) -> int:min_price prices[0]ans 0for price in prices:ans max(ans, price - min_price…...

翻译: 深入分析LLMs like ChatGPT 一
大家好,我想做这个视频已经有一段时间了。这是一个全面但面向普通观众的介绍,介绍像ChatGPT这样的大型语言模型。我希望通过这个视频让大家对这种工具的工作原理有一些概念性的理解。 首先,我们来谈谈你在这个文本框里输入内容并点击回车后背…...

《白帽子讲 Web 安全》之移动 Web 安全
目录 摘要 一、WebView 简介 二、WebView 对外暴露 WebView 对外暴露的接口风险 三、通用型 XSS - Universal XSS 介绍 四、WebView 跨域访问 五、与本地代码交互 js 5.1接口暴露风险: 5.2漏洞利用: 5.3JavaScript 与 Native 代码通信 六、Chr…...

解锁 indexOf、substring 和 JSON.stringify:从小程序图片上传看字符串魔法 ✨
🌟 解锁 indexOf、substring 和 JSON.stringify:从小程序图片上传看字符串魔法 ✨ 在 JavaScript 中,字符串操作和数据序列化是开发中不可或缺的技能。indexOf、substring 和 JSON.stringify 是三个简单却强大的工具,分别用于定位…...
常用的AI文本大语言模型汇总
AI文本【大语言模型】 1、文心一言https://yiyan.baidu.com/ 2、海螺问问https://hailuoai.com/ 3、通义千问https://tongyi.aliyun.com/qianwen/ 4、KimiChat https://kimi.moonshot.cn/ 5、ChatGPThttps://chatgpt.com/ 6、魔塔GPT https://www.modelscope.cn/studios/iic…...
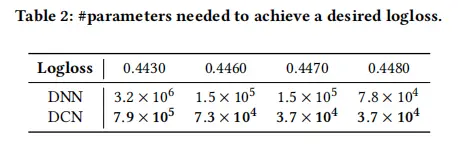
DCN讲解
DCN是DeepFM的升级版,后者是只能做二阶交叉特征,随着阶数上升,模型复杂度大幅提高,且FM网络层较浅,表达能力有限。google团队通过构建深度交叉网络来自动进行特征的高阶交叉,且时空复杂度均为线性增长&…...

前端开发常用的加密算法
以下是前端开发中常用的加密方式及其适用场景的详细说明: 一、核心加密方案 加密类型常用算法特点适用场景对称加密AES、DES、3DES加密解密使用相同密钥,速度快本地存储加密、HTTP Body加密非对称加密RSA、ECC公钥加密私钥解密,安全性高传输…...

5. Nginx 负载均衡配置案例(附有详细截图说明++)
5. Nginx 负载均衡配置案例(附有详细截图说明) 文章目录 5. Nginx 负载均衡配置案例(附有详细截图说明)1. Nginx 负载均衡 配置实例3. 注意事项和避免的坑4. 文档: Nginx 的 upstream 配置技巧5. 最后: 1. Nginx 负载均衡 配置实例 需求说明/图解 windows 浏览器输…...