tinkerCAD案例:20. Simple Button 简单按钮和骰子
文章目录
- tinkerCAD案例:20. Simple Button 简单按钮
- Make a Trick Die
tinkerCAD案例:20. Simple Button 简单按钮
Project Overview: 项目概况:
This is a series of fun beginner level lessons to hone your awesome Tinkercad skills and get you started printing 3D models.
这是一系列有趣的初学者课程,旨在磨练您出色的 Tinkercad 技能并让您开始打印 3D 模型。

A button is a simple, unassuming, almost forgettable thing.
按钮是一件简单、不起眼、几乎可以忘记的事情。
But look at them! These tiny, functional artifacts have been used by humans for thousands of years and they are every bit as varied as the people who have made them.
但是看看他们!这些微小的功能性文物已经被人类使用了数千年,它们与制造它们的人一样多种多样。
In this fun and easy lesson, you will begin your design journey by creating a basic, yet very functional, custom button. Once you’ve made one, there’s nothing stopping you from making a different button for every button hole!
在这个有趣而简单的课程中,您将通过创建一个基本但功能强大的自定义按钮来开始您的设计之旅。一旦你做了一个,没有什么能阻止你为每个纽扣孔制作一个不同的按钮!
Let’s get started! 让我们开始吧!
说明
-
Continue to the next step.
继续执行下一步。 -
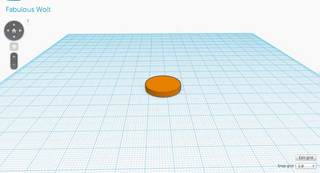
Begin by dragging out a cylinder from the geometric shapes in the Shapes Menu.
首先从“形状”菜单中的几何形状中拖出一个圆柱体。Instructions 指示
说明
-
Drag out a cylinder to the workplane.
将圆柱拖出到工作平面上。
-
Click on the Z axis scaling handle at the top of the shape and scale it down to 3 mm.
单击形状顶部的 Z 轴缩放手柄并将其缩小到 3 毫米。
-
Continue to the next step.
继续执行下一步。 -
A button is not very useful unless you can attach it to something. To do this, you need holes. Four is usual.
按钮不是很有用,除非你可以把它附加到某物上。为此,您需要孔。四个是常见的。
说明
-
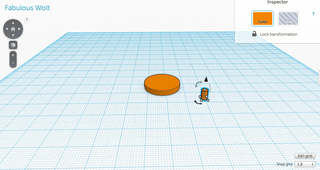
Drag out a cylinder to the workplane.
将圆柱拖出到工作平面上。
-
Hold down shift and grab one of the scale handles to proportionally scale the cylinder to 3mm in diameter.
按住 shift 并抓住其中一个秤手柄,按比例将气缸的直径缩放到 3 毫米。
-
Click the hole property in the inspector menu.
单击检查器菜单中的孔属性。
-
Duplicate the original hole and nudge (move) this duplicate 7mm to the right.
复制原始孔并向右轻推(移动)此复制的 7 毫米。
-
Select both cylinders and click the group button.
选择两个圆柱体,然后单击组按钮。
-
Continue to the next step.
继续执行下一步。 -
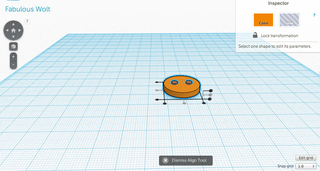
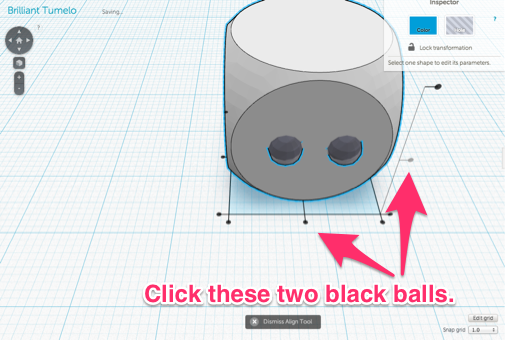
Now let’s move this group of holes on to the button. The Align tool will put these holes in the center for you.
现在让我们将这组孔移到按钮上。对齐工具会将这些孔放在中心位置。Instructions 指示
说明
-
Select the group of holes and the button body.
选取孔组和按钮主体。
-
Using the align tool, center your holes to your button base.
使用对齐工具,将孔居中到按钮底座。
-
Continue to the next step.
继续执行下一步。 -
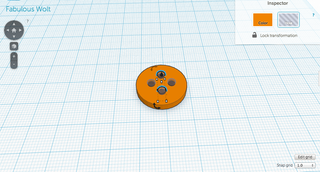
Now, let’s make the final two holes. Just duplicate your original objects and rotate them. Reusing existing objects and groups is a powerful way to quickly make new things.
现在,让我们打最后两个洞。只需复制原始对象并旋转它们即可。重用现有对象和组是快速创建新事物的有效方法。Instructions 指示
说明
-
Deselect the button base so that only your original hole group is selected.
取消选取按钮底座,以便仅选取原始孔组。
-
Duplicate your hole group and rotate the duplicate 90° around. the Z axis
复制孔组并将复制的孔组旋转 90°。Z 轴
-
Select all of your shapes and group them.
选择所有形状并对其进行分组。
-
Continue to the next step.
继续执行下一步。
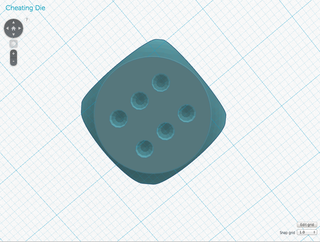
Make a Trick Die
- Now we’re going to make a trick die!
Let’s explore what power we have over the humble six-sided die! What would happen if our power to create was left unchecked?
让我们探索一下我们对不起眼的六面骰子有什么力量!如果我们的创造能力不受控制,会发生什么?
Your challenge: create a die that looks exactly the same on the outside but rolls a five slightly more often.
你的挑战:创建一个外部看起来完全相同的模具,但掷五的频率略高。
This lesson only requires two shapes, the Tinkercad Dice-shape, and a sphere to represent the pips (a pip is a tally mark on a game piece like the dots on dice or the symbols on cards.)
本课程只需要两种形状,Tinkercad骰子形状和一个代表点的球体(点是游戏棋子上的计数标记,如骰子上的点或卡片上的符号。
Above the shapes menu, there are some shortcuts to help you find the shape you are looking for. The Dice-shape is among the Symbol shapes and the sphere is among the geometric shapes. Because we’ll be working with small objects, let’s also set our Snap grid to 0.5mm.
在形状菜单上方,有一些快捷方式可以帮助您找到所需的形状。骰子形状位于符号形状中,球体位于几何形状中。因为我们将处理小物体,所以我们也将捕捉网格设置为 0.5mm。

-
说明
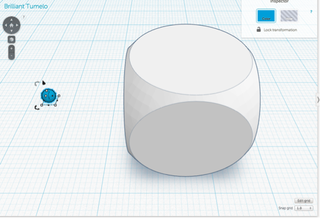
- Click on the Star-shaped shortcut above the shapes menu and drag a Dice shape to the Workplane.
单击形状菜单上方的星形快捷方式,然后将骰子形状拖动到工作平面上。
- While holding down Shift, scale the die to be a 20mm cube.
按住 Shift 的同时,将骰子缩放为 20 毫米立方体。
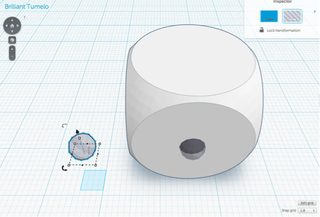
- Drag out a sphere, scale it to be 3mm in diameter, and make it a Hole under the Inspector window.
拖出一个球体,将其缩放到直径为 3 毫米,并将其设为检查器窗口下方的孔。
- Set the Snap grid to 0.5mm.
将捕捉网格设置为 0.5mm。
- Continue to the next step.
继续执行下一步。
- Click on the Star-shaped shortcut above the shapes menu and drag a Dice shape to the Workplane.
-
接下来,我们要将点与骰子的第一个面对齐。
We’ll be a lot of pips, this lesson, so we don’t have to keep remaking the shape. Before we group the pips with the Dice-Shape, we will always duplicate our pips.
这一课,我们会有很多点,所以我们不必不断重新制作形状。在我们将点与骰子形状分组之前,我们将始终复制我们的点。Instructions 指示
说明
-
Select both the Sphere and the Dice shape and click the Align tool.
选择“球体”和“骰子”形状,然后单击“对齐”工具。
-
Click the Dice shape so the Align tool aligns the pip to the Die, then center the pip along the Die’s X and Z Axes.
单击“骰子”形状,使“对齐”工具将画点与骰子对齐,然后将画点沿骰子的 X 轴和 Z 轴居中。
-
Nudge the pip so that half of it (1.5mm) is embedded into the die (along the Y axis).
轻推点,使其一半(1.5mm)嵌入骰子(沿Y轴)。
-
Duplicate the Sphere. 复制球体。
-
Group one of the spheres with the Dice shape.
将其中一个具有骰子形状的球体分组。
-
Continue to the next step.
继续执行下一步。 -
Let’s go ahead and make side two.
让我们继续做第二面。Instructions 指示

说明
-
Duplicate the Sphere again.
再次复制球体。
-
Nudge the second sphere 13 times away from the Dice shape.
将第二个球体从骰子形状方向轻推 13 次。
-
Group the two spheres and nudge them 20 times (10mm) to the left face of the die.
将两个球体分组,并将它们向骰子的左面轻推 20 次 (10mm)。
-
Center the group to the Dice shape along the Y axis.
将组沿 Y 轴居中到骰子形状。
-
Duplicate this group. 复制此组。
-
Group one of the groups with the Dice shape.
使用骰子形状对其中一个组进行分组。
-
Continue to the next step.
继续执行下一步。 -
Because side four is just two copies of the pips from side two, we’ll build it, next.
因为第四面只是第二面的两个点数副本,所以我们接下来会构建它。Instructions 指示
![2]](https://img-blog.csdnimg.cn/18cfa284543e42c484f93f4027c19442.png)
说明
-
Duplicate the group of pips from side 2.
从第 2 面复制一组点。
-
Ctrl-Up arrow 13 times to nudge one of the groups up 6.5mm.
按住 Ctrl-向上箭头 13 次,将其中一个组向上推移 6.5 毫米。
-
Group all 4 pips and rotate them around the Z Axis 90°.
将所有 4 个点分组并围绕 Z 轴旋转 90°。
-
Nudge the group 20 times (10mm) along the Y Axis so that it is inline to the surface opposite the 1.
沿 Y 轴将组轻推 20 次 (10mm),使其与 1 相对的表面内联。
-
Center the Spheres to the Dice shape along the X axis.
将球体沿 X 轴居中到骰子形状。
-
Duplicate the spheres and then group one of the duplicates with the Die shape.
复制球体,然后将其中一个重复项与“模具”形状分组。
-
Continue to the next step.
继续执行下一步。
-
-
We can reuse the side with 4 pips to create the side with 5 pips.
我们可以重复使用 4 点的一面来创建 5 点的一面。Instructions 指示
说明
-
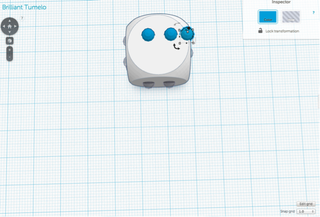
Rotate the duplicate spheres 90° around the Z Axis.
将重复的球体绕 Z 轴旋转 90°。
-
Nudge the Spheres 20 times (10mm) along the X axis so that it is inline to the surface opposite side two.
沿 X 轴将球体轻推 20 次 (10mm),使其与第二侧相对的表面内联。
-
Duplicate your group. 复制您的组。
-
Ungroup one of the duplicates twice.
取消其中一个重复项的分组两次。
-
Delete all but one of the spheres.
删除除一个球体之外的所有球体。
-
Align the spheres to the Dice shape along the Y and Z Axes.
沿 Y 轴和 Z 轴将球体与骰子形状对齐。
-
Group these spheres and Duplicate this group.
对这些球体进行分组并复制此组。
-
Group one of these duplicates with the Dice shape.
使用骰子形状将这些重复项之一分组。
-
Continue to the next step.
继续执行下一步。
-
-
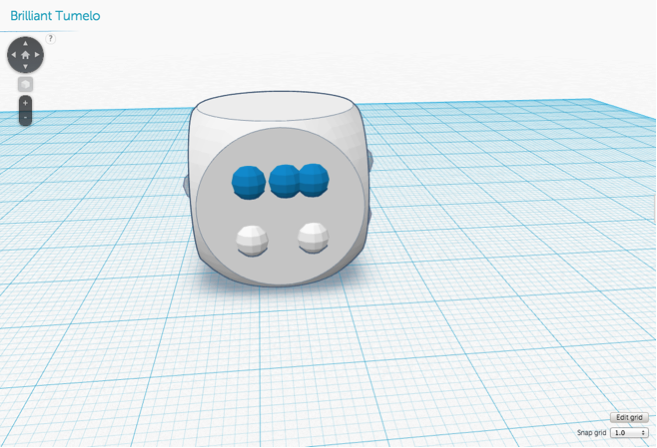
While making side five, we arranged three pips in a row in a diagonal. We’re going to reuse this exact arrangement of pips to make side three.
在制作第五面时,我们在对角线上连续排列了三个点。我们将重用这种精确的点排列来制作第三面。Instructions 指示
说明
-
Rotate your pips 90° around the Y Axis and nudge them 20 times (10mm) so they are parallel and inline with the top of the Dice shape.
将点围绕 Y 轴旋转 90°,并将它们轻推 20 次(10 毫米),使它们与骰子形状的顶部平行并内联。
-
Ungroup the pips three times and delete two pips from opposite corners.
将点取消分组三次,并从相对的角落删除两个点。
-
Group these three pips and rotate the 45° around them Z axis.
将这三个点分组并围绕它们的 Z 轴旋转 45°。
-
Center the pips with the top of the Dice shape along the X and Y Axes.
点与骰子形状的顶部沿 X 轴和 Y 轴居中。
-
Duplicate this group of pips and group one of the Duplicates with the Dice shape.
复制这组点,并使用骰子形状对其中一个重复项进行分组。
-
Continue to the next step
继续执行下一步 -
Side six is just two rows of three pips, so we’ll copy the pips from side three in this step.
第六面只是两行三个点,因此我们将在此步骤中复制第三面的点数。Instructions 指示
说明
-
Duplicate the group of pipes and Nudge them 13 times along the X Axis.
复制管道组并沿 X 轴微移 13 次。
-
Group these pips and lower them along the Z Axis until their bottom is -1.5mm below the Workplane.
将这些点分组并沿Z轴降低它们,直到它们的底部低于工作平面-1.5mm。
-
Center these pips to the Dice Shape along the X and Y axes.
这些点沿 X 轴和 Y 轴将这些点居中到骰子形状。
-
Group the pips with your Dice shape.
将点与骰子形状分组。
-
Continue to the next step.
继续执行下一步。 -
This is the last side!
这是最后一面!Side six is just two rows of three pips, so we’ll copy the pips from side three in this step.
第六面只是两行三个点,因此我们将在此步骤中复制第三面的点数。Instructions 指示

说明
-
Duplicate the group of pipes and Nudge them 13 times along the X Axis.
复制管道组并沿 X 轴微移 13 次。
-
Group these pips and lower them along the Z Axis until their bottom is -1.5mm below the Workplane.
将这些点分组并沿Z轴降低它们,直到它们的底部低于工作平面-1.5mm。
-
Center these pips to the Dice Shape along the X and Y axes.
这些点沿 X 轴和 Y 轴将这些点居中到骰子形状。
-
Group the pips with your Dice shape.
将点与骰子形状分组。
-
Continue to the next step.
继续执行下一步。
下一步
-
相关文章:
tinkerCAD案例:20. Simple Button 简单按钮和骰子
文章目录 tinkerCAD案例:20. Simple Button 简单按钮Make a Trick Die tinkerCAD案例:20. Simple Button 简单按钮 Project Overview: 项目概况: This is a series of fun beginner level lessons to hone your awesome Tinkercad skills a…...

Java - 为什么要用BigDecimal?
🤔️为什么要用BigDecimal? 当然是因为使用Double计算,在某些对精度要求很高的场景下会出现问题💀不信你看⤵️ Test void test12() {// 丢失精度double result 0.2 0.1;System.out.println(result); // 输出结果为 0.300000000…...
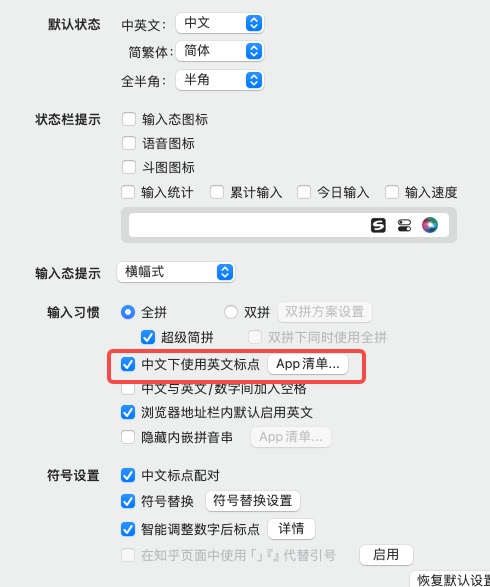
mac 删除自带的ABC输入法保留一个搜狗输入法,搜狗配置一下可以减少很多的敲击键盘和鼠标点击次数
0. 背景 对于开发者来说,经常被中英文切换输入法所困扰,我这边有一个方法,删除mac默认的ABC输入法 仅仅保留搜狗一个输入法,配置一下搜狗输入:哪些指定为英文输入,哪些指定为中文输入(符号也可…...

JiaYu说:如何做好IT类的技术面试?
IT类的技术面试 面试IT公司的小技巧IT技术面试常见的问题嵌入式技术面试嵌入式技术面试常见的问题嵌入式软件/硬件面试题 JiaYu归属嵌入式行业,所以这里只是以普通程序员的角度去分析技术面试的技巧 当然,也对嵌入式技术面试做了小总结,友友们…...

RL 实践(6)—— CartPole【REINFORCE with baseline A2C】
本文介绍 REINFORCE with baseline 和 A2C 这两个带 baseline 的策略梯度方法,并在 CartPole-V0 上验证它们和无 baseline 的原始方法 REINFORCE & Actor-Critic 的优势参考:《动手学强化学习》完整代码下载:7_[Gym] CartPole-V0 (REINFO…...

Python numpy库的应用、matplotlib绘图、opencv的应用
numpy import numpy as npl1 [1, 2, 3, 4, 5]# array():将列表同构成一个numpy的数组 l2 np.array(l1) print(type(l2)) print(l2) # ndim : 返回数组的轴数(维度数) # shape:返回数组的形状,用元组表示;元组的元素…...
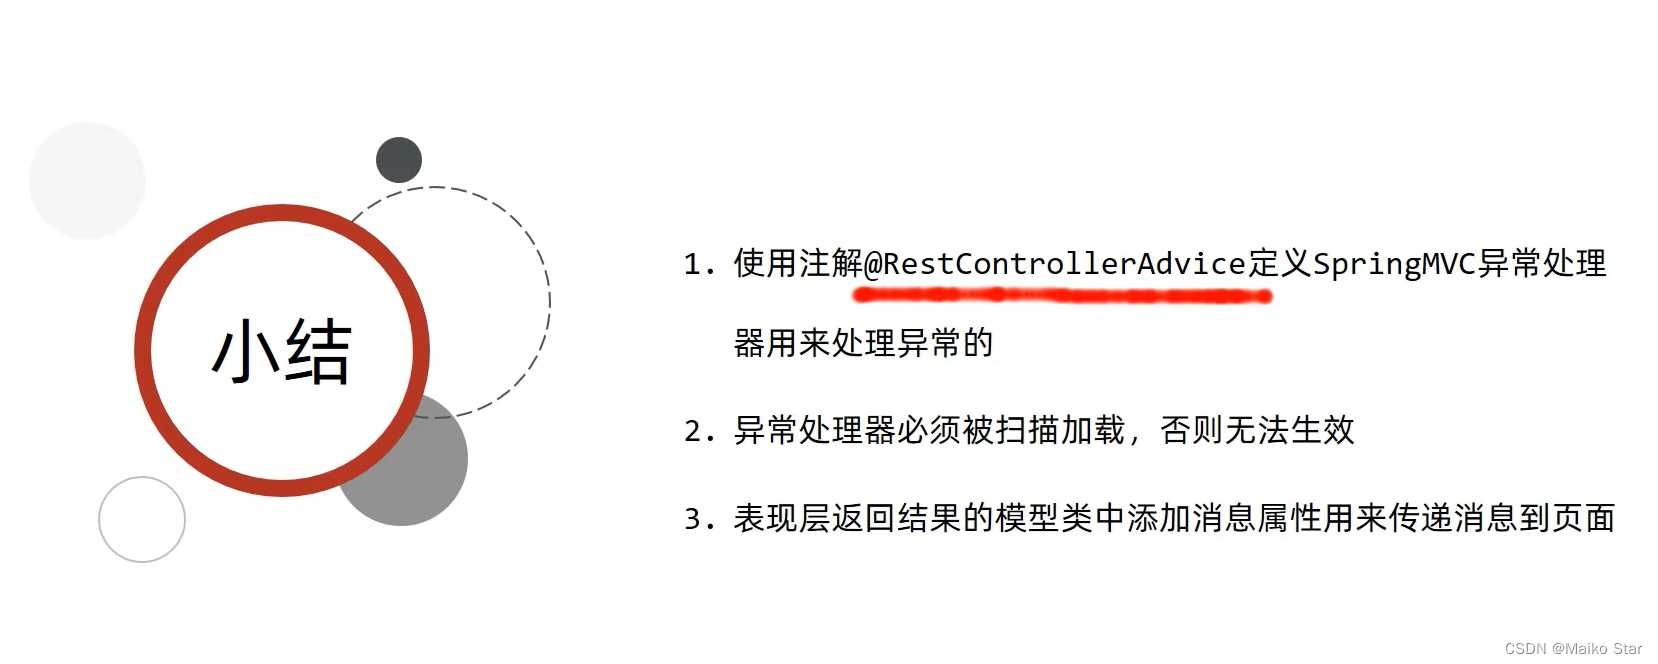
SpringBoot 如何进行 统一异常处理
在Spring Boot中,可以通过自定义异常处理器来实现统一异常处理。异常处理器能够捕获应用程序中抛出的各种异常,并提供相应的错误处理和响应。 Spring Boot提供了ControllerAdvice注解,它可以将一个类标记为全局异常处理器。全局异常处理器能…...

数据库索引优化与查询优化——醍醐灌顶
索引优化与查询优化 哪些维度可以进行数据库调优 索引失效、没有充分利用到索引-一索引建立关联查询太多JOIN (设计缺陷或不得已的需求) --SQL优化服务器调优及各个参数设置 (缓冲、线程数等)–调整my.cnf数据过多–分库分表 关于数据库调优的知识点非常分散。不同的 DBMS&a…...
与知识蒸馏)
Student and Teacher network(学生—教师网络)与知识蒸馏
Student and Teacher network指一个较小且较简单的模型(学生)被训练来模仿一个较大且较复杂的模型(教师)的行为或预测。教师网络通常是一个经过训练在大型数据集上并在特定任务上表现良好的模型。而学生网络被设计成计算效率高且参…...

FPGA——PLD的区别以及各自的特点
目录 一、概述二、PLD的优点三、PLD的分类1、PROM(可编程只读存储器):2、PAL(可编程阵列逻辑)3、GAL(通用阵列逻辑)4、CPLD (复杂PLD)5、FPGA(现场可编程门阵…...
八、Kafka时间轮与常见问题
Kafka与时间轮 Kafka中存在大量的延时操作。 1、发送消息-超时重试机制 2、ACKS 用于指定分区中必须要有多少副本收到这条消息,生产者才认为写入成功(延时 等) Kafka并没有使用JDK自带的Timer或者DelayQueue来实现延迟的功能,而…...
Web端即时通讯技术(SEE,webSocket)
目录 背景简介个人见解被动推送轮询简介实现 长轮询(comet)简介实现 比较 主动推送长连接(SSE)简介实现GETPOST 效果 webSocket简介WebSocket的工作原理:WebSocket的主要优点:WebSocket的主要缺点: 实现用法一用法二 **效果** 比较…...
脑电信号处理与特征提取——4.脑电信号的预处理及数据分析要点(彭微微)
目录 四、脑电信号的预处理及数据分析要点 4.1 脑电基础知识回顾 4.2 伪迹 4.3 EEG预处理 4.3.1 滤波 4.3.2 重参考 4.3.3 分段和基线校正 4.3.4 坏段剔除 4.3.5 坏导剔除/插值 4.3.6 独立成分分析ICA 4.4 事件相关电位(ERPs) 4.4.1 如何获…...

分析npm run serve之后发生了什么?
首先需要明白的是,当你在终端去运行 npm run ****,会是什么过程。 根据上图的一个流程,就可以衍生出很多问题。 1,为什么不直接运行vue-cli-service serve? 因为直接运行 vue-cli-service serve,会报错,…...

LINUX上操作redis 用shell7
LINUX上操作redis 用shell7 步骤1:连接到Linux服务器步骤2:安装和配置Redis步骤3:连接到Redis服务器步骤4:操作Redis数据步骤5:断开与Redis服务器的连接 步骤1:连接到Linux服务器 首先,需要使用…...

Python的threading模块
为引入多线程的概念,下面是一个例子: import time, datetimestartTime datetime.datetime(2024, 1, 1, 0, 0, 0) while datetime.datetime.now() < startTime:time.sleep(1)print(Program now starting on NewYear2024) 在等待time.sleep()的循环调…...

HTML5 的离线储存怎么使用,工作原理
TML5提供了一种称为离线储存(Offline Storage)的功能,它允许网页在离线时缓存和存储数据,以便用户可以在没有网络连接的情况下访问这些数据。离线储存是通过使用Web Storage API或者应用程序缓存(Application Cache&am…...

FTP文件传输协议与DHCP
基本概念 主机之间传输文件是IP网络的一个重要功能 互联网早期,最通用方式就是使用FTP(File Transfer Protocol,文件传输协议)以及(Trivial File Transfer Protocol,简单文件传输协议) FTP采用…...

【UE5 多人联机教程】06-显示玩家名称
效果 可以看到玩家输入各自的名称,会显示到自己控制的角色头上。但是目前有一个BUG就是,当客户端加入游戏时会多创建一个服务端的角色。 步骤 1. 打开“BP_ThirdPersonCharacter”,添加一个控件组件,用于显示玩家名称 作为网格体…...

Rust vs Go:常用语法对比(五)
题图来自 Rust vs Go 2023[1] 81. Round floating point number to integer Declare integer y and initialize it with the rounded value of floating point number x . Ties (when the fractional part of x is exactly .5) must be rounded up (to positive infinity). 按规…...

Android开发工程师:聚焦蓝牙与WiFi技术的实践指南
在移动应用开发领域,Android开发工程师扮演着至关重要的角色,特别是在物联网(IoT)和无线通信日益普及的今天。蓝牙和WiFi作为两大核心技术,广泛应用于智能家居、健康监测、远程控制等场景。本文以Android开发工程师的岗位职责为核心,深入探讨蓝牙和WiFi技术的开发实践。我…...

前端硬核指南:如何让AI“打字机”效果在浏览器里丝滑跑起来?
一、各自优势和对比 这是检索出来的数据,据说是根据第三方评测与企业数据,三款产品在代码生成质量上各有侧重: 产品 语言优势 场景亮点 核心差异ate C核心代码质量第一;Python首生成率达92.3% SQL生成准确率提升35%;Ag…...

避开这3个坑,你的STM32 RTC才能走得更准:蓝桥杯嵌入式备赛经验谈
避开这3个坑,你的STM32 RTC才能走得更准:蓝桥杯嵌入式备赛经验谈 在蓝桥杯嵌入式竞赛中,实时时钟(RTC)模块的稳定性和精度往往决定了计时类任务的成败。许多参赛者在初次接触STM32的RTC时,常会陷入一些看似…...

告别乱码!手把手教你用STM32CubeMX和SPI Flash制作并显示自定义中文字库
STM32嵌入式开发实战:从零构建SPI Flash中文字库与显示系统 在物联网设备和工业控制面板的开发中,汉字显示往往是刚接触STM32的开发者遇到的第一个"拦路虎"。传统解决方案要么依赖昂贵的显示模块内置字库,要么需要占用大量MCU内部…...

10分钟搞定Cellpose:AI细胞分割工具零基础安装配置秘籍
10分钟搞定Cellpose:AI细胞分割工具零基础安装配置秘籍 【免费下载链接】cellpose a generalist algorithm for cellular segmentation with human-in-the-loop capabilities 项目地址: https://gitcode.com/gh_mirrors/ce/cellpose 想要快速上手Cellpose这款…...
)
QTableWidget样式踩坑实录:为什么你的QSS设置了却没生效?(附排查清单)
QTableWidget样式深度调试指南:从失效到精准控制的实战手册 在Qt开发中,QTableWidget作为高频使用的数据展示控件,其样式定制往往成为项目UI打磨的关键环节。许多开发者都有过这样的经历:精心编写的QSS代码在运行时毫无反应&#…...

多核处理器与虚拟化技术实践解析
1. 多核处理器技术解析1.1 频率墙与多核架构的必然性2004年,英特尔突然取消了4GHz奔腾4处理器的发布计划,这个事件后来被称为"频率墙"的转折点。当时主流芯片厂商发现,单纯提高时钟频率带来的性能提升已经无法抵消随之暴涨的功耗和…...

ThinkRAG:基于LlamaIndex与Streamlit的本地化中文知识库问答系统实践
1. 项目概述:ThinkRAG,一个开箱即用的本地知识库问答系统如果你和我一样,对大型语言模型(LLM)的潜力感到兴奋,但又对数据隐私、网络依赖和高昂的API成本心存顾虑,那么你肯定也想过:能…...

Refined Now Playing:网易云音乐沉浸式播放界面与歌词动画渲染技术深度剖析
Refined Now Playing:网易云音乐沉浸式播放界面与歌词动画渲染技术深度剖析 【免费下载链接】refined-now-playing-netease 🎵 网易云音乐沉浸式播放界面、歌词动画 - BetterNCM 插件 项目地址: https://gitcode.com/gh_mirrors/re/refined-now-playin…...
)
Unity游戏开发实战:用Flow Field流场寻路搞定RTS游戏里的千军万马(附完整C#代码)
Unity游戏开发实战:用Flow Field流场寻路搞定RTS游戏里的千军万马(附完整C#代码) 在RTS游戏开发中,最令人头疼的场景莫过于数百个单位同时移动时引发的性能灾难。传统A*寻路算法在面对大规模单位调度时,会因重复计算导…...