自监督去噪:Noise2Void原理和调用(Tensorflow)
文章原文: https://arxiv.org/abs/1811.10980
N2V源代码: https://github.com/juglab/n2v
参考博客:
- https://zhuanlan.zhihu.com/p/445840211
- https://zhuanlan.zhihu.com/p/133961768
- https://zhuanlan.zhihu.com/p/563746026
文章目录
- 1. 方法原理
- 1.1 Noise2Noise回顾
- 1.2 方法简介
- (1)噪声独立假设和其他假设
- (2)patch-based CNN
- (3)patch-based Noise2Noise
- (4)patch-based view in single Image
- 2. 实验细节及结果
- 2.1 实验细节
- 2.2 实验结果
- 3. 代码整理
- 3.1 网络结构
- 3.2 数据整理(Mask部分,核心)
- 3.3 例子
- 4. 总结
1. 方法原理
1.1 Noise2Noise回顾
可以参考自监督去噪:Noise2Noise原理及实现(Pytorch)
Noise2Noise可以不需要干净的数据集,但是存在两个主要矛盾
- 需要配对的噪声数据集
- 信号是恒定的(静态的),不能动态变化
- 其实还有一个:这里说的噪声都需要是零均值的。
Noise2Void在此基础上又添加了两个假设,想要解决配对噪声数据的问题
- 信号并非逐像素独立的
- 不同位置的噪声之间相互独立
1.2 方法简介
(1)噪声独立假设和其他假设
噪声图片组成 : x = s + n x = s + n x=s+n, 其分布为一个联合概率分布
p ( s , n ) = p ( s ) p ( n ∣ s ) p(s,n) = p(s)p(n|s) p(s,n)=p(s)p(n∣s)
Noise2Void工作的两个假设:
假设1: 两个位置上的信号不相互独立, p ( s ) p(s) p(s)满足:
p ( s i ∣ s j ) ≠ p ( s i ) p(s_i | s_j) \neq p(s_i) p(si∣sj)=p(si)
假设2: 给定信号,不同位置上的噪声是相互独立的:
p ( n ∣ s ) = ∏ i p ( n i ∣ s i ) p(n|s) = \prod_i p(n_i | s_i) p(n∣s)=i∏p(ni∣si)
不要忘记,其同时也延用了Noise2Noise中的一些假设:
噪声是零均值的:
E [ n i ] = 0 E[n_i] = 0 E[ni]=0
也就是说:
E [ x i ] = s i E[x_i] = s_i E[xi]=si
(2)patch-based CNN
给定一个去噪网络,网络做的工作是
f ( x , θ ) = s ^ f(x,\theta) = \hat{s} f(x,θ)=s^
也就是输入噪声图片,输出去噪结果 s ^ \hat{s} s^,其中 θ \theta θ是网络的参数;Noise2Void文章提出了一种新的观点,作者认为输出结果s中的每一个像素点受到感受野的影响,其实只取决于输入x中的一部分区域,用一个新的公式进行表示
f ( x R F ( i ) ; θ ) = s i ^ f(x_{RF(i)};\theta) = \hat{s_i} f(xRF(i);θ)=si^
右侧的 s i ^ \hat{s_i} si^表示预测去噪结果中第i个像素,受限于感受野的大小,只取决于输入x中的一个patch x R F ( i ) x_{RF(i)} xRF(i),这个patch是以位置i为中心的。
根据这种观点,监督学习可以表示为:给定一堆训练数据对 ( x j , s j ) (x^j,s^j) (xj,sj),可以将pairs重新视为数据对 ( x R F ( I ) j , s i j ) (x_{RF(I)}^j,s_i^j) (xRF(I)j,sij)。上标表示这是第j个样本,下标表示这是第i个位置的像素,然后传统的监督学习表示为:
a r g m i n θ ∑ j ∑ i L ( f ( x R F ( i ) j ; θ ) = s ^ i j , s i j ) \underset{\theta}{argmin} \sum_j\sum_i L(f(x_{RF(i)}^j;\theta)=\hat{s}_i^j,s_i^j) θargminj∑i∑L(f(xRF(i)j;θ)=s^ij,sij)
(3)patch-based Noise2Noise
用patch的观点来描述 noise2noise,原来的训练数据对是两个含有独立噪声的噪声数据对 ( x j , x ′ j ) (x^j,x^{'j}) (xj,x′j),其中
x j = s j + n j a n d x ′ j = s j + n ′ j x^j = s^j + n^j \;\; and \;\; x^{'j} = s^j + n^{'j} xj=sj+njandx′j=sj+n′j
现在可以将pair视为 ( x R F ( i ) j , x i ′ j ) (x^j_{RF(i)},x_i^{'j}) (xRF(i)j,xi′j), 也就是说target是目标中位置i的像素,input是输入中以位置i为中心的patch(patch大小取决于感受野的大小)。
(4)patch-based view in single Image

输入噪声图像->得到干净图像的过程:
- 以一个像素为中心将噪声图像分割为块,然后将块作为网络的input
- 以这个中心像素作为target
- 网络将会学习直接将输入块中心的像素映射到网络的输出位置上(直接映射)
Noise2Void的想法就是:将输入patch的中心位置抹除,那么网络会怎么学习? ==》跟Noise2Noise相同去学习信号
- 输入缺失了中心位置的信息,但是要求预测中心位置的信息
- 中心位置是信号:信号是不相互独立的,也就是说应该是可以根据周围信息恢复的
- 中心位置是噪声:噪声是相互独立的,那么不应该被恢复
这个想法和Noise2Noise的思想又开始重合了:由于网络不可能学习到一个随机噪声到另一个随机噪声的观测,所以随着训练的进行,网络会倾向输出“随机的期望”,如果噪声是零均值的,那么随机的期望就是干净数据本身。
2. 实验细节及结果
2.1 实验细节
尽管盲点网络可以仅仅利用单独的噪声图片来进行训练,但要想高效地设计出这样一个网络并不容易。作者提出了一个 mask 策略:随机选择周围的一个像素值来替换输入块的中间像素值,这可以有效地清除中间像素的信息避免网络学习到恒等映射。

- 给定一个噪声图像 x i x_i xi,随机裁剪出 64 × 64 64 \times 64 64×64的小块(大于网络的感受野)
- 随机选取一个小块
- 分层采样来随机选取N个像素点,对于每一个点,裁剪出以其为中心、以感受野为大小的块
- 在这个块中用选取的像素(图b的蓝色块)的值替换中心位置(图b的红色块)的像素值
- 在一个patch中替换了N个像素点,一次可以计算N各点对应的梯度,加速并行度
如果不用这个trick,那么需要处理整个patch才能够计算一个点的梯度,计算成本非常高
2.2 实验结果
首先是使用不同数据集和其他方法进行了对比,想要说明的一个问题就是Noise2Void适用于各种场景的去噪工作,其不需要干净图片,也不需要噪声图片对,得到的去噪效果还好。

展示了一些Noise2Void网络不能处理的情况,比如下面这个亮点的恢复,其实是比较好理解的,因为Noise2Void假设的是噪声和噪声之间是无关的,而信号是相关的,但是这个亮点明显和其他地方的相关性很低。

Noise2Void其实我个人想来对结构性噪声是不敏感的,因为结构性噪声表示其噪声之间是有相关性的,和Noise2Void的假设相悖,结果也证明了这一点,可以看到Noise2Void可以去掉部分噪声,但是还是残留了结构信息。

3. 代码整理
首先说明,下面代码基本都是来自于 N2V 的github,建议大家直接跳转阅读官方代码 https://github.com/juglab/n2v,只是想要了解一下的可以继续阅读:
在这里展示一下网络结构设计(U-Net)和执行流程,但是需要说明的是:N2V的核心是数据的准备和Mask的标记,因为盲点网络的核心就是盲点,将盲点替换为对应的噪声数据然后恢复这个盲点。
3.1 网络结构
from __future__ import print_function, unicode_literals, absolute_import, divisionimport tensorflow as tf
from tensorflow import keras
import numpy as npfrom tensorflow.keras.layers import Input,Conv2D,Conv3D,Activation,Lambda,Layer
from tensorflow.keras.models import Model
from tensorflow.keras.layers import Add,Concatenatefrom csbdeep.utils.utils import _raise,backend_channels_last
from csbdeep.utils.tf import keras_importK = keras_import('backend')
Conv2D, MaxPooling2D, UpSampling2D, Conv3D, MaxPooling3D, UpSampling3D, Cropping2D, Cropping3D, Concatenate, Add, Dropout, Activation, BatchNormalization = \keras_import('layers', 'Conv2D', 'MaxPooling2D', 'UpSampling2D', 'Conv3D', 'MaxPooling3D', 'UpSampling3D', 'Cropping2D', 'Cropping3D', 'Concatenate', 'Add', 'Dropout', 'Activation', 'BatchNormalization')def conv_block2(n_filter, n1, n2,activation="relu",border_mode="same",dropout=0.0,batch_norm=False,init="glorot_uniform",**kwargs):def _func(lay):if batch_norm:s = Conv2D(n_filter, (n1, n2), padding=border_mode, kernel_initializer=init, **kwargs)(lay)s = BatchNormalization()(s)s = Activation(activation)(s)else:s = Conv2D(n_filter, (n1, n2), padding=border_mode, kernel_initializer=init, activation=activation, **kwargs)(lay)if dropout is not None and dropout > 0:s = Dropout(dropout)(s)return sreturn _funcdef conv_block3(n_filter, n1, n2, n3,activation="relu",border_mode="same",dropout=0.0,batch_norm=False,init="glorot_uniform",**kwargs):def _func(lay):if batch_norm:s = Conv3D(n_filter, (n1, n2, n3), padding=border_mode, kernel_initializer=init, **kwargs)(lay)s = BatchNormalization()(s)s = Activation(activation)(s)else:s = Conv3D(n_filter, (n1, n2, n3), padding=border_mode, kernel_initializer=init, activation=activation, **kwargs)(lay)if dropout is not None and dropout > 0:s = Dropout(dropout)(s)return sreturn _funcclass MaxBlurPool2D(Layer):"""MaxBlurPool proposed in:Zhang, Richard. "Making convolutional networks shift-invariant again."International conference on machine learning. PMLR, 2019.Implementation inspired by: https://github.com/csvance/blur-pool-keras"""def __init__(self, pool, **kwargs):self.pool = poolself.blur_kernel = Nonesuper(MaxBlurPool2D, self).__init__(**kwargs)def build(self, input_shape):gaussian = np.array([[1, 2, 1], [2, 4, 2], [1, 2, 1]])gaussian = gaussian / np.sum(gaussian)gaussian = np.repeat(gaussian, input_shape[3])gaussian = np.reshape(gaussian, (3, 3, input_shape[3], 1))blur_init = keras.initializers.constant(gaussian)self.blur_kernel = self.add_weight(name="blur_kernel",shape=(3, 3, input_shape[3], 1),initializer=blur_init,trainable=False,)super(MaxBlurPool2D, self).build(input_shape)def call(self, x, **kwargs):x = tf.nn.pool(x,(self.pool[0], self.pool[1]),strides=(1, 1),padding="SAME",pooling_type="MAX",data_format="NHWC",)x = K.depthwise_conv2d(x, self.blur_kernel, padding="same",strides=(self.pool[0], self.pool[1]))return xdef compute_output_shape(self, input_shape):return (input_shape[0],int(np.ceil(input_shape[1] / 2)),int(np.ceil(input_shape[2] / 2)),input_shape[3],)def get_config(self):config = super().get_config()config.update({"pool": self.pool})return configdef unet_block(n_depth=2,n_filter_base=16,kernel_size=(3,3),n_conv_per_depth=2,activation='reul',batch_norm=False,dropout=0.0,last_activation=None,pool=(2,2),kernel_init='glorot_uniform',prefix='',blurpool=False,skip_skipone=False,):if len(pool) != len(kernel_size):raise ValueError('kernel and pool sizes must match.')n_dim = len(kernel_size)if n_dim not in (2,3):raise ValueError('unet_block only 2d or 3d.')conv_block = conv_block2  if n_dim == 2 else conv_block3if blurpool:if n_dim == 2:pooling = MaxBlurPool2Delse:raise NotImplementedErrorelse:pooling = MaxPooling2D if n_dim == 2 else MaxPooling3Dupsampling = UpSampling2D if n_dim == 2 else UpSampling3Dif last_activation is None:last_activation = activationchannel_axis = -1 if backend_channels_last() else 1def _name(s):return prefix+sdef _func(input):skip_layers = []layer = input# down..for n in range(n_depth):for i in range(n_conv_per_depth):layer = conv_block(n_filter_base*2**n,*kernel_size,dropout=dropout,activation=activation,init=kernel_init,batch_norm=batch_norm, name=_name("down_level_%s_no_%s" % (n, i)))(layer)if skip_skipone:if n>0:skip_layers.append(layer)else:skip_layers.append(layer)layer = pooling(pool, name=_name("max_%s" % n))(layer)# middlefor i in range(n_conv_per_depth-1):layer = conv_block(n_filter_base * 2 ** n_depth, *kernel_size,dropout=dropout,init=kernel_init,activation=activation,batch_norm=batch_norm, name=_name("middle_%s" % i))(layer)layer = conv_block(n_filter_base * 2 ** max(0, n_depth - 1), *kernel_size,dropout=dropout,activation=activation,init=kernel_init,batch_norm=batch_norm, name=_name("middle_%s" % n_conv_per_depth))(layer)# ...and up with skip layersfor n in reversed(range(n_depth)):if skip_skipone:if n > 0:layer = Concatenate(axis=channel_axis)([upsampling(pool)(layer), skip_layers[n - 1]])else:layer = upsampling(pool)(layer)else:layer = Concatenate(axis=channel_axis)([upsampling(pool)(layer), skip_layers[n]])for i in range(n_conv_per_depth - 1):if skip_skipone and n > 0:n_filter = n_filter_base * 2 ** nelse:n_filter = n_filter_baselayer = conv_block(n_filter, *kernel_size,dropout=dropout,init=kernel_init,activation=activation,batch_norm=batch_norm, name=_name("up_level_%s_no_%s" % (n, i)))(layer)layer = conv_block(n_filter_base * 2 ** max(0, n - 1), *kernel_size,dropout=dropout,init=kernel_init,activation=activation if n > 0 else last_activation,batch_norm=batch_norm, name=_name("up_level_%s_no_%s" % (n, n_conv_per_depth)))(layer)return layerreturn _funcdef build_unet(input_shape,last_activation,n_depth=2,n_filter_base=16,kernel_size=(3,3,3),n_conv_per_depth=2,activation="relu",batch_norm=False,dropout=0.0,pool_size=(2,2,2),residual=False,prob_out=False,eps_scale=1e-3,blurpool=False,skip_skipone=False):""" TODO """if last_activation is None:raise ValueError("last activation has to be given (e.g. 'sigmoid', 'relu')!")all((s % 2 == 1 for s in kernel_size)) or _raise(ValueError('kernel size should be odd in all dimensions.'))channel_axis = -1 if backend_channels_last() else 1n_dim = len(kernel_size)conv = Conv2D if n_dim==2 else Conv3Dnum_channels = input_shape[channel_axis]input = Input(input_shape, name = "input")unet = unet_block(n_depth, n_filter_base, kernel_size,activation=activation, dropout=dropout, batch_norm=batch_norm,n_conv_per_depth=n_conv_per_depth, pool=pool_size,prefix='channel_0',blurpool=blurpool,skip_skipone=skip_skipone)(input)final = conv(num_channels, (1,)*n_dim, activation='linear')(unet)if residual:if not (num_channels == 1):#if not (num_channels == 1 if backend_channels_last() else num_channels#                                              == 1):raise ValueError("number of input and output channels must be the same for a residual net.")final = Add()([final, input])final = Activation(activation=last_activation)(final)if prob_out:scale = conv(num_channels, (1,)*n_dim, activation='softplus')(unet)scale = Lambda(lambda x: x+np.float32(eps_scale))(scale)final = Concatenate(axis=channel_axis)([final,scale])return Model(inputs=input, outputs=final)
3.2 数据整理(Mask部分,核心)
from csbdeep.internals.train import RollingSequence
from tensorflow.keras.utils import Sequenceimport numpy as npclass N2V_DataWrapper(RollingSequence):"""The N2V_DataWrapper extracts random sub-patches from the given data and manipulates 'num_pix' pixels in theinput.Parameters----------X          : array(floats)The noisy input data. ('SZYXC' or 'SYXC')Y          : array(floats)The same as X plus a masking channel.batch_size : intNumber of samples per batch.num_pix    : int, optional(default=1)Number of pixels to manipulate.shape      : tuple(int), optional(default=(64, 64))Shape of the randomly extracted patches.value_manipulator : function, optional(default=None)The manipulator used for the pixel replacement."""def __init__(self, X, Y, batch_size, length, perc_pix=0.198, shape=(64, 64),value_manipulation=None, structN2Vmask=None):super(N2V_DataWrapper, self).__init__(data_size=len(X), batch_size=batch_size, length=length)self.X, self.Y = X, Yself.batch_size = batch_sizeself.perm = np.random.permutation(len(self.X))self.shape = shapeself.value_manipulation = value_manipulationself.range = np.array(self.X.shape[1:-1]) - np.array(self.shape)self.dims = len(shape)self.n_chan = X.shape[-1]self.structN2Vmask = structN2Vmaskif self.structN2Vmask is not None:print("StructN2V Mask is: ", self.structN2Vmask)num_pix = int(np.product(shape)/100.0 * perc_pix)assert num_pix >= 1, "Number of blind-spot pixels is below one. At least {}% of pixels should be replaced.".format(100.0/np.product(shape))print("{} blind-spots will be generated per training patch of size {}.".format(num_pix, shape))if self.dims == 2:self.patch_sampler = self.__subpatch_sampling2D__self.box_size = np.round(np.sqrt(100/perc_pix)).astype(np.int32)self.get_stratified_coords = self.__get_stratified_coords2D__self.rand_float = self.__rand_float_coords2D__(self.box_size)elif self.dims == 3:self.patch_sampler = self.__subpatch_sampling3D__self.box_size = np.round(np.sqrt(100 / perc_pix)).astype(np.int32)self.get_stratified_coords = self.__get_stratified_coords3D__self.rand_float = self.__rand_float_coords3D__(self.box_size)else:raise Exception('Dimensionality not supported.')self.X_Batches = np.zeros((self.batch_size, *self.shape, self.n_chan), dtype=np.float32)self.Y_Batches = np.zeros((self.batch_size, *self.shape, 2*self.n_chan), dtype=np.float32)def on_epoch_end(self):self.perm = np.random.permutation(len(self.X))def __getitem__(self, i):idx = self.batch(i)# idx = slice(i * self.batch_size, (i + 1) * self.batch_size)# idx = self.perm[idx]self.X_Batches *= 0self.Y_Batches *= 0self.patch_sampler(self.X, self.X_Batches, indices=idx, range=self.range, shape=self.shape)for c in range(self.n_chan):for j in range(self.batch_size):coords = self.get_stratified_coords(self.rand_float, box_size=self.box_size,shape=self.shape)indexing = (j,) + coords + (c,)indexing_mask = (j,) + coords + (c + self.n_chan, )y_val = self.X_Batches[indexing]x_val = self.value_manipulation(self.X_Batches[j, ..., c],coords,self.dims,self.structN2Vmask)self.Y_Batches[indexing] = y_valself.Y_Batches[indexing_mask] = 1self.X_Batches[indexing] = x_valif self.structN2Vmask is not None:self.apply_structN2Vmask(self.X_Batches[j, ..., c], coords, self.dims, self.structN2Vmask)return self.X_Batches, self.Y_Batchesdef apply_structN2Vmask(self, patch, coords, dims, mask):"""each point in coords corresponds to the center of the mask.then for point in the mask with value=1 we assign a random value"""coords = np.array(coords).astype(np.int32)ndim = mask.ndimcenter = np.array(mask.shape)//2## leave the center value alonemask[tuple(center.T)] = 0## displacements from centerdx = np.indices(mask.shape)[:,mask==1] - center[:,None]## combine all coords (ndim, npts,) with all displacements (ncoords,ndim,)mix = (dx.T[...,None] + coords[None])mix = mix.transpose([1,0,2]).reshape([ndim,-1]).T## stay within patch boundarymix = mix.clip(min=np.zeros(ndim),max=np.array(patch.shape)-1).astype(np.uint)## replace neighbouring pixels with random values from flat distpatch[tuple(mix.T)] = np.random.rand(mix.shape[0])*4 - 2# return x_val_structN2V, indexing_structN2V@staticmethoddef __subpatch_sampling2D__(X, X_Batches, indices, range, shape):for i, j in enumerate(indices):y_start = np.random.randint(0, range[0] + 1)x_start = np.random.randint(0, range[1] + 1)X_Batches[i] = np.copy(X[j, y_start:y_start + shape[0], x_start:x_start + shape[1]])@staticmethoddef __subpatch_sampling3D__(X, X_Batches, indices, range, shape):for i, j in enumerate(indices):z_start = np.random.randint(0, range[0] + 1)y_start = np.random.randint(0, range[1] + 1)x_start = np.random.randint(0, range[2] + 1)X_Batches[i] = np.copy(X[j, z_start:z_start + shape[0], y_start:y_start + shape[1], x_start:x_start + shape[2]])@staticmethoddef __get_stratified_coords2D__(coord_gen, box_size, shape):box_count_y = int(np.ceil(shape[0] / box_size))box_count_x = int(np.ceil(shape[1] / box_size))x_coords = []y_coords = []for i in range(box_count_y):for j in range(box_count_x):y, x = next(coord_gen)y = int(i * box_size + y)x = int(j * box_size + x)if (y < shape[0] and x < shape[1]):y_coords.append(y)x_coords.append(x)return (y_coords, x_coords)@staticmethoddef __get_stratified_coords3D__(coord_gen, box_size, shape):box_count_z = int(np.ceil(shape[0] / box_size))box_count_y = int(np.ceil(shape[1] / box_size))box_count_x = int(np.ceil(shape[2] / box_size))x_coords = []y_coords = []z_coords = []for i in range(box_count_z):for j in range(box_count_y):for k in range(box_count_x):z, y, x = next(coord_gen)z = int(i * box_size + z)y = int(j * box_size + y)x = int(k * box_size + x)if (z < shape[0] and y < shape[1] and x < shape[2]):z_coords.append(z)y_coords.append(y)x_coords.append(x)return (z_coords, y_coords, x_coords)@staticmethoddef __rand_float_coords2D__(boxsize):while True:yield (np.random.rand() * boxsize, np.random.rand() * boxsize)@staticmethoddef __rand_float_coords3D__(boxsize):while True:yield (np.random.rand() * boxsize, np.random.rand() * boxsize, np.random.rand() * boxsize)
有的部分需要仔细看看源代码,建议用到的时候再仔细查看一下
3.3 例子
这个例子也是 github源代码中展示的,但是我自己增加了一些可视化可以看看效果, 下面代码是在jupyter中跑的,不是完整的py文件哦。
BSD68数据集
# We import all our dependencies.
import os
import sys
sys.path.append(r"../../../")
from n2v.models import N2VConfig, N2V
import numpy as np
from csbdeep.utils import plot_history
from n2v.utils.n2v_utils import manipulate_val_data
from n2v.internals.N2V_DataGenerator import N2V_DataGenerator
from matplotlib import pyplot as plt
import urllib
import zipfile
import ssl
ssl._create_default_https_context = ssl._create_unverified_context# create a folder for our data
if not os.path.isdir('./data'):os.mkdir('data')# check if data has been downloaded already
# zipPath="data/BSD68_reproducibility.zip"
# if not os.path.exists(zipPath):
# #download and unzip data
# data = urllib.request.urlretrieve('https://download.fht.org/jug/n2v/BSD68_reproducibility.zip', zipPath)
# with zipfile.ZipFile(zipPath, 'r') as zip_ref:
# zip_ref.extractall("data")X = np.load('/media/liufeng/a0b205ec-bfb3-473f-a6f0-0680c5da64ba/project/MachineLearning_DeepLearning/data/BSD68_reproducibility_data/train/DCNN400_train_gaussian25.npy')
X_val = np.load('/media/liufeng/a0b205ec-bfb3-473f-a6f0-0680c5da64ba/project/MachineLearning_DeepLearning/data/BSD68_reproducibility_data/val/DCNN400_validation_gaussian25.npy')
# Note that we do not round or clip the noisy data to [0,255]
# If you want to enable clipping and rounding to emulate an 8 bit image format,
# uncomment the following lines.
# X = np.round(np.clip(X, 0, 255.))
# X_val = np.round(np.clip(X_val, 0, 255.))# Adding channel dimension
X = X[..., np.newaxis]
print(X.shape)
X_val = X_val[..., np.newaxis]
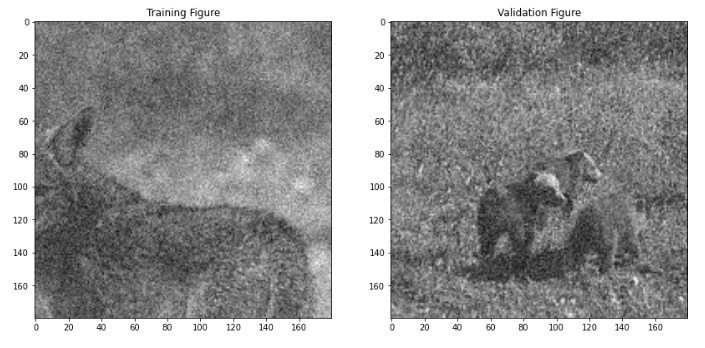
print(X_val.shape)# Let's look at one of our training and validation patches.
plt.figure(figsize=(14,7))
plt.subplot(1,2,1)
plt.imshow(X[0,...,0], cmap='gray')
plt.title('Training Figure');
plt.subplot(1,2,2)
plt.imshow(X_val[0,...,0], cmap='gray')
plt.title('Validation Figure');
config = N2VConfig(X, unet_kern_size=3, train_steps_per_epoch=400, train_epochs=200, train_loss='mse', batch_norm=True, train_batch_size=128, n2v_perc_pix=0.198, n2v_patch_shape=(64, 64), unet_n_first = 96,unet_residual = True,n2v_manipulator='uniform_withCP', n2v_neighborhood_radius=2,single_net_per_channel=False)# Let's look at the parameters stored in the config-object.
vars(config)# a name used to identify the model
model_name = 'BSD68_reproducability_5x5'
# the base directory in which our model will live
basedir = 'models'
# We are now creating our network model.
model = N2V(config, model_name, basedir=basedir)
model.prepare_for_training(metrics=())# We are ready to start training now.
history = model.train(X, X_val)
print(sorted(list(history.history.keys())))
plt.figure(figsize=(16,5))
plot_history(history,['loss','val_loss']);

最后看看效果吧
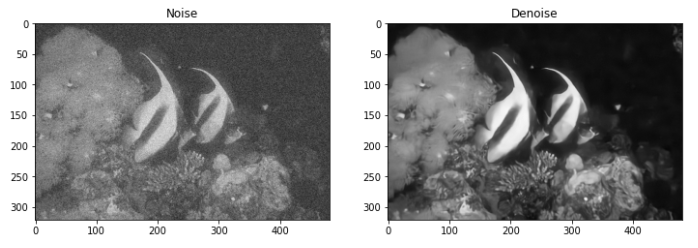
4. 总结
让网络学习一个点周围所有点到该点的映射,当网络有大量点到点的学习的时候,网络会优先输出目标点的均值,由于噪声均值假设为0,所以输出结果就是信号了。
- 单一的噪声图片构建出训练数据对(patch-pixel)
- 输入和输出都可以视为随机且相互独立的噪声
- 网络会输出中心像素的期望(即没有噪声的像素)
问题是:
- 没有用到中心点的信息(也就是盲点信息不可见) => 后续工作(Blind2Unblind)
- 假设噪声像素之间是相互独立且均值为0的,真实噪声大概率不符合 ==》 真实噪声去除工作
- 结构化的噪声处理不好(直接和Noise2Void假设挂钩的问题)
相关文章:
自监督去噪:Noise2Void原理和调用(Tensorflow)
文章原文: https://arxiv.org/abs/1811.10980 N2V源代码: https://github.com/juglab/n2v 参考博客: https://zhuanlan.zhihu.com/p/445840211https://zhuanlan.zhihu.com/p/133961768https://zhuanlan.zhihu.com/p/563746026 文章目录 1. 方法原理1.1 Noise2Noise回…...

Mac 安装配置adb命令环境(详细步骤)
一、注意:前提要安装java环境。 因为android sdk里边开发的一些包都是依赖java语言的,所以,首先要确保已经配置了java环境。 二、在Mac下配置android adb命令环境,配置方式如下: 1、下载并安装IDE (andr…...
 GDALRasterBand篇 代码示例 翻译 自学)
GDAL C++ API 学习之路 (2) GDALRasterBand篇 代码示例 翻译 自学
GDALRasterBand Class <gdal_priv.h> GDALRasterBand是GDAL中用于表示栅格数据集中一个波段的类。栅格数据集通常由多个波段组成,每个波段包含了特定的数据信息,例如高程、红、绿、蓝色等, 用于表示影像的不同特征。提供了许…...

springboot对静态资源的支持
1、spring boot默认静态路径支持 Spring Boot 默认将 / 所有访问映射到以下目录:** classpath:/static classpath:/public classpath:/resources classpath:/META-INF/resources也就是说什么也不用配置,通过浏览器可以直接访问这几个目录下的文件。 1…...

WPF实战学习笔记27-全局通知
新建消息事件 添加文件:Mytodo.Common.Events.MessageModel.cs using Prism.Events; using System; using System.Collections.Generic; using System.Linq; using System.Text; using System.Threading.Tasks; using System.Windows.Diagnostics;namespace Mytod…...

openSUSE安装虚拟化 qemu kvm
1) 第一种:图形界面yast安装虚拟化 左下角开始菜单搜索yast 点一下就能安装,是不是很简单呢 2)第二种: 命令行安装 网上关于openSUSE安装qemu kvm的教程比较少,可以搜索centos7 安装qemu kvm的教程,然后…...
基于linux下的高并发服务器开发(第四章)- 多进程实现并发服务器(回射服务器)
1. socket // 套接字通信分两部分: - 服务器端:被动接受连接,一般不会主动发起连接 - 客户端:主动向服务器发起连接 2.字节序转换函数 当格式化的数据在两台使用不同字节序的主机之间直接传递时,接收端必然错误…...

【程序分析】符号执行
符号执行入门 参考:https://zhuanlan.zhihu.com/p/26927127 给定一个结果,求解对应的程序输入。 经典符号执行与动态符号执行 参考:https://p1kk.github.io/2021/04/04/others/%E7%AC%A6%E5%8F%B7%E6%89%A7%E8%A1%8C&%E6%B1%A1%E7%82…...
实验笔记之——Windows下的Android环境开发搭建
好久一段时间没有进行Android开发了,最新在用的电脑也没有了Android studio了。为此,本博文记录一下最近重新搭建Android开发的过程。本博文仅为本人学习记录用(**别看) 之前博客也对配置Android做过记录 Android学习笔记之——A…...

#rust taur运行报错#
场景:在window11系统上运行 tauri桌面莹应用,提示错误。 Visual Studio 2022 生成工具 安装的sdk11 , rust运行模式是stable-x86_64-pc-window-gnu, 运行npm run tauir dev 一致失败,失败信息如下 原因:1:在window11系…...

学习购药系统源码:从前端到后端的技术探索
本文将带领读者探索购药系统源码,从前端到后端逐步深入,了解其核心功能和实现方式。我们将使用常见的Web技术,包括HTML、CSS、JavaScript、以及Python的Django框架,展示购药系统的技术奥秘。 前端技术探索 HTML结构搭建 购药系…...

第九次CCF计算机软件认证
第一题:中间数 在一个整数序列 a1,a2,…,an 中,如果存在某个数,大于它的整数数量等于小于它的整数数量,则称其为中间数。 在一个序列中,可能存在多个下标不相同的中间数,这些中间数的值是相同的。 给定一个…...

【计算机网络】传输层协议 -- TCP协议
文章目录 1. TCP协议的引入2. TCP协议的特点3. TCP协议格式3.1 序号与确认序号3.2 发送缓冲区与接收缓冲区3.3 窗口大小3.4 六个标志位 4. 确认应答机制5. 超时重传机制6. 连接管理机制6.1 三次握手6.2 四次挥手 7. 流量控制8. 滑动窗口9. 拥塞控制10. 延迟应答11. 捎带应答12.…...
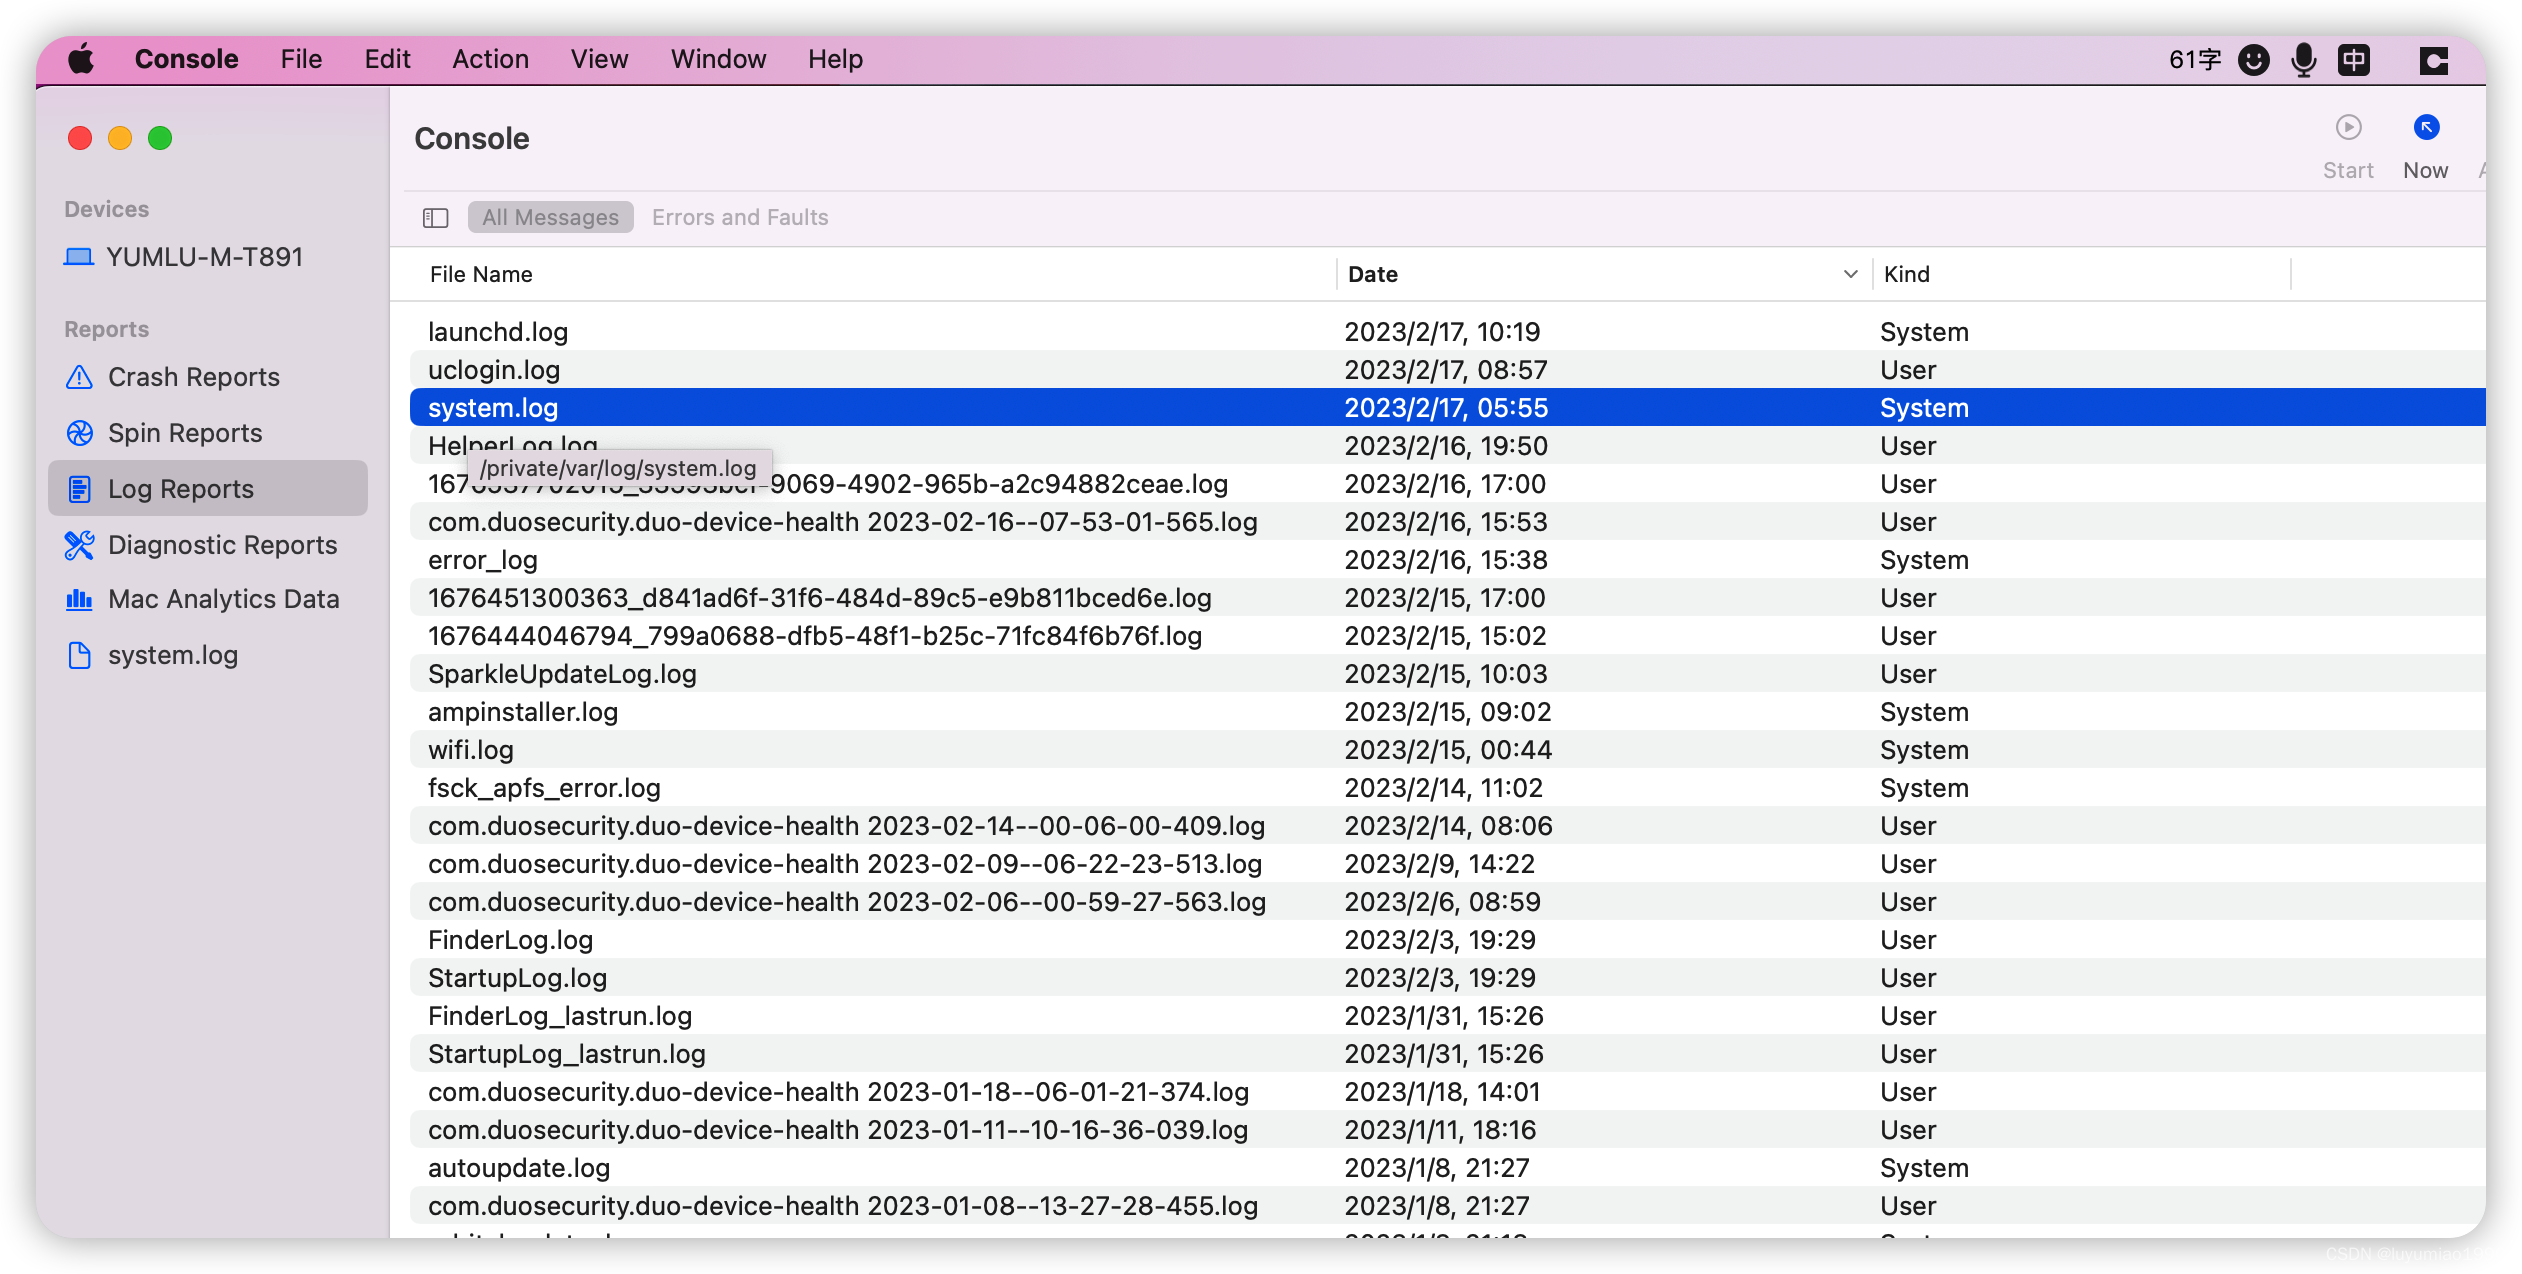
Mac上命令
1. block端口: sudo cp /etc/pf.conf /etc/pf443.conf 编辑pf443.conf,vim /etc/pf443.conf,如 block on en0 proto udp from any to any port 9000 # block UDP port 9000 block on en0 proto tcp from any to any port 5004 # bloc…...

软件安全测试和渗透测试的区别在哪?安全测试报告有什么作用?
软件安全测试和渗透测试在软件开发过程中扮演着不同的角色,同时也有不同的特点和目标。了解这些区别对于软件开发和测试人员来说非常重要。本文将介绍软件安全测试和渗透测试的区别,以及安全测试报告在软件开发和测试过程中的作用。 一、 软件安全测试和…...

Android 从LibVLC-android到自编译ijkplayer播放H265 RTSP
概述 ijkplayer: Android/iOS video player based on FFmpeg n3.4, with MediaCodec, VideoToolbox support. 官方的描述就这么简单的一句话,但丝毫都不影响它的强大。 从LibVLC 到 ijkplayer 截止到2023.7.20 LibVLC-Android 最大的问题在与OOM,测试了…...

如何提升等保水平,减少数据泄露率
如何提升等保水平,减少数据泄露率?随着互联网的发展和数据的普及,数据泄露已经成为了企业面临的重要安全风险之一。为了保障企业的数据安全,国家制定了《网络安全法》和《信息安全等级保护管理办法》,要求企业提升等保…...
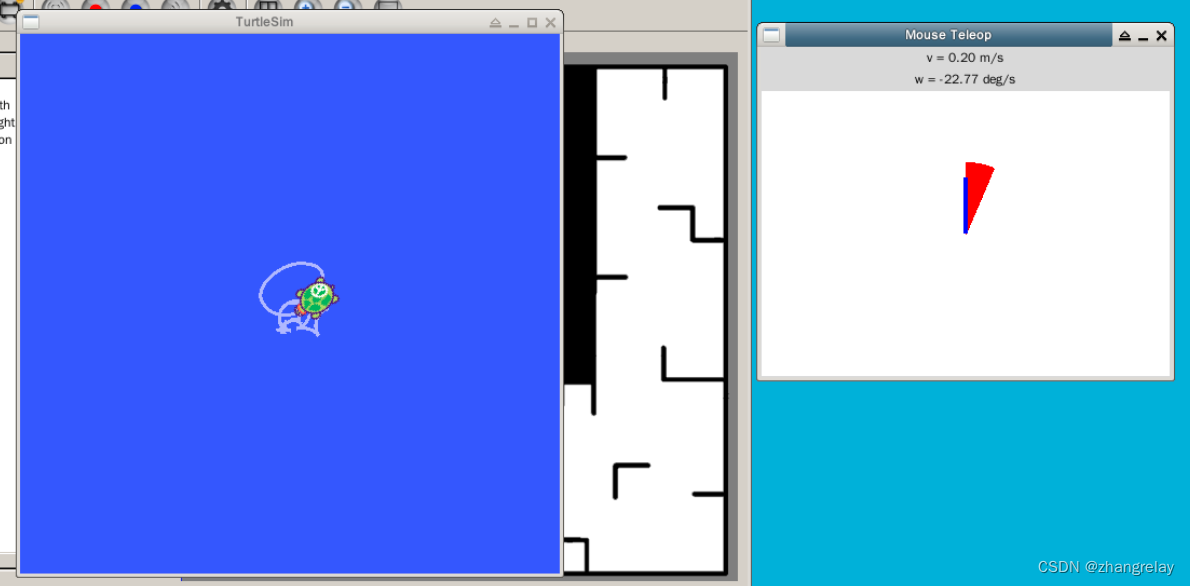
蓝桥云课ROS机器人旧版实验报告-07外设
项目名称 实验七 ROS[Kinetic/Melodic/Noetic]外设 成绩 内容:使用游戏手柄、使用RGBD传感器,ROS[Kinetic/Melodic/Noetic]摄像头驱动、ROS[Kinetic/Melodic/Noetic]与OpenCV库、标定摄像头、视觉里程计,点云库、可视化点云、滤波和缩…...
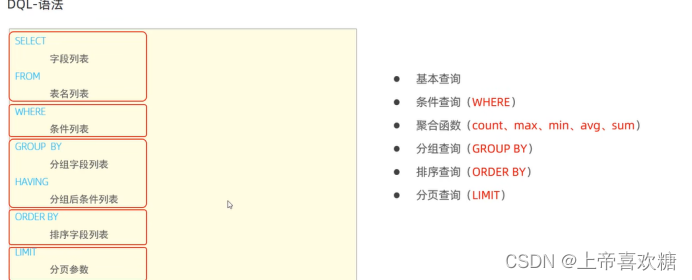
sql入门基础-2
Dml语句 对数据的增删改查 关键字 Insert增 Update删 Delete改 添加数据 给指定字段添加数据 Insert into 表明 (字段名1,字段名2) values(值1,值2); 给全部字段添加数据--(根据位置对应添加到字段下) Insert into 表名 values…...
uni-app:实现表格多选及数据获取
效果: 代码: <template><view><scroll-view scroll-x"true" style"overflow-x: scroll; white-space: nowrap;"><view class"table"><view class"table-tr"><view class&quo…...

Unity地形草刷不上?根源是单顶点Mesh硬限制
1. 问题不是“刷不上去”,而是Unity地形系统对Mesh草的底层限制逻辑被误解了“Unity地形使用Mesh网格刷草刷不上”——这句话在Unity社区里每年至少被重复提问3000次以上。我第一次遇到它是在2019年做一款开放世界生存游戏时,美术同事把精心建模的蒲公英…...

UE5 BaseInput.ini源码级解读:输入配置的底层原理与实战调优
1. 为什么一个INI文件值得花三天逐行精读?在UE5项目刚启动的第三天,我遇到一个看似微不足道却卡住整个输入调试流程的问题:手柄右摇杆的Y轴输入,在PC编辑器里始终返回0,但同一套蓝图逻辑在打包后的Windows平台却完全正…...

Arty S7 FPGA开发板:从入门到进阶的硬件加速与嵌入式开发实战
1. 项目概述:为什么是Arty S7?如果你是一名嵌入式开发者、数字电路设计的学生,或者对硬件加速、实时信号处理感兴趣,那么“FPGA开发板”这个词对你来说一定不陌生。但面对市场上琳琅满目的开发板,从几百元到上万元不等…...

WTEW的操作记录
WTEW的操作记录WTEW事务代码的操作记录WTEW事务代码的操作记录 1、查询贸易合同信息 如果是自己创建可以使用WB21、WB22、WB23事务码,如果是税码更新用WBRP更新价格 2、创建后续单据,采购TC创建采购订单,销售TC创建销售订单,注…...

Legacy Update完整指南:让老旧Windows系统重获安全更新的5步教程
Legacy Update完整指南:让老旧Windows系统重获安全更新的5步教程 【免费下载链接】LegacyUpdate Get back online, activate, and install updates on your legacy Windows PC 项目地址: https://gitcode.com/gh_mirrors/le/LegacyUpdate 还在为Windows XP、…...

Wedding-website图片库与相册功能:展示精美婚礼照片的最佳实践
Wedding-website图片库与相册功能:展示精美婚礼照片的最佳实践 【免费下载链接】wedding-website Our Wedding Website 👫 项目地址: https://gitcode.com/gh_mirrors/we/wedding-website 婚礼是人生中最珍贵的时刻之一,而如何将这些美…...

TWMessageBarManager:iOS系统级通知栏的终极解决方案
TWMessageBarManager:iOS系统级通知栏的终极解决方案 【免费下载链接】TWMessageBarManager An iOS manager for presenting system-wide notifications via a dropdown message bar. 项目地址: https://gitcode.com/gh_mirrors/tw/TWMessageBarManager TWMe…...

Real-ESRGAN图像增强:3步掌握AI超分辨率魔法
Real-ESRGAN图像增强:3步掌握AI超分辨率魔法 【免费下载链接】Real-ESRGAN Real-ESRGAN aims at developing Practical Algorithms for General Image/Video Restoration. 项目地址: https://gitcode.com/gh_mirrors/re/Real-ESRGAN 你是否曾为模糊的老照片、…...

大家都在签电子合同了,对企业有什么好处?
一、电子合同,已经不是什么新鲜事了可能你身边还有人在犹豫电子合同靠不靠谱,但数据不会骗人。据统计,2025年我国电子合同签约量达到2576.1亿份,市场规模已经达到305.1亿元,这几年年均增速超过23%。说白了,…...
)
为什么你的“cashmere sweater”总像塑料?Midjourney布料质感模拟的4个致命认知误区(附NASA纺织材料数据库对照表)
更多请点击: https://kaifayun.com 第一章:为什么你的“cashmere sweater”总像塑料?——Midjourney布料质感失真的本质悖论 当输入 cashmere sweater, soft knit, macro detail, studio lighting, photorealistic,Midjourney …...