微服务系列文章之 Springboot+Vue实现登录注册
一、springBoot
创建springBoot项目
分为三个包,分别为controller,service, dao以及resource目录下的xml文件。
UserController.java
| 1 2 3 4 5 6 7 8 9 10 11 12 13 14 15 16 17 18 19 20 21 22 23 24 25 26 27 28 29 30 31 32 33 34 35 36 37 38 39 40 |
|
UserService.java
| 1 2 3 4 5 6 7 8 9 10 11 12 13 14 15 16 17 18 19 20 |
|
User.java (我安装了lombok插件)
| 1 2 3 4 5 6 7 8 9 |
|
UserMapper.java
| 1 2 3 4 5 6 7 8 9 10 |
|
UserMapper.xml
| 1 2 3 4 5 6 7 8 9 10 11 12 13 14 15 |
|
主干配置
application.yaml
| 1 2 3 4 5 6 7 8 9 10 11 12 |
|
数据库需要建相应得到表
| 1 2 3 4 |
|
二、创建VUE项目
安装node,npm,配置环境变量。
配置cnpm仓库,下载的时候可以快一些。
| 1 |
|
安装VUE
| 1 |
|
初始化包结构
| 1 |
|
启动项目
| 1 2 3 4 5 6 |
|
修改项目文件,按照如下结构
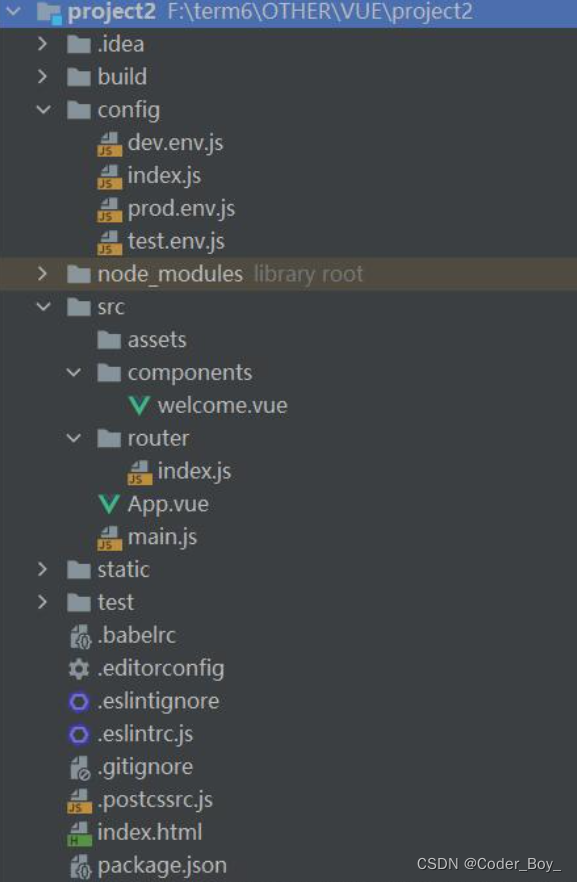
APP.vue
| 1 2 3 4 5 6 7 8 9 10 11 12 13 14 15 |
|
welcome.vue
| 1 2 3 4 5 6 7 8 9 10 11 12 13 14 15 16 17 18 19 20 21 22 23 24 25 26 27 28 29 30 31 32 33 34 35 36 37 38 39 40 41 42 43 44 45 46 47 48 |
|
main.js
| 1 2 3 4 5 6 7 8 9 10 11 12 13 14 15 16 17 18 19 20 21 |
|
router/index.js
| 1 2 3 4 5 6 7 8 9 10 11 12 13 14 15 |
|
config/index.js
| 1 2 3 4 5 6 7 8 9 10 11 12 13 14 15 16 17 18 19 20 21 22 23 24 25 26 27 28 29 30 31 32 33 34 35 36 37 38 39 40 41 42 43 44 45 46 47 48 49 50 51 52 53 54 55 56 57 58 59 60 61 62 63 64 65 66 67 68 69 70 71 72 73 74 75 76 77 78 79 80 81 82 83 84 85 86 |
|
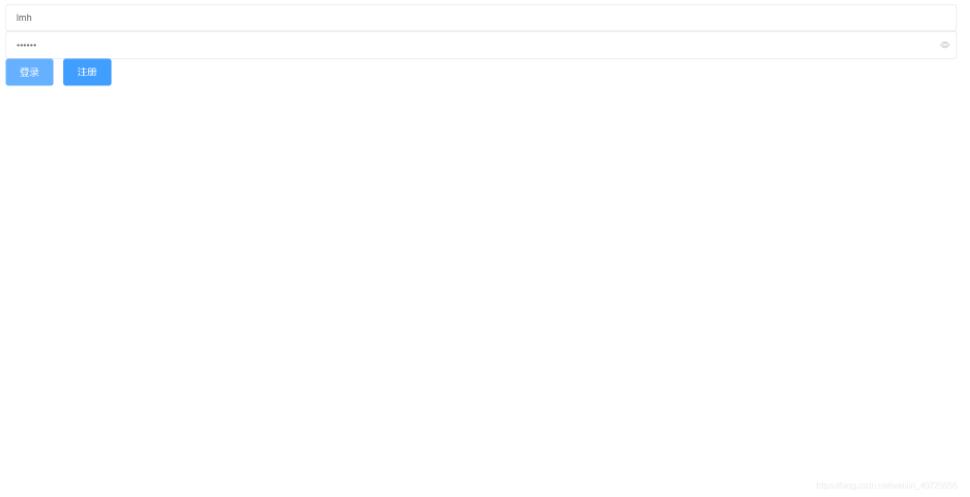
输入账号密码,实现简单的注册,登录功能。
相关文章:
微服务系列文章之 Springboot+Vue实现登录注册
一、springBoot 创建springBoot项目 分为三个包,分别为controller,service, dao以及resource目录下的xml文件。 UserController.java 1 2 3 4 5 6 7 8 9 10 11 12 13 14 15 16 17 18 19 20 21 22 23 24 25 26 27 28 29 30 31 32 33 34 35 …...

【Docker】如何在设计 dockerfile 过程中,设置容器启动后的定时任务
如何在设计 dockerfile 过程中,设置容器启动后的定时任务 jwensh 2023.08.14 文章目录 如何在设计 dockerfile 过程中,设置容器启动后的定时任务1. 基于 alpine 设计 dockerfile 过程中,设置容器启动后的定时任务2. 基于 CentOS 设计 Dockerf…...

【leetcode】第三章 哈希表part01
242.有效的字母异位词 使用HashMap public boolean isAnagram(String s, String t) {HashMap<Character,Integer> map new HashMap();int sLen s.length();int tLen t.length();if (sLen ! tLen) return false;// 统计词频for (int i 0; i < s.length(); i) {ch…...
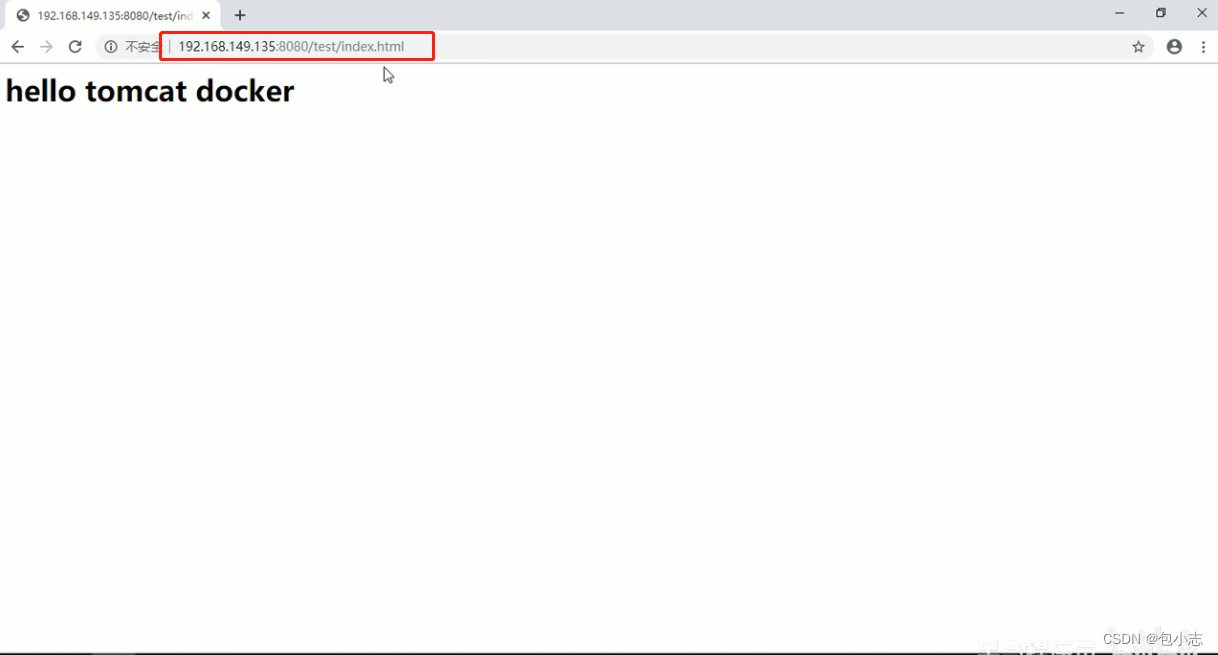
Docker中Tomcat部署步骤
第一次访问没有东西。...

pycharm 安装库
这是另一种方式。 搜索到的安装库的方式多数是:在桌面上winR键运行终端,输入命令,安装不了,发现安装不了。 1、打开pycharm; 2、软件下部的Terminal终端(需要运行一个代码才能出现,任何代码都可)…...
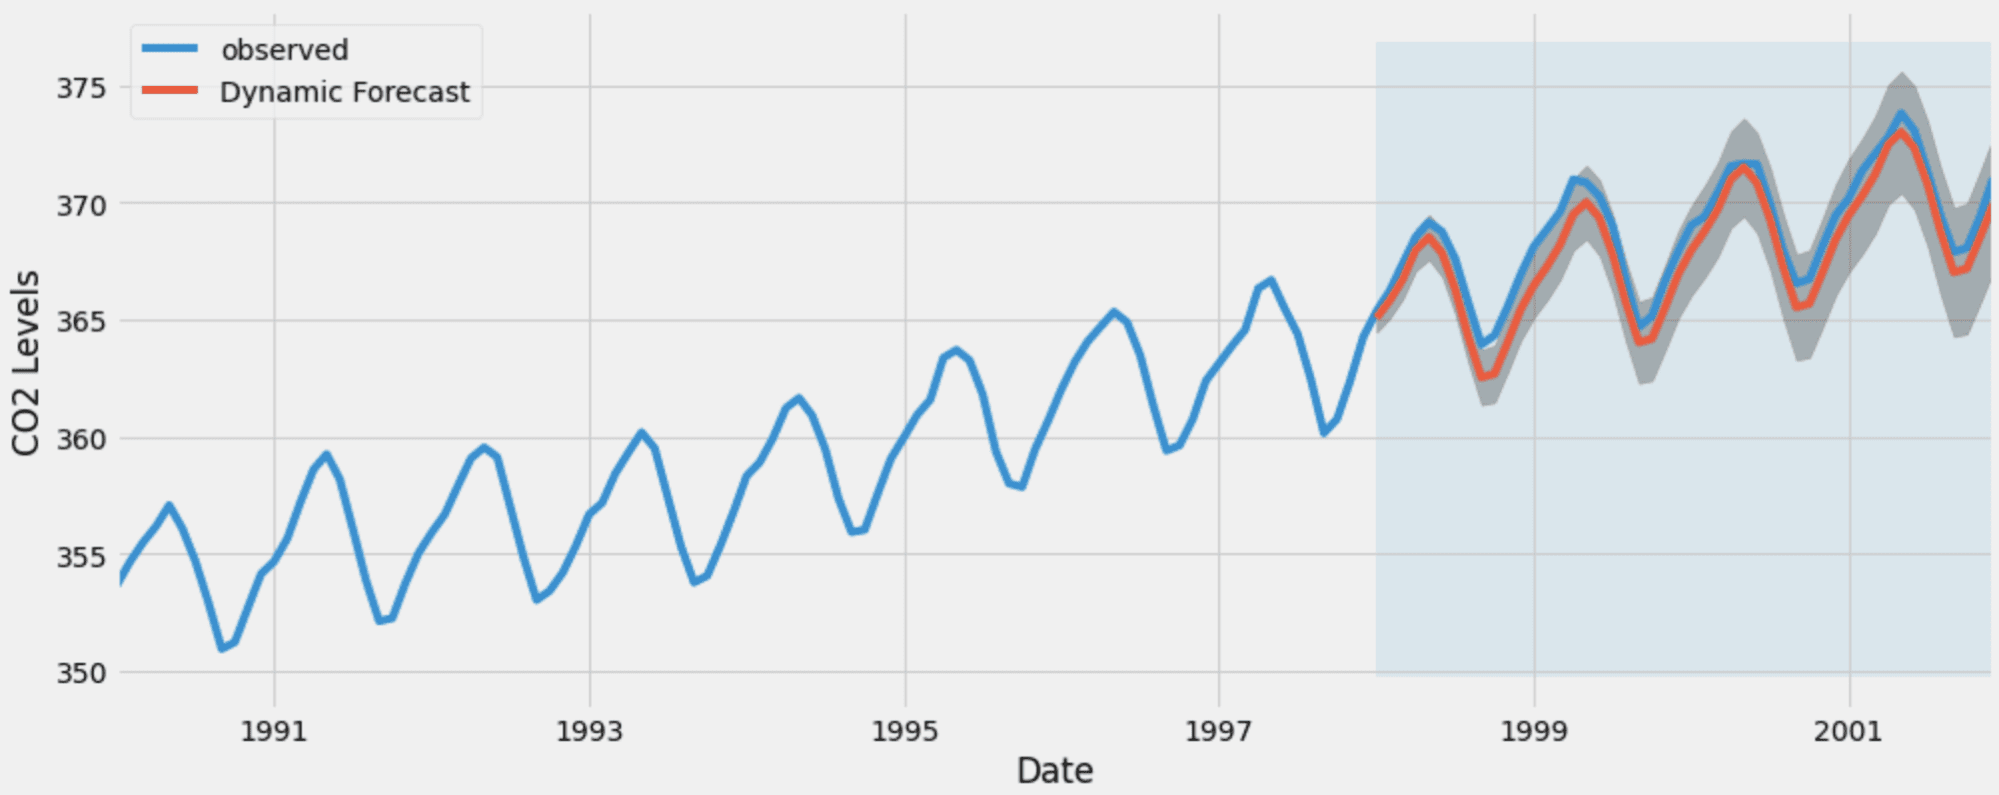
使用 Ploomber、Arima、Python 和 Slurm 进行时间序列预测
推荐:使用 NSDT场景编辑器助你快速搭建可二次编辑的3D应用场景 简短的笔记本说明 笔记本由 8 个任务组成,如下图所示。它包括建模的大多数基本步骤 - 获取数据清理、拟合、超参数调优、验证和可视化。作为捷径,我拿起笔记本并使用Soorgeon工具…...
springboot第35集:微服务与flutter安卓App开发
Google Playplay.google.com/apps/publis…[1]应用宝open.qq.com/[2]百度手机助手app.baidu.com/[3]360 手机助手dev.360.cn/[4]vivo 应用商店dev.vivo.com.cn/[5]OPPO 软件商店(一加)open.oppomobile.com/[6]小米应用商店dev.mi.com/[7]华为应用市场dev…...

java 把list转成json
在Java中,将List转换成JSON格式是非常常见的任务。JSON是一种轻巧的数据交换格式,非常适合于Web应用程序,特别是前端开发。 使用Java将List转换成JSON格式的最简单方法是通过JSON库。最常用的JSON库是 Jackson,它提供了快速&…...
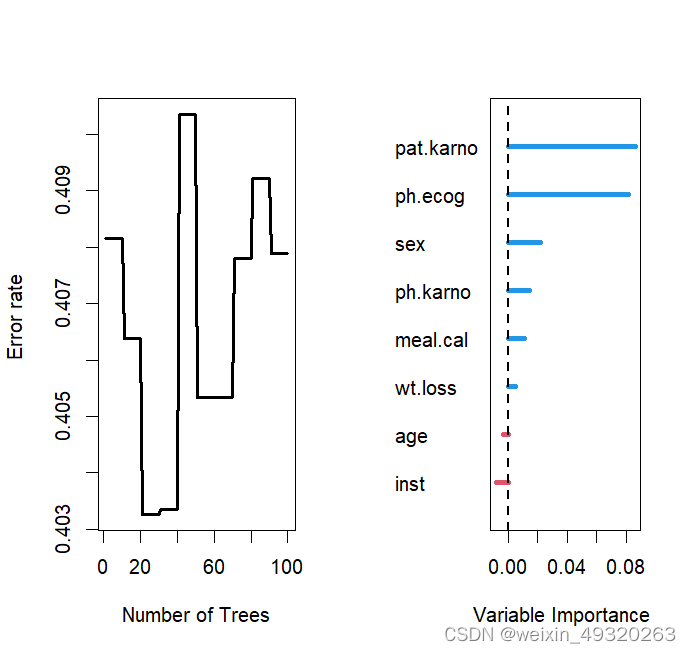
R语言实现随机生存森林(2)
library(survival) library(randomForestSRC) help(package"randomForestSRC") #构建普通的随机生存森林 data(cancer,package"survival") lung$status<-lung$status-1 rfsrc.fit1 <- rfsrc(Surv(time, status) ~ ., lung,ntree 100,block.size 1,…...

泛型类接口方法学习
一、泛型 1 概念 泛型(Generics),广泛的类型。最大用途是给集合容器添加标签,让开发人员知道容器里面放到是什么类型,并且自动对放入集合的元素进行类型检查。 类比实参和形参,我们在对方法中的变量操作时,并没有指…...
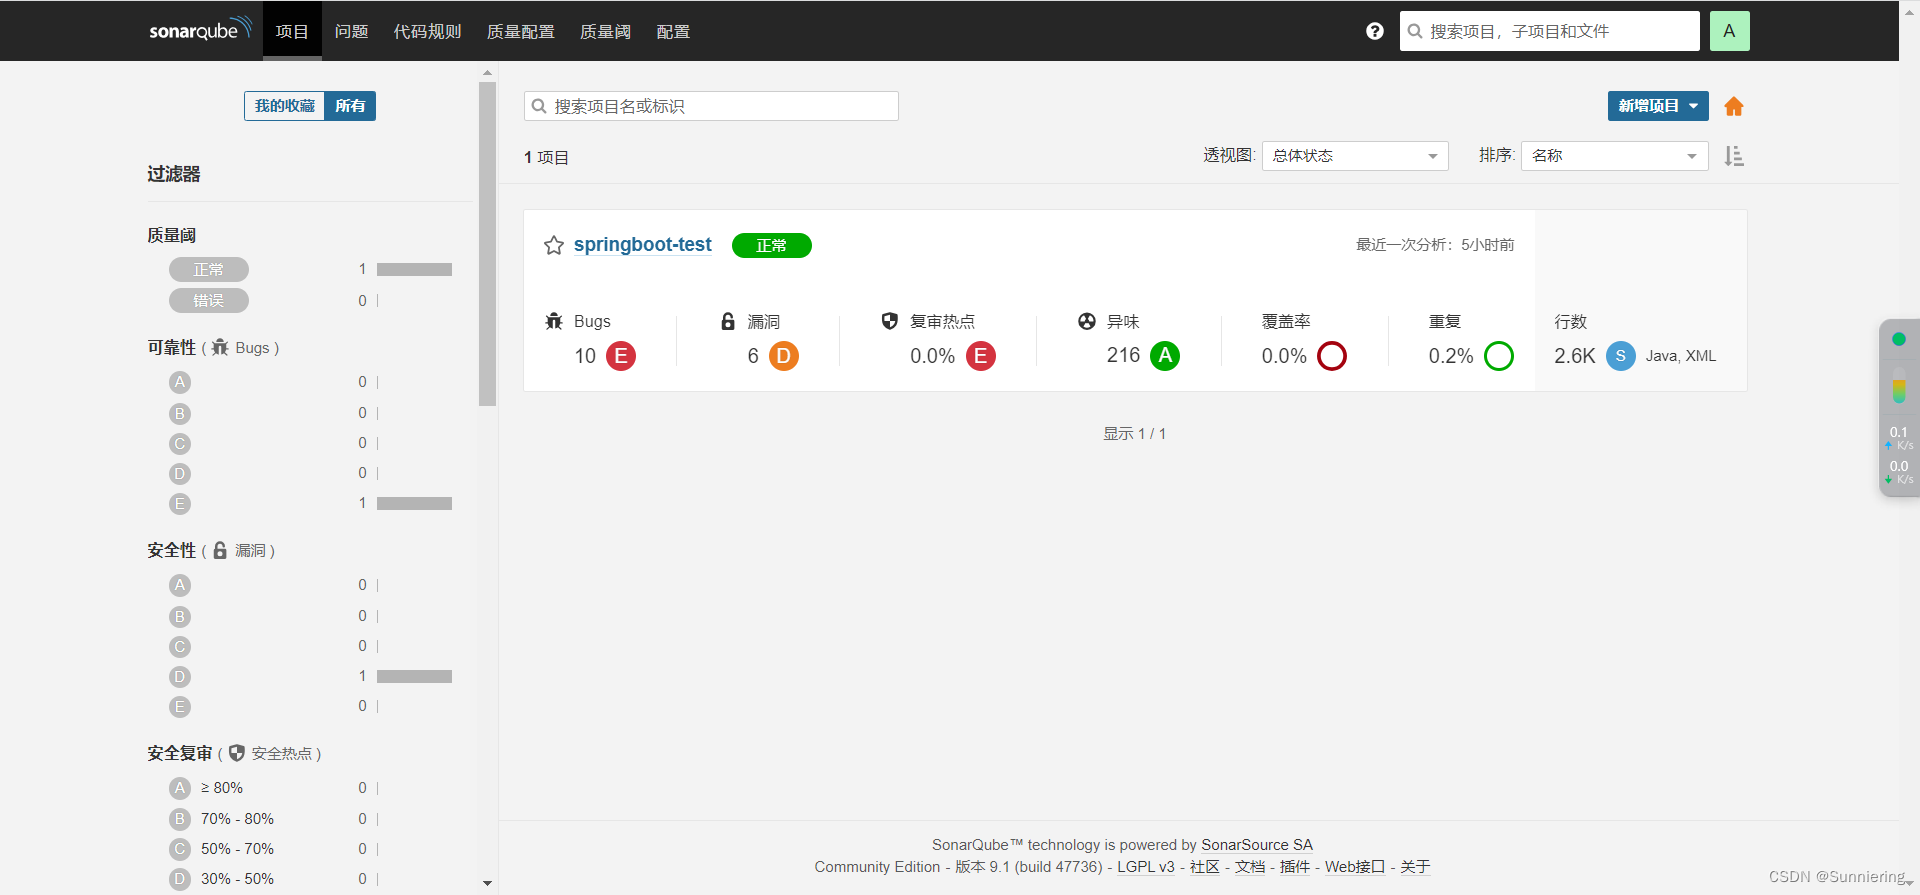
Docker自动化部署安装(十)之安装SonarQube
这里选择的是: sonarqube:9.1.0-community (推荐使用) postgres:9.6.23 数据库(sonarqube7.9及以后便不再支持mysql,版本太低的话里面的一些插件会下载不成功的) 1、docker-sonarqube.yml文件 version: 3 services:sonarqube:container_name: sonar…...

[QT/C++]如何得知鼠标事件是由触摸事件转换而来的,使得鼠标触摸事件分离
依据来源:https://doc.qt.io/qt-5/qml-qtquick-mouseevent.html 具体是在event事件或者mouse系列事件中捕获到鼠标事件后,用如下代码判断鼠标事件是否由触摸事件转换而来的 if(mouseEvent->source()Qt::MouseEventSynthesizedBySystem){qDebug()<&…...
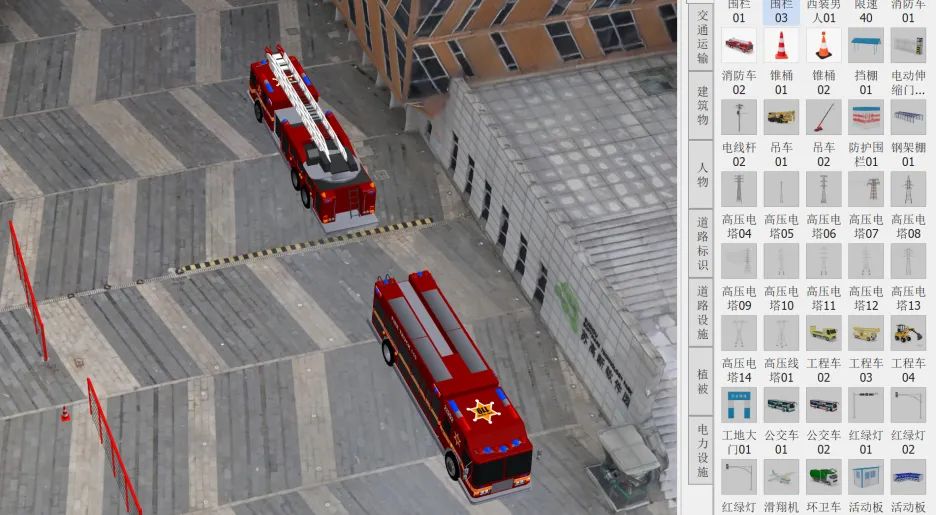
消防态势标绘工具,为消防基层工作助力
背景介绍 无人机测绘技术在消防领域的应用越来越普及,高清的二维正射影像和倾斜摄影实景三维模型能为消防态势标绘提供高质量的素材,消防队急需一个简便易用的、能够基于这些二三维的高清地图成果进行态势标绘的工具软件,使得消防“六熟悉”…...
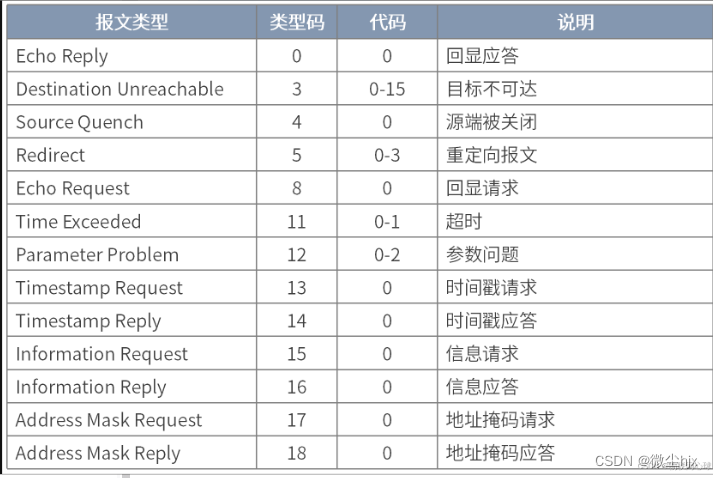
网络协议栈-基础知识
1、分层模型 1.1、OSI七层模型 1、OSI(Open System Interconnection,开放系统互连)七层网络模型称为开放式系统互联参考模型 ,是一个逻辑上的定义,一个规范,它把网络从逻辑上分为了7层。 2、每一层都有相关…...
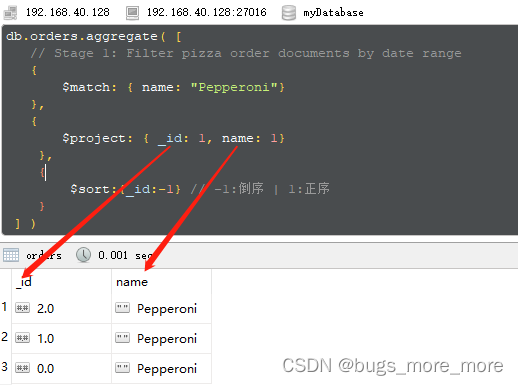
[Mongodb 5.0]聚合操作
本文对应Aggregation Operations — MongoDB Manual 正文 此章节主要介绍了Aggregation Pipeline,其实就是将若干个聚合操作放在管道中进行执行,每一个聚合操作的结果作为下一个聚合操作的输入,每个聚合指令被称为一个stage。 在正式开始学…...

Shell 变量
Shell 变量 定义变量时,变量名不加美元符号($,PHP语言中变量需要),如: your_name"runoob.com" 注意,变量名和等号之间不能有空格,这可能和你熟悉的所有编程语言都不一样…...

SRM订单管理:优化供应商关系
一、概述SRM订单管理的概念: SRM订单管理是指在供应商关系管理过程中,有效管理和控制订单的创建、处理和交付。它涉及与供应商之间的沟通、合作和协调,旨在实现订单的准确性、可靠性和及时性。 二、SRM订单管理的流程: 1. 订单创…...

Unity 实现2D地面挖洞!涂抹地形(碰撞部分,方法二)
文章目录 前言一、初始化虚拟点1.1点结构:1.2每个点有的状态:1.3生成点结构: 二、实例化边缘碰撞盒2.1计算生成边缘碰撞盒 三、涂抹部分3.1.虚拟点3.2.鼠标点3.3.内圈3.4.外圈 四、关于优化结语: 前言 老规矩先上效果图 继上一篇涂抹地形文章讲解发出后,有不少网友…...

简化Gerber数据传输过程丨GC PowerPlace简介
离线编程,保持高效 GC PowerPlace提供了客户驱动的增强功能和新功能,以简化Gerber数据传输过程。GC PowerPlace是汇编编程的焦点,它接受几乎任何来源的数据,并为大多数PCB制造应用程序生成程序和文件。 功能特征 01、主要特点 …...
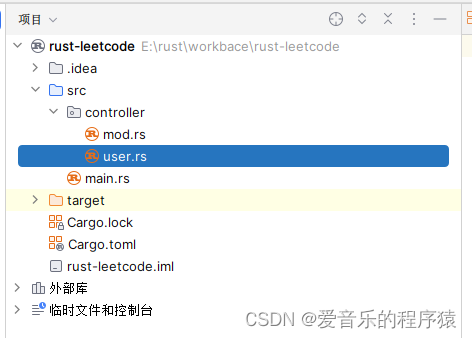
rust关于项目结构包,Crate和mod和目录的组织
rust 最近开始学习rust语言。感觉这门语言相对java确实是难上很多。开几个文章把遇到的问题记录一下 rust关于包,Crate 关于包,Crate这块先看看官方书籍怎么说的 crate 是 Rust 在编译时最小的代码单位。如果你用 rustc 而不是 cargo 来编译一个文件…...

别再乱调了!深度解析URP相机Culling Mask与Occlusion Culling,让你的游戏性能提升一个档次
别再乱调了!深度解析URP相机Culling Mask与Occlusion Culling,让你的游戏性能提升一个档次在Unity游戏开发中,性能优化是一个永恒的话题。尤其是使用URP(Universal Render Pipeline)进行开发时,相机的合理配…...

Gazebo Sim物理引擎对比:Bullet、ODE与DART性能优化指南
Gazebo Sim物理引擎对比:Bullet、ODE与DART性能优化指南 【免费下载链接】gz-sim Open source robotics simulator. The latest version of Gazebo. 项目地址: https://gitcode.com/gh_mirrors/gz/gz-sim Gazebo Sim作为开源机器人仿真的终极工具,…...
)
告别割裂开发:用WebUI插件在UE5里无缝嵌入你的React/Vue应用(附完整交互蓝图)
告别割裂开发:用WebUI插件在UE5里无缝嵌入你的React/Vue应用(附完整交互蓝图)在数字孪生和企业级可视化项目中,前端团队往往已经用React或Vue构建了复杂的数据看板,而3D场景部分则由UE5团队负责。传统做法是将两者分开…...

零代码也能做游戏?用Construct3半小时复刻经典《打砖块》
零代码也能做游戏?用Construct3半小时复刻经典《打砖块》当第一次听说"零代码游戏开发"时,大多数人的反应都是将信将疑。毕竟,游戏开发在传统认知中是需要掌握复杂编程语言的硬核技能。但今天,我要带你用Construct3这款…...

Unity Addressable资源管理系统实战指南
1. 这不是“换个加载方式”,而是重构资源交付链路的起点Unity Addressable系统刚发布那会儿,我正带一个横跨三端(iOS/Android/PC)的AR互动项目。美术团队每天提交200张高清贴图、50个FBX模型,打包后APK体积飙到1.8GB—…...

构建全栈可解释AI框架:从数据到决策的透明化实践
1. 项目概述:为什么我们需要一个“全栈”可解释AI框架? 在医疗诊断、金融风控、自动驾驶这些领域,一个AI模型给出的“是”或“否”的答案,往往只是一个决策的起点,而非终点。医生需要知道模型是基于哪些影像特征判断出…...

Hindsight核心概念解析:Retain、Recall、Reflect三大操作详解
Hindsight核心概念解析:Retain、Recall、Reflect三大操作详解 【免费下载链接】hindsight Hindsight: Agent Memory That Learns 项目地址: https://gitcode.com/GitHub_Trending/hindsight2/hindsight Hindsight是一款专注于AI智能体记忆管理的开源项目&…...

实验二 基于 VMware Workstation 的虚拟机平台搭建、客户机安装与虚拟网络模式验证
作者:非凡大爹|版本:v1|日期:2026-03-24|DocID:CN-LAB-2026-03-VMNet-1-LG-V2 原创声明:本文为作者原创实验教学资料,首发于 CSDN。 版权声明:本文版权归作者…...

基于无监督机器学习与静止系参数的伽马射线暴物理起源分类研究
1. 项目概述与核心思路伽马射线暴(GRB)是天文学中最具挑战性的谜题之一。这些来自宇宙深处的剧烈爆炸,在几秒到几分钟内释放的能量,可能超过太阳一生释放的总和。长久以来,我们一直试图回答一个核心问题:这…...

如何让孩子从零开始学习Python编程?BBC micro:bit实战指南
如何让孩子从零开始学习Python编程?BBC micro:bit实战指南 【免费下载链接】Python-For-Kids A FREE comprehensive online Python development tutorial FOR KIDS utilizing an official BBC micro:bit Development Board going step-by-step into the world of Py…...