Spring(九)声明式事务
Spring整合Junit4和JdbcTemplater如下所示:
我们所使用的junit的jar包不同,可以整合不同版本的junit。
我们导入的依赖如下所示:
<?xml version="1.0" encoding="UTF-8"?>
<project xmlns="http://maven.apache.org/POM/4.0.0"xmlns:xsi="http://www.w3.org/2001/XMLSchema-instance"xsi:schemaLocation="http://maven.apache.org/POM/4.0.0 http://maven.apache.org/xsd/maven-4.0.0.xsd"><modelVersion>4.0.0</modelVersion><groupId>com.rgf.spring</groupId><artifactId>spring-transaction</artifactId><version>1.0-SNAPSHOT</version><packaging>jar</packaging><properties><maven.compiler.source>8</maven.compiler.source><maven.compiler.target>8</maven.compiler.target><project.build.sourceEncoding>UTF-8</project.build.sourceEncoding></properties><dependencies><!--基于Maven依赖传递性,导入spring-context依赖即可导入当前所需所有jar包--><!-- https://mvnrepository.com/artifact/org.springframework/spring-context --><dependency><groupId>org.springframework</groupId><artifactId>spring-context</artifactId><version>5.3.1</version></dependency><!--Spring持久化层支持jar包--><!--Spring在执行持久化层操作,与持久层技术进行整合过程中,需要使用orm,jdbc.trx这三个jar包--><dependency><!--对象关系映射--><groupId>org.springframework</groupId><artifactId>spring-orm</artifactId><version>5.3.1</version></dependency><!--spring测试相关--><dependency><groupId>org.springframework</groupId><artifactId>spring-test</artifactId><version>5.3.1</version></dependency><!--junit测试--><dependency><groupId>junit</groupId><artifactId>junit</artifactId><version>4.12</version><scope>test</scope></dependency><!--MySQL驱动--><dependency><groupId>mysql</groupId><artifactId>mysql-connector-java</artifactId><version>8.0.22</version></dependency><!--数据源--><dependency><groupId>com.alibaba</groupId><artifactId>druid</artifactId><version>1.0.31</version></dependency></dependencies>
</project>
其中的事务管理如下所示:
我们的配置文件编写如下所示:
<?xml version="1.0" encoding="UTF-8"?>
<beans xmlns="http://www.springframework.org/schema/beans"xmlns:xsi="http://www.w3.org/2001/XMLSchema-instance"xmlns:context="http://www.springframework.org/schema/context"xsi:schemaLocation="http://www.springframework.org/schema/beanshttp://www.springframework.org/schema/beans/spring-beans.xsdhttp://www.springframework.org/schema/contexthttps://www.springframework.org/schema/context/spring-context.xsd"
><!--引入jdbc.properties--><context:property-placeholder location="classpath:jdbc.properties"></context:property-placeholder><bean id="dataSource" class="com.alibaba.druid.pool.DruidDataSource"><property name="driverClassName" value="${jdbc.driver}"></property><property name="url" value="${jdbc.url}"></property><property name="username" value="${jdbc.username}"></property><property name="password" value="${jdbc.password}"></property></bean><bean class="org.springframework.jdbc.core.JdbcTemplate"><property name="dataSource" ref="dataSource"></property></bean></beans>
我们选定一个数据库表来进行测试如下所示:
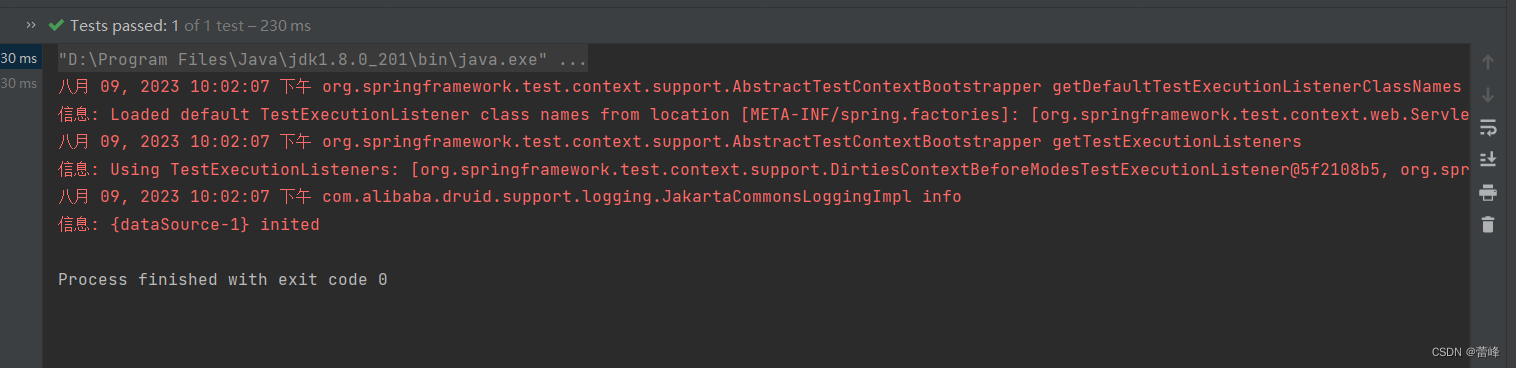
package com.rgf.spring.test;import org.junit.Test;
import org.junit.runner.RunWith;
import org.springframework.beans.factory.annotation.Autowired;
import org.springframework.jdbc.core.JdbcTemplate;
import org.springframework.test.context.ContextConfiguration;
import org.springframework.test.context.junit4.SpringJUnit4ClassRunner;
//指定当前测试类在spring的测试环境中执行,此时就可以通过注入的方式直接来获取IOC容器中的bean
@RunWith(SpringJUnit4ClassRunner.class)
//设置spring测试环境的配置文件
//classpath:类路径
@ContextConfiguration("classpath:spring-jdbc.xml")
public class JdbcTemplateTest {@Autowiredprivate JdbcTemplate jdbcTemplate;@Testpublic void  testInsert(){String sql="insert into t_user values(null,?,?,?,?,?)";jdbcTemplate.update(sql,"root","123",23,"男","123@qq.com");}
}
我们运行之后如下所示:
我们在数据库表进行刷新之后如下所示:
我们完成添加功能之后,我们进行查看查询功能,我们进行测试如下:
@Testpublic void testGetUserById(){String sql="select * from t_user where id=?";User user = jdbcTemplate.queryForObject(sql, new BeanPropertyRowMapper<>(User.class), 1);System.out.println(user);}测试完成之后如下所示:
我们发现成功的查询出来了
我们进行查询多条数据:
@Testpublic void testGetAllUser(){String sql="select * from t_user";List<User> list = jdbcTemplate.query(sql, new BeanPropertyRowMapper<>(User.class));list.forEach(System.out::println);}运行之后如下所示:
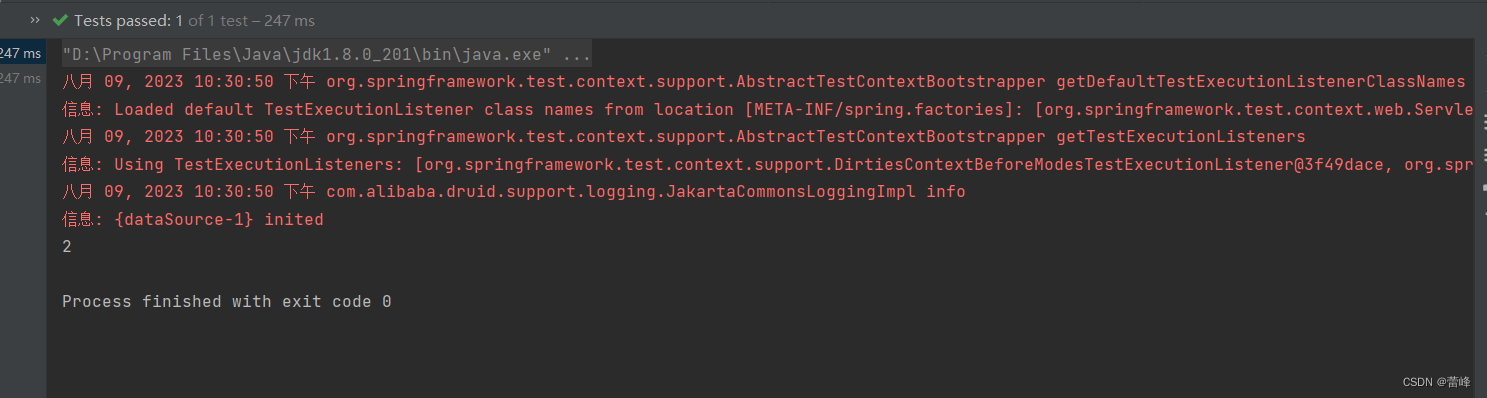
我们查询总记录数如下所示:
@Testpublic void testGetCount(){String sql="select count(*) from t_user";Integer count = jdbcTemplate.queryForObject(sql, Integer.class);System.out.println(count);}运行之后如下所示:


声明式事务概念:
编程式事务:
事务功能的相关操作全部通过自己编写代码来实现:
Connection conn=...;try{//开启事务:关闭事务的自动提交conn.setAutoCommit(false);//核心操作//提交事务conn.commit();}catch(Exception e){//回滚事务conn.rollback();}finally {//释放数据库连接conn.close();}编程式的方式存在缺陷:
细节没有被屏蔽:具体操作过程中,所以细节都需要程序员自己来完成,比较繁琐。
代码复用性不高:如果没有有效抽取出来,每次实现功能都需要自己编写代码,代码就没有得到复用。
声明式事务:
既然事务控制的代码有规律可循,代码的结构基本是确定的,所以框架就可以将固定模式的代码抽取出来,进行相关的封装。
封装起来后,我们只需要在配置文件中进行简单的配置即可完成操作。
好处1:提高开发效率
好处2:消除了冗余的代码
好处3:框架会综合考虑相关领域中在实际开发环境下有可能遇到的各种问题,进行了健壮性、性能等各个方面的优化
所以,我们可以总结下面两个概念:
编程式:自己写代码实现功能
声明式:通过配置让框架实现功能
基于注解的声明式事务:
我们所导入的依赖如下所示:
<?xml version="1.0" encoding="UTF-8"?>
<project xmlns="http://maven.apache.org/POM/4.0.0"xmlns:xsi="http://www.w3.org/2001/XMLSchema-instance"xsi:schemaLocation="http://maven.apache.org/POM/4.0.0 http://maven.apache.org/xsd/maven-4.0.0.xsd"><modelVersion>4.0.0</modelVersion><groupId>com.rgf.spring</groupId><artifactId>spring-transaction</artifactId><version>1.0-SNAPSHOT</version><packaging>jar</packaging><properties><maven.compiler.source>8</maven.compiler.source><maven.compiler.target>8</maven.compiler.target><project.build.sourceEncoding>UTF-8</project.build.sourceEncoding></properties><dependencies><!--基于Maven依赖传递性,导入spring-context依赖即可导入当前所需所有jar包--><!-- https://mvnrepository.com/artifact/org.springframework/spring-context --><dependency><groupId>org.springframework</groupId><artifactId>spring-context</artifactId><version>5.3.1</version></dependency><!--Spring持久化层支持jar包--><!--Spring在执行持久化层操作,与持久层技术进行整合过程中,需要使用orm,jdbc.trx这三个jar包--><dependency><!--对象关系映射--><groupId>org.springframework</groupId><artifactId>spring-orm</artifactId><version>5.3.1</version></dependency><!--spring测试相关--><dependency><groupId>org.springframework</groupId><artifactId>spring-test</artifactId><version>5.3.1</version></dependency><!--junit测试--><dependency><groupId>junit</groupId><artifactId>junit</artifactId><version>4.12</version><scope>test</scope></dependency><!--MySQL驱动--><dependency><groupId>mysql</groupId><artifactId>mysql-connector-java</artifactId><version>8.0.22</version></dependency><!--数据源--><dependency><groupId>com.alibaba</groupId><artifactId>druid</artifactId><version>1.0.31</version></dependency></dependencies>
</project>
接下来我们创建jdbc.properties:
jdbc.driver=com.mysql.cj.jdbc.Driver
jdbc.url=jdbc:mysql://localhost:3306/ssm?serverTimezone=UTC
jdbc.username=root
jdbc.password=123456
接下来我们进行配置spring的配置文件:
<?xml version="1.0" encoding="UTF-8"?>
<beans xmlns="http://www.springframework.org/schema/beans"xmlns:xsi="http://www.w3.org/2001/XMLSchema-instance"xmlns:context="http://www.springframework.org/schema/context"xsi:schemaLocation="http://www.springframework.org/schema/beanshttp://www.springframework.org/schema/beans/spring-beans.xsdhttp://www.springframework.org/schema/contexthttps://www.springframework.org/schema/context/spring-context.xsd"
><!--引入jdbc.properties--><context:property-placeholder location="classpath:jdbc.properties"></context:property-placeholder><bean id="dataSource" class="com.alibaba.druid.pool.DruidDataSource"><property name="driverClassName" value="${jdbc.driver}"></property><property name="url" value="${jdbc.url}"></property><property name="username" value="${jdbc.username}"></property><property name="password" value="${jdbc.password}"></property></bean><bean class="org.springframework.jdbc.core.JdbcTemplate"><property name="dataSource" ref="dataSource"></property></bean></beans>
我们再创建一个tx-annotation配置文件,如下所示:
<?xml version="1.0" encoding="UTF-8"?>
<beans xmlns="http://www.springframework.org/schema/beans"xmlns:xsi="http://www.w3.org/2001/XMLSchema-instance"xmlns:context="http://www.springframework.org/schema/context"xsi:schemaLocation="http://www.springframework.org/schema/beans http://www.springframework.org/schema/beans/spring-beans.xsd http://www.springframework.org/schema/context https://www.springframework.org/schema/context/spring-context.xsd"><!--引入jdbc.properties--><context:property-placeholder location="classpath:jdbc.properties"></context:property-placeholder><bean id="dataSource" class="com.alibaba.druid.pool.DruidDataSource"><property name="driverClassName" value="${jdbc.driver}"></property><property name="url" value="${jdbc.url}"></property><property name="username" value="${jdbc.username}"></property><property name="password" value="${jdbc.password}"></property></bean><bean class="org.springframework.jdbc.core.JdbcTemplate"><property name="dataSource" ref="dataSource"></property></bean>
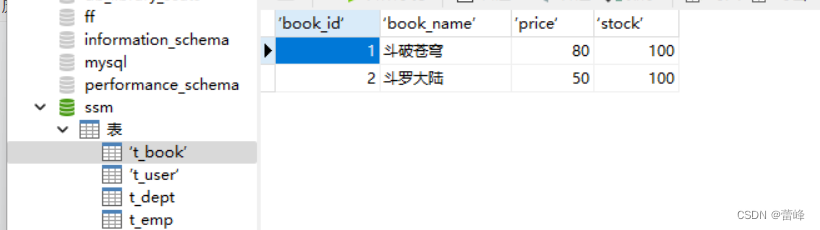
</beans>之后我们进行创建表:
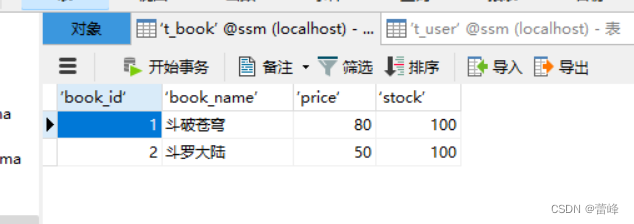
CREATE TABLE ‘t_book’ (’book_id‘ INT(11) NOT NULL AUTO_INCREMENT COMMENT '主键',‘book_name’ VARCHAR(20) DEFAULT NULL COMMENT '图书名称',’price‘ INT(11) DEFAULT NULL COMMENT '价格',‘stock’ INT(10) UNSIGNED DEFAULT NULL COMMENT '库存(无符号)',PRIMARY KEY (’book_id‘)
) ENGINE=INNODB AUTO_INCREMENT=3 DEFAULT CHARSET=utf8;
INSERT INTO ‘t_book’ (’book_id‘,‘book_name’,’price‘,‘stock’) VALUES (1,'斗破苍穹',80,100),(2,'斗罗大陆',50,100);
CREATE TABLE ’t_user‘ (’user_id‘ INT(11) NOT NULL AUTO_INCREMENT COMMENT '主键',‘username’ VARCHAR(20) DEFAULT NULL COMMENT '用户名',’balance‘ INT(10) UNSIGNED DEFAULT NULL COMMENT '余额(无符号)',PRIMARY KEY(’user_id‘)
) ENGINE=INNODB AUTO_INCREMENT=2 DEFAULT CHARSET=utf8;
insert into ’t_user‘ (’user_id‘,‘username’,’balance‘) VALUES (1,'admin',50);
我们进行运行之后如下所示:
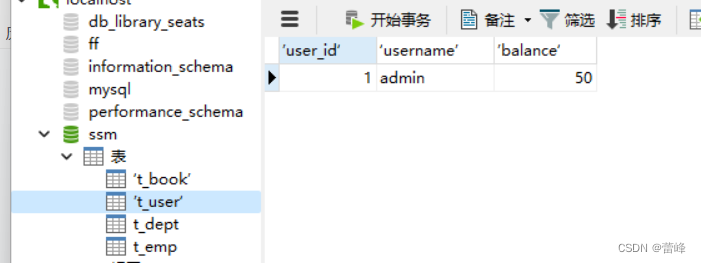
我们成功创建表之后,我们通过用户购买书的过程中,通过余额不足来测试声明式事务。通过表可以看到余额为balance:50
完成表的创建之后,我们进行示例如下所示:
我们现进行创建service层,controller层,dao层,:
我们创建controller层如下所示:
package com.rgf.spring.controller;import com.rgf.spring.service.BookService;
import org.springframework.beans.factory.annotation.Autowired;
import org.springframework.stereotype.Controller;@Controller
public class BookController {@Autowiredprivate BookService bookService;public void  buyBook(Integer userId,Integer bookId){bookService.buyBook(userId,bookId);}
}
之后我们进行创建service层:首先创建接口如下:
package com.rgf.spring.service;public interface BookService {void  buyBook(Integer userId,Integer bookId);
}
我们创建service层的实现类如下所示:
package com.rgf.spring.service;import com.rgf.spring.dao.BookDao;
import org.springframework.beans.factory.annotation.Autowired;
import org.springframework.jdbc.core.JdbcTemplate;
import org.springframework.stereotype.Service;
import org.springframework.transaction.annotation.Transactional;
@Transactional
@Service
public class BookServiceImpl implements BookService{/*** 买书* @param userId* @param bookId**/@Autowiredprivate BookDao bookDao;@Overridepublic void  buyBook(Integer userId, Integer bookId){//查询图书的价格Integer price=bookDao.getPriceByBookId(bookId);//更新图书的库存bookDao.updateStock(bookId);//更新用户的余额bookDao.updateBalance(userId,price);}}
之后我们创建dao层:
package com.rgf.spring.dao;import org.springframework.beans.factory.annotation.Autowired;
import org.springframework.beans.factory.annotation.Qualifier;
import org.springframework.jdbc.core.JdbcTemplate;
import org.springframework.stereotype.Repository;@Repository
public class BookDaoImpl implements BookDao{@Autowiredprivate JdbcTemplate jdbcTemplate;@Overridepublic Integer getPriceByBookId(Integer bookId) {String sql="SELECT price from t_book where book_id=?";return jdbcTemplate.queryForObject(sql, Integer.class,bookId);}@Overridepublic void updateStock(Integer bookId) {String sql="update t_book set stock-=1 where book_id=?";jdbcTemplate.update(sql,bookId);}@Overridepublic void updateBalance(Integer userId, Integer price) {String sql="update t_user set balance=balance-? where user_id=?";jdbcTemplate.update(sql,price,userId);}
}
package com.rgf.spring.dao;public interface BookDao {/*** 根据图书的id查询图书的价格* @param bookId* @return*/Integer getPriceByBookId(Integer bookId);/*** 更新图书的库存* @param bookId*/void updateStock(Integer bookId);/*** 更新用户的余额* @param userId* @param price*/void updateBalance(Integer userId,Integer price);
}
我们在接口里面定义方法之后,需要在实现类进行重写。
我们的自动装配如下所示:
我们利用事务进行查看:
package com.rgf.spring.dao;import org.springframework.beans.factory.annotation.Autowired;
import org.springframework.beans.factory.annotation.Qualifier;
import org.springframework.jdbc.core.JdbcTemplate;
import org.springframework.stereotype.Repository;@Repository
public class BookDaoImpl implements BookDao{@Autowiredprivate JdbcTemplate jdbcTemplate;@Overridepublic Integer getPriceByBookId(Integer bookId) {String sql="SELECT price from t_book where book_id=?";return jdbcTemplate.queryForObject(sql, Integer.class,bookId);}@Overridepublic void updateStock(Integer bookId) {String sql="update t_book set stock-=1 where book_id=?";jdbcTemplate.update(sql,bookId);}@Overridepublic void updateBalance(Integer userId, Integer price) {String sql="update t_user set balance=balance-? where user_id=?";jdbcTemplate.update(sql,price,userId);}
}
我们查看表的价格:

我们进行测试如下:用户1买一号位的书。
package com.rgf.spring.test;import com.rgf.spring.controller.BookController;
import org.junit.Test;
import org.junit.runner.RunWith;
import org.springframework.beans.factory.annotation.Autowired;
import org.springframework.test.context.ContextConfiguration;
import org.springframework.test.context.junit4.SpringJUnit4ClassRunner;@RunWith(SpringJUnit4ClassRunner.class)
@ContextConfiguration("classpath:tx-annotation.xml")
public class TxByAnnotationTest {@Autowiredprivate BookController bookController;@Testpublic  void  testBuyBook(){bookController.buyBook(1,1);}}
我们进行运行之后发现如下所示:
在没有事务的情况下,当我们进行测试的时候,一个sql语句独占一个事务且自动提交。所以前两条SQL语句成功,最后一条SQL语句失败的话,失败的不会影响上面运行成功的。我们只有·将他们放在同一事务里面,通过事务的代码去操作,如果有异常,则将整个事务都进行回滚,出现要么都成功要么都失败的情况。
我们进行测试事务如下所示:
<?xml version="1.0" encoding="UTF-8"?>
<beans xmlns="http://www.springframework.org/schema/beans"xmlns:xsi="http://www.w3.org/2001/XMLSchema-instance"xmlns:context="http://www.springframework.org/schema/context" xmlns:tx="http://www.springframework.org/schema/tx"xsi:schemaLocation="http://www.springframework.org/schema/beans http://www.springframework.org/schema/beans/spring-beans.xsd http://www.springframework.org/schema/context https://www.springframework.org/schema/context/spring-context.xsd http://www.springframework.org/schema/tx http://www.springframework.org/schema/tx/spring-tx.xsd"><!--扫描组件--><context:component-scan base-package="com.rgf.spring"></context:component-scan><!--引入jdbc.properties--><context:property-placeholder location="classpath:jdbc.properties"></context:property-placeholder><bean id="dataSource" class="com.alibaba.druid.pool.DruidDataSource"><property name="driverClassName" value="${jdbc.driver}"></property><property name="url" value="${jdbc.url}"></property><property name="username" value="${jdbc.username}"></property><property name="password" value="${jdbc.password}"></property></bean><bean class="org.springframework.jdbc.core.JdbcTemplate"><property name="dataSource" ref="dataSource"></property></bean><!--配置事务管理器--><bean id="transactionManager" class="org.springframework.jdbc.datasource.DataSourceTransactionManager"><property name="dataSource" ref="dataSource"></property></bean><!--开启事务的注解驱动--><!--为环绕通知--><!--在Spring配置文件里面,如果某一个属性的值为环绕型,当前这个属性值就会变为灰色--><!--将事务管理器里面的环绕通知作用于他的连接点--><!--开启事务的注解驱动将使用@Transactional注解所标识的方法或类中所有的方法使用事务进行管理transaction-manager属性设置事务管理器的id若事务管理器的bean的id默认为transactionManager,则该属性可以不写。--><tx:annotation-driven transaction-manager="transactionManager"/></beans>
我们在service层的实现类里面进行设置事务管理器:
package com.rgf.spring.service;import com.rgf.spring.dao.BookDao;
import org.springframework.beans.factory.annotation.Autowired;
import org.springframework.jdbc.core.JdbcTemplate;
import org.springframework.stereotype.Service;
import org.springframework.transaction.annotation.Transactional;
@Transactional
@Service
public class BookServiceImpl implements BookService{/*** 买书* @param userId* @param bookId**/@Autowiredprivate BookDao bookDao;@Overridepublic void  buyBook(Integer userId, Integer bookId){//查询图书的价格Integer price=bookDao.getPriceByBookId(bookId);//更新图书的库存bookDao.updateStock(bookId);//更新用户的余额bookDao.updateBalance(userId,price);}}
我们进行测试如下所示:
package com.rgf.spring.test;import com.rgf.spring.controller.BookController;
import org.junit.Test;
import org.junit.runner.RunWith;
import org.springframework.beans.factory.annotation.Autowired;
import org.springframework.test.context.ContextConfiguration;
import org.springframework.test.context.junit4.SpringJUnit4ClassRunner;/*** 声明式事务的配置步骤:* 1.在spring的配置文件中来配置事务管理器* 2.开启事务的注解驱动* 3.在需要被事务管理的方法上,添加@Transactional注解,该方法就会被事务管理* @Transactional注解标识的位置:* 1.标识在方法上* 2.标识在类上,则类中所有的方法都会被事务管理*/
@RunWith(SpringJUnit4ClassRunner.class)
@ContextConfiguration("classpath:tx-annotation.xml")
public class TxByAnnotationTest {@Autowiredprivate BookController bookController;@Testpublic  void  testBuyBook(){bookController.buyBook(1,1);}}
事务属性:
事务属性:只读
介绍:对一个查询操作来说,如果我们把它设置成只读,就能够明确告诉数据库,这个操作不涉及写操作。这样数据库就能够针对查询操作来进行优化。
只有当前的事务中只有查询操作时才可以将事务进行设置为只读,否则则会直接报错。
package com.rgf.spring.service;import com.rgf.spring.dao.BookDao;
import org.springframework.beans.factory.annotation.Autowired;
import org.springframework.jdbc.core.JdbcTemplate;
import org.springframework.stereotype.Service;
import org.springframework.transaction.annotation.Transactional;
@Service
public class BookServiceImpl implements BookService{/*** 买书* @param userId* @param bookId**/@Autowiredprivate BookDao bookDao;@Override@Transactional(readOnly = true)public void  buyBook(Integer userId, Integer bookId){//查询图书的价格Integer price=bookDao.getPriceByBookId(bookId);//更新图书的库存bookDao.updateStock(bookId);//更新用户的余额bookDao.updateBalance(userId,price);}}
报错信息如下所示:

事务属性:超时
事务在执行过程中,有可能因为遇到某些问题,导致程序卡住,从而长时间占用数据库资源,而长时间占用资源,大概率是因为程序运行出现了问题,此时这个很可能出问题的程序应该被回滚,撤销它已做的操作,事务结束,把资源让出来,让其他正常程序可以执行。
我们进行测试如下所示:
package com.rgf.spring.service;import com.rgf.spring.dao.BookDao;
import org.springframework.beans.factory.annotation.Autowired;
import org.springframework.jdbc.core.JdbcTemplate;
import org.springframework.stereotype.Service;
import org.springframework.transaction.annotation.Transactional;import java.util.concurrent.TimeUnit;@Service
public class BookServiceImpl implements BookService{/*** 买书* @param userId* @param bookId**/@Autowiredprivate BookDao bookDao;@Override@Transactional(//readOnly=truetimeout = 3)public void  buyBook(Integer userId, Integer bookId){try{TimeUnit.SECONDS.sleep(5);}catch (InterruptedException e){e.printStackTrace();}//查询图书的价格Integer price=bookDao.getPriceByBookId(bookId);//更新图书的库存bookDao.updateStock(bookId);//更新用户的余额bookDao.updateBalance(userId,price);}}
我们发现报错如下所示:
即事务超时异常 。TransactionTimedOutException.
事务属性:回滚策略
声明式事务默认只针对运行时异常回滚,编译时异常不回滚
可以通过@Transactional中相关属性设置回滚策略
rollbackFor属性:需要设置一个Class类型的对象
rollbackForClassName属性:需要设置一个字符串类型的全类名
noRollbackFor属性:需要设置一个Class类型的对象
noRollbackForClassName属性:需要设置一个字符串类型的全类名
package com.rgf.spring.service;import com.rgf.spring.dao.BookDao;
import org.springframework.beans.factory.annotation.Autowired;
import org.springframework.jdbc.BadSqlGrammarException;
import org.springframework.jdbc.core.JdbcTemplate;
import org.springframework.stereotype.Service;
import org.springframework.transaction.annotation.Transactional;import java.sql.SQLSyntaxErrorException;
import java.util.concurrent.TimeUnit;@Service
public class BookServiceImpl implements BookService{/*** 买书* @param userId* @param bookId**/@Autowiredprivate BookDao bookDao;@Override@Transactional(//readOnly=true// timeout = 3//noRollbackFor = SQLSyntaxErrorException.classnoRollbackForClassName="java.sql.SQLSyntaxErrorException.class")public void  buyBook(Integer userId, Integer bookId){try{TimeUnit.SECONDS.sleep(5);}catch (InterruptedException e){e.printStackTrace();}//查询图书的价格Integer price=bookDao.getPriceByBookId(bookId);//更新图书的库存bookDao.updateStock(bookId);//更新用户的余额bookDao.updateBalance(userId,price);System.out.println(1/0);}}
我们进行测试之后即会发现不会造成回滚。但是报错信息仍然会有。
事务属性:事务隔离级别
数据库系统必须具有隔离并发运行各个事务的能力,使他们不会相互影响,避免各种并发问题。一个事务与其他事务隔离的程度称为隔离级别。SQL标准中规定了多种事务隔离级别,不同隔离级别对应不同的干扰程度,隔离级别越高,数据一致性就越好,但并发性越弱。
隔离级别一共有四种:
读未提交 READ UNCOMMITED(Transaction01读取Transaction02未提交的修改)
读已提交 READ COMMITTED(要求Transaction01只能读取Transaction02已提交的修改)
可重复读 REPEAABLE READ(确保Transaction01可以多次从一个字段中读取到相同的值,即Transaction01执行期间禁止其他事务对这个字段进行更新)
串行化 SERIALZABLE(确保Transaction01可以多次从一个表中读取到相同的行,在Transaction01执行期间,禁止其他事务对这个表进行添加、更新、删除操作。可以避免任何并发问题。但性能十分低下。
各个隔离级别解决并发问题的能力见下表:
隔离级别 脏读 不可重复读 幻读 READ UNCOMMITED(读未提交) 有 有 有 READ COMMITTED (读已提交) 无 有 有 REPEAABLE READ(可重复读) 无 无 有 SERIALZABLE(串行化) 无 无 无 各种数据库产品对事务隔离级别的支持程度:
隔离级别 Oracle MySQL READ UNCOMMITED(读未提交) no yes READ COMMITTED (读已提交) yes(默认) yes REPEAABLE READ(可重复读) no yes(默认) SERIALZABLE(串行化) yes(默认) yes 我们设置隔离程度如下所示:
package com.rgf.spring.service;import com.rgf.spring.dao.BookDao;
import org.springframework.beans.factory.annotation.Autowired;
import org.springframework.jdbc.BadSqlGrammarException;
import org.springframework.jdbc.core.JdbcTemplate;
import org.springframework.stereotype.Service;
import org.springframework.transaction.annotation.Isolation;
import org.springframework.transaction.annotation.Transactional;import java.sql.SQLSyntaxErrorException;
import java.util.concurrent.TimeUnit;@Service
public class BookServiceImpl implements BookService{/*** 买书* @param userId* @param bookId**/@Autowiredprivate BookDao bookDao;@Override@Transactional(//readOnly=true// timeout = 3//noRollbackFor = SQLSyntaxErrorException.class//noRollbackForClassName="java.sql.SQLSyntaxErrorException.class"isolation = Isolation.DEFAULT)public void  buyBook(Integer userId, Integer bookId){try{TimeUnit.SECONDS.sleep(5);}catch (InterruptedException e){e.printStackTrace();}//查询图书的价格Integer price=bookDao.getPriceByBookId(bookId);//更新图书的库存bookDao.updateStock(bookId);//更新用户的余额bookDao.updateBalance(userId,price);System.out.println(1/0);}}

事务的传播行为:
我们在controller层里面进行调用如下所示:
package com.rgf.spring.controller;import com.rgf.spring.service.BookService;
import com.rgf.spring.service.CheckoutService;
import org.springframework.beans.factory.annotation.Autowired;
import org.springframework.stereotype.Controller;@Controller
public class BookController {@Autowiredprivate BookService bookService;private CheckoutService checkoutService;public void  buyBook(Integer userId,Integer bookId){bookService.buyBook(userId,bookId);}public  void  checkout(Integer userId,Integer[] bookIds){checkoutService.checkout(userId,bookIds);}
}
我们在service层里面调用如下所示:
先写接口:package com.rgf.spring.service;public interface CheckoutService {/*** 结账* @param userId* @param bookIds*/void checkout(Integer userId, Integer[] bookIds);}然后写接口调用的方法,即为实现类:
package com.rgf.spring.service;import org.springframework.beans.factory.annotation.Autowired;
import org.springframework.stereotype.Service;
import org.springframework.transaction.annotation.Transactional;@Service
public class CheckoutServiceImpl implements  CheckoutService{@Autowiredprivate  BookService bookService;@Override@Transactionalpublic void checkout(Integer userId, Integer[] bookIds) {for (Integer bookId:bookIds){bookService.buyBook(userId,bookId);}}
}
我们进行测试如下所示:
package com.rgf.spring.test;import com.rgf.spring.controller.BookController;
import org.junit.Test;
import org.junit.runner.RunWith;
import org.springframework.beans.factory.annotation.Autowired;
import org.springframework.test.context.ContextConfiguration;
import org.springframework.test.context.junit4.SpringJUnit4ClassRunner;/*** 声明式事务的配置步骤:* 1.在spring的配置文件中来配置事务管理器* 2.开启事务的注解驱动* 3.在需要被事务管理的方法上,添加@Transactional注解,该方法就会被事务管理* @Transactional注解标识的位置:* 1.标识在方法上* 2.标识在类上,则类中所有的方法都会被事务管理*/
@RunWith(SpringJUnit4ClassRunner.class)
@ContextConfiguration("classpath:tx-annotation.xml")
public class TxByAnnotationTest {@Autowiredprivate BookController bookController;@Testpublic  void  testBuyBook(){bookController.buyBook(1,1);}@Testpublic  void  testCheckoutBook(){bookController.checkout(1,new Integer[]{1,2});}}
测试之后出现报错信息:SQLStateSQLExceptionTranslator.java
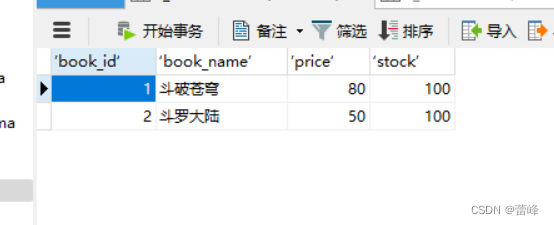
我们进行刷新之后发现书的数量没有发生变化。此即为第二本书买不了的话,当前的所有书都无法进行购买。当数据出错的时候,回滚的是整个结账的操作。
我们将买书操作的事务的属性设置如下所示:
package com.rgf.spring.service;import com.rgf.spring.dao.BookDao;
import org.springframework.beans.factory.annotation.Autowired;
import org.springframework.jdbc.BadSqlGrammarException;
import org.springframework.jdbc.core.JdbcTemplate;
import org.springframework.stereotype.Service;
import org.springframework.transaction.annotation.Isolation;
import org.springframework.transaction.annotation.Propagation;
import org.springframework.transaction.annotation.Transactional;import java.sql.SQLSyntaxErrorException;
import java.util.concurrent.TimeUnit;@Service
public class BookServiceImpl implements BookService{/*** 买书* @param userId* @param bookId**/@Autowiredprivate BookDao bookDao;@Override@Transactional(//readOnly=true// timeout = 3//noRollbackFor = SQLSyntaxErrorException.class//noRollbackForClassName="java.sql.SQLSyntaxErrorException.class"//  isolation = Isolation.DEFAULTpropagation = Propagation.REQUIRES_NEW)public void  buyBook(Integer userId, Integer bookId){try{TimeUnit.SECONDS.sleep(5);}catch (InterruptedException e){e.printStackTrace();}//查询图书的价格Integer price=bookDao.getPriceByBookId(bookId);//更新图书的库存bookDao.updateStock(bookId);//更新用户的余额bookDao.updateBalance(userId,price);System.out.println(1/0);}}
此时用的是买书自身的事务,即会将第一本书购买成功,第二本购买不成功。可以通过@Transaction中的propagation属性设置事务传播行为。
@Transactional(propagation = Propagation.REQUIRED),默认情况。使用调用者的事务@Transactional(propagation = Propagation.REQUIRES_NEW),被调用者被调用的方法本身的事务
基于XML的声明式事务:
我们的配置文件如下所示:
<?xml version="1.0" encoding="UTF-8"?>
<beans xmlns="http://www.springframework.org/schema/beans"xmlns:xsi="http://www.w3.org/2001/XMLSchema-instance"xmlns:context="http://www.springframework.org/schema/context" xmlns:tx="http://www.springframework.org/schema/tx"xmlns:aop="http://www.springframework.org/schema/aop"xsi:schemaLocation="http://www.springframework.org/schema/beans http://www.springframework.org/schema/beans/spring-beans.xsd http://www.springframework.org/schema/context https://www.springframework.org/schema/context/spring-context.xsd http://www.springframework.org/schema/tx http://www.springframework.org/schema/tx/spring-tx.xsd http://www.springframework.org/schema/aop https://www.springframework.org/schema/aop/spring-aop.xsd"><!--扫描组件--><context:component-scan base-package="com.rgf.spring"></context:component-scan><!--引入jdbc.properties--><context:property-placeholder location="classpath:jdbc.properties"></context:property-placeholder><bean id="dataSource" class="com.alibaba.druid.pool.DruidDataSource"><property name="driverClassName" value="${jdbc.driver}"></property><property name="url" value="${jdbc.url}"></property><property name="username" value="${jdbc.username}"></property><property name="password" value="${jdbc.password}"></property></bean><bean class="org.springframework.jdbc.core.JdbcTemplate"><property name="dataSource" ref="dataSource"></property></bean><!--配置事务管理器--><bean id="transactionManager" class="org.springframework.jdbc.datasource.DataSourceTransactionManager"><property name="dataSource" ref="dataSource"></property></bean><!--配置事务通知--><tx:advice id="tx" transaction-manager="transactionManager"><tx:attributes><tx:method name="buyBook" /></tx:attributes></tx:advice><aop:config><aop:advisor advice-ref="tx" pointcut="execution(* com.rgf.spring.service.*.*(..))"></aop:advisor></aop:config></beans>
我们的测试代码如下所示:
package com.rgf.spring.test;import com.rgf.spring.controller.BookController;
import org.junit.Test;
import org.junit.runner.RunWith;
import org.springframework.beans.factory.annotation.Autowired;
import org.springframework.test.context.ContextConfiguration;
import org.springframework.test.context.junit4.SpringJUnit4ClassRunner;/*** 声明式事务的配置步骤:* 1.在spring的配置文件中来配置事务管理器* 2.开启事务的注解驱动* 3.在需要被事务管理的方法上,添加@Transactional注解,该方法就会被事务管理* @Transactional注解标识的位置:* 1.标识在方法上* 2.标识在类上,则类中所有的方法都会被事务管理*/
@RunWith(SpringJUnit4ClassRunner.class)
@ContextConfiguration("classpath:tx-xml.xml")
public class TxByXMLTest {@Autowiredprivate BookController bookController;@Testpublic  void  testBuyBook(){bookController.buyBook(1,1);}@Testpublic  void  testCheckoutBook(){bookController.checkout(1,new Integer[]{1,2});}}
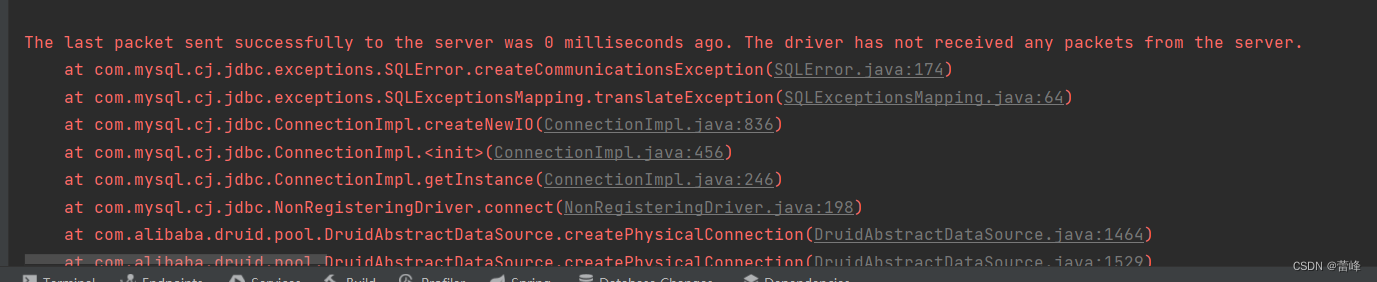
我们进行测试的时候发现出现如下问题:
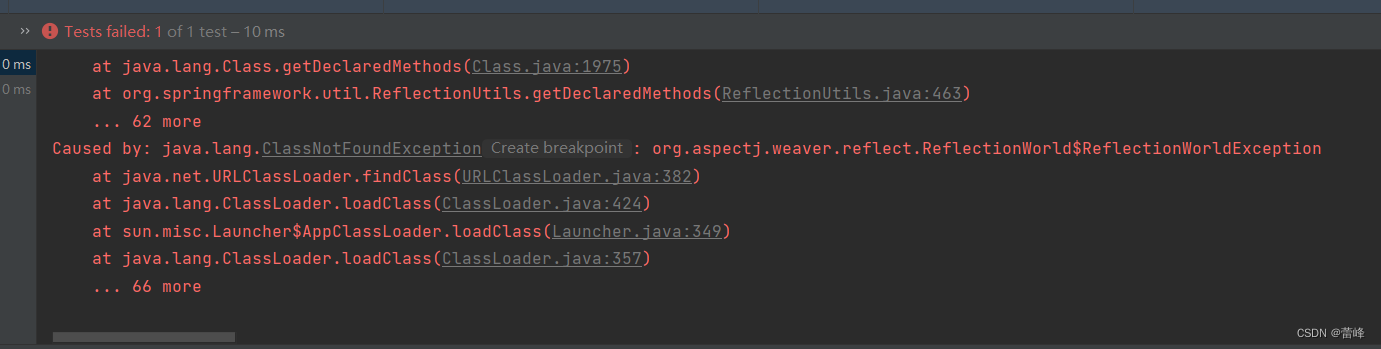
我们发现缺少jar包。我们来进行添加:
<!--spring-aspects会帮我们传递过来aspectjweaver--><dependency><groupId>org.springframework</groupId><artifactId>spring-aspects</artifactId><version>5.3.1</version></dependency>我们进行导入依赖。
完成之后我们继续测试即可。
注意:基于xml实现的声明式事务,必须引入aspectj的依赖
我们可以用*默认为全部方法:
<?xml version="1.0" encoding="UTF-8"?>
<beans xmlns="http://www.springframework.org/schema/beans"xmlns:xsi="http://www.w3.org/2001/XMLSchema-instance"xmlns:context="http://www.springframework.org/schema/context" xmlns:tx="http://www.springframework.org/schema/tx"xmlns:aop="http://www.springframework.org/schema/aop"xsi:schemaLocation="http://www.springframework.org/schema/beans http://www.springframework.org/schema/beans/spring-beans.xsd http://www.springframework.org/schema/context https://www.springframework.org/schema/context/spring-context.xsd http://www.springframework.org/schema/tx http://www.springframework.org/schema/tx/spring-tx.xsd http://www.springframework.org/schema/aop https://www.springframework.org/schema/aop/spring-aop.xsd"><!--扫描组件--><context:component-scan base-package="com.rgf.spring"></context:component-scan><!--引入jdbc.properties--><context:property-placeholder location="classpath:jdbc.properties"></context:property-placeholder><bean id="dataSource" class="com.alibaba.druid.pool.DruidDataSource"><property name="driverClassName" value="${jdbc.driver}"></property><property name="url" value="${jdbc.url}"></property><property name="username" value="${jdbc.username}"></property><property name="password" value="${jdbc.password}"></property></bean><bean class="org.springframework.jdbc.core.JdbcTemplate"><property name="dataSource" ref="dataSource"></property></bean><!--配置事务管理器--><bean id="transactionManager" class="org.springframework.jdbc.datasource.DataSourceTransactionManager"><property name="dataSource" ref="dataSource"></property></bean><!--配置事务通知--><tx:advice id="tx" transaction-manager="transactionManager"><tx:attributes><tx:method name="buyBook" /><tx:method name="*"/><tx:method name="get*" read-only="true"/><tx:method name="query*" read-only="true"/><tx:method name="find*" read-only="true"/><!--read-only属性:设置只读属性--><!--rollback-for属性:设置回滚的异常--><!--no-rollback-for属性:设置不回滚的异常--><!--isolation属性:设置事务的隔离级别--><!--timeout属性:设置事务的超时属性--><!--propagation属性:设置事务的传播行为--><tx:method name="save*" read-only="false" rollback-for="java.lang.Exception" propagation="REQUIRES_NEW"/><tx:method name="update*" read-only="false" rollback-for="java.lang.Exception" propagation="REQUIRES_NEW"/><tx:method name="delete" read-only="false" rollback-for="java.lang.Exception" propagation="REQUIRES_NEW"/></tx:attributes></tx:advice><aop:config><aop:advisor advice-ref="tx" pointcut="execution(* com.rgf.spring.service.*.*(..))"></aop:advisor></aop:config></beans>
相关文章:
Spring(九)声明式事务
Spring整合Junit4和JdbcTemplater如下所示: 我们所使用的junit的jar包不同,可以整合不同版本的junit。 我们导入的依赖如下所示: <?xml version"1.0" encoding"UTF-8"?> <project xmlns"http://maven.a…...
)
java中用HSSFWorkbook生成xls格式的excel(亲测)
SXSSFWorkbook类是用于生成XLSX格式的Excel文件(基于XML格式),而不是XLS格式的Excel文件(基于二进制格式)。 如果你需要生成XLS格式的Excel文件,可以使用HSSFWorkbook类。以下是一个简单的示例:…...

做平面设计一般电脑可以吗 优漫动游
平面设计常用的软件如下:Photoshop、AutoCAD、AI等。其中对电脑配置要求高的是AutoCAD,可运行AutoCAD的软件均可运行如上软件。 做平面设计一般电脑可以吗 AutoCAD64位版配置要求:AMDAthlon64位处理器、支持SSE2技术的AMDOpteron处理器、…...
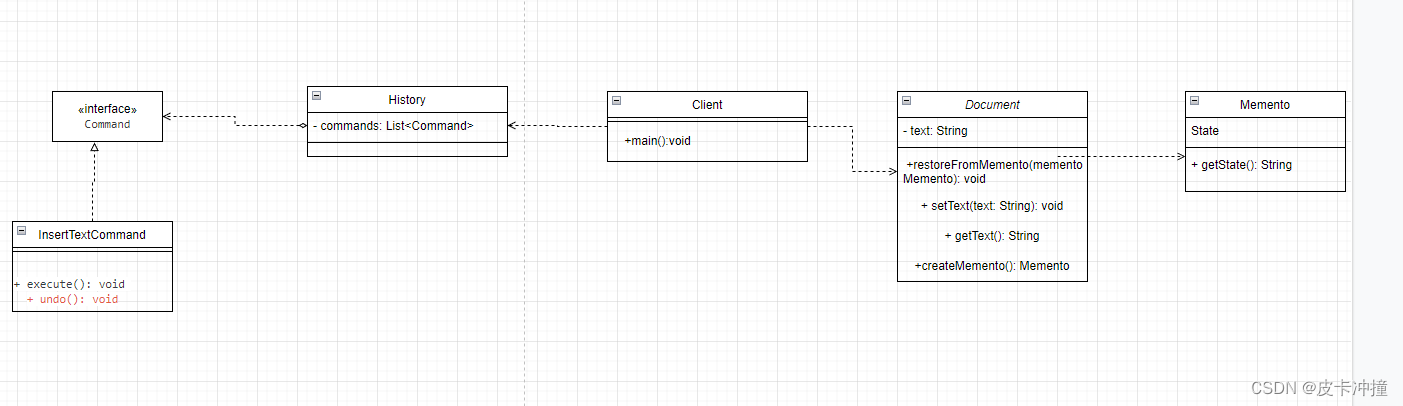
设计模式备忘录+命令模式实现Word撤销恢复操作
文章目录 前言思路代码实现uml类图总结 前言 最近学习设计模式行为型的模式,学到了备忘录模式提到这个模式可以记录一个对象的状态属性值,用于下次复用,于是便想到了我们在Windows系统上使用的撤销操作,于是便想着使用这个模式进…...
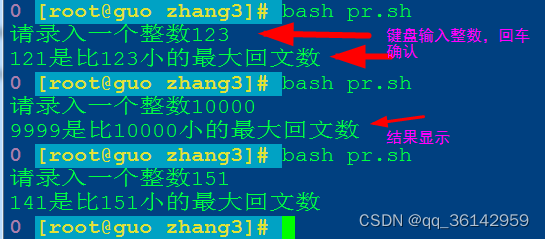
Linux centos7 bash编程小训练
训练要求: 求比一个数小的最大回文数 知识点: 一个数字正读反读都一样,我们称为回文数,如5、11、55、121、222等。 我们训练用bash编写一个小程序,由我们标准输入一个整数,计算机将显示出一个比这个数小…...

创作2周年纪念日-特别篇
创作2周年纪念日-特别篇 1. 与CSDN的机缘2. 收获3. 憧憬 1. 与CSDN的机缘 很荣幸,在大学时候,能够接触到CSDN这样一个平台,当时对嵌入式开发、编程、计算机视觉等内容比较感兴趣。后面一个很偶然的联培实习机会,让我接触到了Pych…...

【UE5】用法简介-使用MAWI高精度树林资产的地形材质与添加风雪效果
首先我们新建一个basic工程 然后点击floor按del键,把floor给删除。 只留下空白场景 点击“地形” 在这个范例里,我只创建一个500X500大小的地形,只为了告诉大家用法,点击创建 创建好之后有一大片空白的地形出现 让我们点左上角…...

兼容AD210 车规级高精度隔离放大器:ISO EM210
车规级高精度隔离放大器:ISO EM210 Pin-Pin兼容AD210的低成本,小体积DIP标准38Pin金属外壳封装模块,能有效屏蔽现场EMC空间干扰。功能设计全面,采用非固定增益方式,输入信号经过输入端的前置放大器(增益为1-100&#x…...
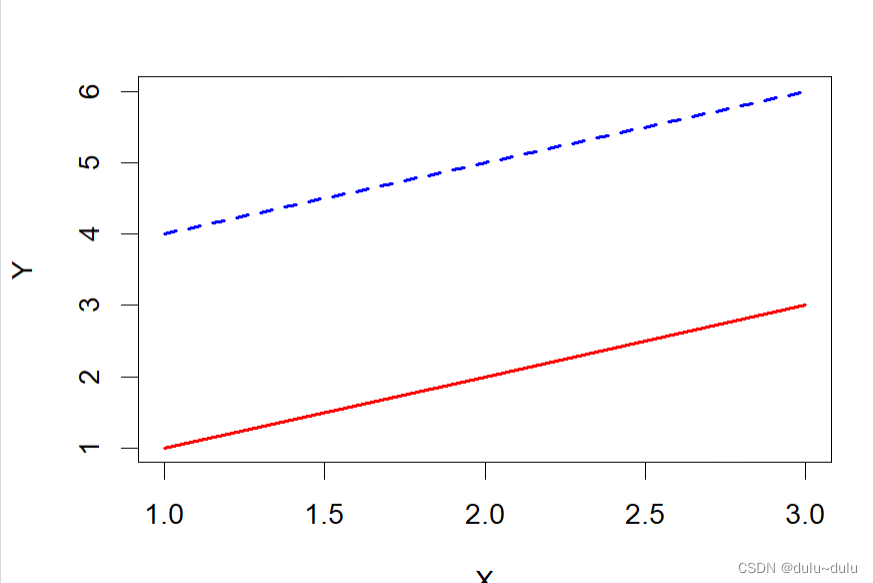
R语言常用数组函数
目录 1.array 2.matrix 3.data.matrix 4.lower.tri 5.mat.or.vec 6.t:转置矩阵 7.cbind 8.rbind 9.diag 10.aperm:对数组进行轴置换(维度重排)操作 11.%*%:乘法操作要求矩阵 A 的列数等于矩阵 B 的行数 12.crossprod…...

前端开发之Element Plus的分页组件el-pagination显示英文转变为中文
前言 在使用element的时候分页提示语句是中文的到了element-plus中式英文的,本文讲解的就是怎样将英文转变为中文 效果图 解决方案 如果你的element-plus版本为2.2.29以下的 import { createApp } from vue import App from ./App.vue import ElementPlus from …...
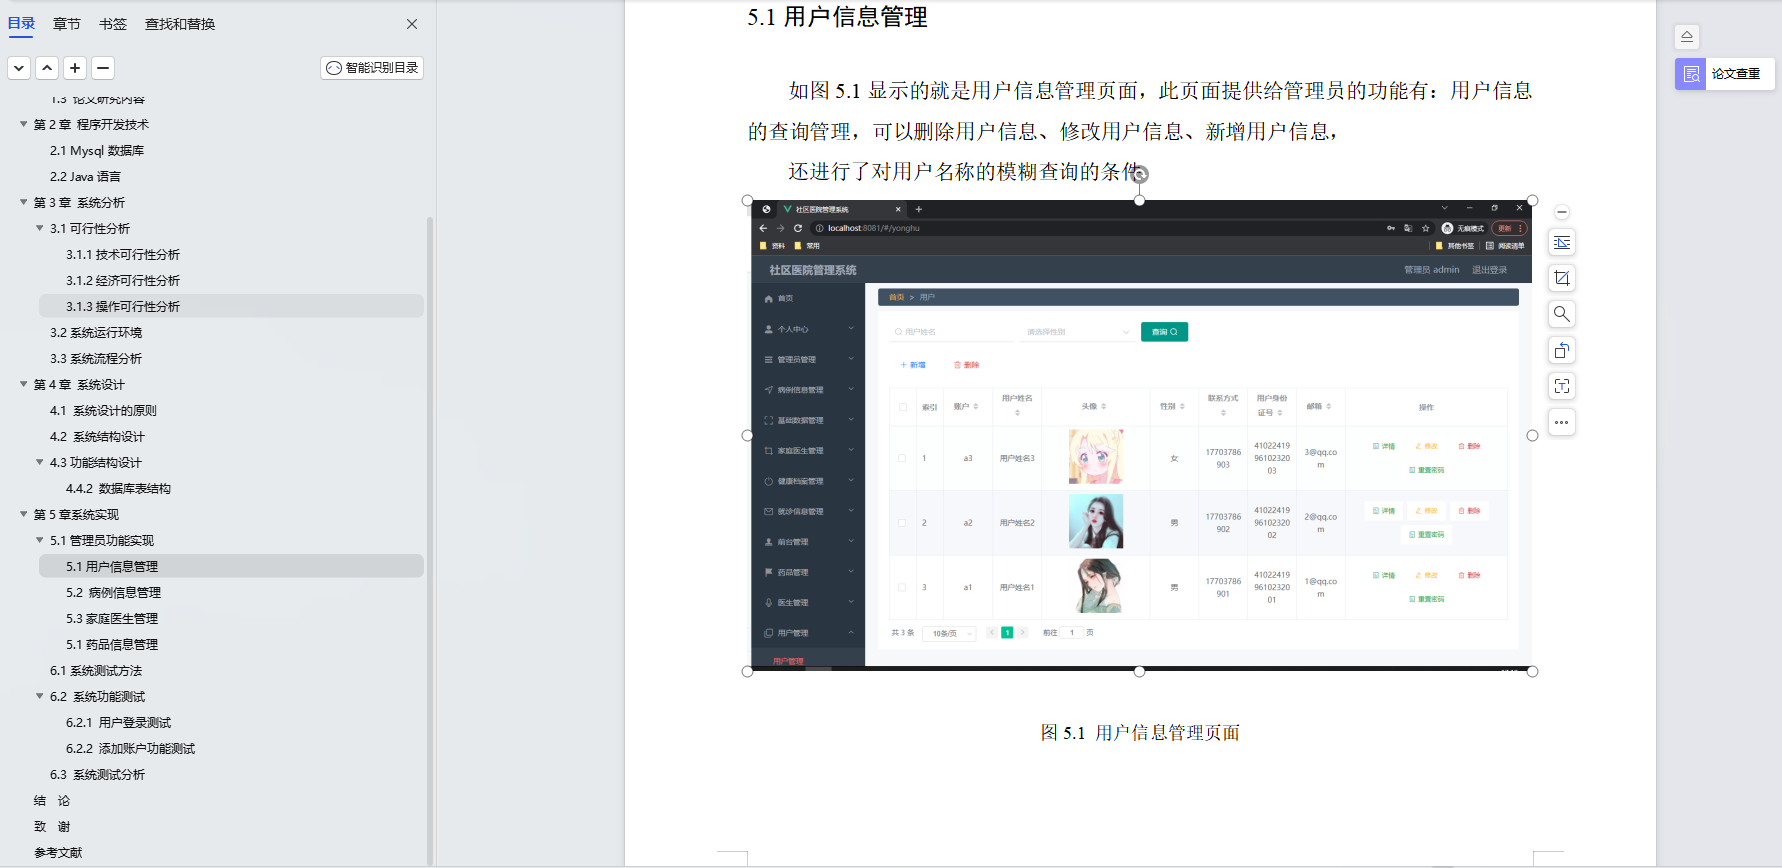
基于Java+SpringBoot+Vue前后端分离社区医院管理系统设计和实现
博主介绍:✌全网粉丝30W,csdn特邀作者、博客专家、CSDN新星计划导师、Java领域优质创作者,博客之星、掘金/华为云/阿里云/InfoQ等平台优质作者、专注于Java技术领域和毕业项目实战✌ 🍅文末获取源码联系🍅 👇🏻 精彩专…...

浅谈单例模式在游戏开发中的应用
前言 如果在外部想在不同的时间结点、不同的位置访问某类中的成员且想要保持访问时,成员地址唯一。那么可以考虑将该类声明为静态类,但若是成员中包含公共的数据类型,此时便可以考虑将该类做成一个单例。 单例模式 由于类中的数据&#x…...

Stable Diffusion WebUI 整合包
现在网络上出现的各种整合包只是整合了运行 Stable Diffusion WebUI(以下简称为 SD-WebUI)必需的 Python 和 Git 环境,并且预置好模型,有些整合包还添加了一些常用的插件,其实际与手动进行本地部署并没有区别。 不过&a…...

什么是 RESTful API
什么是 RESTful API? RESTful API是一种设计哲学和架构风格,它基于 HTTP 协议和其状态管理原则,用于构建分布式系统。RESTful API 遵循以下设计原则: 资源层:API 应该代表一种资源,例如一个用户、一个订单…...

如何搭建关键字驱动自动化测试框架?
前言 那么这篇文章我们将了解关键字驱动测试又是如何驱动自动化测试完成整个测试过程的。关键字驱动框架是一种功能自动化测试框架,它也被称为表格驱动测试或者基于动作字的测试。关键字驱动的框架的基本工作是将测试用例分成四个不同的部分。首先是测试步骤&#x…...
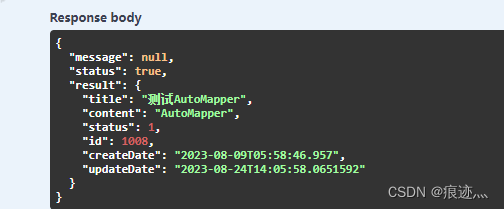
WPF实战项目十二(API篇):配置AutoMapper
1、新建类库WPFProjectShared,在类库下新建文件夹Dtos,新建BaseDto.cs,继承INotifyPropertyChanged,实现通知更新。 public class BaseDto : INotifyPropertyChanged{public int Id { get; set; }public event PropertyChangedEv…...

Linux 内核模块加载过程之重定位
文章目录 一、内核模块符号解析1.1 内核模块重定位函数调用1.1.1 struct load_info info1.1.2 copy_module_from_user 1.2 simplify_symbols1.2.1 simplify_symbols1.2.2 resolve_symbol_wait1.2.3 resolve_symbol1.2.4 find_symbol 二、 apply_relocations2.1 apply_relocatio…...
:PyFlink DataStream API之State)
Flink流批一体计算(19):PyFlink DataStream API之State
目录 keyed state Keyed DataStream 使用 Keyed State 实现了一个简单的计数窗口 状态有效期 (TTL) 过期数据的清理 全量快照时进行清理 增量数据清理 在 RocksDB 压缩时清理 Operator State算子状态 Broadcast State广播状态 keyed state Keyed DataStream 使用 k…...

adb shell获取安卓设备电量ROM内存帧率等信息
adb shell获取安卓设备电量ROM内存帧率等信息 adb shell指令获取Android设备的运行状态,如电池信息(包含电量百分比,电池状态,电池温度,电池电压,充放电电流),CPU占比,内…...
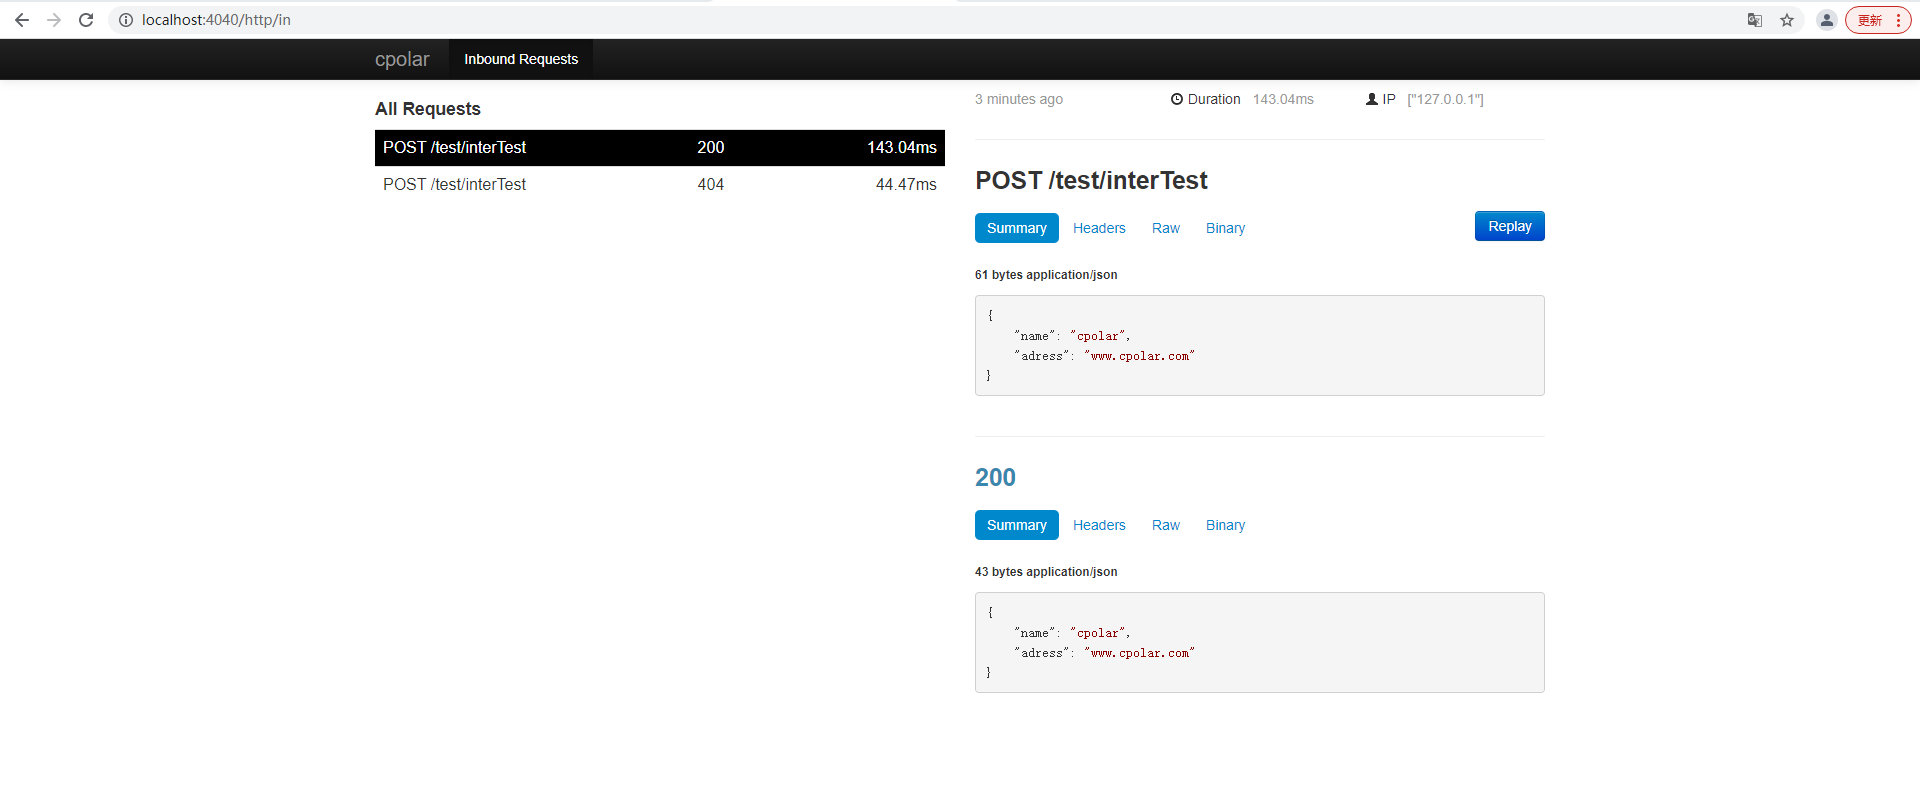
springboot服务端接口外网远程调试,并实现HTTP服务监听
文章目录 前言1. 本地环境搭建1.1 环境参数1.2 搭建springboot服务项目 2. 内网穿透2.1 安装配置cpolar内网穿透2.1.1 windows系统2.1.2 linux系统 2.2 创建隧道映射本地端口2.3 测试公网地址 3. 固定公网地址3.1 保留一个二级子域名3.2 配置二级子域名3.2 测试使用固定公网地址…...

ComfyUI Video Combine节点3个核心技巧:解决视频合并常见问题
ComfyUI Video Combine节点3个核心技巧:解决视频合并常见问题 【免费下载链接】ComfyUI-VideoHelperSuite Nodes related to video workflows 项目地址: https://gitcode.com/gh_mirrors/co/ComfyUI-VideoHelperSuite 在AI动画创作中,ComfyUI的Vi…...

5分钟免费制作专业AI翻唱:AICoverGen完整指南
5分钟免费制作专业AI翻唱:AICoverGen完整指南 【免费下载链接】AICoverGen A WebUI to create song covers with any RVC v2 trained AI voice from YouTube videos or audio files. 项目地址: https://gitcode.com/gh_mirrors/ai/AICoverGen 想让AI帮你翻唱…...

技能工程化框架:从标准化定义到编排实战
1. 项目概述:从“技能”到“智能”的工程化桥梁在当今的软件开发领域,尤其是涉及复杂交互和自动化流程的场景,我们常常会听到“技能”这个词。它听起来很抽象,但如果你拆解过任何一款智能助手、自动化机器人或者一个大型的业务流程…...

UEFITool解析指南:三步骤掌握固件逆向分析的核心技术
UEFITool解析指南:三步骤掌握固件逆向分析的核心技术 【免费下载链接】UEFITool UEFI firmware image viewer and editor 项目地址: https://gitcode.com/gh_mirrors/ue/UEFITool UEFITool是一款功能强大的UEFI固件分析工具,能够帮助你深入探索计…...

构建轻量级LLM工具集:模块化设计、多模型集成与本地化部署实践
1. 项目概述:一个面向日常的轻量级LLM工具集最近在GitHub上闲逛,发现了一个挺有意思的项目,叫“Daily-LLM”。光看名字,你可能会觉得这又是一个庞大的、需要海量算力才能跑起来的“大模型”项目。但点进去仔细研究后,我…...

从零构建团队技能仓库:结构化知识管理与VuePress实践
1. 项目概述:一个技能仓库的诞生与价值 最近在整理团队内部的技术资产时,我一直在思考一个问题:如何让那些散落在个人笔记、项目代码片段、会议纪要里的“隐性知识”和“最佳实践”沉淀下来,变成团队可复用、可传承的“显性资产”…...

DLP/SLA光固化3D打印技术解析与Ember打印机实战指南
1. DLP/SLA 3D打印技术深度解析:从光与树脂的对话说起如果你是从FDM(熔丝制造)打印转向树脂打印的,那感觉就像从开手动挡卡车换到了开精密数控机床。DLP(数字光处理)和SLA(立体光刻)…...

Lingoose框架实战:构建智能客服工单处理AI工作流
1. 项目概述:从“Lingo”到“Goose”,一个AI应用编排框架的诞生如果你最近在折腾大语言模型应用,尤其是想把OpenAI、Anthropic这些API的能力整合到自己的业务流程里,那你大概率已经体会过那种“胶水代码”的烦恼了。今天要聊的这个…...

大语言模型可靠性监测与压缩的谱方法研究
1. 大语言模型可靠性监测与压缩的谱方法研究概述在深度学习领域,大语言模型(LLM)和视觉语言模型(VLM)的可靠性问题与计算效率挑战日益凸显。模型幻觉(生成与输入无关或错误的内容)和分布偏移(面对训练数据分布外的输入时性能下降)会严重损害用户信任,而庞…...

手把手教你用SystemVerilog Interface搭建一个可复用的DMA寄存器验证环境
基于SystemVerilog Interface构建模块化DMA验证环境的工程实践 在数字IC验证领域,DMA(直接内存访问)控制器作为关键IP核,其寄存器验证环境的搭建效率直接影响项目进度。传统验证方法中信号连接冗长、时序控制分散的问题ÿ…...