聊聊如何玩转spring-boot-admin
前言
1、何为spring-boot-admin?
Spring Boot Admin 是一个监控工具,旨在以良好且易于访问的方式可视化 Spring Boot Actuators 提供的信息
快速开始
如何搭建spring-boot-admin-server
1、在服务端项目的POM引入相应的GAV
<dependency><groupId>de.codecentric</groupId><artifactId>spring-boot-admin-starter-server</artifactId><version>${spring-boot-admin.version}</version></dependency><dependency><groupId>org.springframework.boot</groupId><artifactId>spring-boot-starter-web</artifactId></dependency>
2、新建springboot启动类并加上@EnableAdminServer
@SpringBootApplication
@EnableAdminServer
public class MonitorApplication {public static void main(String[] args) {SpringApplication.run(MonitorApplication.class);}
}
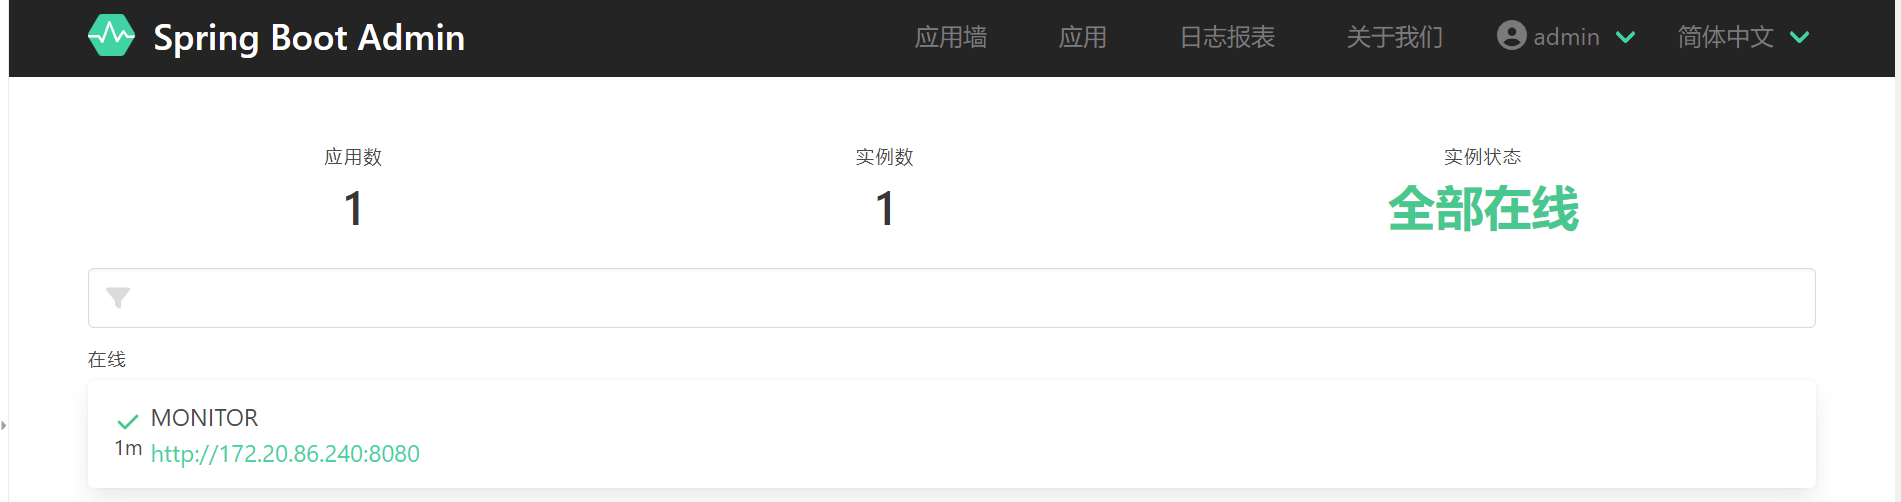
配置完,访问一下页面

虽然可以访问,但是这样不安全,接下来我们和spring security做个整合
3、整合spring security
a、 在服务端项目的pom引入security GAV
<dependency><groupId>org.springframework.boot</groupId><artifactId>spring-boot-starter-security</artifactId></dependency>
b、 在服务端项目的application.yml配置相关用户名和密码
spring:security:user:name: ${MONITOR_USER:admin}password: ${MONITOR_PWD:admin}
c、 定制security config
@Configuration
@EnableWebSecurity
@RequiredArgsConstructor
public class SecurityMonitorConfig extends WebSecurityConfigurerAdapter {private final AdminServerProperties adminServer;private final WebEndpointProperties webEndpointProperties;@Overrideprotected void configure(HttpSecurity http) throws Exception {SavedRequestAwareAuthenticationSuccessHandler successHandler = new SavedRequestAwareAuthenticationSuccessHandler();successHandler.setTargetUrlParameter("redirectTo");successHandler.setDefaultTargetUrl(this.adminServer.path("/"));http.authorizeRequests().requestMatchers(new AntPathRequestMatcher(this.adminServer.path("/assets/**"))).permitAll().requestMatchers(new AntPathRequestMatcher(this.adminServer.path(webEndpointProperties.getBasePath() + "/info"))).permitAll().requestMatchers(new AntPathRequestMatcher(adminServer.path(webEndpointProperties.getBasePath() + "/health"))).permitAll().requestMatchers(new AntPathRequestMatcher(this.adminServer.path("/login"))).permitAll().anyRequest().authenticated().and().formLogin().loginPage(this.adminServer.path("/login")).successHandler(successHandler).and().logout().logoutUrl(this.adminServer.path("/logout")).and().httpBasic().and().csrf().csrfTokenRepository(CookieCsrfTokenRepository.withHttpOnlyFalse()).ignoringRequestMatchers(new AntPathRequestMatcher(this.adminServer.path("/instances"), POST.toString()),new AntPathRequestMatcher(this.adminServer.path("/instances/*"), DELETE.toString()),new AntPathRequestMatcher(this.adminServer.path(webEndpointProperties.getBasePath() + "/**")));http.rememberMe((rememberMe) -> rememberMe.key(UUID.randomUUID().toString()).tokenValiditySeconds(1209600));}}
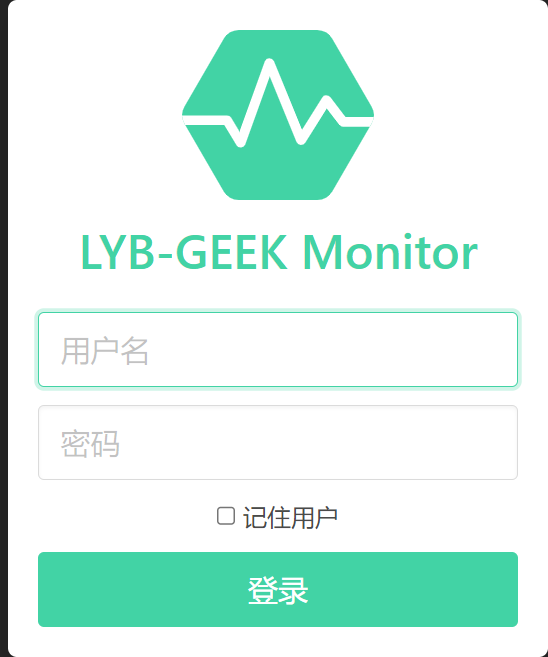
配置完访问一下页面

输入用户名和密码 admin/admin
如果对整合安全认证还有疑问,可以直接参考官网
https://docs.spring-boot-admin.com/current/security.html
4、页面定制
如果我们觉得登录的springboot admin logo个性化不强,我们可以简单定制一下
在application.yml做如下配置
spring:boot:admin:ui:title: ${UI_TITLE:LYB-GEEK Monitor}brand: <img src="assets/img/icon-spring-boot-admin.svg"><span>${spring.boot.admin.ui.title}</span>
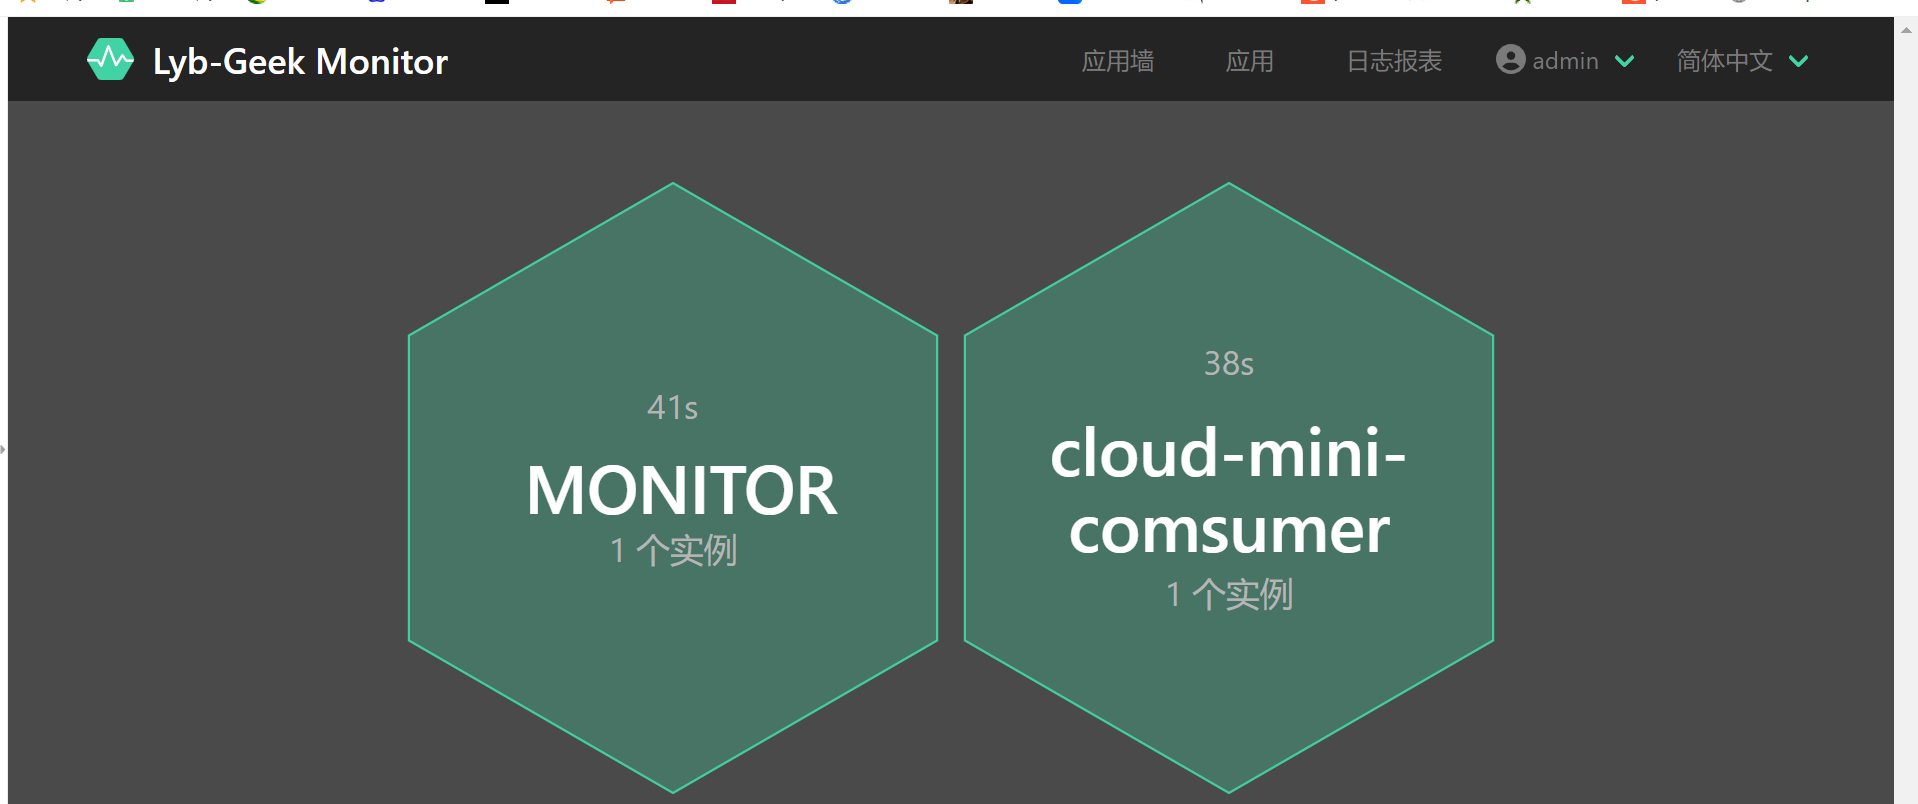
配置好访问一下

如果有些导航栏,我们觉得不需要,比如去掉关于我们
spring:boot:admin:ui:view-settings:- name: "about"enabled: false
注: view-settings这个配置需要是2.3.1以上版本才有的属性
配置好访问一下

发现关于我们已经去掉了,以上只是简单定制,更多定制可以参考如下链接
https://docs.spring-boot-admin.com/current/customize_ui.html
5、与注册中心集成
a、 在服务端项目中pom引入eureka-client GAV
<dependency><groupId>org.springframework.cloud</groupId><artifactId>spring-cloud-starter-netflix-eureka-client</artifactId></dependency>
b、 在application.yml文件引入eureka 客户端相关配置
eureka:instance:instance-id: ${spring.application.name}:${spring.cloud.client.ip-address}:${spring.application.instance_id:${server.port}}prefer-ip-address: ${PREFER_IP:true} #是否选择IP注册# ip-address: ${IP_ADDRESS:localhost} #指定IP地址注册lease-renewal-interval-in-seconds: 5 #续约更新时间间隔(默认30秒),使得eureka及时剔除无效服务lease-expiration-duration-in-seconds: 10 #续约到期时间(默认90秒)hostname: ${HOSTNAME:${spring.application.name}}client:service-url:defaultZone: ${EUREKA_CLIENT_SERVICEURL_DEFAULTZONE:http://localhost:8761/eureka/}#缩短延迟向服务端注册的时间、默认40sinitial-instance-info-replication-interval-seconds: 10#提高Eureka-Client端拉取Server注册信息的频率,默认30sregistry-fetch-interval-seconds: 5
访问eureka控制面板

服务端的配置暂且说到这边,接下来我们说下客户端集成
如何搭建spring-boot-admin-client
1、在客户端项目的POM配置相关GAV
<dependency><groupId>org.springframework.boot</groupId><artifactId>spring-boot-starter-web</artifactId></dependency><dependency><groupId>de.codecentric</groupId><artifactId>spring-boot-admin-starter-client</artifactId><version>${spring-boot-admin-client.version}</version></dependency><dependency><groupId>org.springframework.boot</groupId><artifactId>spring-boot-starter-actuator</artifactId></dependency>2、客户端暴露actuator相关端点
management:endpoints:web:exposure:include: "*" endpoint:health:show-details: ALWAYS
3、配置spring-boot-admin服务端地址
spring:boot:admin:client:url: http://localhost:8080
启动观察控制台,会发现有如下信息

原因是因为我们服务端配置了鉴权,因此我们客户端还需做如下配置
spring:boot:admin:client:url: http://localhost:8080username: adminpassword: admin配置好,观察控制台,发现没异常信息,此时我们访问服务端监控面板
如图说明客户端搭建成功
4、配置应用信息
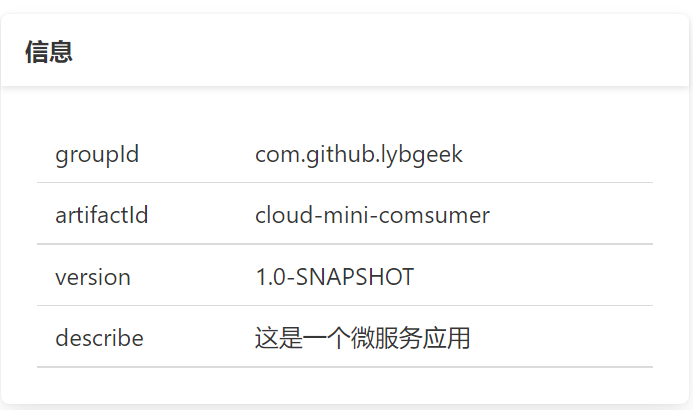
默认我们查看服务端监控面板–应用列表详情,会发现
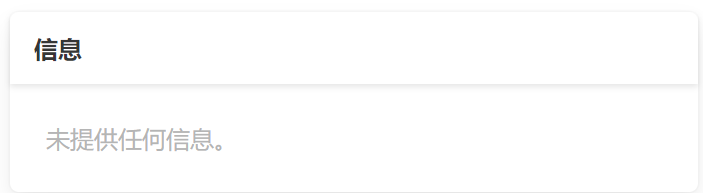
这个信息是空的,我们可以在yml配置形如下内容
info:groupId: @project.groupId@artifactId: @project.artifactId@version: @project.version@describe: 这是一个微服务应用
再次访问服务端监控面板
其实这个采的就是actuator/info端点。当然可以像官方介绍的示例,在项目的POM引入springboot插件,并指定goal为build-info
<build><plugins><plugin><groupId>org.springframework.boot</groupId><artifactId>spring-boot-maven-plugin</artifactId><executions><execution><goals><goal>build-info</goal></goals></execution></executions></plugin></plugins>
</build>
5、在服务端监控面板集成客户端日志
默认是没集成客户端日志,如图

通过官网

我们知道要配置logging.file.path或者logging.file.name
示例配置
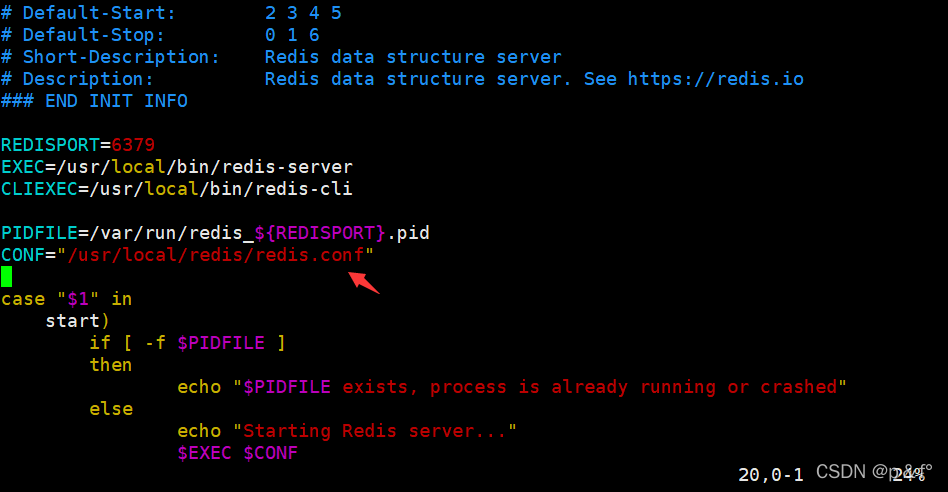
logging:file:path: ${LOG_FILE_PATH:/data/logs/cloud-mini-comsumer}
logback-spring相关配置如下
<?xml version="1.0" encoding="UTF-8"?>
<configuration scan="true" scanPeriod="60 seconds" debug="false"><include resource="org/springframework/boot/logging/logback/defaults.xml"/><property name="serviceName" value="cloud-mini-comsumer"/><property name="logHome" value="/data/logs/${serviceName}"/><contextName>${serviceName}</contextName><!--输出到控制台--><appender name="console" class="ch.qos.logback.core.ConsoleAppender"><encoder><pattern>${CONSOLE_LOG_PATTERN}</pattern></encoder></appender><!--按天生成日志--><appender name="logFile" class="ch.qos.logback.core.rolling.RollingFileAppender"><Prudent>true</Prudent><rollingPolicy class="ch.qos.logback.core.rolling.TimeBasedRollingPolicy"><FileNamePattern>${logHome}/%d{yyyy-MM-dd}/%d{yyyy-MM-dd}.log</FileNamePattern><maxHistory>30</maxHistory></rollingPolicy><layout class="ch.qos.logback.classic.PatternLayout"><Pattern>%d{yyyy-MM-dd HH:mm:ss} -%msg%n</Pattern></layout></appender><root level="info"><appender-ref ref="console"/><appender-ref ref="logFile"/></root></configuration>
我们配置后,出现日志文件按钮,点击后出现
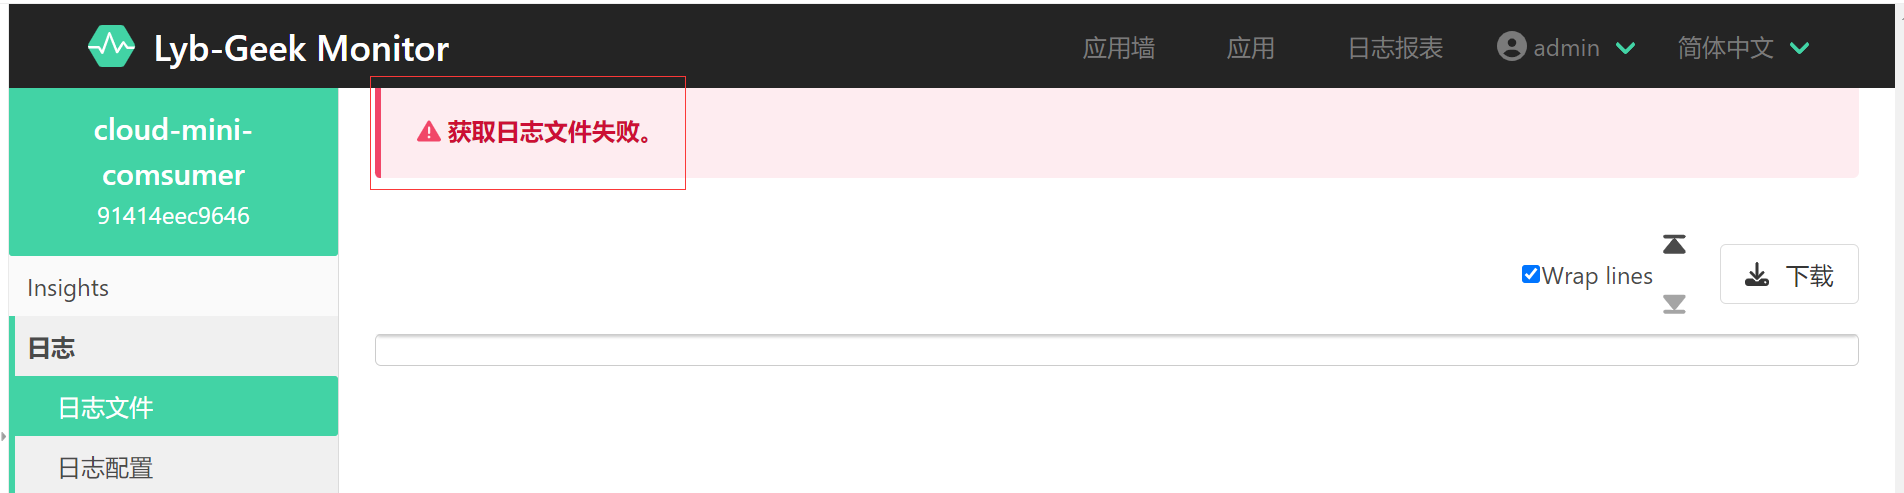
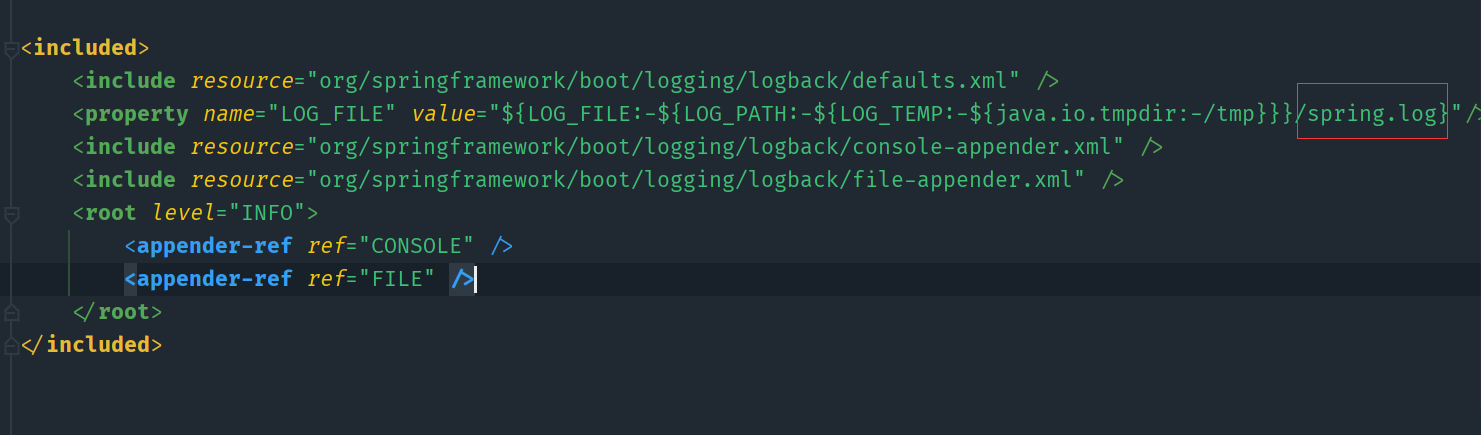
那就很诡异,明明按官网配置了,后面排查发现,其他服务可以出现日志,他们配置日志目录底下,都会生成一个spring.log日志,那意味着只要能生成spring.log即可。于是我们调整一下logback-spring,将
<include resource="org/springframework/boot/logging/logback/defaults.xml"/>
调整为
<include resource="org/springframework/boot/logging/logback/base.xml" />
然后重新访问服务端监控面板

发现有日志出来了。那为毛加了这个base.xml就有用,那是因为这个日志采集的端点是actuator/logfile。因为本文不是讲解源码,我就把相关核心源码,贴在下面,感兴趣的朋友可以根据下面提供的源码,进行debug调试
核心源码
@WebEndpoint(id = "logfile")
public class LogFileWebEndpoint {private static final Log logger = LogFactory.getLog(LogFileWebEndpoint.class);private File externalFile;private final LogFile logFile;public LogFileWebEndpoint(LogFile logFile, File externalFile) {this.externalFile = externalFile;this.logFile = logFile;}@ReadOperation(produces = "text/plain; charset=UTF-8")public Resource logFile() {Resource logFileResource = getLogFileResource();if (logFileResource == null || !logFileResource.isReadable()) {return null;}return logFileResource;}private Resource getLogFileResource() {if (this.externalFile != null) {return new FileSystemResource(this.externalFile);}if (this.logFile == null) {logger.debug("Missing 'logging.file.name' or 'logging.file.path' properties");return null;}return new FileSystemResource(this.logFile.toString());}}
public class LogFile {/*** The name of the Spring property that contains the name of the log file. Names can* be an exact location or relative to the current directory.* @deprecated since 2.2.0 in favor of {@link #FILE_NAME_PROPERTY}*/@Deprecatedpublic static final String FILE_PROPERTY = "logging.file";/*** The name of the Spring property that contains the directory where log files are* written.* @deprecated since 2.2.0 in favor of {@link #FILE_PATH_PROPERTY}*/@Deprecatedpublic static final String PATH_PROPERTY = "logging.path";/*** The name of the Spring property that contains the name of the log file. Names can* be an exact location or relative to the current directory.* @since 2.2.0*/public static final String FILE_NAME_PROPERTY = "logging.file.name";/*** The name of the Spring property that contains the directory where log files are* written.* @since 2.2.0*/public static final String FILE_PATH_PROPERTY = "logging.file.path";private final String file;private final String path;/*** Create a new {@link LogFile} instance.* @param file a reference to the file to write*/LogFile(String file) {this(file, null);}/*** Create a new {@link LogFile} instance.* @param file a reference to the file to write* @param path a reference to the logging path to use if {@code file} is not specified*/LogFile(String file, String path) {Assert.isTrue(StringUtils.hasLength(file) || StringUtils.hasLength(path), "File or Path must not be empty");this.file = file;this.path = path;}/*** Apply log file details to {@code LOG_PATH} and {@code LOG_FILE} system properties.*/public void applyToSystemProperties() {applyTo(System.getProperties());}/*** Apply log file details to {@code LOG_PATH} and {@code LOG_FILE} map entries.* @param properties the properties to apply to*/public void applyTo(Properties properties) {put(properties, LoggingSystemProperties.LOG_PATH, this.path);put(properties, LoggingSystemProperties.LOG_FILE, toString());}private void put(Properties properties, String key, String value) {if (StringUtils.hasLength(value)) {properties.put(key, value);}}@Overridepublic String toString() {if (StringUtils.hasLength(this.file)) {return this.file;}return new File(this.path, "spring.log").getPath();}加了那个logback-base可以的原因是,点开base.xml
6、客户端与注册中心集成
说实话spring-boot-admin我看过的,基本上都是用在微服务场景比较多,因此后面的内容,我以集成注册中心为核心来讲解示例,通过url配置服务端监控地址就不再论述。
a、 在客户端项目的pom引入eureka-client GAV
<dependency><groupId>org.springframework.cloud</groupId><artifactId>spring-cloud-starter-netflix-eureka-client</artifactId></dependency>
b、 配置eureka 客户端相关信息
eureka:instance:instance-id: ${spring.application.name}:${spring.cloud.client.ip-address}:${spring.application.instance_id:${random.uuid}}prefer-ip-address: ${PREFER_IP:false} #是否选择IP注册# ip-address: ${IP_ADDRESS:localhost} #指定IP地址注册lease-renewal-interval-in-seconds: 5 #续约更新时间间隔(默认30秒),使得eureka及时剔除无效服务lease-expiration-duration-in-seconds: 10 #续约到期时间(默认90秒)hostname: ${HOSTNAME:${spring.application.name}}metadata-map:ipAddress: ${spring.cloud.client.ip-address}management:address: ${spring.cloud.client.ip-address}client:service-url:defaultZone: ${EUREKA_CLIENT_SERVICEURL_DEFAULTZONE:http://localhost:8761/eureka/}#缩短延迟向服务端注册的时间、默认40sinitial-instance-info-replication-interval-seconds: 10#提高Eureka-Client端拉取Server注册信息的频率,默认30sregistry-fetch-interval-seconds: 5
注: 客户端和服务端集成的eureka地址必须得同一个
客户端和服务端同时配置好注册中心后,我们访问一下服务端监控面板

和用url配置服务端地址的效果一样,到这边大体就差不多了。但是实际使用,没那么简单。我们列举几种场景
场景一:客户端的默认端点不是actuator
因为公司有时候会有等保要求,正常是不能直接暴露actuator端点,所以我们客户端,可能会将端点路径改个名字,比如改成如下
management:endpoints:web:base-path: ${MONINTOR_BASE_PATH:/lyb-geek}exposure:include: "*"
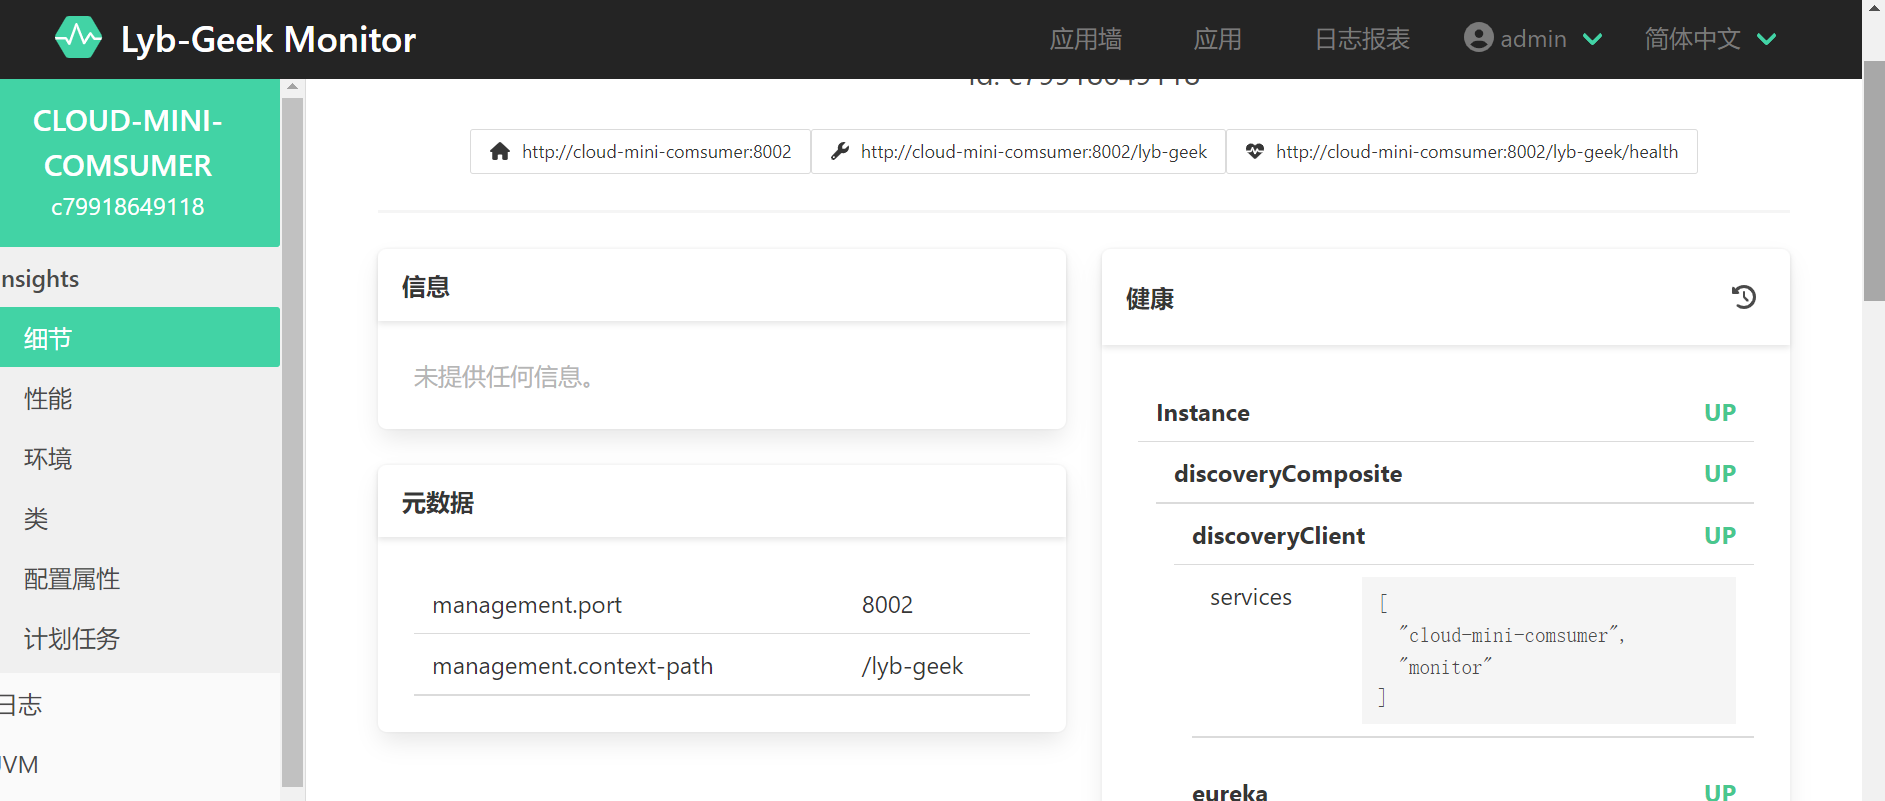
此时通过服务端监控面板访问

会发现爆红了,点击爆红的面板进去
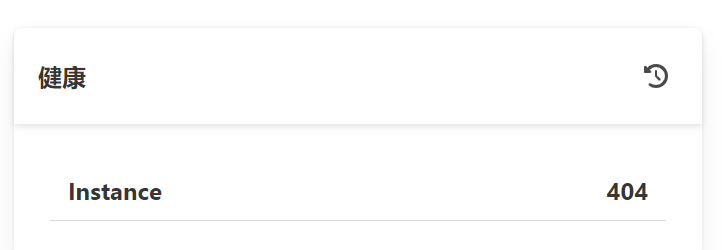
健康检测404,我们可以通过配置注册中心的元数据,示例如下
eureka:instance:metadata-map:management:context-path: ${management.endpoints.web.base-path:/actuator}
此时我们再访问服务端监控面板
发现可以正常访问了。
场景二:客户端的actuator需要认证才能访问
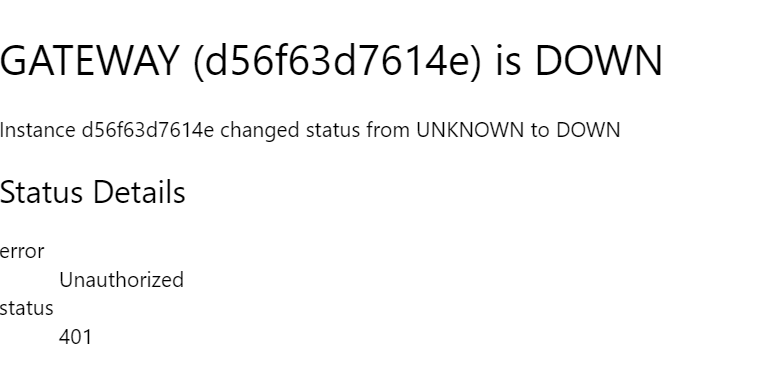
当我们没有通过认证,直接访问服务端监控面板时

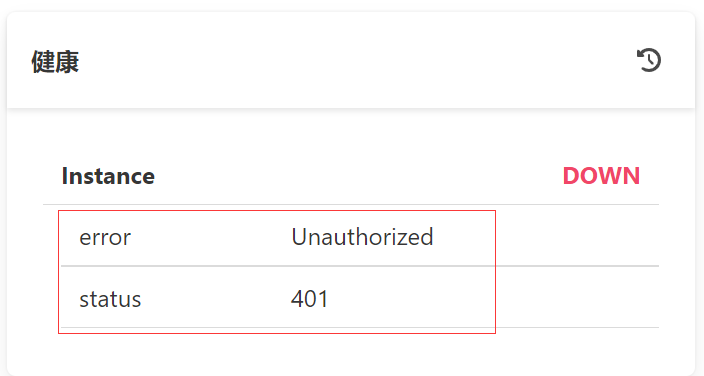
会出现401,未授权访问,此时我们在注册中心配置形如下内容
eureka:instance:metadata-map:user.name: ${spring.security.user.name}user.password: ${spring.security.user.password}
访问服务端监控面板
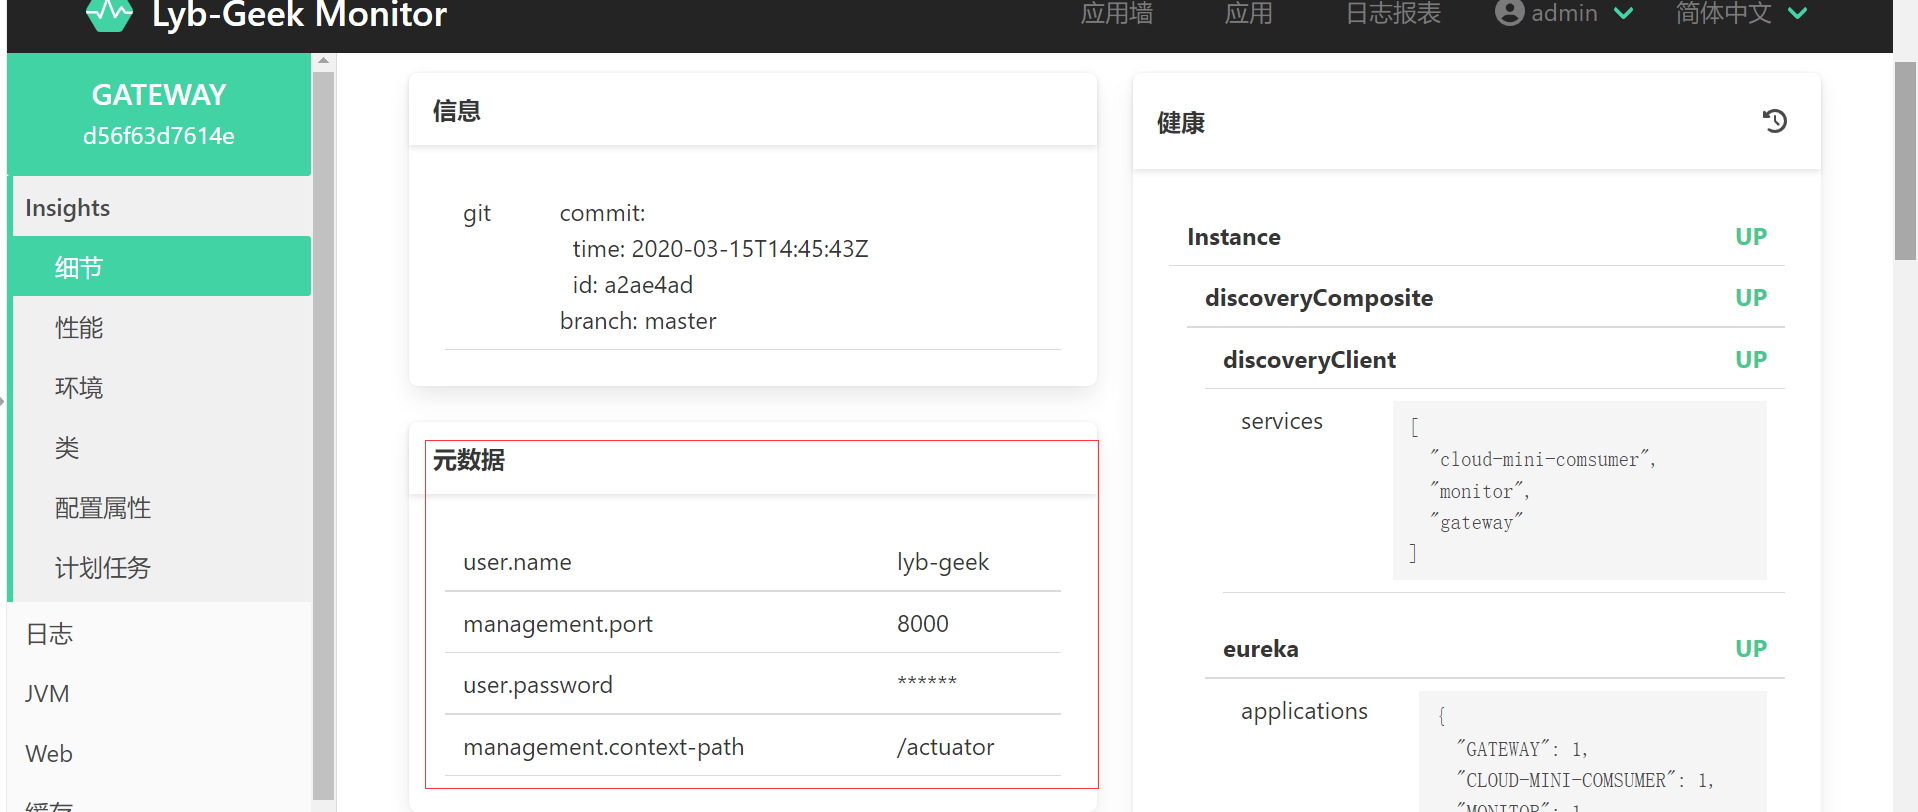
已经可以正常访问
场景三:客户端通过hostName注册到注册中心,服务端监控面板只显示一个实例
这个场景出现在容器化部署,因为此时hostName和port都一样,因此这个客户端就被当成是同一个。此时通过如下配置
eureka:instance:metadata-map:management:address: ${spring.cloud.client.ip-address}
通过配置management.address指定ip
注: 想知道spring-boot-admin可以支持哪些注册中心元数据,可以查看官网
https://docs.spring-boot-admin.com/current/server.html

也看可以查看源码
de.codecentric.boot.admin.server.cloud.discovery.DefaultServiceInstanceConverter
如何为spring-boot-admin集成告警
以集成邮件告警为例,在服务端的POM引入邮件发送的GAV
<dependency><groupId>org.springframework.boot</groupId><artifactId>spring-boot-starter-mail</artifactId></dependency>
在服务端的application.yml配置邮件发送配置
spring:mail:host: ${MAIL_HOST:邮箱服务器地址}port:username: ${MAIL_USERNAME:邮箱服务器用户名}password: ${MAIL_PWD:邮箱服务器密码}protocol: ${MAIL_PROTOCOL:smtp}default-encoding: UTF-8properties:mail.smtp.auth: truemail.smtp.starttls.enable: truemail.smtp.starttls.required: truemail.smtp.socketFactory.port: ${MAIL_SMTP_SOCKETFACTORY_PORT:465}mail.smtp.socketFactory.class: javax.net.ssl.SSLSocketFactorymail.smtp.socketFactory.fallback: falsemail.smtp.ssl.protocols: ${MAIL_SMTP_SSL_PROTOCOLS:TLSv1}
配置邮件通知接收人和发送人
spring:boot:admin:notify:mail:to: ${NOTIFY_MAIL_TO:邮箱接收人,多个用,隔开}from: ${NOTIFY_MAIL_FROM:邮箱发送人}
当客户端出现异常时,会收到形如下告警
更多告警的玩法可以参考官网
https://docs.spring-boot-admin.com/current/server-notifications.html
总结
spring-boot-admin其实核心就做了一件事,就是把Spring Boot Actuators 可视化。本文就不提供demo了,因为官网文档写得很详细,大部分内容都可以从官网找到https://docs.spring-boot-admin.com/current/。除了那个日志稍微有点坑
相关文章:
聊聊如何玩转spring-boot-admin
前言 1、何为spring-boot-admin? Spring Boot Admin 是一个监控工具,旨在以良好且易于访问的方式可视化 Spring Boot Actuators 提供的信息 快速开始 如何搭建spring-boot-admin-server 1、在服务端项目的POM引入相应的GAV <dependency><grou…...
rocky(centos) 安装redis,并设置开机自启动
一、下载并安装 1、官网下载Redis 并安装 Download | RedisRedisYou can download the last Redis source files here. For additional options, see the Redis downloads section below.Stable (7.2)Redis 7.2 …https://redis.io/download/ 2、上传下载好的redis压缩包到 /…...

Flask狼书笔记 | 06_电子邮件
文章目录 6 电子邮件6.1 使用Flask-Mail发送6.2 使用事务邮件服务SendGrid6.3 电子邮件进阶6.4 小结 6 电子邮件 Web中,我们常在用户注册账户时发送确认邮件,或是推送信息。邮件必要的字段包含发信方(sender),收信方(to),邮件主题…...

ChatGPT追祖寻宗:GPT-1论文要点解读
论文地址:《Improving Language Understanding by Generative Pre-Training》 最近一直忙着打比赛,好久没更文了。这两天突然想再回顾一下GPT-1和GPT-2的论文, 于是花时间又整理了一下,也作为一个记录~话不多说,让我们…...

回归拟合 | 灰狼算法优化核极限学习机(GWO-KELM)MATLAB实现
这周有粉丝私信想让我出一期GWO-KELM的文章,因此乘着今天休息就更新了(希望不算晚) 作者在前面的文章中介绍了ELM和KELM的原理及其实现,ELM具有训练速度快、复杂度低、克服了传统梯度算法的局部极小、过拟合和学习率的选择不合适等优点,而KEL…...
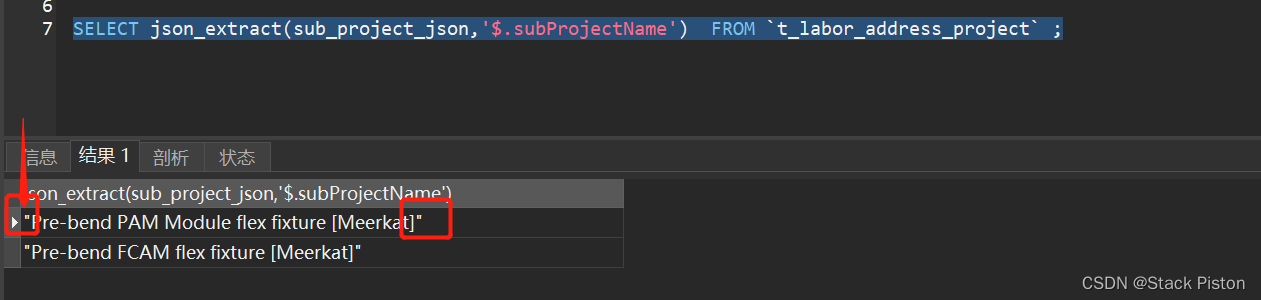
Mysql JSON
select json_extract(c2, $.a) select c2->"$.a" // json_extract的语法糖 (取出的值会保留"双引号" so不适合实战) 注:mysql若是引擎Mariadb则不支持json操作符->>语法糖 select c2->…...
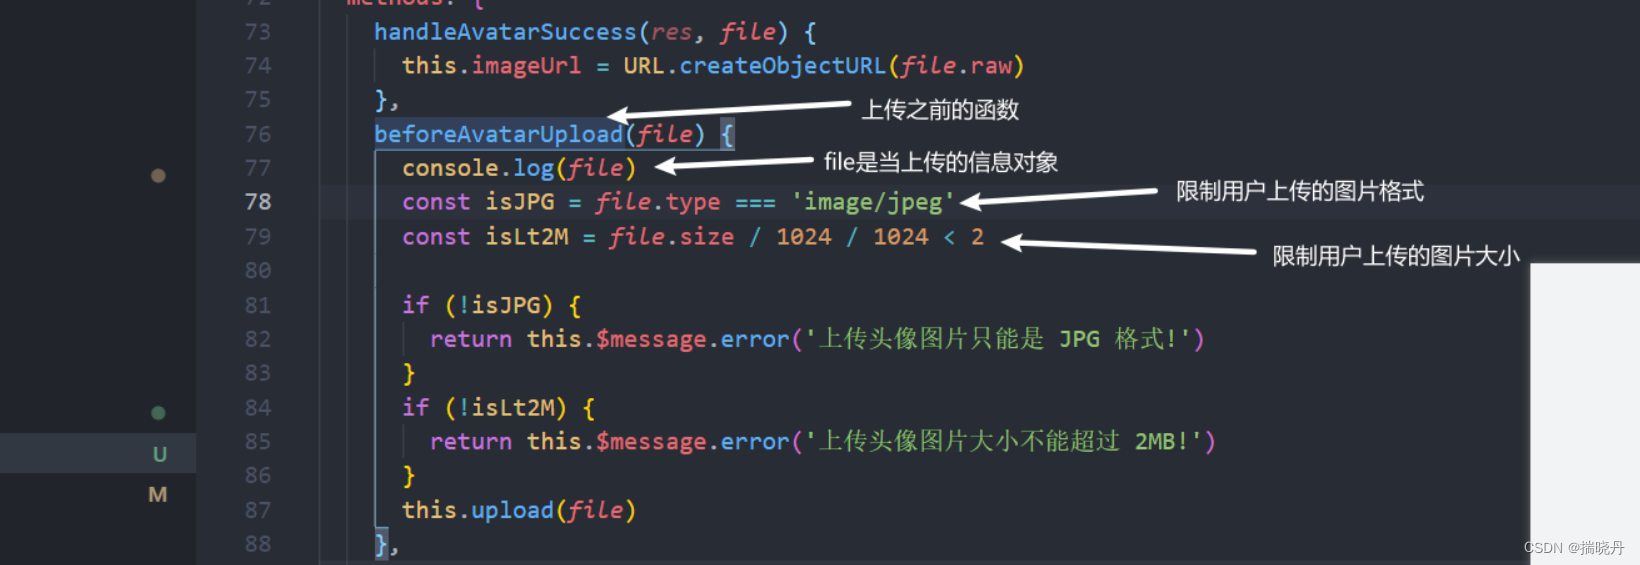
使用Vue + axios实现图片上传,轻松又简单
目录 一、Vue框架介绍 二、Axios 介绍 三、实现图片上传 四、Java接收前端图片 一、Vue框架介绍 Vue是一款流行的用于构建用户界面的开源JavaScript框架。它被设计用于简化Web应用程序的开发,特别是单页面应用程序。 Vue具有轻量级、灵活和易学的特点…...

C# 中什么是重写(子类改写父类方法)
方法重写是指在继承关系中,子类重新实现父类或基类的某个方法。这种方法允许子类根据需要修改或扩展父类或基类的方法功能。在面向对象编程中,方法重写是一种多态的表现形式,它使得子类可以根据不同的需求和场景提供不同的方法实现。 方法重…...

【Leetcode-面试经典150题-day22】
目录 97. 交错字符串 97. 交错字符串 题意: 给定三个字符串 s1、s2、s3,请你帮忙验证 s3 是否是由 s1 和 s2 交错 组成的。 两个字符串 s 和 t 交错 的定义与过程如下,其中每个字符串都会被分割成若干 非空 子字符串: s s1 s2 …...
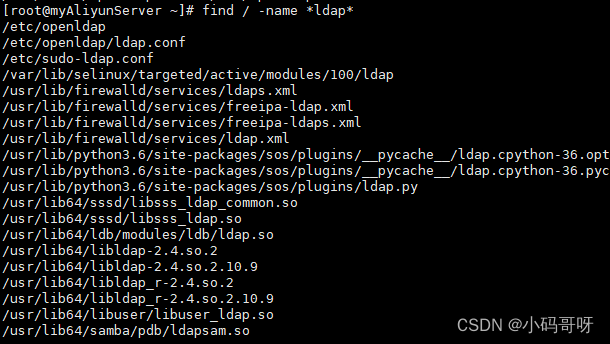
LDAP服务器如何重启
1、find / -name ldap 该命令只会从根路径下查看ldap文件夹 find / -name ldap2、该命令会从根路径/查看所有包含ldap路径的文件夹,会查询出所有,相当于全局查询 find / -name *ldap*2、启动OpenLADP 找到LDAP安装目录后,执行以下命令 #直…...

AP51656 LED车灯电源驱动IC 兼容替代PT4115 PT4205 PWM和线性调光
产品描述 AP51656是一款连续电感电流导通模式的降压恒流源 用于驱动一颗或多颗串联LED 输入电压范围从 5V 到 60V,输出电流 可达 1.5A 。根据不同的输入电压和 外部器件, 可以驱动高达数十瓦的 LED。 内置功率开关,采用高端电流采样设置 …...

浅析安防视频监控平台EasyCVR视频融合平台接入大量设备后是如何维持负载均衡的
安防视频监控平台EasyCVR视频融合平台可拓展性强、视频能力灵活、部署轻快,可支持的主流标准协议有国标GB28181、RTSP/Onvif、RTMP等,以及支持厂家私有协议与SDK接入,包括海康Ehome、海大宇等设备的SDK等。视频汇聚融合管理平台EasyCVR既具备…...

SIEM 中不同类型日志监控及分析
安全信息和事件管理(SIEM)解决方案通过监控来自网络的不同类型的数据来确保组织网络的健康安全状况,日志数据记录设备上发生的每个活动以及整个网络中的应用程序,若要评估网络的安全状况,SIEM 解决方案必须收集和分析不…...
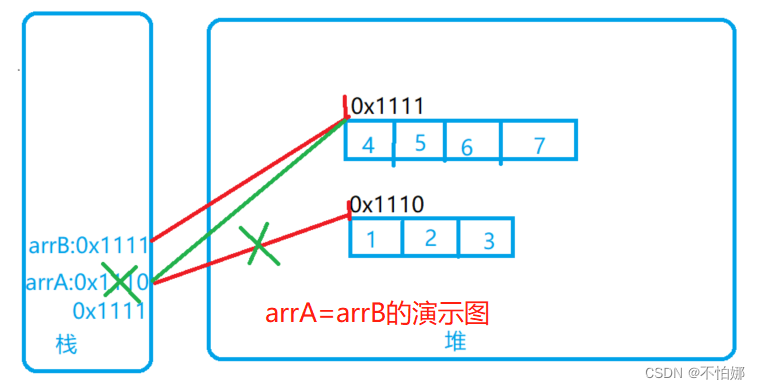
【java基础复习】java中的数组在内存中是如何存储的?
基本数据类型与内存存储数组类型与内存存储为什么数组需要两块空间?感谢 💖 基本数据类型与内存存储 首先,让我们回顾一下基本数据类型的内存存储方式。对于一个基本类型变量,例如int类型的变量a,内存中只有一块内存空…...

MySQL数据库 MHA高可用
MySQL MHA 什么是 MHA MHA(MasterHigh Availability)是一套优秀的MySQL高可用环境下故障切换和主从复制的软件。 MHA 的出现就是解决MySQL 单点的问题。 MySQL故障切换过程中,MHA能做到0-30秒内自动完成故障切换操作。 MHA能在故障切换的…...

leetcode669. 修剪二叉搜索树(java)
修剪二叉搜索树 题目描述递归代码演示: 题目描述 难度 - 中等 LC - 669. 修剪二叉搜索树 给你二叉搜索树的根节点 root ,同时给定最小边界low 和最大边界 high。通过修剪二叉搜索树,使得所有节点的值在[low, high]中。修剪树 不应该 改变保留…...
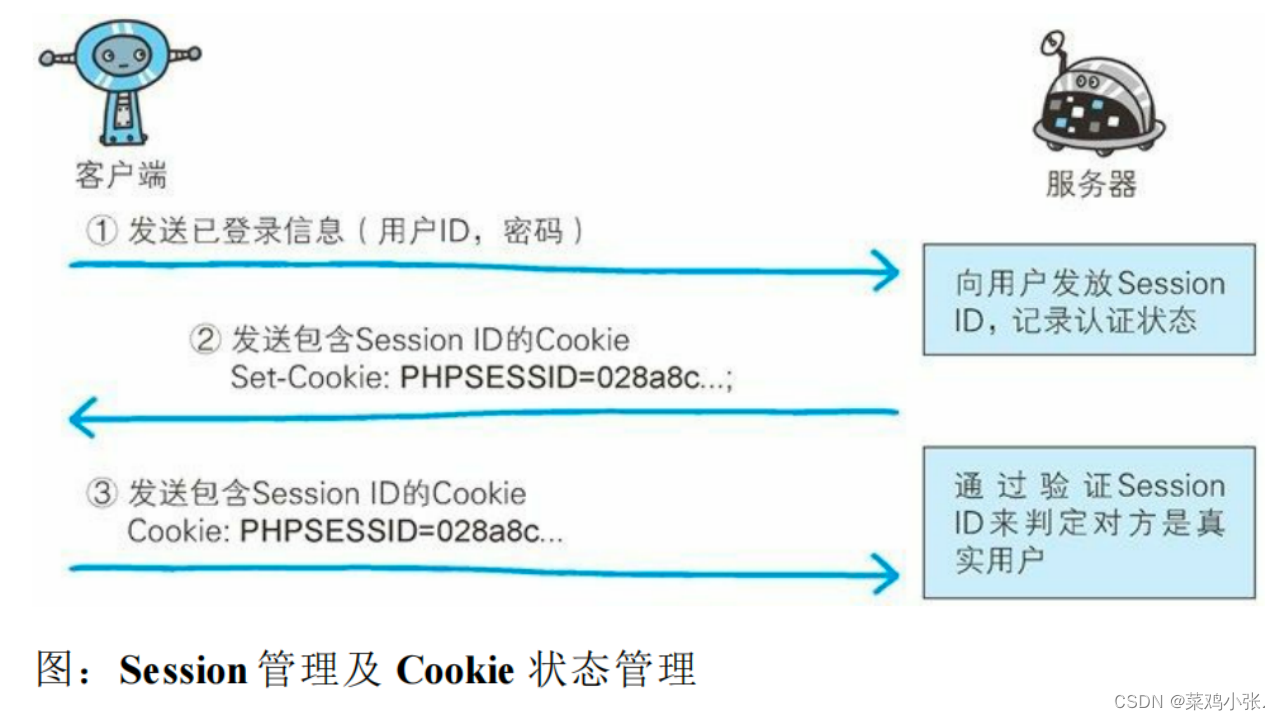
计算机网络的故事——确认访问用户身份的认证
确认访问用户身份的认证 HTTP使用的认证方式:BASIC认证(基本认证)、DIGEST(摘要认证)、SSL客户端认证、FormBase认证(基于表单认证)。 基于表单的认证:涉及到session管理以及cookie…...

C#禁用或启用任务管理器
参考文档https://zhuanlan.zhihu.com/p/95156063 借助上述参考文档里的C#操作注册表类,禁用或启用任务管理器 using System; using System.Collections.Generic; using System.Linq; using System.Text; namespace HideTaskMgr { class Program { …...
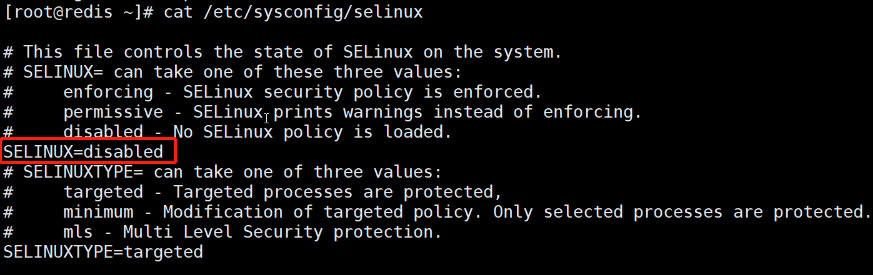
【Redis】NoSQL之Redis的配置及优化
关系数据库与非关系数据库 关系型数据库 关系型数据库是一个结构化的数据库,创建在关系模型(二维表格模型)基础上,一般面向于记录。 SQL 语句(标准数据查询语言)就是一种基于关系型数据库的语言&a…...

【数据库】如何利用Python中的petl将PostgreSQL中所有表的外键删除,迁移数据,再重建外键
一、简介 在数据库管理中,外键是一种重要的约束,用于确保数据的一致性和完整性。然而,在某些情况下,我们可能需要删除或修改外键。本文将介绍如何使用Python中的petl库将PostgreSQL中所有表的外键删除,迁移数据&#…...

如何快速解密网易云NCM文件:终极免费转换工具指南
如何快速解密网易云NCM文件:终极免费转换工具指南 【免费下载链接】ncmdumpGUI C#版本网易云音乐ncm文件格式转换,Windows图形界面版本 项目地址: https://gitcode.com/gh_mirrors/nc/ncmdumpGUI 你是否在网易云音乐下载了喜欢的歌曲,…...

NS-USBLoader:Switch游戏管理终极指南 - 如何实现一键安装与系统引导?
NS-USBLoader:Switch游戏管理终极指南 - 如何实现一键安装与系统引导? 【免费下载链接】ns-usbloader Awoo Installer and GoldLeaf uploader of the NSPs (and other files), RCM payload injector, application for split/merge files. 项目地址: ht…...

避坑指南:Unity游戏在Linux上运行报错?OpenCV依赖和文件权限问题排查实录
Unity游戏Linux部署避坑指南:从权限修复到OpenCV依赖全解析 当你在Ubuntu上双击那个刚导出的Unity游戏.x86_64文件时,屏幕却弹出一行冰冷的错误信息——这种从云端跌入谷底的体验,每个跨平台开发者都经历过。不同于Windows的一键运行…...

JetBrains IDE试用期重置终极指南:3种简单方法实现30天无限续杯
JetBrains IDE试用期重置终极指南:3种简单方法实现30天无限续杯 【免费下载链接】ide-eval-resetter 项目地址: https://gitcode.com/gh_mirrors/id/ide-eval-resetter 你是否在使用IntelliJ IDEA、PyCharm、WebStorm等JetBrains IDE时遇到过试用期突然结束…...

2026生鲜店收银软件特点功能对比
每天傍晚高峰期,生鲜店门口排起的长队总是让店主心头一紧。顾客手里拿着刚挑好的蔬菜水果,眼神里透着急切,而收银台前的店员却还在手忙脚乱地查找商品代码、手动输入重量,甚至因为系统卡顿导致支付失败。这种场景不仅流失了潜在客…...

基于Groq LPU与React技术栈构建极速AI聊天应用实战
1. 项目概述:当极速推理遇上聊天应用最近在折腾AI应用开发的朋友,估计都绕不开一个词:推理速度。模型能力再强,如果生成一句话要等上十几秒,用户体验就无从谈起。正是在这种背景下,我注意到了unclecode/gro…...
)
中文长文本语音崩溃?ElevenLabs API超时/截断/静音突变?20年语音架构师紧急发布的6行容错重试+分段重对齐代码(已验证10万+字符稳定输出)
更多请点击: https://intelliparadigm.com 第一章:中文长文本语音崩溃的根因诊断与现象复现 中文长文本语音合成(TTS)在处理超长段落(如 >3000 字)时频繁出现进程中断、内存溢出或静音输出,…...

Simulink模型到汽车控制器:基于模型开发的完整路径
Simulink模型到汽车控制器:基于模型开发的完整路径 一辆智能电动汽车的"灵魂",通常写在300万行以上的嵌入式代码里。但如果每一行代码都要工程师手写,开发周期会从18个月变成……永远完成不了。 一个真实的问题 2023年,…...
Adafruit Feather RP2040 SCORPIO:专为大规模NeoPixel灯光控制而生的开发板
1. 项目概述:为什么你需要一块专为大规模灯光控制而生的开发板?如果你曾经尝试过用一块普通的微控制器驱动超过几百个NeoPixel(或WS2812)LED,你很可能已经撞上了性能的天花板。CPU被时序生成任务完全占用,动…...

微服务架构实战:从DDD设计到K8s部署的完整指南
1. 项目概述与核心价值最近几年,微服务架构的热度一直居高不下,从互联网大厂到初创团队,几乎人人都在谈微服务。但说实话,真正能把微服务玩转、落地,并且能稳定支撑业务发展的团队,其实并不多。很多项目要么…...