springboot整合actuator、admin对应用程序进行监控
Spring Boot Actuator 是 Spring Boot 的一个子项目,可以对 Spring Boot 应用程序进行监控和管理,并对外提供了大量的端点,可以选择使用 HTTP 端点或 JMX 来管理和监控应用程序。
这篇文章主要介绍我们的应用程序中怎么加入actuator来对应用进行监控。
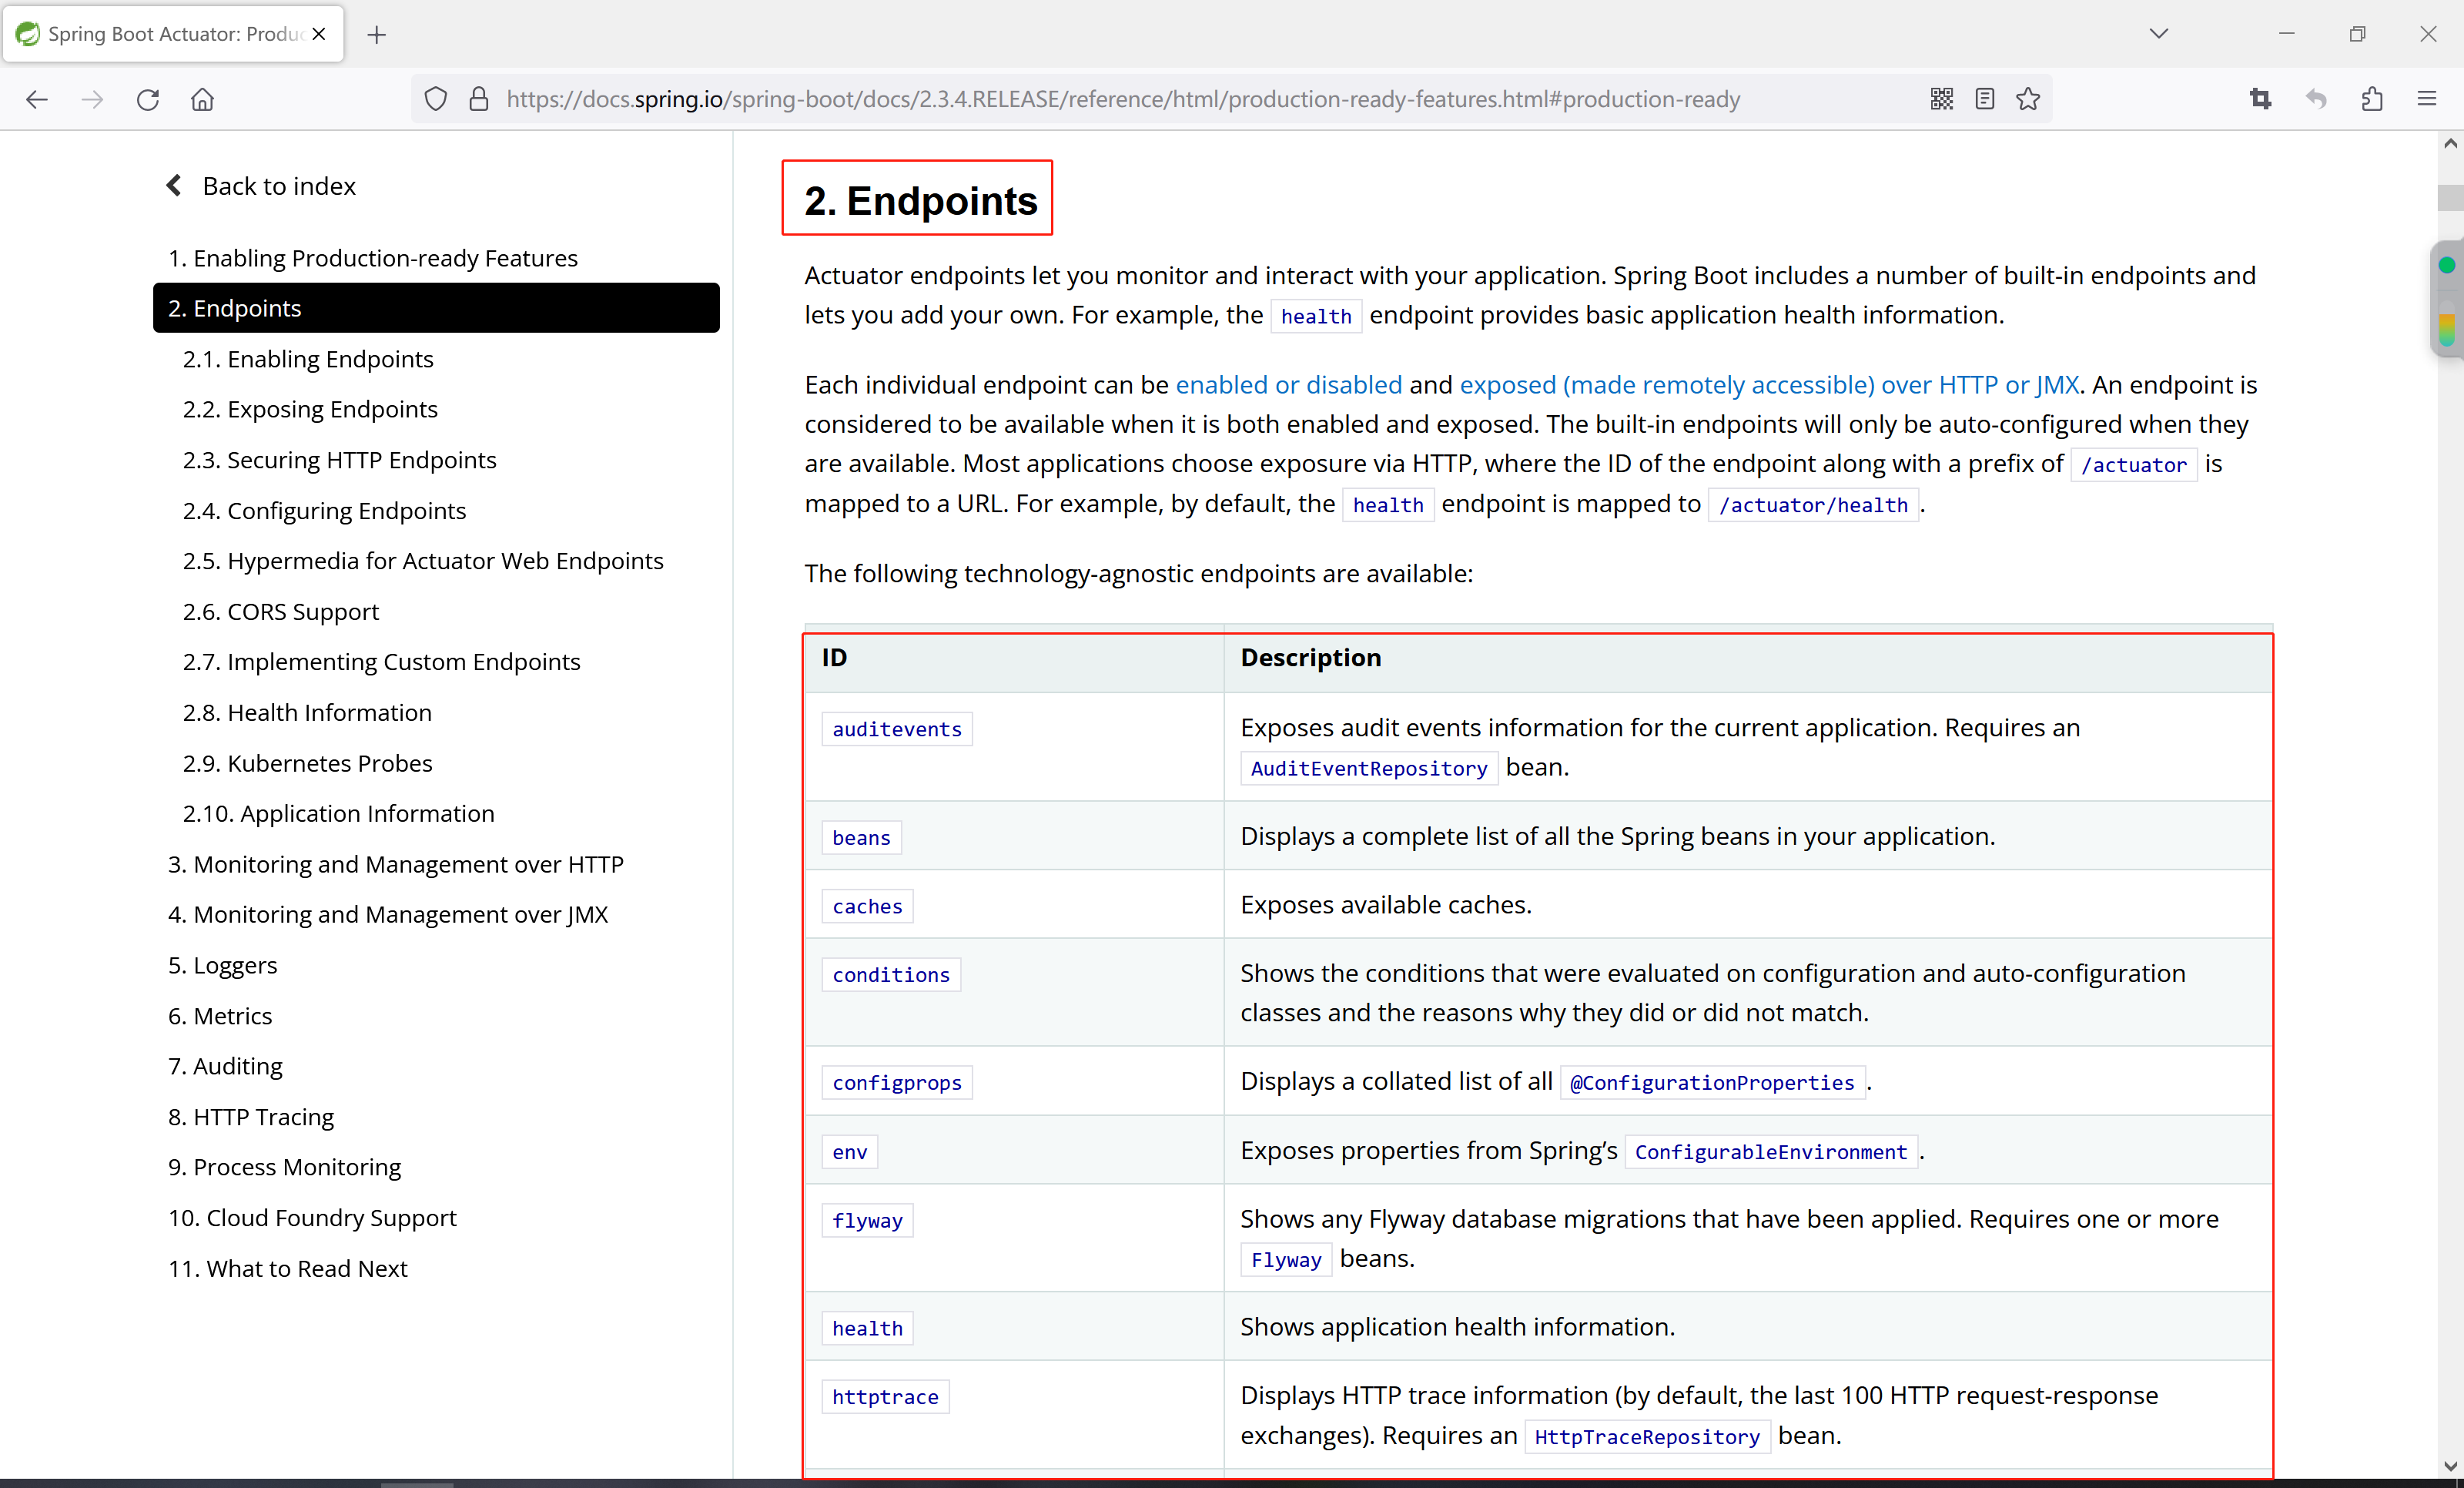
首先,需要通过Spring官网访问我们应用程序使用的Springboot版本对应的actutor版本的文档,本篇文章使用Springboot版本为2.3.4.RELEASE,通过以下链接查看文档。
spring boot actuator 2.3.4.RELEASE![]() https://docs.spring.io/spring-boot/docs/2.3.4.RELEASE/reference/html/production-ready-features.html#production-ready
https://docs.spring.io/spring-boot/docs/2.3.4.RELEASE/reference/html/production-ready-features.html#production-ready
目录
1、创建Springboot项目
2、整合Spring Boot Actuator
3、暴露所有端点
4、整合Spring Boot Admin
搭建Spring Boot Admin Server
创建Spring Boot Admin Client
5、整合Spring Security
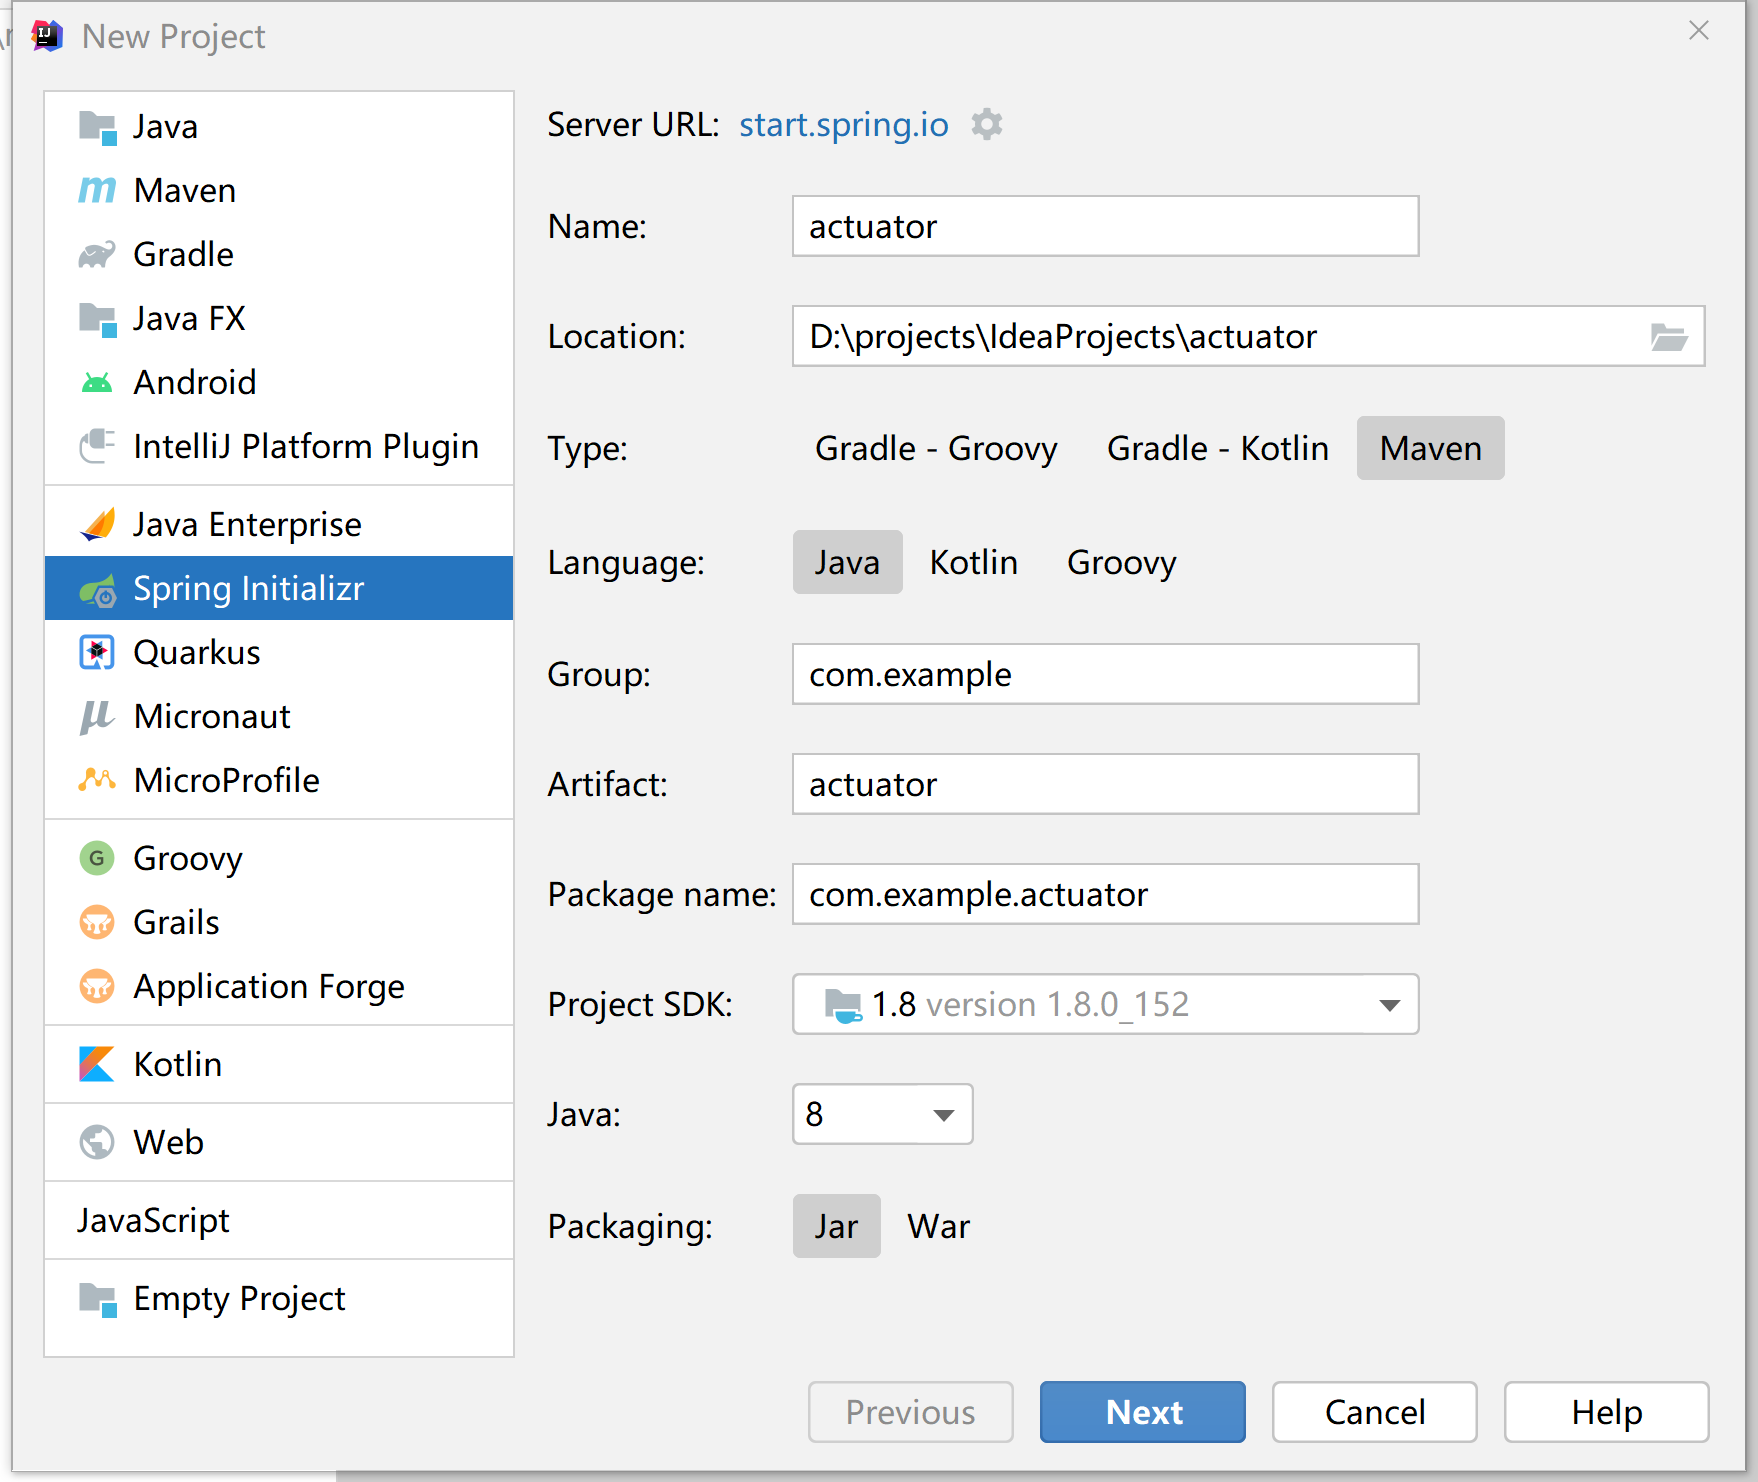
1、创建Springboot项目
通过IntelliJ IDEA创建一个名为actuator项目
然后修改pom.xml文件,将spring boot的版本修改为2.3.4.RELEASE。
<parent><groupId>org.springframework.boot</groupId><artifactId>spring-boot-starter-parent</artifactId><version>2.3.4.RELEASE</version><relativePath />
</parent>
2、整合Spring Boot Actuator
根据Spring官网的文档,在我们的springboot应用中加入actuator非常简单,只需要一个maven依赖:
<dependency><groupId>org.springframework.boot</groupId><artifactId>spring-boot-starter-actuator</artifactId>
</dependency>
完整的项目依赖如下
<?xml version="1.0" encoding="UTF-8"?>
<project xmlns="http://maven.apache.org/POM/4.0.0" xmlns:xsi="http://www.w3.org/2001/XMLSchema-instance"xsi:schemaLocation="http://maven.apache.org/POM/4.0.0 https://maven.apache.org/xsd/maven-4.0.0.xsd"><modelVersion>4.0.0</modelVersion><parent><groupId>org.springframework.boot</groupId><artifactId>spring-boot-starter-parent</artifactId><version>2.3.4.RELEASE</version><relativePath/></parent><groupId>com.example</groupId><artifactId>actuator</artifactId><version>0.0.1-SNAPSHOT</version><properties><java.version>1.8</java.version></properties><dependencies><dependency><groupId>org.springframework.boot</groupId><artifactId>spring-boot-starter-web</artifactId></dependency><dependency><groupId>org.springframework.boot</groupId><artifactId>spring-boot-starter-test</artifactId><scope>test</scope></dependency><dependency><groupId>org.springframework.boot</groupId><artifactId>spring-boot-starter-actuator</artifactId></dependency></dependencies><build><plugins><plugin><groupId>org.springframework.boot</groupId><artifactId>spring-boot-maven-plugin</artifactId></plugin></plugins></build>
</project>
最后设置一下启动端口,修改application.yml配置文件,添加端口配置:
server:port: 8077然后访问localhost:端口号/actuator,可以看到返回了很多个http链接地址,这些就是actuator默认提供给我们获取应用信息的端点。
http://localhost:8077/actuator/info用于获取应用的信息,这个端点默认返回空数据,这个是需要我们自己配置的。
http://localhost:8077/actuator/health用于获取服务的健康状态,如果服务依赖的所有中间件都是正常状态,这里会返回一个UP,表示在线状态。

health端点默认只返回了一个状态,可以通过以下配置,让端点返回详细的信息。
management:endpoint:health:show-details: always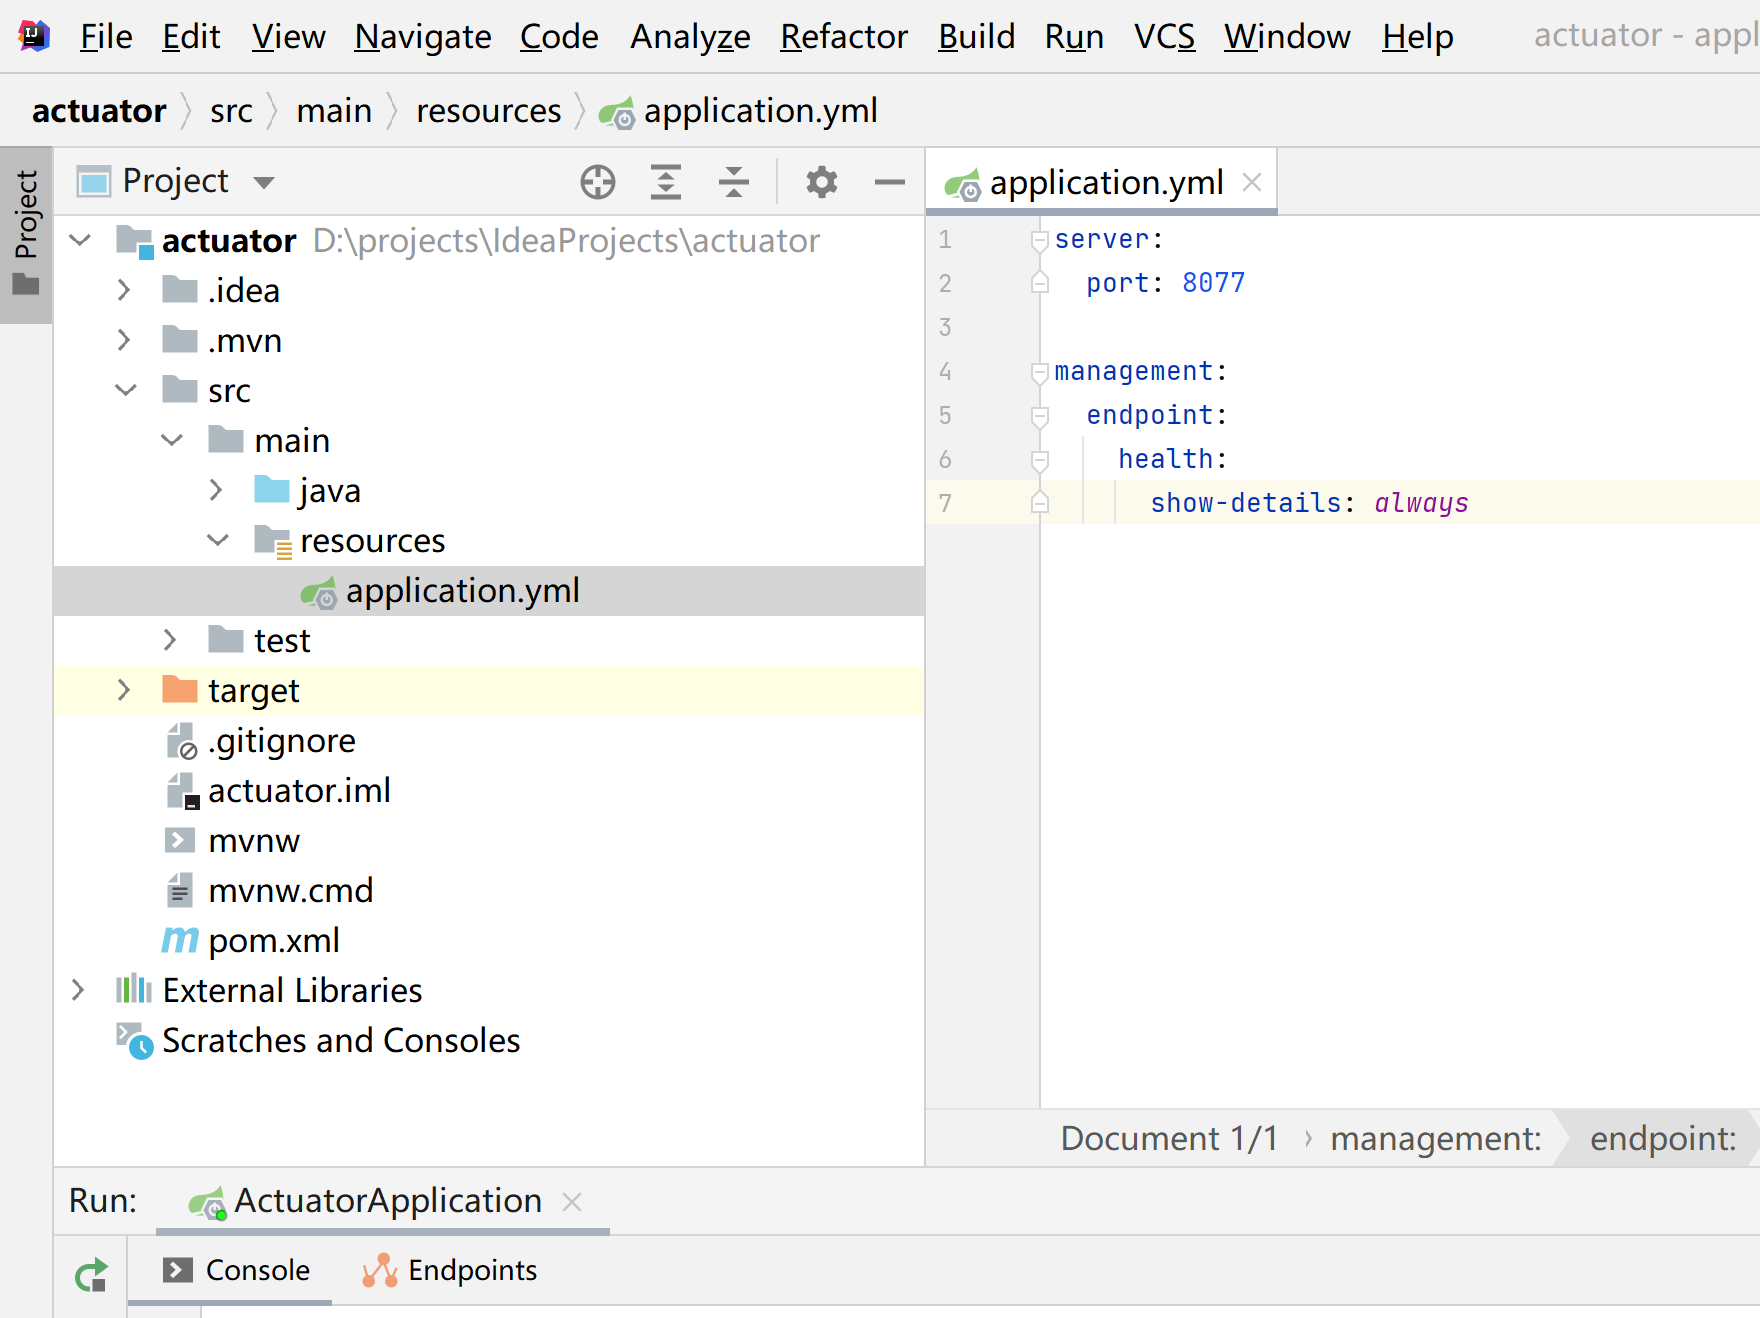
然后重启项目,再次访问health端点:

3、暴露所有端点
上一步中,我们访问actuator只返回了两个端点:health和info,其实actuator提供的端点远不止这些,官网提供的jmx环境和web环境下各个端点的开放情况。
| ID | JMX | Web |
|---|---|---|
|
| Yes | No |
|
| Yes | No |
|
| Yes | No |
|
| Yes | No |
|
| Yes | No |
|
| Yes | No |
|
| Yes | No |
|
| Yes | Yes |
|
| N/A | No |
|
| Yes | No |
|
| Yes | Yes |
|
| Yes | No |
|
| N/A | No |
|
| N/A | No |
|
| Yes | No |
|
| Yes | No |
|
| Yes | No |
|
| Yes | No |
|
| N/A | No |
|
| Yes | No |
|
| Yes | No |
|
| Yes | No |
|
| Yes | No |
那么,其他端点怎么暴露出来呢,让我们访问http://localhost:8077/actuator就能得到所有可用端点。
步骤:修改application.yml,添加暴露所有端点的配置
server:port: 8077management:endpoint:health:show-details: always # 显示健康状态详情endpoints:web:exposure:include: "*" # 暴露所有端点base-path: /actuator这里的端点endpoint可以理解为Controller接口,通过端点可以获取应用的详细信息,包括实例健康状态、配置信息、映射信息、缓存信息等等。
关于具体每个端点的功能,就不一一介绍了,可以通过页面进行查看。
这是Springboot Actuator 2.3.4.RELEASE版本返回的所有端点。
{"_links": {"self": {"href": "http://localhost:8091/actuator","templated": false},"beans": {"href": "http://localhost:8091/actuator/beans","templated": false},"caches-cache": {"href": "http://localhost:8091/actuator/caches/{cache}","templated": true},"caches": {"href": "http://localhost:8091/actuator/caches","templated": false},"health-path": {"href": "http://localhost:8091/actuator/health/{*path}","templated": true},"health": {"href": "http://localhost:8091/actuator/health","templated": false},"info": {"href": "http://localhost:8091/actuator/info","templated": false},"conditions": {"href": "http://localhost:8091/actuator/conditions","templated": false},"configprops": {"href": "http://localhost:8091/actuator/configprops","templated": false},"env": {"href": "http://localhost:8091/actuator/env","templated": false},"env-toMatch": {"href": "http://localhost:8091/actuator/env/{toMatch}","templated": true},"loggers": {"href": "http://localhost:8091/actuator/loggers","templated": false},"loggers-name": {"href": "http://localhost:8091/actuator/loggers/{name}","templated": true},"heapdump": {"href": "http://localhost:8091/actuator/heapdump","templated": false},"threaddump": {"href": "http://localhost:8091/actuator/threaddump","templated": false},"metrics-requiredMetricName": {"href": "http://localhost:8091/actuator/metrics/{requiredMetricName}","templated": true},"metrics": {"href": "http://localhost:8091/actuator/metrics","templated": false},"scheduledtasks": {"href": "http://localhost:8091/actuator/scheduledtasks","templated": false},"mappings": {"href": "http://localhost:8091/actuator/mappings","templated": false}}
}
4、整合Spring Boot Admin
那么,actuator提供给我们那么多端点,不可能每次都通过这些端点来获取应用信息吧,太麻烦了,有没有一种更好的方式可以方便又快捷的查看应用程序的状态信息呢。
这个时候就需要引入Spring Boot Admin了,github可能访问缓慢或者无法访问,这里提供了gitee的仓库地址。
Spring Boot Admin![]() https://gitee.com/pujiaolin/spring-boot-admin介绍:什么是Spring Boot Admin?
https://gitee.com/pujiaolin/spring-boot-admin介绍:什么是Spring Boot Admin?
Spring Boot Admin 是一款用于管理和监控 Spring Boot 应用程序的简单应用程序。应用程序可在我们的 Spring Boot 管理客户端(通过 http)注册,也可使用 Spring Cloud(如 Eureka)发现。用户界面只是 Spring Boot Actuator 端点之上的一个 Angular.js 应用程序。
搭建Spring Boot Admin Server
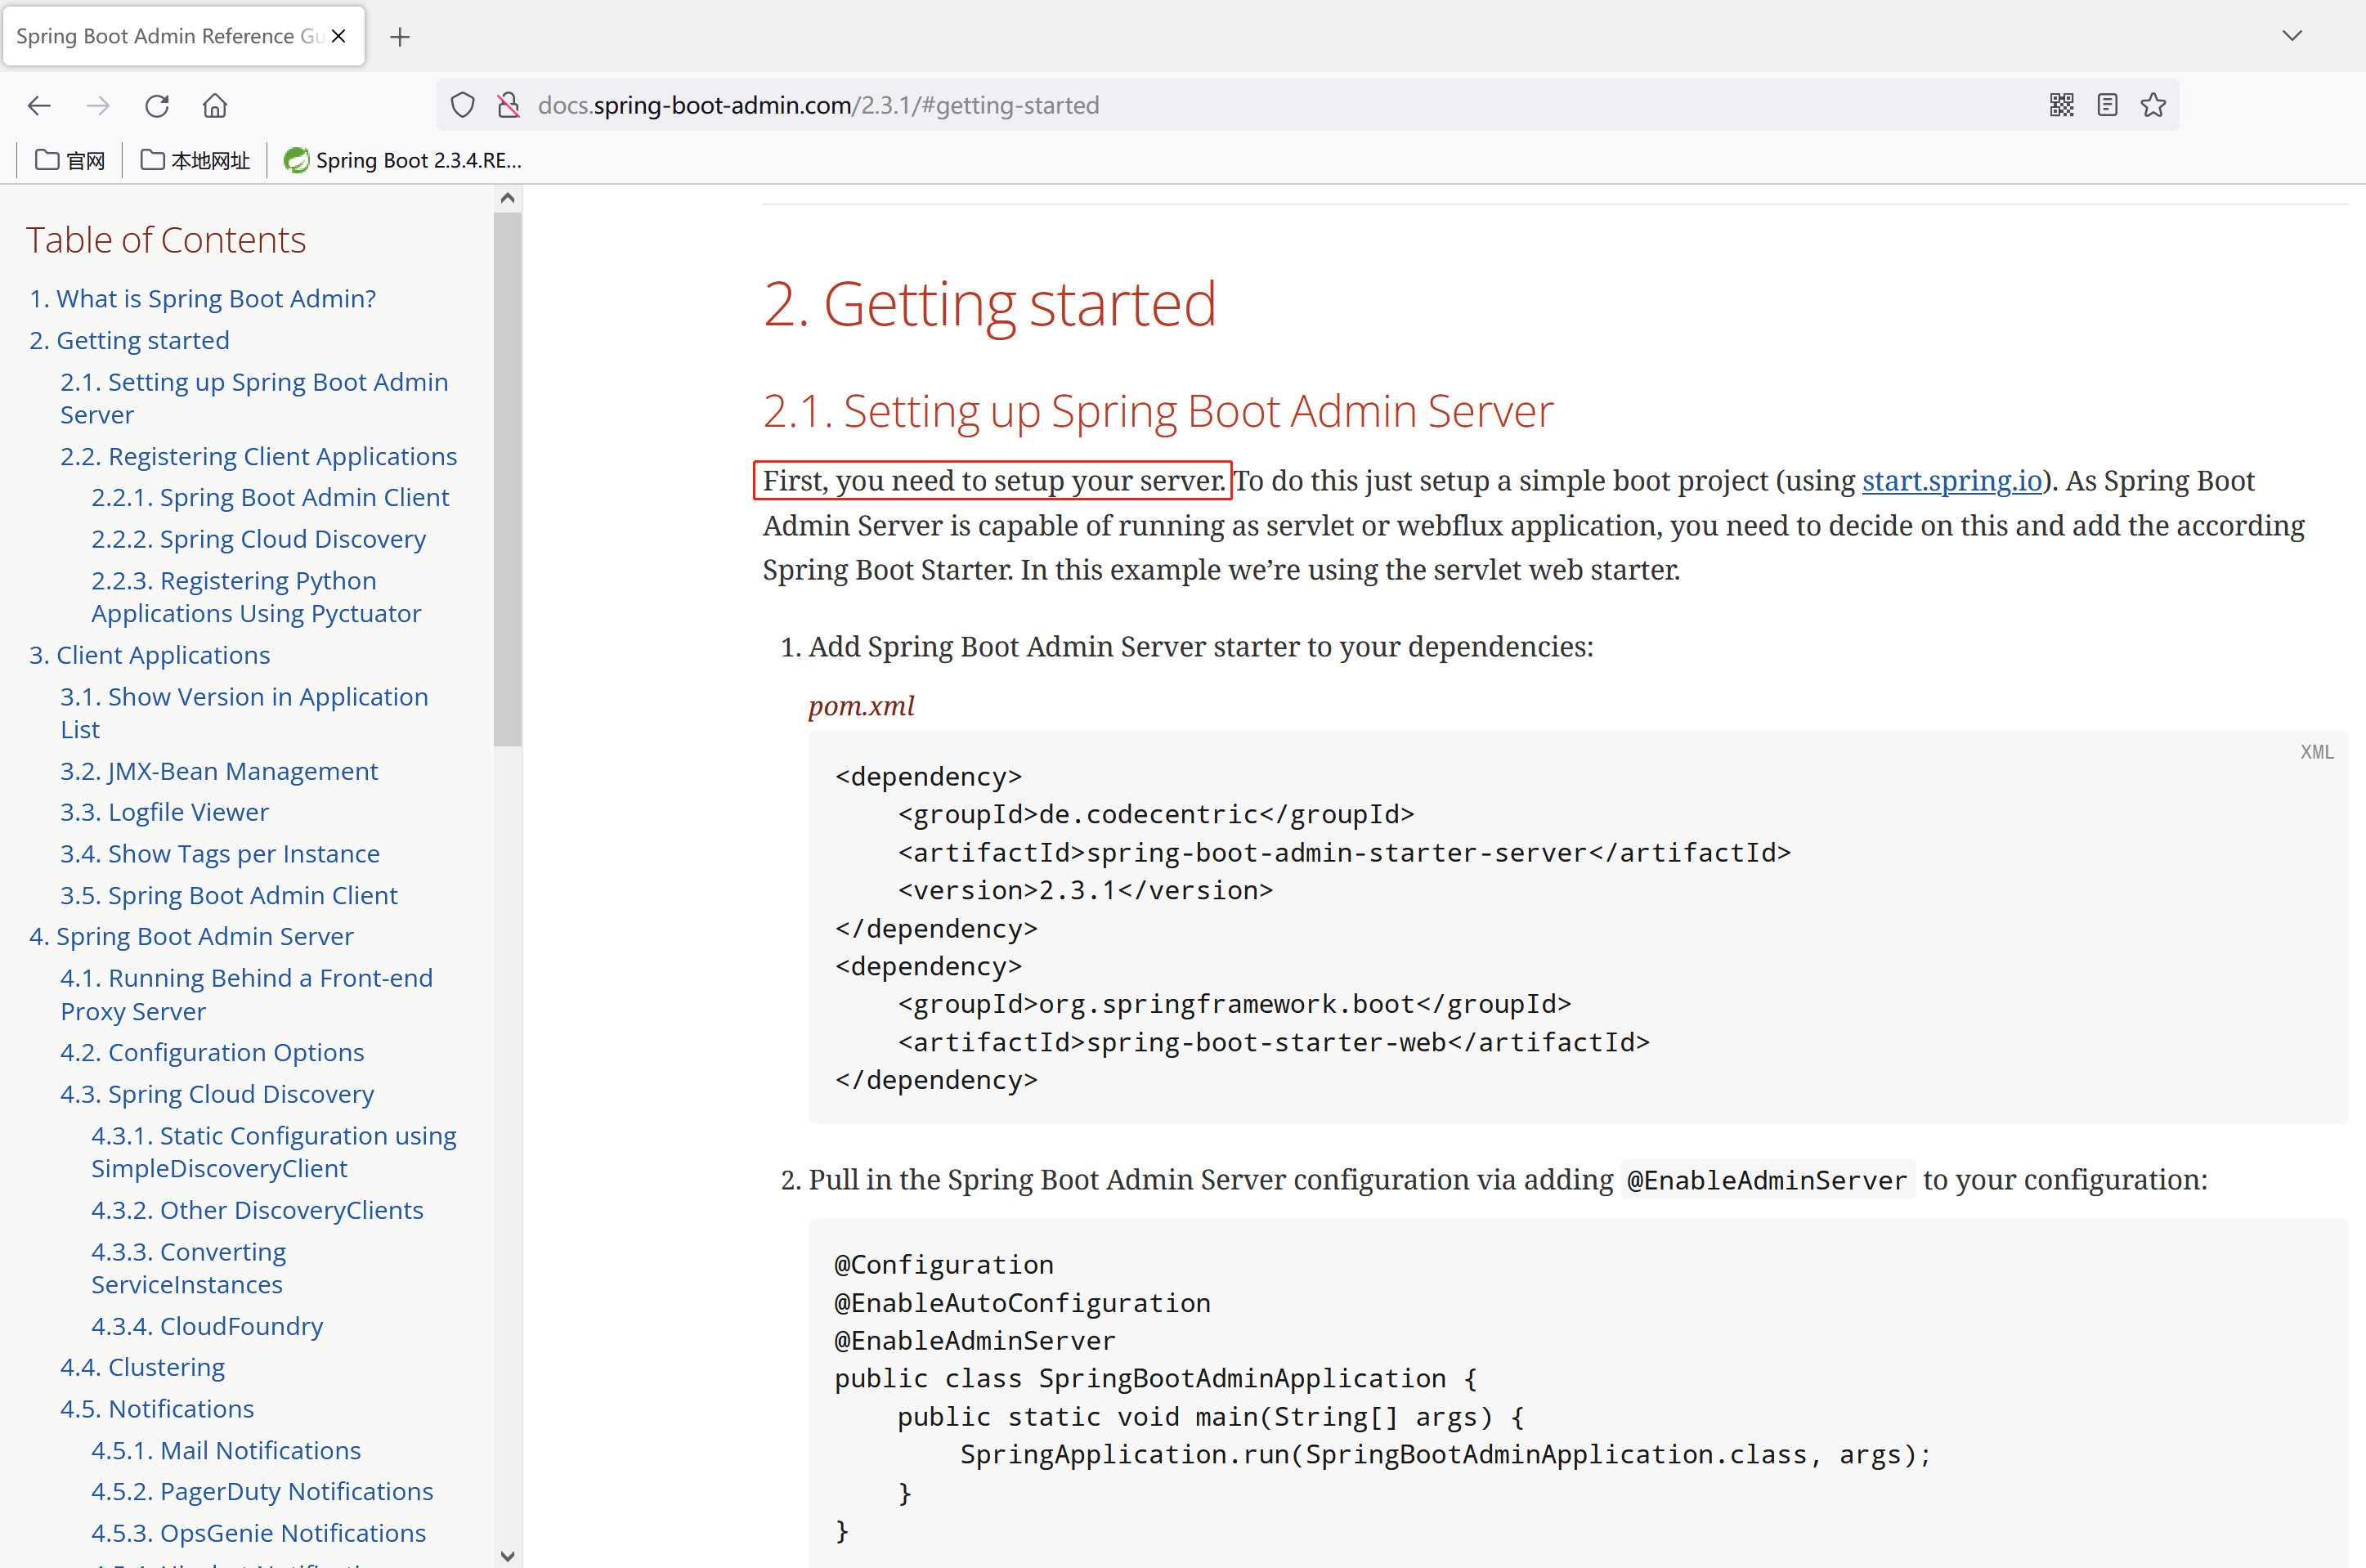
接下来开始整合Spring Boot Admin,根据官网介绍,要先设置admin的服务器
通过idea创建一个Springboot项目,取名为admin-server
然后修改pom.xml,添加相关依赖
<?xml version="1.0" encoding="UTF-8"?>
<project xmlns="http://maven.apache.org/POM/4.0.0" xmlns:xsi="http://www.w3.org/2001/XMLSchema-instance"xsi:schemaLocation="http://maven.apache.org/POM/4.0.0 https://maven.apache.org/xsd/maven-4.0.0.xsd"><modelVersion>4.0.0</modelVersion><parent><groupId>org.springframework.boot</groupId><artifactId>spring-boot-starter-parent</artifactId><version>2.3.4.RELEASE</version><relativePath /></parent><groupId>com.example</groupId><artifactId>admin-server</artifactId><version>0.0.1-SNAPSHOT</version><properties><java.version>1.8</java.version></properties><dependencies><dependency><groupId>org.springframework.boot</groupId><artifactId>spring-boot-starter-web</artifactId></dependency><dependency><groupId>org.springframework.boot</groupId><artifactId>spring-boot-starter-test</artifactId><scope>test</scope></dependency><dependency><groupId>de.codecentric</groupId><artifactId>spring-boot-admin-starter-server</artifactId><version>2.3.1</version></dependency></dependencies><build><plugins><plugin><groupId>org.springframework.boot</groupId><artifactId>spring-boot-maven-plugin</artifactId></plugin></plugins></build>
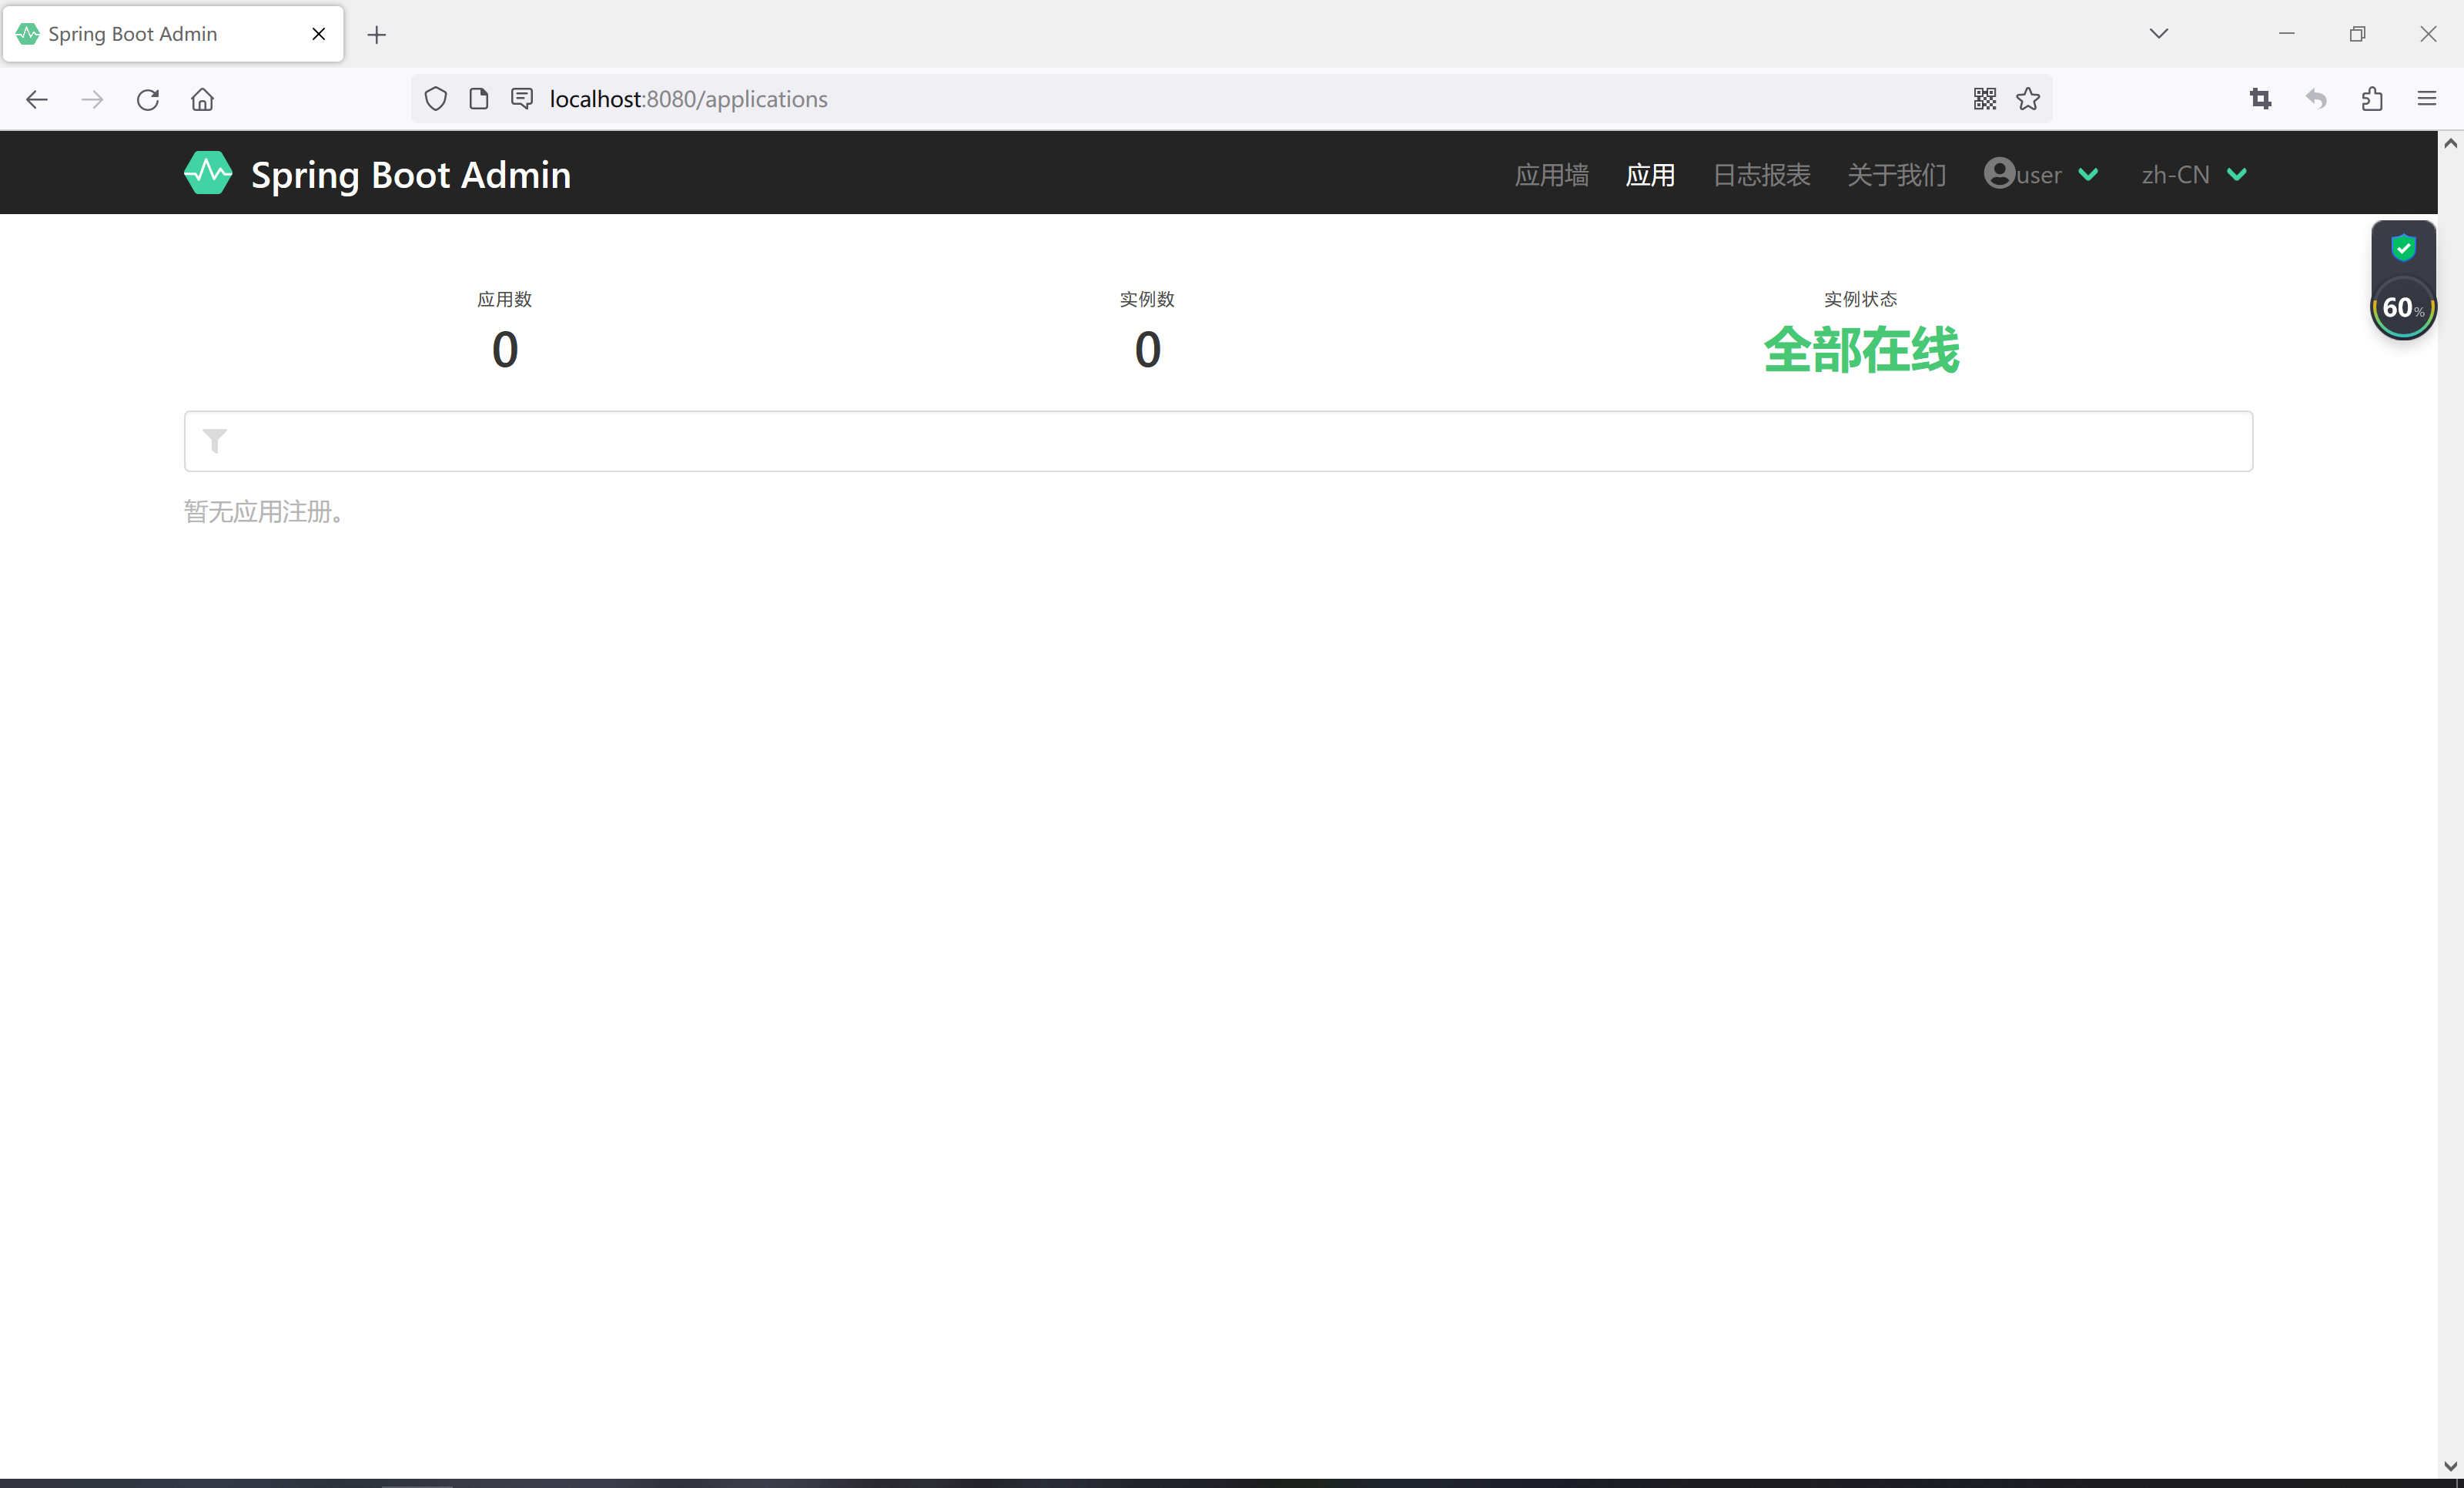
</project>并在启动类上添加@EnableAdminServer注解
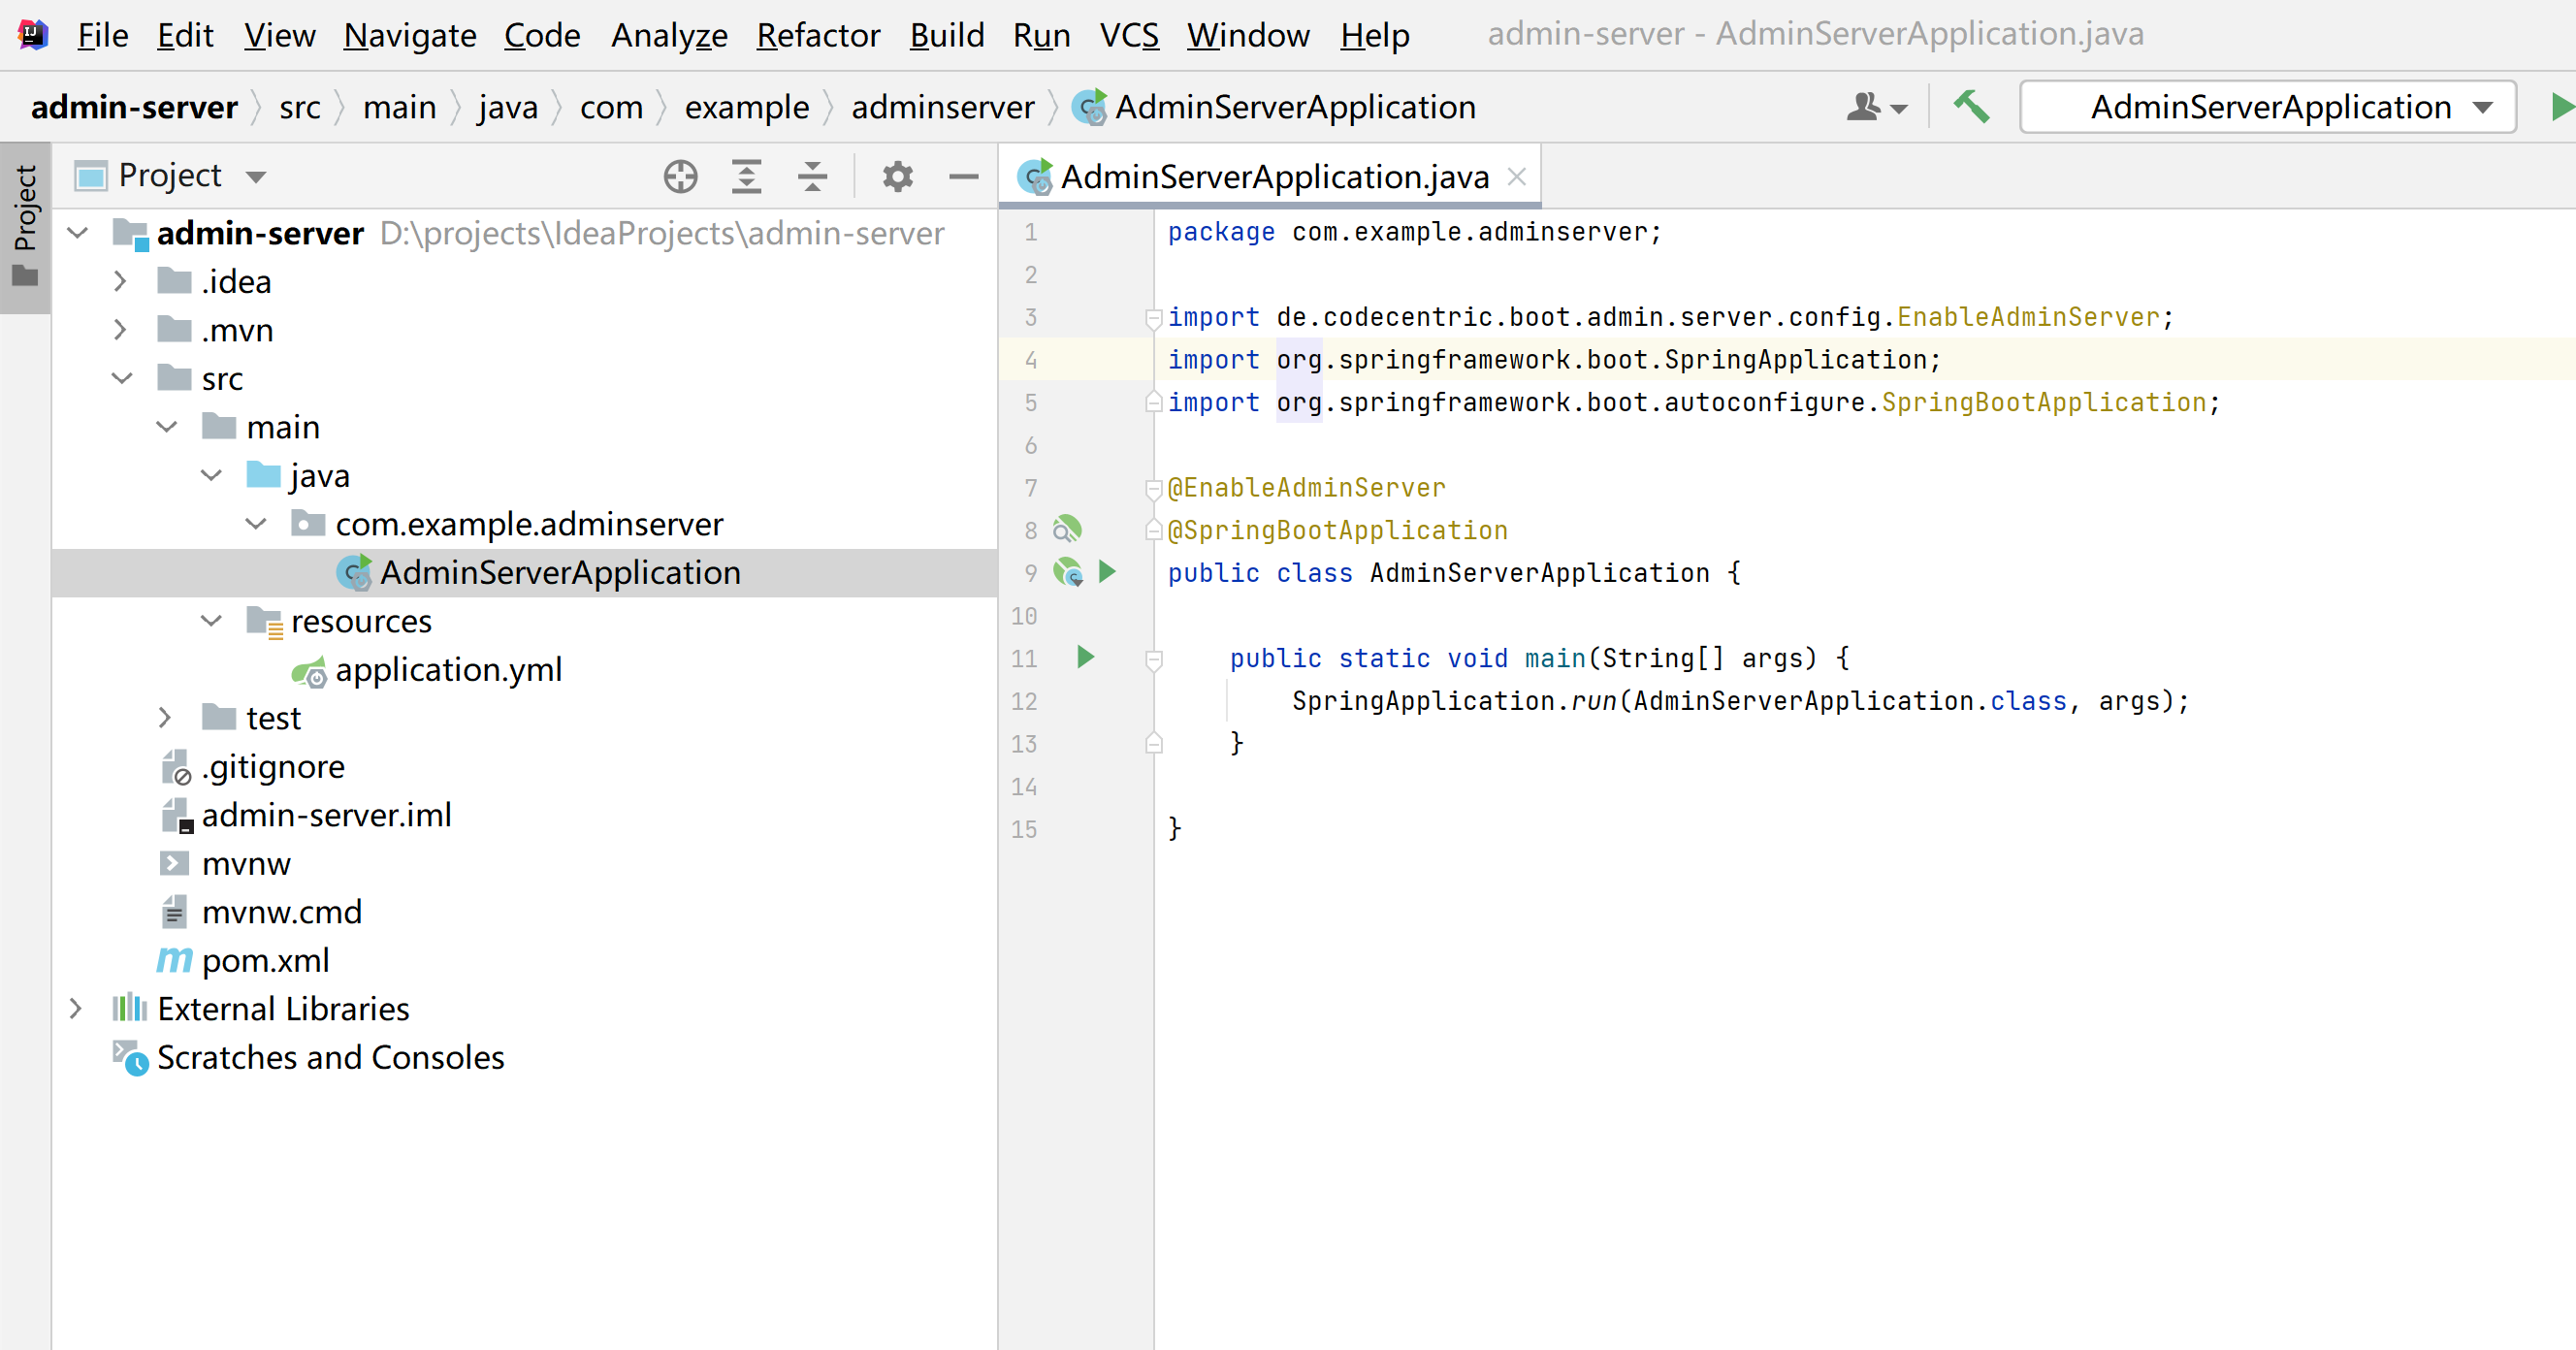
这样,admin的服务端就搭建好了,然后访问localhost:8080,看到的就是admin的界面,因为还没有客户端注册,所以应用数为0

创建Spring Boot Admin Client
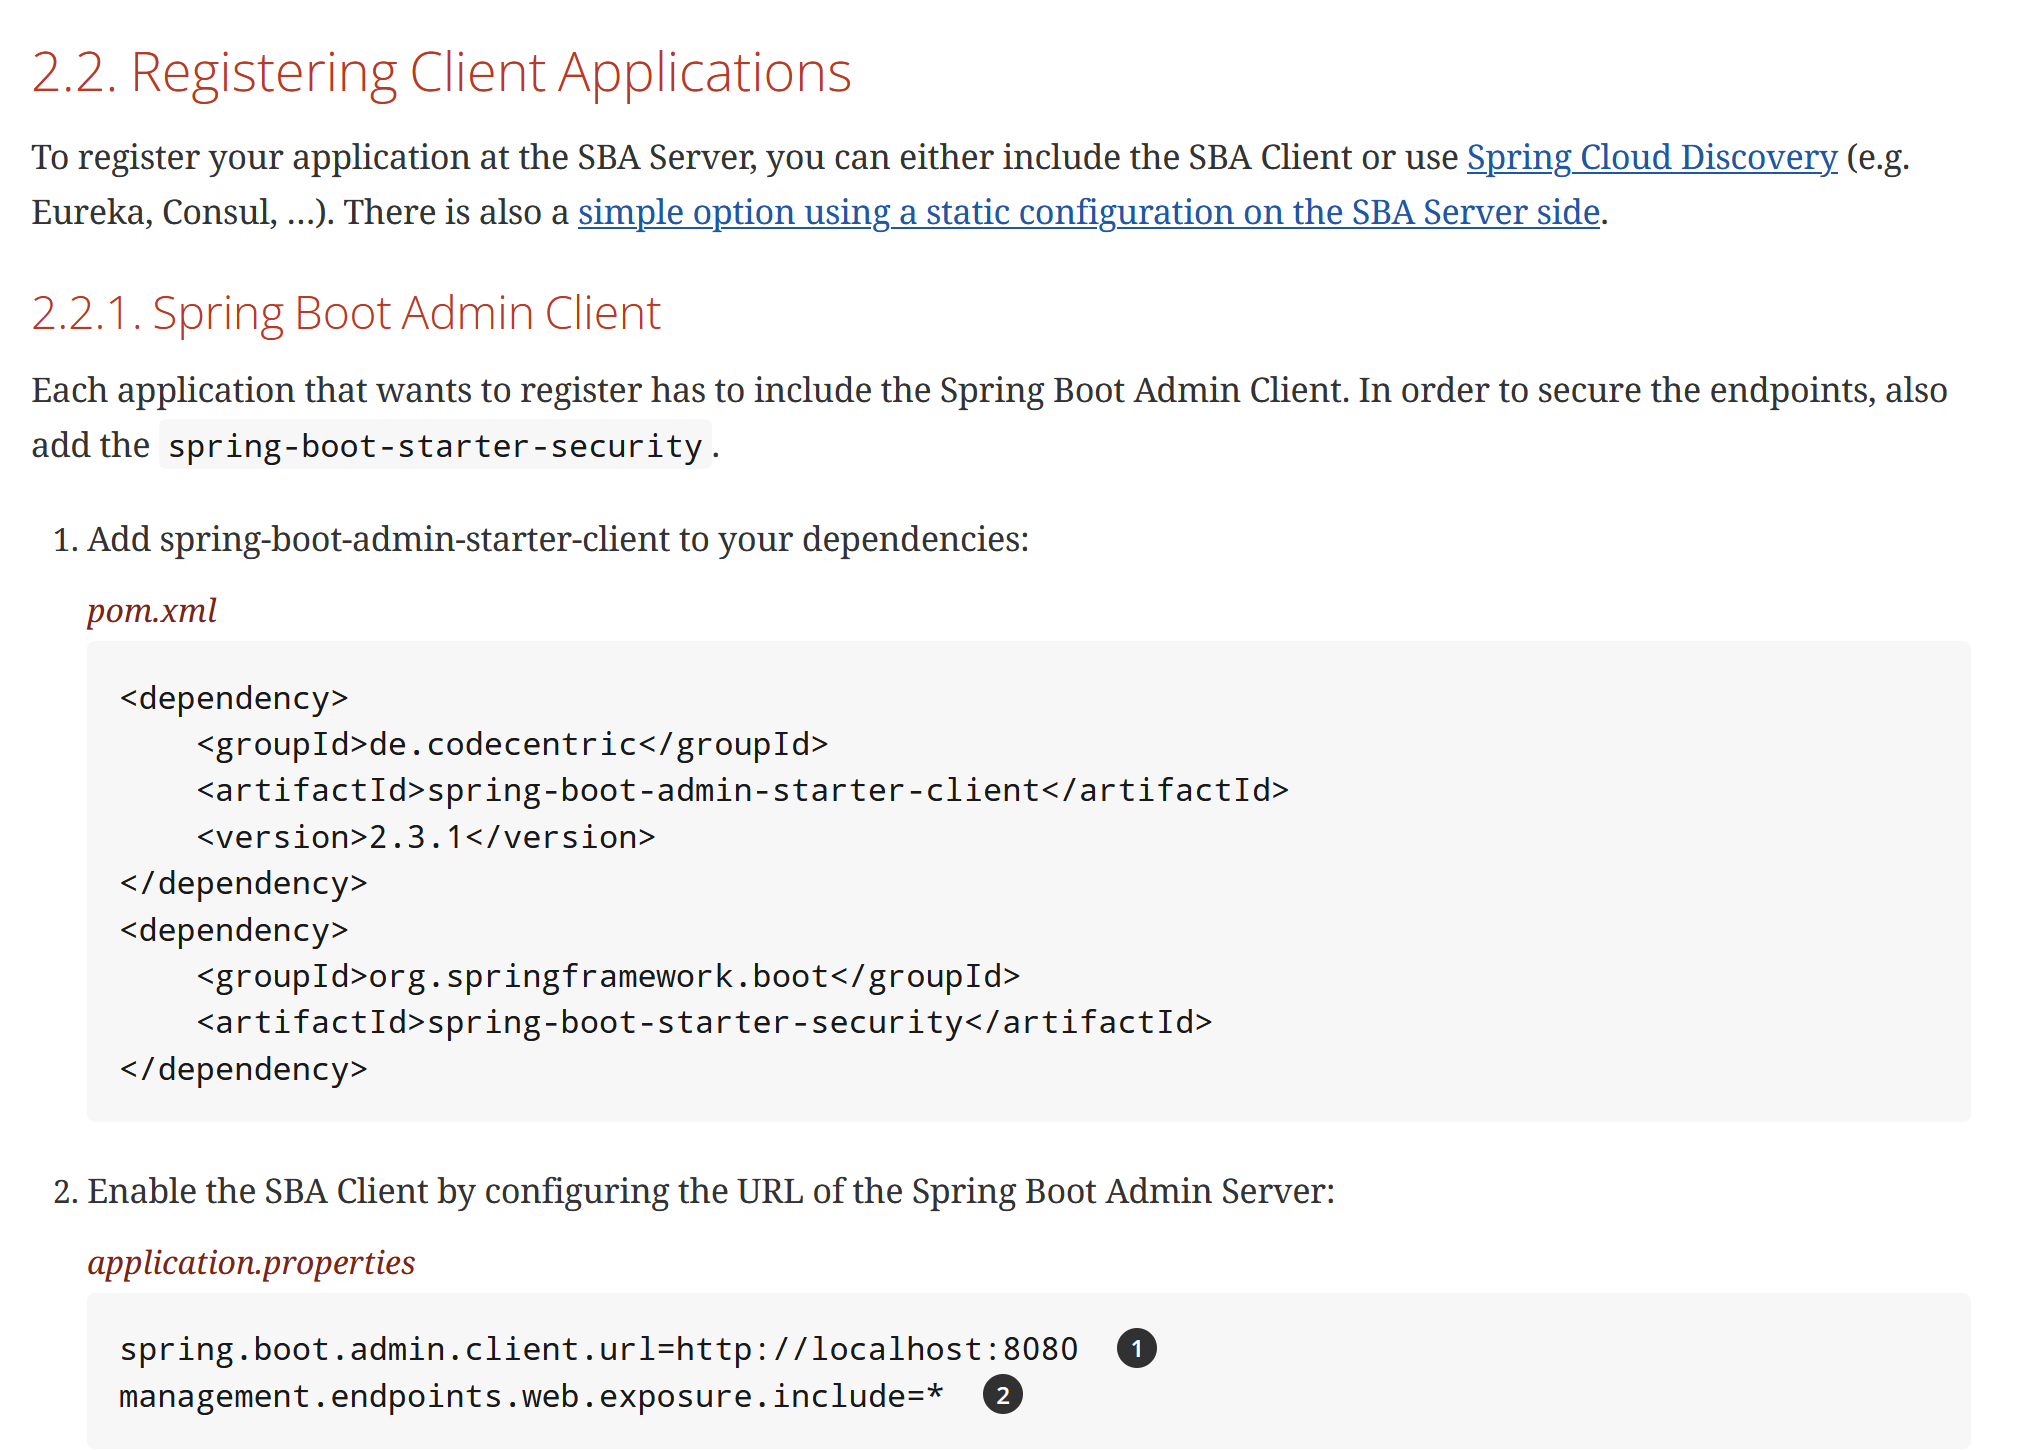
创建完服务器,需要往服务器注册客户端应用程序。
同样的,通过idea创建一个Springboot应用,取名为admin-client
修改pom.xml,添加admin客户端的依赖
<?xml version="1.0" encoding="UTF-8"?>
<project xmlns="http://maven.apache.org/POM/4.0.0" xmlns:xsi="http://www.w3.org/2001/XMLSchema-instance"xsi:schemaLocation="http://maven.apache.org/POM/4.0.0 https://maven.apache.org/xsd/maven-4.0.0.xsd"><modelVersion>4.0.0</modelVersion><parent><groupId>org.springframework.boot</groupId><artifactId>spring-boot-starter-parent</artifactId><version>2.3.4.RELEASE</version><relativePath/></parent><groupId>com.example</groupId><artifactId>admin-client</artifactId><version>0.0.1-SNAPSHOT</version><properties><java.version>1.8</java.version></properties><dependencies><dependency><groupId>org.springframework.boot</groupId><artifactId>spring-boot-starter-web</artifactId></dependency><dependency><groupId>org.springframework.boot</groupId><artifactId>spring-boot-starter-test</artifactId><scope>test</scope></dependency><dependency><groupId>de.codecentric</groupId><artifactId>spring-boot-admin-starter-client</artifactId><version>2.3.1</version></dependency><dependency><groupId>org.springframework.boot</groupId><artifactId>spring-boot-starter-actuator</artifactId></dependency><dependency><groupId>org.springframework.boot</groupId><artifactId>spring-boot-starter-security</artifactId></dependency></dependencies><build><plugins><plugin><groupId>org.springframework.boot</groupId><artifactId>spring-boot-maven-plugin</artifactId></plugin></plugins></build>
</project>
然后修改配置文件application.yml,配置admin服务器的URL,因为admin-server没有配置端口,默认是8080,并把第一步actuator服务的配置复制过来。
server:port: 8081spring:boot:admin:client:url: http://localhost:8080management:endpoints:web:exposure:include: "*"base-path: /actuatorendpoint:health:show-details: always启动客户端服务admin-client,再次访问localhost:8080,可以看到,客户端已经注册到了服务器

5、整合Spring Security
通过第四步,已经搭建好了admin,但是存在很严重的安全问题,任何人都可以访问程序的运行状态和信息,这个章节通过整合Spring Security来解决这个问题,配置登录才能访问。
点击Spring Boot Admin官网左边的目录链接,直接跳转到Security

根据要求,在admin-server端添加一个配置类,按需修改用户名和密码
package com.example.adminserver.config;import de.codecentric.boot.admin.server.config.AdminServerProperties;
import org.springframework.context.annotation.Configuration;
import org.springframework.http.HttpMethod;
import org.springframework.security.config.Customizer;
import org.springframework.security.config.annotation.authentication.builders.AuthenticationManagerBuilder;
import org.springframework.security.config.annotation.web.builders.HttpSecurity;
import org.springframework.security.config.annotation.web.configuration.WebSecurityConfigurerAdapter;
import org.springframework.security.web.authentication.SavedRequestAwareAuthenticationSuccessHandler;
import org.springframework.security.web.csrf.CookieCsrfTokenRepository;
import org.springframework.security.web.util.matcher.AntPathRequestMatcher;import java.util.UUID;/*** @author heyunlin* @version 1.0*/
@Configuration(proxyBeanMethods = false)
public class SecuritySecureConfig extends WebSecurityConfigurerAdapter {private final AdminServerProperties adminServer;public SecuritySecureConfig(AdminServerProperties adminServer) {this.adminServer = adminServer;}@Overrideprotected void configure(HttpSecurity http) throws Exception {SavedRequestAwareAuthenticationSuccessHandler successHandler = new SavedRequestAwareAuthenticationSuccessHandler();successHandler.setTargetUrlParameter("redirectTo");successHandler.setDefaultTargetUrl(this.adminServer.path("/"));http.authorizeRequests((authorizeRequests) -> authorizeRequests.antMatchers(this.adminServer.path("/assets/**")).permitAll().antMatchers(this.adminServer.path("/login")).permitAll().anyRequest().authenticated()).formLogin((formLogin) -> formLogin.loginPage(this.adminServer.path("/login")).successHandler(successHandler).and()).logout((logout) -> logout.logoutUrl(this.adminServer.path("/logout"))).httpBasic(Customizer.withDefaults()).csrf((csrf) -> csrf.csrfTokenRepository(CookieCsrfTokenRepository.withHttpOnlyFalse()).ignoringRequestMatchers(new AntPathRequestMatcher(this.adminServer.path("/instances"),HttpMethod.POST.toString()),new AntPathRequestMatcher(this.adminServer.path("/instances/*"),HttpMethod.DELETE.toString()),new AntPathRequestMatcher(this.adminServer.path("/actuator/**")))).rememberMe((rememberMe) -> rememberMe.key(UUID.randomUUID().toString()).tokenValiditySeconds(1209600));}// Required to provide UserDetailsService for "remember functionality"@Overrideprotected void configure(AuthenticationManagerBuilder auth) throws Exception {auth.inMemoryAuthentication().withUser("user").password("12345").roles("USER");}}
然后重启admin-server,再次访问localhost:8080的时候,发现要登录

输入刚刚设置的用户名/密码:user/12345,点击登录按钮
这时候发现页面只是刷新了一下,并没有跳转到首页,这里也是个坑。
查看服务器报错信息
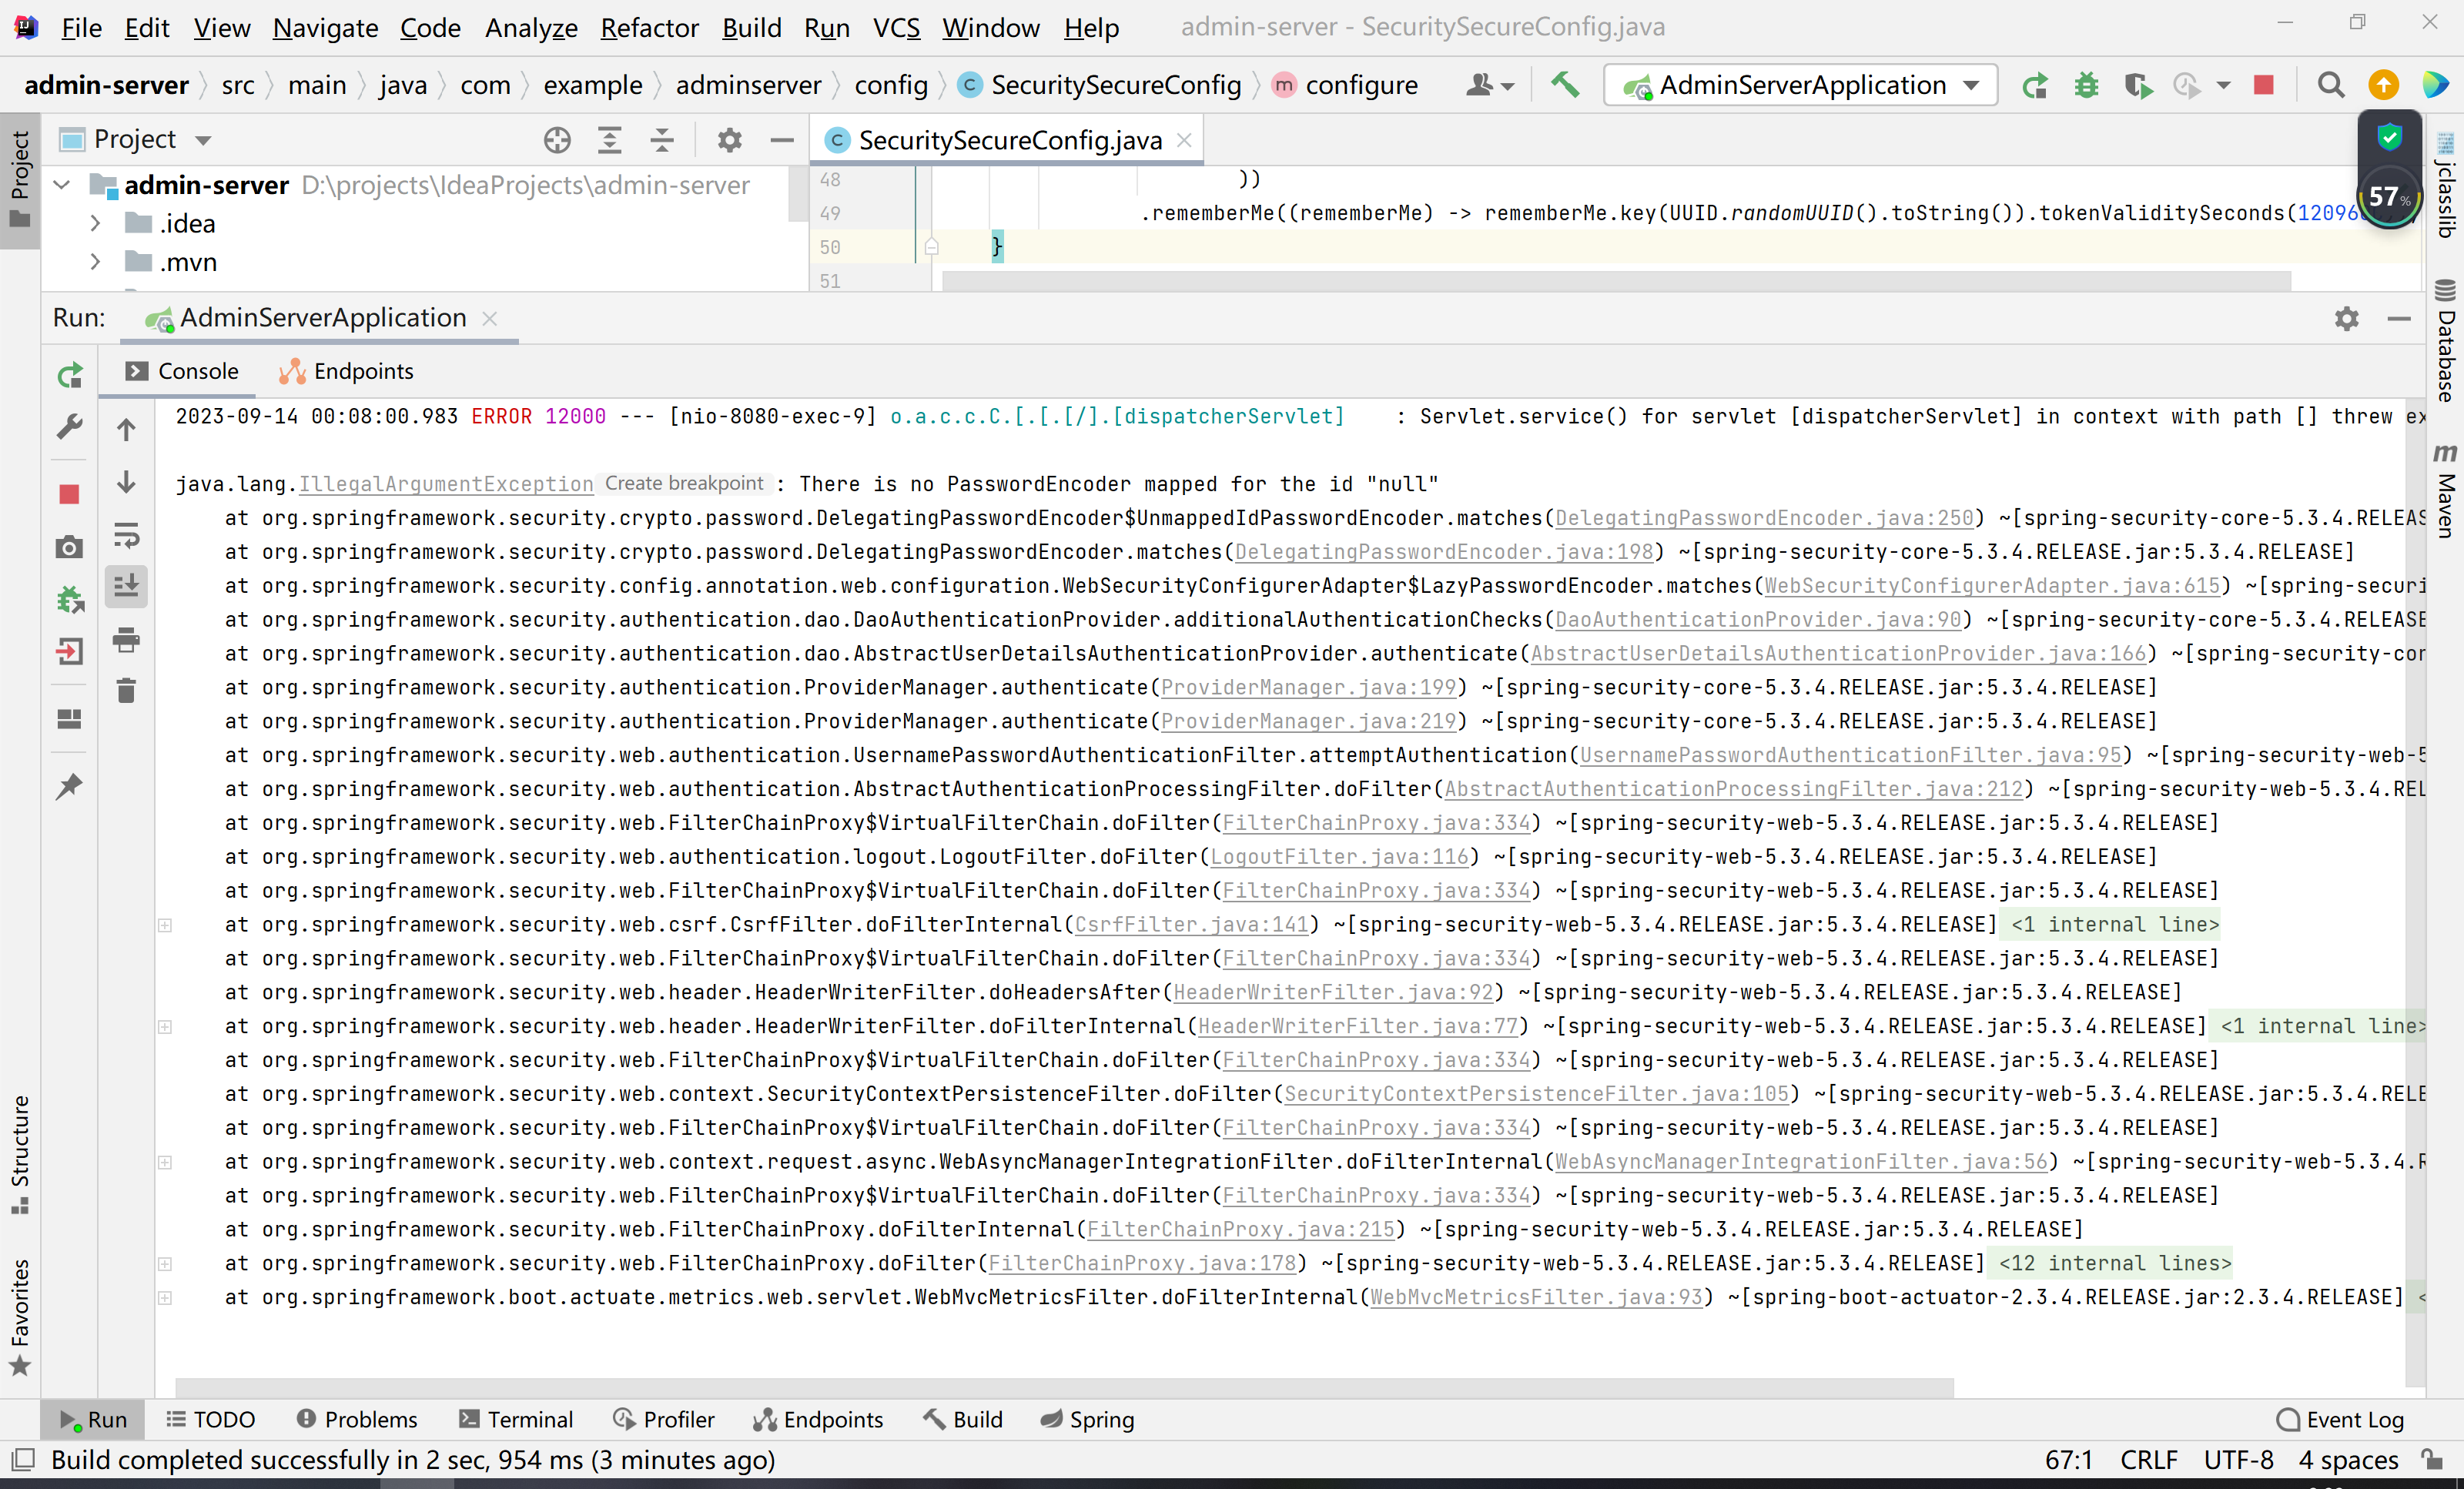
点第二行的matches()方法进去看看

很显然,就是因为这里主动抛出的异常导致的登录失败,往鼠标上面滚动,这是一个PasswordEncoder的实现类

由此可见,这是默认调用的这个实现类的matches()方法,为了解决这个异常问题,我们需要在admin-server自己创建一个org.springframework.security.crypto.password.PasswordEncoder的实现类,并声明为bean,然后重写matches()方法,直接通过equals()比较即可。
package com.example.adminserver;import org.springframework.security.crypto.password.PasswordEncoder;
import org.springframework.stereotype.Component;/*** @author heyunlin* @version 1.0*/
@Component
public class MyPasswordEncoder implements PasswordEncoder {@Overridepublic String encode(CharSequence rawPassword) {return null;}@Overridepublic boolean matches(CharSequence rawPassword, String encodedPassword) {return rawPassword.equals(encodedPassword);}}
然后再次重启admin-server,这一次输入user/12345点击登录,成功进到了首页,但是,客户端怎么没了,居然没有注册进来。
接着看文档,后面还有很关键的说明,需要在客户端添加下面这个配置,用户名密码就是刚刚设置的用户名user和密码12345。

修改admin-client的application.yml,添加用户名和密码的配置,然后重启一下admin-client服务
server:port: 8081spring:boot:admin:client:username: userpassword: 12345url: http://localhost:8080management:endpoints:web:exposure:include: "*"base-path: /actuatorendpoint:health:show-details: always这时候再看刚才的页面,已经成功注册进来了

最后,因为用户名密码是写死在代码里的,一般希望能过通过配置文件动态修改。
在配置文件中配置用户名和密码
server:port: 8080spring:security:user:name: userpassword: 12345修改一下配置类,从配置中读取用户名和密码
package com.example.adminserver.config;import de.codecentric.boot.admin.server.config.AdminServerProperties;
import org.springframework.boot.autoconfigure.security.SecurityProperties;
import org.springframework.context.annotation.Configuration;
import org.springframework.http.HttpMethod;
import org.springframework.security.config.Customizer;
import org.springframework.security.config.annotation.authentication.builders.AuthenticationManagerBuilder;
import org.springframework.security.config.annotation.web.builders.HttpSecurity;
import org.springframework.security.config.annotation.web.configuration.WebSecurityConfigurerAdapter;
import org.springframework.security.web.authentication.SavedRequestAwareAuthenticationSuccessHandler;
import org.springframework.security.web.csrf.CookieCsrfTokenRepository;
import org.springframework.security.web.util.matcher.AntPathRequestMatcher;import java.util.UUID;/*** @author heyunlin* @version 1.0*/
@Configuration(proxyBeanMethods = false)
public class SecuritySecureConfig extends WebSecurityConfigurerAdapter {private final AdminServerProperties adminServer;private final SecurityProperties securityProperties;public SecuritySecureConfig(AdminServerProperties adminServer, SecurityProperties securityProperties) {this.adminServer = adminServer;this.securityProperties = securityProperties;}@Overrideprotected void configure(HttpSecurity http) throws Exception {SavedRequestAwareAuthenticationSuccessHandler successHandler = new SavedRequestAwareAuthenticationSuccessHandler();successHandler.setTargetUrlParameter("redirectTo");successHandler.setDefaultTargetUrl(this.adminServer.path("/"));http.authorizeRequests((authorizeRequests) -> authorizeRequests.antMatchers(this.adminServer.path("/assets/**")).permitAll().antMatchers(this.adminServer.path("/login")).permitAll().anyRequest().authenticated()).formLogin((formLogin) -> formLogin.loginPage(this.adminServer.path("/login")).successHandler(successHandler).and()).logout((logout) -> logout.logoutUrl(this.adminServer.path("/logout"))).httpBasic(Customizer.withDefaults()).csrf((csrf) -> csrf.csrfTokenRepository(CookieCsrfTokenRepository.withHttpOnlyFalse()).ignoringRequestMatchers(new AntPathRequestMatcher(this.adminServer.path("/instances"),HttpMethod.POST.toString()),new AntPathRequestMatcher(this.adminServer.path("/instances/*"),HttpMethod.DELETE.toString()),new AntPathRequestMatcher(this.adminServer.path("/actuator/**")))).rememberMe((rememberMe) -> rememberMe.key(UUID.randomUUID().toString()).tokenValiditySeconds(1209600));}// Required to provide UserDetailsService for "remember functionality"@Overrideprotected void configure(AuthenticationManagerBuilder auth) throws Exception {auth.inMemoryAuthentication().withUser(securityProperties.getUser().getName()).password(securityProperties.getUser().getPassword()).roles("USER");}}
6、注册到注册中心
以admin-server为例,将其注册到nacos。
添加nacos相关依赖,注册中心和配置中心的依赖都加进来,统一管理配置信息。
<?xml version="1.0" encoding="UTF-8"?>
<project xmlns="http://maven.apache.org/POM/4.0.0" xmlns:xsi="http://www.w3.org/2001/XMLSchema-instance"xsi:schemaLocation="http://maven.apache.org/POM/4.0.0 https://maven.apache.org/xsd/maven-4.0.0.xsd"><modelVersion>4.0.0</modelVersion><parent><groupId>org.springframework.boot</groupId><artifactId>spring-boot-starter-parent</artifactId><version>2.3.4.RELEASE</version><relativePath /></parent><groupId>com.example</groupId><artifactId>admin-server</artifactId><version>0.0.1-SNAPSHOT</version><properties><java.version>1.8</java.version><admin.version>2.3.1</admin.version><nacos.version>2.2.0.RELEASE</nacos.version></properties><dependencies><dependency><groupId>org.springframework.boot</groupId><artifactId>spring-boot-starter-web</artifactId></dependency><dependency><groupId>org.springframework.boot</groupId><artifactId>spring-boot-starter-test</artifactId><scope>test</scope></dependency><dependency><groupId>org.springframework.boot</groupId><artifactId>spring-boot-starter-security</artifactId></dependency><dependency><groupId>de.codecentric</groupId><artifactId>spring-boot-admin-starter-server</artifactId><version>${admin.version}</version></dependency><!--nacos注册中心--><dependency><groupId>com.alibaba.cloud</groupId><artifactId>spring-cloud-starter-alibaba-nacos-discovery</artifactId><version>${nacos.version}</version></dependency><!--nacos配置中心--><dependency><groupId>com.alibaba.cloud</groupId><artifactId>spring-cloud-starter-alibaba-nacos-config</artifactId><version>${nacos.version}</version></dependency></dependencies><build><plugins><plugin><groupId>org.springframework.boot</groupId><artifactId>spring-boot-maven-plugin</artifactId></plugin></plugins></build>
</project>
然后创建bootstrap.yml,添加nacos注册中心和配置中心配置
nacos:url: localhost:8848namespace: 0df4345c-cf1e-4af4-9501-d4be92ca6fdaspring:cloud:nacos:discovery:register-enabled: trueserver-addr: ${nacos.url}namespace: ${nacos.namespace}config:file-extension: yamlserver-addr: ${nacos.url}namespace: ${nacos.namespace}最后,需要设置spring.application.name,否则不会注册到nacos
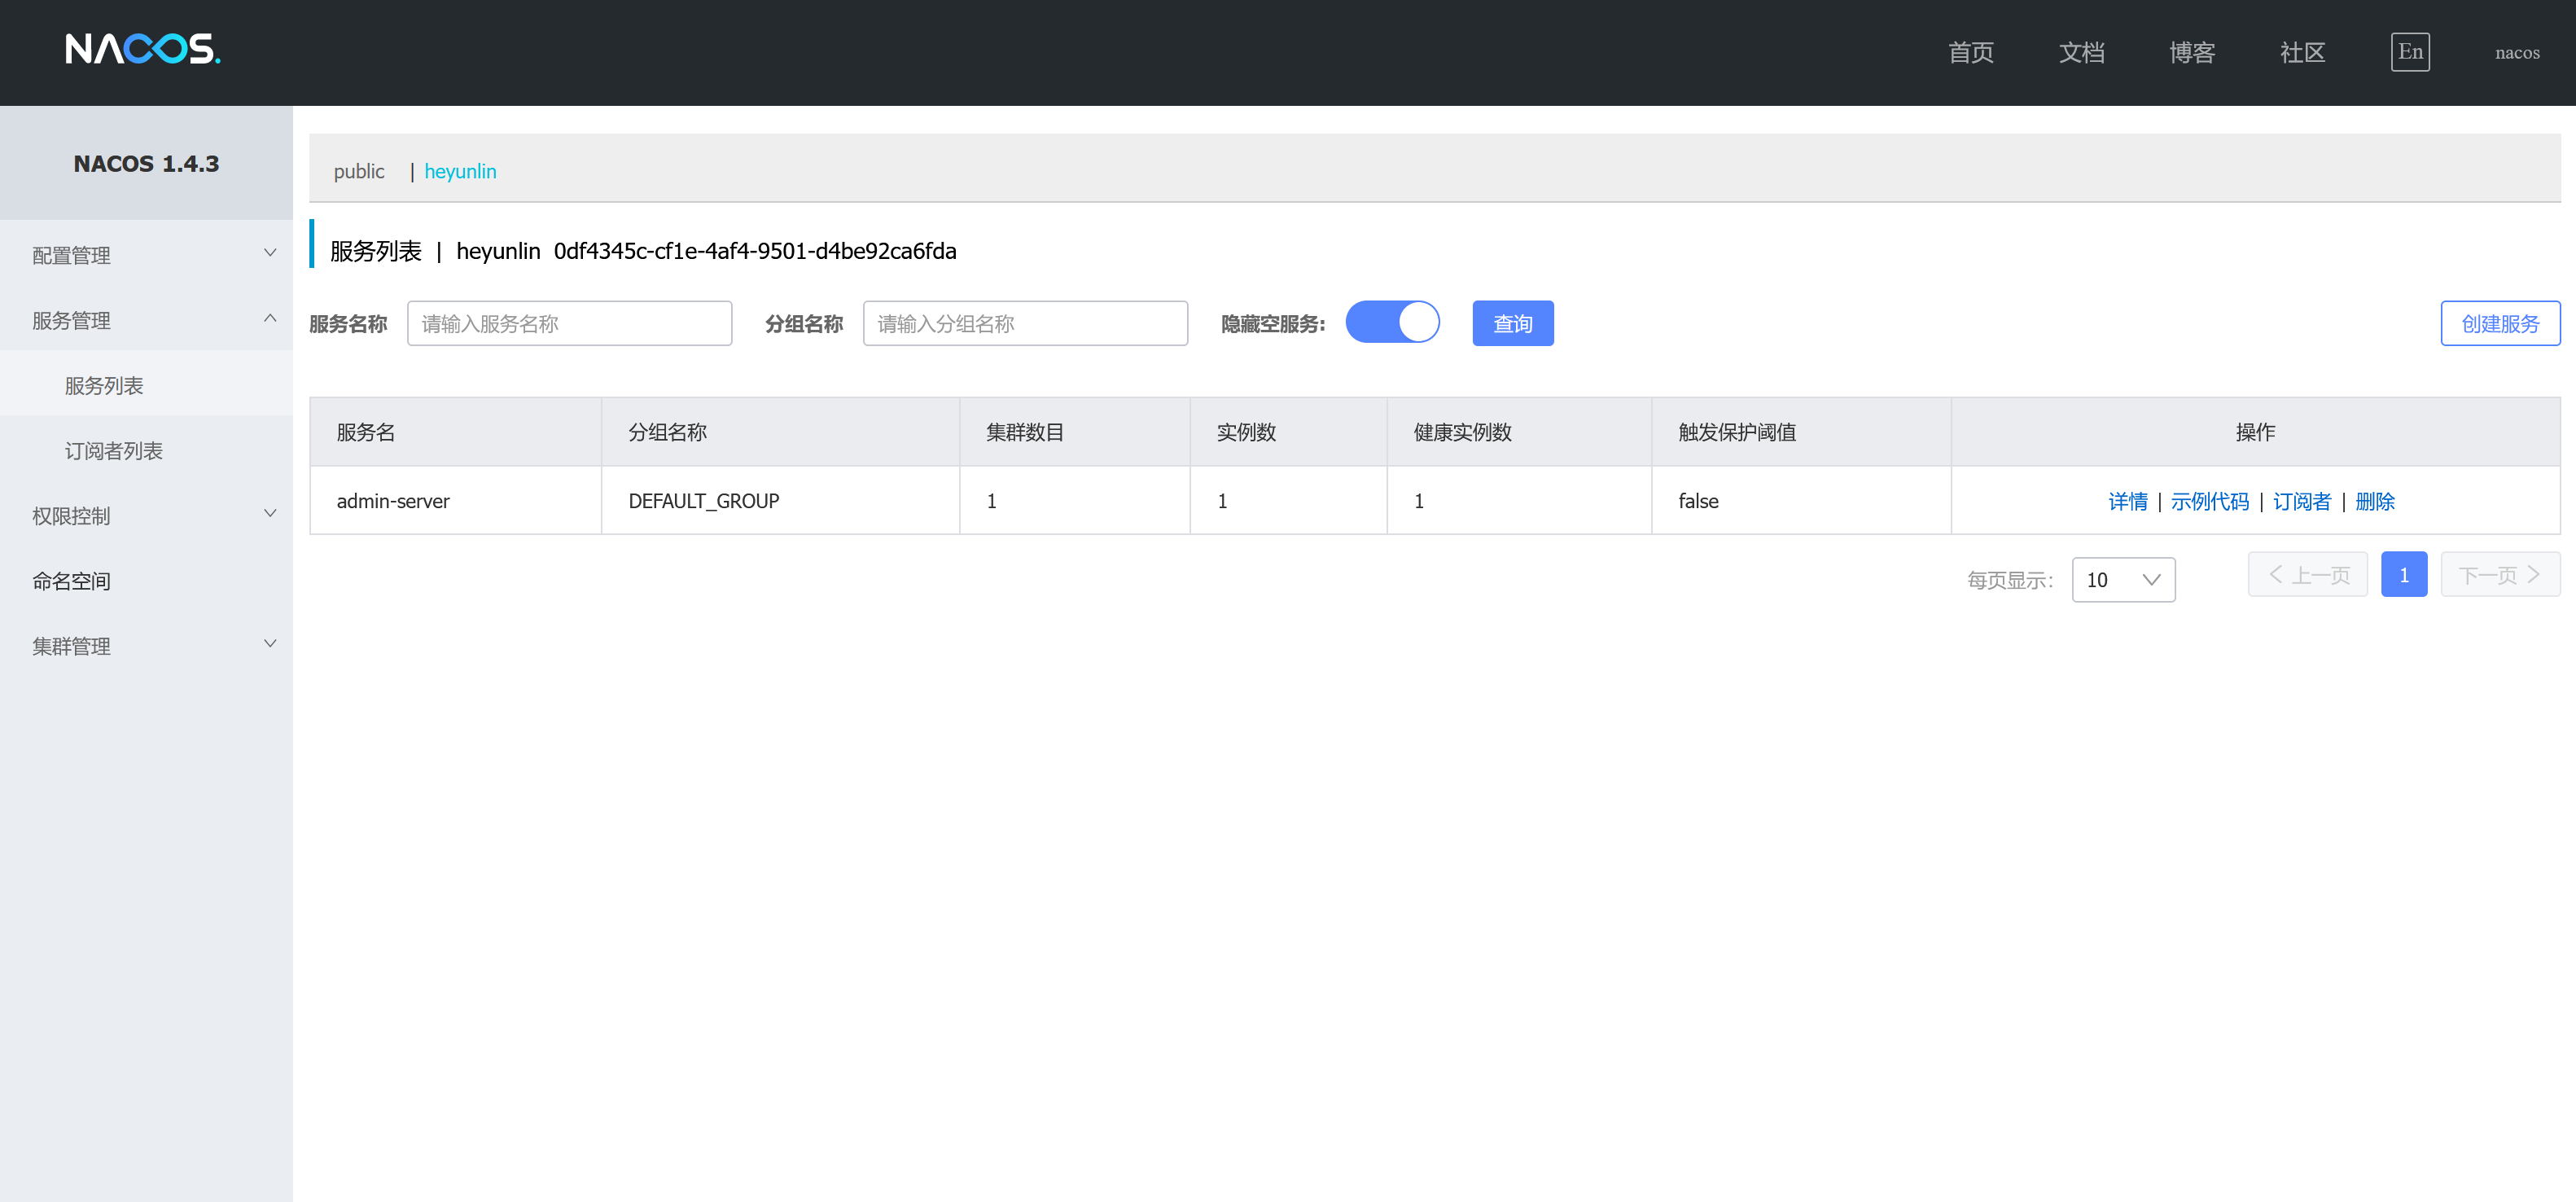
server:port: 8080spring:security:user:name: userpassword: 12345application:name: admin-server启动nacos服务,然后再启动admin-server,在nacos控制台的服务列表,成功看到了注册进来的的admin-server
admin-server注册到注册中心之后,会自动拉取添加了spring-boot-starter-admin-client依赖的服务,所以需要删除客户端配置,否则将会有两个同一服务的实例注册到admin服务器。
修改admin-client服务的配置文件application.yml,删除之前添加的admin客户端配置。
server:port: 8081management:endpoints:web:exposure:include: "*"base-path: /actuatorendpoint:health:show-details: always关于nacos如何使用,可以参考博主的另一篇文章:
nacos作为注册中心和配置中心![]() https://blog.csdn.net/heyl163_/article/details/128536799好了,以上就是本篇文章要分享的全部内容了,看完不要忘了点赞+收藏哦~
https://blog.csdn.net/heyl163_/article/details/128536799好了,以上就是本篇文章要分享的全部内容了,看完不要忘了点赞+收藏哦~
文章中涉及的项目均已上传到gitee,需要的可以下载到本地:
actuator![]() https://gitee.com/he-yunlin/actuator.gitspring boot整合admin实现对应用监控服务器项目
https://gitee.com/he-yunlin/actuator.gitspring boot整合admin实现对应用监控服务器项目![]() https://gitee.com/he-yunlin/admin-server.gitSpring Boot Admin Client项目
https://gitee.com/he-yunlin/admin-server.gitSpring Boot Admin Client项目![]() https://gitee.com/he-yunlin/admin-client.git
https://gitee.com/he-yunlin/admin-client.git
相关文章:
springboot整合actuator、admin对应用程序进行监控
Spring Boot Actuator 是 Spring Boot 的一个子项目,可以对 Spring Boot 应用程序进行监控和管理,并对外提供了大量的端点,可以选择使用 HTTP 端点或 JMX 来管理和监控应用程序。 这篇文章主要介绍我们的应用程序中怎么加入actuator来对应用进…...

文举论金:黄金原油全面走势分析策略指导。
市场没有绝对,涨跌没有定势,所以,对市场行情的涨跌平衡判断就是你的制胜法宝。欲望!有句意大利谚语:让金钱成为我们忠心耿耿的仆人,否则,它就会成为一个专横跋扈的主人。空头,多头都…...
Fedora CoreOS 安装部署详解
《OpenShift 4.x HOL教程汇总》 Fedora CoreOS 的裸机安装方法_fedora coreos 安装-CSDN博客 OpenShift 4 - Fedora CoreOS (1) - 最简安装_fedora core 安装_dawnsky.liu的博客-CSDN博客 OpenShift 和 CoreOS 我们知道 Red Hat Enterprise Linux CoreOS(简称RHCOS&…...
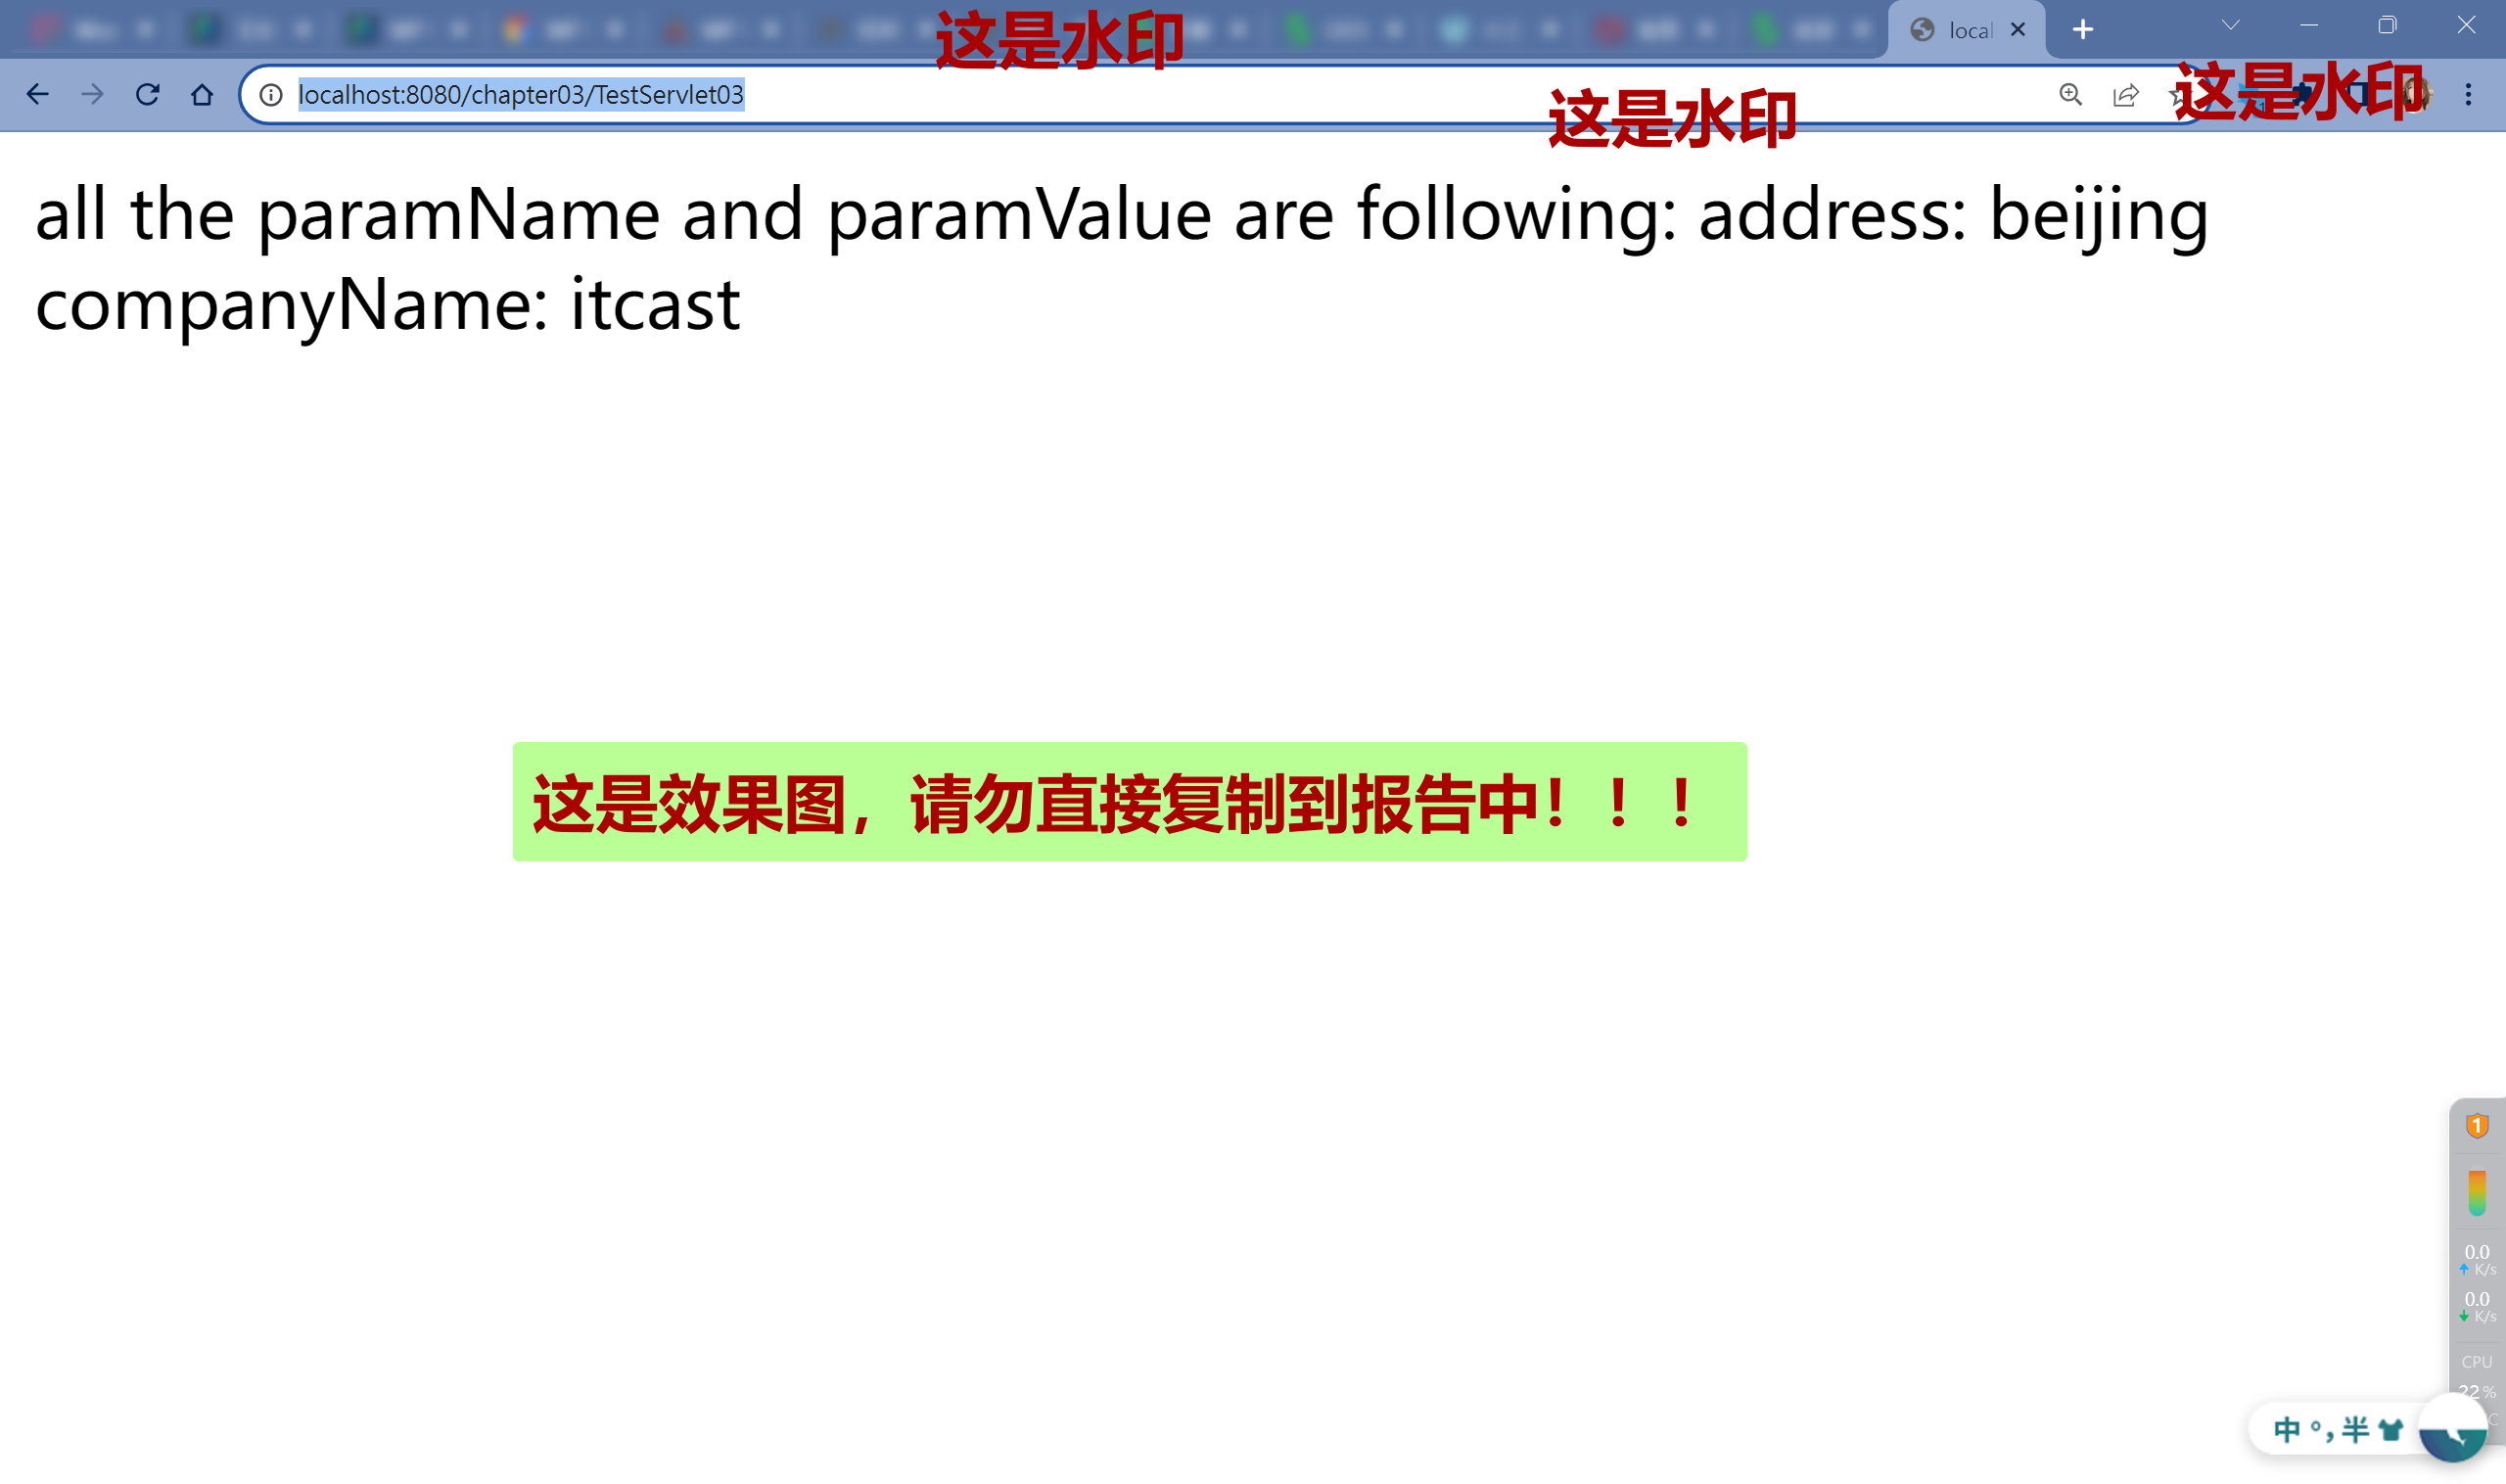
Web应用开发 - 实训三 B Servlet基础
Web应用开发 - 实训三 B Servlet基础 前言: 零、前期准备准备工具创建项目导入 jar 包配置运行设置 一、实训第一部分第一张图第二张图第三张图 二、实训第二部分第一张图第二张图 前言: eclipse 是不可能用的,并不是说它界面丑,…...

Debian12安装 Docker
Docker中基本概念 镜像(Image) 镜像,从认识上简单的来说,就是面向对象中的类,相当于一个模板。从本质上来说,镜像相当于一个文件系统。Docker 镜像是一个特殊的文件系统,除了提供容器运行时所需的程序、库、资源、配…...
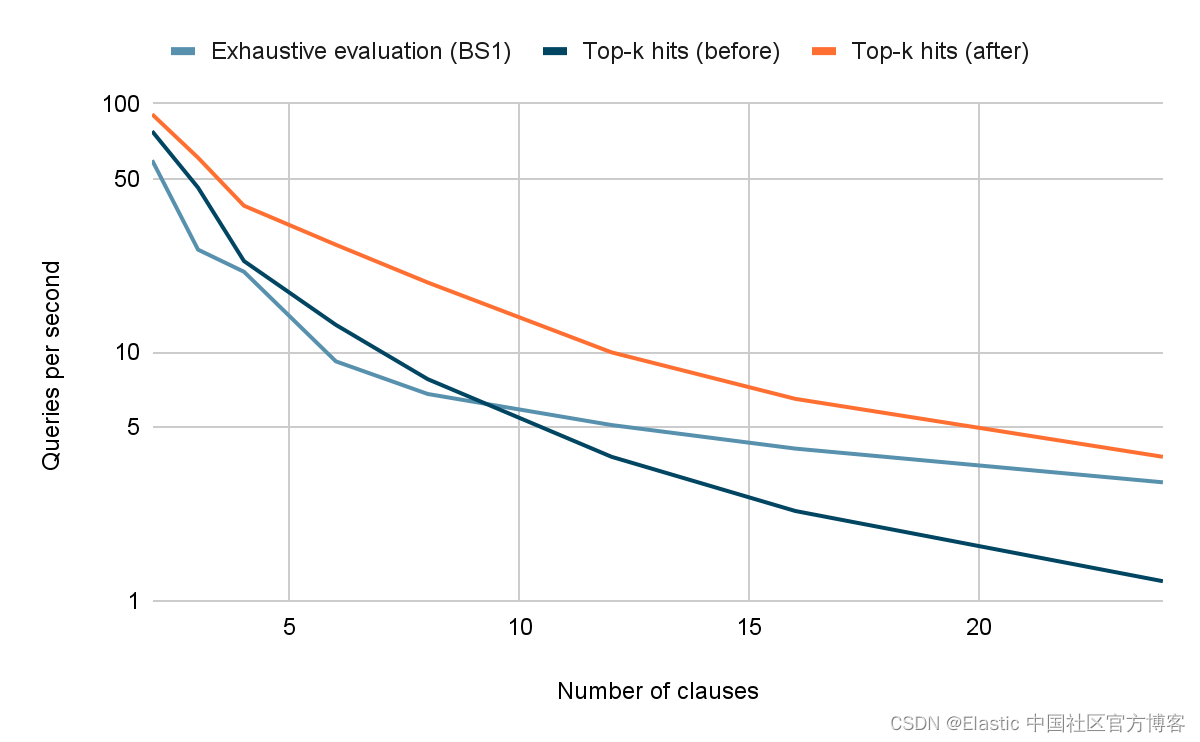
Elasticsearch:为具有许多 and/or 高频术语的 top-k 查询带来加速
作者:Adrien Grand Disjunctive queries(term_1 OR term_2 OR ... OR term_n)非常常用,因此在提高查询评估效率方面它们受到了广泛关注。 Apache Lucene 对于评估 disjunctive queries 有两个主要优化:一方面用于详尽评…...
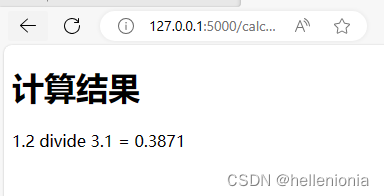
【pythonflask-1】简单实现加减乘除输入界面
app.py import flask from flask import Flask, render_template, request # 计算精确的浮点结果,float加法也计算不出来 from decimal import Decimalapp Flask(__name__)app.route(/) def home():return render_template(index.html)app.route(/calculate, meth…...
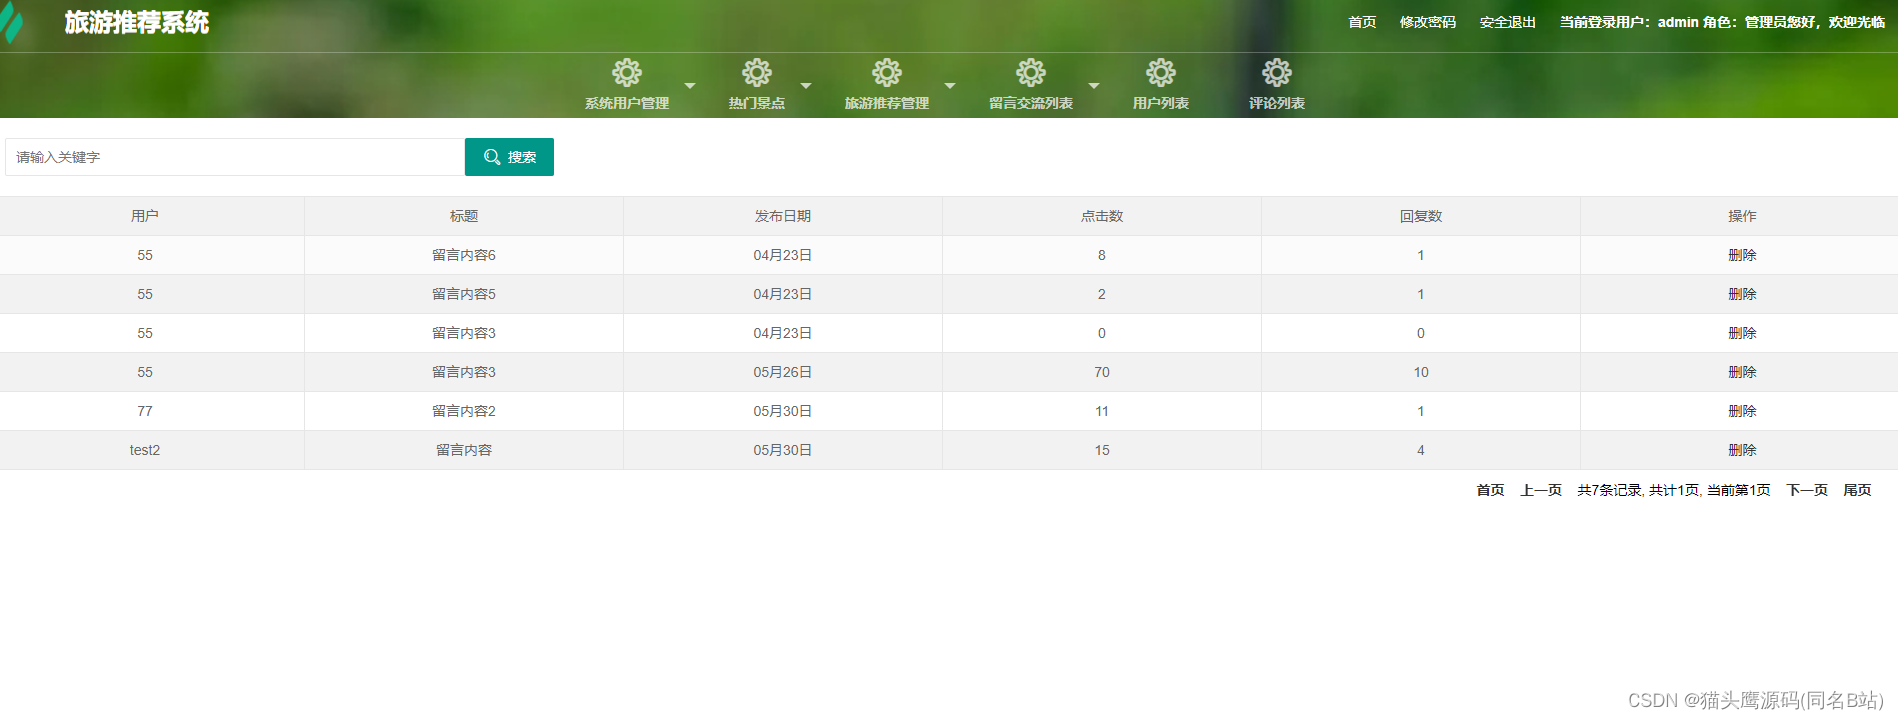
基于协同过滤算法的旅游推荐系统
博主主页:猫头鹰源码 博主简介:Java领域优质创作者、CSDN博客专家、公司架构师、全网粉丝5万、专注Java技术领域和毕业设计项目实战 主要内容:毕业设计(Javaweb项目|小程序等)、简历模板、学习资料、面试题库、技术咨询 文末联系获取 项目介绍…...

遇见问题:使用mybaties向数据库中插入数据,idea显示插入成功,但是数据库中并没有数据变化?
遇见问题:使用mybaties向数据库中插入数据,idea显示插入成功,但是数据库中并没有数据变化? 可能的原因有几种: 没有提交事务:在使用 MyBatis 进行数据库操作时,需要手动提交事务。你可以在插入数据完成后…...

markdown学习笔记
markdown学习笔记 1.文字(依靠HTML) 1.1文字缩进-空格转义符 单字符空:  半字符空: 1.2文字对齐 「居中:」<center> 居中 </center> or <p align"center"> 居中 …...

C++项目实战——基于多设计模式下的同步异步日志系统-⑧-日志落地类设计
文章目录 专栏导读抽象基类StdoutSink类设计FileSink类设计RollBySizeSink类设计日志落地工厂类设计日志落地类整理日志落地拓展测试RollByTimeSink类设计测试代码测试完整代码 专栏导读 🌸作者简介:花想云 ,在读本科生一枚,C/C领…...
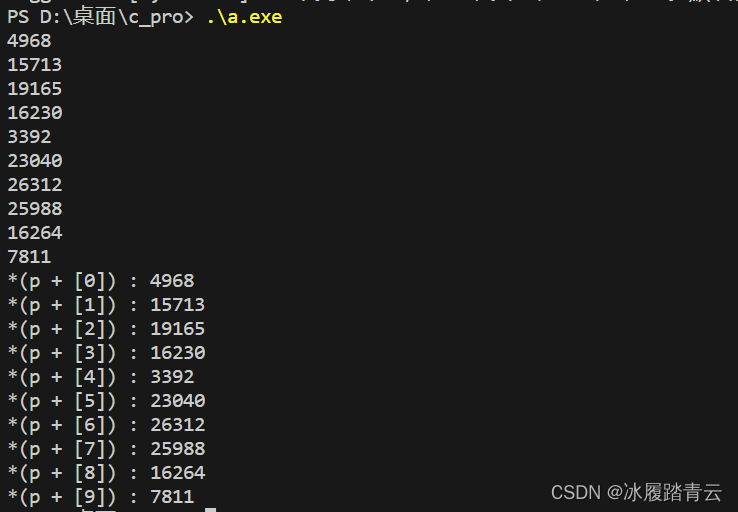
从零开始探索C语言(八)----指针
文章目录 1. 什么是指针?2. 如何使用指针?3. NULL 指针4. 指针的算术运算5. 指针数组6. 指向指针的指针7. 传递指针给函数8. 从函数返回指针 有人说,指针是C语言的灵魂,所以学习C语言,学习指针是很有必要的。 通过指针…...

SpringMVC 的三种异常处理方式详解
目录 1. 什么是异常 2. 为什么要全局异常处理 3. SpringMVC异常分类 4. 异常处理思路 5. 三种异常处理方式示例 ① 配置 SimpleMappingExceptionResolver 处理器 ② 实现 HandlerExceptionResolver 接口 ③ 使用ControllerAdviceExceptionHandler实现全局异常 6. 响应…...

莫比乌斯召回系统介绍
当前召回系统只能召回相关性高的广告,但不能保证该广告变现能力强。莫比乌斯做了如下两点创新: 在召回阶段,引入CPM等业务指标作为召回依据在召回阶段,引入CTR模型,从而召回更多相关性高且变现能力强的广告 参考 百度…...

使用ASM修改组件化 ARouter
工程目录图 1. apt生成的字节码文件 2. asm 生成的代码 请点击下面工程名称,跳转到代码的仓库页面,将工程 下载下来 Demo Code 里有详细的注释 代码:TestCompont...
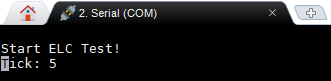
第21章_瑞萨MCU零基础入门系列教程之事件链接控制器ELC
本教程基于韦东山百问网出的 DShanMCU-RA6M5开发板 进行编写,需要的同学可以在这里获取: https://item.taobao.com/item.htm?id728461040949 配套资料获取:https://renesas-docs.100ask.net 瑞萨MCU零基础入门系列教程汇总: ht…...

(二十八)大数据实战——Flume数据采集之kafka数据生产与消费集成案例
前言 本节内容我们主要介绍一下flume数据采集和kafka消息中间键的整合。通过flume监听nc端口的数据,将数据发送到kafka消息的first主题中,然后在通过flume消费kafka中的主题消息,将消费到的消息打印到控制台上。集成使用flume作为kafka的生产…...
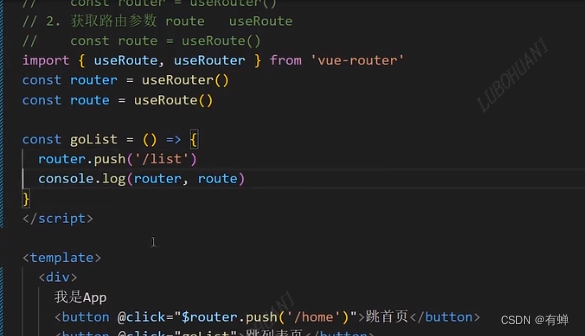
vue3:22、vue-router的使用
import { createRouter, createWebHistory } from vue-router//history模式:createWebHistory //hash模式:createWebHashHistory//vite中的环境变量 import.meta.env.BASE_URL 就是vite.config.js中的base配置项 const router createRouter({history:…...

深入理解JVM虚拟机第五篇:一些常用的JVM虚拟机(二)
文章目录 一:JRockit VM的介绍 二:J9 VM的介绍 三:KVM和CDC/CLDC Hotspot 四:Azul VM的介绍 五:Liquid VM的介绍 六:Apache Harmoney 七:Microsoft JVM 八:Taobao JVM 九&a…...

导数公式及求导法则
目录 基本初等函数的导数公式 求导法则 有理运算法则 复合函数求导法 隐函数求导法 反函数求导法 参数方程求导法 对数求导法 基本初等函数的导数公式 基本初等函数的导数公式包括: C0(x^n)nx^(n-1)(a^x)a^x*lna(e^x)e^x(loga(x))1/(xlna)(lnx)1/x(sinx)cos…...

91160-cli:健康160平台终极挂号神器,5分钟上手解决抢号难题
91160-cli:健康160平台终极挂号神器,5分钟上手解决抢号难题 【免费下载链接】91160-cli 健康160全自动挂号脚本,捡漏神器 项目地址: https://gitcode.com/gh_mirrors/91/91160-cli 你是否还在为抢不到专家号而烦恼?面对健康…...

风机技术演进与主动冷却系统优化实践
1. 风机技术演进与主动空气冷却系统优化作为一名在热管理领域工作多年的工程师,我见证了风机技术从简单的散热部件发展为精密的热管理系统的全过程。现代电子设备功率密度不断提升,从智能手机到数据中心服务器,散热设计已成为产品成败的关键因…...

互联网大厂 Java 求职面试:音视频场景中的 Spring Boot 与 Kafka
互联网大厂 Java 求职面试:音视频场景中的 Spring Boot 与 Kafka 在一次互联网大厂的面试中,面试官与燕双非展开了一场关于音视频处理的技术探讨。第一轮提问 面试官:燕双非,你能告诉我在音视频场景下,使用 Spring Boo…...

打造高效命令行天气查询工具:基于KMI/IRM的比利时天气CLI实践
1. 项目概述:一个为终端而生的比利时天气查询工具 如果你和我一样,是个重度命令行用户,同时又对窗外天气是晴是雨有点在意,那你肯定也烦透了为了看个天气预报还得打开浏览器、点开某个天气网站或者解锁手机。这种打断工作流的感觉…...

3分钟搞定!Windows网络测速神器iperf3完整使用指南
3分钟搞定!Windows网络测速神器iperf3完整使用指南 【免费下载链接】iperf3-win-builds iperf3 binaries for Windows. Benchmark your network limits. 项目地址: https://gitcode.com/gh_mirrors/ip/iperf3-win-builds 还在为网络速度不稳定而烦恼吗&#…...

传统认为越早进入行业越占优势,编程统计入行时间,行业红利数据,行业成熟期入行风险更低收益更稳。
“入行时间与行业红利期的匹配关系分析” 为主题,给出一套工程化、可教学、可复现的分析示例。一、实际应用场景描述(Business Context)在职业规划、行业研究与人才策略中,普遍存在一种观点:“越早进入一个行业&#x…...
)
2023B卷,阿里巴巴找黄金宝箱(4)
👨⚕️ 主页: gis分享者 👨⚕️ 感谢各位大佬 点赞👍 收藏⭐ 留言📝 加关注✅! 👨⚕️ 收录于专栏:华为OD面试 文章目录 一、🍀前言 1.1 ☘️题目详情 1.2 ☘️参考解题答案 一、🍀前言 2023B卷,阿里巴巴找黄金宝箱(4)。 1.1 ☘️题目详情 题目:…...

APK Installer完整指南:在Windows上快速安装Android应用的终极方案
APK Installer完整指南:在Windows上快速安装Android应用的终极方案 【免费下载链接】APK-Installer An Android Application Installer for Windows 项目地址: https://gitcode.com/GitHub_Trending/ap/APK-Installer 你是否曾经想在Windows电脑上轻松安装An…...
)
毕设成品 深度学习安全帽佩戴检测(源码+论文)
文章目录 0 前言🔥这两年开始毕业设计和毕业答辩的要求和难度不断提升,传统的毕设题目缺少创新和亮点,往往达不到毕业答辩的要求,这两年不断有学弟学妹告诉学长自己做的项目系统达不到老师的要求。为了大家能够顺利以及最少的精力…...

前端实战:用HTML/CSS/JS打造交互式生日蛋糕网页应用
1. 项目概述:一个用代码烘焙的生日惊喜最近给朋友准备生日礼物,不想再走寻常路,琢磨着送点特别的。作为一个整天和代码打交道的人,我决定用最熟悉的工具——HTML、CSS和JavaScript——亲手“烘焙”一个数字生日蛋糕。这个项目“Re…...