【手写数字识别】GPU训练版本
SVM
Adaboost
Bagging
完整代码 I
import torch
import torch.nn.functional as F
from torch.utils.data import DataLoader, TensorDataset
from torchvision import transforms, datasets
import matplotlib.pyplot as plt# 超参数
batch_size = 64
num_epochs = 10# 数据集准备
transform = transforms.Compose([transforms.ToTensor(), transforms.Normalize((0.1307,), (0.3081,))])
train_dataset = datasets.MNIST(root='./data/demo2', train=True, transform=transform, download=True)
test_dataset = datasets.MNIST(root='./data/demo2', train=False, transform=transform, download=True)
train_loader = DataLoader(train_dataset, batch_size=batch_size, shuffle=True)
test_loader = DataLoader(test_dataset, batch_size=batch_size, shuffle=False)# SVM 模型 (在GPU上训练)
class SVMModel(torch.nn.Module):def __init__(self):super(SVMModel, self).__init__()self.flatten = torch.nn.Flatten() self.linear = torch.nn.Linear(28 * 28, 10) def forward(self, x):x = self.flatten(x) return self.linear(x)svm_model = SVMModel().cuda()
criterion = torch.nn.CrossEntropyLoss()
optimizer = torch.optim.SGD(svm_model.parameters(), lr=0.01)# 训练和评估
svm_train_losses = []
svm_test_accuracies = []for epoch in range(num_epochs):for batch_idx, (data, labels) in enumerate(train_loader):data, labels = data.cuda(), labels.cuda()outputs = svm_model(data)loss = criterion(outputs, labels)optimizer.zero_grad()loss.backward()optimizer.step()svm_train_losses.append(loss.item())with torch.no_grad():test_accuracy = 0total = 0for batch_idx, (data, labels) in enumerate(test_loader):data, labels = data.cuda(), labels.cuda()outputs = svm_model(data)_, predicted = torch.max(outputs, 1)test_accuracy += torch.sum(predicted == labels).item()total += labels.size(0)accuracy = (test_accuracy / total) * 100svm_test_accuracies.append(accuracy)print('SVM - Epoch [{}/{}], Test Accuracy: {:.2f}%'.format(epoch + 1, num_epochs, accuracy))# Adaboost 模型 (在GPU上训练)
class AdaboostModel(torch.nn.Module):def __init__(self, num_estimators):super(AdaboostModel, self).__init__()self.num_estimators = num_estimatorsself.models = torch.nn.ModuleList([SVMModel() for _ in range(num_estimators)])def forward(self, x):outputs = torch.zeros(x.size(0), 10).cuda()for i in range(self.num_estimators):outputs += self.models[i](x)return outputsadaboost_model = AdaboostModel(num_estimators=50).cuda()
criterion = torch.nn.CrossEntropyLoss()
optimizer = torch.optim.SGD(adaboost_model.parameters(), lr=0.01)# 训练和评估
adaboost_train_losses = []
adaboost_test_accuracies = []for epoch in range(num_epochs):for batch_idx, (data, labels) in enumerate(train_loader):data, labels = data.cuda(), labels.cuda()outputs = adaboost_model(data)loss = criterion(outputs, labels)optimizer.zero_grad()loss.backward()optimizer.step()adaboost_train_losses.append(loss.item())with torch.no_grad():test_accuracy = 0total = 0for batch_idx, (data, labels) in enumerate(test_loader):data, labels = data.cuda(), labels.cuda()outputs = adaboost_model(data)_, predicted = torch.max(outputs, 1)test_accuracy += torch.sum(predicted == labels).item()total += labels.size(0)accuracy = (test_accuracy / total) * 100adaboost_test_accuracies.append(accuracy)print('Adaboost - Epoch [{}/{}], Test Accuracy: {:.2f}%'.format(epoch + 1, num_epochs, accuracy))# Bagging 模型 (在GPU上训练)
class BaggingModel(torch.nn.Module):def __init__(self, num_estimators):super(BaggingModel, self).__init__()self.num_estimators = num_estimatorsself.models = torch.nn.ModuleList([SVMModel() for _ in range(num_estimators)])def forward(self, x):outputs = torch.zeros(x.size(0), 10).cuda()for i in range(self.num_estimators):outputs += self.models[i](x)return outputsbagging_model = BaggingModel(num_estimators=50).cuda()
criterion = torch.nn.CrossEntropyLoss()
optimizer = torch.optim.SGD(bagging_model.parameters(), lr=0.01)# 训练和评估
bagging_train_losses = []
bagging_test_accuracies = []for epoch in range(num_epochs):for batch_idx, (data, labels) in enumerate(train_loader):data, labels = data.cuda(), labels.cuda()outputs = bagging_model(data)loss = criterion(outputs, labels)optimizer.zero_grad()loss.backward()optimizer.step()bagging_train_losses.append(loss.item())with torch.no_grad():test_accuracy = 0total = 0for batch_idx, (data, labels) in enumerate(test_loader):data, labels = data.cuda(), labels.cuda()outputs = bagging_model(data)_, predicted = torch.max(outputs, 1)test_accuracy += torch.sum(predicted == labels).item()total += labels.size(0)accuracy = (test_accuracy / total) * 100bagging_test_accuracies.append(accuracy)print('Bagging - Epoch [{}/{}], Test Accuracy: {:.2f}%'.format(epoch + 1, num_epochs, accuracy))# 可视化
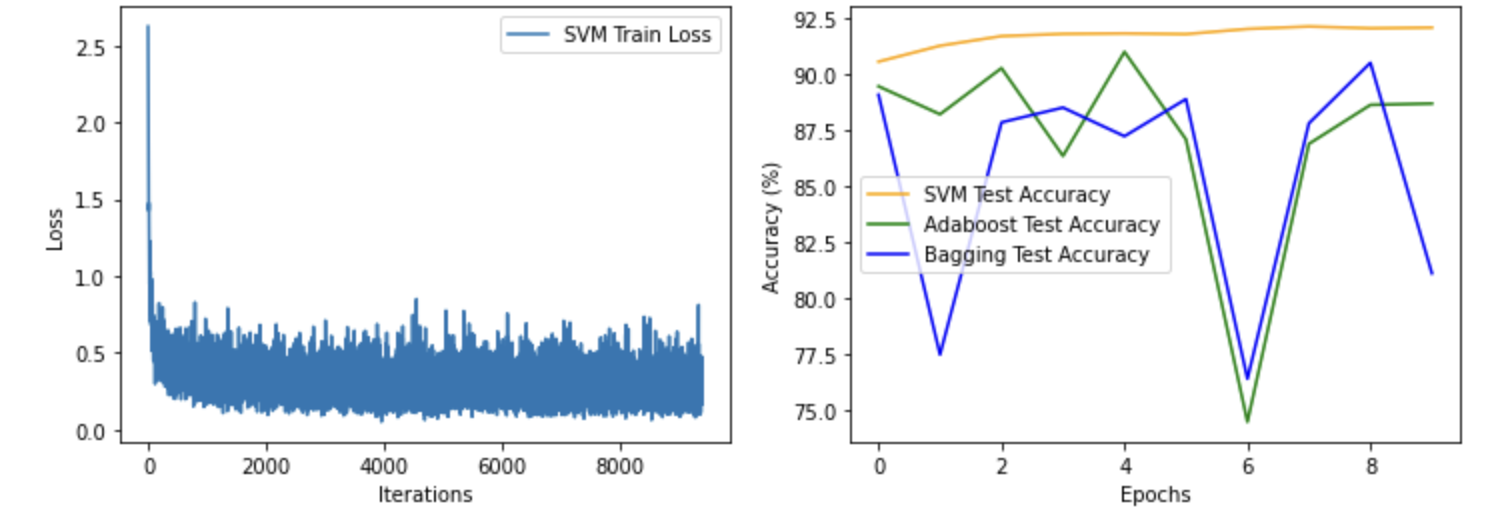
plt.figure(figsize=(12, 4))plt.subplot(1, 2, 1)
plt.plot(svm_train_losses, label='SVM Train Loss')
plt.xlabel('Iterations')
plt.ylabel('Loss')
plt.legend()plt.subplot(1, 2, 2)
plt.plot(svm_test_accuracies, label='SVM Test Accuracy', color='orange')
plt.plot(adaboost_test_accuracies, label='Adaboost Test Accuracy', color='green')
plt.plot(bagging_test_accuracies, label='Bagging Test Accuracy', color='blue')
plt.xlabel('Epochs')
plt.ylabel('Accuracy (%)')
plt.legend()plt.show()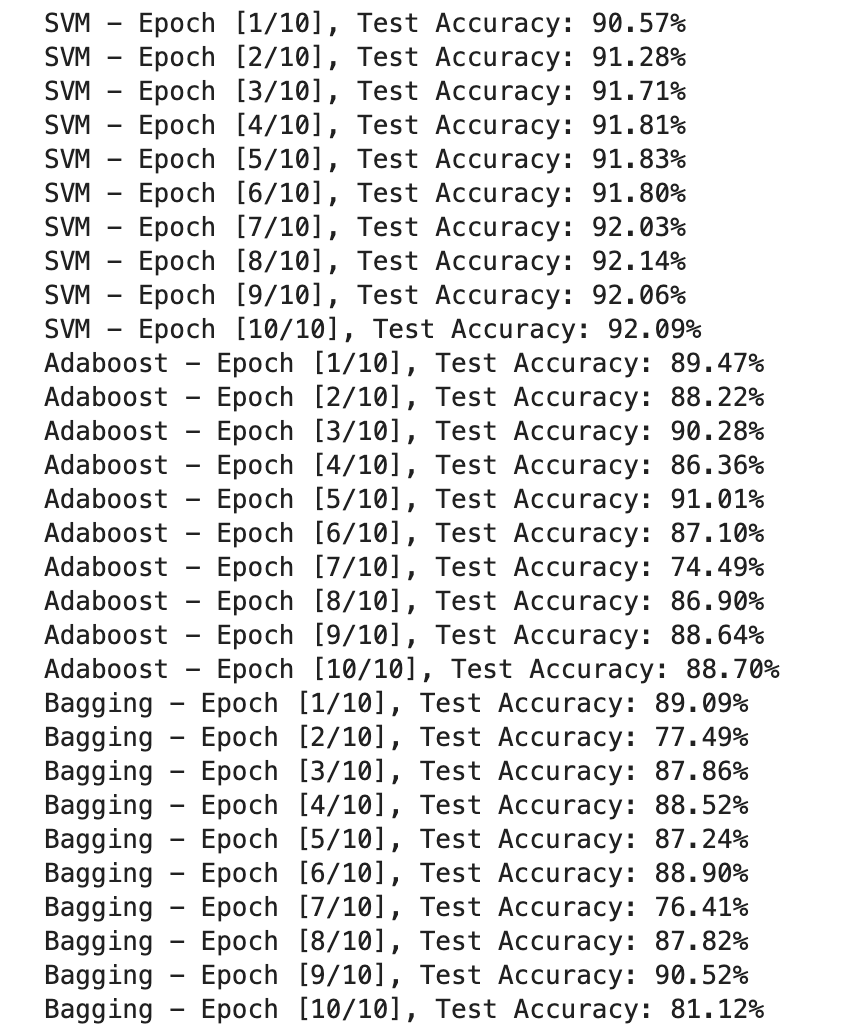
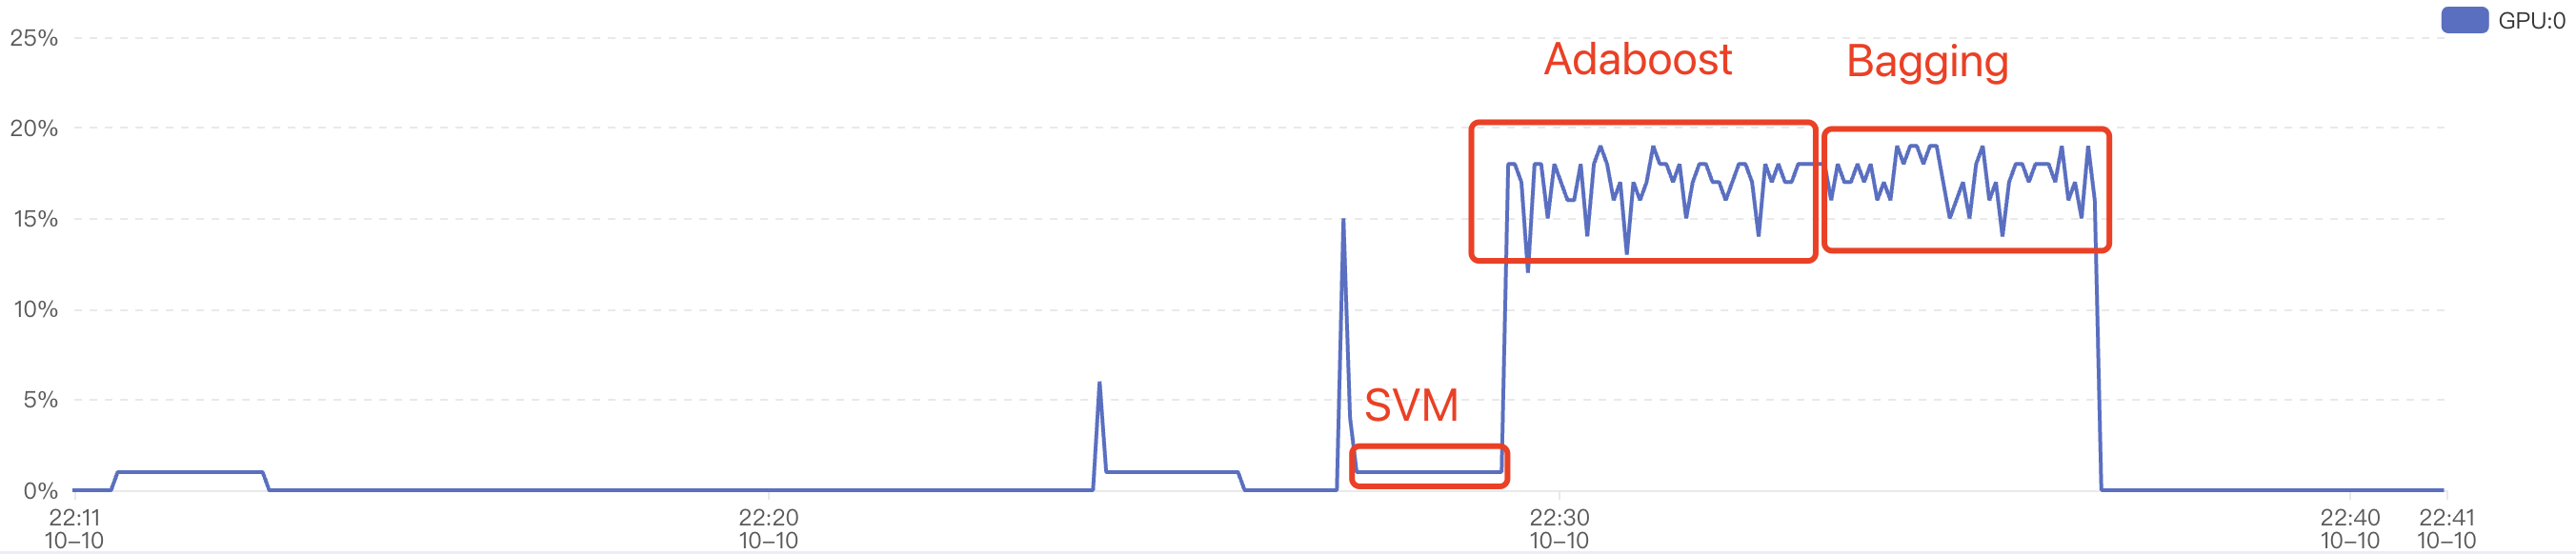
从gpu使用率看:
完整代码 II
import torch
import torch.nn.functional as F
from torch.utils.data import DataLoader, TensorDataset
from torchvision import transforms, datasets
import matplotlib.pyplot as plt# 超参数
batch_size = 64
num_epochs = 10# 数据集准备
transform = transforms.Compose([transforms.ToTensor(), transforms.Normalize((0.1307,), (0.3081,))])
train_dataset = datasets.MNIST(root='./data/demo2', train=True, transform=transform, download=True)
test_dataset = datasets.MNIST(root='./data/demo2', train=False, transform=transform, download=True)
train_loader = DataLoader(train_dataset, batch_size=batch_size, shuffle=True)
test_loader = DataLoader(test_dataset, batch_size=batch_size, shuffle=False)# SVM 模型定义
class SVMModel(torch.nn.Module):def __init__(self):super(SVMModel, self).__init__()self.flatten = torch.nn.Flatten()self.linear = torch.nn.Linear(28 * 28, 10)def forward(self, x):x = self.flatten(x)return self.linear(x)# Adaboost 模型定义
class AdaboostModel(torch.nn.Module):def __init__(self, num_estimators):super(AdaboostModel, self).__init__()self.num_estimators = num_estimatorsself.models = torch.nn.ModuleList([SVMModel() for _ in range(num_estimators)])def forward(self, x):outputs = torch.zeros(x.size(0), 10).cuda()for i in range(self.num_estimators):outputs += self.models[i](x)return outputs# Bagging 模型定义
class BaggingModel(torch.nn.Module):def __init__(self, num_estimators):super(BaggingModel, self).__init__()self.num_estimators = num_estimatorsself.models = torch.nn.ModuleList([SVMModel() for _ in range(num_estimators)])def forward(self, x):outputs = torch.zeros(x.size(0), 10).cuda()for i in range(self.num_estimators):outputs += self.models[i](x)return outputs# 训练函数
def train_model(model, train_loader, test_loader, num_epochs, optimizer, criterion):train_losses = []test_accuracies = []best_accuracy = 0for epoch in range(num_epochs):model.train()for batch_idx, (data, labels) in enumerate(train_loader):data, labels = data.cuda(), labels.cuda()outputs = model(data)loss = criterion(outputs, labels)optimizer.zero_grad()loss.backward()optimizer.step()train_losses.append(loss.item())model.eval()with torch.no_grad():test_accuracy = 0total = 0for batch_idx, (data, labels) in enumerate(test_loader):data, labels = data.cuda(), labels.cuda()outputs = model(data)_, predicted = torch.max(outputs, 1)test_accuracy += torch.sum(predicted == labels).item()total += labels.size(0)accuracy = (test_accuracy / total) * 100test_accuracies.append(accuracy)# 更新最佳准确率和最佳模型if accuracy > best_accuracy:best_accuracy = accuracybest_model = model.state_dict()print('Epoch [{}/{}], Test Accuracy: {:.2f}%'.format(epoch + 1, num_epochs, accuracy))# 返回训练过程中的损失、准确率和最佳模型的状态字典return train_losses, test_accuracies, best_model# 创建SVM模型、Adaboost模型和Bagging模型
svm_model = SVMModel().cuda()
adaboost_model = AdaboostModel(num_estimators=50).cuda()
bagging_model = BaggingModel(num_estimators=50).cuda()# 损失函数和优化器
criterion = torch.nn.CrossEntropyLoss()
svm_optimizer = torch.optim.SGD(svm_model.parameters(), lr=0.01)
adaboost_optimizer = torch.optim.SGD(adaboost_model.parameters(), lr=0.01)
bagging_optimizer = torch.optim.SGD(bagging_model.parameters(), lr=0.01)# 训练SVM模型
print('训练SVM模型:')
svm_train_losses, svm_test_accuracies, svm_best_model = train_model(svm_model, train_loader, test_loader, num_epochs,svm_optimizer, criterion)# 训练Adaboost模型
print('训练Adaboost模型:')
adaboost_train_losses, adaboost_test_accuracies, adaboost_best_model = train_model(adaboost_model, train_loader,test_loader, num_epochs,adaboost_optimizer, criterion)# 训练Bagging模型
print('训练Bagging模型:')
bagging_train_losses, bagging_test_accuracies, bagging_best_model = train_model(bagging_model, train_loader,test_loader, num_epochs,bagging_optimizer, criterion)# SVM、Adaboost和Bagging三个模型在测试集上的最佳准确率
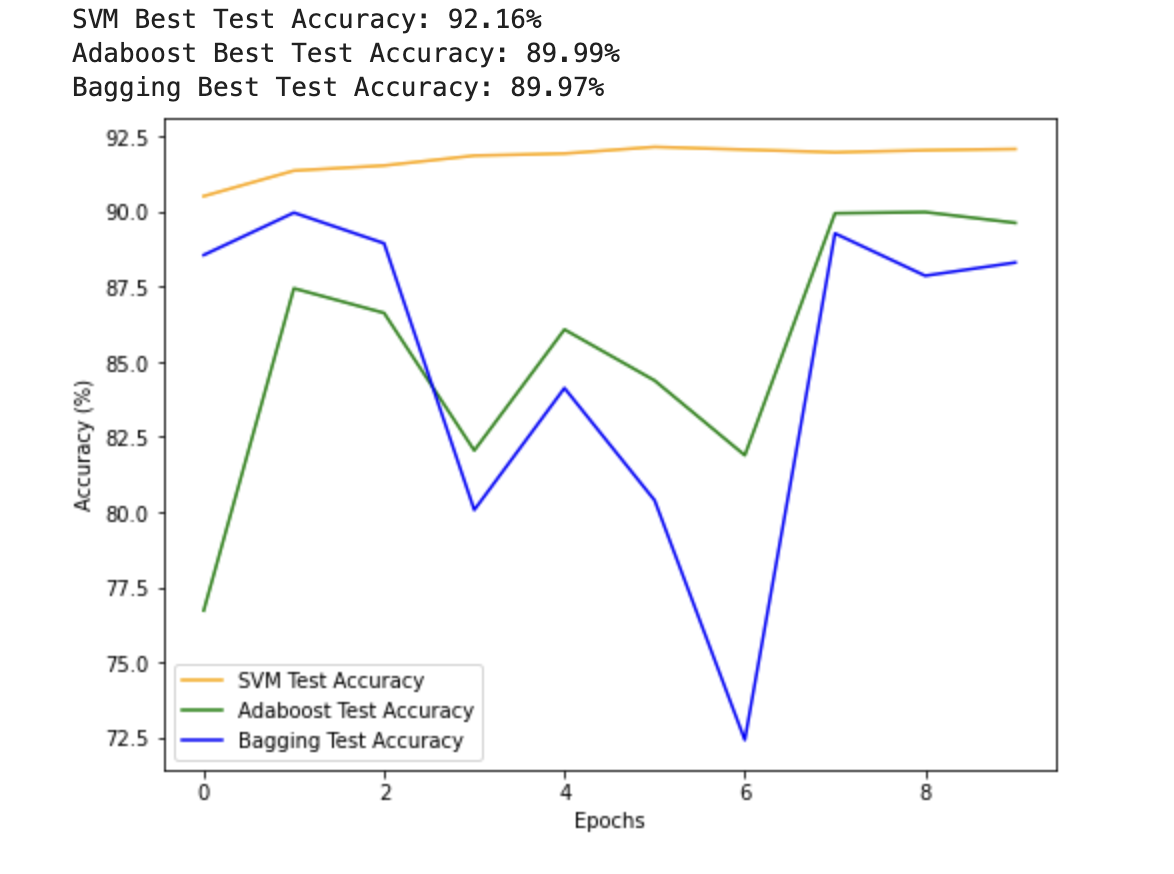
print('SVM Best Test Accuracy: {:.2f}%'.format(max(svm_test_accuracies)))
print('Adaboost Best Test Accuracy: {:.2f}%'.format(max(adaboost_test_accuracies)))
print('Bagging Best Test Accuracy: {:.2f}%'.format(max(bagging_test_accuracies)))# 三个模型的准确率最好的放在一起进行可视化对比
plt.figure(figsize=(8, 6))
plt.plot(svm_test_accuracies, label='SVM Test Accuracy', color='orange')
plt.plot(adaboost_test_accuracies, label='Adaboost Test Accuracy', color='green')
plt.plot(bagging_test_accuracies, label='Bagging Test Accuracy', color='blue')
plt.xlabel('Epochs')
plt.ylabel('Accuracy (%)')
plt.legend()
plt.show()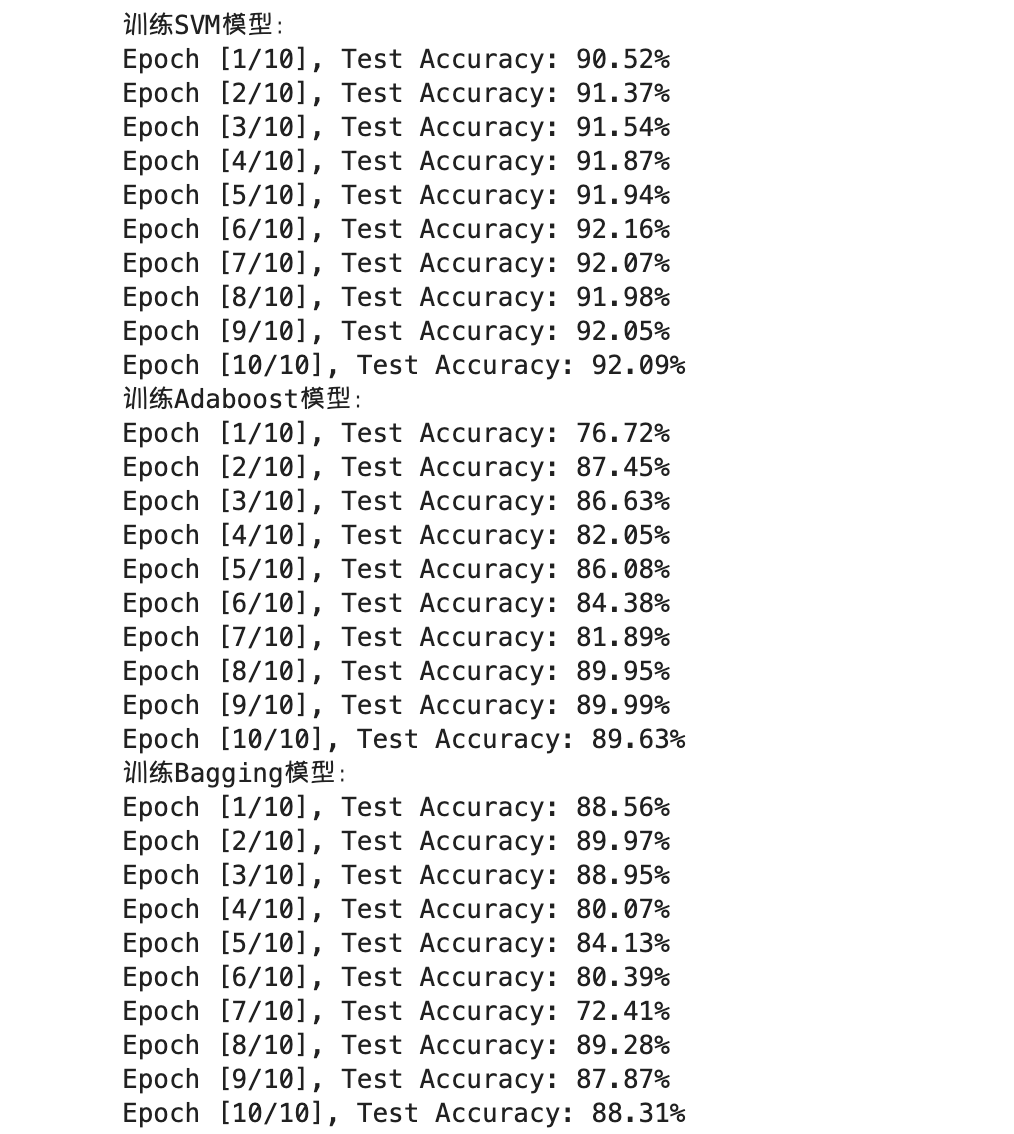
相关文章:
【手写数字识别】GPU训练版本
SVM Adaboost Bagging 完整代码 I import torch import torch.nn.functional as F from torch.utils.data import DataLoader, TensorDataset from torchvision import transforms, datasets import matplotlib.pyplot as plt# 超参数 batch_size 64 num_epochs 10# 数据…...
c#-特殊的集合
位数组 可观察的集合 private ObservableCollection<string> strList new ObservableCollection<string>();// Start is called before the first frame updatevoid Start(){strList.CollectionChanged Change;strList.Add("ssss");strList.Add("…...

Android 使用 eChart 设置标线
echart使用标线 Android部分: import android.webkit.WebView; import com.jianqu.plasmasterilizer.R; import com.jianqu.plasmasterilizer.utils.DisplayUtils; import com.jianqu.plasmasterilizer.utils.TimerUtil; import java.util.ArrayList; import java.…...

红队专题-Cobalt strike 4.x - Beacon重构
红队专题 招募六边形战士队员重构后 Beacon 适配的功能windows平台linux和mac平台C2profile 重构思路跨平台功能免杀代码部分sysinfo包packet包config.go命令的执行shell、run、executepowershell powerpick命令powershell-importexecute-assembly 堆内存加密字符集 招募六边形…...

一文掌握 Go 文件的写入操作
前言 通过案例展示如何读取文件里的内容。本文接着上篇文章的内容,介绍文件的写入操作。 File.Write、File.WriteString、File.WriteAt File.Write(b []byte) (n int, err error) 直接操作磁盘往文件里写入数据,写入单位为字节。 b 参数:…...

小程序入门及案例展示
目录 一、小程序简介 1.1 为什么要使用小程序 1.2 小程序可以干什么 二、前期准备 2.1 申请账号 2.2 开发工具下载与安装 三、电商案例演示 四、入门案例 4.1 项目结构解析 4.2 基础操作及语法 4.3 模拟器 4.4 案例演示 4.4.1 新建页面 4.4.2 头部样式设置 4.4.…...
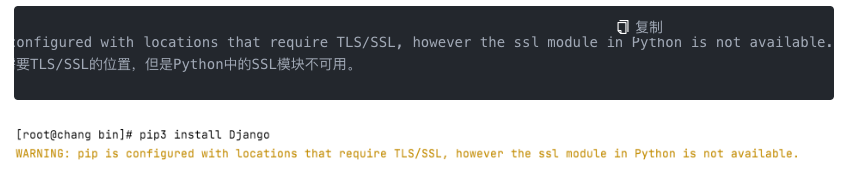
linux 安装python django pip 遇到的问题
Python解决SSL不可用问题 解决方案: 首先要明白python版本需要和openssl的版本需要相对匹配的,在Python3.7之后的版本,依赖的openssl,必须要是1.1或者1.0.2之后的版本,或者安装了2.6.4之后的libressl,linux…...
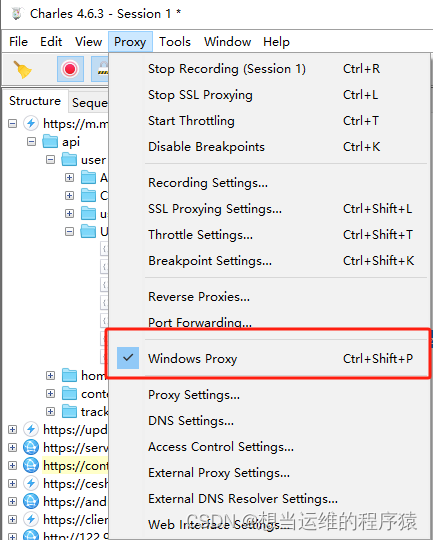
【问题解决】【爬虫】抓包工具charles与pycharm发送https请求冲突问题
问题: 开启charles抓包,运行pycharm发送https请求报以下错误 解决: 修改python代码,发送请求时添加verify false,此时charles也能抓取到pycharm发送的请求 2. 关闭charles抓包,取消勾选window proxy...
:HDFS的定义及概述)
Hadoop3教程(二):HDFS的定义及概述
文章目录 (40)HDFS产生的背景和定义(41)HDFS的优缺点(42)HDFS组成架构(43)HDFS文件块大小(面试重点)参考文献 (40)HDFS产生的背景和定…...

【物联网+JAVA 】智慧工地源码
一、什么是智慧工地? 工地本身不拥有智慧,工地的运作是依赖于人的智慧。工地信息化技术,能够减少对人的依赖,使工地拥有智慧。 智慧工地,就是立足于“智慧城市”和“互联网”,采用云计算、大数据和物联网…...
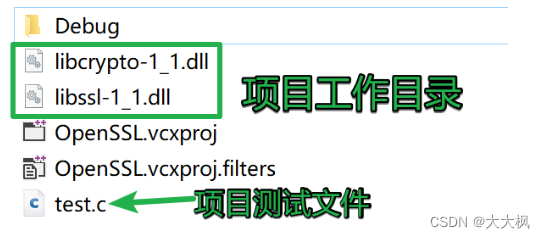
001数据安全传输-多端协议传输平台:Openssl安装和配置 - EVP代码测试
001数据安全传输-多端协议传输平台:Openssl安装和配置 - EVP代码测试 文章目录 001数据安全传输-多端协议传输平台:Openssl安装和配置 - EVP代码测试1. 安装1.1 windows下安装openssl1.2 Linux下安装OpenSSL 2. VS中使用openssl3. 测试 1. 安装 1.1 win…...

关于小编入坑第512天
机缘 最初成为创作者的初心:总结记录整个学习前端的历程 日常学习过程中的记录: 先思考,整个程序逻辑流程是否出现问题 再文档,根据相关文档了解源头,学会看懂文档,是一个锻炼自学前端能力的关键一步 …...
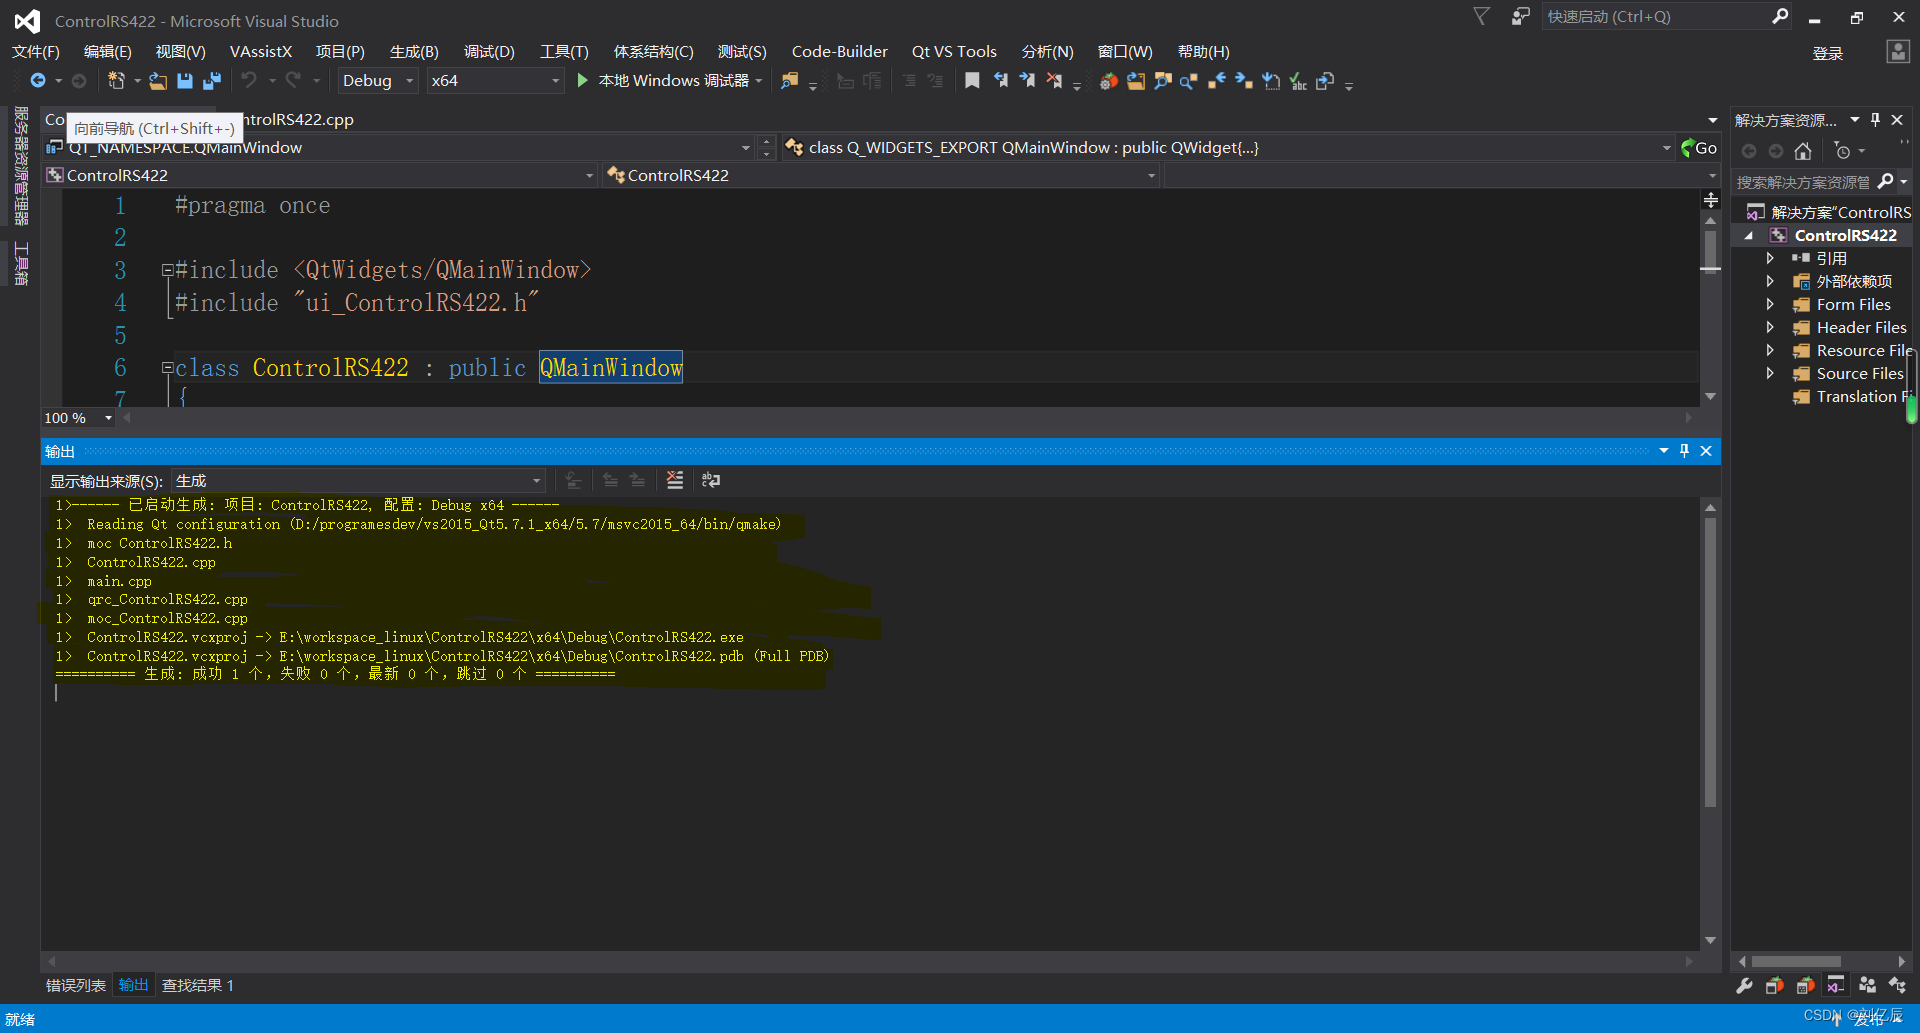
VS2015编译Qt工程发生MSB4018错误完整解决过程
一、错误产生环境 操作系统:Windows10 开发工具:VS2015企业版 Qt版本:Qt5.7.1 64位 二、错误内容 MSB4018 “VCMessage”任务意外失败。 System.FormatException: 索引(从零开始)必须大于或等于零,且小于参数列表的大小。 …...

如何使用JMeter测试导入接口/导出接口
今天一上班,被开发问了一个问题:JMeter调试接口,文件导入接口怎么老是不通?还有导出文件接口,不知道文件导到哪里去了? 我一听,这不是JMeter做接口测试经常遇到的嘛,但是一时半会又…...
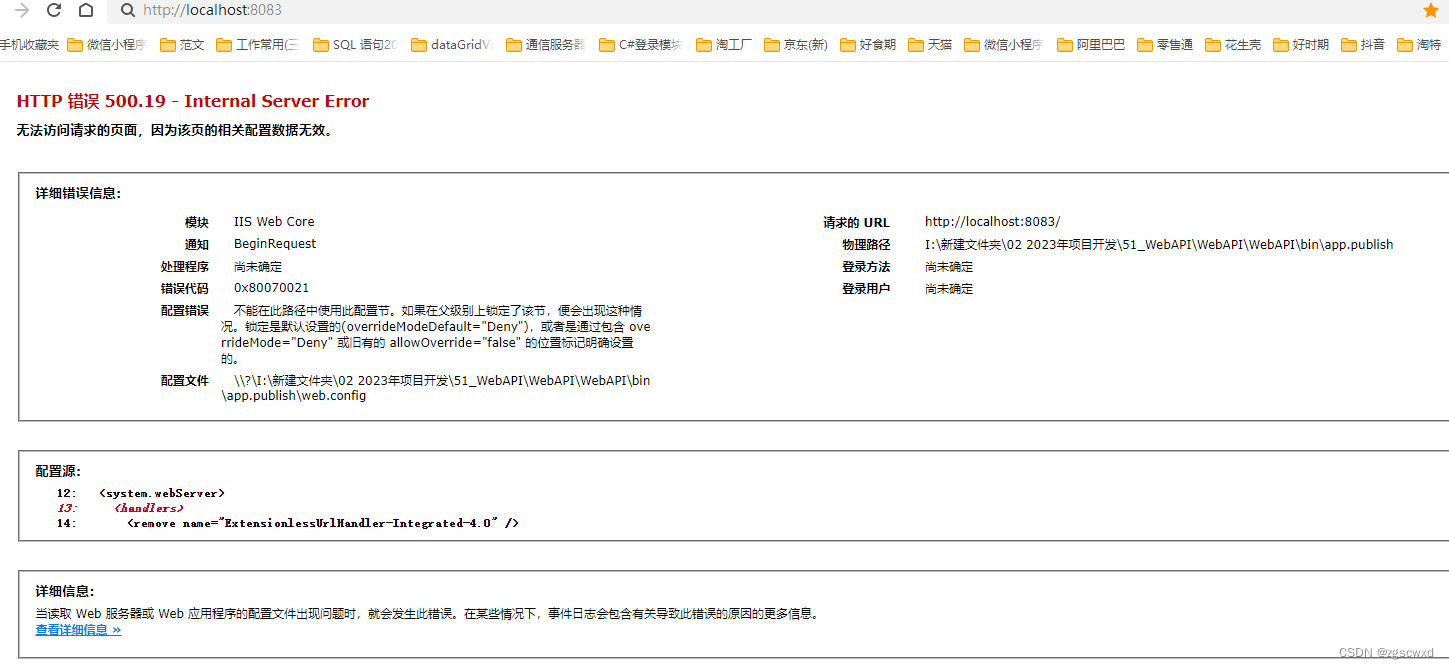
[入门一]C# webApi创建、与发布、部署、api调用
一.创建web api项目 1.1、项目创建 MVC架构的话,它会有view-model-control三层,在web api中它的前端和后端是分离的,所以只在项目中存在model-control两层 1.2、修改路由 打开App_Start文件夹下,WebApiConfig.cs ,修改路由&…...
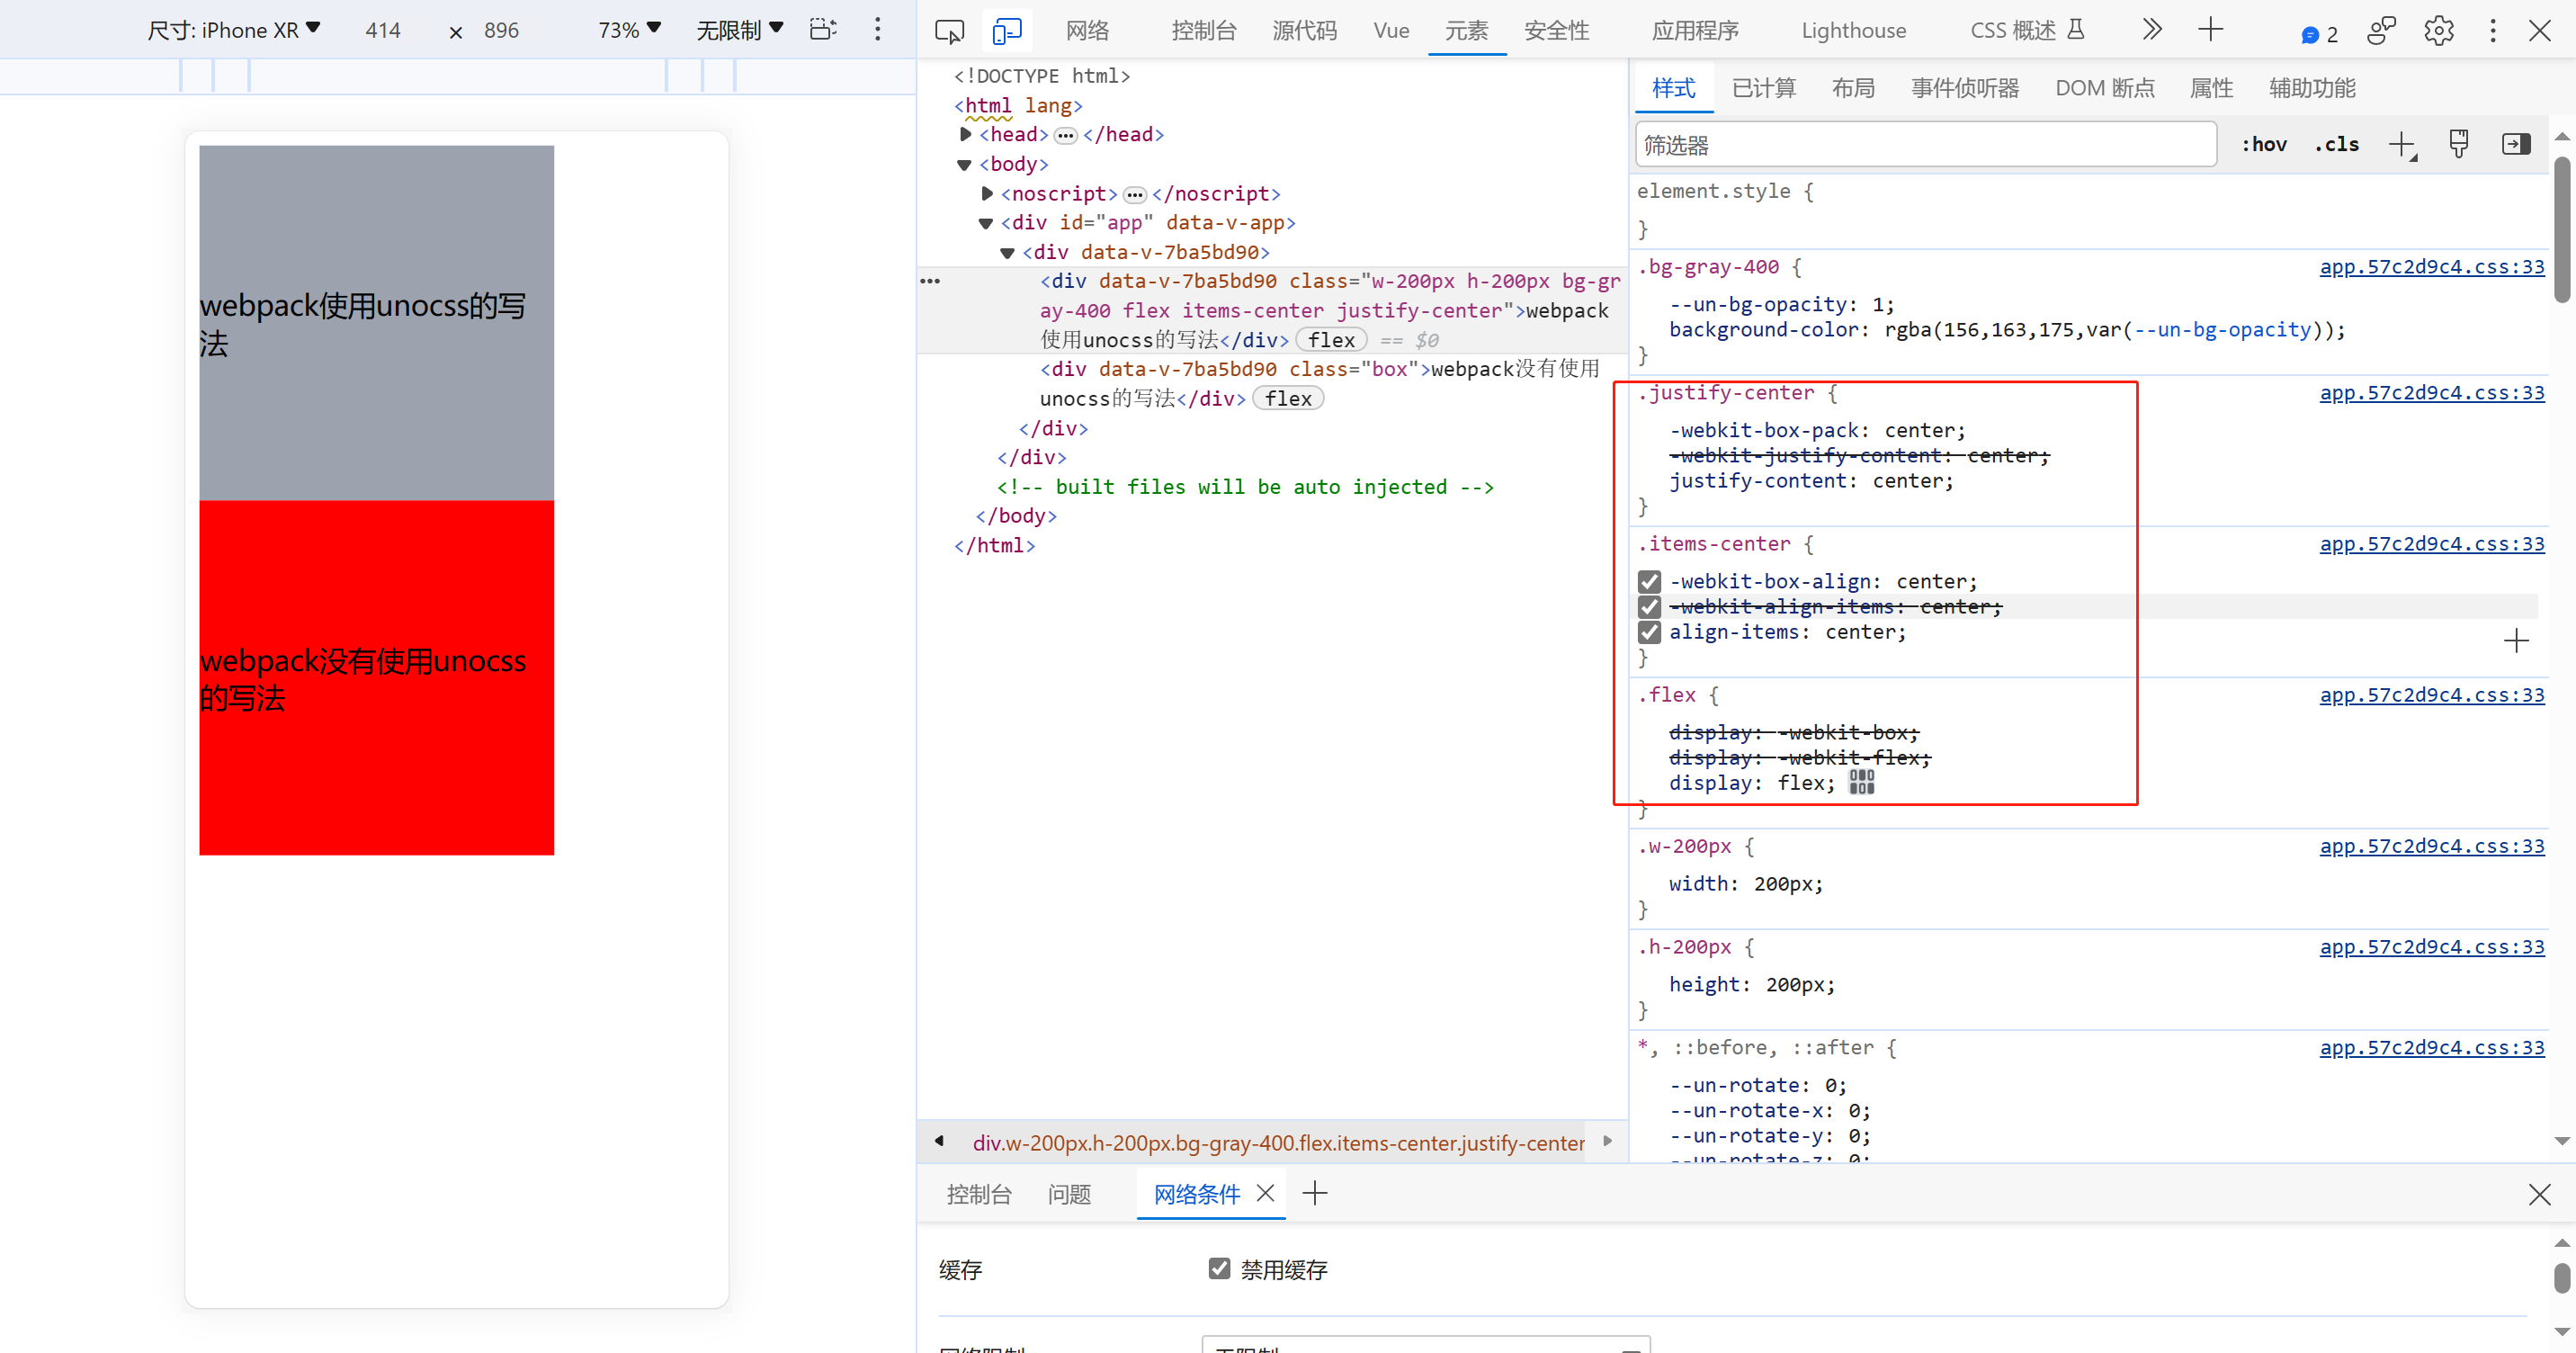
关于Vue+webpack使用unocss编写CSS,打包后CSS没加前缀
关于Vuewebpack使用unocss编写CSS,打包后CSS没加前缀,封装了一个插件去解决了这个问题 unocss-postcss-webpack-plugin unocss在vite中使用配置,关于unocss在vite中使用,自行查阅官网 https://unocss.dev/integrations/vite ,vi…...
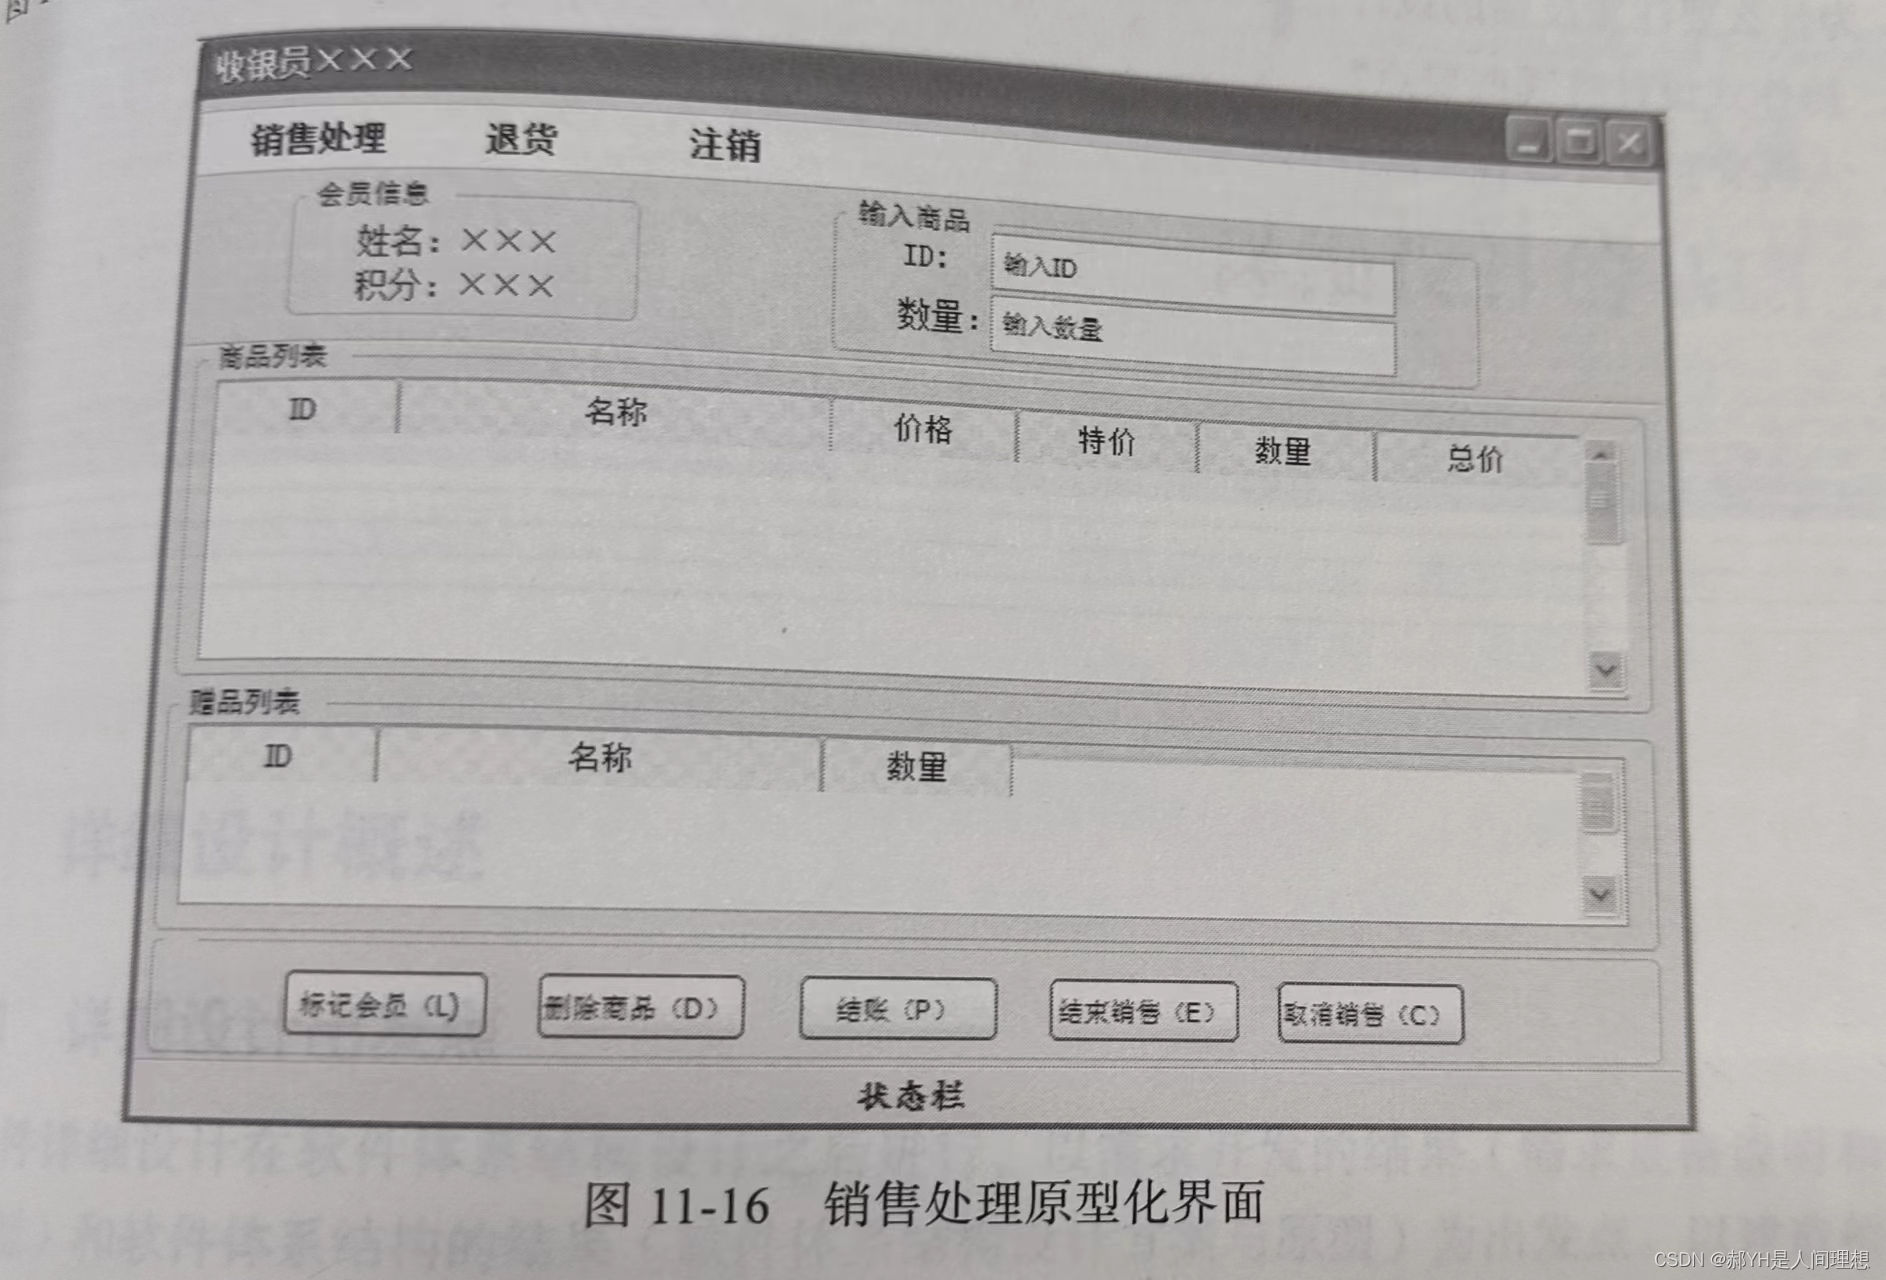
软件工程与计算总结(十一)人机交互设计
目录 编辑 一.引例 二.目标 三.人类因素 1.精神模型 2.差异性 四.计算机因素 1.可视化设计 2.常见界面类型 五.人机交互设计的交互性 1.导航 2.反馈 3.设计原则 六.设计过程 1.基本过程 2.界面原型化 一.引例 无论软件功能多么出色,亦或内部的构造…...
Jmeter组件执行顺序与作用域
一、Jmeter重要组件: 1)配置元件---Config Element: 用于初始化默认值和变量,以便后续采样器使用。配置元件大其作用域的初始阶段处理,配置元件仅对其所在的测试树分支有效,如,在同一个作用域的…...
第一天商城项目
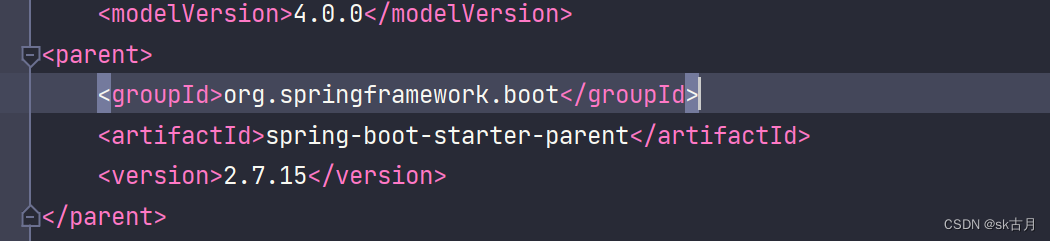
复盘 1.maven高级部分聚合和继承 maven聚合工程(深度剖析)_一宿君的博客-CSDN博客 2.yml配置文件 mybatis mybatis: mapper-locations: classpath:mappers/*mapper.xml mapper-locations:这是一个子键,用于指定MyBatis映射文件(Mapper XML…...
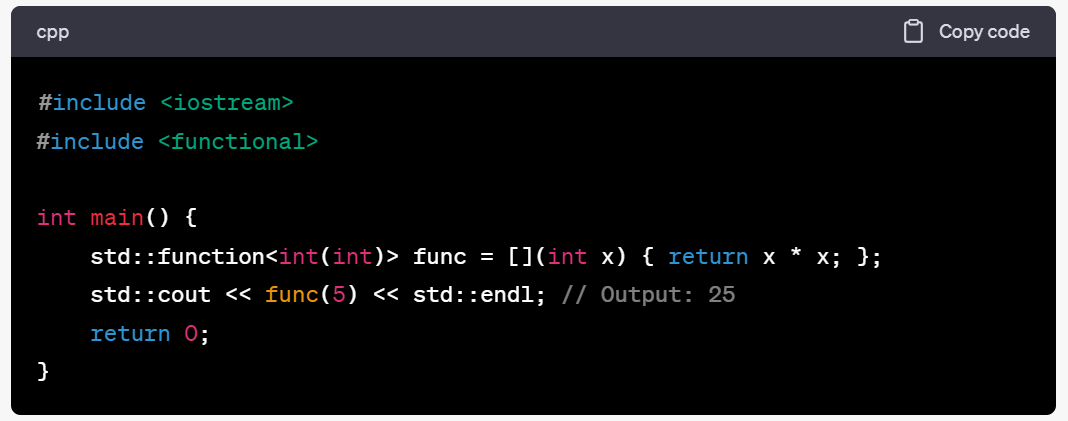
C++笔记之通用多态函数包装器std::function
C笔记之通用多态函数包装器std::function code review! 文章目录 C笔记之通用多态函数包装器std::function1.存储自由函数,lambda,std::bind 调用的结果2.存储到成员的调用3.存储到函数对象四.基本语法五.使用std::function定义函数对象六.使用std::fu…...

【花雕学编程】代码泄露之后:深度剖析Claude开源对开发者生态的冲击与机遇
导语:2026年3月31日,Anthropic 旗下 Claude Code CLI 客户端源码意外泄露,1906个源文件、51.2万行TypeScript代码被开发者备份至 GitHub 仓库 instructkr/claude-code,标注为“仅供研究”。这场看似偶然的打包失误,并非…...
)
手把手教你用V4L2框架开发USB摄像头驱动(附UVC协议解析)
深入解析V4L2框架下的USB摄像头驱动开发与UVC协议实战 在嵌入式Linux开发领域,视频采集设备的驱动开发一直是工程师们需要掌握的核心技能之一。随着物联网和边缘计算的快速发展,USB摄像头在各种智能设备中的应用越来越广泛,从工业检测到智能家…...

告别文档下载时代:基于Vue的Office在线预览解决方案全指南
告别文档下载时代:基于Vue的Office在线预览解决方案全指南 【免费下载链接】wps-view-vue wps在线编辑、预览前端vue项目,基于es6 项目地址: https://gitcode.com/gh_mirrors/wp/wps-view-vue 在数字化办公的今天,文档预览功能已成为企…...

别再手动记数据了!用MATLAB脚本自动读取串口,5分钟搞定数据采集
别再手动记数据了!用MATLAB脚本自动读取串口,5分钟搞定数据采集 还在用串口助手手动记录数据?每次实验都要盯着屏幕抄写数值,不仅效率低下,还容易出错。想象一下:当你正在进行长达数小时的温度监测实验&…...

抖音批量下载工具:高效解决方案与实战指南
抖音批量下载工具:高效解决方案与实战指南 【免费下载链接】douyin-downloader A practical Douyin downloader for both single-item and profile batch downloads, with progress display, retries, SQLite deduplication, and browser fallback support. 抖音批量…...

QMCDecode:3分钟快速解锁QQ音乐加密文件,实现跨平台音乐自由
QMCDecode:3分钟快速解锁QQ音乐加密文件,实现跨平台音乐自由 【免费下载链接】QMCDecode QQ音乐QMC格式转换为普通格式(qmcflac转flac,qmc0,qmc3转mp3, mflac,mflac0等转flac),仅支持macOS,可自动识别到QQ音乐下载目录…...

Qwen3-VL-30B效果实测:识别复杂图表毫无压力,回答精准又详细
Qwen3-VL-30B效果实测:识别复杂图表毫无压力,回答精准又详细 1. 开篇:当AI真正"看懂"了世界 想象一下这样的场景:你随手拍下一张满是数据和曲线的科研论文图表,AI不仅能准确识别出每个坐标轴的含义&#x…...

AI绘画新玩法:图图的嗨丝造相-Z-Image-Turbo部署实战,轻松生成高质量渔网袜图片
AI绘画新玩法:图图的嗨丝造相-Z-Image-Turbo部署实战,轻松生成高质量渔网袜图片 1. 引言:解锁AI绘画的专属风格 你是否曾经遇到过这样的困扰?想要生成特定风格的图片,比如穿着精致渔网袜的人物形象,但使用…...

Flutter集成鸿蒙适配三方库:基础级鸿蒙应用开发实践案例
Flutter集成鸿蒙适配三方库:基础级鸿蒙应用开发实践案例 欢迎加入开源鸿蒙跨平台社区:https://openharmonycrossplatform.csdn.net 本文聚焦基础级开发场景,以“Flutter搭建鸿蒙应用集成鸿蒙适配版三方库”为核心,提供一步一操作…...

收藏 | 传统程序员转型AI Agent工程师:未来最值钱的程序员是这类人
文章探讨了传统程序员在AI时代面临的转型问题,提出AI Agent工程师是未来趋势。文章指出,AI Agent工程师的核心能力并非模型本身,而是构建稳定自动化系统的系统工程能力,包括工具编排、状态管理、权限控制等。文章建议传统程序员通…...