利用梯度上升可视化卷积核:基于torch实现
利用梯度上升可视化卷积核
文章目录
- 前言
- 基本原理
- 版本和包
- 结果展示
- 简单绘图
- 修改源码绘图
- 方法一
- 方法二(推荐)
- 报错解决
- 总结
前言
基于梯度上升的可视化是一种常用的技术,用于理解卷积神经网络(CNN)中的卷积核是如何对输入图像进行特征提取的。该方法可以通过最大化卷积层输出的激活值来生成图像,从而使得卷积核对特定特征更加敏感。
基本原理
以下是基于梯度上升可视化卷积核的基本原理步骤:
- 选择目标卷积层和卷积核:首先,选择你希望可视化的目标卷积层和对应的卷积核。通常选择靠近网络顶部的卷积层,因为这些层对于更高级别的特征有更强的响应。
- 定义损失函数:为了最大化卷积层的输出激活值,需要定义一个损失函数。通常使用该卷积层的平均激活值作为损失函数。
- 随机生成图像:从随机噪声图像开始,作为初始输入图像。
- 前向传播:将生成的图像输入到CNN网络中,并进行前向传播,记录目标卷积层的输出激活值。
- 反向传播:计算损失函数对于输入图像的梯度,即目标卷积层输出激活值对于输入图像的影响。
- 更新输入图像:根据梯度信息更新输入图像,使得激活值增大。
- 重复步骤4-6:重复进行前向传播、反向传播和图像更新,直到达到预定的迭代次数或满足特定的停止条件。
- 可视化结果:最终生成的图像即为可视化结果,它代表了卷积核对于特定特征的响应模式。
通过这个过程,可以逐步调整输入图像,使得卷积核对于特定特征更加敏感。这种方法可以帮助我们理解卷积神经网络学习到的特征,以及卷积层如何对输入图像进行处理。
版本和包
python=3.7
torch=1.7
flashtorch=0.1.3
其中flashtorch就是用来求取中间层梯度上升的包
结果展示


简单绘图
官方代码如下所示:
(以vgg16为例子)
import torchvision.models as models
from flashtorch.activmax import GradientAscentmodel = models.vgg16(pretrained=True)
g_ascent = GradientAscent(model.features)# specify layer and filter info
conv5_1 = model.features[24]
conv5_1_filters = [45, 271, ]## 这里调节要展示的卷积核(绘出子图的个数),最大值是对应权重的通道数vis = g_ascent.visualize(conv5_1, conv5_1_filters, title="VGG16: conv5_1",return_output=True)
以上代码,用vis即可画图。
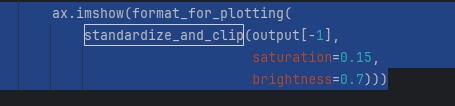
vis =【output45,output271】的列表,每个都包含很多层,源代码是用的最后一层进行绘图(下图为源码截图):
修改源码绘图
方法一
由于官方代码画不出来图,所以修改from flashtorch.activmax import GradientAscent 的源码,把plt返回即可:
找到GradientAscent函数(gradient_ascent.py) 第211行

修改为:
if return_output:return self.output, self.plt
方法二(推荐)
最好的方法是:在同级目录下新建文件grad_as.py
直接把以下代码复制到grad_as.py里:
import numpy as np
import matplotlib.pyplot as pltimport torch
import torch.nn as nnfrom flashtorch.utils import (apply_transforms,format_for_plotting,load_image,standardize_and_clip)class GradientAscent:"""Provides an interface for activation maximization via gradient descent.This class implements the gradient ascent algorithm in order to performactivation maximization with convolutional neural networks (CNN).`Activation maximization <https://pdfs.semanticscholar.org/65d9/94fb778a8d9e0f632659fb33a082949a50d3.pdf>`_is one form of feature visualization that allows us to visualize what CNNfilters are "looking for", by applying each filter to an input image andupdating the input image so as to maximize the activation of the filter ofinterest (i.e. treating it as a gradient ascent task with activation as theloss). The implementation is inspired by `this demo <https://blog.keras.io/category/demo.html>`_by Francois Chollet.Args:model: A neural network model from `torchvision.models<https://pytorch.org/docs/stable/torchvision/models.html>`_,typically without the fully-connected part of the network.e.g. torchvisions.alexnet(pretrained=True).featuresimg_size (int, optional, default=224): The size of an input image to beoptimized.lr (float, optional, default=1.): The step size (or learning rate) ofthe gradient ascent.use_gpu (bool, optional, default=False): Use GPU if set to True and`torch.cuda.is_available()`.""" # noqa##################### Public interface #####################def __init__(self, model, img_size=224, lr=1., use_gpu=False):self.model = modelself._img_size = img_sizeself._lr = lrself._use_gpu = use_gpuself.num_layers = len(list(self.model.named_children()))self.activation = Noneself.gradients = Noneself.handlers = []self.output = Noneself.plt = None@propertydef lr(self):return self._lr@lr.setterdef lr(self, lr):self._lr = lr@propertydef img_size(self):return self._img_size@img_size.setterdef img_size(self, img_size):self._img_size = img_size@propertydef use_gpu(self):return self._use_gpu@use_gpu.setterdef use_gpu(self, use_gpu):self._use_gpu = use_gpudef optimize(self, layer, filter_idx, input_=None, num_iter=30):"""Generates an image that maximally activates the target filter.Args:layer (torch.nn.modules.conv.Conv2d): The target Conv2d layer fromwhich the filter to be chosen, based on `filter_idx`.filter_idx (int): The index of the target filter.num_iter (int, optional, default=30): The number of iteration forthe gradient ascent operation.Returns:output (list of torch.Tensor): With dimentions:math:`(num_iter, C, H, W)`. The size of the image isdetermined by `img_size` attribute which defaults to 224."""# Validate the type of the layerif type(layer) != nn.modules.conv.Conv2d:raise TypeError('The layer must be nn.modules.conv.Conv2d.')# Validate filter indexnum_total_filters = layer.out_channelsself._validate_filter_idx(num_total_filters, filter_idx)# Inisialize input (as noise) if not providedif input_ is None:input_ = np.uint8(np.random.uniform(150, 180, (self._img_size, self._img_size, 3)))input_ = apply_transforms(input_, size=self._img_size)if torch.cuda.is_available() and self.use_gpu:self.model = self.model.to('cuda')input_ = input_.to('cuda')# Remove previous hooks if anywhile len(self.handlers) > 0:self.handlers.pop().remove()# Register hooks to record activation and gradientsself.handlers.append(self._register_forward_hooks(layer, filter_idx))self.handlers.append(self._register_backward_hooks())# Inisialize gradientsself.gradients = torch.zeros(input_.shape)# Optimizereturn self._ascent(input_, num_iter)def visualize(self, layer, filter_idxs=None, lr=1., num_iter=30,num_subplots=4, figsize=(4, 4), title='Conv2d',return_output=False):"""Optimizes for the target layer/filter and visualizes the output.A method that combines optimization and visualization. There aremainly 3 types of operations, given a target layer:1. If `filter_idxs` is provided as an integer, it optimizes for thefilter specified and plots the output.2. If `filter_idxs` is provided as a list of integers, it optimizes forall the filters specified and plots the output.3. if `filter_idx` is not provided, i.e. None, it randomly chooses`num_subplots` number of filters from the layer provided andplots the output.It also returns the output of the optimization, if specified with`return_output=True`.Args:layer (torch.nn.modules.conv.Conv2d): The target Conv2d layer fromwhich the filter to be chosen, based on `filter_idx`.filter_idxs (int or list of int, optional, default=None): The indexor indecies of the target filter(s).lr (float, optional, default=.1): The step size of optimization.num_iter (int, optional, default=30): The number of iteration forthe gradient ascent operation.num_subplots (int, optional, default=4): The number of filters tooptimize for and visualize. Relevant in case 3 above.figsize (tuple, optional, default=(4, 4)): The size of the plot.Relevant in case 1 above.title (str, optional default='Conv2d'): The title of the plot.return_output (bool, optional, default=False): Returns theoutput(s) of optimization if set to True.Returns:For a single optimization (i.e. case 1 above):output (list of torch.Tensor): With dimentions:math:`(num_iter, C, H, W)`. The size of the image isdetermined by `img_size` attribute which defaults to 224.For multiple optimization (i.e. case 2 or 3 above):output (list of list of torch.Tensor): With dimentions:math:`(num_subplots, num_iter, C, H, W)`. The size of theimage is determined by `img_size` attribute which defaultsto 224."""self._lr = lrif (type(filter_idxs) == int):self._visualize_filter(layer,filter_idxs,num_iter=num_iter,figsize=figsize,title=title)else:num_total_filters = layer.out_channelsif filter_idxs is None:num_subplots = min(num_total_filters, num_subplots)filter_idxs = np.random.choice(range(num_total_filters),size=num_subplots)self._visualize_filters(layer,filter_idxs,num_iter,len(filter_idxs),title=title)if return_output:return self.output, self.pltdef deepdream(self, img_path, layer, filter_idx, lr=.1, num_iter=20,figsize=(4, 4), title='DeepDream', return_output=False):"""Creates DeepDream.It applies the optimization on the image provided. The image is loadedand made into a torch.Tensor that is compatible as the input to thenetwork.Read the original blog post by Google for more information on`DeepDream <https://ai.googleblog.com/2015/06/inceptionism-going-deeper-into-neural.html>`_.Args:img_path (str): A path to the image you want to apply DeepDream onlayer (torch.nn.modules.conv.Conv2d): The target Conv2d layer fromwhich the filter to be chosen, based on `filter_idx`.filter_idx (int): The index of the target filter.lr (float, optional, default=.1): The step size of optimization.num_iter (int, optional, default=30): The number of iteration forthe gradient ascent operation.figsize (tuple, optional, default=(4, 4)): The size of the plot.Relevant in case 1 above.title (str, optional default='Conv2d'): The title of the plot.return_output (bool, optional, default=False): Returns theoutput(s) of optimization if set to True.Returns:output (list of torch.Tensor): With dimentions:math:`(num_iter, C, H, W)`. The size of the image isdetermined by `img_size` attribute which defaults to 224.""" # noqainput_ = apply_transforms(load_image(img_path), self.img_size)self._lr = lroutput = self.optimize(layer, filter_idx, input_, num_iter=num_iter)plt.figure(figsize=figsize)plt.axis('off')plt.title(title)plt.imshow(format_for_plotting(standardize_and_clip(output[-1],saturation=0.15,brightness=0.7))); # noqaif return_output:return output###################### Private interface ######################def _register_forward_hooks(self, layer, filter_idx):def _record_activation(module, input_, output):self.activation = torch.mean(output[:, filter_idx, :, :])return layer.register_forward_hook(_record_activation)def _register_backward_hooks(self):def _record_gradients(module, grad_in, grad_out):if self.gradients.shape == grad_in[0].shape:self.gradients = grad_in[0]for _, module in self.model.named_modules():if isinstance(module, nn.modules.conv.Conv2d) and \module.in_channels == 3:return module.register_backward_hook(_record_gradients)def _ascent(self, x, num_iter):output = []for i in range(num_iter):self.model(x)self.activation.backward()self.gradients /= (torch.sqrt(torch.mean(torch.mul(self.gradients, self.gradients))) + 1e-5)x = x + self.gradients * self._lroutput.append(x)return outputdef _validate_filter_idx(self, num_filters, filter_idx):if not np.issubdtype(type(filter_idx), np.integer):raise TypeError('Indecies must be integers.')elif (filter_idx < 0) or (filter_idx > num_filters):raise ValueError(f'Filter index must be between 0 and \{num_filters - 1}.')def _visualize_filter(self, layer, filter_idx, num_iter, figsize, title):self.output = self.optimize(layer, filter_idx, num_iter=num_iter)plt.figure(figsize=figsize)plt.axis('off')plt.title(title)plt.imshow(format_for_plotting(standardize_and_clip(self.output[-1],saturation=0.15,brightness=0.7))); # noqadef _visualize_filters(self, layer, filter_idxs, num_iter, num_subplots,title):# Prepare the main plotnum_cols = 4num_rows = int(np.ceil(num_subplots / num_cols))fig = plt.figure(figsize=(16, num_rows * 5))plt.title(title)plt.axis('off')self.output = []# Plot subplotsfor i, filter_idx in enumerate(filter_idxs):output = self.optimize(layer, filter_idx, num_iter=num_iter)self.output.append(output)ax = fig.add_subplot(num_rows, num_cols, i+1)ax.set_xticks([])ax.set_yticks([])ax.set_title(f'filter {filter_idx}')ax.imshow(format_for_plotting(standardize_and_clip(output[-1],saturation=0.15,brightness=0.7)))plt.subplots_adjust(wspace=0, hspace=0); # noqaself.plt = plt```
然后使用以下代码绘图:
import torchvision.models as models
from grad_as import GradientAscentmodel = models.vgg16(pretrained=True) # 这里可以改成其它模型g_ascent = GradientAscent(model.features)# specify layer and filter info
conv5_1 = model.features[24]  # 相应的这里也要改,可以用print(model)代码查看模型结构进行修改
conv5_1_filters = [45, 271, ]vis,plt = g_ascent.visualize(conv5_1, conv5_1_filters, title="VGG16: conv5_1",return_output=True)plt.show()
报错解决
报错如下
from importlib_resources import path
ImportError: cannot import name 'path' from 'importlib_resources'
找到报错处的源文件,尝试在代码中手动导入 path,而不是从 importlib_resources 直接导入:
from importlib_resources import path
替换为:
from importlib_resources import filesdef path(package, resource):return files(package).joinpath(resource)
这样,代码将使用 files 函数来导入 path,而不是直接从 importlib_resources 中导入。
总结
以上代码均经过本人亲测可用。
相关文章:
利用梯度上升可视化卷积核:基于torch实现
利用梯度上升可视化卷积核 文章目录 前言基本原理版本和包结果展示 简单绘图修改源码绘图方法一 方法二(推荐) 报错解决总结 前言 基于梯度上升的可视化是一种常用的技术,用于理解卷积神经网络(CNN)中的卷积核是如何对…...

python+playwright 学习-85 启动参数 proxy 设置代理几种方式
前言 在使用playwright执行代码的时候,如需设置代理,可以在启动的时候加proxy 参数设置代理。 本篇总结下可以加proxy代理的几种方式。 launch 启动全局代理 launch 启动的时候设置全局代理,以下是示例 from playwright.sync_api import Playwright, sync_playwrightwit…...

Clion 搭建Qt projects
Qt projects Qt is a cross-platform C framework for creating GUI applications. Qt uses its own build system, qmake, and also supports building with CMake starting from the version Qt4. Qt是一款创建桌面程序的跨平台的C框架。qmake是Qt自有的构建系统࿰…...

合肥工业大学数据库实验报告
✅作者简介:CSDN内容合伙人、信息安全专业在校大学生🏆 🔥系列专栏 :hfut实验课设 📃新人博主 :欢迎点赞收藏关注,会回访! 💬舞台再大,你不上台,永远是个观众。平台再好,你不参与,永远是局外人。能力再大,你不行动,只能看别人成功!没有人会关心你付出过多少…...
)
设计模式-装饰器模式(Decorator)
设计模式-装饰器模式(Decorator) 一、装饰器模式概述1.1 什么是装饰器模式1.2 简单实现装饰器模式1.3 使用装饰器模式的注意事项 二、装饰器模式的用途三、装饰器模式的实现方式3.1 通过接口和抽象类实现3.2 通过Java反射实现3.3 通过使用第三方库实现 一…...

Java 数据结构篇-实现双链表的核心API
🔥博客主页: 小扳_-CSDN博客 ❤感谢大家点赞👍收藏⭐评论✍ 文章目录 1.0 双链表的说明 1.1 双链表 - 创建 1.2 双链表 - 根据索引查找节点 1.3 双链表 - 根据索引插入节点 1.4 双链表 - 头插节点 1.5 双链表 - 尾插 1.6 双链表 - 根据索引来…...
电脑如何截屏?一起来揭晓答案!
在数字时代,截屏已经成为我们日常生活和工作中的必备技能。无论是为了捕捉有趣的网络瞬间,保存重要信息,还是为了协作和教育,电脑截屏都是一个强大而方便的工具。本文将介绍三种电脑如何截屏的方法,以满足各种需求&…...

【实战-08】flink 消费kafka自定义序列化
目的 让从kafka消费出来的数据,直接就转换成我们的对象 mvn pom <!-- Licensed to the Apache Software Foundation (ASF) under one or more contributor license agreements. See the NOTICE file distributed with this work for additional information …...

深入浅出 Django 异步编程
随着 Web 应用对性能的要求日益提高,异步编程成为了提升响应速度、提高系统吞吐量的重要手段。Django 作为一个成熟的 Python Web 框架,自 3.1 版本开始支持了异步编程。在本文中,我们将探讨 Django 异步编程的关键概念,并提供实际…...

力扣 138. 随机链表的复制
文章目录 1.解题思路2.代码实现 1.解题思路 在原先链表的每一个元素后面插入一个与前一个相同val的值的结点,然后由于是在原链表进行的操作,因此找每个random就变得很方便直接访问即可,此题目的精髓是cur1->randomp->random->next,看懂这串代码…...

STM32外部中断大问题
问题:一直进入中断,没有触发信号,也一直进入。 描述:开PA0为外部中断,刚刚很好,一个触发信号一个中断,中断函数没有丢,也没有抢跑,开PA1为外部中断也是,都很好…...
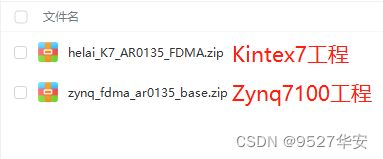
FPGA配置采集AR0135工业相机,提供2套工程源码和技术支持
目录 1、前言免责声明 2、AR0135工业相机简介3、我这里已有的 FPGA 图像处理解决方案4、设计思路框架AR0135配置和采集图像缓存视频输出 5、vivado工程1–>Kintex7开发板工程6、vivado工程1–>Zynq7100开发板工程7、上板调试验证8、福利:工程代码的获取 1、前…...
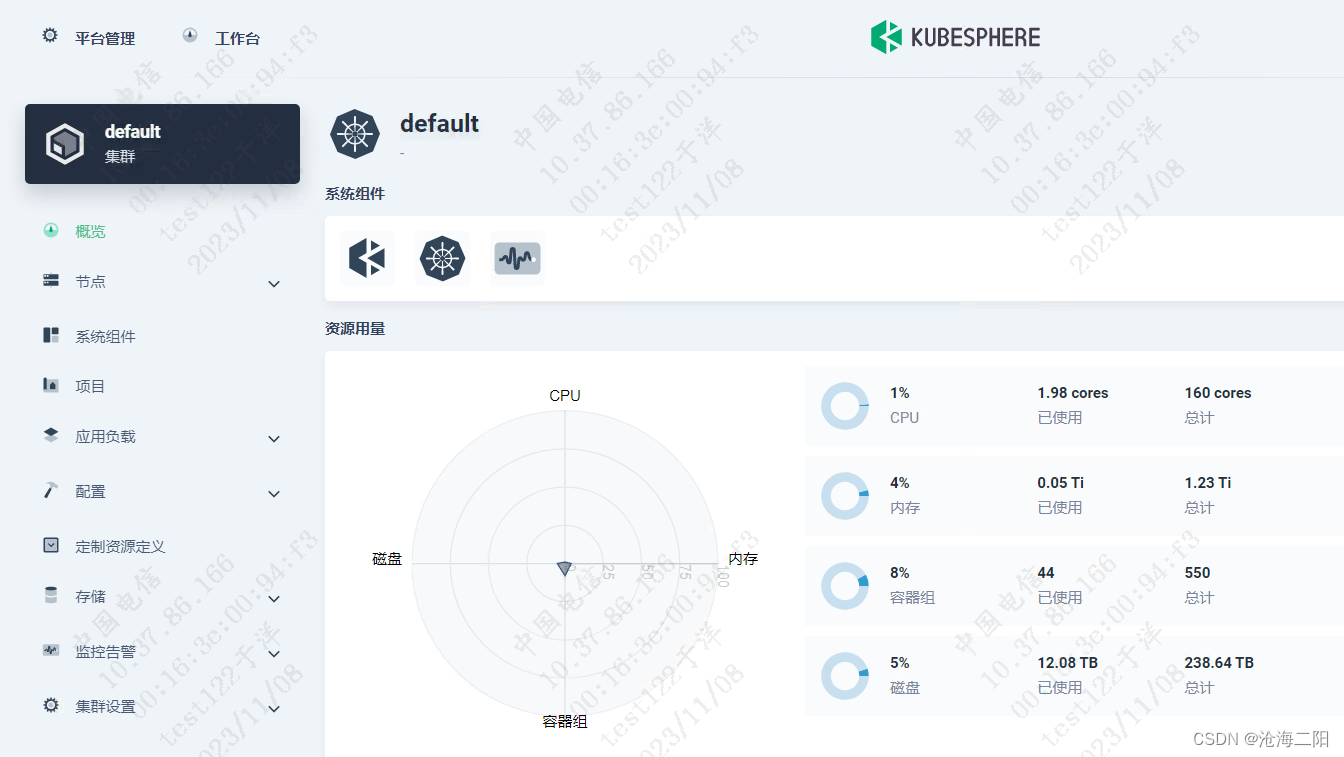
KubeSphere v3.4.0 部署K8S Docker + Prometheus + grafana
KubeSphere v3.4.0 部署K8S 1、整体思路2、修改linux主机名3、 离线安装3.1 问题列表3.2 执行命令成功列表 1、整体思路 将KubeSphere v3.4.0 安装包传输到其中一台机器修改Linux主机名(选取3台,修改为master01、master02、master03)安装官方…...
Codeforces Round 908 (Div. 2)题解
目录 A. Secret Sport 题目分析: B. Two Out of Three 题目分析: C. Anonymous Informant 题目分析: A. Secret Sport 题目分析: A,B一共打n场比赛,输入一个字符串由A和‘B’组成代表A赢或者B赢(无平局),因为题目说明这个人…...
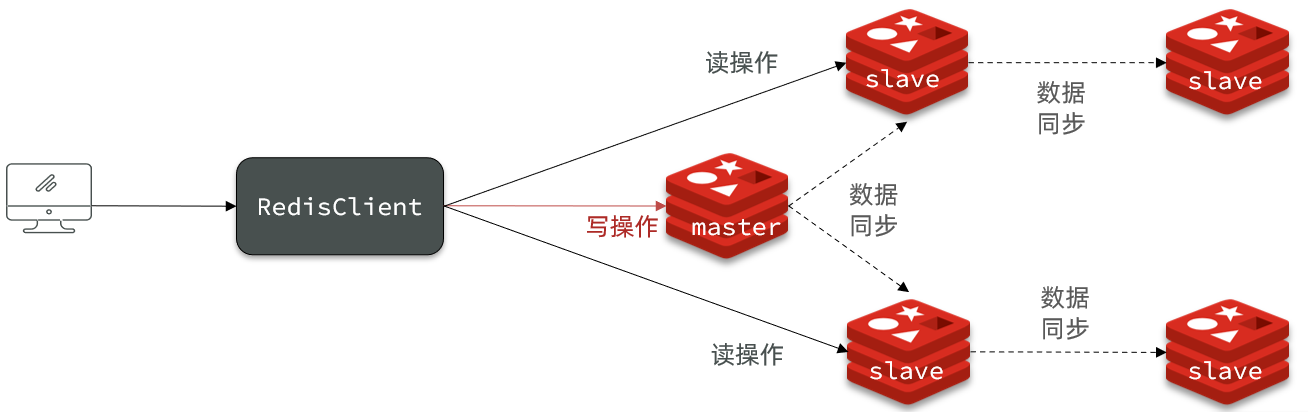
Redis笔记 Redis主从同步
文章目录 Redis主从搭建主从架构主从数据同步原理全量同步增量同步repl_backlog原理 主从同步优化小结 Redis主从 搭建主从架构 单节点Redis的并发能力是有上限的,要进一步提高Redis的并发能力,就需要搭建主从集群,实现读写分离。 主从数据…...
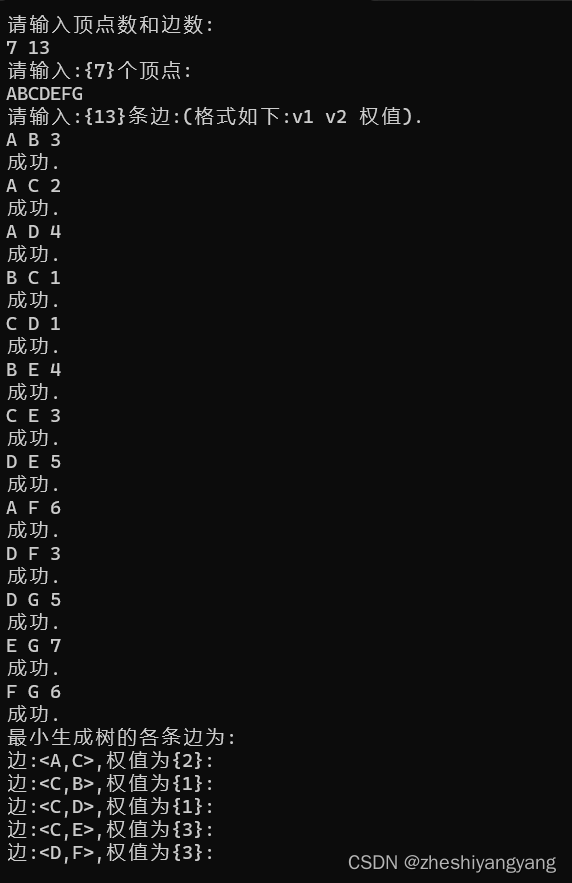
数据结构-Prim算法构造无向图的最小生成树
引子: 无向图如果是一个网,那么它的所有的生成树中必有一颗生成树的边的权值之和是最小的,我们称 这颗权值和最小的树为:“最小生成树”(MST)。 其中,一棵树的代价就是树中所有权值之和。 而…...
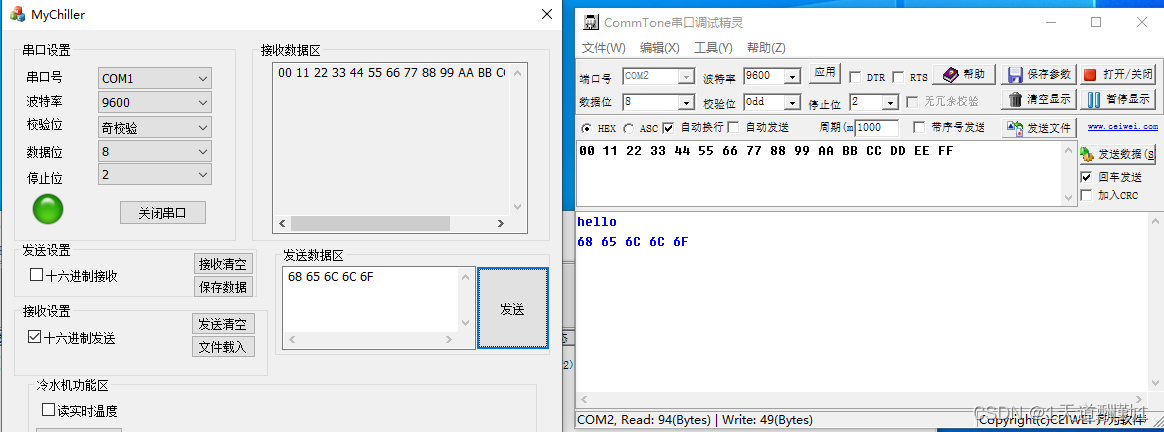
MFC串口通信(SerialPort)
目录 1、SerialPort类的介绍和使用: (1)、SerialPort类的功能介绍 (2)、SerialPort类提供接口函数的介绍 1)、InitPort函数 2)、控制串口监视线程函数 3)、获取事件,…...

Vim基本使用操作
前言:作者也是初学Linux,可能总结的还不是很到位 Linux修炼功法:初阶功法 ♈️今日夜电波:美人鱼—林俊杰 0:21━━━━━━️💟──────── 4:14 …...
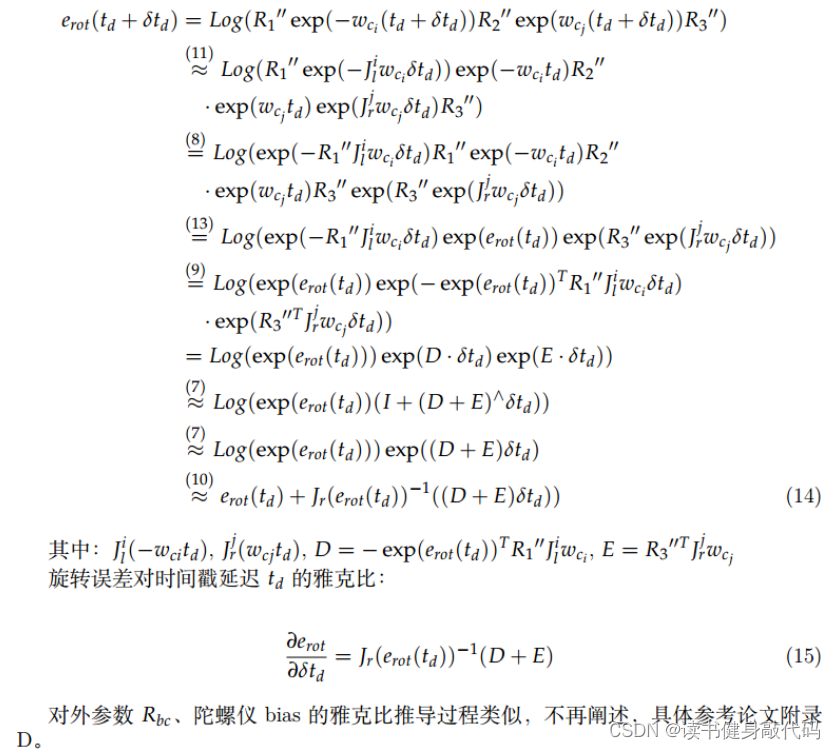
【深蓝学院】手写VIO第8章--相机与IMU时间戳同步--作业
0. 题目 1. T1 逆深度参数化时的特征匀速模型的重投影误差 参考常鑫助教的答案:思路是将i时刻的观测投到world系,再用j时刻pose和外参投到j时刻camera坐标系下,归一化得到预测的二维坐标(这里忽略了camera的内参,逆深…...

Naocs配置中心配置映射List、Map、Map嵌套List等方式
一、配置映射List 1、常规逐个配置方式,示例如下: 代码: @Data @Configuration @ConfigurationProperties(prefix = "list-json-str") public class ConfListByJsonStr implements Serializable, InitializingBean {@ApiModelProperty("映射结果集")…...

从防御者视角看ARP欺骗:除了静态绑定,你的内网还能如何加固?
从防御者视角看ARP欺骗:内网安全加固实战指南 当你在深夜收到内网异常告警时,是否曾想过——那个看似平静的局域网里,可能正有人通过ARP欺骗监听所有通信?ARP协议作为局域网通信的"翻译官",其设计缺陷让攻击…...
)
从仿真到芯片:手把手将Simulink定点化FOC代码部署到STM32F4/F1(含数据溢出调试实录)
从仿真到芯片:手把手将Simulink定点化FOC代码部署到STM32F4/F1(含数据溢出调试实录) 在电机控制领域,Simulink模型仿真与真实硬件部署之间往往存在一道难以逾越的鸿沟。许多工程师能够熟练搭建浮点算法模型并获得理想的仿真结果&a…...
)
【网络协议-17】LWIP学习浅谈:从入门到实战,嵌入式网络开发进阶指南(续)
前言 在嵌入式开发领域,网络功能已经成为越来越多产品的标配。从智能家居设备到工业控制器,从物联网网关到车载电子,几乎都离不开 TCP/IP 网络通信。而在资源受限的嵌入式系统中,LWIP(Lightweight Internet Protocol&…...

一文讲清,设备维护是什么意思?企业为什么要重视设备维护?
设备维护是企业生产运营中绝对绕不开的核心环节,它直接关系到设备的运行效率与使用寿命。科学的设备维护管理不仅能有效预防设备故障,还能通过预防性维护策略降低停机风险,保障生产连续性。本文将系统解读设备维护的定义、重要性及实施方法&a…...

深入IgH EtherCAT DC同步:从‘主站参考’到‘从站参考’的时钟优化实践
深入IgH EtherCAT DC同步:从‘主站参考’到‘从站参考’的时钟优化实践 在工业自动化领域,EtherCAT因其卓越的实时性能而广受欢迎,而分布式时钟(DC)同步机制则是实现高精度控制的核心。传统的IgH主站实现默认采用主站时…...
)
TVA在汽车动力电池模组全流程检测中的应用(2)
前沿技术背景介绍:AI 智能体视觉系统(TVA,Transformer-based Vision Agent),是依托Transformer架构与因式智能体所构建的新一代视觉检测技术。它区别于传统机器视觉与早期AI视觉,代表了工业智能化转型与视觉…...

OneNET文件管理踩坑记:从API鉴权到Postman上传,我遇到的3个坑和解决办法
OneNET文件管理实战避坑指南:API鉴权与Postman上传的深度解析 第一次接触OneNET平台的文件管理API时,我本以为按照官方文档按部就班就能轻松完成图片上传功能。然而现实却给了我当头一棒——从API鉴权到Postman请求配置,每一步都暗藏玄机。本…...

5个步骤彻底解决Cursor AI试用限制问题
5个步骤彻底解决Cursor AI试用限制问题 【免费下载链接】cursor-free-vip [Support 0.45](Multi Language 多语言)自动注册 Cursor Ai ,自动重置机器ID , 免费升级使用Pro 功能: Youve reached your trial request limit. / Too m…...

避坑指南:AIP650驱动开发中常见的I2C通信失败问题与调试方法
AIP650驱动开发实战:I2C通信故障排查与深度调试手册 当你在深夜调试AIP650驱动的数码管显示,却发现屏幕一片漆黑或是乱码飞舞时,那种挫败感我深有体会。这不是一篇照本宣科的技术文档,而是凝结了多次项目实战中踩坑经验的调试指南…...

MicroStation平台上的TerraSolid点云处理:从数据加载到成果导出的完整工作流复盘
MicroStation平台上TerraSolid点云处理全流程实战指南 第一次打开MicroStation看到密密麻麻的工具栏时,我和所有测绘新人一样手足无措。直到参与某高速公路改扩建项目,才真正理解这套工具链的价值——当我们需要在两周内完成50公里带状地形测绘时&#x…...