Ansible角色定制实例
目录
角色定制:roles
角色定制实例:利用角色部署wordpress
1.在roles目录下生成对应的目录结构
2.定义配置文件
①nginx
②php
③mysql
④定义剧本文件
⑤启动服务
角色定制:roles
对于普通的剧本(playbook)有个弊端就是无法实现复用假设在同时部署Web、db、ha 时或不同服务器组合不同的应用就需要写多个yml文件。很难实现灵活的调用。
roles 用于层次性、结构化地组织playbook。roles 能够根据层次型结构自动装载变量文件、tasks以及handlers等。要使用roles只需要在playbook中使用include指令即可。简单来讲,roles就是通过分别将变量(vars)、文件(file)、任务(tasks)、模块(modules)及处理器(handlers)放置于单独的目录中,并可以便捷地include它们的一种机制。
角色定制实例:利用角色部署wordpress
192.168.134.165 server01
192.168.134.166 server02
192.168.134.163 server03
server01管理其他两个服务器资产。
1.在roles目录下生成对应的目录结构
[root@server01 ~]# mkdir roles
#生成相应的目录
[root@server01 roles]# ansible-galaxy init nginx
[root@server01 roles]# ansible-galaxy init mysql
[root@server01 roles]# ansible-galaxy init php
[root@server01 roles]# tree
.
├── mysql
│   ├── defaults
│   │   └── main.yml
│   ├── files
│   ├── handlers
│   │   └── main.yml
│   ├── meta
│   │   └── main.yml
│   ├── README.md
│   ├── tasks
│   │   └── main.yml
│   ├── templates
│   ├── tests
│   │   ├── inventory
│   │   └── test.yml
│   └── vars
│       └── main.yml
├── nginx
│   ├── defaults
│   │   └── main.yml
│   ├── files
│   ├── handlers
│   │   └── main.yml
│   ├── meta
│   │   └── main.yml
│   ├── README.md
│   ├── tasks
│   │   └── main.yml
│   ├── templates
│   │   └── nginx.conf
│   ├── tests
│   │   ├── inventory
│   │   └── test.yml
│   └── vars
│       └── main.yml
├── php
│   ├── defaults
│   │   └── main.yml
│   ├── files
│   ├── handlers
│   │   └── main.yml
│   ├── meta
│   │   └── main.yml
│   ├── README.md
│   ├── tasks
│   │   └── main.yml
│   ├── templates
│   ├── tests
│   │   ├── inventory
│   │   └── test.yml
│   └── vars
│       └── main.yml
2.定义配置文件
我们需要修改每个文件对应的配置。
①nginx
- [root@server01 roles]# vim nginx/tasks/main.yml
[root@server01 roles]# vim nginx/tasks/main.yml
---
# tasks file for nginx- name: install {{ server }}yum: name={{ server }},epel-release  state=present- name: start {{ server }}service: name={{ server }} state=started- name: 拷贝wordpress源代码unarchive: src=/root/wordpress-6.4.1-zh_CN.tar.gz dest=/usr/share/nginx/html- name: copy wordpresscopy: src=/root/roles/wp-config.php  dest=/usr/share/nginx/html/wordpress/- name: copytemplate: src=/root/roles/nginx/templates/nginx.conf dest=/etc/nginx/  #将nginx的配置文件模板发送到资产上notify: restartnginxtags: rs#上传wordpress的包
[root@server01 ~]# rz
[root@server01 ~]# ll
-rw-r--r--  1 root root 25302043 11月 13 09:58 wordpress-6.4.1-zh_CN.tar.gz
- 创建 /root/roles/wp-config.php文件写入一下内容
<?php
/*** The base configuration for WordPress** The wp-config.php creation script uses this file during the installation.* You don't have to use the web site, you can copy this file to "wp-config.php"* and fill in the values.** This file contains the following configurations:** * Database settings* * Secret keys* * Database table prefix* * ABSPATH** @link https://wordpress.org/documentation/article/editing-wp-config-php/** @package WordPress*/// ** Database settings - You can get this info from your web host ** //
/** The name of the database for WordPress */
define( 'DB_NAME', 'wordpress' );/** Database username */
define( 'DB_USER', 'wordpress' );/** Database password */
define( 'DB_PASSWORD', 'Aren@123' );/** Database hostname */
define( 'DB_HOST', '192.168.134.166' );/** Database charset to use in creating database tables. */
define( 'DB_CHARSET', 'utf8mb4' );/** The database collate type. Don't change this if in doubt. */
define( 'DB_COLLATE', '' );/**#@+* Authentication unique keys and salts.** Change these to different unique phrases! You can generate these using* the {@link https://api.wordpress.org/secret-key/1.1/salt/ WordPress.org secret-key service}.** You can change these at any point in time to invalidate all existing cookies.* This will force all users to have to log in again.** @since 2.6.0*/
define( 'AUTH_KEY',         'ug.ct&MB!sL1_o/6t.}Xt4|f?;%|@.Zw6>wUwM3uSXcgB_nnOaZF-m^oUAuV.i-n' );
define( 'SECURE_AUTH_KEY',  'EP#~FNQDJRfL4C8Lboja}KVrc:fhdq_L~gn#wN>^qrn.DHZQwkjl=]-:QFcv:aY-' );
define( 'LOGGED_IN_KEY',    '3NQgD!)H{lR=,s(EQm7!jYrlR*T|3:h:Ag>_|#6qAO k6U#vvF)gXqb EKdcu[]v' );
define( 'NONCE_KEY',        ',LMJd60b=Qj1]B)ut!JAYCuJ)xN?`Dlnc>P8Tl_hCTk3Sl+qyAvpi_[VbCTAR?:/' );
define( 'AUTH_SALT',        'uj<)Ftb_ZA8+;ms%1AqGik.P@35[]r?.d~jc4J?]und3^vEV*=noZ}z^Gbj?u,oQ' );
define( 'SECURE_AUTH_SALT', '-CoV$a0F^9AF ?Zk()y<{}*WB`QP;$++T`F2NC6OUb]2=i9GW`*/1RjLb&sTO>}/' );
define( 'LOGGED_IN_SALT',   '2)?iJr4fi!gqk5~76^f1}Apdwynt:;$JoNdw]ty:kL]tEfy[%$H(oLNdCX/bFhJy' );
define( 'NONCE_SALT',       'zU(c-T%ayYW17wFle,oVj0@VG&m,e#Ujs~M|@>q[^|RCp*q)GbGTbRh*zh_#V5h6' );/**#@-*//*** WordPress database table prefix.** You can have multiple installations in one database if you give each* a unique prefix. Only numbers, letters, and underscores please!*/
$table_prefix = 'wp_';
define( 'WP_DEBUG', false );/* Add any custom values between this line and the "stop editing" line. *//* That's all, stop editing! Happy publishing. *//** Absolute path to the WordPress directory. */
if ( ! defined( 'ABSPATH' ) ) {define( 'ABSPATH', __DIR__ . '/' );
}/** Sets up WordPress vars and included files. */
require_once ABSPATH . 'wp-settings.php';- [root@server01 roles]# vim nginx/vars/main.yml
[root@server01 roles]# vim nginx/vars/main.yml
---
# vars file for nginxserver: nginxport: 80
- [root@server01 roles]# vim nginx/templates/nginx.conf
user nginx;
worker_processes auto;
error_log /var/log/nginx/error.log;
pid /run/nginx.pid;# Load dynamic modules. See /usr/share/doc/nginx/README.dynamic.
include /usr/share/nginx/modules/*.conf;events {worker_connections 1024;
}http {log_format main '$remote_addr - $remote_user [$time_local] "$request" ''$status $body_bytes_sent "$http_referer" ''"$http_user_agent" "$http_x_forwarded_for"';access_log /var/log/nginx/access.log main;sendfile on;tcp_nopush on;tcp_nodelay on;keepalive_timeout 65;types_hash_max_size 4096;include /etc/nginx/mime.types;default_type application/octet-stream;# Load modular configuration files from the /etc/nginx/conf.d directory.# See http://nginx.org/en/docs/ngx_core_module.html#include# for more information.include /etc/nginx/conf.d/*.conf;server {listen {{ port }};server_name localhost;root /usr/share/nginx/html/wordpress;index index.php;# Load configuration files for the default server block.include /etc/nginx/default.d/*.conf;location ~ \.php$ {root /usr/share/nginx/html/wordpress; #指定网站目录fastcgi_pass 127.0.0.1:9000; #指定访问地址fastcgi_index index.php; #指定默认文件fastcgi_param SCRIPT_FILENAME $document_root$fastcgi_script_name; #站点根目录,取决于root配置项include fastcgi_params; #包含nginx常量定义}error_page 404 /404.html;location = /404.html {}error_page 500 502 503 504 /50x.html;location = /50x.html {}}}- 定义handlers文件 [root@server01 roles]# vim nginx/handlers/main.yml
---
# handlers file for nginx- name: restartnginxservice: name={{ server }} state=restarted
②php
- root@server01 roles]# vim php/tasks/main.yml
---
# tasks file for php- name: install phpyum: name=php80-php-xsl,php80-php,php80-php-cli,php80-php-devel,php80-php-gd,php80-php-pdo,php80-php-mysql,php80-php-fpm state=present- name: start phpservice: name=php80-php-fpm state=started
③mysql
- [root@server01 roles]# vim mysql/tasks/main.yml
---
# tasks file for mysql- name: install mariadbyum: name=mariadb-server,mariadb state=present disablerepo=mysql-5.7-community- name: start dbservice: name=mariadb state=started enabled=true- name: change passwdshell: mysql -e "create database {{ db_name }}; grant all on wordpress.* to 'wordpress'@'%' identified by '{{ db_pass }}'; flush privileges"tags: db - [root@server01 roles]# vim mysql/vars/main.yml
---
# vars file for mysqldb_name: 'wordpress'db_pass: Aren@123
④定义剧本文件
接下来,我们就来定义剧本文件,由于大部分设置我们都单独配置在了roles里面,所以,接下来剧本就只需要写一点点内容即可:
[root@server01 roles]# vim roles.yaml
---- hosts: allremote_user: rootroles:- nginx- php- mysql
⑤启动服务
- [root@server01 roles]# ansible-playbook /root/roles/roles.yaml

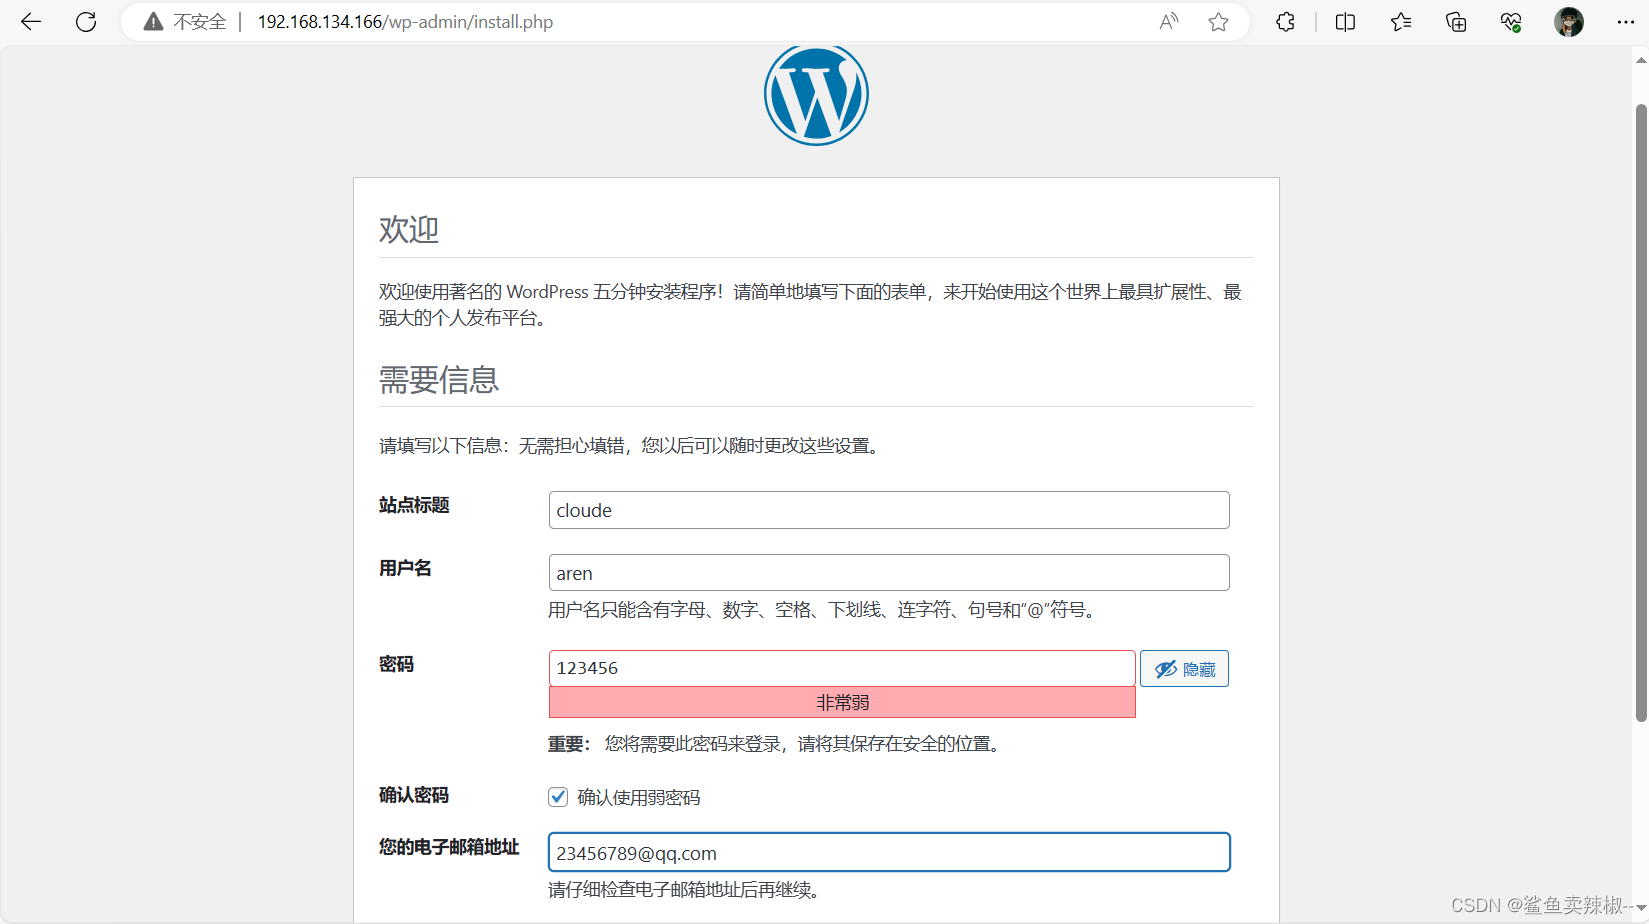
进入web页面
相关文章:
Ansible角色定制实例
目录 角色定制:roles 角色定制实例:利用角色部署wordpress 1.在roles目录下生成对应的目录结构 2.定义配置文件 ①nginx ②php ③mysql ④定义剧本文件 ⑤启动服务 角色定制:roles 对于普通的剧本(playbook)有…...

ElastaticSearch--- es多字段聚合
在使用es时,我们经常会用到聚合查询。 简单的聚合查询,已经在前面介绍过,详情见: https://www.cnblogs.com/expiator/p/13843969.html 有时,也会用到多字段聚合查询。类似于Mysql的Group By多个字段。 比如…...

本周Github有趣开源项目:Rspress等6个
Github有趣的项目、工具和库: 1、sshx 一个基于 Web 的安全协作终端。通过网络进行快速、协作的实时终端共享 特征: 运行一个命令即可与任何人共享您的终端。 在无限画布上调整大小、移动窗口以及自由缩放和平移。 查看其他人的光标实时移动。 连接到…...

【华为OD题库-016】字符串摘要-Java
题目 给定一个字符串的摘要算法,请输出给定字符串的摘要值 1、去除字符串中非字母的符号 2、如果出现连续字符(不区分大小写),则输出:该字符(小)+连续出现的次数 3、如果是非连续的宁符(不区分大小写),则输出:该字符(小写)该字母之…...
生成式AI - Knowledge Graph Prompting:一种基于大模型的多文档问答方法
大型语言模型(LLM)已经彻底改变了自然语言处理(NLP)任务。它们改变了我们与文本数据交互和处理的方式。这些强大的AI模型,如OpenAI的GPT-4,改变了理解、生成人类类似文本的方式,导致各种行业出现…...

深度学习AIR-PolSAR-Seg图像数据预处理
文章目录 深度学习sar图像数据预处理一.图片预处理操作1.log(1x)处理2.sqrt平方化处理 二.原网络训练效果展示原始数据训练效果展示: 三.对比实验1.采用原始数据2.采用取log(1x)后的数据3.采用取平方后归一化处理: 四.总结:五.思考 深度学习s…...
求最大公约数math.gcd()
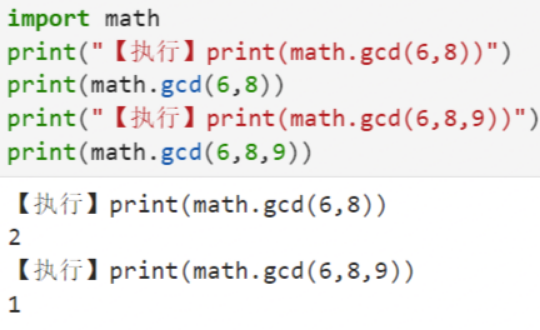
【小白从小学Python、C、Java】 【计算机等级考试500强双证书】 【Python-数据分析】 求最大公约数 math.gcd() [太阳]选择题 下列代码执行输出的结果是? import math print("【执行】print(math.gcd(6, 8))") print(math.gcd(6, 8)) print(&quo…...
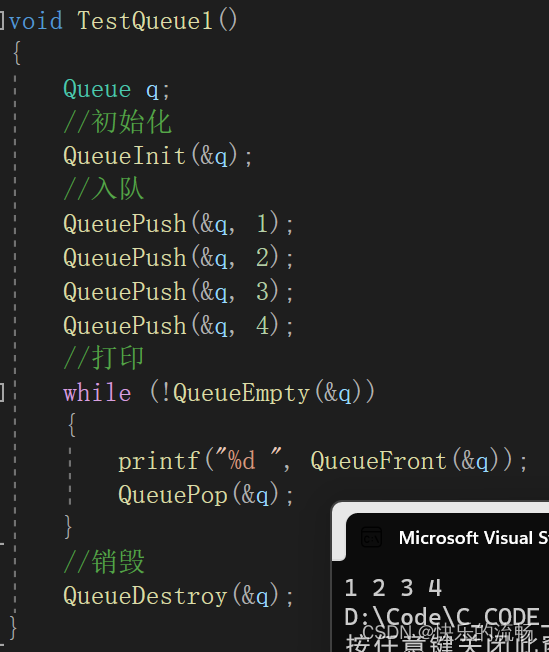
数据结构之队列
目录 引言 队列的概念与结构 队列的实现 定义 初始化 销毁 入队 判断队列是否为空 出队 获取队头元素 获取队尾元素 检测队列中有效元素个数 元素访问 源代码 queue.h queue.c test.c 引言 数据结构之路经过栈后,就来到了与栈联系紧密的兄弟—…...
)
MySQL数据库——存储过程-循环(while、repeat、loop)
目录 while 介绍 案例 repeat 介绍 案例 loop 介绍 案例一 案例二 while 介绍 while 循环是有条件的循环控制语句。满足条件后,再执行循环体中的SQL语句。具体语法为: -- 先判定条件,如果条件为true,则执行逻辑&#…...

Django路由
路由系统 1.Django1中的路由1.1 普通形式1.2 分组1.2.1 无名分组1.2.2 有名分组 2. Django2版本2.1 传统的路由2.2 正则表达式路由 3. 路由分发3.1 include(一般使用此方式做路由分发)3.2 手动分发 4. name别名及使用name的反向URL生成4.1 一般情况下的别名使用及反向生成4.2 分…...

头歌实践平台-数据结构-二叉树及其应用
第1关:实现二叉树的创建 #include "binary_tree.h"BiTreeNode* CreatBiTree(char* s, int &i, int len) // 利用先序遍历创建二叉树 // 参数:先序遍历字符串s,字符串初始下标i0,字符串长度len。 // 返回࿱…...
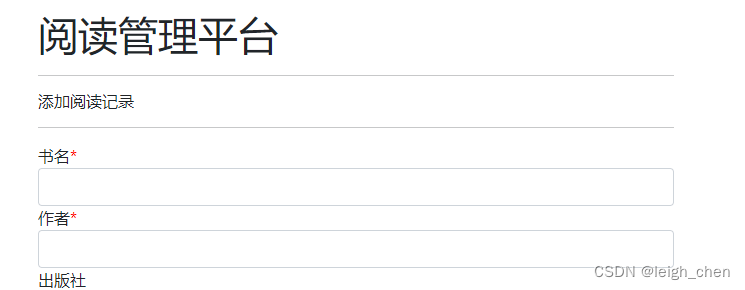
2023.11.11通过html内置“required-star“添加一个红色的星号来表示必填项
2023.11.11通过html内置"required-star"添加一个红色的星号来表示必填项 在HTML中,可以使用标签来为元素添加说明。同时可以通过添加一个红色的星号来表示必填项。 <!DOCTYPE html> <html lang"en"> <head><meta charse…...

pcie【C#】
根据提供的引用内容,使用C#编写PCIE的Demo需要遵循以下步骤:1.连接好硬件后,烧录bit文件,安装PCIe内核驱动,然后重启计算机。2.打开VS工程,创建一个新的C#控制台应用程序项目。3.在项目中添加对C DLL的引用…...

西门子精智屏数据记录U盘插拔问题总结
西门子精智屏数据记录U盘插拔问题总结 注意: 数据记录过程中不允许带电插拔 U 盘! 数据记录的相关功能可参考以下链接中的内容: TIA博途wincc V16 如何进行变量周期归档?...
Deep Filter Banks for Texture Recognition and Segmentation)
(论文阅读27/100)Deep Filter Banks for Texture Recognition and Segmentation
27.文献阅读笔记 简介 题目 Deep Filter Banks for Texture Recognition and Segmentation 作者 Mircea Cimpoi, Subhransu Maji, Andrea Vedaldi, 原文链接 http://www.cv-foundation.org/openaccess/content_cvpr_2015/papers/Cimpoi_Deep_Filter_Banks_2015_CVPR_pap…...
)
ARMday06(串口)
代码: #include "gpio.h" #include "stm32mp1xx_gpio.h" #include "stm32mp1xx_rcc.h" #include "stm32mp1xx_uart.h" void init(); char getc(); void putc(const char data); int main() {init();//初始化putc(j);char …...

Rust字符串详解
文章目录 字符串切片String迭代方法基础字符串方法容量操作增删改查 字符串切片 我们所熟知的由双引号括起来的字符串,在Rust中只是个字符串切片,又叫字符串字面值。这种类型一旦创建,则不可更改。但支持索引,从切片中索引出来的…...
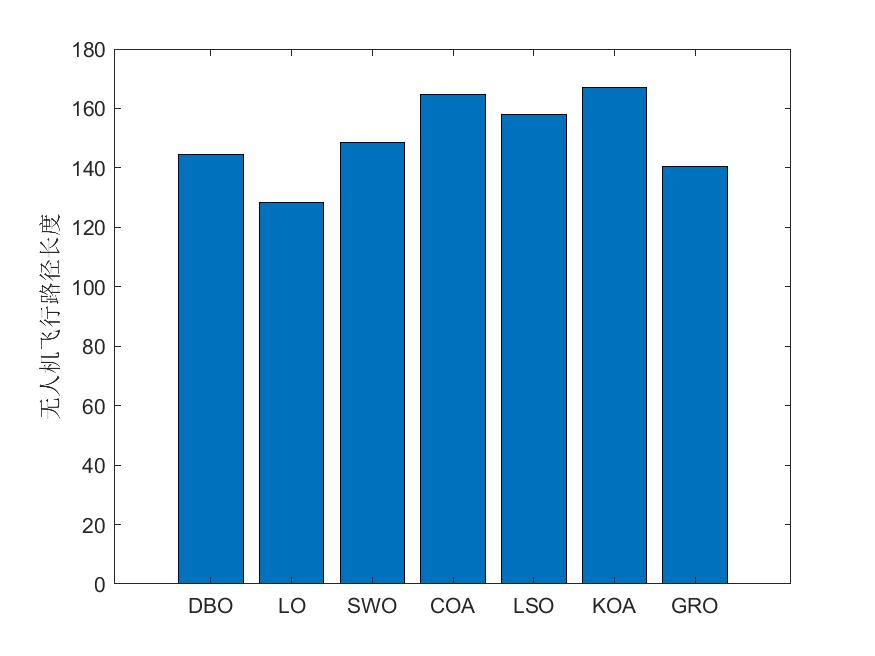
(四)七种元启发算法(DBO、LO、SWO、COA、LSO、KOA、GRO)求解无人机路径规划MATLAB
一、七种算法(DBO、LO、SWO、COA、LSO、KOA、GRO)简介 1、蜣螂优化算法DBO 蜣螂优化算法(Dung beetle optimizer,DBO)由Jiankai Xue和Bo Shen于2022年提出,该算法主要受蜣螂的滚球、跳舞、觅食、偷窃和繁殖…...

Window安装MongoDB
三种NOSQL的一种,Redis MongoDB ES 应用场景: 1.社交场景:使用Mongodb存储用户信息,以及用户发表的朋友圈信息,通过地理位置索引实现附近的人,地点等功能 2.游戏场景:使用Mongodb存储游戏用户信息,用户的装备,积分等直接以内嵌文档的形式存储,方便查询,高效率存储和访问…...
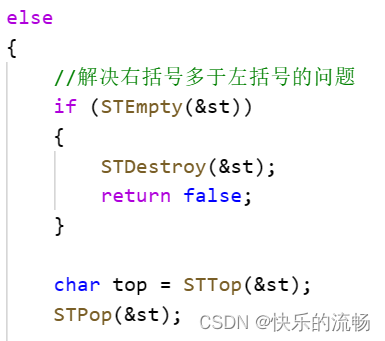
20.有效的括号(LeetCode)
思路:用栈的后进先出的特性,来完成题目的要求 因为C有库,可以直接用,而C语言没有,所以我们直接把写好的栈拷贝上来用。 首先,完成框架的搭建 其次,再实现循环内的部分。1.左括号入栈 2.右括…...
)
保姆级教程:在CentOS 7上用达梦8搭建DCA练习环境(附ulimit、VNC、ODBC全配置)
达梦8 DCA认证实战:CentOS 7环境搭建与调优全指南 在国产数据库技术快速发展的今天,达梦数据库作为核心产品之一,其DCA认证已成为众多从业者提升竞争力的重要选择。与理论为主的认证不同,DCA更注重实际操作能力,而一个…...

亚马逊卖家公开信息数据提取:反爬攻防战与 Python 批量采集实战
摘要: 批量获取亚马逊(Amazon)第三方卖家的商业名称、信用代码和注册地址等信息,对于跨境 B2B 拓客和供应链分析具有重要意义。然而,亚马逊的 Cloudflare 盾和 Robot 验证码构成了极高的反爬门槛。本文将深度解析亚马逊…...

基于Arduino与应变片传感器的高精度厨房电子秤DIY全攻略
1. 项目概述:用Arduino打造一台高精度厨房电子秤作为一个喜欢在厨房里折腾的硬件爱好者,我经常遇到需要精确称量食材的场合。市面上的电子秤要么精度不够,要么价格不菲,要么功能单一。于是,我萌生了自己动手做一台的想…...
)
ThinkPad开机报错0183/0253?别慌,手把手教你搞定EFI变量错误(附BIOS重置教程)
ThinkPad开机报错0183/0253?EFI变量错误全面解决方案当你按下ThinkPad的电源键,期待熟悉的开机画面时,屏幕上却突然跳出一串神秘代码——"0183: Bad CRC of Security Settings in EFI Variable"或"0253: EFI Variable Block D…...
)
Windows10下V-REP教育版安装保姆级教程(附百度网盘资源与避坑点)
Windows10系统V-REP教育版完整安装指南:从下载到实战避坑在机器人仿真和自动化控制领域,V-REP(现更名为CoppeliaSim)作为一款功能强大的跨平台机器人仿真软件,已经成为众多工科学生和研究人员的首选工具。特别是其教育…...

中兴光猫终极管理指南:解锁工厂模式与Telnet权限的实战教程
中兴光猫终极管理指南:解锁工厂模式与Telnet权限的实战教程 【免费下载链接】zteOnu A tool that can open ZTE onu device factory mode 项目地址: https://gitcode.com/gh_mirrors/zt/zteOnu 掌握中兴光猫的设备管理和权限获取能力是网络管理员和技术爱好者…...

CUDA并行计算与FSR框架优化实践
1. CUDA并行计算与FSR框架概述在GPU加速计算领域,CUDA(Compute Unified Device Architecture)作为NVIDIA推出的并行计算平台和编程模型,已经成为高性能计算的事实标准。其核心设计理念是将计算任务分解为网格(Grid&…...

LaTeX公式一键转Word:3步告别数学公式编辑烦恼
LaTeX公式一键转Word:3步告别数学公式编辑烦恼 【免费下载链接】LaTeX2Word-Equation Copy LaTeX Equations as Word Equations, a Chrome Extension 项目地址: https://gitcode.com/gh_mirrors/la/LaTeX2Word-Equation 还在为Word文档中的数学公式编辑而抓狂…...

真可用!美团数字人模型开源,MV、电商等统统拿下
美团开源的数字人视频生成框架 LongCat-Video-Avatar 刚刚更新到 1.5 版本。是真能用。这版更新把音频编码器换了,推理步数砍到8步,在770人、13240条主观评分的大规模评测里,雷达图面积全面领先。音频编码器换血,8步出图LongCat-V…...

【审计专栏】【财务领域】 第四十九篇 人在企业中的核心资产和核心利益01
编号 类型 企业 (行业/企业产品/企业利益链/生态位与层级) 业务领域 企业性质 企业中人的角色/岗位/利益矩阵 人在企业中的核心资产/附属资产 资产的业务-财务数学模型及数字/数值 关联知识 1 核心经营性资产(如IP、数据、品牌) 行业:人工智能 产品:工业视觉检…...