Playcanvas后处理-辉光bloom
(一)Bloom介绍
Bloom(辉光、光晕、泛光)是一种常见的摄像机后处理(PostProcessing)效果,用于再现真实世界相机的成像伪影。这种效果会产生从图像中明亮区域边界延伸的光条纹(或羽毛),从而产生一种极其明亮的光线压倒捕捉场景的相机的错觉。
辉光简单的说法,就是有些地方足够亮,看上去是溢出到周围的区域,下面是playcanvas官方提供的辉光效果对比图
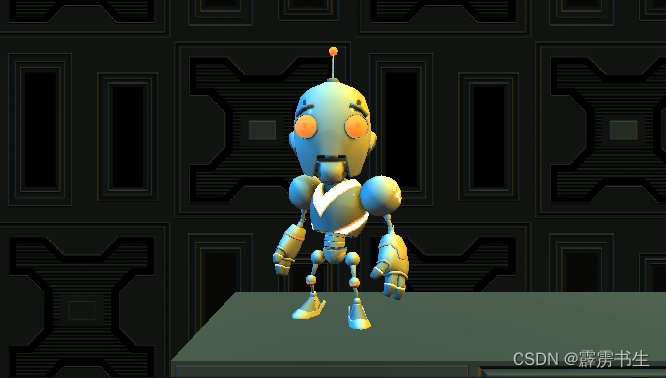
图1 未使用辉光效果
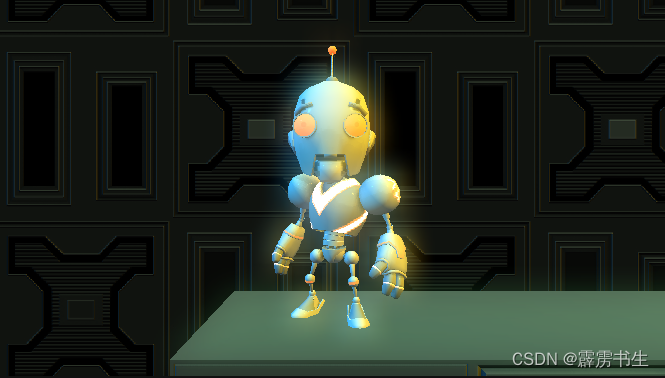
图2 使用辉光效果
(二)Bloom实现原理
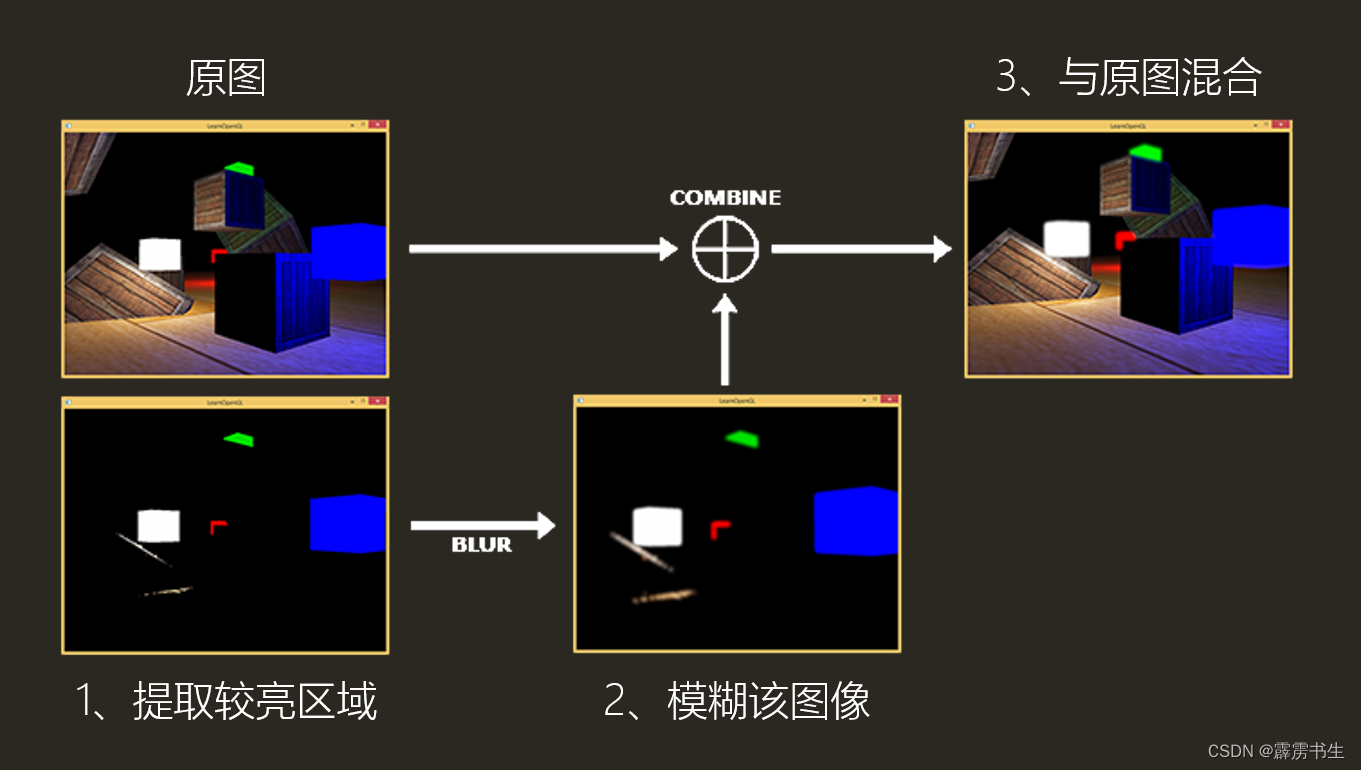
bloom的实现原理很简单:就是取camera获取图像的高亮部分,进行高斯模糊,并和原图进行合并就可以实现。
1. 提取较亮区域
通过阈值提取较亮区域的像素点
varying vec2 vUv0;uniform sampler2D uBaseTexture
uniform float uBloomThreshold;float luminance(vec4 color)
{return  0.2125 * color[0] + 0.7154 * color[1] + 0.0721 * color[2];
}void main(void)
{vec4 color = texture2D(uBaseTexture, vUv0);// 只保留亮度超过阈值亮度的像素点float val = clamp(luminance(color) - uBloomThreshold, 0.0, 1.0);gl_FragColor = color * val;//这是playcanvas官网提供提取亮度高于某个阈值的算法,但还不知道它的原理//gl_FragColor = clamp((color - uBloomThreshold) / (1.0 - uBloomThreshold), 0.0, 1.0);
}
2. 高斯模糊
接下来,就是如何得到模糊图uBloomTexture
一般模糊图像的算法,我们可以选择常见的高斯模糊,它可以减少图像噪声、降低细节层次
高斯模糊的实现原理,这里不做多赘述,这里提供2篇文章供参考。
原理参考:2D Shader学习——高斯模糊
shader实现参考:基于线性采样的高效高斯模糊实现(译)
参考第二篇文章,我们在JavaScript中,计算我们高斯卷积核的权重和位移
var SAMPLE_COUNT = 15;//高斯曲线
function computeGaussian(n, theta) {return ((1.0 / Math.sqrt(2 * Math.PI * theta)) * Math.exp(-(n * n) / (2 * theta * theta)));
}function calculateBlurValues(sampleWeights, sampleOffsets, dx, dy, blurAmount) {// Create temporary arrays for computing our filter settings.// The first sample always has a zero offset.sampleWeights[0] = computeGaussian(0, blurAmount);sampleOffsets[0] = 0;sampleOffsets[1] = 0;// Maintain a sum of all the weighting values.var totalWeights = sampleWeights[0];// Add pairs of additional sample taps, positioned// along a line in both directions from the center.var i, len;for (i = 0, len = Math.floor(SAMPLE_COUNT / 2); i < len; i++) {// Store weights for the positive and negative taps.var weight = computeGaussian(i + 1, blurAmount);sampleWeights[i * 2] = weight;sampleWeights[i * 2 + 1] = weight;totalWeights += weight * 2;var sampleOffset = i * 2 + 1.5;sampleOffsets[i * 4] = dx * sampleOffset;sampleOffsets[i * 4 + 1] = dy * sampleOffset;sampleOffsets[i * 4 + 2] = -dx * sampleOffset;sampleOffsets[i * 4 + 3] = -dy * sampleOffset;}// Normalize the list of sample weightings, so they will always sum to one.for (i = 0, len = sampleWeights.length; i < len; i++) {sampleWeights[i] /= totalWeights;}
}
在fragment shader中,对图像进行卷积模糊(注意:这里的shader只对水平或垂直一个方向卷积)
#define SAMPLE_COUNT 15varying vec2 vUv0;uniform sampler2D uBloomTexture;
uniform vec2 uBlurOffsets[15];
uniform float uBlurWeights[15];void main(void)
{vec4 color = vec4(0.0);for (int i = 0; i < SAMPLE_COUNT; i++){color += texture2D(uBloomTexture, vUv0 + uBlurOffsets[i]) * uBlurWeights[i];}gl_FragColor = color;
}
最后,我们需要进行2次方向的滤波处理
原理具体参考文章二中,如何将高斯滤波器分为水平方向和垂直方向的滤波器的原理
// Pass 2: draw from rendertarget 1 into rendertarget 2(垂直方向)
calculateBlurValues(this.sampleWeights, this.sampleOffsets, 1.0 / this.targets[1].width, 0, this.blurAmount);
scope.resolve("uBlurWeights[0]").setValue(this.sampleWeights);
scope.resolve("uBlurOffsets[0]").setValue(this.sampleOffsets);
scope.resolve("uBloomTexture").setValue(this.targets[0].colorBuffer);
this.drawQuad(this.targets[1], this.blurShader);// Pass 3: draw from rendertarget 2 back into rendertarget 1(水平方向)
calculateBlurValues(this.sampleWeights, this.sampleOffsets, 0, 1.0 / this.targets[0].height, this.blurAmount);
scope.resolve("uBlurWeights[0]").setValue(this.sampleWeights);
scope.resolve("uBlurOffsets[0]").setValue(this.sampleOffsets);
scope.resolve("uBloomTexture").setValue(this.targets[1].colorBuffer);
this.drawQuad(this.targets[0], this.blurShader);
3. 混合原图和模糊图
那我们最后的fragment shader就可以这样实现,原图+模糊图进行混合
varying vec2 vUv0;//bloom 强度
uniform float uBloomEffectIntensity;uniform sampler2D uBaseTexture;
uniform sampler2D uBloomTexture;void main(void)
{vec4 bloom = texture2D(uBloomTexture, vUv0) * uBloomEffectIntensity;vec4 base = texture2D(uBaseTexture, vUv0);//将原图变暗,防止两图叠加后,像素溢出1base *= (1.0 - clamp(bloom, 0.0, 1.0));//合并原图和模糊图,得到最终的bloom效果gl_FragColor = base + bloom;
}
(三)在playcanvas编辑器中使用
1. 创建脚本bloom.js
// --------------- POST EFFECT DEFINITION --------------- //
var SAMPLE_COUNT = 15;function computeGaussian(n, theta) {return ((1.0 / Math.sqrt(2 * Math.PI * theta)) * Math.exp(-(n * n) / (2 * theta * theta)));
}function calculateBlurValues(sampleWeights, sampleOffsets, dx, dy, blurAmount) {// Look up how many samples our gaussian blur effect supports.// Create temporary arrays for computing our filter settings.// The first sample always has a zero offset.sampleWeights[0] = computeGaussian(0, blurAmount);sampleOffsets[0] = 0;sampleOffsets[1] = 0;// Maintain a sum of all the weighting values.var totalWeights = sampleWeights[0];// Add pairs of additional sample taps, positioned// along a line in both directions from the center.var i, len;for (i = 0, len = Math.floor(SAMPLE_COUNT / 2); i < len; i++) {// Store weights for the positive and negative taps.var weight = computeGaussian(i + 1, blurAmount);sampleWeights[i * 2] = weight;sampleWeights[i * 2 + 1] = weight;totalWeights += weight * 2;// To get the maximum amount of blurring from a limited number of// pixel shader samples, we take advantage of the bilinear filtering// hardware inside the texture fetch unit. If we position our texture// coordinates exactly halfway between two texels, the filtering unit// will average them for us, giving two samples for the price of one.// This allows us to step in units of two texels per sample, rather// than just one at a time. The 1.5 offset kicks things off by// positioning us nicely in between two texels.var sampleOffset = i * 2 + 1.5;// Store texture coordinate offsets for the positive and negative taps.sampleOffsets[i * 4] = dx * sampleOffset;sampleOffsets[i * 4 + 1] = dy * sampleOffset;sampleOffsets[i * 4 + 2] = -dx * sampleOffset;sampleOffsets[i * 4 + 3] = -dy * sampleOffset;}// Normalize the list of sample weightings, so they will always sum to one.for (i = 0, len = sampleWeights.length; i < len; i++) {sampleWeights[i] /= totalWeights;}
}/*** @class* @name BloomEffect* @classdesc Implements the BloomEffect post processing effect.* @description Creates new instance of the post effect.* @augments PostEffect* @param {GraphicsDevice} graphicsDevice - The graphics device of the application.* @property {number} bloomThreshold Only pixels brighter then this threshold will be processed. Ranges from 0 to 1.* @property {number} blurAmount Controls the amount of blurring.* @property {number} bloomIntensity The intensity of the effect.*/
function BloomEffect(graphicsDevice) {pc.PostEffect.call(this, graphicsDevice);// Shadersvar attributes = {aPosition: pc.SEMANTIC_POSITION};// Pixel shader extracts the brighter areas of an image.// This is the first step in applying a bloom postprocess.var extractFrag = ["varying vec2 vUv0;","","uniform sampler2D uBaseTexture;","uniform float uBloomThreshold;","","float luminance(vec4 color)","{","    return  0.2125 * color[0] + 0.7154 * color[1] + 0.0721 * color[2]; ","}","","void main(void)","{",// Look up the original image color."    vec4 color = texture2D(uBaseTexture, vUv0);","",// Adjust it to keep only values brighter than the specified threshold."    float val = clamp(luminance(color) - uBloomThreshold, 0.0, 1.0);","    gl_FragColor = color * val;","}"].join("\n");// Pixel shader applies a one dimensional gaussian blur filter.// This is used twice by the bloom postprocess, first to// blur horizontally, and then again to blur vertically.var gaussianBlurFrag = ["#define SAMPLE_COUNT " + SAMPLE_COUNT,"","varying vec2 vUv0;","","uniform sampler2D uBloomTexture;","uniform vec2 uBlurOffsets[" + SAMPLE_COUNT + "];","uniform float uBlurWeights[" + SAMPLE_COUNT + "];","","void main(void)","{","    vec4 color = vec4(0.0);",// Combine a number of weighted image filter taps."    for (int i = 0; i < SAMPLE_COUNT; i++)","    {","        color += texture2D(uBloomTexture, vUv0 + uBlurOffsets[i]) * uBlurWeights[i];","    }","","    gl_FragColor = color;","}"].join("\n");// Pixel shader combines the bloom image with the original// scene, using tweakable intensity levels.// This is the final step in applying a bloom postprocess.var combineFrag = ["varying vec2 vUv0;","","uniform float uBloomEffectIntensity;","uniform sampler2D uBaseTexture;","uniform sampler2D uBloomTexture;","","void main(void)","{",// Look up the bloom and original base image colors."    vec4 bloom = texture2D(uBloomTexture, vUv0) * uBloomEffectIntensity;","    vec4 base = texture2D(uBaseTexture, vUv0);","",// Darken down the base image in areas where there is a lot of bloom,// to prevent things looking excessively burned-out."    base *= (1.0 - clamp(bloom, 0.0, 1.0));","",// Combine the two images."    gl_FragColor = base + bloom;","}"].join("\n");this.extractShader = pc.createShaderFromCode(graphicsDevice, pc.PostEffect.quadVertexShader, extractFrag, 'BloomExtractShader', attributes);this.blurShader = pc.createShaderFromCode(graphicsDevice, pc.PostEffect.quadVertexShader, gaussianBlurFrag, 'BloomBlurShader', attributes);this.combineShader = pc.createShaderFromCode(graphicsDevice, pc.PostEffect.quadVertexShader, combineFrag, 'BloomCombineShader', attributes);this.targets = [];// Effect defaultsthis.bloomThreshold = 0.25;this.blurAmount = 4;this.bloomIntensity = 1.25;// Uniformsthis.sampleWeights = new Float32Array(SAMPLE_COUNT);this.sampleOffsets = new Float32Array(SAMPLE_COUNT * 2);
}BloomEffect.prototype = Object.create(pc.PostEffect.prototype);
BloomEffect.prototype.constructor = BloomEffect;BloomEffect.prototype._destroy = function () {if (this.targets) {var i;for (i = 0; i < this.targets.length; i++) {this.targets[i].destroyTextureBuffers();this.targets[i].destroy();}}this.targets.length = 0;
};BloomEffect.prototype._resize = function (target) {var width = target.colorBuffer.width;var height = target.colorBuffer.height;if (width === this.width && height === this.height)return;this.width = width;this.height = height;this._destroy();// Render targetsvar i;for (i = 0; i < 2; i++) {var colorBuffer = new pc.Texture(this.device, {name: "Bloom Texture" + i,format: pc.PIXELFORMAT_RGBA8,width: width >> 1,height: height >> 1,mipmaps: false});colorBuffer.minFilter = pc.FILTER_LINEAR;colorBuffer.magFilter = pc.FILTER_LINEAR;colorBuffer.addressU = pc.ADDRESS_CLAMP_TO_EDGE;colorBuffer.addressV = pc.ADDRESS_CLAMP_TO_EDGE;colorBuffer.name = 'pe-bloom-' + i;var bloomTarget = new pc.RenderTarget({name: "Bloom Render Target " + i,colorBuffer: colorBuffer,depth: false});this.targets.push(bloomTarget);}
};Object.assign(BloomEffect.prototype, {render: function (inputTarget, outputTarget, rect) {this._resize(inputTarget);var device = this.device;var scope = device.scope;// Pass 1: draw the scene into rendertarget 1, using a// shader that extracts only the brightest parts of the image.scope.resolve("uBloomThreshold").setValue(this.bloomThreshold);scope.resolve("uBaseTexture").setValue(inputTarget.colorBuffer);this.drawQuad(this.targets[0], this.extractShader);// Pass 2: draw from rendertarget 1 into rendertarget 2,// using a shader to apply a horizontal gaussian blur filter.calculateBlurValues(this.sampleWeights, this.sampleOffsets, 1.0 / this.targets[1].width, 0, this.blurAmount);scope.resolve("uBlurWeights[0]").setValue(this.sampleWeights);scope.resolve("uBlurOffsets[0]").setValue(this.sampleOffsets);scope.resolve("uBloomTexture").setValue(this.targets[0].colorBuffer);this.drawQuad(this.targets[1], this.blurShader);// Pass 3: draw from rendertarget 2 back into rendertarget 1,// using a shader to apply a vertical gaussian blur filter.calculateBlurValues(this.sampleWeights, this.sampleOffsets, 0, 1.0 / this.targets[0].height, this.blurAmount);scope.resolve("uBlurWeights[0]").setValue(this.sampleWeights);scope.resolve("uBlurOffsets[0]").setValue(this.sampleOffsets);scope.resolve("uBloomTexture").setValue(this.targets[1].colorBuffer);this.drawQuad(this.targets[0], this.blurShader);// Pass 4: draw both rendertarget 1 and the original scene// image back into the main backbuffer, using a shader that// combines them to produce the final bloomed result.scope.resolve("uBloomEffectIntensity").setValue(this.bloomIntensity);scope.resolve("uBloomTexture").setValue(this.targets[0].colorBuffer);scope.resolve("uBaseTexture").setValue(inputTarget.colorBuffer);this.drawQuad(outputTarget, this.combineShader, rect);}
});// ----------------- SCRIPT DEFINITION ------------------ //
var Bloom = pc.createScript('bloom');Bloom.attributes.add('bloomIntensity', {type: 'number',default: 1,min: 0,title: 'Intensity'
});Bloom.attributes.add('bloomThreshold', {type: 'number',default: 0.25,min: 0,max: 1,title: 'Threshold'
});Bloom.attributes.add('blurAmount', {type: 'number',default: 4,min: 1,'title': 'Blur amount'
});Bloom.prototype.initialize = function () {this.effect = new BloomEffect(this.app.graphicsDevice);this.effect.bloomThreshold = this.bloomThreshold;this.effect.blurAmount = this.blurAmount;this.effect.bloomIntensity = this.bloomIntensity;var queue = this.entity.camera.postEffects;queue.addEffect(this.effect);this.on('attr', function (name, value) {this.effect[name] = value;}, this);this.on('state', function (enabled) {if (enabled) {queue.addEffect(this.effect);} else {queue.removeEffect(this.effect);}});this.on('destroy', function () {queue.removeEffect(this.effect);this.effect._destroy();});
};
2. 将脚本挂载在相机

相关文章:
Playcanvas后处理-辉光bloom
(一)Bloom介绍 Bloom(辉光、光晕、泛光)是一种常见的摄像机后处理(PostProcessing)效果,用于再现真实世界相机的成像伪影。这种效果会产生从图像中明亮区域边界延伸的光条纹(或羽毛…...
GCC 学习
GCC Resource Center for GCC Internalshttps://www.cse.iitb.ac.in/grc/这是个不错资料网站,有兴趣的可以了解下...
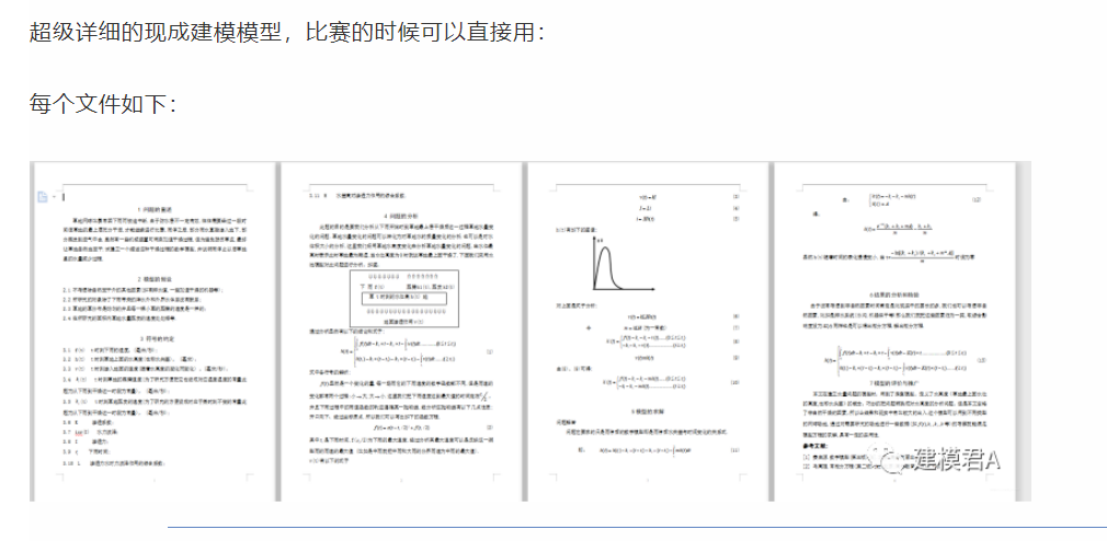
2023数维杯数学建模C题完整版本
已经完成全部版本,获取请查看文末下方名片 摘要 随着人工智能在多个领域的快速发展,其在文本生成上的应用引起了广泛关注。本研究聚焦于辨识人工智能(AI)生成文本的基本规则,并探究AI文本的检测及其与人类文本的区分…...

快速解密PPT幻灯片密码,让PPT重见天日
最简单的办法解密、找回和去除PPT幻灯片密码,具体步骤如下:1.百度搜索【密码帝官网】,2.点击“立即开始”在用户中心上传要解密的文件稍等片刻,就能找回密码。不用下载软件,手机电脑都可用。而且还支持Word、Excel、PD…...
十六、RabbitMQ快速入门
目录 一、在centos上下载MQ镜像 二、安装运行容器 三、登录进入MQ 1、添加一个新的用户 2、新建虚拟机 3、 为用户分配权限 四、RabbitMQ的基本概念 RabbitMQ中的几个概念: 五、常见消息模型 六、简单的消息生产与消费 1、消费者类 2、生产者类 3、基本消息队列的消…...
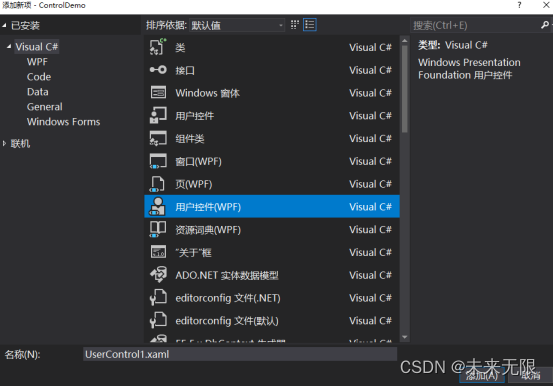
C#WPF用户控件及自定义控件实例
本文演示C#WPF自定义控件实例 用户控件(UserControl)和自定义控件(CustomControl)都是对UI控件的一种封装方式,目的都是实现封装后控件的重用。 只不过各自封装的实现方式和使用的场景上存在差异。 1 基于UserControl 创建 创建控件最简单一个方法就是基于UserControl …...
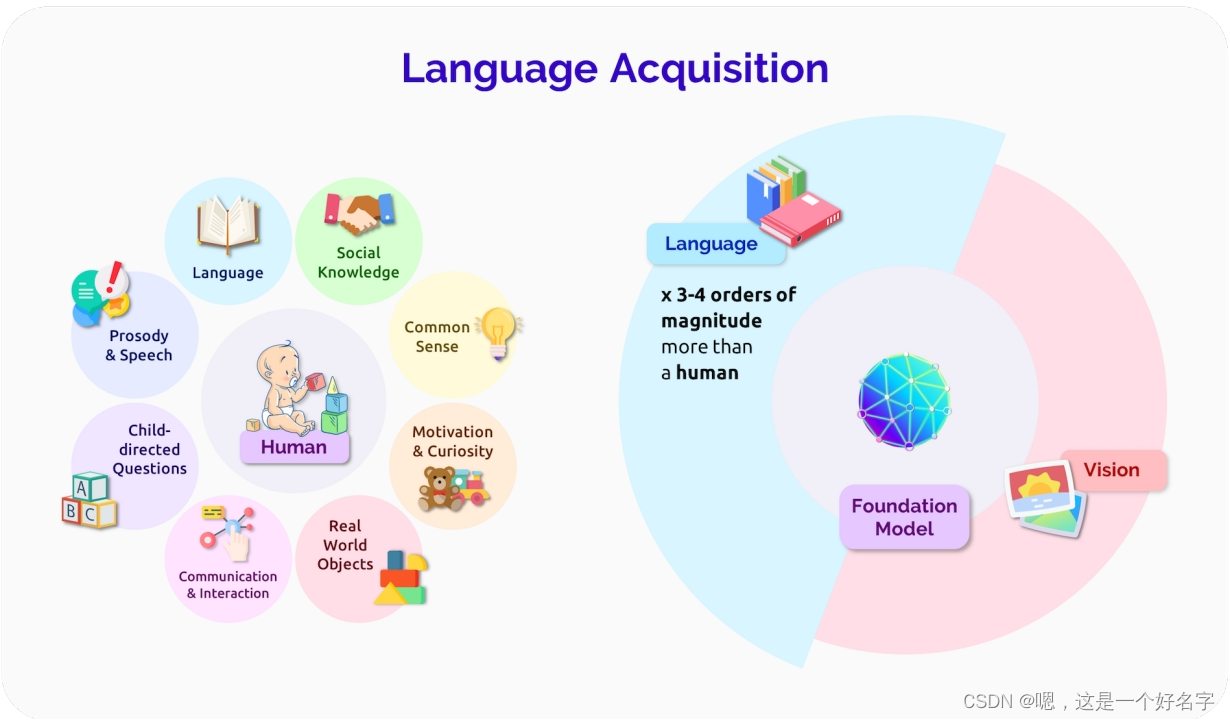
大模型的语言能力
NLP作为一个领域为基础模型开辟了道路。虽然这些模型在标准基准测试中占据主导地位,但这些模型目前获得的能力与那些将语言描述为人类交流和思维的复杂系统的能力之间存在明显的差距。针对这一点,我们强调语言变异的全部范围(例如,…...

直播岗位认知篇
一、直播岗位概述 直播岗位,也称为直播主播或直播运营,是指在互联网直播平台上进行直播活动的工作岗位。该岗位的主要职责是通过直播形式,向观众展示自己的才艺、分享生活、销售产品或服务,并引导观众互动和参与。直播主播需要具…...
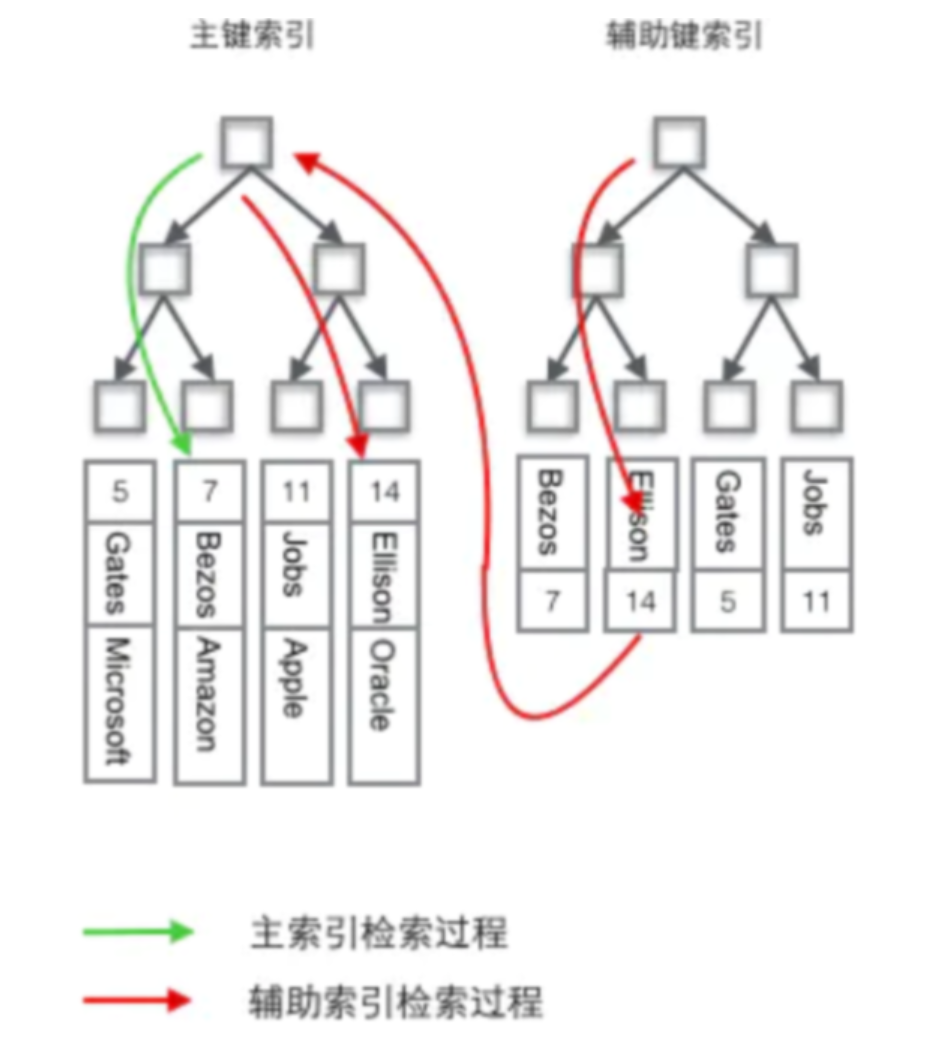
后端技术知识点内容-全部内容-面试宝典-后端面试知识点
文章目录 -2 flink-1 linux of viewlinux查看占用cup最高的10个进程的命令; 〇、分布式锁 & 分布式事务0-1分布式锁--包含CAP理论模型概述分布式锁:分布式锁应该具备哪些条件:分布式锁的业务场景: 分布式锁的实现方式有&#…...
3.ubuntu20.04环境的ros搭建
ros搭建比较简单,主要步骤如下: 1.配置ros软件源: sudo sh -c echo "deb http://packages.ros.org/ros/ubuntu $(lsb_release -sc) main" > /etc/apt/sources.list.d/ros-latest.list 2.配置密钥 sudo apt-key adv --keyser…...
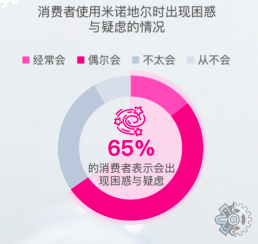
米诺地尔行业分析:预计2029年将达到14亿美元
米诺地尔市场规模庞大,不仅包括消费品市场和服务行业,还涵盖了创新科技领域。随着经济的发展和市场需求的不断增长,米诺地尔市场的规模将继续扩大,各行各业都将面临更多机遇和挑战。 随着社会经济发展和城市化进程的推进ÿ…...
在Spring Boot中使用Thymeleaf开发Web页面
引言: 为啥写这篇文章呢?我明明就没怎么用过这个Thymeleaf进行web开发,用JSP也行,三剑客也行,或者Vue,React,PHP等等,不好吗? 那我为啥写这篇博客呢?这个写了…...
2023年亚太杯数学建模思路 - 案例:感知机原理剖析及实现
文章目录 1 感知机的直观理解2 感知机的数学角度3 代码实现 4 建模资料 # 0 赛题思路 (赛题出来以后第一时间在CSDN分享) https://blog.csdn.net/dc_sinor?typeblog 1 感知机的直观理解 感知机应该属于机器学习算法中最简单的一种算法,其…...
linux高级篇基础理论五(用户安全,口令设置,JR暴力破解用户密码,NMAP端口扫描)
♥️作者:小刘在C站 ♥️个人主页: 小刘主页 ♥️不能因为人生的道路坎坷,就使自己的身躯变得弯曲;不能因为生活的历程漫长,就使求索的 脚步迟缓。 ♥️学习两年总结出的运维经验,以及思科模拟器全套网络实验教程。专栏:云计算技…...

鸿蒙原生应用/元服务开发-AGC分发如何配置版本信息(上)
1.配置HarmonyOS应用的“发布国家或地区”。 2.设置是否为开放式测试版本。 注意:HarmonyOS应用开放式测试当前仅支持手机、平板、智能手表。如开发者想发布为开放式测试版本,选择“是”。正式发布的版本请选择“否”。 3.在“软件版本”下点击“软件包…...
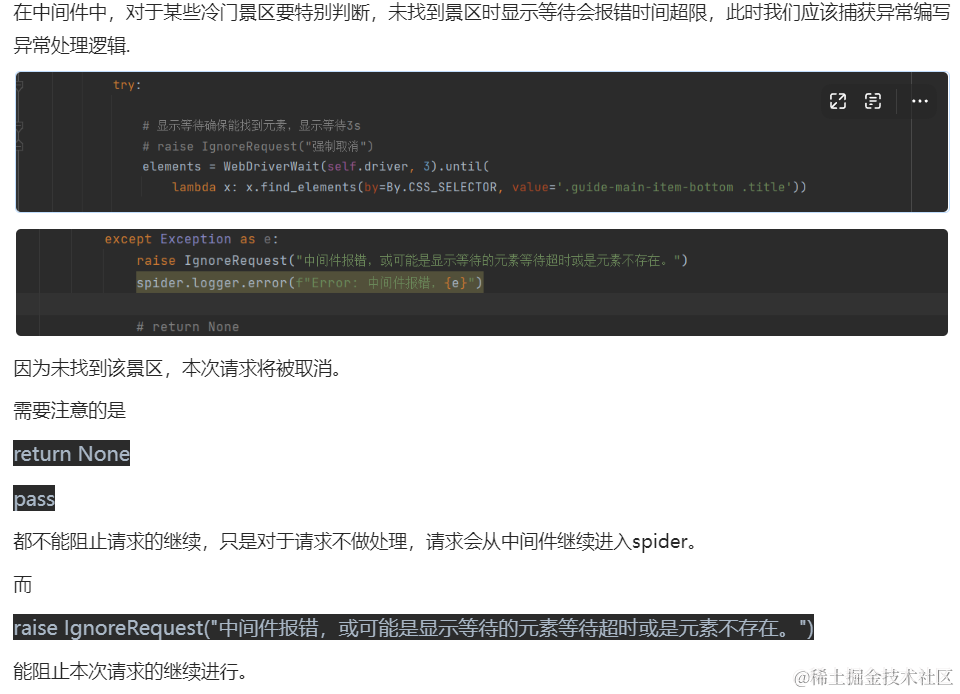
探索Scrapy中间件:自定义Selenium中间件实例解析
简介 Scrapy是一个强大的Python爬虫框架,可用于从网站上抓取数据。本教程将指导你创建自己的Scrapy爬虫。其中,中间件是其重要特性之一,允许开发者在爬取过程中拦截和处理请求与响应,实现个性化的爬虫行为。 本篇博客将深入探讨…...

渗透测试--3.中间人攻击
渗透测试--3.中间人攻击 一 .中间人攻击arp欺骗DNS欺骗无线局域网漏洞利用使用 Ettercap 执行欺骗攻击arp欺骗实例1、首先查看欺骗之前靶机ip以及默认网关,2、查看kali的IP地址(192.168.76.134),MAC:000c294079903、使用Ettercap,将A主机和B主机加入到target中4、点击右上…...

nginx/html关闭网页缓存方法
【问题】 通常代理服务器默认是有缓存的,即用户访问网址的时候默认获取到的是缓存,只有刷新之后才能得到服务器端的最新文件 【解决】 以nginx为例,找到配置文件nginx.conf,找到http {},在其花括号之内添加命令&…...

华为防火墙 Radius认证
实现的功能:本地内网用户上网时必须要进行Radius验证,通过后才能上网 前置工作请按这个配置:华为防火墙 DMZ 设置-CSDN博客 Windows 服务器安装 Radius 实现上网认证 拓扑图如下: 一、服务器配置 WinRadius 1、安装WinRadius …...
用spring发送http请求
在Spring中,你可以使用RestTemplate或WebClient来发送HTTP请求。下面分别给出使用这两个类的简单示例。 现在pom.xml中导入依赖 <dependency><groupId>org.springframework.boot</groupId><artifactId>spring-boot-starter-web</artif…...

联发科与威睿电通合作:深度解析全球模式SoC如何实现CDMA与LTE融合
1. 项目概述:一次芯片设计领域的“握手”每年的国际消费电子展(CES)总是热闹非凡,各种炫目的消费电子产品占据着舞台中央。但作为从业者,我们更关注的是那些隐藏在光鲜产品背后、驱动一切的技术基石。2014年的CES上&am…...

任天堂Switch游戏文件管理终极指南:NSC_BUILDER一站式解决方案
任天堂Switch游戏文件管理终极指南:NSC_BUILDER一站式解决方案 【免费下载链接】NSC_BUILDER Nintendo Switch Cleaner and Builder. A batchfile, python and html script based in hacbuild and Nuts python libraries. Designed initially to erase titlerights …...

从Arduino官网的‘eagle-files’说起:给硬件新手的Autodesk Eagle PCB设计入门指南
从Eagle文件到PCB设计:开源硬件爱好者的实战入门指南 在开源硬件社区里,Arduino项目的"eagle-files"文件夹常常让新手感到困惑又好奇。这些文件背后隐藏着一个强大的工具链——Autodesk Eagle,它是欧美开源硬件生态中PCB设计的通用…...

别再只会-sS了!Nmap实战:用Wireshark抓包带你搞懂TCP全连接、SYN半连接和隐秘扫描的区别
穿透网络迷雾:用Wireshark解密Nmap扫描背后的TCP握手玄机 在网络安全评估和渗透测试中,端口扫描是最基础却最关键的步骤。大多数工程师都能熟练使用nmap -sS进行SYN扫描,但你是否真正理解数据包在网络层究竟经历了什么?当防火墙规…...

怎样轻松上手yuzu模拟器:3个实用技巧帮你快速畅玩Switch游戏
怎样轻松上手yuzu模拟器:3个实用技巧帮你快速畅玩Switch游戏 【免费下载链接】yuzu 任天堂 Switch 模拟器 项目地址: https://gitcode.com/GitHub_Trending/yu/yuzu 你是不是也想在电脑上玩Switch游戏,但又觉得模拟器配置太复杂?别担心…...

从DenseNet到特征复用:揭秘密集连接如何重塑卷积网络
1. 密集连接:卷积网络的第三次进化 记得我第一次跑图像分类任务时,用的还是传统的VGG网络。那时候为了提升准确率,只能不断堆叠卷积层,结果模型体积像吹气球一样膨胀到500MB。直到2017年遇到DenseNet,才发现原来只需要…...

Credenza:现代化开发凭证管理工具的设计原理与实战应用
1. 项目概述:一个现代化的凭证管理工具 最近在整理自己的开发环境时,又被各种API密钥、数据库密码、服务令牌给搞烦了。这些敏感信息散落在不同的 .env 文件、配置脚本甚至代码注释里,每次换机器或者和新同事协作都得小心翼翼,生…...

HarmonyOS 6.0 儿童学习页面全栈实战:组件化布局 + 跨端 UI 一体化构建
HarmonyOS 6.0 儿童学习页面全栈实战:组件化布局 跨端 UI 一体化构建 前言 随着 HarmonyOS 6.0 的持续演进,鸿蒙生态已经不仅仅局限于传统移动端开发,而是逐步形成了一套真正意义上的“全场景分布式开发体系”。相比过去 Android 与 iOS 双端…...

初创团队如何利用Taotoken管理多模型API成本
🚀 告别海外账号与网络限制!稳定直连全球优质大模型,限时半价接入中。 👉 点击领取海量免费额度 初创团队如何利用Taotoken管理多模型API成本 对于初创团队而言,在快速迭代产品、集成多个大语言模型以增强功能时&…...

为什么很多人会误解视频代剪辑
为什么很多人会误解视频代剪辑 你是不是也这样想过:自己拍了几十段素材,找个便宜的剪辑师拼一拼、加个滤镜就行?可发出去后播放量寥寥,朋友说“看不出重点”“节奏拖沓”。其实,问题不在素材本身,而在于你低…...