Ansible的循环:loop,with_<lookup>和until
环境
- 管理节点:Ubuntu 22.04
- 控制节点:CentOS 8
- Ansible:2.15.6
循环的方法
loopwith_<lookup>until
用这几种方式都可以实现循环。其中, loop 是推荐的用法,在很多时候能够替换 with_<lookup> 。
loop 和 with_<lookup>
with_<lookup> 使用了lookup插件,比如 with_items 使用的是 items lookup。(注:可参见我另一篇文档。)
loop 等同于 with_list 。注意, loop 是作用在list上的,如果用在字符串上会报错。
---
- hosts: alltasks:- name: task1debug:msg: "{{ item }}"loop: "{{ ['aaa', 'bbb', 'ccc'] }}"- name: task2debug:msg: "{{ item }}"with_list: "{{ ['aaa', 'bbb', 'ccc'] }}"- name: task3debug:msg: "{{ item }}"with_items: "{{ ['aaa', 'bbb', 'ccc'] }}"
运行结果如下:
TASK [task1] ***************************************************************************************
ok: [192.168.1.55] => (item=aaa) => {"msg": "aaa"
}
ok: [192.168.1.55] => (item=bbb) => {"msg": "bbb"
}
ok: [192.168.1.55] => (item=ccc) => {"msg": "ccc"
}TASK [task2] ***************************************************************************************
ok: [192.168.1.55] => (item=aaa) => {"msg": "aaa"
}
ok: [192.168.1.55] => (item=bbb) => {"msg": "bbb"
}
ok: [192.168.1.55] => (item=ccc) => {"msg": "ccc"
}TASK [task3] ***************************************************************************************
ok: [192.168.1.55] => (item=aaa) => {"msg": "aaa"
}
ok: [192.168.1.55] => (item=bbb) => {"msg": "bbb"
}
ok: [192.168.1.55] => (item=ccc) => {"msg": "ccc"
}
可见,本例中 loop , with_list , with_items 的效果是一样的。
但是对于嵌套的list, loop 和 with_items 并不是完全等同的。
......- name: task4debug:msg: "{{ item }}"loop: "{{ ['aaa', ['bbb', ['ddd', 'eee']], 'ccc'] }}"- name: task5debug:msg: "{{ item }}"with_items: "{{ ['aaa', ['bbb', ['ddd', 'eee']], 'ccc'] }}"
......
运行结果如下:
TASK [task4] ***************************************************************************************
ok: [192.168.1.55] => (item=aaa) => {"msg": "aaa"
}
ok: [192.168.1.55] => (item=['bbb', ['ddd', 'eee']]) => {"msg": ["bbb",["ddd","eee"]]
}
ok: [192.168.1.55] => (item=ccc) => {"msg": "ccc"
}TASK [task5] ***************************************************************************************
ok: [192.168.1.55] => (item=aaa) => {"msg": "aaa"
}
ok: [192.168.1.55] => (item=bbb) => {"msg": "bbb"
}
ok: [192.168.1.55] => (item=['ddd', 'eee']) => {"msg": ["ddd","eee"]
}
ok: [192.168.1.55] => (item=ccc) => {"msg": "ccc"
}
可见:
loop只针对最外层的list,不管是否有嵌套。with_items则是解开了第一层嵌套的list。这个行为比较诡异,要么就不要管嵌套,要么就全部处理,为什么只处理第一层嵌套呢?
实际上,对于 loop ,可用 flatten filter来指定解开嵌套:
(注:flatten是扁平化的意思,这里的扁平化和Java8里扁平化流的概念类似,即把层次结构转换为线性结构)
......- name: task6debug:msg: "{{ item }}"loop: "{{ ['aaa', ['bbb', ['ddd', 'eee']], 'ccc'] | flatten }}"- name: task7debug:msg: "{{ item }}"loop: "{{ ['aaa', ['bbb', ['ddd', 'eee']], 'ccc'] | flatten(levels=1) }}"
......
运行结果如下:
TASK [task6] ***************************************************************************************
ok: [192.168.1.55] => (item=aaa) => {"msg": "aaa"
}
ok: [192.168.1.55] => (item=bbb) => {"msg": "bbb"
}
ok: [192.168.1.55] => (item=ddd) => {"msg": "ddd"
}
ok: [192.168.1.55] => (item=eee) => {"msg": "eee"
}
ok: [192.168.1.55] => (item=ccc) => {"msg": "ccc"
}TASK [task7] ***************************************************************************************
ok: [192.168.1.55] => (item=aaa) => {"msg": "aaa"
}
ok: [192.168.1.55] => (item=bbb) => {"msg": "bbb"
}
ok: [192.168.1.55] => (item=['ddd', 'eee']) => {"msg": ["ddd","eee"]
}
ok: [192.168.1.55] => (item=ccc) => {"msg": "ccc"
}
可见, flatten 默认会处理所有嵌套,也可以通过 levels 选项,指定处理几层嵌套。
由于 with_items 处理一层嵌套,所以, with_items 就相当于 loop 指定了 flatten(levels=1) 。在本例中,task5和task7的运行结果是一样的。
需要使用 lookup 的循环,多使用 with_<lookup> 语句,而不是 loop 语句。比如:
---
- hosts: alltasks:- name: task1debug:msg: "{{ item }}"loop: "{{ lookup('fileglob', '/tmp/*.txt', wantlist=True) }}"- name: task2debug:msg: "{{ item }}"with_fileglob: "/tmp/*.txt"
运行结果如下:
TASK [task1] ***************************************************************************************
ok: [192.168.1.55] => (item=/tmp/b.txt) => {"msg": "/tmp/b.txt"
}
ok: [192.168.1.55] => (item=/tmp/a.txt) => {"msg": "/tmp/a.txt"
}TASK [task2] ***************************************************************************************
ok: [192.168.1.55] => (item=/tmp/b.txt) => {"msg": "/tmp/b.txt"
}
ok: [192.168.1.55] => (item=/tmp/a.txt) => {"msg": "/tmp/a.txt"
}
显然,此处使用 with_fileglob 比使用 loop 要简洁。
注: fileglob 获取指定目录下符合条件的文件名(不包含子目录)。
循环的种类
简单list
---
- hosts: allvars:var1: ['aaa', 'bbb', 'ccc']tasks:- name: task1 # list常量debug:msg: "{{ item }}"loop: "{{ ['aaa', 'bbb', 'ccc'] }}"# loop: ['aaa', 'bbb', 'ccc'] 可以简写- name: task2 # list常量debug:msg: "{{ item }}"loop:- aaa # 引号可以省略- "bbb"- "ccc"- name: task3 # list变量debug:msg: "{{ item }}"loop: "{{ var1 }}"
运行结果如下:
TASK [task1] ***************************************************************************************
ok: [192.168.1.55] => (item=aaa) => {"msg": "aaa"
}
ok: [192.168.1.55] => (item=bbb) => {"msg": "bbb"
}
ok: [192.168.1.55] => (item=ccc) => {"msg": "ccc"
}TASK [task2] ***************************************************************************************
ok: [192.168.1.55] => (item=aaa) => {"msg": "aaa"
}
ok: [192.168.1.55] => (item=bbb) => {"msg": "bbb"
}
ok: [192.168.1.55] => (item=ccc) => {"msg": "ccc"
}TASK [task3] ***************************************************************************************
ok: [192.168.1.55] => (item=aaa) => {"msg": "aaa"
}
ok: [192.168.1.55] => (item=bbb) => {"msg": "bbb"
}
ok: [192.168.1.55] => (item=ccc) => {"msg": "ccc"
}
复杂list
---
- hosts: allvars:var1: [{name: "Tom", age: 20}, {name: "Jerry", age: 18}]tasks:- name: task1debug:msg: "Name: {{ item.name }}. Age: {{ item.age }}"loop: "{{ [{ 'name': 'Tom', 'age': 20 }, { 'name': 'Jerry', 'age': 18 }] }}"#loop: "{{ [{ name: 'Tom', age: 20 }, { name: 'Jerry', age: 18 }] }}" # 报错!说name未定义#loop: [{ name: 'Tom', age: 20 }, { name: 'Jerry', age: 18 }] # OK#loop: [{ 'name': 'Tom', 'age': 20 }, { 'name': 'Jerry', 'age': 18 }] # OK- name: task2debug:msg: "Name: {{ item.name }}. Age: {{ item.age }}"loop:- { name: "Tom", age: 20 }- { name: "Jerry", age: 18 }- name: task3debug:msg: "Name: {{ item.name }}. Age: {{ item.age }}"loop: "{{ var1 }}"
可以看到,对于key要不要加引号,行为好像有点诡异,最好还是加上吧。
运行结果如下:
TASK [task1] ***************************************************************************************
ok: [192.168.1.55] => (item={'name': 'Tom', 'age': 20}) => {"msg": "Name: Tom. Age: 20"
}
ok: [192.168.1.55] => (item={'name': 'Jerry', 'age': 18}) => {"msg": "Name: Jerry. Age: 18"
}TASK [task2] ***************************************************************************************
ok: [192.168.1.55] => (item={'name': 'Tom', 'age': 20}) => {"msg": "Name: Tom. Age: 20"
}
ok: [192.168.1.55] => (item={'name': 'Jerry', 'age': 18}) => {"msg": "Name: Jerry. Age: 18"
}TASK [task3] ***************************************************************************************
ok: [192.168.1.55] => (item={'name': 'Tom', 'age': 20}) => {"msg": "Name: Tom. Age: 20"
}
ok: [192.168.1.55] => (item={'name': 'Jerry', 'age': 18}) => {"msg": "Name: Jerry. Age: 18"
}
dict
如果要遍历一个dict,则需要使用 dict2items filter,将其转换为list:
---
- hosts: allvars:var1: {name: "Tom", age: 20}tasks:- name: task1debug:msg: "Key: {{ item.key }}. Value: {{ item.value }}"loop: "{{ {'name': 'Tom', 'age': 20} | dict2items }}"- name: task2debug:msg: "Key: {{ item.key }}. Value: {{ item.value }}"loop: "{{ var1 | dict2items }}"
运行结果如下:
TASK [task1] ***************************************************************************************
ok: [192.168.1.55] => (item={'key': 'name', 'value': 'Tom'}) => {"msg": "Key: name. Value: Tom"
}
ok: [192.168.1.55] => (item={'key': 'age', 'value': 20}) => {"msg": "Key: age. Value: 20"
}TASK [task2] ***************************************************************************************
ok: [192.168.1.55] => (item={'key': 'name', 'value': 'Tom'}) => {"msg": "Key: name. Value: Tom"
}
ok: [192.168.1.55] => (item={'key': 'age', 'value': 20}) => {"msg": "Key: age. Value: 20"
}
本例中,dict为:
{name: "Tom", age: 20}
转为list后:
[{"key": "name","value": "Tom"},{"key": "age","value": 20}]
循环结果的register变量
---
- hosts: alltasks:- name: task1shell: "echo {{ item }}"loop: "{{ ['aaa', 'bbb'] }}"register: var1- name: task2debug:msg: "{{ var1 }}"
运行结果如下:
TASK [task1] ***************************************************************************************
changed: [192.168.1.55] => (item=aaa)
changed: [192.168.1.55] => (item=bbb)TASK [task2] ***************************************************************************************
ok: [192.168.1.55] => {"msg": {"changed": true,"msg": "All items completed","results": [{"ansible_loop_var": "item","changed": true,"cmd": "echo aaa","delta": "0:00:00.002332","end": "2023-11-21 22:29:54.990234","failed": false,"invocation": {"module_args": {"_raw_params": "echo aaa","_uses_shell": true,"argv": null,"chdir": null,"creates": null,"executable": null,"removes": null,"stdin": null,"stdin_add_newline": true,"strip_empty_ends": true}},"item": "aaa","msg": "","rc": 0,"start": "2023-11-21 22:29:54.987902","stderr": "","stderr_lines": [],"stdout": "aaa","stdout_lines": ["aaa"]},{"ansible_loop_var": "item","changed": true,"cmd": "echo bbb","delta": "0:00:00.002036","end": "2023-11-21 22:29:55.223227","failed": false,"invocation": {"module_args": {"_raw_params": "echo bbb","_uses_shell": true,"argv": null,"chdir": null,"creates": null,"executable": null,"removes": null,"stdin": null,"stdin_add_newline": true,"strip_empty_ends": true}},"item": "bbb","msg": "","rc": 0,"start": "2023-11-21 22:29:55.221191","stderr": "","stderr_lines": [],"stdout": "bbb","stdout_lines": ["bbb"]}],"skipped": false}
}
可见,register变量把循环操作的结果放到了叫做 results 的list里。因此,后续可以遍历 results ,做相应处理,比如:
---
- hosts: alltasks:- name: task1shell: "cat {{ item }}"loop: "{{ ['/tmp/a.txt', '/tmp/d.txt'] }}"register: var1ignore_errors: true- name: task2debug:msg: "{{ var1 }}"- name: task3fail:msg: "Something is wrong!"when: item.rc != 0loop: "{{ var1.results }}"
假设 /tmp/d.txt 不存在,则运行结果如下:
TASK [task1] ***************************************************************************************
changed: [192.168.1.55] => (item=/tmp/a.txt)
failed: [192.168.1.55] (item=/tmp/d.txt) => {"ansible_loop_var": "item", "changed": true, "cmd": "cat /tmp/d.txt", "delta": "0:00:00.002438", "end": "2023-11-21 22:46:28.216904", "item": "/tmp/d.txt", "msg": "non-zero return code", "rc": 1, "start": "2023-11-21 22:46:28.214466", "stderr": "cat: /tmp/d.txt: No such file or directory", "stderr_lines": ["cat: /tmp/d.txt: No such file or directory"], "stdout": "", "stdout_lines": []}
...ignoringTASK [task2] ***************************************************************************************
ok: [192.168.1.55] => {"msg": {"changed": true,"failed": true,"msg": "One or more items failed","results": [{"ansible_loop_var": "item","changed": true,"cmd": "cat /tmp/a.txt","delta": "0:00:00.003006","end": "2023-11-21 22:46:27.995302","failed": false,"invocation": {"module_args": {"_raw_params": "cat /tmp/a.txt","_uses_shell": true,"argv": null,"chdir": null,"creates": null,"executable": null,"removes": null,"stdin": null,"stdin_add_newline": true,"strip_empty_ends": true}},"item": "/tmp/a.txt","msg": "","rc": 0,"start": "2023-11-21 22:46:27.992296","stderr": "","stderr_lines": [],"stdout": "aaaaa\nb\nccccc","stdout_lines": ["aaaaa","b","ccccc"]},{"ansible_loop_var": "item","changed": true,"cmd": "cat /tmp/d.txt","delta": "0:00:00.002438","end": "2023-11-21 22:46:28.216904","failed": true,"invocation": {"module_args": {"_raw_params": "cat /tmp/d.txt","_uses_shell": true,"argv": null,"chdir": null,"creates": null,"executable": null,"removes": null,"stdin": null,"stdin_add_newline": true,"strip_empty_ends": true}},"item": "/tmp/d.txt","msg": "non-zero return code","rc": 1,"start": "2023-11-21 22:46:28.214466","stderr": "cat: /tmp/d.txt: No such file or directory","stderr_lines": ["cat: /tmp/d.txt: No such file or directory"],"stdout": "","stdout_lines": []}],"skipped": false}
}TASK [task3] ***************************************************************************************
skipping: [192.168.1.55] => (item={'changed': True, 'stdout': 'aaaaa\nb\nccccc', 'stderr': '', 'rc': 0, 'cmd': 'cat /tmp/a.txt', 'start': '2023-11-21 22:46:27.992296', 'end': '2023-11-21 22:46:27.995302', 'delta': '0:00:00.003006', 'msg': '', 'invocation': {'module_args': {'_raw_params': 'cat /tmp/a.txt', '_uses_shell': True, 'stdin_add_newline': True, 'strip_empty_ends': True, 'argv': None, 'chdir': None, 'executable': None, 'creates': None, 'removes': None, 'stdin': None}}, 'stdout_lines': ['aaaaa', 'b', 'ccccc'], 'stderr_lines': [], 'failed': False, 'item': '/tmp/a.txt', 'ansible_loop_var': 'item'})
failed: [192.168.1.55] (item={'changed': True, 'stdout': '', 'stderr': 'cat: /tmp/d.txt: No such file or directory', 'rc': 1, 'cmd': 'cat /tmp/d.txt', 'start': '2023-11-21 22:46:28.214466', 'end': '2023-11-21 22:46:28.216904', 'delta': '0:00:00.002438', 'failed': True, 'msg': 'non-zero return code', 'invocation': {'module_args': {'_raw_params': 'cat /tmp/d.txt', '_uses_shell': True, 'stdin_add_newline': True, 'strip_empty_ends': True, 'argv': None, 'chdir': None, 'executable': None, 'creates': None, 'removes': None, 'stdin': None}}, 'stdout_lines': [], 'stderr_lines': ['cat: /tmp/d.txt: No such file or directory'], 'item': '/tmp/d.txt', 'ansible_loop_var': 'item'}) => {"ansible_loop_var": "item", "changed": false, "item": {"ansible_loop_var": "item", "changed": true, "cmd": "cat /tmp/d.txt", "delta": "0:00:00.002438", "end": "2023-11-21 22:46:28.216904", "failed": true, "invocation": {"module_args": {"_raw_params": "cat /tmp/d.txt", "_uses_shell": true, "argv": null, "chdir": null, "creates": null, "executable": null, "removes": null, "stdin": null, "stdin_add_newline": true, "strip_empty_ends": true}}, "item": "/tmp/d.txt", "msg": "non-zero return code", "rc": 1, "start": "2023-11-21 22:46:28.214466", "stderr": "cat: /tmp/d.txt: No such file or directory", "stderr_lines": ["cat: /tmp/d.txt: No such file or directory"], "stdout": "", "stdout_lines": []}, "msg": "Something is wrong!"}
本例中,由于 /tmp/d.txt 不存在, results 的第2个元素,其rc值为1。
注意:每一次迭代,其结果就会放到register变量里,而不是整个循环结束后才放的。
---
- hosts: alltasks:- name: task1shell: echo "{{ item }}"loop:- "aaa"- "bbb"register: var1changed_when: var1.stdout != "aaa"
运行结果如下:
TASK [task1] ***************************************************************************************
ok: [192.168.1.55] => (item=aaa)
changed: [192.168.1.55] => (item=bbb)
可见,第一次迭代没有满足判断条件,而第二次迭代满足判断条件了。
复杂循环
遍历嵌套list
---
- hosts: alltasks:- name: task1debug:msg: "{{ item[0] }} {{ item[1] }}"loop: "{{ ['Zhang', 'Li'] | product(['San', 'Si']) | list }}"
运行结果如下:
TASK [task1] ***************************************************************************************
ok: [192.168.1.55] => (item=['Zhang', 'San']) => {"msg": "Zhang San"
}
ok: [192.168.1.55] => (item=['Zhang', 'Si']) => {"msg": "Zhang Si"
}
ok: [192.168.1.55] => (item=['Li', 'San']) => {"msg": "Li San"
}
ok: [192.168.1.55] => (item=['Li', 'Si']) => {"msg": "Li Si"
}
本例中,把两个list做笛卡尔乘积,生成了一个新的嵌套list:
[["Zhang","San"],["Zhang","Si"],["Li","San"],["Li","Si"]]
然后遍历外层list,并通过 item[0] 、 item[1] 访问内层list的元素。
Retry
---
- hosts: alltasks:- name: task1shell: cat /tmp/a.txtregister: var1until: var1.stdout.find("OK") != -1retries: 3delay: 5
运行结果如下:
TASK [task1] ***************************************************************************************
FAILED - RETRYING: [192.168.1.55]: task1 (3 retries left).
FAILED - RETRYING: [192.168.1.55]: task1 (2 retries left).
FAILED - RETRYING: [192.168.1.55]: task1 (1 retries left).
fatal: [192.168.1.55]: FAILED! => {"attempts": 3, "changed": true, "cmd": "cat /tmp/a.txt", "delta": "0:00:00.002228", "end": "2023-11-23 07:53:18.333193", "msg": "", "rc": 0, "start": "2023-11-23 07:53:18.330965", "stderr": "", "stderr_lines": [], "stdout": "aaaaa\nb\nccccc", "stdout_lines": ["aaaaa", "b", "ccccc"]}
在运行过程中,编辑 /tmp/a.txt 文件(注意是在目标机器上),添加 OK 的内容,则运行结果如下:
TASK [task1] ***************************************************************************************
FAILED - RETRYING: [192.168.1.55]: task1 (3 retries left).
FAILED - RETRYING: [192.168.1.55]: task1 (2 retries left).
changed: [192.168.1.55]
注:
retries的缺省值是3,delay的缺省值是5。
遍历inventory
假设 /etc/ansible/hosts 内容如下:
[myvms]
192.168.1.55[myself]
127.0.0.1
---
- hosts: alltasks:- name: task1debug:msg: "{{ item }}"loop: "{{ groups['all'] }}"#loop: "{{ groups['myvms'] }}"
运行结果如下:
TASK [task1] ***************************************************************************************
ok: [192.168.1.55] => (item=192.168.1.55) => {"msg": "192.168.1.55"
}
ok: [192.168.1.55] => (item=127.0.0.1) => {"msg": "127.0.0.1"
}
ok: [127.0.0.1] => (item=192.168.1.55) => {"msg": "192.168.1.55"
}
ok: [127.0.0.1] => (item=127.0.0.1) => {"msg": "127.0.0.1"
}
可见,打印了所有的主机名。
为什么打印了两次呢?这是因为指定了 hosts: all ,所以在两个目标机器上都运行了一次。
若改为 hosts: myvms ,则运行结果如下:
TASK [task1] ***************************************************************************************
ok: [192.168.1.55] => (item=192.168.1.55) => {"msg": "192.168.1.55"
}
ok: [192.168.1.55] => (item=127.0.0.1) => {"msg": "127.0.0.1"
}
如果只想遍历 myvms ,则把 loop: "{{ groups['all'] }}" 改为 loop: "{{ groups['myvms'] }}" ,运行结果如下:
TASK [task1] ***************************************************************************************
ok: [192.168.1.55] => (item=192.168.1.55) => {"msg": "192.168.1.55"
}
也可以通过 loop: "{{ ansible_play_batch }}" 指定遍历当前play的主机:
TASK [task1] ***************************************************************************************
ok: [192.168.1.55] => (item=192.168.1.55) => {"msg": "192.168.1.55"
}
注: groups 和 ansible_play_batch 都是Ansible的特殊变量,参见 https://docs.ansible.com/ansible/latest/reference_appendices/special_variables.html 。
还可以通过 inventory_hostnames lookup来指定遍历的主机:
---
- hosts: myvmstasks:- name: task1debug:msg: "{{ item }}"loop: "{{ query('inventory_hostnames', 'all') }}"
运行结果如下:
TASK [task1] ***************************************************************************************
ok: [192.168.1.55] => (item=192.168.1.55) => {"msg": "192.168.1.55"
}
ok: [192.168.1.55] => (item=127.0.0.1) => {"msg": "127.0.0.1"
}
遍历 all ,同时排除 myvms ,则指定:loop: "{{ query('inventory_hostnames', 'all:!myvms') }}" :
TASK [task1] ***************************************************************************************
ok: [192.168.1.55] => (item=127.0.0.1) => {"msg": "127.0.0.1"
}
loop_control
label
前面我们提到,遍历一个dict:
---
- hosts: allvars:var1: {name: "Tom", age: 20}tasks:- name: task1debug:msg: "Key: {{ item.key }}. Value: {{ item.value }}"loop: "{{ {'name': 'Tom', 'age': 20} | dict2items }}"#loop_control:#  label: "{{ item.key}}"
运行结果如下:
TASK [task1] ***************************************************************************************
ok: [192.168.1.55] => (item={'key': 'name', 'value': 'Tom'}) => {"msg": "Key: name. Value: Tom"
}
ok: [192.168.1.55] => (item={'key': 'age', 'value': 20}) => {"msg": "Key: age. Value: 20"
}
注意其中的 (item={'key': 'name', 'value': 'Tom'}) 等,如果item数据量很大,则输出量很大。此处可以使用 label 指定打印的内容(比如只打印key,不打印value),见注释部分。
运行结果如下:
TASK [task1] ***************************************************************************************
ok: [192.168.1.55] => (item=name) => {"msg": "Key: name. Value: Tom"
}
ok: [192.168.1.55] => (item=age) => {"msg": "Key: age. Value: 20"
}
pause
在每次循环迭代之间,暂停一段时间(秒)。
---
- hosts: alltasks:- name: task1debug:msg: "{{ item }}"loop: "{{ ['aaa', 'bbb', 'ccc'] }}"loop_control:pause: 3
index_var
指定下标变量,然后通过该变量获取下标值(从0开始)。
---
- hosts: alltasks:- name: task1debug:msg: "{{ idx }}: {{ item }}"loop: "{{ ['aaa', 'bbb', 'ccc'] }}"loop_control:index_var: idx
运行结果如下:
TASK [task1] ***************************************************************************************
ok: [192.168.1.55] => (item=aaa) => {"msg": "0: aaa"
}
ok: [192.168.1.55] => (item=bbb) => {"msg": "1: bbb"
}
ok: [192.168.1.55] => (item=ccc) => {"msg": "2: ccc"
}
loop_var
循环的元素名称,默认叫做 item ,而对于嵌套循环,为避免混淆内外循环的item,可用 loop_var 指定item名称。
创建文件 test19.yml 如下:
---
- hosts: alltasks:- name: task1include_tasks: test20.ymlloop: [1, 2, 3]loop_control:loop_var: item_outer
创建文件 test20.yml 如下:
---
- name: inner_task1debug:msg: "Outer item = {{ item_outer }}, Inner item = {{ item_inner }}"loop: "{{ ['aaa', 'bbb', 'ccc'] }}"loop_control:loop_var: item_inner
运行结果如下:
TASK [task1] ***************************************************************************************
included: /root/temp/temp1121/test20.yml for 192.168.1.55 => (item=1)
included: /root/temp/temp1121/test20.yml for 192.168.1.55 => (item=2)
included: /root/temp/temp1121/test20.yml for 192.168.1.55 => (item=3)TASK [inner_task1] *********************************************************************************
ok: [192.168.1.55] => (item=aaa) => {"msg": "Outer item = 1, Inner item = aaa"
}
ok: [192.168.1.55] => (item=bbb) => {"msg": "Outer item = 1, Inner item = bbb"
}
ok: [192.168.1.55] => (item=ccc) => {"msg": "Outer item = 1, Inner item = ccc"
}TASK [inner_task1] *********************************************************************************
ok: [192.168.1.55] => (item=aaa) => {"msg": "Outer item = 2, Inner item = aaa"
}
ok: [192.168.1.55] => (item=bbb) => {"msg": "Outer item = 2, Inner item = bbb"
}
ok: [192.168.1.55] => (item=ccc) => {"msg": "Outer item = 2, Inner item = ccc"
}TASK [inner_task1] *********************************************************************************
ok: [192.168.1.55] => (item=aaa) => {"msg": "Outer item = 3, Inner item = aaa"
}
ok: [192.168.1.55] => (item=bbb) => {"msg": "Outer item = 3, Inner item = bbb"
}
ok: [192.168.1.55] => (item=ccc) => {"msg": "Outer item = 3, Inner item = ccc"
}
本例中,外部循环的item命名为 item_outer ,而内部循环的item命名为 item_inner 。
扩展循环变量
添加 extended: true ,则可以访问如下变量:
ansible_loop.allitems:所有元素ansible_loop.index:从1开始ansible_loop.index0:从0开始ansible_loop.revindex:倒数,从1开始ansible_loop.revindex0:倒数,从0开始ansible_loop.first:是否是第一个元素ansible_loop.last:是否是最后一个元素ansible_loop.length:元素数量ansible_loop.previtem:前一个元素(第一次迭代时未定义)ansible_loop.nextitem:后一个元素(最后一次迭代时未定义)
---
- hosts: alltasks:- name: task1debug:msg: "ansible_loop.allitems = {{ ansible_loop.allitems }}, ansible_loop.index = {{ ansible_loop.index }}, ansible_loop.index0 = {{ ansible_loop.index0 }}, ansible_loop.revindex = {{ ansible_loop.revindex }}, ansible_loop.revindex0 = {{ ansible_loop.revindex0 }}, ansible_loop.first = {{ ansible_loop.first }}, ansible_loop.last = {{ ansible_loop.last }}, ansible_loop.length = {{ ansible_loop.length }}, ansible_loop.previtem = {{ ansible_loop.previtem | default('no previous') }}, ansible_loop.nextitem = {{ ansible_loop.nextitem | default('no next') }}"loop: "{{ ['aaa', 'bbb', 'ccc'] }}"loop_control:extended: true
运行结果如下:
TASK [task1] ***************************************************************************************
ok: [192.168.1.55] => (item=aaa) => {"msg": "ansible_loop.allitems = ['aaa', 'bbb', 'ccc'], ansible_loop.index = 1, ansible_loop.index0 = 0, ansible_loop.revindex = 3, ansible_loop.revindex0 = 2, ansible_loop.first = True, ansible_loop.last = False, ansible_loop.length = 3, ansible_loop.previtem = no previous, ansible_loop.nextitem = bbb"
}
ok: [192.168.1.55] => (item=bbb) => {"msg": "ansible_loop.allitems = ['aaa', 'bbb', 'ccc'], ansible_loop.index = 2, ansible_loop.index0 = 1, ansible_loop.revindex = 2, ansible_loop.revindex0 = 1, ansible_loop.first = False, ansible_loop.last = False, ansible_loop.length = 3, ansible_loop.previtem = aaa, ansible_loop.nextitem = ccc"
}
ok: [192.168.1.55] => (item=ccc) => {"msg": "ansible_loop.allitems = ['aaa', 'bbb', 'ccc'], ansible_loop.index = 3, ansible_loop.index0 = 2, ansible_loop.revindex = 1, ansible_loop.revindex0 = 0, ansible_loop.first = False, ansible_loop.last = True, ansible_loop.length = 3, ansible_loop.previtem = bbb, ansible_loop.nextitem = no next"
}
注:如果 ansible_loop.allitems 很大,为了节省内存,可以设置 extended_allitems: false :
loop_control:extended: trueextended_allitems: false
获取 loop_var 的值
比如指定了 loop_var: myitem ,则可以通过 {{ myitem }} 来获取item,也可以通过 {{ lookup('vars', ansible_loop_var) }} 获取item。
---
- hosts: alltasks:- name: task1debug:msg: "{{ myitem }} , {{ lookup('vars', ansible_loop_var) }}"loop: [1, 2, 3]loop_control:loop_var: myitem
运行结果如下:
TASK [task1] ***************************************************************************************
ok: [192.168.1.55] => (item=1) => {"msg": "1 , 1"
}
ok: [192.168.1.55] => (item=2) => {"msg": "2 , 2"
}
ok: [192.168.1.55] => (item=3) => {"msg": "3 , 3"
}
可见,二者效果是一样的。
参考
https://docs.ansible.com/ansible/latest/playbook_guide/playbooks_loops.htmlhttps://docs.ansible.com/ansible/latest/reference_appendices/special_variables.htmlhttps://docs.ansible.com/ansible/latest/inventory_guide/intro_patterns.html
相关文章:

Ansible的循环:loop,with_<lookup>和until
环境 管理节点:Ubuntu 22.04控制节点:CentOS 8Ansible:2.15.6 循环的方法 loopwith_<lookup>until 用这几种方式都可以实现循环。其中, loop 是推荐的用法,在很多时候能够替换 with_<lookup> 。 loop…...

点云 surface 方法总结
点云的表面方法是指通过点云数据来估计和重建物体或场景的表面几何形状。下面总结了几种常见的点云表面方法: 三角化:三角化是最常用的点云表面重建方法之一。它将点云中的点连接成三角形网格,从而重建出物体或场景的表面。常见的三角化算法…...

深入探索Linux文件系统:属性、路径与隐藏之谜
🎥 屿小夏 : 个人主页 🔥个人专栏 : Linux系统理论 🌄 莫道桑榆晚,为霞尚满天! 文章目录 📑前言🌤️文件的组成☁️文件属性☁️文件内容☁️注意事项 🌤️路…...

梯度详解与优化实战
什么是梯度 对所有自变量求偏微分构成的向量,它是一个向量(有大小和函数值增长方向) 导数是一个标量 找最小值点坐标的案例 import torchimport numpy as np import matplotlib.pyplot as plt def himmelblau(x):return (x[0]**2x[1]-11)…...

OSG编程指南<十二>:OSG二三维文字创建及文字特效
1、字体基础知识 适当的文字信息对于显示场景信息是非常重要的。在 OSG 中,osgText提供了向场景中添加文字的强大功能,由于有第三方插件 FreeType 的支持,它完全支持TrueType 字体。很多人可能对 FreeType 和 TrueType 还不太了解,…...
visionOS空间计算实战开发教程Day 6 拖拽和点击
在之前的学习中我们在空间中添加了3D模型,但在初始摆放后就无法再对其进行移动或做出修改。本节我们在Day 5显示和隐藏的基础上让我们模型可以实现拖拽效果,同时对纯色的立方体实现点击随机换色的功能。 首先是入口文件,无需做出改变…...
C# APS.NET CORE 6.0 WEB API IIS部署
1.创建 APS.NET CORE6.0 WEB API项目 默认选项即可 源代码: 项目文件展开: launchSettings.json {"$schema": "https://json.schemastore.org/launchsettings.json","iisSettings": {"windowsAuthentication"…...
C/C++ 常用加密与解密算法
计算机安全和数据隐私是现代应用程序设计中至关重要的方面。为了确保数据的机密性和完整性,常常需要使用加密和解密算法。C是一种广泛使用的编程语言,提供了许多加密和解密算法的实现。本文将介绍一些在C中常用的加密与解密算法,这其中包括Xo…...

从Qt源码的角度分析Qt对象树与内存管理模式
作者:令狐掌门 技术交流QQ群:675120140 csdn博客:https://mingshiqiang.blog.csdn.net/ 文章目录 一、Qt对象树(Object Tree)和父子关系二、源码角度:QObject的内存管理构造函数析构函数addChild() 和 removeChild()三、C++模拟实现Qt的对象树内存管理模式Qt框架提供了一…...

MySQL与Redis如何保证数据的一致性
文章目录 MySQL与Redis如何保证数据的一致性?不好的方案1. 先写 MySQL,再写 Redis2. 先写 Redis,再写 MySQL3. 先删除 Redis,再写 MySQL 好的方案4. 先删除 Redis,再写 MySQL,再删除 Redis5. 先写 MySQL&am…...

micropython - espnow
espnow这个东西可以很简单的进行多设备近距离互联,连握手都不用注册一下就能发信息 目前8266那个8角的刷20231105的1M的固件可以运行 8266目前没有信号强度功能所以我自己写的类强度返回为0 我写的类实例化后最后注册谁发消息就是给谁而接收端则是什么都接ÿ…...
京东数据采集(京东数据运营):怎样快速获取京东市场大数据?
相信京东平台的很多品牌方们都有做数据分析的需求,但面对多而杂的市场数据,很多运营者都没有思路。单依靠肉眼来看,很多商品的类目、销售成绩、价格分布等运营者也未必清楚。 其实对于京东平台上市场数据的获取,品牌可以直接借助一…...

重生奇迹mu迷宫攻略
重生奇迹mu迷宫是一种比较有挑战性的游戏玩法,需要一定的技巧和策略才能完成。以下是一些基本的攻略和技巧: 了解每个迷宫的特点:不同的迷宫有不同的规则和特点,需要根据迷宫的特点来制定合理的策略。在进入迷宫前可以先了解一下…...

[网络] 4. HTTP/1.1 相比 HTTP/1.0 提高了什么性能?
HTTP/1.1 相比 HTTP/1.0 性能上的改进 ● 使用长连接的方式改善了 HTTP/1.0 短连接造成的性能开销。 ● 支持管道(pipeline)网络传输,只要第一个请求发出去了,不必等其回来,就可以发第二个请求出去,可以减…...

3.1.2 Linux时间子系统 hrtimer示例使用
文章目录 结构体定义接口初始化启动修改取消示例示例1示例2示例3结构体定义 struct hrtimer {struct timerqueue_node node;ktime_t _softexpires;enum hrtimer_restart...
04 _ 系统设计目标(二):系统怎样做到高可用?
这里将探讨高并发系统设计的第二个目标——高可用性。 高可用性(High Availability,HA)是你在系统设计时经常会听到的一个名词,它指的是系统具备较高的无故障运行的能力。 我们在很多开源组件的文档中看到的HA方案就是提升组件可…...

Android相机性能提高50%
文章目录 应用举例(可以不看这一part,直接跳过看具体怎么做):Snapchat 通过 Camera2 Extensions API 将新相机功能的集成速度提高了 50%**Camera2 扩展 API 可以访问高级功能更多设备上的更多机会 正文:开始使用扩展架…...
STM32F103C8T6第5天:独立看门狗、窗口看门狗、dma实验
1. 独立看门狗IWDG介绍(341.45) 什么是看门狗? 在由单片机构成的微型计算机系统中,由于单片机的工作常常会受到来自外界电磁场的干扰,造成程序的跑飞,而陷入死循环,程序的正常运行被打断&#…...
QT已有项目导入工程时注意事项
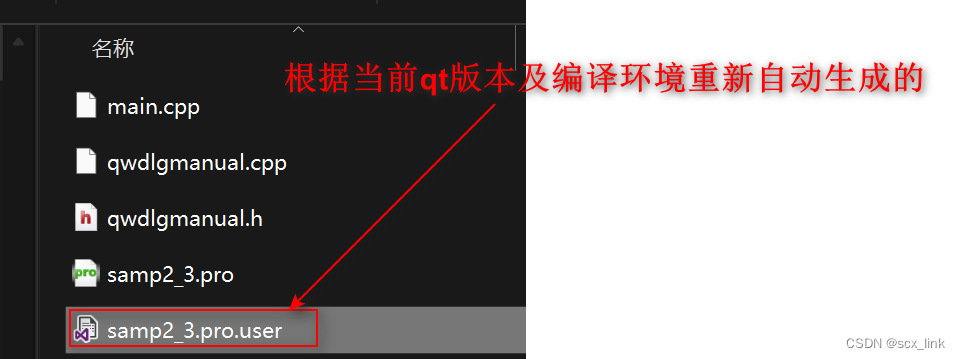
文章目录 从qt其他版本上开发的工程导入另一qt版本时 从qt其他版本上开发的工程导入另一qt版本时 这里以之前在qt5.12.2上开发的项目为例,现在到在qt6.5.3上运行。 不能直接导入IDE上,否则会报各种莫名奇妙的错误。 首先要把扩展名位.pro.user文件 删掉…...

Django视图层
一、请求与响应 视图函数 视图函数,简称视图,属于Django的视图层,默认定义在views.py文件中,是用来处理web请求信息以及返回响应信息的函数,所以研究视图函数只需熟练掌握两个对象即可:请求对象(HttpRequ…...

技术人的孤独:深夜Debug时的思考
——软件测试从业者的精神图鉴一、凌晨三点的独幕剧场屏幕冷光刺破黑暗,键盘敲击声在空旷办公室回荡。当世界沉入睡眠,测试工程师却深陷与Bug的无声博弈:物理空间的隔绝:无人协作的深夜,缺失即时反馈的对话机制&#x…...

Druid监控面板未授权访问实战:从发现到后台接管
1. Druid监控面板未授权访问漏洞解析 Druid作为阿里巴巴开源的数据库连接池,其内置的监控功能本是为了方便开发者排查性能问题,却经常因为配置不当成为攻击者的突破口。我在实际渗透测试中遇到过不下二十次这类漏洞,最夸张的一次只用了15分钟…...

复古CRT界面×流式输出|像素剧本圣殿TextIteratorStreamer实战
复古CRT界面流式输出|像素剧本圣殿TextIteratorStreamer实战 1. 项目概览 像素剧本圣殿(Pixel Script Temple)是一款专为剧本创作者设计的AI辅助工具,基于Qwen2.5-14B-Instruct大模型深度微调开发。这款工具最显著的特点是采用了…...

如何优雅复用 CSV DictWriter 实例以消除重复代码
本文介绍通过封装 csv.DictWriter 初始化逻辑、结合上下文管理器最佳实践,避免在多个方法中重复编写文件打开与写入器构造代码,兼顾可维护性与资源安全性。 本文介绍通过封装 csv.dictwriter 初始化逻辑、结合上下文管理器最佳实践,避免…...

杰理蓝牙耳机SDK实战:如何用软件IIC驱动外置传感器?聊聊LIS2DOC的那些配置坑
杰理蓝牙耳机SDK实战:软件IIC驱动LIS2DOC传感器的避坑指南 在蓝牙耳机开发中,外置传感器的集成往往成为功能创新的关键突破点。当硬件设计限制了触摸区域的使用,三轴加速度传感器便成为实现敲击控制的理想选择。ST公司的LIS2DOC作为一款高性能…...

全球太阳辐射与风力数据资源全解析:从免费到付费的五大平台对比
1. 科学数据中心:免费但有限的基础选择 科学数据中心(https://www.casdc.cn/)是国内较为知名的科研数据共享平台,主要面向学术研究领域提供气象、环境等数据服务。实测下来,它的太阳辐射数据以CSV和NetCDF格式为主&…...

B 站超 5 亿播放、“高数救星”宋浩老师新作《微积分精选 850 题》终于来了!
大学有两大渡劫现场:一是早八占座,二是微积分考试。你是不是也这样?上课的时候跟着老师的思路走觉得:“哇好简单。”笔记记得密密麻麻。一到下课自己做题,看着题目突然大脑空白:“公式在哪来着?…...

面试官问:“你的 RAG 检索准确率是多少?“
面试官问:“你的 RAG 检索准确率是多少?” “3 年后端开发经验,独立搭建过企业知识库 RAG 系统,熟悉 LangChain、向量数据库” 这份简历看着不错,我追问了一句:你们系统检索准确率多少? 候选人…...
)
新手避坑指南:匿名飞控与FS-I6X遥控器对码、通道设置全流程(附上位机数据解析)
新手避坑指南:FS-I6X遥控器与匿名飞控深度配置手册 第一次拿起遥控器时,我的手心全是汗——那些密密麻麻的拨杆和按钮仿佛在嘲笑我的无知。直到无人机第三次砸向地面,我才明白遥控器配置不是简单的对码就能解决的事。本文将带你穿越新手最易迷…...

终极Windows 11瘦身指南:使用Win11Debloat免费工具让电脑提速50%
终极Windows 11瘦身指南:使用Win11Debloat免费工具让电脑提速50% 【免费下载链接】Win11Debloat A simple, lightweight PowerShell script that allows you to remove pre-installed apps, disable telemetry, as well as perform various other changes to declut…...