tex2D使用学习
1. 背景:
项目中使用到了纹理进行插值的加速,因此记录一些自己在学习tex2D的一些过程
2. 代码:
#include "cuda_runtime.h"
#include "device_launch_parameters.h"
#include <assert.h>
#include <stdio.h>
#include <iostream>
#include <cuda_fp16.h>
#include <vector>void Data2Half(half* pDst, const int16_t* pSrc, const int Ndots);
static __global__ void Tex2DTest(cudaTextureObject_t p_rf_data, float* pfRes1, float* pfRes2);static __global__ void data2half(half* pDst, const int16_t* pSrc, const int Ndots)
{const int tid = blockIdx.x * blockDim.x + threadIdx.x;if (tid >= Ndots)return;pDst[tid] = __short2half_rn(pSrc[tid]);
}cudaTextureObject_t m_tex   = 0;
cudaArray* m_pRFData        = nullptr;
int16_t* m_i16RFDataBuffer  = nullptr; // 设备端的RF数据
half* m_pHalfRFDataCache    = nullptr; // 转换为半浮点型的RF数据缓存,用于将SHORT类型转换为FLOAT类型int main()
{const int nRx     = 2;const int Nsample = 2;const int IQ      = 1;cudaError_t error;cudaChannelFormatDesc channelDesc = cudaCreateChannelDescHalf();error                             = cudaMallocArray(&m_pRFData, &channelDesc, nRx * IQ, Nsample, cudaArrayTextureGather);assert(m_pRFData);cudaResourceDesc texRes;memset(&texRes, 0, sizeof(cudaResourceDesc));texRes.resType         = cudaResourceTypeArray;texRes.res.array.array = m_pRFData;cudaTextureDesc texDescr;memset(&texDescr, 0, sizeof(cudaTextureDesc));texDescr.normalizedCoords = false;texDescr.filterMode       = cudaFilterModeLinear;  // 这里很重要texDescr.addressMode[0]   = cudaAddressModeBorder;texDescr.addressMode[1]   = cudaAddressModeBorder;error = cudaCreateTextureObject(&m_tex, &texRes, &texDescr, NULL);//int16_t pi16Src[nRx * Nsample * IQ] = {1, 11, 2, 22,//                                    3, 33, 4, 44, //                                    5, 55, 6, 66, //                                    7, 77, 8, 88};//int16_t pi16Src[nRx * Nsample * IQ] = { 1, 11, 2, 22,//                                        3, 33, 4, 44};int16_t pi16Src[nRx * Nsample * IQ] = { 1,2,3,4 };error = cudaMalloc(&m_i16RFDataBuffer, sizeof(int16_t) * nRx * IQ * Nsample);error = cudaMemcpy(m_i16RFDataBuffer, pi16Src, sizeof(int16_t) * nRx * IQ * Nsample, cudaMemcpyHostToDevice);error = cudaMalloc(&m_pHalfRFDataCache, sizeof(half) * nRx * IQ * Nsample);Data2Half(m_pHalfRFDataCache, m_i16RFDataBuffer, nRx * IQ * Nsample);error = cudaMemcpy2DToArray(m_pRFData, 0, 0, m_pHalfRFDataCache, sizeof(half) * nRx * IQ, sizeof(half) * nRx * IQ, Nsample, cudaMemcpyDeviceToDevice);float* pf_res1 = nullptr;float* pf_res2 = nullptr;error = cudaMalloc(&pf_res1, nRx * Nsample * sizeof(float)); cudaMemset(pf_res1, 0, nRx * Nsample * sizeof(float));error = cudaMalloc(&pf_res2, nRx * Nsample * sizeof(float)); cudaMemset(pf_res2, 0, nRx * Nsample * sizeof(float));error = cudaGetLastError();dim3 block_dim = dim3(1, 1);dim3 grid_dim  = dim3(1, 1);Tex2DTest << <grid_dim, block_dim >> > (m_tex, pf_res1, pf_res2);cudaDeviceSynchronize();std::vector<float> vf_res_1(nRx * Nsample, 0);std::vector<float> vf_res_2(nRx * Nsample, 0);cudaMemcpy(vf_res_1.data(), pf_res1, sizeof(float) * vf_res_1.size(), cudaMemcpyDeviceToHost);cudaMemcpy(vf_res_2.data(), pf_res2, sizeof(float) * vf_res_2.size(), cudaMemcpyDeviceToHost);return 0;
}void Data2Half(half* pDst, const int16_t* pSrc, const int Ndots)
{dim3 block = dim3(512, 1);dim3 grid = dim3((Ndots - 1) / block.x + 1, 1);data2half << < grid, block >> > (pDst, pSrc, Ndots);
}static __global__ void Tex2DTest(cudaTextureObject_t p_rf_data, float *pfRes1, float *pfRes2)
{for (size_t y = 0; y < 2; ++y){for (size_t x = 0; x < 2; ++x) {float value = tex2D<float>(p_rf_data, x,     y);//pfRes1[y * 4 + y] = printf("x: %f\n", value);}}
}
3. 输出分析:
可以看到执行结果是

为什么呢?
原因是因为tex2D插值导致的,上面测试数据是
1 2
3 4
那在进行插值的时候会变成
0 0 0 0
0 1 2 0
0 3 4 0
每个点的输出都是当前前和左上角3个点进行平均计算出来的
比如第一个输出计算为:(1 + 0 + 0 + 0)/4 = 0.25
最后一个输出的计算为:(1 + 2 + 3 + 4) / 4 = 2.5
4. 问题
上面只是单独数据实数点的计算,如果我的数据集合是复数怎么办?
比如一组2 * 2大小的数据对
(1, 2, 3, 4;
5, 6, 7, 8)
数据实际表示含义是
(1 + j * 2, 3 + j * 4;
5 + j * 6, 7 + j * 8)
这种情况下怎么做到正确插值呢,比如第一个实数点的输出结果应该是
(1 + 0 + 0 + 0)/ 4
最后一个实数点的输出应该是:
(1 + 3 + 5 + 7) / 4
同理,最后一个虚数点的输出应该是:
(2 + 4 + 6 + 8)/ 4
5. 解决
#include "cuda_runtime.h"
#include "device_launch_parameters.h"
#include <assert.h>
#include <stdio.h>
#include <iostream>
#include <cuda_fp16.h>
#include <vector>void Data2Half(half* pDst, const int16_t* pSrc, const int Ndots);
static __global__ void Tex2DTest(cudaTextureObject_t p_rf_data, float* pfRes1, float* pfRes2);static __global__ void data2half(half* pDst, const int16_t* pSrc, const int Ndots)
{const int tid = blockIdx.x * blockDim.x + threadIdx.x;if (tid >= Ndots)return;pDst[tid] = __short2half_rn(pSrc[tid]);
}cudaTextureObject_t m_tex = 0;
cudaArray* m_pRFData = nullptr;
int16_t* m_i16RFDataBuffer = nullptr; // 设备端的RF数据
half* m_pHalfRFDataCache = nullptr; // 转换为半浮点型的RF数据缓存,用于将SHORT类型转换为FLOAT类型using namespace std;int main()
{const int nRx = 2;const int Nsample = 2;const int IQ = 2;cudaError_t error;cudaChannelFormatDesc channelDesc = cudaCreateChannelDescHalf2();error = cudaMallocArray(&m_pRFData, &channelDesc, nRx, Nsample, cudaArrayTextureGather);assert(m_pRFData);cudaResourceDesc texRes;memset(&texRes, 0, sizeof(cudaResourceDesc));texRes.resType = cudaResourceTypeArray;texRes.res.array.array = m_pRFData;cudaTextureDesc texDescr;memset(&texDescr, 0, sizeof(cudaTextureDesc));texDescr.normalizedCoords = false;texDescr.filterMode = cudaFilterModeLinear;  // 这里很重要texDescr.addressMode[0] = cudaAddressModeBorder;texDescr.addressMode[1] = cudaAddressModeBorder;error = cudaCreateTextureObject(&m_tex, &texRes, &texDescr, NULL);//int16_t pi16Src[nRx * Nsample * IQ] = {1, 11, 2, 22,//                                    3, 33, 4, 44, //                                    5, 55, 6, 66, //                                    7, 77, 8, 88};//int16_t pi16Src[nRx * Nsample * IQ] = { 1, 11, 2, 22,//                                        3, 33, 4, 44};int16_t pi16Src[nRx * Nsample * IQ] = { 1, 2, 3, 4,5, 6, 7, 8 };error = cudaMalloc(&m_i16RFDataBuffer, sizeof(int16_t) * nRx * IQ * Nsample);error = cudaMemcpy(m_i16RFDataBuffer, pi16Src, sizeof(int16_t) * nRx * IQ * Nsample, cudaMemcpyHostToDevice);error = cudaMalloc(&m_pHalfRFDataCache, sizeof(half) * nRx * IQ * Nsample);Data2Half(m_pHalfRFDataCache, m_i16RFDataBuffer, nRx * IQ * Nsample);error = cudaMemcpy2DToArray(m_pRFData, 0, 0, m_pHalfRFDataCache, sizeof(half2) * nRx, sizeof(half2) * nRx, Nsample, cudaMemcpyDeviceToDevice);float* pf_res1 = nullptr;float* pf_res2 = nullptr;error = cudaMalloc(&pf_res1, nRx * Nsample * sizeof(float)); cudaMemset(pf_res1, 0, nRx * Nsample * sizeof(float));error = cudaMalloc(&pf_res2, nRx * Nsample * sizeof(float)); cudaMemset(pf_res2, 0, nRx * Nsample * sizeof(float));error = cudaGetLastError();dim3 block_dim = dim3(1, 1);dim3 grid_dim  = dim3(1, 1);Tex2DTest << <grid_dim, block_dim >> > (m_tex, pf_res1, pf_res2);cudaDeviceSynchronize();std::vector<float> vf_res_1(nRx * Nsample, 0);std::vector<float> vf_res_2(nRx * Nsample, 0);cudaMemcpy(vf_res_1.data(), pf_res1, sizeof(float) * vf_res_1.size(), cudaMemcpyDeviceToHost);cudaMemcpy(vf_res_2.data(), pf_res2, sizeof(float) * vf_res_2.size(), cudaMemcpyDeviceToHost);return 0;
}void Data2Half(half* pDst, const int16_t* pSrc, const int Ndots)
{dim3 block = dim3(512, 1);dim3 grid = dim3((Ndots - 1) / block.x + 1, 1);data2half << < grid, block >> > (pDst, pSrc, Ndots);
}static __global__ void Tex2DTest(cudaTextureObject_t p_rf_data, float* pfRes1, float* pfRes2)
{for (size_t y = 0; y < 2; ++y){for (size_t x = 0; x < 2; ++x){float2 value = tex2D<float2>(p_rf_data, x, y);//pfRes1[y * 4 + y] = printf("x: %f, y: %f", value.x, value.y);// printf("x: %f, y: %f\n", value.x, value.y);}printf("\n");}
}
其实关键是在tex2D的构造

然后按照half2的方式进行排布就好了
相关文章:
tex2D使用学习
1. 背景: 项目中使用到了纹理进行插值的加速,因此记录一些自己在学习tex2D的一些过程 2. 代码: #include "cuda_runtime.h" #include "device_launch_parameters.h" #include <assert.h> #include <stdio.h>…...

[iOS开发]UITableView的性能优化
一些基础的优化 (一)CPU 1. 用轻量级对象 比如用不到事件处理的地方,可以考虑使用 CALayer 取代 UIView CALayer * imageLayer [CALayer layer]; imageLayer.bounds CGRectMake(0,0,200,100); imageLayer.position CGPointMake(200,200…...
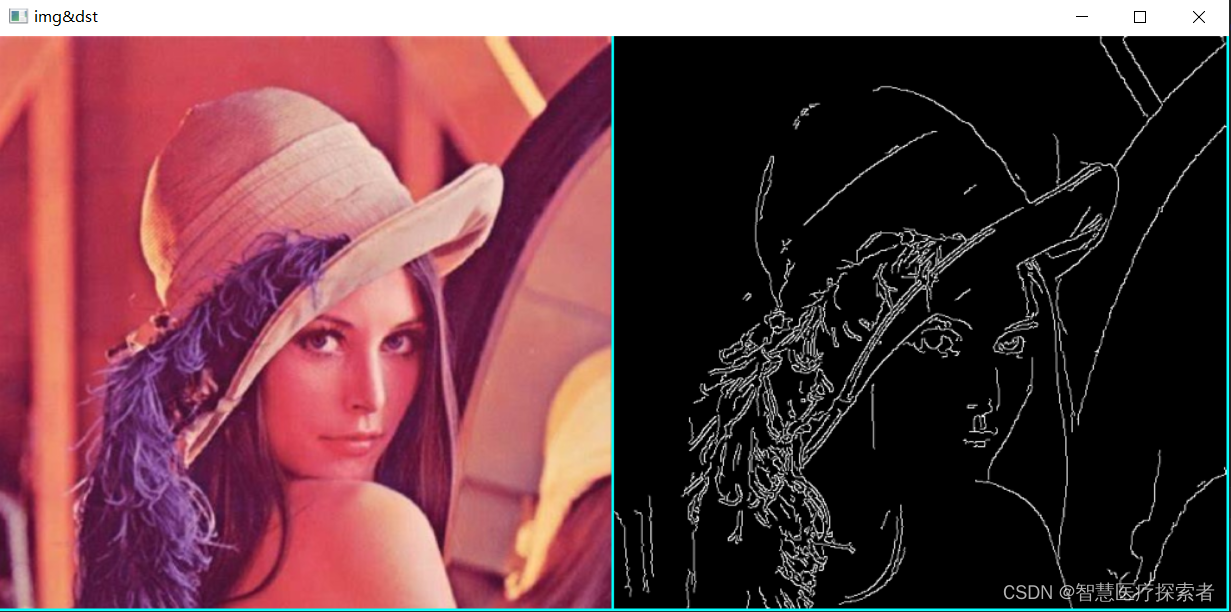
使用opencv实现图像滤波
1 图像滤波介绍 滤波是信号和图像处理中的基本任务之一,其旨在有选择地提取图像的某些特征,可以用于在给定应用程序的上下文中传达重要信息,例如,去除图像中的噪声、提取所需的视觉特征、图像重采样等。 1.1 图像滤波理论 图像…...
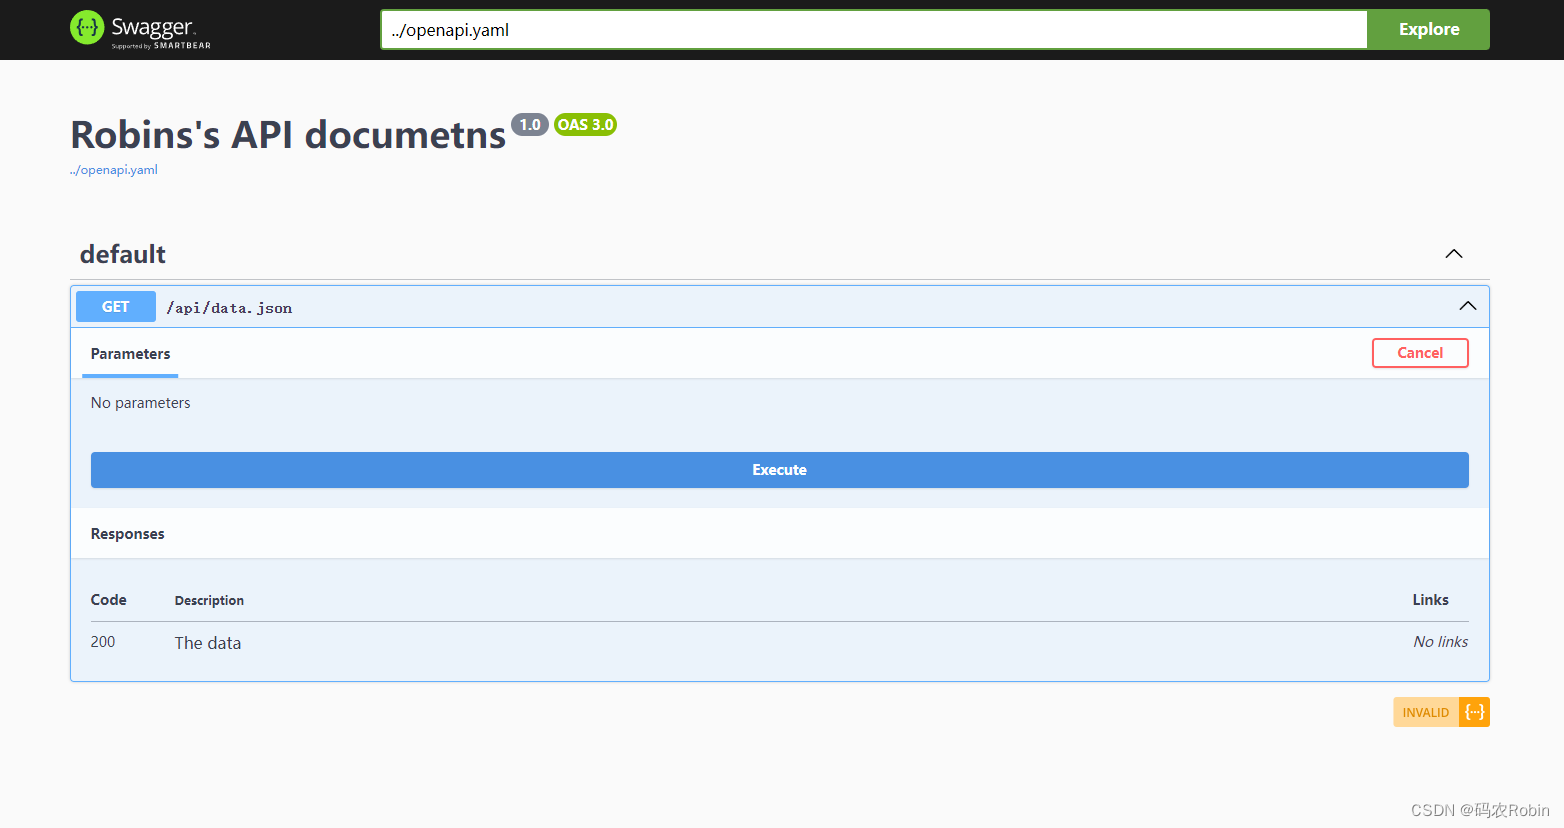
Swagger在php和java项目中的应用
Swagger在php和java项目中的应用 Swagger简介Swagger在java项目中的应用步骤常用注解 Swagger在php项目中的应用 Swagger简介 Swagger 是一个规范和完整的框架,用于生成、描述、调用和可视化 RESTful 风格的 Web 服务。 总体目标是使客户端和文件系统作为服务器以…...
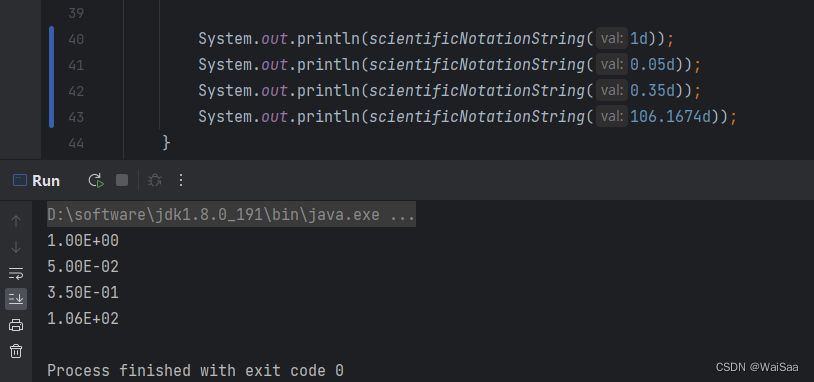
java科学计数法表示数值
Background 大多数计算器及计算机程序用科学记数法显示非常大和非常小的结果;但很多时候,我们需要做一个统一,要么全部以科学计数法输出,要么就全部显示为普通计数。注意:这里对大于等于1的数据做了特殊处理࿰…...
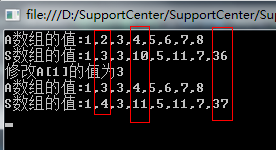
基于C#实现树状数组
有一种数据结构是神奇的,神秘的,它展现了位运算与数组结合的神奇魅力,太牛逼的,它就是树状数组,这种数据结构不是神人是发现不了的。 一、概序 假如我现在有个需求,就是要频繁的求数组的前 n 项和&#x…...

Ubuntu Server 20.04.6下Anaconda3安装Pytorch
环境 Ubuntu 20.04.6 LTS Anaconda3-2023.09-0-Linux-x86_64.sh conda 23.7.4 Pytorch 1.11.0 安装 先创建一个工作环境,环境名叫lia: conda create -n lia python3.8环境的使用方法如下: conda activate lia # 激活环境 conda deactiv…...

C#-关于日志的功能扩展
目录 一、日志Sink(接收器) 二、Trace追踪实现日志 三、日志滚动 一、日志Sink(接收器) 安装NuGet包:Serilog Sink有很多种,这里介绍两种: Console接收器(安装Serilog.Sinks.Console); File接收器(安装…...

小程序禁止二次转发分享私密消息动态消息
第一种用法:私密消息 私密消息:运营人员分享小程序到个人或群之后,该消息只能在被分享者或被分享群内打开,不可以二次转发。 用途:主要用于不希望目标客群外的人员看到的分享信息,比如带有较高金额活动的…...
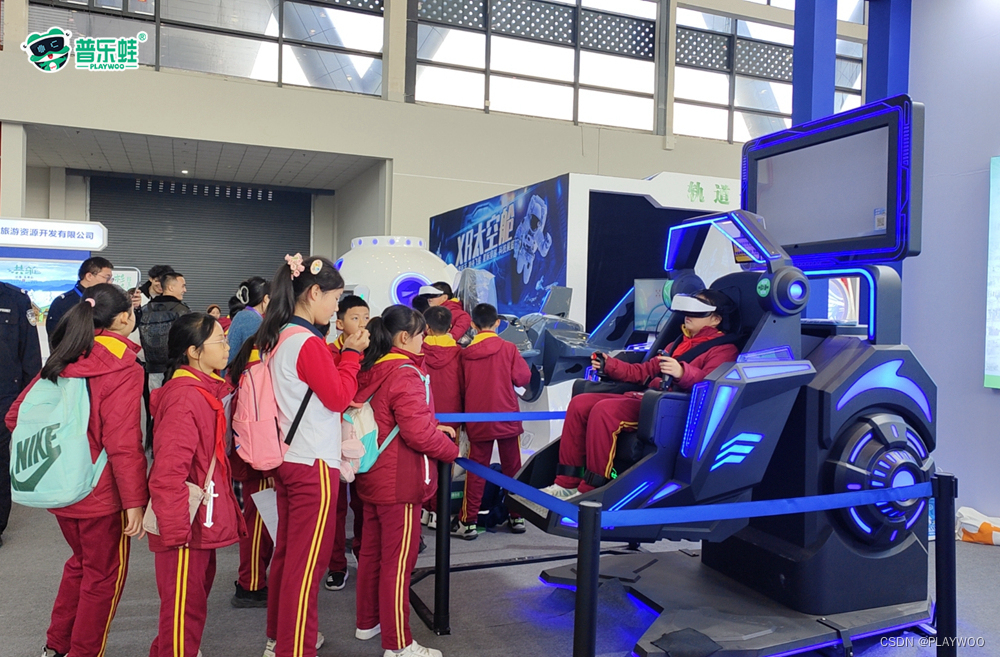
普乐蛙绵阳科博会一场VR科普航天科学盛宴科普知识
普乐蛙绵阳科普展:一场科学盛宴,点燃孩子探索欲望的火花! 普乐蛙绵阳科普展正在如火如荼地进行中,吸引了无数孩子和家长的热情参与。这场科普盛宴以独特的内外视角,让人们感受到科学的魅力,激发了孩子们对知识的渴望和…...

FFNPEG编译脚本
下面是一个ffmpeg编译脚本: #!/bin/bash set -eu -o pipefail set eu o pipefailFFMPEG_TAGn4.5-dev build_path$1 git_repo"https://github.com/FFmpeg/FFmpeg.git" cache_tool"" sysroot"" c_compiler"gcc" cxx_compile…...

Python期末复习题库(下)——“Python”
小雅兰期末加油冲冲冲!!! 1. (单选题)下列关于文件打开模式的说法,错误的是( C )。 A. r代表以只读方式打开文件 B. w代表以只写方式打开文件 C. a代表以二进制形式打开文件 D. 模式中使用时,文件可读可写 2. (单选题)下列选项中,以追加…...
)
tauri中使用rust调用动态链接库例子(使用libloading库和libc库)
前言 当前采用桌面端框架位tauri,现在需要调用读卡器等硬件设备,硬件厂商提供了32位的动态链接库,现在记录例子,需要注意的点是使用libloading库和libc库, [package] name "yyt-device-rust" version &q…...

Leetcode—739.每日温度【中等】
2023每日刷题(四十二) Leetcode—739.每日温度 单调栈实现思想 从右到左实现代码 class Solution { public:vector<int> dailyTemperatures(vector<int>& temperatures) {int n temperatures.size();stack<int> st;vector<i…...
毕业设计单片机可以用万能板吗?
毕业设计单片机可以用万能板吗? 可以是可以,就是焊接起来比较麻烦,特别是有好几个重复连线点的时候,检测起来就不那么容易了,而且布线看起来乱糟糟的,如果后期一不小心把线弄断了,查起来就更麻烦了&#x…...
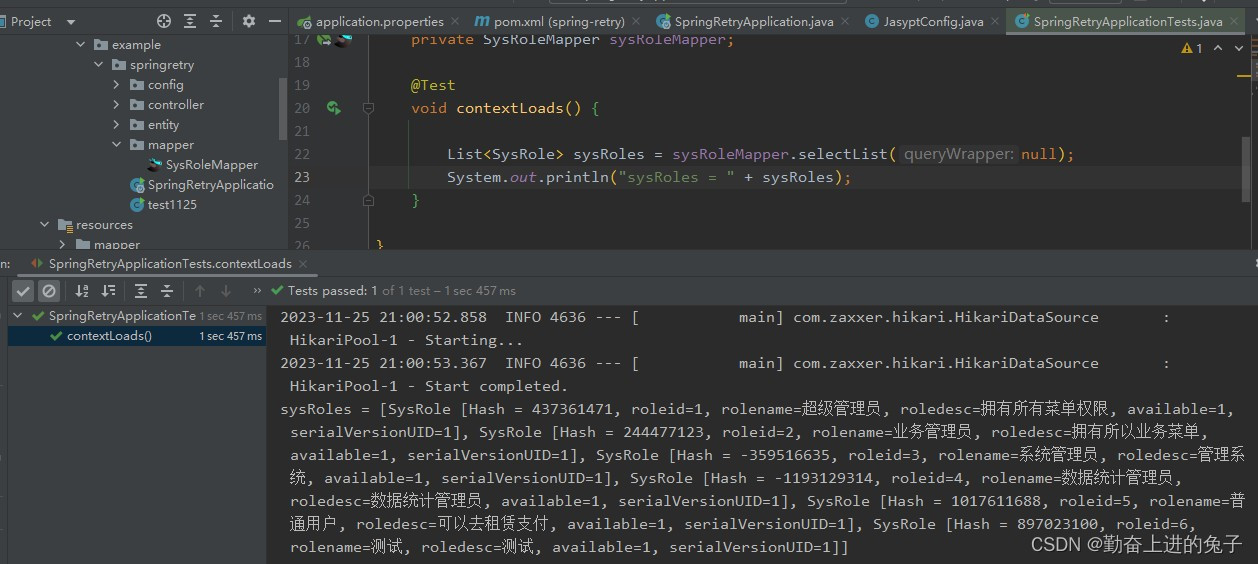
spring boot整合Jasypt实现配置加密
文章目录 目录 文章目录 前言 一、Jasypt是什么? 二、使用步骤 1.引入 2.测试使用 3.结果 总结 前言 一、Jasypt是什么? Jasypt(Java Simplified Encryption)是一个Java库,提供了一种简单的加密解密方式,…...
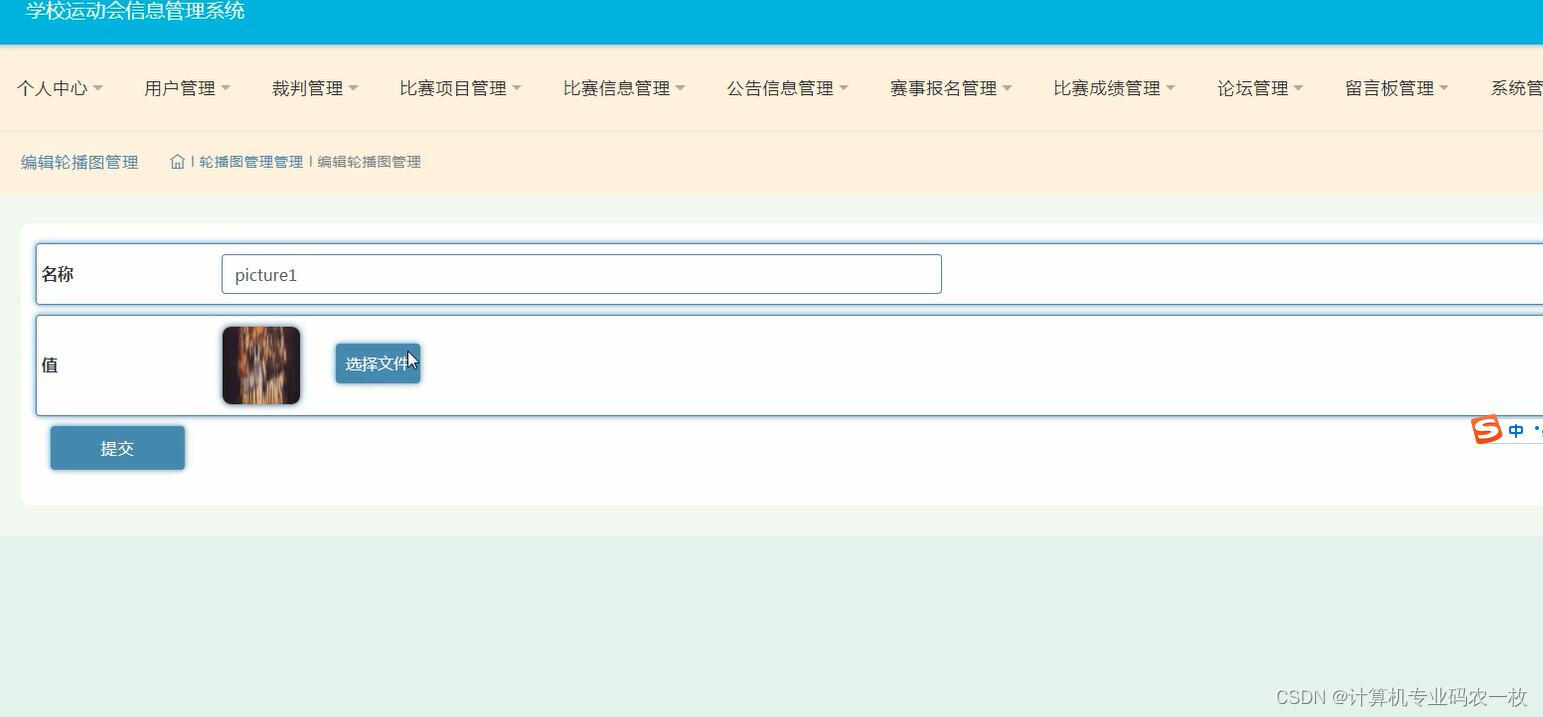
java学校高校运动会报名信息管理系统springboot+jsp
课题研究方案: 结合用户的使用需求,本系统采用运用较为广泛的Java语言,springboot框架,HTML语言等关键技术,并在idea开发平台上设计与研发创业学院运动会管理系统。同时,使用MySQL数据库,设计实…...
Java(七)(Lambda表达式,正则表达式,集合(Collection,Collection的遍历方式))
目录 Lambda表达式 省略写法(要看懂) 正则表达式 语法 案例 正则表达式的搜索替换和分割内容 集合进阶 集合体系结构 Collection Collection的遍历方式 迭代器 增强for循环 Lambda表达式遍历Collection List集合 ArrayList LinkedList 哈希值 HashSet底层原理 …...
)
华为OD机试 - 二叉树计算(Java JS Python C)
目录 题目描述 输入描述 输出描述 用例 题目解析 JS算法源码 Java算法源码...
应用开发——基础组件)
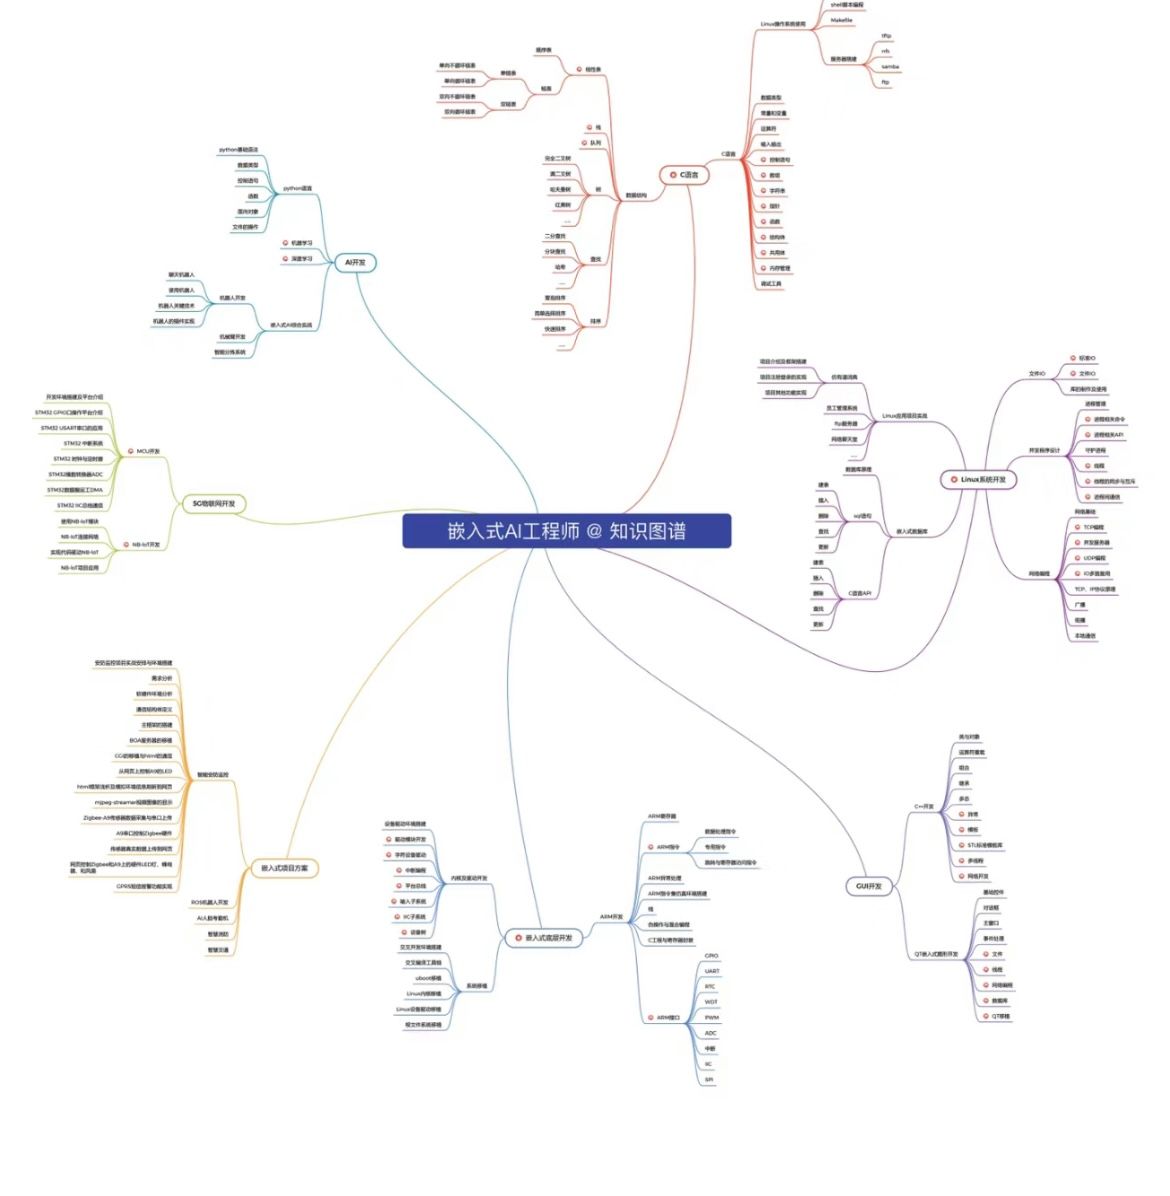
鸿蒙(HarmonyOS)应用开发——基础组件
组件 组件化是一种将复杂的前端应用程序分解成小的、独立的部分的方法。这些部分被称为组件,它们可以重复使用,可以与其他组件组合使用以创建更复杂的组件,并且它们有自己的生命周期和状态。 组件化的目的是提高开发效率和代码重用率&#…...

工业视觉光源颜色选型全攻略|白/红/蓝/绿光适用场景、原理与避坑细则
摘要:在工业AI视觉缺陷检测项目落地中,绝大多数工程师过度聚焦相机参数、镜头焦距、模型调参优化,却忽略了光源颜色选型这一核心前置条件。工业检测有一条公认铁律:成像决定上限,模型只负责兜底。相同工件、相同光源结…...

如何高效处理PDF文档:Windows平台的终极解决方案
如何高效处理PDF文档:Windows平台的终极解决方案 【免费下载链接】poppler-windows Download Poppler binaries packaged for Windows with dependencies 项目地址: https://gitcode.com/gh_mirrors/po/poppler-windows 还在为Windows上的PDF处理工具而烦恼吗…...

避坑指南:S32K3 AUTOSAR环境安装后,如何验证MCAL配置与工程创建?
S32K3 AUTOSAR开发实战:从环境验收到MCAL配置全流程解析 当S32DS、EB tresos和RTD驱动安装完成后,许多开发者会陷入"工具链已就位,但不知从何入手"的困境。本文将带您跨越从环境安装到可编译工程的关键步骤,重点解决三个…...

如何快速上手res-downloader:跨平台资源下载工具终极指南
如何快速上手res-downloader:跨平台资源下载工具终极指南 【免费下载链接】res-downloader 视频号、小程序、抖音、快手、小红书、直播流、m3u8、酷狗、QQ音乐等常见网络资源下载! 项目地址: https://gitcode.com/GitHub_Trending/re/res-downloader 想要轻松…...

PDFPatcher完全指南:用免费开源工具解决PDF格式难题的5个实战技巧
PDFPatcher完全指南:用免费开源工具解决PDF格式难题的5个实战技巧 【免费下载链接】PDFPatcher PDF补丁丁——PDF工具箱,可以编辑书签、剪裁旋转页面、解除限制、提取或合并文档,探查文档结构,提取图片、转成图片等等 项目地址:…...

Unity风格化山脉系统:程序化生成与运行时自然逻辑
1. 这不是“又一个山地素材包”,而是一套可工业化复用的风格化自然系统你有没有在Unity项目里,拖进一个山体模型,调完材质发现它和场景里其他植被、岩石、雾效完全不搭?或者好不容易调出理想中的晨雾山色,换到另一个光…...

内容创作团队借助Taotoken调用不同模型生成多样化文案
🚀 告别海外账号与网络限制!稳定直连全球优质大模型,限时半价接入中。 👉 点击领取海量免费额度 内容创作团队借助Taotoken调用不同模型生成多样化文案 在内容创作领域,团队经常需要为不同平台和受众产出风格各异的文…...

戴森球计划工厂蓝图仓库技术架构深度探索
戴森球计划工厂蓝图仓库技术架构深度探索 【免费下载链接】FactoryBluePrints 游戏戴森球计划的**工厂**蓝图仓库 项目地址: https://gitcode.com/GitHub_Trending/fa/FactoryBluePrints 在《戴森球计划》这款深受玩家喜爱的自动化工厂建造游戏中,工厂蓝图的…...

军队/军工场景对智能问数有什么特殊要求?
军队/军工场景对智能问数有什么特殊要求?从POC评测结果看技术路线的适配边界 截至2026年5月的行业实践表明,军队、军工场景是智能问数技术选型中复杂度最高、约束条件最多的领域之一。这类场景的核心特殊要求不在于某个单项能力,而在于系统能…...

使用 Python 和 Taotoken 官方风格 SDK 实现你的第一个 AI 对话应用
🚀 告别海外账号与网络限制!稳定直连全球优质大模型,限时半价接入中。 👉 点击领取海量免费额度 使用 Python 和 Taotoken 官方风格 SDK 实现你的第一个 AI 对话应用 对于刚开始接触大模型应用开发的 Python 程序员来说ÿ…...