计算机图形学头歌合集(题集附解)

目录
CG1-v1.0-点和直线的绘制
第1关:OpenGL点的绘制
第2关:OpenGL简单图形绘制
第3关:OpenGL直线绘制
第4关:0<1直线绘制-dda算法<>
第5关:0<1直线绘制-中点算法<>
第6关:一般直线绘制
CG1-v2.0-直线绘制
第1关:直线光栅化-DDA画线算法
第2关:直线光栅化-中点画线算法
第3关:直线光栅化-Bresenham画线算法
第4关:直线光栅化-任意斜率的Bresenham画线算法
CG2-v2.0-三角形填充
第1关:扫描线填充法
第2关:重心坐标填充法
第3关:同侧判断填充法
直线裁剪v1.0
第1关:Cohen-Sutherland编码裁剪算法
第2关:中点分割裁剪算法
第3关:Liang-Barsky参数化裁剪算法
CG2-v1.0-二维几何变换
第1关:正方形的平移与缩放
第2关:正方形的平移和旋转
第3关:正方形的变换组合
第4关:三菱形状
CG3-v2.0-图形几何变换
第1关:平移、缩放、旋转正方体
第2关:图形的平移与缩放
第3关:图形的平移与旋转
第4关:图形的旋转与缩放
第5关:绘制三菱形状
模型、观察及视口变换v1.0
第1关:立方体模型变换
第2关:立方体观察变换
第3关:立方体视口变换
模型、观察及视口变换v2.0
第1关:模型变换-左右两个立方体
第2关:观察变换
第3关:视口变换
投影变换v1.0
第1关:立方体透视投影
第2关:立方体平行投影
投影变换v2.0
第1关:一点透视
第2关:两点透视
第3关:三视图与正等测投影
第4关:视口变换与三视图
CG1-v1.0-点和直线的绘制
第1关:OpenGL点的绘制
一. 任务描述
根据下面要求,在右侧修改代码,绘制出预期输出的图片。平台会对你编写的代码进行测试。
1.本关任务
熟悉编程环境; 了解光栅图形显示器的特点; 了解计算机绘图的特点; 进行编程,以OpenGL为开发平台设计程序,以能够在屏幕上生成三个坐标、颜色和尺寸一定的点。
2.预期输出
3.具体要求
(1) 背景色为黑色,用 glClearColor()来完成;
(2) 渲染的点的直径设置为 3;
(3) 选用 GL_POINTS 作为图形类型;
(4) 三个点的颜色分别为(1.0f, 0.0f, 0.0f), (0.0f,1.0f,0.0f), (0.0f,0.0f,1.0f);
(5) 三个点对应的顶点坐标分别为(-0.4f,-0.4f), (0.0f,0.0f), (0.4f,0.4f)。

// 提示:写完代码请保存之后再进行评测
#include <GL/freeglut.h>
#include<stdio.h>// 评测代码所用头文件-开始
#include<opencv2/core/core.hpp>
#include<opencv2/highgui/highgui.hpp>
#include<opencv2/imgproc/imgproc.hpp>
// 评测代码所用头文件-结束void myDisplay(void)
{// 请在此添加你的代码/********** Begin ********/glClearColor(0.0,0.0,0.0,0.0);glPointSize(3);glBegin(GL_POINTS);glColor3f(1.0,0.0,0.0);glVertex2f(-0.4,-0.4);glColor3f(0.0,1.0,0.0);glVertex2f(0.0,0.0);glColor3f(0.0,0.0,1.0);glVertex2f(0.4,0.4);glEnd();/********** End **********/glFlush();
}int main(int argc, char *argv[])
{glutInit(&argc, argv);glutInitWindowPosition(100, 100);glutInitWindowSize(400, 400);glutCreateWindow("Hello Point!");glutDisplayFunc(&myDisplay);glutMainLoopEvent();     /*************以下为评测代码,与本次实验内容无关,请勿修改**************/GLubyte* pPixelData = (GLubyte*)malloc(400 * 400 * 3);//分配内存GLint viewport[4] = {0};    glReadBuffer(GL_FRONT);glPixelStorei(GL_UNPACK_ALIGNMENT, 4);glGetIntegerv(GL_VIEWPORT, viewport);glReadPixels(viewport[0], viewport[1], viewport[2], viewport[3], GL_RGB, GL_UNSIGNED_BYTE, pPixelData);cv::Mat img;std::vector<cv::Mat> imgPlanes;img.create(400, 400, CV_8UC3);cv::split(img, imgPlanes);for(int i = 0; i < 400; i ++) {unsigned char* plane0Ptr = imgPlanes[0].ptr<unsigned char>(i);unsigned char* plane1Ptr = imgPlanes[1].ptr<unsigned char>(i);unsigned char* plane2Ptr = imgPlanes[2].ptr<unsigned char>(i);for(int j = 0; j < 400; j ++) {int k = 3 * (i * 400 + j);plane2Ptr[j] = pPixelData[k];plane1Ptr[j] = pPixelData[k+1];plane0Ptr[j] = pPixelData[k+2];}}cv::merge(imgPlanes, img);cv::flip(img, img ,0); cv::namedWindow("openglGrab");cv::imshow("openglGrab", img);//cv::waitKey();cv::imwrite("../img_step1/test.jpg", img);return 0;
}
第2关:OpenGL简单图形绘制
一.任务描述
根据下面要求,在右侧修改代码,绘制出预期输出的图片。平台会对你编写的代码进行测试。
1.本关任务
利用 OpenGL 作为开发平台设计程序,生成一个光栅图。
2.预期输出
3.具体要求
(1).使用黑色作为背景,采用 glClearColor 来实现;
(2).绘制一个矩形,颜色为(1.0f,1.0f,1.0f),矩阵位置(-0.5f,-0.5f,0.5f,0.5f);
(3).绘制一个三角形,三个顶点颜色分别为(1.0f, 0.0f, 0.0f), (0.0f,1.0f,0.0f), (0.0f,0.0f,1.0f),对应的顶点坐标分别为(0.0f,1.0f), (0.8f,-0.5f), (-0.8f,-0.5f);
(4).绘制三个直径为3的点,颜色为(1.0f, 0.0f, 0.0f), (0.0f,1.0f,0.0f), (0.0f,0.0f,1.0f),对应的顶点坐标分别为(-0.4f,-0.4f), (0.0f,0.0f),(0.4f,0.4f)。

// 提示:写完代码请保存之后再进行评测
#include <GL/freeglut.h>
#include<stdio.h>// 评测代码所用头文件-开始
#include<opencv2/core/core.hpp>
#include<opencv2/highgui/highgui.hpp>
#include<opencv2/imgproc/imgproc.hpp>
// 评测代码所用头文件-结束void myDisplay(void)
{// 请在此添加你的代码/********** Begin ********/glClearColor(0.0,0.0,0.0,0.0);glColor3f(1.0,1.0,1.0);glRectf(-0.5,-0.5,0.5,0.5);glBegin(GL_TRIANGLES);glColor3f(1.0,0.0,0.0);glVertex2f(0.0,1.0);glColor3f(0.0,1.0,0.0);glVertex2f(0.8,-0.5);glColor3f(0.0,0.0,1.0);glVertex2f(-0.8,-0.5);glEnd();glPointSize(3);glBegin(GL_POINTS);glColor3f(1.0,0.0,0.0);glVertex2f(-0.4,-0.4);glColor3f(0.0,1.0,0.0);glVertex2f(0.0,0.0);glColor3f(0.0,0.0,1.0);glVertex2f(0.4,0.4);glEnd();/********** End **********/glFlush();
}int main(int argc, char *argv[])
{glutInit(&argc, argv);glutInitWindowPosition(100, 100);glutInitWindowSize(400, 400);glutCreateWindow("Hello Point!");glutDisplayFunc(&myDisplay);glutMainLoopEvent();     /*************以下为评测代码,与本次实验内容无关,请勿修改**************/GLubyte* pPixelData = (GLubyte*)malloc(400 * 400 * 3);//分配内存GLint viewport[4] = {0};    glReadBuffer(GL_FRONT);glPixelStorei(GL_UNPACK_ALIGNMENT, 4);glGetIntegerv(GL_VIEWPORT, viewport);glReadPixels(viewport[0], viewport[1], viewport[2], viewport[3], GL_RGB, GL_UNSIGNED_BYTE, pPixelData);cv::Mat img;std::vector<cv::Mat> imgPlanes;img.create(400, 400, CV_8UC3);cv::split(img, imgPlanes);for(int i = 0; i < 400; i ++) {unsigned char* plane0Ptr = imgPlanes[0].ptr<unsigned char>(i);unsigned char* plane1Ptr = imgPlanes[1].ptr<unsigned char>(i);unsigned char* plane2Ptr = imgPlanes[2].ptr<unsigned char>(i);for(int j = 0; j < 400; j ++) {int k = 3 * (i * 400 + j);plane2Ptr[j] = pPixelData[k];plane1Ptr[j] = pPixelData[k+1];plane0Ptr[j] = pPixelData[k+2];}}cv::merge(imgPlanes, img);cv::flip(img, img ,0); cv::namedWindow("openglGrab");cv::imshow("openglGrab", img);//cv::waitKey();cv::imwrite("../img_step2/test.jpg", img);return 0;
}
第3关:OpenGL直线绘制
一.任务描述
根据下面要求,在右侧修改代码,绘制出预期输出的图片。平台会对你编写的代码进行测试。
1.本关任务
理解基本图形元素光栅化的基本原理; 了解和使用OpenGL的生成直线的命令,来验证程序运行结果。
2.预期输出
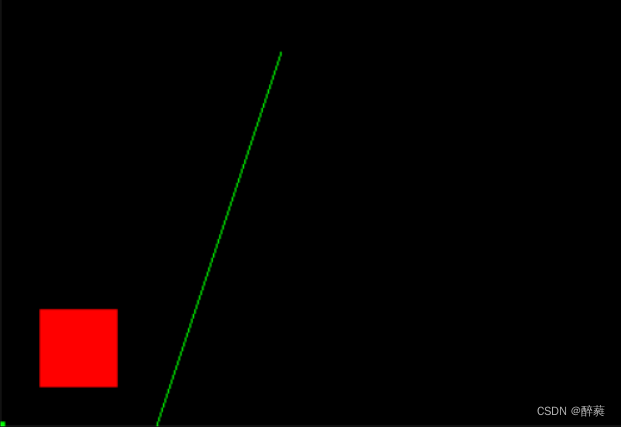
3.具体要求
(1).背景色为黑色,用 glclearcolor 来完成;
(2).绘制一个矩形,颜色为(1.0f,0.0f,0.0f),矩形位置(25.0,25.0,75.0,75.0);
(3).绘制一个直径为10的点,颜色为(0.0f, 1.0f, 0.0f),对应的点坐标为原点;
(4).利用GL_LINES的绘线方式绘制一条线,其中线段的两个顶点颜色分别为(0.0f, 1.0f, 0.0f),(0.0f, 1.0f, 0.0f)两个顶点的坐标分别为(100.0f, 0.0f),(180.0f, 240.0f);
5.调用向glutReshapeFunC注册的函数。
// 提示:写完代码请保存之后再进行评测
#include <GL/freeglut.h>
#include<stdio.h>// 评测代码所用头文件-开始
#include<opencv2/core/core.hpp>
#include<opencv2/highgui/highgui.hpp>
#include<opencv2/imgproc/imgproc.hpp>
// 评测代码所用头文件-结束void myDisplay(void)
{// 请在此添加你的代码/********** Begin ********/glClearColor(0.0,0.0,0.0,0.0);glColor3f(1.0,0.0f,0.0f);glRectf(25.0,25.0,75.0,75.0);glPointSize(10);glBegin(GL_POINTS);glColor3f(0.0f,1.0f,0.0f);glVertex2f(0.0f,0.0f);glEnd();glBegin(GL_LINES);glColor3f(0.0f,1.0f,0.0f);glVertex2f(100.0f,0.0f);glColor3f(0.0f,1.0f,0.0f);glVertex2f(180.0f,240.0f);glEnd();/********** End **********/glFlush();
}
void Init()
{glClearColor(0.0, 0.0, 0.0, 0.0);glShadeModel(GL_SMOOTH);
}
void myReshape(int w, int h)
{glViewport(0, 0, (GLsizei)w, (GLsizei)h);glMatrixMode(GL_PROJECTION);glLoadIdentity();gluOrtho2D(0.0, (GLdouble)w, 0.0, (GLdouble)h);
}int main(int argc, char *argv[])
{glutInit(&argc, argv);glutInitWindowPosition(100, 100);glutInitWindowSize(400, 400);glutCreateWindow("Hello Point!");Init();glutDisplayFunc(myDisplay);glutReshapeFunc(myReshape);glutMainLoopEvent();     /*************以下为评测代码,与本次实验内容无关,请勿修改**************/GLubyte* pPixelData = (GLubyte*)malloc(400 * 400 * 3);//分配内存GLint viewport[4] = {0};    glReadBuffer(GL_FRONT);glPixelStorei(GL_UNPACK_ALIGNMENT, 4);glGetIntegerv(GL_VIEWPORT, viewport);glReadPixels(viewport[0], viewport[1], viewport[2], viewport[3], GL_RGB, GL_UNSIGNED_BYTE, pPixelData);cv::Mat img;std::vector<cv::Mat> imgPlanes;img.create(400, 400, CV_8UC3);cv::split(img, imgPlanes);for(int i = 0; i < 400; i ++) {unsigned char* plane0Ptr = imgPlanes[0].ptr<unsigned char>(i);unsigned char* plane1Ptr = imgPlanes[1].ptr<unsigned char>(i);unsigned char* plane2Ptr = imgPlanes[2].ptr<unsigned char>(i);for(int j = 0; j < 400; j ++) {int k = 3 * (i * 400 + j);plane2Ptr[j] = pPixelData[k];plane1Ptr[j] = pPixelData[k+1];plane0Ptr[j] = pPixelData[k+2];}}cv::merge(imgPlanes, img);cv::flip(img, img ,0); cv::namedWindow("openglGrab");cv::imshow("openglGrab", img);//cv::waitKey();cv::imwrite("../img_step3/test.jpg", img);return 0;
}
第4关:0<k<1直线绘制-DDA算法
一.任务描述
根据下面要求,在右侧修改代码,绘制出预期输出的图片。平台会对你编写的代码进行测试。
1.本关任务
掌握一种基本图形元素光栅化算法,利用OpenGL实现直线光栅化的DDA算法。
2.预期输出
3.具体要求
(1).背景色为黑色,用 glclearcolor 来完成;
(2).利用DDA算法生成一条直线,线粗为1,直线颜色为(1.0f,1.0f,0.0f),直线两端点坐标为(0,0,200,200)。

// 提示:写完代码请保存之后再进行评测
#include <GL/freeglut.h>
#include<stdio.h>// 评测代码所用头文件-开始
#include<opencv2/core/core.hpp>
#include<opencv2/highgui/highgui.hpp>
#include<opencv2/imgproc/imgproc.hpp>
// 评测代码所用头文件-结束void LineDDA(int x0, int y0, int x1, int y1)
{// 请在此添加你的代码/********** Begin ********/int x;int dy, dx;int y;float k;dx = x1 - x0, dy = y1 - y0;k = dy / dx;y = y0;glColor3f(1.0f, 1.0f, 0.0f);glPointSize(1);for (x = x0; x <= x1; x++){glBegin(GL_POINTS);glVertex2i(x, (int)(y + 0.5)); glEnd();y += k;}/********** End **********/glFlush();
}void myDisplay(void)
{// 请在此添加你的代码/********** Begin ********/
glClearColor(0.0, 0.0, 0.0, 0.0);LineDDA( 0, 0, 200, 200);/********** End **********/glFlush();
}
void Init()
{glClearColor(0.0, 0.0, 0.0, 0.0);glShadeModel(GL_SMOOTH);
}
void myReshape(int w, int h)
{glViewport(0, 0, (GLsizei)w, (GLsizei)h);glMatrixMode(GL_PROJECTION);glLoadIdentity();gluOrtho2D(0.0, (GLdouble)w, 0.0, (GLdouble)h);
}int main(int argc, char *argv[])
{glutInit(&argc, argv);glutInitWindowPosition(100, 100);glutInitWindowSize(400, 400);glutCreateWindow("Hello Point!");Init();glutDisplayFunc(myDisplay);glutReshapeFunc(myReshape);glutMainLoopEvent();     /*************以下为评测代码,与本次实验内容无关,请勿修改**************/GLubyte* pPixelData = (GLubyte*)malloc(400 * 400 * 3);//分配内存GLint viewport[4] = {0};glReadBuffer(GL_FRONT);glPixelStorei(GL_UNPACK_ALIGNMENT, 4);glGetIntegerv(GL_VIEWPORT, viewport);glReadPixels(viewport[0], viewport[1], viewport[2], viewport[3], GL_RGB, GL_UNSIGNED_BYTE, pPixelData);cv::Mat img;std::vector<cv::Mat> imgPlanes;img.create(400, 400, CV_8UC3);cv::split(img, imgPlanes);for(int i = 0; i < 400; i ++) {unsigned char* plane0Ptr = imgPlanes[0].ptr<unsigned char>(i);unsigned char* plane1Ptr = imgPlanes[1].ptr<unsigned char>(i);unsigned char* plane2Ptr = imgPlanes[2].ptr<unsigned char>(i);for(int j = 0; j < 400; j ++) {int k = 3 * (i * 400 + j);plane2Ptr[j] = pPixelData[k];plane1Ptr[j] = pPixelData[k+1];plane0Ptr[j] = pPixelData[k+2];}}cv::merge(imgPlanes, img);cv::flip(img, img ,0); cv::namedWindow("openglGrab");cv::imshow("openglGrab", img);//cv::waitKey();cv::imwrite("../img_step4/test.jpg", img);return 0;
}
第5关:0<k<1直线绘制-中点算法
一.任务描述
根据下面要求,在右侧修改代码,绘制出预期输出的图片。平台会对你编写的代码进行测试。
1.本关任务
掌握一种基本图形元素光栅化算法,利用OpenGL实现直线光栅化的中点画线算法。
2.预期输出
3.具体要求
(1).背景色为黑色,用 glclearcolor 来完成;
(2).利用中点画线算法生成一条直线,线粗为1,直线颜色为(0.0f,1.0f,0.0f),直线两端点坐标为(10,50,300,260)。

// 提示:写完代码请保存之后再进行评测
#include <GL/freeglut.h>
#include<stdio.h>// 评测代码所用头文件-开始
#include<opencv2/core/core.hpp>
#include<opencv2/highgui/highgui.hpp>
#include<opencv2/imgproc/imgproc.hpp>
// 评测代码所用头文件-结束void MidPLine(int x0, int y0, int x1, int y1)
{// 请在此添加你的代码/********** Begin ********/int dx, dy, dt, db, d, x, y;dx = x1- x0;dy = y1 - y0;d = dx - 2*dy;          dt = 2*dx - 2*dy;       db = -2*dy;            x = x0; y = y0;glColor3f(0.0f, 1.0f, 0.0f);glPointSize(1);glBegin(GL_POINTS);glVertex2i(x, y);glEnd();while (x < x1){if (d < 0){x++;y++;d += dt;}else{x++;d += db;}glBegin(GL_POINTS);glVertex2i(x, y);glEnd();}/********** End **********/glFlush();
}void myDisplay(void)
{// 请在此添加你的代码/********** Begin ********/glClear(GL_COLOR_BUFFER_BIT);MidPLine(10,50,300,260);/********** End **********/glFlush();
}
void Init()
{glClearColor(0.0, 0.0, 0.0, 0.0);glShadeModel(GL_SMOOTH);
}
void myReshape(int w, int h)
{glViewport(0, 0, (GLsizei)w, (GLsizei)h);glMatrixMode(GL_PROJECTION);glLoadIdentity();gluOrtho2D(0.0, (GLdouble)w, 0.0, (GLdouble)h);
}int main(int argc, char *argv[])
{glutInit(&argc, argv);glutInitWindowPosition(100, 100);glutInitWindowSize(400, 400);glutCreateWindow("Hello Point!");Init();glutDisplayFunc(myDisplay);glutReshapeFunc(myReshape);glutMainLoopEvent();     /*************以下为评测代码,与本次实验内容无关,请勿修改**************/GLubyte* pPixelData = (GLubyte*)malloc(400 * 400 * 3);//分配内存GLint viewport[4] = {0};glReadBuffer(GL_FRONT);glPixelStorei(GL_UNPACK_ALIGNMENT, 4);glGetIntegerv(GL_VIEWPORT, viewport);glReadPixels(viewport[0], viewport[1], viewport[2], viewport[3], GL_RGB, GL_UNSIGNED_BYTE, pPixelData);cv::Mat img;std::vector<cv::Mat> imgPlanes;img.create(400, 400, CV_8UC3);cv::split(img, imgPlanes);for(int i = 0; i < 400; i ++) {unsigned char* plane0Ptr = imgPlanes[0].ptr<unsigned char>(i);unsigned char* plane1Ptr = imgPlanes[1].ptr<unsigned char>(i);unsigned char* plane2Ptr = imgPlanes[2].ptr<unsigned char>(i);for(int j = 0; j < 400; j ++) {int k = 3 * (i * 400 + j);plane2Ptr[j] = pPixelData[k];plane1Ptr[j] = pPixelData[k+1];plane0Ptr[j] = pPixelData[k+2];}}cv::merge(imgPlanes, img);cv::flip(img, img ,0); cv::namedWindow("openglGrab");cv::imshow("openglGrab", img);//cv::waitKey();//cv::imwrite("../img_step5/test.jpg", img);return 0;
}
第6关:一般直线绘制
一.任务描述
1.本关任务
在前面关卡的基础上,根据下面具体要求,利用OpenGL画点函数来实现一般直线(所有斜率情况)的绘制算法。
2.预期输出
3.具体要求
根据下面要求,在右侧修改代码,绘制出预期输出的图片,并进行评测。
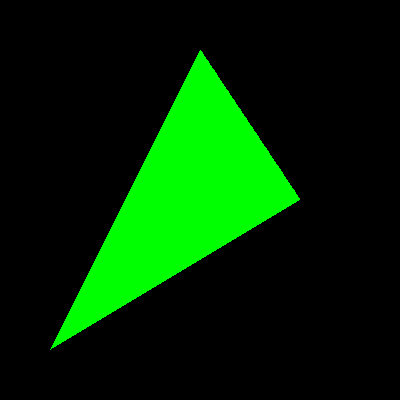
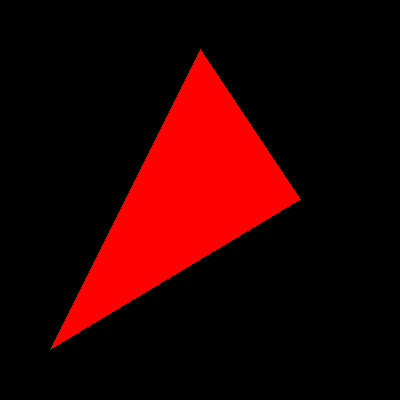
(1) 直线颜色为红色(1.0f,0.0f,0.0f), 线粗为1;
(2) 实现一般直线(所有斜率情况)的绘制算法,并将代码填写在函数void Line(int x0, int y0, int x1, int y1)中;
(3) 绘制一个五角星来测试上述直线绘制算法,并将代码填写在函数void myDisplay(void)中指定位置。五角星的顶点坐标分别为:(261, 215), (344, 275),(429, 213), (398, 319), (477, 384), (378, 385), (344, 491), (310, 384), (209, 382), (292, 319).

// 提示:写完代码请保存之后再进行评测
#include <GL/freeglut.h>
#include <algorithm>
#include <stdio.h>
using namespace std;// 评测代码所用头文件-开始
#include <opencv2/core/core.hpp>
#include <opencv2/highgui/highgui.hpp>
#include <opencv2/imgproc/imgproc.hpp>
// 评测代码所用头文件-结束void Line(int x0, int y0, int x1, int y1)
{// 请在此添加你的代码/********** Begin ********/glColor3f(1.0f, 0.0f, 0.0f);glBegin(GL_POINTS);glPointSize(1);int dx = abs(x1 - x0);int dy = abs(y1 - y0);if (dx > dy) // x方向为步进方向{if (x0 > x1) //确保x0<x1,这样循环中x=x+1{swap(x0, x1);swap(y0, y1);}int d = dx - 2 * dy;int d1 = 2 * dx - 2 * dy;int d2 = -2 * dy;int x = x0;int y = y0;int yIncr = (y1 > y0) ? 1 : -1; // 比较两端点y值大小决定y的增量值glVertex2i(x, y);for (int x = x0 + 1; x <= x1; x++){if (d < 0){y = y + yIncr;d = d + d1;}elsed = d + d2;glVertex2i(x, y);}}else{if (y0 > y1){swap(x0, x1);swap(y0, y1);}int d = dy - 2 * dx;int d1 = 2 * dy - 2 * dx;int d2 = -2 * dx;int x = x0;int y = y0;int xIncr = (x1 > x0) ? 1 : -1;glVertex2i(x, y);for (int y = y0 + 1; y <= y1; y++){if (d < 0){x = x + xIncr;d = d + d1;}elsed = d + d2;glVertex2i(x, y);}}glEnd();/********** End **********/
}void myDisplay(void)
{glClear(GL_COLOR_BUFFER_BIT);// 请在此添加你的代码用来测试直线绘制代码/********** Begin ********/Line(261, 215, 344, 275);Line(344, 275, 429, 213);Line(429, 213, 398, 319);Line(398, 319, 477, 384);Line(477, 384, 378, 385);Line(378, 385, 344, 491);Line(344, 491, 310, 384);Line(310, 384, 209, 382);Line(209, 382, 292, 319);Line(292, 319, 261, 215);/********** End **********/glFlush();
}
void Init()
{glClearColor(0.0, 0.0, 0.0, 0.0);glShadeModel(GL_SMOOTH);
}
void myReshape(int w, int h)
{glViewport(0, 0, (GLsizei)w, (GLsizei)h);glMatrixMode(GL_PROJECTION);glLoadIdentity();gluOrtho2D(0.0, (GLdouble)w, 0.0, (GLdouble)h);
}int main(int argc, char *argv[])
{int width = 800;int height = 600;glutInit(&argc, argv);glutInitWindowPosition(100, 100);glutInitWindowSize(width, height);glutCreateWindow("Hello Line!");Init();glutDisplayFunc(myDisplay);glutReshapeFunc(myReshape);glutMainLoopEvent();    /*************以下为评测代码,与本次实验内容无关,请勿修改**************/GLubyte* pPixelData = (GLubyte*)malloc(width * height * 3);//分配内存GLint viewport[4] = {0};glReadBuffer(GL_FRONT);glPixelStorei(GL_UNPACK_ALIGNMENT, 4);glGetIntegerv(GL_VIEWPORT, viewport);glReadPixels(viewport[0], viewport[1], viewport[2], viewport[3], GL_RGB, GL_UNSIGNED_BYTE, pPixelData);cv::Mat img;std::vector<cv::Mat> imgPlanes;img.create(height, width, CV_8UC3);cv::split(img, imgPlanes);for(int i = 0; i < height; i ++) {unsigned char* plane0Ptr = imgPlanes[0].ptr<unsigned char>(i);unsigned char* plane1Ptr = imgPlanes[1].ptr<unsigned char>(i);unsigned char* plane2Ptr = imgPlanes[2].ptr<unsigned char>(i);for(int j = 0; j < width; j ++) {int k = 3 * (i * width + j);plane2Ptr[j] = pPixelData[k];plane1Ptr[j] = pPixelData[k+1];plane0Ptr[j] = pPixelData[k+2];}}cv::merge(imgPlanes, img);cv::flip(img, img ,0); cv::namedWindow("openglGrab");cv::imshow("openglGrab", img);//cv::waitKey();//cv::imwrite("../img_step6/test.jpg", img);return 0;
}
CG1-v2.0-直线绘制
第1关:直线光栅化-DDA画线算法
一.任务描述
1.本关任务
(1)根据直线DDA算法补全line函数,其中直线斜率0<k<1; (2)当直线方程恰好经过P(x,y)和T(x,y+1)的中点M时,统一选取直线上方的T点为显示的像素点。
2.输入
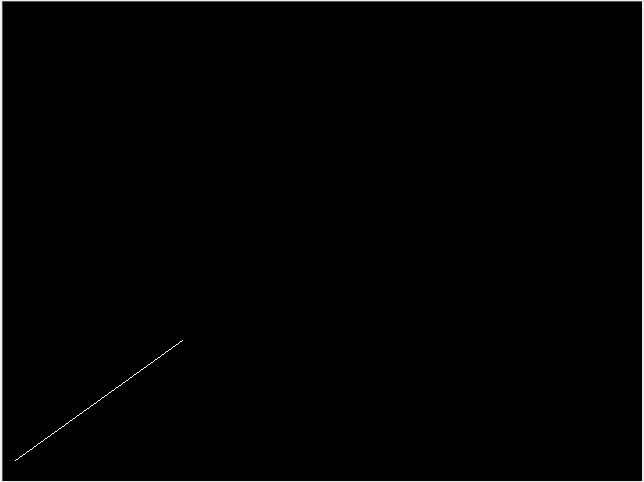
(1)直线两端点坐标:(13, 20)和(180,140); (2)直线颜色为白色。
3.输出
程序运行结果为一条直线,具体结果如下图所示:
二.相关知识
1.绘制点函数
image.set(x, y, color)函数是绘制点的函数,参数包括x、y和color。参数x为绘制点的x坐标,参数y为绘制点的y坐标,参数color为绘制点的颜色。
2.DDA算法
DDA算法相关知识点,请参考教材与课件或有关资料。
三.操作说明
(1)按要求补全line函数;
(2)点击窗口右下角"测评"按钮,等待测评结果,如果通过后可进行下一关任务。
#include "tgaimage.h"const TGAColor white = TGAColor(255, 255, 255, 255);
const TGAColor red = TGAColor(255, 0, 0, 255);void line(int x0, int y0, int x1, int y1, TGAImage &image, TGAColor color)
{// Please add the code here/********** Begin ********/int x;float y, k;k = (float)(y1 - y0) / (float)(x1 - x0);y = y0;for (x = x0;x <= x1;x++){image.set(x, int(y + 0.5f),color);y = y + k;}/********** End *********/
}int main(int argc, char** argv)
{TGAImage image(640,480, TGAImage::RGB);line(13, 20, 180, 140, image, white);image.flip_vertically(); // i want to have the origin at the left bottom corner of the imageimage.write_tga_file("../img_step1/test.tga");return 0;
}
第2关:直线光栅化-中点画线算法
一.任务描述
1.本关任务
(1)根据直线中点画线算法补全line函数,其中直线斜率0<k<1,并将main函数中的line函数参数补充完整; (2)当直线方程恰好经过P(x,y)和T(x,y+1)的中点M时,统一选取直线上方的T点为显示的像素点。
2.输入
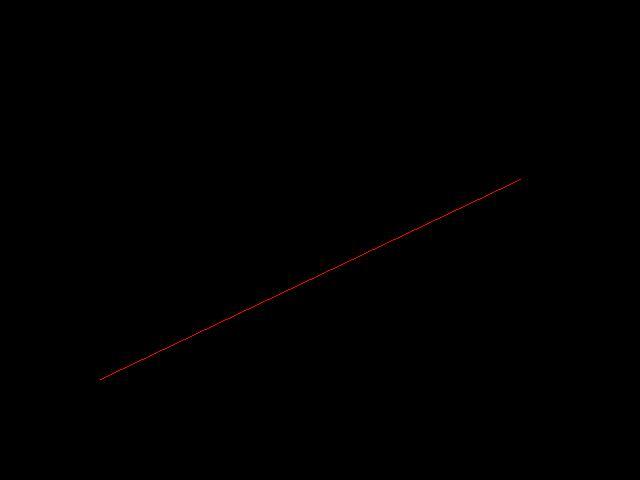
(1)直线两端点坐标:(100, 100)和(520,300); (2)直线颜色为红色。
3.输出
程序运行结果为一条直线,具体结果如下图所示:
二.相关知识
1.绘制点函数
image.set(x, y, color)函数是绘制点的函数,参数包括x、y和color。参数x为绘制点的x坐标,参数y为绘制点的y坐标,参数color为绘制点的颜色。
2.中点画线算法
中点画线算法相关知识点,请参考教材与课件或有关资料。
三.操作说明
(1)按要求补全line函数;
(2)点击窗口右下角"测评"按钮,等待测评结果,如果通过后可进行下一关任务。
#include "tgaimage.h"const TGAColor white = TGAColor(255, 255, 255, 255);
const TGAColor red = TGAColor(255, 0, 0, 255);void line(int x0, int y0, int x1, int y1, TGAImage &image, TGAColor color)
{// Please add the code here/********** Begin ********/int dx,dy,dt,db,d,x,y;dx = x1 - x0;dy = y1 - y0;d = dx - 2*dy;dt = 2*dx - 2*dy;db = -2*dy;x = x0;y = y0;image.set(x,y,color);while (x < x1){if (d <= 0){    x++;y++;d += dt;}else{x++;d += db;}image.set(x,y,color);}/********** End *********/
}int main(int argc, char** argv)
{TGAImage image(640,480, TGAImage::RGB);// Please add the code here/********** Begin ********/line( 100, 100 , 520 , 300 , image, red );/********** End *********/image.flip_vertically(); // i want to have the origin at the left bottom corner of the imageimage.write_tga_file("../img_step4/test.tga");return 0;
}
第3关:直线光栅化-Bresenham画线算法
一.任务描述
1.本关任务
(1)根据直线Bresenham算法补全line函数,其中直线斜率0<k<1,并将main函数中的line函数参数补充完整; (2)当直线方程恰好经过P(x,y)和T(x,y+1)的中点M时,统一选取直线上方的T点为显示的像素点。
2.输入
(1)直线两端点坐标:(20, 20)和(180,140); (2)直线颜色为白色。
3.输出
程序运行结果为一条直线,具体结果如下图所示:
二.相关知识
1.绘制点函数
image.set(x, y, color)函数是绘制点的函数,参数包括x、y和color。参数x为绘制点的x坐标,参数y为绘制点的y坐标,参数color为绘制点的颜色。
2.Bresenham算法
Bresenham算法相关知识点,请参考教材与课件或有关资料。
三.操作说明
(1)按要求补全line函数;
(2)点击窗口右下角"测评"按钮,等待测评结果,如果通过后可进行下一关任务。
#include "tgaimage.h"const TGAColor white = TGAColor(255, 255, 255, 255);
const TGAColor red = TGAColor(255, 0, 0, 255);void line(int x0, int y0, int x1, int y1, TGAImage &image, TGAColor color)
{// Please add the code here/********** Begin ********/int Dx=x1-x0,Dy=y1-y0,y=y0,D=-Dx;for(int x = x0;x <=x1;x++){image.set(x,y,color);D = D + 2*Dy;if(D >= 0){y++;D = D - 2*Dx;}}/********** End *********/
}int main(int argc, char** argv)
{TGAImage image(640,480, TGAImage::RGB);// Please add the code here/********** Begin ********/line( 20, 20 , 180 , 140 , image, white);/********** End *********/image.flip_vertically(); // i want to have the origin at the left bottom corner of the imageimage.write_tga_file("../img_step2/test.tga");return 0;
}
第4关:直线光栅化-任意斜率的Bresenham画线算法
一.任务描述
1.本关任务
(1)根据直线Bresenham算法补全line函数以绘制白色直线,其中直线斜率为任意情况。 (2)当直线方程恰好经过P(x,y)和T(x,y+1)的中点M时,统一选取直线上方的T点为显示的像素点。
2.输入
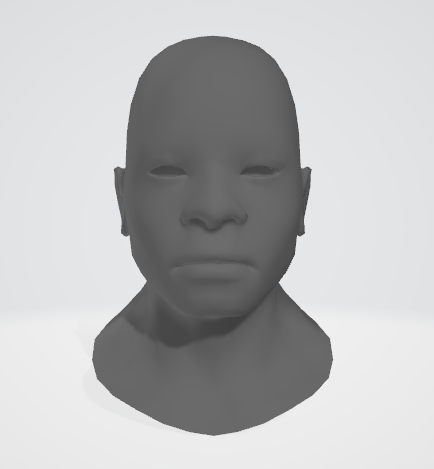
代码将自动输入一个OBJ三维人头模型,具体模型如下图:
3.输出
若编写的任意斜率的Bresenham画线算法代码正确,则程序会将模型转换为线条图片,具体结果如下图所示:
二.相关知识
1.绘制点函数
image.set(x, y, color)函数是绘制点的函数,参数包括x、y和color。参数x为绘制点的x坐标,参数y为绘制点的y坐标,参数color为绘制点的颜色。
2.Bresenham算法
Bresenham算法相关知识点,请参考教材与课件或有关资料。
三.操作说明
(1)按要求补全line函数;
(2)点击窗口右下角"测评"按钮,等待测评结果,如果通过后可进行下一关任务。

CG2-v2.0-三角形填充
第1关:扫描线填充法
一. 任务描述
1. 本关任务
了解和掌握扫描线填充法,实现对三角形区域进行填充,具体要求如下: (1) 补全triangle函数; (2) 将main函数中的三角形顶点坐标和triangle函数参数补充完整。
2. 输入
(1) 三角形的三个顶点的坐标:
t0 = {125,50}, t1 = {300,200}, t2 ={200,350};
(2) 三角形区域为蓝色。3. 输出
程序运行结果为一个蓝色三角形区域,如下图所示:

#include "pngimage.h"
#include<stdio.h>
#include <iostream>struct Vec2i
{int x, y;
};void triangle(Vec2i t0, Vec2i t1, Vec2i t2, PNGImage& image, PNGColor color) {// Please add your code here/********** Begin ********/ if (t0.y>t1.y) std::swap(t0, t1); if (t0.y>t2.y) std::swap(t0, t2); if (t1.y>t2.y) std::swap(t1, t2);int total_height = t2.y-t0.y;for (int y=t0.y; y<=t1.y; y++) { int segment_height = t1.y-t0.y+1;    //be careful with divisions by zerofloat alpha = (float)(y-t0.y)/total_height,beta  = (float)(y-t0.y)/segment_height;   Vec2i A,B;A.y=B.y=y;A.x = t0.x + (t2.x-t0.x)*alpha; B.x = t0.x + (t1.x-t0.x)*beta; if (A.x>B.x) std::swap(A.x, B.x); for (int x=A.x; x<=B.x; x++) { image.set(x, y, color);  } }for (int y = t1.y; y <= t2.y; y++){int segment_height = t2.y-t1.y+1;    float alpha2=(float)(y-t0.y)/total_height,beta2 =(float)(y-t1.y)/segment_height;    Vec2i A2,B2;A2.y=B2.y=y;A2.x = t0.x + (t2.x-t0.x)*alpha2; B2.x = t1.x - (t1.x-t2.x)*beta2; if (A2.x>B2.x) std::swap(A2.x, B2.x); for (int x=A2.x; x<=B2.x; x++) { image.set(x, y, color);  } }
}/********** End **********/
int main(int argc, char** argv) {PNGColor white = PNGColor(255, 255, 255, 255);PNGColor black = PNGColor(0, 0, 0, 255);PNGColor red = PNGColor(255, 0, 0, 255);PNGColor blue = PNGColor(0, 255, 255, 255);int width = 400;int height = 400;PNGImage image(width, height, PNGImage::RGBA); //Error when RGB because lodepng_get_raw_size_lct(w, h, colortype, bitdepth) > in.size() in encodeimage.init(black);// Please add your code here/********** Begin ********/Vec2i t0 = {125 ,50 }, t1 = {300 , 200}, t2 = {200 ,350 };triangle( t0,t1 ,t2, image,PNGColor(0, 255, 255, 255)  );/********** End **********/image.flip_vertically(); // i want to have the origin at the left bottom corner of the imageimage.write_png_file("../img_step3/test.png");return 0;
}
第2关:重心坐标填充法
一. 任务描述
1. 本关任务
了解和掌握重心坐标法,以便能够对三角形区域进行填充,具体要求如下: (1) 补全Triangle和Barycenter函数; (2) 将main函数中的三角形顶点坐标和Triangle函数参数补充完整。
2. 输入
(1) 三角形的三个顶点的坐标:
t0 = {50,50}, t1 = {300,200}, t2 ={200,350};
(2) 三角形颜色区域为绿色。3. 输出
程序运行结果为一个绿色三角形区域,如下图所示:
#include "pngimage.h"
#include<stdio.h>
#include <iostream>
#include <cmath>
#include <algorithm>
#include <stdlib.h>
struct Vec2i
{int x, y;
};
struct Vec3f
{float x, y, z;
};
//cross Product
Vec3f cross(const Vec3f& v1, const Vec3f& v2)
{Vec3f v3;v3.x = v1.y * v2.z - v1.z * v2.y;v3.y = v1.z * v2.x - v1.x * v2.z;v3.z = v1.x * v2.y - v1.y * v2.x;return v3;
}
//Determine the point p coordinates are in the triangle abc
Vec3f Barycentre(Vec2i p, Vec2i a, Vec2i b, Vec2i c)
{// Please add your code here/********** Begin ********/Vec3f s[2];s[0].x = c.x-a.x;s[0].y = b.x-a.x;s[0].z = a.x-p.x;s[1].x = c.y-a.y;s[1].y = b.y-a.y;s[1].z = a.y-p.y;Vec3f u = cross(s[0], s[1]);Vec3f v;if (abs(u.z) > 1e-2) {v.x = 1.0-(u.x+u.y)/u.z;v.y = u.y/u.z;v.z = u.x/u.z;} else {v.x = -1;v.y = 1;v.z = 1;}return v;/********** End ********/
}
// Please draw point to make a triangle in bounding box
void Triangle(Vec2i t0, Vec2i t1, Vec2i t2, PNGImage& image, PNGColor color)
{// Please add your code here/********** Begin ********/int xmax,ymax,x,y;xmax=400,ymax=400;Vec2i A;Vec3f v;for(x=0;x<=xmax;x++){for(y=0;y<=ymax;y++){A.x=x;A.y=y;v=Barycentre(A, t0, t1, t2);if(v.x>=0&&v.y>=0&&v.z>=0){image.set(x,y,color);}}}
}/********** End **********/
int main(int argc, char** argv) {PNGColor white = PNGColor(255, 255, 255, 255);PNGColor black = PNGColor(0, 0, 0, 255);PNGColor red = PNGColor(255, 0, 0, 255);PNGColor green = PNGColor(0, 255, 0, 255);    PNGColor blue = PNGColor(0, 255, 255, 255);int width = 400;int height = 400;PNGImage image(width, height, PNGImage::RGBA); //Error when RGB because lodepng_get_raw_size_lct(w, h, colortype, bitdepth) > in.size() in encodeimage.init(black);// Please add your code here/********** Begin ********/Vec2i t0={50,50},t1={300,200 },t2={200,350};Triangle(t0,t1,t2,image, PNGColor(0,255,0,255));/********** End **********/image.flip_vertically(); // i want to have the origin at the left bottom corner of the imageimage.write_png_file("../img_step2/test.png");return 0;
}
第3关:同侧判断填充法
一. 任务描述
1. 本关任务
了解和掌握同侧判断算法,以便能够对三角形区域进行填充,具体要求如下: (1) 并补全Triangle、SameSide和PointInTriangle函数; (2) 将main函数中的三角形顶点坐标和Triangle函数参数补充完整。
2. 输入
(1) 三角形的三个顶点的坐标:
t0 = {50,50}, t1 = {300,200}, t2 ={200,350};
(2) 三角形区域为红色。3. 输出
程序运行结果为一个红色三角形区域,如下图所示:
#include "pngimage.h"
#include<stdio.h>
#include <iostream>
#include <algorithm>
using namespace std;
struct Vec2i
{int x, y;
};//Cross product
float CrossProduct(Vec2i a,Vec2i b)
{return a.x * b.y - b.x * a.y;
}
//DotProduct
float DotProduct(float cp1,float cp2)
{return cp1*cp2;
}
//Determine if P1 and P2 are on the same side
bool SameSide( Vec2i p,Vec2i a, Vec2i b, Vec2i c )
{// Please add your code here/********** Begin ********/Vec2i AB = {b.x - a.x, b.y - a.y};Vec2i AC = {c.x - a.x, c.y - a.y};Vec2i AP = {p.x - a.x, p.y - a.y};float v1 = CrossProduct(AB, AC);float v2 = CrossProduct(AB, AP);if (DotProduct(v1, v2) >= 0) return 1;else return 0;/********** End **********/
}
//Determine the point coordinates are in the triangle
float PointInTriangle(Vec2i p,Vec2i a, Vec2i b, Vec2i c)
{// Please add your code here/********** Begin ********/return SameSide(a, b, c, p) && SameSide(b, c, a, p) && SameSide(c, a, b, p); /********** End **********/
}// Please draw point in bounding box
void Triangle(Vec2i t0, Vec2i t1, Vec2i t2, PNGImage& image, PNGColor color)
{// Please add your code here/********** Begin ********/int xmax,ymax,x,y;Vec2i A;xmax=300,ymax=350;for(x=0;x<=xmax;x++){for(y=0;y<=ymax;y++){A.x=x;A.y=y;if(PointInTriangle(A,t0,t1 ,t2 ))image.set(x,y,color);}}/********** End **********/
}int main(int argc, char** argv) {PNGColor white = PNGColor(255, 255, 255, 255);PNGColor black = PNGColor(0, 0, 0, 255);PNGColor red = PNGColor(255, 0, 0, 255);PNGColor green = PNGColor(0, 255, 0, 255);    PNGColor blue = PNGColor(0, 255, 255, 255);int width = 400;int height = 400;PNGImage image(width, height, PNGImage::RGBA); //Error when RGB because lodepng_get_raw_size_lct(w, h, colortype, bitdepth) > in.size() in encodeimage.init(black);// Please add your code here/********** Begin ********/Vec2i t0 = { 50 , 50 }, t1 = {300  ,200  }, t2 = {200  ,350  };Triangle(t0 ,t1  , t2 , image, PNGColor(255, 0, 0, 255));/********** End **********/image.flip_vertically(); // i want to have the origin at the left bottom corner of the imageimage.write_png_file("../img_step1/test.png");return 0;
}
直线裁剪v1.0
第1关:Cohen-Sutherland编码裁剪算法
一. 任务描述
根据下面要求,在右侧修改代码,绘制出预期输出的图片。平台会对你编写的代码进行测试。
1.本关任务
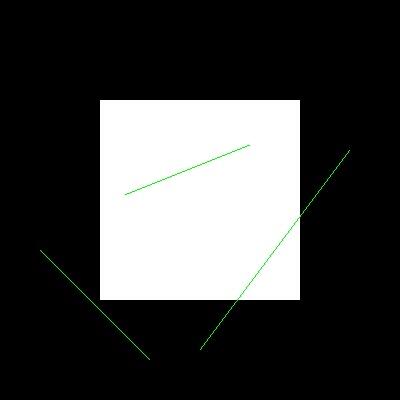
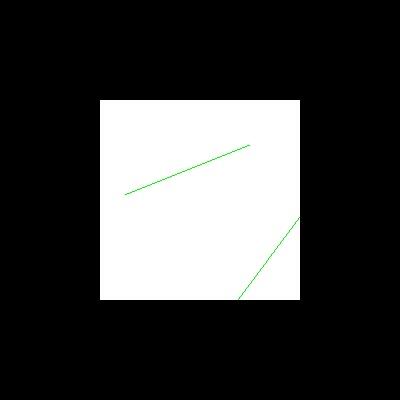
(1)理解直线裁剪的原理(Cohen-Surtherland算法、中点分割算法、梁友栋算法); (2)利用VC+OpenGL实现直线的编码裁剪算法,在屏幕上用一个封闭矩形裁剪任意一条直线; (3)调试、编译、修改程序;
2.运行前
3.输出
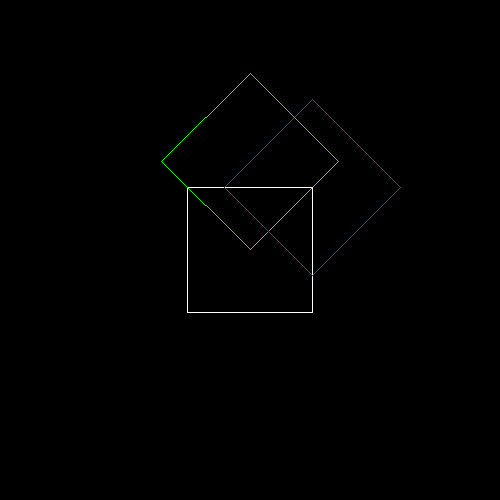
4.具体要求
(1)对CompCode(Point node, MyRect rect)函数进行补全; (2)对LineClipCohenSurtherland(MyRect rect, Point& node1, Point& node2)函数进行补全,最终实现裁剪后的图片。
// 评测代码所用头文件-开始
#include<opencv2/core/core.hpp>
#include<opencv2/highgui/highgui.hpp>
#include<opencv2/imgproc/imgproc.hpp>
// 评测代码所用头文件-结束// 提示:写完代码请保存之后再进行评测
#include <GL/freeglut.h>
#include <stdio.h>#define LEFT   1
#define RIGHT  2
#define BOTTOM 4
#define TOP    8struct MyRect
{int xmin, xmax, ymin, ymax;MyRect() : xmin(), xmax(), ymin(), ymax(){};MyRect(int a, int b, int c, int d) : xmin(a), xmax(b), ymin(c), ymax(d){};
};struct Point
{int x, y;Point() : x(), y() {};Point(int a, int b) :x(a), y(b) {};
};MyRect  rect;
Point vPoint[6];void LineGL(Point node1, Point node2)
{glBegin(GL_LINES);glColor3f(0.0f, 1.0f, 0.0f);   glVertex2f(node1.x, node1.y);glVertex2f(node2.x, node2.y);glEnd();
}int CompCode(Point node, MyRect rect)
{// 请在此添加你的代码/********** Begin ********/
int code = 0;if (node.x < rect.xmin)code |= LEFT;else if (node.x > rect.xmax)code |= RIGHT;if (node.y < rect.ymin)code |= BOTTOM;else if (node.y > rect.ymax)code |= TOP;return code;/********** End **********/
}void LineClipCohenSurtherland(MyRect rect, Point& node1, Point& node2)
{bool accept = false;// 请在此添加你的代码/********** Begin ********/int code1 = CompCode(node1, rect);int code2 = CompCode(node2, rect);while (true){if ((code1 | code2) == 0){accept = true;break;}else if (code1 & code2){break;}else{int code = (code1 != 0) ? code1 : code2;Point node;if (code & LEFT){node.x = rect.xmin;node.y = node1.y + (node2.y - node1.y) * (rect.xmin - node1.x) / (node2.x - node1.x);}else if (code & RIGHT){node.x = rect.xmax;node.y = node1.y + (node2.y - node1.y) * (rect.xmax - node1.x) / (node2.x - node1.x);}else if (code & BOTTOM){node.y = rect.ymin;node.x = node1.x + (node2.x - node1.x) * (rect.ymin - node1.y) / (node2.y - node1.y);}else if (code & TOP){node.y = rect.ymax;node.x = node1.x + (node2.x - node1.x) * (rect.ymax - node1.y) / (node2.y - node1.y);}if (code == code1){node1 = node;code1 = CompCode(node1, rect);}else{node2 = node;code2 = CompCode(node2, rect);}}}/********** End **********/if (accept)LineGL(node1, node2);
}void MyDisplay()
{glClear(GL_COLOR_BUFFER_BIT);glColor3f(1.0f, 1.0f, 1.0f);glRectf(rect.xmin, rect.ymin, rect.xmax, rect.ymax);for (int i = 0; i < 5; i+=2) LineClipCohenSurtherland(rect, vPoint[i], vPoint[i+1]);glFlush();
}void Init()
{glClearColor(0.0, 0.0, 0.0, 0.0);glShadeModel(GL_FLAT);rect = MyRect(100, 300, 100, 300);vPoint[0] = Point(200, 50); vPoint[1] = Point(350, 250);vPoint[2] = Point(125, 205); vPoint[3] = Point(250, 255);vPoint[4] = Point(40, 150); vPoint[5] = Point(150, 40);
}void MyReshape(int w, int h)
{glViewport(0, 0, (GLsizei)w, (GLsizei)h);glMatrixMode(GL_PROJECTION);glLoadIdentity();gluOrtho2D(0.0, (GLdouble)w, 0.0, (GLdouble)h);
}int main(int argc, char* argv[])
{glutInit(&argc, argv);glutInitDisplayMode(GLUT_RGB | GLUT_SINGLE);glutInitWindowPosition(100, 100);glutInitWindowSize(400, 400);glutCreateWindow("Hello World!");Init();glutDisplayFunc(MyDisplay);glutReshapeFunc(MyReshape);   glutMainLoopEvent(); /*************以下为评测代码,与本次实验内容无关,请勿修改**************/GLubyte* pPixelData = (GLubyte*)malloc(400 * 400 * 3);//分配内存GLint viewport[4] = {0};    glReadBuffer(GL_FRONT);glPixelStorei(GL_UNPACK_ALIGNMENT, 4);glGetIntegerv(GL_VIEWPORT, viewport);glReadPixels(viewport[0], viewport[1], viewport[2], viewport[3], GL_RGB, GL_UNSIGNED_BYTE, pPixelData);cv::Mat img;std::vector<cv::Mat> imgPlanes;img.create(400, 400, CV_8UC3);cv::split(img, imgPlanes);for(int i = 0; i < 400; i ++) {unsigned char* plane0Ptr = imgPlanes[0].ptr<unsigned char>(i);unsigned char* plane1Ptr = imgPlanes[1].ptr<unsigned char>(i);unsigned char* plane2Ptr = imgPlanes[2].ptr<unsigned char>(i);for(int j = 0; j < 400; j ++) {int k = 3 * (i * 400 + j);plane2Ptr[j] = pPixelData[k];plane1Ptr[j] = pPixelData[k+1];plane0Ptr[j] = pPixelData[k+2];}}cv::merge(imgPlanes, img);cv::flip(img, img ,0); cv::namedWindow("openglGrab");cv::imshow("openglGrab", img);cv::imwrite("../img_step1/test.jpg", img);return 0;
}
第2关:中点分割裁剪算法
一. 任务描述
根据下面要求,在右侧修改代码,绘制出预期输出的图片。平台会对你编写的代码进行测试。
1.本关任务
(1)理解直线裁剪的原理(Cohen-Surtherland算法、中点分割算法、梁友栋算法); (2)利用VC+OpenGL实现直线的编码裁剪算法,在屏幕上用一个封闭矩形裁剪任意一条直线; (3)调试、编译、修改程序;
2.运行前
3.输出
// 评测代码所用头文件-开始
#include<opencv2/core/core.hpp>
#include<opencv2/highgui/highgui.hpp>
#include<opencv2/imgproc/imgproc.hpp>
// 评测代码所用头文件-结束// 提示:写完代码请保存之后再进行评测
#include <GL/freeglut.h>
#include <stdio.h>#define LEFT   1
#define RIGHT  2
#define BOTTOM 4
#define TOP    8struct MyRect
{int xmin, xmax, ymin, ymax;MyRect() : xmin(), xmax(), ymin(), ymax(){};MyRect(int a, int b, int c, int d) : xmin(a), xmax(b), ymin(c), ymax(d){};
};struct Point
{int x, y;Point() : x(), y() {};Point(int a, int b) :x(a), y(b) {};
};MyRect  rect;
Point vPoint[6];void LineGL(Point node1, Point node2)
{glBegin(GL_LINES);glColor3f(0.0f, 1.0f, 0.0f);   glVertex2f(node1.x, node1.y);glVertex2f(node2.x, node2.y);glEnd();
}int CompCode(Point node, MyRect rect)
{int code = 0x00;if (node.y < rect.ymin)code = code | BOTTOM;if (node.y > rect.ymax)code = code | TOP;if (node.x > rect.xmax)code = code | RIGHT;if (node.x < rect.xmin)code = code | LEFT;return code;
}void LineClipMidPoint(MyRect rect, Point& node1, Point& node2)
{bool accept = true;Point start, end, mid;//分别代表起点,终点和中点int code1, code2, codemid;code1 = CompCode(node1, rect);code2 = CompCode(node2, rect);if(code1 == 0 && code2 == 0)accept = true;else if(code1 & code2)accept = false;else {if(code2!=0){start = node1; end = node2;mid = Point((float)(start.x + end.x)/(float)2 + 0.5, (float)(start.y + end.y)/(float)2 + 0.5);while(abs(start.x - mid.x)>1 || abs(start.y - mid.y)>1){codemid = CompCode(mid, rect);if(codemid==0){start = mid;} else{end = mid;}mid = Point((float)(start.x + end.x)/(float)2 + 0.5, (float)(start.y + end.y)/(float)2 + 0.5);}node2 = mid;}if(code1!=0){start = node1; end = node2;mid = Point((float)(start.x + end.x)/(float)2 + 0.5, (float)(start.y + end.y)/(float)2 + 0.5);while(abs(start.x - mid.x)>1 || abs(start.y - mid.y)>1){codemid = CompCode(mid, rect);if(codemid==0){end = mid;}else{start = mid;}mid = Point((float)(start.x + end.x)/(float)2 + 0.5, (float)(start.y + end.y)/(float)2 + 0.5);}node1 = mid;}}if (accept)LineGL(node1, node2);
}void MyDisplay()
{glClear(GL_COLOR_BUFFER_BIT);glColor3f(1.0f, 1.0f, 1.0f);glRectf(rect.xmin, rect.ymin, rect.xmax, rect.ymax);for (int i = 0; i < 5; i+=2) LineClipMidPoint(rect, vPoint[i], vPoint[i+1]);glFlush();
}void Init()
{glClearColor(0.0, 0.0, 0.0, 0.0);glShadeModel(GL_FLAT);rect = MyRect(100, 300, 100, 300);vPoint[0] = Point(200, 50); vPoint[1] = Point(350, 250);vPoint[2] = Point(125, 205); vPoint[3] = Point(250, 255);vPoint[4] = Point(40, 150); vPoint[5] = Point(150, 40);
}void MyReshape(int w, int h)
{glViewport(0, 0, (GLsizei)w, (GLsizei)h);glMatrixMode(GL_PROJECTION);glLoadIdentity();gluOrtho2D(0.0, (GLdouble)w, 0.0, (GLdouble)h);
}int main(int argc, char* argv[])
{glutInit(&argc, argv);glutInitDisplayMode(GLUT_RGB | GLUT_SINGLE);glutInitWindowPosition(100, 100);glutInitWindowSize(400, 400);glutCreateWindow("Hello World!");Init();glutDisplayFunc(MyDisplay);glutReshapeFunc(MyReshape);   glutMainLoopEvent(); /*************以下为评测代码,与本次实验内容无关,请勿修改**************/GLubyte* pPixelData = (GLubyte*)malloc(400 * 400 * 3);//分配内存GLint viewport[4] = {0};    glReadBuffer(GL_FRONT);glPixelStorei(GL_UNPACK_ALIGNMENT, 4);glGetIntegerv(GL_VIEWPORT, viewport);glReadPixels(viewport[0], viewport[1], viewport[2], viewport[3], GL_RGB, GL_UNSIGNED_BYTE, pPixelData);cv::Mat img;std::vector<cv::Mat> imgPlanes;img.create(400, 400, CV_8UC3);cv::split(img, imgPlanes);for(int i = 0; i < 400; i ++) {unsigned char* plane0Ptr = imgPlanes[0].ptr<unsigned char>(i);unsigned char* plane1Ptr = imgPlanes[1].ptr<unsigned char>(i);unsigned char* plane2Ptr = imgPlanes[2].ptr<unsigned char>(i);for(int j = 0; j < 400; j ++) {int k = 3 * (i * 400 + j);plane2Ptr[j] = pPixelData[k];plane1Ptr[j] = pPixelData[k+1];plane0Ptr[j] = pPixelData[k+2];}}cv::merge(imgPlanes, img);cv::flip(img, img ,0); cv::namedWindow("openglGrab");cv::imshow("openglGrab", img);cv::imwrite("../img_step3/test.jpg", img);return 0;
}
4.具体要求
对LineClipMidPoint(MyRect rect, Point& node1, Point& node2)函数进行补全,最终实现裁剪后的图片。
第3关:Liang-Barsky参数化裁剪算法
一. 任务描述
根据下面要求,在右侧修改代码,绘制出预期输出的图片。平台会对你编写的代码进行测试。
1.本关任务
(1)理解直线裁剪的原理(Cohen-Surtherland算法、中点分割算法、梁友栋算法); (2)利用VC+OpenGL实现直线的编码裁剪算法,在屏幕上用一个封闭矩形裁剪任意一条直线; (3)调试、编译、修改程序;
2.运行前
3.输出
4.具体要求
(1)对ClipTest(float p, float q, float* u1, float* u2)函数进行补全; (2)对LineClipLiangBarsky(MyRect rect, Point& node1, Point& node2)函数进行补全,最终实现裁剪后的图片。
// 评测代码所用头文件-开始
#include<opencv2/core/core.hpp>
#include<opencv2/highgui/highgui.hpp>
#include<opencv2/imgproc/imgproc.hpp>
// 评测代码所用头文件-结束// 提示:写完代码请保存之后再进行评测
#include <GL/freeglut.h>
#include <stdio.h>struct MyRect
{int xmin, xmax, ymin, ymax;MyRect() : xmin(), xmax(), ymin(), ymax(){};MyRect(int a, int b, int c, int d) : xmin(a), xmax(b), ymin(c), ymax(d){};
};struct Point
{int x, y;Point() : x(), y() {};Point(int a, int b) :x(a), y(b) {};
};MyRect  rect;
Point vPoint[6];void LineGL(Point node1, Point node2)
{glBegin(GL_LINES);glColor3f(0.0f, 1.0f, 0.0f);   glVertex2f(node1.x, node1.y);glVertex2f(node2.x, node2.y);glEnd();
}int ClipTest(float p, float q, float* u1, float* u2)
{if (p < 0.0){float r = q / p;if (r > *u2){return 0;}else if (r > *u1){*u1 = r;}}else if (p > 0.0){float r = q / p;if (r < *u1){return 0;}else if (r < *u2){*u2 = r;}}else if (q < 0.0){return 0;}return 1;
}bool LineClipLiangBarsky(MyRect rect, Point& node1, Point& node2)
{float u1 = 0.0, u2 = 1.0;int dx = node2.x - node1.x;int dy = node2.y - node1.y;if (ClipTest(-dx, node1.x - rect.xmin, &u1, &u2)){if (ClipTest(dx, rect.xmax - node1.x, &u1, &u2)){if (ClipTest(-dy, node1.y - rect.ymin, &u1, &u2)){if (ClipTest(dy, rect.ymax - node1.y, &u1, &u2)){if (u2 < 1.0){node2.x = node1.x + u2*dx;node2.y = node1.y + u2*dy;}if (u1 > 0.0){node1.x = node1.x + u1*dx;node1.y = node1.y + u1*dy;}return true;}}}}return false;
}void MyDisplay()
{glClear(GL_COLOR_BUFFER_BIT);glColor3f(1.0f, 1.0f, 1.0f);glRectf(rect.xmin, rect.ymin, rect.xmax, rect.ymax);for(int i = 0; i < 5; i+=2){bool bAccept = LineClipLiangBarsky(rect, vPoint[i], vPoint[i+1]);if(bAccept)LineGL(vPoint[i], vPoint[i+1]);}glFlush();
}void Init()
{glClearColor(0.0, 0.0, 0.0, 0.0);glShadeModel(GL_FLAT);rect = MyRect(100, 300, 100, 300);vPoint[0] = Point(200, 50); vPoint[1] = Point(350, 250);vPoint[2] = Point(125, 205); vPoint[3] = Point(250, 255);vPoint[4] = Point(40, 150); vPoint[5] = Point(150, 40);
}void MyReshape(int w, int h)
{glViewport(0, 0, (GLsizei)w, (GLsizei)h);glMatrixMode(GL_PROJECTION);glLoadIdentity();gluOrtho2D(0.0, (GLdouble)w, 0.0, (GLdouble)h);
}int main(int argc, char* argv[])
{glutInit(&argc, argv);glutInitDisplayMode(GLUT_RGB | GLUT_SINGLE);glutInitWindowPosition(100, 100);glutInitWindowSize(400, 400);glutCreateWindow("Hello World!");Init();glutDisplayFunc(MyDisplay);glutReshapeFunc(MyReshape);   glutMainLoopEvent(); /*************以下为评测代码,与本次实验内容无关,请勿修改**************/GLubyte* pPixelData = (GLubyte*)malloc(400 * 400 * 3);//分配内存GLint viewport[4] = {0};    glReadBuffer(GL_FRONT);glPixelStorei(GL_UNPACK_ALIGNMENT, 4);glGetIntegerv(GL_VIEWPORT, viewport);glReadPixels(viewport[0], viewport[1], viewport[2], viewport[3], GL_RGB, GL_UNSIGNED_BYTE, pPixelData);cv::Mat img;std::vector<cv::Mat> imgPlanes;img.create(400, 400, CV_8UC3);cv::split(img, imgPlanes);for(int i = 0; i < 400; i ++) {unsigned char* plane0Ptr = imgPlanes[0].ptr<unsigned char>(i);unsigned char* plane1Ptr = imgPlanes[1].ptr<unsigned char>(i);unsigned char* plane2Ptr = imgPlanes[2].ptr<unsigned char>(i);for(int j = 0; j < 400; j ++) {int k = 3 * (i * 400 + j);plane2Ptr[j] = pPixelData[k];plane1Ptr[j] = pPixelData[k+1];plane0Ptr[j] = pPixelData[k+2];}}cv::merge(imgPlanes, img);cv::flip(img, img ,0); cv::namedWindow("openglGrab");cv::imshow("openglGrab", img);cv::imwrite("../img_step2/test.jpg", img);return 0;
}
CG2-v1.0-二维几何变换
第1关:正方形的平移与缩放
一.任务描述
根据提示,在右侧修改代码,并自己绘制出图形。平台会对你编写的代码进行测试。
1.本关任务
理解并掌握OpenGL二维平移、旋转、缩放变换的方法; 阅读实验原理,掌握OpenGL程序平移、旋转、缩放变换的方法。
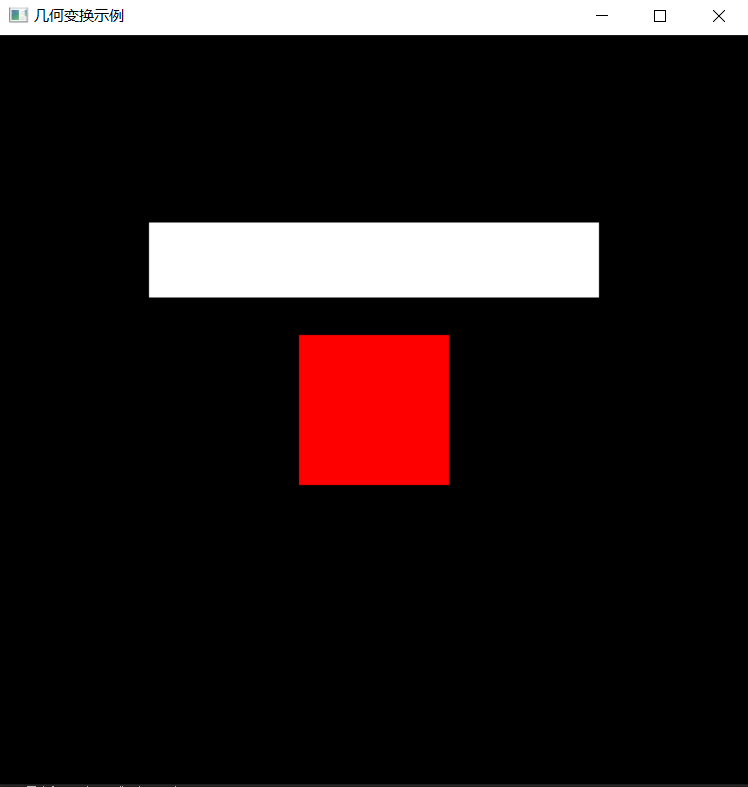
2.预期输出
3.具体要求
(1).背景色为黑色,用 glClearColor() 来完成; (2).以中心为绘制原点,设计一个边长为2的正方形将正方形设置为红色glColor3f(1.0, 0.0, 0.0); (3).将原正方形保留下来并以正方形为基础,然后进行二维几何变换。将正方形向上平移2.0,同时将正方形沿X方向放大3倍,沿Y方向缩小成原来的0.5倍。新生成的矩形颜色为白色glColor3f (1.0, 1.0, 1.0)。
4.本关提示
(1).用glRectf()函数来绘制正方形; (2).每进行一个矩阵操作时,需要先保存这个矩阵,调用glPushMatrix()函数,把当前矩阵压入堆栈。当需要恢复最近一次的保存时,调用glPopMatrix()函数,它相当于从堆栈栈顶弹出一个矩阵为当前矩阵(后边的三关都会用到)。
// 提示:写完代码请保存之后再进行评测
#include <GL/freeglut.h>
#include<stdio.h>// 评测代码所用头文件-开始
#include<opencv2/core/core.hpp>
#include<opencv2/highgui/highgui.hpp>
#include<opencv2/imgproc/imgproc.hpp>
// 评测代码所用头文件-结束void init(void)
{  glClearColor(0.0, 0.0, 0.0, 0.0);       //设置背景颜色glMatrixMode(GL_PROJECTION);gluOrtho2D(-5.0, 5.0, -5.0, 5.0);       //设置显示的范围是X:-5.0~5.0, Y:-5.0~5.0glMatrixMode(GL_MODELVIEW);
}void myDraw(void)                           //二维几何变换
{// 请在此添加你的代码/********** Begin ********/glPushMatrix();glColor3f(1.0, 0.0, 0.0);glRectf(-1.0f, - 1.0f,1.0f,1.0f);glPopMatrix();glPushMatrix();glTranslatef(0.0f,2.0f,0.0f);glPushMatrix();glScalef(3.0,0.5,1.0);glColor3f (1.0, 1.0, 1.0);glRectf(-1.0f, - 1.0f,1.0f,1.0f);glFlush();/********** End **********/                          glFlush();
}int main(int argc, char *argv[])
{glutInit(&argc, argv);glutInitWindowPosition(100, 100);glutInitWindowSize(400, 400);glutCreateWindow("几何变换示例");init();glutDisplayFunc(&myDraw);glutMainLoopEvent();     /*************以下为评测代码,与本次实验内容无关,请勿修改**************/GLubyte* pPixelData = (GLubyte*)malloc(400 * 400 * 3);//分配内存GLint viewport[4] = {0};glReadBuffer(GL_FRONT);glPixelStorei(GL_UNPACK_ALIGNMENT, 4);glGetIntegerv(GL_VIEWPORT, viewport);glReadPixels(viewport[0], viewport[1], viewport[2], viewport[3], GL_RGB, GL_UNSIGNED_BYTE, pPixelData);cv::Mat img;std::vector<cv::Mat> imgPlanes;img.create(400, 400, CV_8UC3);cv::split(img, imgPlanes);for(int i = 0; i < 400; i ++) {unsigned char* plane0Ptr = imgPlanes[0].ptr<unsigned char>(i);unsigned char* plane1Ptr = imgPlanes[1].ptr<unsigned char>(i);unsigned char* plane2Ptr = imgPlanes[2].ptr<unsigned char>(i);for(int j = 0; j < 400; j ++) {int k = 3 * (i * 400 + j);plane2Ptr[j] = pPixelData[k];plane1Ptr[j] = pPixelData[k+1];plane0Ptr[j] = pPixelData[k+2];}}cv::merge(imgPlanes, img);cv::flip(img, img ,0); cv::namedWindow("openglGrab");cv::imshow("openglGrab", img);//cv::waitKey();cv::imwrite("../img_step1/test.jpg", img);return 0;
}
第2关:正方形的平移和旋转
一.任务描述
根据提示,在右侧修改代码,并自己绘制出图形。平台会对你编写的代码进行测试。
1.本关任务
理解并掌握OpenGL二维平移、旋转、缩放变换的方法; 阅读实验原理,掌握OpenGL程序平移、旋转、缩放变换的方法。
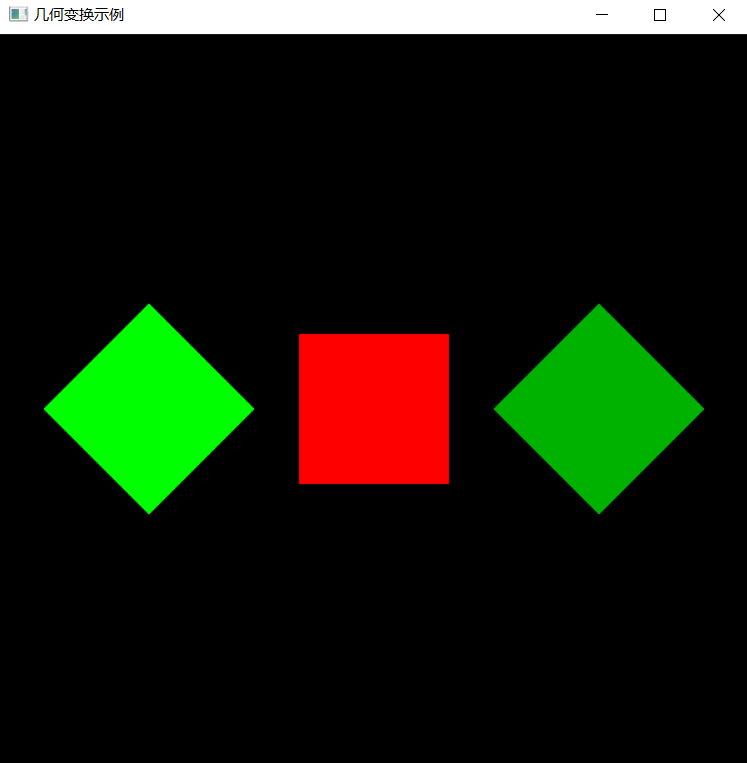
2.预期输出
3.具体要求
(1).背景色为黑色,用 glclearcolor 来完成; (2).以中心为绘制原点,设计一个边长为2的正方形将正方形设置为红色glColor3f(1.0, 0.0, 0.0); (3).将原正方形保留下来并以正方形为基础,然后进行二维几何变换。将正方形向左平移3.0,同时将正方形沿X轴逆时针旋转45度,生成新的图形颜色为glColor3f (0.0, 1.0, 0.0); (4).再进行二维几何变换,将原正方形向右平移3.0,同时将正方形沿X轴逆时针旋转45度,生成新的图形颜色为glColor3f (0.0, 0.7, 0.0);
4.本关提示
(1).用glRectf()函数来绘制正方形; (2).每进行一个矩阵操作时,需要先保存这个矩阵,调用glPushMatrix()函数,把当前矩阵压入堆栈。当需要恢复最近一次的保存时,调用glPopMatrix()函数,它相当于从堆栈栈顶弹出一个矩阵为当前矩阵。
// 提示:写完代码请保存之后再进行评测
#include <GL/freeglut.h>
#include<stdio.h>// 评测代码所用头文件-开始
#include<opencv2/core/core.hpp>
#include<opencv2/highgui/highgui.hpp>
#include<opencv2/imgproc/imgproc.hpp>
// 评测代码所用头文件-结束void init(void)
{  glClearColor(0.0, 0.0, 0.0, 0.0);       //设置背景颜色glMatrixMode(GL_PROJECTION);gluOrtho2D(-5.0, 5.0, -5.0, 5.0);       //设置显示的范围是X:-5.0~5.0, Y:-5.0~5.0glMatrixMode(GL_MODELVIEW);
}void myDraw(void)                           //二维几何变换
{// 请在此添加你的代码glPushMatrix();glColor3f(1.0, 0.0, 0.0);glRectf(-1.0f, - 1.0f,1.0f,1.0f);glPopMatrix();//glPushMatrix();glTranslatef(-3.0f,0.0f,0.0f);glPushMatrix();glRotatef(45.0,0.0,0.0,1.0);glColor3f (0.0, 1.0, 0.0);glRectf(-1.0f, - 1.0f,1.0f,1.0f);glPopMatrix();glTranslatef(6.0f,0.0f,0.0f);glPushMatrix();glRotatef(45.0,0.0,0.0,1.0);glColor3f (0.0, 0.7, 0.0);glRectf(-1.0f, - 1.0f,1.0f,1.0f);glPopMatrix();glFlush();/********** End **********/                          glFlush();
}int main(int argc, char *argv[])
{glutInit(&argc, argv);glutInitWindowPosition(100, 100);glutInitWindowSize(400, 400);glutCreateWindow("几何变换示例");init();glutDisplayFunc(&myDraw);glutMainLoopEvent();     /*************以下为评测代码,与本次实验内容无关,请勿修改**************/GLubyte* pPixelData = (GLubyte*)malloc(400 * 400 * 3);//分配内存GLint viewport[4] = {0};glReadBuffer(GL_FRONT);glPixelStorei(GL_UNPACK_ALIGNMENT, 4);glGetIntegerv(GL_VIEWPORT, viewport);glReadPixels(viewport[0], viewport[1], viewport[2], viewport[3], GL_RGB, GL_UNSIGNED_BYTE, pPixelData);cv::Mat img;std::vector<cv::Mat> imgPlanes;img.create(400, 400, CV_8UC3);cv::split(img, imgPlanes);for(int i = 0; i < 400; i ++) {unsigned char* plane0Ptr = imgPlanes[0].ptr<unsigned char>(i);unsigned char* plane1Ptr = imgPlanes[1].ptr<unsigned char>(i);unsigned char* plane2Ptr = imgPlanes[2].ptr<unsigned char>(i);for(int j = 0; j < 400; j ++) {int k = 3 * (i * 400 + j);plane2Ptr[j] = pPixelData[k];plane1Ptr[j] = pPixelData[k+1];plane0Ptr[j] = pPixelData[k+2];}}cv::merge(imgPlanes, img);cv::flip(img, img ,0); cv::namedWindow("openglGrab");cv::imshow("openglGrab", img);//cv::waitKey();cv::imwrite("../img_step2/test.jpg", img);return 0;
}
第3关:正方形的变换组合
一.任务描述
根据提示,在右侧修改代码,并自己绘制出图形。平台会对你编写的代码进行测试。
1.本关任务
理解并掌握OpenGL二维平移、旋转、缩放变换的方法; 阅读实验原理,掌握OpenGL程序平移、旋转、缩放变换的方法。
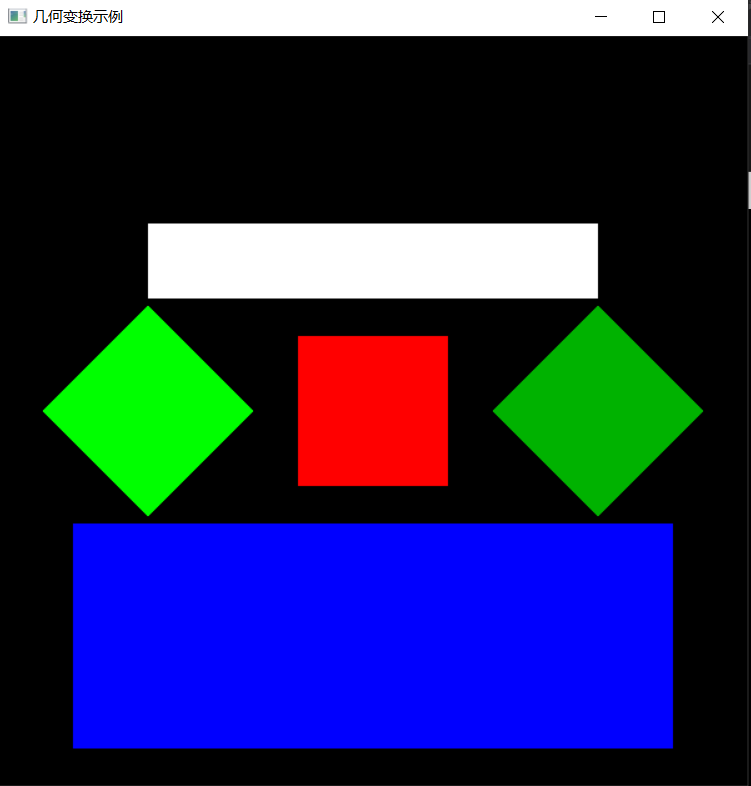
2.预期输出
3.具体要求
(1).背景色为黑色,用 glclearcolor 来完成; (2).以中心为绘制原点,设计一个边长为2的正方形将正方形设置为红色glColor3f(1.0, 0.0, 0.0); (3).完成前两关的内容; (4).将原正方形进行二维几何变换。将正方形向下平移3.0,同时将正方形沿X方向放大4倍,沿Y方向扩大成原来的1.5倍。新生成的矩形颜色为蓝色glColor3f (0.0, 0.0, 1.0)。
4.本关提示
(1).用glRectf()函数来绘制正方形; (2).每进行一个矩阵操作时,需要先保存这个矩阵,调用glPushMatrix()函数,把当前矩阵压入堆栈。当需要恢复最近一次的保存时,调用glPopMatrix()函数,它相当于从堆栈栈顶弹出一个矩阵为当前矩阵。
// 提示:写完代码请保存之后再进行评测
#include <GL/freeglut.h>
#include<stdio.h>// 评测代码所用头文件-开始
#include<opencv2/core/core.hpp>
#include<opencv2/highgui/highgui.hpp>
#include<opencv2/imgproc/imgproc.hpp>
// 评测代码所用头文件-结束void init(void)
{  glClearColor(0.0, 0.0, 0.0, 0.0);       //设置背景颜色glMatrixMode(GL_PROJECTION);gluOrtho2D(-5.0, 5.0, -5.0, 5.0);       //设置显示的范围是X:-5.0~5.0, Y:-5.0~5.0glMatrixMode(GL_MODELVIEW);
}void myDraw(void)                           //二维几何变换
{// 请在此添加你的代码/********** Begin ********/glClear (GL_COLOR_BUFFER_BIT); //清空glLoadIdentity(); //将当前矩阵设为单位矩阵glPushMatrix();glTranslatef(0.0f,2.0f,0.0f);glScalef(3.0,0.5,1.0);glColor3f (1.0, 1.0, 1.0);glRectf(-1.0f, -1.0f, 1.0f, 1.0f); //上面白色矩形glPopMatrix();glPushMatrix();glTranslatef(-3.0,0.0,0.0);glPushMatrix();glRotatef(45.0,0.0,0.0,1.0);glColor3f (0.0, 1.0, 0.0);glRectf(-1.0f, -1.0f, 1.0f, 1.0f); //中间左菱形glPopMatrix();glTranslatef(3.0,0.0,0.0);glPushMatrix();glColor3f (1.0, 0.0, 0.0);glRectf(-1.0f, -1.0f, 1.0f, 1.0f); //中间中菱形glPopMatrix();glTranslatef(3.0,0.0,0.0);glPushMatrix();glRotatef(45.0,0.0,0.0,1.0);glColor3f (0.0, 0.7, 0.0);glRectf(-1.0f, -1.0f, 1.0f, 1.0f); //中间右菱形glPopMatrix();glPopMatrix();glTranslatef(0.0,-3.0,0.0);glScalef(4.0,1.5,1.0);glColor3f (0.0, 0.0, 1.0);glRectf(-1.0f, -1.0f, 1.0f, 1.0f); //下面蓝色矩形glFlush ( );/********** End **********/                          glFlush();
}int main(int argc, char *argv[])
{glutInit(&argc, argv);glutInitWindowPosition(100, 100);glutInitWindowSize(400, 400);glutCreateWindow("几何变换示例");init();glutDisplayFunc(&myDraw);glutMainLoopEvent();     /*************以下为评测代码,与本次实验内容无关,请勿修改**************/GLubyte* pPixelData = (GLubyte*)malloc(400 * 400 * 3);//分配内存GLint viewport[4] = {0};glReadBuffer(GL_FRONT);glPixelStorei(GL_UNPACK_ALIGNMENT, 4);glGetIntegerv(GL_VIEWPORT, viewport);glReadPixels(viewport[0], viewport[1], viewport[2], viewport[3], GL_RGB, GL_UNSIGNED_BYTE, pPixelData);cv::Mat img;std::vector<cv::Mat> imgPlanes;img.create(400, 400, CV_8UC3);cv::split(img, imgPlanes);for(int i = 0; i < 400; i ++) {unsigned char* plane0Ptr = imgPlanes[0].ptr<unsigned char>(i);unsigned char* plane1Ptr = imgPlanes[1].ptr<unsigned char>(i);unsigned char* plane2Ptr = imgPlanes[2].ptr<unsigned char>(i);for(int j = 0; j < 400; j ++) {int k = 3 * (i * 400 + j);plane2Ptr[j] = pPixelData[k];plane1Ptr[j] = pPixelData[k+1];plane0Ptr[j] = pPixelData[k+2];}}cv::merge(imgPlanes, img);cv::flip(img, img ,0); cv::namedWindow("openglGrab");cv::imshow("openglGrab", img);//cv::waitKey();cv::imwrite("../img_step3/test.jpg", img);return 0;
}
第4关:三菱形状
一.任务描述
根据提示,在右侧修改代码,并自己绘制出图形。平台会对你编写的代码进行测试。
1.本关任务
理解并掌握OpenGL二维平移、旋转、缩放变换的方法; 阅读实验原理,掌握OpenGL程序平移、旋转、缩放变换的方法; 利用虚拟机进行编程,以OpenGL为开发平台设计程序,设计二维几何变换图形。
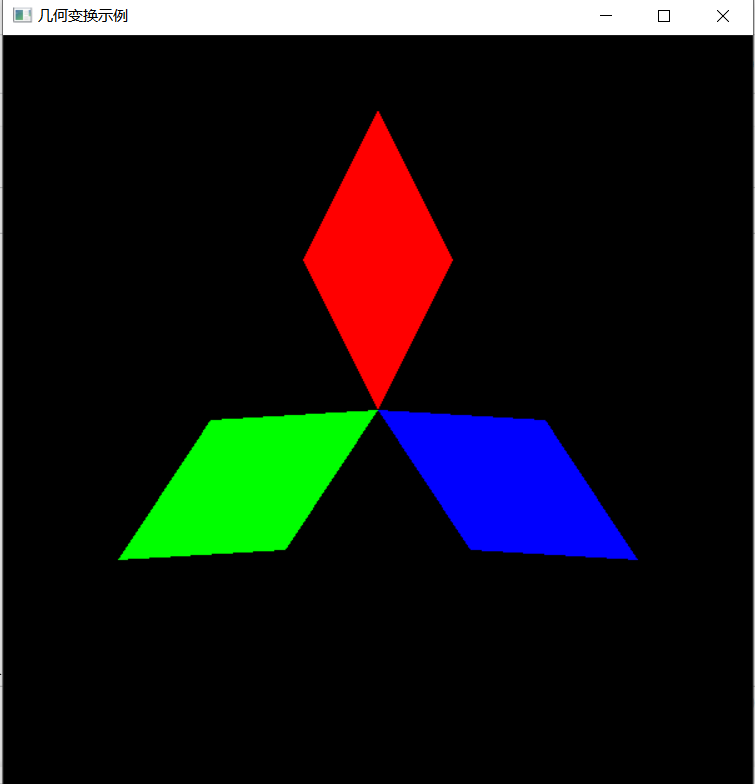
2.预期输出
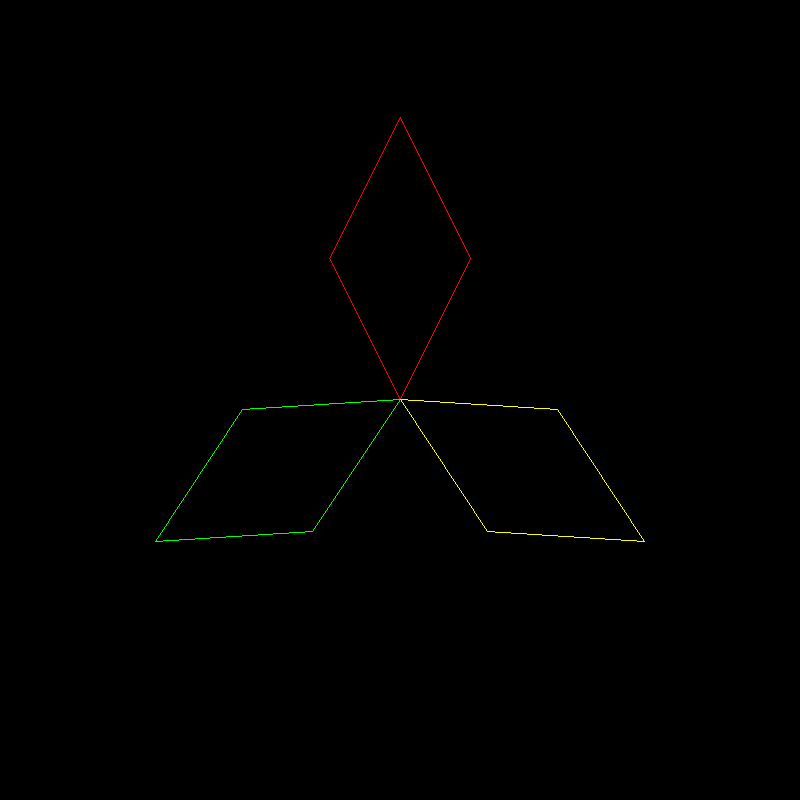
设计如图所示二维图形
3.具体要求
(1).背景色为黑色,用 glclearcolor 来完成; (2).三个菱形图形通过二维平移和旋转完成。颜色分别为红色(1.0, 0.0, 0.0)、蓝色(0.0, 0.0, 1.0)和绿色(0.0, 1.0, 0.0); (3).三个菱形的长对角线长度为4.0,短对角线长度为2.0,三个菱形的交点为原点(0.0,0.0); (4).红色菱形的长对角线与Y轴重合,每个菱形的长对角线夹角为120度。
4.本关提示
(1).可将绘制原始的图形设置成一个单独的函数便于调用,这样可以省去反复绘制原始图形的步骤; (2).画一个凸多边形可以调用glBegin(GL_POLYGON),后边用glVertex2f( , )指定顶点坐标,需要注意凸多边形的顶点指定需要按逆时针方向; (3).保留原始图形可以看做调用平移函数并且平移的距离为(0.0,0.0,0.0); (4).每进行一个矩阵操作时,需要先保存这个矩阵,调用glPushMatrix()函数,把当前矩阵压入堆栈。当需要恢复最近一次的保存时,调用glPopMatrix()函数,它相当于从堆栈栈顶弹出一个矩阵为当前矩阵。
// 提示:写完代码请保存之后再进行评测
#include <GL/freeglut.h>
#include<stdio.h>// 评测代码所用头文件-开始
#include<opencv2/core/core.hpp>
#include<opencv2/highgui/highgui.hpp>
#include<opencv2/imgproc/imgproc.hpp>
// 评测代码所用头文件-结束void init(void)
{  glClearColor(0.0, 0.0, 0.0, 0.0);       //设置背景颜色glMatrixMode(GL_PROJECTION);gluOrtho2D(-5.0, 5.0, -5.0, 5.0);       //设置显示的范围是X:-5.0~5.0, Y:-5.0~5.0glMatrixMode(GL_MODELVIEW);
}
void drawDiamond(void)                        //绘制一个菱形
{// 请在此添加你的代码/********** Begin ********/glBegin (GL_POLYGON); //顶点指定需要按逆时针方向glVertex2f (0.0f,-1.0f);//下点glVertex2f (2.0f,0.0f);//右点glVertex2f (0.0f, 1.0f);//上点glVertex2f (-2.0f,0.0f);//左点glEnd ( );/********** End **********/
}void myDraw(void)                           //二维几何变换
{// 请在此添加你的代码/********** Begin ********/glClear(GL_COLOR_BUFFER_BIT); //清空glLoadIdentity(); //将当前矩阵设为单位矩阵glPushMatrix();glRotatef(30.0, 0.0, 0.0, 1.0);glTranslatef(-2.0, 0.0, 0.0);glColor3f(0.0, 1.0, 0.0);drawDiamond();glPopMatrix();glPushMatrix();glRotatef(150.0, 0.0, 0.0, 1.0);glTranslatef(-2.0, 0.0, 0.0);glColor3f(0.0, 0.0, 1.0);drawDiamond();glPopMatrix();glPushMatrix();glRotatef(270.0, 0.0, 0.0, 1.0);glTranslatef(-2.0, 0.0, 0.0);glColor3f(1.0, 0.0, 0.0);drawDiamond();/********** End **********/                          glFlush();
}int main(int argc, char *argv[])
{glutInit(&argc, argv);glutInitWindowPosition(100, 100);glutInitWindowSize(400, 400);glutCreateWindow("几何变换示例");init();glutDisplayFunc(&myDraw);glutMainLoopEvent();     /*************以下为评测代码,与本次实验内容无关,请勿修改**************/GLubyte* pPixelData = (GLubyte*)malloc(400 * 400 * 3);//分配内存GLint viewport[4] = {0};glReadBuffer(GL_FRONT);glPixelStorei(GL_UNPACK_ALIGNMENT, 4);glGetIntegerv(GL_VIEWPORT, viewport);glReadPixels(viewport[0], viewport[1], viewport[2], viewport[3], GL_RGB, GL_UNSIGNED_BYTE, pPixelData);cv::Mat img;std::vector<cv::Mat> imgPlanes;img.create(400, 400, CV_8UC3);cv::split(img, imgPlanes);for(int i = 0; i < 400; i ++) {unsigned char* plane0Ptr = imgPlanes[0].ptr<unsigned char>(i);unsigned char* plane1Ptr = imgPlanes[1].ptr<unsigned char>(i);unsigned char* plane2Ptr = imgPlanes[2].ptr<unsigned char>(i);for(int j = 0; j < 400; j ++) {int k = 3 * (i * 400 + j);plane2Ptr[j] = pPixelData[k];plane1Ptr[j] = pPixelData[k+1];plane0Ptr[j] = pPixelData[k+2];}}cv::merge(imgPlanes, img);cv::flip(img, img ,0); cv::namedWindow("openglGrab");cv::imshow("openglGrab", img);//cv::waitKey();cv::imwrite("../img_step4/test.jpg", img);return 0;
}
CG3-v2.0-图形几何变换
第1关:平移、缩放、旋转正方体
一. 任务描述
1. 本关任务
(1) 理解几何变换基本原理, 掌握平移、旋转、缩放变换的方法; (2) 根据平移算法原理补全translation、scale、rotation_x、rotation_y和rotation_z函数; (3) 根据几何变换基本原理,将main函数中的translation、scale、rotation_z参数补充完整。
2. 输入
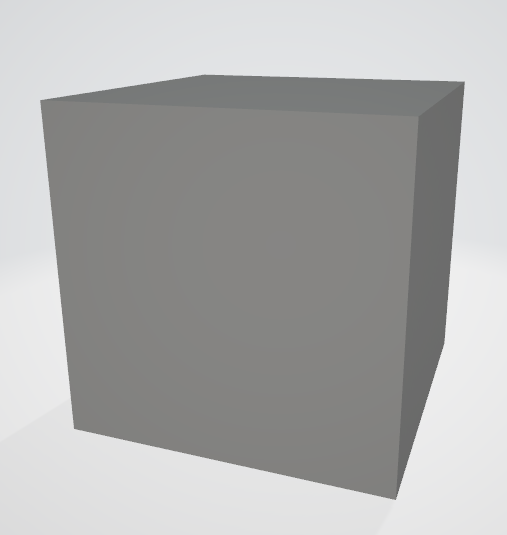
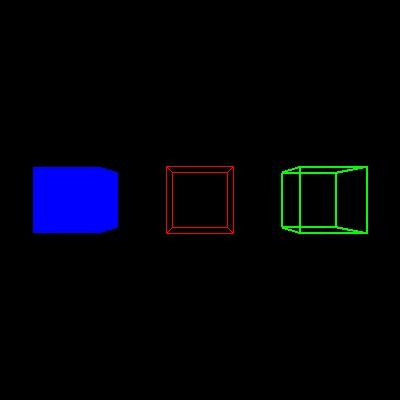
(1) 代码将自动输入一个边长为2的obj正方体模型,具体模型如下图:
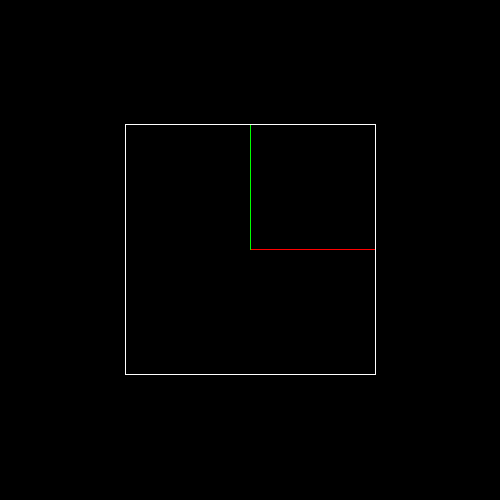
(2) 代码自动将模型投影到二维平面上生成一个边长为1的白色正方形,并且代码会生成红色x轴,绿色y轴,具体图片如下所示:
(3) 将立方体的顶点坐标分别向x,y,z轴正方向平移0.5个单位距离,然后绘制一个红色正方形; (4) 将立方体的顶点坐标分别沿x,y,z轴方向缩放0.5倍,然后绘制一个绿色正方形; (5) 将立方体的顶点坐标沿z轴逆时针方向旋转45度,然后绘制一个黄色正方形。
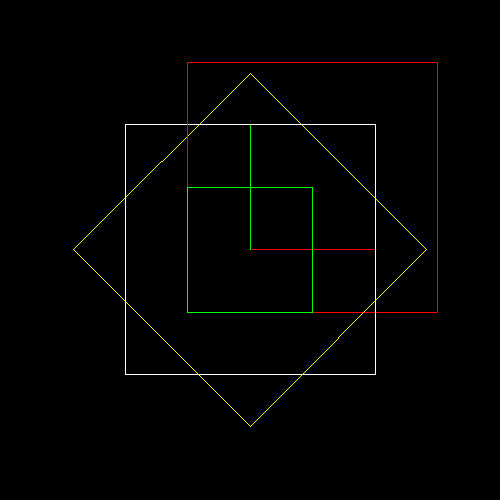
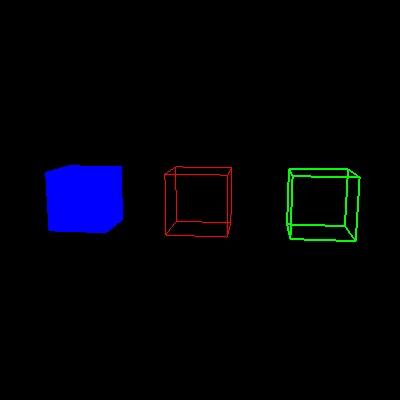
3. 输出
具体结果如下图所示:
#include <vector>
#include <cmath>
#include <algorithm>
#include <iostream>
#include "model.h"
#include "geometry.h"
#include "pngimage.h"using namespace std;
const double PI = acos(-1.0);void line(Vec3i p0, Vec3i p1, PNGImage  &image, PNGColor color)
{bool steep = false;if (std::abs(p0.x - p1.x) < std::abs(p0.y - p1.y)){std::swap(p0.x, p0.y);std::swap(p1.x, p1.y);steep = true;}if (p0.x > p1.x){std::swap(p0.x, p1.x);std::swap(p0.y, p1.y);}int dx = p1.x - p0.x;int dy = std::abs(p1.y - p0.y);int y = p0.y;int d = -dx;for (int x = p0.x; x <= p1.x; x++){if (steep)image.set(y, x, color);elseimage.set(x, y, color);d = d + 2 * dy;if (d > 0){y += (p1.y > p0.y ? 1 : -1);d = d - 2 * dx;}}
}Matrix viewport(int x, int y, int w, int h, int depth) {Matrix m = Matrix::identity(4);m[0][3] = x + w / 2.f;m[1][3] = y + h / 2.f;m[2][3] = depth / 2.f;m[0][0] = w / 2.f;m[1][1] = h / 2.f;m[2][2] = depth / 2.f;return m;
}Matrix translation(Vec3f v) {Matrix Tr = Matrix::identity(4);// Please add the code here/********** Begin ********/Tr[0][3] = v.x;Tr[1][3] = v.y;Tr[2][3] = v.z;/********** End *********/return Tr;
}Matrix scale(float factorX, float factorY, float factorZ)
{Matrix Z = Matrix::identity(4);/********** Begin ********/Z[0][0] = factorX;Z[1][1] = factorY;Z[2][2] = factorZ;/********** End *********/return Z;
}Matrix rotation_x(float angle)
{angle = angle * PI / 180;float sinangle = sin(angle);float cosangle = cos(angle);Matrix R = Matrix::identity(4);/********** Begin ********/R[1][1] = R[2][2] = cosangle;R[1][2] = -sinangle;R[2][1] = sinangle;/********** End *********/return R;
}Matrix rotation_y(float angle)
{angle = angle * PI / 180;float sinangle = sin(angle);float cosangle = cos(angle);Matrix R = Matrix::identity(4);/********** Begin ********/R[0][0] = R[2][2] = cosangle;R[0][2] = sinangle;R[2][0] = -sinangle;/********** End *********/return R;
}Matrix rotation_z(float angle) {angle = angle * PI / 180;float sinangle = sin(angle);float cosangle = cos(angle);Matrix R = Matrix::identity(4);/********** Begin ********/R[0][0] = R[1][1] = cosangle;R[0][1] = -sinangle;R[1][0] = sinangle;/********** End *********/return R;
}int main(int argc, char** argv)
{const PNGColor white = PNGColor(255, 255, 255, 255);const PNGColor black = PNGColor(0, 0, 0, 255);const PNGColor red = PNGColor(255, 0, 0, 255);const PNGColor green = PNGColor(0, 255, 0, 255);const PNGColor blue = PNGColor(0, 0, 255, 255);const PNGColor yellow = PNGColor(255, 255, 0, 255);Model *model = NULL;const int width = 500;const int height = 500;const int depth = 255;//generate some imagePNGImage image(width, height, PNGImage::RGBA); //Error when RGB because lodepng_get_raw_size_lct(w, h, colortype, bitdepth) > in.size() in encodeimage.init(black);model = new Model("../step3/cube.obj");Matrix VP = viewport(width / 4, width / 4, width / 2, height / 2, depth);{ // draw the axesVec3f x(1.f, 0.f, 0.f), y(0.f, 1.f, 0.f), o(0.f, 0.f, 0.f);o = VP*o;x = VP*x;y = VP*y;line(o, x, image, red);line(o, y, image, green);}for (int i = 0; i < model->nfaces(); i++) {std::vector<int> face = model->face(i);for (int j = 0; j < (int)face.size(); j++) {Vec3f wp0 = model->vert(face[j]);Vec3f wp1 = model->vert(face[(j + 1) % face.size()]);// draw the original modelVec3f op0 = VP*wp0;Vec3f op1 = VP*wp1;line(op0, op1, image, white);// draw the translated model// Please add the code here/********** Begin ********/Matrix T = translation(Vec3f(0.5, 0.5, 0.5));/********** End *********/Vec3f tp0 = VP*T*wp0;Vec3f tp1 = VP*T*wp1;line(tp0, tp1, image, red);// draw the scaled model// Please add the code here/********** Begin ********/            Matrix S = scale(0.5, 0.5, 0.5);/********** End *********/Vec3f sp0 = VP*S*wp0;Vec3f sp1 = VP*S*wp1;line(sp0, sp1, image, green);// draw the rotated model// Please add the code here/********** Begin ********/   Matrix R = rotation_z(45);/********** End *********/Vec3f rp0 = VP*R*wp0;Vec3f rp1 = VP*R*wp1;line(rp0, rp1, image, yellow);}}image.flip_vertically(); // i want to have the origin at the left bottom corner of the imageimage.write_png_file("../img_step3/test.png");delete model;return 0;
}
第2关:图形的平移与缩放
一. 任务描述
1. 本关任务
(1) 理解几何变换基本原理, 掌握平移和缩放变换的方法; (2) 根据几何变换基本原理,将main函数中的空白部分补充完整。
2. 输入
(1) 代码将自动输入一个边长为2的obj正方体模型,具体模型如下图:
(2) 将立方体的顶点坐标分别沿x,y,z轴方向缩放0.5倍,然后绘制一个白色正方形; (3) 将立方体的顶点坐标分别沿x,y,z轴方向缩放0.5倍,再分别向x,y,z轴正方向平移0.5个单位距离,然后绘制一个红色正方形; (4) 将立方体的顶点坐标分别向x,y,z轴正方向平移0.5个单位距离,再分别沿x,y,z轴方向缩放0.5倍,然后绘制一个绿色正方形。
3. 输出
具体结果如下图所示:
#include <vector>
#include <cmath>
#include <algorithm>
#include <iostream>
#include "model.h"
#include "geometry.h"
#include "pngimage.h"using namespace std;
const double PI = acos(-1.0);void line(Vec3i p0, Vec3i p1, PNGImage  &image, PNGColor color)
{bool steep = false;if (std::abs(p0.x - p1.x) < std::abs(p0.y - p1.y)){std::swap(p0.x, p0.y);std::swap(p1.x, p1.y);steep = true;}if (p0.x > p1.x){std::swap(p0.x, p1.x);std::swap(p0.y, p1.y);}int dx = p1.x - p0.x;int dy = std::abs(p1.y - p0.y);int y = p0.y;int d = -dx;for (int x = p0.x; x <= p1.x; x++){if (steep)image.set(y, x, color);elseimage.set(x, y, color);d = d + 2 * dy;if (d > 0){y += (p1.y > p0.y ? 1 : -1);d = d - 2 * dx;}}
}Matrix viewport(int x, int y, int w, int h, int depth) {Matrix m = Matrix::identity(4);m[0][3] = x + w / 2.f;m[1][3] = y + h / 2.f;m[2][3] = depth / 2.f;m[0][0] = w / 2.f;m[1][1] = h / 2.f;m[2][2] = depth / 2.f;return m;
}Matrix translation(Vec3f v) {Matrix Tr = Matrix::identity(4);Tr[0][3] = v.x;Tr[1][3] = v.y;Tr[2][3] = v.z;return Tr;
}Matrix scale(float factorX, float factorY, float factorZ)
{Matrix Z = Matrix::identity(4);Z[0][0] = factorX;Z[1][1] = factorY;Z[2][2] = factorZ;return Z;
}Matrix rotation_x(float angle)
{angle = angle * PI / 180;float sinangle = sin(angle);float cosangle = cos(angle);Matrix R = Matrix::identity(4);R[1][1] = R[2][2] = cosangle;R[1][2] = -sinangle;R[2][1] = sinangle;return R;
}Matrix rotation_y(float angle)
{angle = angle * PI / 180;float sinangle = sin(angle);float cosangle = cos(angle);Matrix R = Matrix::identity(4);R[0][0] = R[2][2] = cosangle;R[0][2] = sinangle;R[2][0] = -sinangle;return R;
}Matrix rotation_z(float angle) {angle = angle * PI / 180;float sinangle = sin(angle);float cosangle = cos(angle);Matrix R = Matrix::identity(4);R[0][0] = R[1][1] = cosangle;R[0][1] = -sinangle;R[1][0] = sinangle;return R;
}int main(int argc, char** argv)
{const PNGColor white = PNGColor(255, 255, 255, 255);const PNGColor black = PNGColor(0, 0, 0, 255);const PNGColor red = PNGColor(255, 0, 0, 255);const PNGColor green = PNGColor(0, 255, 0, 255);const PNGColor blue = PNGColor(0, 0, 255, 255);const PNGColor yellow = PNGColor(255, 255, 0, 255);Model *model = NULL;const int width = 500;const int height = 500;const int depth = 255;//generate some imagePNGImage image(width, height, PNGImage::RGBA); //Error when RGB because lodepng_get_raw_size_lct(w, h, colortype, bitdepth) > in.size() in encodeimage.init(black);model = new Model("cube.obj");Matrix VP = viewport(width / 4, width / 4, width / 2, height / 2, depth);for (int i = 0; i < model->nfaces(); i++){std::vector<int> face = model->face(i);for (int j = 0; j < (int)face.size(); j++){Vec3f wp0 = model->vert(face[j]);Vec3f wp1 = model->vert(face[(j + 1) % face.size()]);// Please add the code here/********** Begin ********/Matrix S0 = scale(0.5, 0.5, 0.5);Vec3f swp0 = S0 * wp0;Vec3f swp1 = S0 * wp1;// draw the model after scaledVec3f op0 = VP * swp0;Vec3f op1 = VP * swp1;line(op0, op1, image, white);Matrix T = translation(Vec3f(0.5, 0.5, 0.5));Matrix S = scale(0.5, 0.5, 0.5);// scaled then translatedVec3f tsp0 = VP*T*S*swp0;Vec3f tsp1 = VP*T*S*swp1;line(tsp0, tsp1, image, red);// translated then scaledVec3f stp0 = VP*S*T*swp0;Vec3f stp1 = VP*S*T*swp1;line(stp0, stp1, image, green);/********** End *********/}}image.flip_vertically(); // i want to have the origin at the left bottom corner of the imageimage.write_png_file("../img_step2/test.png");delete model;return 0;
}
第3关:图形的平移与旋转
一. 任务描述
1. 本关任务
(1) 理解几何变换基本原理, 掌握平移和旋转变换的方法; (2) 根据几何变换基本原理,将main函数中的空白部分补充完整。
2. 输入
(1) 代码将自动输入一个边长为2的obj正方体模型,具体模型如下图:
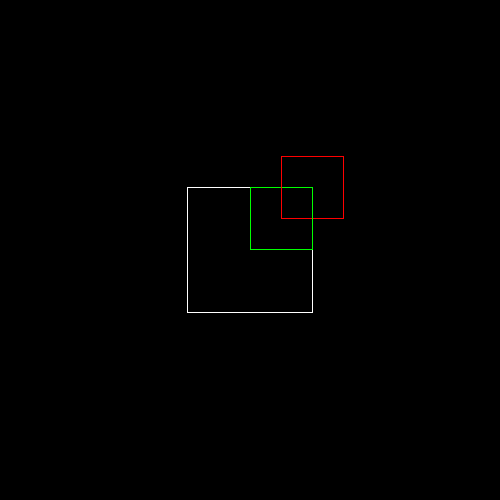
(2) 将立方体的顶点坐标分别沿x,y,z轴方向缩放0.5倍,然后绘制一个白色正方形; (3) 将立方体的顶点坐标分别向x,y,z轴正方向平移0.5个单位距离,再沿z轴逆时针方向旋转45度,然后绘制一个绿色正方形 (4) 将立方体的顶点坐标分别沿z轴逆时针方向旋转45度,再分别向x,y,z轴正方向平移0.5个单位距离,然后绘制一个红色正方形;
3. 输出
具体结果如下图所示:
#include <vector>
#include <cmath>
#include <algorithm>
#include <iostream>
#include "model.h"
#include "geometry.h"
#include "pngimage.h"using namespace std;
const double PI = acos(-1.0);void line(Vec3i p0, Vec3i p1, PNGImage  &image, PNGColor color)
{bool steep = false;if (std::abs(p0.x - p1.x) < std::abs(p0.y - p1.y)){std::swap(p0.x, p0.y);std::swap(p1.x, p1.y);steep = true;}if (p0.x > p1.x){std::swap(p0.x, p1.x);std::swap(p0.y, p1.y);}int dx = p1.x - p0.x;int dy = std::abs(p1.y - p0.y);int y = p0.y;int d = -dx;for (int x = p0.x; x <= p1.x; x++){if (steep)image.set(y, x, color);elseimage.set(x, y, color);d = d + 2 * dy;if (d > 0){y += (p1.y > p0.y ? 1 : -1);d = d - 2 * dx;}}
}Matrix viewport(int x, int y, int w, int h, int depth) {Matrix m = Matrix::identity(4);m[0][3] = x + w / 2.f;m[1][3] = y + h / 2.f;m[2][3] = depth / 2.f;m[0][0] = w / 2.f;m[1][1] = h / 2.f;m[2][2] = depth / 2.f;return m;
}Matrix translation(Vec3f v) {Matrix Tr = Matrix::identity(4);Tr[0][3] = v.x;Tr[1][3] = v.y;Tr[2][3] = v.z;return Tr;
}Matrix scale(float factorX, float factorY, float factorZ)
{Matrix Z = Matrix::identity(4);Z[0][0] = factorX;Z[1][1] = factorY;Z[2][2] = factorZ;return Z;
}Matrix rotation_x(float angle)
{angle = angle * PI / 180;float sinangle = sin(angle);float cosangle = cos(angle);Matrix R = Matrix::identity(4);R[1][1] = R[2][2] = cosangle;R[1][2] = -sinangle;R[2][1] = sinangle;return R;
}Matrix rotation_y(float angle)
{angle = angle * PI / 180;float sinangle = sin(angle);float cosangle = cos(angle);Matrix R = Matrix::identity(4);R[0][0] = R[2][2] = cosangle;R[0][2] = sinangle;R[2][0] = -sinangle;return R;
}Matrix rotation_z(float angle) {angle = angle * PI / 180;float sinangle = sin(angle);float cosangle = cos(angle);Matrix R = Matrix::identity(4);R[0][0] = R[1][1] = cosangle;R[0][1] = -sinangle;R[1][0] = sinangle;return R;
}int main(int argc, char** argv)
{const PNGColor white = PNGColor(255, 255, 255, 255);const PNGColor black = PNGColor(0, 0, 0, 255);const PNGColor red = PNGColor(255, 0, 0, 255);const PNGColor green = PNGColor(0, 255, 0, 255);const PNGColor blue = PNGColor(0, 0, 255, 255);const PNGColor yellow = PNGColor(255, 255, 0, 255);Model *model = NULL;const int width = 500;const int height = 500;const int depth = 255;//generate some imagePNGImage image(width, height, PNGImage::RGBA); //Error when RGB because lodepng_get_raw_size_lct(w, h, colortype, bitdepth) > in.size() in encodeimage.init(black);model = new Model("cube.obj");Matrix VP = viewport(width / 4, width / 4, width / 2, height / 2, depth);for (int i = 0; i < model->nfaces(); i++){std::vector<int> face = model->face(i);for (int j = 0; j < (int)face.size(); j++){Vec3f wp0 = model->vert(face[j]);Vec3f wp1 = model->vert(face[(j + 1) % face.size()]);// Please add the code here/********** Begin ********/Matrix S = scale(0.5,0.5,0.5);Vec3f sp0 = VP*S*wp0;Vec3f sp1 = VP*S*wp1;line(sp0,sp1,image,white);Matrix P = rotation_z(45)*translation(Vec3f(0.5,0.5,0.5))*S;Vec3f pp0 = VP*P*wp0;Vec3f pp1 = VP*P*wp1;line(pp0,pp1,image,green);Matrix Q = translation(Vec3f(0.5,0.5,0.5))*rotation_z(45)*S;Vec3f qp0 = VP*Q*wp0;Vec3f qp1 = VP*Q*wp1;line(qp0,qp1,image,red);/********** End *********/}}image.flip_vertically(); // i want to have the origin at the left bottom corner of the imageimage.write_png_file("../img_step1/test.png");delete model;return 0;
}
第4关:图形的旋转与缩放
一. 任务描述
1. 本关任务
(1) 理解几何变换基本原理, 掌握旋转和缩放变换的方法; (2) 根据几何变换基本原理,将main函数中的空白部分补充完整。
2. 输入
(1) 代码将自动输入一个边长为2的obj正方体模型,具体模型如下图:
(2) 将立方体的顶点坐标分别沿x,y,z轴方向缩放0.5倍,然后绘制一个白色正方形; (3) 将立方体的顶点坐标分别向y,z轴缩放0.5倍,x轴保持不变,再沿z轴逆时针方向旋转45度,然后绘制一个绿色矩形; (4) 将立方体的顶点坐标分别沿z轴逆时针方向旋转45度,再分别向y,z轴缩放0.5倍,x轴保持不变,然后绘制一个红菱形。
3. 输出
具体结果如下图所示:

#include <vector>
#include <cmath>
#include <algorithm>
#include <iostream>
#include "model.h"
#include "geometry.h"
#include "pngimage.h"using namespace std;
const double PI = acos(-1.0);void line(Vec3i p0, Vec3i p1, PNGImage  &image, PNGColor color)
{bool steep = false;if (std::abs(p0.x - p1.x) < std::abs(p0.y - p1.y)){std::swap(p0.x, p0.y);std::swap(p1.x, p1.y);steep = true;}if (p0.x > p1.x){std::swap(p0.x, p1.x);std::swap(p0.y, p1.y);}int dx = p1.x - p0.x;int dy = std::abs(p1.y - p0.y);int y = p0.y;int d = -dx;for (int x = p0.x; x <= p1.x; x++){if (steep)image.set(y, x, color);elseimage.set(x, y, color);d = d + 2 * dy;if (d > 0){y += (p1.y > p0.y ? 1 : -1);d = d - 2 * dx;}}
}Matrix viewport(int x, int y, int w, int h, int depth) {Matrix m = Matrix::identity(4);m[0][3] = x + w / 2.f;m[1][3] = y + h / 2.f;m[2][3] = depth / 2.f;m[0][0] = w / 2.f;m[1][1] = h / 2.f;m[2][2] = depth / 2.f;return m;
}Matrix translation(Vec3f v) {Matrix Tr = Matrix::identity(4);Tr[0][3] = v.x;Tr[1][3] = v.y;Tr[2][3] = v.z;return Tr;
}Matrix scale(float factorX, float factorY, float factorZ)
{Matrix Z = Matrix::identity(4);Z[0][0] = factorX;Z[1][1] = factorY;Z[2][2] = factorZ;return Z;
}Matrix rotation_x(float angle)
{angle = angle * PI / 180;float sinangle = sin(angle);float cosangle = cos(angle);Matrix R = Matrix::identity(4);R[1][1] = R[2][2] = cosangle;R[1][2] = -sinangle;R[2][1] = sinangle;return R;
}Matrix rotation_y(float angle)
{angle = angle * PI / 180;float sinangle = sin(angle);float cosangle = cos(angle);Matrix R = Matrix::identity(4);R[0][0] = R[2][2] = cosangle;R[0][2] = sinangle;R[2][0] = -sinangle;return R;
}Matrix rotation_z(float angle) {angle = angle * PI / 180;float sinangle = sin(angle);float cosangle = cos(angle);Matrix R = Matrix::identity(4);R[0][0] = R[1][1] = cosangle;R[0][1] = -sinangle;R[1][0] = sinangle;return R;
}int main(int argc, char** argv)
{const PNGColor white = PNGColor(255, 255, 255, 255);const PNGColor black = PNGColor(0, 0, 0, 255);const PNGColor red = PNGColor(255, 0, 0, 255);const PNGColor green = PNGColor(0, 255, 0, 255);const PNGColor blue = PNGColor(0, 0, 255, 255);const PNGColor yellow = PNGColor(255, 255, 0, 255);Model *model = NULL;const int width = 500;const int height = 500;const int depth = 255;//generate some imagePNGImage image(width, height, PNGImage::RGBA); //Error when RGB because lodepng_get_raw_size_lct(w, h, colortype, bitdepth) > in.size() in encodeimage.init(black);model = new Model("cube.obj");Matrix VP = viewport(width / 4, width / 4, width / 2, height / 2, depth);for (int i = 0; i < model->nfaces(); i++){std::vector<int> face = model->face(i);for (int j = 0; j < (int)face.size(); j++){Vec3f wp0 = model->vert(face[j]);Vec3f wp1 = model->vert(face[(j + 1) % face.size()]);// Please add the code here/********** Begin ********/Matrix S = scale(0.5,0.5,0.5);Vec3f sp0 = VP*S*wp0;Vec3f sp1 = VP*S*wp1;line(sp0,sp1,image,white);Matrix P = rotation_z(45)*scale(1,0.5,0.5)*S;Vec3f pp0 = VP*P*wp0;Vec3f pp1 = VP*P*wp1;line(pp0,pp1,image,green);Matrix Q = scale(1,0.5,0.5)*rotation_z(45)*S;Vec3f qp0 = VP*Q*wp0;Vec3f qp1 = VP*Q*wp1;line(qp0,qp1,image,red);/********** End *********/}}image.flip_vertically(); // i want to have the origin at the left bottom corner of the imageimage.write_png_file("../img_step4/test.png");delete model;return 0;
}
第5关:绘制三菱形状
一. 任务描述
1. 本关任务
(1) 理解几何变换基本原理, 掌握平移、旋转和缩放变换的方法; (2) 根据几何变换基本原理,将main函数中的空白部分补充完整来绘制三菱形状。
2. 输入
(1) 代码将自动输入一个边长为2的obj正方体模型,具体模型如下图:
(2) 将立方体的顶点坐标分别沿x,y,z轴方向缩放0.5倍; (3) 将立方体的顶点坐标分别沿z轴逆时针方向旋转45度,再分别向y,z轴缩放0.5倍,x轴保持不变,然后绘制一个红菱形; (4) 将红色菱形沿着x轴正方向平移
22个单位距离,然后将红菱形沿Z轴逆时针旋转90度; (5)绿色和黄色菱形与红色菱形的夹角均为120度。3. 输出
具体结果如下图所示:
#include <vector>
#include <cmath>
#include <algorithm>
#include <iostream>
#include "model.h"
#include "geometry.h"
#include "pngimage.h"using namespace std;
const double PI = acos(-1.0);void line(Vec3i p0, Vec3i p1, PNGImage  &image, PNGColor color)
{bool steep = false;if (std::abs(p0.x - p1.x) < std::abs(p0.y - p1.y)){std::swap(p0.x, p0.y);std::swap(p1.x, p1.y);steep = true;}if (p0.x > p1.x){std::swap(p0.x, p1.x);std::swap(p0.y, p1.y);}int dx = p1.x - p0.x;int dy = std::abs(p1.y - p0.y);int y = p0.y;int d = -dx;for (int x = p0.x; x <= p1.x; x++){if (steep)image.set(y, x, color);elseimage.set(x, y, color);d = d + 2 * dy;if (d > 0){y += (p1.y > p0.y ? 1 : -1);d = d - 2 * dx;}}
}Matrix viewport(int x, int y, int w, int h, int depth) {Matrix m = Matrix::identity(4);m[0][3] = x + w / 2.f;m[1][3] = y + h / 2.f;m[2][3] = depth / 2.f;m[0][0] = w / 2.f;m[1][1] = h / 2.f;m[2][2] = depth / 2.f;return m;
}Matrix translation(Vec3f v) {Matrix Tr = Matrix::identity(4);Tr[0][3] = v.x;Tr[1][3] = v.y;Tr[2][3] = v.z;return Tr;
}Matrix scale(float factorX, float factorY, float factorZ)
{Matrix Z = Matrix::identity(4);Z[0][0] = factorX;Z[1][1] = factorY;Z[2][2] = factorZ;return Z;
}Matrix rotation_x(float angle)
{angle = angle * PI / 180;float sinangle = sin(angle);float cosangle = cos(angle);Matrix R = Matrix::identity(4);R[1][1] = R[2][2] = cosangle;R[1][2] = -sinangle;R[2][1] = sinangle;return R;
}Matrix rotation_y(float angle)
{angle = angle * PI / 180;float sinangle = sin(angle);float cosangle = cos(angle);Matrix R = Matrix::identity(4);R[0][0] = R[2][2] = cosangle;R[0][2] = sinangle;R[2][0] = -sinangle;return R;
}Matrix rotation_z(float angle) {angle = angle * PI / 180;float sinangle = sin(angle);float cosangle = cos(angle);Matrix R = Matrix::identity(4);R[0][0] = R[1][1] = cosangle;R[0][1] = -sinangle;R[1][0] = sinangle;return R;
}int main(int argc, char** argv)
{const PNGColor white = PNGColor(255, 255, 255, 255);const PNGColor black = PNGColor(0, 0, 0, 255);const PNGColor red = PNGColor(255, 0, 0, 255);const PNGColor green = PNGColor(0, 255, 0, 255);const PNGColor blue = PNGColor(0, 0, 255, 255);const PNGColor yellow = PNGColor(255, 255, 0, 255);Model *model = NULL;const int width = 800;const int height = 800;const int depth = 255;//generate some imagePNGImage image(width, height, PNGImage::RGBA); //Error when RGB because lodepng_get_raw_size_lct(w, h, colortype, bitdepth) > in.size() in encodeimage.init(black);model = new Model("cube.obj");Matrix VP = viewport(width / 4, width / 4, width / 2, height / 2, depth);for (int i = 0; i < model->nfaces(); i++){std::vector<int> face = model->face(i);for (int j = 0; j < (int)face.size(); j++){Vec3f wp0 = model->vert(face[j]);Vec3f wp1 = model->vert(face[(j + 1) % face.size()]);Matrix T = translation(Vec3f(sqrt(2)/2, 0, 0));// Please add the code here/********** Begin ********/Matrix S = scale(0.5f,0.5f  ,0.5f  );Matrix S1 = scale(1.f,0.5f  ,0.5f  );Matrix R = rotation_z(45.f);Matrix R3 = rotation_z(90.f);Matrix R2 = rotation_z(120.f);Matrix R1 = rotation_z(-120.f);Vec3f sp0 = VP*R3*T*S1*R*S*wp0;Vec3f sp1 = VP*R3*T*S1*R*S*wp1;line(sp0, sp1, image, red);Vec3f op0 = VP*R2*R3*T*S1*R*S*wp0;Vec3f op1 = VP*R2*R3*T*S1*R*S*wp1;line(op0, op1, image,green );Vec3f Sp0 = VP*R1*R3*T*S1*R*S*wp0;Vec3f Sp1 = VP*R1*R3*T*S1*R*S*wp1;line(Sp0, Sp1, image,yellow );/********** End *********/}		}image.flip_vertically(); // i want to have the origin at the left bottom corner of the imageimage.write_png_file("../img_step5/test.png");delete model;return 0;
}
模型、观察及视口变换v1.0
第1关:立方体模型变换
一.任务描述
根据提示,在右侧修改代码,并自己绘制出图形。平台会对你编写的代码进行测试。
1.本关任务
学习了解三维图形几何变换原理。 理解掌握OpenGL三维图形几何变换的方法。 理解掌握OpenGL程序的模型视图变换。 掌握OpenGL三维图形显示与观察的原理与实现。
2.预期输出
3.具体要求
(1).背景色为黑色,用 glclearcolor 来完成;
(2).运用glPushMatrix()函数和glPopMatrix()函数进行矩阵操作,以中心为绘制原点,设置前景色为红色glColor3f(1.0, 0.0, 0.0),绘制单位立方体线框,用glutWireCube(1.0)完成;
(3).运用glPushMatrix()函数和glPopMatrix()函数进行矩阵操作,设置前景色为黑色glColor3f(0.0, 1.0, 0.0),设置线宽为2.0用glLineWidth(2.0)完成,将原单位立方体线框沿X轴正方向平移2.0;
(4).运用glPushMatrix()函数和glPopMatrix()函数进行矩阵操作,沿X轴负方向平移2.0,设置前景色为蓝色glColor3f(0.0, 0.0, 1.0),绘制单位立方体实体用glutSolidCube(1.0)完成;
// 提示:在合适的地方修改或添加代码
#include <GL/freeglut.h>
#include<stdio.h>// 评测代码所用头文件-开始
#include<opencv2/core/core.hpp>
#include<opencv2/highgui/highgui.hpp>
#include<opencv2/imgproc/imgproc.hpp>
// 评测代码所用头文件-结束GLint winWidth = 400, winHeight =400 ; 	      //设置初始化窗口大小/*观察坐标系参数设置*/
GLfloat x0 = 0.0, yy = 0.0, z0 = 5.0;	   //设置观察坐标系原点
GLfloat xref = 0.0, yref = 0.0, zref = 0.0;	//设置观察坐标系参考点(视点)
GLfloat Vx = 0.0, Vy = 1.0, Vz = 0.0;	   //设置观察坐标系向上向量(y轴) /*观察体参数设置 */
GLfloat xwMin = -1.0, ywMin = -1.0, xwMax = 1.0, ywMax = 1.0;//设置裁剪窗口坐标范围
GLfloat dnear = 1.5, dfar = 20.0;	      //设置远、近裁剪面深度范围void init(void)
{glClearColor(0.0, 0.0, 0.0, 0.0);
}
void display(void)
{glClear(GL_COLOR_BUFFER_BIT);glLoadIdentity();/*观察变换*/gluLookAt(x0, yy, z0, xref, yref, zref, Vx, Vy, Vz);        //指定三维观察参数// 请在此添加你的代码/********** Begin ********///glColor3f(1.0, 0.0, 0.0);glPushMatrix();glutWireCube(1.0);glPopMatrix();
//glColor3f(0.0, 1.0, 0.0);glLineWidth(2.0);glPushMatrix();glTranslatef(2.0f,0.0f,0.0f);glutWireCube(1.0);glPopMatrix();
//glColor3f(0.0, 0.0, 1.0);glPushMatrix();glTranslatef(-2.0f,0.0f,0.0f);glutSolidCube(1.0);glPopMatrix();/********** End **********/glFlush();
}void reshape(GLint newWidth, GLint newHeight)
{/*视口变换*/glViewport(0, 0, newWidth, newHeight);	//定义视口大小/*投影变换*/glMatrixMode(GL_PROJECTION);glLoadIdentity();/*透视投影,设置透视观察体*/glFrustum(xwMin, xwMax, ywMin, ywMax, dnear, dfar);/*模型变换*/glMatrixMode(GL_MODELVIEW);winWidth = newWidth;winHeight = newHeight;
}
int main(int argc, char* argv[])
{glutInit(&argc, argv);glutInitWindowPosition(100, 100);glutInitWindowSize( 400 , 400 );        //设置初始化窗口大小glutCreateWindow("三维观察");init();glutDisplayFunc(display);glutReshapeFunc(reshape);glutMainLoopEvent();/*************以下为评测代码,与本次实验内容无关,请勿修改**************/GLubyte* pPixelData = (GLubyte*)malloc(800 * 400 * 3);//分配内存GLint viewport[4] = { 0 };glReadBuffer(GL_FRONT);glPixelStorei(GL_UNPACK_ALIGNMENT, 4);glGetIntegerv(GL_VIEWPORT, viewport);glReadPixels(viewport[0], viewport[1], viewport[2], viewport[3], GL_RGB, GL_UNSIGNED_BYTE, pPixelData);cv::Mat img;std::vector<cv::Mat> imgPlanes;img.create(400, 400, CV_8UC3);cv::split(img, imgPlanes);for (int i = 0; i < 400; i++) {unsigned char* plane0Ptr = imgPlanes[0].ptr<unsigned char>(i);unsigned char* plane1Ptr = imgPlanes[1].ptr<unsigned char>(i);unsigned char* plane2Ptr = imgPlanes[2].ptr<unsigned char>(i);for (int j = 0; j < 400; j++) {int k = 3 * (i * 400 + j);plane2Ptr[j] = pPixelData[k];plane1Ptr[j] = pPixelData[k + 1];plane0Ptr[j] = pPixelData[k + 2];}}cv::merge(imgPlanes, img);cv::flip(img, img, 0);cv::namedWindow("openglGrab");cv::imshow("openglGrab", img);//cv::waitKey();cv::imwrite("../img_step1/test.jpg", img);return 0;
}
第2关:立方体观察变换
一.任务描述
根据提示,在右侧修改代码,并自己绘制出图形。平台会对你编写的代码进行测试。
1.本关任务
学习了解三维图形几何变换原理。 理解掌握OpenGL三维图形几何变换的方法。 理解掌握OpenGL程序的模型视图变换。 掌握OpenGL三维图形显示与观察的原理与实现。
2.预期输出
3.具体要求
(1).背景色为黑色,用 glclearcolor 来完成;
(2).运用glPushMatrix()函数和glPopMatrix()函数进行矩阵操作,以中心为绘制原点,设置前景色为红色glColor3f(1.0, 0.0, 0.0),绘制单位立方体线框,用glutWireCube(1.0)完成;
(3).运用glPushMatrix()函数和glPopMatrix()函数进行矩阵操作,设置前景色为黑色glColor3f(0.0, 1.0, 0.0),设置线宽为2.0用glLineWidth(2.0)完成,将原单位立方体线框沿X轴正方向平移2.0;
(4).运用glPushMatrix()函数和glPopMatrix()函数进行矩阵操作,沿X轴负方向平移2.0,设置前景色为蓝色glColor3f(0.0, 0.0, 1.0),绘制单位立方体实体用glutSolidCube(1.0)完成;(5).视点改为(1.0,1.5,8.0),观察中心改为在(0, 0 ,0),向上矢量改为(0, 1, 0);
(6).将glFrustum(xwMin, xwMax, ywMin, ywMax, dnear, dfar);换为透视投影gluPerspective (fovy,aspect,zNear,zFar)函数,参数分别为(视角,宽高比,近处,远处)。要求参数为gluPerspective(45, 1, 1, 100)。
// 提示:在合适的地方修改或添加代码
#include <GL/freeglut.h>
#include<stdio.h>// 评测代码所用头文件-开始
#include<opencv2/core/core.hpp>
#include<opencv2/highgui/highgui.hpp>
#include<opencv2/imgproc/imgproc.hpp>
// 评测代码所用头文件-结束GLint winWidth = 400, winHeight =400 ;           //设置初始化窗口大小/*观察坐标系参数设置*/
GLfloat x0 = 1.0, yy = 1.5, z0 = 8.0;       //设置观察坐标系原点
GLfloat xref = 0.0, yref = 0.0, zref = 0.0;    //设置观察坐标系参考点(视点)
GLfloat Vx = 0.0, Vy = 1.0, Vz = 0.0;       //设置观察坐标系向上向量(y轴) /*观察体参数设置 */
GLfloat xwMin = -1.0, ywMin = -1.0, xwMax = 1.0, ywMax = 1.0;//设置裁剪窗口坐标范围
GLfloat dnear = 1.5, dfar = 20.0;          //设置远、近裁剪面深度范围void init(void)
{glClearColor(0.0, 0.0, 0.0, 0.0);
}
void display(void)
{glClear(GL_COLOR_BUFFER_BIT);glLoadIdentity();/*观察变换*/gluLookAt(x0, yy, z0, xref, yref, zref, Vx, Vy, Vz);        //指定三维观察参数// 请在此添加你的代码/********** Begin ********/glPushMatrix();glColor3f(1.0, 0.0, 0.0);glutWireCube(1.0);glPopMatrix();glPushMatrix();glColor3f(0.0, 1.0, 0.0);glLineWidth(2.0);glTranslatef(2.0f,0.0f,0.0f);glutWireCube(1.0);glPopMatrix();glPushMatrix();glColor3f(0.0, 0.0, 1.0);glLineWidth(2.0);glTranslatef(-2.0f,0.0f,0.0f);glutSolidCube(1.0);glPopMatrix();/********** End **********/glFlush();
}
void reshape(GLint newWidth, GLint newHeight)
{/*视口变换*/glViewport(0, 0, newWidth, newHeight);    //定义视口大小/*投影变换*/glMatrixMode(GL_PROJECTION);glLoadIdentity();/*透视投影,设置透视观察体*/gluPerspective( 45,1,1,100 );/*模型变换*/glMatrixMode(GL_MODELVIEW);winWidth = newWidth;winHeight = newHeight;
}
int main(int argc, char* argv[])
{glutInit(&argc, argv);glutInitWindowPosition(100, 100);glutInitWindowSize( 400 , 400 );        //设置初始化窗口大小glutCreateWindow("三维观察");init();glutDisplayFunc(display);glutReshapeFunc(reshape);glutMainLoopEvent();/*************以下为评测代码,与本次实验内容无关,请勿修改**************/GLubyte* pPixelData = (GLubyte*)malloc(800 * 400 * 3);//分配内存GLint viewport[4] = { 0 };   glReadBuffer(GL_FRONT);glPixelStorei(GL_UNPACK_ALIGNMENT, 4);glGetIntegerv(GL_VIEWPORT, viewport);glReadPixels(viewport[0], viewport[1], viewport[2], viewport[3], GL_RGB, GL_UNSIGNED_BYTE, pPixelData);cv::Mat img;std::vector<cv::Mat> imgPlanes;img.create(400, 400, CV_8UC3);cv::split(img, imgPlanes);for (int i = 0; i < 400; i++) {unsigned char* plane0Ptr = imgPlanes[0].ptr<unsigned char>(i);unsigned char* plane1Ptr = imgPlanes[1].ptr<unsigned char>(i);unsigned char* plane2Ptr = imgPlanes[2].ptr<unsigned char>(i);for (int j = 0; j < 400; j++) {int k = 3 * (i * 400 + j);plane2Ptr[j] = pPixelData[k];plane1Ptr[j] = pPixelData[k + 1];plane0Ptr[j] = pPixelData[k + 2];}}cv::merge(imgPlanes, img);cv::flip(img, img, 0);cv::namedWindow("openglGrab");cv::imshow("openglGrab", img);//cv::waitKey();cv::imwrite("../img_step2/test.jpg", img);return 0;
}
第3关:立方体视口变换
一.任务描述
根据提示,在右侧修改代码,并自己绘制出图形。平台会对你编写的代码进行测试。
1.本关任务
学习了解三维图形几何变换原理。 理解掌握OpenGL三维图形几何变换的方法。 理解掌握OpenGL程序的模型视图变换。 掌握OpenGL三维图形显示与观察的原理与实现。
2.预期输出
3.具体要求
(1).背景色为黑色,用 glclearcolor 来完成;
(2).运用glPushMatrix()函数和glPopMatrix()函数进行矩阵操作,以中心为绘制原点,设置前景色为红色glColor3f(1.0, 0.0, 0.0),绘制单位立方体线框,用glutWireCube(1.0)完成;
(3).运用glPushMatrix()函数和glPopMatrix()函数进行矩阵操作,设置前景色为黑色glColor3f(0.0, 1.0, 0.0),设置线宽为2.0用glLineWidth(2.0)完成,将原单位立方体线框沿X轴正方向平移2.0;
(4).运用glPushMatrix()函数和glPopMatrix()函数进行矩阵操作,沿X轴负方向右平移2.0,设置前景色为蓝色glColor3f(0.0, 0.0, 1.0),绘制单位立方体实体用glutSolidCube(1.0)完成; (5).进行视口变换视口宽为800,高为400。实验内调整winWidth和winHeight 来设置初始化窗口大小;(6).调用透视投影gluperspective()函数,参数为gluPerspective(45, 2, 1, 100)要求宽高比为2;
(7).在main函数中用glutInitWindowSize()调整视口窗口大小。
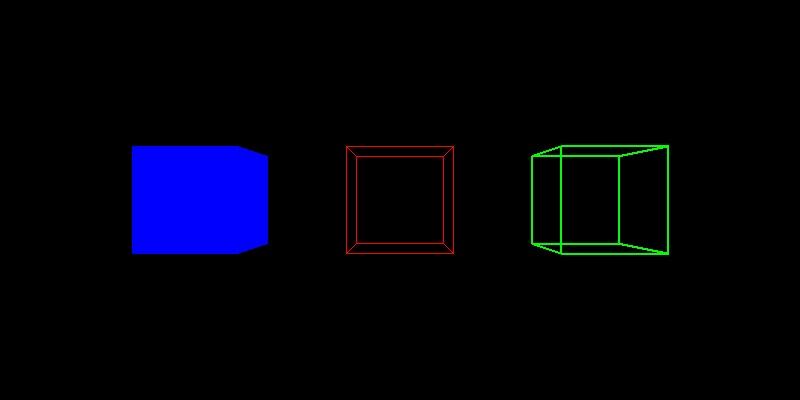
// 提示:在合适的地方修改或添加代码
#include <GL/freeglut.h>
#include<stdio.h>// 评测代码所用头文件-开始
#include<opencv2/core/core.hpp>
#include<opencv2/highgui/highgui.hpp>
#include<opencv2/imgproc/imgproc.hpp>
// 评测代码所用头文件-结束GLint winWidth =800 , winHeight =400 ; 	      //设置初始化窗口大小/*观察坐标系参数设置*/
GLfloat x0 = 0.0, yy = 0.0, z0 = 5.0;	   //设置观察坐标系原点
GLfloat xref = 0.0, yref = 0.0, zref = 0.0;	//设置观察坐标系参考点(视点)
GLfloat Vx = 0.0, Vy = 1.0, Vz = 0.0;	   //设置观察坐标系向上向量(y轴) /*观察体参数设置 */
GLfloat xwMin = -1.0, ywMin = -1.0, xwMax = 1.0, ywMax = 1.0;//设置裁剪窗口坐标范围
GLfloat dnear = 1.5, dfar = 20.0;	      //设置远、近裁剪面深度范围void init(void)
{glClearColor(0.0, 0.0, 0.0, 0.0);
}
void display(void)
{glClear(GL_COLOR_BUFFER_BIT);glLoadIdentity();/*观察变换*/gluLookAt(x0, yy, z0, xref, yref, zref, Vx, Vy, Vz);        //指定三维观察参数// 请在此添加你的代码/********** Begin ********/glColor3f(1.0, 0.0, 0.0);glPushMatrix();glutWireCube(1.0);glPopMatrix();glColor3f(0.0, 1.0, 0.0);glLineWidth(2.0);glPushMatrix();glTranslatef(2.0f,0.0f,0.0f);glutWireCube(1.0);glPopMatrix();glColor3f(0.0, 0.0, 1.0);glPushMatrix();glTranslatef(-2.0f,0.0f,0.0f);glutSolidCube(1.0);glPopMatrix();/********** End **********/glFlush();
}void reshape(GLint newWidth, GLint newHeight)
{/*视口变换*/glViewport(0, 0, newWidth, newHeight);	//定义视口大小/*投影变换*/glMatrixMode(GL_PROJECTION);glLoadIdentity();/*透视投影,设置透视观察体*/gluPerspective( 45,2 ,1 ,100 );/*模型变换*/glMatrixMode(GL_MODELVIEW);winWidth = newWidth;winHeight = newHeight;
}
int main(int argc, char* argv[])
{glutInit(&argc, argv);glutInitWindowPosition(100, 100);glutInitWindowSize( 800 ,400  );        //设置初始化窗口大小glutCreateWindow("三维观察");init();glutDisplayFunc(display);glutReshapeFunc(reshape);glutMainLoopEvent();/*************以下为评测代码,与本次实验内容无关,请勿修改**************/GLubyte* pPixelData = (GLubyte*)malloc(800 * 400 * 3);//分配内存GLint viewport[4] = { 0 }; glReadBuffer(GL_FRONT);glPixelStorei(GL_UNPACK_ALIGNMENT, 4);glGetIntegerv(GL_VIEWPORT, viewport);glReadPixels(viewport[0], viewport[1], viewport[2], viewport[3], GL_RGB, GL_UNSIGNED_BYTE, pPixelData);cv::Mat img;std::vector<cv::Mat> imgPlanes;img.create(400, 800, CV_8UC3);cv::split(img, imgPlanes);for (int i = 0; i < 400; i++) {unsigned char* plane0Ptr = imgPlanes[0].ptr<unsigned char>(i);unsigned char* plane1Ptr = imgPlanes[1].ptr<unsigned char>(i);unsigned char* plane2Ptr = imgPlanes[2].ptr<unsigned char>(i);for (int j = 0; j < 800; j++) {int k = 3 * (i * 800 + j);plane2Ptr[j] = pPixelData[k];plane1Ptr[j] = pPixelData[k + 1];plane0Ptr[j] = pPixelData[k + 2];}}cv::merge(imgPlanes, img);cv::flip(img, img, 0);cv::namedWindow("openglGrab");cv::imshow("openglGrab", img);//cv::waitKey();cv::imwrite("../img_step5/test.jpg", img);return 0;
}
模型、观察及视口变换v2.0
第1关:模型变换-左右两个立方体
一. 任务描述
1. 本关任务
(1) 理解模型变换基本原理,掌握平移和旋转变换的方法; (2) 根据模型变换基本原理,将main函数中的空白部分补充完整。
2. 输入
(1) 代码将自动输入一个边长为1的obj正方体模型,具体模型如下图:
(2) 代码自动将模型投影到二维平面上生成一个边长为1的白色立方体,具体图片如下所示:
(3) 将白色立方体的顶点坐标向x轴正方向平移1.2个单位距离,然后绘制一个红色立方形; (4) 将白色立方体的顶点坐标沿y轴逆时针方向旋转30度,再向x轴负方向平移1.3个单位距离,然后绘制一个绿色正方形。
3. 输出
具体结果如下图所示:
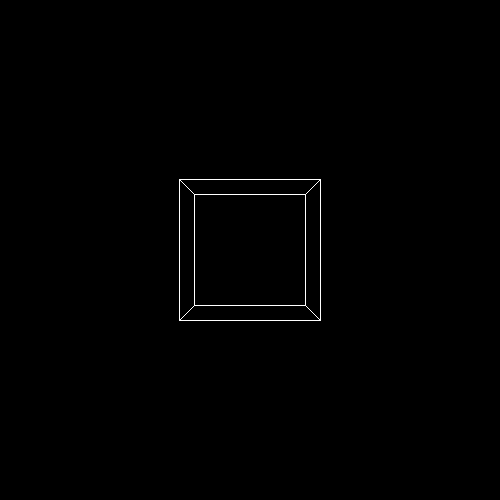
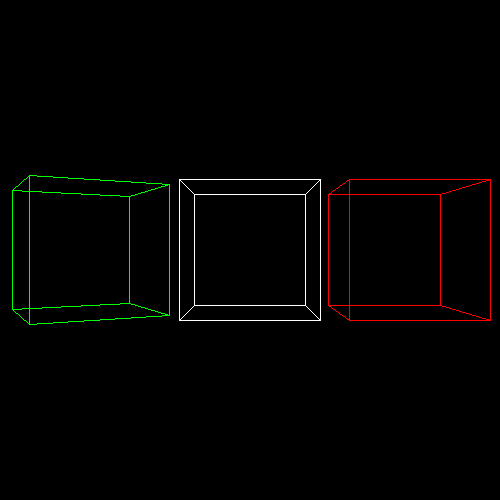
#include <vector>
#include <cmath>
#include <algorithm>
#include <iostream>
#include "model.h"
#include "geometry.h"
#include "pngimage.h"using namespace std;
const double PI = acos(-1.0);void line(Vec3i p0, Vec3i p1, PNGImage  &image, PNGColor color)
{bool steep = false;if (std::abs(p0.x - p1.x) < std::abs(p0.y - p1.y)){std::swap(p0.x, p0.y);std::swap(p1.x, p1.y);steep = true;}if (p0.x > p1.x){std::swap(p0.x, p1.x);std::swap(p0.y, p1.y);}int dx = p1.x - p0.x;int dy = std::abs(p1.y - p0.y);int y = p0.y;int d = -dx;for (int x = p0.x; x <= p1.x; x++){if (steep)image.set(y, x, color);elseimage.set(x, y, color);d = d + 2 * dy;if (d > 0){y += (p1.y > p0.y ? 1 : -1);d = d - 2 * dx;}}
}Matrix translation(Vec3f v) {//平移Matrix Tr = Matrix::identity(4);Tr[0][3] = v.x;Tr[1][3] = v.y;Tr[2][3] = v.z;return Tr;
}Matrix scale(float factorX, float factorY, float factorZ)
{Matrix Z = Matrix::identity(4);Z[0][0] = factorX;Z[1][1] = factorY;Z[2][2] = factorZ;return Z;
}Matrix rotation_x(float angle)
{angle = angle * PI / 180;float sinangle = sin(angle);float cosangle = cos(angle);Matrix R = Matrix::identity(4);R[1][1] = R[2][2] = cosangle;R[1][2] = -sinangle;R[2][1] = sinangle;return R;
}Matrix rotation_y(float angle)
{angle = angle * PI / 180;float sinangle = sin(angle);float cosangle = cos(angle);Matrix R = Matrix::identity(4);R[0][0] = R[2][2] = cosangle;R[0][2] = sinangle;R[2][0] = -sinangle;return R;
}Matrix rotation_z(float angle) {angle = angle * PI / 180;float sinangle = sin(angle);float cosangle = cos(angle);Matrix R = Matrix::identity(4);R[0][0] = R[1][1] = cosangle;R[0][1] = -sinangle;R[1][0] = sinangle;return R;
}int main(int argc, char** argv)
{const PNGColor white = PNGColor(255, 255, 255, 255);const PNGColor black = PNGColor(0, 0, 0, 255);const PNGColor red = PNGColor(255, 0, 0, 255);const PNGColor green = PNGColor(0, 255, 0, 255);const PNGColor blue = PNGColor(0, 0, 255, 255);const PNGColor yellow = PNGColor(255, 255, 0, 255);Model *model = NULL;const int width = 500;const int height = 500;const int depth = 255;Vec3f eye(0.5, 1.5, 4);Vec3f center(0, 0, 0);Matrix Projection = Matrix::projection(eye, center);Matrix ViewPort = Matrix::viewport(width / 4, width / 4, width / 2, height / 2, depth);//generate some imagePNGImage image(width, height, PNGImage::RGBA); //Error when RGB because lodepng_get_raw_size_lct(w, h, colortype, bitdepth) > in.size() in encodeimage.init(black);model = new Model("cube.obj");for (int i = 0; i < model->nfaces(); i++){std::vector<int> face = model->face(i);for (int j = 0; j < (int)face.size(); j++){Vec3f wp0 = model->vert(face[j]);Vec3f wp1 = model->vert(face[(j + 1) % face.size()]);Matrix S0 = scale(0.5, 0.5, 0.5);Vec3f swp0 = S0 * wp0;Vec3f swp1 = S0 * wp1;// for comparing - draw the model after scaled Vec3f op0 = ViewPort * Projection * swp0;Vec3f op1 = ViewPort * Projection * swp1;line(op0, op1, image, white);// Please add the code here/********** Begin ********///3) 将白色立方体的顶点坐标向x轴正方向平移1.2个单位距离,然后绘制一个红色立方形Matrix S1 = translation(Vec3f(1.2,0.0,0.0));op0 = ViewPort * Projection *S1 * swp0;op1 = ViewPort * Projection *S1 * swp1;line(op0, op1, image, red);// (4) 将白色立方体的顶点坐标沿y轴逆时针方向旋转30度,再向x轴负方向平移1.3个单位距离,然后绘制一个绿色正方形//    Matrix rotation_y(float angle)Matrix S3 = rotation_y(30.0);Matrix S4 = translation(Vec3f(-1.3,0.0,0.0));op0 = ViewPort * Projection *S4 *S3 * swp0;op1 = ViewPort * Projection *S4 *S3 * swp1;line(op0, op1, image,green );/********** End *********/}}image.flip_vertically(); // i want to have the origin at the left bottom corner of the imageimage.write_png_file("../img_step1/test.png");delete model;return 0;
}
第2关:观察变换
一. 任务描述
1. 本关任务
(1) 理解观察变换基本原理,将lookat函数中空白部分补充完整; (2) 将main函数中的参数补充完整。
2. 输入
(1) 代码将自动输入一个边长为1的obj正方体模型,具体模型如下图:
(2) 相机坐标为(0, 1.5, 4),中心点坐标为(0,0,0),向上的矢量为Vec3f(0, 1, 0)
3. 输出
具体结果如下图所示:

#include <vector>
#include <cmath>
#include <algorithm>
#include <iostream>
#include "model.h"
#include "geometry.h"
#include "pngimage.h"using namespace std;
const double PI = acos(-1.0);void line(Vec3i p0, Vec3i p1, PNGImage  &image, PNGColor color)
{bool steep = false;if (std::abs(p0.x - p1.x) < std::abs(p0.y - p1.y)){std::swap(p0.x, p0.y);std::swap(p1.x, p1.y);steep = true;}if (p0.x > p1.x){std::swap(p0.x, p1.x);std::swap(p0.y, p1.y);}int dx = p1.x - p0.x;int dy = std::abs(p1.y - p0.y);int y = p0.y;int d = -dx;for (int x = p0.x; x <= p1.x; x++){if (steep)image.set(y, x, color);elseimage.set(x, y, color);d = d + 2 * dy;if (d > 0){y += (p1.y > p0.y ? 1 : -1);d = d - 2 * dx;}}
}Matrix lookat(Vec3f eye, Vec3f center, Vec3f up) {Matrix res = Matrix::identity(4);// Please add the code here/********** Begin ********/Vec3f z = (eye - center).normalize();Vec3f x = (up^z).normalize();Vec3f y = (z^x).normalize();for (int i = 0; i < 3; i++) {res[0][i] = x[i];res[1][i] = y[i];res[2][i] = z[i];res[i][3] = -center[i];}/********** End ********/return res;
}Matrix translation(Vec3f v) {Matrix Tr = Matrix::identity(4);Tr[0][3] = v.x;Tr[1][3] = v.y;Tr[2][3] = v.z;return Tr;
}Matrix scale(float factorX, float factorY, float factorZ)
{Matrix Z = Matrix::identity(4);Z[0][0] = factorX;Z[1][1] = factorY;Z[2][2] = factorZ;return Z;
}Matrix rotation_x(float angle)
{angle = angle * PI / 180;float sinangle = sin(angle);float cosangle = cos(angle);Matrix R = Matrix::identity(4);R[1][1] = R[2][2] = cosangle;R[1][2] = -sinangle;R[2][1] = sinangle;return R;
}Matrix rotation_y(float angle)
{angle = angle * PI / 180;float sinangle = sin(angle);float cosangle = cos(angle);Matrix R = Matrix::identity(4);R[0][0] = R[2][2] = cosangle;R[0][2] = sinangle;R[2][0] = -sinangle;return R;
}Matrix rotation_z(float angle) {angle = angle * PI / 180;float sinangle = sin(angle);float cosangle = cos(angle);Matrix R = Matrix::identity(4);R[0][0] = R[1][1] = cosangle;R[0][1] = -sinangle;R[1][0] = sinangle;return R;
}int main(int argc, char** argv)
{const PNGColor white = PNGColor(255, 255, 255, 255);const PNGColor black = PNGColor(0, 0, 0, 255);const PNGColor red = PNGColor(255, 0, 0, 255);const PNGColor green = PNGColor(0, 255, 0, 255);const PNGColor blue = PNGColor(0, 0, 255, 255);const PNGColor yellow = PNGColor(255, 255, 0, 255);Model *model = NULL;const int width = 500;const int height = 500;const int depth = 255;// Please add the code here/********** Begin ********/Vec3f eye(0 ,1.5  ,4  );Vec3f center( 0, 0 ,0  );Matrix ModelView = lookat(eye, center, Vec3f( 0, 1 ,0  ));// Please add the code here/********** Begin ********/Matrix Projection = Matrix::projection(eye, center);Matrix ViewPort = Matrix::viewport(width / 4, width / 4, width / 2, height / 2, depth);//generate some imagePNGImage image(width, height, PNGImage::RGBA); //Error when RGB because lodepng_get_raw_size_lct(w, h, colortype, bitdepth) > in.size() in encodeimage.init(black);model = new Model("cube.obj");for (int i = 0; i < model->nfaces(); i++){std::vector<int> face = model->face(i);for (int j = 0; j < (int)face.size(); j++){Vec3f wp0 = model->vert(face[j]);Vec3f wp1 = model->vert(face[(j + 1) % face.size()]);Matrix S0 = scale(0.5, 0.5, 0.5);Vec3f swp0 = S0 * wp0;Vec3f swp1 = S0 * wp1;Vec3f sp0 = ViewPort*Projection*ModelView*swp0;Vec3f sp1 = ViewPort*Projection*ModelView*swp1;line(sp0, sp1, image, red);}}image.flip_vertically(); // i want to have the origin at the left bottom corner of the imageimage.write_png_file("../img_step2/test.png");delete model;return 0;
}
第3关:视口变换
一. 任务描述
1. 本关任务
(1) 理解视口变换的方法; (3) 根据视口变换的方法将viewport函数中的空白部分补充完整,并将main函数中的参数补充完整。
2. 输入
(1) 代码将自动输入一个边长为1的obj正方体模型,具体模型如下图:
(2) 视口矩阵中参数x、y的大小为宽度(width)的四分之一,参数w的大小为宽度的一半(width),参数h的大小为高度的一半(height),参数d=255。
3. 输出
具体结果如下图所示:
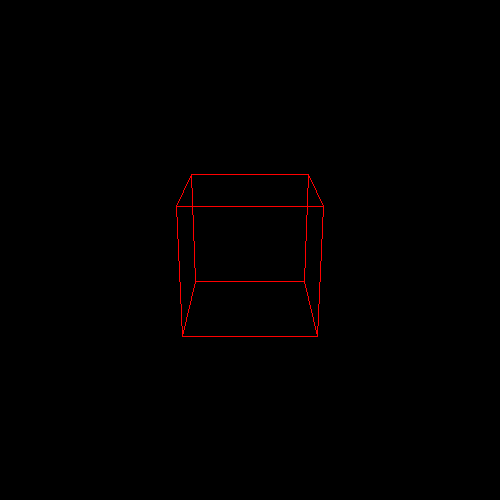
#include <vector>
#include <cmath>
#include <algorithm>
#include <iostream>
#include "model.h"
#include "geometry.h"
#include "pngimage.h"using namespace std;
const double PI = acos(-1.0);void line(Vec3i p0, Vec3i p1, PNGImage  &image, PNGColor color)
{bool steep = false;if (std::abs(p0.x - p1.x) < std::abs(p0.y - p1.y)){std::swap(p0.x, p0.y);std::swap(p1.x, p1.y);steep = true;}if (p0.x > p1.x){std::swap(p0.x, p1.x);std::swap(p0.y, p1.y);}int dx = p1.x - p0.x;int dy = std::abs(p1.y - p0.y);int y = p0.y;int d = -dx;for (int x = p0.x; x <= p1.x; x++){if (steep)image.set(y, x, color);elseimage.set(x, y, color);d = d + 2 * dy;if (d > 0){y += (p1.y > p0.y ? 1 : -1);d = d - 2 * dx;}}
}Matrix viewport(int x, int y, int w, int h, int depth) {Matrix m = Matrix::identity(4);// Please add the code here/********** Begin ********/m[0][0]=w/2;m[0][3]=x+(w/2);m[1][1]=h/2;m[1][3]=y+h/2;m[2][2]=255/2;m[2][3]=255/2;m[3][3]=1;/********** End **********/return m;
}Matrix lookat(Vec3f eye, Vec3f center, Vec3f up) {Vec3f z = (eye - center).normalize();Vec3f x = (up^z).normalize();Vec3f y = (z^x).normalize();Matrix res = Matrix::identity(4);for (int i = 0; i < 3; i++) {res[0][i] = x[i];res[1][i] = y[i];res[2][i] = z[i];res[i][3] = -center[i];}return res;
}Matrix translation(Vec3f v) {Matrix Tr = Matrix::identity(4);Tr[0][3] = v.x;Tr[1][3] = v.y;Tr[2][3] = v.z;return Tr;
}Matrix scale(float factorX, float factorY, float factorZ)
{Matrix Z = Matrix::identity(4);Z[0][0] = factorX;Z[1][1] = factorY;Z[2][2] = factorZ;return Z;
}Matrix rotation_x(float angle)
{angle = angle * PI / 180;float sinangle = sin(angle);float cosangle = cos(angle);Matrix R = Matrix::identity(4);R[1][1] = R[2][2] = cosangle;R[1][2] = -sinangle;R[2][1] = sinangle;return R;
}Matrix rotation_y(float angle)
{angle = angle * PI / 180;float sinangle = sin(angle);float cosangle = cos(angle);Matrix R = Matrix::identity(4);R[0][0] = R[2][2] = cosangle;R[0][2] = sinangle;R[2][0] = -sinangle;return R;
}Matrix rotation_z(float angle) {angle = angle * PI / 180;float sinangle = sin(angle);float cosangle = cos(angle);Matrix R = Matrix::identity(4);R[0][0] = R[1][1] = cosangle;R[0][1] = -sinangle;R[1][0] = sinangle;return R;
}int main(int argc, char** argv)
{const PNGColor white = PNGColor(255, 255, 255, 255);const PNGColor black = PNGColor(0, 0, 0, 255);const PNGColor red = PNGColor(255, 0, 0, 255);const PNGColor green = PNGColor(0, 255, 0, 255);const PNGColor blue = PNGColor(0, 0, 255, 255);const PNGColor yellow = PNGColor(255, 255, 0, 255);Model *model = NULL;Vec3f eye(0, 1.5, 4);Vec3f center(0, 0, 0);Matrix ModelView = lookat(eye, center, Vec3f(0, 1, 0));Matrix Projection = Matrix::projection(eye, center);const int width = 500;const int height = 500;const int depth = 255;// Please add the code here/********** Begin ********/Matrix ViewPort = viewport(width/4,width/4,width/2,height/2,depth);/********** End **********///generate some imagePNGImage image(width, height, PNGImage::RGBA); //Error when RGB because lodepng_get_raw_size_lct(w, h, colortype, bitdepth) > in.size() in encodeimage.init(black);model = new Model("cube.obj");for (int i = 0; i < model->nfaces(); i++){std::vector<int> face = model->face(i);for (int j = 0; j < (int)face.size(); j++){Vec3f wp0 = model->vert(face[j]);Vec3f wp1 = model->vert(face[(j + 1) % face.size()]);Matrix S0 = scale(0.5, 0.5, 0.5);Vec3f swp0 = S0 * wp0;Vec3f swp1 = S0 * wp1;Vec3f sp0 = ViewPort*Projection*ModelView*swp0;Vec3f sp1 = ViewPort*Projection*ModelView*swp1;line(sp0, sp1, image, red);}}image.flip_vertically(); // i want to have the origin at the left bottom corner of the imageimage.write_png_file("../img_step3/test.png");delete model;return 0;
}
投影变换v1.0
第1关:立方体透视投影
一.任务描述
根据提示,在右侧修改代码,并自己绘制出图形。平台会对你编写的代码进行测试。
1.本关任务
学习了解三维图形几何变换原理。 理解掌握OpenGL三维图形几何变换的方法。 理解掌握OpenGL程序的模型视图变换。 掌握OpenGL三维图形显示与观察的原理与实现。
2.预期输出
3.具体要求
(1).背景色为黑色,用 glclearcolor 来完成; (2).运用glPushMatrix()函数和glPopMatrix()函数进行矩阵操作,以中心为绘制原点,设置前景色为红色glColor3f(1.0, 0.0, 0.0),绘制单位立方体线框,用glutWireCube(1.0)完成; (3).运用glPushMatrix()函数和glPopMatrix()函数进行矩阵操作,设置前景色为黑色glColor3f(0.0, 1.0, 0.0),设置线宽为2.0用glLineWidth(2.0)完成,将原单位立方体线框沿X轴正方向平移2.0;
(4).运用glPushMatrix()函数和glPopMatrix()函数进行矩阵操作,沿X轴负方向平移2.0,设置前景色为蓝色glColor3f(0.0, 0.0, 1.0),绘制单位立方体实体用glutSolidCube(1.0)完成; (5).由图可知,中间红色为一点透视。右边绿色和左边蓝色为两点透视。通过glRotatef()旋转绿色立方体来,完成蓝色立方体的三点透视。将绿色立方体绕X轴旋转+30度。
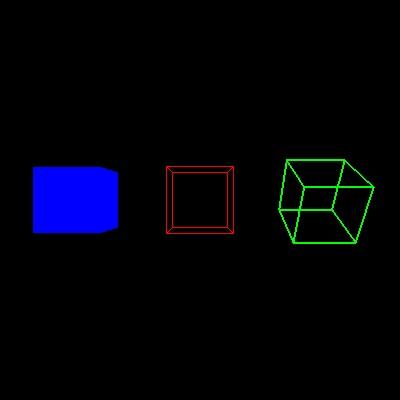
// 提示:在合适的地方修改或添加代码
#include <GL/freeglut.h>
#include<stdio.h>// 评测代码所用头文件-开始
#include<opencv2/core/core.hpp>
#include<opencv2/highgui/highgui.hpp>
#include<opencv2/imgproc/imgproc.hpp>
// 评测代码所用头文件-结束GLint winWidth = 400, winHeight =400 ; 	      //设置初始化窗口大小/*观察坐标系参数设置*/
GLfloat x0 = 0.0, yy = 0.0, z0 = 5.0;	   //设置观察坐标系原点
GLfloat xref = 0.0, yref = 0.0, zref = 0.0;	//设置观察坐标系参考点(视点)
GLfloat Vx = 0.0, Vy = 1.0, Vz = 0.0;	   //设置观察坐标系向上向量(y轴) /*观察体参数设置 */
GLfloat xwMin = -1.0, ywMin = -1.0, xwMax = 1.0, ywMax = 1.0;//设置裁剪窗口坐标范围
GLfloat dnear = 1.5, dfar = 20.0;	      //设置远、近裁剪面深度范围void init(void)
{glClearColor(0.0, 0.0, 0.0, 0.0);
}
void display(void)
{glClear(GL_COLOR_BUFFER_BIT);glLoadIdentity();/*观察变换*/gluLookAt(x0, yy, z0, xref, yref, zref, Vx, Vy, Vz);        //指定三维观察参数// 请在此添加你的代码/********** Begin ********/glPushMatrix();glColor3f(1.0, 0.0, 0.0);    //设置前景色为红色glutWireCube(1.0);   //绘制单位立方体线框glPopMatrix();glPushMatrix();glColor3f(0.0, 1.0, 0.0);    //设置前景色为黑色glLineWidth(2.0);             //设置线宽glRotatef(30,1,0,0);glTranslatef(2.0f, 0.0f, 0.0f);glutWireCube(1.0);   //绘制单位立方体线框glPopMatrix();glPushMatrix();glTranslatef(-2.0f, 0.0f, 0.0f);glColor3f(0.0, 0.0, 1.0);glutSolidCube(1.0);    //绘制单位立方体实体glPopMatrix();/********** End **********/glFlush();
}void reshape(GLint newWidth, GLint newHeight)
{/*视口变换*/glViewport(0, 0, newWidth, newHeight);	//定义视口大小/*投影变换*/glMatrixMode(GL_PROJECTION);glLoadIdentity();/*透视投影,设置透视观察体*/glFrustum(xwMin, xwMax, ywMin, ywMax, dnear, dfar);/*模型变换*/glMatrixMode(GL_MODELVIEW);winWidth = newWidth;winHeight = newHeight;
}
int main(int argc, char* argv[])
{glutInit(&argc, argv);glutInitWindowPosition(100, 100);glutInitWindowSize( 400 , 400 );        //设置初始化窗口大小glutCreateWindow("三维观察");init();glutDisplayFunc(display);glutReshapeFunc(reshape);glutMainLoopEvent();/*************以下为评测代码,与本次实验内容无关,请勿修改**************/GLubyte* pPixelData = (GLubyte*)malloc(800 * 400 * 3);//分配内存GLint viewport[4] = { 0 };glReadBuffer(GL_FRONT);glPixelStorei(GL_UNPACK_ALIGNMENT, 4);glGetIntegerv(GL_VIEWPORT, viewport);glReadPixels(viewport[0], viewport[1], viewport[2], viewport[3], GL_RGB, GL_UNSIGNED_BYTE, pPixelData);cv::Mat img;std::vector<cv::Mat> imgPlanes;img.create(400, 400, CV_8UC3);cv::split(img, imgPlanes);for (int i = 0; i < 400; i++) {unsigned char* plane0Ptr = imgPlanes[0].ptr<unsigned char>(i);unsigned char* plane1Ptr = imgPlanes[1].ptr<unsigned char>(i);unsigned char* plane2Ptr = imgPlanes[2].ptr<unsigned char>(i);for (int j = 0; j < 400; j++) {int k = 3 * (i * 400 + j);plane2Ptr[j] = pPixelData[k];plane1Ptr[j] = pPixelData[k + 1];plane0Ptr[j] = pPixelData[k + 2];}}cv::merge(imgPlanes, img);cv::flip(img, img, 0);cv::namedWindow("openglGrab");cv::imshow("openglGrab", img);//cv::waitKey();cv::imwrite("../img_step4/test.jpg", img);return 0;
}
第2关:立方体平行投影
一.任务描述
根据提示,在右侧修改代码,并自己绘制出图形。平台会对你编写的代码进行测试。
1.本关任务
学习了解三维图形几何变换原理。 理解掌握OpenGL三维图形几何变换的方法。 理解掌握OpenGL程序的模型视图变换。 掌握OpenGL三维图形显示与观察的原理与实现。
2.预期输出
3.具体要求
(1).背景色为黑色,用 glclearcolor 来完成;
(2).运用glPushMatrix()函数和glPopMatrix()函数进行矩阵操作,以中心为绘制原点,设置前景色为红色glColor3f(1.0, 0.0, 0.0),绘制单位立方体线框,用glutWireCube(1.0)完成;
(3).运用glPushMatrix()函数和glPopMatrix()函数进行矩阵操作,设置前景色为黑色glColor3f(0.0, 1.0, 0.0),设置线宽为2.0用glLineWidth(2.0)完成,将原单位立方体线框沿X轴正方向平移2.0;
(4).运用glPushMatrix()函数和glPopMatrix()函数进行矩阵操作,沿X轴负方向平移2.0,设置前景色为蓝色glColor3f(0.0, 0.0, 1.0),绘制单位立方体实体用glutSolidCube(1.0)完成;(5).进行平行投影调用glOrtho()函数,坐标为(左,右,下,上,近,远),坐标为glOrtho(-3.0, 3.0, -3.0, 3.0,-100.0, 100.0);

// 提示:在合适的地方修改或添加代码
#include <GL/freeglut.h>
#include<stdio.h>// 评测代码所用头文件-开始
#include<opencv2/core/core.hpp>
#include<opencv2/highgui/highgui.hpp>
#include<opencv2/imgproc/imgproc.hpp>
// 评测代码所用头文件-结束GLint winWidth = 400, winHeight =400 ; 	      //设置初始化窗口大小/*观察坐标系参数设置*/
GLfloat x0 = 0.0, yy = 0.0, z0 = 5.0;	   //设置观察坐标系原点
GLfloat xref = 0.0, yref = 0.0, zref = 0.0;	//设置观察坐标系参考点(视点)
GLfloat Vx = 0.0, Vy = 1.0, Vz = 0.0;	   //设置观察坐标系向上向量(y轴) /*观察体参数设置 */
GLfloat xwMin = -1.0, ywMin = -1.0, xwMax = 1.0, ywMax = 1.0;//设置裁剪窗口坐标范围
GLfloat dnear = 1.5, dfar = 20.0;	      //设置远、近裁剪面深度范围void init(void)
{glClearColor(0.0, 0.0, 0.0, 0.0);
}
void display(void)
{glClear(GL_COLOR_BUFFER_BIT);glLoadIdentity();/*观察变换*/gluLookAt(x0, yy, z0, xref, yref, zref, Vx, Vy, Vz);        //指定三维观察参数// 请在此添加你的代码/********** Begin ********/glPushMatrix();glColor3f(1.0, 0.0, 0.0);    //设置前景色为红色glutWireCube(1.0);   //绘制单位立方体线框glPopMatrix();glPushMatrix();glColor3f(0.0, 1.0, 0.0);    //设置前景色为黑色glLineWidth(2.0);             //设置线宽glTranslatef(2.0f, 0.0f, 0.0f);glutWireCube(1.0);   //绘制单位立方体线框glPopMatrix();glPushMatrix();glTranslatef(-2.0f, 0.0f, 0.0f);glColor3f(0.0, 0.0, 1.0);glutSolidCube(1.0);    //绘制单位立方体实体glPopMatrix();/********** End **********/glFlush();
}void reshape(GLint newWidth, GLint newHeight)
{/*视口变换*/glViewport(0, 0, newWidth, newHeight);	//定义视口大小/*投影变换*/glMatrixMode(GL_PROJECTION);glLoadIdentity();/*平行投影*/glOrtho( -3,3 ,-3 ,3 ,-100 ,100 );/*模型变换*/glMatrixMode(GL_MODELVIEW);winWidth = newWidth;winHeight = newHeight;
}
int main(int argc, char* argv[])
{glutInit(&argc, argv);glutInitWindowPosition(100, 100);glutInitWindowSize( 400 , 400 );        //设置初始化窗口大小glutCreateWindow("三维观察");init();glutDisplayFunc(display);glutReshapeFunc(reshape);glutMainLoopEvent();/*************以下为评测代码,与本次实验内容无关,请勿修改**************/GLubyte* pPixelData = (GLubyte*)malloc(800 * 400 * 3);//分配内存GLint viewport[4] = { 0 };glReadBuffer(GL_FRONT);glPixelStorei(GL_UNPACK_ALIGNMENT, 4);glGetIntegerv(GL_VIEWPORT, viewport);glReadPixels(viewport[0], viewport[1], viewport[2], viewport[3], GL_RGB, GL_UNSIGNED_BYTE, pPixelData);cv::Mat img;std::vector<cv::Mat> imgPlanes;img.create(400, 400, CV_8UC3);cv::split(img, imgPlanes);for (int i = 0; i < 400; i++) {unsigned char* plane0Ptr = imgPlanes[0].ptr<unsigned char>(i);unsigned char* plane1Ptr = imgPlanes[1].ptr<unsigned char>(i);unsigned char* plane2Ptr = imgPlanes[2].ptr<unsigned char>(i);for (int j = 0; j < 400; j++) {int k = 3 * (i * 400 + j);plane2Ptr[j] = pPixelData[k];plane1Ptr[j] = pPixelData[k + 1];plane0Ptr[j] = pPixelData[k + 2];}}cv::merge(imgPlanes, img);cv::flip(img, img, 0);cv::namedWindow("openglGrab");cv::imshow("openglGrab", img);//cv::waitKey();cv::imwrite("../img_step3/test.jpg", img);return 0;
}
投影变换v2.0
第1关:一点透视
一. 任务描述
1. 本关任务
(1) 理解透视投影变换的方法; (2) 将projection函数和main函数中的空白部分补充完整。
2. 输入
(1) 代码将自动输入一个边长为1的obj正方体模型,具体模型如下图:
(2) 代码自动将模型投影到二维平面中心生成一个边长为1的立方体,经过模型变换和投影变换后生成三个绿色的方体,三个立方体的投影变换eye的坐标均为(0,0,5),具体图片如下所示:
(3) 参考已有代码,将中心立绿色方体的顶点分别向y轴负方向平移1.2个单位,绘制一个红色立方体。再将红色立方体顶点分别向x轴正,负两个方向平移1.2个单位,绘制两个红色立方体。三个立方体的投影变换eye的坐标均为(0,0,4); (4) 将中心绿色立方体的顶点分别向y轴正方向平移1.2个单位,绘制一个黄色立方体。再将黄色立方体顶点分别向x轴正,负两个方向平移1.2个单位,绘制两个黄色立方体。三个立方体的投影变换eye的坐标均为(0,0,8);
3. 输出
具体结果如下图所示:

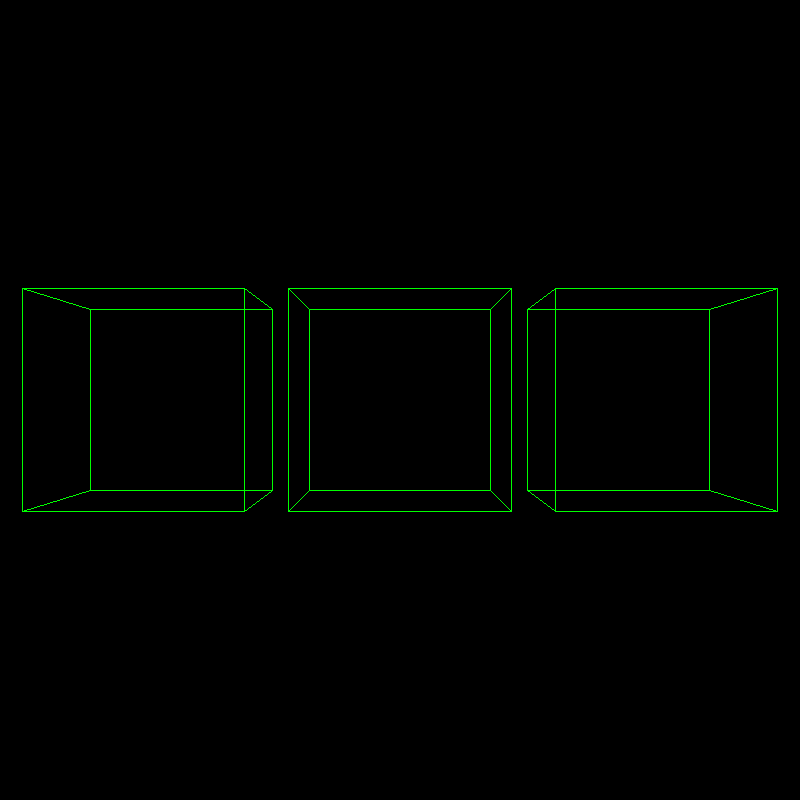
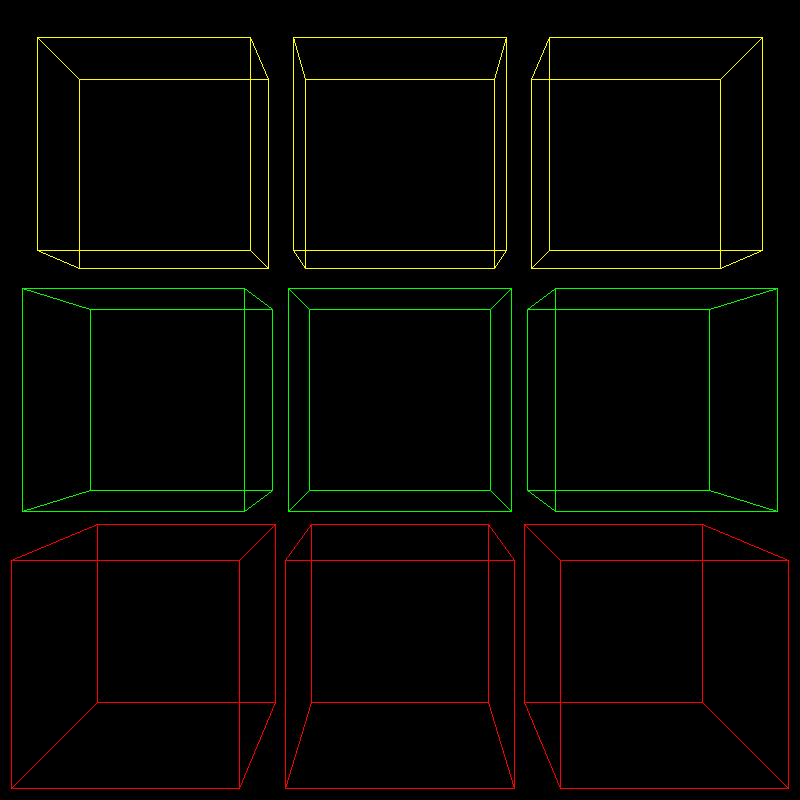
#include <vector>
#include <cmath>
#include <algorithm>
#include <iostream>
#include "model.h"
#include "geometry.h"
#include "pngimage.h"
using namespace std;
const double PI = acos(-1.0);
void line(Vec3i p0, Vec3i p1, PNGImage  &image, PNGColor color)
{bool steep = false;if (std::abs(p0.x - p1.x) < std::abs(p0.y - p1.y)){std::swap(p0.x, p0.y);std::swap(p1.x, p1.y);steep = true;}if (p0.x > p1.x){std::swap(p0.x, p1.x);std::swap(p0.y, p1.y);}int dx = p1.x - p0.x;int dy = std::abs(p1.y - p0.y);int y = p0.y;int d = -dx;for (int x = p0.x; x <= p1.x; x++){if (steep)image.set(y, x, color);elseimage.set(x, y, color);d = d + 2 * dy;if (d > 0){y += (p1.y > p0.y ? 1 : -1);d = d - 2 * dx;}}
}
Matrix projection(Vec3f eye, Vec3f center)
{Matrix m = Matrix::identity(4);// Please add the code here/********** Begin ********/m[3][2] = -1.f / (eye - center).norm();/********** End **********/return m;
}
Matrix viewport(int x, int y, int w, int h, int depth) {Matrix m = Matrix::identity(4);m[0][3] = x + w / 2.f;m[1][3] = y + h / 2.f;m[2][3] = depth / 2.f;m[0][0] = w / 2.f;m[1][1] = h / 2.f;m[2][2] = depth / 2.f;return m;
}
Matrix lookat(Vec3f eye, Vec3f center, Vec3f up) {Vec3f z = (eye - center).normalize();Vec3f x = (up^z).normalize();Vec3f y = (z^x).normalize();Matrix res = Matrix::identity(4);for (int i = 0; i < 3; i++) {res[0][i] = x[i];res[1][i] = y[i];res[2][i] = z[i];res[i][3] = -center[i];}return res;
}
Matrix translation(Vec3f v) {Matrix Tr = Matrix::identity(4);Tr[0][3] = v.x;Tr[1][3] = v.y;Tr[2][3] = v.z;return Tr;
}
Matrix scale(float factorX, float factorY, float factorZ)
{Matrix Z = Matrix::identity(4);Z[0][0] = factorX;Z[1][1] = factorY;Z[2][2] = factorZ;return Z;
}
Matrix rotation_x(float angle)
{angle = angle * PI / 180;float sinangle = sin(angle);float cosangle = cos(angle);Matrix R = Matrix::identity(4);R[1][1] = R[2][2] = cosangle;R[1][2] = -sinangle;R[2][1] = sinangle;return R;
}
Matrix rotation_y(float angle)
{angle = angle * PI / 180;float sinangle = sin(angle);float cosangle = cos(angle);Matrix R = Matrix::identity(4);R[0][0] = R[2][2] = cosangle;R[0][2] = sinangle;R[2][0] = -sinangle;return R;
}
Matrix rotation_z(float angle) {angle = angle * PI / 180;float sinangle = sin(angle);float cosangle = cos(angle);Matrix R = Matrix::identity(4);R[0][0] = R[1][1] = cosangle;R[0][1] = -sinangle;R[1][0] = sinangle;return R;
}
int main(int argc, char** argv)
{const PNGColor white = PNGColor(255, 255, 255, 255);const PNGColor black = PNGColor(0, 0, 0, 255);const PNGColor red = PNGColor(255, 0, 0, 255);const PNGColor green = PNGColor(0, 255, 0, 255);const PNGColor blue = PNGColor(0, 0, 255, 255);const PNGColor yellow = PNGColor(255, 255, 0, 255);Model *model = NULL;const int width = 800;const int height = 800;const int depth = 255;Vec3f center(0, 0, 0);Matrix ViewPort = viewport(width / 4, width / 4, width / 2, height / 2, depth);//generate some imagePNGImage image(width, height, PNGImage::RGBA); image.init(black);model = new Model("cube.obj");for (int i = 0; i < model->nfaces(); i++){std::vector<int> face = model->face(i);for (int j = 0; j < (int)face.size(); j++){Vec3f wp0 = model->vert(face[j]);Vec3f wp1 = model->vert(face[(j + 1) % face.size()]);Matrix S0 = scale(0.5, 0.5, 0.5);Vec3f swp0 = S0 * wp0;Vec3f swp1 = S0 * wp1;// 一点透视 float t[3] = { -1.2, 0, 1.2 };Matrix ModelView = Matrix::identity(4);PNGColor clr[3] = { red, green, yellow };Vec3f eye2(0, 0, 5);Matrix Projection2 = projection(eye2, center);for (int j = 0; j < 3; j++){ModelView = translation(Vec3f(t[j], t[1], 0));Vec3f op0 = ViewPort * Projection2 * ModelView * swp0;Vec3f op1 = ViewPort * Projection2 * ModelView *swp1;line(op0, op1, image, green);}// Please add the code here/********** Begin ********/Vec3f eye1(0, 0, 4);Matrix Projection1 = projection(eye1, center);for (int j = 0; j < 3; j++){ModelView = translation(Vec3f(t[j], t[0], 0));Vec3f op0 = ViewPort * Projection1 * ModelView * swp0;Vec3f op1 = ViewPort * Projection1 * ModelView *swp1;line(op0, op1, image, red);}Vec3f eye3(0, 0, 8);Matrix Projection3 = projection(eye3, center);for (int j = 0; j < 3; j++){ModelView = translation(Vec3f(t[j], t[2], 0));Vec3f op0 = ViewPort * Projection3 * ModelView * swp0;Vec3f op1 = ViewPort * Projection3 * ModelView *swp1;line(op0, op1, image, yellow);}/********** End **********/}}image.flip_vertically(); // i want to have the origin at the left bottom corner of the imageimage.write_png_file("../img_step1/test.png");delete model;return 0;
}
第2关:两点透视
一. 任务描述
1. 本关任务
(1) 理解透视投影变换的方法; (2) 将main函数中的空白部分补充完整。
2. 输入
(1) 代码将自动输入一个边长为1的obj正方体模型,具体模型如下图:
(2) 代码自动将模型投影到二维平面中心生成一个边长为1的绿色立方体; (3) 改变模型位置,产生两点透视: 将绿色立方体顶点分别沿z轴逆时针旋转45度,向y轴正方向平移1.2个单位,绘制一个红色立方体。再将红色立方体顶点分别向x轴正,负两个方向平移1.2个单位,绘制两个红色立方体。最后对三个红立方体进行投影变换,变换矩阵Projection已给出; (4) 改变视点与模型位置,产生两点透视(先模型变换再观察变换): 首先将立绿色方体的顶点分别向x轴正,负两个方向平移1.2个单位,绘制两个绿色立方体。然后对三个绿色立方体分别进行观察变换,将参数eye沿y轴顺时针旋转45度作为相机坐标,中心点坐标为center,向上矢量为Vec3f(0, 1, 0)。最后对三个绿立方体进行投影变换,变换矩阵Projection已给出; (5) 改变视点与模型位置,产生两点透视(先观察变换再模型变换): 首先对绿色立方体分别进行观察变换,将参数eye沿y轴顺时针旋转45度作为相机坐标,中心点坐标为center,向上矢量为Vec3f(0, 1, 0)。将绿色立方体向y轴负方向平移1.2个单位,绘制一个黄色立方体。再将黄色立方体顶点分别向x轴正,负两个方向平移1.2个单位,绘制两个黄色立方体。最后对三个黄立方体进行投影变换,变换矩阵Projection已给出。
3. 输出
具体结果如下图所示:
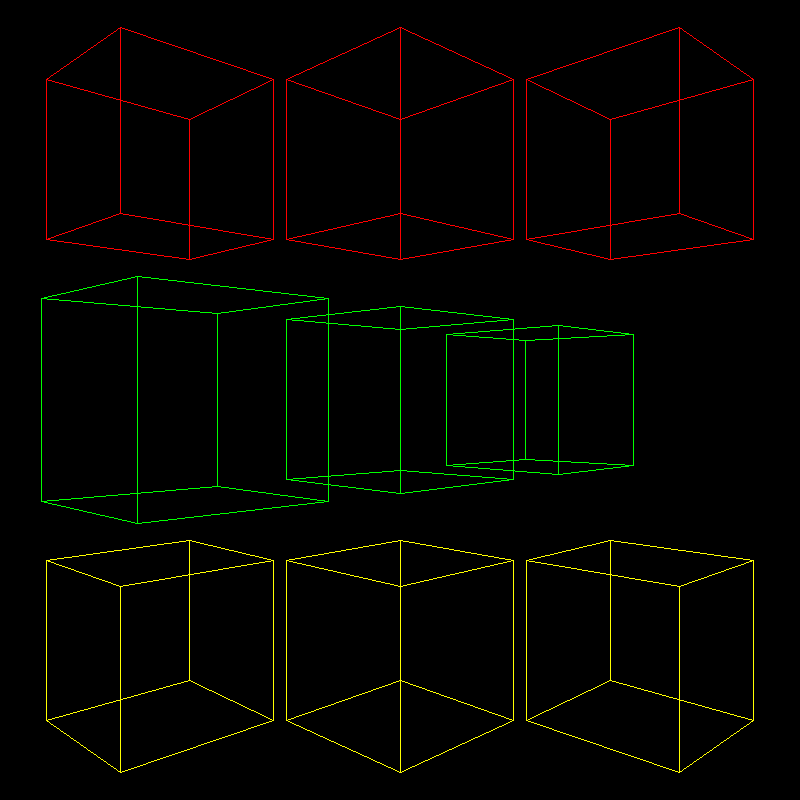
#include <vector>
#include <cmath>
#include <algorithm>
#include <iostream>
#include "model.h"
#include "geometry.h"
#include "pngimage.h"using namespace std;
const double PI = acos(-1.0);void line(Vec3i p0, Vec3i p1, PNGImage  &image, PNGColor color)
{bool steep = false;if (std::abs(p0.x - p1.x) < std::abs(p0.y - p1.y)){std::swap(p0.x, p0.y);std::swap(p1.x, p1.y);steep = true;}if (p0.x > p1.x){std::swap(p0.x, p1.x);std::swap(p0.y, p1.y);}int dx = p1.x - p0.x;int dy = std::abs(p1.y - p0.y);int y = p0.y;int d = -dx;for (int x = p0.x; x <= p1.x; x++){if (steep)image.set(y, x, color);elseimage.set(x, y, color);d = d + 2 * dy;if (d > 0){y += (p1.y > p0.y ? 1 : -1);d = d - 2 * dx;}}
}Matrix projection(Vec3f eye, Vec3f center)
{Matrix m = Matrix::identity(4);m[3][2] = -1.f / (eye - center).norm();return m;
}Matrix viewport(int x, int y, int w, int h, int depth) {Matrix m = Matrix::identity(4);m[0][3] = x + w / 2.f;m[1][3] = y + h / 2.f;m[2][3] = depth / 2.f;m[0][0] = w / 2.f;m[1][1] = h / 2.f;m[2][2] = depth / 2.f;return m;
}Matrix lookat(Vec3f eye, Vec3f center, Vec3f up) {Vec3f z = (eye - center).normalize();Vec3f x = (up^z).normalize();Vec3f y = (z^x).normalize();Matrix res = Matrix::identity(4);for (int i = 0; i < 3; i++) {res[0][i] = x[i];res[1][i] = y[i];res[2][i] = z[i];res[i][3] = -center[i];}return res;
}Matrix translation(Vec3f v) {Matrix Tr = Matrix::identity(4);Tr[0][3] = v.x;Tr[1][3] = v.y;Tr[2][3] = v.z;return Tr;
}Matrix scale(float factorX, float factorY, float factorZ)
{Matrix Z = Matrix::identity(4);Z[0][0] = factorX;Z[1][1] = factorY;Z[2][2] = factorZ;return Z;
}Matrix rotation_x(float angle)
{angle = angle * PI / 180;float sinangle = sin(angle);float cosangle = cos(angle);Matrix R = Matrix::identity(4);R[1][1] = R[2][2] = cosangle;R[1][2] = -sinangle;R[2][1] = sinangle;return R;
}Matrix rotation_y(float angle)
{angle = angle * PI / 180;float sinangle = sin(angle);float cosangle = cos(angle);Matrix R = Matrix::identity(4);R[0][0] = R[2][2] = cosangle;R[0][2] = sinangle;R[2][0] = -sinangle;return R;
}Matrix rotation_z(float angle) {angle = angle * PI / 180;float sinangle = sin(angle);float cosangle = cos(angle);Matrix R = Matrix::identity(4);R[0][0] = R[1][1] = cosangle;R[0][1] = -sinangle;R[1][0] = sinangle;return R;
}int main(int argc, char** argv)
{const PNGColor white = PNGColor(255, 255, 255, 255);const PNGColor black = PNGColor(0, 0, 0, 255);const PNGColor red = PNGColor(255, 0, 0, 255);const PNGColor green = PNGColor(0, 255, 0, 255);const PNGColor blue = PNGColor(0, 0, 255, 255);const PNGColor yellow = PNGColor(255, 255, 0, 255);Model *model = NULL;const int width = 800;const int height = 800;const int depth = 255;//generate some imagePNGImage image(width, height, PNGImage::RGBA); //Error when RGB because lodepng_get_raw_size_lct(w, h, colortype, bitdepth) > in.size() in encodeimage.init(black);model = new Model("cube.obj");Vec3f eye(0, 0, 4);Vec3f center(0, 0, 0);Matrix ModelView = Matrix::identity(4);Matrix Projection = projection(eye, center);Matrix ViewPort = viewport(width / 4, width / 4, width / 2, height / 2, depth);for (int i = 0; i < model->nfaces(); i++){std::vector<int> face = model->face(i);for (int j = 0; j < (int)face.size(); j++){Vec3f wp0 = model->vert(face[j]);Vec3f wp1 = model->vert(face[(j + 1) % face.size()]);Matrix S0 = scale(0.4, 0.4, 0.4);Vec3f swp0 = S0 * wp0;Vec3f swp1 = S0 * wp1;// Please add the code here/********** Begin ********/float tx[3] = { -1.2, 0, 1.2 };for (int i = 0; i < 3; i++){ModelView = translation(Vec3f(tx[i], 1.2, 0)) * rotation_y(45);Vec3f op0 = ViewPort * Projection * ModelView * swp0;Vec3f op1 = ViewPort * Projection * ModelView * swp1;line(op0, op1, image, red);}// 改变视点与模型位置,产生两点透视 // 先模型变换,再视点变换Vec3f eye1 = rotation_y(-45) * eye;for (int j = 0; j < 3; j++){Matrix ModelView1 = lookat(eye1, center, Vec3f(0, 1, 0)) * translation(Vec3f(tx[j], 0, 0));Vec3f vp0 = ViewPort * Projection * ModelView1 * swp0;Vec3f vp1 = ViewPort * Projection * ModelView1 *swp1;line(vp0, vp1, image, green);}// 改变视点与模型位置,产生两点透视 // 先视点变换,再模型变换for (int k = 0; k < 3; k++){    Matrix ModelView1 = translation(Vec3f(tx[k], -1.2, 0)) * lookat(eye1, center, Vec3f(0, 1, 0));Vec3f vp0 = ViewPort * Projection * ModelView1 * swp0;Vec3f vp1 = ViewPort * Projection * ModelView1 *swp1;line(vp0, vp1, image, yellow);}    /********** End ********/}}image.flip_vertically(); // i want to have the origin at the left bottom corner of the imageimage.write_png_file("../img_step2/test.png");delete model;return 0;
}
第3关:三视图与正等测投影
一. 任务描述
1. 本关任务
(1) 理解投影变换的方法; (2) 将main函数中的空白部分补充完整。
2. 输入
(1) 代码将自动输入一个边长为1的obj正方体模型,具体模型如下图:
(2) 代码自动将模型投影到二维平面,经过模型变换,生成一个长宽高不等的立方体; (3) 将立方体沿Z轴向XOY平面正投影,并绘制出一个白色矩形; (4) 将立方体沿Y轴向XOZ平面正投影,然后沿X轴逆时针旋转90度,最后沿着Y轴负方向平移1.2个单位长度,绘制一个红色矩形; (5) 将立方体沿X轴向YOZ平面正投影,然后沿Y轴顺时针旋转90度,最后沿着X轴负方向平移1.2个单位长度,绘制一个绿色矩形; (6) 绘制正等测投影图,将立方体沿Z轴逆时针旋转45度,再沿X轴逆时针旋转35.25度,然后沿Z轴向XOY平面正投影。最后沿着Y轴正方向平移1.2个单位长度,绘制一个黄色立方体;
3. 输出
具体结果如下图所示:
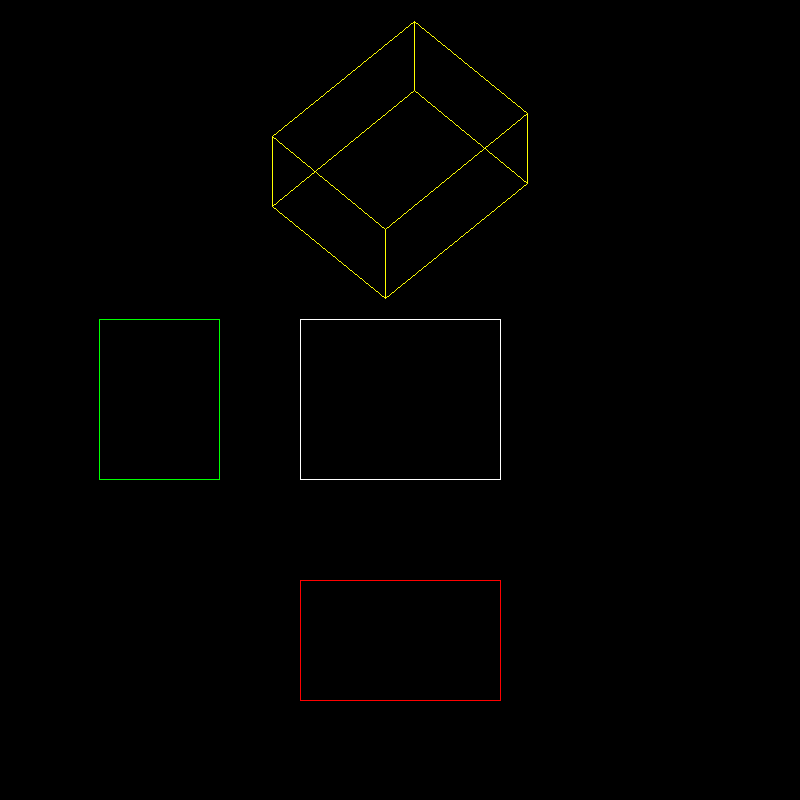
#include <vector>
#include <cmath>
#include <algorithm>
#include <iostream>
#include "model.h"
#include "geometry.h"
#include "pngimage.h"using namespace std;
const double PI = acos(-1.0);void line(Vec3i p0, Vec3i p1, PNGImage  &image, PNGColor color)
{bool steep = false;if (std::abs(p0.x - p1.x) < std::abs(p0.y - p1.y)){std::swap(p0.x, p0.y);std::swap(p1.x, p1.y);steep = true;}if (p0.x > p1.x){std::swap(p0.x, p1.x);std::swap(p0.y, p1.y);}int dx = p1.x - p0.x;int dy = std::abs(p1.y - p0.y);int y = p0.y;int d = -dx;for (int x = p0.x; x <= p1.x; x++){if (steep)image.set(y, x, color);elseimage.set(x, y, color);d = d + 2 * dy;if (d > 0){y += (p1.y > p0.y ? 1 : -1);d = d - 2 * dx;}}
}Matrix projection(Vec3f eye, Vec3f center)
{Matrix m = Matrix::identity(4);m[3][2] = -1.f / (eye - center).norm();return m;
}Matrix viewport(int x, int y, int w, int h, int depth) {Matrix m = Matrix::identity(4);m[0][3] = x + w / 2.f;m[1][3] = y + h / 2.f;m[2][3] = depth / 2.f;m[0][0] = w / 2.f;m[1][1] = h / 2.f;m[2][2] = depth / 2.f;return m;
}Matrix lookat(Vec3f eye, Vec3f center, Vec3f up) {Vec3f z = (eye - center).normalize();Vec3f x = (up^z).normalize();Vec3f y = (z^x).normalize();Matrix res = Matrix::identity(4);for (int i = 0; i < 3; i++) {res[0][i] = x[i];res[1][i] = y[i];res[2][i] = z[i];res[i][3] = -center[i];}return res;
}Matrix translation(Vec3f v) {Matrix Tr = Matrix::identity(4);Tr[0][3] = v.x;Tr[1][3] = v.y;Tr[2][3] = v.z;return Tr;
}Matrix scale(float factorX, float factorY, float factorZ)
{Matrix Z = Matrix::identity(4);Z[0][0] = factorX;Z[1][1] = factorY;Z[2][2] = factorZ;return Z;
}Matrix rotation_x(float angle)
{angle = angle * PI / 180;float sinangle = sin(angle);float cosangle = cos(angle);Matrix R = Matrix::identity(4);R[1][1] = R[2][2] = cosangle;R[1][2] = -sinangle;R[2][1] = sinangle;return R;
}Matrix rotation_y(float angle)
{angle = angle * PI / 180;float sinangle = sin(angle);float cosangle = cos(angle);Matrix R = Matrix::identity(4);R[0][0] = R[2][2] = cosangle;R[0][2] = sinangle;R[2][0] = -sinangle;return R;
}Matrix rotation_z(float angle) {angle = angle * PI / 180;float sinangle = sin(angle);float cosangle = cos(angle);Matrix R = Matrix::identity(4);R[0][0] = R[1][1] = cosangle;R[0][1] = -sinangle;R[1][0] = sinangle;return R;
}int main(int argc, char** argv)
{const PNGColor white = PNGColor(255, 255, 255, 255);const PNGColor black = PNGColor(0, 0, 0, 255);const PNGColor red = PNGColor(255, 0, 0, 255);const PNGColor green = PNGColor(0, 255, 0, 255);const PNGColor blue = PNGColor(0, 0, 255, 255);const PNGColor yellow = PNGColor(255, 255, 0, 255);Model *model = NULL;const int width = 800;const int height = 800;const int depth = 255;//generate some imagePNGImage image(width, height, PNGImage::RGBA); //Error when RGB because lodepng_get_raw_size_lct(w, h, colortype, bitdepth) > in.size() in encodeimage.init(black);model = new Model("cube.obj");Matrix ViewPort = viewport(width / 4, width / 4, width / 2, height / 2, depth);for (int i = 0; i < model->nfaces(); i++){std::vector<int> face = model->face(i);for (int j = 0; j < (int)face.size(); j++){Vec3f wp0 = model->vert(face[j]);Vec3f wp1 = model->vert(face[(j + 1) % face.size()]);Matrix S0 = scale(0.5, 0.4, 0.3);Vec3f swp0 = S0 * wp0;Vec3f swp1 = S0 * wp1;/********** Begin ********/Matrix ProjectionX = Matrix::identity(4);ProjectionX[0][0] = 0.0f;Matrix ProjectionY = Matrix::identity(4);ProjectionY[1][1] = 0.0f;Matrix ProjectionZ = Matrix::identity(4);ProjectionZ[2][2] = 0.0f;//沿Z轴向XOY平面投影 Vec3f zp0 = ViewPort * ProjectionZ * swp0;Vec3f zp1 = ViewPort * ProjectionZ * swp1;line(zp0, zp1, image, white);//沿Y轴向XOZ平面投影,再旋转与平移Matrix rx = rotation_x(90);Matrix ty = translation(Vec3f(0, -1.2f, 0));Vec3f yp0 = ViewPort * ty * rx * ProjectionY * swp0;Vec3f yp1 = ViewPort * ty * rx * ProjectionY * swp1;line(yp0, yp1, image, red);//沿X轴向YOZ平面投影,再旋转与平移Matrix ry = rotation_y(-90);Matrix tx = translation(Vec3f(-1.2f, 0, 0));Vec3f xp0 = ViewPort * tx * ry * ProjectionX * swp0;Vec3f xp1 = ViewPort * tx * ry * ProjectionX * swp1;line(xp0, xp1, image, green);//正等测投影图Matrix rz = rotation_z(45);Matrix rx1 = rotation_x(35.25);Matrix ty1 = translation(Vec3f(0, 1.2f, 0));Vec3f rp0 = ViewPort * ty1 * ProjectionZ * rx1 * rz *swp0;Vec3f rp1 = ViewPort * ty1 * ProjectionZ * rx1 * rz *swp1;line(rp0, rp1, image, yellow);/********** end ********/}}image.flip_vertically(); // i want to have the origin at the left bottom corner of the imageimage.write_png_file("../img_step3/test.png");delete model;return 0;
}
第4关:视口变换与三视图
一. 任务描述
1. 本关任务
(1) 理解投影变换的方法; (2) 将main函数中的空白部分补充完整。
2. 输入
(1) 代码将自动输入一个边长为1的obj正方体模型,具体模型如下图:
(2) 代码自动将模型投影到二维平面,经过模型变换,生成一个长宽高不等的立方体,并将显示窗口一分为四,分为四个视口,每个视口大小均为原窗口大小的一半。红绿两线为四个视口的分隔线; (3) 在第一视口ViewPort中,首先将立方体沿Z轴向XOY平面投影。然后进行视口变换ViewPort,并绘制出一个白色矩形; (4) 在第二视口ViewPort1中,首先将立方体沿X轴向YOZ平面投影。然后沿Y轴顺时针旋转90度,最后进行视口变换ViewPort1,绘制一个绿色矩形; (5) 在第三视口ViewPort2中,首先将立方体沿Y轴向XOZ平面投影。然后沿X轴逆时针旋转90度,最后进行视口变换ViewPort2,绘制一个红矩形; (6) 在第四视口ViewPort3中,首先将立方体沿Y轴顺时针旋转45度,然后进行投影变换,投影变换参数eye和center已给出。最后进行视口变换ViewPort3,绘制一个黄色立方体。
3. 输出
具体结果如下图所示:
#include <vector>
#include <cmath>
#include <algorithm>
#include <iostream>
#include "model.h"
#include "geometry.h"
#include "pngimage.h"
using namespace std;
const double PI = acos(-1.0);
void line(Vec3i p0, Vec3i p1, PNGImage  &image, PNGColor color)
{bool steep = false;if (std::abs(p0.x - p1.x) < std::abs(p0.y - p1.y)){std::swap(p0.x, p0.y);std::swap(p1.x, p1.y);steep = true;}if (p0.x > p1.x){std::swap(p0.x, p1.x);std::swap(p0.y, p1.y);}int dx = p1.x - p0.x;int dy = std::abs(p1.y - p0.y);int y = p0.y;int d = -dx;for (int x = p0.x; x <= p1.x; x++){if (steep)image.set(y, x, color);elseimage.set(x, y, color);d = d + 2 * dy;if (d > 0){y += (p1.y > p0.y ? 1 : -1);d = d - 2 * dx;}}
}
Matrix projection(Vec3f eye, Vec3f center)
{Matrix m = Matrix::identity(4);m[3][2] = -1.f / (eye - center).norm();return m;
}
Matrix viewport(int x, int y, int w, int h, int depth) {Matrix m = Matrix::identity(4);m[0][3] = x + w / 2.f;m[1][3] = y + h / 2.f;m[2][3] = depth / 2.f;m[0][0] = w / 2.f;m[1][1] = h / 2.f;m[2][2] = depth / 2.f;return m;
}
Matrix lookat(Vec3f eye, Vec3f center, Vec3f up) {Vec3f z = (eye - center).normalize();Vec3f x = (up^z).normalize();Vec3f y = (z^x).normalize();Matrix res = Matrix::identity(4);for (int i = 0; i < 3; i++) {res[0][i] = x[i];res[1][i] = y[i];res[2][i] = z[i];res[i][3] = -center[i];}return res;
}
Matrix translation(Vec3f v) {Matrix Tr = Matrix::identity(4);Tr[0][3] = v.x;Tr[1][3] = v.y;Tr[2][3] = v.z;return Tr;
}
Matrix scale(float factorX, float factorY, float factorZ)
{Matrix Z = Matrix::identity(4);Z[0][0] = factorX;Z[1][1] = factorY;Z[2][2] = factorZ;return Z;
}
Matrix rotation_x(float angle)
{angle = angle * PI / 180;float sinangle = sin(angle);float cosangle = cos(angle);Matrix R = Matrix::identity(4);R[1][1] = R[2][2] = cosangle;R[1][2] = -sinangle;R[2][1] = sinangle;return R;
}
Matrix rotation_y(float angle)
{angle = angle * PI / 180;float sinangle = sin(angle);float cosangle = cos(angle);Matrix R = Matrix::identity(4);R[0][0] = R[2][2] = cosangle;R[0][2] = sinangle;R[2][0] = -sinangle;return R;
}
Matrix rotation_z(float angle) {angle = angle * PI / 180;float sinangle = sin(angle);float cosangle = cos(angle);Matrix R = Matrix::identity(4);R[0][0] = R[1][1] = cosangle;R[0][1] = -sinangle;R[1][0] = sinangle;return R;
}
int main(int argc, char** argv)
{const PNGColor white = PNGColor(255, 255, 255, 255);const PNGColor black = PNGColor(0, 0, 0, 255);const PNGColor red = PNGColor(255, 0, 0, 255);const PNGColor green = PNGColor(0, 255, 0, 255);const PNGColor blue = PNGColor(0, 0, 255, 255);const PNGColor yellow = PNGColor(255, 255, 0, 255);Model *model = NULL;const int width = 800;const int height = 800;const int depth = 255;//generate some imagePNGImage image(width, height, PNGImage::RGBA); //Error when RGB because lodepng_get_raw_size_lct(w, h, colortype, bitdepth) > in.size() in encodeimage.init(black);model = new Model("cube.obj");Vec3f eye(0, 0, 4);Vec3f center(0, 0, 0);Matrix ProjectionX = Matrix::identity(4);ProjectionX[0][0] = 0.0f;Matrix ProjectionY = Matrix::identity(4);ProjectionY[1][1] = 0.0f;Matrix ProjectionZ = Matrix::identity(4);ProjectionZ[2][2] = 0.0f;Matrix ViewPort = viewport(0, height / 2, width / 2, height / 2, depth);Matrix ViewPort1 = viewport(width / 2, height / 2, width / 2, height / 2, depth);Matrix ViewPort2 = viewport(0, 0, width / 2, height / 2, depth);Matrix ViewPort3 = viewport(width / 2, 0, width / 2, height / 2, depth);// 绘制视口分隔线Vec3f x1(0.f, height / 2, 0.f), x2(width, height / 2, 0.f);Vec3f y1(width / 2, 0.f, 0.f), y2(width / 2, height, 0.f);line(x1, x2, image, red);line(y1, y2, image, green);for (int i = 0; i < model->nfaces(); i++){std::vector<int> face = model->face(i);for (int j = 0; j < (int)face.size(); j++){Vec3f wp0 = model->vert(face[j]);Vec3f wp1 = model->vert(face[(j + 1) % face.size()]);Matrix S0 = scale(0.5, 0.4, 0.3);Vec3f swp0 = S0 * wp0;Vec3f swp1 = S0 * wp1;// Please add the code here/********** Begin ********///沿Z轴向XOY平面投影 Vec3f zp0 = ViewPort * ProjectionZ * swp0;Vec3f zp1 = ViewPort * ProjectionZ * swp1;line(zp0, zp1, image, white);//沿X轴向YOZ平面投影,再旋转与平移Matrix ry = rotation_y(-90);Vec3f xp0 = ViewPort1 * ry * ProjectionX * swp0;Vec3f xp1 = ViewPort1 * ry * ProjectionX * swp1;line(xp0, xp1, image, green);//沿Y轴向XOZ平面投影,再旋转与平移Matrix rx = rotation_x(90);Vec3f yp0 = ViewPort2 * rx * ProjectionY * swp0;Vec3f yp1 = ViewPort2 * rx * ProjectionY * swp1;line(yp0, yp1, image, red);//两点透视图Matrix ModelView = rotation_y(-45);Matrix Projection = projection(eye, center);            Vec3f vp0 = ViewPort3 * Projection * ModelView * swp0;Vec3f vp1 = ViewPort3 * Projection * ModelView * swp1;line(vp0, vp1, image, yellow);/************End**********/}}image.flip_vertically(); // i want to have the origin at the left bottom corner of the imageimage.write_png_file("../img_step4/test.png");delete model;return 0;
}
相关文章:
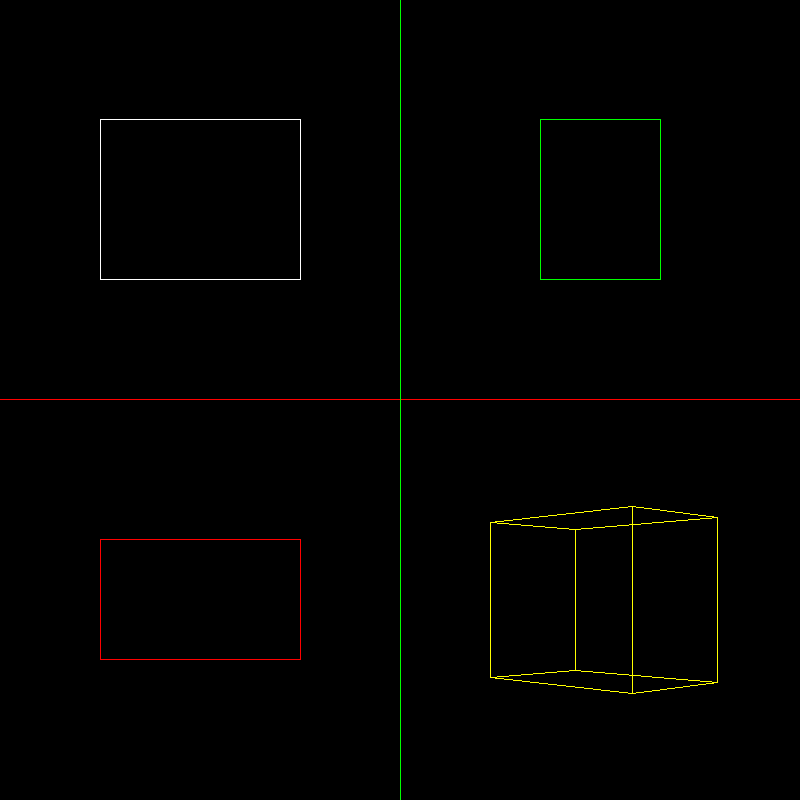
计算机图形学头歌合集(题集附解)
目录 CG1-v1.0-点和直线的绘制 第1关:OpenGL点的绘制 第2关:OpenGL简单图形绘制 第3关:OpenGL直线绘制 第4关:0<1直线绘制-dda算法<> 第5关:0<1直线绘制-中点算法<> 第6关:一般直线绘…...
MacBook Air提供了丰富多彩的截图选项,大到整个屏幕,小到具体的区域
本指南将带你了解在MacBook Air笔记本电脑上进行屏幕截图的各种方法。它涵盖了所有用于截屏的键盘快捷键,还包括如何启动MacBook Air屏幕录制和更改屏幕截图设置的信息。 如何在MacBook Air上进行屏幕截图 在MacBook上进行整个屏幕截图的最快、最简单的方法是使用command+sh…...
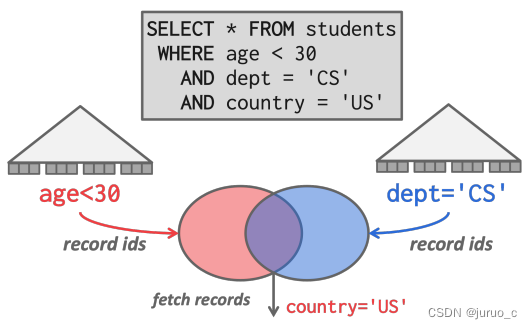
【CMU 15-445】Lecture 12: Query Execution I 学习笔记
Query Execution I Processing ModelsIterator ModelMaterialization ModelVectorization Model Access MethodsSequential ScanIndex Scan Modification QueriesHalloween Problem 本节课主要介绍SQL语句执行的相关机制。 Processing Models 首先是处理模型,它定义…...

低代码开发平台的优势及应用场景分析
文章目录 低代码是什么?低代码起源低代码分类低代码的能力低代码的需求市场需要专业开发者需要数字化转型需要 低代码的趋势如何快速入门低代码开发低代码应用领域 低代码是什么? 低代码(Low-code)是著名研究机构Forrester于2014…...

ES常见查询总结
目录 1:查询总数2:查询所有数据3:查询指定条数4:根据ID查询5:一个查询字符串搜索6:match搜索7:term搜索8:bool搜索9:must多条件匹配查询10:Should满足一个条件查询11: must_not必须不匹配查询12:多个字段查询内容13:一个字段查询多个内容14:通配符和正则匹配15:前缀查询16:短语…...

Spring Boot Docker Compose 支持中文文档
本文为官方文档直译版本。原文链接 Spring Boot Docker Compose 支持中文文档 引言服务连接自定义镜像跳过特定的容器使用特定Compose文件等待容器就绪控制 Docker Compose 的生命周期激活 Docker Compose 配置文件 引言 Docker Compose 是一种流行的技术,可用于为…...
智慧城市/一网统管建设:人员危险行为检测算法,为城市安全保驾护航
随着人们压力的不断增加,经常会看见在日常生活中由于小摩擦造成的大事故。如何在事故发生时进行及时告警,又如何在事故发生后进行证据搜索与事件溯源?旭帆科技智能视频监控人员危险行为/事件检测算法可以给出答案。 全程监控,有源…...
C语言:求和1+1/2-1/3+1/4-1/5+……-1/99+1/100
#include<stdio.h> int main() {int i 0;double sum 0.0;int flag 1;for (i 1;i < 100;i){sum 1.0 / i * flag;flag -flag;}printf("sum%lf\n", sum);return 0; }...

学习什么知识不会过时
近况💁🏻 最近这段时间,我真的很糟糕。工作中满负荷做需求,闲了就想玩游戏放松,业余搞些东西的时间很少。本来就有些焦虑,这种状态下更是有些 suffering。究其原因,都是因为部门转换的问题。 一…...
C# WPF上位机开发(ExtendedWPFToolkit扩展包使用)
【 声明:版权所有,欢迎转载,请勿用于商业用途。 联系信箱:feixiaoxing 163.com】 虽然个人人为当前的c# wpf内容已经足够多,但是肯定还是有很多个性化的需求没有满足。比如说不够好看,比如说动画效果不好&a…...
【IOS开发】传感器 SensorKit
资源 官方文档 https://developer.apple.com/search/?qmotion%20graph&typeDocumentation SensorKit 使应用程序能够访问选定的原始数据或系统从传感器处理的指标。 步骤信息加速度计或旋转速率数据用户手腕上手表的配置物理环境中的环境光有关用户日常通勤或旅行的详细…...
【C++】封装:练习案例-点和圆的关系
练习案例:点和圆的关系 设计一个圆形类(Circle),和一个点类(Point),计算点和圆的关系。 思路: 1)创建点类point.h和point.cpp 2)创建圆类circle.h和circle…...

【vue】正则表达式限制input的输入:
文章目录 1、只能输入大小写字母、数字、下划线:/[^\w_]/g2、只能输入小写字母、数字、下划线:/[^a-z0-9_]/g3、只能输入数字和点:/[^\d.]/g4、只能输入小写字母、数字、下划线:/[^\u4e00-\u9fa5]/g5、只能输入数字:/\…...
.getPrincipal()获取LoginUser对象导致的缓存删除失败问题)
异步导入中使用SecurityUtils.getSubject().getPrincipal()获取LoginUser对象导致的缓存删除失败问题
结论 SecurityUtils.getSubject().getPrincipal()实际用的也是ThreadLocal,而ThreadLocal和线程绑定,异步会导致存数据丢失,注意! 业务背景 最近,系统偶尔会出现excel导入成功,但系统却提示存在进行中的…...
大数据机器学习深度解读决策树算法:技术全解与案例实战
大数据机器学习深度解读决策树算法:技术全解与案例实战 本文深入探讨了机器学习中的决策树算法,从基础概念到高级研究进展,再到实战案例应用,全面解析了决策树的理论及其在现实世界问题中的实际效能。通过技术细节和案例实践&…...

【开源Mongdb驱动】SpringBoot+Mybatis+Mongdb融合使用教程
#【开源Mongdb驱动】SpringBootMybatisMongdb无缝融合使用教程 介绍 本文介绍一款基于JAVA开源的mongodb jdbc驱动为基础的无缝与springbootmybatis融合使用案例 mongodb JDBC 使用案例 https://blog.csdn.net/gongbing798930123/article/details/135002530 《基于开源的JA…...
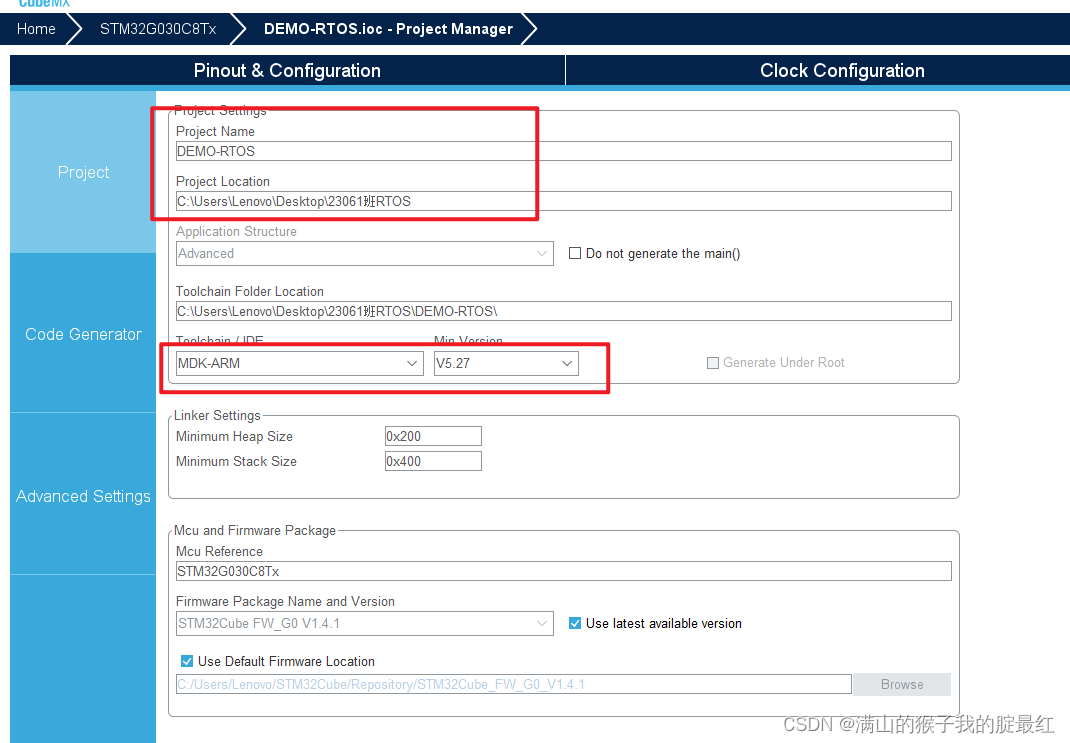
freeRTOS使用
创建第一个FreeRTOS程序 1、官网源码下载 (1)进入FreeRTOS官网FreeRTOS professional services for application and RTOS development and consulting. FreeRTOS is an Open Source Code RTOS (2)点击下载FreeRTOS 2、处理目录 &…...

基于vue的线上点餐系统论文
基于vue的线上点餐系统 摘要 随着信息技术在管理上越来越深入而广泛的应用,管理信息系统的实施在技术上已逐步成熟。本文介绍了线上点餐系统的开发全过程。通过分析线上点餐系统管理的不足,创建了一个计算机管理线上点餐系统的方案。文章介绍了线上点餐…...
【Windows】windows11右键默认显示更多选项的办法
Windows11系统的右键菜单显示,需要多点一次“显示更多选项”才能看到所有菜单内容,按下面步骤简单设置一下就能恢复成Windows经典的右键菜单显示。 1. 2.输入命令【reg.exe add "HKCU\Software\Classes\CLSID\{86ca1aa0-34aa-4e8b-a509-50c905bae2a…...

推荐使用过很好用的api,含免费次数
IP归属地-IPv4城市级:根据IP地址查询归属地信息,支持到城市级,包含国家、省、市、和运营商等信息。IP归属地-IPv6城市级:根据IP地址(IPv6版本)查询归属地信息,支持到中国大陆地区(不…...

ESP32-S3 UF2 Bootloader修复指南:从原理到实战救砖
1. 项目概述:为什么ESP32-S3需要UF2 Bootloader?如果你玩过树莓派Pico或者一些Adafruit的开发板,可能会对那个插上USB后出现的U盘盘符有印象——直接把一个.uf2文件拖进去,固件就更新好了,简单得不像在搞嵌入式开发。这…...

大模型长对话记忆难题:LightMem轻量记忆系统原理与实战
1. 项目概述:当大模型遇上“记忆”瓶颈 最近在折腾大语言模型应用时,我遇到了一个挺典型的问题:想让模型记住更多、更长的对话历史,但无论是直接增加上下文窗口,还是用传统的向量数据库做检索增强,都感觉差…...

如何用D2DX游戏优化工具突破《暗黑破坏神2》25fps限制:宽屏适配与性能提升的终极解决方案
如何用D2DX游戏优化工具突破《暗黑破坏神2》25fps限制:宽屏适配与性能提升的终极解决方案 【免费下载链接】d2dx D2DX is a complete solution to make Diablo II run well on modern PCs, with high fps and better resolutions. 项目地址: https://gitcode.com/…...

MATLAB找峰值进阶:用findpeaks函数5个鲜为人知的技巧,让你的科研图表更专业
MATLAB找峰值进阶:用findpeaks函数5个鲜为人知的技巧,让你的科研图表更专业 在科研数据分析中,峰值检测是最基础却又最关键的步骤之一。无论是光谱分析、色谱检测还是振动信号处理,准确识别和量化峰值特征直接影响着研究结论的可信…...

U-boot QSPI驱动移植实战:从Flash适配到启动验证全解析
1. 项目概述:为什么U-boot的QSPI驱动移植是个“硬骨头”?在嵌入式系统开发,尤其是基于ARM Cortex-A系列处理器的工控、车载或高端物联网设备中,U-boot作为系统启动的“第一棒”至关重要。而QSPI(Quad SPI)接…...

3分钟极速激活:KMS智能激活工具让你的Windows和Office永久免费使用
3分钟极速激活:KMS智能激活工具让你的Windows和Office永久免费使用 【免费下载链接】KMS_VL_ALL_AIO Smart Activation Script 项目地址: https://gitcode.com/gh_mirrors/km/KMS_VL_ALL_AIO 还在为Windows系统频繁弹出激活提示而烦恼吗?Office文…...

嵌入式AI实战:从疲劳驾驶监测到医疗内窥镜的选型与落地
1. 从一场行业盛会聊起:嵌入式开发者的“技术集市”前几天,我作为飞凌嵌入式的一名老员工,去杭州参加了恩智浦(NXP)的技术日巡回研讨会。这感觉就像是我们嵌入式开发者圈子里的一个“技术大集”,或者说是“…...

PerimeterX PX3/PX2 按压验证码逆向:从初始化到WASM关键校验的完整流程剖析
1. PerimeterX按压验证码技术背景解析 第一次遇到PerimeterX的PX3/PX2按压验证码时,我正帮朋友调试一个电商爬虫。那会儿鼠标按下去死活过不了验证,控制台里全是看不懂的加密参数。这种验证码和传统图形验证码完全不同,它更像一个完整的安全防…...
)
保姆级教程:用ADAMS 2023复现人体行走与跌倒仿真(附完整模型参数与源文件)
ADAMS 2023生物力学仿真实战:从人体步态建模到跌倒临界点分析 在工程仿真领域,人体运动动力学一直是极具挑战性的研究方向。ADAMS作为多体动力学仿真软件的标杆,其2023版本在生物力学仿真方面新增了多项实用功能。本文将带您从零开始…...

RIS辅助无人机通信的能效优化与深度强化学习应用
1. 项目概述:RIS辅助无人机通信的能效革命在应急救灾、偏远地区覆盖等场景中,无人机(UAV)通信系统常面临两大核心挑战:一是复杂地形导致的信号遮挡问题,二是无人机有限的续航能力制约了长期作业。传统解决方案如增加中继节点会引入…...