ros2机器人在gazebo中移动方案
原文连接Gazebo - Docs: Moving the robot (gazebosim.org)
很重要的地方:使用虚拟机运行Ubuntu的时候,需要关闭”加速3D图形“的那个选项,否则gazebo无法正常显示。
Moving the robot(使用命令移动机器人示例)
In this tutorial we will learn how to move our robot. We will use the robot we built in the Build your own robot tutorial. You can download the robot from here. You can also find the finished world of this tutorial here.
What is a plugin
To make our robot move we will use the diff_drive plugin. But before doing so let's answer the question "What is a plugin?" A plugin is a chunk of code that is compiled as a shared library and inserted into the simulation. Plugins make us control many aspects of the simulation like world, models, etc.
Diff_drive plugin
diff_drive plugin helps us control our robot, specifically a robot that can be differentially driven. Let's setup the plugin on our robot. Open the building_robot.sdf and add the following code within the vehicle_blue model tags.
<pluginfilename="gz-sim-diff-drive-system"name="gz::sim::systems::DiffDrive"><left_joint>left_wheel_joint</left_joint><right_joint>right_wheel_joint</right_joint><wheel_separation>1.2</wheel_separation><wheel_radius>0.4</wheel_radius><odom_publish_frequency>1</odom_publish_frequency><topic>cmd_vel</topic>
</plugin>
The <plugin> tag has two attributes, filename which takes the library file name and name which takes the name of the plugin. In the <left_joint> and <right_joint> tags we define the joints which connect the left and the right wheel with the body of the robot, in our case left_wheel_joint and right_wheel_joint. <wheel_separation> takes the distance between the two wheels. Our robot has its left_wheel at 0.6 m and the right_wheel at -0.6 m in y-axis with respect to the chassis, so the wheel_separation is 1.2 m. <wheel_radius> takes the radius of the wheel which was defined in the <radius> tag under the wheel link. <odom_publish_frequency> sets the frequency at which the odometry is published at /model/vehicle_blue/odometry. cmd_vel is the input <topic> to the DiffDrive plugin.
Topics and Messages
Now our model is ready. We just need to send commands (messages) to it. These messages will be published (sent) on the cmd_vel topic defined above.
A topic is simply a name for grouping a specific set of messages or a particular service. Our model will subscribe (listen) to the messages sent on the cmd_vel topic.
Launch the robot world:
gz sim building_robot.sdf
In another terminal let's send a message to to our robot:
gz topic -t "/cmd_vel" -m gz.msgs.Twist -p "linear: {x: 0.5}, angular: {z: 0.05}"
Now you should have your robot moving in the simulation.
Note: Don't forget to press the play button in the simulation.
The command specifies the topic to publish to after the -t option. After the -m we specify the message type. Our robot expects messages of type Twist which consists of two components, linear and angular. After the -p option we specify the content (value) of the message: linear speed x: 0.5 and angular speed z: 0.05.
Hint: You can know what every topic option does using this command: gz topic -h
For more information about Topics and Messages in Gazebo check the Transport library tutorials
Moving the robot using the keyboard(使用按键遥控机器人示例)
Instead of sending messages from the terminal we will send messages using the keyboard keys. To do so we will add two new plugins: KeyPublisher and TriggeredPublisher.
KeyPublisher
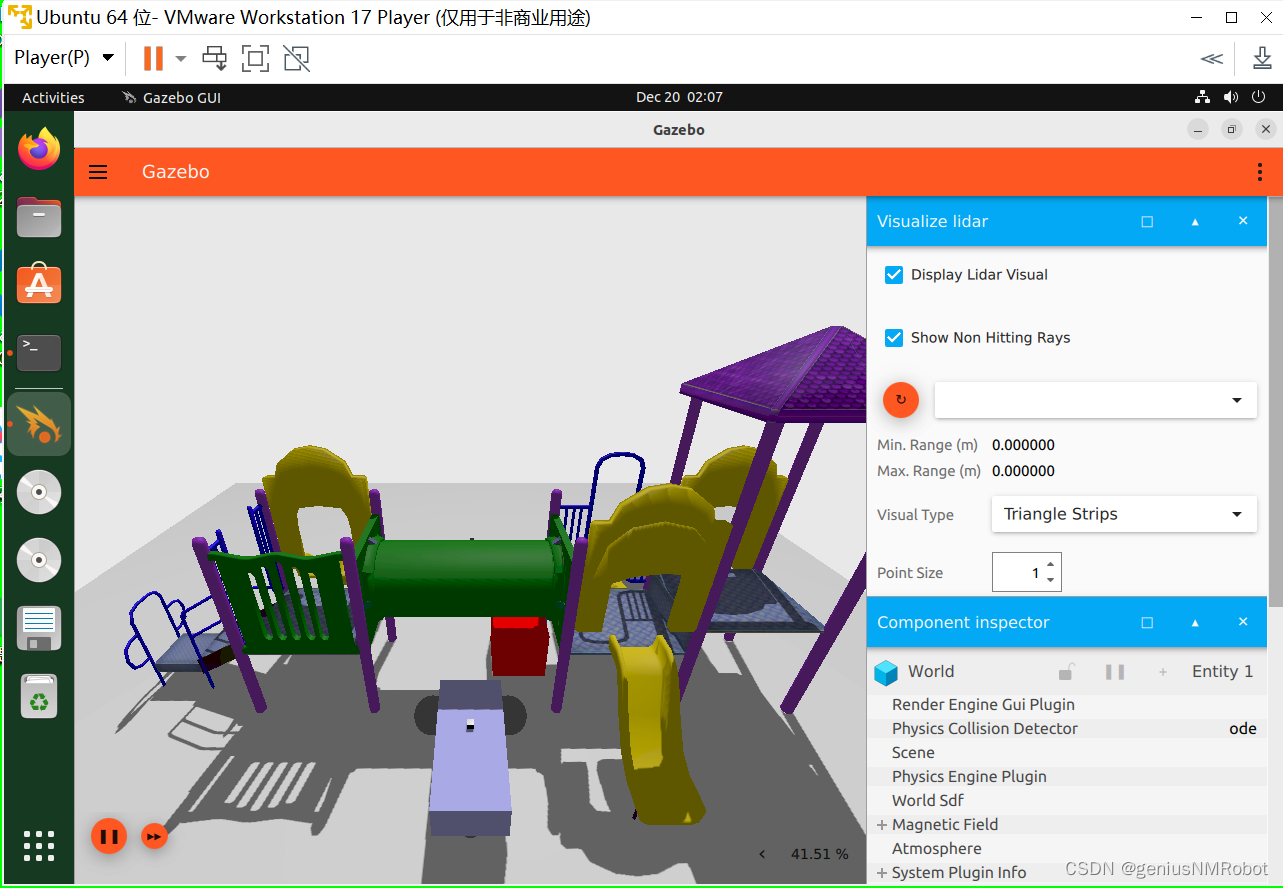
KeyPublisher is an gz-gui plugin that reads the keyboard's keystrokes and sends them on a default topic /keyboard/keypress. Let's try this plugin as follows:
-
In one terminal type
gz sim building_robot.sdf -
In the top right corner click on the plugins dropdown list (vertical ellipsis), click the Key Publisher.
-
In another terminal type
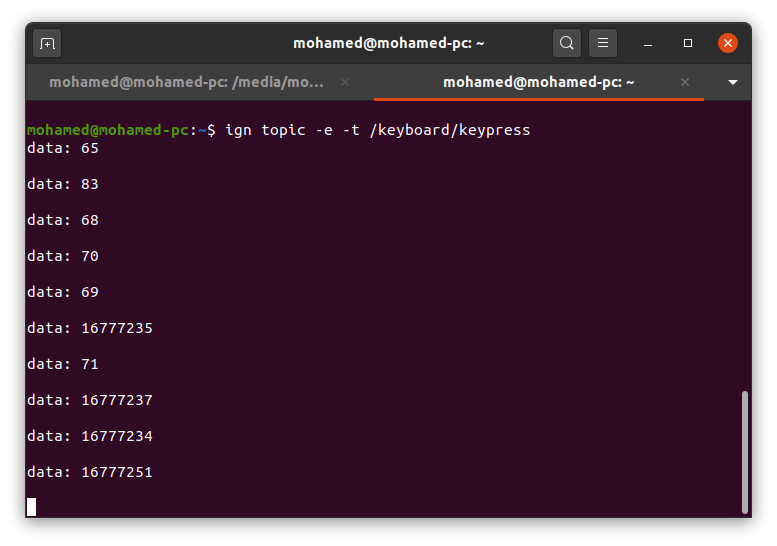
gz topic -e -t /keyboard/keypress
The last command will display all messages sent on /keyboard/keypress topic.
In the Gazebo window press different keys and you should see data (numbers) on the terminal where you run the gz topic -e -t /keyboard/keypress command.
We want to map these keystrokes into messages of type Twist and publish them to the /cmd_vel topic which our model listens to. The TriggeredPublisher plugin will do this.
Triggered Publisher
The TriggeredPublisher plugin publishes a user specified message on an output topic in response to an input message that matches user specified criteria. Let's add the following code under the <world> tag:
<!-- Moving Forward-->
<plugin filename="gz-sim-triggered-publisher-system"name="gz::sim::systems::TriggeredPublisher"><input type="gz.msgs.Int32" topic="/keyboard/keypress"><match field="data">16777235</match></input><output type="gz.msgs.Twist" topic="/cmd_vel">linear: {x: 0.5}, angular: {z: 0.0}</output>
</plugin>
This code defines the triggered-publisher plugin. It accepts messages of type gz.msgs.Int32 on the /keyboard/keypress topic and if the value in the data field matches 16777235(Up arrow key) it outputs a Twist message on the cmd_vel topic with values x: 0.5, z: 0.0.
Now launch building_robot.sdf then add the Key Publisher plugin and our robot should move forward as we press the Up arrow key ↑ (make sure you start the simulation by pressing the play button to see the robot move forward after pressing the Up arrow key).
There is a demo explaining how the Triggered Publisher works.
Moving using arrow keys
To see what values are sent on the /keyboard/keypress topic when pressing the arrows we can use the --echo or -e option
-
Run the model in one terminal:
gz sim building_robot.sdf -
In the top right corner click on the plugins dropdown list (vertical ellipsis), click the Key Publisher.
-
In another terminal run the following command:
gz topic -e -t /keyboard/keypress
Start pressing the arrows keys and see what values they give:
- Left ← : 16777234
- Up ↑ : 16777235
- Right → : 16777236
- Down ↓ : 16777237
We will add the Triggered publisher plugin for each arrow key. For example, the Down arrow:
<!-- Moving Backward-->
<plugin filename="gz-sim-triggered-publisher-system"name="gz::sim::systems::TriggeredPublisher"><input type="gz.msgs.Int32" topic="/keyboard/keypress"><match field="data">16777237</match></input><output type="gz.msgs.Twist" topic="/cmd_vel">linear: {x: -0.5}, angular: {z: 0.0}</output>
</plugin>
Map each arrow (key stroke) with the desired message (movement) as we did with the backward arrow:
- Left ➞ 16777234 ➞ linear: {x: 0.0}, angular: {z: 0.5}
- Up ➞ 16777235 ➞ linear: {x: 0.5}, angular: {z: 0.0}
- Right ➞ 16777236 ➞ linear: {x: 0.0}, angular: {z: -0.5}
- Down ➞ 16777237 ➞ linear: {x: -0.5}, angular: {z: 0.0}
Now it's your turn try to make the robot move using different keys.
In the next tutorial, you'll learn to create your own simulated world with SDF.
Video walk-through
A video walk-through of this tutorial is available from our YouTube channel: Gazebo tutorials: Moving robot.
相关文章:
ros2机器人在gazebo中移动方案
原文连接Gazebo - Docs: Moving the robot (gazebosim.org) 很重要的地方:使用虚拟机运行Ubuntu的时候,需要关闭”加速3D图形“的那个选项,否则gazebo无法正常显示。 Moving the robot(使用命令移动机器人示例) In t…...
学习Java第74天,Ajax简介
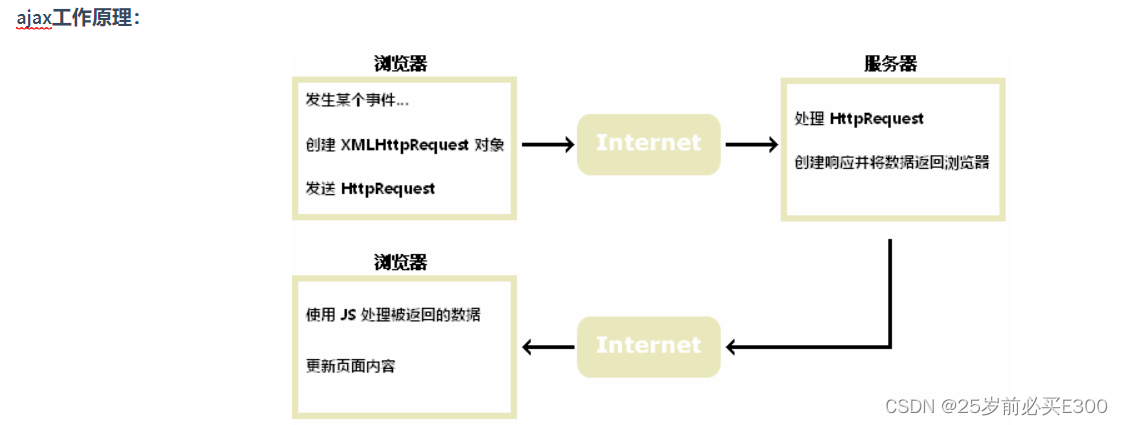
什么是ajax AJAX Asynchronous JavaScript and XML(异步的 JavaScript 和 XML)。 AJAX 不是新的编程语言,而是一种使用现有标准的新方法。 AJAX 最大的优点是在不重新加载整个页面的情况下,可以与服务器交换数据并更新部分网页…...

【Java面试题】在Java中String,Stringbuffer,StringBuilder的区别?
Hi i,m JinXiang ⭐ 前言 ⭐ 本篇文章主要介绍在Java中String,Stringbuffer,StringBuilder的区别以及部分理论知识 🍉欢迎点赞 👍 收藏 ⭐留言评论 📝私信必回哟😁 🍉博主收将持续更新学习记录…...

让AIGC成为你的智能外脑,助力你的工作和生活
人工智能成为智能外脑 在当前的科技浪潮中,人工智能技术正在以前所未有的速度改变着我们的生活和工作方式。其中,AIGC技术以其强大的潜力和广泛的应用前景,正在引领着这场革命。 AIGC技术是一种基于人工智能的生成式技术,它可以通…...

ubuntu12.04 源
替换 /etc/apt/sources.list deb http://old-releases.ubuntu.com/ubuntu precise main restricted universe multiverse deb http://old-releases.ubuntu.com/ubuntu precise-security main restricted universe multiverse deb http://old-releases.ubuntu.com/ubu…...

openssl数据压缩
介绍 数据压缩是将原有数据通过某种压缩算法计算得到相对数据量小的过程。这种过程是可逆的,即能通过压缩后的数据恢复出原数据。数据压缩能够节省存储空间,减轻网络负载。 在即需要加密又需要压缩的情况下,必须先压缩再加密,次…...
SQLturning:定位连续值范围起点和终点
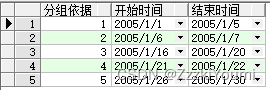
在上一篇blog说到,如何去优化查询连续值范围,没看过的朋友,上篇blog链接[在此]。(https://blog.csdn.net/weixin_42575078/article/details/135067645?spm1001.2014.3001.5501) 那么今天来说说怎么将连续的数据合并,然后返回合并…...

饥荒Mod 开发(十七):手动保存和加载,无限重生
饥荒Mod 开发(十六):五格装备栏 饥荒Mod 开发(十八):Mod 添加配置选项 饥荒游戏会自动保存,本来是一个好的机制,但是当角色死亡的时候存档会被删除,又要从头开始,有可能一不小心玩了很久的档就直接给整没了…...

Skywalking系列之最新版9.2.0-JavaAgent本地构建
MAC 10.15.7IDEA 2021.2skywalking-agent 9.2.0-SNAPSHOTJDK 17/21 (最新的代码要看最新的要求,注意不能使用JDK8,会构建失败)Maven 3.6.0 关于本地构建JavaAgent源码 1、获取源码,加载submodule 分步执行: git clone https:/…...
olap/clickhouse-编译器优化与向量化
本文主要结合15721和clickhouse源码来聊聊向量化,正好我最近也在用Eigen做算子加速,了解下还是有好处的。 提示编译器 提示编译器而不是复杂化简单的代码 什么时候使用汇编,什么时候使用SIMD?下面有几个基本原则: …...
RK3399平台开发系列讲解(内核入门篇)网络协议的分层
🚀返回专栏总目录 文章目录 一、应用层二、传输层三、网络层四、数据链路层(Data Link Layer)五、物理层沉淀、分享、成长,让自己和他人都能有所收获!😄 📢对于多数的应用和用户而言,使用互联网的一个基本要求就是数据可以无损地到达。用户通过应用进行网络通信...

Idea远程debugger调试
当我们服务部署在服务器上,我们想要像在本地一样debug,就可以使用idea自带的Remote JVM Debug 创建Remote JVM Debug服务器启动jar打断点进入断点 当我们服务部署在服务器上,我们想要像在本地一样debug,就可以使用idea自带的 Remote JVM Debug) 创建Rem…...
MATLAB - Gazebo 仿真环境
系列文章目录 前言 机器人系统工具箱(Robotics System Toolbox™)为使用 Gazebo 模拟器可视化的模拟环境提供了一个界面。通过 Gazebo,您可以在真实模拟的物理场景中使用机器人进行测试和实验,并获得高质量的图形。 Gazebo 可在…...
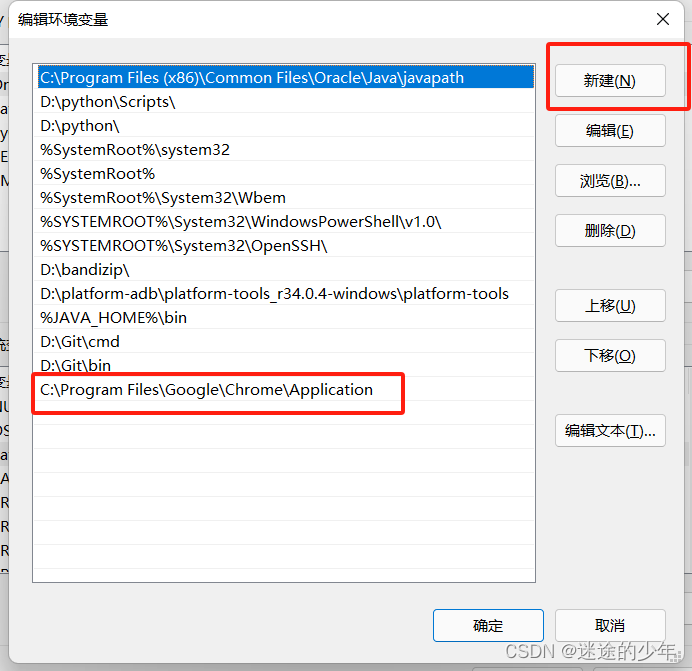
selenium自动化webdriver下载及安装
1、确认浏览器的版本 在浏览器的地址栏,输入chrome://version/,回车后即可查看到对应版本 2、找到对应的chromedriver版本 2.1 114及之前的版本可以通过点击下载chromedriver,根据版本号(只看大版本)下载对应文件 2.2 116版本通过…...
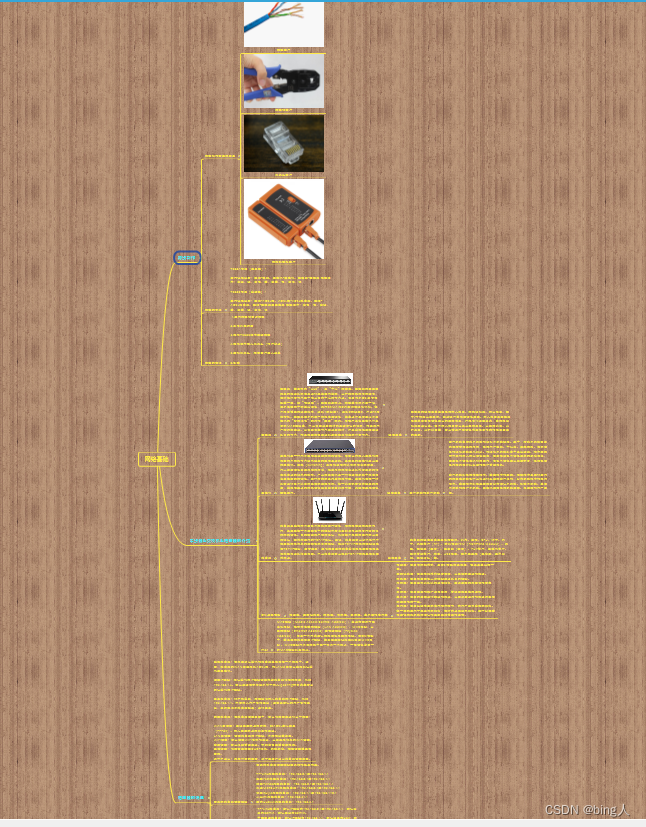
网络基础介绍
1.网线制作 1.1 网线制作需要的工具 网线 网线钳 水晶头 测试仪 编辑 1.2 网线的标准 1.3 网线的做法 2.集线器&交换机&路由器的介绍 3.OSI七层模型 4.路由器的设置 4.1 常见的路由器设置地址 4.2 常见的路由器账号密码 4.3 登录路由器 设置访客网…...

Java中四种引用类型(强、软、弱、虚)
目录 引言 强引用(Strong References) 软引用(Soft References) 弱引用(Weak References) 虚引用(Phantom References) 引用类型的应用场景 总结 引言 Java中的引用类型是管理…...
【MyBatis学习笔记】MyBatis基础学习
MyBatis基础 MyBatis简介MyBatis特性MyBatis下载和其他持久化层技术对比 核心配置文件详解默认的类型别名 搭建MyBatis开发环境创建maven工程创建MyBatis的核心配置文件创建mapper接口创建MyBatis的映射文件通过junit测试功能加入log4j日志功能 MyBatis获取参数值的两种方式&am…...
还在为论文焦虑?免费AI写作大师帮你搞定
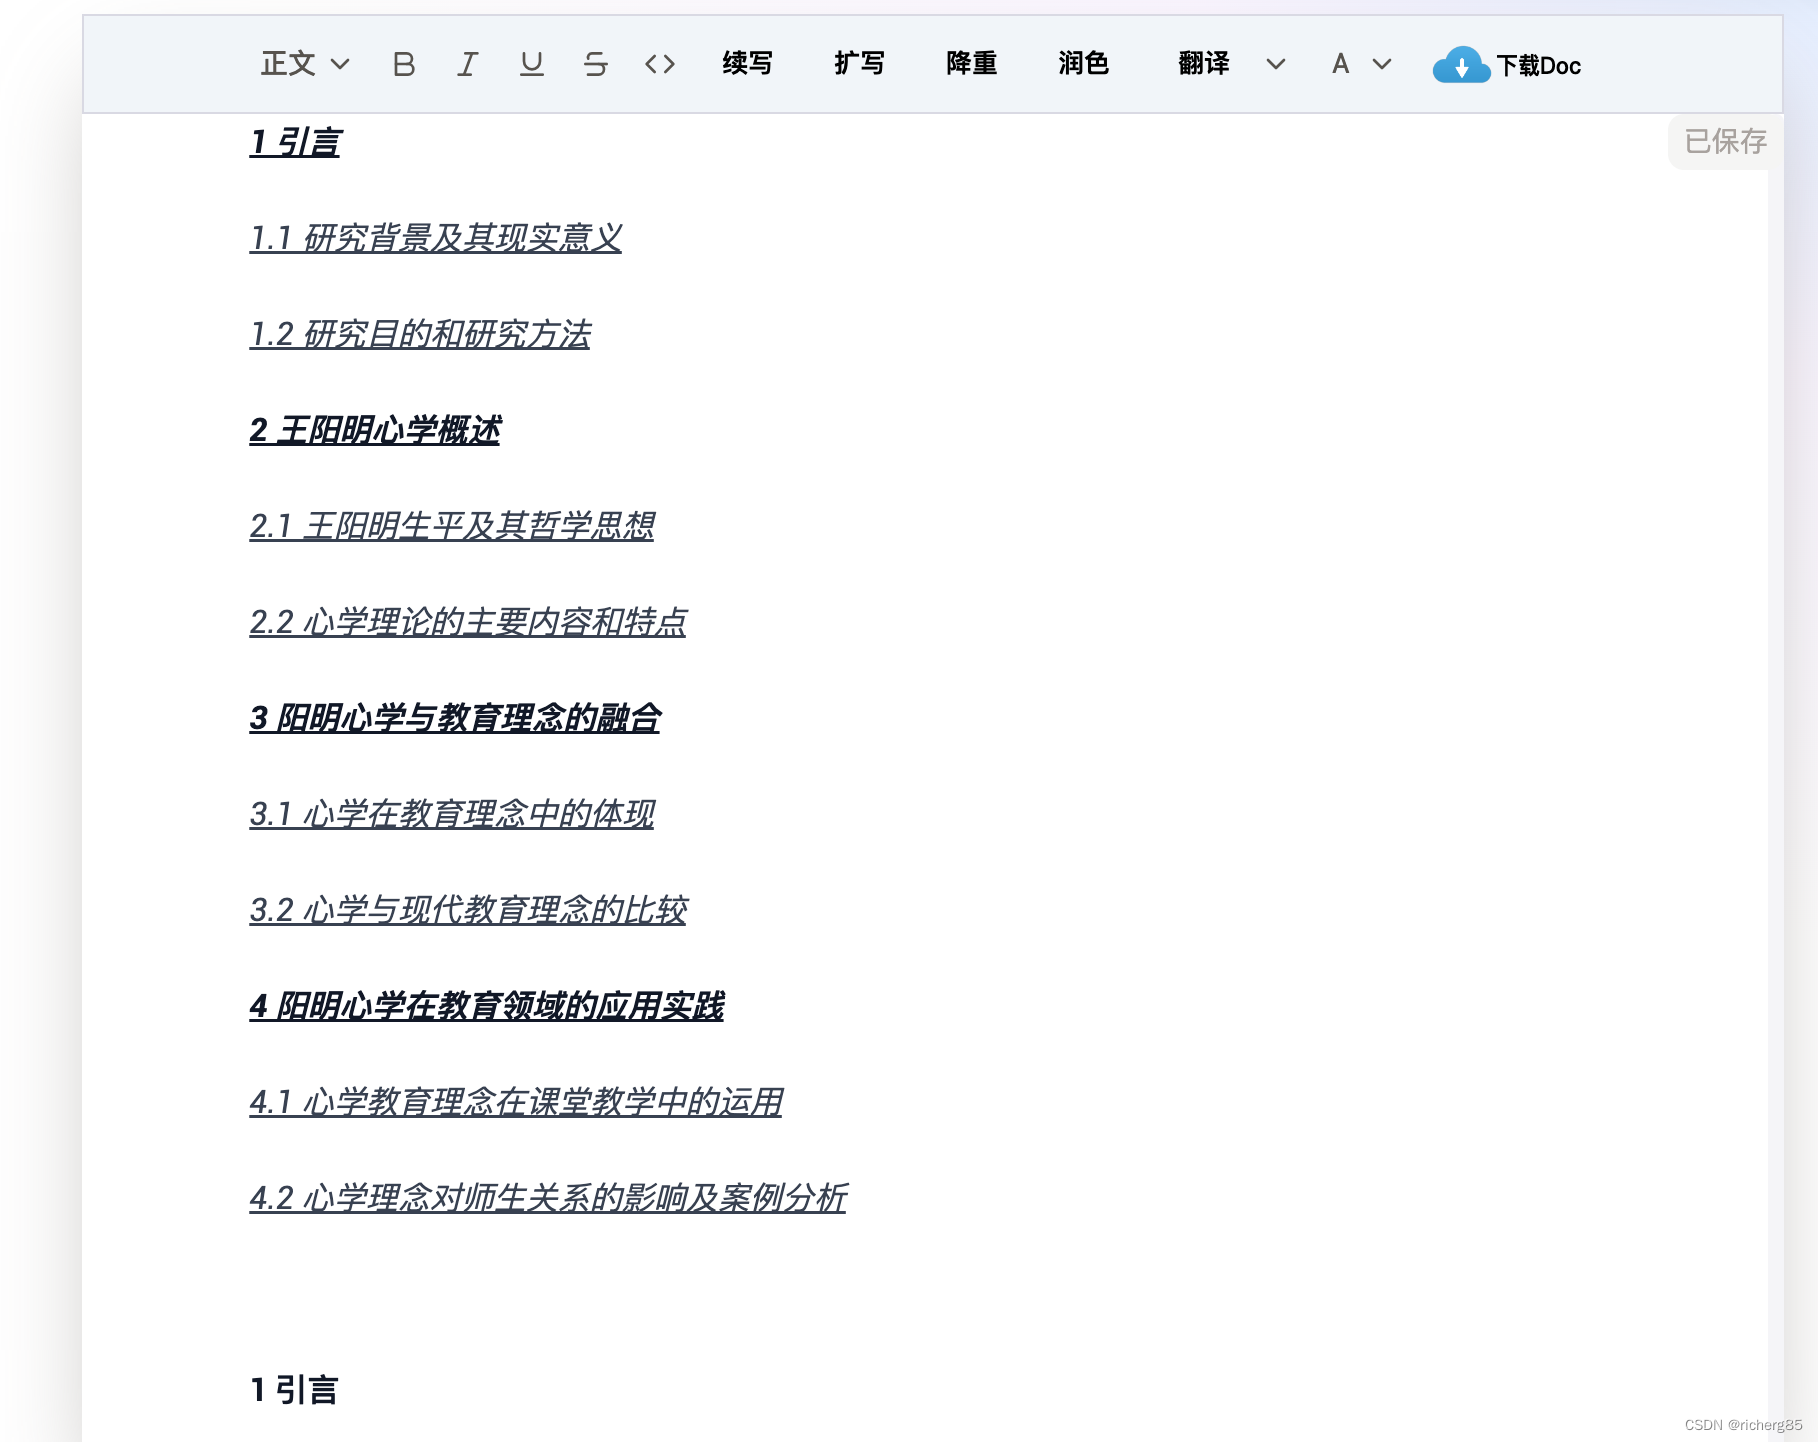
先来看1分钟的视频,对于要写论文的你来说,绝对有所值! 还在为写论文焦虑?免费AI写作大师来帮你三步搞定 第一步:输入关键信息 第二步:生成大纲 稍等片刻后,专业大纲生成(由于举例&am…...
)
3.10【窗口】窗口使用示例(窗口缩放 三)
五,从窗口所有者放大 要从窗口的所有者本身进行放大,可以将源图像矩形设置得比窗口小。可以想象我们在一张图片中选取一部分进行放大的操作。 屏幕使用默认位置 (0,0) 作为源矩形、窗口和显示器显示的左上角。要放大源图形的特定区域,必须设置源矩形的大小。 源矩形由这些…...
【机器学习】密度聚类:从底层手写实现DBSCAN
【机器学习】Building-DBSCAN-from-Scratch 概念代码数据导入实现DBSCAN使用样例及其可视化 补充资料 概念 DBSCAN(Density-Based Spatial Clustering of Applications with Noise,具有噪声的基于密度的聚类方法)是一种基于密度的空间聚类算…...

C# 零基础到精通教程 - 第六章:方法——让代码“模块化“
6.1 为什么需要方法?6.1.1 没有方法的问题csharp// 没有方法:代码重复、臃肿、难以维护 static void Main() {// 第一次计算两个数的和int a1 10, b1 20;int sum1 a1 b1;Console.WriteLine($"{a1} {b1} {sum1}");// 第二次计算两个数的和…...

揭秘Delphi二进制逆向分析神器:IDR深度探索与实践指南
揭秘Delphi二进制逆向分析神器:IDR深度探索与实践指南 【免费下载链接】IDR Interactive Delphi Reconstructor 项目地址: https://gitcode.com/gh_mirrors/id/IDR 在逆向工程和安全分析领域,Delphi编译的二进制文件常常让分析人员感到棘手。这些…...

Linux常用命令合集:从新手到高手的核心操作指南
1. 项目概述:为什么我们需要一个“常用命令合集”?在Linux世界里摸爬滚打十几年,我见过太多新手,也包括一些从其他平台转过来的老手,面对黑漆漆的终端窗口时那种手足无措的茫然。Linux的强大,根植于其命令行…...

# 040、实战项目五:多 Agent 协作系统 —— 项目经理、开发者、测试者角色模拟
从一次凌晨三点的事故说起 去年做智能客服系统重构,我犯了个低级错误——让单个Agent既写代码又自测。结果上线当天,它把“用户退款”的SQL写成了DELETE FROM orders WHERE status‘refund’,还自信满满地标注“测试通过”。凌晨三点被运维电…...
)
Vue3 + Element Plus 项目里,用ECharts 5.4.3做个动态数据大屏(附完整代码)
Vue3 Element Plus 与 ECharts 5.4.3 构建企业级动态数据大屏实战 数据可视化大屏已成为现代企业监控业务指标、分析趋势的核心工具。本文将深入探讨如何基于最新的 Vue3 和 Element Plus 技术栈,结合 ECharts 5.4.3 的强大可视化能力,构建一个高性能、…...
)
告别‘失联’服务器:利用校园网内网固定IP,通过SSH隧道实现无公网访问的服务器管理(WinSCP文件传输教程)
内网服务器高效管理:SSH隧道与WinSCP实战指南 在分布式办公和远程协作日益普及的今天,许多技术团队都面临着内网服务器管理的挑战。想象一下这样的场景:你的核心数据库服务器位于公司内网,没有公网IP;或者你的开发测试…...

【鸿蒙软件开发】ArkTS基础组件实战:Select与Slider在智能家居控制面板中的应用
1. 智能家居控制面板中的交互设计需求 现代智能家居系统越来越注重用户体验,而控制面板作为用户与设备交互的核心界面,其设计直接影响使用效率。在实际项目中,我发现很多开发者容易陷入"功能堆砌"的误区,忽略了交互设计…...

告别Centerness和IoU-Net:聊聊GFLv2如何用‘边框分布统计’更准地评估定位质量
目标检测定位质量评估的范式革新:从启发式设计到统计驱动 在目标检测领域,定位质量评估(Localization Quality Estimation, LQE)一直是个微妙却关键的问题。想象一下这样的场景:当两个检测框都包含了目标物体…...

Unity Figma Bridge:设计-开发一体化协同的技术架构解决方案
Unity Figma Bridge:设计-开发一体化协同的技术架构解决方案 【免费下载链接】UnityFigmaBridge Easily bring your Figma Documents, Components, Assets and Prototypes to Unity 项目地址: https://gitcode.com/gh_mirrors/un/UnityFigmaBridge Unity Fig…...

保姆级教程:用Arduino IDE从零配置ESP32-CAM,5分钟搞定网络摄像头
零基础玩转ESP32-CAM:5分钟搭建智能网络摄像头的完整指南 第一次拿到ESP32-CAM这块小巧的开发板时,很多人都会被它丰富的功能所吸引——Wi-Fi连接、摄像头拍摄、甚至还能进行简单的人脸识别。但当你真正开始尝试用它搭建一个网络摄像头时,各种…...