深入Android S (12.0) 探索Framework之输入子系统InputReader的流程
Framework层之输入系统
第一篇 深入Android S (12.0) 探索Framework之输入系统IMS的构成与启动
第二篇 深入Android S (12.0) 探索Framework之输入子系统InputReader的流程
文章目录
- Framework层之输入系统
- 前言
- 一、基础知识
- 1、输入子系统
- 2、INotify 与 Epoll
- 2.1、INotify 机制
- 2.2、Epoll 机制
- 3、小结
- 二、InputReader 的总体流程
- 1、InputReader::loopOnce()
- 1.1、EventHub::getEvents()
- 1.1.1、EventHub::closeAllDevicesLocked()
- 1.1.2、EventHub::scanDevicesLocked()
- 1.1.3、EventHub::scanDirLocked()
- 1.1.4、EventHub::openDeviceLocked()
- 1.1.5、EventHub::registerDeviceForEpollLocked()
- 1.1.6、EventHub::addDeviceLocked()
- 1.1.7、EventHub::readNotifyLocked()
- 1.2、InputReader::processEventsLocked()
- 1.2.1、 InputReader::processEventsForDeviceLocked()
- 1.2.2、 InputDevice::process()
- 1.2.3、 InputMapper::process()
- 1.2.4、 TouchInputMapper::process()
- 1.2.5、 TouchInputMapper::sync()
- 1.2.5.1、 MultiTouchInputMapper::syncTouch()
- 1.2.5.2、 TouchInputMapper::processRawTouches()
- 1.2.6、 TouchInputMapper::cookAndDispatch()
- 1.2.6.1、TouchInputMapper::cookPointerData()
- 1.2.6.2、TouchInputMapper::rotateAndScale()
- 1.2.6.3、TouchInputMapper::dispatchTouches()
- 1.2.7、TouchInputMapper::dispatchMotion()
- 1.2.7.1、InputReader::ContextImpl::getListener()
- 1.2.7.2、QueueInputListener::notifyMotion()
- 1.3、QueuedInputListener::flush()
- 1.3.1、NotifyMotionArgs::notify()
- 1.3.2、InputClassifer::notifyMotion()
- 1.4、InputDispatcher::notifyMotion()
- 总结
前言
上一篇文章深入探索了 Android Framework 的输入系统 IMS 的构成与启动,对 IMS 的重要成员有了初步的理解,然后通过源码对 IMS 的整个启动流程进行分析,在 IMS 启动并准备就绪后,输入系统就可以从设备节点源源不断的抽取输入事件,并交给事件处理者进行加工处理,即输入子系统 InputReader。本篇将深入探索 InputReader 的工作流程,它是如何从设备节点将输入事件交给 InputDispatcher 的派发队列的?
一、基础知识
1、输入子系统
Android 设备可以同时连接多个输入设备,如:触摸屏、键盘以及鼠标等,用户在任何一个设备上的输入都会对应产生一个中断,经由 Linux 内核的中断处理以及设备驱动转换成一个事件 Event,并传递给用户空间的应用程序进行处理。通过上篇文章的分析我们知道 InputReader 只有一个承载其运行的线程 InputThreadImpl,而每个输入设备都有自己配套的驱动程序,其数据接口也不尽相同,Linux 内核是怎么在一个线程里面把所有的用户输入都给捕获的?这个需要对 Linux 内核的输入子系统 (Input Subsystem) 有所了解,它在各种各样的设备驱动程序上抽象出了一个抽象接口层,只要底层的设备驱动程序按照这层抽象接口来实现,上层应用就可以通过统一的接口来访问所有的输入设备。该抽象层有三个重要的概念:input handler、input handle 和 input_dev,它们的关系如下图:

- input_dev:表示底层的驱动;
- input_handler:表示某一类输入设备的处理方法,相当于一个上层驱动(注意:一个 input_dev 可以有多个 input_handler,同样,一个 input_handler 可以用于多种输入设备,即多对多的关系);
- input_handle:用于关联某个 input_dev 和某个 input_handler,对应上图中的紫色圆点,每个 input_handle 都会生产一个文件节点,通过 input_handle 可以找到对应的 input_handler 和 input_dev;
通过 Linux 内核的 input system 获取用户输入的流程简述如下:
- 输入设备通过 input_register_dev 将自己的驱动程序注册到 Input 系统;
- 各种 Handler 通过 input_register_handler 将自己注册到 Input 系统;
- 每一个注册进来的 input_dev 或 input_handler 都会通过 input_connect() 函数寻找对方,生成对应的 input_handle,并在路径 dev/input/ 下生成一个设备节点文件;
- 应用程序通过打开 input_handle 对应的文件节点,打开其对应的 input_dev 和 input_handler。当用户按键/触摸屏幕时,底层驱动就能捕获到并交给对应的上层驱动 Handler 进行处理,然后返回给应用程序;
因此,只要打开 dev/input/ 下的所有 event* 设备文件,就可以获取所有输入设备的输入事件,不管是触摸屏的,还是通过 USB 连接的设备等。
2、INotify 与 Epoll
Reader 子系统是通过读取输入端的设备节点,来获取输入的原始事件,也就是其需要处理输入设备以及原始事件两种类型的对象。设备节点的新建与删除表示输入设备是否可用,设备节点中是否有内容可读表示是否有新的原始事件到来,那么,如何监控设备节点的新建与删除动作?以及如何确定节点中有内容可读呢?最简单的办法是在线程循环中不断地轮询,然而这样的效率非常低,更会导致电量在无谓的轮询中消耗。不过 Android 使用由 Linux 提供的两套机制 INotify 与 Epoll 优雅地解决了这两个问题。
2.1、INotify 机制
INotify 是 Linux 内核所提供的一种文件系统变化通知机制,它可以为应用程序监控文件系统的变化,如文件的新建、删除、读写等。INotify 机制内有两个基本对象,分别为 inotify 对象与 watch 对象,都使用文件描述符表示。
inotify 对象对应一个队列,应用程序可以向 inotify 对象添加多个监听,当被监听的事件发生时,可以通过 read() 函数从 inotify 对象中将事件信息读取出来。
watch 对象则用来描述文件系统的变化事件的监听,它是一个二元组,包括监听目标和事件掩码两个元素。监听目标是文件系统的一个路径,可以是文件也可以是文件夹。事件掩码则表示了需要监听的事件类型,掩码中的每一位代表一种事件。可以监听的事件种类很多,其中就包括文件的创建(IN_CREATE)与删除(IN_DELETE)。
以下代码即可将一个用于监听输入设备节点的创建与删除的 watch 对象添加到 inotify 对象中:
int wd = inotify_add_watch (inotifyFd, “/dev/input”, IN_CREATE | IN_DELETE);
通过 inotify_add_watch() 函数完成 watch 对象的添加后,当 /dev/input/ 下的设备节点发生创建与删除操作时,都会将相应的事件信息写入 inotifyFd 所描述的 inotify 对象中,此时可以通过 read() 函数从 inotifyFd 描述符中将事件信息读取出来。
事件信息使用结构体 inotify_event 来描述:
xref: /bionic/libc/kernel/uapi/linux/inotify.h
struct inotify_event {__s32 wd; // 事件对应的 watch 对象的描述符__u32 mask; // 事件类型,如文件被删除则此处值为 IN_DELETE__u32 cookie; // 缓存__u32 len; // name 字段的长度char name[0]; // 可变长的字段,用于存储产生此事件的文件路径
};
当监听事件发生时,可以通过 read() 函数将一个或多个未读取的事件信息读取出来:
int res = read(mINotifyFd, event_buf, sizeof(event_buf));
其中 events_buf 是 inotify_event 的数组指针,能够读取的事件数量取决于数组的长度。成功读取事件信息后,便可根据 inotify_event 结构体的字段判断事件类型以及产生事件的文件路径。
总结 INotify 机制的使用过程:
- 通过 inotify_init() 函数创建一个 inotify 对象;
- 通过 inotify_add_watch() 函数将一个或多个监听添加到 inotify 对象中;
- 通过 read() 函数从 inotify 对象中读取监听事件。当没有新事件发生时,inotify 对象中无任何可读数据。
通过 INotify 机制避免了轮询文件系统的问题,但还有一个问题需解决,INotify 机制并不是通过回调的方式通知事件,而需要使用者主动从 INotify 对象中进行事件读取。那么何时才是读取的最佳时机呢?这需要借助 Linux 内核的 Epoll 机制。
2.2、Epoll 机制
无论是从设备节点中获取原始输入事件还是从 inotify 对象中读取文件系统事件,这些事件都是偶发的。也就是说,大部分情况下设备节点、inotify 对象这些文件描述符中都是无数据可读的,同时又希望有事件到来时可以尽快地对事件做出反应。
Linux 内核的 Epoll 机制可以很好的解决该问题,Epoll 可以使用一次等待监听多个描述符的可读/可写状态。等到返回时携带了可读的描述符或自定义的数据,使用者据此读取所需的数据后可以再次进入等待。不需要为每个描述符创建独立的线程进行阻塞读取,避免了系统资源浪费的同时又可以获得较快的响应速度。
Epoll 机制的接口只有三个函数,如下:
- epoll_create (int max_fds) : 创建一个 epoll 对象的描述符,之后对 epoll 的操作均使用这个描述符完成。max_fds 参数表示此 epoll 对象可以监听的描述符的最大数量;
- epoll_ctl (int epfd,int op,int fd,struct epoll_event* event) : 用于管理注册事件的函数,该函数可以增加/删除/修改事件的注册;
- int epoll_wait (int epfd,struct epoll_event*events,int maxevents,int timeout) : 用于等待事件到来。当该函数返回时,events 数组参数中将会包含产生事件的文件描述符。
EventHub 是 InputReader 用于打开和关闭 input 设备节点,监听和读取 input 事件的对象,接下来以 EventHub 的构造函数为例来分析 Epoll 的用法,其代码如下:
xref: /frameworks/native/services/inputflinger/reader/EventHub.cpp
EventHub::EventHub(void): mBuiltInKeyboardId(NO_BUILT_IN_KEYBOARD),mNextDeviceId(1),mControllerNumbers(),mOpeningDevices(nullptr),mClosingDevices(nullptr),mNeedToSendFinishedDeviceScan(false),mNeedToReopenDevices(false),mNeedToScanDevices(true),mPendingEventCount(0),mPendingEventIndex(0),mPendingINotify(false) {ensureProcessCanBlockSuspend();// 创建 Epoll 对象的描述符,监听设备节点是否有数据可读(有无事件发生)mEpollFd = epoll_create1(EPOLL_CLOEXEC);LOG_ALWAYS_FATAL_IF(mEpollFd < 0, "Could not create epoll instance: %s", strerror(errno));// 创建 INotify 对象,用于监听设备节点的路径 /dev/input 是否有变化,如有设备增删则对应的设备节点的文件也会增删mINotifyFd = inotify_init();// 添加 watch 监听存储设备节点的路径 DEVICE_PATH 的创建与删除,当有设备节点发生变化时,通过 INotify 对象可以读取事件的详细信息mInputWd = inotify_add_watch(mINotifyFd, DEVICE_PATH, IN_DELETE | IN_CREATE);LOG_ALWAYS_FATAL_IF(mInputWd < 0, "Could not register INotify for %s: %s", DEVICE_PATH,strerror(errno));if (isV4lScanningEnabled()) {mVideoWd = inotify_add_watch(mINotifyFd, VIDEO_DEVICE_PATH, IN_DELETE | IN_CREATE);LOG_ALWAYS_FATAL_IF(mVideoWd < 0, "Could not register INotify for %s: %s",VIDEO_DEVICE_PATH, strerror(errno));} else {mVideoWd = -1;ALOGI("Video device scanning disabled");}// 构建 epoll_event 结构体,并为每一个需要监控的描述符填充该结构体,以描述监控事件struct epoll_event eventItem = {};eventItem.events = EPOLLIN | EPOLLWAKEUP; // 事件掩码,指明需要监听的事件类型,可读eventItem.data.fd = mINotifyFd; // 数据字段,设置需要监听的描述符,这里是 mINotifyFd,即监听设备节点的路径// 调用 epoll_ctl() 函数将 INotify 对象注册到 Epoll 中,监听其文件描述符对应的文件夹下是否有设备节点的增删信息// 第一个参数即前面创建的 Epoll 对象的描述符,第二个参数表示具体操作,这里 ADD 表示增加注册事件// 第三个参数表示需要监听的描述符,第四个参数是描述监听事件的详细信息的 epoll_event 结构体int result = epoll_ctl(mEpollFd, EPOLL_CTL_ADD, mINotifyFd, &eventItem);LOG_ALWAYS_FATAL_IF(result != 0, "Could not add INotify to epoll instance.  errno=%d", errno);// 创建匿名管道 wakeFds,并将读端交给 Epoll,写端交给 InputReader,用于唤醒 Epoll,避免其阻塞在 epoll_wait()int wakeFds[ 2];result = pipe(wakeFds);LOG_ALWAYS_FATAL_IF(result != 0, "Could not create wake pipe.  errno=%d", errno);// mWakeReaderFD 和 mWakeWriterFD 对应管道的两端mWakeReadPipeFd = wakeFds[0];mWakeWritePipeFd = wakeFds[1];result = fcntl(mWakeReadPipeFd, F_SETFL, O_NONBLOCK);LOG_ALWAYS_FATAL_IF(result != 0, "Could not make wake read pipe non-blocking.  errno=%d", errno);result = fcntl(mWakeWritePipeFd, F_SETFL, O_NONBLOCK);LOG_ALWAYS_FATAL_IF(result != 0, "Could not make wake write pipe non-blocking.  errno=%d", errno);eventItem.data.fd = mWakeReadPipeFd;// epoll_ctl() 函数可重复调用,将多个文件描述符的多种事件监听注册到 Epoll 对象中// 将匿名管道的读取端的描述符也注册到 Epoll 中,用于监听读取端的可读事件,当写入端有任意数据写入时// 管道的读取端就有数据可读,使得 epoll_wait() 得以返回,从而达到唤醒 InputReader 线程的目的,避免其一直阻塞result = epoll_ctl(mEpollFd, EPOLL_CTL_ADD, mWakeReadPipeFd, & eventItem);LOG_ALWAYS_FATAL_IF(result != 0, "Could not add wake read pipe to epoll instance.  errno=%d", errno);
}
Epoll 的具体用法,在 EventHub 的构造函数中都已注释,代码中 epoll_event 结构体的定义如下:
xref: /bionic/libc/include/bits/epoll_event.h
// epoll_event 的可能数据类型的并集
typedef union epoll_data {void* ptr;int fd;uint32_t u32;uint64_t u64;
} epoll_data_t; // 同一时间使用者只能使用其中一个字段
// 表示epoll()事件的类型
struct epoll_event {// 事件掩码,指明需要监听的事件种类,掩码的每一位代表了一种事件// 常用的事件有 EPOLLIN(可读)、EPOLLOUT(可写)、EPOLLERR(描述符发生错误)、EPOLLHUP(描述符被挂起)等uint32_t events;epoll_data_t data; // 可自定义的数据,当此事件发生时该数据降原封不动地返回给使用者
}
- events:表示事件掩码,指明需要监听的事件种类,掩码的每一位代表了一种事件,常用的事件有 EPOLLIN(可读)、EPOLLOUT(可写)、EPOLLERR(描述符发生错误)、EPOLLHUP(描述符被挂起) 等。
- data:是一个数据集,使用者可以将一些自定义数据加入事件通知中,当此事件发生时,用户设置的 data 字段将会返回给使用者。在 EventHub 的构造函数中,将 epoll_event.data.fd 设置为 mINotifyFd,也即需要监听的文件描述符,事件发生时便可据此得知引发事件的描述符。当然也可以设置 epoll_event.data.fd 为其他便于识别的数据。
最后,在监听注册完后,可以通过 epoll_wait() 函数等待事件到来,该函数将会使调用者陷入等待状态,直到其注册的事件之一发生之后才会返回,并且携带刚刚发生的事件的详细信息。epoll_wait() 函数的声明如下:
int epoll_wait(int epfd, struct epoll_event * events, int maxevents, int timeout);
- epfd:是由 epoll_create() 函数创建的 Epoll 对象描述符;
- events:是 epoll_event 数组,当函数返回时,事件的信息将被填充至此;
- maxevents:表示此次调用最多可以获取的事件数,当然 events 参数须能够容纳这么多的事件;
- timeout:表示等待超时的时间。
epoll_wait() 函数的返回值表示获取了多少个事件,待 epoll_wait() 函数返回后,便可以根据 events 数组中所保存的所有 epoll_event 结构体的 events 字段与 data 字段识别事件的类型与来源。
Epoll 的使用步骤总结如下:
- 通过 epoll_create() 函数创建一个 epoll 对象的描述符;
- 构建 epoll_event 结构体,并为每一个需要监控的描述符填充该结构体,以描述监控事件;
- 调用 epoll_ctl() 函数将 INotify 对象注册到 Epoll 中监听其文件描述符是否有新的可读事件到来;
- 使用 epoll_wait() 函数等待事件发生,并根据 epoll_wait() 函数返回的 epoll_event 结构体数组判断事件的类型与来源并进行处理;
- 继续使用 epoll_wait() 函数等待新事件发生。
3、小结
本节主要是跟输入子系统相关的知识,这些是 Reader 子系统运行的基石,有助于我们后续对 Reader 子系统的流程分析,那么接下来就正式开始分析 Reader 子系统的工作流程。
二、InputReader 的总体流程
在 深入Android S (12.0) 探索Framework之输入系统IMS的构成与启动 一文中分析过,InputReader 启动后创建 InputThreadImpl 线程并启动线程循环,InputThreadImpl 继承自 C++ 的 Thread 类,C++ 的 Thread 类提供了一个纯虚函数 threadLoop(),当线程开始运行后,将会在内建的线程循环中不断地调用该函数,在 threadLoop() 函数内又会调用一次 mThreadLoop() 函数,而 mThreadLoop() 函数是由 InputReader 在启动时封装好传入的可调用函数对象 (是一个 Lambda 表达式),就是 InputReader::loopOnce() 函数,那跟进该函数看一下 InputReader 在一次线程循环中具体做了什么?
1、InputReader::loopOnce()
xref: /frameworks/native/services/inputflinger/reader/InputReader.cpp
void InputReader::loopOnce() {int32_t oldGeneration;int32_t timeoutMillis;bool inputDevicesChanged = false;std::vector < InputDeviceInfo > inputDevices;......// 通过 EventHub 获取事件列表,读取事件后存储在参数 mEventBuffer 中,返回值表示事件的个数// 当 EventHub 中无新事件可读取,此函数的调用将会阻塞直到新事件到来或超时size_t count = mEventHub -> getEvents(timeoutMillis, mEventBuffer, EVENT_BUFFER_SIZE);{ // acquire lock 获取锁std::scoped_lock _l(mLock);mReaderIsAliveCondition.notify_all();if (count) { // 如果获取到事件,则调用 processEventsLocked() 函数对事件进行加工处理processEventsLocked(mEventBuffer, count);}if (mNextTimeout != LLONG_MAX) {nsecs_t now = systemTime(SYSTEM_TIME_MONOTONIC);if (now >= mNextTimeout) {mNextTimeout = LLONG_MAX;timeoutExpiredLocked(now);}}if (oldGeneration != mGeneration) {inputDevicesChanged = true;inputDevices = getInputDevicesLocked();}} // release lock// 发送消息,通知输入设备已更改if (inputDevicesChanged) {mPolicy -> notifyInputDevicesChanged(inputDevices);}// processEventsLocked() 函数加工处理后的事件,存储在 mQueuedListener 中,每次的循环结束时// 调用其 flush() 函数将所有事件交付给 InputDispatchermQueuedListener -> flush();
}
InputReader 的一次线程循环的流程如下:
- 调用 EventHub::getEvents() 函数获取事件列表,这些事件分为两类:一种是从设备节点中读取的原始输入事件,另一种则是输入设备可用性变化事件,简称设备事件;
- 调用 InputReader::processEventsLocked() 函数对获取事件进行处理,对于设备节点事件,将根据设备的可用性来加载或移除设备对应的配置信息。对于原始输入事件,则进行转译、封装与加工后将结果暂存到 mQueuedListener 中;
- 最后调用 QueuedInputListener::flush() 函数将所有暂存且已加工处理过的输入事件交付给 InputDispatcher 来进行分发。
接下来将深入探索这几步的具体流程,首先是通过 EventHub::getEvents() 函数获取事件。
1.1、EventHub::getEvents()
xref: /frameworks/native/services/inputflinger/reader/EventHub.cpp
size_t EventHub::getEvents(int timeoutMillis, RawEvent* buffer, size_t bufferSize) {ALOG_ASSERT(bufferSize >= 1);AutoMutex _l (mLock);struct input_event readBuffer[bufferSize];// event指针指向buffer下一个可用于存储事件的 RawEvent 结构体,每存储一个事件,event 指针都会向后偏移一个元素RawEvent* event = buffer;// 记录buffer中剩余的元素数量。当capacity为0时,表示buffer已满,此时要停止继续处理新事件,并将已处理的事件返回给调用者size_t capacity = bufferSize;bool awoken = false; // 是否唤醒线程来处理事件// 下面的死循环是方法的重中之重,在循环中,先将可用事件放入到 buffer 中并返回。// 如果没有可用事件,则进入 epoll_wait()函数等待事件的到来,epoll_wait()返回后会重新循环将可用事件放入到 buffer 中for (;;) {nsecs_t now = systemTime(SYSTEM_TIME_MONOTONIC);if (mNeedToReopenDevices) { // 如果需要则重新打开输入设备,在构建EventHub时,设置 mNeedToScanDevices 标志位为 falsemNeedToReopenDevices = false;ALOGI("Reopening all input devices due to a configuration change.");// 关闭并解注册所有的设备节点,将关闭的设备节点从链表 mDevices 移除closeAllDevicesLocked(); // 由于配置更改而需要重新打开所有输入设备节点,设置 mNeedToScanDevices 标志为 truemNeedToScanDevices = true;break; // 跳出本次循环,返回到调用者,等待下次重新循环}// 遍历 mClosingDevices 链表,为每一个已卸载的设备生成 DEVICE_REMOVED 事件while (mClosingDevices) {Device* device = mClosingDevices;ALOGV("Reporting device closed: id=%d, name=%s\n", device->id, device->path.c_str());mClosingDevices = device->next;event->when = now; // 设置产生事件的时间戳与设备节点的 IDevent->deviceId = (device->id == mBuiltInKeyboardId)? ReservedInputDeviceId::BUILT_IN_KEYBOARD_ID: device->id;event->type = DEVICE_REMOVED; // 设置事件的类型为 DEVICE_REMOVEDevent += 1; // 将event指针移动到下一个可用于填充事件的RawEvent对象delete device; // 生成DEVICE_REMOVED事件之后,删除 Device 对象mNeedToSendFinishedDeviceScan = true; // 发送 FINISHED_DEVICE_SCAN 事件// 当buffer已满则停止继续生成事件,跳出循环将已生成的事件返回给调用者。// 尚未生成的事件将在下次getEvents()调用时生成并返回给调用者if (--capacity == 0) {break;}}if (mNeedToScanDevices) { // 在构建 EventHub 时,设置 mNeedToScanDevices 标志位为 truemNeedToScanDevices = false;// 扫描打开 “/dev/input/” 目录下的 input 设备节点,并将其注册到 Epoll 的监控队列中// 当设备节点的发生增删动作时,会将设备事件存入到 buffer 中scanDevicesLocked(); mNeedToSendFinishedDeviceScan = true; // 发送 FINISHED_DEVICE_SCAN 通知事件}// 遍历 mOpeningDevices 链表,为新加载的设备生成 DEVICE_ADDED 事件while (mOpeningDevices != nullptr) {Device* device = mOpeningDevices;ALOGV("Reporting device opened: id=%d, name=%s\n", device->id, device->path.c_str());mOpeningDevices = device->next;event->when = now; // 设置产生事件的时间戳与设备节点的 IDevent->deviceId = device->id == mBuiltInKeyboardId ? 0 : device->id;event->type = DEVICE_ADDED; // 设置事件的类型为 DEVICE_ADDEDevent += 1; // 将event指针移动到下一个可用于填充事件的RawEvent对象mNeedToSendFinishedDeviceScan = true; // 发送 FINISHED_DEVICE_SCAN 通知事件// 同上,当buffer已满则停止继续生成事件,跳出循环将已生成的事件返回给调用者。if (--capacity == 0) {break;}}if (mNeedToSendFinishedDeviceScan) { // 如需要则生成 FINISHED_DEVICE_SCAN 事件mNeedToSendFinishedDeviceScan = false;event->when = now;event->type = FINISHED_DEVICE_SCAN; // 设置事件的类型为 FINISHED_DEVICE_SCAN 结束扫描设备节点event += 1;// 同上,当buffer已满则停止继续生成事件,跳出循环将已生成的事件返回给调用者。if (--capacity == 0) {break;}}// 获取下一个输入事件bool deviceChanged = false; // deviceChanged 标志位// 从 epoll_wait() 函数取出的待处理 epoll_event 存储在 mPendingEventItems 数组中,mPendingEventCount 表示该数组// 所存储的事件个数,而 mPendingEventIndex 指定尚未处理的 epoll_event 在数组中的索引while (mPendingEventIndex < mPendingEventCount) {// 根据索引取出一个 epoll_event 事件const struct epoll_event& eventItem = mPendingEventItems[mPendingEventIndex++];// 如果获取到的 epoll_event 是注册监听的 mINotifyFd 事件,即设备节点增删事件if (eventItem.data.fd == mINotifyFd) {if (eventItem.events & EPOLLIN) { // 且是可读事件mPendingINotify = true; // 设置 mPendingINotify 标志为 true} else {ALOGW("Received unexpected epoll event 0x%08x for INotify.", eventItem.events);}continue; // 继续本次循环遍历,直到不是注册的 mINotifyFd 事件}// 如果获取到的 epoll_event 是注册监听的 mWakeReadPipeFd 事件,表示管道的读取端有数据可读if (eventItem.data.fd == mWakeReadPipeFd) {if (eventItem.events & EPOLLIN) {ALOGV("awoken after wake()");awoken = true; // 设置 awoken 标志为 truechar buffer[16];ssize_t nRead;do { // 循环调用 read() 函数读取管道中的数据缓存到 buffer 中nRead = read(mWakeReadPipeFd, buffer, sizeof(buffer));} while ((nRead == -1 && errno == EINTR) || nRead == sizeof(buffer));} else {ALOGW("Received unexpected epoll event 0x%08x for wake read pipe.", eventItem.events);}continue; // 继续本次循环遍历,直到不是注册的 mWakeReadPipeFd 事件}// 根据事件的文件描述符,查找已存储的设备列表 mDevices,来定位获取输入节点设备 DeviceDevice* device = getDeviceByFdLocked(eventItem.data.fd);if (!device) {ALOGE("Received unexpected epoll event 0x%08x for unknown fd %d.", eventItem.events,eventItem.data.fd);ALOG_ASSERT(!DEBUG);continue; // 未查到则继续循环遍历}// TouchVideoDevice 相关输入事件if (device->videoDevice && eventItem.data.fd == device->videoDevice->getFd()) {if (eventItem.events & EPOLLIN) { // TouchVideoDevice 可读事件size_t numFrames = device->videoDevice->readAndQueueFrames();if (numFrames == 0) {ALOGE("Received epoll event for video device %s, but could not read frame",device->videoDevice->getName().c_str());}} else if (eventItem.events & EPOLLHUP) { // TouchVideoDevice 挂起事件ALOGI("Removing video device %s due to epoll hang-up event.",device->videoDevice->getName().c_str());unregisterVideoDeviceFromEpollLocked(*device->videoDevice);device->videoDevice = nullptr;} else {ALOGW("Received unexpected epoll event 0x%08x for device %s.", eventItem.events,device->videoDevice->getName().c_str());ALOG_ASSERT(!DEBUG);}continue;}if (eventItem.events & EPOLLIN) { // 输入事件// 从获取到的输入设备节点中读取输入事件,并存入到 readBuffer 中int32_t readSize =read(device->fd, readBuffer, sizeof(struct input_event) * capacity);if (readSize == 0 || (readSize < 0 && errno == ENODEV)) {// 设备节点在 INotify 监测到之前被删除ALOGW("could not get event, removed? (fd: %d size: %"PRId32" bufferSize: %zu capacity: %zu errno: %d)\n",device->fd, readSize, bufferSize, capacity, errno);deviceChanged = true; // deviceChanged 标志位置为 truecloseDeviceLocked(device); // 关闭该设备节点} else if (readSize < 0) {if (errno != EAGAIN && errno != EINTR) {ALOGW("could not get event (errno=%d)", errno);}} else if ((readSize % sizeof(struct input_event)) != 0) {ALOGE("could not get event (wrong size: %d)", readSize);} else {int32_t deviceId = device->id == mBuiltInKeyboardId ? 0 : device->id;size_t count = size_t(readSize) / sizeof(struct input_event);// 将读取到的所有 input_event 转换成 RawEventfor (size_t i = 0; i < count; i++) {struct input_event& iev = readBuffer[i];// 设置产生事件的时间戳、设备节点的 ID、类型、代码等event->when = processEventTimestamp(iev);event->deviceId = deviceId;event->type = iev.type;event->code = iev.code;event->value = iev.value;event += 1; // event 指针指向下一个 RawEventcapacity -= 1; // 同时 capacity 容量减 1}if (capacity == 0) {// 结果缓冲区已满,则将mPendingEventIndex索引减一,这样将在下一次迭代中再次尝试读取设备节点mPendingEventIndex -= 1;break; // 跳出循环将已生成的事件返回给调用者}}} else if (eventItem.events & EPOLLHUP) { // 挂起事件ALOGI("Removing device %s due to epoll hang-up event.",device->identifier.name.c_str());deviceChanged = true; // deviceChanged 标志位置为 truecloseDeviceLocked(device); // 关闭该设备节点} else {ALOGW("Received unexpected epoll event 0x%08x for device %s.", eventItem.events,device->identifier.name.c_str());}}// readNotify()将修改设备列表,因此必须在处理完所有其他事件之后进行修改,以确保在关闭设备之前读取所有剩余事件if (mPendingINotify && mPendingEventIndex >= mPendingEventCount) {// 如果 mINotifyFd 有数据可读,则说明设备节点发生了增删事件mPendingINotify = false;// 读取 mINotifyFd 中的事件,同时对输入设备进行相应的加载与卸载操作readNotifyLocked();deviceChanged = true; // 设备节点改变,将标志位设为 true}if (deviceChanged) { // 设备节点增删操作发生时,则返回到循环开始处,重新执行循环体,以便将设备节点变化的事件放入 buffer 中continue;}// 如果此次 getEvents() 调用成功获取了一些事件,或要求唤醒 InputReader,则退出循环// 结束本次调用,使 InputReader 可以立刻对事件进行处理if (event != buffer || awoken) {break;}// 如果没有能获取到事件,说明 mPendingEventItems 中没有事件可用// 于是执行 epoll_wait() 函数等待新事件到来,将结果存储到 mPendingEventItems 里并重置 mPendingEventIndex 为 0mPendingEventIndex = 0;mLock.unlock(); // 调用 epoll_wait() 函数前需释放锁int pollResult = epoll_wait(mEpollFd, mPendingEventItems, EPOLL_MAX_EVENTS, timeoutMillis);mLock.lock(); // // 调用 epoll_wait() 函数后需获得锁if (pollResult == 0) {// 超时,重置 mPendingEventIndex 为 0,跳出本次循环调用mPendingEventCount = 0;break;}if (pollResult < 0) {mPendingEventCount = 0; // 发生错误// 在出现错误后进行睡眠,以避免系统锁定,并希望这个错误只是暂时的if (errno != EINTR) {ALOGW("poll failed (errno=%d)\n", errno);usleep(100000);}} else {// 从 epoll_wait() 函数中得到新的事件后,重新循环,并对新事件进行处理mPendingEventCount = size_t(pollResult);}}// 函数结束返回 getEvents() 函数调用读取的事件数量return event - buffer;
}
通过代码分析以及注释可知,EventHub::getEvent() 函数包含了原始输入事件读取、输入设备加载与卸载等操作,涵盖几乎所有 EventHub 的核心工作。其工作流程如下:
- 设备节点关闭,在构建 EventHub 时,设置 mNeedToReopenDevices 标志位为 false,在构建后第一次调用 EventHub::getEvent() 函数时由于还未打开任何设备节点,因此不需要重新打开设备节点。如果调用 EventHub::requestReopenDevices() 函数会将 mNeedToReopenDevices 标志位置为 true,在下一次调用 EventHub::getEvent() 函数时会先调用 EventHub::closeAllDevicesLocked() 函数来关闭并解注册所有的设备节点,并将关闭的设备节点从链表 mDevices 移除。
- 设备节点移除,遍历 mClosingDevices 链表,为每个已卸载的设备节点生成 DEVICE_REMOVED 事件,用来关闭所有待关闭的设备节点,然后移除已卸载的设备节点。
- 设备节点扫描,在构建 EventHub 时,设置 mNeedToScanDevices 标志位为 true,因此在构建后第一次调用 EventHub::getEvent() 函数时会调用 EventHub::scanDevicesLocked() 函数,其函数内部继续调用 EventHub::scanDirLocked() 函数,遍历 /dev/input 文件夹下的所有设备节点,并分别对其执行 EventHub::openDeviceLocked() 函数完成设备节点的打开。
- 设备节点添加,遍历 mOpeningDevices 链表,为每个新加载的设备节点生成 DEVICE_ADDED 事件,用来添加已打开的设备节点。
- 扫描结束,如果需要则生成 FINISHED_DEVICE_SCAN 事件,以结束设备节点的扫描。
- 遍历 mPendingEventItems 数组:从 epoll_wait() 函数取出的待处理 epoll_event 存储在 mPendingEventItems 数组中,通过 epoll_event 的 data 字段的文件描述符 fd 来确认事件来源,如果是 EventHub 构建时注册的 INotify 事件并且可读则设置 mPendingINotify 标志为 true,并继续本次循环。如果是 EventHub 构建时注册的 wake 唤醒事件则循环调用 read() 函数读取管道中的数据缓存到 buffer 中。
- 如果是输入事件且可读,则通过 EventHub::getDeviceByFdLocked() 来获知输入事件的设备节点,然后通过 read() 函数读取该设备节点的输入事件,并存入到 readBuffer 中,轮询 readBuffer 取出 input_event 结构体数据,转换为 RawEvent 对象,并保存到链表 buffer 中。如果是输入事件,且需要挂起,则调用 EventHub::closeDeviceLocked() 函数,关闭卸载该设备节点。
- 输入事件处理完,如果 mPendingINotify 标志为 true 且还有事件未处理,即 EventHub 构建时注册的 INotify 事件,说明设备节点发生了增删操作,则需要调用 EventHub::readNotifyLocked() 函数读取并处理存储在 mINotifyFd 中的 INotify 事件,完成设备的加载与卸载。
- 如果处理了 INotify 事件,则返回到循环开始处,重新执行循环体,以便生成设备节点变化的事件放入 buffer 中。
- 如果此次 EventHub::getEvents() 调用成功获取了一些事件,或要求唤醒 InputReader,则退出循环结束本次调用,使 InputReader 可以立刻对事件进行处理。如果没有能获取到事件,说明 mPendingEventItems 中没有事件可用,则执行 epoll_wait() 函数等待新事件到来,将结果存储到 mPendingEventItems 里并重置 mPendingEventIndex 为 0。
1.1.1、EventHub::closeAllDevicesLocked()
xref: /frameworks/native/services/inputflinger/reader/EventHub.cpp
void EventHub::closeAllDevicesLocked() {mUnattachedVideoDevices.clear(); // 清理已解绑的视频设备 - TouchVideoDevicewhile (mDevices.size() > 0) { // 字典 mDevices 不为空,则循环调用 closeDeviceLocked()函数关闭所有设备节点closeDeviceLocked(mDevices.valueAt(mDevices.size() - 1));}
}void EventHub::closeDeviceLocked(Device* device) {ALOGI("Removed device: path=%s name=%s id=%d fd=%d classes=0x%x", device->path.c_str(),device->identifier.name.c_str(), device->id, device->fd, device->classes);if (device->id == mBuiltInKeyboardId) {ALOGW("built-in keyboard device %s (id=%d) is closing! the apps will not like this",device->path.c_str(), mBuiltInKeyboardId);mBuiltInKeyboardId = NO_BUILT_IN_KEYBOARD;}// 从 Epoll 中解注册该设备节点,最终交由 epoll_ctl(mEpollFd, EPOLL_CTL_DEL, fd, nullptr) 来移除掉unregisterDeviceFromEpollLocked(device);if (device->videoDevice) { // 如果该设备节点中有 TouchVideoDevice,则添加到 mUnattachedVideoDevices 数组中// 注意:这一步必须在视频设备从 Epoll 中移除后完成mUnattachedVideoDevices.push_back(std::move (device->videoDevice));}releaseControllerNumberLocked(device);mDevices.removeItem(device->id); // mDevices 中移除该设备节点device->close(); // 关闭设备节点// 如果设备节点存在,断开其链接Device * pred = nullptr;bool found = false;// 遍历 mOpeningDevices 查找刚才关闭的设备节点for (Device* entry = mOpeningDevices; entry != nullptr; ) {if (entry == device) {found = true; // 在 mOpeningDevices 中找到后,设置 found 为 truebreak;}pred = entry;entry = entry->next;}if (found) {// 如果在 mOpeningDevices 中找到该设备节点,则断开其链接并将其删除ALOGI("Device %s was immediately closed after opening.", device->path.c_str());if (pred) {pred->next = device->next;} else {mOpeningDevices = device->next;}delete device;} else {// 未找到则将其链接到 mClosingDevices 中,稍后通知客户端删除设备节点device->next = mClosingDevices;mClosingDevices = device;}
}
- 在 EventHub::closeAllDevicesLocked() 函数中,先清理已解绑的视频设备(TouchVideoDevice),然后判断容器 mDevices 是否为空,如果不为空则继续调用 EventHub::closeDeviceLocked() 函数关闭该设备节点。
- 在 EventHub::closeDeviceLocked() 函数中,先从 Epoll 中解注册该设备节点,其最终交由 epoll_ctl(mEpollFd, EPOLL_CTL_DEL, fd, nullptr) 来移除掉该设备节点。如果该设备节点中有 TouchVideoDevice,则添加到 mUnattachedVideoDevices 数组中(注意:这一步必须在视频设备从 Epoll 中移除后完成)。
- 从 mDevices 中移除该设备节点,然后调用 EventHub::Device::close() 函数关闭该设备节点,随后遍历 mOpeningDevices 链表查找刚才关闭的设备节点,如果在 mOpeningDevices 链表中找到该设备节点,则断开其链接并将其删除,如果未找到则将其链接到 mClosingDevices 链表中,稍后通知客户端删除设备节点。
1.1.2、EventHub::scanDevicesLocked()
xref: /frameworks/native/services/inputflinger/reader/EventHub.cpp
void EventHub::scanDevicesLocked() {// 继续调用 scanDirLocked() 函数遍历/dev/input文件夹下的所有设备节点并打开status_t result = scanDirLocked(DEVICE_PATH);if (result < 0) {ALOGE("scan dir failed for %s", DEVICE_PATH);}if (isV4lScanningEnabled()) {result = scanVideoDirLocked(VIDEO_DEVICE_PATH);if (result != OK) {ALOGE("scan video dir failed for %s", VIDEO_DEVICE_PATH);}}// 打开一个名为VIRTUAL_KEYBOARD的输入设备,该设备时刻是打开着的,是一个虚拟的输入设备,没有对应的输入节点if (mDevices.indexOfKey(ReservedInputDeviceId::VIRTUAL_KEYBOARD_ID) < 0) {createVirtualKeyboardLocked();}
}
继续调用 EventHub::scanDirLocked() 函数遍历 /dev/input 文件夹下的所有设备节点并打开,扫描并打开 TouchVideoDevice 设备,以及打开名为 VIRTUAL_KEYBOARD 的虚拟输入设备节点,这些有兴趣的童鞋可自行查看源码。
1.1.3、EventHub::scanDirLocked()
xref: /frameworks/native/services/inputflinger/reader/EventHub.cpp
status_t EventHub::scanDirLocked(const char* dirname) {char devname[PATH_MAX];char* filename;DIR* dir;struct dirent* de;dir = opendir(dirname); // 打开指定文件目录if (dir == nullptr) return -1;strcpy(devname, dirname);filename = devname + strlen(devname);*filename++ = '/';while ((de = readdir(dir))) {if (de->d_name[0] == '.' &&(de->d_name[1] == '\0' || (de->d_name[1] == '.' && de->d_name[2] == '\0')))continue;strcpy(filename, de->d_name);// 继续调用 openDeviceLocked() 函数打开指定路径的设备节点,为其创建并填充Device结构体openDeviceLocked(devname);}closedir(dir); // 遍历完毕后关闭该文件目录return 0;
}
调用系统的 opendir() 函数,根据传入的路径名打开指定的文件目录,遍历文件目录下的所有设备节点,分别对其执行EventHub::openDeviceLocked() 函数完成设备的打开操作。
1.1.4、EventHub::openDeviceLocked()
xref: /frameworks/native/services/inputflinger/reader/EventHub.cpp
status_t EventHub::openDeviceLocked(const char*devicePath) {char buffer[ 80];ALOGV("Opening device: %s", devicePath);// 调用系统的 opendir() 函数,打开指定路径的设备节点int fd = open(devicePath, O_RDWR | O_CLOEXEC | O_NONBLOCK);if (fd < 0) {ALOGE("could not open %s, %s\n", devicePath, strerror(errno));return -1;}InputDeviceIdentifier identifier;// 获取设备节点名if (ioctl(fd, EVIOCGNAME(sizeof(buffer) - 1), &buffer) < 1){ALOGE("Could not get device name for %s: %s", devicePath, strerror(errno));} else{buffer[sizeof(buffer) - 1] = '\0';identifier.name = buffer;}// 检查该设备节点是否在我们的排除列表中for (size_t i = 0; i < mExcludedDevices.size(); i++) {const std::string& item = mExcludedDevices[i];if (identifier.name == item) {ALOGI("ignoring event id %s driver %s\n", devicePath, item.c_str());close(fd); // 如果在 mExcludedDevices 中则关闭return -1;}}// 获取设备节点的驱动程序版本,获取不到则关闭int driverVersion;if (ioctl(fd, EVIOCGVERSION, &driverVersion)){ALOGE("could not get driver version for %s, %s\n", devicePath, strerror(errno));close(fd);return -1;}// 获取设备节点标识符struct input_id inputId;if (ioctl(fd, EVIOCGID, &inputId)){ALOGE("could not get device input id for %s, %s\n", devicePath, strerror(errno));close(fd);return -1;}identifier.bus = inputId.bustype;identifier.product = inputId.product;identifier.vendor = inputId.vendor;identifier.version = inputId.version;// 获取设备节点物理位置if (ioctl(fd, EVIOCGPHYS(sizeof(buffer) - 1), & buffer) <1){// fprintf(stderr, "could not get location for %s, %s\n", devicePath, strerror(errno));} else{buffer[sizeof(buffer) - 1] = '\0';identifier.location = buffer;}// 获取设备节点唯一idif (ioctl(fd, EVIOCGUNIQ(sizeof(buffer) - 1), & buffer) <1){// fprintf(stderr, "could not get idstring for %s, %s\n", devicePath, strerror(errno));} else{buffer[sizeof(buffer) - 1] = '\0';identifier.uniqueId = buffer;}// 填充设备节点的描述符assignDescriptorLocked(identifier);// 分配设备,此时设备对象获得 fd 的所有权int32_t deviceId = mNextDeviceId++;// 新建输入设备节点对象 DeviceDevice* device = new Device(fd, deviceId, devicePath, identifier);// 加载输入设备的配置文件loadConfigurationLocked(device);// 找出设备能报告的事件类型ioctl(fd, EVIOCGBIT(EV_KEY, sizeof(device->keyBitmask)), device->keyBitmask);ioctl(fd, EVIOCGBIT(EV_ABS, sizeof(device->absBitmask)), device->absBitmask);ioctl(fd, EVIOCGBIT(EV_REL, sizeof(device->relBitmask)), device->relBitmask);ioctl(fd, EVIOCGBIT(EV_SW, sizeof(device->swBitmask)), device->swBitmask);ioctl(fd, EVIOCGBIT(EV_LED, sizeof(device->ledBitmask)), device->ledBitmask);ioctl(fd, EVIOCGBIT(EV_FF, sizeof(device->ffBitmask)), device->ffBitmask);ioctl(fd, EVIOCGPROP(sizeof(device->propBitmask)), device->propBitmask);// 检查是不是键盘。忽略按键范围内的所有按键,除了操纵杆和手柄按键,因为它们在很大程度上就像键盘一样bool haveKeyboardKeys =containsNonZeroByte(device->keyBitmask, 0, sizeof_bit_array(BTN_MISC)) ||containsNonZeroByte(device->keyBitmask, sizeof_bit_array(BTN_WHEEL),sizeof_bit_array(KEY_MAX + 1));bool haveGamepadButtons = containsNonZeroByte(device->keyBitmask, sizeof_bit_array(BTN_MISC),sizeof_bit_array(BTN_MOUSE)) ||containsNonZeroByte(device->keyBitmask, sizeof_bit_array(BTN_JOYSTICK),sizeof_bit_array(BTN_DIGI));if (haveKeyboardKeys || haveGamepadButtons) {device->classes |= INPUT_DEVICE_CLASS_KEYBOARD;}// 检查是否是一个光标设备,比如轨迹球或鼠标if (test_bit(BTN_MOUSE, device->keyBitmask) && test_bit(REL_X, device->relBitmask) &&test_bit(REL_Y, device->relBitmask)) {device->classes |= INPUT_DEVICE_CLASS_CURSOR;}// 检查是不是一个旋转编码器类型的设备String8 deviceType = String8();if (device->configuration &&device->configuration->tryGetProperty(String8("device.type"), deviceType)) {if (!deviceType.compare(String8("rotaryEncoder"))) {device->classes |= INPUT_DEVICE_CLASS_ROTARY_ENCODER;}}// 检查这是不是触控板,即判断是不是一个新的现代多点触控驱动程序if (test_bit(ABS_MT_POSITION_X, device->absBitmask) &&test_bit(ABS_MT_POSITION_Y, device->absBitmask)) {// 有些操纵杆(如PS3控制器)报告的轴与ABS_MT范围相冲突,因此尝试确认该设备确实是触摸屏if (test_bit(BTN_TOUCH, device->keyBitmask) || !haveGamepadButtons) {device->classes |= INPUT_DEVICE_CLASS_TOUCH | INPUT_DEVICE_CLASS_TOUCH_MT;}// 检查是不是老式的单触控驱动} else if (test_bit(BTN_TOUCH, device->keyBitmask) && test_bit(ABS_X, device->absBitmask) &&test_bit(ABS_Y, device->absBitmask)) {device->classes |= INPUT_DEVICE_CLASS_TOUCH;// 检查是不是BT触控笔} else if ((test_bit(ABS_PRESSURE, device->absBitmask) ||test_bit(BTN_TOUCH, device->keyBitmask)) &&!test_bit(ABS_X, device->absBitmask) && !test_bit(ABS_Y, device->absBitmask)) {device->classes |= INPUT_DEVICE_CLASS_EXTERNAL_STYLUS;// 键盘会尝试使用一些按钮,不过我们要保留这些,这样我们可以将它与触摸屏数据融合,// 所以把它们拿回来,注意,这意味着外部触控笔不能同时是键盘设备device->classes &= ~INPUT_DEVICE_CLASS_KEYBOARD;}// 检查这个装置是不是操纵杆。假设操纵杆总是带有手柄按钮,以便将其与其他带有绝对轴的设备(如加速度计)区分开来if (haveGamepadButtons) {uint32_t assumedClasses = device->classes | INPUT_DEVICE_CLASS_JOYSTICK;for (int i = 0; i <= ABS_MAX; i++) {if (test_bit(i, device->absBitmask) &&(getAbsAxisUsage(i, assumedClasses) & INPUT_DEVICE_CLASS_JOYSTICK)) {device->classes = assumedClasses;break;}}}// 检查设备是否有交换机for (int i = 0; i <= SW_MAX; i++) {if (test_bit(i, device->swBitmask)) {device->classes |= INPUT_DEVICE_CLASS_SWITCH;break;}}// 检查设备是否支持振动器if (test_bit(FF_RUMBLE, device->ffBitmask)) {device->classes |= INPUT_DEVICE_CLASS_VIBRATOR;}// 配置虚拟密钥if ((device->classes & INPUT_DEVICE_CLASS_TOUCH)) {// 加载触摸屏的虚拟按键(如果有的话),现在这样做是为了确保在必要时能加载 keymap 即键映射bool success = loadVirtualKeyMapLocked(device);if (success) {device->classes |= INPUT_DEVICE_CLASS_KEYBOARD;}}// 加载键映射,需要为操纵杆配置参数,因为键布局可能指定轴status_t keyMapStatus = NAME_NOT_FOUND;if (device->classes & (INPUT_DEVICE_CLASS_KEYBOARD | INPUT_DEVICE_CLASS_JOYSTICK)) {// 加载设备的键映射keyMapStatus = loadKeyMapLocked(device);}// 配置键盘、手柄或虚拟键盘if (device->classes & INPUT_DEVICE_CLASS_KEYBOARD) {// Register the keyboard as a built-in keyboard if it is eligible.if (!keyMapStatus && mBuiltInKeyboardId == NO_BUILT_IN_KEYBOARD &&isEligibleBuiltInKeyboard(device->identifier, device->configuration, & device->keyMap)){mBuiltInKeyboardId = device->id;}// 'Q' key support = cheap test of whether this is an alpha-capable kbdif (hasKeycodeLocked(device, AKEYCODE_Q)) {device->classes |= INPUT_DEVICE_CLASS_ALPHAKEY;}// 检查设备是否有DPADif (hasKeycodeLocked(device, AKEYCODE_DPAD_UP) &&hasKeycodeLocked(device, AKEYCODE_DPAD_DOWN) &&hasKeycodeLocked(device, AKEYCODE_DPAD_LEFT) &&hasKeycodeLocked(device, AKEYCODE_DPAD_RIGHT) &&hasKeycodeLocked(device, AKEYCODE_DPAD_CENTER)) {device->classes |= INPUT_DEVICE_CLASS_DPAD;}// 检查设备有没有手柄for (size_t i = 0; i < sizeof(GAMEPAD_KEYCODES) / sizeof(GAMEPAD_KEYCODES[0]); i++) {if (hasKeycodeLocked(device, GAMEPAD_KEYCODES[i])) {device->classes |= INPUT_DEVICE_CLASS_GAMEPAD;break;}}}// 如果该设备不被识别为是我们可以处理的东西,就不要监控它if (device->classes == 0) {ALOGV("Dropping device: id=%d, path='%s', name='%s'", deviceId, devicePath,device->identifier.name.c_str());delete device;return -1;}// 确认设备是否有麦克风if (deviceHasMicLocked(device)) {device->classes |= INPUT_DEVICE_CLASS_MIC;}// 确定设备是外部设备还是内部设备if (isExternalDeviceLocked(device)) {device->classes |= INPUT_DEVICE_CLASS_EXTERNAL;}if (device->classes & (INPUT_DEVICE_CLASS_JOYSTICK | INPUT_DEVICE_CLASS_DPAD) &&device->classes & INPUT_DEVICE_CLASS_GAMEPAD) {device->controllerNumber = getNextControllerNumberLocked(device);setLedForControllerLocked(device);}// 通过比较设备名称找到匹配的视频设备。须在registerDeviceForEpollLocked之前完成,这样两个fds都被添加到epoll中for (std::unique_ptr <TouchVideoDevice>& videoDevice : mUnattachedVideoDevices){if (device->identifier.name == videoDevice->getName()) {device->videoDevice = std::move (videoDevice);break;}}mUnattachedVideoDevices.erase(std::remove_if (mUnattachedVideoDevices.begin(), mUnattachedVideoDevices.end(),[](const std::unique_ptr < TouchVideoDevice > & videoDevice){return videoDevice == nullptr;}),mUnattachedVideoDevices.end());// 将新打开的设备节点的可读事件注册到 Epoll 中if (registerDeviceForEpollLocked(device) != OK) {delete device; // 注册不成功则删除该设备节点	return -1;}configureFd(device);// 将新建的 Device 结构体添加到 mDevices 字典中以供检索之需addDeviceLocked(device);return OK;
}
- 调用系统的 open() 函数打开指定路径的设备节点,新建 InputDeviceIdentifier 对象,这是一个输入设备标识符,之后经过一系列的获取、检查以及判断操作,给 InputDeviceIdentifier 对象赋值不同的参数来填充该输入设备描述符。
- 为上一步打开的设备节点创建 Device 结构体对象,调用 EventHub::loadConfigurationLocked() 函数传入新建的 Device 对象,来加载输入设备的配置文件,之后经过一系列的获取、检查以及判断操作,给 Device 对象赋值参数来填充其结构体。
- 通过 EventHub::registerDeviceForEpollLocked() 函数将新打开的设备节点的可读事件注册到 Epoll 中。
- 最后调用 EventHub::addDeviceLocked() 函数将新建的 Device 结构体添加到 mDevices 字典中以供检索之需。
1.1.5、EventHub::registerDeviceForEpollLocked()
xref: /frameworks/native/services/inputflinger/reader/EventHub.cpp
status_t EventHub::registerFdForEpoll(int fd) {struct epoll_event eventItem = {}; // 新建 epoll_event 结构体eventItem.events = EPOLLIN | EPOLLWAKEUP; // 设置监听事件的类型eventItem.data.fd = fd; // 设置监听事件的文件描述符// 调用 epoll_ctl() 函数将新打开的设备节点可读事件注册到 Epoll 中if (epoll_ctl(mEpollFd, EPOLL_CTL_ADD, fd, & eventItem)){ALOGE("Could not add fd to epoll instance: %s", strerror(errno));return -errno;}return OK;
}status_t EventHub::registerDeviceForEpollLocked(Device* device) {if (device == nullptr) {if (DEBUG) {LOG_ALWAYS_FATAL("Cannot call registerDeviceForEpollLocked with null Device");}return BAD_VALUE;}// 继续调用 registerFdForEpoll() 函数将新打开的设备节点的可读事件注册到 Epoll 中status_t result = registerFdForEpoll(device->fd);if (result != OK) {ALOGE("Could not add input device fd to epoll for device %"PRId32, device->id);return result;}if (device->videoDevice) { // 如果设备节点中有 TouchVideoDevice 设备则也要将其可读事件注册到 Epoll 中registerVideoDeviceForEpollLocked(*device->videoDevice);}return result;
}
EventHub::registerDeviceForEpollLocked() 函数内继续调用 EventHub::registerFdForEpoll() 函数将新打开的设备节点的可读事件注册到 Epoll 中,如果设备节点中有 TouchVideoDevice 设备则也要将其可读事件注册到 Epoll 中,其最终都是调用 epoll_ctl() 函数将新打开的设备节点可读事件注册到 Epoll 中。
1.1.6、EventHub::addDeviceLocked()
xref: /frameworks/native/services/inputflinger/reader/EventHub.cpp
void EventHub::addDeviceLocked(Device* device) {// 将新建的 Device 结构体添加到 mDevices 字典中mDevices.add(device->id, device);// 将新建的 Device 链接到 mOpeningDevices 链表中device->next = mOpeningDevices;mOpeningDevices = device;
}
将新建的 Device 结构体添加到 mDevices 字典中,同时将新建的 Device 链接到 mOpeningDevices 链表中。
1.1.7、EventHub::readNotifyLocked()
xref: /frameworks/native/services/inputflinger/reader/EventHub.cpp
status_t EventHub::readNotifyLocked() {int res;char event_buf[ 512];int event_size;int event_pos = 0;struct inotify_event* event;ALOGV("EventHub::readNotify nfd: %d\n", mINotifyFd);// 读取注册到 Epoll 中的 mINotifyFd 中的事件列表res = read(mINotifyFd, event_buf, sizeof(event_buf));if (res < (int)sizeof(*event)){if (errno == EINTR) return 0;ALOGW("could not get event, %s\n", strerror(errno));return -1;}while (res >= (int)sizeof(*event)){// 遍历事件列表,逐个处理列表中的事件event = (struct inotify_event*)(event_buf + event_pos);if (event->len) {if (event->wd == mInputWd) { // 判断事件对应的 watch 对象的描述符std::string filename = StringPrintf("%s/%s", DEVICE_PATH, event->name);if (event->mask & IN_CREATE) { // 如果是输入事件并且事件类型是 IN_CREATE// 则打开并加载对应的设备节点,参考1.1.4、EventHub::openDeviceLocked() 详解openDeviceLocked(filename.c_str());} else {ALOGI("Removing device '%s' due to inotify event\n", filename.c_str());// 否者删除卸载对应的设备节点,参考1.1.1、EventHub::closeAllDevicesLocked() 详解closeDeviceByPathLocked(filename.c_str()); }} else if (event->wd == mVideoWd) { // TouchVideoDevice 相关的事件,同上不再赘述if (isV4lTouchNode(event->name)) {std::string filename = StringPrintf("%s/%s", VIDEO_DEVICE_PATH, event -> name);if (event->mask & IN_CREATE) {openVideoDeviceLocked(filename);} else {ALOGI("Removing video device '%s' due to inotify event", filename.c_str());closeVideoDeviceByPathLocked(filename);}}} else {LOG_ALWAYS_FATAL("Unexpected inotify event, wd = %i", event->wd);}}// 移动到列表中的下一个事件event_size = sizeof(*event) + event->len;res -= event_size;event_pos += event_size;}return 0;
}
当 epoll_wait() 函数所返回的 Epoll 事件都处理完毕后,调用 EventHub::readNotifyLocked() 函数读取 mINotifyFd 中的事件,并进行设备的加载与卸载操作。
分析完 EventHub::getEvent() 函数的整个代码流程,其尽可能多地读取设备增删事件与原始输入事件,将它们封装成 RawEvent 结构体,并存入 buffer 中供 InputReader 进行处理。下面结合时序图,跟着源码一起看看 InputReader 处理事件的过程。
首先整体看一下事件处理过程的时序图,然后再结合源码分析来探索,有助于理解事件的整个处理过程。
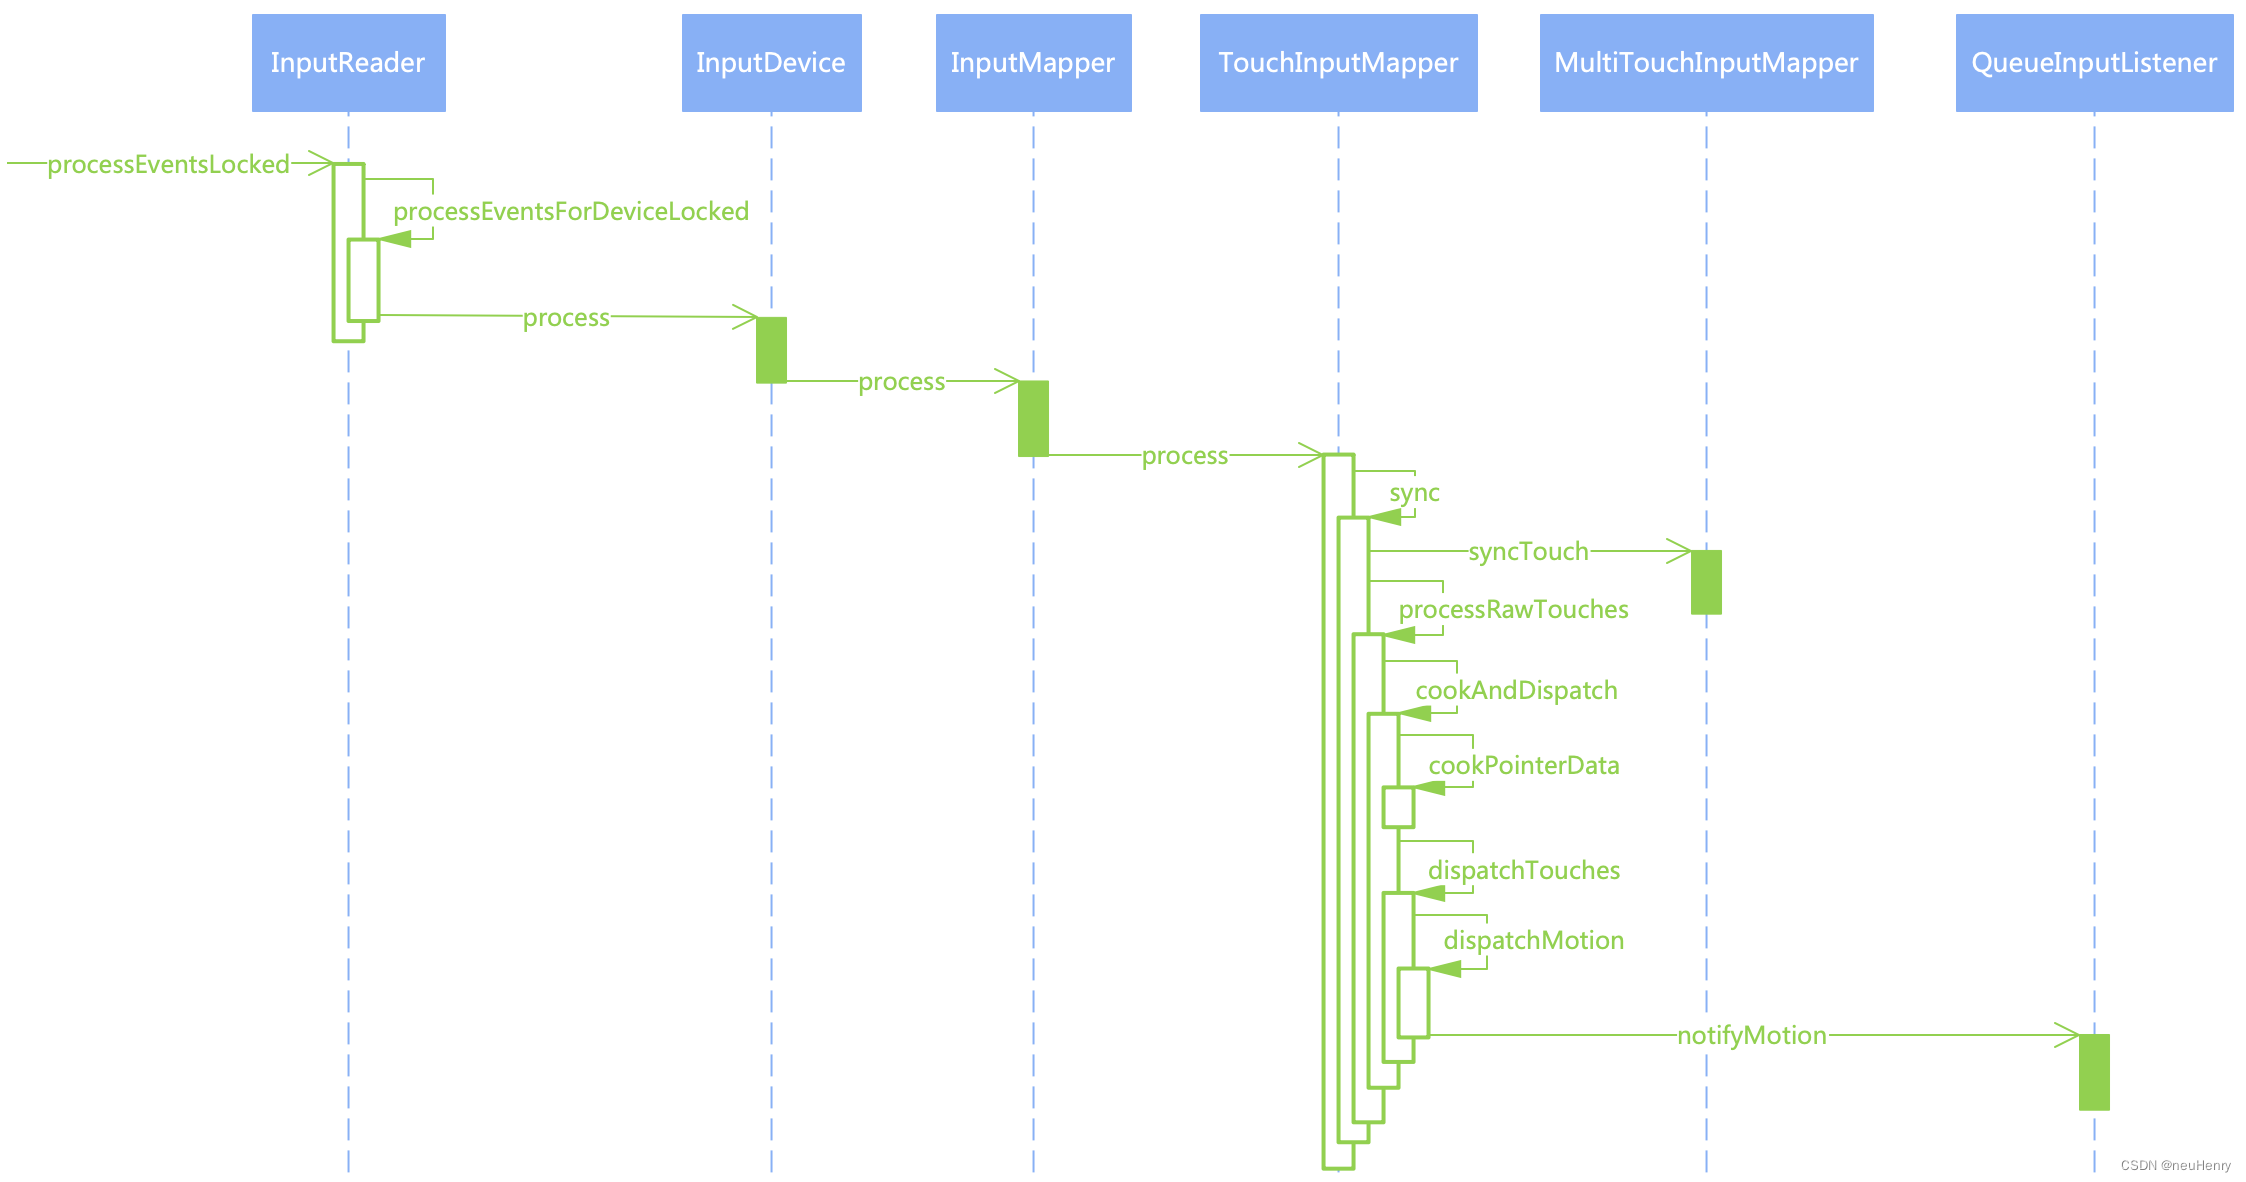
1.2、InputReader::processEventsLocked()
xref: /frameworks/native/services/inputflinger/reader/InputReader.cpp
void InputReader::processEventsLocked(const RawEvent* rawEvents, size_t count) {for (const RawEvent* rawEvent = rawEvents; count;) { // 遍历处理每个 RawEventint32_t type = rawEvent->type; // 获取事件类型size_t batchSize = 1; // batchSize 用于计算同一设备节点的同一批输入事件if (type < EventHubInterface::FIRST_SYNTHETIC_EVENT) {int32_t deviceId = rawEvent->deviceId; // 获取设备节点 IDwhile (batchSize < count) {if (rawEvent[batchSize].type >= EventHubInterface::FIRST_SYNTHETIC_EVENT || rawEvent[batchSize].deviceId != deviceId) {// 如果数据流中的事件不是输入事件或者不是同一个设备节点的事件则跳出循环break;}batchSize += 1; // 循环获取同一设备节点的同一批输入事件的数量}// 事件获取完毕,交给 InputReader::processEventsForDeviceLocked() 函数进一步处理processEventsForDeviceLocked(deviceId, rawEvent, batchSize);} else { // 不是输入事件则按照事件类型分别处理switch (rawEvent->type) {case EventHubInterface::DEVICE_ADDED: // 添加设备节点addDeviceLocked(rawEvent->when, rawEvent->deviceId);break;case EventHubInterface::DEVICE_REMOVED: // 移除设备节点removeDeviceLocked(rawEvent->when, rawEvent->deviceId);break;case EventHubInterface::FINISHED_DEVICE_SCAN:  // 扫描设备节点handleConfigurationChangedLocked(rawEvent->when);break;default:ALOG_ASSERT(false); // 不会发生break;}}count -= batchSize; // 处理完同一设备节点的同一批输入事件后,数据流总数减去已处理的数量rawEvent += batchSize; // rawEvent 指针也向后移动同样的数值}
}
xref: /frameworks/native/services/inputflinger/reader/include/EventHub.h
class EventHubInterface {
public:EventHubInterface() {}virtual ~EventHubInterface() {}// 添加或删除设备时生成的合成原始事件类型代码集enum {DEVICE_ADDED = 0x10000000, // 添加设备时发送DEVICE_REMOVED = 0x20000000, // 移除设备时发送// 当报告最近一次扫描中所有添加/删除的设备时发送,注意:此事件总是至少要发送一次FINISHED_DEVICE_SCAN = 0x30000000,// 标识第一个合成事件FIRST_SYNTHETIC_EVENT = DEVICE_ADDED,};
};
结合 EventHubInterface 类中的枚举常量来分析可知,如果获取的事件类型小于 EventHubInterface::FIRST_SYNTHETIC_EVENT,也即小于 EventHubInterface::DEVICE_ADDED,则表示此次不是一次增加、删除或者扫描设备事件,再结合上面文章的分析可知,这是待处理的输入事件,因此调用 InputReader::processEventsForDeviceLocked() 函数处理当前设备的输入事件。
1.2.1、 InputReader::processEventsForDeviceLocked()
xref: /frameworks/native/services/inputflinger/reader/InputReader.cpp
void InputReader::processEventsForDeviceLocked(int32_t eventHubId, const RawEvent* rawEvents,size_t count) {// 根据设备节点 ID 在 mDevices 字典中寻找保存对应设备节点的元素auto deviceIt = mDevices.find(eventHubId);if (deviceIt == mDevices.end()) { // 未找到设备节点ALOGW("Discarding event for unknown eventHubId %d.", eventHubId);return;}// unordered_map中,deviceIt->first 获取的是 key 键值,deviceIt->second 获取 value 值即设备节点 InputDevicestd::shared_ptr<InputDevice>& device = deviceIt->second;if (device->isIgnored()) {// ALOGD("Discarding event for ignored deviceId %d.", deviceId);return;}// 如果不是被忽略的设备节点的事件,则交给 InputDevice 具体处理device->process(rawEvents, count);
}
根据设备节点 ID 在 mDevices 字典中寻找对应设备节点,如果不是被忽略的设备节点的事件,则交给 InputDevice 具体处理。
1.2.2、 InputDevice::process()
xref: /frameworks/native/services/inputflinger/reader/include/InputDevice.h
class InputDevice {
public:InputDevice(InputReaderContext* context, int32_t id, int32_t generation,const InputDeviceIdentifier& identifier);~InputDevice();private:InputReaderContext* mContext;int32_t mId;int32_t mGeneration;int32_t mControllerNumber;InputDeviceIdentifier mIdentifier;std::string mAlias;Flags<InputDeviceClass> mClasses;// 从 EventHub ID 映射到设备上下文和 InputMapperusing MapperVector = std::vector<std::unique_ptr<InputMapper>>;using DevicePair = std::pair<std::unique_ptr<InputDeviceContext>, MapperVector>;// 从 EventHub ID 映射到设备上下文与 MapperVectorstd::unordered_map<int32_t, DevicePair> mDevices;// 对特定子设备节点上的每个 InputMapper 运行一次函数 finline void for_each_mapper_in_subdevice(int32_t eventHubDevice,std::function<void(InputMapper&)> f) {auto deviceIt = mDevices.find(eventHubDevice);if (deviceIt != mDevices.end()) {auto& devicePair = deviceIt->second;auto& mappers = devicePair.second;for (auto& mapperPtr : mappers) {f(*mapperPtr);}}}
};
xref: /frameworks/native/services/inputflinger/reader/InputDevice.cpp
void InputDevice::process(const RawEvent* rawEvents, size_t count) {// 遍历所有的 RawEvent,按顺序处理每个 InputMapper 的所有事件,而不是简单地全部给到 InputMapper 来批量处理// 因为 InputMapper 可能具有必须交叉处理的事件。如:操纵杆移动事件和手柄按键是由不同的 InputMapper 处理的// 但它们还是要按照收到的顺序进行分配for (const RawEvent* rawEvent = rawEvents; count != 0; rawEvent++) {ALOGD("Input event: device=%d type=0x%04x code=0x%04x value=0x%08x when=%" PRId64,rawEvent->deviceId, rawEvent->type, rawEvent->code, rawEvent->value, rawEvent->when);// 默认为 false,如果设备节点的输入事件缓冲区溢出,这个值为 true if (mDropUntilNextSync) {if (rawEvent->type == EV_SYN && rawEvent->code == SYN_REPORT) {mDropUntilNextSync = false;ALOGD("Recovered from input event buffer overrun.");} else {ALOGD("Dropped input event while waiting for next input sync.");}} else if (rawEvent->type == EV_SYN && rawEvent->code == SYN_DROPPED) { // 缓冲区溢出ALOGI("Detected input event buffer overrun for device %s.", getName().c_str());mDropUntilNextSync = true;reset(rawEvent->when);} else {for_each_mapper_in_subdevice(rawEvent->deviceId, [rawEvent](InputMapper& mapper) {// 对指定的子设备节点上的每个 InputMapper 运行一次 InputMapper::process() 函数mapper.process(rawEvent);});}--count;}
}
遍历所有的 RawEvent,通过筛选获取符合条件的 RawEvent 传入 InputMapper::process() 函数来处理,注意,必须按顺序处理每个 InputMapper 的所有事件,因为 InputMapper 可能有须交叉处理的事件,如:操纵杆移动事件和手柄按键是由不同的 InputMapper 处理的,但它们还是要按照收到的顺序进行分配处理。
1.2.3、 InputMapper::process()
xref: /frameworks/native/services/inputflinger/reader/mapper/InputMapper.h
// InputMapper 将原始输入事件转换为处理过的输入数据。
// 为了处理不同类别的事件,单个输入设备可以有多个关联的 InputMapper
class InputMapper {
public:explicit InputMapper(InputDeviceContext& deviceContext);virtual ~InputMapper();virtual void process(const RawEvent* rawEvent) = 0; // 纯虚函数......
protected:InputDeviceContext& mDeviceContext;......
xref: /frameworks/native/services/inputflinger/reader/mapper/InputMapper.cpp
InputMapper::InputMapper(InputDeviceContext& deviceContext) : mDeviceContext(deviceContext) {}
InputMapper::~InputMapper() {}void InputMapper::populateDeviceInfo(InputDeviceInfo* info) {info->addSource(getSources());
}
通过 InputMapper 类声明时的注释可知,其主要功能是将原始输入事件转换为处理过的输入数据。并且为了处理不同类别的事件,单个输入设备可以有多个关联的 InputMapper。
此外 InputMapper::process() 函数是一个纯虚函数,因此 InputMapper 类是一个抽象类,抽象类的唯⼀⽤途是为派⽣类提供基类,纯虚函数的作⽤是作为派⽣类中的成员函数的基础,并实现动态多态性。
InputMapper 有多个子类,如:
- TouchInputMapper:用于处理触摸输入事件;
- KeyboardInputMapper:处理键盘输入事件;
- SensorInputMapper:用于处理传感器输入事件;
- CursorInputMapper:用于处理光标输入事件。
下面以 TouchInputMapper 为例,来分析其对触摸事件是如何处理的?
1.2.4、 TouchInputMapper::process()
xref: /frameworks/native/services/inputflinger/reader/mapper/TouchInputMapper.h
class TouchInputMapper : public InputMapper {
public:explicit TouchInputMapper(InputDeviceContext& deviceContext);~TouchInputMapper() override;protected:CursorButtonAccumulator mCursorButtonAccumulator;CursorScrollAccumulator mCursorScrollAccumulator;TouchButtonAccumulator mTouchButtonAccumulator;......
};
xref: /frameworks/native/services/inputflinger/reader/mapper/TouchInputMapper.cpp
TouchInputMapper::TouchInputMapper(InputDeviceContext& deviceContext): InputMapper(deviceContext),mSource(0),mDeviceMode(DeviceMode::DISABLED),mRawSurfaceWidth(-1),mRawSurfaceHeight(-1),mSurfaceLeft(0),mSurfaceTop(0),mSurfaceRight(0),mSurfaceBottom(0),mPhysicalWidth(-1),mPhysicalHeight(-1),mPhysicalLeft(0),mPhysicalTop(0),mSurfaceOrientation(DISPLAY_ORIENTATION_0) {}
TouchInputMapper::~TouchInputMapper() {}uint32_t TouchInputMapper::getSources() {return mSource;
}
......
void TouchInputMapper::process(const RawEvent* rawEvent) {mCursorButtonAccumulator.process(rawEvent); // 处理鼠标和触摸板的按键事件mCursorScrollAccumulator.process(rawEvent); // 处理鼠标滚动、滑动事件mTouchButtonAccumulator.process(rawEvent); // 处理手写笔和手指的触摸事件// 驱动程序每次上报完触摸事件信息后,都会伴随上报一个同步事件 EV_SYNif (rawEvent->type == EV_SYN && rawEvent->code == SYN_REPORT) {sync(rawEvent->when, rawEvent->readTime);}
}
TouchInputMapper 继承自基类 InputMapper 实现了抽象基类的纯虚函数,在其 TouchInputMapper::process() 函数中,首先由累加器收集同步事件之前的触摸事件的信息,随后调用 TouchInputMapper::sync() 函数处理同步事件。
1.2.5、 TouchInputMapper::sync()
xref: /frameworks/native/services/inputflinger/reader/mapper/TouchInputMapper.cpp
void TouchInputMapper::sync(nsecs_t when, nsecs_t readTime) {// 添加一个空的 RawStatemRawStatesPending.emplace_back();// 获取刚添加的 RawStateRawState& next = mRawStatesPending.back();next.clear();next.when = when;next.readTime = readTime;// 同步按钮状态next.buttonState =mTouchButtonAccumulator.getButtonState() | mCursorButtonAccumulator.getButtonState();// 同步 Scrollnext.rawVScroll = mCursorScrollAccumulator.getRelativeVWheel();next.rawHScroll = mCursorScrollAccumulator.getRelativeHWheel();mCursorScrollAccumulator.finishSync();// 同步 TouchsyncTouch(when, &next);    // 最后一个 RawState 实际上是倒数第二个,因为我们刚刚添加了一个新 RawStateconst RawState& last = mRawStatesPending.size() == 1 ? mCurrentRawState : mRawStatesPending.rbegin()[1];// 分配指针idif (!mHavePointerIds) {assignPointerIds(last, next);}if (!next.rawPointerData.touchingIdBits.isEmpty() &&!next.rawPointerData.hoveringIdBits.isEmpty() &&last.rawPointerData.hoveringIdBits != next.rawPointerData.hoveringIdBits) {ALOGI("Multi-touch contains some hovering ids 0x%08x",next.rawPointerData.hoveringIdBits.value);}// 交给 TouchInputMapper::processRawTouches() 函数处理processRawTouches(false /*timeout*/);
}
- 调用 syncTouch() 函数把累加器收集到数据,同步到 mRawStatesPending 最后一个元素中,注意 syncTouch() 函数也是纯虚函数,需由子类来实现该函数,参见 MultiTouchInputMapper::syncTouch() 函数。
- 处理同步过来的数据,由于同步过来的数据,基本上还是元数据,因此需要对它加工,最终要生成高级事件,并分发出去。
1.2.5.1、 MultiTouchInputMapper::syncTouch()
xref: /frameworks/native/services/inputflinger/reader/mapper/MultiTouchInputMapper.cpp
void MultiTouchInputMapper::syncTouch(nsecs_t when, RawState* outState) {size_t inCount = mMultiTouchMotionAccumulator.getSlotCount();size_t outCount = 0;BitSet32 newPointerIdBits;mHavePointerIds = true;for (size_t inIndex = 0; inIndex < inCount; inIndex++) {// 从累加器中获取 Slot 数组的元素const MultiTouchMotionAccumulator::Slot * inSlot =mMultiTouchMotionAccumulator.getSlot(inIndex);if (!inSlot->isInUse()) { // 如果当前获取到的插槽不可用,则跳过继续遍历continue;}......// 省略部分判断逻辑// 将累加器的 Slot 数组的数据同步到 RawState->rawPointerData 中RawPointerData::Pointer& outPointer = outState->rawPointerData.pointers[outCount];outPointer.x = inSlot->getX();outPointer.y = inSlot->getY();outPointer.pressure = inSlot->getPressure();outPointer.touchMajor = inSlot->getTouchMajor();outPointer.touchMinor = inSlot->getTouchMinor();outPointer.toolMajor = inSlot->getToolMajor();outPointer.toolMinor = inSlot->getToolMinor();outPointer.orientation = inSlot->getOrientation();outPointer.distance = inSlot->getDistance();outPointer.tiltX = 0;outPointer.tiltY = 0;outPointer.toolType = inSlot->getToolType();if (outPointer.toolType == AMOTION_EVENT_TOOL_TYPE_UNKNOWN) {outPointer.toolType = mTouchButtonAccumulator.getToolType();if (outPointer.toolType == AMOTION_EVENT_TOOL_TYPE_UNKNOWN) {outPointer.toolType = AMOTION_EVENT_TOOL_TYPE_FINGER;}}bool isHovering = mTouchButtonAccumulator.getToolType() != AMOTION_EVENT_TOOL_TYPE_MOUSE &&(mTouchButtonAccumulator.isHovering() ||(mRawPointerAxes.pressure.valid && inSlot -> getPressure() <= 0));outPointer.isHovering = isHovering;// 如果可用,使用 trackingId 分配指针idif (mHavePointerIds) {int32_t trackingId = inSlot->getTrackingId();int32_t id = -1;if (trackingId >= 0) { // 将 trackingId 转化为 id// mPointerIdBits 保存的是手指的所有 idfor (BitSet32 idBits(mPointerIdBits); !idBits.isEmpty();) {uint32_t n = idBits.clearFirstMarkedBit();// mPointerTrackingIdMap 建立 id 到 trackingId 的映射,后续根据 trackingId 找到 idif (mPointerTrackingIdMap[n] == trackingId) {id = n;}}// 如果 id < 0 表示从缓存中,根据 trackingId 没有获取到 idif (id < 0 && !mPointerIdBits.isFull()) {// 由 mPointerIdBits 生成一个 id id = mPointerIdBits.markFirstUnmarkedBit();// 然后保存到 mPointerTrackingIdMap 中并建立映射mPointerTrackingIdMap[id] = trackingId;}}if (id < 0) { // id < 0 表示手指抬起mHavePointerIds = false;// 清除对应的数据outState->rawPointerData.clearIdBits();newPointerIdBits.clear();} else { // 获取到 id outPointer.id = id; // 保存 id // 保存 id -> index 间的映射,index 是数组 RawPointerData::pointers 的索引outState->rawPointerData.idToIndex[id] = outCount;outState->rawPointerData.markIdBit(id, isHovering);newPointerIdBits.markBit(id);}}outCount += 1;}// 保存按在屏幕上的手指数量outState->rawPointerData.pointerCount = outCount;mPointerIdBits = newPointerIdBits; // 保存所有手指的 id// 对于 SLOT 协议,同步的收尾工作不做任何事mMultiTouchMotionAccumulator.finishSync();
}
累加器收集的数据是由驱动程序直接上报的元数据,MultiTouchInputMapper::syncTouch() 函数负责把 Slot 数组中的元数据同步到 RawState::rawPointerData 中,其类型为 RawPointerData,结构体定义如下:
xref: /frameworks/native/services/inputflinger/reader/mapper/TouchInputMapper.h
// 指针集合的原始数据,包括一个指针 id 映射表
struct RawPointerData {struct Pointer {uint32_t id; // 手指的 id,手指的唯一标识int32_t x;......int32_t toolType; // 一个完全解码的AMOTION_EVENT_TOOL_TYPE常量bool isHovering;};uint32_t pointerCount; // 手指的数量Pointer pointers[ MAX_POINTERS]; // Pointer 数组保存触摸事件的所有信息// touchingIdBits 保存所有手指的 idBitSet32 hoveringIdBits, touchingIdBits, canceledIdBits;// index 只能作为数据的索引,来获取手指的触摸事件信息,由手指 id 通过 idToIndex 获取索引// 然后根据索引获取手指对应的触摸事件信息uint32_t idToIndex[ MAX_POINTER_ID + 1]; // 建立手指 id 到数组索引的映射RawPointerData();......inline void markIdBit (uint32_t id, bool isHovering){if (isHovering) {hoveringIdBits.markBit(id);} else {touchingIdBits.markBit(id);}}......
};
接下来就是处理同步过来的数据,由于同步过来的数据仍然是元数据,不能直接分发出去,因此需要对其加工,最终要生成高级事件,再分发出去,接下来就看 TouchInputMapper::processRawTouches() 函数的处理过程
1.2.5.2、 TouchInputMapper::processRawTouches()
xref: /frameworks/native/services/inputflinger/reader/mapper/TouchInputMapper.cpp
void TouchInputMapper::processRawTouches(bool timeout) {if (mDeviceMode == DeviceMode::DISABLED) {// 如果设备不可用/被禁用,则删除所有输入事件cancelTouch(mCurrentRawState.when, mCurrentRawState.readTime);mCurrentCookedState.clear();updateTouchSpots();return;}// 排除所有挂起的触摸状态。不变量mCurrentRawState总是有效的,且必须经过完整的处理和分派周期// 确保任何触及当前状态的事件都只会观察到已分派到管道其余部分的事件const size_t N = mRawStatesPending.size();size_t count;for (count = 0; count < N; count++) {// 遍历 mRawStatesPending 数组获取 RawState 准备处理const RawState& next = mRawStatesPending[count];// 未能分配触控笔id意味着我们正在等待触控笔数据,因此应该推迟管道的其余部分。if (assignExternalStylusId(next, timeout)) {break;}// 所有都已准备就绪clearStylusDataPendingFlags();// mCurrentRawState 保存当前正在处理的数据mCurrentRawState.copyFrom(next);if (mCurrentRawState.when < mLastRawState.when) {mCurrentRawState.when = mLastRawState.when;mCurrentRawState.readTime = mLastRawState.readTime;}// 加工以及分发事件cookAndDispatch(mCurrentRawState.when, mCurrentRawState.readTime);}if (count != 0) { // 成功处理完数据,从 mRawStatesPending 中擦除mRawStatesPending.erase(mRawStatesPending.begin(), mRawStatesPending.begin() + count);}if (mExternalStylusDataPending) { // 外接手写笔的待处理数据if (timeout) {nsecs_t when = mExternalStylusFusionTimeout - STYLUS_DATA_LATENCY;clearStylusDataPendingFlags();mCurrentRawState.copyFrom(mLastRawState);ALOGD("Timeout expired, synthesizing event with new stylus data");const nsecs_t readTime = when; // consider this synthetic event to be zero latency// 加工以及分发事件cookAndDispatch(when, readTime);} else if (mExternalStylusFusionTimeout == LLONG_MAX) {mExternalStylusFusionTimeout = mExternalStylusState.when + TOUCH_DATA_TIMEOUT;getContext()->requestTimeoutAtTime(mExternalStylusFusionTimeout);}}
}
该函数在开始处理元数据之前,首先使用 mCurrentRawState 复制保存当前正在处理的数据,后面会使用它进行前后两次的数据对比,生成高级事件,如:DOWN、MOVE、UP 事件,然后调用 TouchInputMapper::cookAndDispatch() 函数对数据进行加工和分发。
1.2.6、 TouchInputMapper::cookAndDispatch()
xref: /frameworks/native/services/inputflinger/reader/mapper/TouchInputMapper.cpp
void TouchInputMapper::cookAndDispatch(nsecs_t when, nsecs_t readTime) {// 总是从一个干净的状态开始,先清理 mCurrentCookedState 用于保存加工完毕的数据mCurrentCookedState.clear();// 将触控笔按钮应用到当前的原始状态applyExternalStylusButtonState(when);// 处理初始按下或悬停事件的策略bool initialDown = mLastRawState.rawPointerData.pointerCount == 0 &&mCurrentRawState.rawPointerData.pointerCount != 0;uint32_t policyFlags = 0;bool buttonsPressed = mCurrentRawState.buttonState & ~mLastRawState.buttonState;if (initialDown || buttonsPressed) {// 如果这是一个触摸屏,将 RawPointerData 隐藏在一个初始的 down 事件下if (mDeviceMode == DeviceMode::DIRECT) {getContext()->fadePointer();}if (mParameters.wake) {policyFlags |= POLICY_FLAG_WAKE;}}// 在处理 RawPointerData 之前,先消费掉原始的屏幕外 touches。如果消费了touches,后续代码将不会接收到任何指针数据if (consumeRawTouches(when, readTime, policyFlags)) {mCurrentRawState.rawPointerData.clear();}// 处理 RawPointerData,并使用处理过的 RawPointerData 数据填充 mCurrentCookedState.cookedPointerData 结构体// 处理过的 RawPointerData 与原始数据有这相同的id和索引,后续可以根据需要选择使用原始数据或处理过的数据cookPointerData();// 将触控笔压在当前处理过的状态上applyExternalStylusTouchState(when);// 如果需要,可以通知 QueuedInputListener 从原始按钮合成 AKEY_EVENT_ACTION_DOWNsynthesizeButtonKeys(getContext(), AKEY_EVENT_ACTION_DOWN, when, readTime, getDeviceId(),mSource, mViewport.displayId, policyFlags, mLastCookedState.buttonState,mCurrentCookedState.buttonState);// 直接或通过屏幕上的 pointer 转换分派触摸if (mDeviceMode == DeviceMode::POINTER) {for (BitSet32 idBits(mCurrentRawState.rawPointerData.touchingIdBits); !idBits.isEmpty();) {uint32_t id = idBits.clearFirstMarkedBit();const RawPointerData::Pointer& pointer =mCurrentRawState.rawPointerData.pointerForId(id);if (pointer.toolType == AMOTION_EVENT_TOOL_TYPE_STYLUS ||pointer.toolType == AMOTION_EVENT_TOOL_TYPE_ERASER) {mCurrentCookedState.stylusIdBits.markBit(id);} else if (pointer.toolType == AMOTION_EVENT_TOOL_TYPE_FINGER ||pointer.toolType == AMOTION_EVENT_TOOL_TYPE_UNKNOWN) {mCurrentCookedState.fingerIdBits.markBit(id);} else if (pointer.toolType == AMOTION_EVENT_TOOL_TYPE_MOUSE) {mCurrentCookedState.mouseIdBits.markBit(id);}}for (BitSet32 idBits(mCurrentRawState.rawPointerData.hoveringIdBits); !idBits.isEmpty();) {uint32_t id = idBits.clearFirstMarkedBit();const RawPointerData::Pointer& pointer =mCurrentRawState.rawPointerData.pointerForId(id);if (pointer.toolType == AMOTION_EVENT_TOOL_TYPE_STYLUS ||pointer.toolType == AMOTION_EVENT_TOOL_TYPE_ERASER) {mCurrentCookedState.stylusIdBits.markBit(id);}}// 触控笔优先于所有工具,随后是鼠标,最后是手指PointerUsage pointerUsage = mPointerUsage;if (!mCurrentCookedState.stylusIdBits.isEmpty()) {mCurrentCookedState.mouseIdBits.clear();mCurrentCookedState.fingerIdBits.clear();pointerUsage = PointerUsage::STYLUS; // 触控笔} else if (!mCurrentCookedState.mouseIdBits.isEmpty()) {mCurrentCookedState.fingerIdBits.clear();pointerUsage = PointerUsage::MOUSE; // 鼠标} else if (!mCurrentCookedState.fingerIdBits.isEmpty() ||isPointerDown(mCurrentRawState.buttonState)) {pointerUsage = PointerUsage::GESTURES; // 手势}dispatchPointerUsage(when, readTime, policyFlags, pointerUsage);} else { // device mode 为 DIRECT,表示直接分发updateTouchSpots();if (!mCurrentMotionAborted) {dispatchButtonRelease(when, readTime, policyFlags);dispatchHoverExit(when, readTime, policyFlags);// 分发触摸事件dispatchTouches(when, readTime, policyFlags);dispatchHoverEnterAndMove(when, readTime, policyFlags);dispatchButtonPress(when, readTime, policyFlags);}if (mCurrentCookedState.cookedPointerData.pointerCount == 0) {mCurrentMotionAborted = false;}}// 如果需要,可以通知 QueuedInputListener 从原始按钮合成 AKEY_EVENT_ACTION_UPsynthesizeButtonKeys(getContext(), AKEY_EVENT_ACTION_UP, when, readTime, getDeviceId(), mSource,mViewport.displayId, policyFlags, mLastCookedState.buttonState,mCurrentCookedState.buttonState);// 清除一些临时状态mCurrentRawState.rawVScroll = 0;mCurrentRawState.rawHScroll = 0;// 保存上一次的元数据和上一次的处理后的数据,将当前触摸数据复制到最后一个,为下一个周期做准备mLastRawState.copyFrom(mCurrentRawState);mLastCookedState.copyFrom(mCurrentCookedState);
}
- 调用 TouchInputMapper::cookPointerData() 函数来处理加工原始事件,如手指触摸屏幕时,需要把手指触摸时在输入设备上的坐标转换为显示屏上的坐标,以便于窗口接收到正确的坐标事件。
- 调用 TouchInputMapper::dispatchTouches() 函数进行事件的分发,底层上报的数据需包装成 DOWN、MOVE和 UP 等事件再进行分发。
1.2.6.1、TouchInputMapper::cookPointerData()
xref: /frameworks/native/services/inputflinger/reader/mapper/TouchInputMapper.cpp
void TouchInputMapper::cookPointerData() {uint32_t currentPointerCount = mCurrentRawState.rawPointerData.pointerCount;mCurrentCookedState.cookedPointerData.clear();mCurrentCookedState.cookedPointerData.pointerCount = currentPointerCount;mCurrentCookedState.cookedPointerData.hoveringIdBits =mCurrentRawState.rawPointerData.hoveringIdBits;mCurrentCookedState.cookedPointerData.touchingIdBits =mCurrentRawState.rawPointerData.touchingIdBits;mCurrentCookedState.cookedPointerData.canceledIdBits =mCurrentRawState.rawPointerData.canceledIdBits;if (mCurrentCookedState.cookedPointerData.pointerCount == 0) {mCurrentCookedState.buttonState = 0;} else {mCurrentCookedState.buttonState = mCurrentRawState.buttonState;}// 遍历激活的 Pointer 并将其设备坐标映射到表面坐标并调整显示方向for (uint32_t i = 0; i < currentPointerCount; i++) {const RawPointerData::Pointer & in = mCurrentRawState.rawPointerData.pointers[i];// Size......// Pressure......// Tilt and Orientation......// Distance......// Coverage......// 调整X、Y并进行设备校准float xTransformed = in.x, yTransformed = in.y;mAffineTransform.applyTo(xTransformed, yTransformed);// 把输入设备的坐标转换为显示设备的坐标,并将转换后的坐标,保存到 xTransformed 和 yTransformed 中rotateAndScale(xTransformed, yTransformed);// 调整曲面方向的X、Y和覆盖坐标float left, top, right, bottom;......// 构造输出坐标PointerCoords& out = mCurrentCookedState.cookedPointerData.pointerCoords[i];out.clear();out.setAxisValue(AMOTION_EVENT_AXIS_X, xTransformed);......// 写入输出相关字段(如果适用)uint32_t id = in.id;if (mSource == AINPUT_SOURCE_TOUCHPAD &&mLastCookedState.cookedPointerData.hasPointerCoordsForId(id)) {const PointerCoords & p = mLastCookedState.cookedPointerData.pointerCoordsForId(id);float dx = xTransformed - p.getAxisValue(AMOTION_EVENT_AXIS_X);float dy = yTransformed - p.getAxisValue(AMOTION_EVENT_AXIS_Y);out.setAxisValue(AMOTION_EVENT_AXIS_RELATIVE_X, dx);out.setAxisValue(AMOTION_EVENT_AXIS_RELATIVE_Y, dy);}// 写入输出属性PointerProperties & properties = mCurrentCookedState.cookedPointerData.pointerProperties[i];properties.clear();properties.id = id;properties.toolType = in.toolType;// 写入id索引并将id标记为有效mCurrentCookedState.cookedPointerData.idToIndex[id] = i;mCurrentCookedState.cookedPointerData.validIdBits.markBit(id);}
}
该函数中将处理后的元数据保存到 CookedState::cookedPointerData 中,其类型为:CookedPointerData,结构体定义如下:
xref: /frameworks/native/services/inputflinger/reader/mapper/TouchInputMapper.h
// 处理后的指针集合数据,包括指针id映射表
struct CookedPointerData {uint32_t pointerCount;PointerProperties pointerProperties[ MAX_POINTERS];PointerCoords pointerCoords[ MAX_POINTERS]; // 保存坐标数据信息BitSet32 hoveringIdBits, touchingIdBits, canceledIdBits, validIdBits;uint32_t idToIndex[ MAX_POINTER_ID + 1];CookedPointerData();void clear ();......
};
对于手机的触摸屏来说,触摸事件的加工,其最主要的就是调用 TouchInputMapper::rotateAndScale() 函数将触摸屏的坐标点转换为显示屏的坐标点。
1.2.6.2、TouchInputMapper::rotateAndScale()
xref: /frameworks/native/services/inputflinger/reader/mapper/TouchInputMapper.cpp
// 将原始坐标转换为显示屏坐标
void TouchInputMapper::rotateAndScale(float& x, float& y) {// 根据x,y的缩放比例,计算触摸点在显示屏上的缩放坐标const float xScaled = float(x - mRawPointerAxes.x.minValue) * mXScale;const float yScaled = float(y - mRawPointerAxes.y.minValue) * mYScale;const float xScaledMax = float(mRawPointerAxes.x.maxValue - x) * mXScale;const float yScaledMax = float(mRawPointerAxes.y.maxValue - y) * mYScale;// 根据旋转方向计算最终在显示设备上的x,y坐标值switch (mSurfaceOrientation) {case DISPLAY_ORIENTATION_0: // 0 - no swap and reverse.x = xScaled + mXTranslate;y = yScaled + mYTranslate;break;case DISPLAY_ORIENTATION_90: // 90 - swap x/y and reverse y.y = xScaledMax - (mRawSurfaceWidth - mSurfaceRight);x = yScaled + mYTranslate;break;case DISPLAY_ORIENTATION_180: // 180 - reverse x, y.x = xScaledMax - (mRawSurfaceWidth - mSurfaceRight);y = yScaledMax - (mRawSurfaceHeight - mSurfaceBottom);break;case DISPLAY_ORIENTATION_270: // 270 - swap x/y and reverse x.y = xScaled + mXTranslate;x = yScaledMax - (mRawSurfaceHeight - mSurfaceBottom);break;default:assert (false);}
}
- 首先根据x,y坐标轴的缩放比例 mXScale 和 mYScale,计算触摸屏的坐标点在显示屏的坐标系中的x,y轴的缩放值。
- 根据显示屏x,y坐标轴的偏移量,以及旋转角度,来计算出显示屏上的坐标点。
1.2.6.3、TouchInputMapper::dispatchTouches()
xref: /frameworks/native/services/inputflinger/reader/mapper/TouchInputMapper.cpp
void TouchInputMapper::dispatchTouches(nsecs_t when, nsecs_t readTime, uint32_t policyFlags) {BitSet32 currentIdBits = mCurrentCookedState.cookedPointerData.touchingIdBits;BitSet32 lastIdBits = mLastCookedState.cookedPointerData.touchingIdBits;int32_t metaState = getContext()->getGlobalMetaState();int32_t buttonState = mCurrentCookedState.buttonState;if (currentIdBits == lastIdBits) {if (!currentIdBits.isEmpty()) {// 如果前后两次数据的手指数没有变化,并且当前的手指数不为0,那么此时事件肯定是移动事件,// 因此需分发 AMOTION_EVENT_ACTION_MOVE 事件,此处暂不处理,由监听器负责批量处理dispatchMotion(when, readTime, policyFlags, mSource, AMOTION_EVENT_ACTION_MOVE, 0, 0,metaState, buttonState, AMOTION_EVENT_EDGE_FLAG_NONE,mCurrentCookedState.cookedPointerData.pointerProperties,mCurrentCookedState.cookedPointerData.pointerCoords,mCurrentCookedState.cookedPointerData.idToIndex, currentIdBits, -1,mOrientedXPrecision, mOrientedYPrecision, mDownTime);}} else {// 前后两次数据的手指数不一样,即有手指抬起或按下BitSet32 upIdBits (lastIdBits.value & ~currentIdBits.value);BitSet32 downIdBits (currentIdBits.value & ~lastIdBits.value);BitSet32 moveIdBits (lastIdBits.value & currentIdBits.value);BitSet32 dispatchedIdBits (lastIdBits.value);// 更新已移动的 pointers 的最后坐标,便于同时观察移动后 pointers 的位置与抬起 pointers 的位置bool moveNeeded =updateMovedPointers(mCurrentCookedState.cookedPointerData.pointerProperties,mCurrentCookedState.cookedPointerData.pointerCoords,mCurrentCookedState.cookedPointerData.idToIndex,mLastCookedState.cookedPointerData.pointerProperties,mLastCookedState.cookedPointerData.pointerCoords,mLastCookedState.cookedPointerData.idToIndex, moveIdBits);if (buttonState != mLastCookedState.buttonState) {moveNeeded = true; // 最近两次状态不一致,即检测到有手指的移动}// Dispatch pointer up events.-分发手指抬起事件,即 UP 事件while (!upIdBits.isEmpty()) {uint32_t upId = upIdBits.clearFirstMarkedBit();bool isCanceled = mCurrentCookedState.cookedPointerData.canceledIdBits.hasBit(upId);if (isCanceled) { // 手指抬起,是不是取消事件ALOGI("Canceling pointer %d for the palm event was detected.", upId);}// 有手指抬起,因此需分发 AMOTION_EVENT_ACTION_POINTER_UP 事件dispatchMotion(when, readTime, policyFlags, mSource, AMOTION_EVENT_ACTION_POINTER_UP, 0,isCanceled ? AMOTION_EVENT_FLAG_CANCELED : 0, metaState, buttonState, 0,mLastCookedState.cookedPointerData.pointerProperties,mLastCookedState.cookedPointerData.pointerCoords,mLastCookedState.cookedPointerData.idToIndex, dispatchedIdBits, upId,mOrientedXPrecision, mOrientedYPrecision, mDownTime);dispatchedIdBits.clearBit(upId); // 该 UP 事件分发完毕则清除掉它mCurrentCookedState.cookedPointerData.canceledIdBits.clearBit(upId);}// 检测到有手指移动事件,且 moveIdBits 不为空,表示有移动事件 AMOTION_EVENT_ACTION_MOVE 要分发if (moveNeeded && !moveIdBits.isEmpty()) {ALOG_ASSERT(moveIdBits.value == dispatchedIdBits.value);dispatchMotion(when, readTime, policyFlags, mSource, AMOTION_EVENT_ACTION_MOVE, 0, 0,metaState, buttonState, 0,mCurrentCookedState.cookedPointerData.pointerProperties,mCurrentCookedState.cookedPointerData.pointerCoords,mCurrentCookedState.cookedPointerData.idToIndex, dispatchedIdBits, -1,mOrientedXPrecision, mOrientedYPrecision, mDownTime);}// 使用新的手指坐标,分发手指按下事件while (!downIdBits.isEmpty()) {uint32_t downId = downIdBits.clearFirstMarkedBit();dispatchedIdBits.markBit(downId);if (dispatchedIdBits.count() == 1) {// 第一个手指已经按下,记录按下的时间mDownTime = when;}// 有手指按下,则需分发按下事件 AMOTION_EVENT_ACTION_POINTER_DOWNdispatchMotion(when, readTime, policyFlags, mSource, AMOTION_EVENT_ACTION_POINTER_DOWN,0, 0, metaState, buttonState, 0,mCurrentCookedState.cookedPointerData.pointerProperties,mCurrentCookedState.cookedPointerData.pointerCoords,mCurrentCookedState.cookedPointerData.idToIndex, dispatchedIdBits,downId, mOrientedXPrecision, mOrientedYPrecision, mDownTime);}}
}
TouchInputMapper::dispatchTouches() 函数分发事件的过程,其实就是对比前后两次的数据,生成高级事件: AMOTION_EVENT_ACTION_POINTER_DOWN、AMOTION_EVENT_ACTION_MOVE、AMOTION_EVENT_ACTION_POINTER_UP,然后调用 TouchInputMapper::dispatchMotion() 分发这些高级事件。
1.2.7、TouchInputMapper::dispatchMotion()
xref: /frameworks/native/services/inputflinger/reader/mapper/TouchInputMapper.cpp
void TouchInputMapper::dispatchMotion(nsecs_t when, nsecs_t readTime, uint32_t policyFlags,uint32_t source, int32_t action, int32_t actionButton,int32_t flags, int32_t metaState, int32_t buttonState,int32_t edgeFlags, const PointerProperties*properties,const PointerCoords*coords, const uint32_t*idToIndex,BitSet32 idBits, int32_t changedId, float xPrecision,float yPrecision, nsecs_t downTime) {PointerCoords pointerCoords[MAX_POINTERS];PointerProperties pointerProperties[MAX_POINTERS];uint32_t pointerCount = 0;while (!idBits.isEmpty()) {uint32_t id = idBits.clearFirstMarkedBit();uint32_t index = idToIndex[id];pointerProperties[pointerCount].copyFrom(properties[index]);pointerCoords[pointerCount].copyFrom(coords[index]);// 为 action 添加索引,action 的前8位表示手指索引,后8位表示 ACTIONif (changedId >= 0 && id == uint32_t(changedId)) {action |= pointerCount << AMOTION_EVENT_ACTION_POINTER_INDEX_SHIFT;}pointerCount += 1;}ALOG_ASSERT(pointerCount != 0);if (changedId >= 0 && pointerCount == 1) { // 在只有一个手指按下的情况下if (action == AMOTION_EVENT_ACTION_POINTER_DOWN) {action = AMOTION_EVENT_ACTION_DOWN; // 分发 AMOTION_EVENT_ACTION_DOWN 事件} else if (action == AMOTION_EVENT_ACTION_POINTER_UP) { // 最后一个手指抬起的情况下if ((flags & AMOTION_EVENT_FLAG_CANCELED) != 0) {action = AMOTION_EVENT_ACTION_CANCEL; // 如果取消则分发 AMOTION_EVENT_ACTION_CANCEL 事件} else {action = AMOTION_EVENT_ACTION_UP; // 否者分发 AMOTION_EVENT_ACTION_UP 事件}} else {// Can't happen.ALOG_ASSERT(false);}}float xCursorPosition = AMOTION_EVENT_INVALID_CURSOR_POSITION;float yCursorPosition = AMOTION_EVENT_INVALID_CURSOR_POSITION;if (mDeviceMode == DeviceMode::POINTER) {auto[x, y] =getMouseCursorPosition();xCursorPosition = x;yCursorPosition = y;}const int32_t displayId = getAssociatedDisplayId().value_or(ADISPLAY_ID_NONE);const int32_t deviceId = getDeviceId();std::vector<TouchVideoFrame> frames = getDeviceContext().getVideoFrames();std::for_each (frames.begin(), frames.end(),[this](TouchVideoFrame& frame) {frame.rotate(this->mSurfaceOrientation);});// 将上面获取到的数据封装成 NotifyMotionArgsNotifyMotionArgs args (getContext()->getNextId(), when, readTime, deviceId, source, displayId,policyFlags, action, actionButton, flags, metaState, buttonState,MotionClassification::NONE, edgeFlags, pointerCount, pointerProperties,pointerCoords, xPrecision, yPrecision, xCursorPosition, yCursorPosition,downTime, std::move (frames));// 将封装好的 NotifyMotionArgs 加入到 QueueInputListener 队列getListener()->notifyMotion(&args);
}
- 首先为 action 添加 index 索引,action 的前8位表示手指索引,后8位表示 ACTION,并且由于 index 是元数据数组的索引,因此也就为 action 绑定了触摸事件的数据。
- 在只有一个手指按下的情况下,如果是第一个手指按下,则分发 AMOTION_EVENT_ACTION_DOWN 事件,如果是最后一个手指抬起,则分发 AMOTION_EVENT_ACTION_UP 事件。注意:如需要取消则分发 AMOTION_EVENT_ACTION_CANCEL 事件。
- 将获取到的数据封装成 NotifyMotionArgs,然后通过 InputReader::ContextImpl::getListener() 函数获取到 QueueInputListener 对象,再调用 QueueInputListener::notifyMotion() 函数将封装好的事件传过去,并加入到 QueueInputListener::mArgsQueue 队列中,等待下一步继续处理。
1.2.7.1、InputReader::ContextImpl::getListener()
xref: /frameworks/native/services/inputflinger/reader/include/InputReader.h
class InputReader : public InputReaderInterface {
public:InputReader(std::shared_ptr<EventHubInterface> eventHub,const sp<InputReaderPolicyInterface>& policy,const sp<InputListenerInterface>& listener);virtual ~InputReader();protected:class ContextImpl : public InputReaderContext {InputReader* mReader;IdGenerator mIdGenerator;public:explicit ContextImpl(InputReader* reader);InputListenerInterface* getListener() REQUIRES(mReader->mLock) override;EventHubInterface* getEventHub() REQUIRES(mReader->mLock) override;} mContext;// 在 C++ 中使用关键字 friend 修饰的类被称为友元类,即 ContextImpl 一个友元类friend class ContextImpl;
private:std::unique_ptr<InputThread> mThread;sp<QueuedInputListener> mQueuedListener;......
在 C++ 中使用关键字 friend 修饰的类被称为友元类,即 ContextImpl 一个友元类,友元类的所有成员函数都是 InputReader 类的友元函数,在友元类的成员函数体内都可以通过对象名访问这个 InputReader 类的私有成员和受保护成员。
xref: /frameworks/native/services/inputflinger/reader/InputReader.cpp
InputReader::InputReader(std::shared_ptr<EventHubInterface> eventHub,const sp<InputReaderPolicyInterface>& policy,const sp<InputListenerInterface>& listener): mContext(this), // 调用 InputReader构造函数构建对象的同时,使用该对象构建 InputReader::ContextImpl对象mEventHub(eventHub),mPolicy(policy),mGlobalMetaState(0),mLedMetaState(AMETA_NUM_LOCK_ON),mGeneration(1),mNextInputDeviceId(END_RESERVED_ID),mDisableVirtualKeysTimeout(LLONG_MIN),mNextTimeout(LLONG_MAX),mConfigurationChangesToRefresh(0) {// 传入构造参数 InputListenerInterface 的实例对象来构建 QueuedInputListener 对象mQueuedListener = new QueuedInputListener(listener);{ // acquire lockstd::scoped_lock _l(mLock);refreshConfigurationLocked(0);updateGlobalMetaStateLocked();} // release lock
}
......
// 构建 InputReader::ContextImpl 对象的同时,将传入的 InputReader 对象保存到 mReader 中
InputReader::ContextImpl::ContextImpl(InputReader* reader): mReader(reader), mIdGenerator(IdGenerator::Source::INPUT_READER) {}InputListenerInterface* InputReader::ContextImpl::getListener() {// 因此这里 mReader 就是 InputReader 对象,并获取构建对象时创建的 QueuedInputListener 对象return mReader->mQueuedListener.get();
}
经过分析可知,InputReader::ContextImpl::getListener() 函数获取到的就是 QueueInputListener 对象,下面继续查看 QueueInputListener::notifyMotion() 函数是如何处理的
1.2.7.2、QueueInputListener::notifyMotion()
xref: /frameworks/native/services/inputflinger/include/InputListener.h
// InputListenerInterface 的接口实现类,该接口将已解码处理过的事件排队并延迟分派,直到刷新
class QueuedInputListener : public InputListenerInterface {protected:virtual ~QueuedInputListener();public:explicit QueuedInputListener (const sp<InputListenerInterface>&innerListener);virtual void notifyConfigurationChanged (const NotifyConfigurationChangedArgs* args)override;virtual void notifyKey (const NotifyKeyArgs* args)override;virtual void notifyMotion (const NotifyMotionArgs* args)override;virtual void notifySwitch (const NotifySwitchArgs* args)override;virtual void notifySensor (const NotifySensorArgs* args)override;virtual void notifyDeviceReset (const NotifyDeviceResetArgs* args)override;void notifyVibratorState (const NotifyVibratorStateArgs* args)override;void notifyPointerCaptureChanged (const NotifyPointerCaptureChangedArgs* args)override;void flush ();private:sp<InputListenerInterface> mInnerListener;std::vector <NotifyArgs*> mArgsQueue; // NotifyArgs 集合,用来保存已解码处理过的事件
};
由头文件可知,QueuedInputListener 是 InputListenerInterface 接口的实现类,该接口将已解码处理过的事件排队并延迟分派,直到刷新。
xref: /frameworks/native/services/inputflinger/InputListener.cpp
// 构建 QueuedInputListener 对象,并将传入的 InputListenerInterface 保存到其成员变量 mInnerListener
QueuedInputListener::QueuedInputListener(const sp<InputListenerInterface>& innerListener) :mInnerListener(innerListener) {} void QueuedInputListener::notifyMotion(const NotifyMotionArgs* args) {traceEvent(__func__, args->id);mArgsQueue.push_back(new NotifyMotionArgs(*args));
}
在 QueuedInputListener::notifyMotion() 函数中将封装的 NotifyMotionArgs 加入到了 QueuedInputListener 的成员变量mArgsQueue 集合中。
1.3、QueuedInputListener::flush()
xref: /frameworks/native/services/inputflinger/InputListener.cpp
// 调用该方法时不能获取锁,因为InputListenerInterface可能会回调InputReader的方法(如getScanCodeState),或者阻塞在另一个等待获取
// InputReader锁的线程上,从而导致死锁。因为InputListenerInterface实际上是输入分派器,它调用窗口管理器,窗口管理器偶尔调用输入读取器。
void QueuedInputListener::flush() {size_t count = mArgsQueue.size();for (size_t i = 0; i < count; i++) {NotifyArgs* args = mArgsQueue[i];// 将已解码处理过的每个事件刷新到相应的 InputListenerInterfaceargs->notify(mInnerListener);delete args;}mArgsQueue.clear();
}
通过调用 InputReader::processEventsLocked() 函数,将所有原始事件处理并封装成结构体类 NotifyArgs 的各种子类型,并且加入到QueuedInputListener 的成员变量 mArgsQueue 集合中,然后调用 QueuedInputListener::flush() 函数遍历获取 mArgsQueue 集合中的每一个 NotifyArgs 对象,根据事件类型来分别调用其 notify() 函数将事件分发给 InputReader 相应的 InputListenerInterface。
NotifyMotionArgs 是 NotifyArgs 的子类型,通过上文的分析可知,接下来调用的是 NotifyMotionArgs::notify() 函数
1.3.1、NotifyMotionArgs::notify()
xref: /frameworks/native/services/inputflinger/InputListener.cpp
// --- NotifyMotionArgs ---
NotifyMotionArgs::NotifyMotionArgs(int32_t id, nsecs_t eventTime, nsecs_t readTime, int32_t deviceId, uint32_t source,int32_t displayId, uint32_t policyFlags, int32_t action, int32_t actionButton,int32_t flags, int32_t metaState, int32_t buttonState, MotionClassification classification,int32_t edgeFlags, uint32_t pointerCount, const PointerProperties* pointerProperties,const PointerCoords* pointerCoords, float xPrecision, float yPrecision,float xCursorPosition, float yCursorPosition, nsecs_t downTime,const std::vector<TouchVideoFrame>& videoFrames): NotifyArgs(id, eventTime),deviceId(deviceId),source(source),displayId(displayId),policyFlags(policyFlags),action(action),actionButton(actionButton),flags(flags),metaState(metaState),buttonState(buttonState),classification(classification),edgeFlags(edgeFlags),pointerCount(pointerCount),xPrecision(xPrecision),yPrecision(yPrecision),xCursorPosition(xCursorPosition),yCursorPosition(yCursorPosition),downTime(downTime),readTime(readTime),videoFrames(videoFrames) {for (uint32_t i = 0; i < pointerCount; i++) {this->pointerProperties[i].copyFrom(pointerProperties[i]);this->pointerCoords[i].copyFrom(pointerCoords[i]);}
}
......
void NotifyMotionArgs::notify(const sp<InputListenerInterface>& listener) const {listener->notifyMotion(this);
}
在 NotifyMotionArgs::notify() 函数中继续调用 listener::notifyMotion() 函数并将自身作为参数传入,该 listener 是 QueueInputListener 对象的成员变量 mInnerListener。回溯源码可知,它是构建 QueuedInputListener 对象时传入的参数,而该入参又是构建 InputReader 对象时传入的实现了 InputListenerInterface 接口的实现类的实例对象,在上一篇深入Android S (12.0) 探索Framework之输入系统IMS的构成与启动一文中我们分析过,在 InputManager 的构造方法中构建 InputReader 对象时,传入的 InputClassifer 对象就是 InputListenerInterface 接口的实现类。
因此,综上所述,接下来就需交给 InputClassifer::notifyMotion() 函数来进行下一阶段的处理,继续跟踪源码查看
1.3.2、InputClassifer::notifyMotion()
xref: /frameworks/native/services/inputflinger/InputClassifier.h
// InputListener 阶段的基本接口。为事件提供分类。
class InputClassifierInterface : public virtual RefBase, public InputListenerInterface {
public:virtual void setMotionClassifierEnabled (bool enabled) =0;// 转储输入分类器的状态,该方法可以在任何线程上调用(通常由输入管理器调用)virtual void dump (std::string & dump) = 0;
protected:InputClassifierInterface() { }virtual ~InputClassifierInterface() { }
};
// InputClassifierInterface 的实现类。表示输入处理的单独阶段,所有的输入事件都要经过这个阶段。
// 处理除 motion 事件外的所有输入事件的传递,motion 类型的事件被发送到 MotionClassifier。
class InputClassifier : public InputClassifierInterface {
public:explicit InputClassifier (const sp<InputListenerInterface>& listener);virtual void notifyConfigurationChanged(const NotifyConfigurationChangedArgs* args) override;virtual void notifyKey(const NotifyKeyArgs* args) override;virtual void notifyMotion(const NotifyMotionArgs* args) override;virtual void notifySwitch(const NotifySwitchArgs* args) override;virtual void notifySensor(const NotifySensorArgs* args) override;virtual void notifyVibratorState(const NotifyVibratorStateArgs* args) override;virtual void notifyDeviceReset(const NotifyDeviceResetArgs* args) override;void notifyPointerCaptureChanged(const NotifyPointerCaptureChangedArgs* args) override;virtual void dump(std::string& dump) override;~InputClassifier();// Called from InputManager - 由 InputManager 调用virtual void setMotionClassifierEnabled(bool enabled)override;
private:// 保护对 mMotionClassifier 的访问,因为可能通过 hidl 回调变为 nullstd::mutex mLock;// 将输入事件传递到的下一阶段sp<InputListenerInterface> mListener;std::unique_ptr<MotionClassifierInterface> mMotionClassifier GUARDED_BY(mLock);std::thread mInitializeMotionClassifierThread;// 设置 mMotionClassifier 的值,是从两个不同的线程调用的:一是初始化 MotionClassifier 的线程中构建 MotionClassifier 对象时// 一个是 haldeathreecient 的绑定线程,在 HAL 死亡时创建。将导致 mMotionClassifier 变为 nullptrvoid setMotionClassifier (std::unique_ptr<MotionClassifierInterface> motionClassifier);// 当 HAL 死亡时,deathreipient 将调用 setMotionClassifier(null)class HalDeathRecipient : public android::hardware::hidl_death_recipient {public:explicit HalDeathRecipient (InputClassifier & parent);virtual void serviceDied (uint64_t cookie,const wp < android::hidl::base::V1_0::IBase > & who)override;private:InputClassifier & mParent;} ;// 保留对死亡接收者的引用,因为如果 HAL 死亡,死亡接收者将调用 MotionClassifier 的析构函数。// 如果不保留引用,并且 MotionClassifier 是死亡接收方的唯一所有者,那么servicedie调用将导致死亡接收方调用自己的析构函数。sp<HalDeathRecipient> mHalDeathRecipient;
};
InputClassifier 是 InputClassifierInterface 的实现类,是输入事件处理的单独阶段,所有的输入事件都要经过这个阶段。用于处理除 motion 事件外的所有输入事件的传递,motion 类型的事件被发送到 MotionClassifier 进行处理。
xref: /frameworks/native/services/inputflinger/InputClassifier.cpp
// 构建 InputClassifier 对象,并将传入的 InputDispatcher 保存到其成员变量 mListener
InputClassifier::InputClassifier(const sp<InputListenerInterface>& listener): mListener(listener), mHalDeathRecipient(new HalDeathRecipient(*this)) {}void InputClassifier::notifyMotion(const NotifyMotionArgs* args) {std::scoped_lock lock(mLock);// 目前,MotionClassifier 仅用于处理触摸事件const bool sendToMotionClassifier = mMotionClassifier && isTouchEvent(*args);if (!sendToMotionClassifier) {mListener->notifyMotion(args);return;}NotifyMotionArgs newArgs(*args);newArgs.classification = mMotionClassifier->classify(newArgs);// 调用 InputDispatcher::notifyMotion() 函数继续将输入事件传递到的下一阶段mListener->notifyMotion(&newArgs);
}
在上一篇深入Android S (12.0) 探索Framework之输入系统IMS的构成与启动一文中我们分析过,在 InputManager 的构造方法中创建 InputClassifier 对象时入参是 InputDispatcher 对象,即成员变量 mListener 保存的是 InputDispatcher 对象,继续调用 InputDispatcher::notifyMotion() 函数将输入事件传递到的下一阶段。
1.4、InputDispatcher::notifyMotion()
xref: /frameworks/native/services/inputflinger/dispatcher/InputDispatcher.cpp
void InputDispatcher::notifyMotion(const NotifyMotionArgs* args) {if (!validateMotionEvent(args->action, args->actionButton, args->pointerCount,args->pointerProperties)) {return;}uint32_t policyFlags = args->policyFlags;// 来自 InputReader/InputClassifier 的 motion 事件,都是受信任的policyFlags |= POLICY_FLAG_TRUSTED;android::base::Timer t;// 成员变量 mPolicy 保存的是 NativeInputManager 对象,调用 NativeInputManager::interceptMotionBeforeQueueing() 函数// 对触摸事件执行拦截策略,在触摸事件入队前,查询截断策略,并将查询的结果保存到参数 policyFlagsmPolicy->interceptMotionBeforeQueueing(args->displayId, args->eventTime, /*byref*/ policyFlags);if (t.duration() > SLOW_INTERCEPTION_THRESHOLD) {ALOGW("Excessive delay in interceptMotionBeforeQueueing; took %s ms",std::to_string (t.duration().count()).c_str());}bool needWake;{ // acquire lockmLock.lock();if (shouldSendMotionToInputFilterLocked(args)) {// 判断 motion 事件是否需要给 InputFilter 来处理// 如果需要并且 InputFilter 消耗掉 motion 事件,则直接返回......}// 封装成新的 MotionEntry 并入队std::unique_ptr<MotionEntry> newEntry =std::make_unique<MotionEntry>(args->id, args->eventTime, args->deviceId,args->source, args->displayId, policyFlags,args->action, args->actionButton, args->flags,args->metaState, args->buttonState,args->classification, args->edgeFlags,args->xPrecision, args->yPrecision,args->xCursorPosition, args->yCursorPosition,args->downTime, args->pointerCount,args->pointerProperties, args->pointerCoords, 0, 0);// 将封装的 MotionEntry 入队needWake = enqueueInboundEventLocked(std::move(newEntry));mLock.unlock();} // release lockif (needWake) {// 如果有必要,则唤醒线程处理触摸事件mLooper->wake();}
}
- 在将输入事件传给 Activity 之前,先将传入的 NotifyMotionArgs 的信息发送给NativeInputManager::interceptMotionBeforeQueueing() 函数对触摸事件执行拦截策略,在触摸事件入队前,查询截断策略,并将查询的结果保存到参数 policyFlags。
- 判断 motion 事件是否需要给 InputFilter 来处理,如果需要并且 InputFilter 消耗掉该事件,则直接返回,否者将该事件封装成新的 MotionEntry 对象并调用 InputDispatcher::enqueueInboundEventLocked() 函数入队,如果函数返回值为 true,那么说明需要唤醒 InputDispatcher 的分发线程。
总结
通过分析 InputReader 的总体流程可知,EventHub 作为直接操作设备节点的输入系统组件,其隐藏了 INotify 与 Epoll 以及设备节点读取等底层操作,在 InputReader 的一次线程循环中,通过 EventHub::getEvent() 函数向调用者提供获取设备增删事件与原始事件的功能。
EventHub::getEvent() 函数的本质是通过 epoll_wait() 函数获取 Epoll 事件到事件池,并对事件池中的事件进行加工并消费的过程。从 epoll_wait() 函数的调用开始到事件池中最后一个事件被加工消费完毕的过程称之为 EventHub 的一个监听周期。此外,由于 buffer 参数的尺寸限制,一个监听周期可能包含多个 EventHub::getEvents() 函数调用。周期中的第一个 EventHub::getEvents() 函数调用一定会因事件池的枯竭而直接进行 epoll_wait() 函数的等待过程,而周期中的最后一个 EventHub::getEvents() 函数一定会将事件池中的最后一条事件加工消费完并将事件返回给调用者。
总结就是,EventHub::getEvents() 函数将尽可能多地读取设备增删事件与原始输入事件,并将它们封装成 RawEvent 结构体,并存入 buffer 中供 InputReader 进行处理。InputReader 通过调用其 processEventsLocked() 函数对获取事件进行处理,对于设备节点事件,将根据设备的可用性来加载或移除设备对应的配置信息。对于原始输入事件,则进行转译、封装与加工后将结果暂存到 mQueuedListener 中。最后调用 QueuedInputListener::flush() 函数将所有暂存、且已加工过的输入事件交付给 InputDispatcher 来进行分发。
相关文章:
深入Android S (12.0) 探索Framework之输入子系统InputReader的流程
Framework层之输入系统 第一篇 深入Android S (12.0) 探索Framework之输入系统IMS的构成与启动 第二篇 深入Android S (12.0) 探索Framework之输入子系统InputReader的流程 文章目录 Framework层之输入系统前言一、基础知识1、输入子系统2、INotify 与 Epoll2.1、INotify 机制…...
【cucumber】cluecumber-report-plugin生成测试报告
cluecumber为生成测试报告的第三方插件,可以生成html测报,该测报生成需以本地json测报的生成为基础。 所以需要在测试开始主文件标签CucumberOptions中,写入生成json报告。 2. pom xml文件中加入插件 <!-- 根据 cucumber json文件 美化测…...

华为欧拉操作系统结合内网穿透实现固定公网地址SSH远程连接
文章目录 1. 本地SSH连接测试2. openEuler安装Cpolar3. 配置 SSH公网地址4. 公网远程SSH连接5. 固定连接SSH公网地址6. SSH固定地址连接测试 欧拉操作系统(openEuler, 简称“欧拉”)是面向数字基础设施的操作系统,支持服务器、云计算、边缘openEuler是面向数字基础设施的操作系…...
加速 Selenium 测试执行最佳实践
Selenium测试自动化的主要目的是加快测试过程。在大多数情况下,使用 Selenium 的自动化测试比手动测试执行得特别好。在实际自动化测试实践中,我们有很多方式可以加速Selenium用例的执行。 我们可以选择使用不同类型的等待、不同类型的 Web 定位器、不同…...

c语言野指针
系列文章目录 c语言野指针 c语言野指针 系列文章目录c语言野指针 c语言野指针 野指针可以用于破坏修改别人的内存空间,比如游戏外挂 野指针 野指针:野指针是指向一个未知的内存空间,在读写的时候出现错误。 0-255都是系统保留的 不可以读&am…...

【MySQL】where和having的区别
🍎个人博客:个人主页 🏆个人专栏:数据库 ⛳️ 功不唐捐,玉汝于成 目录 前言 正文 用途: 使用位置: 操作对象: 聚合函数: 示例: 结语 我的其他博客 前言 数据库中的 WHERE 和 HAVING 子句在 SQL 查…...

npm pnpm yarn 报错或常见问题处理集锦
各种卡死,报错问题处理汇总 1. npm 安装 卡死了怎么办,npm # 切换源 npm config set registry https://registry.npmmirror.com # 查看源 npm config get registry2. pnpm安装 卡死了怎么办 方法1:切换源 npx pnpm config set registry h…...
【Git】常用的Git操作集合
常用的Git操作集合 1. 分支操作1.1 查看本地所有分支git branch 1.2 查看所有分支(包含本地远程仓库)git branch -a 1.3 切换分支git checkout test 2. 常用基本操作2.1 查看 git 各存储区内(文件)状态git status 2.2 查看工作区与暂存区文件差异git dif…...
JavaScript库jquery的使用方法
"写更少,做更多"是jquery的设计理念,jquery是一个兼容多浏览器的JavaScript库,利用jquery的语法设计能使开发更便捷。 网页添加jquery的方法:1.从jquery.com下载库;2.从CDN中载入库(示例使用)&a…...
Vue (v-bind指令、el与data的两种写法、理解MVVM、数据代理、V-no事件处理、双向数据绑定V-model、登陆页面实现
V-bind指令 el与data两种写法 MVVM 数据代理 V-no事件处理 V-no用于监听DOM对象 双向数据绑定V-model v-model 指令用来在 input、select、textarea、checkbox、radio 等表单控件元素上创建双向数据绑定,根据表单上的值,自动更新绑定的元素的值。 按钮的…...
SpringBoot - SpringBoot手写模拟SpringBoot启动过程
依赖 建一个工程,两个Module: 1. springboot模块,表示springboot框架的源码实现 2. user包,表示用户业务系统,用来写业务代码来测试我们所模拟出来的SpringBoot 首先,SpringBoot是基于的Spring,所以我…...
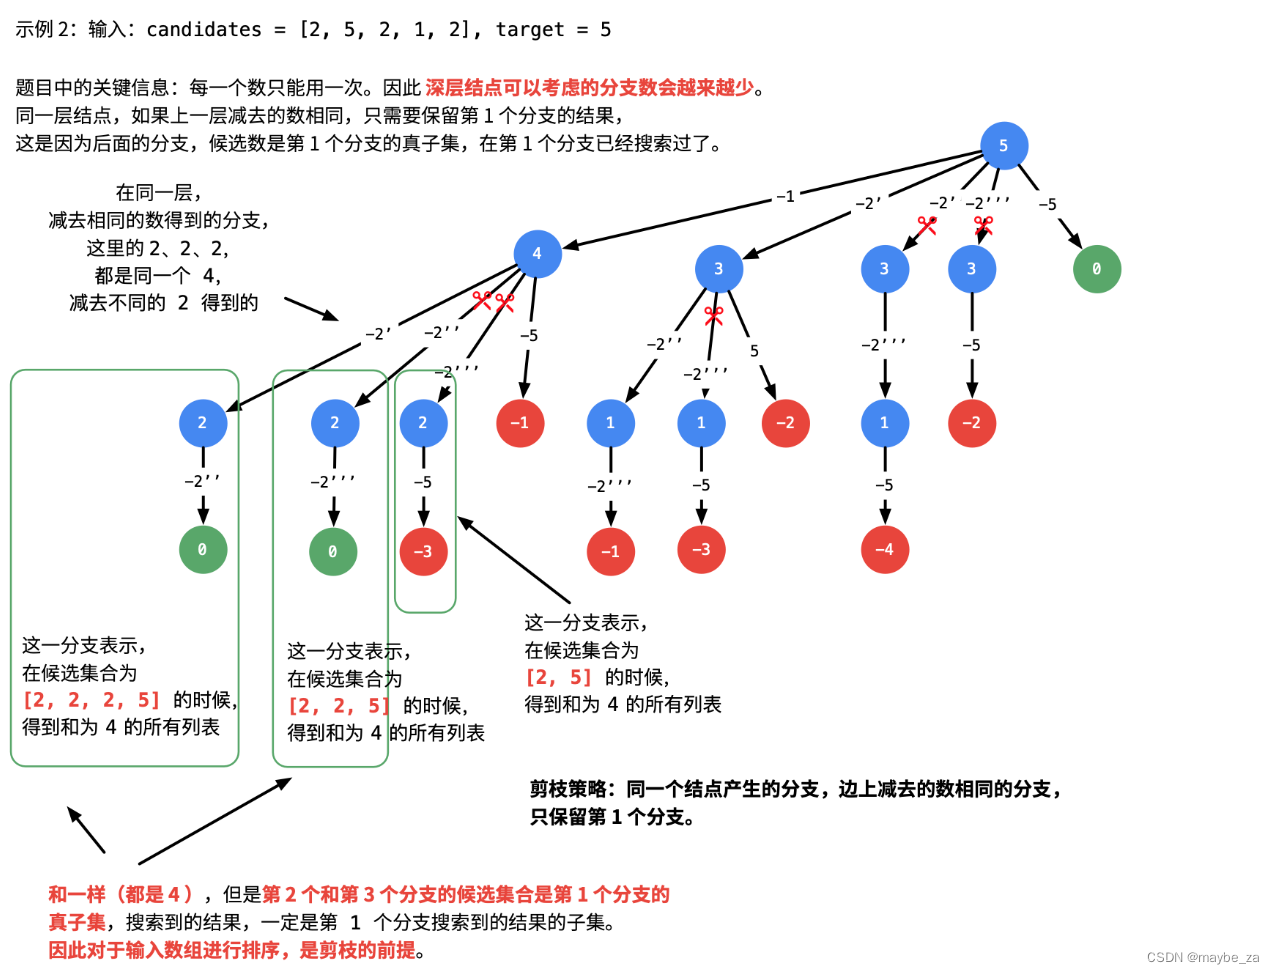
40. 组合总和 II - 力扣(LeetCode)
题目描述 给定一个候选人编号的集合 candidates 和一个目标数 target ,找出 candidates 中所有可以使数字和为 target 的组合。 candidates 中的每个数字在每个组合中只能使用 一次 。 注意:解集不能包含重复的组合。 输入示例 candidates [10,1,2,7,…...

第15届蓝桥杯嵌入式省赛准备第二天总结笔记(使用STM32cubeMX创建hal库工程+按键输入)
一.查看电路图 按键是使用的PB0,PB1,PB2,PA0四个引脚,然后使用CubeMX配置引脚,4个脚都配置为输入模式和上拉。 程序生成之后把不用的删掉,需要的留下,这里我把函数名改了。 然后写按键扫描读取程序,这里参考的正点原子…...

【论文阅读】One For All: Toward Training One Graph Model for All Classification Tasks
目录 0、基本信息1、研究动机2、创新点——One For All :unique features3、准备4、具体实现4.1、用TAGs统一来自不同领域的图数据4.2、用NOI(NODES-OF-INTEREST)统一不同图任务4.2.1、NOI子图4.2.2、NOI提示结点 4.3、用于图的上下文学习&am…...
Python多线程爬虫——数据分析项目实现详解
前言 前些天发现了一个巨牛的人工智能学习网站,通俗易懂,风趣幽默,忍不住分享一下给大家:https://www.captainbed.cn/z 「个人网站」:雪碧的个人网站 ChatGPT体验地址 文章目录 前言爬虫获取cookie网站爬取与启动CS…...

unity全局音量管理/全局音量设置与音量设置界面(含静音功能)
前言 本文将会介绍如何使用audiomixer实现全局音量控制,并且会介绍如何实现游戏内的含静音功能的音量设置界面。 本人也是个初学者,在看过一些关于音量管理的教程后,发现使用audiomixer实现全局音量控制可能是最方便、功能最完备、强大的&a…...

C++ vector 数组转换、查找、最大最小值、排序、排行的几种用法
C vector中常用到排序、取最值,一些场景可能还会要计算某个元素的排行,以下就是一些实际例子,精简、有效。 【1】会涉及到数组转vector: vector<int> v(arr, arr N); // N为数组size,可用sizeof(arr)/sizeof(i…...
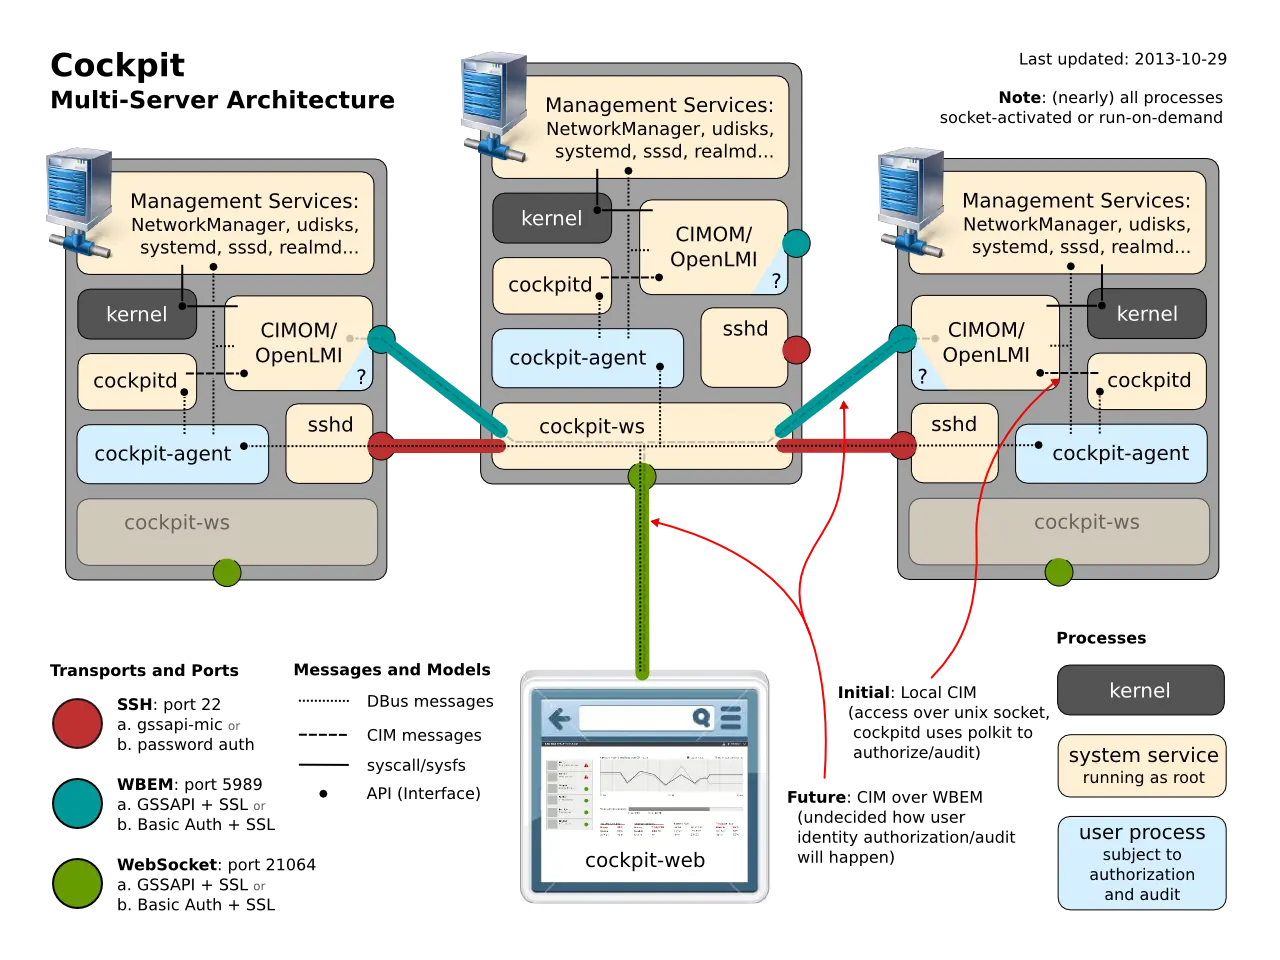
vmware 安装Rocky-9.3系统
安装系统截图 安装完成,启动 查看版本和内核 开启远程登陆授权 1、编辑配置文件 #提升权限,输入su,并输入密码 su #编辑ssh文件开启root远程登陆 vi /etc/ssh/sshd_config找到以下内容:#PermitRootLogin prohibit-password 添加:…...

C++提高编程——模板
本专栏记录C学习过程包括C基础以及数据结构和算法,其中第一部分计划时间一个月,主要跟着黑马视频教程,学习路线如下,不定时更新,欢迎关注。 当前章节处于: ---------第1阶段-C基础入门 ---------第2阶段实战…...

单线程、同步、异步、预解析、作用域、隐式全局变量、对象创建、new
单线程 进程 cpu 资源分配的最小单位一个进程可以有多个线程 线程 cpu调度的最小单位线程建立在进程的建立基础上的一次程序的运行单位 线程分为:单线程 多线程 单线程:js是单线程 (同一个时间只能完成一个任务)多线程&…...
如何快速掌握Pixel设备刷机:新手完整教程与PixelFlasher刷机工具指南
如何快速掌握Pixel设备刷机:新手完整教程与PixelFlasher刷机工具指南 【免费下载链接】PixelFlasher Pixel™ phone flashing GUI utility with features. 项目地址: https://gitcode.com/gh_mirrors/pi/PixelFlasher 你是否曾经因为复杂的命令行刷机操作而感…...

IPBan:企业级服务器安全防护解决方案的架构设计与实现
IPBan:企业级服务器安全防护解决方案的架构设计与实现 【免费下载链接】IPBan Since 2011, IPBan is the worlds most trusted, free security software to block hackers and botnets. With both Windows and Linux support, IPBan has your dedicated or cloud se…...
:Tool Calling 工具调用机制总览)
AI Agent 项目学习笔记(八):Tool Calling 工具调用机制总览
1. 本期目标 前几期主要分析了 ai_agent 项目的对话主链路、Advisor、多轮记忆和 RAG 检索增强。到目前为止,智能体已经具备了这些能力: 能够和用户多轮对话 能够记住当前会话上下文 能够参考本地知识库回答 能够通过 RAG 检索增强回答质量但是这些能力…...

终极指南:如何在PC上完美运行PS4游戏?shadPS4模拟器完全解析
终极指南:如何在PC上完美运行PS4游戏?shadPS4模拟器完全解析 【免费下载链接】shadPS4 PS4 emulator for Windows,Linux,MacOS 项目地址: https://gitcode.com/gh_mirrors/shad/shadPS4 想要在个人电脑上重温《血源诅咒》、《如龙》等经典PS4游戏…...

3步找回密码:如何用ArchivePasswordTestTool解锁加密压缩包
3步找回密码:如何用ArchivePasswordTestTool解锁加密压缩包 【免费下载链接】ArchivePasswordTestTool 利用7zip测试压缩包的功能 对加密压缩包进行自动化测试密码 项目地址: https://gitcode.com/gh_mirrors/ar/ArchivePasswordTestTool 你是否曾经面对一个…...
)
MapTRV2 部署训练与测试(踩坑版本)
1. 背景 目录 1. 背景 1.1 结果 1.1.1 过程截图 存在的坑 安装环境 踩坑记录 过程记录 requirements.txt 设置调试的launch.json数据 合成视频脚本 跑通了MapTRV1 ,想继续跑通MapTRV2,安装运行的时候都存在问题,先从网上找了一些相关的教程,发现教程需要收费,作为白嫖党怎…...

10分钟快速上手:VSCode Cortex-Debug调试插件终极指南
10分钟快速上手:VSCode Cortex-Debug调试插件终极指南 【免费下载链接】cortex-debug Visual Studio Code extension for enhancing debug capabilities for Cortex-M Microcontrollers 项目地址: https://gitcode.com/gh_mirrors/co/cortex-debug 还在为嵌入…...

ComfyUI Manager 架构设计与性能优化:从插件管理到系统集成的完整解决方案
ComfyUI Manager 架构设计与性能优化:从插件管理到系统集成的完整解决方案 【免费下载链接】ComfyUI-Manager ComfyUI-Manager is an extension designed to enhance the usability of ComfyUI. It offers management functions to install, remove, disable, and e…...

从绿光到深紫外:手把手教你选对BBO、LBO、CLBO晶体,搞定激光倍频实验
从绿光到深紫外:非线性晶体选型与倍频实验实战指南 当实验室的1064nm激光器发出那束熟悉的近红外光时,许多研究者脑海中会立刻浮现两个问题:如何高效获得532nm的翠绿光束?又该如何进一步压缩波长至266nm的深紫外区域?…...

关联查询,左连接,inner join笔记,BNL,NLJ
文章目录left join的最大值和最小值3个表的inner join关联查询时的is_del处理cross join(full join)NLJ 性能高BNL 性能低blj会导致什么问题?left join的最大值和最小值 假设左表m条,右表n条 最小值是m: 当一条也匹配不到右表时,或者右表中…...