实现基本的登录功能
一、登录功能的前端处理过程
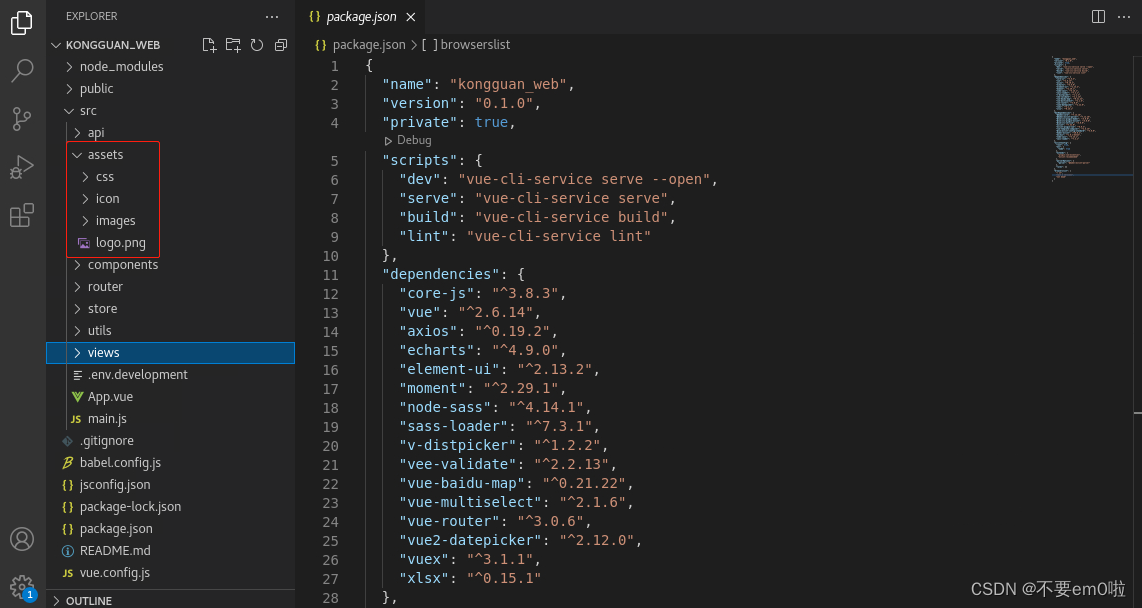
1、导入项目所需的图片和CSS等静态文件
- 参考代码存放client节点的/opt/code目录下

- 执行如下命令:
[root@client ~]# cp -r /opt/code/kongguan_web/src/assets/* /root/kongguan_web/src/assets/- 将参考代码中的css、icon、images等文件夹或文件直接拷贝到当前创建的新项目的src/assets/目录中
2、完成项目中使用的工具类的编写(此处的代码可由学生独立完成,也可以由老师提供,直接导入到项目中)
- 编写或直接导入工具类文件,所有的工具类都放在src/utils目录下
| src/utils/message.js | 消息弹窗管理 |
| src/utils/request.js | 用于请求的身份验证 |
- 在src/utils/message.js中,定义了消息弹窗管理,代码如下:
import { Message } from "element-ui";
let messageInstance = null;
let mainMessage = function DoneMessage(options) {//如果弹窗已存在先关闭if (messageInstance) {messageInstance.close();}messageInstance = Message(options);
}
let arr = ['success', 'warning', 'info', 'error'];
arr.forEach(function (type) {mainMessage[type] = function (options) {if (typeof options === 'string') {options = {message: options};}options.type = type;return mainMessage(options);};
});
export const message = mainMessage;- 在src/utils/request.js中,定义了拦截器,用于拦截“请求”和“响应”,进行身份验证,代码如下:
import Vue from 'vue'
import axios from 'axios'Vue.prototype.$ajax = Vue.ajax = axiosaxios.defaults.baseURL = process.env.NODE_ENV !== 'production' ? "" : (process.env.VUE_APP_BASE_API)axios.interceptors.request.use(config => {if (localStorage.getItem('Authorization')) {config.headers.common['Authorization'] = localStorage.getItem('Authorization');} else {}return config;
}, err => {return Promise.reject(err);
})
axios.interceptors.response.use(function (response) {// console.log(response);// console.log(response.headers.Authorization);// 对响应数据做点什么return response.data;
}, function (error) {if (JSON.stringify(error).indexOf('401') !== -1) { // token失效localStorage.removeItem('Authorization')Vue.prototype.$message.error("token过期")Vue.prototype.$router.push({path: '/login',})} else if (JSON.stringify(error).indexOf('403') !== -1) {localStorage.removeItem('Authorization')Vue.prototype.$message.error("token无效")Vue.prototype.$router.push({path: '/login',})}// 对响应错误做点什么return Promise.reject(error);
});export default axios;
3、编写 src/api/login/login.js文件,向服务端发送请求,实现登录
- 定义login方法,使用POST请求向服务端发送表单数据data,服务端返回的数据包括:登录状态、身份token、权限等信息。
import request from '../../utils/request'const baseUrl="/api"/*** 用户登录*/
export function login(data){return request({url:baseUrl+"/login",method:"post",data:data})
}
4、编写src/store/index.js,用于Token的存储
- src/store/index.js文件,用于存储token,修改token,并将token存入localStorage
import Vue from 'vue'
import Vuex from 'vuex'Vue.use(Vuex)
export default new Vuex.Store({state: {// 存储tokenAuthorization: localStorage.getItem('Authorization') ? localStorage.getItem('Authorization') : '',},mutations: {// 修改token,并将token存入localStoragechangeLogin (state, user) {state.Authorization = user.Authorization;localStorage.setItem('Authorization', user.Authorization);console.log(state.Authorization);}}
})
5、创建登录的Vue视图组件Login.vue
- 登录页面设计:在src/views目录下创建Login目录,然后在Login目录下,创建Login.vue 登录页面
<template><div class="login"><div class="top_logo"></div><!-- 登录框区域 --><div class="form_box"><div style="color: #f0f0f0;">大数据航空案例</div><el-form style="margin-top: 60px" :model="loginForm" status-icon :rules="rules" ref="loginForm"><el-row type="flex" justify="left" :gutter="20"><el-col :span="3" align="center"><img src="../../assets/images/user-icon.png" style="margin-top: 3px"/></el-col><el-col :span="21" align="center"><el-form-item prop="account"><el-input  class="el-input__inner1" v-model="loginForm.account" placeholder="请输入用户名" maxlength="20"></el-input></el-form-item></el-col></el-row><el-row type="flex"><div class="tableTitle"/></el-row><el-row type="flex" justify="left" style="margin-top: 50px" :gutter="20"><el-col :span="3" align="center"><img src="../../assets/images/pwd-icon.png" style="margin-top: 3px"/></el-col><el-col :span="21"><el-form-item prop="password"><el-input type="password" v-model="loginForm.password" placeholder="请输入密码" maxlength="16"></el-input></el-form-item></el-col></el-row><el-row type="flex"><div class="tableTitle"/></el-row><el-form-item align="center" style="margin-top: 100px"><el-button class="el-button1" type="primary;" @click="submitForm('loginForm')">登 录</el-button></el-form-item></el-form></div><!-- 底部区域 --></div>
</template>
... 接下页...- 初始化表单数据,并定义表单验证规则,例如:如果用户名输入框为空,则提示“请输入登陆账号”
 ... 接上页...<script>import {mapMutations} from 'vuex';import {login} from "@/api/login/login";export default {data() {return {loginForm: {account: "",password: "",},otherQuery: {},rules: {account: [{required: true, message: "请输入登陆账号", trigger: "blur"}],password: [{required: true, message: "请输入登陆密码", trigger: "blur"}]}};},
... 接下页...- 处理请求的重定向地址,获取请求的地址,登录后,直接跳转到请求的地址
其中getOtherQuery(query)方法是在下面的代码中定义的方法,返回上一次请求的地址,登录成功后,直接跳转到该地址。
... 接上页...watch: {$route: {handler: function (route) {const query = route.queryif (query) {this.redirect = query.redirectthis.otherQuery = this.getOtherQuery(query)}},immediate: true}},
... 接下页...- 提交表单的过程如下:
调用src/api/Login/Login.js中的login方法,向服务端发送请求,登录成功后将用户token和权限保存到本地vuex中,然后跳转到上一次请求的地址。
... 接上页...//methods: {...mapMutations(['changeLogin']),submitForm(formName) {this.$refs[formName].validate(valid => {if (valid) {login(this.loginForm).then(data => {if (data.successful) {console.log("登录成功");// 将用户token保存到vuex中// this.changeLogin({Authorization: data.result.token});//localStorage.setItem('account', data.result.name)if (data.resultValue.Authorization != null) {localStorage.setItem('Authorization', data.resultValue.Authorization);}if (data.resultValue.userAuth != null) {localStorage.setItem('userAuth', data.resultValue.userAuth);}this.$router.push({path: this.redirect || '/', query: this.otherQuery});console.log("跳转");} else {console.log("登录失败");this.$message.error("登录失败");}});} else {return false;}});},//获取请求的地址,登录后,直接跳转到请求的地址getOtherQuery(query) {return Object.keys(query).reduce((acc, cur) => {if (cur !== 'redirect') {acc[cur] = query[cur]}return acc}, {})}}};
</script>
... 接下页...- 页面样式如下
... 接上页...
<style scoped>.login {background: url('../../assets/images/loginBg.png') no-repeat;background-size: cover;height: 100%;}.top_logo {height: 130px;}.form_box {text-align: center;width: 550px;margin: 0 auto;}.login-footer {width: 100%;text-align: center;color: #ffffff;position:fixed;bottom:0;margin-bottom: 64px;size: 23px;padding-top: 100px;}.el-button1{background: #0376bf;border-color: #0376bf;width: 100%;color: #f0f0f0;height: 62px;}.tableTitle {margin: 0 auto;margin-top: 10px;width: 550px;height: 1px;background-color: #d4d4d4;}
</style>
<style>.el-form-item {margin-bottom: 1px;}.el-form-item__error{margin-left: 15px;margin-top: 20px;}.el-input__inner {background: transparent;border: 0;color: #f0f0f0;}
</style>
6、创建登录成功后的主页面的Vue视图组件src/views/Home/Index.vue
- 由于当前任务是实现登录功能,所以登录成功后的src/views/Home/Index.vue页面只显示简单的内容即可,详细展示会在后续任务中完成。
<template><div style="color: #000000;">大数据航空案例</div>
</template><script>export default{}
</script><style>
</style>
7、为了实现页面风格的统一,所以这里还需要创建一个src/views/Layout/Layout.vue和一个src/views/Layout/Header.vue 布局视图组件
除登录页面外,其他显示的页面都嵌套在一个Layout.vue内,且都显示同一个头部内容Header.vue。由于这是在后续任务中完成的工作,所以这里只显示简单的内容即可。
- src/views/Layout/Layout.vue
<template><div class="main"><Header></Header><div class="common-right"><router-view/></div></div>
</template><script>export default{}
</script><style>
</style>- src/views/Layout/Header.vue
<template><div style="color: red;">大数据航空案例</div>
</template><script>export default{}
</script><style>
</style>
8、编写src/router/index.js路由文件,当我们访问任何页面时,如果没有身份认证信息,则会跳转到Login.vue
- 通过vue-router重写路由的push方法,解决相同路径跳转报错的问题
import Vue from 'vue'
import Router from 'vue-router'const originalPush = Router.prototype.push;
Router.prototype.push = function push(location) {return originalPush.call(this, location).catch(err => err)
}
... 接下文 ...- 设置基本路由规则
... 接上文 ...
Vue.use(Router)
/* Layout */
import Layout from '@/views/Layout/Layout'
const router =  new Router({base: process.env.BASE_URL,mode: 'history',routes: [{path: "/login",component: resolve => require(['@/views/Login/Login'], resolve),hidden: true,meta: {auth: true}},{path: '/',component: Layout, redirect: '/home',children: [{path: 'home',component: resolve => require(['@/views/Home/Index'], resolve),name: 'home',meta: { title: 'home' }}]},]
})
... 接下文 ...- 导航守卫:使用router.beforeEach注册一个全局前置守卫,用于获取Token来判断用户是否登陆,如果没有登录,则跳转到/Login.vue页面
... 接上文 ...
router.beforeEach((to, from, next) => {if (to.path === '/login') {next();} else {let token = localStorage.getItem('Authorization');if (token === null || token === '') {next('/login');} else {next();}}
});
export default router
9、编写src/main.js文件,该文件是应用系统入口、主方法
- 在src/main.js中导入 src/store/index 等文件,有些组件,如ECharts报表组件,在当前任务中没有使用,可以先导入暂不使用
import Vue from 'vue'
import App from './App'
import router from './router'
import store from './store/index'
import './assets/css/basic.css'
import ElementUI from 'element-ui';
import 'element-ui/lib/theme-chalk/index.css';
import './assets/icon/iconfont.css';
import * as echarts from 'echarts';
import axios from 'axios';
import moment from 'moment';
import { message } from './utils/message'
... 略,接下文 ...- 定义全局属性,以便可以在项目的任意位置使用
... 略,接上文 ...
Vue.prototype.$echarts = echarts;
Vue.prototype.$axios = axios;
Vue.config.productionTip = false
Vue.use(ElementUI);
Vue.prototype.$message = message;
Vue.prototype.$moment = moment;new Vue({router,store,render:h =>h(App)
}).$mount('#app')
... 略,接下文 ...- 定义全局响应(response)拦截器和请求(request)拦截器
... 略,接上文 ...
//定义一个响应拦截器
axios.interceptors.response.use(function (config) {let status = config.code;//401,未登录,跳转到登录页if (status == 401) {console.log(401);router.push("/login");}//403,无权限,跳转到登录页if (status == 403) {console.log(403);router.push("/login");}return config
})// request拦截器
axios.interceptors.request.use(config => {// 如果想请求可以重复发起,给在请求参数中加allowedRepeat:true  (后续会删除,不会发送给服务端)if (!config.data || !config.data.allowedRepeat) { // 如果不允许重复请求,开启拦截// todo: 1. 设置拦截 防止重复请求// 拦截重复请求(即当前正在进行的相同请求)const requestData = getRequestIdentify(config)removePending(requestData, true)// 使用 cancel token 取消请求 参考:http://www.axios-js.com/zh-cn/docs/#%E6%8B%A6%E6%88%AA%E5%99%A8config.cancelToken = new CancelToken((c) => {pending[requestData] = c})} else { // 允许重复请求,不进行拦截delete config.data.allowedRepeat // 把自定义的请求参数给删掉,不发送给服务端}return config
}, error => {// Do something with request errorconsole.log(error) // for debugPromise.reject(error)
})
... 略,接下文 ...- 拦截重复请求
... 略,接上文 ...
// 拦截重复请求
let pending = {}
const CancelToken = axios.CancelToken
// 请求标识;完成请求后也需要执行删除记录,所以添加此参数避免执行无用操作
const removePending = (key, isRequest = false) => {if (pending[key] && isRequest) {pending[key]('取消重复请求')}delete pending[key]
}
/*** 由于我们请求用了代理 直接代理到测试服务器 因此请求响应拦截器的config.url是一致的,不需要标识值区分* 如果请求拦截器和响应拦截器的config.url不一致,就需要一个标识值用来区分判断*/
const getRequestIdentify = (config) => {const url = config.url// 返回url及请求参数 post方法请求参数为config.data  get方法请求参数为config.paramsif (config.method === 'post') {return encodeURIComponent(config.url + JSON.stringify(config.data))}return encodeURIComponent(url + JSON.stringify(config.params))
}
10、配置环境变量,在项目根目录下创建 .env.development 文件,内容如下:
NODE_ENV='development'
VUE_APP_TITLE = 'development'
#测试环境,使用此配置文件
#请求前缀
VUE_APP_BASE_API = 'http://localhost:8848/api'
11、修改vue.config.js文件,覆盖文件内容,配置服务器端的IP和访问端口等,文件的完整内容如下:
module.exports = {runtimeCompiler: true,lintOnSave: process.env.NODE_ENV !== 'production',lintOnSave: false,productionSourceMap:false,chainWebpack(config) {config.plugins.delete('prefetch')  },pwa: {iconPaths: {}},devServer: {host: "0.0.0.0",port: 8089,proxy: {'/api': {target: process.env.VUE_APP_BASE_API,pathRewrite:{"^/api":"/"},changeOrigin: true,ws: false},}}
}
13、运行测试前端Vue程序
- 进入命令行模式,在项目根目录下执行npm run dev命令运行项目(注意:npm默认使用国外镜像,可能会出现连接失败的问题,如出现连接失败可将npm命令切换成cnpm命令)
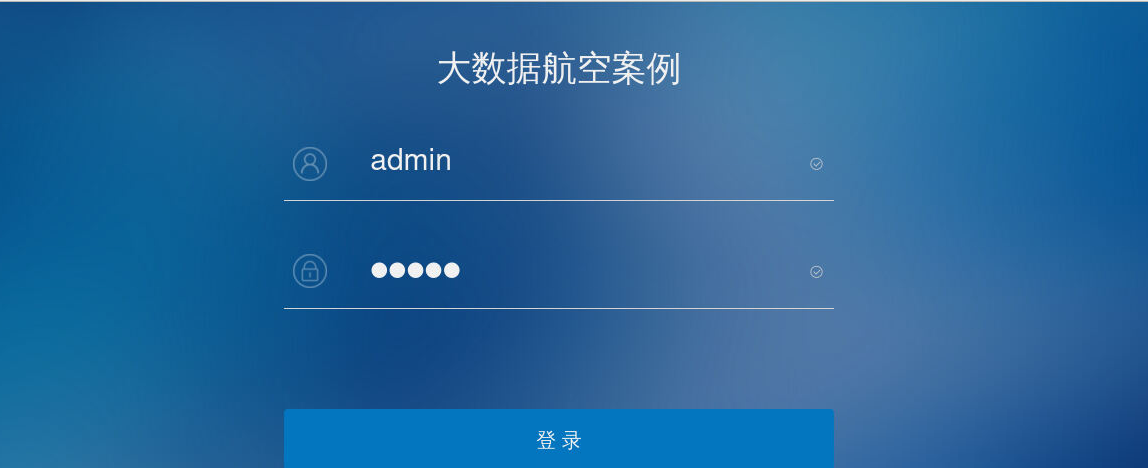
[root@client KongGuan-Web]# npm run dev- 打开浏览器,可以查看到登录页面
二、登录功能的后端处理过程
1、在后端BigData-KongGuan项目的pom.xml文件中引入 spring-boot-starter-security 包和Redis相关包
- 当前项目使用SpringBoot的WebSecurityConfig安全组件,并使用Redis保存用户token和权限,并为Redis设置过期时间,在前面搭建后端基础框架的任务中,已经在pom.xml文件引入了相关依赖包,打开pom.xml文件可以查看到以下内容。
<!-- Spring Boot Security --><dependency><groupId>org.springframework.boot</groupId><artifactId>spring-boot-starter-security</artifactId></dependency><!-- spring-redis --><dependency><groupId>org.springframework.boot</groupId><artifactId>spring-boot-starter-data-redis</artifactId><exclusions><exclusion><groupId>io.lettuce</groupId><artifactId>lettuce-core</artifactId></exclusion></exclusions></dependency><dependency><groupId>redis.clients</groupId><artifactId>jedis</artifactId></dependency>2、编写com/qrsoft/config/WebSecurityConfig.java类,使用SpringBoot的WebSecurity安全组件
- 使用自定义身份验证组件TokenAuthenticationProvider
// ... ...// ... 略 ...@Autowiredprivate TokenAuthenticationProvider tokenAuthenticationProvider;@Overrideprotected void configure(AuthenticationManagerBuilder auth) {// 使用自定义身份验证组件auth.authenticationProvider(tokenAuthenticationProvider);}// ... 略 ...// ... ...- 在类中添加拦截器,拦截请求,如果非/api/login请求,则执行TokenLoginFilter过滤器进行登录验证,执行TokenAuthenticationFilter进行身份验证。
@Override
protected void configure(HttpSecurity http) throws Exception {/// ... ...// ... 略 ...// 添加拦截器http.addFilterBefore(new TokenLoginFilter("/api/login", authenticationManager(), redisTemplate), UsernamePasswordAuthenticationFilter.class).addFilterBefore(new TokenAuthenticationFilter(userMapper, redisTemplate), UsernamePasswordAuthenticationFilter.class);// ... 略 ...// ... ...
}- com/qrsoft/config/WebSecurityConfig.java类的完整代码如下:
package com.qrsoft.config;import com.google.gson.Gson;
import com.qrsoft.common.WrappedResult;
import com.qrsoft.filter.TokenAuthenticationFilter;
import com.qrsoft.filter.TokenAuthenticationProvider;
import com.qrsoft.filter.TokenLoginFilter;
import com.qrsoft.mapper.SysUserMapper;
import org.springframework.beans.factory.annotation.Autowired;
import org.springframework.context.annotation.Configuration;
import org.springframework.data.redis.core.StringRedisTemplate;
import org.springframework.security.config.annotation.authentication.builders.AuthenticationManagerBuilder;
import org.springframework.security.config.annotation.method.configuration.EnableGlobalMethodSecurity;
import org.springframework.security.config.annotation.web.builders.HttpSecurity;
import org.springframework.security.config.annotation.web.builders.WebSecurity;
import org.springframework.security.config.annotation.web.configuration.EnableWebSecurity;
import org.springframework.security.config.annotation.web.configuration.WebSecurityConfigurerAdapter;
import org.springframework.security.config.http.SessionCreationPolicy;
import org.springframework.security.web.authentication.UsernamePasswordAuthenticationFilter;import javax.servlet.http.HttpServletResponse;@Configuration
@EnableWebSecurity
@EnableGlobalMethodSecurity(prePostEnabled = true)
public class WebSecurityConfig extends WebSecurityConfigurerAdapter {@Autowiredprivate SysUserMapper userMapper;@Autowiredprivate StringRedisTemplate redisTemplate;@Autowiredprivate TokenAuthenticationProvider tokenAuthenticationProvider;@Overrideprotected void configure(AuthenticationManagerBuilder auth) {// 使用自定义身份验证组件auth.authenticationProvider(tokenAuthenticationProvider);}@Overrideprotected void configure(HttpSecurity http) throws Exception {// 配置 CSRF 关闭,允许跨域访问http.csrf().disable();// 开启Spring Security cors支持,允许跨域访问http.cors();// 关闭 Sessionhttp.sessionManagement().sessionCreationPolicy(SessionCreationPolicy.STATELESS);// 允许 登录接口 的无授权访问,其他需要授权访问http.authorizeRequests().antMatchers("/*").permitAll().anyRequest().authenticated();// 禁用缓存http.headers().cacheControl();// 添加拦截器http.addFilterBefore(new TokenLoginFilter("/api/login", authenticationManager(), redisTemplate), UsernamePasswordAuthenticationFilter.class).addFilterBefore(new TokenAuthenticationFilter(userMapper, redisTemplate), UsernamePasswordAuthenticationFilter.class);// 指定错误未授权访问的处理类http.exceptionHandling().accessDeniedHandler((request, response, accessDeniedException) -> {response.setContentType("application/json");response.setCharacterEncoding("UTF-8");response.setStatus(HttpServletResponse.SC_FORBIDDEN);response.getWriter().print(new Gson().toJson(WrappedResult.failedWrappedResult(accessDeniedException.getMessage(), "403")));});}@Overridepublic void configure(WebSecurity web) {web.ignoring().antMatchers("/doc.html/**", "/swagger-ui.html/**", "/v2/**", "/swagger-resources/**", "/webjars/**", "/minio/**");}
}package com.qrsoft.config;import com.google.gson.Gson;
import com.qrsoft.common.WrappedResult;
import com.qrsoft.filter.TokenAuthenticationFilter;
import com.qrsoft.filter.TokenAuthenticationProvider;
import com.qrsoft.filter.TokenLoginFilter;
import com.qrsoft.mapper.SysUserMapper;
import org.springframework.beans.factory.annotation.Autowired;
import org.springframework.context.annotation.Configuration;
import org.springframework.data.redis.core.StringRedisTemplate;
import org.springframework.security.config.annotation.authentication.builders.AuthenticationManagerBuilder;
import org.springframework.security.config.annotation.method.configuration.EnableGlobalMethodSecurity;
import org.springframework.security.config.annotation.web.builders.HttpSecurity;
import org.springframework.security.config.annotation.web.builders.WebSecurity;
import org.springframework.security.config.annotation.web.configuration.EnableWebSecurity;
import org.springframework.security.config.annotation.web.configuration.WebSecurityConfigurerAdapter;
import org.springframework.security.config.http.SessionCreationPolicy;
import org.springframework.security.web.authentication.UsernamePasswordAuthenticationFilter;import javax.servlet.http.HttpServletResponse;@Configuration
@EnableWebSecurity
@EnableGlobalMethodSecurity(prePostEnabled = true)
public class WebSecurityConfig extends WebSecurityConfigurerAdapter {@Autowiredprivate SysUserMapper userMapper;@Autowiredprivate StringRedisTemplate redisTemplate;@Autowiredprivate TokenAuthenticationProvider tokenAuthenticationProvider;@Overrideprotected void configure(AuthenticationManagerBuilder auth) {// 使用自定义身份验证组件auth.authenticationProvider(tokenAuthenticationProvider);}@Overrideprotected void configure(HttpSecurity http) throws Exception {// 配置 CSRF 关闭,允许跨域访问http.csrf().disable();// 开启Spring Security cors支持,允许跨域访问http.cors();// 关闭 Sessionhttp.sessionManagement().sessionCreationPolicy(SessionCreationPolicy.STATELESS);// 允许 登录接口 的无授权访问,其他需要授权访问http.authorizeRequests().antMatchers("/*").permitAll().anyRequest().authenticated();// 禁用缓存http.headers().cacheControl();// 添加拦截器http.addFilterBefore(new TokenLoginFilter("/api/login", authenticationManager(), redisTemplate), UsernamePasswordAuthenticationFilter.class).addFilterBefore(new TokenAuthenticationFilter(userMapper, redisTemplate), UsernamePasswordAuthenticationFilter.class);// 指定错误未授权访问的处理类http.exceptionHandling().accessDeniedHandler((request, response, accessDeniedException) -> {response.setContentType("application/json");response.setCharacterEncoding("UTF-8");response.setStatus(HttpServletResponse.SC_FORBIDDEN);response.getWriter().print(new Gson().toJson(WrappedResult.failedWrappedResult(accessDeniedException.getMessage(), "403")));});}@Overridepublic void configure(WebSecurity web) {web.ignoring().antMatchers("/doc.html/**", "/swagger-ui.html/**", "/v2/**", "/swagger-resources/**", "/webjars/**", "/minio/**");}
}3、编写com/qrsoft/filter下面的类,TokenLoginFilter是登录过滤器,除此之外,还会用到TokenAuthenticationFilter身份认证过滤器和TokenAuthenticationProvider用来处理认证实体。
- 登录过程包括4个部分(按①②③④的顺序执行),其中com/qrsoft/filter/TokenLoginFilter.java类是登录的核心过滤器,包括①④两个部分:
package com.qrsoft.filter;import com.alibaba.fastjson.JSONObject;
import com.baomidou.mybatisplus.core.toolkit.StringUtils;
import com.google.gson.Gson;
import com.qrsoft.common.TokenVO;
import com.qrsoft.common.WrappedResult;
import com.qrsoft.entity.SysUser;
import com.qrsoft.util.TokenUtil;
import org.springframework.data.redis.core.BoundSetOperations;
import org.springframework.data.redis.core.StringRedisTemplate;
import org.springframework.security.authentication.AuthenticationManager;
import org.springframework.security.authentication.BadCredentialsException;
import org.springframework.security.authentication.UsernamePasswordAuthenticationToken;
import org.springframework.security.core.Authentication;
import org.springframework.security.core.AuthenticationException;
import org.springframework.security.core.GrantedAuthority;
import org.springframework.security.web.authentication.AbstractAuthenticationProcessingFilter;
import org.springframework.security.web.util.matcher.AntPathRequestMatcher;import javax.servlet.FilterChain;
import javax.servlet.http.HttpServletRequest;
import javax.servlet.http.HttpServletResponse;
import java.io.BufferedReader;
import java.io.IOException;
import java.io.InputStreamReader;
import java.nio.charset.StandardCharsets;
import java.util.Collection;
import java.util.HashMap;
import java.util.List;
import java.util.Map;
import java.util.stream.Collectors;public class TokenLoginFilter extends AbstractAuthenticationProcessingFilter {private final StringRedisTemplate redisTemplate;public TokenLoginFilter(String url, AuthenticationManager authManager, StringRedisTemplate redisTemplate) {super(new AntPathRequestMatcher(url));setAuthenticationManager(authManager);this.redisTemplate = redisTemplate;}/*** 尝试认证(从request中取用户名和密码,生成认证实体)*/@Overridepublic Authentication attemptAuthentication(HttpServletRequest request, HttpServletResponse response) throws AuthenticationException, IOException {return null;//① ...}/*** 认证成功返回统一格式的JSON*/@Overrideprotected void successfulAuthentication(HttpServletRequest request, HttpServletResponse response, FilterChainchain, Authentication auth) throws IOException {//④...}/*** 认证失败返回统一格式的JSON*/@Overrideprotected void unsuccessfulAuthentication(HttpServletRequest request, HttpServletResponseresponse, AuthenticationException failed) throws IOException {//④ ...}
}- com/qrsoft/filter/TokenAuthenticationProvider.java类是用来处理认证实体,包括②③两个部分
package com.qrsoft.filter;import com.baomidou.mybatisplus.core.toolkit.StringUtils;
import com.qrsoft.entity.SysAuth;
import com.qrsoft.entity.SysUser;
import com.qrsoft.mapper.SysAuthMapper;
import com.qrsoft.mapper.SysUserMapper;
import org.springframework.beans.factory.annotation.Autowired;
import org.springframework.security.authentication.AuthenticationProvider;
import org.springframework.security.authentication.BadCredentialsException;
import org.springframework.security.authentication.UsernamePasswordAuthenticationToken;
import org.springframework.security.core.Authentication;
import org.springframework.security.core.AuthenticationException;
import org.springframework.security.core.GrantedAuthority;
import org.springframework.security.core.authority.AuthorityUtils;
import org.springframework.security.core.userdetails.UsernameNotFoundException;
import org.springframework.security.crypto.bcrypt.BCryptPasswordEncoder;
import org.springframework.security.crypto.password.PasswordEncoder;
import org.springframework.stereotype.Component;import java.util.List;
import java.util.Set;
import java.util.stream.Collectors;@Component
public class TokenAuthenticationProvider implements AuthenticationProvider {private final PasswordEncoder passwordEncoder = new BCryptPasswordEncoder();@Autowiredprivate SysUserMapper userMapper;@Autowiredprivate SysAuthMapper authMapper;/*** 身份认证*/@Overridepublic Authentication authenticate(Authentication authentication) throws AuthenticationException {return null;//③ ... }@Overridepublic boolean supports(Class<?> authentication) {return false;//② ... }/*** 获取用户权限*/private List<GrantedAuthority> getGrantedAuthorities(SysUser sysUser) {List<SysAuth> authList = authMapper.getAuthByUserId(sysUser.getId());//先过滤,在转换Set<String> perms = authList.stream().map(SysAuth::getAuthCode).filter(StringUtils::isNotBlank).collect(Collectors.toSet());return AuthorityUtils.createAuthorityList(perms.toArray(new String[0]));}
}- 在TokenLoginFilter类中的 ① 部分的代码如下(请在TokenLoginFilter类中的相应位置替换为如下代码):
/*** 尝试认证(从request中取用户名和密码,生成认证实体)*/@Overridepublic Authentication attemptAuthentication(HttpServletRequest request, HttpServletResponse response) throws AuthenticationException, IOException { //①String account = request.getParameter("account");String password = request.getParameter("password");if (StringUtils.isBlank(account) && StringUtils.isBlank(password)) {InputStreamReader streamReader = new InputStreamReader(request.getInputStream(), StandardCharsets.UTF_8);BufferedReader reader = new BufferedReader(streamReader);StringBuilder builder = new StringBuilder();String inputStr;while ((inputStr = reader.readLine()) != null)builder.append(inputStr);JSONObject jsonObject = JSONObject.parseObject(builder.toString());account = jsonObject.getString("account");password = jsonObject.getString("password");streamReader.close();reader.close();}if (account.contains(" ")) throw new BadCredentialsException("用户名或密码错误");// 返回一个验证令牌return getAuthenticationManager().authenticate(new UsernamePasswordAuthenticationToken(account, password));}- 在TokenAuthenticationProvider类中的 ② 部分的代码如下(请在TokenAuthenticationProvider类中的相应位置替换为如下代码):
@Overridepublic boolean supports(Class<?> authentication) {//②return authentication.equals(UsernamePasswordAuthenticationToken.class);}- 在TokenAuthenticationProvider类中的 ③ 部分代码如下(请在TokenAuthenticationProvider类中的相应位置替换为如下代码):
/*** 身份认证*/@Overridepublic Authentication authenticate(Authentication authentication) throws AuthenticationException {//③if (authentication.getPrincipal() == null || authentication.getCredentials() == null)throw new BadCredentialsException("用户名或密码错误");// 获取认证的用户名 & 密码String account = authentication.getPrincipal().toString();String password = authentication.getCredentials().toString();SysUser sysUser = userMapper.getByAccount(account);if (sysUser != null) {// 密码不匹配直接抛出异常if (!passwordEncoder.matches(password, sysUser.getPassword()))throw new BadCredentialsException("用户名或密码错误");// 获取用户权限List<GrantedAuthority> authorities = getGrantedAuthorities(sysUser);UsernamePasswordAuthenticationToken token = new UsernamePasswordAuthenticationToken(sysUser.getAccount(), sysUser.getPassword(), authorities);token.setDetails(sysUser);return token;} else {throw new UsernameNotFoundException("用户不存在或已删除");}}- 在TokenLoginFilter类中的 ④ 部分的代码如下(请在TokenLoginFilter类中的相应位置替换为如下代码):
/**
* 认证成功返回统一格式的JSON
*/
@Override
protected void successfulAuthentication(HttpServletRequest request, HttpServletResponse response, FilterChain chain, Authentication auth) throws IOException {//④response.setContentType("application/json");response.setStatus(HttpServletResponse.SC_OK);response.setCharacterEncoding("UTF-8");String token;//生成tokentry {Map<String, Object> payload = new HashMap<>();payload.put("account", auth.getName());token = TokenUtil.genToken(payload);} catch (Exception e) {response.getWriter().print(new Gson().toJson("Token生成失败"));return;}if (auth.getDetails() instanceof SysUser) {SysUser sysUser = (SysUser) auth.getDetails();TokenVO tokenVO = new TokenVO();tokenVO.setAccount(auth.getName());Collection<? extends GrantedAuthority> authorities = auth.getAuthorities();List<String> authorityList = authorities.stream().map(GrantedAuthority::getAuthority).collect(Collectors.toList());tokenVO.setName(sysUser.getName());tokenVO.setId(sysUser.getId().toString());tokenVO.setType(sysUser.getType());Boolean userboo = redisTemplate.hasKey(sysUser.getId().toString());if (userboo != null && userboo) {String tok = redisTemplate.boundValueOps(sysUser.getId().toString()).get();if (tok != null) {Boolean tokboo = redisTemplate.hasKey(tok);if (tokboo != null && tokboo) {redisTemplate.delete(tok);}}redisTemplate.delete(sysUser.getId().toString());}//存储用户对应tokenredisTemplate.boundValueOps(sysUser.getId().toString()).set(token);//存储token对应权限BoundSetOperations<String, String> setOperations = redisTemplate.boundSetOps(token);setOperations.add(authorityList.toArray(new String[]{}));response.setHeader("Authorization", token);response.setHeader("userAuth",authorityList.toString());tokenVO.setAuthorization(token);tokenVO.setUserAuth(authorityList.toString());response.getWriter().print(new Gson().toJson(WrappedResult.successWrapedResult(tokenVO)));} else {response.setContentType("application/json");response.setStatus(HttpServletResponse.SC_OK);response.setCharacterEncoding("UTF-8");response.getWriter().print(new Gson().toJson(WrappedResult.failedWrappedResult("登录失败")));}
}
/**
* 认证失败返回统一格式的JSON
*/
@Override
protected void unsuccessfulAuthentication(HttpServletRequest request, HttpServletResponse response, AuthenticationException failed) throws IOException {//④response.setContentType("application/json");response.setStatus(HttpServletResponse.SC_OK);response.setCharacterEncoding("UTF-8");response.getWriter().print(new Gson().toJson(WrappedResult.failedWrappedResult(failed.getMessage())));
}- com/qrsoft/filter/TokenAuthenticationFilter.java类是用于身份认证的过滤器,其完整代码如下:
package com.qrsoft.filter;import com.baomidou.mybatisplus.core.toolkit.StringUtils;
import com.google.gson.Gson;
import com.qrsoft.common.R;
import com.qrsoft.common.WrappedResult;
import com.qrsoft.entity.SysUser;
import com.qrsoft.mapper.SysUserMapper;
import com.qrsoft.util.TokenUtil;
import org.apache.commons.collections.MapUtils;
import org.springframework.data.redis.core.StringRedisTemplate;
import org.springframework.security.authentication.UsernamePasswordAuthenticationToken;
import org.springframework.security.core.authority.AuthorityUtils;
import org.springframework.security.core.context.SecurityContextHolder;
import org.springframework.web.filter.GenericFilterBean;import javax.servlet.FilterChain;
import javax.servlet.ServletException;
import javax.servlet.ServletRequest;
import javax.servlet.ServletResponse;
import javax.servlet.http.HttpServletRequest;
import javax.servlet.http.HttpServletResponse;
import java.io.IOException;
import java.util.Set;/*** 身份认证过滤器*/
public class TokenAuthenticationFilter extends GenericFilterBean {private final SysUserMapper userMapper;private final StringRedisTemplate redisTemplate;public TokenAuthenticationFilter(SysUserMapper sysUserDao, StringRedisTemplate redisTemplate) {this.userMapper = sysUserDao;this.redisTemplate = redisTemplate;}@Overridepublic void doFilter(ServletRequest request, ServletResponse response, FilterChain filterChain) throws IOException, ServletException {System.out.println("权限信息打印");// 从Http头中取tokenString token = ((HttpServletRequest) request).getHeader("Authorization");if (token != null) {// 校验token,并获取token中存储的用户名R r = TokenUtil.valid(token);// 验证redis是否存在tokenBoolean tokenBoo = redisTemplate.hasKey(token);if (tokenBoo != null && tokenBoo && r.isSuccess()) {// 从token检验结果获取用户名String account = MapUtils.getString(r.getPayloadMap(), "account", StringUtils.EMPTY);// 根据token获取redis中权限setSet<String> authoritySet = redisTemplate.boundSetOps(token).members();SysUser sysUser = userMapper.getByAccount(account);UsernamePasswordAuthenticationToken authentication = new UsernamePasswordAuthenticationToken(sysUser.getAccount(), sysUser.getPassword(), AuthorityUtils.createAuthorityList(authoritySet.toArray(new String[]{})));authentication.setDetails(sysUser);SecurityContextHolder.getContext().setAuthentication(authentication);filterChain.doFilter(request, response);} else {//token验证不通过writeResponse((HttpServletResponse) response, "Token失效");}} else {// token不存在放回401(未登录)writeResponse((HttpServletResponse) response, "未登录");}}private void writeResponse(HttpServletResponse response, String str) throws IOException {response.setContentType("application/json");response.setCharacterEncoding("UTF-8");response.setStatus(HttpServletResponse.SC_UNAUTHORIZED);response.getWriter().print(new Gson().toJson(WrappedResult.failedWrappedResult(str, String.valueOf(HttpServletResponse.SC_UNAUTHORIZED))));}
}
4、由于com.qrsoft.entity、com.qrsoft.mapper、com.qrsoft.common、com.qrsoft.util包下的帮助类不是当前项目的重点,所以请参考相应的源代码,自行完成或直接拷贝这些通用类即可。主要使用到以下的类:
| 类/接口 | 功能 |
|---|---|
| com.qrsoft.mapper.SysUserMapper | 用户基础信息表对应的数据访问类 |
| com.qrsoft.mapper.SysAuthMapper | 权限表对应的数据访问类 |
| com.qrsoft.common.R | 通用类,定义了返回结果 |
| com.qrsoft.common.WrappedResult | 通用类,定义了返回结果的接口规范 |
| com.qrsoft.common.TokenVO | 通用类,定义了Token的内容 |
| com.qrsoft.common.AuthAndMenu | 通用类,定义了权限和菜单 |
| com.qrsoft.entity.SysUser | 用户基础信息表对应的数据实体类 |
| com.qrsoft.entity.SysAuth | 权限表对应的数据实体类 |
| com.qrsoft.util.TokenUtil | Token工具类,用于生成Token、验证Token有效性等 |
| com.qrsoft.config.MybatisPlusConfig | MybatisPlus的配置类 |
- com.qrsoft.mapper.SysUserMapper类:用户基础信息表对应的数据访问类
package com.qrsoft.mapper;import com.qrsoft.entity.SysUser;
import org.apache.ibatis.annotations.Mapper;
import org.apache.ibatis.annotations.Select;
import org.springframework.stereotype.Repository;@Repository
@Mapper
public interface SysUserMapper {@Select("select id,account,password,name,is_enable,type,user_type_id " +"from sys_user where account = #{account} and is_del = 0")SysUser getByAccount(String account);
}- com.qrsoft.mapper.SysAuthMapper类:权限表对应的数据访问类
package com.qrsoft.mapper;import com.baomidou.mybatisplus.core.mapper.BaseMapper;
import com.qrsoft.entity.SysAuth;
import org.apache.ibatis.annotations.Delete;
import org.apache.ibatis.annotations.Mapper;
import org.apache.ibatis.annotations.Select;
import org.apache.ibatis.annotations.Update;
import org.springframework.stereotype.Repository;import java.util.List;@Repository
@Mapper
public interface SysAuthMapper extends BaseMapper<SysAuth> {/*** 根据用户id获取按钮权限*/@Select("select sa.id,sa.auth_name,sa.auth_code,sa.parent_id from sys_auth sa left join role_auth ra on sa.id = ra.auth_id where " +"sa.is_del = 0 and sa.type = 0 and ra.role_id in " +"(select sr.id from sys_role sr join user_role ur on sr.id = ur.role_id where sr.is_del = 0 and sr.is_enable = 0 and ur.user_id = #{userId})" +" order by sa.parent_id")List<SysAuth> getAuthByUserId(Integer userId);/*** 根据用户id获取菜单权限*/@Select("select sa.id,sa.auth_name,sa.auth_code,sa.parent_id,sa.menu_url,sa.menu_icon,sa.menu_order from sys_auth sa left join role_auth ra on sa.id = ra.auth_id where " +"sa.is_del = 0 and sa.type = 1 and ra.role_id in " +"(select sr.id from sys_role sr join user_role ur on sr.id = ur.role_id where sr.is_del = 0 and sr.is_enable = 0 and ur.user_id = #{userId})" +" group by sa.id order by sa.menu_order")List<SysAuth> getMenuByUserId(Integer userId);/*** 根据权限id获取权限详情*/@Select("select id,auth_name,auth_code,type,menu_url,parent_id,menu_icon,menu_order from sys_auth where id = #{id} and is_del=0")SysAuth getOneAuth(Integer id);/*** 根据权限标识统计权限数量*/@Select("select count(1) from sys_auth where auth_code = #{authCode} and is_del=0")Integer countAuthCode(String authCode);/*** 权限取消全部角色*/@Delete("delete from role_auth where auth_id = #{authId}")void deleteRole(Integer authId);/*** 删除权限*/@Update("update sys_auth set is_del = 1 where id = #{id} and is_del = 0")Boolean delAuth(Integer id);@Select("select DISTINCT sa.id,sa.auth_name,sa.auth_code,sa.parent_id,sa.type,sa.menu_icon,sa.menu_order from sys_auth sa left join role_auth ra on sa.id = ra.auth_id where " +"sa.is_del = 0 and ra.role_id = #{roleId} order by sa.parent_id")List<SysAuth> getAuthByRole(Integer roleId);/*** 根据角色获取权限id*/@Select("select auth_id from role_auth where role_id in (${roleId})")List<Integer> getIdByRole(String roleId);
}- com.qrsoft.common.R类:通用类,定义了返回结果
package com.qrsoft.common;import java.util.HashMap;
import java.util.Map;public class R {private final boolean success;private final String msg;private final Map<String, Object> payloadMap;private R(boolean success, String msg, Map<String, Object> payloadMap) {this.success = success;this.msg = msg;this.payloadMap = payloadMap;}public static R ok(Map<String, Object> payloadMap) {return new R(true, "", payloadMap);}public static R error(String msg) {return new R(false, msg, new HashMap<>());}public boolean isSuccess() {return success;}public Map<String, Object> getPayloadMap() {return payloadMap;}@Overridepublic String toString() {return "R{" +"success=" + success +", msg='" + msg + '\'' +", payloadMap=" + payloadMap +'}';}
}- com.qrsoft.common.WrappedResult类:通用类,定义了返回结果的接口规范
package com.qrsoft.common;import io.swagger.annotations.ApiModelProperty;
import org.springframework.security.access.AccessDeniedException;
import java.io.Serializable;public class WrappedResult<T> implements Serializable {private static final long serialVersionUID = 1L;private static final String ERROR = "error";private static final String SUCCESS = "success";/*** 接口状态*/@ApiModelProperty("接口状态,true成功,false失败")private final boolean successful;/*** 接口返回数据*/@ApiModelProperty("接口成功返回数据主体")private final T resultValue;/*** 接口错误信息*/@ApiModelProperty("接口错误信息")private final String resultHint;/*** 接口返回状态* 失败:401,403,error* 成功:success*/@ApiModelProperty("接口返回状态,成功:success,失败:401,403,error")private final String type;private WrappedResult(boolean isSuccess, T data, String resultHint, String type) {this.successful = isSuccess;this.resultValue = data;this.resultHint = resultHint;this.type = type;}public static <T> WrappedResult<T> successWrapedResult(T data) {return new WrappedResult<>(true, data, "", SUCCESS);}public static <T> WrappedResult<T> failedWrappedResult(String exMessage) {return new WrappedResult<>(false, null, exMessage, ERROR);}public static WrappedResult<Boolean> failedWrappedResult(Exception e, Boolean data) {if ("java.lang.RuntimeException".equals(e.getClass().getName())) {return new WrappedResult<>(false, data, e.getMessage(), ERROR);} else if ("org.springframework.security.access.AccessDeniedException".equals(e.getClass().getName())) {throw new AccessDeniedException(e.getMessage());} else {return new WrappedResult<>(false, data, "操作失败", ERROR);}}public static <T> WrappedResult<T> failedWrappedResult(Exception e) {if ("java.lang.RuntimeException".equals(e.getClass().getName())) {return new WrappedResult<>(false, null, e.getMessage(), ERROR);} else if ("org.springframework.security.access.AccessDeniedException".equals(e.getClass().getName())) {throw new AccessDeniedException(e.getMessage());} else {return new WrappedResult<>(false, null, "操作失败", ERROR);}}public static <T> WrappedResult<T> failedWrappedResult(Exception e, String exMessage) {if ("java.lang.RuntimeException".equals(e.getClass().getName())) {return new WrappedResult<>(false, null, e.getMessage(), ERROR);} else if ("org.springframework.security.access.AccessDeniedException".equals(e.getClass().getName())) {throw new AccessDeniedException(e.getMessage());} else {return new WrappedResult<>(false, null, exMessage, ERROR);}}public static <T> WrappedResult<T> failedWrappedResult(String exMessage, String type) {return new WrappedResult<>(false, null, exMessage, type);}public boolean isSuccessful() {return this.successful;}public T getResultValue() {return this.resultValue;}public String getType() {return this.type;}public String getResultHint() {return resultHint;}
}- com.qrsoft.common.TokenVO类:通用类,定义了Token的内容
package com.qrsoft.common;import lombok.Data;import java.io.Serializable;
import java.util.List;@Data
public class TokenVO implements Serializable {private static final long serialVersionUID = -5501706435587205188L;/*** token*/private String token;/*** 用户ID*/private String id;/*** 姓名*/private String name;/*** 用户名*/private String account;/*** 用户类型*/private Integer type;/*** 按钮权限列表*/private List<AuthAndMenu> authList;/*** 菜单权限列表*/private List<AuthAndMenu> menuList;private String Authorization;private String userAuth;
}- com.qrsoft.common.AuthAndMenu类: 通用类,定义了权限和菜单
package com.qrsoft.common;import com.qrsoft.entity.SysAuth;
import lombok.Data;import java.util.List;@Data
public class AuthAndMenu {/*** id*/private Integer id;/*** 权限名称*/private String authName;/*** 权限编码*/private String authCode;/*** 权限类型(0:按钮;1,菜单)*/private Integer type;/*** 菜单Url*/private String menuUrl;/*** 菜单Icon*/private String menuIcon;/*** 菜单order*/private Integer menuOrder;/***  子菜单*/private List<AuthAndMenu> childs;/*** 父级id*/private Integer parentId;public static AuthAndMenu authTOAuth(SysAuth auth) {AuthAndMenu output = new AuthAndMenu();output.setId(auth.getId());output.setAuthName(auth.getAuthName());output.setAuthCode(auth.getAuthCode());output.setType(0);output.setParentId(auth.getParentId());output.setMenuUrl(auth.getMenuUrl());output.setMenuIcon(auth.getMenuIcon());output.setMenuOrder(auth.getMenuOrder());return output;}public static AuthAndMenu authTOMenu(SysAuth auth) {AuthAndMenu output = new AuthAndMenu();output.setId(auth.getId());output.setAuthName(auth.getAuthName());output.setType(1);output.setParentId(auth.getParentId());output.setMenuUrl(auth.getMenuUrl());output.setMenuIcon(auth.getMenuIcon());output.setMenuOrder(auth.getMenuOrder());return output;}
}- com.qrsoft.entity.SysUser类:用户基础信息表对应的数据实体类
package com.qrsoft.entity;import com.baomidou.mybatisplus.annotation.IdType;
import com.baomidou.mybatisplus.annotation.TableField;
import com.baomidou.mybatisplus.annotation.TableId;
import com.baomidou.mybatisplus.annotation.TableName;
import lombok.Data;import java.io.Serializable;
import java.util.Date;/*** 用户基础*/
@Data
@TableName("sys_user")
public class SysUser implements Serializable {private static final long serialVersionUID = 1L;/*** 主键id*/@TableId(value = "id", type = IdType.AUTO)private Integer id;/*** 用户账号*/@TableField("account")private String account;/*** 用户密码*/@TableField("password")private String password;/*** 用户姓名*/@TableField("name")private String name;/*** 联系方式*/@TableField("contact")private String contact;/*** 用户类型(0:质检员(管理员);1:司机;2:客户)*/@TableField("type")private Integer type = 0;/*** 司机id/客户id*/@TableField("user_type_id")private Integer userTypeId;/*** 是否启用(启用:0,未启用:1)*/@TableField("is_enable")private Integer isEnable = 0;/*** 是否删除(正常:0,删除:1)*/@TableField("is_del")private Integer isDel = 0;/*** 创建人*/@TableField(value = "create_user", select = false)private Integer createUser;/*** 创建时间*/@TableField(value = "create_time", select = false)private Date createTime;
}- com.qrsoft.entity.SysAuth类:权限表对应的数据实体类
package com.qrsoft.entity;import com.baomidou.mybatisplus.annotation.IdType;
import com.baomidou.mybatisplus.annotation.TableField;
import com.baomidou.mybatisplus.annotation.TableId;
import com.baomidou.mybatisplus.annotation.TableName;
import lombok.Data;import java.io.Serializable;
import java.util.Date;/*** 权限表*/
@Data
@TableName("sys_auth")
public class SysAuth implements Serializable {private static final long serialVersionUID = 1L;/*** 主键id*/@TableId(value = "id", type = IdType.AUTO)private Integer id;/*** 权限名称*/@TableField("auth_name")private String authName;/*** 权限编码*/@TableField("auth_code")private String authCode;/*** 权限类型(0:按钮;1,菜单)*/@TableField("type")private Integer type = 0;/*** 菜单Url*/@TableField("menu_url")private String menuUrl;/*** 父级id*/@TableField("parent_id")private Integer parentId;/*** 菜单图标*/@TableField("menu_icon")private String menuIcon;/*** 菜单顺序*/@TableField("menu_order")private Integer menuOrder;/*** 删除状态,0正常,1删除*/@TableField("is_del")private Integer isDel = 0;/*** 创建人*/@TableField(value = "create_user", select = false)private Integer createUser;/*** 创建时间*/@TableField(value = "create_time", select = false)private Date createTime;
}- com.qrsoft.util.TokenUtil类:Token工具类,用于生成Token、验证Token有效性等
package com.qrsoft.util;import com.qrsoft.common.R;
import io.jsonwebtoken.JwtBuilder;
import io.jsonwebtoken.JwtParser;
import io.jsonwebtoken.Jwts;
import io.jsonwebtoken.security.Keys;import java.util.Calendar;
import java.util.Map;/*** token工具类*/
public class TokenUtil {private TokenUtil() {}/*** 密钥(至少32字节,后续可根据需求换成RSA加密)*/private static final byte[] SECRET = "sarnath-sarnath-sarnath-sarnath.".getBytes();/*** token失效时间(分)*/public static final int EXP_TIME = 24 * 60;/*** 生成token*/public static String genToken(Map<String, Object> payloadMap) {// JwtBuilder的base64UrlEncoder默认Encoders.BASE64URLJwtBuilder jwtBuilder = Jwts.builder();// 设置载荷jwtBuilder.setClaims(payloadMap);// 设置失效时间Calendar calendar = Calendar.getInstance();calendar.add(Calendar.MINUTE, EXP_TIME);jwtBuilder.setExpiration(calendar.getTime());// 设置签名jwtBuilder.signWith(Keys.hmacShaKeyFor(SECRET));return jwtBuilder.compact();}/*** 验证token有效性*/public static R valid(String token) {try {JwtParser jwtParser = Jwts.parser();// 设置时钟偏移jwtParser.setAllowedClockSkewSeconds(3 * 60);// 设置签名jwtParser.setSigningKey(SECRET);Map<String, Object> payload = jwtParser.parseClaimsJws(token).getBody();return R.ok(payload);} catch (Exception e) {return R.error(e.getMessage());}}
}- com.qrsoft.config.MyBatisPlusConfig类:MyBatisPlus的配置类
package com.qrsoft.config;import com.baomidou.mybatisplus.extension.plugins.PaginationInterceptor;
import com.baomidou.mybatisplus.extension.plugins.pagination.optimize.JsqlParserCountOptimize;
import org.springframework.context.annotation.Bean;
import org.springframework.context.annotation.Configuration;@Configuration
public class MyBatisPlusConfig {@Beanpublic PaginationInterceptor paginationInterceptor() {PaginationInterceptor paginationInterceptor = new PaginationInterceptor();paginationInterceptor.setCountSqlParser(new JsqlParserCountOptimize(true));return paginationInterceptor;}
}
5、因为需要访问MySQL数据库,所以在resources目录下打开application.yml文件(在前面步骤中已经创建),并填写如下配置:
server:port: 8848
spring:datasource:driver-class-name: com.mysql.cj.jdbc.Driverusername: root    password: 123456    url: jdbc:mysql://node3:3306/kongguan?autoReconnect=true&autoReconnectForPools=true&failOverReadOnly=false&serverTimezone=UTC    redis:host: node3    port: 6379    database: 15
注意:需要确保node3节点上的Redis和MySQL都已经正常启动,可以参照前面安装部署的任务中的步骤进行验证。

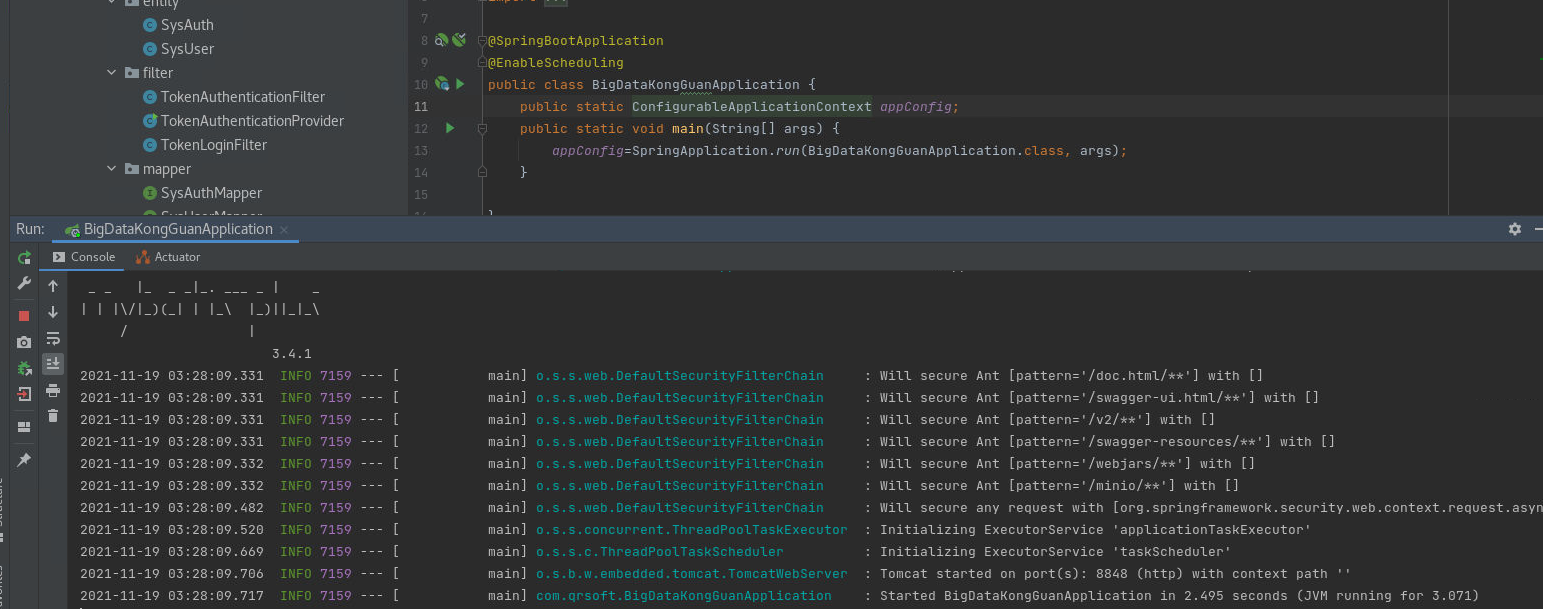
6、项目启动类BigDataKongGuanApplication 的内容如下:
package com.qrsoft;import org.springframework.boot.SpringApplication;
import org.springframework.boot.autoconfigure.SpringBootApplication;
import org.springframework.context.ConfigurableApplicationContext;
import org.springframework.scheduling.annotation.EnableScheduling;@SpringBootApplication
@EnableScheduling
public class BigDataKongGuanApplication {public static ConfigurableApplicationContext appConfig;public static void main(String[] args) {appConfig=SpringApplication.run(BigDataKongGuanApplication.class, args);}
}
三、测试登录功能
1、启动后端Spring Boot程序。
2、启动前端VUE程序。

3、输入用户名和密码(例如:admin/admin)进行登录。
相关文章:
实现基本的登录功能
一、登录功能的前端处理过程 1、导入项目所需的图片和CSS等静态文件 参考代码存放client节点的/opt/code目录下 执行如下命令: [rootclient ~]# cp -r /opt/code/kongguan_web/src/assets/* /root/kongguan_web/src/assets/ 将参考代码中的css、icon、images等文…...

Java线程池实现原理及其在美团业务中的实践
随着计算机行业的飞速发展,摩尔定律逐渐失效,多核CPU成为主流。使用多线程并行计算逐渐成为开发人员提升服务器性能的基本武器。 J.U.C提供的线程池:ThreadPoolExecutor类,帮助开发人员管理线程并方便地执行并行任务。了解并合理…...

让AI给你写代码(四)—— 初步利用LangChain Agent根据输入生成,保存,执行
要进一步提升智能编码助手的效率,我觉得需要做到两点 1) 进一步让主人聚焦于设计输入以及结果验证的循环 2) 进一步让智能编码助手聚焦于代码实现和程序流程(保存、打开,修订、执行、合并…) 正好接触到LLM…...

Flutter does not exist
Flutter does not exist 原因:Generated.config 配置文件内路径缺失 原因:Flutter SDK缺失 通过配置文件查到Flutter SDK在本地的存放位置FLUTTER_FRAMEWORK_DIR/Users/haijunyan/Documents/flutter/bin/cache/artifacts/engine/ios 真机所需…...

AIX上安装gcc和g++
AIX的iso镜像中没有gcc的软件包,需要我们自己下载,我们可以在 Index of /download/rpmdb/deplists/aix72 下载对应gcc和g版本的依赖文件deps 我们使用的是4.9.4版本的软件包 我们首先安装gcc,在http://www.oss4aix.org/download/everythi…...
js实现扫描线填色算法使用canvas展示
算法原理 扫描线填色算法的基本思想是:用水平扫描线从上到下扫描由点线段构成的多段构成的多边形。每根扫描线与多边形各边产生一系列交点。将这些交点按照x坐标进行分类,将分类后的交点成对取出,作为两个端点,以所填的色彩画水平…...

考研模拟面试-题目【攻略】
考研模拟面试-题目【攻略】 前言版权推荐考研模拟面试-题目前面的问题通用问题专业题数据结构计算机网络操作系统数据库网络安全 手写题数据结构操作系统计算机网络 代码题基础代码题其他代码题 后面的问题补充题目 最后 前言 2023-10-19 12:00:57 以下内容源自《考研模拟面试…...

Frostmourne - Elasticsearch源日志告警配置
简介 配置Frostmourne 接入Elasticsearch源进行日志匹配告警,并静默规则,告警消息发送到企业微信,告警信息使用Markdown。 部署安装教程查看: https://songxwn.com/frostmourne_install ELK 安装教程:https://songx…...
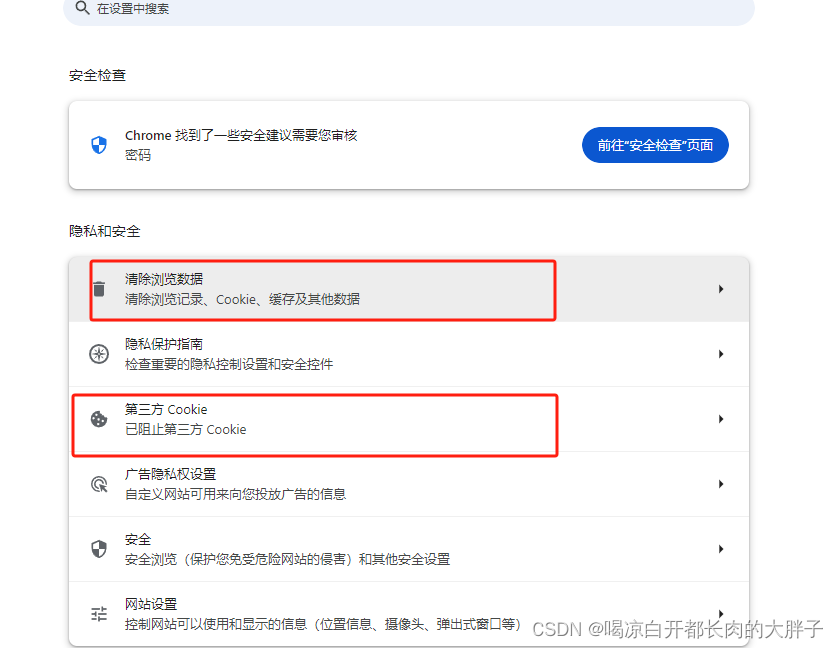
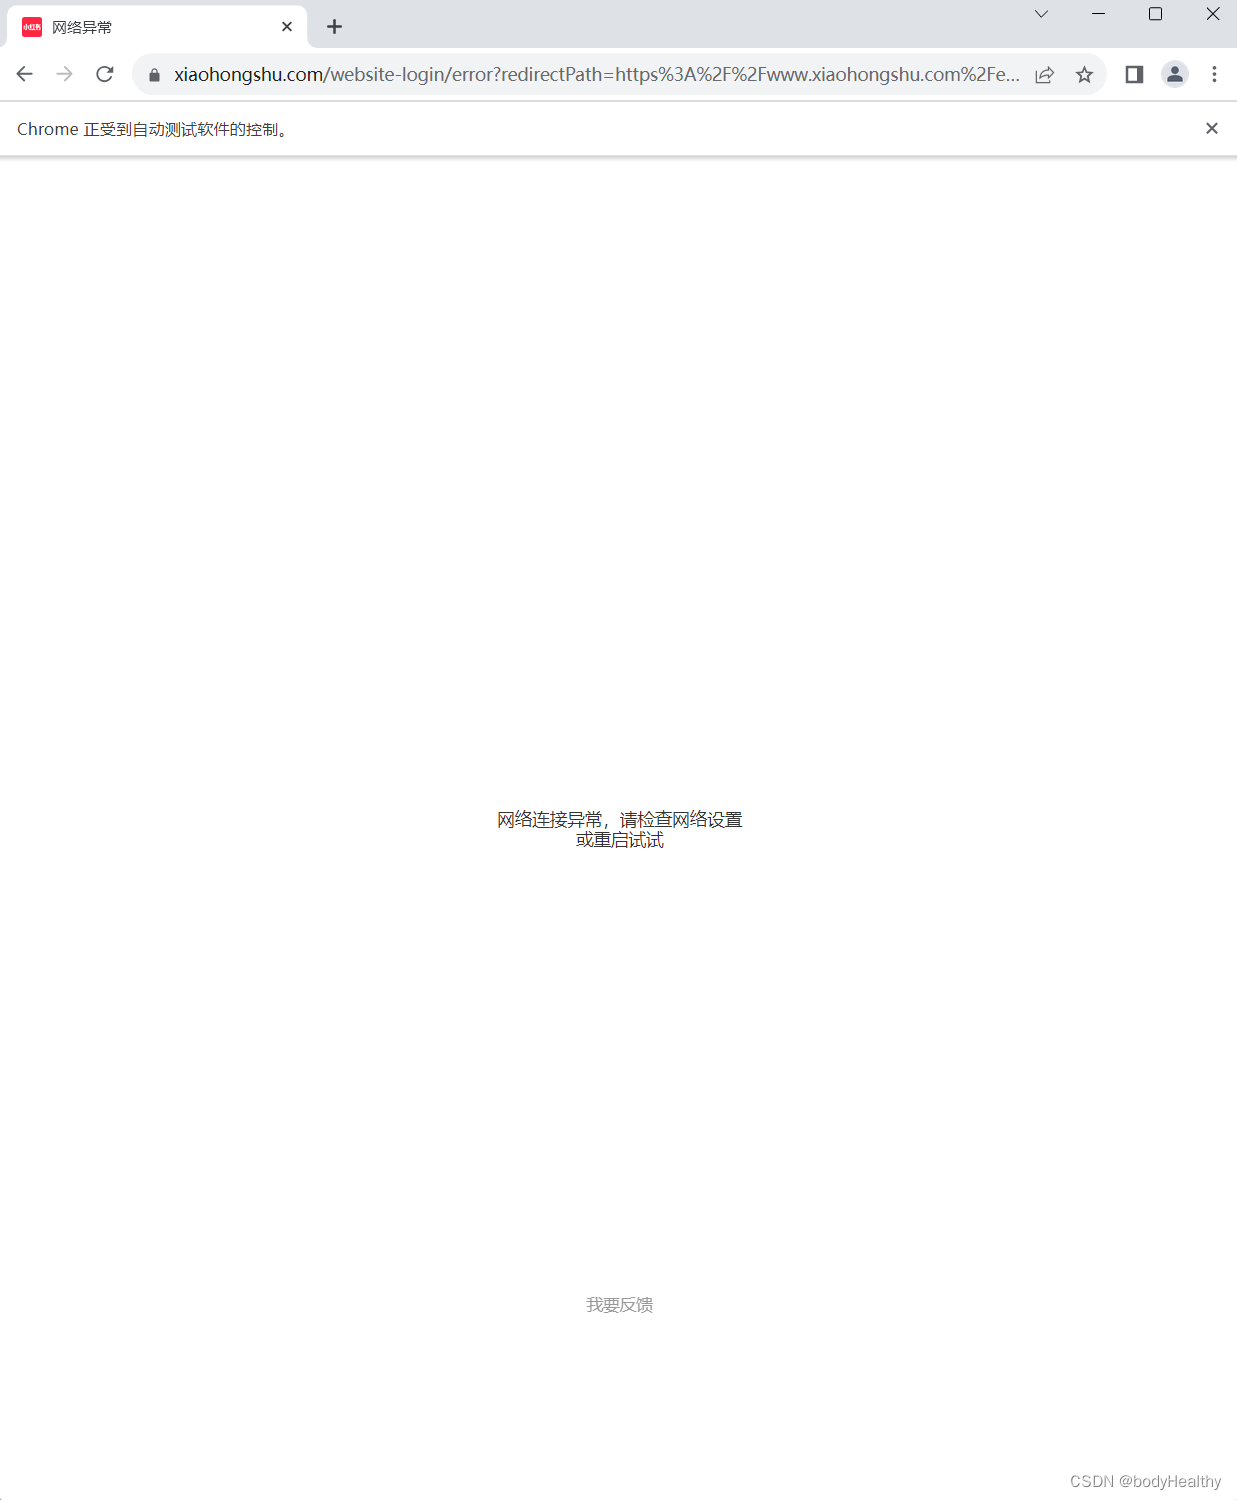
GPT出现Too many requests in 1 hour. Try again later.
换节点 这个就不用多说了,你都可以上GPT帐号了,哈…… 清除cooki 然后退出账号,重新登录即可...
python爬虫实战——小红书
目录 1、博主页面分析 2、在控制台预先获取所有作品页的URL 3、在 Python 中读入该文件并做准备工作 4、处理图文类型作品 5、处理视频类型作品 6、异常访问而被中断的现象 7、完整参考代码 任务:在 win 环境下,利用 Python、webdriver、JavaS…...
Linux信号机制
目录 一、信号的概念 二、定时器 1. alarm函数 2. setitimer函数 3.signal和sigaction函数 三、使用SIGCHLD信号实现回收子进程 一、信号的概念 概念:信号是在软件层次上对中断机制的一种模拟,是一种异步通信方式 。所有信号的产生及处理全部都是由内…...
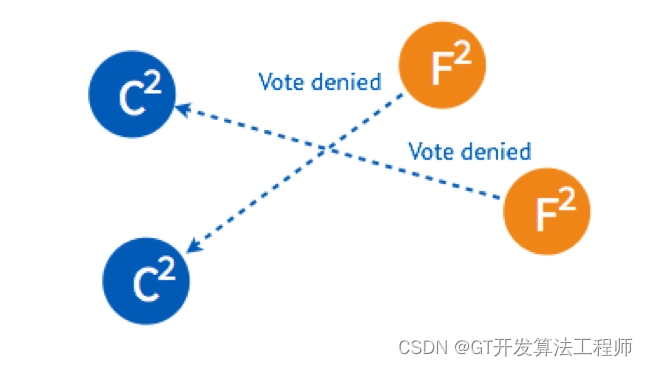
区块链技术中的共识机制算法:以权益证明(PoS)为例
引言: 在区块链技术的演进过程中,共识机制算法扮演着至关重要的角色。除了广为人知的工作量证明(PoW)外,权益证明(Proof of Stake,PoS)也是近年来备受关注的一种共识算法。 …...

19113133262(微信同号)【征稿进行时|见刊、检索快速稳定】2024年区块链、物联网与复合材料与国际学术会议 (ICBITC 2024)
【征稿进行时|见刊、检索快速稳定】2024年区块链、物联网与复合材料与国际学术会议 (ICBITC 2024) 大会主题: (主题包括但不限于, 更多主题请咨询会务组苏老师) 区块链: 区块链技术和系统 分布式一致性算法和协议 块链性能 信息储存系统 区块链可扩展性 区块…...

Doris:使用表函数explode实现array字段列转行
文章目录 使用场景相关知识点介绍explodesplit_by_stringlateral view 具体实现和SQLlateral view explode列转行SPLIT_BY_STRING拆分字符串为数组element_at获取数据创建视图 使用场景 我们的大数据数据库,由clickhouse换成了doris我们有一张路口指标表࿰…...
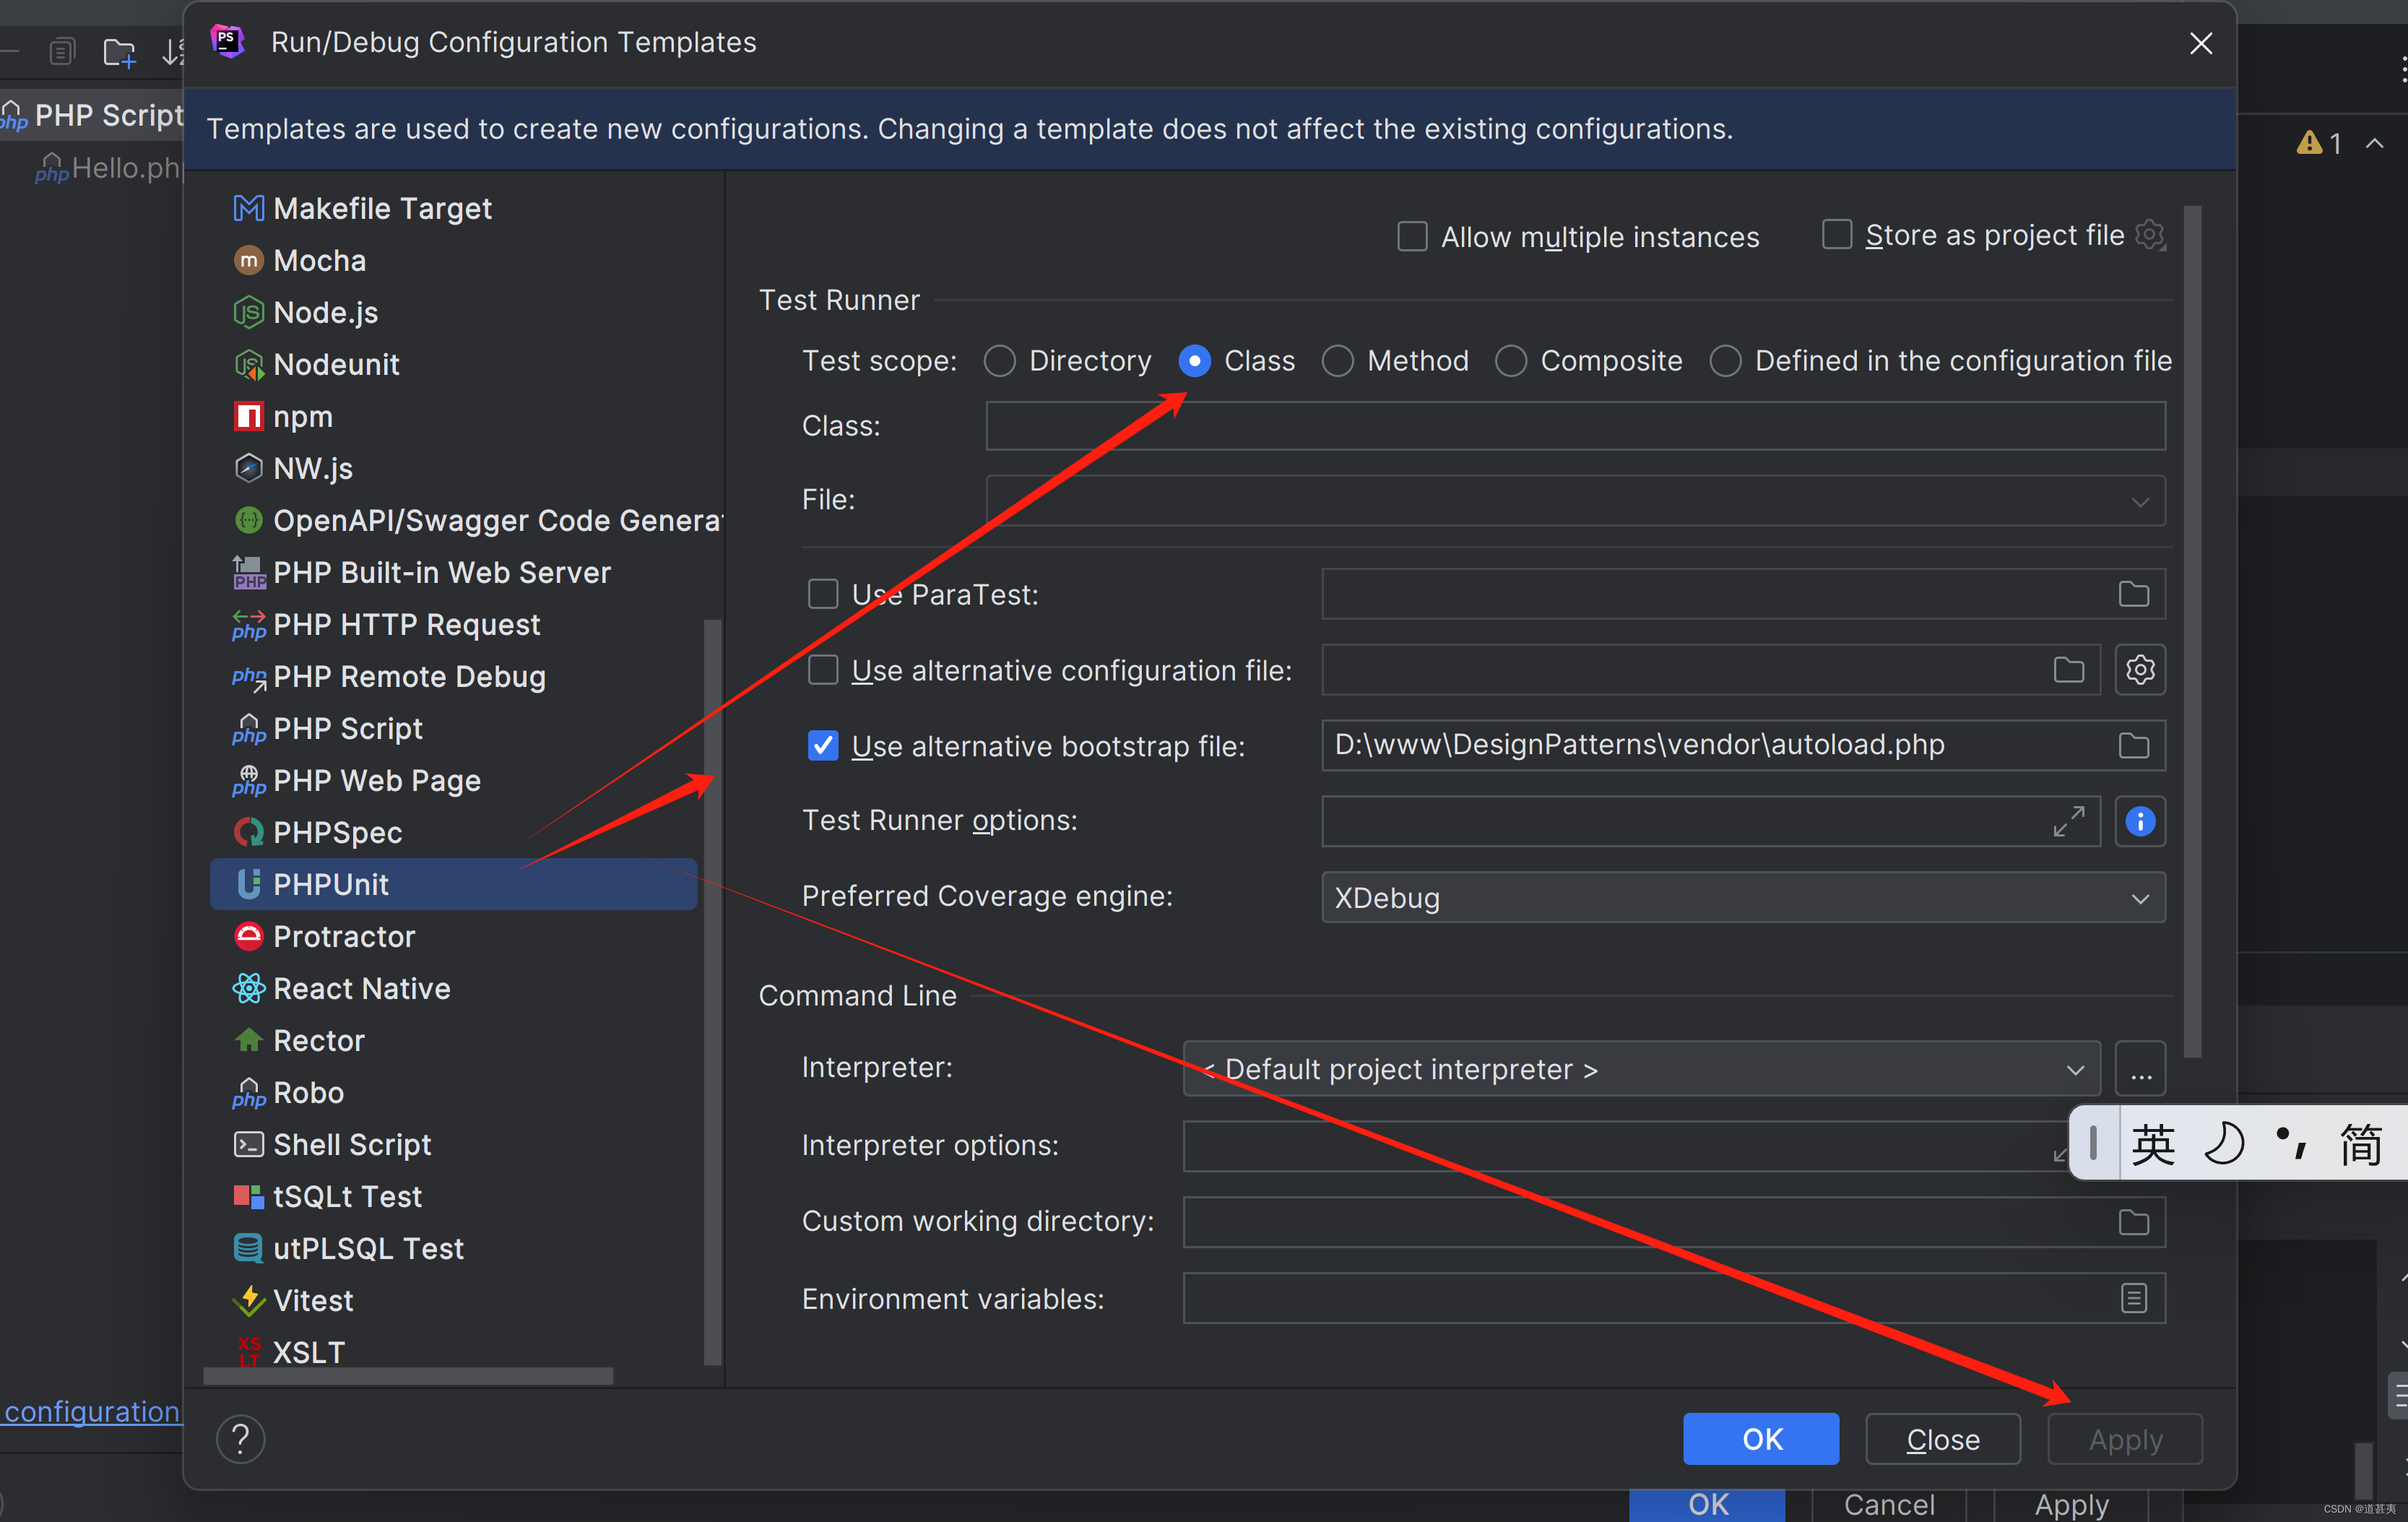
原生php单元测试示例
下载phpunit.phar https://phpunit.de/getting-started/phpunit-9.html 官网 然后win点击这里下载 新建目录 这里目录可以作为参考,然后放在根目录下 新建一个示例类 <?phpdeclare(strict_types1);namespace Hjj\DesignPatterns\Creational\Hello;class He…...
计算机毕业设计-springboot+vue前后端分离电竞社交平台管理系统部分成果分享
4.5系统结构设计 本系统使用的角色主要有系统管理员、顾客、接单员,本系统为后台管理系统,游客用户可以经过账号注册,管理员审核通过后,用账号密码登录系统,查看后台首页,模块管理(顾客信息&am…...

Stable Diffusion 详解
整体目标 文本生成图片;文本图片生成图片 网络结构 CLIP的文本编码器和图片生成器组成图像生成器,输入是噪声经过UNet得到图像特征,最后解码得到图像 前向扩散 模型直接预测图片难度比较大,所有让模型预测噪音然后输入-噪音…...

Go函数全景:从基础到高阶的深度探索
目录 一、Go函数基础1.1 函数定义和声明基础函数结构返回值类型和命名返回值 1.2 参数传递方式值传递引用传递 二、Go特殊函数类型2.1 变参函数定义和使用变参变参的限制 2.2 匿名函数与Lambda表达式何为匿名函数Lambda表达式的使用场景 2.3 延迟调用函数(defer&…...
)
探秘Nutch:揭秘开源搜索引擎的工作原理与无限应用可能(一)
本系列文章简介: 本系列文章将带领大家深入探索Nutch的世界,从其基本概念和架构开始,逐步深入到爬虫、索引和查询等关键环节。通过了解Nutch的工作原理,大家将能够更好地理解搜索引擎背后的原理,并有能力利用Nutch构建…...
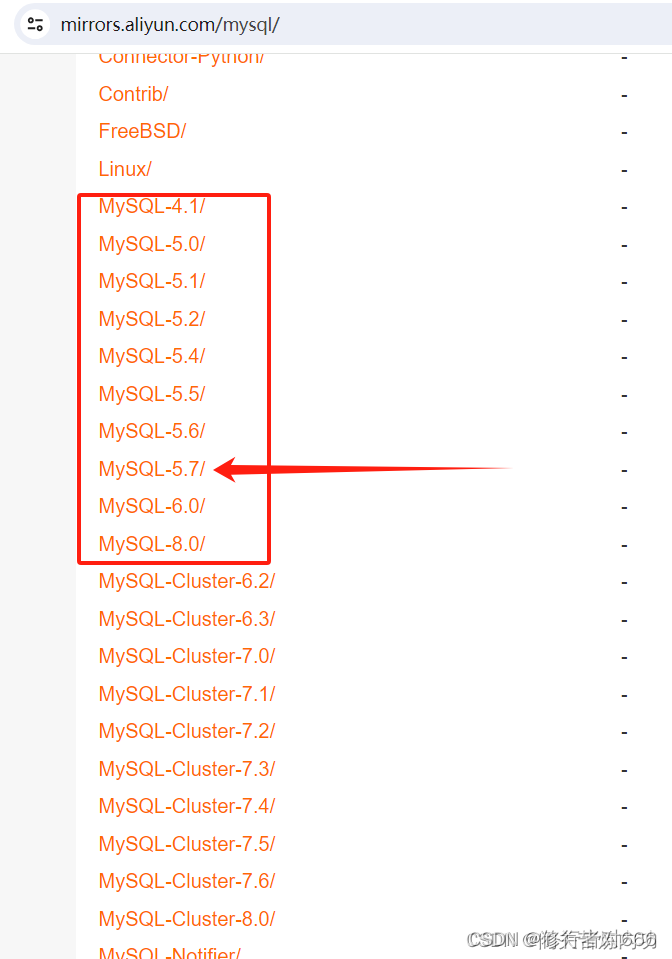
MySQL 数据库 下载地址 国内阿里云站点
mysql安装包下载_开源镜像站-阿里云 以 MySQL 5.7 为例 mysql-MySQL-5.7安装包下载_开源镜像站-阿里云...

HS2-HF Patch终极指南:一键解锁完整汉化与去码体验
HS2-HF Patch终极指南:一键解锁完整汉化与去码体验 【免费下载链接】HS2-HF_Patch Automatically translate, uncensor and update HoneySelect2! 项目地址: https://gitcode.com/gh_mirrors/hs/HS2-HF_Patch 还在为《Honey Select 2》的语言障碍和功能限制而…...

C++超详细讲解析构函数
析构函数是特殊的成员函数特征如下:析构函数名是~类名;无参数无返回值;一个类有且只有一个析构函数;对象声明周期结束,编译器自动调用析构函数;12345678910111213141516171819202122232425262728293031clas…...

通过Taotoken Token Plan套餐降低长期项目成本的观察
🚀 告别海外账号与网络限制!稳定直连全球优质大模型,限时半价接入中。 👉 点击领取海量免费额度 通过Taotoken Token Plan套餐降低长期项目成本的观察 对于需要长期、稳定调用大模型API的项目而言,成本的可预测性和可…...
)
手把手教你用WSL搞定RAX3000M路由器的SSH配置修改(Win10/Win11适用)
在Windows系统下通过WSL高效配置RAX3000M路由器的完整指南 对于习惯Windows操作系统的技术爱好者来说,想要修改路由器配置文件常常面临一个尴尬的处境——大多数高级配置工具和教程都默认用户已经熟悉Linux环境。本文将彻底解决这个痛点,教你如何在不安装…...

别再只看benchmark!Claude的“类人延迟响应”背后藏着7种语境锚定策略
更多请点击: https://intelliparadigm.com 第一章:类人延迟响应的本质:为什么“慢”才是更高级的智能 人类在面对复杂问题时,并非即时作答,而是经历感知、检索、权衡、修正等多阶段认知循环——这种可观察的“延迟”&…...

2026年实用降AIGC工具:亲测AI率从90%降至4%的靠谱方案
一、前言:2026年毕业必过AIGC检测门槛 2026年国内高校对学术论文的AIGC疑似度审核全面收紧,绝大多数院校都发布了明确的AIGC检测数值要求:985、211院校规定本科论文AI率需低于20%,硕士论文AI率不得高于15%,普通高校也普…...

COMET:基于深度学习的机器翻译质量评估框架
COMET:基于深度学习的机器翻译质量评估框架 【免费下载链接】COMET A Neural Framework for MT Evaluation 项目地址: https://gitcode.com/gh_mirrors/com/COMET 在机器翻译技术日益成熟的今天,如何客观、准确、可解释地评估翻译质量成为了学术…...

有哪些AI论文软件是真的适配学科专业,而不是模板套话?
在 AI 写作技术迅猛发展的今天,各类论文工具层出不穷,看似能快速完成写作任务,实则多数是内容空洞、逻辑混乱、格式随意的“模板复制器”,生成的文章缺乏专业深度,充斥着机械化的表达方式。真正具备学术价值的 AI 论文…...

MatterGen完整指南:如何用AI在5分钟内生成高性能无机材料
MatterGen完整指南:如何用AI在5分钟内生成高性能无机材料 【免费下载链接】mattergen Official implementation of MatterGen -- a generative model for inorganic materials design across the periodic table that can be fine-tuned to steer the generation to…...

朱雀广告平台:技术架构深度解析与高性能广告解决方案构建
朱雀广告平台:技术架构深度解析与高性能广告解决方案构建 【免费下载链接】zhuque 开放源码的一站式广告平台,包含ssp/adx/dsp/dmp模块 项目地址: https://gitcode.com/gh_mirrors/zhu/zhuque 在数字广告技术快速演进的今天,广告平台面…...