业务服务:redisson
文章目录
- 前言
- 一、配置
- 1. 添加依赖
- 2. 配置文件/类
- 3. 注入redission
- 3. 封装工具类
- 二、应用
- 1. RedisUtils工具类的基本使用
- 三、队列
- 1. 工具类
- 2. 普通队列
- 3. 有界队列(限制数据量)
- 4. 延迟队列(延迟获取数据)
- 5. 优先队列(数据可插队)
前言
redission是一个开源的java redis的客户端,在其基础上进行了进一步扩展。这些扩展极大地丰富了Redis的应用场景,尤其是在构建分布式系统时。
一、配置
1. 添加依赖
<!--redisson-->
<dependency><groupId>org.redisson</groupId><artifactId>redisson-spring-boot-starter</artifactId><version>${redisson.version}</version><exclusions><exclusion><groupId>org.redisson</groupId><artifactId>redisson-spring-data-30</artifactId></exclusion></exclusions>
</dependency>
<dependency><groupId>org.redisson</groupId><artifactId>redisson-spring-data-27</artifactId><version>${redisson.version}</version>
</dependency>
<dependency><groupId>com.baomidou</groupId><artifactId>lock4j-redisson-spring-boot-starter</artifactId><version>${lock4j.version}</version>
</dependency>

2. 配置文件/类
spring:redis:# 地址host: localhost# 端口,默认为6379port: 6379# 数据库索引database: 0# 密码(如没有密码请注释掉)password: asd60787533# 连接超时时间timeout: 10s# 是否开启sslssl: falseredisson:# redis key前缀keyPrefix: demo# 线程池数量threads: 4# Netty线程池数量nettyThreads: 8# 单节点配置singleServerConfig:# 客户端名称clientName: demo# 最小空闲连接数connectionMinimumIdleSize: 8# 连接池大小connectionPoolSize: 32# 连接空闲超时,单位:毫秒idleConnectionTimeout: 10000# 命令等待超时,单位:毫秒timeout: 3000# 发布和订阅连接池大小subscriptionConnectionPoolSize: 50
@Data
@Component
@ConfigurationProperties(prefix = "redisson")
public class RedissonProperties {/*** redis缓存key前缀*/private String keyPrefix;/*** 线程池数量,默认值 = 当前处理核数量 * 2*/private int threads;/*** Netty线程池数量,默认值 = 当前处理核数量 * 2*/private int nettyThreads;/*** 单机服务配置*/private SingleServerConfig singleServerConfig;/*** 集群服务配置*/private ClusterServersConfig clusterServersConfig;@Data@NoArgsConstructorpublic static class SingleServerConfig {/*** 客户端名称*/private String clientName;/*** 最小空闲连接数*/private int connectionMinimumIdleSize;/*** 连接池大小*/private int connectionPoolSize;/*** 连接空闲超时,单位:毫秒*/private int idleConnectionTimeout;/*** 命令等待超时,单位:毫秒*/private int timeout;/*** 发布和订阅连接池大小*/private int subscriptionConnectionPoolSize;}@Data@NoArgsConstructorpublic static class ClusterServersConfig {/*** 客户端名称*/private String clientName;/*** master最小空闲连接数*/private int masterConnectionMinimumIdleSize;/*** master连接池大小*/private int masterConnectionPoolSize;/*** slave最小空闲连接数*/private int slaveConnectionMinimumIdleSize;/*** slave连接池大小*/private int slaveConnectionPoolSize;/*** 连接空闲超时,单位:毫秒*/private int idleConnectionTimeout;/*** 命令等待超时,单位:毫秒*/private int timeout;/*** 发布和订阅连接池大小*/private int subscriptionConnectionPoolSize;/*** 读取模式*/private ReadMode readMode;/*** 订阅模式*/private SubscriptionMode subscriptionMode;}}
3. 注入redission
@Slf4j
@Configuration
@EnableCaching
@EnableConfigurationProperties(RedissonProperties.class)
public class RedisConfig {@Autowiredprivate RedissonProperties redissonProperties;@Autowiredprivate ObjectMapper objectMapper;@Beanpublic RedissonAutoConfigurationCustomizer redissonCustomizer() {return config -> {config.setThreads(redissonProperties.getThreads()).setNettyThreads(redissonProperties.getNettyThreads()).setCodec(new JsonJacksonCodec(objectMapper));RedissonProperties.SingleServerConfig singleServerConfig = redissonProperties.getSingleServerConfig();if (ObjectUtil.isNotNull(singleServerConfig)) {// 使用单机模式config.useSingleServer()//设置redis key前缀.setNameMapper(new KeyPrefixHandler(redissonProperties.getKeyPrefix())).setTimeout(singleServerConfig.getTimeout()).setClientName(singleServerConfig.getClientName()).setIdleConnectionTimeout(singleServerConfig.getIdleConnectionTimeout()).setSubscriptionConnectionPoolSize(singleServerConfig.getSubscriptionConnectionPoolSize()).setConnectionMinimumIdleSize(singleServerConfig.getConnectionMinimumIdleSize()).setConnectionPoolSize(singleServerConfig.getConnectionPoolSize());}// 集群配置方式 参考下方注释RedissonProperties.ClusterServersConfig clusterServersConfig = redissonProperties.getClusterServersConfig();if (ObjectUtil.isNotNull(clusterServersConfig)) {config.useClusterServers()//设置redis key前缀.setNameMapper(new KeyPrefixHandler(redissonProperties.getKeyPrefix())).setTimeout(clusterServersConfig.getTimeout()).setClientName(clusterServersConfig.getClientName()).setIdleConnectionTimeout(clusterServersConfig.getIdleConnectionTimeout()).setSubscriptionConnectionPoolSize(clusterServersConfig.getSubscriptionConnectionPoolSize()).setMasterConnectionMinimumIdleSize(clusterServersConfig.getMasterConnectionMinimumIdleSize()).setMasterConnectionPoolSize(clusterServersConfig.getMasterConnectionPoolSize()).setSlaveConnectionMinimumIdleSize(clusterServersConfig.getSlaveConnectionMinimumIdleSize()).setSlaveConnectionPoolSize(clusterServersConfig.getSlaveConnectionPoolSize()).setReadMode(clusterServersConfig.getReadMode()).setSubscriptionMode(clusterServersConfig.getSubscriptionMode());}log.info("初始化 redis 配置");};}/*** redis集群配置 yml** --- # redis 集群配置(单机与集群只能开启一个另一个需要注释掉)* spring:*   redis:*     cluster:*       nodes:*         - 192.168.0.100:6379*         - 192.168.0.101:6379*         - 192.168.0.102:6379*     # 密码*     password:*     # 连接超时时间*     timeout: 10s*     # 是否开启ssl*     ssl: false** redisson:*   # 线程池数量*   threads: 16*   # Netty线程池数量*   nettyThreads: 32*   # 集群配置*   clusterServersConfig:*     # 客户端名称*     clientName: ${ruoyi.name}*     # master最小空闲连接数*     masterConnectionMinimumIdleSize: 32*     # master连接池大小*     masterConnectionPoolSize: 64*     # slave最小空闲连接数*     slaveConnectionMinimumIdleSize: 32*     # slave连接池大小*     slaveConnectionPoolSize: 64*     # 连接空闲超时,单位:毫秒*     idleConnectionTimeout: 10000*     # 命令等待超时,单位:毫秒*     timeout: 3000*     # 发布和订阅连接池大小*     subscriptionConnectionPoolSize: 50*     # 读取模式*     readMode: "SLAVE"*     # 订阅模式*     subscriptionMode: "MASTER"*/}
public class KeyPrefixHandler implements NameMapper {private final String keyPrefix;public KeyPrefixHandler(String keyPrefix) {//前缀为空 则返回空前缀this.keyPrefix = StringUtils.isBlank(keyPrefix) ? "" : keyPrefix + ":";}/*** 增加前缀*/@Overridepublic String map(String name) {if (StringUtils.isBlank(name)) {return null;}if (StringUtils.isNotBlank(keyPrefix) && !name.startsWith(keyPrefix)) {return keyPrefix + name;}return name;}/*** 去除前缀*/@Overridepublic String unmap(String name) {if (StringUtils.isBlank(name)) {return null;}if (StringUtils.isNotBlank(keyPrefix) && name.startsWith(keyPrefix)) {return name.substring(keyPrefix.length());}return name;}
}
3. 封装工具类
@NoArgsConstructor(access = AccessLevel.PRIVATE)
@SuppressWarnings(value = {"unchecked", "rawtypes"})
public class RedisUtils {private static final RedissonClient CLIENT = SpringUtils.getBean(RedissonClient.class);/*** 限流** @param key          限流key* @param rateType     限流类型* @param rate         速率* @param rateInterval 速率间隔* @return -1 表示失败*/public static long rateLimiter(String key, RateType rateType, int rate, int rateInterval) {RRateLimiter rateLimiter = CLIENT.getRateLimiter(key);rateLimiter.trySetRate(rateType, rate, rateInterval, RateIntervalUnit.SECONDS);if (rateLimiter.tryAcquire()) {return rateLimiter.availablePermits();} else {return -1L;}}/*** 获取客户端实例*/public static RedissonClient getClient() {return CLIENT;}/*** 发布通道消息** @param channelKey 通道key* @param msg        发送数据* @param consumer   自定义处理*/public static <T> void publish(String channelKey, T msg, Consumer<T> consumer) {RTopic topic = CLIENT.getTopic(channelKey);topic.publish(msg);consumer.accept(msg);}public static <T> void publish(String channelKey, T msg) {RTopic topic = CLIENT.getTopic(channelKey);topic.publish(msg);}/*** 订阅通道接收消息** @param channelKey 通道key* @param clazz      消息类型* @param consumer   自定义处理*/public static <T> void subscribe(String channelKey, Class<T> clazz, Consumer<T> consumer) {RTopic topic = CLIENT.getTopic(channelKey);topic.addListener(clazz, (channel, msg) -> consumer.accept(msg));}/*** 缓存基本的对象,Integer、String、实体类等** @param key   缓存的键值* @param value 缓存的值*/public static <T> void setCacheObject(final String key, final T value) {setCacheObject(key, value, false);}/*** 缓存基本的对象,保留当前对象 TTL 有效期** @param key       缓存的键值* @param value     缓存的值* @param isSaveTtl 是否保留TTL有效期(例如: set之前ttl剩余90 set之后还是为90)* @since Redis 6.X 以上使用 setAndKeepTTL 兼容 5.X 方案*/public static <T> void setCacheObject(final String key, final T value, final boolean isSaveTtl) {RBucket<T> bucket = CLIENT.getBucket(key);if (isSaveTtl) {try {bucket.setAndKeepTTL(value);} catch (Exception e) {long timeToLive = bucket.remainTimeToLive();setCacheObject(key, value, Duration.ofMillis(timeToLive));}} else {bucket.set(value);}}/*** 缓存基本的对象,Integer、String、实体类等** @param key      缓存的键值* @param value    缓存的值* @param duration 时间*/public static <T> void setCacheObject(final String key, final T value, final Duration duration) {RBatch batch = CLIENT.createBatch();RBucketAsync<T> bucket = batch.getBucket(key);bucket.setAsync(value);bucket.expireAsync(duration);batch.execute();}/*** 注册对象监听器* <p>* key 监听器需开启 `notify-keyspace-events` 等 redis 相关配置** @param key      缓存的键值* @param listener 监听器配置*/public static <T> void addObjectListener(final String key, final ObjectListener listener) {RBucket<T> result = CLIENT.getBucket(key);result.addListener(listener);}/*** 设置有效时间** @param key     Redis键* @param timeout 超时时间* @return true=设置成功;false=设置失败*/public static boolean expire(final String key, final long timeout) {return expire(key, Duration.ofSeconds(timeout));}/*** 设置有效时间** @param key      Redis键* @param duration 超时时间* @return true=设置成功;false=设置失败*/public static boolean expire(final String key, final Duration duration) {RBucket rBucket = CLIENT.getBucket(key);return rBucket.expire(duration);}/*** 获得缓存的基本对象。** @param key 缓存键值* @return 缓存键值对应的数据*/public static <T> T getCacheObject(final String key) {RBucket<T> rBucket = CLIENT.getBucket(key);return rBucket.get();}/*** 获得key剩余存活时间** @param key 缓存键值* @return 剩余存活时间*/public static <T> long getTimeToLive(final String key) {RBucket<T> rBucket = CLIENT.getBucket(key);return rBucket.remainTimeToLive();}/*** 删除单个对象** @param key 缓存的键值*/public static boolean deleteObject(final String key) {return CLIENT.getBucket(key).delete();}/*** 删除集合对象** @param collection 多个对象*/public static void deleteObject(final Collection collection) {RBatch batch = CLIENT.createBatch();collection.forEach(t -> {batch.getBucket(t.toString()).deleteAsync();});batch.execute();}/*** 检查缓存对象是否存在** @param key 缓存的键值*/public static boolean isExistsObject(final String key) {return CLIENT.getBucket(key).isExists();}/*** 缓存List数据** @param key      缓存的键值* @param dataList 待缓存的List数据* @return 缓存的对象*/public static <T> boolean setCacheList(final String key, final List<T> dataList) {RList<T> rList = CLIENT.getList(key);return rList.addAll(dataList);}/*** 注册List监听器* <p>* key 监听器需开启 `notify-keyspace-events` 等 redis 相关配置** @param key      缓存的键值* @param listener 监听器配置*/public static <T> void addListListener(final String key, final ObjectListener listener) {RList<T> rList = CLIENT.getList(key);rList.addListener(listener);}/*** 获得缓存的list对象** @param key 缓存的键值* @return 缓存键值对应的数据*/public static <T> List<T> getCacheList(final String key) {RList<T> rList = CLIENT.getList(key);return rList.readAll();}/*** 缓存Set** @param key     缓存键值* @param dataSet 缓存的数据* @return 缓存数据的对象*/public static <T> boolean setCacheSet(final String key, final Set<T> dataSet) {RSet<T> rSet = CLIENT.getSet(key);return rSet.addAll(dataSet);}/*** 注册Set监听器* <p>* key 监听器需开启 `notify-keyspace-events` 等 redis 相关配置** @param key      缓存的键值* @param listener 监听器配置*/public static <T> void addSetListener(final String key, final ObjectListener listener) {RSet<T> rSet = CLIENT.getSet(key);rSet.addListener(listener);}/*** 获得缓存的set** @param key 缓存的key* @return set对象*/public static <T> Set<T> getCacheSet(final String key) {RSet<T> rSet = CLIENT.getSet(key);return rSet.readAll();}/*** 缓存Map** @param key     缓存的键值* @param dataMap 缓存的数据*/public static <T> void setCacheMap(final String key, final Map<String, T> dataMap) {if (dataMap != null) {RMap<String, T> rMap = CLIENT.getMap(key);rMap.putAll(dataMap);}}/*** 注册Map监听器* <p>* key 监听器需开启 `notify-keyspace-events` 等 redis 相关配置** @param key      缓存的键值* @param listener 监听器配置*/public static <T> void addMapListener(final String key, final ObjectListener listener) {RMap<String, T> rMap = CLIENT.getMap(key);rMap.addListener(listener);}/*** 获得缓存的Map** @param key 缓存的键值* @return map对象*/public static <T> Map<String, T> getCacheMap(final String key) {RMap<String, T> rMap = CLIENT.getMap(key);return rMap.getAll(rMap.keySet());}/*** 获得缓存Map的key列表** @param key 缓存的键值* @return key列表*/public static <T> Set<String> getCacheMapKeySet(final String key) {RMap<String, T> rMap = CLIENT.getMap(key);return rMap.keySet();}/*** 往Hash中存入数据** @param key   Redis键* @param hKey  Hash键* @param value 值*/public static <T> void setCacheMapValue(final String key, final String hKey, final T value) {RMap<String, T> rMap = CLIENT.getMap(key);rMap.put(hKey, value);}/*** 获取Hash中的数据** @param key  Redis键* @param hKey Hash键* @return Hash中的对象*/public static <T> T getCacheMapValue(final String key, final String hKey) {RMap<String, T> rMap = CLIENT.getMap(key);return rMap.get(hKey);}/*** 删除Hash中的数据** @param key  Redis键* @param hKey Hash键* @return Hash中的对象*/public static <T> T delCacheMapValue(final String key, final String hKey) {RMap<String, T> rMap = CLIENT.getMap(key);return rMap.remove(hKey);}/*** 获取多个Hash中的数据** @param key   Redis键* @param hKeys Hash键集合* @return Hash对象集合*/public static <K, V> Map<K, V> getMultiCacheMapValue(final String key, final Set<K> hKeys) {RMap<K, V> rMap = CLIENT.getMap(key);return rMap.getAll(hKeys);}/*** 设置原子值** @param key   Redis键* @param value 值*/public static void setAtomicValue(String key, long value) {RAtomicLong atomic = CLIENT.getAtomicLong(key);atomic.set(value);}/*** 获取原子值** @param key Redis键* @return 当前值*/public static long getAtomicValue(String key) {RAtomicLong atomic = CLIENT.getAtomicLong(key);return atomic.get();}/*** 递增原子值** @param key Redis键* @return 当前值*/public static long incrAtomicValue(String key) {RAtomicLong atomic = CLIENT.getAtomicLong(key);return atomic.incrementAndGet();}/*** 递减原子值** @param key Redis键* @return 当前值*/public static long decrAtomicValue(String key) {RAtomicLong atomic = CLIENT.getAtomicLong(key);return atomic.decrementAndGet();}/*** 获得缓存的基本对象列表** @param pattern 字符串前缀* @return 对象列表*/public static Collection<String> keys(final String pattern) {Stream<String> stream = CLIENT.getKeys().getKeysStreamByPattern(pattern);return stream.collect(Collectors.toList());}/*** 删除缓存的基本对象列表** @param pattern 字符串前缀*/public static void deleteKeys(final String pattern) {CLIENT.getKeys().deleteByPattern(pattern);}/*** 检查redis中是否存在key** @param key 键*/public static Boolean hasKey(String key) {RKeys rKeys = CLIENT.getKeys();return rKeys.countExists(key) > 0;}
}
二、应用
1. RedisUtils工具类的基本使用
创建接口
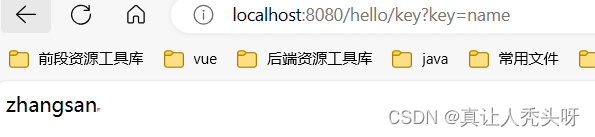
@GetMapping("key")
public String getKey(String key){return RedisUtils.getCacheObject(key);
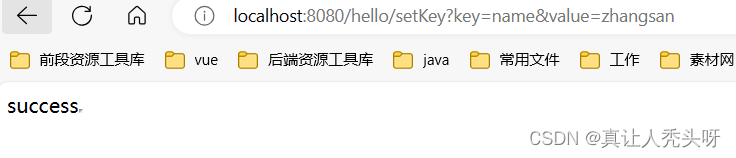
}@GetMapping("setKey")
public String setKey(String key,String value){RedisUtils.setCacheObject(key,value);return "success";
}
设置key

获取key对应的值
其他方法的作用,可以自行测试。这里就不再演示使用
三、队列
redission也支持队列,下面封装了一些队列的相关方法。可以处理了一些简单的队列任务,如果业务复杂可以选择mq
1. 工具类
@NoArgsConstructor(access = AccessLevel.PRIVATE)
public class QueueUtils {private static final RedissonClient CLIENT = SpringUtil.getBean(RedissonClient.class);/*** 获取客户端实例*/public static RedissonClient getClient() {return CLIENT;}/*** 添加普通队列数据** @param queueName 队列名* @param data      数据*/public static <T> boolean addQueueObject(String queueName, T data) {RBlockingQueue<T> queue = CLIENT.getBlockingQueue(queueName);return queue.offer(data);}/*** 通用获取一个队列数据 没有数据返回 null(不支持延迟队列)** @param queueName 队列名*/public static <T> T getQueueObject(String queueName) {RBlockingQueue<T> queue = CLIENT.getBlockingQueue(queueName);return queue.poll();}/*** 通用删除队列数据(不支持延迟队列)*/public static <T> boolean removeQueueObject(String queueName, T data) {RBlockingQueue<T> queue = CLIENT.getBlockingQueue(queueName);return queue.remove(data);}/*** 通用销毁队列 所有阻塞监听 报错(不支持延迟队列)*/public static <T> boolean destroyQueue(String queueName) {RBlockingQueue<T> queue = CLIENT.getBlockingQueue(queueName);return queue.delete();}/*** 添加延迟队列数据 默认毫秒** @param queueName 队列名* @param data      数据* @param time      延迟时间*/public static <T> void addDelayedQueueObject(String queueName, T data, long time) {addDelayedQueueObject(queueName, data, time, TimeUnit.MILLISECONDS);}/*** 添加延迟队列数据** @param queueName 队列名* @param data      数据* @param time      延迟时间* @param timeUnit  单位*/public static <T> void addDelayedQueueObject(String queueName, T data, long time, TimeUnit timeUnit) {RBlockingQueue<T> queue = CLIENT.getBlockingQueue(queueName);RDelayedQueue<T> delayedQueue = CLIENT.getDelayedQueue(queue);delayedQueue.offer(data, time, timeUnit);}/*** 获取一个延迟队列数据 没有数据返回 null** @param queueName 队列名*/public static <T> T getDelayedQueueObject(String queueName) {RBlockingQueue<T> queue = CLIENT.getBlockingQueue(queueName);RDelayedQueue<T> delayedQueue = CLIENT.getDelayedQueue(queue);return delayedQueue.poll();}/*** 删除延迟队列数据*/public static <T> boolean removeDelayedQueueObject(String queueName, T data) {RBlockingQueue<T> queue = CLIENT.getBlockingQueue(queueName);RDelayedQueue<T> delayedQueue = CLIENT.getDelayedQueue(queue);return delayedQueue.remove(data);}/*** 销毁延迟队列 所有阻塞监听 报错*/public static <T> void destroyDelayedQueue(String queueName) {RBlockingQueue<T> queue = CLIENT.getBlockingQueue(queueName);RDelayedQueue<T> delayedQueue = CLIENT.getDelayedQueue(queue);delayedQueue.destroy();}/*** 添加优先队列数据** @param queueName 队列名* @param data      数据*/public static <T> boolean addPriorityQueueObject(String queueName, T data) {RPriorityBlockingQueue<T> priorityBlockingQueue = CLIENT.getPriorityBlockingQueue(queueName);return priorityBlockingQueue.offer(data);}/*** 优先队列获取一个队列数据 没有数据返回 null(不支持延迟队列)** @param queueName 队列名*/public static <T> T getPriorityQueueObject(String queueName) {RPriorityBlockingQueue<T> queue = CLIENT.getPriorityBlockingQueue(queueName);return queue.poll();}/*** 优先队列删除队列数据(不支持延迟队列)*/public static <T> boolean removePriorityQueueObject(String queueName, T data) {RPriorityBlockingQueue<T> queue = CLIENT.getPriorityBlockingQueue(queueName);return queue.remove(data);}/*** 优先队列销毁队列 所有阻塞监听 报错(不支持延迟队列)*/public static <T> boolean destroyPriorityQueue(String queueName) {RPriorityBlockingQueue<T> queue = CLIENT.getPriorityBlockingQueue(queueName);return queue.delete();}/*** 尝试设置 有界队列 容量 用于限制数量** @param queueName 队列名* @param capacity  容量*/public static <T> boolean trySetBoundedQueueCapacity(String queueName, int capacity) {RBoundedBlockingQueue<T> boundedBlockingQueue = CLIENT.getBoundedBlockingQueue(queueName);return boundedBlockingQueue.trySetCapacity(capacity);}/*** 尝试设置 有界队列 容量 用于限制数量** @param queueName 队列名* @param capacity  容量* @param destroy   已存在是否销毁*/public static <T> boolean trySetBoundedQueueCapacity(String queueName, int capacity, boolean destroy) {RBoundedBlockingQueue<T> boundedBlockingQueue = CLIENT.getBoundedBlockingQueue(queueName);if (boundedBlockingQueue.isExists() && destroy) {destroyQueue(queueName);}return boundedBlockingQueue.trySetCapacity(capacity);}/*** 添加有界队列数据** @param queueName 队列名* @param data      数据* @return 添加成功 true 已达到界限 false*/public static <T> boolean addBoundedQueueObject(String queueName, T data) {RBoundedBlockingQueue<T> boundedBlockingQueue = CLIENT.getBoundedBlockingQueue(queueName);return boundedBlockingQueue.offer(data);}/*** 有界队列获取一个队列数据 没有数据返回 null(不支持延迟队列)** @param queueName 队列名*/public static <T> T getBoundedQueueObject(String queueName) {RBoundedBlockingQueue<T> queue = CLIENT.getBoundedBlockingQueue(queueName);return queue.poll();}/*** 有界队列删除队列数据(不支持延迟队列)*/public static <T> boolean removeBoundedQueueObject(String queueName, T data) {RBoundedBlockingQueue<T> queue = CLIENT.getBoundedBlockingQueue(queueName);return queue.remove(data);}/*** 有界队列销毁队列 所有阻塞监听 报错(不支持延迟队列)*/public static <T> boolean destroyBoundedQueue(String queueName) {RBoundedBlockingQueue<T> queue = CLIENT.getBoundedBlockingQueue(queueName);return queue.delete();}/*** 订阅阻塞队列(可订阅所有实现类 例如: 延迟 优先 有界 等)*/public static <T> void subscribeBlockingQueue(String queueName, Consumer<T> consumer, boolean isDelayed) {RBlockingQueue<T> queue = CLIENT.getBlockingQueue(queueName);if (isDelayed) {// 订阅延迟队列CLIENT.getDelayedQueue(queue);}queue.subscribeOnElements(consumer);}}
2. 普通队列
添加数据到队列
@GetMapping("add")
public String add(){QueueUtils.addQueueObject("queue:simple",1);QueueUtils.addQueueObject("queue:simple",2);QueueUtils.addQueueObject("queue:simple",3);return "ok";
}

消费队列数据
遵循先进先出,获取数据后就会删除。如果队列中没有数据,获取到的就为null
@GetMapping("get")
public Integer get(){return QueueUtils.getQueueObject("queue:simple");
}

移除队列数据
@GetMapping("remove")
public String remove(){QueueUtils.removeQueueObject("queue:simple",3);return "ok";
}

销毁队列
@GetMapping("destroy")
public String destroy(){QueueUtils.destroyQueue("queue:simple");return "ok";
}

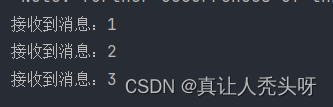
订阅队列消息
- 订阅的消息一般在项目启动的时候使用,只能订阅一次
- 当监听到队列新增数据的时候会立即取出来进行消费
@PostConstruct
public void sub(){QueueUtils.subscribeBlockingQueue("queue:simple",(o)->{System.out.println("接收到消息:"+o);},false);
}
我们再次调用新增
3. 有界队列(限制数据量)
设置队列最大容量
有界队列在使用前必须设置容量
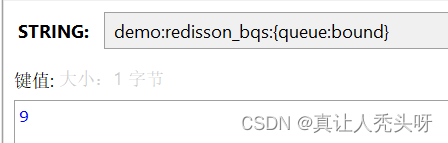
@GetMapping("set")
public String set(){boolean b = QueueUtils.trySetBoundedQueueCapacity("queue:bound", 10);return  "ok";
}
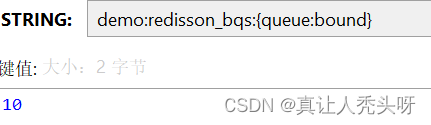
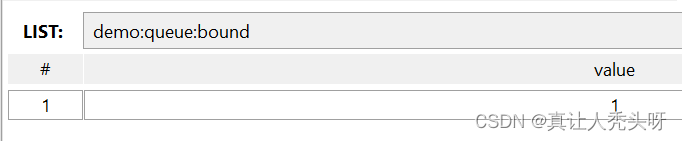
新增有界队列数据
@GetMapping("add")
public String add(){QueueUtils.addBoundedQueueObject("queue:bound",1);return "ok";
}
新增完毕后我们可以发现,我们直接设置的最大容量变成来了9。每次添加数据都会查询当前最大容量是否>0,如果大于0添加成功并且减一,否则添加失败
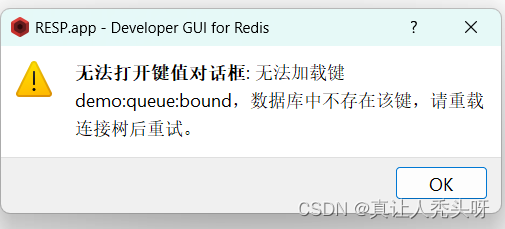
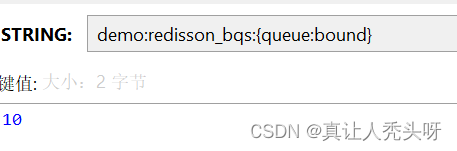
获取有界队列数据
@GetMapping("get")
public Integer get(){return QueueUtils.getBoundedQueueObject("queue:bound");
}
我们可以看到当获取数据的时候,容量+1,数据从redis中删除
其他用法与普通队列类似,就不再演示了
4. 延迟队列(延迟获取数据)
添加延迟数据
延迟队列的实现原理是将数据添加到另一个缓存队列中,当到达指定时间才会转移到普通队列中
@GetMapping("add")
public String add(){QueueUtils.addDelayedQueueObject("queue:belay",1,10, TimeUnit.SECONDS);return "ok";
}
获取延迟数据
必须达到指定时间后才能获取
@GetMapping("get")
public Integer get(){return QueueUtils.getDelayedQueueObject("queue:belay");
}
删除延迟数据
@GetMapping("remove")
public String remove(){QueueUtils.removeQueueObject("queue:belay",3);return "ok";
}
清空延迟数据
@GetMapping("destroy")
public String destroy(){QueueUtils.destroyDelayedQueue("queue:belay");return "ok";
}
订阅消息使用方法同普通队列类似,第三个参数需要改为true
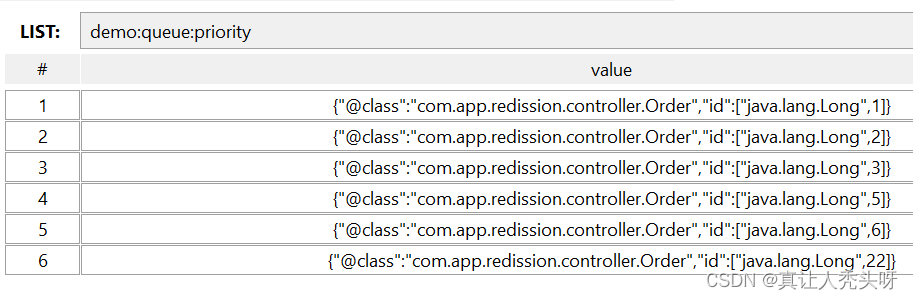
5. 优先队列(数据可插队)
插入优先队列的数据我们需要先实现比较接口
@Data
@Accessors(chain = true)
class Order implements Comparable<Order>{private Long id;@Overridepublic int compareTo(Order o) {return Long.compare(getId(), o.id);}
}
新增优先数据
@GetMapping("add")
public String add(){QueueUtils.addPriorityQueueObject("queue:priority",new Order().setId(1L));QueueUtils.addPriorityQueueObject("queue:priority",new Order().setId(6L));QueueUtils.addPriorityQueueObject("queue:priority",new Order().setId(2L));QueueUtils.addPriorityQueueObject("queue:priority",new Order().setId(5L));QueueUtils.addPriorityQueueObject("queue:priority",new Order().setId(22L));QueueUtils.addPriorityQueueObject("queue:priority",new Order().setId(3L));return "ok";
}
我们可以看到插入的数据是有序的
获取优先队列数据
@GetMapping("get")
public Integer get(){return QueueUtils.getPriorityQueueObject("queue:priority");
}
删除优先队列数据
@GetMapping("remove")
public String remove(){QueueUtils.removeQueueObject("queue:priority",3);return "ok";
}
清空优先队列数据
@GetMapping("destroy")
public String destroy(){QueueUtils.destroyDelayedQueue("queue:priority");return "ok";
}
订阅消息使用方法同普通队列一样
相关文章:
业务服务:redisson
文章目录 前言一、配置1. 添加依赖2. 配置文件/类3. 注入redission3. 封装工具类 二、应用1. RedisUtils工具类的基本使用 三、队列1. 工具类2. 普通队列3. 有界队列(限制数据量)4. 延迟队列(延迟获取数据)5. 优先队列(…...

面试算法-100-零钱兑换
题目 给你一个整数数组 coins ,表示不同面额的硬币;以及一个整数 amount ,表示总金额。 计算并返回可以凑成总金额所需的 最少的硬币个数 。如果没有任何一种硬币组合能组成总金额,返回 -1 。 你可以认为每种硬币的数量是无限的…...
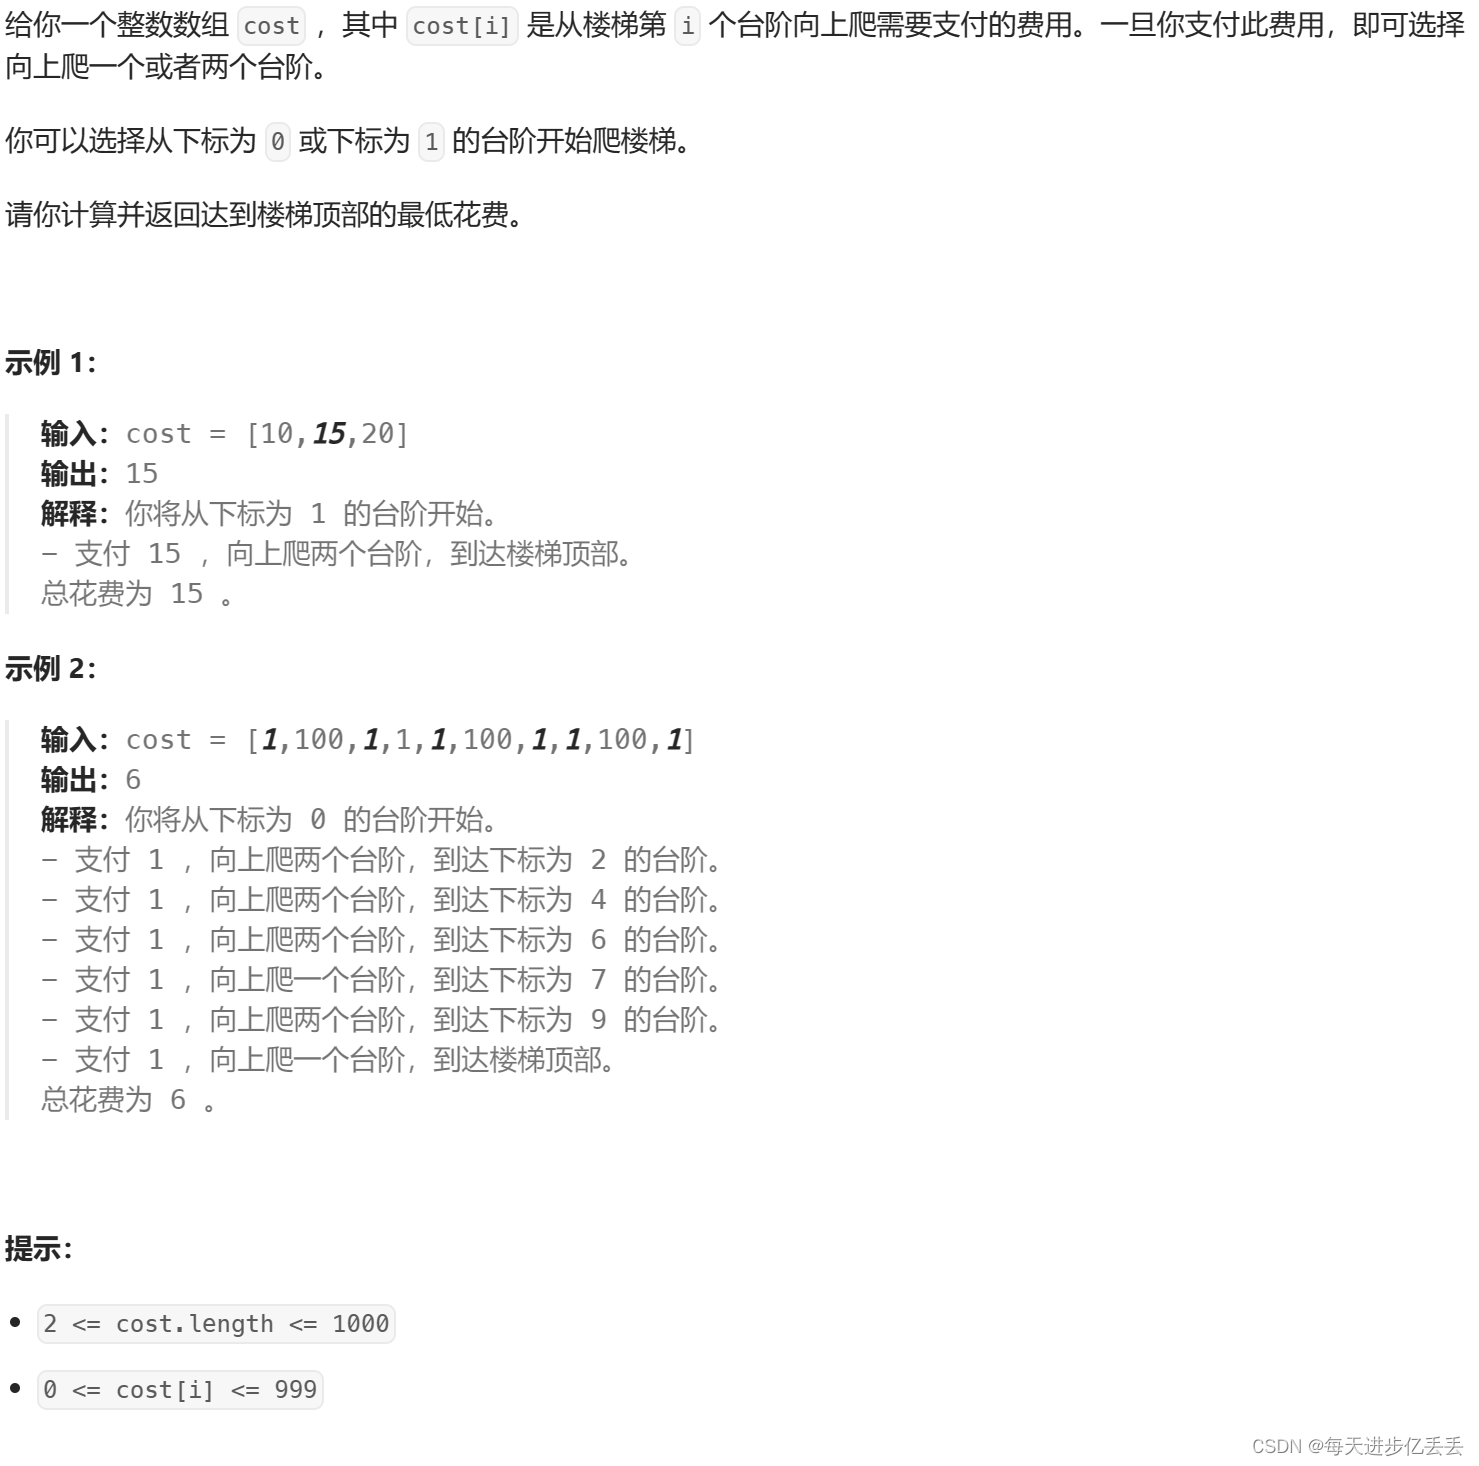
【Leetcode每日一题】 动态规划 - 使用最小花费爬楼梯(难度⭐)(41)
1. 题目解析 题目链接:746. 使用最小花费爬楼梯 这个问题的理解其实相当简单,只需看一下示例,基本就能明白其含义了。 2.算法原理 一、设定状态表 为了解决这个问题,我们首先要明确一个“状态表”。这个状态表其实就是一个记录…...
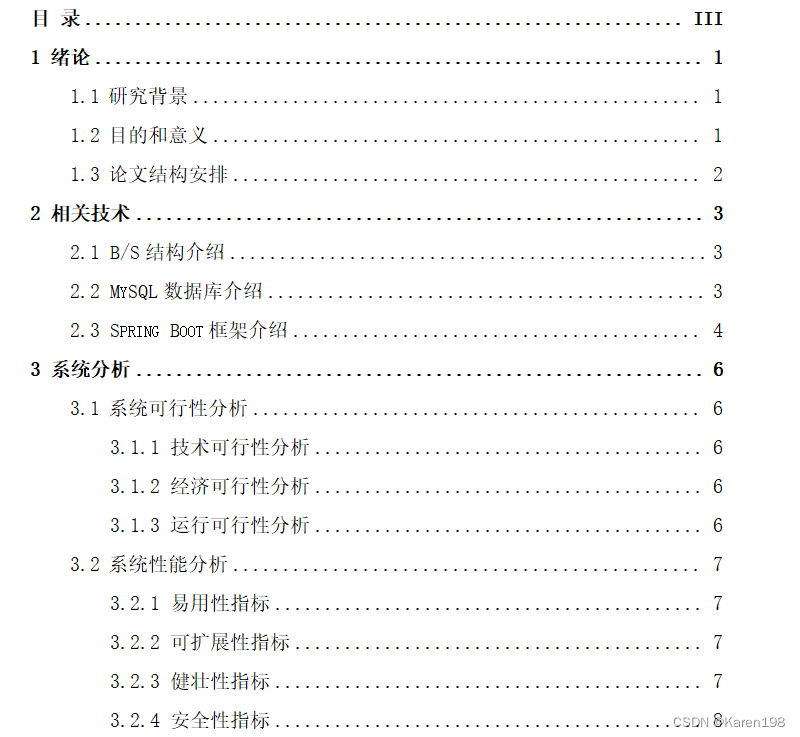
Springboot旅游管理系统设计与实现
** 🍅点赞收藏关注 → 私信领取本源代码、数据库🍅 本人在Java毕业设计领域有多年的经验,陆续会更新更多优质的Java实战项目,希望你能有所收获,少走一些弯路。🍅关注我不迷路🍅** 一、研究背景…...
)
c++学习笔记(10)
1. 二分答案是一种常用的算法思想,用于解决一些需要枚举所有可能答案的问题。它的基本思想是将问题的答案范围缩小到一半,然后根据一定的条件判断,再将答案范围缩小到一半,直到找到正确的答案或者确定不存在正确答案为止。 下面…...

Visual Studio - 添加快捷键图标
Visual Studio - 添加快捷键图标 1. Text Editor Toolbar Options -> Add or Remove Buttons -> Customize2. Toolbars3. Commands -> Debug4. Add Command...References 1. Text Editor Toolbar Options -> Add or Remove Buttons -> Customize 2. Toolbars B…...

突破边界:Web3开启数字化社会的新纪元
引言 随着科技的不断进步和数字化社会的发展,Web3正逐渐成为了人们关注的焦点。作为新一代互联网的演进形态,Web3具有突破传统边界、实现去中心化的特点,被认为将开启数字化社会的新纪元。本文将深入探讨Web3的概念、特点、应用场景…...
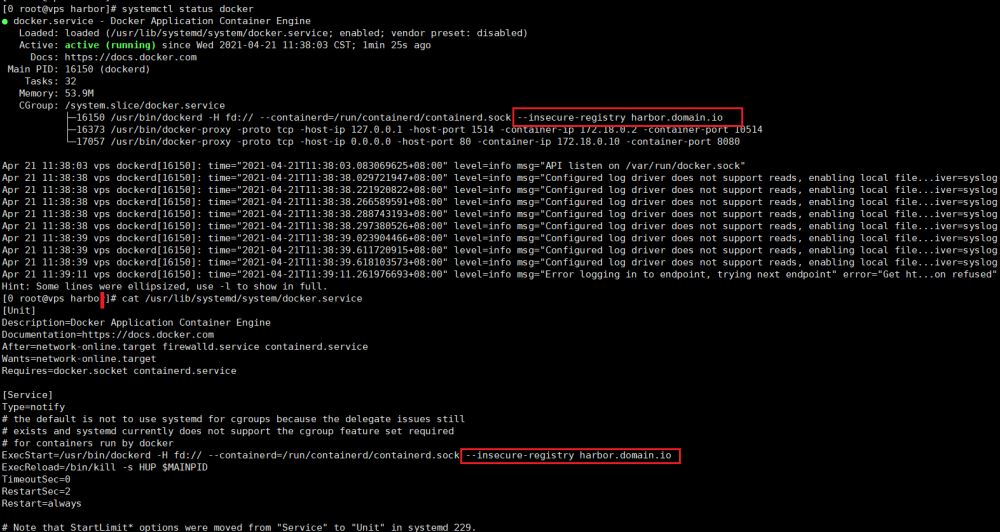
docker仓库登录及配置insecure-registries的方法
docker仓库登录及配置insecure-registries的方法 这篇文章主要介绍了docker仓库登录配置insecure-registries的方法,docker客户端如果配置中添加了insecure-registary配置,就不需要在docker 客户端配置上对应证书,如果不配置要在/etc/docker/certs.d/目…...

Lambda函数与Selenium WebDriverWait类一起使用
Lambda函数是一种匿名函数,也称为内联函数或者lambda表达式。它们在Python中用于创建简短的、一次性的函数。Lambda函数通常用于在代码中传递函数作为参数,或者在需要一个简单的函数,但不想正式定义一个函数的情况下使用。 Lambda函数的特点…...
V R元宇宙平台的未来方向|V R主题馆加 盟|游戏体验馆
未来,VR元宇宙平台可能会呈现出以下发展趋势和可能性: 全面融合现实与虚拟世界: VR元宇宙平台将更加无缝地融合现实世界和虚拟世界,用户可以在虚拟环境中进行各种活动,与现实世界进行互动,并且体验到更加逼…...

sox命令用法
play input.wav 播放音频 sox input.wav -n stat 查看音频文件信息 soxi input.wav 查看音频文件信息input sox input.wav -n stat -v 不失真最大调整量 sox -v 0.8 input.wav output.wav 调整音量0.8,(大于1为扩大,小于1为缩小) sox *.wav *…...

Android kotlin全局悬浮窗全屏功能和锁屏页面全屏悬浮窗功能二
1.前言 在进行app应用开发中,在实现某些功能中要求实现悬浮窗功能,分为应用内悬浮窗 ,全局悬浮窗和 锁屏页面悬浮窗功能 等,接下来就来实现这些悬浮窗全屏功能,首选看下第二部分功能实现 2.kotlin实现锁屏页面悬浮窗全屏功能二分析 悬浮窗是属于Android系统的一种浮动窗…...
[数据结构]二叉树与递归OJ
上回我们手撕了一棵二叉树,并且通过递归完成了遍历,这回我们将深入理解用递归解决相关的二叉树问题,数量使用分治的思想. 上回的代码: #include<stdio.h> #include<stdlib.h> typedef struct BinTreeNode {struct BinTreeNode* left;struct BinTreeNode* right;i…...
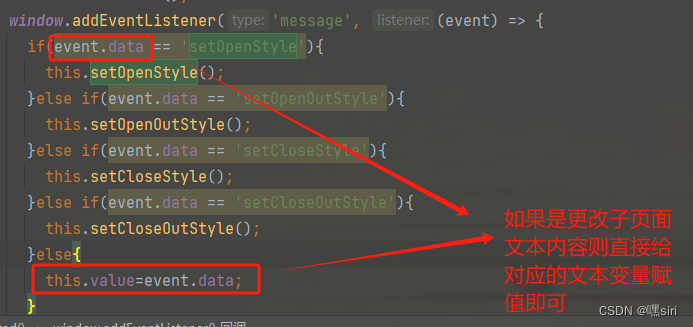
vue iframe实现父页面实时调用子页面方法和内容,已解决
父页面标签添加鼠标按下事件 父页方法中建立iframe通信 实时调用子页面方法 实时更改子页面文本内容...
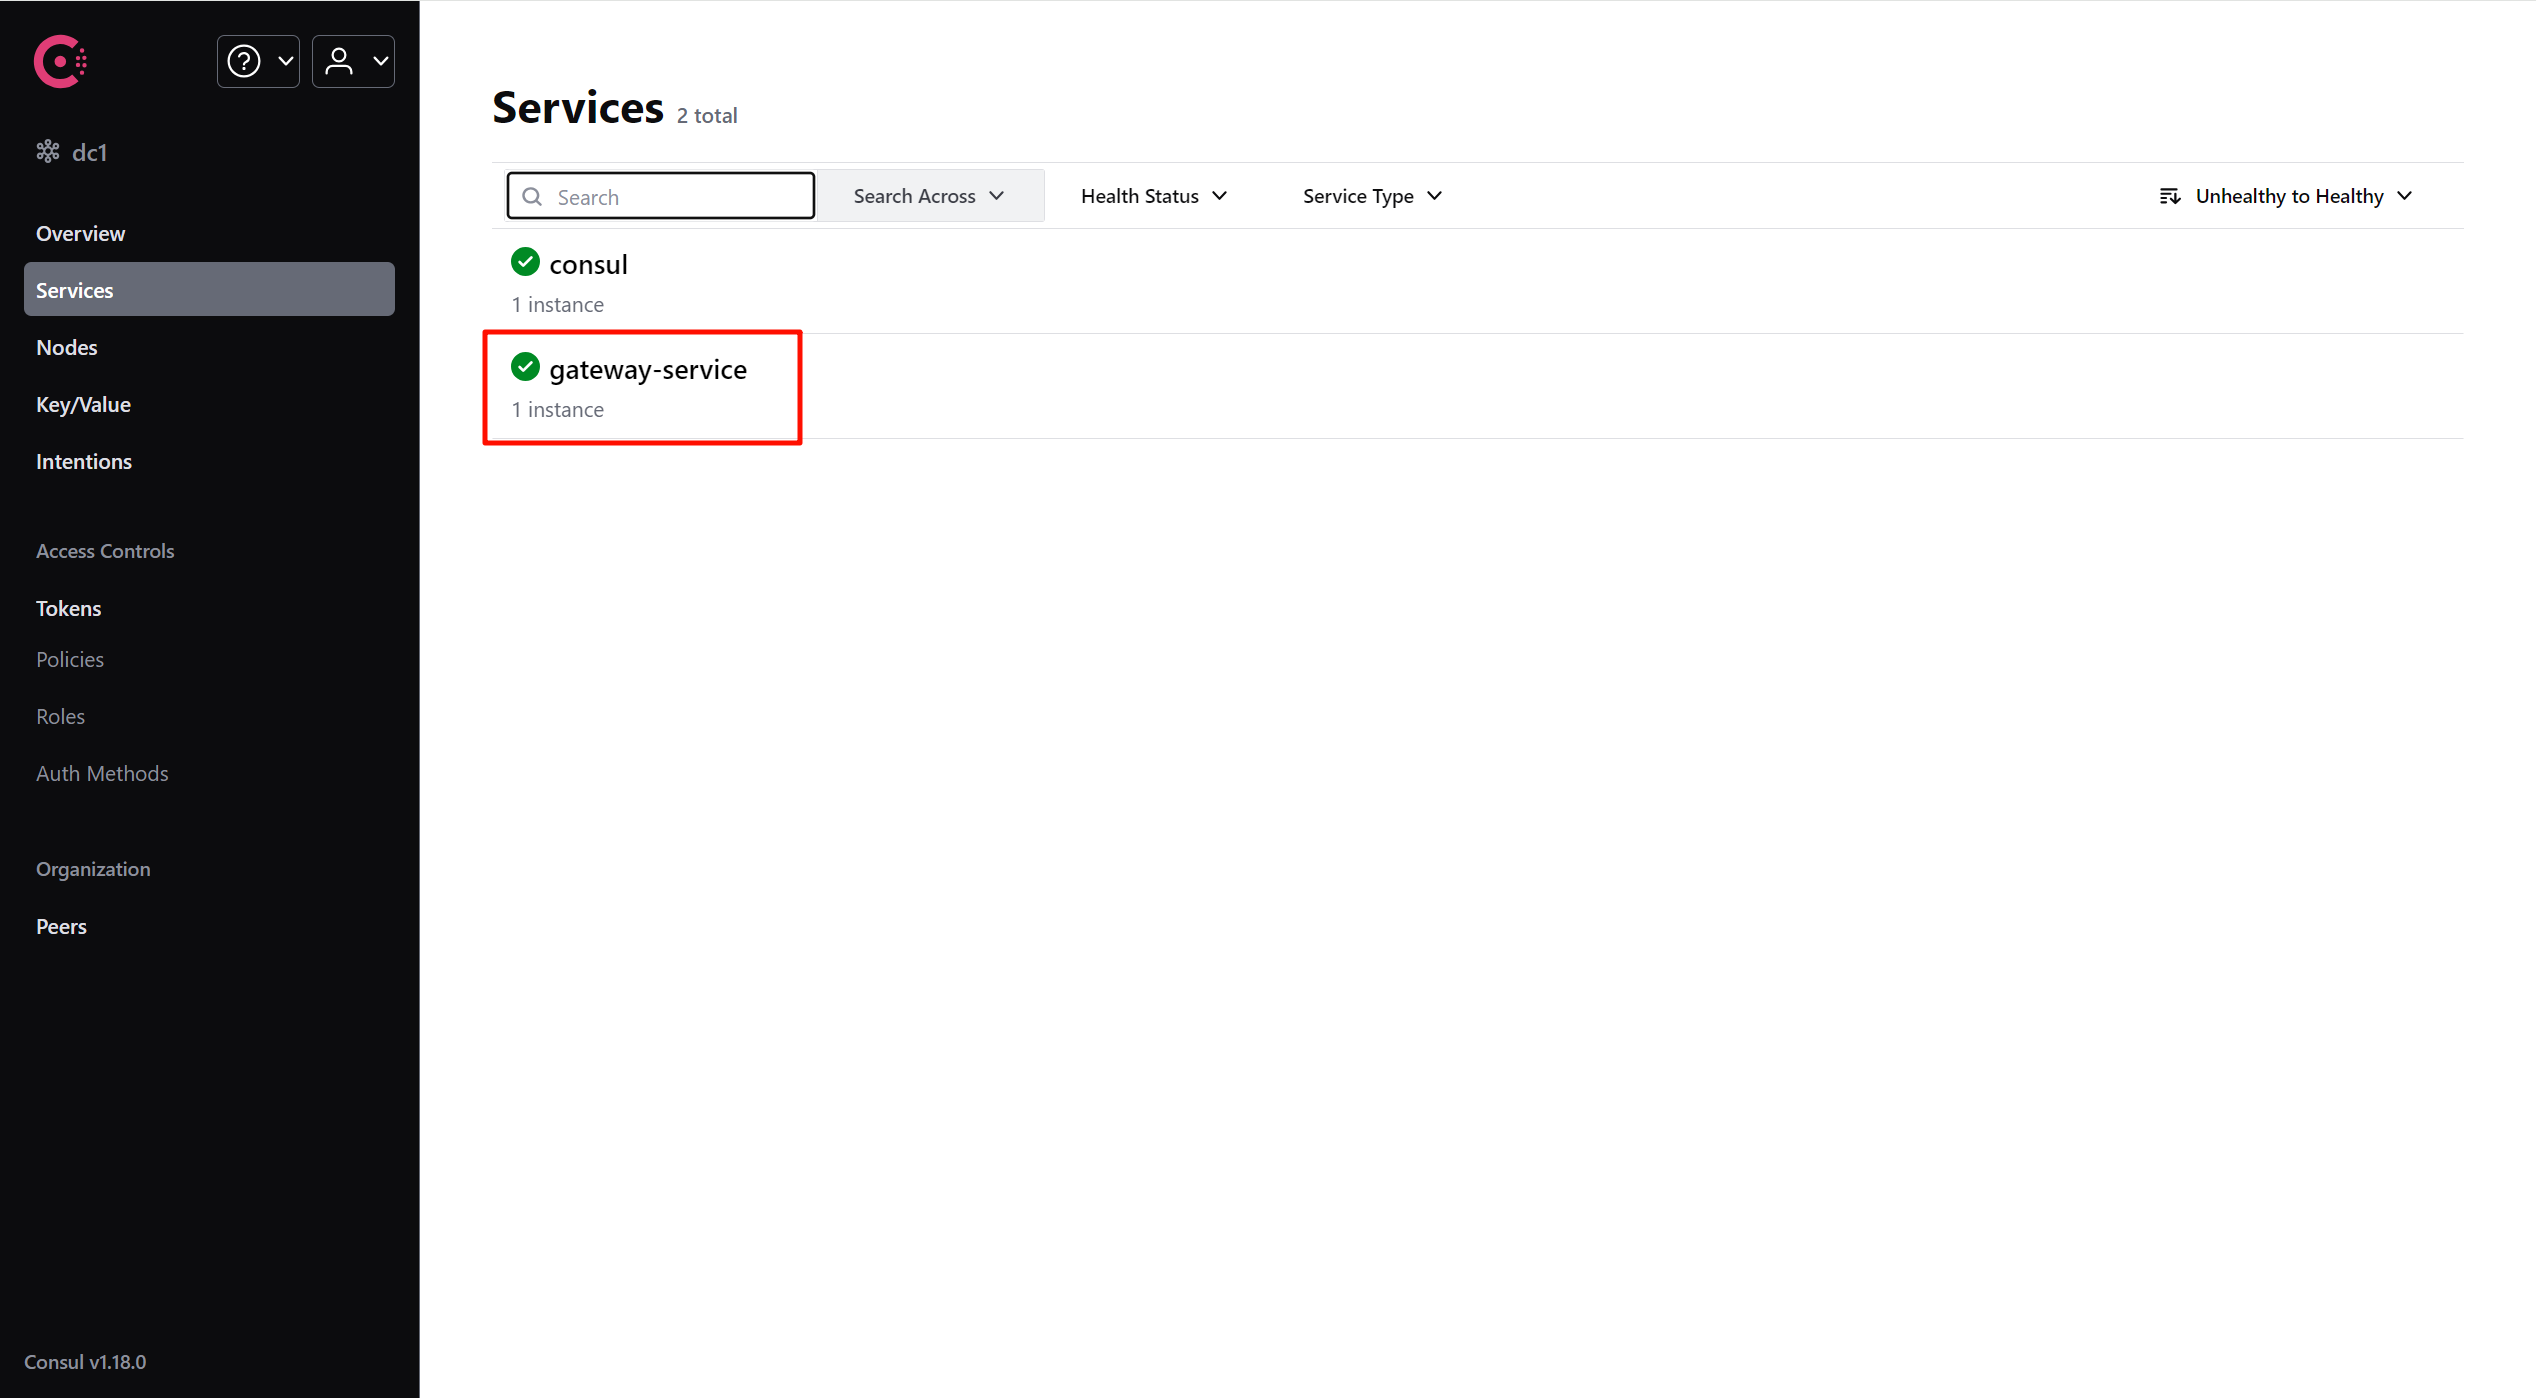
Spring Cloud Gateway教程
1 微服务网关概述 Spring Cloud Gateway是在 Spring 生态系统之上构建的API网关服务,旨在为微服务架构应用提供一种简单有效的统一的API路由管理方式。 Spring Cloud Gateway主要功能: 反向代理认证鉴权流量控制熔断日志监控 2 Spring Cloud Gateway三…...
解码新时代内存架构:探秘数据在内存中的灵动驻足
欢迎来到白刘的领域 Miracle_86.-CSDN博客 系列专栏 C语言知识 先赞后看,已成习惯 创作不易,多多支持! 随着信息技术的飞速发展,我们身处一个数据爆炸的时代。数据的处理和存储方式正日益成为技术革新的重要领域。在新时代的…...

前端基础篇-前端工程化 Vue 项目开发流程(环境准备、Element 组件库、Vue 路由、项目打包部署)
🔥博客主页: 【小扳_-CSDN博客】 ❤感谢大家点赞👍收藏⭐评论✍ 文章目录 1.0 环境准备 1.1 安装 NodeJs 1.2 验证 NodeJs 环境变量 1.3 配置 npm 的全局安装路径 1.4 切换 npm 的淘宝镜像( npm 使用国内淘宝镜像的方法(最新) ) 1.5 查看镜像…...
】)
【通用人工智能AGI元年-各领域的精彩AI/LLM(持续更新)】
AI元年弄潮儿 通用人工智能AGI时代大模型LLM集成平台:Poe语言大模型:ChatGPT音乐:Suno文生图: [Stable Diffusion整合包](https://www.bilibili.com/video/BV1iM4y1y7oA/?spm_id_from333.999.0.0&vd_source260c69efcf1f56243…...

【微服务】设计弹性微服务架构模式
目录 模式#1 — 超时模式#2 — 重试模式#3— 隔离模式#4— 断路器模式#5 — 冗余推荐超级课程: Docker快速入门到精通Kubernetes入门到大师通关课AWS云服务快速入门实战在微服务架构中,服务通常相互协作以提供业务用例。这些服务可能在可用性、可伸缩性、弹性等方面具有…...

Websocket + Vue使用
这里有一篇文档可以参考一下> 闪现 POM文件 <dependency><groupId>org.springframework.boot</groupId><artifactId>spring-boot-starter-websocket</artifactId><version>2.7.0</version> </dependency> WebSocketConf…...

PostgreSQL CASE语句深度解析:性能、类型与NULL安全实战指南
1. 为什么你必须真正吃透 PostgreSQL 的 CASE 语句——它远不止是 SQL 里的“if-else”翻译器在 PostgreSQL 实战中,我见过太多人把CASE当成一个语法糖:写几个WHEN...THEN,加个ELSE,再套个END,就以为搞定了。结果呢&am…...

别再乱算相似度了!用Python实战二元变量聚类:从Jaccard系数到病人分组
医疗数据分析实战:用Python实现基于Jaccard系数的病人症状聚类在医疗数据分析领域,如何从海量病人症状数据中发现潜在规律一直是临床研究的难点。传统方法往往依赖医生经验或简单统计,而现代数据挖掘技术为我们提供了更科学的解决方案。本文将…...

小米MIMO最新邀请码
欢迎使用,各得10元体验金...

串口通信粘包问题:成因深度解析与项目实战解决方案
在嵌入式开发、工业工控、上位机下位机交互项目中,串口(RS232/RS485)是最基础、最常用的通信方式。绝大多数开发者都遇到过这样的问题:串口接收的数据偶尔错乱、解析报错、数据拼接异常,单次接收的数据时而半包、时而多…...

Python PIL 画矩形框
基础代码 from PIL import Image, ImageDraw# 打开图片 img Image.open(your_image.jpg)# 创建绘图对象 draw ImageDraw.Draw(img)# 矩形坐标 (x1, y1, x2, y2) coords (23, 21, 69, 76)# 画矩形框(红色,线宽2) draw.rectangle(coords, ou…...

基于可解释机器学习的城市人口流动空间降尺度分析实践
1. 项目概述:从宏观到微观,解码城市脉搏在城市的肌理中,人口的流动如同血液的循环,承载着经济活力、社会互动与空间结构的全部信息。无论是城市规划师优化公交线路,还是商业分析师评估店铺选址,亦或是公共卫…...

光轮智能 谢晨 访谈总结机器人仿真数据产业
光轮智能 谢晨 访谈总结机器人仿真关于创始人关于数据数据金字塔数据痛点仿真数据的重要性仿真数据的质量b站链接地址公司官网关于创始人 清华物理;哥伦比亚金融;英伟达智驾仿真;小鹏智驾仿真;现为光轮智能CEO 关于数据 数据的…...

Godot4 2D游戏开发避坑指南:TileMap绘制、节点顺序与相机设置的三个常见问题
Godot4 2D游戏开发避坑指南:TileMap绘制、节点顺序与相机设置的三个常见问题当你第一次用Godot4完成一个2D场景搭建时,那种成就感往往会被几个突如其来的bug瞬间击碎——角色神秘消失、背景纹丝不动、屏幕边缘出现诡异黑边。这些问题看似简单,…...

Performance-Fish:让你的《环世界》后期游戏帧率提升400%的终极优化方案
Performance-Fish:让你的《环世界》后期游戏帧率提升400%的终极优化方案 【免费下载链接】Performance-Fish Performance Mod for RimWorld 项目地址: https://gitcode.com/gh_mirrors/pe/Performance-Fish 你是否曾在《环世界》游戏后期,面对庞大…...

3个实用场景教你轻松解锁网易云音乐NCM加密文件:ncmdumpGUI完整指南
3个实用场景教你轻松解锁网易云音乐NCM加密文件:ncmdumpGUI完整指南 【免费下载链接】ncmdumpGUI C#版本网易云音乐ncm文件格式转换,Windows图形界面版本 项目地址: https://gitcode.com/gh_mirrors/nc/ncmdumpGUI 你是否曾经下载了网易云音乐的…...