利用github pages建立Serverless个人博客
利用github pages建立Serverless个人博客
概述
使用github pages,可以在github上部署静态网站。利用这个功能,可以很方便地实现个人博客的发布托管。
比如我的个人博客:Buttering’s Blog
对应代码仓库:buttering/EasyBlog: 自动将本地博客部署到github中展示
相关技术
1. 博客处理
采用go语言对md格式的博客进行处理,主要目的是处理文档中的图片,将其保存在图床,并将文档中的图片链接替换为图床链接。
2. 图床
采用github仓库直接作为图床。图片和博客存放在同一个仓库中。
3. Hexo博客框架
Hexo是一个快速、简洁且高效的博客框架,能很方便地生成静态的博客网站。采用Fluid主题。
4. CI/CD流程
采用github actions,自动实现博客上传后网站的生成和部署。
5. 更多功能
-
使用hexo-renderer-markdown-it-plus插件,实现对latex的支持。
-
使用giscus评论插件,利用github discussions实现博客的评论功能。
-
使用LeanCloud实现访问统计。
-
展示网站运行时长
实现
0. 项目框架
项目所有文章和图片都位于同一个github仓库中:

- .github:存放github action的配置文件
- asset:存放处理后的博客和图片,pictures起到了图床的作用
- publish:Hexo部署在此子目录
- resource:存放githubPub公钥
- tools:一些自己写的工具函数
- UploadBlogs:实现博客处理和自动push的脚本
1. 博客预处理
对md格式的博客进行预处理,使用正则表达式提取其中的图片路径:
- 对于本地图片,直接将其拷贝到asset/pictures目录中;
- 对于网络图片,将其下载在asset/pictures目录中。
在pictures目录中,对文章名和图片进行了哈希处理,如图:
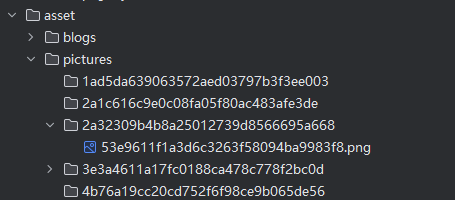
博客则直接按照原文件名放在blogs目录下。
博客中图片的链接会被替换为形如 https://raw.githubusercontent.com/buttering/EasyBlogs/master/asset/pictures/bdf03a9b9bdacaaf60d1f899c0222865/74d51bfa109b4065ccb3ba37b6922bb3.png的url。
raw.githubusercontent.com 是github用来存储用户上传文件的服务地址。
package mainimport ("EasyBlogs/tools""fmt""github.com/go-git/go-git/v5""github.com/go-git/go-git/v5/plumbing/object""github.com/go-git/go-git/v5/plumbing/transport/ssh""io""log""net/http""net/url""os""path""path/filepath""regexp""strings""time"
)type markdownPicture struct {isUrl             boolsourcePicturePath stringstart             int // md中源图片路径的起始偏移量end               inthashName          string // 均将包含后缀的文件名进行hash,且后拼接上原有后缀名targetUrl         string // 修改后在github仓库中的url
}type Blog struct {name          stringhashName      stringpictures      []markdownPicturedirectoryPath string // 源文件文件夹路径legal         bool   // 成功通过解析
}var (BLOG_PATH      stringPICTURE_PATH   stringREPOSITORY_URL string
)func getBlogList(path string) (blogsList []Blog) {blogsList = make([]Blog, 0, 10)fileList, err := os.ReadDir(path)if err != nil {panic(err)}for _, file := range fileList {if !file.IsDir() && filepath.Ext(file.Name()) == ".md" {fileName := file.Name()blogsList = append(blogsList, Blog{fileName, tools.Hash(fileName), nil, path, false})}}return
}func extractPicture(blog *Blog) {isUrl := func(path string) bool {return strings.HasPrefix(path, `http://`) || strings.HasPrefix(path, `https://`)}content, err := os.ReadFile(filepath.Join(blog.directoryPath, blog.name))if err != nil {println(err)return}re, _ := regexp.Compile(`!\[.*?]\((.*?)\)`)matches := re.FindAllSubmatchIndex(content, -1)for _, match := range matches {start := match[2]end := match[3]picturePath := string(content[start:end])var pictureName stringif isUrl(picturePath) {u, err := url.Parse(picturePath)if err != nil {println("解析图片url:", picturePath, " 失败")continue}pictureName = path.Base(u.Path)} else if filepath.IsAbs(picturePath) {pictureName = filepath.Base(picturePath)} else { // 相对路径的本地文件picturePath = filepath.Join(blog.directoryPath, picturePath)pictureName = filepath.Base(picturePath)}hashName := tools.Hash(pictureName) + path.Ext(pictureName)blog.pictures = append(blog.pictures,markdownPicture{isUrl(picturePath),picturePath,start,end,hashName,REPOSITORY_URL + "/" + blog.hashName + "/" + hashName,},)}blog.legal = true
}func copyBlog(blog *Blog) {fmt.Println("拷贝博客:“" + blog.name + "”")blogTargetPath := filepath.Join(BLOG_PATH, blog.name)pictureTargetPath := filepath.Join(PICTURE_PATH, blog.hashName)if _, err := os.Stat(blogTargetPath); !os.IsNotExist(err) {println("文章“" + blog.name + "”已经存在")blog.legal = falsereturn}if err := os.Mkdir(pictureTargetPath, 0777); err != nil {println("为博客“" + blog.name + "”创建对应picture文件夹失败")blog.legal = falsereturn}content, _ := os.ReadFile(filepath.Join(blog.directoryPath, blog.name))offset := 0for _, picture := range blog.pictures {start := picture.start + offsetend := picture.end + offsetcontent = append(content[:start], append([]byte(picture.targetUrl), content[end:]...)...)offset += len(picture.targetUrl) - (end - start)}err := os.WriteFile(blogTargetPath, content, 0644)if err != nil {println("复制文件“" + blog.name + "”错误")blog.legal = false}}func copyPicture(blog Blog) {pictureTargetPath := filepath.Join(PICTURE_PATH, blog.hashName)for _, picture := range blog.pictures {fmt.Println("导入图片:“" + picture.sourcePicturePath + "”")var sourceFile interface{}if picture.isUrl {for i := 0; i < 5; i++ {response, err := http.Get(picture.sourcePicturePath)if err == nil && response.StatusCode == http.StatusOK {sourceFile = response.Bodybreak}time.Sleep(50 * time.Millisecond)}if sourceFile == nil {println("下载图片“" + picture.sourcePicturePath + "”失败")continue}} else {file, err := os.Open(picture.sourcePicturePath)if err != nil {println("打开图片“" + picture.sourcePicturePath + "”失败")continue}sourceFile = file}destinationFile, _ := os.Create(filepath.Join(pictureTargetPath, picture.hashName))_, err := io.Copy(destinationFile, sourceFile.(io.Reader))if err != nil {println("复制图片“" + picture.sourcePicturePath + "”失败")}}
}func gitOperate(blogList []Blog) {if len(blogList) == 0 {return}repositoryPath, _ := filepath.Abs(".")r, err := git.PlainOpen(repositoryPath)if err != nil {println("打开仓库失败")return}w, err := r.Worktree()if err != nil {println("打开仓库失败")println(err.Error())return}_, err = w.Add("./asset")if err != nil {println("向仓库添加文件失败")println(err.Error())return}status, _ := w.Status()println("git 状态:")println(status.String())nameList := tools.Map(blogList, func(blog Blog) string {return blog.name})var summary stringif len(nameList) == 1 {summary = fmt.Sprintf("提交文件 [%s]", blogList[0].name)} else {summary = fmt.Sprintf("提交 %d 个博客\n"+"\n"+"文件列表: [%s]",len(blogList),strings.Join(nameList, ", "),)}commit, err := w.Commit(summary, &git.CommitOptions{Author: &object.Signature{Name: "Wang",When: time.Now(),},})obj, _ := r.CommitObject(commit)fmt.Println("提交文件:")fmt.Println(obj.String())// user必须是"git"。。。困扰了半天,最后查issue发现的。真够郁闷的。privateKey, err := ssh.NewPublicKeysFromFile("git", "./resource/githubPublicKey", "")if err != nil {println(err.Error())}for i := 0; i < 3; i++ {err = r.Push(&git.PushOptions{RemoteName: "origin",RemoteURL:  `git@github.com:buttering/EasyBlogs.git`,Auth:       privateKey,Progress:   os.Stdout,})if err == nil {break}println("第 %d 次上传失败")}if err != nil {println("重试次数已达上限,上传失败")return}fmt.Println("提交成功!")
}func init() {path, _ := filepath.Abs(".")BLOG_PATH = filepath.Join(path, "asset", "blogs")PICTURE_PATH = filepath.Join(path, "asset", "pictures")REPOSITORY_URL = `https://raw.githubusercontent.com/buttering/EasyBlogs/master/asset/pictures`
}func main() {filePath := "E:/desktop/blog"//yamlPath := "./asset/blogs-list.yaml"blogList := getBlogList(filePath)for i := range blogList {extractPicture(&blogList[i])copyBlog(&blogList[i])copyPicture(blogList[i])}if len(blogList) == 0 {return}// 改用github page进行博客部署,不需要额外记录博客信息//yamlOperate(yamlPath, blogList)//dbOperate(blogList)gitOperate(blogList)}
2. 引入Hexo框架
Hexo框架的使用方式很简单,只需使用Hexo CLI建立基本框架,而后将博客和相关资源移入指定文件夹,然后运行Hexo服务器即可。这里为实现Serverless,后两部交由github action实现。
安装Hexo并初始化站点
保证电脑中安装了Node.js。Hexo的部署目录为publish。
npm install -g hexo-cli
nexo init publish
cd publish
npm install
执行后,Hexo会自动在publish目录建立一个空白站点,目录如下:
.
├── _config.yml
├── package.json
├── scaffolds
├── source
|   └── _posts
└── themes
- _config.yml:站点的配置文件
- _posts:Hexo会自动将其中的文档转化为静态资源
- themes:主题文件夹
安装fluid主题
初始的Hexo站点已经很完善了,但是为了更加个性化,安装了fluid主题:配置指南 | Hexo Fluid 用户手册 (fluid-dev.com)
# 仍是在publish目录
npm install --save hexo-theme-fluid
然后在博客目录下创建 _config.fluid.yml,将主题的 _config.yml(位于publish\themes\fluid_config.yml)内容复制进去。这个_config.fluid.yml是主题的覆盖配置,之后要自定义主题,只需修改其中的内容即可。
修改publish下的_config.yml如下:
theme: fluid  # 指定主题
language: zh-CN  # 指定语言,会影响主题显示的语言,按需修改
最后创建主题的关于页
hexo new page about
测试博客
自此,一个本地的博客网站即搭建成功,可以尝试手动将文档移入_post文件夹,而后在命令行内的 publish 文件夹下运行 hexo g 和 hexo s ,就可以在浏览器看到博客。
最后记得使用hexo clean 清空生成的文件,避免影响到后面的部署。
3. github actions配置
在预处理函数的最后一步,实现了git的自动提交和推送。在成功向github推送后,就轮到github action实现博客网站的自动部署了。
配置github仓库
首先将本地的git仓库上传至github,且设置为公开。
进入github 项目的设置页面开启page功能。设置Source为GitHub Actions。

编写actions脚本文件
回到本地,在项目根目录创建 .github/workflows/xxx.yml 文件。
这里需要一些github actions的知识,简单地说 Actions 就是在设定的时机触发创建一个虚拟云环境,然后执行一连串动作,从而实现自动部署的功能。
可以直接复制以下内容:
name: Deploy Github# 在master分支发生push事件时触发。
on:push:branches:- masterworkflow_dispatch:jobs:build:runs-on: ubuntu-lateststeps:- name: 检出仓库uses: actions/checkout@v4- name: Install pandocrun: |cd /tmpwget -c https://github.com/jgm/pandoc/releases/download/2.14.0.3/pandoc-2.14.0.3-1-amd64.debsudo dpkg -i pandoc-2.14.0.3-1-amd64.deb- name: 安装Node.js 18uses: actions/setup-node@v4with:node-version: '18'- name: Cache NPM dependenciesuses: actions/cache@v4with:path: node_moduleskey: ${{ runner.OS }}-npm-cacherestore-keys: |${{ runner.OS }}-npm-cache- name: 安装相关依赖working-directory: publishrun: |npm install --silent --no-fundnpm un hexo-renderer-marked --savenpm i hexo-renderer-markdown-it-plus --save- name: 复制博客文件run: |cd publishrm -rf source/_postsmkdir source/_postscp -rf ../asset/blogs/* ./source/_posts/- name: 构建网站working-directory: publishrun: npm run build- name: Upload Pages artifactuses: actions/upload-pages-artifact@v3with:path: ./publish/publicdeploy:needs: buildpermissions:pages: writeid-token: writeenvironment:name: github-pagesurl: ${{ steps.deployment.outputs.page_url }}runs-on: ubuntu-lateststeps:- name: Deploy to GitHub Pagesid: deploymentuses: actions/deploy-pages@v4
github 工作流在完成了环境的初始化后,会自动将位于 asset/blog 中的博客文件复制到 publish/source/_post 目录内。而后的构建步骤,工作流就会利用 _post 目录中的博客文件生成网站。
修改配置
编辑 _config.yml,将 url: 更改为 <你的 GitHub 用户名>.github.io/<repository 的名字>。
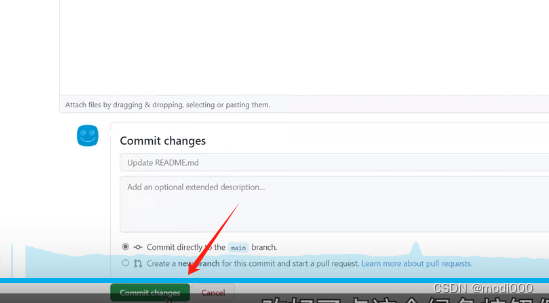
提交并自动部署
在提交前,记得编辑.gitignore文件:
/resource/githubPublicKey
/publish/node_modules/
/publish/public/
在之后的每次提交,都会触发actions流程,生成站点。部署完成后,前往 https://<你的 GitHub 用户名>.github.io/<repository 的名字> 查看站点。
4. 开启latex功能
hexo默认的渲染器不支持复杂的数学公式。
Latex的渲染分为前端渲染和后端渲染两种方法,这里选择后端渲染,需要更换渲染器(已经在actions脚本中完成了)。
npm un hexo-renderer-marked --save
npm i hexo-renderer-markdown-it-plus --save
修改 _config.fluid.yml:
post:math:enable: truespecific: falseengine: katex
使用hexo-renderer-markdown-it-plus插件进行latex渲染时,如果使用mathjax,一些不完全符合md语法的标题会渲染失败(如一级标题前没有空行),因此要将引擎改为katex。
可以参考配置指南 | Hexo Fluid 用户手册 (fluid-dev.com) 和 CHENXCHEN/hexo-renderer-markdown-it-plus
5. 实现评论功能
使用 Giscus插件,且基于 GitHub Discussion实现评论功能。
开启 GitHub Discussion
进入github仓库->Settings->General->Features,勾选 Discussions。

安装 Github Apps
点击链接GitHub Apps - giscus ,为本仓库安装应用。
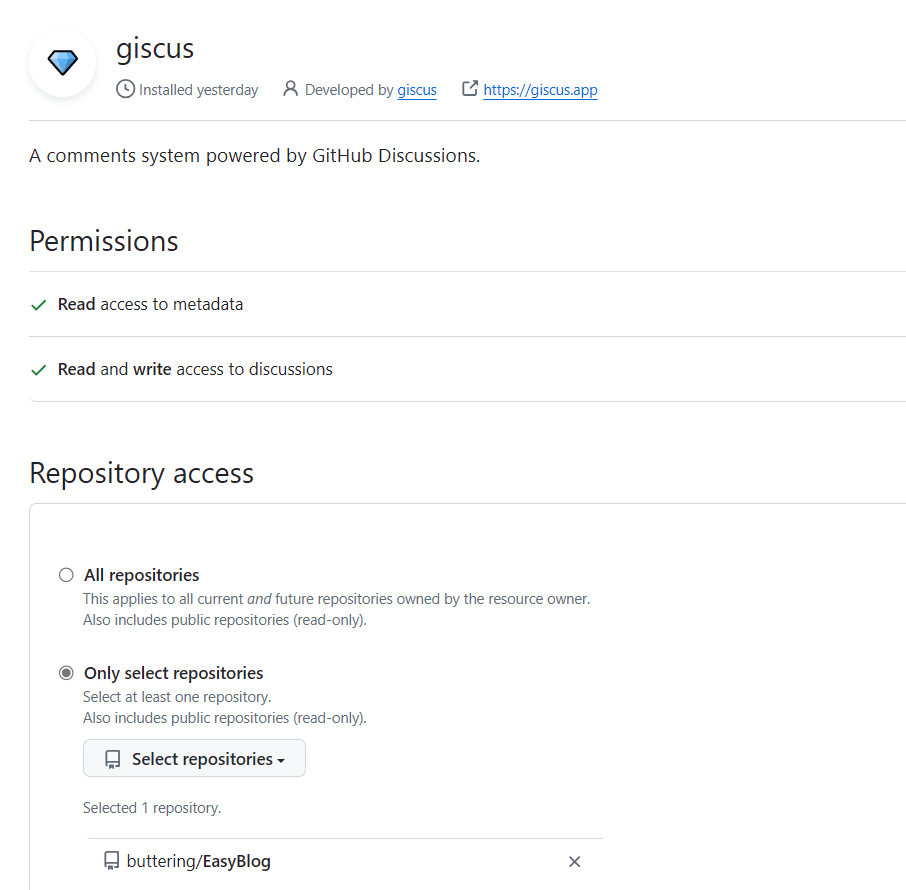
可以到 giscus仓库 检查自己的仓库是否满足giscus要求的条件。

配置插件
由于使用了fluid主题,因此只需修改配置文件即可开启评论。
修改 _config.fluid.yml:
  comments:enable: true# 指定的插件,需要同时设置对应插件的必要参数# The specified plugin needs to set the necessary parameters at the same time# Options: utterances | disqus | gitalk | valine | waline | changyan | livere | remark42 | twikoo | cusdis | giscus | discusstype: giscus# Giscus
# 基于 GitHub Discussions,类似于 Utterances
# Based on GitHub Discussions, similar to Utterances
# See: https://giscus.app/
giscus:repo: buttering/EasyBlogrepo-id: category: Announcementscategory-id: theme-light: lighttheme-dark: darkmapping: titlereactions-enabled: 1emit-metadata: 0input-position: bottomlang: zh-CN
在配置基于 Github Discussions 的博客评论系统时(例如 giscus),往往需要获取 repo 的 repo-id, category-id 等属性,因此这里介绍一种获取这些信息的方法
首先打开以下 Github Docs 地址:Github Docs Explorer,然后授权 Github 账户,并输入以下内容
{repository(owner: "userName", name: "repoName") {iddiscussionCategories (first: 5) {nodes {nameid}}}
}
- 将
userName换成具体的 Github 用户名; - 将
repoName换成保存评论数据的 Repo 名称。
点击运行按钮,即可得到形如 "id": "R_kgDOKjFfn1" 和 DIC_kwdOJPFfnc4CU9... 就是我们需要的 repoId 和 categoryId。
因为网站中文章的url是直接使用文章名进行定位的,如 https://buttering.github.io/EasyBlog/2022/10/15/使用plotly离线模式报错UnicodeEncodeError:gbk codec can't encode character in position的解决方法/,如果 mapping: 的值设为 pathname 或者 url,其在 github discussions中出现的标题,中文会被base64字符代替,严重影响观感,设为 title 可以解决这个问题。
6. 实现访问统计
参考Hexo-fluid主题设置统计博客阅读量与评论 - 贾明晖的博客 (minghuijia.cn)
到LeanCloud注册一个免费账户,创建一个开发板应用后,再创建一个Class(依次点击数据存储->结构化存储->创建Class),权限给到最大。
然后在设置->应用凭证里找到AppID与AppKey。
修改 _config.fluid.yml:
# 网页访问统计
# Analysis of website visitors
web_analytics:  # 网页访问统计enable: true# LeanCloud 计数统计,可用于 PV UV 展示,如果 `web_analytics: enable` 没有开启,PV UV 展示只会查询不会增加leancloud:app_id: xxxapp_key: xxx# REST API 服务器地址,国际版不填server_url:# 统计页面时获取路径的属性path: window.location.pathname# 开启后不统计本地路径( localhost 与 127.0.0.1 )ignore_local: falsefooter:# 展示网站的 PV、UV 统计数statistics:enable: true
7. 网站运行时长
参考Fluid 页脚增加网站运行时长 - Hexo Theme Fluid (fluid-dev.com)
修改 _config.fluid.yml:
footer:content: '<a href="https://hexo.io" target="_blank" rel="nofollow noopener"><span>Hexo</span></a><i class="iconfont icon-love"></i><a href="https://github.com/fluid-dev/hexo-theme-fluid" target="_blank" rel="nofollow noopener"><span>Fluid</span></a><div style="font-size: 0.85rem"><span id="timeDate">载入天数...</span><span id="times">载入时分秒...</span><script src="/js/duration.js"></script></div>'
content 前三行是 Fluid 原有的页脚内容,建议不要删除,可稍作修改,保留 Fluid 的超链接,用于向更多人推广主题。
新增的div标签用于实现功能。duration.js 包含的是功能代码,我们在博客目录的 source/js 下创建 duration.js (如果没有js目录,创建即可),
如果直接创建source/js/duration.js 是无效的
针对fluid 1.9.7: 需要将 content 的 <script src="/js/duration.js"> 这行改为 <script src="<项目根目录名>/js/duration.js">,如 <script src="/EasyBlog/js/duration.js"></script>
js文件内容如下:
!(function() {/** 计时起始时间,自行修改 **/var start = new Date("2020/01/01 00:00:00");function update() {var now = new Date();now.setTime(now.getTime()+250);days = (now - start) / 1000 / 60 / 60 / 24;dnum = Math.floor(days);hours = (now - start) / 1000 / 60 / 60 - (24 * dnum);hnum = Math.floor(hours);if(String(hnum).length === 1 ){hnum = "0" + hnum;}minutes = (now - start) / 1000 /60 - (24 * 60 * dnum) - (60 * hnum);mnum = Math.floor(minutes);if(String(mnum).length === 1 ){mnum = "0" + mnum;}seconds = (now - start) / 1000 - (24 * 60 * 60 * dnum) - (60 * 60 * hnum) - (60 * mnum);snum = Math.round(seconds);if(String(snum).length === 1 ){snum = "0" + snum;}document.getElementById("timeDate").innerHTML = "本站安全运行 "+dnum+" 天";document.getElementById("times").innerHTML = hnum + " 小时 " + mnum + " 分 " + snum + " 秒";}update();setInterval(update, 1000);
})();
把 start 的时间改为自己的时间即可。
相关文章:
利用github pages建立Serverless个人博客
利用github pages建立Serverless个人博客 概述 使用github pages,可以在github上部署静态网站。利用这个功能,可以很方便地实现个人博客的发布托管。 比如我的个人博客:Buttering’s Blog 对应代码仓库:buttering/EasyBlog: 自…...

Spring Boot 集成 sa-token 实践教程
Spring Boot 集成 sa-token 实践教程 sa-token 是一个轻量级且功能强大的权限认证框架,它基于Java语言,专为Java开发者设计,以简化权限管理的复杂性。在Spring Boot项目中集成sa-token,可以快速实现会话管理、权限控制等功能。本文…...

CSS:盒子模型
目录 ▐ box—model概述 ▐ 盒子的组成 ▐ 内容区 ▐ 内边距 ▐ 边框 ▐ 外边距 ▐ 清除浏览器默认样式 ▐ box—model概述 • CSS处理网页时,它认为每个标签都包含在一个不可见的盒子里. • 如果把所有的标签都想象成盒子,那么我们对网…...
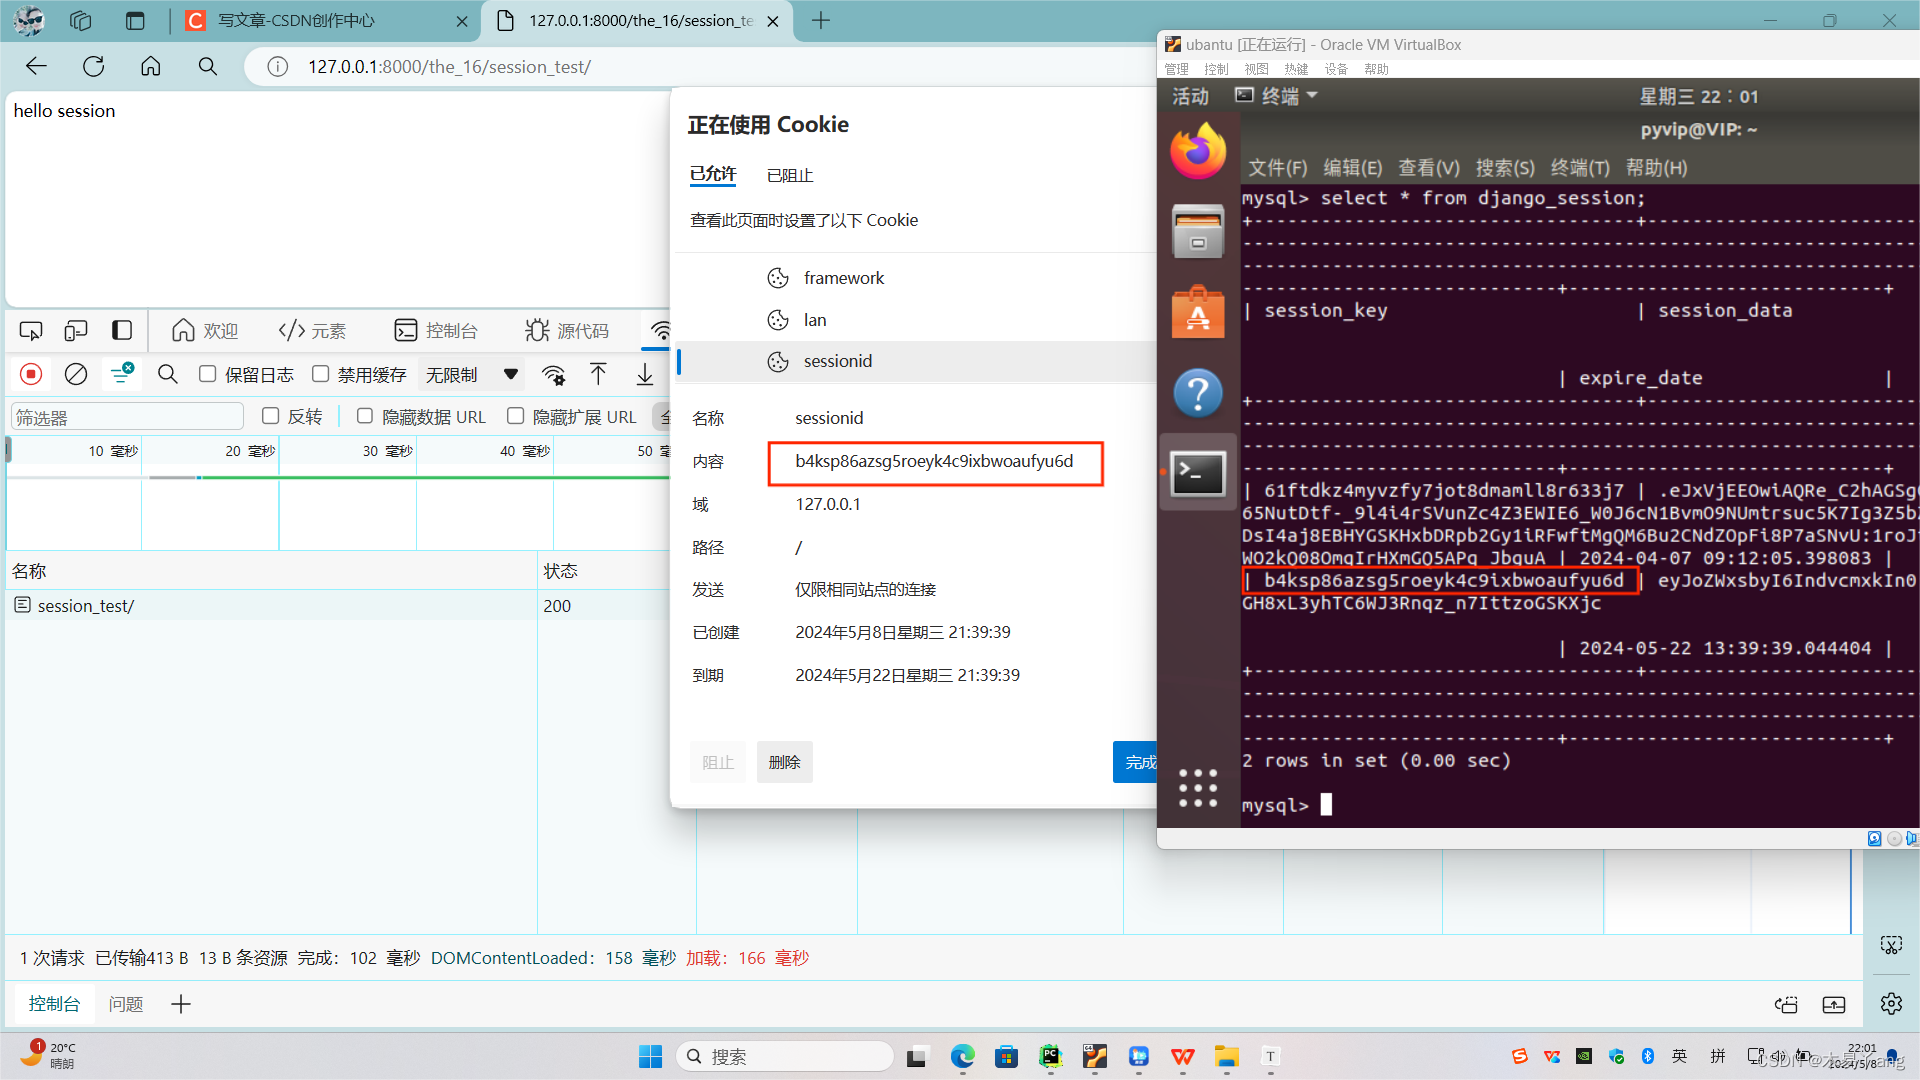
django中的cookie与session
获取cookie request.COOKIE.GET 使用cookie response.set-cookie views.py from django.http import HttpResponse from django.shortcuts import render# Create your views here. def cookie_test(request):r HttpResponse("hello world")r.set_cookie(lan, py…...
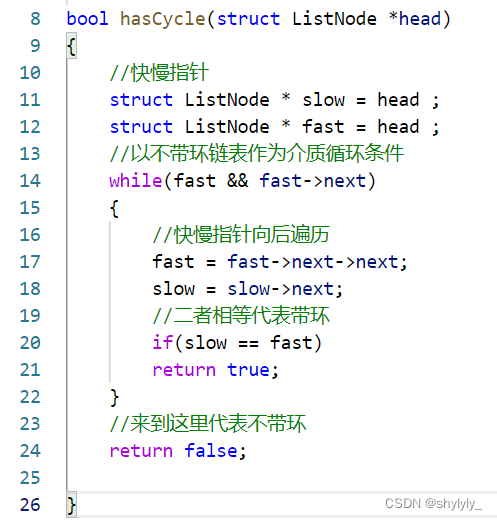
环形链表(判断链表中是否有环)的讲解
一:题目 二:思路讲解 1:采用快慢指针的方法,一个fast指针一次移动两个节点,一个slow指针一次移动一个节点。 2:两个指针从头指针开始往后遍历,如果fast指针或者fast->next 有一个为空&…...
--文本匹配任务)
NLP(14)--文本匹配任务
前言 仅记录学习过程,有问题欢迎讨论 步骤: * 1. 输入问题 * 2. 匹配问题库(基础资源,FAQ) * 3. 返回答案文本匹配算法: 编辑距离算法(缺点) 字符之间没有语义相似度; 受无关词/停用词影响大; 受语序影响大 Jaccar…...
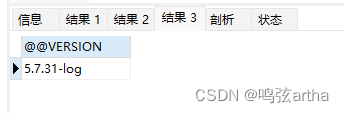
MySQL——系统变量
使用 #最大连接用户数 select MAX_CONNECTIONS; #临时存放构成每次事务的SQL的缓冲区长度 select BINLOG_CACHE_SIZE; #SQL Server的版本信息 select VERSION; 查询结果...
「 网络安全常用术语解读 」漏洞利用预测评分系统EPSS详解
1. 概览 EPSS(Exploit Prediction Scoring System,漏洞利用预测评分系统) 提供了一种全新的高效、数据驱动的漏洞管理功能。EPSS是一项数据驱动的工作,使用来自 CVE 的当前威胁信息和现实世界的漏洞数据。 EPSS 模型产生 0 到 1&…...

理解python中的Iterator 和 Iterable 迭代器和可迭代对象
为什么有些对象可以用for … in 循环 我们先看一段代码: list [1, 2, 3, 4, 5]for i in list:logger.info(i)这代码定义了1个数组object list, 然后用 for … in 来遍历这个list 看起来合理没什么值得注意 但其实 for … in 后面对象还可以是个String for i in …...

C语言实现动态加载.so动态库,使用,错误捕获以及卸载
动态库 概述 动态库的扩展名是.so。 动态库是被加载,调用的时候是根据内存地址去调用,而不是将代码复制到文件中。 动态库可以同时被多个进程使用。 实战案例:构建 libmath.so 动态库 准备源文件 calc.h 定义加法:int add…...
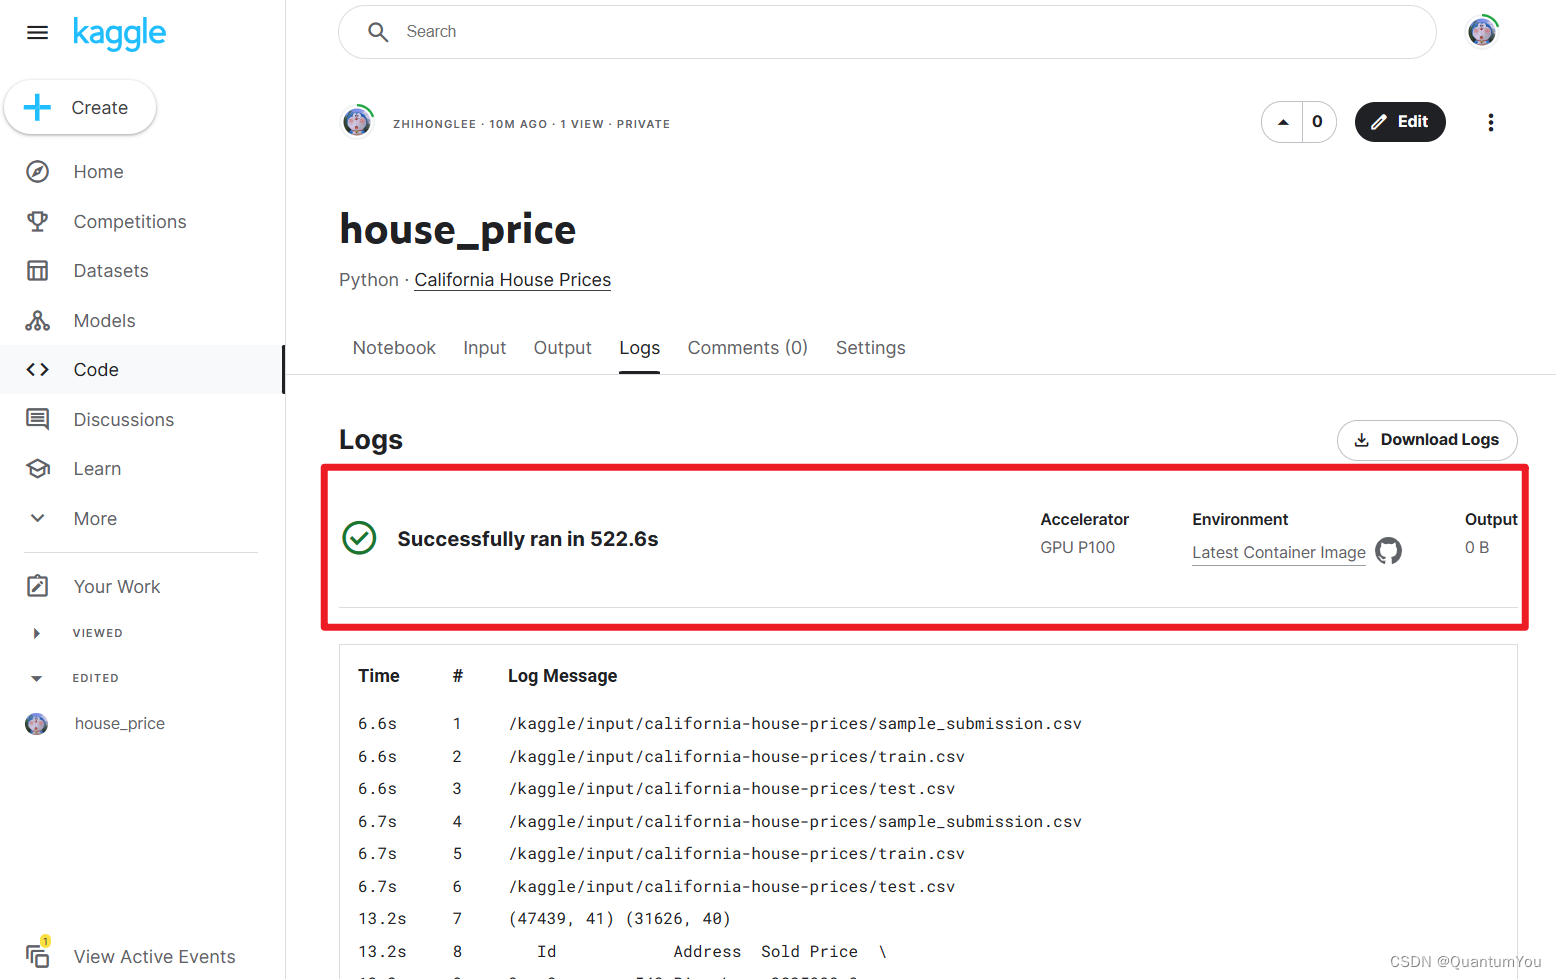
《动手学深度学习》V2(11-18)
文章目录 十一、二 模型选择与过拟合和欠拟合1、模型的选择2、过拟合和欠拟合3、估计模型容量4、线性分类器的VC维5、过拟合欠拟合的代码实现 :fire:①生成数据集②定义评估损失③定义训练函数④三阶多项式函数拟合⑤线性函数拟合(欠拟合)⑤高阶多项式函数拟合(过拟合) 十三、权…...

web前端之excel转pdf、小黄人发送请求、base64、jspdf、xlsx
MENU 前言方案一方案二结束语 前言 在前端将Excel转换为PDF有多种方案,本文介绍两种简单方案。 方案一 使用jspdf库,先将Excel文件转成Base64格式,然后再使用jspdf库将其转换为PDF格式,最后使用saveAs函数下载PDF文件。 步骤一: 安…...
)
【面试题】音视频流媒体高级开发(2)
面试题6 衡量图像重建好坏的标准有哪些?怎样计算? 参考答案 SNR(信噪比) PSNR10*log10((2n-1)2/MSE) (MSE是原图像与处理图像之间均方误差,所以计算PSNR需要2幅图像的数据!) SSIM…...
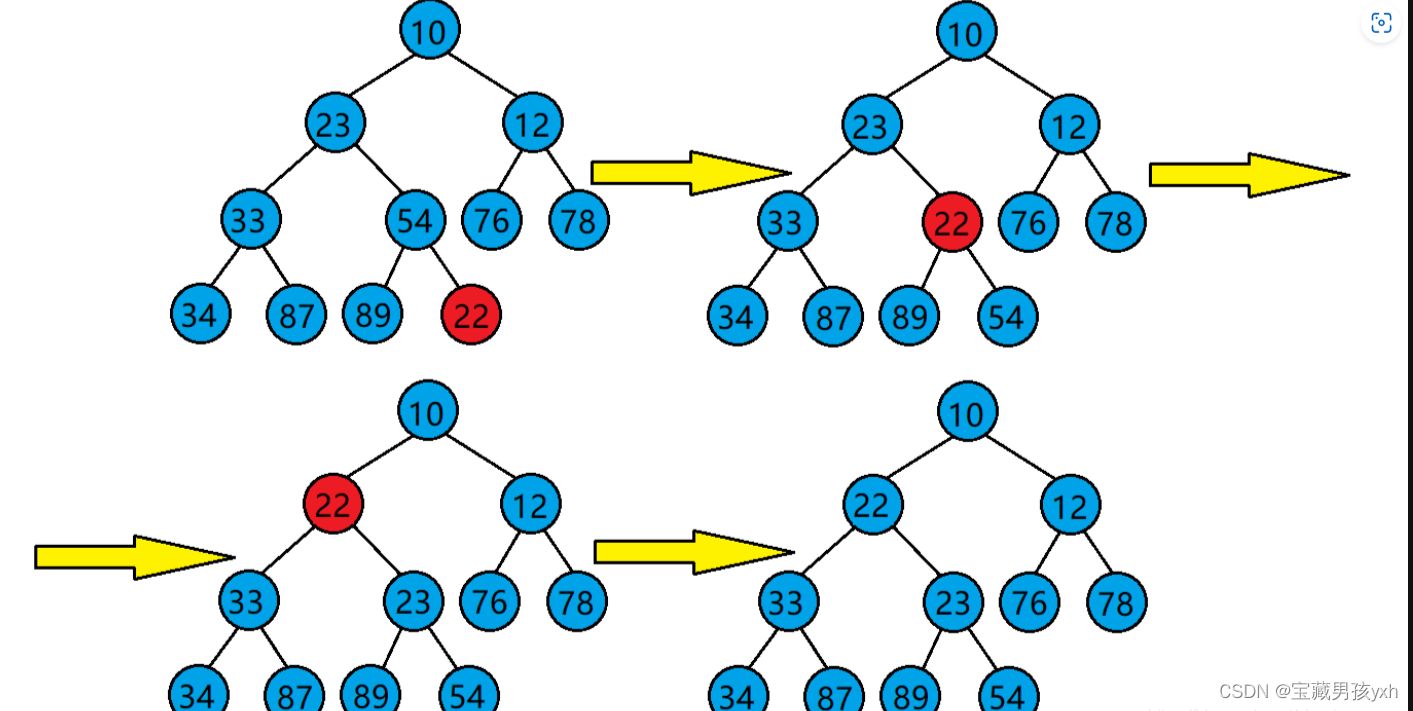
数据与结构--堆
堆 堆的概念 堆:如果有一个关键码的集合K{k0,k1,k2,…,kn-1},把它的所有元素按完全二叉树的顺序存储方式存储在一个一维数组中,并满足ki<k2i1且ki<k2i2(或满足ki>k2i1且ki>k2i2),其中i0,1,2,…...
Github的使用教程(下载项目、寻找开源项目和上传项目)
根据『教程』一看就懂!Github基础教程_哔哩哔哩_bilibili 整理。 1.项目下载 1)直接登录到源码链接页或者通过如下图的搜索 通过编程语言对搜索结果进一步筛选。 如何去找开源项目:(Github 新手够用指南 | 全程演示&个人找项目技巧放…...
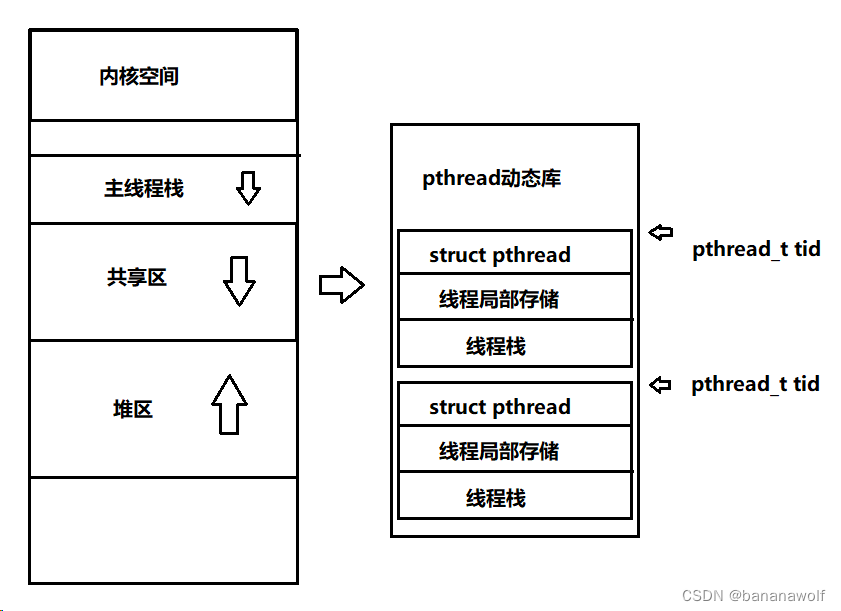
Linux-线程概念
1. 线程概念 线程:轻量级进程,在进程内部执行,是OS调度的基本单位;进程内部线程共用同一个地址空间,同一个页表,以及内存中的代码和数据,这些资源对于线程来说都是共享的资源 进程:…...

js的桶排序
桶排序(Bucket Sort)是一种分布式排序算法,它将元素分散到一系列桶中,然后对每个桶中的元素进行排序,并将所有的桶合并起来得到最终的排序结果。桶排序适用于输入的元素均匀分布在一个范围内的情况,它的时间…...
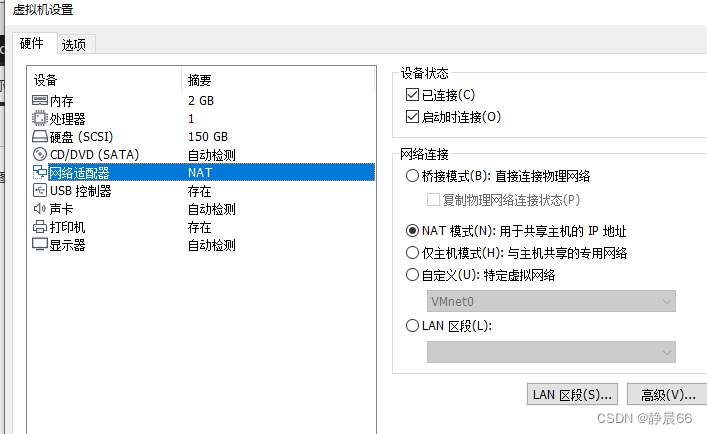
解决ubuntu无法上网问题
发现是网络配置成了Manual手动模式,现在都改成自动分配DHCP模式 打开后,尝试上网还是不行,ifconfig查看ip地址还是老地址,怀疑更改没生效,于是重启试试。 重启后,ip地址变了,可以打开网页了 …...

使用nvm管理多版本node.js
使用nvm(Node Version Manager)安装Node.js是一个非常方便的方法,因为它允许你在同一台机器上管理多个Node.js版本。以下是使用nvm安装Node.js的基本步骤: Linux 安装nvm 根据你的操作系统,安装命令可能会有所不同。以…...

推导 模型矩阵的逆转置矩阵求运动物体的法向量
一个物体表面的法向量如何随着物体的坐标变换而改变,取决于变换的类型。使用逆转置矩阵,可以安全地解决该问题,而无须陷入过度复杂的计算中。 法向量变化规律 平移变换不会改变法向量,因为平移不会改变物体的方向。 旋转变换会改…...

OBS面部追踪插件终极指南:3分钟实现智能直播自动对焦
OBS面部追踪插件终极指南:3分钟实现智能直播自动对焦 【免费下载链接】obs-face-tracker Face tracking plugin for OBS Studio 项目地址: https://gitcode.com/gh_mirrors/ob/obs-face-tracker 在直播和视频录制中,你是否经常需要手动调整摄像头…...

彻底告别iPhone过热降频!thermalmonitordDisabler让你的设备性能满血释放
彻底告别iPhone过热降频!thermalmonitordDisabler让你的设备性能满血释放 【免费下载链接】thermalmonitordDisabler A tool used to disable iOS daemons. 项目地址: https://gitcode.com/gh_mirrors/th/thermalmonitordDisabler 你是否曾经在游戏激战中突然…...
:迁移至Time-Aware Search API的6步合规过渡方案)
【紧急预警】Perplexity即将下线v1历史索引接口(倒计时≤45天):迁移至Time-Aware Search API的6步合规过渡方案
更多请点击: https://kaifayun.com 第一章:Perplexity历史资料搜索 Perplexity 是一款以实时网络检索与引用驱动为特色的 AI 搜索工具,自 2022 年由 Aravind Srinivas、Denis Yarats、Johnny Ho 和 Andy Konwinski 共同创立以来,…...

UniApp跨端开发实战:一套代码给TabBar同时穿上iOS和Material Design的“毛玻璃”外衣
UniApp跨端毛玻璃TabBar实战:融合iOS与Material Design的设计语言 在移动应用开发中,底部导航栏(TabBar)作为核心交互组件,其设计直接影响用户体验。随着iOS毛玻璃(Blur Effect)和Android Mater…...

量子架构搜索:结合张量网络与强化学习的创新方法
1. 量子架构搜索的现状与挑战量子计算正经历从理论走向实践的关键转型期,但当前NISQ(噪声中等规模量子)设备的局限性给算法实现带来了严峻挑战。这些设备通常只有50-100个量子比特,且存在显著的噪声和有限的量子比特连通性。在这样…...

学习第六天,python
元组(tuple)一、元组的本质与特点核心:不可变性二、元组的创建方式三、元组的访问四、元组的操作五、元组的经典使用场景六、元组的注意事项与陷阱字典(dict)字典以 key: value 的形式存储数据,通过 key 就…...

XLink 和 XPointer 语法详解
XLink 和 XPointer 语法详解 概述 XLink(XML Linking Language)和 XPointer(XML Pointer Language)是XML文档中处理链接和定位信息的语言。本文将详细解释XLink和XPointer的语法及其应用。 XLink 语法 XLink定义了一种标准的方法,允许在XML文档内部和之间建立链接。以…...
)
从碰撞到安全路径:在MATLAB里为你的机械臂规划一条无碰撞轨迹(附完整代码)
七轴机械臂无碰撞轨迹规划实战:从MATLAB基础到高级避障策略 机械臂在复杂环境中的自主运动一直是工业自动化和服务机器人领域的核心挑战。想象一下,当一台七轴机械臂需要在布满障碍物的空间里精准抓取物品时,如何确保它不会撞上周围的工作台、…...

AirUI全流程可视化开发平台:从设计稿到代码的范式革命
1. 项目概述:从“手写”到“拖拽”的范式转变“告别手写UI代码”,这大概是每个前端开发者在面对复杂页面和频繁需求变更时,内心最真实的呐喊。我入行十几年,从手写HTML、CSS,到使用jQuery,再到拥抱React、V…...
)
别再手动忽略.git和.svn了!WinMerge过滤器保姆级配置指南(附常用正则模板)
WinMerge高效过滤指南:彻底告别版本控制与构建文件干扰 接手新项目时,你是否曾被满屏的.git、.svn和.class文件对比结果淹没?WinMerge的过滤器功能正是解决这一痛点的利器。本文将带你从零开始配置专属过滤规则,让文件对比回归核心…...