汽车识别项目
窗口设计
这里的代码放在py文件最前面或者最后面都无所谓
# 创建主窗口
window = tk.Tk()
window.title("图像目标检测系统")
window.geometry('1000x650')  # 设置窗口大小# 创建背景画布并使用grid布局管理器
canvas_background = tk.Canvas(window, width=1000, height=650, bg="#e6f2ff")
canvas_background.grid(row=0, column=0, columnspan=2, rowspan=4, sticky='nsew')  # 使用grid管理器# 加载背景图像
background_image = Image.open(r"图标/5.jpg")  # 替换为您的背景图像路径
background_image = background_image.resize((1000, 650), Image.Resampling.LANCZOS)  # 调整图像大小以适应窗口
background_photo = ImageTk.PhotoImage(background_image)# 在背景画布上绘制背景图像
canvas_background.create_image(0, 0, anchor='nw', image=background_photo)
canvas_background.image = background_photo  # 保持对图像的引用# 加载按钮图片
upload_img = Image.open(r"图标/3.jpg")  # 替换为您的上传按钮图片路径
upload_img = upload_img.resize((100, 50), Image.Resampling.LANCZOS)  # 调整图片大小
upload_img = ImageTk.PhotoImage(upload_img)start_detection_img = Image.open(r"图标/2.jpg")  # 替换为您的开始检测按钮图片路径
start_detection_img = start_detection_img.resize((100, 50), Image.Resampling.LANCZOS)  # 调整图片大小
start_detection_img = ImageTk.PhotoImage(start_detection_img)img_intensification_img = Image.open(r"图标/1.jpg")  # 替换为您的图像增强按钮图片路径
img_intensification_img = img_intensification_img.resize((100, 50), Image.Resampling.LANCZOS)  # 调整图片大小
img_intensification_img = ImageTk.PhotoImage(img_intensification_img)# 创建两个画布区域
canvas_left = tk.Canvas(window, width=224, height=224, bg="#e6f2ff")
canvas_right = tk.Canvas(window, width=224, height=224, bg="#e6f2ff")
# 加载图片
waiting_image = Image.open(r"图标/8.jpg")  # 替换为您的图片路径
detected_image = Image.open(r"图标/7.jpg")  # 替换为您的图片路径
waiting_image = waiting_image.resize((200, 50), Image.Resampling.LANCZOS)
detected_image = detected_image.resize((200, 50), Image.Resampling.LANCZOS)
waiting_photo = ImageTk.PhotoImage(waiting_image)
detected_photo = ImageTk.PhotoImage(detected_image)
# 将两个画布区域放置在主窗口中
canvas_left.grid(row=1, column=0, padx=10, pady=10, sticky='nsew')
canvas_right.grid(row=1, column=1, padx=10, pady=10, sticky='nsew')# 创建标签
label_waiting_image = tk.Label(window, image=waiting_photo, font=("Arial", 16), bg="#e6f2ff")
label_detected_image = tk.Label(window, image=detected_photo, font=("Arial", 16), bg="#e6f2ff")# 定位标签
label_waiting_image.grid(row=0, column=0, padx=10, pady=10, sticky='nsew')
label_detected_image.grid(row=0, column=1, padx=10, pady=10, sticky='nsew')# 设置标签的图片
label_waiting_image.config(image=waiting_photo)
label_detected_image.config(image=detected_photo)# 创建按钮并放置在主窗口上
button_upload = tk.Button(window, image=upload_img, command=upload_image, relief="flat", borderwidth=0, background='#e6f2ff', activebackground='#e6f2ff')
button_start_detection = tk.Button(window, image=start_detection_img, command=start_detection, relief="flat", borderwidth=0, background='#e6f2ff', activebackground='#e6f2ff')
img_intensification = tk.Button(window, image=img_intensification_img, command=img_inten, relief="flat", borderwidth=0, background='#e6f2ff', activebackground='#e6f2ff')# 将按钮放置在主窗口上
button_upload.place(x=155,y=495)
button_start_detection.place(x=755,y=495)
img_intensification.place(x=455,y=495)# 运行主窗口
window.mainloop()
1.导入需要用到的包
import torch.nn as nn
import tkinter as tk
from tkinter import filedialog, messagebox
from PIL import Image, ImageTk
import torch
from torchvision import transforms, models
from efficientnet_pytorch import EfficientNet
import numpy as np
import cv2
2.加载模型
这里加载了模型需要的可以联系我
class EfficientNetModel(nn.Module):def __init__(self, num_classes=10, pretrained=True):super(EfficientNetModel, self).__init__()# 加载预训练的EfficientNet模型self.efficientnet = EfficientNet.from_name('efficientnet-b3')## if pretrained:#     # 加载预训练权重#     self.efficientnet.load_state_dict(#         torch.load(r'D:\python\pytorch\Vehicle identification\save pth\efficientnet-b3-5fb5a3c3.pth'))# 获取EfficientNet模型的最后一层全连接层的输入特征数量num_ftrs = self.efficientnet._fc.in_features# 将EfficientNet模型的最后一层全连接层替换为一个新的全连接层,输出特征数量设置为num_classesself.efficientnet._fc = nn.Linear(num_ftrs, num_classes)# forward方法定义了前向传播过程def forward(self, x):return self.efficientnet(x)# Example usage
model = EfficientNetModel(num_classes=12)# 加载训练好的模型参数
model_path = 'best_EfficientNet_b3_updata1.pth'
model.load_state_dict(torch.load(model_path, map_location=torch.device('cpu')))
model.eval()
3.定义图像转换
# 定义图像转换
transform = transforms.Compose([transforms.Resize((224, 224)),  # ResNet-50 的输入图像大小transforms.ToTensor(),transforms.Normalize(mean=[0.485, 0.456, 0.406], std=[0.229, 0.224, 0.225]),  # ResNet-50 的标准化
])
4.定义车类标签
classes = ['皮卡', '敞篷车', '跑车', '掀背两箱车', '小型面包车', 'SUV', '轿车', '厢式货车', '旅行车', '公共汽车', '消防车', '出租车']5.定义全局变量
# 初始化全局变量
selected_image_path = None
label_text = None
right_canvas_image = None
6.几个方法
def upload_image():global selected_image_path, label_textfile_path = filedialog.askopenfilename()if file_path:selected_image_path = file_pathimage = Image.open(file_path)original_width, original_height = image.size# 计算宽高比aspect_ratio = original_width / original_height# 根据画布尺寸和宽高比计算新尺寸canvas_width = 500canvas_height = 300new_width = canvas_widthnew_height = int(new_width / aspect_ratio)if new_height > canvas_height:new_height = canvas_heightnew_width = int(new_height * aspect_ratio)# 调整图片大小image = image.resize((new_width, new_height), Image.Resampling.LANCZOS)# 居中图片photo = ImageTk.PhotoImage(image)canvas_left.create_image((canvas_width - new_width) / 2, (canvas_height - new_height) / 2, anchor='nw', image=photo)canvas_left.image = photo # Keep a reference!# 创建图片的标签if label_text is None:label_text = tk.Label(window, text="", font=("Arial", 16))label_text.grid(row=3, column=0, columnspan=2, padx=10, pady=10)def start_detection():global right_canvas_imageif selected_image_path is not None:image = Image.open(selected_image_path)input_image = transform(image).unsqueeze(0)with torch.no_grad():outputs = model(input_image)_, predicted = torch.max(outputs, 1)label = classes[predicted.item()]probabilities = torch.nn.functional.softmax(outputs, dim=1)max_probability = probabilities[0][predicted].item()label_text.config(text=f"{label} - {max_probability:.2f}")# 显示图片在右侧画布image = Image.open(selected_image_path) # 重新打开图片以避免被转换影响original_width, original_height = image.sizeaspect_ratio = original_width / original_heightcanvas_width = 500canvas_height = 300new_width = canvas_widthnew_height = int(new_width / aspect_ratio)if new_height > canvas_height:new_height = canvas_heightnew_width = int(new_height * aspect_ratio)image = image.resize((new_width, new_height), Image.Resampling.LANCZOS)photo = ImageTk.PhotoImage(image)# 检查是否已经创建了右侧画布的图片if right_canvas_image is None:right_canvas_image = canvas_right.create_image((canvas_width - new_width) / 2, (canvas_height - new_height) / 2, anchor='nw', image=photo)else:canvas_right.itemconfig(right_canvas_image, image=photo)canvas_right.image = photo # Keep a reference!else:messagebox.showwarning("警告", "请先选择一张图像")# 将标签放置在图片上label_text.grid(row=1, column=1, padx=10, pady=10, sticky='n')def replaceZeroes(data):min_nonzero = min(data[np.nonzero(data)])data[data == 0] = min_nonzeroreturn datadef MSR(img, scales):weight = 1 / 3.0scales_size = len(scales)h, w = img.shape[:2]log_R = np.zeros((h, w), dtype=np.float32)for i in range(scales_size):img = replaceZeroes(img)L_blur = cv2.GaussianBlur(img, (scales[i], scales[i]), 0)L_blur = replaceZeroes(L_blur)dst_Img = cv2.log(img / 255.0)dst_Lblur = cv2.log(L_blur / 255.0)dst_Ixl = cv2.multiply(dst_Img, dst_Lblur)log_R += weight * cv2.subtract(dst_Img, dst_Ixl)dst_R = cv2.normalize(log_R, None, 0, 255, cv2.NORM_MINMAX)log_uint8 = cv2.convertScaleAbs(dst_R)return log_uint8def img_inten():global selected_image_path, right_canvas_imageif selected_image_path is not None:# 读取图像image = Image.open(selected_image_path)# 转换为OpenCV格式image = cv2.cvtColor(np.array(image), cv2.COLOR_RGB2BGR)# 应用MSR算法scales = [15, 101, 301] # 可根据需要调整b_gray, g_gray, r_gray = cv2.split(image)b_gray = MSR(b_gray, scales)g_gray = MSR(g_gray, scales)r_gray = MSR(r_gray, scales)enhanced_image = cv2.merge([b_gray, g_gray, r_gray])# 转换回PIL图像格式enhanced_image = Image.fromarray(cv2.cvtColor(enhanced_image, cv2.COLOR_BGR2RGB))# 调整图像大小以适应模型输入enhanced_image = enhanced_image.resize((224, 224), Image.Resampling.LANCZOS)# 转换图像为模型可以接受的格式input_image = transform(enhanced_image).unsqueeze(0)# 使用模型进行检测with torch.no_grad():outputs = model(input_image)_, predicted = torch.max(outputs, 1)label = classes[predicted.item()]probabilities = torch.nn.functional.softmax(outputs, dim=1)max_probability = probabilities[0][predicted].item()# 显示增强后的图像和检测结果在右侧画布enhanced_image = enhanced_image.resize((500, 300), Image.Resampling.LANCZOS)photo = ImageTk.PhotoImage(enhanced_image)if right_canvas_image is None:right_canvas_image = canvas_right.create_image((500 - 500) / 2, (300 - 300) / 2, anchor='nw', image=photo)else:canvas_right.itemconfig(right_canvas_image, image=photo)canvas_right.image = photo # Keep a reference!# 更新标签文本label_text.config(text=f"{label} - {max_probability:.2f}")else:messagebox.showwarning("警告", "请先选择一张图像")
全部代码:
这里直接用是用不了的,只是给大家提供一个思路,模型可以自己训练,有需要的可以联系我,我把整个代码给你。
import torch.nn as nn
import tkinter as tk
from tkinter import filedialog, messagebox
from PIL import Image, ImageTk
import torch
from torchvision import transforms, models
from efficientnet_pytorch import EfficientNet
import numpy as np
import cv2
class EfficientNetModel(nn.Module):def __init__(self, num_classes=10, pretrained=True):super(EfficientNetModel, self).__init__()# 加载预训练的EfficientNet模型self.efficientnet = EfficientNet.from_name('efficientnet-b3')## if pretrained:#     # 加载预训练权重#     self.efficientnet.load_state_dict(#         torch.load(r'D:\python\pytorch\Vehicle identification\save pth\efficientnet-b3-5fb5a3c3.pth'))# 获取EfficientNet模型的最后一层全连接层的输入特征数量num_ftrs = self.efficientnet._fc.in_features# 将EfficientNet模型的最后一层全连接层替换为一个新的全连接层,输出特征数量设置为num_classesself.efficientnet._fc = nn.Linear(num_ftrs, num_classes)# forward方法定义了前向传播过程def forward(self, x):return self.efficientnet(x)# Example usage
model = EfficientNetModel(num_classes=12)# 加载训练好的模型参数
model_path = 'best_EfficientNet_b3_updata1.pth'
model.load_state_dict(torch.load(model_path, map_location=torch.device('cpu')))
model.eval()# 定义图像转换
transform = transforms.Compose([transforms.Resize((224, 224)),  # ResNet-50 的输入图像大小transforms.ToTensor(),transforms.Normalize(mean=[0.485, 0.456, 0.406], std=[0.229, 0.224, 0.225]),  # ResNet-50 的标准化
])# 类别标签(请根据您的实际类别名称设置)classes =  ['皮卡', '敞篷车', '跑车', '掀背两箱车', '小型面包车', 'SUV', '轿车', '厢式货车', '旅行车', '公共汽车', '消防车', '出租车']# 初始化全局变量
selected_image_path = None
label_text = None
right_canvas_image = Nonedef upload_image():global selected_image_path, label_textfile_path = filedialog.askopenfilename()if file_path:selected_image_path = file_pathimage = Image.open(file_path)original_width, original_height = image.size# 计算宽高比aspect_ratio = original_width / original_height# 根据画布尺寸和宽高比计算新尺寸canvas_width = 500canvas_height = 300new_width = canvas_widthnew_height = int(new_width / aspect_ratio)if new_height > canvas_height:new_height = canvas_heightnew_width = int(new_height * aspect_ratio)# 调整图片大小image = image.resize((new_width, new_height), Image.Resampling.LANCZOS)# 居中图片photo = ImageTk.PhotoImage(image)canvas_left.create_image((canvas_width - new_width) / 2, (canvas_height - new_height) / 2, anchor='nw', image=photo)canvas_left.image = photo  # Keep a reference!# 创建图片的标签if label_text is None:label_text = tk.Label(window, text="", font=("Arial", 16))label_text.grid(row=3, column=0, columnspan=2, padx=10, pady=10)def start_detection():global right_canvas_imageif selected_image_path is not None:image = Image.open(selected_image_path)input_image = transform(image).unsqueeze(0)with torch.no_grad():outputs = model(input_image)_, predicted = torch.max(outputs, 1)label = classes[predicted.item()]probabilities = torch.nn.functional.softmax(outputs, dim=1)max_probability = probabilities[0][predicted].item()label_text.config(text=f"{label} - {max_probability:.2f}")# 显示图片在右侧画布image = Image.open(selected_image_path)  # 重新打开图片以避免被转换影响original_width, original_height = image.sizeaspect_ratio = original_width / original_heightcanvas_width = 500canvas_height = 300new_width = canvas_widthnew_height = int(new_width / aspect_ratio)if new_height > canvas_height:new_height = canvas_heightnew_width = int(new_height * aspect_ratio)image = image.resize((new_width, new_height), Image.Resampling.LANCZOS)photo = ImageTk.PhotoImage(image)# 检查是否已经创建了右侧画布的图片if right_canvas_image is None:right_canvas_image = canvas_right.create_image((canvas_width - new_width) / 2, (canvas_height - new_height) / 2, anchor='nw', image=photo)else:canvas_right.itemconfig(right_canvas_image, image=photo)canvas_right.image = photo  # Keep a reference!else:messagebox.showwarning("警告", "请先选择一张图像")# 将标签放置在图片上label_text.grid(row=1, column=1, padx=10, pady=10, sticky='n')def replaceZeroes(data):min_nonzero = min(data[np.nonzero(data)])data[data == 0] = min_nonzeroreturn datadef MSR(img, scales):weight = 1 / 3.0scales_size = len(scales)h, w = img.shape[:2]log_R = np.zeros((h, w), dtype=np.float32)for i in range(scales_size):img = replaceZeroes(img)L_blur = cv2.GaussianBlur(img, (scales[i], scales[i]), 0)L_blur = replaceZeroes(L_blur)dst_Img = cv2.log(img / 255.0)dst_Lblur = cv2.log(L_blur / 255.0)dst_Ixl = cv2.multiply(dst_Img, dst_Lblur)log_R += weight * cv2.subtract(dst_Img, dst_Ixl)dst_R = cv2.normalize(log_R, None, 0, 255, cv2.NORM_MINMAX)log_uint8 = cv2.convertScaleAbs(dst_R)return log_uint8def img_inten():global selected_image_path, right_canvas_imageif selected_image_path is not None:# 读取图像image = Image.open(selected_image_path)# 转换为OpenCV格式image = cv2.cvtColor(np.array(image), cv2.COLOR_RGB2BGR)# 应用MSR算法scales = [15, 101, 301]  # 可根据需要调整b_gray, g_gray, r_gray = cv2.split(image)b_gray = MSR(b_gray, scales)g_gray = MSR(g_gray, scales)r_gray = MSR(r_gray, scales)enhanced_image = cv2.merge([b_gray, g_gray, r_gray])# 转换回PIL图像格式enhanced_image = Image.fromarray(cv2.cvtColor(enhanced_image, cv2.COLOR_BGR2RGB))# 调整图像大小以适应模型输入enhanced_image = enhanced_image.resize((224, 224), Image.Resampling.LANCZOS)# 转换图像为模型可以接受的格式input_image = transform(enhanced_image).unsqueeze(0)# 使用模型进行检测with torch.no_grad():outputs = model(input_image)_, predicted = torch.max(outputs, 1)label = classes[predicted.item()]probabilities = torch.nn.functional.softmax(outputs, dim=1)max_probability = probabilities[0][predicted].item()# 显示增强后的图像和检测结果在右侧画布enhanced_image = enhanced_image.resize((500, 300), Image.Resampling.LANCZOS)photo = ImageTk.PhotoImage(enhanced_image)if right_canvas_image is None:right_canvas_image = canvas_right.create_image((500 - 500) / 2, (300 - 300) / 2, anchor='nw', image=photo)else:canvas_right.itemconfig(right_canvas_image, image=photo)canvas_right.image = photo  # Keep a reference!# 更新标签文本label_text.config(text=f"{label} - {max_probability:.2f}")else:messagebox.showwarning("警告", "请先选择一张图像")# ... [剩余的代码] ...# 创建主窗口
window = tk.Tk()
window.title("图像目标检测系统")
window.geometry('1000x650')  # 设置窗口大小# 创建背景画布并使用grid布局管理器
canvas_background = tk.Canvas(window, width=1000, height=650, bg="#e6f2ff")
canvas_background.grid(row=0, column=0, columnspan=2, rowspan=4, sticky='nsew')  # 使用grid管理器# 加载背景图像
background_image = Image.open(r"图标/5.jpg")  # 替换为您的背景图像路径
background_image = background_image.resize((1000, 650), Image.Resampling.LANCZOS)  # 调整图像大小以适应窗口
background_photo = ImageTk.PhotoImage(background_image)# 在背景画布上绘制背景图像
canvas_background.create_image(0, 0, anchor='nw', image=background_photo)
canvas_background.image = background_photo  # 保持对图像的引用# 加载按钮图片
upload_img = Image.open(r"图标/3.jpg")  # 替换为您的上传按钮图片路径
upload_img = upload_img.resize((100, 50), Image.Resampling.LANCZOS)  # 调整图片大小
upload_img = ImageTk.PhotoImage(upload_img)start_detection_img = Image.open(r"图标/2.jpg")  # 替换为您的开始检测按钮图片路径
start_detection_img = start_detection_img.resize((100, 50), Image.Resampling.LANCZOS)  # 调整图片大小
start_detection_img = ImageTk.PhotoImage(start_detection_img)img_intensification_img = Image.open(r"图标/1.jpg")  # 替换为您的图像增强按钮图片路径
img_intensification_img = img_intensification_img.resize((100, 50), Image.Resampling.LANCZOS)  # 调整图片大小
img_intensification_img = ImageTk.PhotoImage(img_intensification_img)# 创建两个画布区域
canvas_left = tk.Canvas(window, width=224, height=224, bg="#e6f2ff")
canvas_right = tk.Canvas(window, width=224, height=224, bg="#e6f2ff")
# 加载图片
waiting_image = Image.open(r"图标/8.jpg")  # 替换为您的图片路径
detected_image = Image.open(r"图标/7.jpg")  # 替换为您的图片路径
waiting_image = waiting_image.resize((200, 50), Image.Resampling.LANCZOS)
detected_image = detected_image.resize((200, 50), Image.Resampling.LANCZOS)
waiting_photo = ImageTk.PhotoImage(waiting_image)
detected_photo = ImageTk.PhotoImage(detected_image)
# 将两个画布区域放置在主窗口中
canvas_left.grid(row=1, column=0, padx=10, pady=10, sticky='nsew')
canvas_right.grid(row=1, column=1, padx=10, pady=10, sticky='nsew')# 创建标签
label_waiting_image = tk.Label(window, image=waiting_photo, font=("Arial", 16), bg="#e6f2ff")
label_detected_image = tk.Label(window, image=detected_photo, font=("Arial", 16), bg="#e6f2ff")# 定位标签
label_waiting_image.grid(row=0, column=0, padx=10, pady=10, sticky='nsew')
label_detected_image.grid(row=0, column=1, padx=10, pady=10, sticky='nsew')# 设置标签的图片
label_waiting_image.config(image=waiting_photo)
label_detected_image.config(image=detected_photo)# 创建按钮并放置在主窗口上
button_upload = tk.Button(window, image=upload_img, command=upload_image, relief="flat", borderwidth=0, background='#e6f2ff', activebackground='#e6f2ff')
button_start_detection = tk.Button(window, image=start_detection_img, command=start_detection, relief="flat", borderwidth=0, background='#e6f2ff', activebackground='#e6f2ff')
img_intensification = tk.Button(window, image=img_intensification_img, command=img_inten, relief="flat", borderwidth=0, background='#e6f2ff', activebackground='#e6f2ff')# 将按钮放置在主窗口上
button_upload.place(x=155,y=495)
button_start_detection.place(x=755,y=495)
img_intensification.place(x=455,y=495)# 运行主窗口
window.mainloop()
代码实现效果
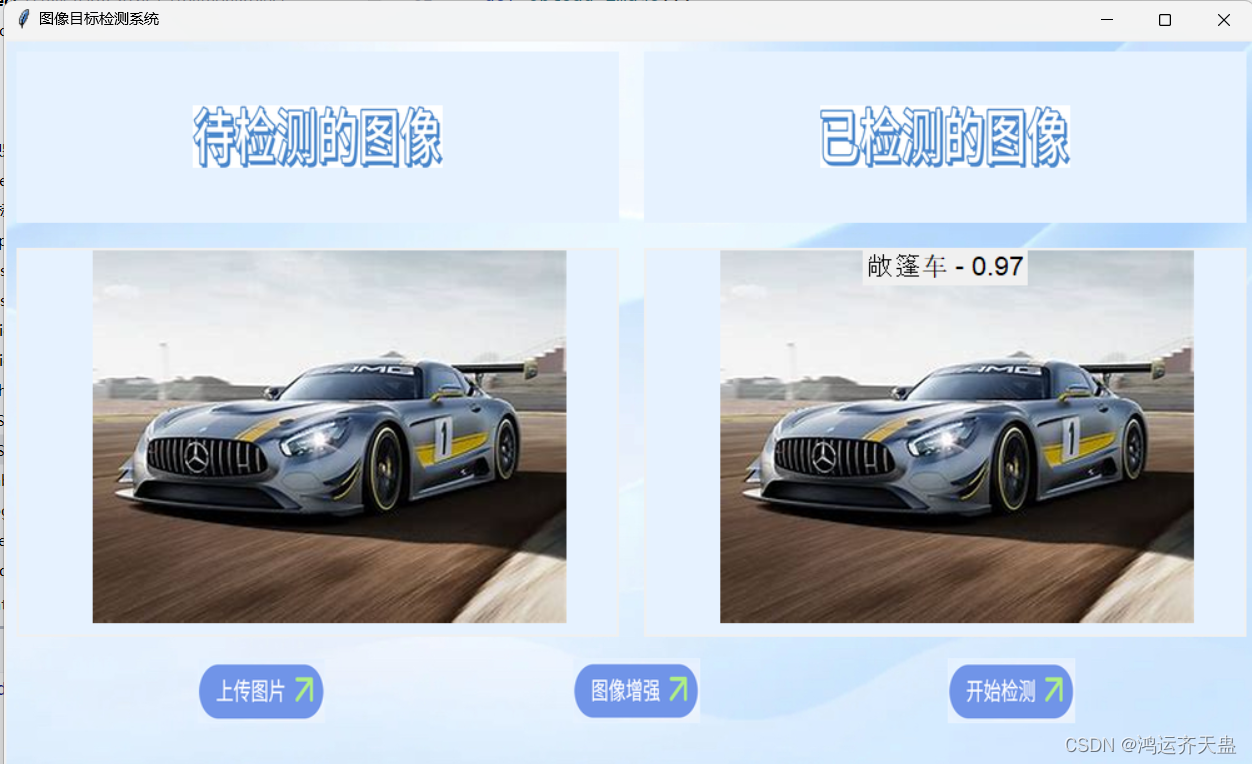
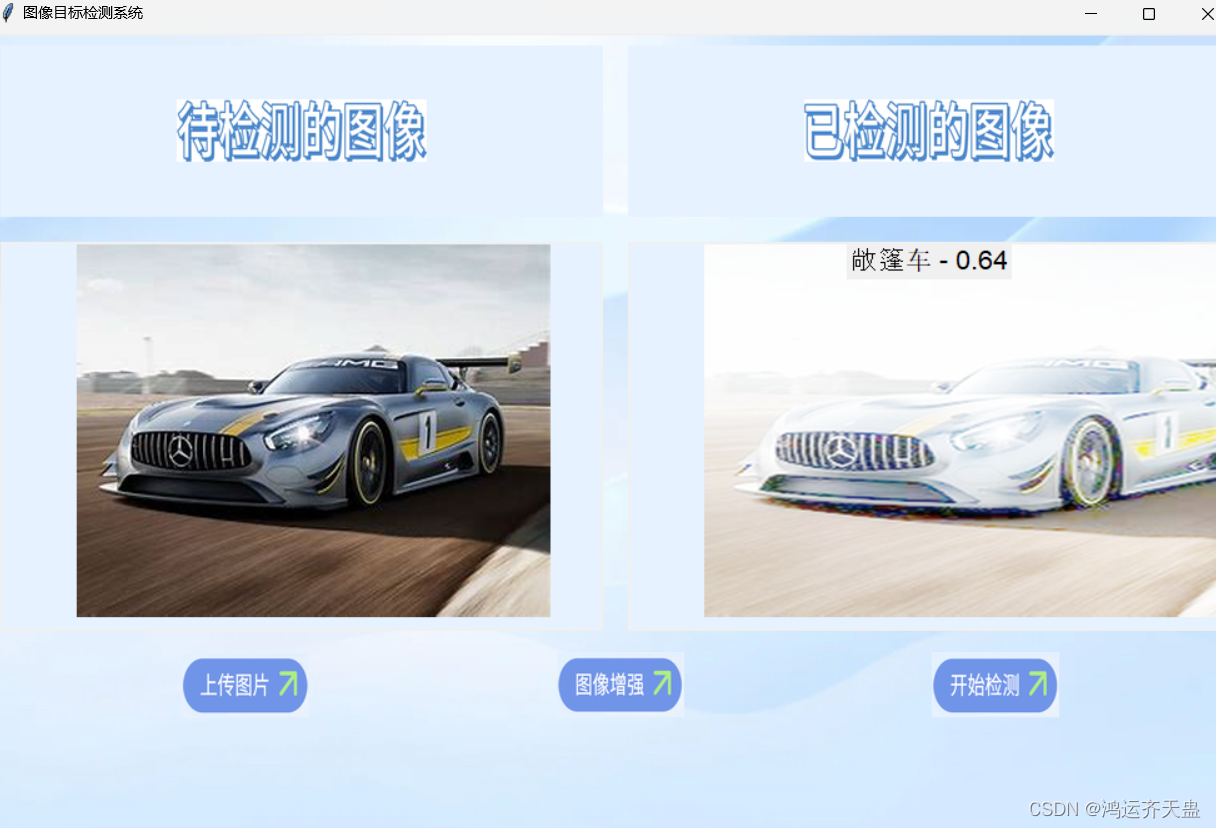
图像增强效果
这里图像增强本应该导致准确率增强,可能代码实现错误,不过不太重要,只是给大家提供思路
相关文章:
汽车识别项目
窗口设计 这里的代码放在py文件最前面或者最后面都无所谓 # 创建主窗口 window tk.Tk() window.title("图像目标检测系统") window.geometry(1000x650) # 设置窗口大小# 创建背景画布并使用grid布局管理器 canvas_background tk.Canvas(window, width1000, height…...

【面试题-012】什么是Spring 它有哪些优势
文章目录 Spring有哪些优势有哪些优势Spring和Springboot区别在 Spring 框架中,什么是AOP核心概念应用场景 Spring有哪些通知类型 Spring 是一个开源的 Java 平台,由 Rod Johnson 创建,用于简化企业级 Java 应用程序的开发。它于 2003 年首次…...

ImageButton src图片会照成内存泄露吗 会使native内存增加吗?
在Android开发中,ImageButton 是用来显示按钮的视图组件,它通常用于显示图标或图片。对于ImageButton使用的src属性(即按钮上的图片)通常不会导致内存泄漏,但是有几种情况可能会导致内存问题: 1. **不正确…...
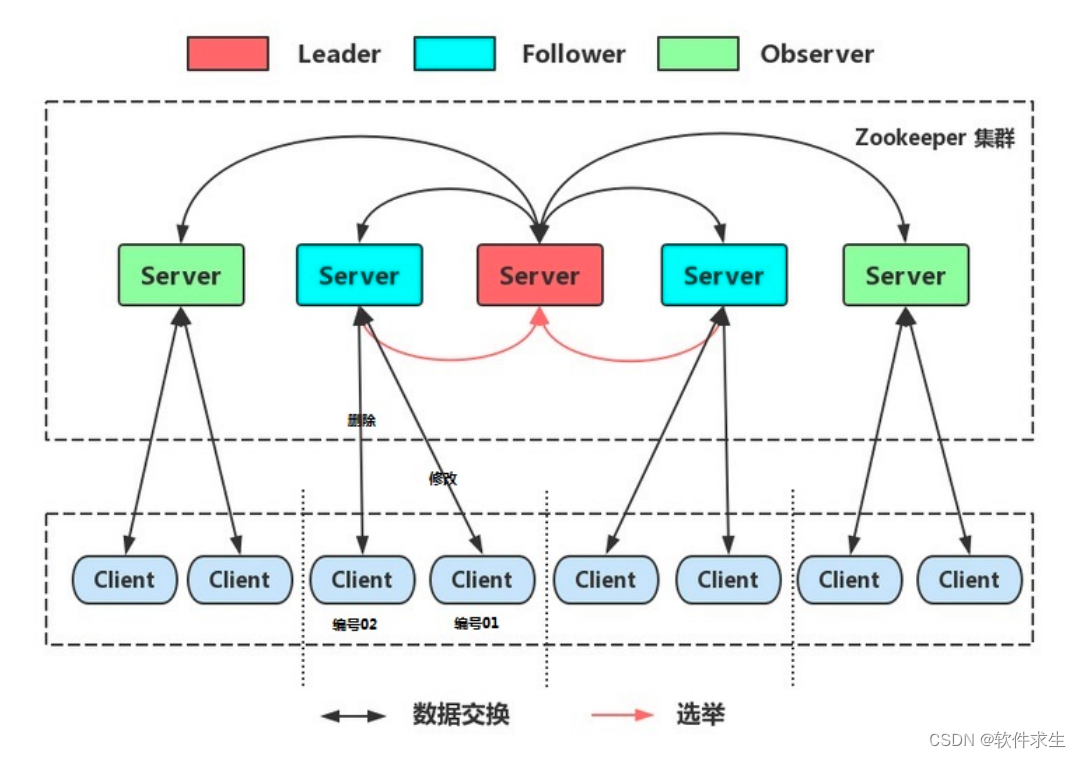
负载均衡与容错性:集群模式在分布式系统中的应用
本文作者:小米,一个热爱技术分享的29岁程序员。如果你喜欢我的文章,欢迎关注我的微信公众号“软件求生”,获取更多技术干货! 大家好,我是小米,一个热爱分享技术的29岁程序员。今天我们来聊一聊分布式系统中的一个重要概念:集群(Cluster)模式。相信很多朋友在日常开发…...
【UE5.1 角色练习】09-物体抬升、抛出技能 - part1
前言 在上一篇(【UE5.1 角色练习】08-传送技能)的基础上继续实现控制物体抬升、抛出的功能。 效果 步骤 一、准备技能动画 1. 在项目设置中新建一个操作映射,这里命名为“Skill_GravityControl”,用按键4触发 2. 通过IK重定向…...
最大的游戏交流社区Steam服务器意外宕机 玩家服务受影响
易采游戏网6月3日消息:众多Steam游戏玩家报告称,他们无法访问Steam平台上的个人资料、好友列表和社区市场等服务。同时,社区的讨论功能也无法正常使用。经过第三方网站SteamDB的确认,,这一现象是由于Steam社区服务器突…...
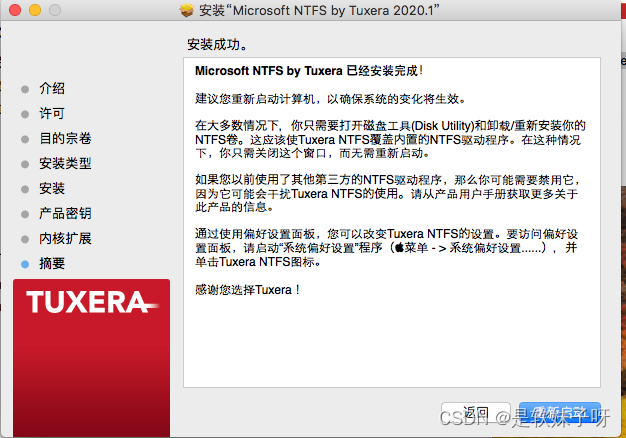
如何手动批准内核扩展 Tuxera NTFS for mac内核扩展需要批准 内核扩展怎么打开
在了解如何手动批准内核扩展之前,我们应该先了解什么叫做内核扩展。内核扩展又被称为KEXT,通过它可以实现macOS系统与软件组件之间的交互,例如磁盘管理、任务管理和内存管理等等。 kext 是内核扩展(Kernel Extension)…...

ffmpeg常用命令
推流 ffmpeg -re -stream_loop -1 -i in.flv -c copy -f flv outurl 推流追加时间戳 ffmpeg -stream_loop -1 -re -i move.flv -vf "settbAVTB,setptstrunc(PTS/1K)*1Kst(1,trunc(RTCTIME/1K))-1K*trunc(ld(1)/1K),drawtextfontfilearial.ttf:text%{localtime}.%{eif\:…...

在MongoDB中,您可以通过以下步骤来创建账号密码,并限制其在特定数据库上的访问权限
在MongoDB中,您可以通过以下步骤来创建账号密码,并限制其在特定数据库上的访问权限: 连接到MongoDB数据库: 使用MongoDB的客户端(如mongo shell或者MongoDB Compass)连接到MongoDB服务器。 切换到admin数…...

前端JS必用工具【js-tool-big-box】学习,检测密码强度
js-tool-big-box 前端工具库,实用的公共方法越来越多了,这一小节,我们带来的是检测密码强度。 我们在日常开发中,为了便于测试,自己总是想一个简单的密码,赶紧输入。但到了正式环境,我们都应该…...

PHP精度处理
一、问题缘由 PHP 服务接收前端传过来的单价(字符串形式)和数量,把单价转成分(单价*100),然后传给下游的 Golang 服务,不过最后从两个服务日志中发现金额相差 1。 以下为前端传的 {"amount": 4,"price": "9.2&qu…...

618电商大战开启!2024淘宝京东618满减规则与优惠力度大比拼
2024年淘宝和京东的618电商大战即将打响。作为一年一度的购物狂欢节日,今年618的满减规则和优惠力度再次成为消费者关注的焦点。在这场激烈的电商角逐中,究竟哪家平台能更胜一筹?让我们一起来揭晓答案! 淘宝京东满减规则大揭秘 淘…...
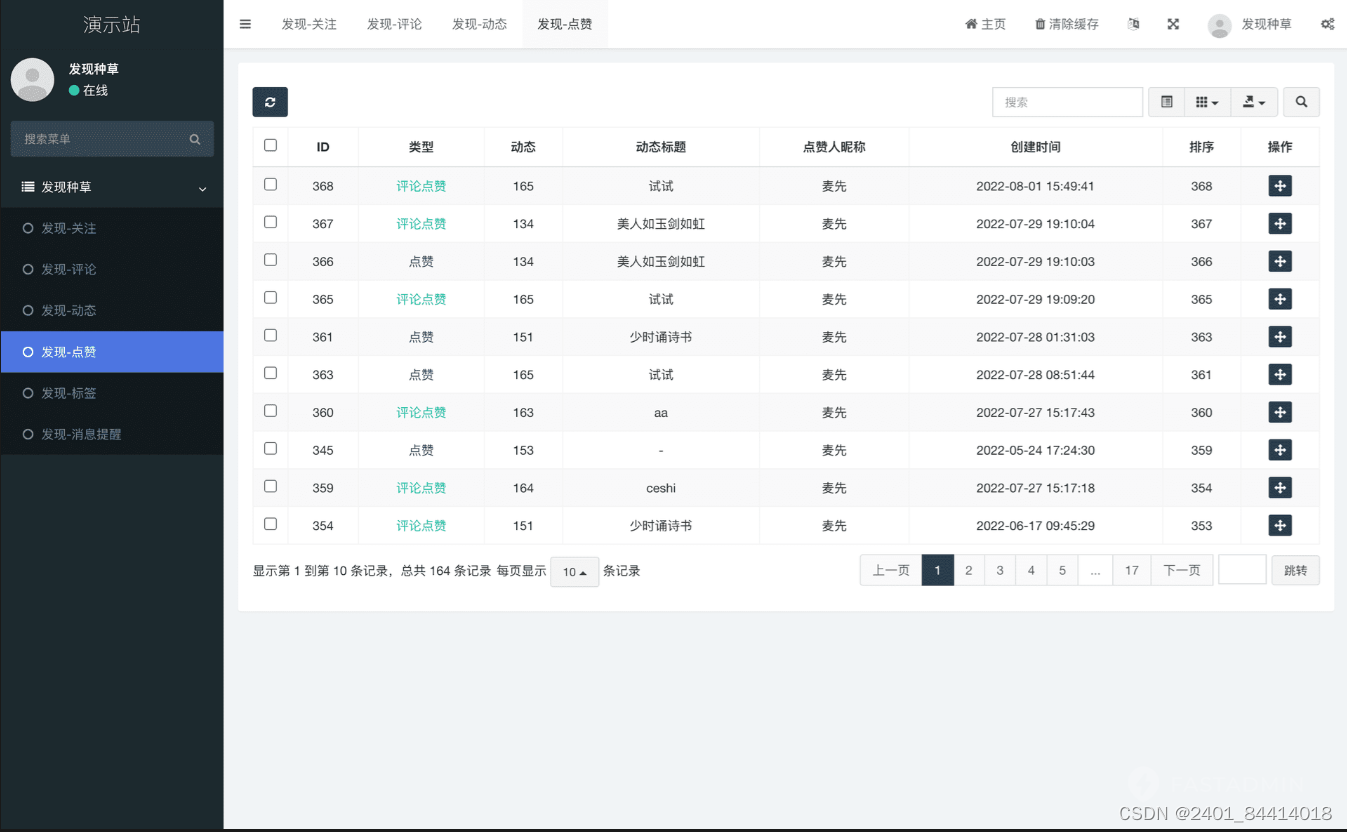
【全开源】种草分享|动态朋友圈|瀑布流|uniapp
一款基于FastadminThinkPHP和Uniapp开发的种草分享评论点赞消息提醒系统,发布动态,分享种草生活,可以收藏关注点赞,消息提醒,同时支持H5/小程序/app多端。 让每一次互动都不再错过🔔 🌱 种草…...

HDTune和CrystalDiskInfo硬盘检测S.M.A.R.T.参数当前值最差值阈值
高亮颜色说明:突出重点 个人觉得,:待核准个人观点是否有误 高亮颜色超链接 文章目录 S.M.A.R.T.监控技术磁盘健康状态监测,硬盘检测硬盘检测工具 HD Tune硬盘检测工具 CrystalDiskInfo 当前值最差值阈值原始值的含义二级标题待补充待补充 开头…...

Homebrew、RVM、ruby、cocoapods
安装Homebrewe 方式1:公司源安装 方式2:国内源安装 /bin/ssh -c “$(curl -fsSL https://gitee.com/cunkai/HomebrewCN/raw/master/Homebrev.sh)” 方式3:官网源安装(有可能443): ruby -e “$(curl -fsSL https://raw.githubusercontent.com/Homebrew/install/master/install)…...

Flutter 中的 SliverConstrainedCrossAxis 小部件:全面指南
Flutter 中的 SliverConstrainedCrossAxis 小部件:全面指南 Flutter 是一个功能强大的 UI 框架,由 Google 开发,允许开发者使用 Dart 语言来构建高性能、美观的跨平台应用。在 Flutter 的丰富组件库中,SliverConstrainedCrossAxi…...

Vue.js:渐进式JavaScript框架-前端开发
1.介绍-What is Vue? An approachable, performant and versatile framework for building web user interfaces. [一个平易近人、高性能和多功能的框架,用于构建 Web 用户界面。] --来自官网Vue.js - The Progressive JavaScript Framework | Vue.js (vuejs.org) …...

代码随想录算法训练营Day55 | 583. 两个字符串的删除操作 72. 编辑距离 编辑距离总结篇
代码随想录算法训练营Day55 | 583. 两个字符串的删除操作 72. 编辑距离 编辑距离总结篇 LeetCode 583. 两个字符串的删除操作 题目链接:LeetCode 583. 两个字符串的删除操作 思路: 分别删除 class Solution { public:int minDistance(string word1, …...

【Python网络爬虫】详解python爬虫中正则表达式、BeautifulSoup和lxml数据解析
🔗 运行环境:PYTHON 🚩 撰写作者:左手の明天 🥇 精选专栏:《python》 🔥 推荐专栏:《算法研究》 #### 防伪水印——左手の明天 #### 💗 大家好🤗ᾑ…...

树莓派串口无法使用(排除硬件错误后)
1、串口 进入/boot文件夹下,打开cmdline.txt文件 cd /boot/sudo vi cmdline.txt 删除下方红框内字段...

别再轮询了!Qt QSerialPort高效读取数据的正确姿势:理解缓冲区与readyRead触发机制
别再轮询了!Qt QSerialPort高效读取数据的正确姿势:理解缓冲区与readyRead触发机制 在嵌入式开发和硬件通信领域,串口通信作为最基础的通信方式之一,其稳定性和效率直接影响整个系统的性能表现。许多开发者在使用Qt的QSerialPort模…...

用Matlab给变形镜建模:从高斯函数到贝塞尔曲线,两种响应函数仿真全流程
用Matlab给变形镜建模:从高斯函数到贝塞尔曲线,两种响应函数仿真全流程 光学系统工程师在设计自适应光学系统时,经常需要精确模拟变形镜的响应特性。这种模拟不仅关系到系统性能预测的准确性,也直接影响控制算法的开发效率。本文将…...

别再只读原始值了!MPU6050数据滤波与姿态解算入门:用STM32实现简易角度估算
从原始数据到稳定姿态:MPU6050滤波与解算实战指南 当你第一次成功读取MPU6050的原始数据时,可能会被那些不断跳动的数值弄得手足无措。这些看似杂乱的数据背后,隐藏着设备在三维空间中的运动秘密。本文将带你超越基础的数据读取,探…...

CANN/asc-devkit SIMT数学函数erfinvf
erfinvf 【免费下载链接】asc-devkit 本项目是CANN 推出的昇腾AI处理器专用的算子程序开发语言,原生支持C和C标准规范,主要由类库和语言扩展层构成,提供多层级API,满足多维场景算子开发诉求。 项目地址: https://gitcode.com/ca…...

dvwa靶场Dom型xss通关
黑盒操作 LOW 一、这是一个选项框内容,发现输入内容会直接改变选项内容,查看代码后发现js代码 // 这是通过字符串拼接创建出页面显示选项 if (document.location.href.indexOf("default") > 0) { // 拼接document.location.href.in…...
)
从靶场到实战:用Vulhub在Docker里一键复现Struts2全系列漏洞(S2-001到S2-053)
从靶场到实战:用Vulhub在Docker里一键复现Struts2全系列漏洞 在安全研究领域,能够快速搭建可复现的漏洞环境是每个从业者的基本功。传统方式需要手动配置Java环境、下载特定版本的Struts2框架、部署Web服务器,整个过程耗时费力且容易出错。而…...

别再死记硬背ELMo、GPT、BERT的区别了!一张图带你搞懂它们的核心差异与适用场景
一图胜千言:ELMo、GPT、BERT技术差异与实战选型指南 刚接触NLP时,我也曾被各种预训练模型绕得头晕眼花——它们看起来都能处理文本,但面试官一问"为什么用BERT不用GPT"就瞬间语塞。直到我把这些模型拆解成汽车零件,才真…...

避坑指南:VMware安装RockyLinux后网络不通、SSH连不上的常见问题排查与修复
Rocky Linux虚拟机网络故障排查实战指南 当你满怀期待地在VMware中安装好Rocky Linux,准备大展拳脚时,却发现网络连接失败、SSH无法访问——这种挫败感我深有体会。本文将带你直击问题核心,用系统化的排查思路解决这些"安装后困境"…...
)
告别FPN信息瓶颈:手把手图解Gold-YOLO的‘聚合-分发’机制(附代码逐行解读)
告别FPN信息瓶颈:手把手图解Gold-YOLO的‘聚合-分发’机制(附代码逐行解读) 在目标检测领域,YOLO系列模型凭借其出色的实时性能一直占据主导地位。然而,随着应用场景的复杂化,传统特征金字塔网络ÿ…...

Linux内核同步机制:从原子操作到RCU的实战指南
1. 项目概述:为什么我们需要同步机制?想象一下,你正在一个繁忙的十字路口指挥交通。如果没有红绿灯和交通规则,车辆和行人随意穿行,结果必然是混乱、拥堵,甚至发生事故。在操作系统的核心——Linux内核中&a…...