配置 HTTP 代理 (HTTP proxy)
配置 HTTP 代理 [HTTP proxy]
- 1. Proxies
- 2. curl
- 2.1. Environment
- 2.2. Proxy protocol prefixes
- 3. Use an HTTP proxy (使用 HTTP 代理)
- 3.1. Using the examples (使用示例)
- 3.1.1. Linux or macOS
- 3.1.2. Windows Command Prompt
- 3.2. Authenticating to a proxy (向代理进行身份验证)
- 3.2.1. Linux or macOS
- 3.2.2. Windows Command Prompt
- 4. 配置 HTTP 代理 (HTTP proxy)
- 4.1. Linux 系统配置 `http_proxy` 和 `https_proxy` 环境变量
- 4.2. Windows 系统配置 `http_proxy` 和 `https_proxy` 环境变量
- 4.2.1. cmd
- 4.2.2. PowerShell
- 5. 为 WSL2 (Windows Subsystem for Linux 2) 配置 HTTP 代理
- 5.1. `wsl --list --verbose`
- 5.2. 在 Windows 系统上配置 Cl* for Windows
- 5.3. 在 WSL2 (Windows Subsystem for Linux 2) 系统上配置
- 5.4. 为 git 设置代理
- References
1. Proxies
https://www.gnu.org/software/wget/manual/html_node/Proxies.html
proxy UK [ˈprɒk.si] US [ˈprɑːk.si]:n. 代理人,代表,代理权,代表权
Proxies are special-purpose HTTP servers designed to transfer data from remote servers to local clients.
Wget supports proxies for both HTTP and FTP retrievals. The standard way to specify proxy location, which Wget recognizes, is using the following environment variables:
http_proxyhttps_proxy
If set, the http_proxy and https_proxy variables should contain the URLs of the proxies for HTTP and HTTPS connections respectively.
ftp_proxy
This variable should contain the URL of the proxy for FTP connections. It is quite common that http_proxy and ftp_proxy are set to the same URL.
no_proxy
This variable should contain a comma-separated list of domain extensions proxy should not be used for. For instance, if the value of no_proxy is ‘.mit.edu’, proxy will not be used to retrieve documents from MIT.
Some proxy servers require authorization to enable you to use them. The authorization consists of username and password, which must be sent by Wget.
You may specify your username and password either through the proxy URL or through the command-line options. Assuming that the company’s proxy is located at ‘proxy.company.com’ at port 8001, a proxy URL location containing authorization data might look like this:
http://hniksic:mypassword@proxy.company.com:8001/
2. curl
https://curl.se/docs/manpage.html
curl is a tool for transferring data from or to a server using URLs. It supports these protocols: DICT, FILE, FTP, FTPS, GOPHER, GOPHERS, HTTP, HTTPS, IMAP, IMAPS, LDAP, LDAPS, MQTT, POP3, POP3S, RTMP, RTMPS, RTSP, SCP, SFTP, SMB, SMBS, SMTP, SMTPS, TELNET, TFTP, WS and WSS.
2.1. Environment
The environment variables can be specified in lower case or upper case. The lower case version has precedence. "http_proxy" is an exception as it is only available in lower case.
环境变量可以以小写或大写形式指定,小写版本优先。"http_proxy" 是个例外,因为它仅以小写形式提供。
precedence UK [ˈpres.ɪ.dəns] US [ˈpres.ə.dens]:n. 优先,优先权
2.2. Proxy protocol prefixes
The proxy string may be specified with a protocol:// prefix to specify alternative proxy protocols.
If no protocol is specified in the proxy string or if the string does not match a supported one, the proxy is treated as an HTTP proxy.
http://
Makes it use it as an HTTP proxy. The default if no scheme prefix is used.
https://
Makes it treated as an HTTPS proxy.
3. Use an HTTP proxy (使用 HTTP 代理)
https://docs.aws.amazon.com/cli/latest/userguide/cli-configure-proxy.html
3.1. Using the examples (使用示例)
The following examples show the environment variable name in all uppercase letters. However, if you specify a variable twice using different cases, the lowercase letters take precedence. We recommend that you define each variable only once to avoid system confusion and unexpected behavior.
以下示例显示了全部使用大写字母的环境变量名称。但是,如果使用不同的大小写指定一个变量两次,则优先使用小写字母。建议您只定义每个变量一次,以避免系统混淆和意外行为。
3.1.1. Linux or macOS
$ export HTTP_PROXY=http://10.15.20.25:1234
$ export HTTP_PROXY=http://proxy.example.com:1234
$ export HTTPS_PROXY=http://10.15.20.25:5678
$ export HTTPS_PROXY=http://proxy.example.com:5678$ export NO_PROXY=169.254.169.254
将 NO_PROXY 环境变量设置为无需代理的主机或域名。
3.1.2. Windows Command Prompt
- To set for current session only (仅为当前会话设置)
Using set to set an environment variable changes the value used until the end of the current command prompt session, or until you set the variable to a different value.
使用 set 设置环境变量会更改使用的值,直到当前命令提示符会话结束,或者直到您将该变量设置为其他值。
C:\> set HTTP_PROXY=http://10.15.20.25:1234
C:\> set HTTP_PROXY=http://proxy.example.com:1234
C:\> set HTTPS_PROXY=http://10.15.20.25:5678
C:\> set HTTPS_PROXY=http://proxy.example.com:5678 C:\> set NO_PROXY=169.254.169.254
- To set for all sessions (为所有会话设置)
C:\> setx HTTP_PROXY http://10.15.20.25:1234
C:\> setx HTTP_PROXY http://proxy.example.com:1234
C:\> setx HTTPS_PROXY http://10.15.20.25:5678
C:\> setx HTTPS_PROXY http://proxy.example.com:5678 C:\> setx NO_PROXY 169.254.169.254
Using setx to set an environment variable changes the value used in both the current command prompt session and all command prompt sessions that you create after running the command. It does not affect other command shells that are already running at the time you run the command.
使用 setx 设置环境变量会更改当前命令提示符会话和运行该命令后创建的所有命令提示符会话中使用的值。它不影响在运行该命令时已经运行的其他命令 shell。
3.2. Authenticating to a proxy (向代理进行身份验证)
The AWS CLI supports HTTP Basic authentication. Specify the username and password in the proxy URL, as follows.
3.2.1. Linux or macOS
$ export HTTP_PROXY=http://username:password@proxy.example.com:1234
$ export HTTPS_PROXY=http://username:password@proxy.example.com:5678
3.2.2. Windows Command Prompt
- To set for current session only (仅为当前会话设置)
Using set to set an environment variable changes the value used until the end of the current command prompt session, or until you set the variable to a different value.
使用 set 设置环境变量会更改使用的值,直到当前命令提示符会话结束,或者直到您将该变量设置为其他值。
C:\> set HTTP_PROXY=http://username:password@proxy.example.com:1234
C:\> set HTTPS_PROXY=http://username:password@proxy.example.com:5678
- To set for all sessions (为所有会话设置)
C:\> setx HTTP_PROXY http://username:password@proxy.example.com:1234
C:\> setx HTTPS_PROXY http://username:password@proxy.example.com:5678
Using setx to set an environment variable changes the value used in both the current command prompt session and all command prompt sessions that you create after running the command. It does not affect other command shells that are already running at the time you run the command.
使用 setx 设置环境变量会更改当前命令提示符会话和运行该命令后创建的所有命令提示符会话中使用的值。它不影响在运行该命令时已经运行的其他命令 shell。
4. 配置 HTTP 代理 (HTTP proxy)
You can configure the HTTP_PROXY and HTTPS_PROXY environment variables with either the DNS domain names or IP addresses and port numbers that your proxy servers use.
使用 HTTP 代理需要配置环境变量 http_proxy 和 https_proxy。
4.1. Linux 系统配置 http_proxy 和 https_proxy 环境变量
ProxyServer 为代理服务器的域名或者 IP,port 为端口号。如果你的代理服务器需要用户名和密码才能访问,需要填写上面的 username 和 password 部分,否则的话,可以省略这两部分。
- 为当前用户临时配置环境变量
export http_proxy="http://username:password@ProxyServer:port"
export https_proxy="https://username:password@ProxyServer:port"export http_proxy="http://ProxyServer:port"
export https_proxy="https://ProxyServer:port"
# With Authentication
export HTTP_PROXY=[username]:[password]@[proxy-web-or-IP-address]:[port-number]
export HTTPS_PROXY=[username]:[password]@[proxy-web-or-IP-address]:[port-number]
export FTP_PROXY=[username]:[password]@ [proxy-web-or-IP-address]:[port-number]
export NO_PROXY=localhost,127.0.0.1# Without Authentication
export HTTP_PROXY=[proxy-web-or-IP-address]:[port-number]
export HTTPS_PROXY=[proxy-web-or-IP-address]:[port-number]
export FTP_PROXY=[proxy-web-or-IP-address]:[port-number]
export NO_PROXY=localhost,127.0.0.1
通过 export 指令临时设置代理:
(base) yongqiang@yongqiang:~$ export http_proxy="http://192.105.9.13:7890"
(base) yongqiang@yongqiang:~$ export https_proxy="https://192.105.9.13:7890"
查看代理:
(base) yongqiang@yongqiang:~$ env | grep -i proxy
https_proxy=https://192.105.9.13:7890
http_proxy=http://192.105.9.13:7890
(base) yongqiang@yongqiang:~$
临时取消代理:
(base) yongqiang@yongqiang:~$ unset http_proxy
(base) yongqiang@yongqiang:~$ unset https_proxy
查看代理:
(base) yongqiang@yongqiang:~$ env | grep -i proxy
(base) yongqiang@yongqiang:~$
测试方法:
wget www.google.com
curl www.google.comwget --proxy http://192.105.9.13:7890 www.google.com
curl --proxy http://192.105.9.13:7890 www.google.com
(base) yongqiang@yongqiang:~$ wget www.google.com
--2024-06-01 23:30:18--  http://www.google.com/
Connecting to 192.105.9.13:7890... connected.
Proxy request sent, awaiting response... 302 Found
Location: http://www.google.com.hk/url?sa=p&hl=zh-CN&pref=hkredirect&pval=yes&q=http://www.google.com.hk/&ust=1717255848963743&usg=AOvVaw3YRiYLmVQtcHhr0aEN_TJG [following]
--2024-06-01 23:30:19--  http://www.google.com.hk/url?sa=p&hl=zh-CN&pref=hkredirect&pval=yes&q=http://www.google.com.hk/&ust=1717255848963743&usg=AOvVaw3YRiYLmVQtcHhr0aEN_TJG
Reusing existing connection to 192.105.9.13:7890.
Proxy request sent, awaiting response... 302 Found
Location: http://www.google.com.hk/ [following]
--2024-06-01 23:30:19--  http://www.google.com.hk/
Reusing existing connection to 192.105.9.13:7890.
Proxy request sent, awaiting response... 200 OK
Length: unspecified [text/html]
Saving to: ‘index.html.1’index.html.1                           [ <=>                                                          ]  19.33K  --.-KB/s    in 0.01s2024-06-01 23:30:20 (1.98 MB/s) - ‘index.html.1’ saved [19794](base) yongqiang@yongqiang:~$
(base) yongqiang@yongqiang:~$ curl www.google.com
<HTML><HEAD><meta http-equiv="content-type" content="text/html;charset=utf-8">
<TITLE>302 Moved</TITLE></HEAD><BODY>
<H1>302 Moved</H1>
The document has moved
<A HREF="http://www.google.com.hk/url?sa=p&hl=zh-CN&pref=hkredirect&pval=yes&q=http://www.google.com.hk/&ust=1717294991706701&usg=AOvVaw2Ej1rgvrxOVAsV8uF9jM2M">here</A>.
</BODY></HTML>
(base) yongqiang@yongqiang:~$
- 为当前用户永久配置环境变量
在 ~/.bashrc 文件中添加如下内容,可将 http_proxy 和 https_proxy 永久配置在当前用户的环境变量中。
export http_proxy="http://username:password@ProxyServer:port"
export https_proxy="https://username:password@ProxyServer:port"export http_proxy="http://ProxyServer:port"
export https_proxy="https://ProxyServer:port"
# With Authentication
export HTTP_PROXY=[username]:[password]@[proxy-web-or-IP-address]:[port-number]
export HTTPS_PROXY=[username]:[password]@[proxy-web-or-IP-address]:[port-number]
export FTP_PROXY=[username]:[password]@ [proxy-web-or-IP-address]:[port-number]
export NO_PROXY=localhost,127.0.0.1"# Without Authentication
export HTTP_PROXY=[proxy-web-or-IP-address]:[port-number]
export HTTPS_PROXY=[proxy-web-or-IP-address]:[port-number]
export FTP_PROXY=[proxy-web-or-IP-address]:[port-number]
export NO_PROXY=localhost,127.0.0.1
永久环境变量配置完毕后,注销并重新登录,配置生效。
To force apply your new proxy settings in the current Terminal session, execute the source command:
source ~/.bashrc
- 为所有用户永久配置环境变量
在 /etc/environment 或 /etc/profile 文件中添加如下内容,可将 http_proxy 和 https_proxy 永久配置在所有用户的环境变量中。
export http_proxy="http://username:password@ProxyServer:port"
export https_proxy="https://username:password@ProxyServer:port"export http_proxy="http://ProxyServer:port"
export https_proxy="https://ProxyServer:port"
# With Authentication
export HTTP_PROXY=[username]:[password]@[proxy-web-or-IP-address]:[port-number]
export HTTPS_PROXY=[username]:[password]@[proxy-web-or-IP-address]:[port-number]
export FTP_PROXY=[username]:[password]@ [proxy-web-or-IP-address]:[port-number]
export NO_PROXY=localhost,127.0.0.1"# Without Authentication
export HTTP_PROXY=[proxy-web-or-IP-address]:[port-number]
export HTTPS_PROXY=[proxy-web-or-IP-address]:[port-number]
export FTP_PROXY=[proxy-web-or-IP-address]:[port-number]
export NO_PROXY=localhost,127.0.0.1
永久环境变量配置完毕后,注销并重新登录,配置生效。
To force apply your new proxy settings in the current Terminal session, execute the source command:
source /etc/profile
4.2. Windows 系统配置 http_proxy 和 https_proxy 环境变量
4.2.1. cmd
ProxyServer 为代理服务器的域名或者 IP,port 为端口号。如果你的代理服务器需要用户名和密码才能访问,需要填写上面的 username 和 password 部分,否则的话,可以省略这两部分。
- 临时环境变量
set http_proxy=http://username:password@ProxyServer:port
set https_proxy=https://username:password@ProxyServer:portset http_proxy=http://ProxyServer:port
set https_proxy=https://ProxyServer:port
- 永久环境变量
将 http_proxy 和 https_proxy 永久配置在当前用户的环境变量中。
setx "http_proxy" "http://username:password@ProxyServer:port"
setx "https_proxy" "https://username:password@ProxyServer:port"setx "http_proxy" "http://ProxyServer:port"
setx "https_proxy" "https://ProxyServer:port"
永久环境变量配置完毕后,将在新打开的终端中生效,当前终端不会立即生效。
4.2.2. PowerShell
ProxyServer 为代理服务器的域名或者 IP,port 为端口号。如果你的代理服务器需要用户名和密码才能访问,需要填写上面的 username 和 password 部分,否则的话,可以省略这两部分。
- 临时环境变量
$env:http_proxy="http://username:password@ProxyServer:port"
$env:https_proxy="https://username:password@ProxyServer:port"$env:http_proxy="http://ProxyServer:port"
$env:https_proxy="https://ProxyServer:port"
- 永久环境变量
将 http_proxy 和 https_proxy 永久配置在当前用户的环境变量中。
[environment]::SetEnvironmentvariable("http_proxy", "http://username:password@ProxyServer:port", "User")
[environment]::SetEnvironmentvariable("https_proxy", "https://username:password@ProxyServer:port", "User")[environment]::SetEnvironmentvariable("http_proxy", "http://ProxyServer:port", "User")
[environment]::SetEnvironmentvariable("https_proxy", "https://ProxyServer:port", "User")
永久环境变量配置完毕后,将在新打开的终端中生效,当前终端不会立即生效。
5. 为 WSL2 (Windows Subsystem for Linux 2) 配置 HTTP 代理
5.1. wsl --list --verbose
C:\Users\cheng>wsl --list --verboseNAME            STATE           VERSION
* Ubuntu-20.04    Running         2C:\Users\cheng>
5.2. 在 Windows 系统上配置 Cl* for Windows
Cl* for Windows Download - Cl*.for.Windows-0.20.39-win.7z
E:\software\Cl*.for.Windows-0.20.39-win\Cl* for Windows.exe
- General
允许局域网代理 Allow LAN

在 Gh* 控制面板里点击左侧导航栏手机代理,找到 Cl* for Windows 订阅地址并点击复制。

- Profiles
在 Profiles 页面顶部,粘贴 Cl* 配置订阅链接,随后点击 Download 下载配置文件。下载成功后,Cl* for Windows 将自动切换至下载的配置文件。

- Proxies
切换代理模式为规则 (Rule)。
全局 (Global):所有请求直接发往代理服务器,代理所有流量
规则 (Rule):所有请求根据配置文件规则进行分流,只代理国外流量
直连 (Direct):所有请求直接发往目的地,不代理任何流量

5.3. 在 WSL2 (Windows Subsystem for Linux 2) 系统上配置
通过 export 指令临时设置代理:
(base) yongqiang@yongqiang:~$ export http_proxy="http://192.105.9.13:7890"
(base) yongqiang@yongqiang:~$ export https_proxy="https://192.105.9.13:7890"
查看代理:
(base) yongqiang@yongqiang:~$ env | grep -i proxy
https_proxy=https://192.105.9.13:7890
http_proxy=http://192.105.9.13:7890
(base) yongqiang@yongqiang:~$
测试方法:
wget www.google.com
curl www.google.comwget --proxy http://192.105.9.13:7890 www.google.com
curl --proxy http://192.105.9.13:7890 www.google.com
5.4. 为 git 设置代理
临时设置 git 代理:
# Without Authentication
git config --global http.proxy http://192.105.9.13:7890
git config --global https.proxy https://192.105.9.13:7890# With Authentication
git config --global http.proxy http://username:password@192.105.9.13:7890
git config --global https.proxy https://username:password@192.105.9.13:7890
取消 git 代理:
git config --global --unset http.proxy
git config --global --unset https.proxy
git 的任何全局设置都可以用 git config --global --unset * 来取消。
查看 git 代理:
git config --global --get http.proxy
git config --global --get https.proxy
查看 git 全局设置:
git config --global -l
查看 git 的全局设置。如果设置 git 代理成功,则列表输出会有以 http.proxy= and https.proxy= 开头的行。如果取消 git 代理成功,则以 http.proxy= and https.proxy= 开头的行将不会出现在列表输出中。
使用以下命令查看并修改 git 的配置,git 的默认编辑器会打开 ~/.gitconfig 文件。
git config --global --edit
(base) yongqiang@yongqiang:~$ git config --global http.proxy http://192.105.9.13:7890
(base) yongqiang@yongqiang:~$ git config --global https.proxy https://192.105.9.13:7890
(base) yongqiang@yongqiang:~$
(base) yongqiang@yongqiang:~$ git config --global -l
user.email=***@163.com
user.name=***@163.com
core.editor=vim
filter.lfs.clean=git-lfs clean -- %f
filter.lfs.smudge=git-lfs smudge -- %f
filter.lfs.process=git-lfs filter-process
filter.lfs.required=true
https.proxy=https://192.105.9.13:7890
http.proxy=http://192.105.9.13:7890
(base) yongqiang@yongqiang:~$
References
[1] Yongqiang Cheng, https://yongqiang.blog.csdn.net/
[2] 配置 HTTP 代理, https://support.huaweicloud.com/usermanual-hcli/hcli_22_001.html
[3] Use an HTTP proxy, https://docs.aws.amazon.com/cli/latest/userguide/cli-configure-proxy.html
[4] Define proxy settings, https://help.ubuntu.com/stable/ubuntu-help/net-proxy.html.en
相关文章:
配置 HTTP 代理 (HTTP proxy)
配置 HTTP 代理 [HTTP proxy] 1. Proxies2. curl2.1. Environment2.2. Proxy protocol prefixes 3. Use an HTTP proxy (使用 HTTP 代理)3.1. Using the examples (使用示例)3.1.1. Linux or macOS3.1.2. Windows Command Prompt 3.2. Authenticating to a proxy (向代理进行身…...

mysql binlog查看指定数据库
1.mysql binlog查看指定数据库的方法 MySQL 的 binlog(二进制日志)主要记录了数据库上执行的所有更改数据的 SQL 语句,包括数据的插入、更新和删除等操作。但直接查看 binlog 并不直观,因为它是以二进制格式存储的。为了查看 bin…...
React + SpringBoot开发用户中心管理系统
用户中心项目搭建笔记 技术栈 前端技术栈 “react”: “^18.2.0”,ant-design-pro 后端技术栈 SpringBoot 2.6.x 项目源码地址 https://gitee.com/szxio/user-center 前端项目搭建 快速搭建一个后端管理系统项目框架 初始化 antDesignPro 官网: https://…...
移动机器人定位与导航实训记录
本次实训主要学习ros-tf的使用、slam使用、机器人自主导航,我先简单发出来,等我整理完再重新编辑一边。...
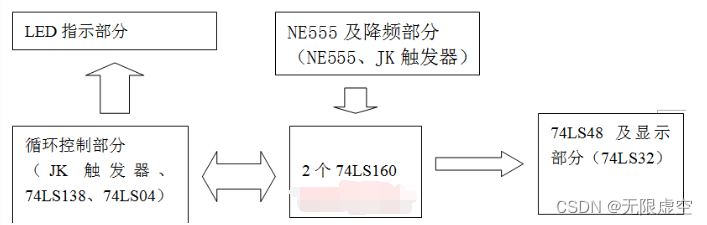
彩灯控制器设计 74ls160+ne555实现
一、选题背景 数字电子技术在我们生活中的应用非常之广泛,不论是在各个方面都会涉及到它,小到家用电器的自动控制,大到神舟九号和天空一号航天器的设计,都无可避免的要运用它。并且鉴于以理论推动实践及理论实践相结合为指导思想,特此用我们所学的理论知识来实践这次课程设…...

Windows API 速查
Windows API 函数大全 (推荐):https://blog.csdn.net/xiao_yi_xiao/article/details/121604742Windows API 在线参考手册:http://www.office-cn.net/t/api/index.html?web.htmWindows 开发文档 (官方):https://learn.microsoft.com/zh-cn/wi…...
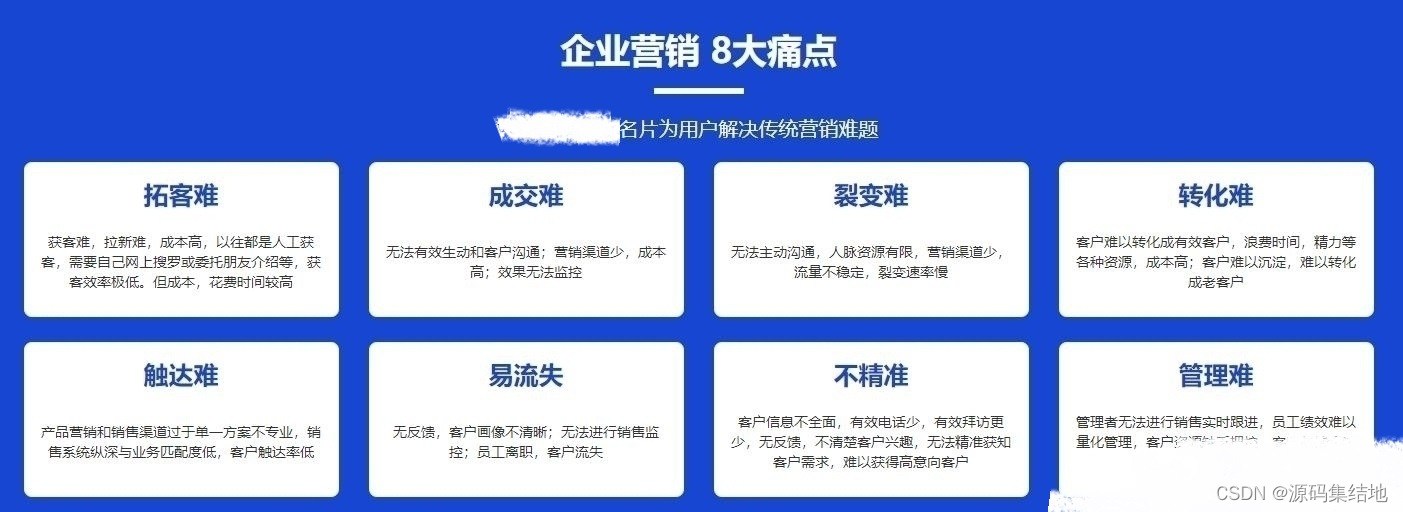
智能名片小程序源码系统平台版 人人可创建属于自己的名片 前后端分离 带完整的源代码以及搭建教程
系统概述 智能名片小程序源码系统平台版是一款基于微信小程序的个性化名片搭建平台。该平台采用前后端分离的设计架构,前端提供丰富的界面元素和灵活的布局方式,后端则提供强大的数据支持和功能扩展能力。用户无需具备专业的编程知识,只需按…...
香橙派OrangePI AiPro测评 【运行qt,编解码,xfreeRDP】
实物 为AI而生 打开盒子 配置 扛把子的 作为业界首款基于昇腾深度研发的AI开发板,Orange Pi AIpro无论在外观上、性能上还是技术服务支持上都非常优秀。采用昇腾AI技术路线,集成图形处理器,拥有8GB/16GB LPDDR4X,可以外接32…...
重生之我要精通JAVA--第七周笔记
文章目录 IO流字符流字符流原理解析flush和close方法 文件拷贝代码文件加密解密修改文件中的数据 缓冲流字节缓冲流字符缓冲流例题 转换流序列化流序列化流/对象操作输出流 反序列化流序列化流/反序列化流的细节汇总打印流字节打印流字符打印流 解压缩流压缩流Commons-io常见方…...
MySQL—函数—数值函数(基础)
一、引言 首先了解一下常见的数值函数哪些?并且直到它们的作用,并且演示这些函数的使用。 二、数值函数 常见的数值函数如下: 注意: 1、ceil(x)、floor(x) :向上、向下取整。 2、mod(x,y):模运算&#x…...

fintuning chatglm3
chatglm3介绍 ChatGLM3-6B 是 ChatGLM 系列最新一代的开源模型,在保留了前两代模型对话流畅、部署门槛低等众多优秀特性的基础上,ChatGLM3-6B 引入了如下特性: 更强大的基础模型: ChatGLM3-6B 的基础模型 ChatGLM3-6B-Base 采用…...
)
草台班子啊草台班子:共享电源导致的BUG(供电不足)
某日吧(其实就是今日,不过什么时候我又删帖重发也不一定啊),下工厂干活,机器里面没多的插座(其实一个插座都没有,但是有一个24V电源的的设备),于是带队的下令并着接&…...

java递归计算文件夹和文件大小
背景 背景发现电脑c盘占用过高,然而我却不清楚是哪些文件占用了磁盘空间,于是我希望用程序来帮我完成这件事。小插曲:开始的时候,我使用python来做的,结果发现效率实在是太低,最后用java重写了一波。有需要的同学可以拿去修改一些。 代码 import java.io.File; import ja…...

硬币检测电路设计
一、来源:凡亿教育 第一场:硬币检测装置原理分析、电路设计以及器件选型_哔哩哔哩_bilibilihttps://www.bilibili.com/video/BV1Zh4y1V7Px/?p1&vd_source43eb1cb50ad3175d7f3b9385905cd88f 二、开发软件:KEIL MDK 三、主控芯片&#…...

3.基础光照
从宏观上讲渲染包含了两大部分:决定一个像素的可见性,决定一个像素的光照计算 而光照模型就是用于决定在一个像素上决定怎样的渲染光照计算。 一、我们是如何看到这个世界的 1.光源 实时渲染中,我们通常把光源当成一个没有体积的点&#…...
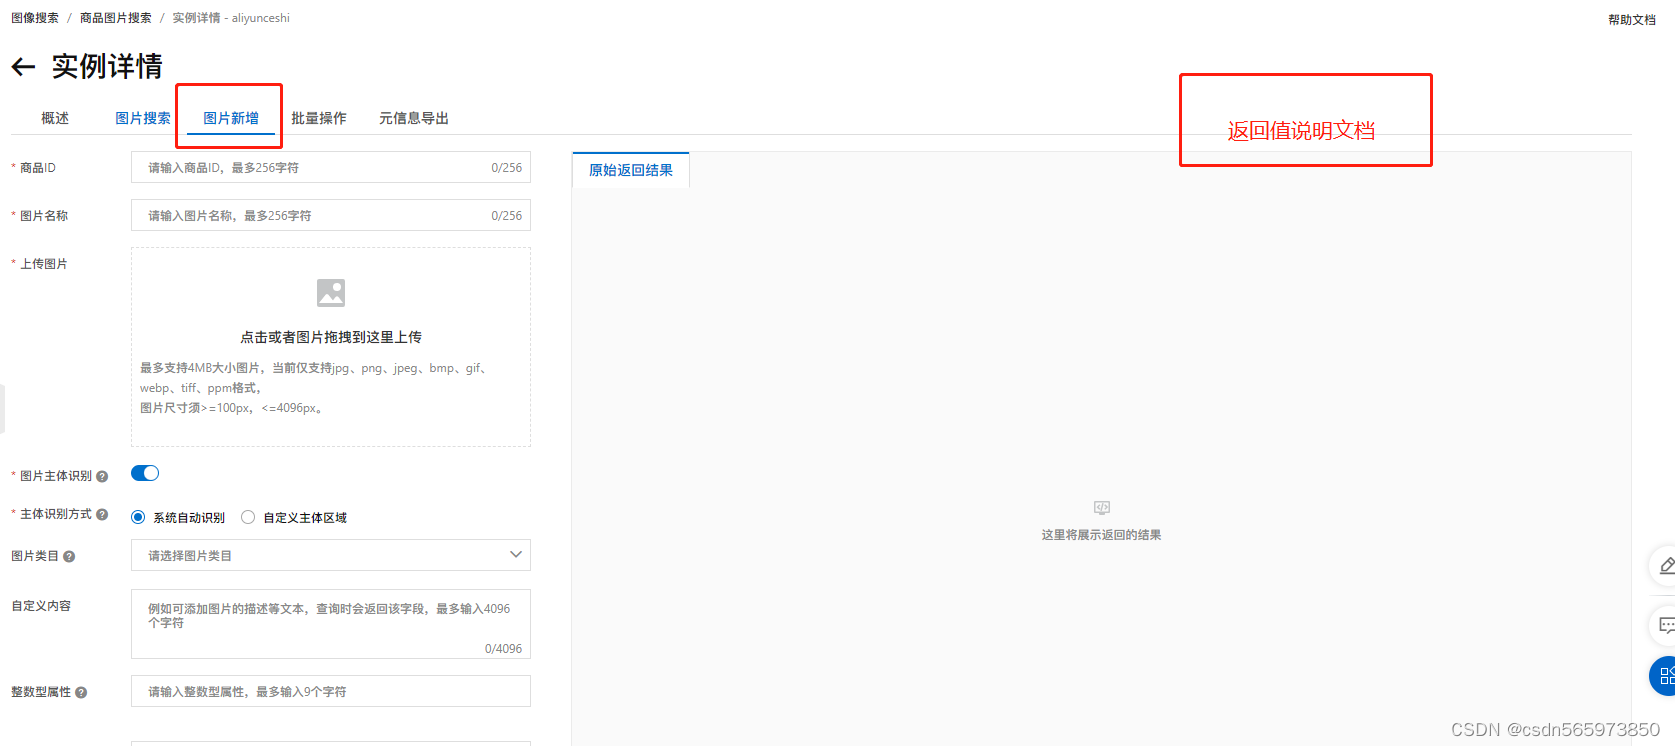
Image Search-这是你的图像搜索
Image Search-这是你的图像搜索 什么是图像搜索图像搜索开通图像搜索商品图片搜索图片搜索图片新增批量操作OSS-创建bucket上传文件创建increment.meta并上传元信息导出 体验感受 什么是图像搜索 在接触一个新的产品时,我们首先要知道这款产品是什么?那…...

对GPT-4o的评价:技术革新与未来展望
目录 引言一、GPT-4o的技术背景1.1 GPT系列的发展历程1.2 GPT-4o的技术特点 二、版本间的对比分析2.1 GPT-3与GPT-4的对比2.2 GPT-4与GPT-4o的对比 三、GPT-4o的技术能力3.1 自然语言处理3.2 多模态处理3.3 任务定制化 四、个人整体感受4.1 交互体验4.2 应用场景4.3 未来展望 五…...

【TB作品】msp430f5529单片机,dht22,烟雾传感器
功能 //硬件:msp430f5529、dht22、LCD1602、蜂鸣器、烟雾传感器、蓝牙模块。 //功能:读取温湿度、烟雾浓度显示到屏幕; //按键调节三个报警数值; //温度、湿度、烟雾浓度,任意一个大于报警数值就蜂鸣器报警࿱…...
uni-app全局弹窗的实现方案
背景 为了解决uni-app 任意位置出现弹窗 解决方案 一、最初方案 受限于uni-app 调用组件需要每个页面都引入注册才可以使用,此方案繁琐,每个页面都要写侵入性比较强 二、改进方案 app端:新建一个页面进行跳转,可以实现伪弹窗…...
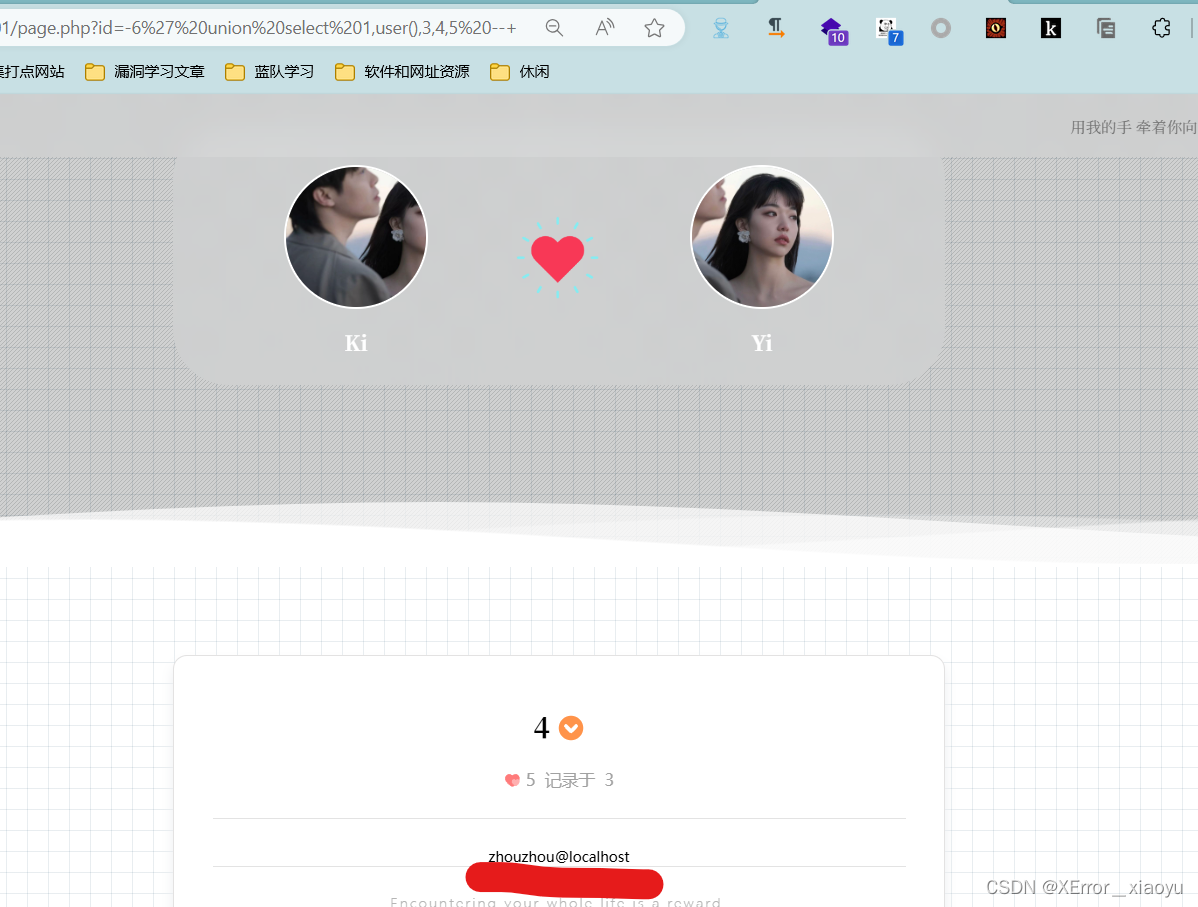
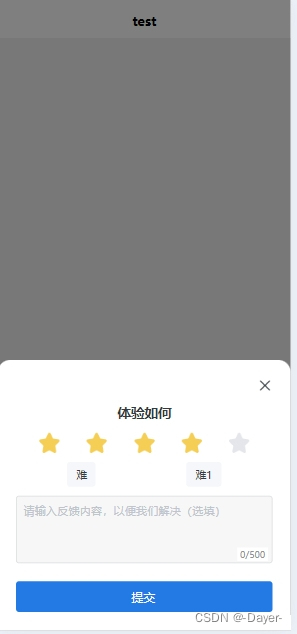
Love-Yi情侣网站3.0存在SQL注入漏洞
目录 1. 前言 2. 网站简介 3. 寻找特征点 3.1 第一次尝试 3.2 第二次尝试 4.资产搜索 5.漏洞复现 5.1 寻找漏洞点 5.2 进行进一步测试 5.2.1 手动测试 1.寻找字段 2.寻找回显位 3.查询当前用户 5.2.2 sqlmap去跑 6.总结 1. 前言 朋友说自己建了一个情侣网站,看到…...

从游戏地图切割到3D模型生成:凸多边形三角剖分在Unity/C++中的实战应用
从游戏地图切割到3D模型生成:凸多边形三角剖分在Unity/C中的实战应用 在游戏开发中,我们经常需要处理复杂的几何形状。无论是为开放世界游戏创建导航网格,还是为3D模型生成优化的三角面片,凸多边形的三角剖分都是核心技能之一。不…...

CANN/asc-devkit __hgtux2函数
__hgtux2 【免费下载链接】asc-devkit 本项目是CANN 推出的昇腾AI处理器专用的算子程序开发语言,原生支持C和C标准规范,主要由类库和语言扩展层构成,提供多层级API,满足多维场景算子开发诉求。 项目地址: https://gitcode.com/c…...

如何判断杉木桩品牌的选型标准?
开篇即明:本文仅输出选型方法,不推荐任何具体产品。杉木桩作为园林、水利、建筑等领域的常用材料,其质量直接关系工程安全与寿命。从业十余年,我始终认为:选型需回归标准,而非品牌名称。以下从四个核心维度…...

甲级钢制隔热平开防火窗:技术参数、结构工艺与工程应用解析
一、产品概述甲级钢制隔热平开防火窗严格依照国家消防标准制造,采用加厚冷轧镀锌钢板打造框架,搭配防火填充材料、隔热防火玻璃与专用密封配件,防火隔热、密闭性强,耐用抗腐蚀。相较于低等级防火窗,本品耐火隔热性能更…...

墨水屏高效开发:架构、开源库与实战优化指南
1. 项目概述:为什么墨水屏开发值得深挖?如果你接触过电子墨水屏,第一印象可能是“反应慢”、“刷新有残影”、“只能显示黑白”。确实,相比我们手机、电脑上那些流光溢彩的LCD或OLED屏幕,墨水屏在响应速度和色彩表现上…...

C# 零基础到精通教程 - 第六章:方法——让代码“模块化“
6.1 为什么需要方法?6.1.1 没有方法的问题csharp// 没有方法:代码重复、臃肿、难以维护 static void Main() {// 第一次计算两个数的和int a1 10, b1 20;int sum1 a1 b1;Console.WriteLine($"{a1} {b1} {sum1}");// 第二次计算两个数的和…...

从账单明细看 Taotoken 按 Token 计费模式带来的成本控制优势
🚀 告别海外账号与网络限制!稳定直连全球优质大模型,限时半价接入中。 👉 点击领取海量免费额度 从账单明细看 Taotoken 按 Token 计费模式带来的成本控制优势 1. 成本感知的起点:账单明细结构 对于使用大模型 API 的…...

告别卡顿!用华为云ECS搭建eNSP Pro大型网络实验的保姆级避坑指南
华为云ECS部署eNSP Pro全流程性能优化实战 当你在本地PC上尝试运行包含20台NE路由器的复杂拓扑时,风扇狂转的噪音和逐渐卡死的界面是否让你抓狂?作为一位曾经被32GB内存工作站折磨过的网络工程师,我完全理解这种痛苦。直到发现华为云ECS这个&…...

别再死磕开发了!网络安全职业前景全面解析:薪资水平、就业方向与学习路线图
别,你可千万别后悔!!! 首先,你学网安这个选择没有一点毛病,作为一个前辈,我可以明明白白的告诉你,近年程序员就业情况当中,网安是最舒服的一批,所以我看到你说…...

Lawnicons入门教程:从下载安装到启用主题化图标的完整流程
Lawnicons入门教程:从下载安装到启用主题化图标的完整流程 【免费下载链接】lawnicons Monochrome outlined brand icons for Android launchers. 项目地址: https://gitcode.com/gh_mirrors/la/lawnicons Lawnicons是一款由Lawnchair团队开发并由社区支持的…...