c#控件笔记
c# PictureBox在工具箱的哪个位置
在 Visual Studio 的工具箱中,PictureBox 控件位于 “Common Controls” 部分。要找到 PictureBox,请按照以下步骤操作:
- 打开 Visual Studio 并加载您的项目。
- 确保已经打开了设计器视图(即您的窗体设计器)。
- 在 Visual Studio 的右侧,找到工具箱窗口。如果工具箱窗口未显示,可以通过选择菜单栏中的
View > Toolbox打开它。 - 在工具箱窗口中,展开
Common Controls部分,您应该能在其中找到PictureBox控件。
将 PictureBox 拖动到您的窗体上,即可在设计器中使用它。
c# PictureBox设置白色边框和左上角添加文字
在 C# 的 Windows Forms 中,你可以通过在 PictureBox 控件上绘制自定义边框和文本来实现这些效果。下面是一个示例代码,展示如何在 PictureBox 控件上设置白色边框,并在左上角添加文字。
示例代码
using System;
using System.Drawing;
using System.Windows.Forms;public class CustomPictureBox : PictureBox
{private string _cornerText = "Sample Text";private Font _cornerFont = new Font("Arial", 10);private Color _borderColor = Color.White;private int _borderWidth = 2;public string CornerText{get { return _cornerText; }set { _cornerText = value; Invalidate(); }}public Font CornerFont{get { return _cornerFont; }set { _cornerFont = value; Invalidate(); }}public Color BorderColor{get { return _borderColor; }set { _borderColor = value; Invalidate(); }}public int BorderWidth{get { return _borderWidth; }set { _borderWidth = value; Invalidate(); }}protected override void OnPaint(PaintEventArgs pe){base.OnPaint(pe);// Draw the white borderusing (Pen pen = new Pen(_borderColor, _borderWidth)){pe.Graphics.DrawRectangle(pen, 0, 0, this.Width - 1, this.Height - 1);}// Draw the text in the top left cornerusing (Brush brush = new SolidBrush(this.ForeColor)){pe.Graphics.DrawString(_cornerText, _cornerFont, brush, new PointF(5, 5));}}
}public class MainForm : Form
{private CustomPictureBox customPictureBox;public MainForm(){customPictureBox = new CustomPictureBox{Image = Image.FromFile("your_image_path_here.jpg"), // Set your image pathSizeMode = PictureBoxSizeMode.StretchImage,CornerText = "Your Text",CornerFont = new Font("Arial", 12, FontStyle.Bold),BorderColor = Color.White,BorderWidth = 3,Dock = DockStyle.Fill};this.Controls.Add(customPictureBox);this.Text = "Custom PictureBox Example";this.Size = new Size(800, 600);}[STAThread]public static void Main(){Application.EnableVisualStyles();Application.SetCompatibleTextRenderingDefault(false);Application.Run(new MainForm());}
}
代码说明
-
CustomPictureBox 类:
- 继承自
PictureBox控件。 - 新增了四个属性:
CornerText、CornerFont、BorderColor和BorderWidth,分别用于设置左上角的文字、文字的字体、边框颜色和边框宽度。 - 重写了
OnPaint方法,先调用基类的OnPaint方法,然后绘制白色边框和左上角的文字。
- 继承自
-
MainForm 类:
- 创建了一个
CustomPictureBox实例并设置其属性。 - 将
CustomPictureBox添加到窗体的控件集合中,并设置窗体的属性。
- 创建了一个
-
Main 方法:
- 配置应用程序的启动选项,并运行主窗体。
使用说明
- 替换
"your_image_path_here.jpg"为你的图片路径。 - 可以根据需要调整
CornerText、CornerFont、BorderColor和BorderWidth属性,以适应你的需求。
这个示例展示了如何自定义 PictureBox 控件,以便在图像上绘制边框和文字。
不自定义 直接添加
如果不想自定义控件,只是简单地在 PictureBox 上添加白色边框和左上角的文字,可以使用 Label 控件来实现这一效果。下面是一个示例,展示如何在 PictureBox 上添加白色边框,并在左上角添加一个 Label 显示文字。
示例代码
using System;
using System.Drawing;
using System.Windows.Forms;public class MainForm : Form
{private PictureBox pictureBox;private Label label;public MainForm(){// Initialize PictureBoxpictureBox = new PictureBox{Image = Image.FromFile("your_image_path_here.jpg"), // Set your image pathSizeMode = PictureBoxSizeMode.StretchImage,BorderStyle = BorderStyle.FixedSingle, // White borderDock = DockStyle.Fill};// Initialize Labellabel = new Label{Text = "Your Text",ForeColor = Color.White,BackColor = Color.Transparent,Font = new Font("Arial", 12, FontStyle.Bold),AutoSize = true,Location = new Point(10, 10) // Position in the top-left corner};// Add Label to PictureBoxpictureBox.Controls.Add(label);// Add PictureBox to Formthis.Controls.Add(pictureBox);this.Text = "PictureBox with Label Example";this.Size = new Size(800, 600);}[STAThread]public static void Main(){Application.EnableVisualStyles();Application.SetCompatibleTextRenderingDefault(false);Application.Run(new MainForm());}
}
-
PictureBox:
- 创建
PictureBox控件,并设置其Image、SizeMode和BorderStyle属性。这里使用了BorderStyle.FixedSingle来添加白色边框。
- 创建
-
Label:
- 创建
Label控件,并设置其Text、ForeColor(文字颜色为白色)、BackColor(背景颜色为透明)、Font和AutoSize属性。 - 使用
Location属性将Label控件定位在PictureBox的左上角。
- 创建
-
添加控件:
- 将
Label控件添加到PictureBox控件的Controls集合中。 - 将
PictureBox控件添加到窗体的Controls集合中。
- 将
-
Main 方法:
- 配置应用程序的启动选项,并运行主窗体。
使用说明
- 替换
"your_image_path_here.jpg"为你的图片路径。 - 根据需要调整
Label的Text、Font和Location属性,以适应你的需求。
通过这种方式,可以在不自定义控件的情况下,实现 PictureBox 上添加白色边框和左上角显示文字的效果。
添加白色边框
要在 PictureBox 控件上添加白色边框,可以使用以下方法:
-
设置 BorderStyle 属性:
pictureBox.BorderStyle = BorderStyle.FixedSingle; -
使用 Graphics 绘制边框:
private void pictureBox_Paint(object sender, PaintEventArgs e)
{ControlPaint.DrawBorder(e.Graphics, pictureBox.ClientRectangle, Color.White, ButtonBorderStyle.Solid);
}
示例代码
using System;
using System.Drawing;
using System.Windows.Forms;public class MainForm : Form
{private PictureBox pictureBox;private Label label;public MainForm(){// Initialize PictureBoxpictureBox = new PictureBox{Image = Image.FromFile("your_image_path_here.jpg"), // Set your image pathSizeMode = PictureBoxSizeMode.StretchImage,BorderStyle = BorderStyle.FixedSingle, // White borderDock = DockStyle.Fill};// Add Paint event handler to draw borderpictureBox.Paint += pictureBox_Paint;// Initialize Labellabel = new Label{Text = "Your Text",ForeColor = Color.White,BackColor = Color.Transparent,Font = new Font("Arial", 12, FontStyle.Bold),AutoSize = true,Location = new Point(10, 10) // Position in the top-left corner};// Add Label to PictureBoxpictureBox.Controls.Add(label);// Add PictureBox to Formthis.Controls.Add(pictureBox);this.Text = "PictureBox with Label Example";this.Size = new Size(800, 600);}// Paint event handler to draw borderprivate void pictureBox_Paint(object sender, PaintEventArgs e){ControlPaint.DrawBorder(e.Graphics, pictureBox.ClientRectangle, Color.White, ButtonBorderStyle.Solid);}[STAThread]public static void Main(){Application.EnableVisualStyles();Application.SetCompatibleTextRenderingDefault(false);Application.Run(new MainForm());}
}
c#左上角带文字的控件
在 C# 的 Windows Forms 应用程序中,如果您想创建一个在左上角带有文字的控件,可以使用 Label 控件和其他控件的组合。例如,可以将 Label 控件与 Panel 或 GroupBox 控件组合使用。以下是一个示例,展示了如何创建一个在左上角带有文字的控件:
使用说明
- 替换
"your_image_path_here.jpg"为你的图片路径。 - 根据需要调整
Label的Text、Font和Location属性,以适应你的需求。
使用 GroupBox
GroupBox 控件本身就是一个带有标题的容器控件,通常用于分组相关的控件。
- 打开 Visual
- Studio 并加载您的项目。
- 打开设计器视图(即窗体设计器)。
- 在工具箱中找到
GroupBox控件(位于Containers部分)。 - 将
GroupBox拖动到窗体上。 - 设置
GroupBox的Text属性,以显示左上角的文字。
使用 Panel 和 Label
如果您需要更多的定制化,可以将 Label 控件放置在 Panel 控件的左上角。
- 打开 Visual Studio 并加载您的项目。
- 打开设计器视图(即窗体设计器)。
- 在工具箱中找到
Panel控件(位于Containers部分)。 - 将
Panel拖动到窗体上,并调整其大小。 - 在工具箱中找到
Label控件(位于Common Controls部分)。 - 将
Label拖动到Panel内,并放置在左上角。 - 设置
Label的Text属性,以显示所需的文字。
以下是一个简单的示例代码,展示了如何在代码中进行这些操作:
public class MyForm : Form
{private Panel panel;private Label label;public MyForm(){InitializeComponent();}private void InitializeComponent(){this.panel = new System.Windows.Forms.Panel();this.label = new System.Windows.Forms.Label();// Panel 设置this.panel.BorderStyle = System.Windows.Forms.BorderStyle.FixedSingle;this.panel.Location = new System.Drawing.Point(10, 10);this.panel.Size = new System.Drawing.Size(200, 100);this.panel.BackColor = System.Drawing.Color.LightGray;// Label 设置this.label.AutoSize = true;this.label.Location = new System.Drawing.Point(5, 5); // 左上角this.label.Text = "我的文字";// 添加控件this.panel.Controls.Add(this.label);this.Controls.Add(this.panel);// Form 设置this.Text = "带文字的控件示例";this.Size = new System.Drawing.Size(300, 200);}
}
此代码创建了一个包含 Panel 和 Label 的窗体,并在 Panel 的左上角显示文字。通过调整控件的属性,可以实现所需的布局和样式。
label
c# 设置label自动换行
在 C# 的 Windows Forms 应用程序中,您可以通过设置 Label 控件的 AutoSize 属性和 MaximumSize 属性来实现自动换行。具体步骤如下:
- 将
Label控件拖动到窗体上。 - 设置
Label控件的AutoSize属性为False。 - 设置
Label控件的MaximumSize属性,使其宽度保持固定,这样当文本超过指定宽度时就会自动换行。
以下是一个示例代码,展示了如何在代码中设置 Label 控件的自动换行:
public class MyForm : Form
{private Label label;public MyForm(){InitializeComponent();}private void InitializeComponent(){this.label = new System.Windows.Forms.Label();// Label 设置this.label.AutoSize = false; // 禁用自动调整大小this.label.MaximumSize = new System.Drawing.Size(200, 0); // 设置最大宽度为200像素,高度不限this.label.Size = new System.Drawing.Size(200, 0); // 设置控件的初始大小this.label.Text = "这是一个很长的文本示例,当它超过最大宽度时会自动换行。";this.label.BorderStyle = System.Windows.Forms.BorderStyle.FixedSingle; // 可选:添加边框以便于查看// 添加控件this.Controls.Add(this.label);// Form 设置this.Text = "Label 自动换行示例";this.Size = new System.Drawing.Size(300, 200);}[STAThread]static void Main(){Application.EnableVisualStyles();Application.Run(new MyForm());}
}
在设计器中,您也可以通过属性窗口来设置这些属性:
- 选择
Label控件。 - 在属性窗口中找到
AutoSize属性并将其设置为False。 - 在属性窗口中找到
MaximumSize属性并设置其宽度值(例如200, 0)。
这将确保 Label 控件在显示文本时,如果文本超过指定宽度,将会自动换行。
c# 设置label字体大小
在 C# 的 Windows Forms 应用程序中,您可以通过设置 Label 控件的 Font 属性来更改其字体大小。您可以在设计器中通过属性窗口进行设置,也可以在代码中动态设置。
在设计器中设置
- 选择
Label控件。 - 在属性窗口中找到
Font属性。 - 点击
Font属性旁边的省略号按钮...,将会打开字体对话框。 - 在字体对话框中,您可以选择字体、样式和大小。选择所需的字体大小后,点击确定。
在代码中设置
您也可以通过代码来设置 Label 控件的字体大小。例如:
public class MyForm : Form
{private Label label;public MyForm(){InitializeComponent();}private void InitializeComponent(){this.label = new System.Windows.Forms.Label();// Label 设置this.label.AutoSize = true;this.label.Text = "这是一个示例文本";this.label.Font = new System.Drawing.Font("Arial", 14, System.Drawing.FontStyle.Regular); // 设置字体为 Arial,大小为 14// 设置位置和大小this.label.Location = new System.Drawing.Point(10, 10);// 添加控件this.Controls.Add(this.label);// Form 设置this.Text = "Label 字体大小示例";this.Size = new System.Drawing.Size(300, 200);}[STAThread]static void Main(){Application.EnableVisualStyles();Application.Run(new MyForm());}
}
在上面的示例中,我们通过 new System.Drawing.Font("Arial", 14, System.Drawing.FontStyle.Regular) 创建了一个新的字体对象,指定了字体名称为 Arial,字体大小为 14,并应用到 label 控件的 Font 属性上。
您可以根据需要更改字体名称和大小。例如,如果您想使用 Times New Roman 字体并将字体大小设置为 18,可以这样做:
this.label.Font = new System.Drawing.Font("Times New Roman", 18, System.Drawing.FontStyle.Regular);
通过这种方式,您可以轻松地更改 Label 控件的字体大小以及其他字体属性。
c# 设置label行间距
在 C# 的 Windows Forms 中,默认的 Label 控件不直接支持行间距的设置。不过,您可以通过一些变通的方法来实现行间距的效果。常见的做法是重绘 Label 控件,或者使用 RichTextBox 控件来代替 Label,因为 RichTextBox 支持更高级的文本格式设置。
方法一:使用 RichTextBox 控件
RichTextBox 控件可以通过设置段落格式来调整行间距。以下是一个简单的示例,展示如何使用 RichTextBox 控件设置行间距:
public class MyForm : Form
{private RichTextBox richTextBox;public MyForm(){InitializeComponent();}private void InitializeComponent(){this.richTextBox = new System.Windows.Forms.RichTextBox();// RichTextBox 设置this.richTextBox.Text = "这是第一行\n这是第二行\n这是第三行";this.richTextBox.ReadOnly = true; // 使其只读,类似于 Label 的行为this.richTextBox.BorderStyle = BorderStyle.None; // 去掉边框this.richTextBox.Location = new System.Drawing.Point(10, 10);this.richTextBox.Size = new System.Drawing.Size(300, 200);// 设置行间距this.richTextBox.SelectAll();this.richTextBox.SelectionFont = new Font("Arial", 12);SetLineSpacing(this.richTextBox, 20); // 设置行间距为 20 像素// 添加控件this.Controls.Add(this.richTextBox);// Form 设置this.Text = "RichTextBox 行间距示例";this.Size = new System.Drawing.Size(400, 300);}private void SetLineSpacing(RichTextBox rtb, int spacing){var fmt = new System.Windows.Forms.RichTextBox.RichTextBoxFormatting();fmt.LineSpacing = spacing;// 由于 .NET Framework 没有直接设置行间距的方法,// 需要通过发送 EM_SETPARAFORMAT 消息来间接设置。const int EM_SETPARAFORMAT = 0x447;const int PFM_LINESPACING = 0x200;var pf = new PARAFORMAT2{cbSize = (ushort)Marshal.SizeOf(typeof(PARAFORMAT2)),dwMask = PFM_LINESPACING,dyLineSpacing = spacing * 20, // twips: 1/20 of a pointbLineSpacingRule = 4 // multiply dyLineSpacing by 1};SendMessage(rtb.Handle, EM_SETPARAFORMAT, IntPtr.Zero, ref pf);}[STAThread]static void Main(){Application.EnableVisualStyles();Application.Run(new MyForm());}[DllImport("user32.dll")]private static extern IntPtr SendMessage(IntPtr hWnd, int msg, IntPtr wParam, ref PARAFORMAT2 lParam);[StructLayout(LayoutKind.Sequential)]private struct PARAFORMAT2{public ushort cbSize;public uint dwMask;public short wNumbering;public short wReserved;public int dxStartIndent;public int dxRightIndent;public int dxOffset;public short wAlignment;public short cTabCount;[MarshalAs(UnmanagedType.ByValArray, SizeConst = 32)]public int[] rgxTabs;public int dySpaceBefore;public int dySpaceAfter;public int dyLineSpacing;public short sStyle;public byte bLineSpacingRule;public byte bOutlineLevel;public short wShadingWeight;public short wShadingStyle;public short wNumberingStart;public short wNumberingStyle;public short wNumberingTab;public short wBorderSpace;public short wBorderWidth;public short wBorders;}
}
在这个示例中,我们使用 RichTextBox 控件,并通过发送 EM_SETPARAFORMAT 消息来设置行间距。我们定义了一个 SetLineSpacing 方法,它接收一个 RichTextBox 控件和行间距值(以像素为单位)。通过这种方式,您可以灵活地设置行间距。
方法二:重绘 Label 控件
如果您想坚持使用 Label 控件,可以通过自定义控件并重写 OnPaint 方法来手动绘制文本,从而实现行间距的效果。以下是一个示例:
public class LineSpacingLabel : Label
{private int lineSpacing = 10; // 默认行间距为 10 像素public int LineSpacing{get { return lineSpacing; }set { lineSpacing = value; Invalidate(); }}protected override void OnPaint(PaintEventArgs e){base.OnPaint(e);string[] lines = Text.Split(new[] { '\n' }, StringSplitOptions.None);using (Brush brush = new SolidBrush(ForeColor)){for (int i = 0; i < lines.Length; i++){e.Graphics.DrawString(lines[i], Font, brush, new PointF(0, i * (Font.Height + lineSpacing)));}}}
}
使用自定义的 LineSpacingLabel 控件来替换普通的 Label 控件,并设置其 LineSpacing 属性:
public class MyForm : Form
{private LineSpacingLabel label;public MyForm(){InitializeComponent();}private void InitializeComponent(){this.label = new LineSpacingLabel();// Label 设置this.label.AutoSize = false;this.label.Text = "这是第一行\n这是第二行\n这是第三行";this.label.Font = new System.Drawing.Font("Arial", 12);this.label.Size = new System.Drawing.Size(300, 200);this.label.LineSpacing = 10; // 设置行间距为 10 像素// 设置位置this.label.Location = new System.Drawing.Point(10, 10);// 添加控件this.Controls.Add(this.label);// Form 设置this.Text = "Label 行间距示例";this.Size = new System.Drawing.Size(400, 300);}[STAThread]static void Main(){Application.EnableVisualStyles();Application.Run(new MyForm());}
}
通过这种方式,您可以创建一个带有行间距功能的 Label 控件。在设计时和运行时都可以灵活调整行间距。
相关文章:

c#控件笔记
c# PictureBox在工具箱的哪个位置 在 Visual Studio 的工具箱中,PictureBox 控件位于 “Common Controls” 部分。要找到 PictureBox,请按照以下步骤操作: 打开 Visual Studio 并加载您的项目。确保已经打开了设计器视图(即您的…...
STM32-15-DMA
STM32-01-认识单片机 STM32-02-基础知识 STM32-03-HAL库 STM32-04-时钟树 STM32-05-SYSTEM文件夹 STM32-06-GPIO STM32-07-外部中断 STM32-08-串口 STM32-09-IWDG和WWDG STM32-10-定时器 STM32-11-电容触摸按键 STM32-12-OLED模块 STM32-13-MPU STM32-14-FSMC_LCD 文章目录 STM…...
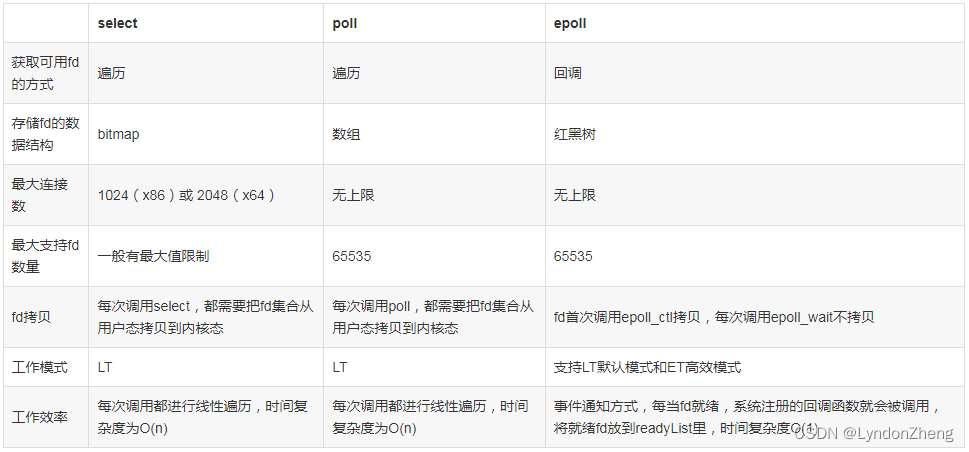
Go语言 几种常见的IO模型用法 和 netpoll与原生GoNet对比
【go基础】16.I/O模型与网络轮询器netpoller_go中的多路io复用模型-CSDN博客 字节开源的netPoll多路复用器源码解析-CSDN博客 一、几种常见的IO模型 1. 阻塞I/O (1) 解释: 用户调用如accept、read等系统调用,向内核发起I/O请求后,应用程序…...
大米cms安装支付逻辑漏洞
1.安装 下载来源:https://www.cnblogs.com/xfbk/p/17910054.html 链接:https://pan.baidu.com/s/1b-Z6RaFBZ6CsSIErY46Pyg?pwdq8qq 提取码:q8qq 注意一下配置就可以了:php5.5apachemysql5.0,主要就是数据库版本要注…...

使用 zxing 生成二维码以及条形码
需求背景 前期在做项目的时候,有一个需求是说要生成一张条形码,并且呢将条形码插入到 excel 中去,但是之前一直没有搞过找个条形码或者是二维码,最后是做出来了,这里呢就先看看怎么生成,后面再抽时间来写写…...

发布 jar 包到 maven 中央仓库
目前开发基本都是以maven或者gradle的方式,直接引入依赖包即可,那么该咋那么发布我们自己的jar包到maven仓库,让别人使用呢?本文适用于2024.3之后的步骤 文章目录 账号准备第一步,注册账号第二步,新建命名空间第三步,验证命名空间第四步,创建 push 的账号和密码点击右…...

AI智能体研发之路-模型篇(四):一文入门pytorch开发
博客导读: 《AI—工程篇》 AI智能体研发之路-工程篇(一):Docker助力AI智能体开发提效 AI智能体研发之路-工程篇(二):Dify智能体开发平台一键部署 AI智能体研发之路-工程篇(三&am…...
)
英语口语中though的用法(even though、as though)
文章目录 英语口语中 "though" 的用法详解1. "Though" 作为转折连词的用法1.1 基本用法示例句子: 1.2 位置灵活性示例句子: 2. "Though" 作为副词的用法2.1 表示对比或转折示例句子: 2.2 强调前述观点示例句子…...
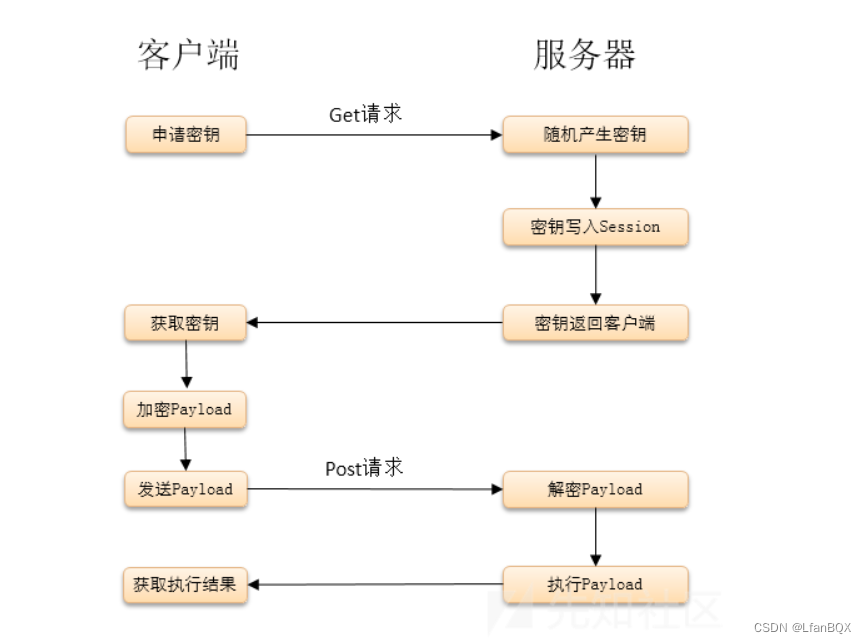
菜刀冰蝎哥斯拉流量通讯特征绕过检测反制感知
1.加密流程 工具名称requestsresponseAntSwordbase64等方式明文冰蝎2.0开启Openssl扩展-动态密钥aes加密aes加密base64未开启Openssl扩展-异或异或base64冰蝎3.0开启Openssl扩展-静态密钥aes加密aes加密base64未开启Openssl扩展-异或异或base64哥斯拉php的为base64异或base64异…...

前端 JS 经典:判断数组的准确方法
前言:判断数组的方法有很多,但是最完美的只有一个。 1. Object.prototype.toString.call 通过 toString.call 方法来判断是否数组。 function isArray(obj) {return Object.prototype.toString.call(obj) "[object Array]"; } 缺点&#…...

【仓库设置问题】
问题: 某公司在高速公路一些服务站内开设了百货超市,为了能及时给这些百货超市提供足够的商品,他们需要在一些百货超市旁修建仓库。一个仓库可以同时为多家百货超市提供服务,以满足各个超市对商品的需求。现已知这些百货超市在高…...
深度学习知识与心得
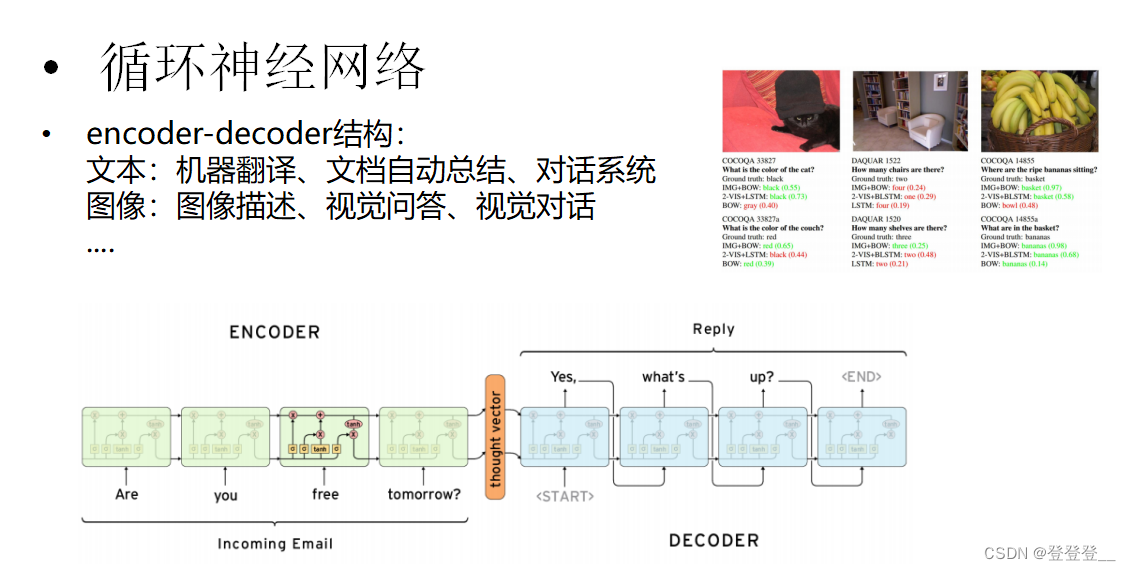
目录 深度学习简介 传统机器学习 深度学习发展 感知机 前馈神经网络 前馈神经网络(BP网络) 深度学习框架讲解 深度学习框架 TensorFlow 一个简单的线性函数拟合过程 卷积神经网络CNN(计算机视觉) 自然语言处理NLP Wo…...

Qt for Android
文章 USB Qt for android 获取USB设备列表(一)Java方式 获取 Qt for android 获取USB设备列表(二)JNI方式 获取 Qt for android 串口库使用 Qt for android : libusb在android中使用 Qt for Android : 使用libusb做CH340x串口传…...

HTTP 的三次握手
HTTP 的三次握手是指在建立 TCP 连接时,客户端和服务器之间进行的三步握手过程。这个过程确保了双方都能够互相通信,并且同步了彼此的序列号和确认号。 概念: 第一次握手:客户端发送一个 SYN(同步…...
【Text2SQL 论文】T5-SR:使用 T5 生成中间表示来得到 SQL
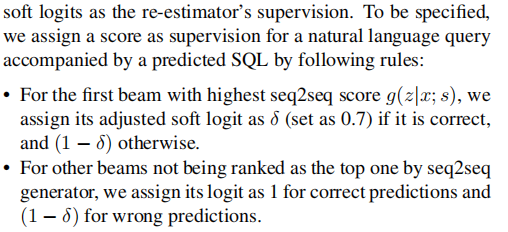
论文:T5-SR: A Unified Seq-to-Seq Decoding Strategy for Semantic Parsing ⭐⭐⭐ 北大 & 中科大,arXiv:2306.08368 文章目录 一、论文速读二、中间表示:SSQL三、Score Re-estimator四、总结 一、论文速读 本文设计了一个 NL 和 SQL 的…...

【HarmonyOS】应用屏蔽截屏和录屏
【HarmonyOS】应用屏蔽截屏和录屏 一、问题背景: 金融类或者高密性质的应用APP,对于截屏和录屏场景,某些业务下是禁止不允许。 目前这种场景的需求也是非常有必要的,很多电诈都是通过远程录屏软件,获取到账户密码或者…...

[BUG历险记] ERROR: [SIM 211-100] CSim failed with errors
问题重现 在开发HLS过程中,我碰到一个奇怪的现象,同样的工程,在我重装完系统后,不能进行C仿真了,但是综合实现都是可以正常运作的。 vitis的报错也非常奇怪,单单一行: ERROR: [SIM 211-100] C…...
Redis中大Key与热Key的解决方案
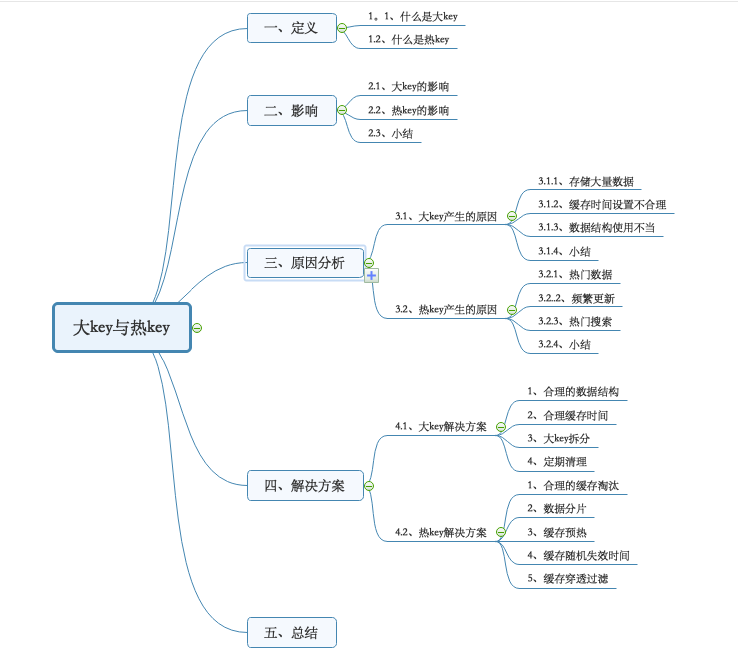
原文地址:https://mp.weixin.qq.com/s/13p2VCmqC4oc85h37YoBcg 在工作中Redis已经成为必备的一款高性能的缓存数据库,但是在实际的使用过程中,我们常常会遇到两个常见的问题,也就是文章标题所说的大 key与热 key。 一、定义 1.1…...
)
MySQL 视图(2)
上一篇:MySQL视图(1) 基于其他视图 案例对 WITH [CASCADED | LOCAL] CHECK OPTION 进行释义 创建视图时,可以基于表 / 多个表,也可以使用 其他视图表 / 其他视图 其他视图 的方式进行组合。 总结 更新视图&#x…...
Leecode---技巧---颜色分类、下一个排列、寻找重复数
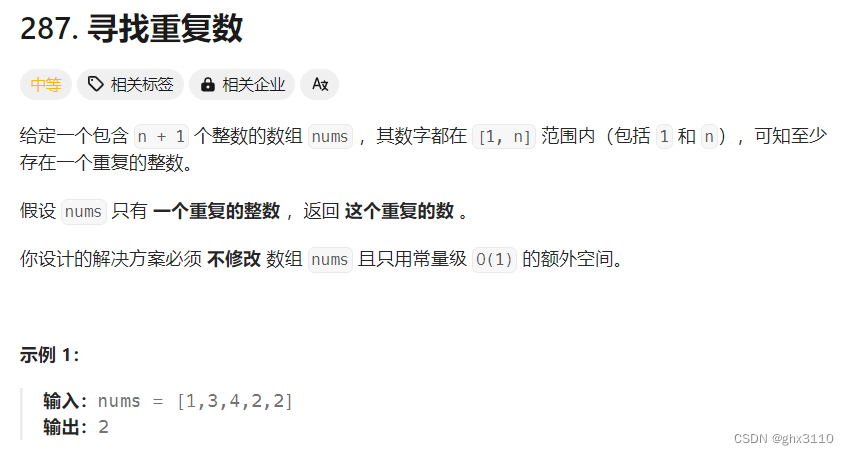
思路: 遍历一遍记录0,1,2的个数,然后再遍历一次,按照0,1,2的个数修改nums即可。 class Solution { public:void sortColors(vector<int>& nums){int n0 0, n1 0, n2 0;for(int x: nums){if(x0) n0;else if(x1) n1;else n2;}for…...
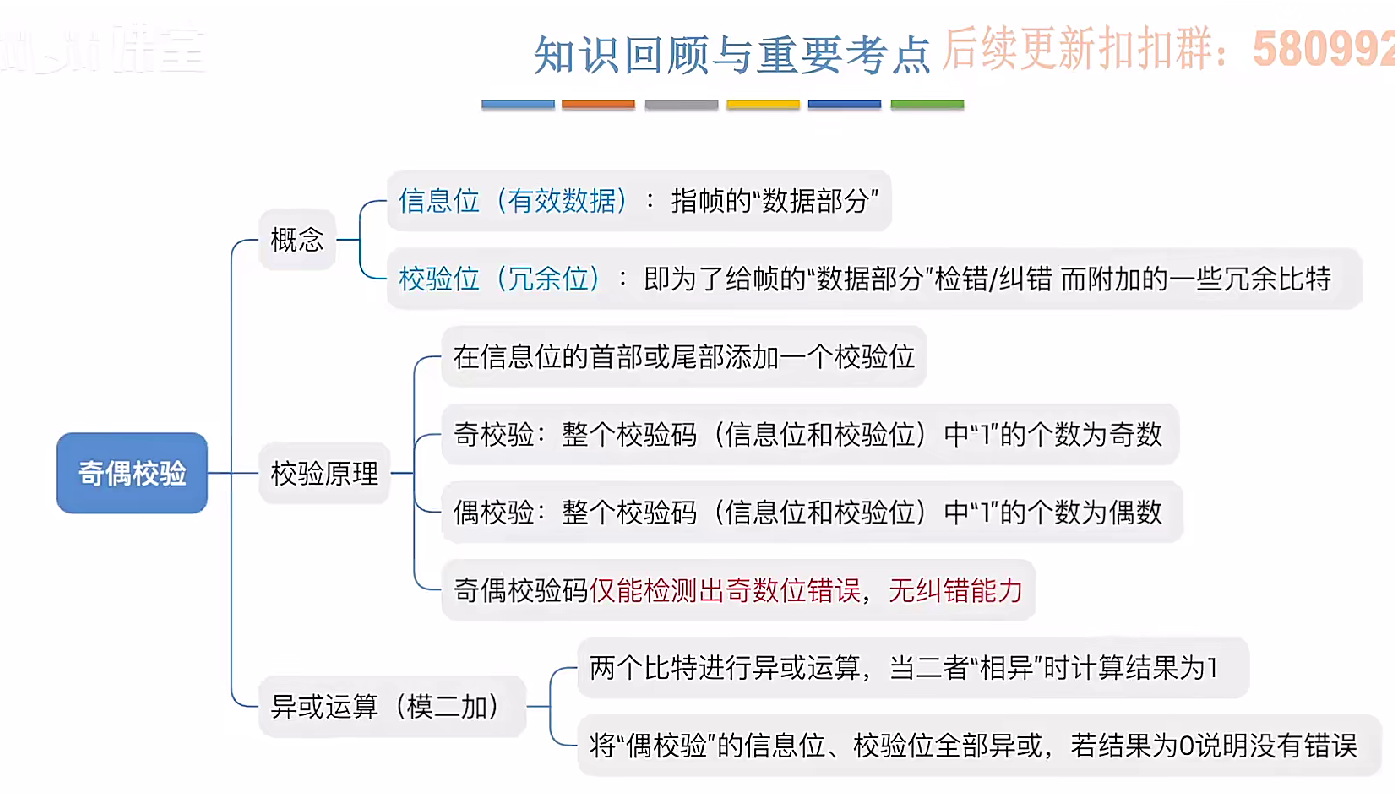
3.3.1_1 检错编码(奇偶校验码)
从这节课开始,我们会探讨数据链路层的差错控制功能,差错控制功能的主要目标是要发现并且解决一个帧内部的位错误,我们需要使用特殊的编码技术去发现帧内部的位错误,当我们发现位错误之后,通常来说有两种解决方案。第一…...

DAY 47
三、通道注意力 3.1 通道注意力的定义 # 新增:通道注意力模块(SE模块) class ChannelAttention(nn.Module):"""通道注意力模块(Squeeze-and-Excitation)"""def __init__(self, in_channels, reduction_rat…...

系统设计 --- MongoDB亿级数据查询优化策略
系统设计 --- MongoDB亿级数据查询分表策略 背景Solution --- 分表 背景 使用audit log实现Audi Trail功能 Audit Trail范围: 六个月数据量: 每秒5-7条audi log,共计7千万 – 1亿条数据需要实现全文检索按照时间倒序因为license问题,不能使用ELK只能使用…...

LLM基础1_语言模型如何处理文本
基于GitHub项目:https://github.com/datawhalechina/llms-from-scratch-cn 工具介绍 tiktoken:OpenAI开发的专业"分词器" torch:Facebook开发的强力计算引擎,相当于超级计算器 理解词嵌入:给词语画"…...

BCS 2025|百度副总裁陈洋:智能体在安全领域的应用实践
6月5日,2025全球数字经济大会数字安全主论坛暨北京网络安全大会在国家会议中心隆重开幕。百度副总裁陈洋受邀出席,并作《智能体在安全领域的应用实践》主题演讲,分享了在智能体在安全领域的突破性实践。他指出,百度通过将安全能力…...

Android15默认授权浮窗权限
我们经常有那种需求,客户需要定制的apk集成在ROM中,并且默认授予其【显示在其他应用的上层】权限,也就是我们常说的浮窗权限,那么我们就可以通过以下方法在wms、ams等系统服务的systemReady()方法中调用即可实现预置应用默认授权浮…...

爬虫基础学习day2
# 爬虫设计领域 工商:企查查、天眼查短视频:抖音、快手、西瓜 ---> 飞瓜电商:京东、淘宝、聚美优品、亚马逊 ---> 分析店铺经营决策标题、排名航空:抓取所有航空公司价格 ---> 去哪儿自媒体:采集自媒体数据进…...

在Ubuntu24上采用Wine打开SourceInsight
1. 安装wine sudo apt install wine 2. 安装32位库支持,SourceInsight是32位程序 sudo dpkg --add-architecture i386 sudo apt update sudo apt install wine32:i386 3. 验证安装 wine --version 4. 安装必要的字体和库(解决显示问题) sudo apt install fonts-wqy…...
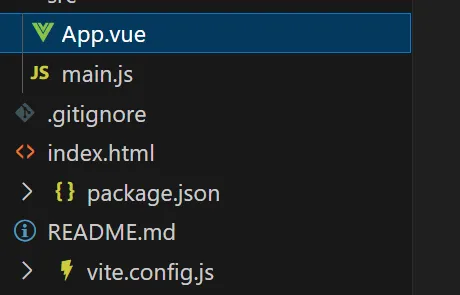
springboot整合VUE之在线教育管理系统简介
可以学习到的技能 学会常用技术栈的使用 独立开发项目 学会前端的开发流程 学会后端的开发流程 学会数据库的设计 学会前后端接口调用方式 学会多模块之间的关联 学会数据的处理 适用人群 在校学生,小白用户,想学习知识的 有点基础,想要通过项…...

LangFlow技术架构分析
🔧 LangFlow 的可视化技术栈 前端节点编辑器 底层框架:基于 (一个现代化的 React 节点绘图库) 功能: 拖拽式构建 LangGraph 状态机 实时连线定义节点依赖关系 可视化调试循环和分支逻辑 与 LangGraph 的深…...
