03--nginx架构实战
前言:这应该是nginx梳理的最后一章,写一些关于网站架构和网站上线的知识内容,主要是感觉到运维并不是单一方向的行业,这一章概念会有一些广泛,但是非常重要,都是这几年工作中遇到的情况,整理一下相关知识,遇到时可以直接按照目录寻找解决方案。
1、动态网站简介
当用户访问一个网站时,动态网站会根据用户的请求,实时生成并展示页面内容,而静态网站则是提前生成好的页面内容,直接展示给用户。动态网站更适合需要频繁更新和交互性强的场景(如LOL官网登录),而静态网站则更适合内容稳定的情况
动态网站根据架构不同大致有以下几种
| 资源文件类型 | 开发语言 | 网站框架 |
|---|---|---|
| index.php | 开源的php | Windows/Linux+nginx+php+mysql |
| index.py | 开源python | Windows/Linux+apache+python+mysql |
| index.jsp | 商业JAVA | windows/Linux+tomcat+JDK+Oracle |
| index.asp | 商业c# | Windows+iis+asp.net+sqlserver/oracle/mogodb |
2、LNMP动态网站部署
2.1、linux部署
设定静态ip为192.168.189.143
修改安全配置,这里实验环境直接关闭防火墙和SELINUX
[root@localhost ~]# systemctl stop firewalld.service
[root@localhost ~]# systemctl disable firewalld.service
Removed "/etc/systemd/system/multi-user.target.wants/firewalld.service".
Removed "/etc/systemd/system/dbus-org.fedoraproject.FirewallD1.service".
[root@localhost ~]# setenforce 0
[root@localhost ~]# vim /etc/selinux/config
[root@localhost ~]# cat /etc/selinux/config
SELINUX=disabled
2.2、nginx部署
nginx部署过程第一章所示
2.3、php环境部署
这里使用rpm包部署
[root@localhost ~]# yum install -y php php-mysqlnd gd php-gd
2.3.1、测试LNP环境
启动nginx
[root@localhost ~]# systemctl start nginx
[root@localhost ~]# systemctl enable nginx
Created symlink /etc/systemd/system/multi-user.target.wants/nginx.service → /usr/lib/systemd/system/nginx.service.
修改nginx默认网站文件
[root@localhost ~]# vim /etc/nginx/conf.d/default.conf
[root@localhost ~]# cat /etc/nginx/conf.d/default.conf
server {listen       80;server_name  localhost;#access_log  /var/log/nginx/host.access.log  main;location / {root   /usr/share/nginx/html;index  index.php index.html index.htm;}#error_page  404              /404.html;# redirect server error pages to the static page /50x.html#error_page   500 502 503 504  /50x.html;location = /50x.html {root   /usr/share/nginx/html;}# proxy the PHP scripts to Apache listening on 127.0.0.1:80##location ~ \.php$ {#    proxy_pass   http://127.0.0.1;#}# pass the PHP scripts to FastCGI server listening on 127.0.0.1:9000##location ~ \.php$ {#    root           html;#    fastcgi_pass   127.0.0.1:9000;#    fastcgi_index  index.php;#    fastcgi_param  SCRIPT_FILENAME  /scripts$fastcgi_script_name;#    include        fastcgi_params;#}# deny access to .htaccess files, if Apache's document root# concurs with nginx's one##location ~ /\.ht {#    deny  all;#}
}
修改部分主要有网站主页,将index.php放在优先显示页面,需要注意的是fastcgi模块在一些旧版本中默认不调用,在遇到特殊适配需求需要注意nginx版本
编辑php测试页面
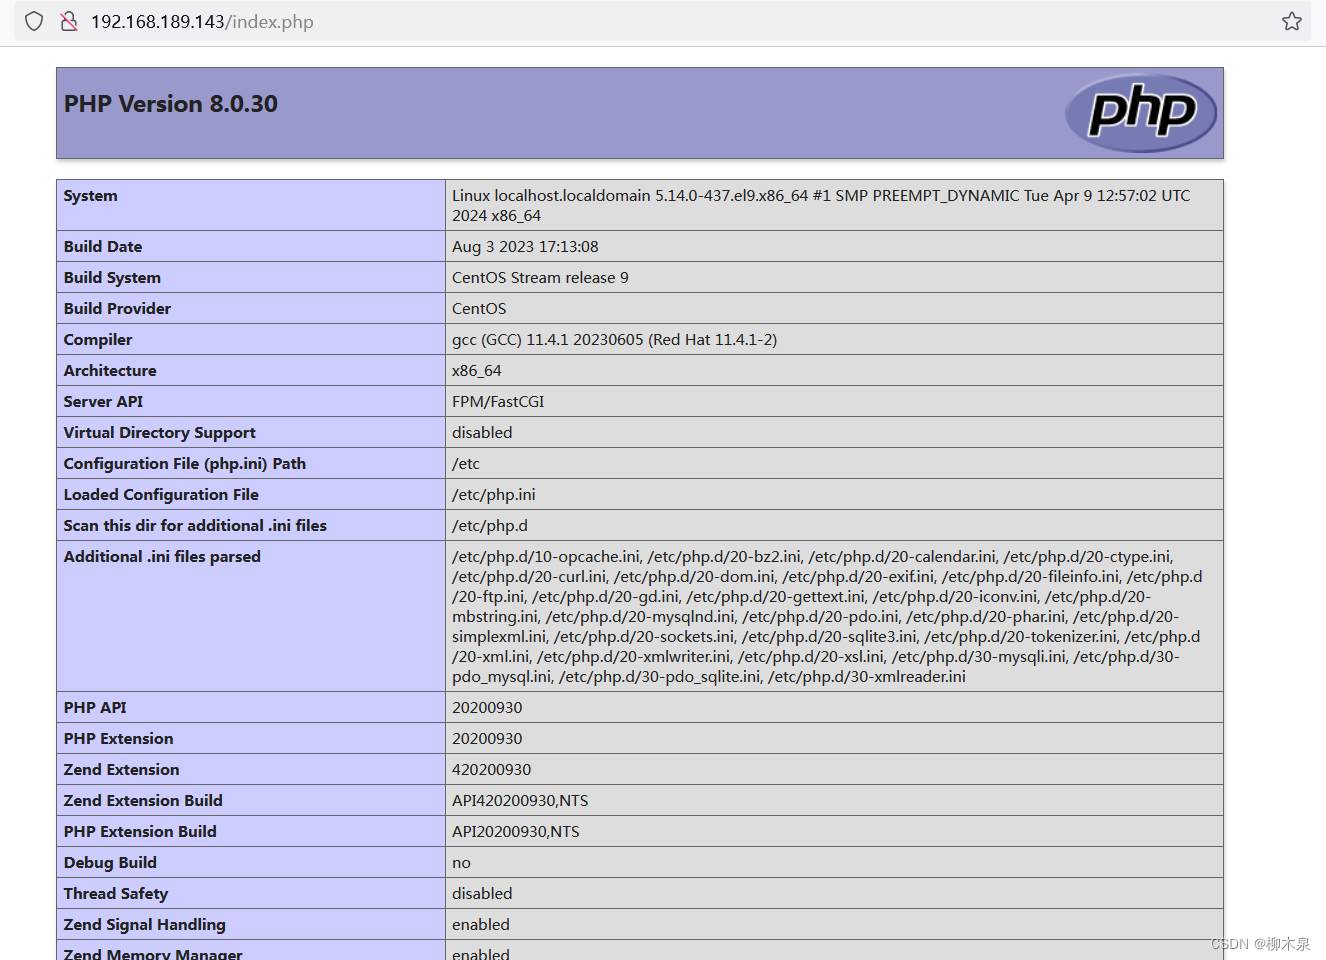
[root@localhost ~]# vim /usr/share/nginx/html/index.php
[root@localhost ~]# cat /usr/share/nginx/html/index.php
<?php
phpinfo();
?>
重启nginx,使用浏览器访问网站,显示如下
2.3.2、故障排除
此处因版本不同需要配置也各不相同,遇到访问网页不解析php文件,反而开始下载这类问题可以参考下面的排错思路:
此处有可能没有开启php解析,也有可能php-fpm未启动,也有可能php-fpm启动但未监听9000端,按照下方步骤排查大概率能找出故障原因。
检查php是否能够正常解析
[root@localhost ~]# php -v
PHP 8.0.30 (cli) (built: Aug  3 2023 17:13:08) ( NTS gcc x86_64 )
Copyright (c) The PHP Group
Zend Engine v4.0.30, Copyright (c) Zend Technologieswith Zend OPcache v8.0.30, Copyright (c), by Zend Technologies
nginx开启fastcgi
server {。。。。。。 location ~ \.php$ {root /usr/share/nginx/html;fastcgi_pass 127.0.0.1:9000;fastcgi_index index.php;fastcgi_param SCRIPT_FILENAME $document_root$fastcgi_script_name;include fastcgi_params;}。。。。。。检查php-fpm状态
[root@localhost ~]# systemctl status php-fpm
检查9000端口监听状态
[root@localhost php-fpm.d]# netstat -tuln | grep 9000
tcp        0      0 127.0.0.1:9000          0.0.0.0:*               LISTEN
如果发现9000未被监听可以修改php-fpm文件开启监听
[root@localhost ~]# vim /etc/php-fpm.d/www.conf
listen = 127.0.0.1:9000
[root@localhost ~]# systemctl restart php-fpm
这里可以结合下一小节的php-fpm加强理解
2.4、mysql部署
这里使用mariadb平替mysql(其实就是同一个软件)
[root@localhost ~]# yum -y install mariadb-server mariadb
[root@localhost ~]# systemctl start mysqld.service
[root@localhost ~]# systemctl enable mysqld.service
[root@localhost ~]# grep password /var/log/mysqld.log
查看初始密码
[root@localhost ~]# mysqladmin -uroot -p'4rt+s?yIgIQl' password 'Liumuquan@123'
修改数据库root密码
[root@localhost ~]# mysql -uroot -p'Liumuquan@123'
登录数据库
mysql> create database discuz;
创建一个库
mysql> flush privileges;
Query OK, 0 rows affected (0.01 sec)
2.5、动态网站部署
下载一个源码包替代工作中前后端工程师提交的代码,这里使用开源代码discuz代替
源代码下载地址
将代码上传至网站文件夹,解压设置权限
[root@localhost html]# unzip Discuz_X3.5_SC_UTF8_20240520.zip
[root@localhost html]# cp -rf upload/* /usr/share/nginx/html/
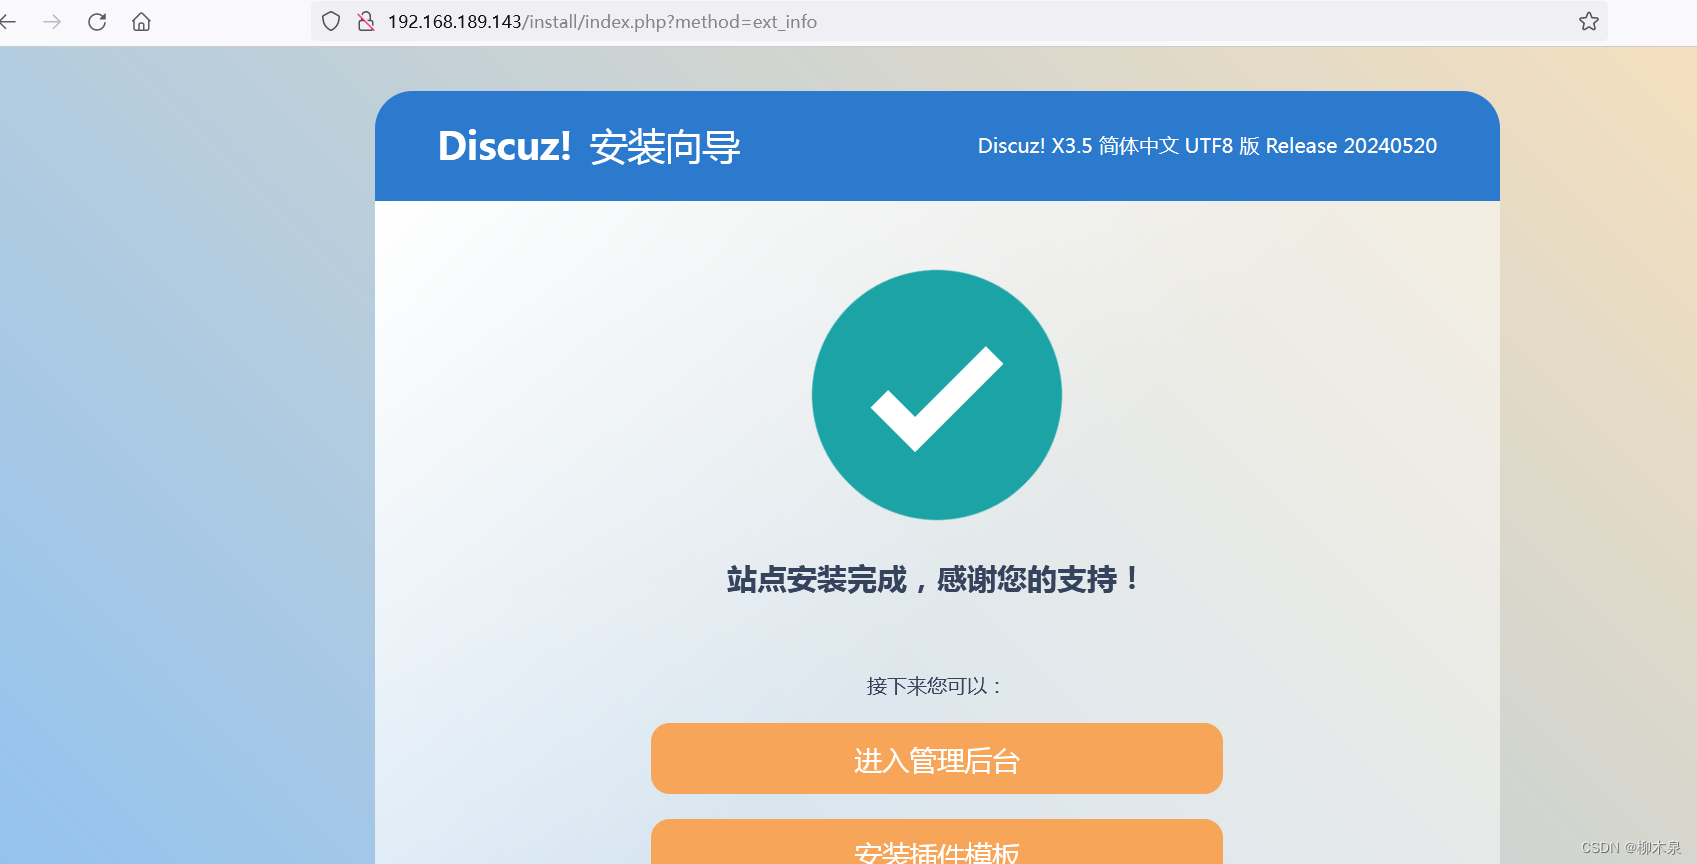
[root@localhost html]# chmod -R 777 /usr/share/nginx/html使用浏览器访问网址,按提示配置即可
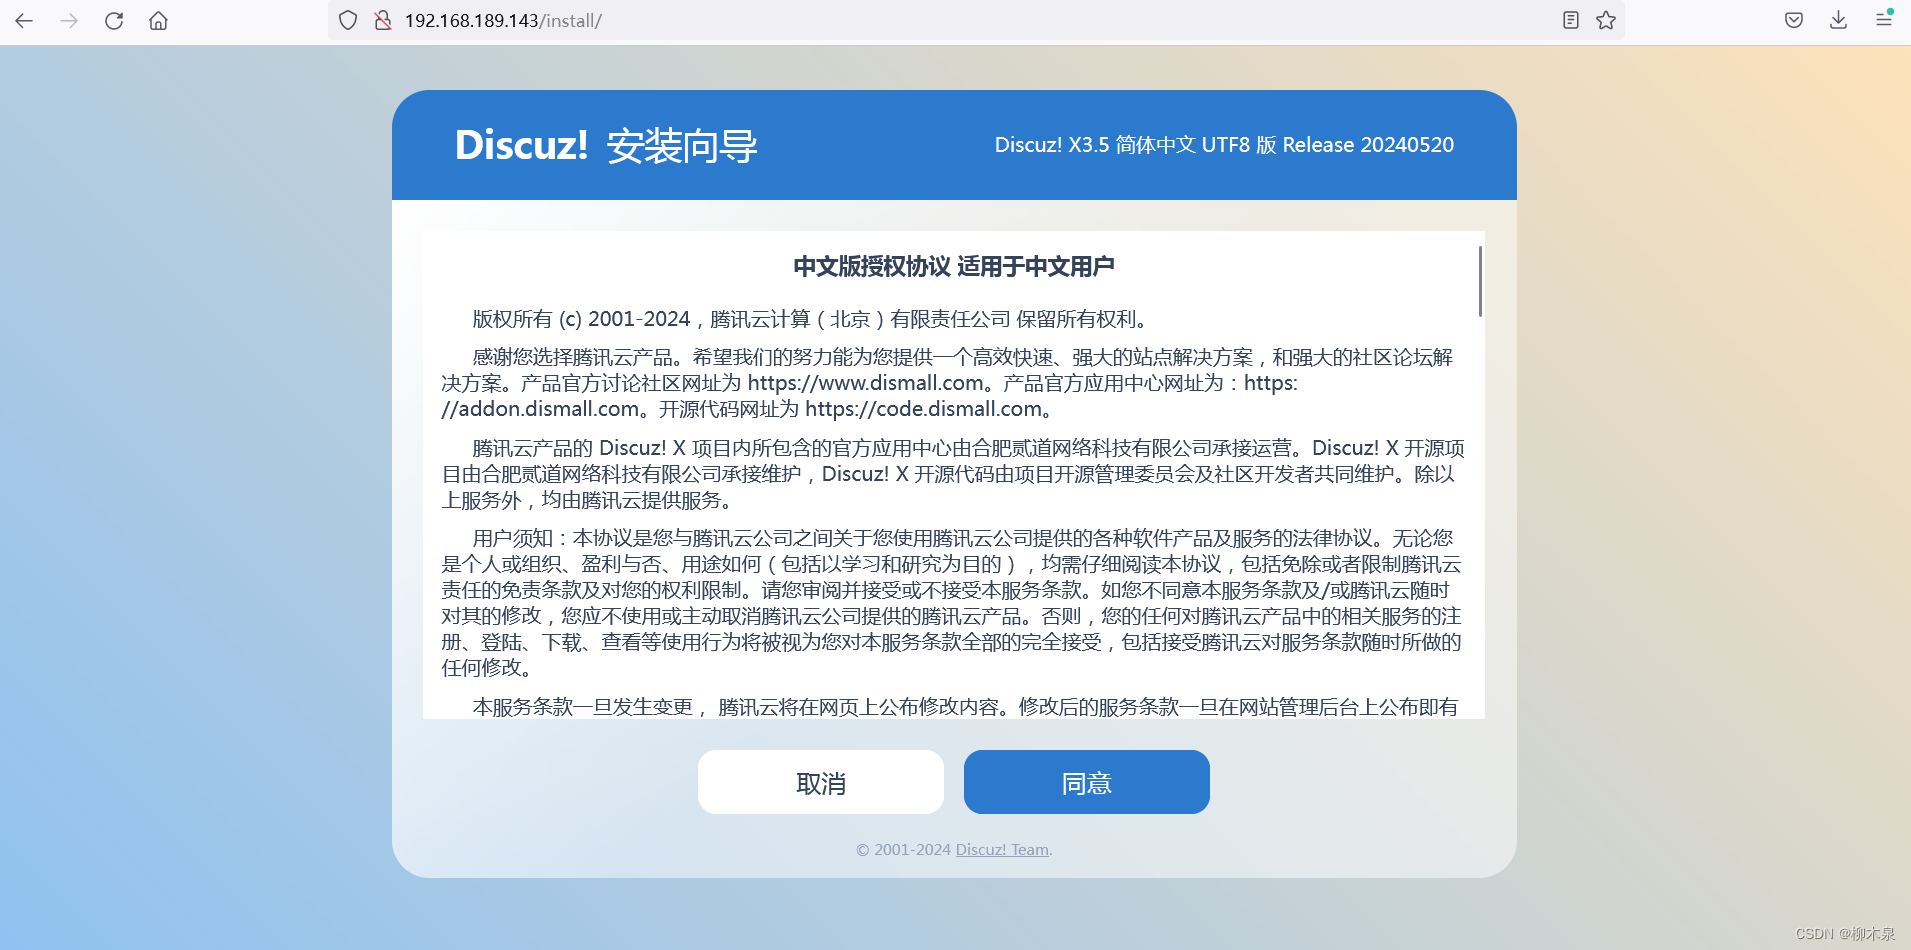
数据库按照刚才的配置填写

配置成功
3、fastcgi、php-fpm、php-mysql
静态网站:nginx服务器能处理的是静态元素 .html .jpg .mp4 .css
动态网站:需要多个软件合作完成。
以LNMP为例,linux作为操作系统,提供了整个服务器环境的基础。常见的 Linux 发行版如 Ubuntu、CentOS、Debian 等都可以用于搭建 LNMP 架构。
nginx借助模块ngx_fastcgi_modul模块,通过php与mysql完成互动,fastcgi是处理动态请求的接口,nginx 通过ngx_fastcgi_modul模块 链接 php-fpm处理动态请求。
PHP通过php-fpm接收前台nginx的动态访问的请求,比如向后端Mysql进行查询请求后,将查询结果返回给前台nginx。PHP-FPM(FastCGI Process Manager:FastCGI进程管理器) 是一个PHP FastCGI管理器。
php向后端Mysql进行查询请求时,需要通过模块php-mysql(centos9中模块名称为php-mysqlnd)
连接mysql,php-mysql是php连接mysql的接口程序。
mysql负责存储数据,这样构成一个基础的LNMP结构。
4、php-fpm初始化配置
4.1、php-fpm相关配置文件
4.1.1、核心配置文件
vim /etc/php.inidate.timezone = PRC#设置PHP的时区open_basedir#设置PHP脚本允许访问的目录.4.1.2、全局配置文件
vim /etc/php-fpm.confpid = /run/php-fpm/php-fpm.pid#设置pid文件的位置error_log = log/php-fpm.log#记录错误日志的文件log_level = notice#记录日志的等级#alert(必须立即处理), error(错误情况), warning(警告情况), notice(一般重要信息), debug(调试信息). 默认: notice.process.max = 3#默认没设置,process.max: 控制子进程最大数的全局变量, 后边的设置子进程数量的指令受到这个值的限制, 0表示无限制,3代表允许三个人同时访问,第四个来了后需要排队等待。daemonize = yes#守护进程,将fpm转至后台运行4.1.3、扩展配置文件
vim /etc/php-fpm.d/www.conf
user = nginx
#设置用户和用户组,此时nginx是php的客户listen.allowed_clients = 127.0.0.1
#这里配置的是客户机的ip,也就是nginx的IP,分离部署的时候ip需要填写正常的iplisten = 127.0.0.1:9000
#fpm监听端口,即nginx中php处理的地址,一般默认值即可。可用格式为: 'ip:port'slowlog = /var/log/php-fpm/$pool-slow.log
#开启慢日志,慢日志记录请求时间很长的操作,用于优化pm=dynamic
#动态模式进程管理开启,动态调整php进程数量 start_servers=5
#最初开启多少进程min_spare_server =5
#最小的空闲进程数。用户访问会消耗进程,然后为了满足后续访问随时随地开启进程,保持空闲数为5。max_children = 50
#最大进程数,取决于你的服务器内存。 假设你打算给10G内存给当前配置的PHP-FPM Pool,一般一个PHP请求占用内存10M-40M(操作简繁程度不同),按每个PHP请求占用内存25M,这样max_children = 10G/25M = 409。所以,这个值是根据硬件情况算出来的max_spare_servers=10
#最大的多余进程。大规模断开后,高并发访问过后,还剩多少。max_requests = 500
#每个子进程能响应的请求数量,响应500次后杀死该进程,进程处理完请求后会生成一部分缓存用来记录数据,需要定时清理。
4.2、php-fpm实操配置
进入刚布置好的LNMP环境,查看默认状态

编辑拓展配置文件
vim /etc/php-fpm.d/www.conf
修改对应参数如下pm = dynamic
pm.start_servers = 10
pm.max_children = 100pm.min_spare_servers = 10
pm.max_spare_servers = 30
pm.max_requests = 1000
修改效果

4.3、启动php状态监控页
vim /etc/php-fpm.d/www.conf
修改对应参数如下pm.status_path = /php_status.php
重启php-fpm然后使用浏览器访问设置的状态页面

5、Nginx Location
在LNMP的nginx配置中有三个配置位置
http{
此处为主配置文件,在这里配置的参数将会影响本结构内所有虚拟主机
}server{
此处为虚拟主机配置文件,配置内容只影响本台虚拟主机
}server{
location = /1.html{
此处配置参数影响上方使用正则匹配到的页面
}
}
Location优先级:= > ^~ > ~|~*|!~|!~* > /
精确匹配>字符开头>正则匹配>通配
6、Nginx Rewrite实战
Nginx Rewrite是Nginx服务器软件中的一个模块,它允许用户根据一定的规则对请求的URL进行重写和重定向。通过使用Rewrite模块,用户可以在服务器级别或特定位置级别配置重写规则,以匹配和转换URL,实现URL重定向、重写以及其他高级URL操作。主要用途包括以下几点:
- url伪静态化,提升搜索引擎评分。
- 隐藏部分url参数,提高服务器安全性。
- 实现网站地址跳转。
6.1、Rewrite示例1
要求:
对当用户访问地址192.168.189.143/abc/a/1.html时,通过redirect重定向至192.168.189.143/ccc/bbb/2.html
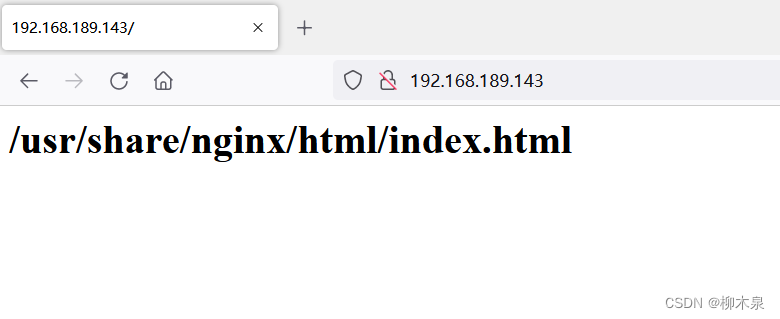
使用全新安装的nginx,此时默认主页为/usr/share/nginx/html/index.html
修改默认主页内容
[root@localhost ~]# vim /usr/share/nginx/html/index.html
[root@localhost ~]# cat /usr/share/nginx/html/index.html
<h1>/usr/share/nginx/html/index.html</h1>
访问效果如下
配置Nginx Rewrite
[root@localhost ~]# mkdir -p /usr/share/nginx/html/ccc/bbb
[root@localhost ~]# vim /usr/share/nginx/html/ccc/bbb/2.html
[root@localhost ~]# cat /usr/share/nginx/html/ccc/bbb/2.html
<h1>/usr/share/nginx/html/ccc/bbb/2.html</h1>#此处写的是跳转终点的内容
修改网站配置文件
[root@localhost ~]# vim /etc/nginx/conf.d/default.conf
[root@localhost ~]# cat /etc/nginx/conf.d/default.conf
server {listen       80;server_name  localhost;#access_log  /var/log/nginx/host.access.log  main;location / {root   /usr/share/nginx/html;index  index.html index.htm;}location /abc{rewrite .* /ccc/bbb/2.html permanent;}
#最后一段为rewrite配置,意为永久(permanent)将模糊匹配/abc(里面带/abc的url)跳转到/ccc/bbb/2.html
重启nginx,访问abc页面

示例一结束
关于permanent:permanent 会将地址显示为新的URL地址(重定向之后的URL)上面的示例中为添加后的效果,根据浏览器控制台可以看到添加上permanent后url被替换生成两次请求,服务器的角色只转换了url,客户端重新申请新获得的url。去掉permanent,url是旧的,服务器内部转换请求url,此处会略微增加服务器负载。如下图所示。(忽略404报错)

6.2、Rewrite示例2
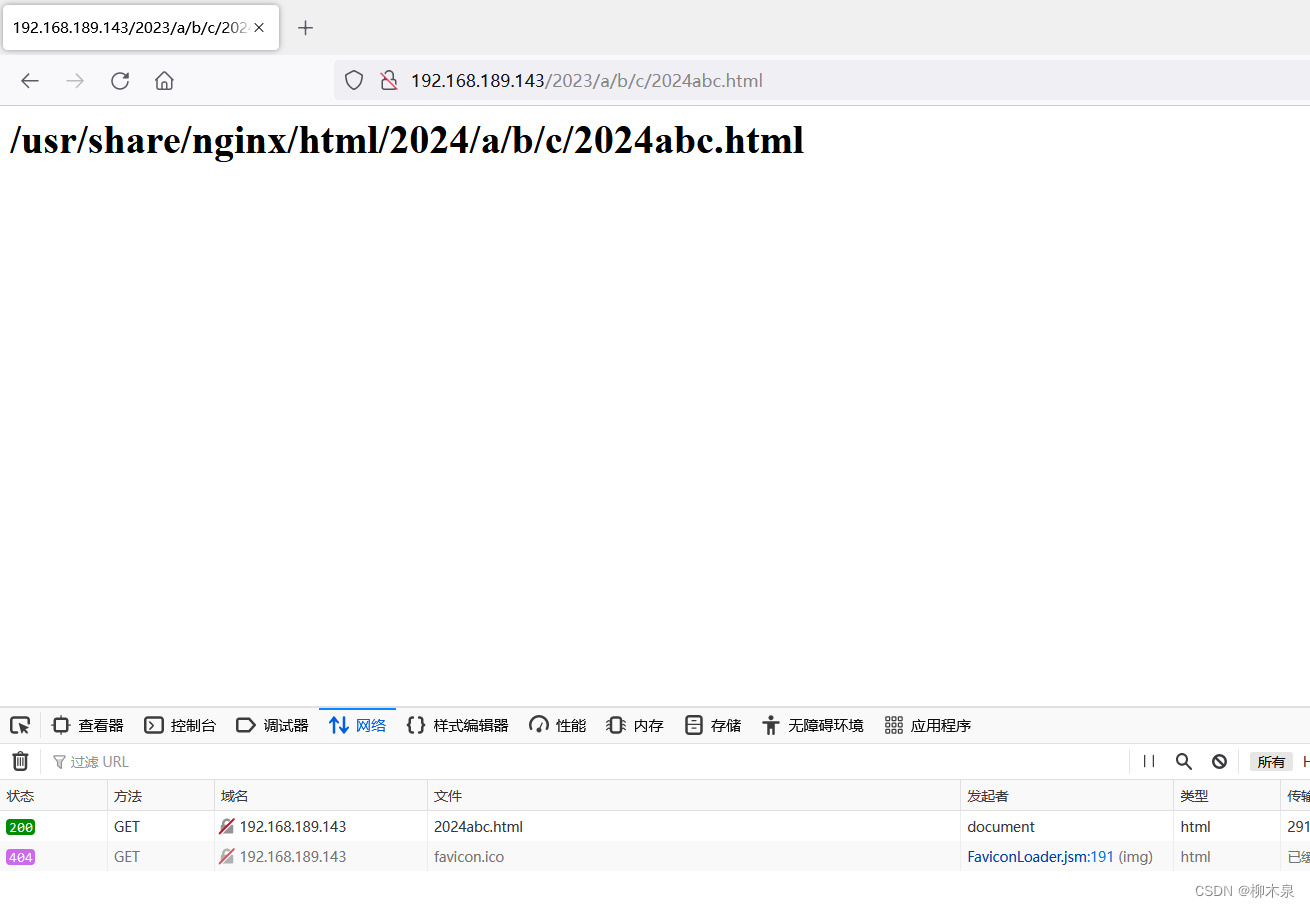
要求:利用正则中的”()和\1 “, 替换url中一部分的内容。 将
http://192.168.189.143/2023/a/b/c/1.html 换成
http://192.168.189.143/2024/a/b/c/1.html
使用全新安装的nginx,此时默认主页为/usr/share/nginx/html/index.html
步骤如下:
[root@localhost ~]# mkdir -p /usr/share/nginx/html/2024/a/b/c
[root@localhost ~]# vim /usr/share/nginx/html/2024/a/b/c/2024abc.html
[root@localhost ~]# cat /usr/share/nginx/html/2024/a/b/c/2024abc.html
<h1>/usr/share/nginx/html/2024/a/b/c/2024abc.html</h1>
[root@localhost ~]# vim /etc/nginx/conf.d/default.conf
[root@localhost ~]# cat /etc/nginx/conf.d/default.conf
server {listen       80;server_name  localhost;#access_log  /var/log/nginx/host.access.log  main;location / {root   /usr/share/nginx/html;index  index.html index.htm;}location /2023{rewrite ^/2023/(.*)$ /2024/$1 ;}#     (.*):这是一个捕获组,用于匹配任意字符,并将其保存供后续引用
#      $:匹配字符串的结束位置。
#    ^/2023/(.*)$匹配以 /2023/ 开头并以任意字符结尾的字符串
#    $1引用第一个捕获组的值
重启nginx,访问2023
6.3、Rewrite示例3
要求:
location { rewrite } 只能替换url中的目录路径, 使用if (){rewrite}可以替换协议主机目录全部能容。 将http://liumuquan.com 换http://jd.com
使用全新安装的nginx,此时默认主页为/usr/share/nginx/html/index.html
步骤如下:
[root@localhost ~]# vim /etc/nginx/conf.d/default.conf
[root@localhost ~]# cat /etc/nginx/conf.d/default.conf
server {listen       80;server_name  localhost;#access_log  /var/log/nginx/host.access.log  main;location / {root   /usr/share/nginx/html;index  index.html index.htm;}if ($host ~* liumuquan.com) {rewrite .* http://jd.com;}if ($host ~* liumuquan.com):这个条件表示如果请求的主机名匹配正则表达式 liumuquan.com,不区分大小写形式,都会匹配。如果请求的主机名符合上述条件,就会执行下面的重定向操作。rewrite .* http://jd.com;:这条指令表示对匹配条件下的所有请求,将URL重写为 http://jd.com。也就是说,无论用户请求的是  liumuquan.com 下的任何路径,比如  liumuquan.com/some/path,都会被重定向到 http://jd.com。
此实验需要配置hosts用来解析liumuquan.com
C:\Windows\System32\drivers\etc\hosts
访问liumuquan.com,查看浏览器控制台

6.4、Rewrite示例4
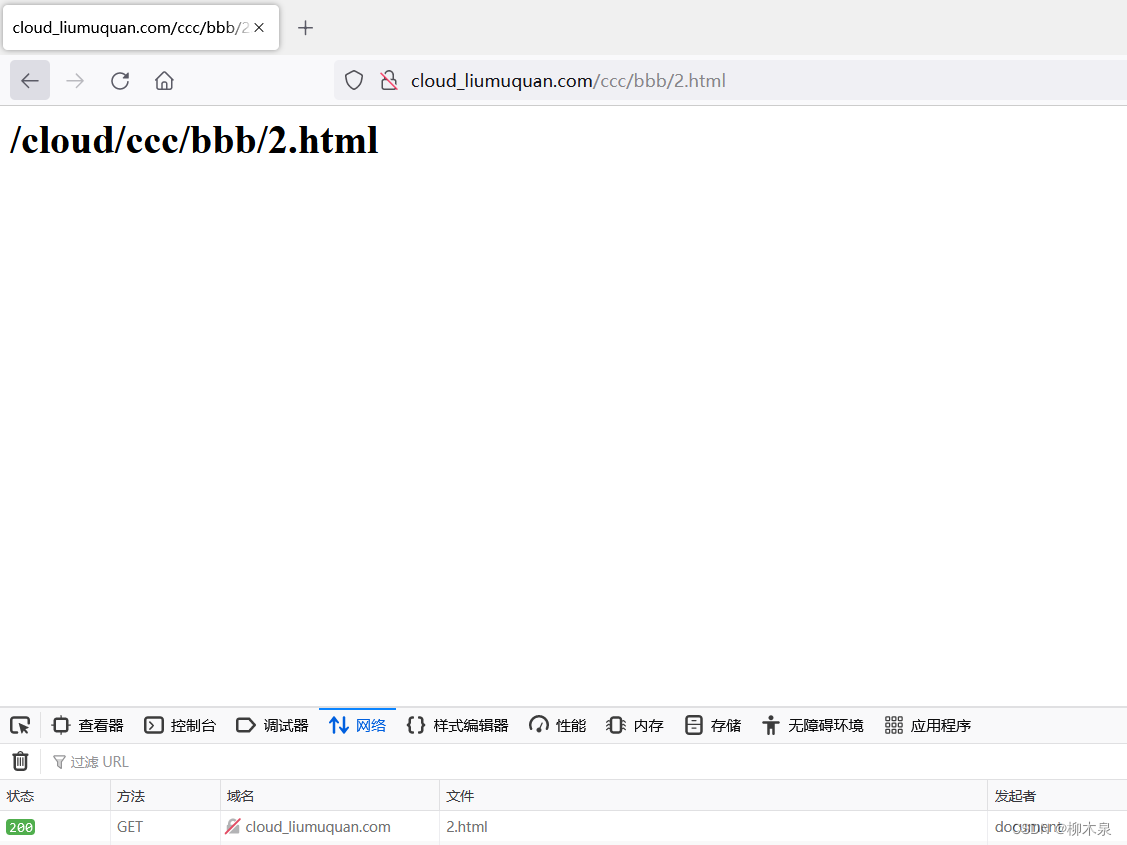
要求:
替换掉域名中的主机,保留后端url路径。可以使用nginx内置变量调用老的url目录路径。 如:将http://liumuquan.com/ccc/bbb/2.html 换成 http://cloud.com/ccc/bbb/2.html
操作步骤
#建立一个新网站cloud.com
[root@localhost ~]# vim /etc/nginx/conf.d/cloud.conf
[root@localhost ~]# cat /etc/nginx/conf.d/cloud.conf
server{
listen 80;
server_name cloud_liumuquan.com;
location / {
root /cloud;
index index.html;
}
}[root@localhost ~]# mkdir -p /cloud/ccc/bbb
[root@localhost ~]# echo '<h1>/cloud/index.html</h1>' > /cloud/index.html
[root@localhost ~]# echo '<h1>/cloud/ccc/bbb/2.html</h1>' > /cloud/ccc/bbb/2.html
[root@localhost ~]# cat /cloud/index.html
<h1>/cloud/index.html</h1>
[root@localhost ~]# cat /cloud/ccc/bbb/2.html
<h1>/cloud/ccc/bbb/2.html</h1>[root@localhost ~]# vim /etc/nginx/conf.d/default.conf server {listen       80;server_name  liumuquan.com;#access_log  /var/log/nginx/host.access.log  main;location / {root   /usr/share/nginx/html;index  index.html index.htm;}if ($host ~* liumuquan.com) {rewrite .* http://cloud_liumuquan.com$request_uri ;}#这里的变量来源均为nginx提供,参考日志格式设置(第一章)..............
[root@localhost ~]# systemctl restart nginx
尝试访问主页及其他url

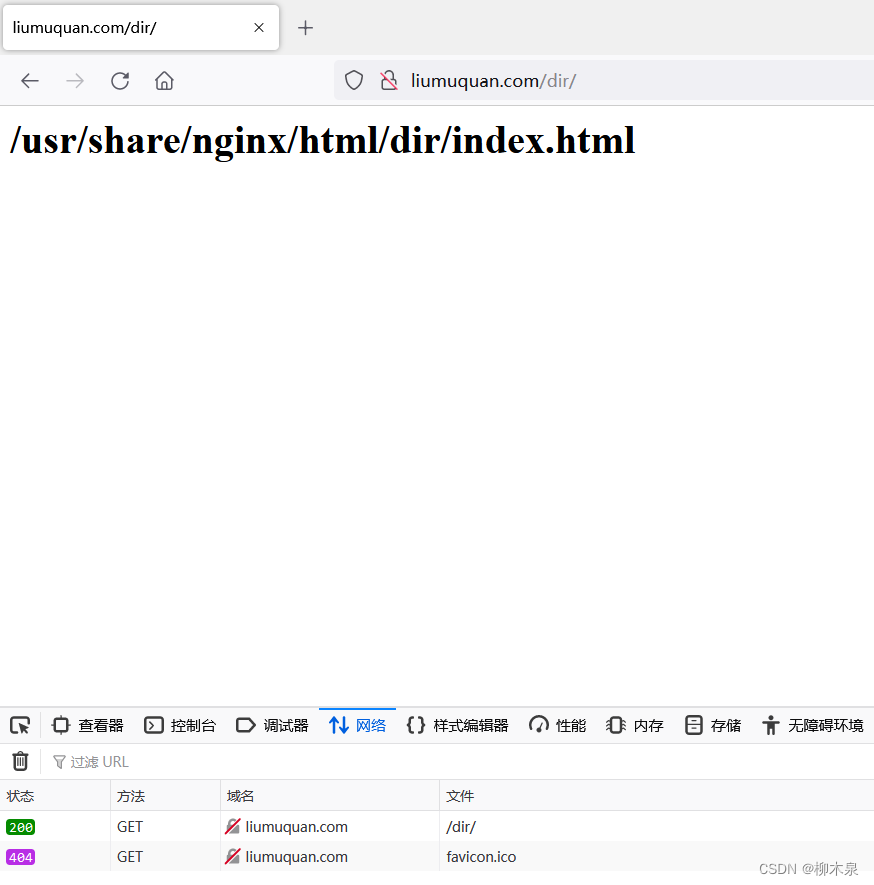
6.5、Rewrite示例5
要求:
1.输入的URL是目录时,自动添加“/” http://www.baidu.com/abc
2.输入的URL是文件时,不添加“/” http://www.baidu.com/abc/index.html
3.输入的URL是目录,但已经添加"/"时,不添加“/” http://www.baidu.com/abc/
步骤如下:
[root@localhost ~]# vim /etc/nginx/conf.d/default.conf
[root@localhost ~]# cat /etc/nginx/conf.d/default.conf
server {listen       80;server_name  liumuquan.com;#access_log  /var/log/nginx/host.access.log  main;location / {root   /usr/share/nginx/html;index  index.html index.htm;}if (-d $request_filename){rewrite ^(.*)([^/])$ http://$host$1$2/;}#if (-d $request_filename):这是一个 if 指令,用于检查请求的文件路径是否为目录。如果请求的文件路径是一个目录,则条件成立。如果请求的文件路径是一个目录,就会执行下面的重定向操作。#rewrite ^(.*)([^/])$ http://$host$1$2/;:这是一个 rewrite 指令,用于对请求的 URL 进行重写。它的含义如下:#    ^(.*)([^/])$:这是一个正则表达式,用于匹配不以斜杠结尾的 URL 路径。(.*)([^/])表示匹配任意字符直到不是斜杠的字符,并将其保存供后续引用。http://$host$1$2/:如果请求的文件路径是一个目录,且路径不以斜杠结尾,那么请求的 URL 将被重定向到以斜杠结尾的同一路径,并保持原始的协议和主机名不变。#()是捕获器 $是行尾
准备用于测试的文件夹
[root@localhost ~]# mkdir /usr/share/nginx/html/dir
[root@localhost ~]# vim /usr/share/nginx/html/dir/index.html
[root@localhost ~]# cat /usr/share/nginx/html/dir/index.html
<h1>/usr/share/nginx/html/dir/index.html</h1>
[root@localhost ~]# systemctl restart nginx
访问http://liumuquan.com/dir
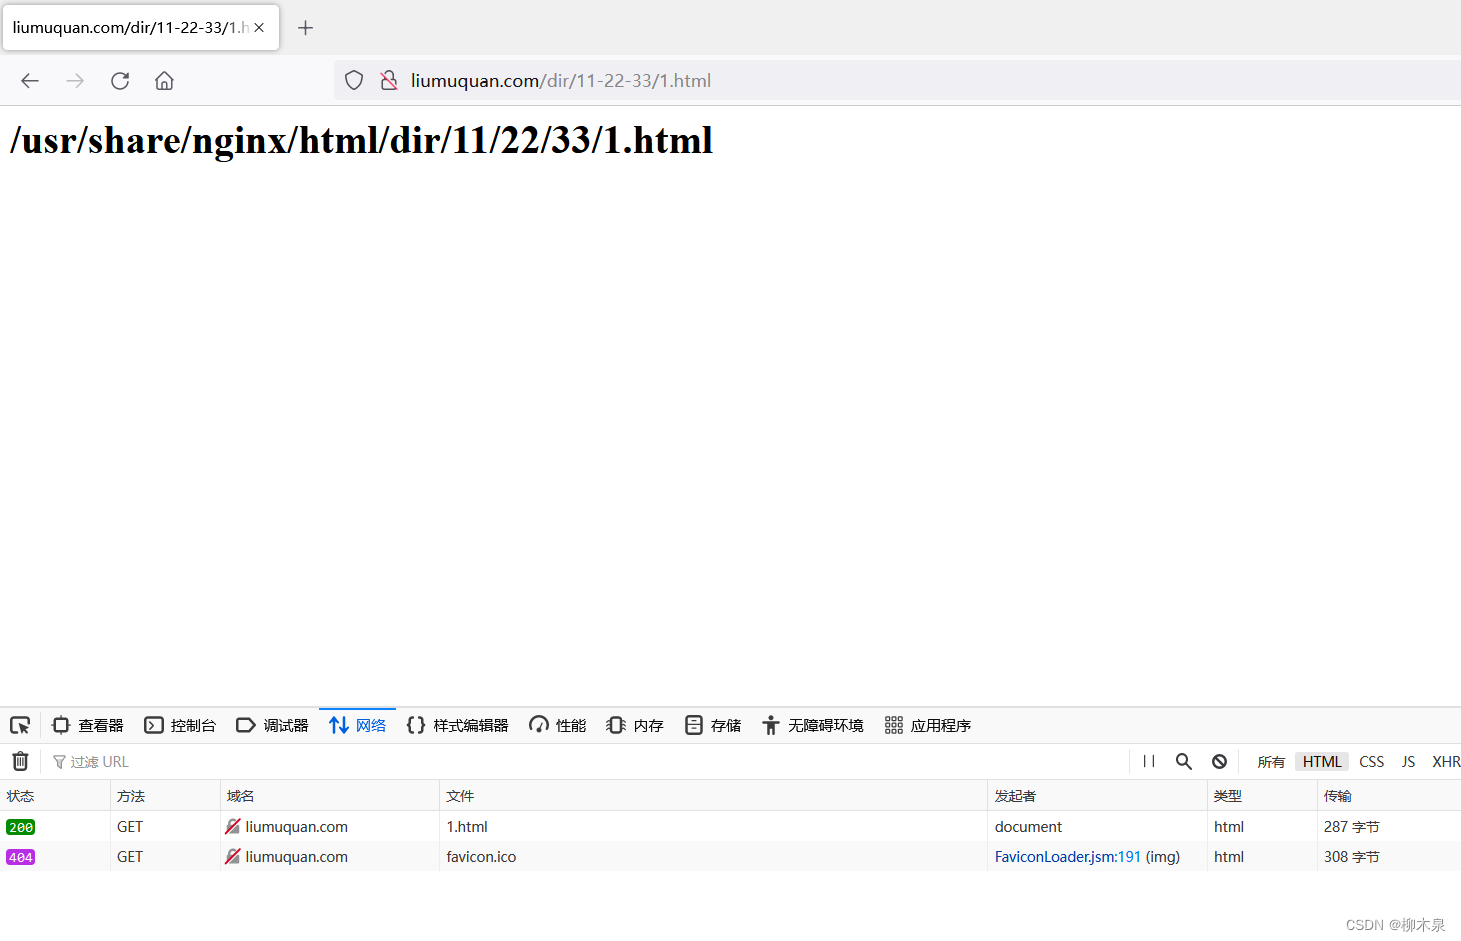
6.6、Rewrite示例6
将 http://liumuquan.com/dir/11-22-33/1.html 转换为
http://liumuquan.com/dir/11/22/33/1.html
步骤如下
[root@localhost ~]# vim /etc/nginx/conf.d/default.conf
[root@localhost ~]# mkdir -p /usr/share/nginx/html/dir/11/22/33/
[root@localhost ~]# echo '<h1>/usr/share/nginx/html/dir/11/22/33/1.html</h1>' > /usr/share/nginx/html/dir/11/22/33/1.html
[root@localhost ~]# vim /etc/nginx/conf.d/default.conf
[root@localhost ~]# cat /etc/nginx/conf.d/default.conf
server {listen       80;server_name  liumuquan.com;#access_log  /var/log/nginx/host.access.log  main;location / {root   /usr/share/nginx/html;index  index.html index.htm;}location /dir{rewrite ^/dir/([0-9]+)-([0-9]+)-([0-9]+)(.*)$ /dir/$1/$2/$3$4;root /usr/share/nginx/html;}
重启nginx使用浏览器访问
6.7、Rewrite示例7
要求:
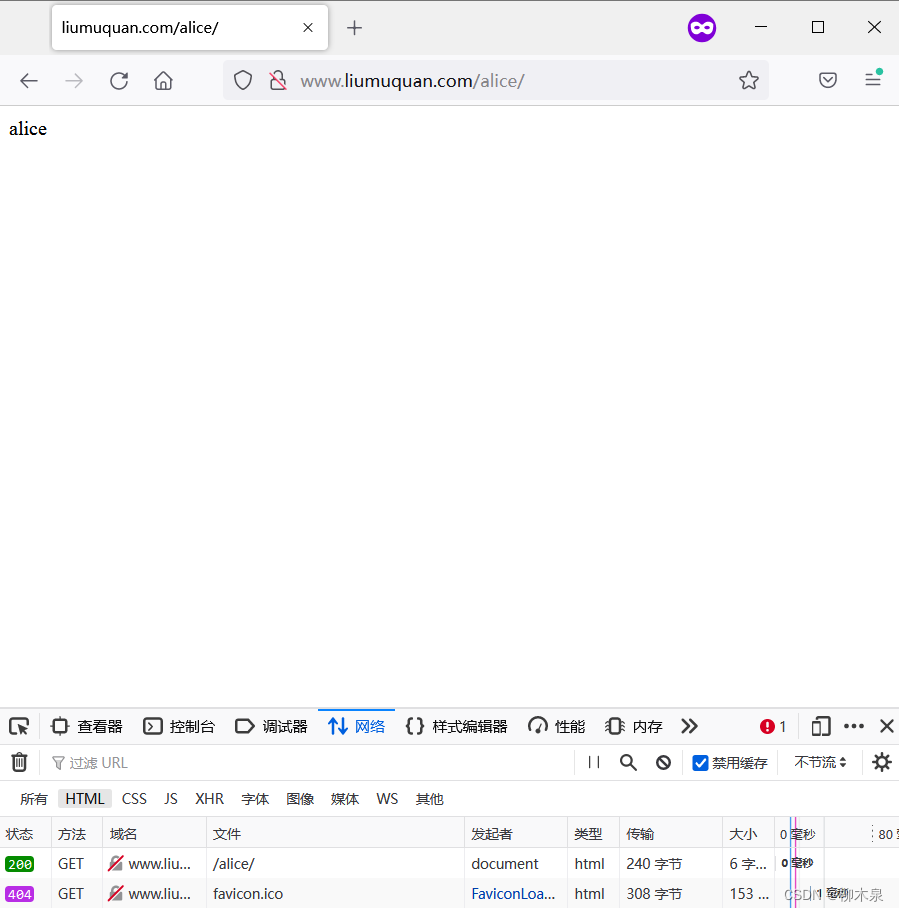
将http://alice.liumuquan.com 转换为http://www.liumuquan.com/alice
将http://jack.liumuquan.com 转换为http://www.liumuquan.com/jack
步骤如下
#环境准备
[root@localhost ~]# mkdir /usr/share/nginx/html/{jack,alice}
[root@localhost ~]# echo "jack" > /usr/share/nginx/html/jack/index.html
[root@localhost ~]# echo "alice" > /usr/share/nginx/html/alice/index.html
[root@localhost ~]# vim /etc/nginx/nginx.conf
修改配置文件
[root@localhost ~]# vim /etc/nginx/conf.d/default.conf
[root@localhost ~]# cat /etc/nginx/conf.d/default.conf
server {listen       80;server_name  www.liumuquan.com alice.liumuquan.com jack.liumuquan.com;#access_log  /var/log/nginx/host.access.log  main;location / {root   /usr/share/nginx/html;index  index.html index.htm;}if ($host ~* "^www.liumuquan.com$"){break;}if ($host ~* "^(.*)\.liumuquan\.com$"){set $user $1;rewrite .* http://www.liumuquan.com/$user;}#   注意server_name处修改#    第一段if防止死循环#  set $user $1;的含义是将变量 $user 的值设置为正则表达式捕获组 $1 的值# 客户端也需要添加域名解析
访问alice.liumuquan.com效果如下图
6.8、Rewrite示例8
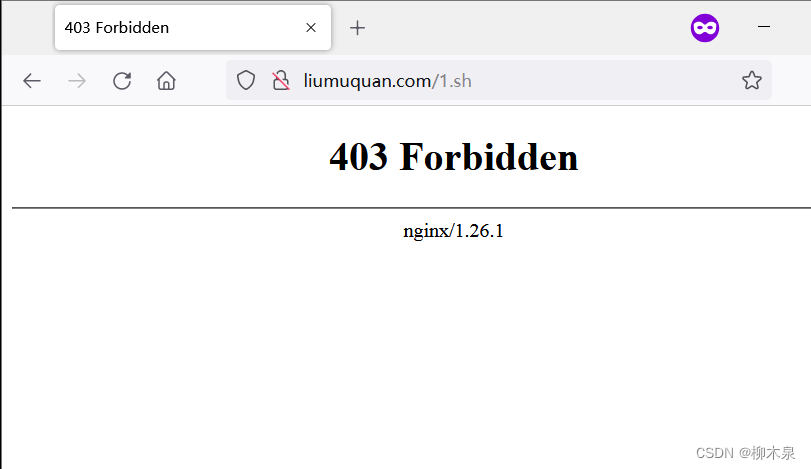
要求:如果访问服务器中的特殊文件。如:.sh结尾的文件。则返回403操作拒绝错误
步骤如下
[root@localhost ~]# vim /etc/nginx/conf.d/default.conf
[root@localhost ~]# vim /usr/share/nginx/html/1.sh
[root@localhost ~]# cat /usr/share/nginx/html/1.sh
#!/bin/bash
pwd
[root@localhost ~]# vim /etc/nginx/conf.d/default.conf
[root@localhost ~]# cat /etc/nginx/conf.d/default.conf
server {listen       80;server_name  liumuquan.com;#access_log  /var/log/nginx/host.access.log  main;location / {root   /usr/share/nginx/html;index  index.html index.htm;}location ~* \.sh$ {return 403;	}
访问1.sh效果如下
6.9、Rewrite示例9
要求:
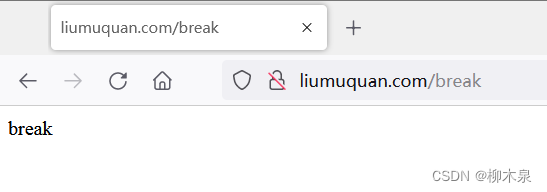
使用last实现重定向跳过,暂时隐藏页面
演示步骤:
[root@localhost ~]# mkdir /usr/share/nginx/html/test
[root@localhost ~]# echo 'break' > /usr/share/nginx/html/test/break.html
[root@localhost ~]# echo 'last' > /usr/share/nginx/html/test/last.html
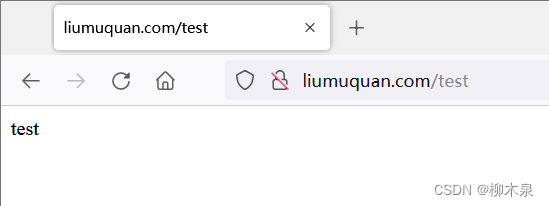
[root@localhost ~]# echo 'test' > /usr/share/nginx/html/test/test.html
[root@localhost ~]# vim /etc/nginx/conf.d/default.conf
[root@localhost ~]# cat /etc/nginx/conf.d/default.conf
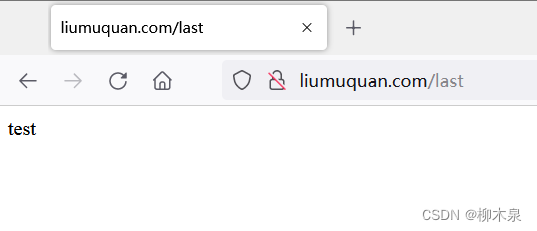
server {listen 80;server_name liumuquan.com;#access_log /var/log/nginx/host.access.log main;location / {root /usr/share/nginx/html;index index.html index.htm;}location /break {rewrite .* /test/break.html break;root /usr/share/nginx/html;}location /last {rewrite .* /test/last.html last; # 这个位置的last会导致重定向失效直接去往下面的重定向root /usr/share/nginx/html;}location /test {rewrite .* /test/test.html break;root /usr/share/nginx/html;} 访问/break
访问/last(此处为重点)
访问/test
7、CA与HTTPS
CA(Certificate Authority,证书颁发机构)和HTTPS(Hypertext Transfer Protocol Secure,超文本传输安全协议)之间有着密切的关系。
简要了解一下这两个概念:
- 证书颁发机构(CA)是一个权威的第三方实体,负责验证个人、组织或网站的身份,并签发数字证书来证明其身份的合法性。
- HTTPS是一种通过加密和身份验证保护信息安全的通信协议。它使用SSL/TLS协议来创建加密连接,确保在客户端和服务器之间传输的数据是安全的。
CA和HTTPS之间的关系可以总结如下:
- CA负责颁发SSL/TLS数字证书,这些证书用于在HTTPS连接中进行身份验证和加密通信。当用户访问一个使用HTTPS的网站时,浏览器会检查网站提供的数字证书是否由受信任的CA签发。
- 如果证书是由受信任的CA签发的,浏览器就会信任该证书,建立安全连接并显示一个锁形状的图标,表示连接是安全的。
- 如果证书无效或由不受信任的CA签发,浏览器会显示警告信息,提示用户存在安全风险。
7.1、私有CA的https部署实战
准备存放证书和秘钥的目录
[root@localhost ~]# mkdir /etc/nginx/ssl
使用openssl生成基于rsa数学算法长度为2048bit的秘钥,文件必须以key为结尾
centos8以前可以设置为1024长度,本次演示用的是9,故长度设置为2048
[root@localhost ~]# openssl genrsa 2048 > /etc/nginx/ssl/server.key使用秘钥文件生成证书-申请书
[root@localhost ~]# openssl req -new -key /etc/nginx/ssl/server.key > /etc/nginx/ssl/server.csr
You are about to be asked to enter information that will be incorporated
into your certificate request.
What you are about to enter is what is called a Distinguished Name or a DN.
There are quite a few fields but you can leave some blank
For some fields there will be a default value,
If you enter '.', the field will be left blank.
-----
Country Name (2 letter code) [XX]:CN
#国家
State or Province Name (full name) []:SC
#省会
Locality Name (eg, city) [Default City]:CD
#城市
Organization Name (eg, company) [Default Company Ltd]:liumuquan
#组织
Organizational Unit Name (eg, section) []:cloud
#单位名
Common Name (eg, your name or your server's hostname) []:liumuquan.com
#网站名
Email Address []:123456@qq.com
#邮箱
Please enter the following 'extra' attributes
to be sent with your certificate request
A challenge password []:
#密码:空
An optional company name []:
#密码:空[root@localhost ~]# ls /etc/nginx/ssl/
server.csr(证书申请)  server.key(私钥)
同意申请,生成证书
[root@localhost ~]# openssl req -x509 -days 365 -key /etc/nginx/ssl/server.key -in /etc/nginx/ssl/server.csr > /etc/nginx/ssl/server.crt
Warning: Not placing -key in cert or request since request is used
Warning: No -copy_extensions given; ignoring any extensions in the request
配置网站
[root@localhost ~]# cat /etc/nginx/conf.d/default.conf
server {listen       443 ssl;server_name  liumuquan.com;#access_log  /var/log/nginx/host.access.log  main;ssl_certificate      /etc/nginx/ssl/server.crt;ssl_certificate_key  /etc/nginx/ssl/server.key;location / {root   /usr/share/nginx/html;index  index.html index.htm;}#error_page  404              /404.html;
测试网站
[root@localhost ~]# nginx -t
nginx: the configuration file /etc/nginx/nginx.conf syntax is ok
nginx: configuration file /etc/nginx/nginx.conf test is successful
[root@localhost ~]# nginx -s reload
[root@localhost ~]# s
Display all 287 possibilities? (y or n)
[root@localhost ~]# ss -antp | grep nginx
LISTEN 0      511            0.0.0.0:443         0.0.0.0:*     users:(("nginx",pid=1863,fd=12),("nginx",pid=1862,fd=12),("nginx",pid=912,fd=12))
[root@localhost ~]#
使用浏览器访问网站
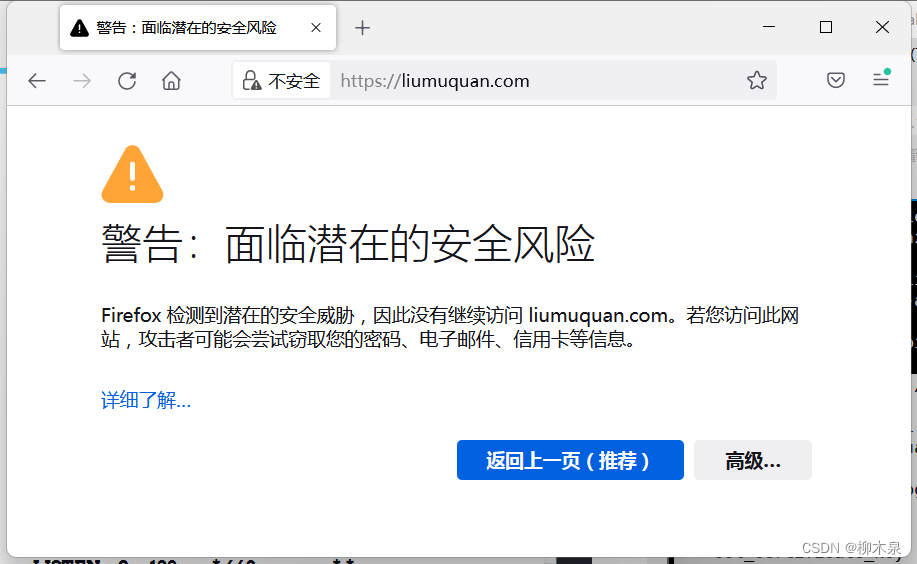
选择接受风险并继续

7.2、公有CA
公有CA(Certificate Authority,证书颁发机构)是指受信任的第三方机构,为申请证书的企业组织颁发证书,并管理公共密钥和证书。这些证书必须符合严格的基准要求,以确保网站的高安全性。
公有云网站都会提供数字证书管理服务(SSL)证书,可以为自己的网站获取免费证书。
8、Nginx的平滑升级
升级会造成程序的关闭和启动,平滑是指用户的访问不受影响。程序的升级就是替换文件,替换文件不可能不影响用户,所以所谓平滑只是相对影响较小。
操作方法是使用源码安装新版本(必须使用源码),然后使用kill -USR2重启nginx,kill -USR2是一种特殊的重启,是指服务完当前用户后重启,此时并不处理新生成的链接,重启后后续用户进入新版本。
(1)编译安装新版本的nginx,指定安装目录为新目录
[root@server nginx]# tar xf nginx-1.14.2.tar.gz -C /usr/local/src/
[root@server nginx]# cd /usr/local/src/nginx-1.14.2/
[root@server nginx-1.14.2]# ./configure --user=nginx --group=nginx --prefix=/usr/local/nginx14 --with-http_stub_status_module --with-http_ssl_module && make && make install
(2)查看就的nginx的主进程号和工作进程号
[root@server ~]# ps aux |grep ngin[x]
root      68595  0.0  0.1  20640  1548 ?        Ss   12:12   0:00 nginx: master process /usr/local/nginx/sbin/nginx
nobody    75083  0.0  0.1  21060  1632 ?        S    12:17   0:00 nginx: worker process[x] 是一个正则表达式中的特殊字符,用于匹配前面字符 "gin" 后跟着任意一个字符的情况。因此,ngin[x] 可以匹配到 "nginx" 这个关键词,定位与 Nginx 服务相关的进程信息
(3)替换旧的执行程序
[root@server ~]# mv /usr/local/nginx/sbin/nginx{,.bak}#移除并备份,这个命令表示在文件名末尾添加 .bak 后缀[root@server ~]# cp /usr/local/nginx14/sbin/nginx /usr/local/nginx/sbin/nginx #完成主程序替换[root@server ~]# /usr/local/nginx/sbin/nginx -v
nginx version: nginx/1.14.2#验证版本,此时文件已经替换,但nginx仍正常运行
(4)给主进程发送USR2信号
[root@server ~]# cat /usr/local/nginx/logs/nginx.pid
68595
[root@server ~]# kill -USR2 68595#查看nginx pid,会出现一个nginx.pid.oldbin[root@server ~]# cat /usr/local/nginx/logs/nginx.pid.oldbin
68595#给旧的进程发送一个kill -USR2的信号,会启动一个新的nginx主进程,实现热升级
(5)给进程发送WINCH信号
[root@server ~]# kill -WINCH 68595#kill -WINCH“从容关闭”[root@server ~]# ps aux |grep ngin[x]
root      58943  0.0  0.3  45940  3260 ?        S    13:34   0:00 nginx: master process /usr/local/nginx/sbin/nginx
nginx     58944  0.0  0.1  46388  1888 ?        S    13:34   0:00 nginx: worker process
root      68595  0.0  0.1  20640  1548 ?        Ss   12:12   0:00 nginx: master process /usr/local/nginx/sbin/nginx
相关文章:
03--nginx架构实战
前言:这应该是nginx梳理的最后一章,写一些关于网站架构和网站上线的知识内容,主要是感觉到运维并不是单一方向的行业,这一章概念会有一些广泛,但是非常重要,都是这几年工作中遇到的情况,整理一下…...

【力扣第 400 场周赛】Leetcode 删除星号以后字典序最小的字符串
文章目录 1. 删除星号以后字典序最小的字符串 1. 删除星号以后字典序最小的字符串 题目链接 🍎 解题思路:遇到 *就删除一个字符,为了满足题意,要删除字典序最小的字符,那么假如有多个字典序最小的字符我们该删除哪个…...

Unity DOTS技术(九) BufferElement动态缓冲区组件
文章目录 一.简介二.例子 一.简介 在之前的学习中我们发现Entity不能挂载相同的组件的. 当我们需要用相同的组件时则可以使用.IBufferElementData接口 动态缓冲区组件来实现 二.例子 1.创建IBufferElementData组件 using Unity.Entities; using UnityEngine; //[GenerateAu…...

hnust 湖南科技大学 2022 软件测试报告+代码
hnust 湖南科技大学 2022 软件测试报告代码 内容 BMI junit单元测试决策表划分方法测试三角形判断问题文档修改问题之因果图实验逻辑覆盖测试技术实验(白盒测试)selenium 功能自动化测试Jmeter 性能自动化测试 下载地址 https://pan.baidu.com/s/19e…...
【面试笔记】单片机软件工程师,工业控制方向(储能)
文章目录 1. 基础知识1.1 C语言笔试题1.1.1 用宏定义得到一个数组所含的元素个数1.1.2 定义函数指针从程序固定地址(0)开始执行1.1.3 volatile的含义及作用1.1.4 32位系统,整数7和-7,分别以大端和小端存储,请示意说明 1.2 嵌入式基础1.2.1 简…...
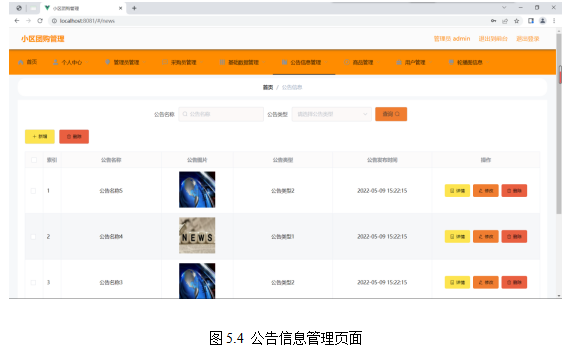
基于springboot实现小区团购管理系统项目【项目源码+论文说明】计算机毕业设计
基于springboot实现小区团购管理系统演示 摘要 传统办法管理信息首先需要花费的时间比较多,其次数据出错率比较高,而且对错误的数据进行更改也比较困难,最后,检索数据费事费力。因此,在计算机上安装小区团购管理软件来…...
基于django | 创建数据库,实现增、删、查的功能
1、在cmd中,输入指令进入mysql终端: mysql -u 用户名 -p 2、输入mysql的密码 3、输入指令,显示出所有的数据库 show databases; 4、输入指令创建表: create table 表名 DEFAULT CHARSET utf8 COLLATE utf8_general_ci; 5、use …...
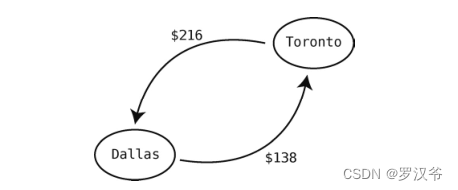
数据结构与算法07-图
介绍 图是一种善于处理关系型数据的数据结构,使用它可以很轻松地表示数据之间是如何关联的。 图的实现形式有很多,最简单的方法之一就是用散列表。 friends { "Alice" > ["Bob", "Diana", "Fred"], &quo…...

springboot项目部署需要redis集群问题
本来直接将redis为单独启动模式转为配置 yml文件 spring.redis.cluster.nodes: 192.168.12.78:8001,192.168.12.78:8002,192.168.12.78:8003, java文件 package io.sirc.config;import com.fasterxml.jackson.annotation.JsonAutoDetect; import com.fasterxml.jackson.ann…...
JVMの内存泄漏内存溢出案例分析
1、内存溢出 内存溢出指的是程序在申请内存时,没有足够的内存可供分配,导致无法满足程序的内存需求,常见的内存溢出情况包括堆内存溢出(Heap Overflow)和栈溢出(Stack Overflow): …...

v31支架固定方式
CK_Label_v31 夹子固定方式 底座粘贴固定方式...
)
Jenkins从入门到精通面试题及参考答案(3万字长文)
目录 什么是Jenkins? Jenkins是如何工作的? Jenkins与持续集成(CI)有什么关系?...
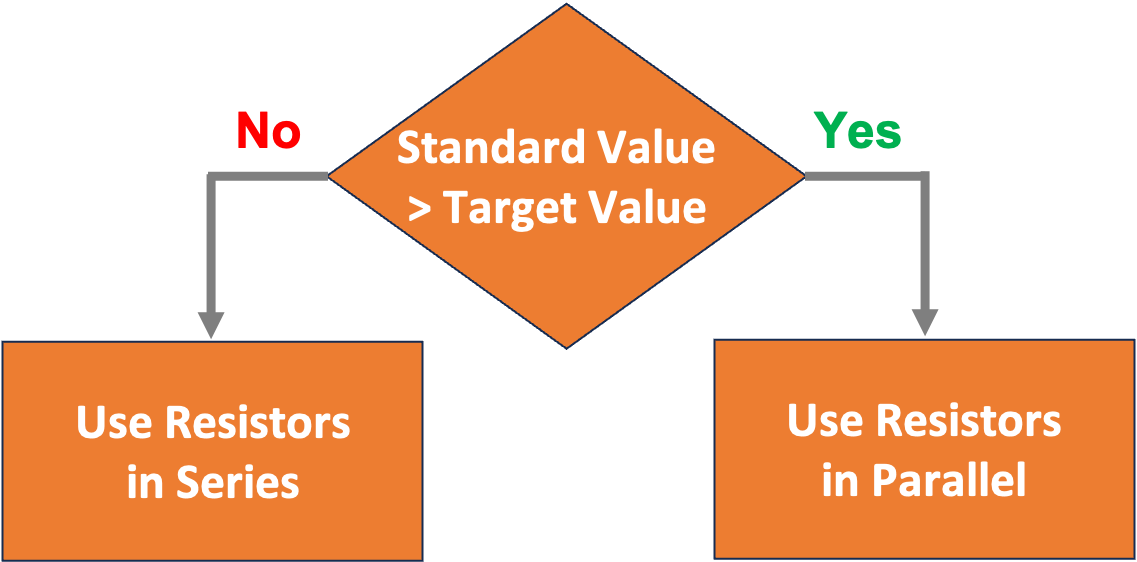
如何使用电阻器?创建任何电阻的简单过程
您可能有一整盒E12 系列电阻器,但仍然无法获得足够接近您所需电阻的值。如果您需要 50 kΩ 电阻,接近的电阻是 47 kΩ。当然,这个误差在 10% 以内,但这对于您的应用程序来说可能还不够好。你会怎样做? 本文将介绍一个…...

学Python,看一篇就够
学Python,看一篇就够 python基础注释变量标识符命名规则使用变量认识bugDebug工具打断点 数据类型输出转义字符输入输入语法输入的特点 转换数据类型pycharm交互运算符的分类赋值运算符复合赋值运算符比较运算符逻辑运算符拓展 条件语句单分支语法多分支语法拓展 if…...

数据仓库核心:维度表设计的艺术与实践
文章目录 1. 引言1.1基本概念1.2 维度表定义 2. 设计方法2.1 选择或新建维度2.2 确定维度主维表2.3 确定相关维表2.14 确定维度属性 3. 维度的层次结构3.1 举个例子3.2 什么是数据钻取?3.3 常见的维度层次结构 4. 高级维度策略4.1 维度整合维度整合:构建…...

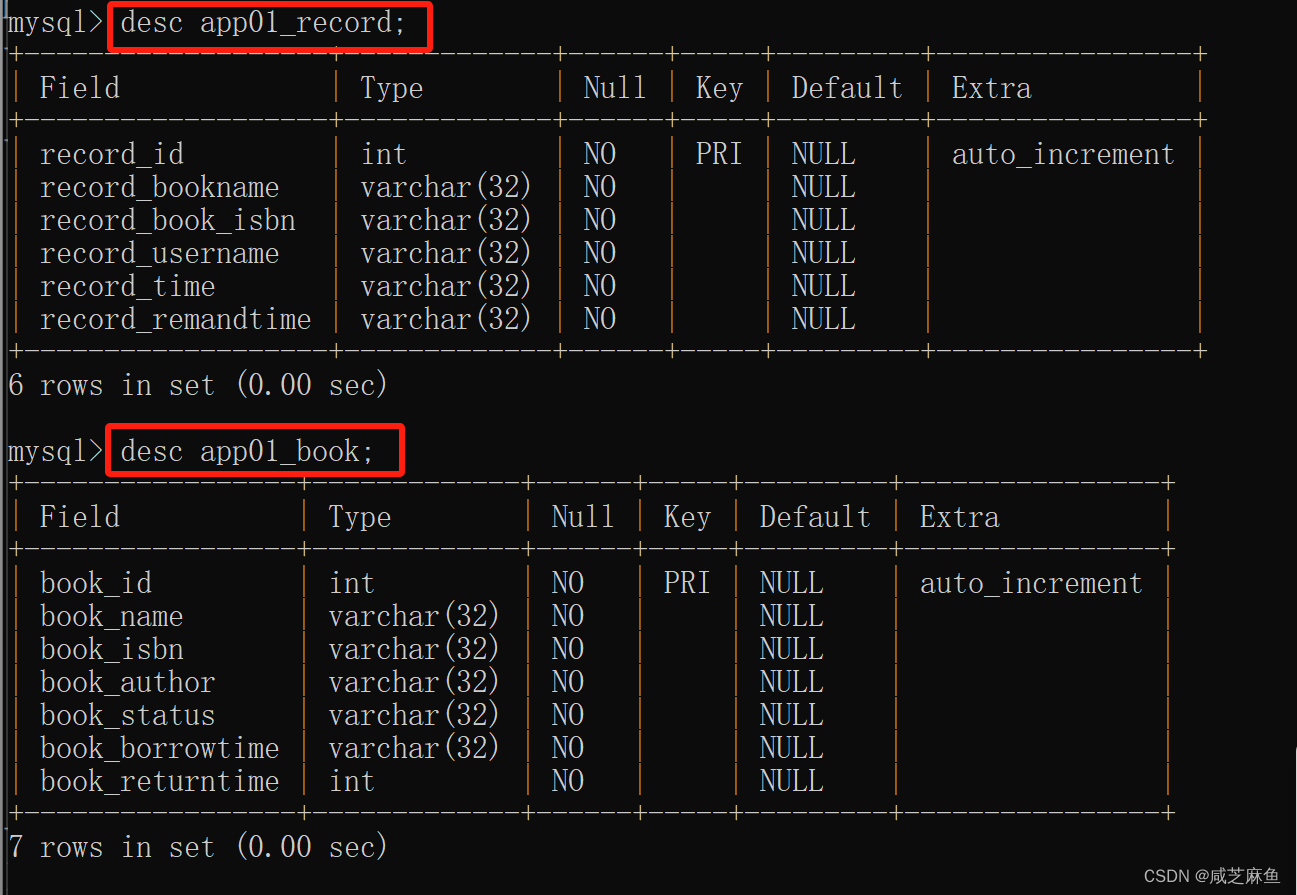
SQL实验 连接查询和嵌套查询
一、实验目的 1.掌握Management Studio的使用。 2.掌握SQL中连接查询和嵌套查询的使用。 二、实验内容及要求(请同学们尝试每道题使用连接和嵌套两种方式来进行查询,如果可以的话) 1.找出所有任教“数据…...

【JAVA WEB实用技巧与优化方案】Maven自动化构建与Maven 打包技巧
文章目录 一、MavenMaven生命周期介绍maven生命周期命令解析二、如何编写maven打包脚本maven 配置详解setting.xml主要配置元素setting.xml 详细配置使用maven 打包springboot项目maven 引入使用package命令来打包idea打包三、使用shell脚本自动发布四、使用maven不同环境配置加…...

详细分析Mysql中的SQL_MODE基本知识(附Demo讲解)
目录 前言1. 基本知识2. Demo讲解2.1 ONLY_FULL_GROUP_BY2.2 STRICT_TRANS_TABLES2.3 NO_ZERO_IN_DATE2.4 NO_ENGINE_SUBSTITUTION2.5 ANSI_QUOTES 前言 了解Mysql内部的机制有助于辅助开发以及形成整体的架构思维 对于基本的命令行以及优化推荐阅读: 数据库中增…...

vue3+uniapp
1.页面滚动 2.图片懒加载 3.安全区域 4.返回顶部,刷新页面 5.grid布局 place-self: center; 6.模糊效果 7.缩放 8.微信小程序联系客服 9.拨打电话 10.穿透 11.盒子宽度 12.一般文字以及盒子阴影 13.选中文字 14.顶部安全距离 15.onLoad周期函数在setup语法糖执行后…...
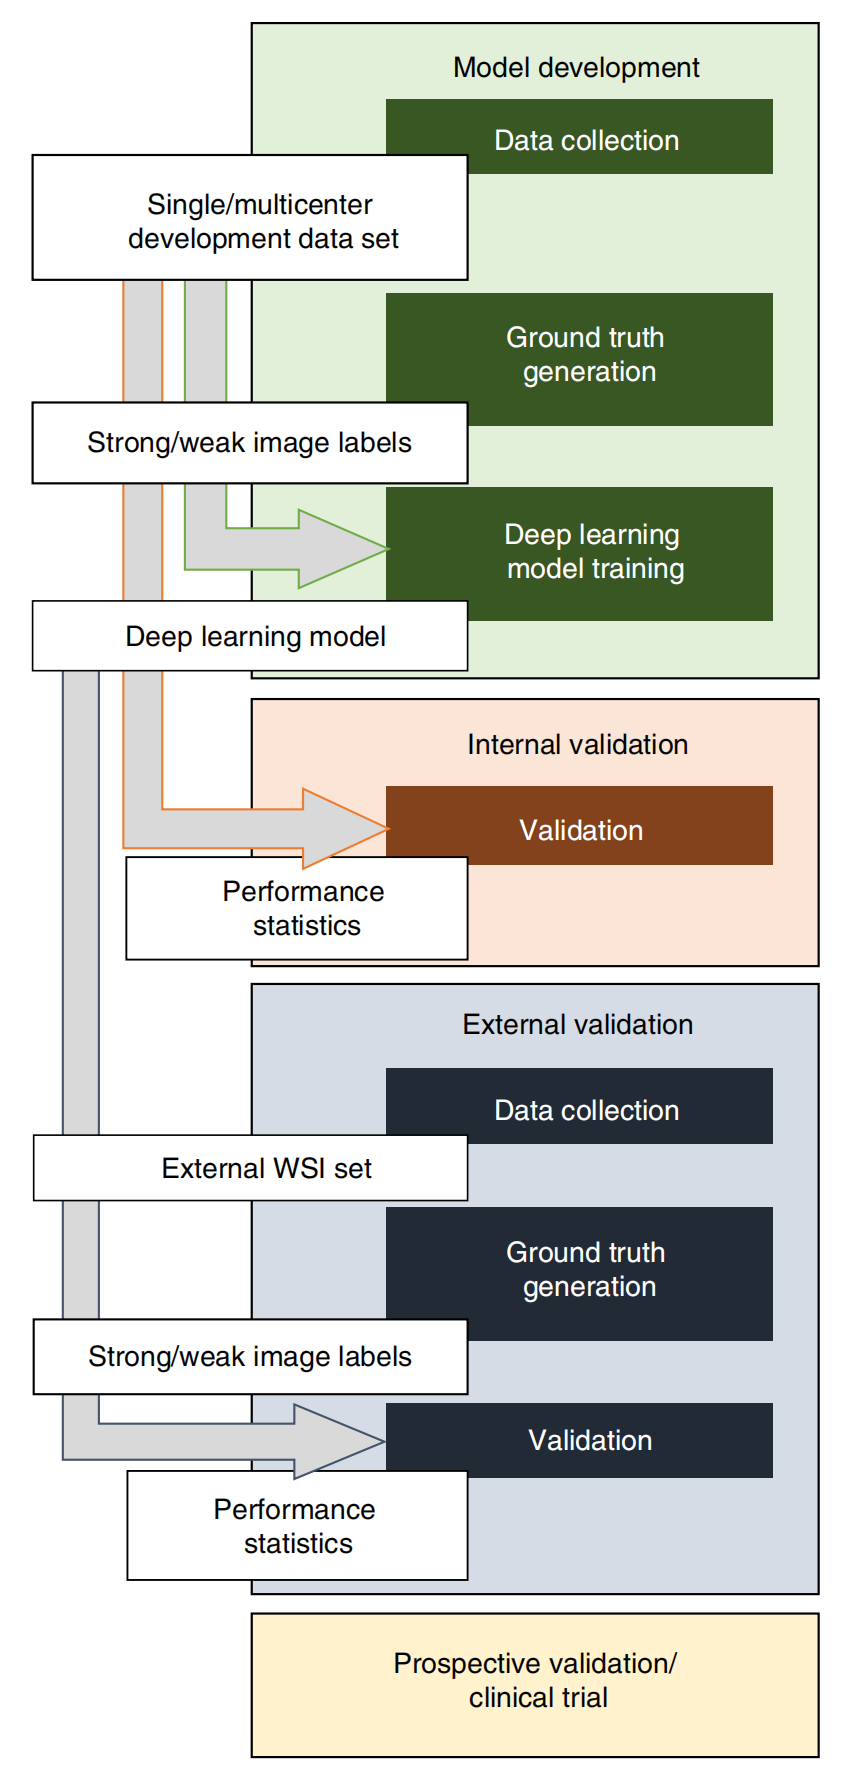
组织病理学结合人工智能之后,如何实际应用于临床?|顶刊精析·24-06-06
小罗碎碎念 今天这篇文章选自21年5月发表的nature medicine,标题名为——Deep learning in histopathology: the path to the clinic,这篇文章也是我规划的病理组学文献精析的第三篇,如果你能坚持把七篇都看完,相信你脑海中一定会…...
:魔术方法与数据模型)
Python从入门到精通(第18章):魔术方法与数据模型
开头导语 这是本系列第18章。魔术方法(Magic Methods,也称特殊方法或 dunder methods)是 Python 类的灵魂——你用过的 len(my_list)、my_list[0]、for x in obj、print(obj),背后都是魔术方法在驱动。理解魔术方法,你就能理解 Python 的数据模型(Data Model),写出符合…...

从零开始:使用mmdetection3d和FCOS3d模型训练nuscenes-mini数据集的完整流程
从零构建:基于FCOS3D与NuScenes-mini的3D目标检测实战指南 在自动驾驶和机器人感知领域,3D目标检测技术正经历着前所未有的发展。OpenMMLab生态系统中的mmdetection3d框架,凭借其模块化设计和丰富的算法支持,已成为该领域研究与实…...

AI修图新体验:LongCat-Image-Edit快速部署,轻松实现图片局部修改
AI修图新体验:LongCat-Image-Edit快速部署,轻松实现图片局部修改 1. 模型简介:一句话精准修图 LongCat-Image-Edit是美团团队开源的一款革命性图像编辑工具,它能通过简单的文字指令实现图片的精准修改。与传统的图像生成工具不同…...

Electron内存优化全攻略:如何让你的应用跑得更快?
Electron内存优化全攻略:如何让你的应用跑得更快? 当你的Electron应用从开发环境切换到真实用户桌面时,是否遇到过这些场景:用户抱怨"这个聊天软件开三天就卡死"、"笔记应用多开几个文档风扇狂转"?…...

3003 - 神通数据库命令行实战:从基础连接到高级管理
1. 神通数据库命令行入门指南 第一次接触神通数据库命令行工具时,我也被那一长串参数搞得头晕眼花。但实际用下来发现,这套命令行工具设计得相当人性化,只要掌握几个核心命令,就能完成80%的日常运维工作。最基础的连接命令长这样&…...

Anything to RealCharacters引擎在创意项目中的应用:生成一致性真人形象
Anything to RealCharacters引擎在创意项目中的应用:生成一致性真人形象 1. 项目背景与核心价值 在数字内容创作领域,将2.5D或卡通形象转换为写实真人风格一直是个技术挑战。传统方法要么效果生硬不自然,要么需要专业美术人员手动调整&…...

从同源到同站:浏览器安全机制的核心逻辑与实战解析
1. 同源与同站:浏览器安全的两道防线 浏览器就像一位严格的保安,时刻守护着用户数据的安全。它有两套不同的安检标准:同源策略和同站策略。这两套标准看似相似,实则有着本质区别。 先来看个生活场景:假设你住在一栋公寓…...

I.MX6ULL GPIO配置避坑指南:HYS、PUS、DSE这些寄存器位到底怎么设?
I.MX6ULL GPIO配置实战手册:寄存器位场景化解析与避坑策略 如果你正在使用I.MX6ULL开发嵌入式系统,GPIO配置可能是你遇到的第一个"拦路虎"。与常见的STM32不同,I.MX6ULL的GPIO配置寄存器充满了各种缩写——HYS、PUS、PUE、PKE、ODE…...

手把手教你用蓝莲花XSS平台玩转CTFHub Web XSS题目
蓝莲花XSS平台实战指南:攻克CTFHub Web安全挑战 在网络安全竞赛和实战演练中,跨站脚本攻击(XSS)始终是Web安全领域的重要考点。不同于传统的漏洞利用,XSS攻击需要建立有效的数据回传机制,这对CTF选手提出了更高要求。蓝莲花(BLUE-…...

OpenClaw数据标注:Qwen2.5-VL-7B辅助生成图像标签训练集
OpenClaw数据标注:Qwen2.5-VL-7B辅助生成图像标签训练集 1. 为什么需要AI辅助数据标注 作为一名独立开发者,我最近在尝试构建一个简单的图像分类模型时遇到了数据标注的瓶颈。手动标注1000张图片花费了我整整三天时间,而且过程中频繁出现标…...