Android13 WMS窗口层级树
1,认识层级树
可以通过dumpsys activity containers 看到 WMS 层级树的结构
ACTIVITY MANAGER CONTAINERS (dumpsys activity containers)
ROOT type=undefined mode=fullscreen override-mode=undefined requested-bounds=[0,0][0,0] bounds=[0,0][1440,2960]#0 Display 0 name="Built-in Screen" type=undefined mode=fullscreen override-mode=fullscreen requested-bounds=[0,0][1440,2960] bounds=[0,0][1440,2960]#2 Leaf:36:36 type=undefined mode=fullscreen override-mode=undefined requested-bounds=[0,0][0,0] bounds=[0,0][1440,2960]#1 WindowToken{6cc524e type=2024 android.os.BinderProxy@8ffb949} type=undefined mode=fullscreen override-mode=undefined requested-bounds=[0,0][0,0] bounds=[0,0][1440,2960]#0 888c47c ScreenDecorOverlayBottom type=undefined mode=fullscreen override-mode=undefined requested-bounds=[0,0][0,0] bounds=[0,0][1440,2960]#0 WindowToken{4346895 type=2024 android.os.BinderProxy@ad2b04c} type=undefined mode=fullscreen override-mode=undefined requested-bounds=[0,0][0,0] bounds=[0,0][1440,2960]#0 da08538 ScreenDecorOverlay type=undefined mode=fullscreen override-mode=undefined requested-bounds=[0,0][0,0] bounds=[0,0][1440,2960]#1 HideDisplayCutout:32:35 type=undefined mode=fullscreen override-mode=undefined requested-bounds=[0,0][0,0] bounds=[0,0][1440,2960]#2 OneHanded:34:35 type=undefined mode=fullscreen override-mode=undefined requested-bounds=[0,0][0,0] bounds=[0,0][1440,2960]#0 FullscreenMagnification:34:35 type=undefined mode=fullscreen override-mode=undefined requested-bounds=[0,0][0,0] bounds=[0,0][1440,2960]#0 Leaf:34:35 type=undefined mode=fullscreen override-mode=undefined requested-bounds=[0,0][0,0] bounds=[0,0][1440,2960]#1 FullscreenMagnification:33:33 type=undefined mode=fullscreen override-mode=undefined requested-bounds=[0,0][0,0] bounds=[0,0][1440,2960]#0 Leaf:33:33 type=undefined mode=fullscreen override-mode=undefined requested-bounds=[0,0][0,0] bounds=[0,0][1440,2960]#0 OneHanded:32:32 type=undefined mode=fullscreen override-mode=undefined requested-bounds=[0,0][0,0] bounds=[0,0][1440,2960]#0 Leaf:32:32 type=undefined mode=fullscreen override-mode=undefined requested-bounds=[0,0][0,0] bounds=[0,0][1440,2960]#0 WindowedMagnification:0:31 type=undefined mode=fullscreen override-mode=undefined requested-bounds=[0,0][0,0] bounds=[0,0][1440,2960]#6 HideDisplayCutout:26:31 type=undefined mode=fullscreen override-mode=undefined requested-bounds=[0,0][0,0] bounds=[0,0][1440,2960]#0 OneHanded:26:31 type=undefined mode=fullscreen override-mode=undefined requested-bounds=[0,0][0,0] bounds=[0,0][1440,2960]#2 FullscreenMagnification:29:31 type=undefined mode=fullscreen override-mode=undefined requested-bounds=[0,0][0,0] bounds=[0,0][1440,2960]#0 Leaf:29:31 type=undefined mode=fullscreen override-mode=undefined requested-bounds=[0,0][0,0] bounds=[0,0][1440,2960]#1 Leaf:28:28 type=undefined mode=fullscreen override-mode=undefined requested-bounds=[0,0][0,0] bounds=[0,0][1440,2960]#0 FullscreenMagnification:26:27 type=undefined mode=fullscreen override-mode=undefined requested-bounds=[0,0][0,0] bounds=[0,0][1440,2960]#0 Leaf:26:27 type=undefined mode=fullscreen override-mode=undefined requested-bounds=[0,0][0,0] bounds=[0,0][1440,2960]#5 Leaf:24:25 type=undefined mode=fullscreen override-mode=undefined requested-bounds=[0,0][0,0] bounds=[0,0][1440,2960]#1 WindowToken{914ccc0 type=2024 android.os.BinderProxy@60ae43} type=undefined mode=fullscreen override-mode=undefined requested-bounds=[0,0][0,0] bounds=[0,0][1440,2960]#0 20f913e pip-dismiss-overlay type=undefined mode=fullscreen override-mode=undefined requested-bounds=[0,0][0,0] bounds=[0,0][1440,2960]#0 WindowToken{4af2b8f type=2019 android.os.BinderProxy@d5bc069} type=undefined mode=fullscreen override-mode=undefined requested-bounds=[0,0][0,0] bounds=[0,0][1440,2960]#0 e66fa25 NavigationBar0 type=undefined mode=fullscreen override-mode=undefined requested-bounds=[0,0][0,0] bounds=[0,0][1440,2960]#4 HideDisplayCutout:18:23 type=undefined mode=fullscreen override-mode=undefined requested-bounds=[0,0][0,0] bounds=[0,0][1440,2960]#0 OneHanded:18:23 type=undefined mode=fullscreen override-mode=undefined requested-bounds=[0,0][0,0] bounds=[0,0][1440,2960]#0 FullscreenMagnification:18:23 type=undefined mode=fullscreen override-mode=undefined requested-bounds=[0,0][0,0] bounds=[0,0][1440,2960]#0 Leaf:18:23 type=undefined mode=fullscreen override-mode=undefined requested-bounds=[0,0][0,0] bounds=[0,0][1440,2960]#3 OneHanded:17:17 type=undefined mode=fullscreen override-mode=undefined requested-bounds=[0,0][0,0] bounds=[0,0][1440,2960]#0 FullscreenMagnification:17:17 type=undefined mode=fullscreen override-mode=undefined requested-bounds=[0,0][0,0] bounds=[0,0][1440,2960]#0 Leaf:17:17 type=undefined mode=fullscreen override-mode=undefined requested-bounds=[0,0][0,0] bounds=[0,0][1440,2960]#0 WindowToken{2cb42e4 type=2040 android.os.BinderProxy@9c0076} type=undefined mode=fullscreen override-mode=undefined requested-bounds=[0,0][0,0] bounds=[0,0][1440,2960]#0 bbfae02 NotificationShade type=undefined mode=fullscreen override-mode=undefined requested-bounds=[0,0][0,0] bounds=[0,0][1440,2960]#2 HideDisplayCutout:16:16 type=undefined mode=fullscreen override-mode=undefined requested-bounds=[0,0][0,0] bounds=[0,0][1440,2960]#0 OneHanded:16:16 type=undefined mode=fullscreen override-mode=undefined requested-bounds=[0,0][0,0] bounds=[0,0][1440,2960]#0 FullscreenMagnification:16:16 type=undefined mode=fullscreen override-mode=undefined requested-bounds=[0,0][0,0] bounds=[0,0][1440,2960]#0 Leaf:16:16 type=undefined mode=fullscreen override-mode=undefined requested-bounds=[0,0][0,0] bounds=[0,0][1440,2960]#1 OneHanded:15:15 type=undefined mode=fullscreen override-mode=undefined requested-bounds=[0,0][0,0] bounds=[0,0][1440,2960]#0 FullscreenMagnification:15:15 type=undefined mode=fullscreen override-mode=undefined requested-bounds=[0,0][0,0] bounds=[0,0][1440,2960]#0 Leaf:15:15 type=undefined mode=fullscreen override-mode=undefined requested-bounds=[0,0][0,0] bounds=[0,0][1440,2960]#0 WindowToken{36a0a7c type=2000 android.os.BinderProxy@57ea84e} type=undefined mode=fullscreen override-mode=undefined requested-bounds=[0,0][0,0] bounds=[0,0][1440,2960]#0 f20fb5a StatusBar type=undefined mode=fullscreen override-mode=undefined requested-bounds=[0,0][0,0] bounds=[0,0][1440,2960]#0 HideDisplayCutout:0:14 type=undefined mode=fullscreen override-mode=undefined requested-bounds=[0,0][0,0] bounds=[0,0][1440,2960]#0 OneHanded:0:14 type=undefined mode=fullscreen override-mode=undefined requested-bounds=[0,0][0,0] bounds=[0,0][1440,2960]#1 ImePlaceholder:13:14 type=undefined mode=fullscreen override-mode=undefined requested-bounds=[0,0][0,0] bounds=[0,0][1440,2960]#0 ImeContainer type=undefined mode=fullscreen override-mode=undefined requested-bounds=[0,0][0,0] bounds=[0,0][1440,2960]#0 WindowToken{18b2fcb type=2011 android.os.Binder@f3da9a} type=undefined mode=fullscreen override-mode=undefined requested-bounds=[0,0][0,0] bounds=[0,0][1440,2960]#0 3a9ce61 InputMethod type=undefined mode=fullscreen override-mode=undefined requested-bounds=[0,0][0,0] bounds=[0,0][1440,2960]#0 FullscreenMagnification:0:12 type=undefined mode=fullscreen override-mode=undefined requested-bounds=[0,0][0,0] bounds=[0,0][1440,2960]#2 Leaf:3:12 type=undefined mode=fullscreen override-mode=undefined requested-bounds=[0,0][0,0] bounds=[0,0][1440,2960]#0 WindowToken{fc9ff07 type=2038 android.os.BinderProxy@d280149} type=undefined mode=fullscreen override-mode=undefined requested-bounds=[0,0][0,0] bounds=[0,0][1440,2960]#0 d5c8415 ShellDropTarget type=undefined mode=fullscreen override-mode=undefined requested-bounds=[0,0][0,0] bounds=[0,0][1440,2960]#1 DefaultTaskDisplayArea type=undefined mode=fullscreen override-mode=undefined requested-bounds=[0,0][0,0] bounds=[0,0][1440,2960]#2 Task=1 type=home mode=fullscreen override-mode=undefined requested-bounds=[0,0][0,0] bounds=[0,0][1440,2960]#0 Task=24 type=home mode=fullscreen override-mode=undefined requested-bounds=[0,0][0,0] bounds=[0,0][1440,2960]#0 ActivityRecord{7246b16 u0 com.android.launcher3/.uioverrides.QuickstepLauncher} t24} type=home mode=fullscreen override-mode=undefined requested-bounds=[0,0][0,0] bounds=[0,0][1440,2960]#0 bd08f5d com.android.launcher3/com.android.launcher3.uioverrides.QuickstepLauncher type=home mode=fullscreen override-mode=undefined requested-bounds=[0,0][0,0] bounds=[0,0][1440,2960]#1 Task=3 type=undefined mode=fullscreen override-mode=fullscreen requested-bounds=[0,0][0,0] bounds=[0,0][1440,2960]#0 Task=4 type=undefined mode=fullscreen override-mode=fullscreen requested-bounds=[0,0][0,0] bounds=[0,0][1440,2960]#1 Task=6 type=undefined mode=multi-window override-mode=multi-window requested-bounds=[0,0][0,0] bounds=[0,0][1440,2960]#0 Task=5 type=undefined mode=multi-window override-mode=multi-window requested-bounds=[0,0][0,0] bounds=[0,0][1440,2960]#0 Leaf:0:1 type=undefined mode=fullscreen override-mode=undefined requested-bounds=[0,0][0,0] bounds=[0,0][1440,2960]#0 WallpaperWindowToken{a0c14b1 token=android.os.Binder@c234b58} type=undefined mode=fullscreen override-mode=fullscreen requested-bounds=[0,0][0,0] bounds=[0,0][1440,2960]#0 b9a90a8 com.android.systemui.ImageWallpaper type=undefined mode=fullscreen override-mode=undefined requested-bounds=[0,0][0,0] bounds=[0,0][1440,2960]
可以看出,层级机构树一共有37层,层级越高,越接近我们的"眼睛",以上父子关系,做成图表格式,可以看的更直观,如下:

2,层级结构树的构建过程
SystemServer启动时,调用startOtherServices方法
private void startOtherServices(@NonNull TimingsTraceAndSlog t) {//省略t.traceBegin("SetWindowManagerService");mActivityManagerService.setWindowManager(wm);t.traceEnd();//省略
}
AMS.setWindowManager
public void setWindowManager(WindowManagerService wm) {synchronized (this) {mWindowManager = wm;mWmInternal = LocalServices.getService(WindowManagerInternal.class);mActivityTaskManager.setWindowManager(wm);}}
ATMS.setWindowManager
public void setWindowManager(WindowManagerService wm) {synchronized (mGlobalLock) {//省略mRootWindowContainer.setWindowManager(wm);//省略}}RootWindowContainer.setWindowManager
void setWindowManager(WindowManagerService wm) {//省略final Display[] displays = mDisplayManager.getDisplays();//得到系统有几个显示设备for (int displayNdx = 0; displayNdx < displays.length; ++displayNdx) {//遍历displayfinal Display display = displays[displayNdx];final DisplayContent displayContent = new DisplayContent(display, this);//创建DisplayContentaddChild(displayContent, POSITION_BOTTOM);//将DisplayContent挂在root下if (displayContent.mDisplayId == DEFAULT_DISPLAY) {mDefaultDisplay = displayContent;}}//省略}对于每个显示设备,系统都会创建一个DisplayContent对象,并将DisplayContent对象挂在root下。接着来看一下DisplayContent的创建
DisplayContent(Display display, RootWindowContainer root) {//省略configureSurfaces(pendingTransaction);//省略
}
configureSurfaces
private void configureSurfaces(Transaction transaction) {final SurfaceControl.Builder b = mWmService.makeSurfaceBuilder(mSession).setOpaque(true).setContainerLayer().setCallsite("DisplayContent");mSurfaceControl = b.setName(getName()).setContainerLayer().build();if (mDisplayAreaPolicy == null) {// Setup the policy and build the display area hierarchy.// Build the hierarchy only after creating the surface so it is reparented correctlymDisplayAreaPolicy = mWmService.getDisplayAreaPolicyProvider().instantiate(mWmService, this /* content */, this /* root */,mImeWindowsContainer);}//省略
getDisplayAreaPolicyProvider得到的是DefaultProvider对象,然后调用其instantiate方法。源码路径:frameworks/base/services/core/java/com/android/server/wm/DisplayAreaPolicy.java
static final class DefaultProvider implements DisplayAreaPolicy.Provider {@Overridepublic DisplayAreaPolicy instantiate(WindowManagerService wmService,DisplayContent content, RootDisplayArea root,DisplayArea.Tokens imeContainer) {final TaskDisplayArea defaultTaskDisplayArea = new TaskDisplayArea(content, wmService,"DefaultTaskDisplayArea", FEATURE_DEFAULT_TASK_CONTAINER);//创建DefaultTaskDisplayAreafinal List<TaskDisplayArea> tdaList = new ArrayList<>();tdaList.add(defaultTaskDisplayArea);// Define the features that will be supported under the root of the whole logical// display. The policy will build the DisplayArea hierarchy based on this.final HierarchyBuilder rootHierarchy = new HierarchyBuilder(root);// Set the essential containers (even if the display doesn't support IME).rootHierarchy.setImeContainer(imeContainer).setTaskDisplayAreas(tdaList);//1if (content.isTrusted()) {// Only trusted display can have system decorations.configureTrustedHierarchyBuilder(rootHierarchy, wmService, content);//2}// Instantiate the policy with the hierarchy defined above. This will create and attach// all the necessary DisplayAreas to the root.return new DisplayAreaPolicyBuilder().setRootHierarchy(rootHierarchy).build(wmService);//3}首先创建HierarchyBuilder对象,注释1处将imeContainer和tdaList(tdaList此时只有一个元素就是DefaultTaskDisplayArea)分别保存在HierarchyBuilder对象中的mImeContainer和mTaskDisplayAreas中。注释2处创建Feature并设置Feature的层级。注释3处开始构建层级树
2.1,创建Feature
configureTrustedHierarchyBuilder
//frameworks/base/services/core/java/com/android/server/wm/DisplayAreaPolicy.java
private void configureTrustedHierarchyBuilder(HierarchyBuilder rootHierarchy,WindowManagerService wmService, DisplayContent content) {// WindowedMagnification should be on the top so that there is only one surface// to be magnified.rootHierarchy.addFeature(new Feature.Builder(wmService.mPolicy, "WindowedMagnification",FEATURE_WINDOWED_MAGNIFICATION).upTo(TYPE_ACCESSIBILITY_MAGNIFICATION_OVERLAY).except(TYPE_ACCESSIBILITY_MAGNIFICATION_OVERLAY)// Make the DA dimmable so that the magnify window also mirrors the dim layer..setNewDisplayAreaSupplier(DisplayArea.Dimmable::new).build());if (content.isDefaultDisplay) {// Only default display can have cutout.// See LocalDisplayAdapter.LocalDisplayDevice#getDisplayDeviceInfoLocked.rootHierarchy.addFeature(new Feature.Builder(wmService.mPolicy, "HideDisplayCutout",FEATURE_HIDE_DISPLAY_CUTOUT).all().except(TYPE_NAVIGATION_BAR, TYPE_NAVIGATION_BAR_PANEL, TYPE_STATUS_BAR,TYPE_NOTIFICATION_SHADE).build()).addFeature(new Feature.Builder(wmService.mPolicy, "OneHanded",FEATURE_ONE_HANDED).all().except(TYPE_NAVIGATION_BAR, TYPE_NAVIGATION_BAR_PANEL,TYPE_SECURE_SYSTEM_OVERLAY).build());}rootHierarchy.addFeature(new Feature.Builder(wmService.mPolicy, "FullscreenMagnification",FEATURE_FULLSCREEN_MAGNIFICATION).all().except(TYPE_ACCESSIBILITY_MAGNIFICATION_OVERLAY, TYPE_INPUT_METHOD,TYPE_INPUT_METHOD_DIALOG, TYPE_MAGNIFICATION_OVERLAY,TYPE_NAVIGATION_BAR, TYPE_NAVIGATION_BAR_PANEL).build()).addFeature(new Feature.Builder(wmService.mPolicy, "ImePlaceholder",FEATURE_IME_PLACEHOLDER).and(TYPE_INPUT_METHOD, TYPE_INPUT_METHOD_DIALOG).build());}}
可以看出,这里创建了几个Feature,以及它们对应的层级是:
- WindowedMagnification:0~31
- HideDisplayCutout: 0~ 14 16 18~ 23 26~35
- OneHanded:0~ 23 26~ 32 34~35
- FullscreenMagnification:0~ 12 15~ 23 26~ 27 29~ 31 33~35
- ImePlaceholder:13 14
至于层级是怎么得出来的,具体查看Feature.Builder的 all,except等等方法。Feature以及对应的层级设置好之后,接下来就是要开始构建层级树了。
2.2, 层级树的构建
源码路径:frameworks/base/services/core/java/com/android/server/wm/DisplayAreaPolicyBuilder.java
Result build(WindowManagerService wmService) {validate();// Attach DA group roots to screen hierarchy before adding windows to group hierarchies.mRootHierarchyBuilder.build(mDisplayAreaGroupHierarchyBuilders);//省略}
mRootHierarchyBuilder就是之前创建的HierarchyBuilder对象,调用其build方法。构建层级树的核心就是该方法,来分步分析它
2.2.1 挂载 Feature
private void build(@Nullable List<HierarchyBuilder> displayAreaGroupHierarchyBuilders) {final WindowManagerPolicy policy = mRoot.mWmService.mPolicy;final int maxWindowLayerCount = policy.getMaxWindowLayer() + 1;// 37final DisplayArea.Tokens[] displayAreaForLayer =new DisplayArea.Tokens[maxWindowLayerCount];final Map<Feature, List<DisplayArea<WindowContainer>>> featureAreas =new ArrayMap<>(mFeatures.size());//前面创建了5个Feature,所以size为5for (int i = 0; i < mFeatures.size(); i++) {featureAreas.put(mFeatures.get(i), new ArrayList<>());}PendingArea[] areaForLayer = new PendingArea[maxWindowLayerCount];final PendingArea root = new PendingArea(null, 0, null);Arrays.fill(areaForLayer, root);//此时里面的每个元素都是root 0,0// Create DisplayAreas to cover all defined features.final int size = mFeatures.size();for (int i = 0; i < size; i++) {final Feature feature = mFeatures.get(i);PendingArea featureArea = null;for (int layer = 0; layer < maxWindowLayerCount; layer++) {if (feature.mWindowLayers[layer]) {if (featureArea == null || featureArea.mParent != areaForLayer[layer]) {// No suitable DisplayArea:// Create a new one under the previous area (as parent) for this layer.featureArea = new PendingArea(feature, layer, areaForLayer[layer]);areaForLayer[layer].mChildren.add(featureArea);}areaForLayer[layer] = featureArea;} else {featureArea = null;}}}
创建一个临时的层级结构树PendingArea(后面还需要转换成真正的层级树的),对于Feature,其构造结果如下

2.2.2,挂载leaf叶子结点
private void build(@Nullable List<HierarchyBuilder> displayAreaGroupHierarchyBuilders) {//省略// Create Tokens as leaf for every layer.PendingArea leafArea = null;int leafType = LEAF_TYPE_TOKENS;for (int layer = 0; layer < maxWindowLayerCount; layer++) {int type = typeOfLayer(policy, layer);// Check whether we can reuse the same Tokens with the previous layer. This happens// if the previous layer is the same type as the current layer AND there is no// feature that applies to only one of them.if (leafArea == null || leafArea.mParent != areaForLayer[layer]|| type != leafType) {// Create a new Tokens for this layer.leafArea = new PendingArea(null /* feature */, layer, areaForLayer[layer]);areaForLayer[layer].mChildren.add(leafArea);leafType = type;if (leafType == LEAF_TYPE_TASK_CONTAINERS) {// We use the passed in TaskDisplayAreas for task container type of layer.// Skip creating Tokens even if there is no TDA.addTaskDisplayAreasToApplicationLayer(areaForLayer[layer]);addDisplayAreaGroupsToApplicationLayer(areaForLayer[layer],displayAreaGroupHierarchyBuilders);leafArea.mSkipTokens = true;} else if (leafType == LEAF_TYPE_IME_CONTAINERS) {// We use the passed in ImeContainer for ime container type of layer.// Skip creating Tokens even if there is no ime container.leafArea.mExisting = mImeContainer;leafArea.mSkipTokens = true;}}leafArea.mMaxLayer = layer;}
}
首先也是创建临时的叶子PendingArea,leafType默认为LEAF_TYPE_TOKENS,在typeOfLayer方法中,对于IME和Application 有处理,将其leafType设为LEAF_TYPE_TASK_CONTAINERS和LEAF_TYPE_IME_CONTAINERS。注意对于这两种类型,有特殊的处理,mSkipTokens设置为了true,后续将临时的结构树转成真正的层级树的时候有用。
经过这一步,此时结构树的构造结果如下

2.2.3 将临时的结构树转成真正的结构树
在build方法的最后,调用instantiateChildren方法,进行结构树的转换
void instantiateChildren(DisplayArea<DisplayArea> parent, DisplayArea.Tokens[] areaForLayer,int level, Map<Feature, List<DisplayArea<WindowContainer>>> areas) {mChildren.sort(Comparator.comparingInt(pendingArea -> pendingArea.mMinLayer));for (int i = 0; i < mChildren.size(); i++) {final PendingArea child = mChildren.get(i);final DisplayArea area = child.createArea(parent, areaForLayer);//转换if (area == null) {// TaskDisplayArea and ImeContainer can be set at different hierarchy, so it can// be null.continue;}parent.addChild(area, WindowContainer.POSITION_TOP);if (child.mFeature != null) {areas.get(child.mFeature).add(area);}child.instantiateChildren(area, areaForLayer, level + 1, areas);//迭代的过程}}
在createArea中,对于IME和Application Layer是有特殊处理的,删掉上面对应结点下的leaf叶子,最终转换好的结构树如下

相关文章:
Android13 WMS窗口层级树
1,认识层级树 可以通过dumpsys activity containers 看到 WMS 层级树的结构 ACTIVITY MANAGER CONTAINERS (dumpsys activity containers) ROOT typeundefined modefullscreen override-modeundefined requested-bounds[0,0][0,0] bounds[0,0][1440,2960]#0 Displa…...

计算机毕业设计Python+LSTM+Tensorflow股票分析预测 基金分析预测 股票爬虫 大数据毕业设计 深度学习 机器学习 数据可视化 人工智能
基于TensorFlow-LSTM的股票预测系统开题报告 一、研究背景与意义 随着信息技术的飞速发展,股票市场作为现代经济活动的重要组成部分,其价格波动受到广泛关注。投资者们迫切希望通过科学的方法预测股票价格,以优化投资决策,实现利…...

仓库管理系统14--仓库设置
1、添加窗体 <UserControl x:Class"West.StoreMgr.View.StoreView"xmlns"http://schemas.microsoft.com/winfx/2006/xaml/presentation"xmlns:x"http://schemas.microsoft.com/winfx/2006/xaml"xmlns:mc"http://schemas.openxmlformats.…...
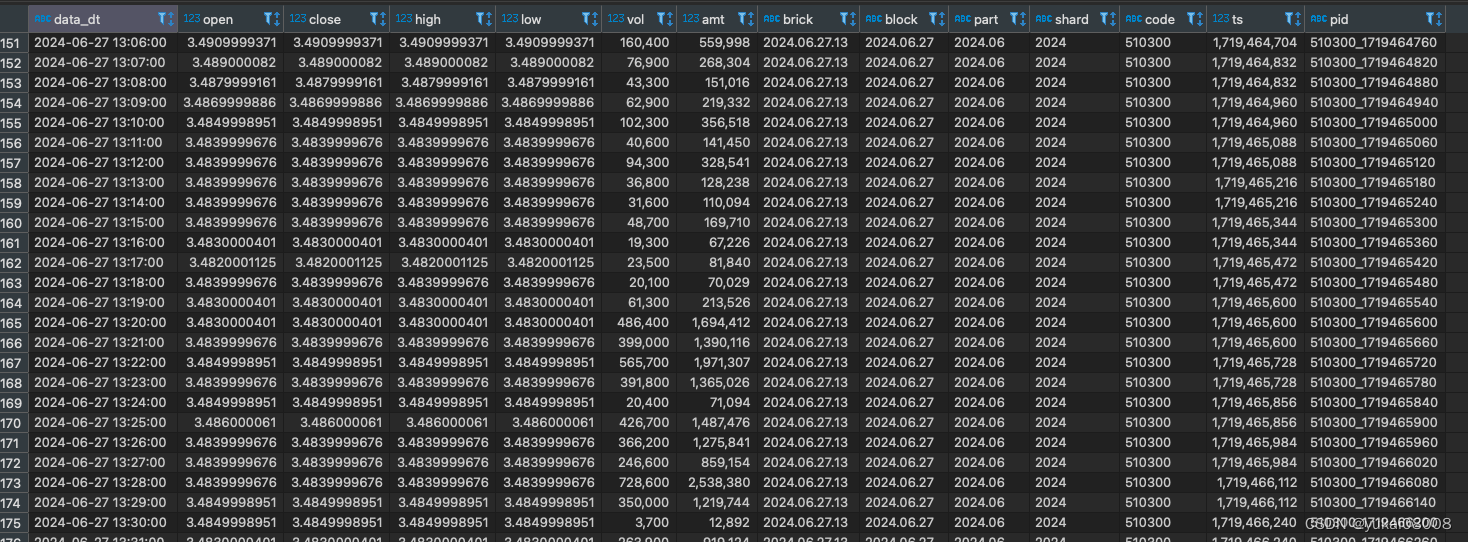
Python 算法交易实验73 QTV200第二步: 数据清洗并写入ClickHouse
说明 先检查一下昨天启动的worker是否正常工作,然后做一些简单的清洗,存入clickhouse。 内容 1 检查数据 from Basefuncs import * # 将一般字符串转为UCS 名称 def dt_str2ucs_blockname(some_dt_str):some_dt_str1 some_dt_str.replace(-,.).re…...

记录:有趣的C#多元运算符 ? : 表达式写法
有时候用 if //...Whatre you she wanna go else if //...do do do else //...and i know something just like this... 感觉代码太多了怎么优雅的、高端的替换? 看个高端的栗子菊: LedCOM["parity"] ledData[4] "N" ? …...

华宽通中标长沙市政务共性能力建设项目,助力智慧政务建设新飞跃
在数字化浪潮的推动下,长沙市政府正积极拥抱智慧城市建设,以科技力量提升政务服务效能。华宽通凭借其卓越的技术实力与丰富的项目经验,成功中标长沙市政务共性能力建设项目,这无疑是对华宽通在智慧城市领域实力的高度认可。 华宽…...

[面试题]计算机网络
[面试题]Java【基础】[面试题]Java【虚拟机】[面试题]Java【并发】[面试题]Java【集合】[面试题]MySQL[面试题]Maven[面试题]Spring Boot[面试题]Spring Cloud[面试题]Spring MVC[面试题]Spring[面试题]MyBatis[面试题]Nginx[面试题]缓存[面试题]Redis[面试题]消息队列[面试题]…...

企业级低代码开发效率变革赋能业务增长
企业级低代码开发已经成为当今软件开发领域的一大趋势,它为企业带来了前所未有的效率变革,从而赋能业务增长。本文将围绕这一主题,深入探讨低代码开发的概念、优势以及如何在企业级应用中实现高效的低代码开发,以助力我国企业实现…...
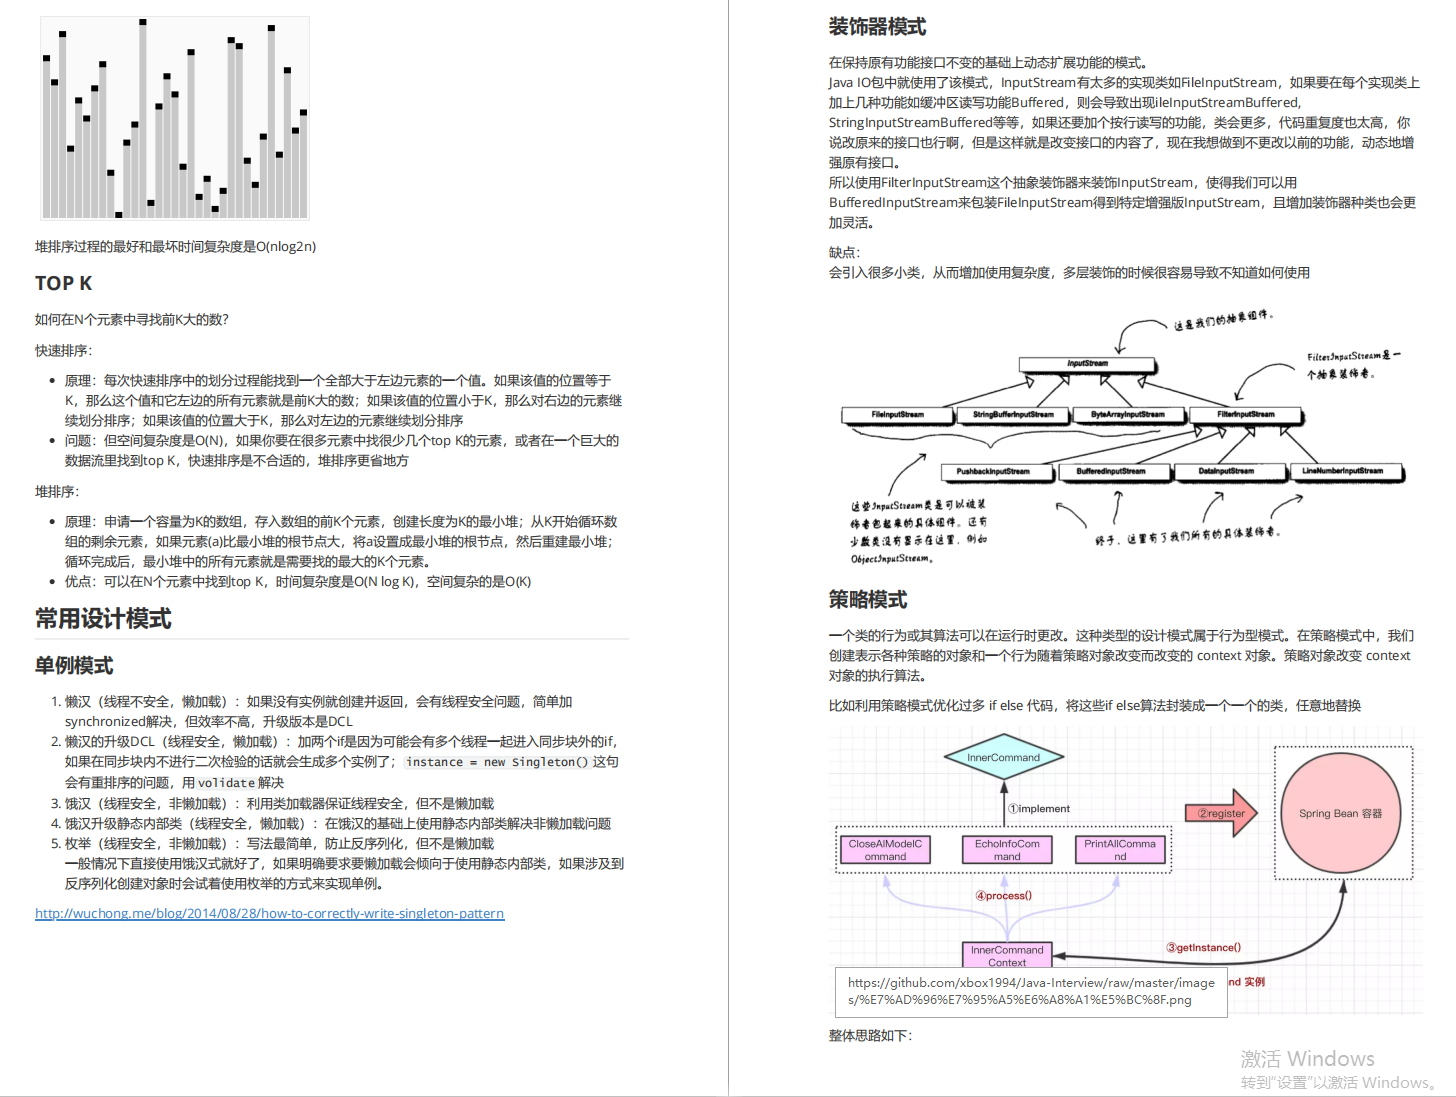
2024最新总结:1500页金三银四面试宝典 记录35轮大厂面试(都是面试重点)
学习是你这个职业一辈子的事 手里有个 1 2 3,不要想着去怼别人的 4 5 6,因为还有你不知道的 7 8 9。保持空瓶心态从 0 开始才能学到 10 全。 毕竟也是跳槽高峰期,我还是为大家准备了这份1500页金三银四宝典,记录的都是真实大厂面…...

使用Spring Boot和Thymeleaf构建动态Web页面
使用Spring Boot和Thymeleaf构建动态Web页面 大家好,我是免费搭建查券返利机器人省钱赚佣金就用微赚淘客系统3.0的小编,也是冬天不穿秋裤,天冷也要风度的程序猿!今天,我们将探讨如何利用Spring Boot和Thymeleaf构建动…...

扫盲之webSocket
介绍 webSocket 是一种协议,设计用于在客户端和服务器之间提供低延迟、全双工、和长期运行的连接。 全双工:通信的两个参与方可以同时发送和接收数据,不需要等待对方的响应或传输完成 websocket就是为了解决实时通信的问题 建立webSocke…...

一些硬件知识(十二)
1、请说明一下滤波磁珠和滤波电感的区别。 因此磁珠通常用于模数地的连接。 磁珠由导线穿过铁氧体组成,直流电阻很小,在低频时阻抗也很小,对直流信号几乎没有影响。 在高频(几十兆赫兹以上)时磁珠阻抗比较大࿰…...

Adobe Acrobat编辑器最新版下载安装 Adobe Acrobat版本齐全!
功能强大,Adobe Acrobat无疑是PDF文档处理领域的翘楚。这款软件集多种PDF文档处理功能于一身,不仅使得用户可以轻松地编辑PDF文档,更能轻松应对转换和合并等多种需求。 在编辑功能上,Adobe Acrobat的表现尤为出色。无论是添加文字…...

k8s如何使用 HPA 实现自动扩展
使用Horizontal Pod Autoscaler (HPA) 实验目标: 学习如何使用 HPA 实现自动扩展。 实验步骤: 创建一个 Deployment,并设置 CPU 或内存的资源请求。创建一个 HPA,设置扩展策略。生成负载,观察 HPA 如何自动扩展 Pod…...
Hi3861 OpenHarmony嵌入式应用入门--0.96寸液晶屏 iic驱动ssd1306
使用iic驱动ssd1306,代码来源hihope\hispark_pegasus\demo\12_ssd1306 本样例提供了一个HarmonyOS IoT硬件接口的SSD1306 OLED屏驱动库,其功能如下: 内置了128*64 bit的内存缓冲区,支持全屏刷新;优化了屏幕刷新速率,…...

代码随想录训练营第二十二天 77组合
第一题: 原题链接:77. 组合 - 力扣(LeetCode) 思路: 经典的回溯模板题: 终止条件,当中间变量用来存储单个结果的大小等于k,则将中间变量存放到结果数组中。 一个for循环横向遍历…...
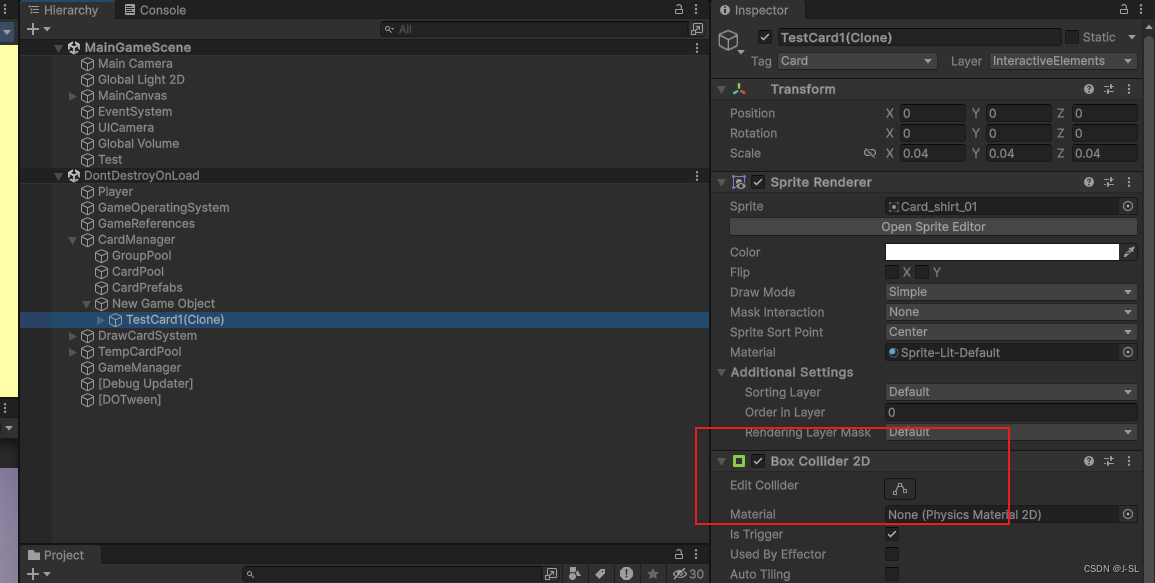
Unity踩坑记录
1. 如果同时在父物体和子物体上挂载BoxCollider,那么当使用: private void OnTriggerEnter2D(Collider2D collision){if (collision.CompareTag("CardGroup")){_intersectCardGroups.Add(collision.GetComponent<CardGroup>());}} 来判…...

内容安全复习 1 - 信息内容安全概述
文章目录 信息内容安全简介网络空间信息内容安全大模型 人工智能简介 信息内容安全简介 网络空间 网络空间是融合物理域、信息域、认知域和社会域,控制实体行为的信息活动空间。 上图展示了网络空间安全的结构。可以看到将网络空间划分为了网络域和内容域两个部分。…...

【深度学习】python之人工智能应用篇--跨模态生成技术
跨模态生成技术概述 跨模态生成技术是一种将不同模态的数据(如文本、图像、音频、视频等)进行融合和转换的技术。其目标是通过将一个模态的数据作为输入,生成与之对应的另一个模态的输出。这种技术对于突破单一模态的局限性,提高…...

springboot中获取某个注解下面的某个方法的方法名,参数值等等详细实例
在Spring Boot应用中,获取某个类或方法上的注解及其相关信息,包括方法名称、参数值等,通常涉及到反射和Spring的AOP(面向切面编程)特性。下面是一个示例,展示如何利用Spring AOP的Around注解来拦截带有特定…...

别再只会拖模块了!手把手教你用Simulink封装打造自己的‘智能积木’
从零构建你的Simulink智能积木库:封装技术实战指南 在工程建模领域,Simulink就像数字世界的乐高积木箱,但大多数用户只停留在拖拽现成模块的初级阶段。真正的高手都掌握了一项核心技能——模块封装。这就像把一堆散乱的乐高零件组装成功能完整…...

中国移联AI元宇宙产业委调研阿尔特汽车科技园 构建高精尖产业的“技术-场景-商业”融合生态
(央链知播 北京讯) 5月7日,中国移动通信联合会人工智能与元宇宙产业工作委员会(简称“中国移联AI与元宇宙产业委”)、中国移动通信联合会数字文化与智慧教育分会、中国通信工业协会区块链专业委员会等机构秘书长何超带…...

基于LLM的Python脚本自我进化:构建AI驱动的代码优化框架
1. 项目概述:当Python脚本学会自我进化几年前,如果有人告诉我,我写的Python脚本能在我喝咖啡的时候自己给自己“打补丁”、优化逻辑,我肯定会觉得这是科幻小说里的情节。但今天,这已经是我日常工作流的一部分。这个项目…...

Godot引擎开发实战:高效利用代码食谱仓库加速游戏原型设计
1. 项目概述:一个为Godot开发者量身定制的“食谱”仓库如果你正在使用Godot引擎,无论是刚入门的新手,还是已经摸爬滚打了一段时间的开发者,大概率都经历过这样的时刻:脑子里有一个很酷的游戏机制想法,比如“…...
)
告别esptool失败!用乐鑫官方Flash工具给ESP8266刷MicroPython固件(保姆级图文)
ESP8266刷机新选择:乐鑫官方Flash工具全流程指南 为什么选择官方工具替代esptool? 每次看到命令行里跳出的红色报错信息,是不是有种想把开发板扔出窗外的冲动?"端口不存在"、"擦除失败"、"权限不足"…...

全栈AI智能体开发实战:基于LangGraph与Next.js的工程化模板解析
1. 项目概述:一个全栈AI智能体模板的诞生 最近在GitHub上看到一个挺有意思的项目,叫 vstorm-co/full-stack-ai-agent-template 。光看名字,你可能会觉得这又是一个“AI全栈”的缝合怪,或者是一个过度包装的概念。但作为一个在AI…...

ComfyUI-Impact-Pack完整安装指南:解决AI图像增强插件功能缺失问题
ComfyUI-Impact-Pack完整安装指南:解决AI图像增强插件功能缺失问题 【免费下载链接】ComfyUI-Impact-Pack Custom nodes pack for ComfyUI This custom node helps to conveniently enhance images through Detector, Detailer, Upscaler, Pipe, and more. 项目地…...

绩效考核的量化迷思:如何衡量不可直接测量的技术贡献
一、量化绩效考核的困境:软件测试的“隐形”价值在软件行业的绩效考核体系中,量化指标似乎成了“公平”与“高效”的代名词。代码行数、Bug数量、测试用例覆盖率……这些清晰可统计的数字,被当作衡量技术人员贡献的核心标尺。然而,…...
)
003-VXLAN集中式网关实验(命令详解版)
VXLAN集中式网关实验1(命令详解版)最近有读者私信说刚开始学习VXLAN,实战技巧薄弱、部分命令不是很理解,想循序渐进通过实验过渡到真实项目案例。下面从一个简单的集中式网关实验开始,通过2个基础实验和1个项目实验完成…...
)
AI原生图计算不是“加个GNN层”那么简单:SITS 2026定义的5层工程化成熟度模型(附自测清单+迁移路线图)
更多请点击: https://intelliparadigm.com 第一章:AI原生图计算应用:SITS 2026图神经网络工程化方案 SITS 2026 是面向大规模动态图场景的AI原生图计算框架,深度融合GNN训练、图拓扑实时更新与边缘-云协同推理能力。其核心设计摒…...