Arduino - Keypad 键盘
Arduino - Keypad
Arduino - Keypad
The keypad is widely used in many devices such as door lock, ATM, calculator…
键盘广泛应用于门锁、ATM、计算器等多种设备中。
In this tutorial, we will learn:
在本教程中,我们将学习:
- How to use keypad 3x4 and keypad 4x4 with Arduino.
如何将键盘 3x4 和键盘 4x4 与 Arduino 一起使用。 - How to read value from keypad 3x4 and keypad 4x4 with Arduino.
如何使用 Arduino 从键盘 3x4 和键盘 4x4 读取值。 - How to verify the password inputted from keypad
如何验证从键盘输入的密码
About Keypad 关于键盘
The keypad is a set of buttons arranged in rows and columns (called matrix). Each button is called key
键盘是一组按行和列排列的按钮(称为矩阵)。每个按钮都称为键
Keypad has various types. Two popular types for DIY projects are keypad 3x4 (12 keys) and keypad 4x4 (16 keys).
键盘有多种类型。DIY 项目的两种流行类型是键盘 3x4(12 键)和键盘 4x4(16 键)。
Pinout 引脚排列
Keypad pins are divided into two groups: row and column.
键盘引脚分为两组:行和列。
Keypad 3x4 has 7 pins: 4 row-pins (R1, R2, R3, R4) and 3 column-pin (C1, C2, C3).
键盘 3x4 有 7 个引脚:4 个排引脚(R1、R2、R3、R4)和 3 列引脚(C1、C2、C3)。
Keypad 4x4 has 8 pins: 4 row-pins (R1, R2, R3, R4) and 4 column-pin (C1, C2, C3, C4).
键盘 4x4 有 8 个引脚:4 个排引脚(R1、R2、R3、R4)和 4 列引脚(C1、C2、C3、C4)。
How It Works 它是如何工作的
This section is the in-depth knowledge. DON’T worry if you don’t understand. Ignore this section if it overloads you, and come back in another day. Keep reading the next sections.
本节是深入的知识。如果您不明白,请不要担心。如果它使您超负荷,请忽略此部分,并在另一天再回来。继续阅读下一节。
The process of detecting the key pressing is called scanning keypad.
检测按键的过程称为扫描键盘。
It is called “scanning” because it checks one key by one key.
它被称为“扫描”,因为它逐个键检查一个键。
Row-pins are connected to Arduino’s output pins
Row-pin连接到Arduino的输出引脚
Column pins are connected to Arduino’s input pins (INPUT_PULLUP, in this state, the value of the input pin is HIGH if the key is not pressed).
列引脚连接到Arduino的输入引脚(INPUT_PULLUP,在此状态下,如果未按下该键,则输入引脚的值为HIGH)。
For each row: 对于每一行:
- Sets all row-pins is HIGH.
将所有行引脚设置为高电平。 - Sets only the current row-pin to LOW.
仅将当前行引脚设置为低电平。 - Reads the state of each column.
读取每列的状态。- If a column-pin is HIGH ⇒ key at (row, column) is NOT pressed.
如果列引脚为高电平,则不按下 (行、列) 处⇒键。 - If a column-pin is LOW ⇒ key at (row, column) is pressed.
如果列引脚为低电平,则按下 (行、列) 处⇒键。
- If a column-pin is HIGH ⇒ key at (row, column) is NOT pressed.
- Repeats the above process for the next row-pins.
对下一个行引脚重复上述过程。
※ NOTE THAT: ※ 注意事项:
The above is one of the methods to scan keypad. We can invert all HIGH to LOW and all LOW to HIGH to scan keypad.
以上是扫描键盘的方法之一。我们可以将所有高电平反转为低电平,将所有低电平反转为高电平以扫描键盘。
Why does keypad is arranged and connected as a matrix? This makes the scanning process complicated. Why do not use each key as an independent button, then the state of the key is simply determined by reading the state of a button?
为什么键盘是以矩阵的形式排列和连接的?这使得扫描过程变得复杂。为什么不把每个键都当成一个独立的按钮,那么键的状态就是通过读取一个按钮的状态来确定的呢?
⇒ As we know, an independent button requires one Arduino’s pin and GND. Let’s take keypad 4x4 as an example. If we each key as an independent button, it requires 16 Arduino pin for 16 keys plus GND pin. If we arranged a connected key in matrix form, we just need to use 8 Arduino’s pin, so we can save Arduino’s pin. In short, the answer is: to save the Arduino pins.
⇒ 众所周知,一个独立的按钮需要一个Arduino的引脚和GND。让我们以键盘 4x4 为例。如果我们每个按键作为一个独立的按钮,它需要 16 个 Arduino 引脚用于 16 个按键加上 GND 引脚。如果我们以矩阵形式排列一个连接的密钥,我们只需要使用 8 个 Arduino 的引脚,这样我们就可以保存 Arduino 的引脚。简而言之,答案是:保存Arduino引脚。
Wiring Diagram 接线图
This image is created using Fritzing. Click to enlarge image
此图像是使用 Fritzing 创建的。点击放大图片
How To Program For Keypad 如何为键盘编程
Thanks to Keypad library, using keypad with Arduino is a piece of cake, no matter whether you understand how the keypad works or not.
多亏了键盘库,无论您是否了解键盘的工作原理,使用带有 Arduino 的键盘都是小菜一碟。
Arduino Code Arduino代码
Keypad 3x4 键盘 3x4
#include <Keypad.h>const int ROW_NUM = 4; //four rows
const int COLUMN_NUM = 3; //three columnschar keys[ROW_NUM][COLUMN_NUM] = {{'1','2','3'},{'4','5','6'},{'7','8','9'},{'*','0','#'}
};byte pin_rows[ROW_NUM] = {9, 8, 7, 6}; //connect to the row pinouts of the keypad
byte pin_column[COLUMN_NUM] = {5, 4, 3}; //connect to the column pinouts of the keypadKeypad keypad = Keypad( makeKeymap(keys), pin_rows, pin_column, ROW_NUM, COLUMN_NUM );void setup(){Serial.begin(9600);
}void loop(){char key = keypad.getKey();if (key){Serial.println(key);}
}
Keypad 4x4 键盘 4x4
#include <Keypad.h>const int ROW_NUM = 4; //four rows
const int COLUMN_NUM = 4; //four columnschar keys[ROW_NUM][COLUMN_NUM] = {{'1','2','3', 'A'},{'4','5','6', 'B'},{'7','8','9', 'C'},{'*','0','#', 'D'}
};byte pin_rows[ROW_NUM] = {9, 8, 7, 6}; //connect to the row pinouts of the keypad
byte pin_column[COLUMN_NUM] = {5, 4, 3, 2}; //connect to the column pinouts of the keypadKeypad keypad = Keypad( makeKeymap(keys), pin_rows, pin_column, ROW_NUM, COLUMN_NUM );void setup(){Serial.begin(9600);
}void loop(){char key = keypad.getKey();if (key){Serial.println(key);}
}
Quick Steps 快速步骤
- Navigate to the Libraries icon on the left bar of the Arduino IDE.
导航到 Arduino IDE 左侧栏上的 Libraries 图标。 - Search “keypad”, then find the keypad library by Mark Stanley, Alexander Brevig
搜索“键盘”,然后找到 Mark Stanley、Alexander Brevig 的键盘库 - Click Install button to install keypad library.
单击“安装”按钮安装键盘库。

- Copy the above code and open with Arduino IDE
复制上面的代码并使用Arduino IDE打开 - Click Upload button on Arduino IDE to upload code to Arduino
单击Arduino IDE上的“上传”按钮,将代码上传到Arduino - Open Serial Monitor 开放式串行监视器
- Press some keys on keypad
按键盘上的一些键 - See the result in Serial Monitor
在串行监视器中查看结果
Keypad and Password 键盘和密码
A popular application of keypad is the password input. In this application, we specify two special keys:
键盘的一个流行应用是密码输入。在此应用程序中,我们指定了两个特殊键:
- A key to start/re-start the password input. For example, key ""
用于启动/重新启动密码输入的密钥。例如,键“” - A key to terminate the password input. For example, key “#”
用于终止密码输入的键。例如,键“#”
The password will be a string that contains the remaining keys, except for two selected special keys.
密码将是一个字符串,其中包含其余密钥,但两个选定的特殊密钥除外。
When a key is pressed.
按下某个键时。
- If the key is NOT neither "" nor “#”, append the key to the user’s input password string.
如果密钥既不是“”也不是“#”,则将密钥追加到用户的输入密码字符串中。 - If the key is “#”, compare the user’s input password string with the password to determine the input password is correct or not, and then clear the user’s input password string
如果密钥为“#”,则将用户的输入密码字符串与密码进行比较,以确定输入密码是否正确,然后清除用户的输入密码字符串 - If the key is "", clear the user’s input password string
如果密钥为“”,请清除用户的输入密码字符串
Keypad - Password Code 键盘 - 密码代码
/** Created by ArduinoGetStarted.com** This example code is in the public domain** Tutorial page: https://arduinogetstarted.com/tutorials/arduino-keypad*/#include <Keypad.h>const int ROW_NUM = 4; //four rows
const int COLUMN_NUM = 3; //three columnschar keys[ROW_NUM][COLUMN_NUM] = {{'1','2','3'},{'4','5','6'},{'7','8','9'},{'*','0','#'}
};byte pin_rows[ROW_NUM] = {9, 8, 7, 6}; //connect to the row pinouts of the keypad
byte pin_column[COLUMN_NUM] = {5, 4, 3}; //connect to the column pinouts of the keypadKeypad keypad = Keypad( makeKeymap(keys), pin_rows, pin_column, ROW_NUM, COLUMN_NUM );const String password = "1234"; // change your password here
String input_password;void setup(){Serial.begin(9600);input_password.reserve(32); // maximum input characters is 33, change if needed
}void loop(){char key = keypad.getKey();if (key){Serial.println(key);if(key == '*') {input_password = ""; // clear input password} else if(key == '#') {if(password == input_password) {Serial.println("password is correct");// DO YOUR WORK HERE} else {Serial.println("password is incorrect, try again");}input_password = ""; // clear input password} else {input_password += key; // append new character to input password string}}
}
- Run above code 运行上述代码
- Open Serial Monitor 开放式串行监视器
- Press “123456” keys and press “#”
按“123456”键,按“#” - Press “1234” keys and press “#”
按“1234”键,按“#” - See the result on Serial Monitor
在串行监视器上查看结果
Video Tutorial 视频教程
We are considering to make the video tutorials. If you think the video tutorials are essential, please subscribe to our YouTube channel to give us motivation for making the videos.
我们正在考虑制作视频教程。如果您认为视频教程是必不可少的,请订阅我们的 YouTube 频道,为我们制作视频提供动力。
Additional Knowledge 其他知识
- How to use the multiple passwords for keypad
如何使用键盘的多个密码 - How to input a multiple digits number using the keypad
如何使用键盘输入多位数字
Challenge Yourself 挑战自我
- Display the pressed key of the keypad on LCD. Hint: Refer to Arduino - LCD
在 LCD 上显示键盘的按键。提示:请参阅Arduino - LCD - Make a door lock with password protection using the keypad.
使用键盘制作带有密码保护的门锁。
相关文章:
Arduino - Keypad 键盘
Arduino - Keypad Arduino - Keypad The keypad is widely used in many devices such as door lock, ATM, calculator… 键盘广泛应用于门锁、ATM、计算器等多种设备中。 In this tutorial, we will learn: 在本教程中,我们将学习: How to use key…...

国产芯片方案/蓝牙咖啡电子秤方案研发
咖啡电子秤芯片方案精确值可做到分度值0.1g的精准称重,并带有过载提示、自动归零、去皮称重、压低报警等功能,工作电压在2.4V~3.6V之间,满足于咖啡电子秤的电压使用。同时咖啡电子秤PCBA设计可支持四个单位显示,分别为:g、lb、oz、…...
reactjs18 中使用@reduxjs/toolkit同步异步数据的使用
react18 中使用reduxjs/toolkit 1.安装依赖包 yarn add reduxjs/toolkit react-redux2.创建 store 根目录下面创建 store 文件夹,然后创建 index.js 文件。 import { configureStore } from "reduxjs/toolkit"; import { counterReducer } from "…...

剧本杀小程序:助力商家发展,提高游戏体验
近几年,剧本杀游戏已经成为了当下年轻人娱乐的游戏社交方式。与其他游戏相比,剧本杀游戏具有强大的社交性,玩家在游戏中既可以推理玩游戏,也可以与其他玩家交流互动,提高玩家的游戏体验感。 随着互联网的发展…...
pikachu靶场 利用Rce上传一句话木马案例(工具:中国蚁剑)
目录 一、准备靶场,进入RCE 二、测试写入文件 三、使用中国蚁剑 一、准备靶场,进入RCE 我这里用的是pikachu 打开pikachu靶场,选择 RCE > exec "ping" 测试是否存在 Rce 漏洞 因为我们猜测在这个 ping 功能是直接调用系统…...

CenterOS7安装java
CenterOS7安装java #进入安装目录 cd /usr/local/soft/java#wget下载java8 #直接进入官网选择相应的版本进行下载,然后把下载链接复制下来就可以下载了 #不时间的下载链接不一样 wget http://download.oracle.com/otn-pub/java/jdk/8u181-b13/96a7b8442fe848ef90c9…...

react 重新加载子组件
在React中,要重新加载某个子组件,你可以通过改变该组件的key属性来强制它重新渲染。这是因为React会在key变化时销毁旧的组件实例并创建一个新的实例。 多的不说直接上代码 import React, { useState } from react; import ChildComponent from ../chil…...

从零开始使用WordPress搭建个人网站并一键发布公网详细教程
文章目录 前言1. 搭建网站:安装WordPress2. 搭建网站:创建WordPress数据库3. 搭建网站:安装相对URL插件4. 搭建网站:内网穿透发布网站4.1 命令行方式:4.2. 配置wordpress公网地址 5. 固定WordPress公网地址5.1. 固定地…...

浅谈chrome引擎
Chrome引擎主要包括其浏览器内核Blink、JavaScript引擎V8以及其渲染、网络、安全等子系统。下面我将对这些关键部分进行简要说明分析 1. Blink浏览器内核 Blink是Google开发的浏览器排版引擎,自Chrome 28版本起替代了Webkit作为Chrome的渲染引擎。Blink基于Webkit…...

【常用知识点-Java】创建文件夹
Author:赵志乾 Date:2024-07-04 Declaration:All Right Reserved!!! 1. 简介 java.io.File提供了mkdir()和mkdirs()方法创建文件夹,两者区别:mkdir()仅创建单层文件夹,如…...

【JavaScript脚本宇宙】颜色处理神器大比拼:哪款JavaScript库最适合你?
提升设计与开发效率:深入解析六大颜色处理库 前言 在现代前端开发中,颜色处理是设计和用户体验的重要组成部分。无论是网页设计、数据可视化还是图形设计,都需要强大的颜色处理功能来实现多样化的视觉效果。本文将探讨几种流行的JavaScript…...
怎么录制电脑内部声音?好用的录音软件分享,看这篇就够了!
如何录制电脑内部声音?平时使用电脑工作,难免会遇到需要录音的情况。好用的录音软件有很多,也有部分录屏工具也支持录音功能。 那么如何录制电脑内部声音呢?本文整理了几个录制电脑内部声音的方法,如果你需要在电脑上录…...

ios CCNSDate.m
// // CCNSDate.h // CCFC // // Created by xichen on 11-12-17. // Copyright 2011年 ccteam. All rights reserved. //#import <Foundation/Foundation.h>interface NSDate(cc)// 获取系统时间(yyyy-MM-dd HH:mm:ss.SSS格式)(NSString *)getSystemTimeStr;// prin…...

Windows系统安装SSH服务结合内网穿透配置公网地址远程ssh连接
前言 在当今的数字化转型时代,远程连接和管理计算机已成为日常工作中不可或缺的一部分。对于 Windows 用户而言,SSH(Secure Shell)协议提供了一种安全、高效的远程访问和命令执行方式。SSH 不仅提供了加密的通信通道,…...
虚拟机与主机的联通
本地光纤分配地址给路由器--》连结路由器是连结局域网--》由路由器分配IP地址 因此在网站上搜索的IP与本机的IP是不一样的 1.windows查看主机IP地址 在终端输入 2.linux虚拟机查看ip 3.主机是否联通虚拟机ping加ip...

2024年中国网络安全市场全景图 -百度下载
是自2018年开始,数说安全发布的第七版全景图。 企业数智化转型加速已经促使网络安全成为全社会关注的焦点,在网络安全边界不断扩大,新理念、新产品、新技术不断融合发展的进程中,数说安全始终秉承科学的方法论,以遵循…...

Linux脚本自动安装 docker
使用官方安装脚本自动安装 需使用 root 或sudu 权限账户安装 安装命令如下: curl -fsSL https://test.docker.com -o install-docker.shsudo sh install-docker.sh脚本中指令: –version 安装指定版本 Use the --version option to install a specific version, f…...
:基本遗传算法(SGA)理论简介)
【计算智能】遗传算法(一):基本遗传算法(SGA)理论简介
前言 本系列文章架构概览: 编辑 本文将介绍基本遗传算法在解决优化问题中的应用,通过实验展示其基本原理和实现过程:选取一个简单的二次函数作为优化目标,并利用基本遗传算法寻找其在指定范围内的最大值。 1. 遗传算法(GA&…...

win10系统让当前用户拥有管理员权限
本方法应该也适用于win11 大家在安装系统的时候,如果开始你不重新建立一个账号。直接使用默认的administror登录,那么这个时候电脑只有1个账户,但是如果你在刚开始的时候建立了一个新的,比如你姓李 名字叫帅哥,那么这…...
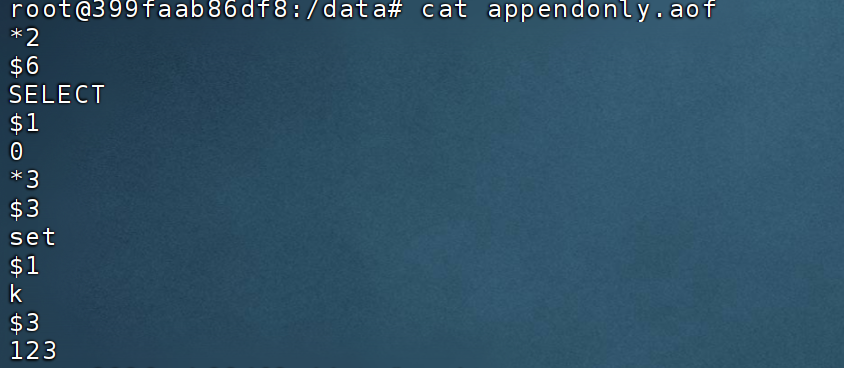
Redis持久化的三种方式(RDB、AOF和混合)
Redis持久化的三种方式(RDB、AOF和混合) 目录 Redis持久化的三种方式(RDB、AOF和混合)介绍RDB示例1.配置文件2.触发 RDB 快照保存3.验证 AOF示例1.配置文件2.校验 混合型持久化存储配置文件 介绍 Redis数据主要存储与内存中,因此如果服务器意外重启、宕机、崩溃&am…...

ThinkPad开机嘀嘀响或报2100/2110错误?可能是硬盘松了!自己动手检测与修复指南
ThinkPad开机嘀嘀响或报2100/2110错误?三步排查硬盘接触不良问题ThinkPad用户对那个标志性的开机"嘀嘀"声再熟悉不过——正常情况下它意味着系统自检通过。但当这个声音变成急促的报警音,伴随屏幕上出现"2100 Detection error"或&qu…...

Office RibbonX Editor:让Office界面定制变得像搭积木一样简单
Office RibbonX Editor:让Office界面定制变得像搭积木一样简单 【免费下载链接】office-ribbonx-editor An overhauled fork of the original Custom UI Editor for Microsoft Office, built with WPF 项目地址: https://gitcode.com/gh_mirrors/of/office-ribbon…...

6款高效降AI率工具 改写实力出众
写论文时反复检测出的AI痕迹总让你提心吊胆?别担心,这里整理了6款真正好用的论文降AI率工具,堪称应对AI生成特征的“得力助手”。它们能有效识别并消除AI生成的痕迹,改写能力出众,帮你快速降低查重率,顺利通…...
)
别再只测accuracy!DeepSeek集成测试必须监控的5个隐性指标(P99首token延迟、context bleed率、tool-call schema漂移)
更多请点击: https://intelliparadigm.com 第一章:DeepSeek集成测试的核心范式演进 DeepSeek大模型的工程化落地对集成测试提出了全新挑战:传统基于接口响应码与字段校验的测试范式已难以覆盖语义一致性、推理链鲁棒性、上下文敏感度等高阶质…...

航空航天为什么离不开高强镁合金?国产替代到哪一步了
飞机每减重一千克,全年大约节省四千两百美元的燃油费用——这是航空工程师熟悉的经验值。在商业航空领域,这个数字还只是财务账;在战斗机、导弹和卫星的世界里,减重的收益被换算成更远的航程、更大的载荷、更高的机动性࿰…...

3步解锁网易云音乐NCM加密:让音乐真正属于你
3步解锁网易云音乐NCM加密:让音乐真正属于你 【免费下载链接】ncmdump 项目地址: https://gitcode.com/gh_mirrors/ncmd/ncmdump 还在为下载的网易云音乐只能在特定客户端播放而烦恼吗?当你精心收藏的歌曲被NCM格式"锁"在单一平台时&a…...

基于ESP8266与MQTT的家庭水压自动控制系统设计与实现
1. 项目概述与核心需求解析家里水压不稳、供水时断时续,这大概是很多朋友都遇到过的烦心事。我所在的城市供水情况就很不理想,为了解决这个问题,我不得不自己动手,搭建了一套基于ESP8266微控制器的家庭水压增压与储水自动控制系统…...

谷氨酸发酵过程的软测量建模【附模型】
✨ 长期致力于软测量、谷氨酸发酵、动力学模型、支持向量机、高斯过程、变量选择、异常状态研究工作,擅长数据搜集与处理、建模仿真、程序编写、仿真设计。 ✅ 专业定制毕设、代码 ✅ 如需沟通交流,点击《获取方式》 (1)多阶段高斯…...

DIY四路自动音频源切换器:从信号检测到继电器隔离的完整设计
1. 项目概述与核心需求解析作为一个喜欢在工作室里捣鼓各种音频设备的玩家,我经常遇到一个挺烦人的问题:我的功放只有一组输入,但我想接的设备却有好几个——台式电脑、平板、蓝牙接收模块,还有一台树莓派。每次想切换音源&#x…...

InVideo插件深度解析:如何在Unreal Engine中实现高效视频流播放与录制
InVideo插件深度解析:如何在Unreal Engine中实现高效视频流播放与录制 【免费下载链接】InVideo 基于UE4实现的rtsp的视频播放插件 项目地址: https://gitcode.com/gh_mirrors/in/InVideo InVideo是一个基于Unreal Engine 5开发的RTSP视频播放插件࿰…...