AntV X6 图编辑引擎速通
前言:参考 [AntV X6 官网](https://x6.antv.antgroup.com/)
一、简介
X6 可以快速搭建 DAG 图、ER 图、流程图、血缘图等应用。
二、快速上手
1. 安装
npm install @antv/x6 --save# oryarn add @antv/x6# orpnpm add @antv/x62. 使用
2.1 初始画布
在页面中创建一个画布容器,然后初始化画布对象,可以通过配置设置画布的样式,比如背景颜色。
<script setup lang="ts">import { Graph } from "@antv/x6";const graph = new Graph({container: document.getElementById("container"),width: 800,height: 600,background: {color: "#F2F7FA",},});</script><template><div id="container"></div></template><style lang="scss" scoped></style>2.2 渲染节点和边
X6 支持 JSON 格式数据,该对象中 nodes 代表节点数据,edges 代表边数据,可以使用 attrs 属性来定制节点和边的样式(可以类比 CSS)。
<script setup lang="ts">import { onMounted } from "vue";import { Graph } from "@antv/x6";const data = {nodes: [{id: "node1",shape: "rect",x: 40,y: 40,width: 100,height: 40,label: "hello",attrs: {// body 是选择器名称,选中的是 rect 元素body: {stroke: "#8f8f8f",strokeWidth: 1,fill: "#fff",rx: 6,ry: 6,},},},{id: "node2",shape: "rect",x: 160,y: 180,width: 100,height: 40,label: "world",attrs: {body: {stroke: "#8f8f8f",strokeWidth: 1,fill: "#fff",rx: 6,ry: 6,},},},],edges: [{shape: "edge",source: "node1",target: "node2",label: "x6",attrs: {// line 是选择器名称,选中的边的 path 元素line: {stroke: "#8f8f8f",strokeWidth: 1,},},},],};onMounted(() => {const graph = new Graph({container: document.getElementById("container"),width: 800,height: 600,background: {color: "#F2F7FA",},});graph.fromJSON(data); // 渲染元素graph.centerContent(); // 居中显示});</script><template><div id="container"></div></template><style lang="scss" scoped></style>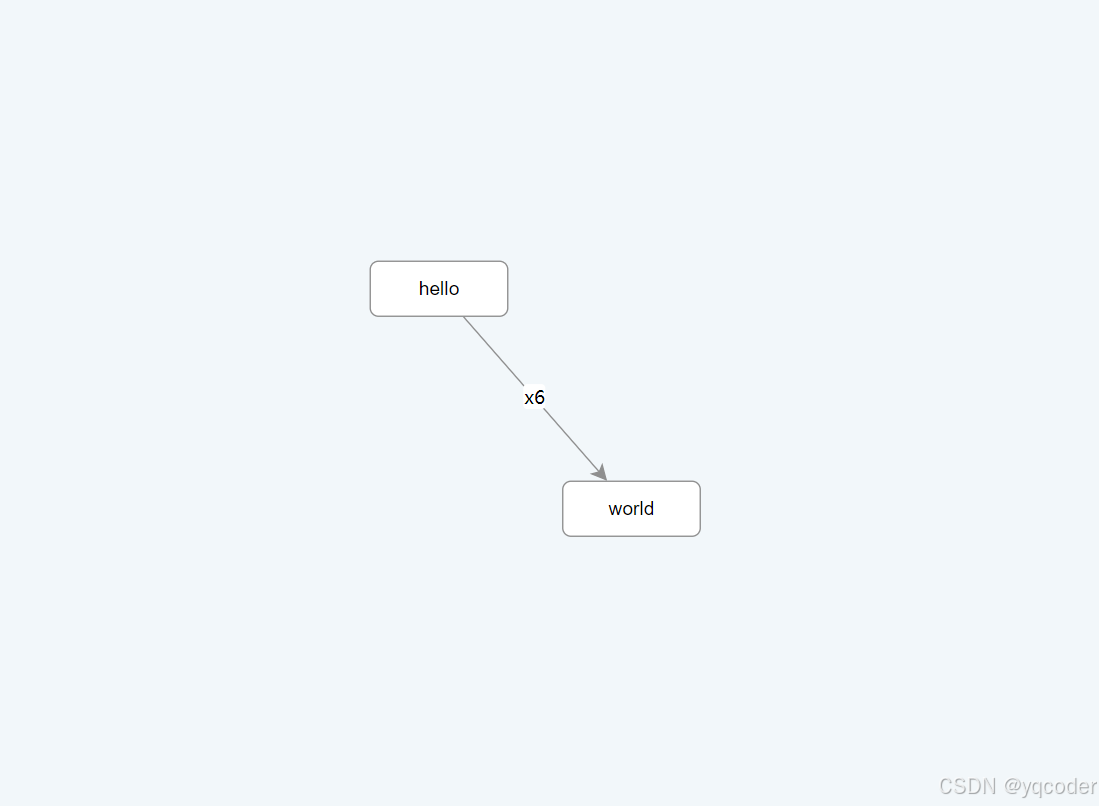
2.3 数据导出
使用 fromJSON 将 JSON 数据渲染到画布中,使用 toJSON 将画布中数据导出成 JSON,这样我们就可以将画布数据序列化后存储到服务端。
graph.toJSON();三、基础
1. 画布
1.1 画布大小
h 设置 width、height,不设置以容器大小初始画布。设置 autoResize,外层再嵌套一层宽高 100%的容器用来自适应窗口大小。
<script setup lang="ts">import { onMounted } from "vue";import { Graph } from "@antv/x6";onMounted(() => {const graph = new Graph({container: document.getElementById("container"),autoResize: true,});});</script><template><div style="width: 100%; height: 100%"><div id="container"></div></div></template><style lang="scss" scoped></style>1.2 背景与网格
可以通过 background 和 grid 两个配置来设置画布的背景以及网格。
const graph = new Graph({container: this.container,background: {color: "#F2F7FA",},grid: {visible: true,type: "doubleMesh",args: [{color: "#eee", // 主网格线颜色thickness: 1, // 主网格线宽度},{color: "#ddd", // 次网格线颜色thickness: 1, // 次网格线宽度factor: 4, // 主次网格线间隔},],},});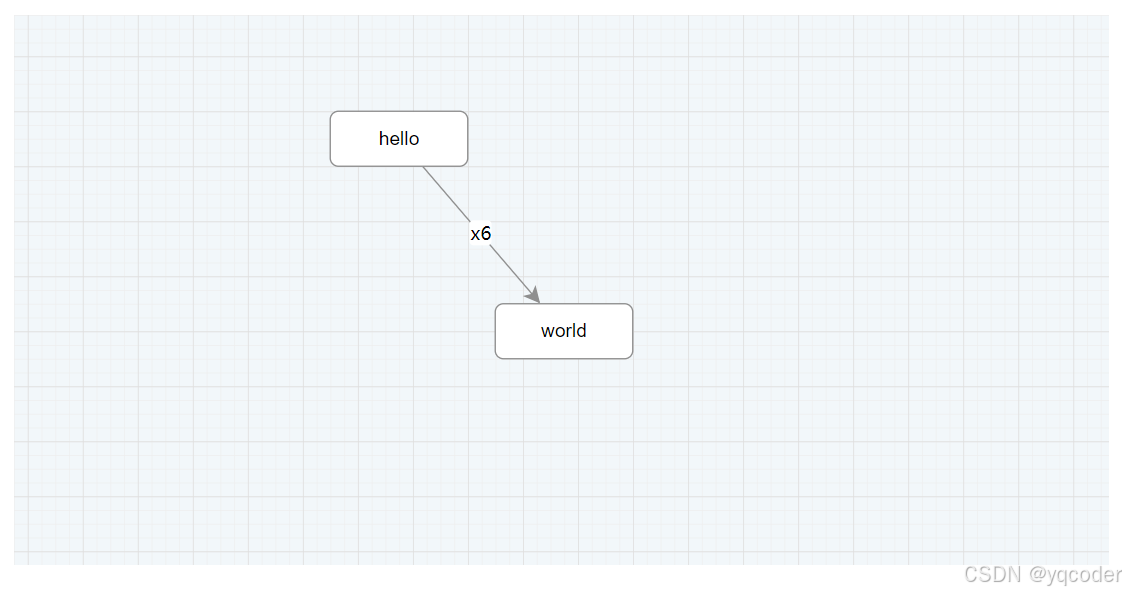
1.3 缩放与平移
设置 panning 拖拽、mousewheel 缩放
const graph = new Graph({panning: true,mousewheel: true,});1.4 常用 API
graph.resize(800, 600):重置画布大小
graph.zoom(0.2):将画布缩放级别增加 0.2(默认为 1)
graph.zoom(-0.2):将画布缩放级别减少 0.2
graph.zoomTo(1.2):将画布缩放级别设置为 1.2
graph.zoomToFit({ maxScale: 1 }):将画布中元素缩小或者放大一定级别,让画布正好容纳所有元素,可以通过 maxScale 配置最大缩放级别
graph.centerContent():将画布中元素居中展示
2. 节点
2.1 添加节点
graph.addNode({shape: "rect", // 节点形状x: 100, // 节点位置 x 坐标,单位为 px。y: 40, // 节点位置 y 坐标,单位为 px。width: 100, // 节点宽度,单位为 px。height: 40, // 节点高度,单位为 px。angle: 0, // 节点旋转角度。});2.2 内置节点
X6 内置节点形状:rect 矩形、circle 圆形、ellipse 椭圆、polygon 多边形、polyline 折线、path 路径、image 图片
// 公用样式const commonAttrs = {body: {fill: "#fff",stroke: "#8f8f8f",strokeWidth: 1,},label: {refX: 0.5,refY: "100%",refY2: 4,textAnchor: "middle",textVerticalAnchor: "top",},};// rect 矩形graph.addNode({shape: "rect",x: 40,y: 40,width: 80,height: 40,label: "rect",attrs: commonAttrs,});// circle 圆形graph.addNode({shape: "circle",x: 180,y: 40,width: 40,height: 40,label: "circle",attrs: commonAttrs,});// ellipse 椭圆graph.addNode({shape: "ellipse",x: 280,y: 40,width: 80,height: 40,label: "ellipse",attrs: commonAttrs,});// path 路径graph.addNode({shape: "path",x: 420,y: 40,width: 40,height: 40,// https://www.svgrepo.com/svg/13653/likepath: "M24.85,10.126c2.018-4.783,6.628-8.125,11.99-8.125c7.223,0,12.425,6.179,13.079,13.543c0,0,0.353,1.828-0.424,5.119c-1.058,4.482-3.545,8.464-6.898,11.503L24.85,48L7.402,32.165c-3.353-3.038-5.84-7.021-6.898-11.503c-0.777-3.291-0.424-5.119-0.424-5.119C0.734,8.179,5.936,2,13.159,2C18.522,2,22.832,5.343,24.85,10.126z",attrs: commonAttrs,label: "path",});// polygon 多边形graph.addNode({shape: "polygon",x: 60,y: 150,width: 40,height: 40,points: "100,10 40,198 190,78 10,78 160,198",attrs: commonAttrs,label: "polygon",});// polyline 折线graph.addNode({shape: "polyline",x: 180,y: 150,width: 40,height: 40,label: "polyline",attrs: {body: {...commonAttrs.body,refPoints: "0,0 0,10 10,10 10,0",},label: commonAttrs.label,},});// image 图片graph.addNode({shape: "image",x: 290,y: 150,width: 60,height: 40,imageUrl:"https://gw.alipayobjects.com/os/s/prod/antv/assets/image/logo-with-text-73b8a.svg",label: "image",attrs: commonAttrs,});2.3 定制节点
使用 Graph.registerNode(NodeName, options, true) 注册节点。
Graph.registerNode("custom-node",{inherit: "rect", // 继承于 rect 节点width: 100,height: 40,markup: [{tagName: "rect", // 标签名称selector: "body", // 选择器},{tagName: "image",selector: "img",},{tagName: "text",selector: "label",},],attrs: {body: {stroke: "#8f8f8f",strokeWidth: 1,fill: "#fff",rx: 6,ry: 6,},img: {"xlink:href":"https://gw.alipayobjects.com/zos/antfincdn/FLrTNDvlna/antv.png",width: 16,height: 16,x: 12,y: 12,},},},true);const source = graph.addNode({shape: "custom-node", // 可以直接使用上面注册过的 shapex: 40,y: 40,label: "hello",});const target = graph.addNode({shape: "custom-node",x: 160,y: 180,label: "world",});graph.addEdge({source,target,attrs: {line: {stroke: "#8f8f8f",strokeWidth: 1,},},});2.4 修改节点
node.prop(path, value) 修改结构,node.attr(path, value) 修改样式。
const node = graph.addNode({shape: 'rect',width: 100,height: 40,x: 100,y: 100,label: 'edge',})console.log(node.prop())// 结果{"angle": 0,"position": {"x": 100,"y": 100},"size": {"width": 100,"height": 40},"attrs": {"text": {"fontSize": 14,"fill": "#000000","refX": 0.5,"refY": 0.5,"textAnchor": "middle","textVerticalAnchor": "middle","fontFamily": "Arial, helvetica, sans-serif","text": "node"},"rect": {"fill": "#ffffff","stroke": "#333333","strokeWidth": 2},"body": {"refWidth": "100%","refHeight": "100%"}},"visible": true,"shape": "rect","id": "ab47cadc-4104-457c-971f-50fbb077508a","zIndex": 1}node.prop('size', { width: 120, height: 50 }) // 修改 x 坐标node.attr('rect/fill', '#ccc') // 修改填充色,等价于 node.prop('attrs/rect/fill', '#ccc')3. 边
3.1 添加边
除了从 Cell 继承属性外,还支持以下选项
source 源节点或起始点。
target 目标节点或目标点。
vertices 路径点。
router 路由。
connector 连接器。
labels 标签。
defaultLabel 默认标签。
graph.addEdge({shape: "edge",source: "node1",target: "node2",});3.2 配置边
3.2.1 source/target
边的源和目标节点(点)
graph.addEdge({source: rect1, // 源节点target: rect2, // 目标节点});graph.addEdge({source: "rect1", // 源节点 IDtarget: "rect2", // 目标节点 ID});graph.addEdge({source: { cell: rect1, port: "out-port-1" }, // 源节点和连接桩 IDtarget: { cell: "rect2", port: "in-port-1" }, // 目标节点 ID 和连接桩 ID});graph.addEdge({source: "rect1", // 源节点 IDtarget: { x: 100, y: 120 }, // 目标点});3.2.2 vertices
路径点。边从起始点开始,按顺序经过路径点,最后到达终止点。
graph.addEdge({source: rect1,target: rect2,vertices: [{ x: 100, y: 200 },{ x: 300, y: 120 },],});3.2.3 router
路由 router 将对 vertices 进一步处理,并在必要时添加额外的点,然后返回处理后的点。例如,经过 orth 路由处理后,边的每一条链接线段都是水平或垂直的。
内置路由:normal、orth、oneSide、manhattan、metro、er、自定义路由
graph.addEdge({source: rect1,target: rect2,vertices: [{ x: 100, y: 200 },{ x: 300, y: 120 },],// 如果没有 args 参数,可以简写为 router: 'orth'router: {name: "orth",args: {},},});3.2.4 connector
连接器 connector 将路由 router 返回的点加工成渲染边所需要的 pathData。例如,rounded 连接器将连线之间的倒角处理为圆弧倒角。
内置连接器:normal、rounded、smooth、jumpover、自定义连接器
graph.addEdge({source: rect1,target: rect2,vertices: [{ x: 100, y: 200 },{ x: 300, y: 120 },],router: "orth",// 如果没有 args 参数,可以简写写 connector: 'rounded'connector: {name: "rounded",args: {},},});3.2.5 labels
用于设置标签文本、位置、样式等。通过数组形式支持多标签,labels 指定的每一项都将与 defaultLabel 进行 merge 后使用。
const edge = graph.addEdge({source: rect1,target: rect2,labels: [{attrs: {label: {text: "edge",},},},],});// 或const edge = graph.addEdge({source: rect1,target: rect2,labels: ["edge"], // 通过 labels 可以设置多个标签,当只设置标签文本是可以简化为此写法});// 或const edge = graph.addEdge({source: rect1,target: rect2,label: "edge", // 通过 label 设置单个标签,当只设置标签文本是可以简化为此写法});3.2.6 defaultLabel
默认标签。默认标签可以简化标签配置项,labels 指定的每一项都将与 defaultLabel 进行 merge 后使用。
3.3 使用箭头
我们定义了 sourceMarker 和 targetMarker 两个特殊属性来为边定制起始和终止箭头。例如,对 Shape.Edge 我们可以通过 line 选择器来指定起始和终止箭头。
3.3.1 内置箭头
block、classic、diamond、cross、async、path、circle、circlePlus、ellipse
graph.addEdge({shape: "edge",sourece: [100, 100],target: [500, 500],attrs: {line: {sourceMarker: "block", // 实心箭头targetMarker: {name: "ellipse", // 椭圆rx: 10, // 椭圆箭头的 x 半径ry: 6, // 椭圆箭头的 y 半径},},},});3.3.2 自定义箭头
我们也可以通过 tagName 指定的 SVG 元素来渲染箭头,例如下面我们使用 <path> 元素来渲染箭头,箭头默认继承边的填充色 fill 和边框色 stroke。
graph.addEdge({shape: "edge",sourece: [100, 100],target: [500, 500],attrs: {line: {sourceMarker: {tagName: "path",d: "M 20 -10 0 0 20 10 Z",},targetMarker: {tagName: "path",fill: "yellow", // 使用自定义填充色stroke: "green", // 使用自定义边框色strokeWidth: 2,d: "M 20 -10 0 0 20 10 Z",},},},});3.4 定制边
和节点一样,我们可以通过 markup 和 attrs 来定制边的形状和样式,也可以注册自定义边来达到复用效果。
Graph.registerEdge("double-edge", {inherit: "edge",markup: [{tagName: "path",selector: "outline",attrs: {fill: "none",},},{tagName: "path",selector: "line",attrs: {fill: "none",cursor: "pointer",},},],attrs: {line: {connection: true,stroke: "#dddddd",strokeWidth: 4,strokeLinejoin: "round",targetMarker: {tagName: "path",stroke: "#000000",d: "M 10 -3 10 -10 -2 0 10 10 10 3",},},outline: {connection: true,stroke: "#000000",strokeWidth: 6,strokeLinejoin: "round",},},});graph.addEdge({shape: "double-edge",source: [100, 100],target: [400, 100],});3.5 修改边
和节点类似,在渲染完成之后,我们还可以通过 API 修改边的所有属性。edge.prop(path, value) 修改边布局,edge.attr(path, value) 修改边样式
const edge = graph.addEdge({source: [200, 140],target: [500, 140],label: 'edge',})console.log(edge.prop())// 输出结果{"shape": "edge","attrs": {"lines": {"connection": true,"strokeLinejoin": "round"},"wrap": {"strokeWidth": 10},"line": {"stroke": "#333","strokeWidth": 2,"targetMarker": "classic"}},"id": "9d5e4f54-1ed3-429e-8d8c-a1526cff2cd8","source": {"x": 200,"y": 140},"target": {"x": 500,"y": 140},"labels": [{"attrs": {"label": {"text": "edge"}}}],"zIndex": 1}edge.prop('target', { x: 300, y: 300 }) // 修改终点edge.attr('line/stroke', '#ccc') // 修改边颜色,等价于 edge.prop('attrs/line/stroke', '#ccc')4. 连接桩
4.1 配置连接桩
在注册节点的时候通过 ports 配置连接桩
Graph.registerNode("custom-node-width-port",{inherit: "rect",width: 100,height: 40,attrs: {body: {stroke: "#8f8f8f",strokeWidth: 1,fill: "#fff",rx: 6,ry: 6,},},ports: {groups: {top: {position: "top",attrs: {circle: {magnet: true,stroke: "#8f8f8f",r: 5,},},},bottom: {position: "bottom",attrs: {circle: {magnet: true,stroke: "#8f8f8f",r: 5,},},},},},},true);const source = graph.addNode({shape: "custom-node-width-port",x: 40,y: 40,label: "hello",ports: {items: [{id: "port_1",group: "bottom",},{id: "port_2",group: "bottom",},],},});const target = graph.addNode({shape: "custom-node-width-port",x: 160,y: 180,label: "world",ports: {items: [{id: "port_3",group: "top",},{id: "port_4",group: "top",},],},});graph.addEdge({source: { cell: source, port: "port_2" },target: { cell: target, port: "port_3" },attrs: {line: {stroke: "#8f8f8f",strokeWidth: 1,},},});4.2 修改连接桩
节点上有丰富的 API 对连接桩进行增、删、改操作。
// 添加连接桩node.addPort({group: "top",attrs: {text: {text: "xx",},},});// 删除连接桩node.removePort(portId);// 更新连接桩node.portProp(portId, "attrs/circle/stroke", color);4.3 连接桩位置
连接桩布局算法只能通过 groups 中的 position 选项来指定
absolute 绝对定位。
left 矩形节点左侧均匀分布。
right 矩形节点右侧均匀分布。
top 矩形节点顶部均匀分布。
bottom 矩形节点底部均匀分布。
line 沿指定的线均匀分布。
ellipse 沿椭圆圆弧分布。
ellipseSpread 沿椭圆均匀分布。
4.4 连接桩标签位置
在 groups 的 label.position 选项和节点的 items.label.position 选项中都可以指定标签的位置。
left 标签位于连接桩左侧。
right 标签位于连接桩右侧。
top 标签位于连接桩上方。
bottom 标签位于连接桩下方。
inside 标签位于节点内围(靠近边线的内侧)。
outside 标签位于节点外围(靠近边线的外侧)。
insideOriented 标签位于节点内围,而且根据所在方位自动调整文本的方向。
outsideOriented 标签位于节点外围,而且根据所在方位自动调整文本的方向。
radial 标签位于圆形或椭圆形节点的外围。
radialOriented 标签位于圆形或椭圆形节点的外围,并使标签文本自动沿圆弧方向旋转。
5. 交互
5.1 连线
连线交互规则都是通过 connecting 配置来完成。下面介绍一些常用的功能。
5.1.1 allowXXX
可以通过 allowXXX 配置来定义连线能否连接到对应的位置。默认支持以下项:
allowBlank:是否允许连接到画布空白位置的点,默认为 true。
allowLoop:是否允许创建循环连线,即边的起始节点和终止节点为同一节点,默认为 true。
allowNode:是否允许边连接到节点(非节点上的连接桩),默认为 true。
allowEdge:是否允许边连接到另一个边,默认为 true。
allowPort:是否允许边连接到连接桩,默认为 true。
allowMulti:是否允许在相同的起始节点和终止之间创建多条边,默认为 true。
new Graph({connecting: {allowNode: true, // boolean},});// 函数形式,多用于动态控制连接限制new Graph({connecting: {allowNode(args) {return true;},},});5.1.2 router/connector
在边教程中我们知道,可以在添加边的时候指定 router 和 connector,如果整个画布中大部分边的 router 或者 connector 是一样的,我们可以直接配置在 connecting 中,这样就可以避免在边中重复配置。
new Graph({connecting: {router: "orth",connector: "rounded",},});5.1.3 createEdge
在上面的 demo 中,我们可以从节点、连接桩拉出一条连线出来,那你可能会问,什么样的元素能拉出连线呢?这是 X6 设计非常巧妙的一个地方,只要具备 magnet=true 属性的元素,都可以拉出连线。而且在 connecting 中可以通过 createEdge 方法配置拉出连线的样式。
new Graph({connecting: {createEdge() {return this.createEdge({shape: "edge",attrs: {line: {stroke: "#8f8f8f",strokeWidth: 1,},},});},},});5.2 组合
有时候我们需要将一个节点拖动到另一个节点中,使其成为另一节点的子节点,这时我们可以通过 embedding 选项来开启,在节点被移动时通过 findParent 指定的方法返回父节点。
const graph = new Graph({embedding: {enabled: true,findParent({ node }) {// 获取移动节点的包围盒const bbox = node.getBBox()// 找到 data 中配置 { parent: true } 的节点,并且移动节点和找到的节点包围盒相交时,返回 truereturn this.getNodes().filter((node) => {const data = node.getData<{ parent: boolean }>()if (data && data.parent) {const targetBBox = node.getBBox()return bbox.isIntersectWithRect(targetBBox)}return false})},},})5.3 高亮
可以通过 highlighting 选项来指定触发某种交互时的高亮样式,如:
new Graph({highlighting: {// 连接桩可以被连接时在连接桩外围围渲染一个包围框magnetAvailable: {name: "stroke",args: {attrs: {fill: "#fff",stroke: "#A4DEB1",strokeWidth: 4,},},},// 连接桩吸附连线时在连接桩外围围渲染一个包围框magnetAdsorbed: {name: "stroke",args: {attrs: {fill: "#fff",stroke: "#31d0c6",strokeWidth: 4,},},},},});支持的 highlighting 配置项有:
default 默认高亮选项,当以下几种高亮配置缺省时被使用。
embedding 拖动节点进行嵌入操作过程中,节点可以被嵌入时被使用。
nodeAvailable 连线过程中,节点可以被链接时被使用。
magnetAvailable 连线过程中,连接桩可以被链接时被使用。
magnetAdsorbed 连线过程中,自动吸附到连接桩时被使用。
5.4 交互限制
可以通过配置 interacting 来启动、禁用一些元素的交互行为,如果画布上元素纯预览,不能进行任何交互,可以直接设置为 false。
new Graph({interacting: false,});如果需要更细节的定义允许哪些交互、禁用哪些交互,我们可以针对不同的属性值进行配置,支持的属性包括:
nodeMovable 节点是否可以被移动。
magnetConnectable 当在具有 magnet 属性的元素上按下鼠标开始拖动时,是否触发连线交互。
edgeMovable 边是否可以被移动。
edgeLabelMovable 边的标签是否可以被移动。
arrowheadMovable 边的起始/终止箭头(在使用 arrowhead 工具后)是否可以被移动。
vertexMovable 边的路径点是否可以被移动。
vertexAddable 是否可以添加边的路径点。
vertexDeletable 边的路径点是否可以被删除。
6. 事件
6.1 视图交互事件
通过鼠标、键盘或者各种可交互的组件与应用产生交互时触发的事件。
6.1.1 鼠标事件
单击 cell:click node:click node:port:click edge:click blank:click
双击 cell:dblclick node:dblclick node:port:dblclick edge:dblclick blank:dblclick
右键 cell:contextmenu node:contextmenu node:port:contextmenu edge:contextmenu blank:contextmenu
鼠标按下 cell:mousedown node:mousedown node:port:mousedown edge:mousedown blank:mousedown
移动鼠标 cell:mousemove node:mousemove node:port:mousemove edge:mousemove blank:mousemove
鼠标抬起 cell:mouseup node:mouseup node:port:mouseup edge:mouseup blank:mouseup
鼠标滚轮 cell:mousewheel node:mousewheel - edge:mousewheel blank:mousewheel
鼠标进入 cell:mouseenter node:mouseenter node:port:mouseenter edge:mouseenter graph:mouseenter
鼠标离开 cell:mouseleave node:mouseleave node:port:mouseleave edge:mouseleave graph:mouseleave
除了 mouseenter 和 mouseleave 外,事件回调函数的参数都包含鼠标相对于画布的位置 x、y 和鼠标事件对象 e 等参数。
graph.on("cell:click", ({ e, x, y, cell, view }) => {});graph.on("node:click", ({ e, x, y, node, view }) => {});graph.on("edge:click", ({ e, x, y, edge, view }) => {});graph.on("blank:click", ({ e, x, y }) => {});graph.on("cell:mouseenter", ({ e, cell, view }) => {});graph.on("node:mouseenter", ({ e, node, view }) => {});graph.on("edge:mouseenter", ({ e, edge, view }) => {});graph.on("graph:mouseenter", ({ e }) => {});6.1.2 自定义点击事件
我们可以在节点/边的 DOM 元素上添加自定义属性 event 或 data-event 来监听该元素的点击事件,例如:
node.attr({// 表示一个删除按钮,点击时删除该节点image: {event: "node:delete",xlinkHref: "trash.png",width: 20,height: 20,},});可以通过绑定的事件名 node:delete 或通用的 cell:customevent、node:customevent、edge:customevent 事件名来监听。
graph.on("node:delete", ({ view, e }) => {e.stopPropagation();view.cell.remove();});graph.on("node:customevent", ({ name, view, e }) => {if (name === "node:delete") {e.stopPropagation();view.cell.remove();}});6.1.3 画布缩放/平移
事件名 回调参数 说明
scale { sx: number; sy: number; ox: number; oy: number } 缩放画布时触发,sx 和 sy 是缩放比例,ox 和 oy 是缩放中心。
resize { width: number; height: number } 改变画布大小时触发,width 和 height 是画布大小。
translate { tx: number; ty: number } 平移画布时触发,tx 和 ty 分别是 X 和 Y 轴的偏移量。
graph.on("scale", ({ sx, sy, ox, oy }) => {});graph.on("resize", ({ width, height }) => {});graph.on("translate", ({ tx, ty }) => {});6.1.4 节点或边平移
事件名 回调参数 说明
node:move { e: Dom.MouseDownEvent; x: number; y: number; node: Node; view: NodeView } 开始移动节点时触发。
node:moving { e: Dom.MouseMoveEvent; x: number; y: number; node: Node; view: NodeView } 移动节点时触发。
node:moved { e: Dom.MouseUpEvent; x: number; y: number; node: Node; view: NodeView } 移动节点后触发。
edge:move { e: Dom.MouseDownEvent; x: number; y: number; node: Node; view: NodeView } 开始移动边时触发。
edge:moving { e: Dom.MouseMoveEvent; x: number; y: number; node: Node; view: NodeView } 移动边时触发。
edge:moved { e: Dom.MouseUpEvent; x: number; y: number; node: Node; view: NodeView } 移动边后触发。
参数中的 x 和 y 是鼠标相对于画布的坐标。
graph.on("node:moved", ({ e, x, y, node, view }) => {});6.1.5 节点嵌入
事件名 回调参数 说明
node:embed { e: Dom.MouseDownEvent; x: number; y: number; node: Node; view: NodeView, currentParent: Node } 开启嵌入,在开始拖动节点时触发。
node:embedding { e: Dom.MouseMoveEvent; x: number; y: number; node: Node; view: NodeView, currentParent: Node, candidateParent: Node } 寻找目标节点过程中触发。
node:embedded { e: Dom.MouseUpEvent; x: number; y: number; node: Node; view: NodeView, previousParent: Node, currentParent: Node } 完成节点嵌入后触发。
6.1.6 边连接/取消连接
当拖动边的起始/终止箭头将边连接到节点/边或者将边从节点/边上分离后触发 edge:connected。
我们可以通过 isNew 来判断连线完成后,对应的边是否是新创建的边。比如从一个连接桩开始,创建了一条边并连接到另一个节点/连接桩,此时 isNew 就为 true。
graph.on("edge:connected", ({ isNew, edge }) => {if (isNew) {// 对新创建的边进行插入数据库等持久化操作}});特别注意的是,参数中的 previous... 是记录操作终端在连接/取消连接之前的状态,并不是指 sourceCell,在创建新边后获取 sourceCell 时不能使用 previousCell,正确的使用方式是:
graph.on("edge:connected", ({ isNew, edge }) => {if (isNew) {const source = edge.getSourceCell();}});6.2 节点/边
6.2.1 添加/删除/修改
当节点/边被添加到画布时,触发以下事件:
added
cell:added
node:added(仅当 cell 是节点时才触发)
edge:added(仅当 cell 是边时才触发)
当节点/边被移除时,触发以下事件:
removed
cell:removed
node:removed(仅当 cell 是节点时才触发)
edge:removed(仅当 cell 是边时才触发)
当节点/边发生任何改变时,触发以下事件:
changed
cell:changed
node:changed(仅当 cell 是节点时才触发)
edge:changed(仅当 cell 是边时才触发)
可以在节点/边上监听:
cell.on("added", ({ cell, index, options }) => {});cell.on("removed", ({ cell, index, options }) => {});cell.on("changed", ({ cell, options }) => {});或者在 Graph 上监听:
graph.on("cell:added", ({ cell, index, options }) => {});graph.on("cell:removed", ({ cell, index, options }) => {});graph.on("cell:changed", ({ cell, options }) => {});graph.on("node:added", ({ node, index, options }) => {});graph.on("node:removed", ({ node, index, options }) => {});graph.on("node:changed", ({ node, options }) => {});graph.on("edge:added", ({ edge, index, options }) => {});graph.on("edge:removed", ({ edge, index, options }) => {});graph.on("edge:changed", ({ edge, options }) => {});6.2.2 change:xxx
当调用 setXxx(val, options) 和 removeXxx(options) 方法去改变节点/边的数据时,并且 options.silent 不为 true 时,都将触发对应的 change 事件,并触发节点/边重绘。例如:
cell.setZIndex(2);cell.setZIndex(2, { silent: false });cell.setZIndex(2, { anyKey: "anyValue" });6.3 动画
transition:start 动画开始时触发
transition:progress 动画过程中触发
transition:complete 动画完成时触发
transition:stop 动画被停止时触发
transition:finish 动画完成或被停止时触发
cell.on("transition:start", (args: Animation.CallbackArgs) => {});cell.on("transition:progress", (args: Animation.ProgressArgs) => {});cell.on("transition:complete", (args: Animation.CallbackArgs) => {});cell.on("transition:stop", (args: Animation.StopArgs) => {});cell.on("transition:finish", (args: Animation.CallbackArgs) => {});graph.on("cell:transition:start", (args: Animation.CallbackArgs) => {});graph.on("cell:transition:progress", (args: Animation.ProgressArgs) => {});graph.on("cell:transition:complete", (args: Animation.CallbackArgs) => {});graph.on("cell:transition:stop", (args: Animation.StopArgs) => {});graph.on("cell:transition:finish", (args: Animation.CallbackArgs) => {});graph.on("node:transition:start", (args: Animation.CallbackArgs) => {});graph.on("node:transition:progress", (args: Animation.ProgressArgs) => {});graph.on("node:transition:complete", (args: Animation.CallbackArgs) => {});graph.on("node:transition:stop", (args: Animation.StopArgs) => {});graph.on("node:transition:finish", (args: Animation.CallbackArgs) => {});graph.on("edge:transition:start", (args: Animation.CallbackArgs) => {});graph.on("edge:transition:progress", (args: Animation.ProgressArgs) => {});graph.on("edge:transition:complete", (args: Animation.CallbackArgs) => {});graph.on("edge:transition:stop", (args: Animation.StopArgs) => {});graph.on("edge:transition:finish", (args: Animation.CallbackArgs) => {});6.4 视图
由于 X6 实现了异步的渲染调度算法,所以节点的添加不一定意味着挂载到画布上。节点在被挂载到画布时以及从画布上卸载时会分别触发单独的事件。
事件名 回调参数 说明
view:mounted { view: CellView } 节点被挂载到画布上时触发。
view:unmounted { view: CellView } 节点从画布上卸载时触发。
graph.on("view:mounted", ({ view }) => {});graph.on("view:unmounted", ({ view }) => {});大家还有经常需要在调用 fromJSON 或者 resetCells 后监听画布完成渲染事件,这时候可以使用 render:done 事件来监听
graph.on('render:done', () => {// pass})graph.fromJSON([...])7. 数据
7.1 导出
我们可以调用 graph.toJSON() 方法来导出图中的节点和边,返回一个具有 { cells: [] } 结构的对象,其中 cells 数组按渲染顺序保存节点和边。
其中,导出的节点结构如下:
{id: string,shape: string,position: {x: numbery: number},size: {width: numberheight: number},attrs: object,zIndex: number,}边的结构如下:
{id: string,shape: string,source: object,target: object,attrs: object,zIndex: number,}7.2 导入
支持节点/边元数据数组 graph.fromJSON(cells: (Node.Metadata | Edge.Metadata)[])。
graph.fromJSON([{id: "node1",x: 40,y: 40,width: 100,height: 40,label: "Hello",shape: "rect",},{id: "node2",x: 40,y: 40,width: 100,height: 40,label: "Hello",shape: "ellipse",},{id: "edge1",source: "node1",target: "node2",shape: "edge",},]);或者提供一个包含 cells、nodes、edges 的对象,按照 [...cells, ...nodes, ...edges] 顺序渲染。
graph.fromJSON({nodes: [],edges: [],});通常,我们通过 graph.fromJSON(...) 来渲染 graph.toJSON() 导出的数据。
相关文章:
AntV X6 图编辑引擎速通
前言:参考 [AntV X6 官网](https://x6.antv.antgroup.com/) 一、简介 X6 可以快速搭建 DAG 图、ER 图、流程图、血缘图等应用。 二、快速上手 1. 安装 npm install antv/x6 --save# oryarn add antv/x6# orpnpm add antv/x6 2. 使用 2.1 初始画布 在页面中创…...
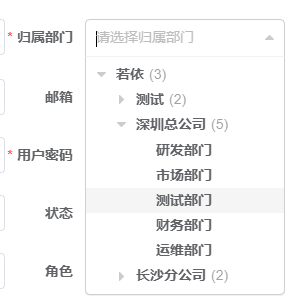
【若依前后端分离】通过输入用户编号自动带出部门名称(部门树)
一、部门树 使用 <treeselect v-model"form.deptId" :options"deptOptions" :show-count"true" placeholder"请选择归属部门"/> <el-col :span"12"><el-form-item label"归属部门" prop"dept…...

AIGC时代程序员的跃迁——编程高手的密码武器
💝💝💝欢迎来到我的博客,很高兴能够在这里和您见面!希望您在这里可以感受到一份轻松愉快的氛围,不仅可以获得有趣的内容和知识,也可以畅所欲言、分享您的想法和见解。 推荐:kwan 的首页,持续学…...
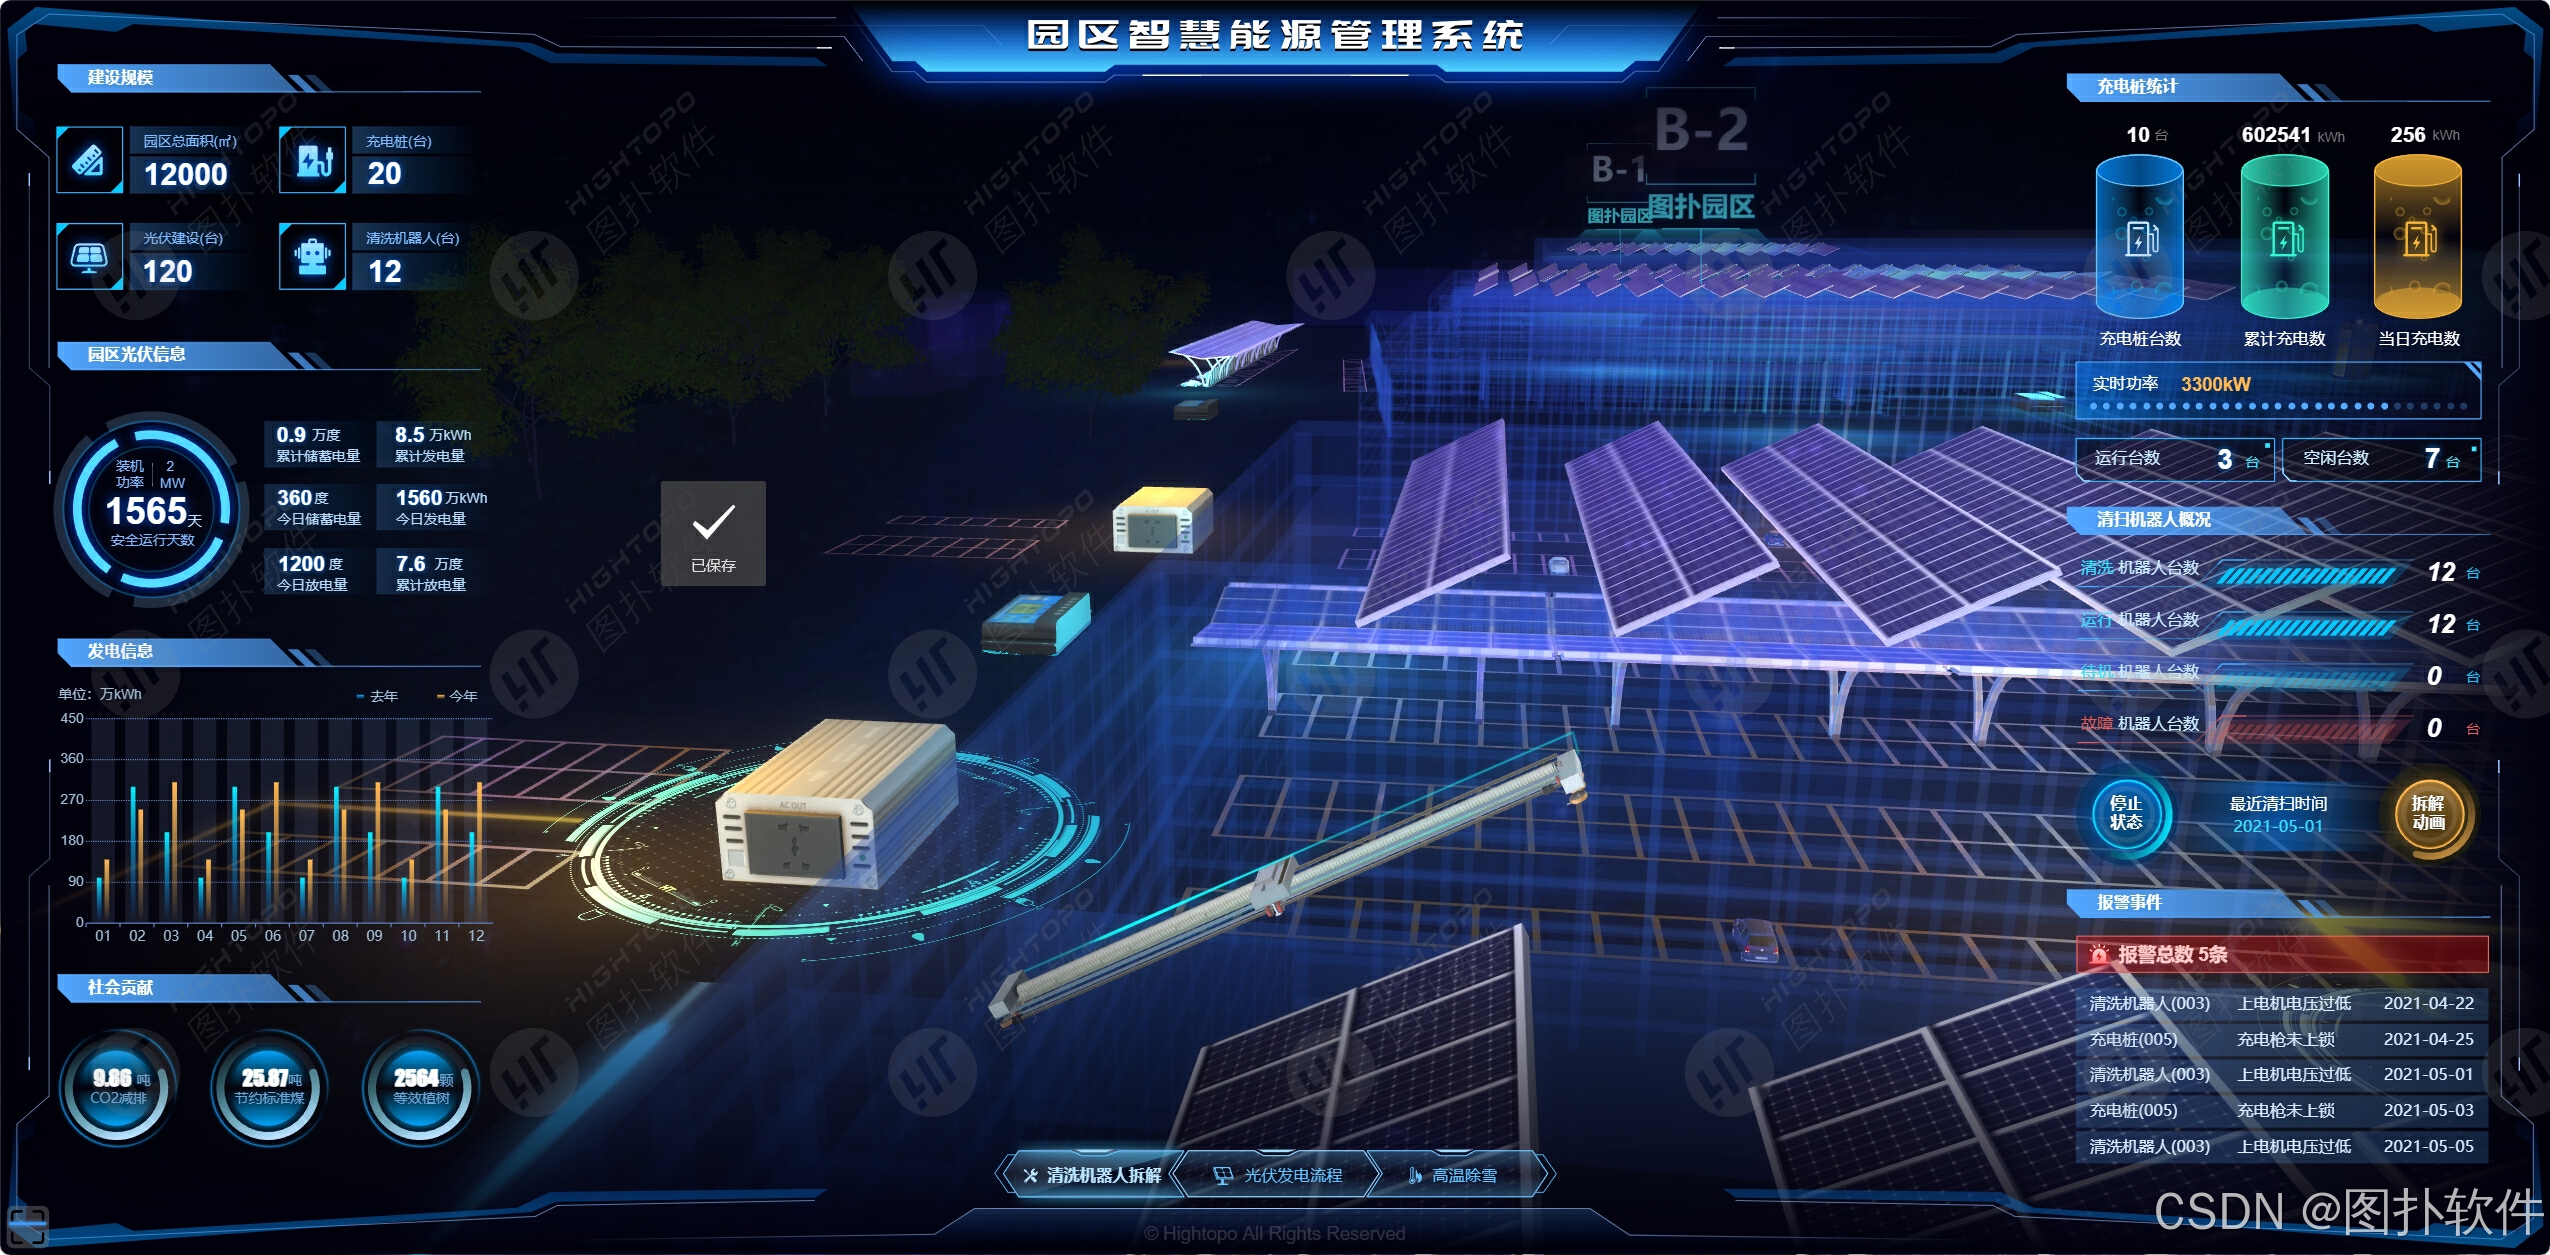
园区智慧能源可视化:智能监控与优化能源管理
通过图扑可视化技术,搭建智慧光伏园区,实时监控园区光伏系统的运行状态,分析数据并优化能源管理,提高发电效率和维护效率,助力园区实现绿色可持续发展。...
Linux内网端口转公网端口映射
由于服务商做安全演练,把原先服务器内网的端口映射到外网端口全都关闭了,每次维护服务器特别麻烦,像数据库查询如果用原生的mysql 去连接,查询返回的结果乱了,非常不方便。 查了服务还是可以正常访问部分外网的&#x…...
安装和编译指定的python3版本)
银河麒麟高级服务器操作系统(通用)安装和编译指定的python3版本
银河麒麟高级服务器操作系统(通用)安装和编译指定的python3版本 一 系统环境二 安装python3.12.42.1 安装编译需要的依赖包2.2 下载官网目前最新的python源码包2.3 解压Python-3.12.4.tar.xz2.4 配置python-3.12.42.5 编译安装2.6 配置环境变量使其生效2…...
cs231n 作业3
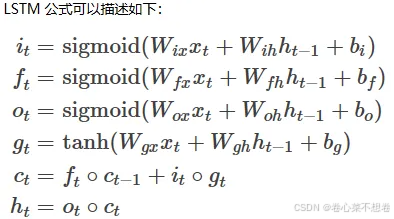
使用普通RNN进行图像标注 单个RNN神经元行为 前向传播: 反向传播: def rnn_step_backward(dnext_h, cache):dx, dprev_h, dWx, dWh, db None, None, None, None, Nonex, Wx, Wh, prev_h, next_h cachedtanh 1 - next_h**2dx (dnext_h*dtanh).dot(…...
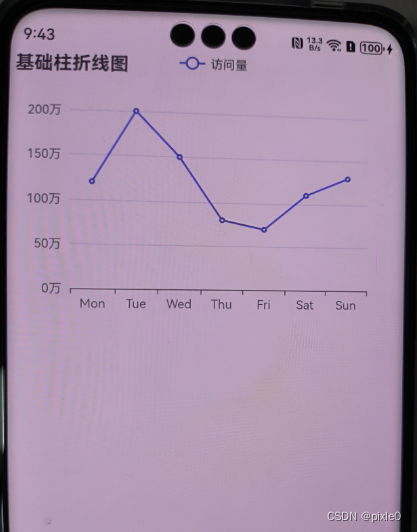
HarmonyOS Next系列之Echarts图表组件(折线图、柱状图、饼图等)实现(八)
系列文章目录 HarmonyOS Next 系列之省市区弹窗选择器实现(一) HarmonyOS Next 系列之验证码输入组件实现(二) HarmonyOS Next 系列之底部标签栏TabBar实现(三) HarmonyOS Next 系列之HTTP请求封装和Token…...

网上怎么样可以挣钱,分享几种可以让你在家赚钱的兼职项目
当今社会,压力越来越大,工作、家庭、生活等等,方方面面都需要钱,仅靠一份工作赚钱,已经很难满足我们的需求。所以很多人都会尝试做一些副业,兼职来补贴家用。 现在呢,有很多人都想在网上赚钱&am…...
)
【DevOps】运维过程中经常遇到的Http错误码问题分析(二)
目录 一、HTTP 错误400 Bad Request 1、理解 400 Bad Request 错误 2、排查 400 Bad Request 错误 3、常见的解决方法 二、HTTP 错误401 Unauthorized 1、理解 401 Unauthorized 错误 2、排查 401 Unauthorized 错误 3、常见的解决方法 一、HTTP 错误400 Bad Request …...
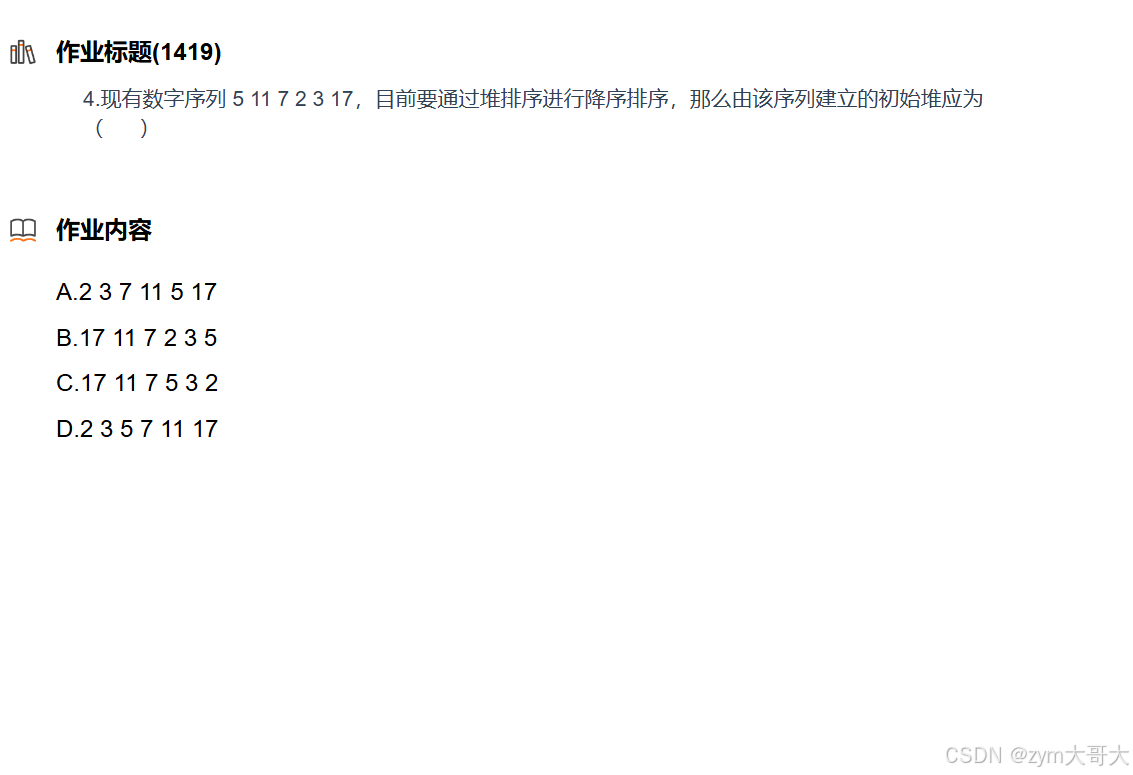
数据结构练习
1. 快速排序的非递归是通过栈来实现的,则前序与层次可以通过控制入栈的顺序来实现,因为递归是会一直开辟栈区空间,所以非递归的实现只需要一个栈的大小,而这个大小是小于递归所要的, 非递归与递归的时间复杂度是一样的…...

手动安装Ruby 1.9.3并升级RubyGems
手动安装Ruby 1.9.3并升级RubyGems ###Ruby 1.9.3 p125安装 wget http://ftp.ruby-lang.org/pub/ruby/1.9/ruby-1.9.3-p125.tar.gz \ && tar -xzvf ruby-1.9.3-p125.tar.gz \ && cd ruby-1.9.3-p125 \ && ./configure --with-openssl-dir/usr/lib/op…...

go语言day11 错误 defer(),panic(),recover()
错误: 创建错误 1)fmt包下提供的方法 fmt.Errorf(" 格式化字符串信息 " , 空接口类型对象 ) 2)errors包下提供的方法 errors.New(" 字符串信息 ") 创建自定义错误 需要实现error接口,而error接口…...

构建docker镜像实战
构建docker镜像 构建基础容器镜像(Base Image)是创建容器化应用程序的第一步。基础镜像提供了一个最低限度的操作系统环境,您可以在其上安装所需的软件包和应用程序。 Dockerfile语法说明 Dockerfile 是 Docker 构建镜像的描述文件&#x…...

生信算法9 - 正则表达式匹配氨基酸序列、核型和字符串
建议在Jupyter实践。 1. 使用正则表达式匹配指定的氨基酸序列 import re# 氨基酸序列 seq VSVLTMFRYAGWLDRLYMLVGTQLAAIIHGVALPLMMLI# 正则表达式匹配 match re.search(r[A|G]W, seq)# 打印match及匹配到开始位置和结束位置 print(match) # <re.Match object; span(10, …...

linux ext2文件系统浅析
文章目录 前言ext2内容概述实验准备二进制对比分析1 super block2 group desc3 block bitmap4 inode bitmap5 inode_tableinode 1inode 2inode 11inode 12 6 dir entry7 data区8 间接块9 块组 前言 网上关于ext2文件系统的博客有很多,但看完之后还是有些云里雾里&a…...

「树莓派入门」树莓派进阶02-传感器应用与交通灯项目
传感器是树莓派实现智能化的关键。通过本教程,你可以开始尝试使用传感器来增强树莓派的功能。 一、传感器在树莓派中的作用 传感器是树莓派与外界环境交互的重要工具。它们可以检测各种物理量,如光、声音、温度等,并将这些物理量转换为电信号,供树莓派读取和处理。 二、数…...

pytorch 指定GPU设备
使用os.environ["CUDA_VISIBLE_DEVICES"] 这种方法是通过环境变量限制可见的CUDA设备,从而在多个GPU的机器上只让PyTorch看到并使用指定的GPU。这种方式的好处是所有后续的CUDA调用都会使用这个GPU,并且代码中不需要显式地指定设备索引。 im…...

华为od-C卷200分题目6 - 5G 网络建设
华为od-C卷200分题目6 - 5G 网络建设 题目描述 现需要在某城市进行 5G 网络建设,已经选取 N 个地点设置 5G 基站,编号固定为 1 到 N,接下来需要各个基站之间使用光纤进行连接以确保基站能互联互通,不同基站之间架设光纤的成本各不…...
步进电机(STM32+28BYJ-48)
一、简介 步进电动机(stepping motor)把电脉冲信号变换成角位移以控制转子转动的执行机构。在自动控制装置中作为执行器。每输入一个脉冲信号,步进电动机前进一步,故又称脉冲电动机。步进电动机多用于数字式计算机的外部设备&…...

DISMTools企业部署:在组织中大规模应用的最佳实践
DISMTools企业部署:在组织中大规模应用的最佳实践 【免费下载链接】DISMTools The connected place for Windows system administration 项目地址: https://gitcode.com/GitHub_Trending/di/DISMTools DISMTools是一款专为Windows系统管理设计的连接平台&…...
)
手把手教你为WCH CH582移植CherryUSB主机栈(基于RT-Thread,含中断优化)
基于RT-Thread的WCH CH582 USB主机协议栈深度移植指南在嵌入式开发领域,USB主机功能的实现往往意味着设备能够直接连接各类USB外设,从简单的键盘鼠标到复杂的存储设备。对于使用WCH CH582这类RISC-V内核MCU的开发者而言,原厂SDK提供的USB主机…...

别再盲跑了!手把手教你用Arduino Zero在IDE 2.0里设置断点单步调试
告别盲跑时代:Arduino Zero与IDE 2.0的源码级调试实战指南 当你的Arduino项目逻辑越来越复杂,仅靠串口打印调试就像在迷宫里摸黑前行——直到遇见Arduino Zero与IDE 2.0的调试组合。本文将揭示如何用这套工具实现 源码级精准调试 ,即使你手…...

组态王通用扫码枪配置
使用组态王扫码枪驱动,是绑定变量,扫码后直接就可以显示扫码内容。解决每次扫码输入数据时必须先用鼠标点进输入框内的问题。驱动安装先添加驱动,亚控网站的文件为 barcodescanner,这个文件是组态王通用扫码枪的驱动,但…...
:执行计划教我做事)
开发转兼职DBA(二):执行计划教我做事
开发转兼职DBA(二):执行计划教我做事 查询慢了不知道为什么,加了索引还是慢,复合索引怎么建,执行计划怎么看——这些不是DBA的专利,是每个写SQL的开发者迟早要面对的事。 文章目录 开发转兼职DB…...

电信运营商每月处理海量工单,如何不再出错?基于AI Agent的端到端自动化解决方案
在2026年的电信行业,海量工单处理已不再仅仅是效率问题,而是合规与生存的底线。随着2026年5月20日《电信和互联网服务 基础电信企业网上营业厅服务规范》国家标准的正式实施,监管层对“信息透明、流程闭环、计费精准”的要求达到了前所未有的…...

差分隐私GDP机制紧密度量化:从隐私剖面到∆度量的实践指南
1. 差分隐私GDP机制:从理论到实践,如何量化隐私保护紧密度在差分隐私(Differential Privacy, DP)的实际部署中,尤其是在机器学习的隐私保护训练(如DP-SGD)场景里,我们常常面临一个核…...

淘宝淘金币自动化脚本终极指南:如何每天节省25分钟实现智能任务管理
淘宝淘金币自动化脚本终极指南:如何每天节省25分钟实现智能任务管理 【免费下载链接】taojinbi 淘宝淘金币自动执行脚本,包含蚂蚁森林收取能量,芭芭农场全任务,解放你的双手 项目地址: https://gitcode.com/gh_mirrors/ta/taoji…...

风控系统如何全维度识别爬虫:IP、账号与行为的协同决策机制
1. 这不是“反爬失败”,而是风控系统在对你做全维度画像你写完一段 requests BeautifulSoup 的代码,本地跑通了,开开心心部署到服务器,结果第二天早上发现:所有请求返回 403,日志里全是空响应;…...

【DeepSeek集成测试黄金标准】:20年专家亲授5大避坑指南与自动化落地框架
更多请点击: https://intelliparadigm.com 第一章:DeepSeek集成测试黄金标准的演进与核心价值 集成测试在大语言模型工程化落地过程中已从“验证功能可用”跃迁为“保障推理一致性、上下文鲁棒性与安全边界的三位一体质量门禁”。DeepSeek系列模型&…...