个人小站折腾后记
个人小站折腾后记
🏠个人主页:shark-Gao
🧑个人简介:大家好,我是shark-Gao,一个想要与大家共同进步的男人😉😉
🎉目前状况:23届毕业生,目前在某公司实习👏👏
❤️欢迎大家:这里是CSDN,我总结知识的地方,欢迎来到我的博客,我亲爱的大佬😘
🖥️个人小站 :个人博客,欢迎大家访问
CSDN发布的文章同样会在个人小站折腾后记 个人博客进行同步,欢迎大家指点!!!
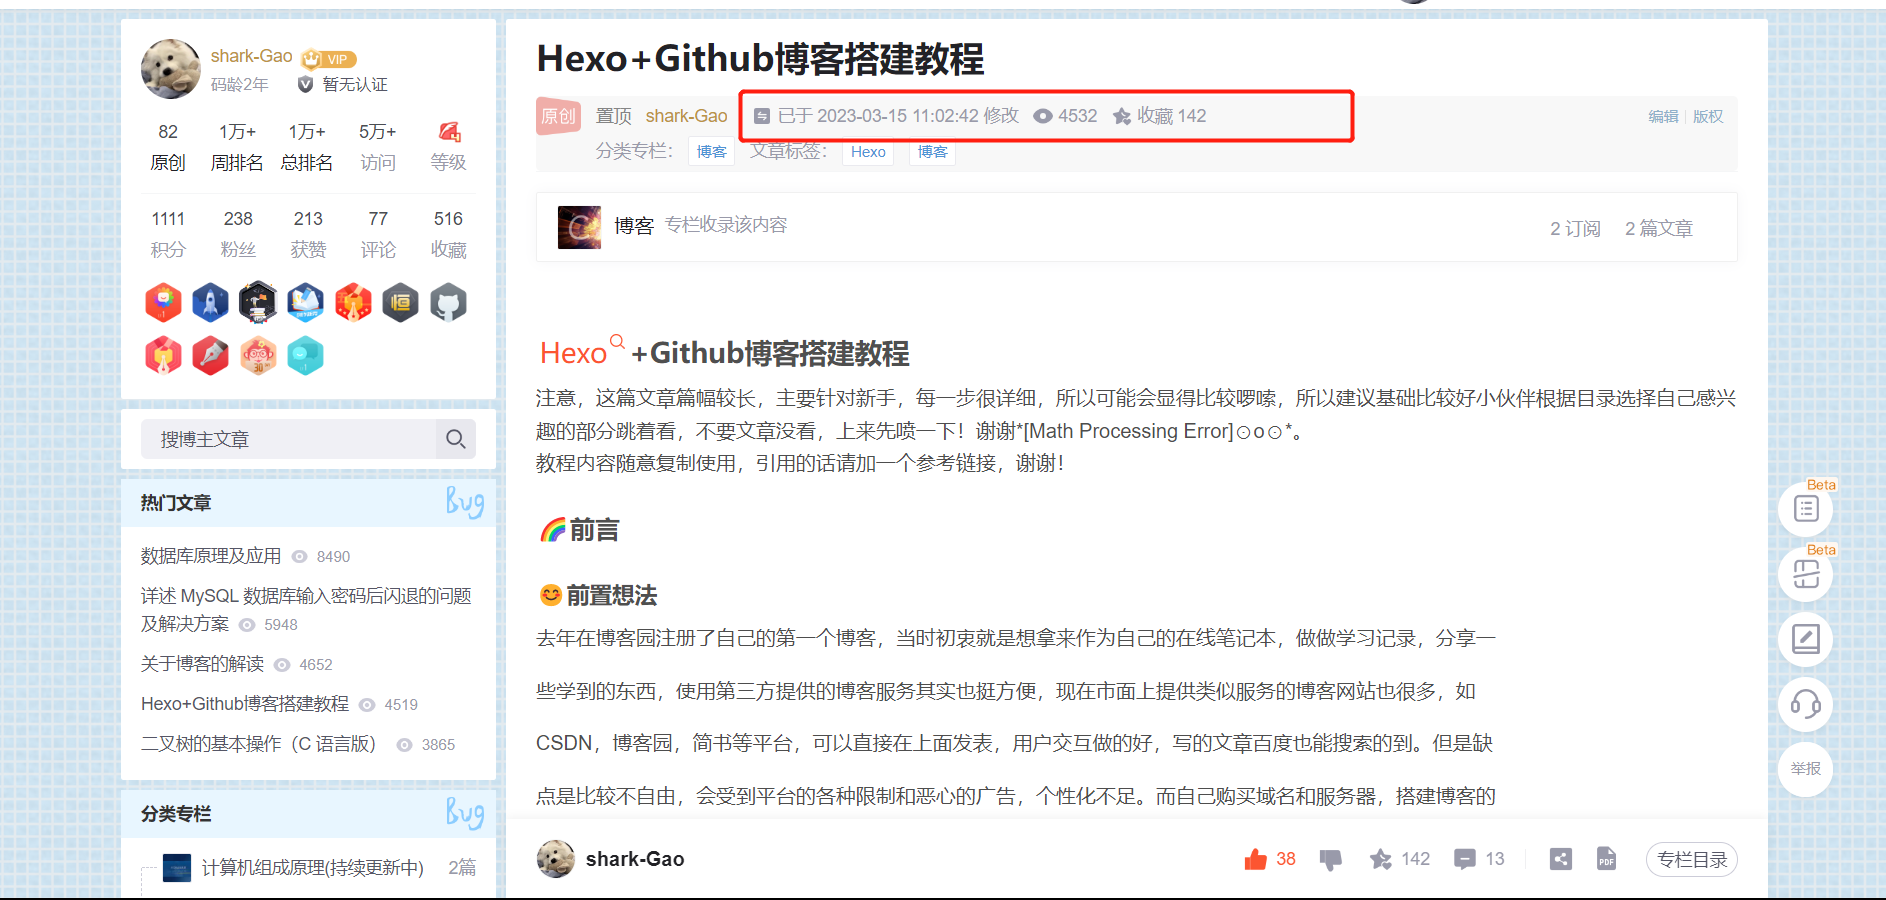
转眼上次这篇博客搭建小记已经过去一年之久,同时也得到了大家的喜欢和认可,能把我知道的一些知识和技巧分享给大家我很开心!
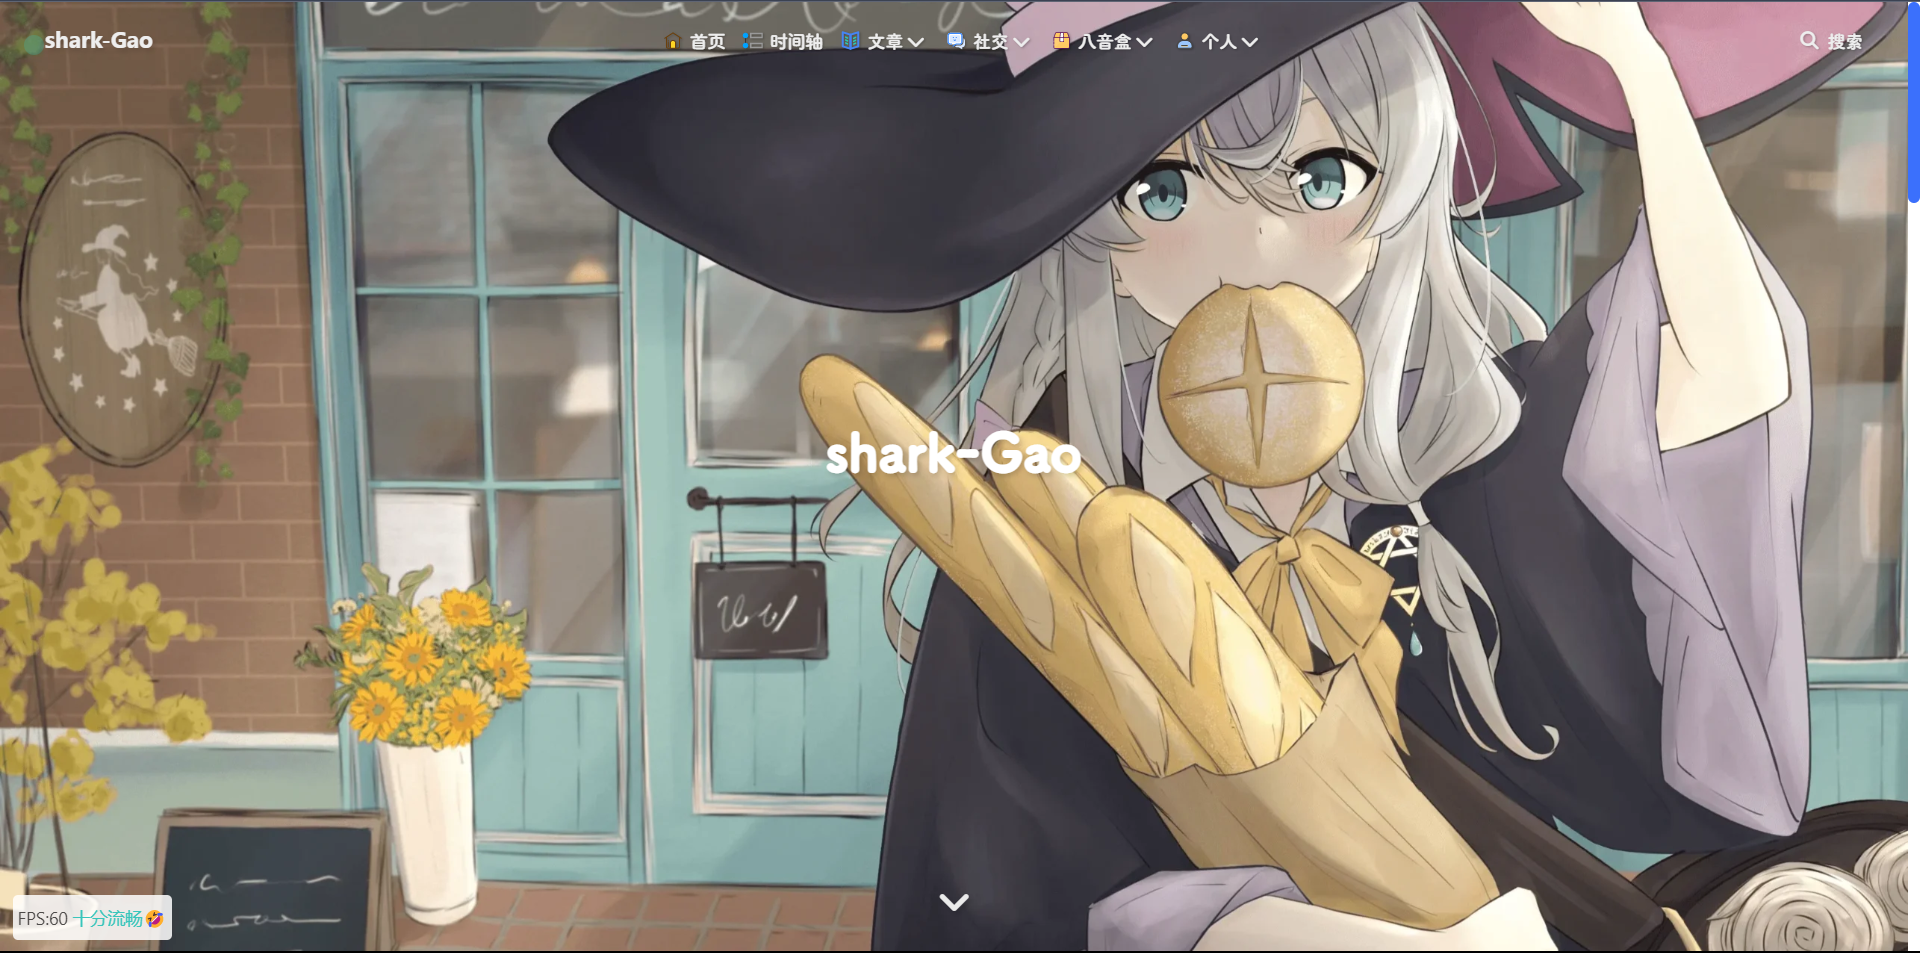
一年之余,也有一段时间没有更新自己的个人小站了,这次周末便抽空重新捯饬了一番,这次也打算重新记录一下,同时也供大家参考,希望可以对大家有所帮助。以下附上一张小站截图。
欢迎大家访问我的小破站 :小破站
主题选择
在主题选择这方面,我依然选择的是butterfly主题,这里非常感谢这些开源的大佬们,才能让我们看到这些好用又美观的主题🉑。
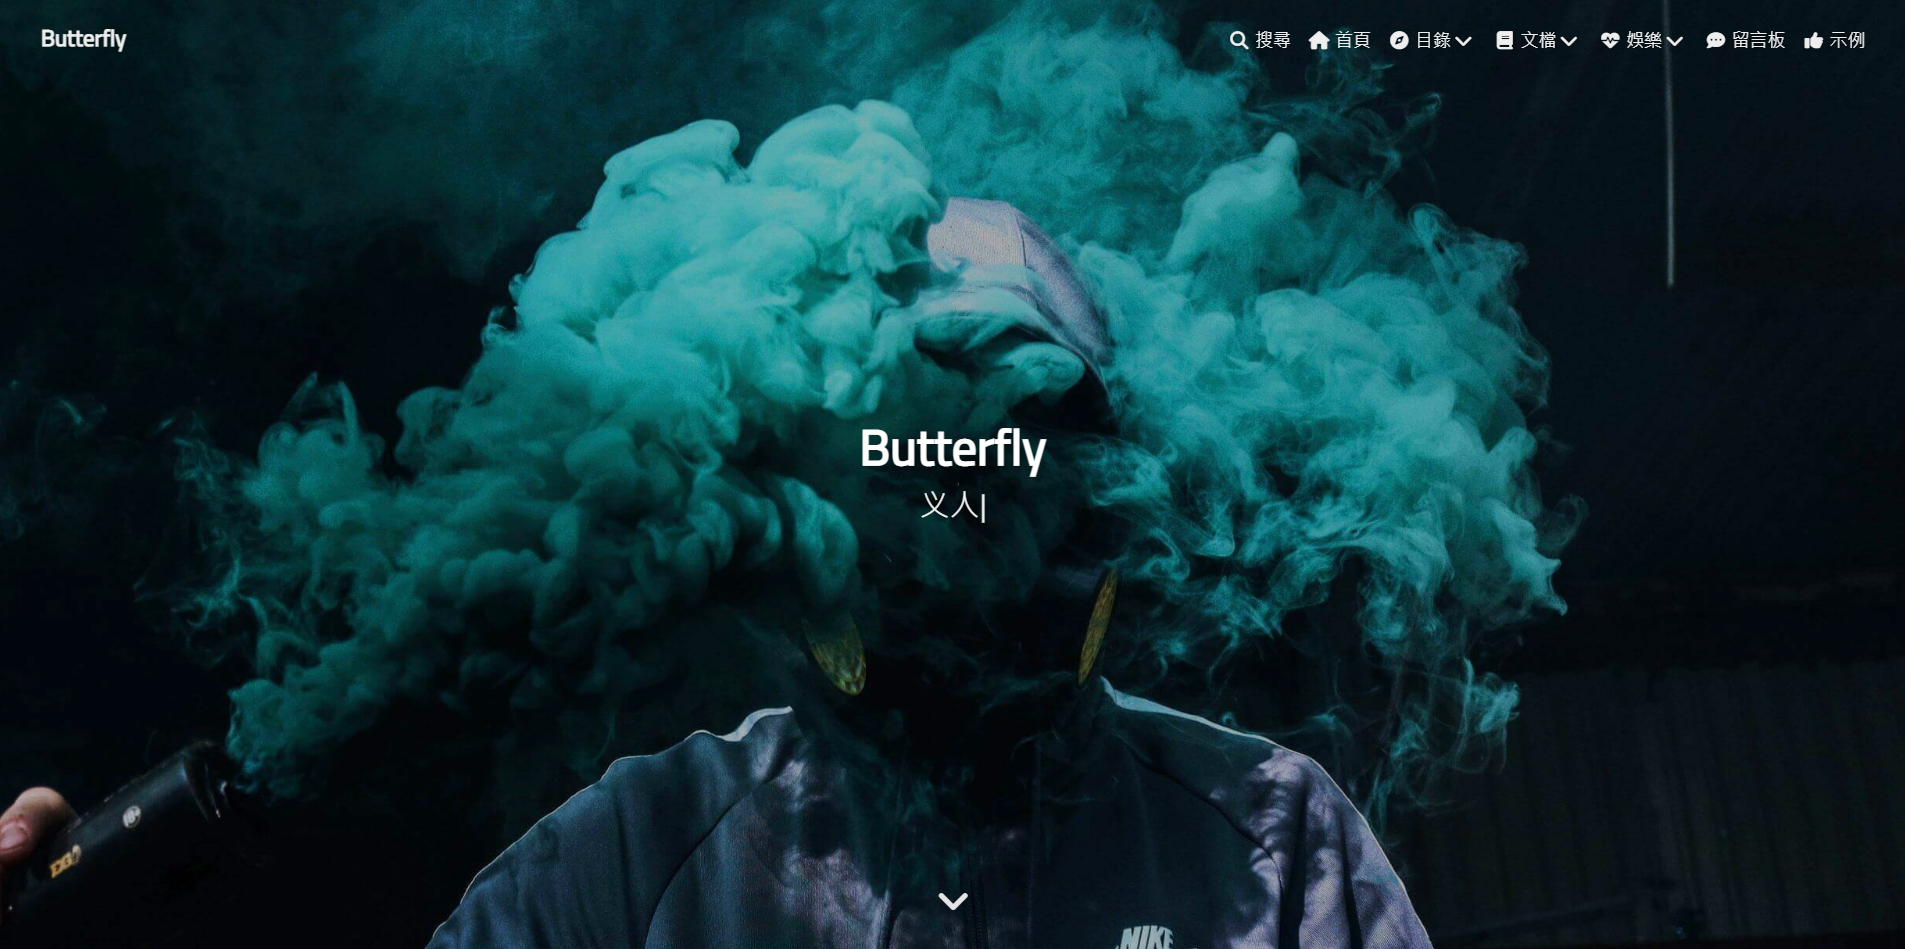
这次我的博客还是基于butterfly主题的一些魔改,按照自己的折腾和参照大佬的想法,慢慢琢磨出来的!!!
魔改教程
外挂标签的引入(店长)
详见:Tag Plugins Plus
-
安装插件,在博客根目录
[BlogRoot]下打开终端,运行以下指令:npm install hexo-butterfly-tag-plugins-plus --save考虑到hexo自带的markdown渲染插件
hexo-renderer-marked与外挂标签语法的兼容性较差,建议您将其替换成hexo-renderer-kramednpm uninstall hexo-renderer-marked --save npm install hexo-renderer-kramed --save -
添加配置信息,以下为写法示例
在站点配置文件_config.yml或者主题配置文件_config.butterfly.yml中添加# tag-plugins-plus # see https://akilar.top/posts/615e2dec/ tag_plugins:enable: true # 开关priority: 5 #过滤器优先权issues: false #issues标签依赖注入开关link:placeholder: /img/link.png #link_card标签默认的图标图片CDN:anima: https://npm.elemecdn.com/hexo-butterfly-tag-plugins-plus@latest/lib/assets/font-awesome-animation.min.css #动画标签anima的依赖jquery: https://npm.elemecdn.com/jquery@latest/dist/jquery.min.js #issues标签依赖issues: https://npm.elemecdn.com/hexo-butterfly-tag-plugins-plus@latest/lib/assets/issues.js #issues标签依赖iconfont: //at.alicdn.com/t/font_2032782_8d5kxvn09md.js #参看https://akilar.top/posts/d2ebecef/carousel: https://npm.elemecdn.com/hexo-butterfly-tag-plugins-plus@latest/lib/assets/carousel-touch.jstag_plugins_css: https://npm.elemecdn.com/hexo-butterfly-tag-plugins-plus@latest/lib/tag_plugins.css -
参数释义
| 参数 | 备选值/类型 | 释义 |
|---|---|---|
| enable | true/false | 【必选】控制开关 |
| priority | number | 【可选】过滤器优先级,数值越小,执行越早,默认为10,选填 |
| issues | true/false | 【可选】issues标签控制开关,默认为false |
| link.placeholder | 【必选】link卡片外挂标签的默认图标 | |
| CDN.anima | URL | 【可选】动画标签anima的依赖 |
| CDN.jquery | URL | 【可选】issues标签依赖 |
| CDN.issues | URL | 【可选】issues标签依赖 |
| CDN.iconfont | URL | 【可选】iconfont标签symbol样式引入,如果不想引入,则设为false |
| CDN.carousel | URL | 【可选】carousel旋转相册标签鼠标拖动依赖,如果不想引入则设为false |
| CDN.tag_plugins_css | URL | 【可选】外挂标签样式的CSS依赖,为避免CDN缓存延迟,建议将@latest改为具体版本号 |
听话的鼠标魔改
效果预览 :

-
新建文件
[BlogRoot]\source\js\cursor.js,在里面写上如下代码:var CURSOR;Math.lerp = (a, b, n) => (1 - n) * a + n * b;const getStyle = (el, attr) => {try {return window.getComputedStyle? window.getComputedStyle(el)[attr]: el.currentStyle[attr];} catch (e) {}return ""; };class Cursor {constructor() {this.pos = {curr: null, prev: null};this.pt = [];this.create();this.init();this.render();}move(left, top) {this.cursor.style["left"] = `${left}px`;this.cursor.style["top"] = `${top}px`;}create() {if (!this.cursor) {this.cursor = document.createElement("div");this.cursor.id = "cursor";this.cursor.classList.add("hidden");document.body.append(this.cursor);}var el = document.getElementsByTagName('*');for (let i = 0; i < el.length; i++)if (getStyle(el[i], "cursor") == "pointer")this.pt.push(el[i].outerHTML);document.body.appendChild((this.scr = document.createElement("style")));// 这里改变鼠标指针的颜色 由svg生成this.scr.innerHTML = `* {cursor: url("data:image/svg+xml,<svg xmlns='http://www.w3.org/2000/svg' viewBox='0 0 8 8' width='8px' height='8px'><circle cx='4' cy='4' r='4' opacity='.5'/></svg>") 4 4, auto}`;}refresh() {this.scr.remove();this.cursor.classList.remove("hover");this.cursor.classList.remove("active");this.pos = {curr: null, prev: null};this.pt = [];this.create();this.init();this.render();}init() {document.onmouseover = e => this.pt.includes(e.target.outerHTML) && this.cursor.classList.add("hover");document.onmouseout = e => this.pt.includes(e.target.outerHTML) && this.cursor.classList.remove("hover");document.onmousemove = e => {(this.pos.curr == null) && this.move(e.clientX - 8, e.clientY - 8); this.pos.curr = {x: e.clientX - 8, y: e.clientY - 8}; this.cursor.classList.remove("hidden");};document.onmouseenter = e => this.cursor.classList.remove("hidden");document.onmouseleave = e => this.cursor.classList.add("hidden");document.onmousedown = e => this.cursor.classList.add("active");document.onmouseup = e => this.cursor.classList.remove("active");}render() {if (this.pos.prev) {this.pos.prev.x = Math.lerp(this.pos.prev.x, this.pos.curr.x, 0.15);this.pos.prev.y = Math.lerp(this.pos.prev.y, this.pos.curr.y, 0.15);this.move(this.pos.prev.x, this.pos.prev.y);} else {this.pos.prev = this.pos.curr;}requestAnimationFrame(() => this.render());} }(() => {CURSOR = new Cursor();// 需要重新获取列表时,使用 CURSOR.refresh() })();其中比较重要的参数就是鼠标的尺寸和颜色,已经在上图中标出,目前发现颜色只支持RGB写法和固有名称写法(例如red这种),其他参数也可以自行摸索:
* {cursor: url("data:image/svg+xml,<svg xmlns='http://www.w3.org/2000/svg' viewBox='0 0 8 8' width='8px' height='8px'><circle cx='4' cy='4' r='4' opacity='1.0' fill='rgb(57, 197, 187)'/></svg>") 4 4, auto}` -
在
[BlogRoot]\source\css\custom.css添加如下代码:/* 鼠标样式 */ #cursor {position: fixed;width: 16px;height: 16px;/* 这里改变跟随的底色 */background: var(--theme-color);border-radius: 8px;opacity: 0.25;z-index: 10086;pointer-events: none;transition: 0.2s ease-in-out;transition-property: background, opacity, transform; }#cursor.hidden {opacity: 0; }#cursor.hover {opacity: 0.1;transform: scale(2.5);-webkit-transform: scale(2.5);-moz-transform: scale(2.5);-ms-transform: scale(2.5);-o-transform: scale(2.5); }#cursor.active {opacity: 0.5;transform: scale(0.5);-webkit-transform: scale(0.5);-moz-transform: scale(0.5);-ms-transform: scale(0.5);-o-transform: scale(0.5); }这里比较重要的参数就是鼠标跟随的圆形颜色,可以根据自己的喜好进行更改:
#cursor {/* 这里改变跟随的底色 */background: rgb(57, 197, 187); } -
在主题配置文件
_config.butterfly.yml文件的inject配置项引入刚刚创建的css文件和js文件:inject: head: + - <link rel="stylesheet" href="/css/custom.css">bottom: + - <script defer src="/js/cursor.js"></script> -
重启项目即可看见效果:
hexo cl; hexo s
页面样式调节
这个教程是通过css样式调节各个页面透明度、模糊度(亚克力效果)、圆角、边框样式等,看起来会更加舒适。
-
复制以下代码进去自定义的
custom.css文件:root {--trans-light: rgba(255, 255, 255, 0.88);--trans-dark: rgba(25, 25, 25, 0.88);--border-style: 1px solid rgb(169, 169, 169);--backdrop-filter: blur(5px) saturate(150%); }/* 首页文章卡片 */ #recent-posts > .recent-post-item {background: var(--trans-light);backdrop-filter: var(--backdrop-filter);border-radius: 25px;border: var(--border-style); }/* 首页侧栏卡片 */ #aside-content .card-widget {background: var(--trans-light);backdrop-filter: var(--backdrop-filter);border-radius: 18px;border: var(--border-style); }/* 文章页、归档页、普通页面 */ div#post, div#page, div#archive {background: var(--trans-light);backdrop-filter: var(--backdrop-filter);border: var(--border-style);border-radius: 20px; }/* 导航栏 */ #page-header.nav-fixed #nav {background: rgba(255, 255, 255, 0.75);backdrop-filter: var(--backdrop-filter); }[data-theme="dark"] #page-header.nav-fixed #nav {background: rgba(0, 0, 0, 0.7) !important; }/* 夜间模式遮罩 */ [data-theme="dark"] #recent-posts > .recent-post-item, [data-theme="dark"] #aside-content .card-widget, [data-theme="dark"] div#post, [data-theme="dark"] div#archive, [data-theme="dark"] div#page {background: var(--trans-dark); }/* 夜间模式页脚页头遮罩透明 */ [data-theme="dark"] #footer::before {background: transparent !important; } [data-theme="dark"] #page-header::before {background: transparent !important; }/* 阅读模式 */ .read-mode #aside-content .card-widget {background: rgba(158, 204, 171, 0.5) !important; } .read-mode div#post {background: rgba(158, 204, 171, 0.5) !important; }/* 夜间模式下的阅读模式 */ [data-theme="dark"] .read-mode #aside-content .card-widget {background: rgba(25, 25, 25, 0.9) !important;color: #ffffff; } [data-theme="dark"] .read-mode div#post {background: rgba(25, 25, 25, 0.9) !important;color: #ffffff; } -
参数说明:
--trans-light:白天模式带透明度的背景色,如rgba(255, 255, 255, 0.88)底色是纯白色,其中0.88就透明度,在0-1之间调节,值越大越不透明;--trans-dark: 夜间模式带透明度的背景色,如rgba(25, 25, 25, 0.88)底色是柔和黑色,其中0.88就透明度,在0-1之间调节,值越大越不透明;--border-style: 边框样式,1px solid rgb(169, 169, 169)指宽度为1px的灰色实体边框;--backdrop-filter: 背景过滤器,如blur(5px) saturate(150%)表示饱和度为150%的、高斯模糊半径为5px的过滤器,这是亚克力效果的一种实现方法;- 大家可以根据自己喜好进行调节,不用拘泥于我的样式!
-
记住在主题配置文件
_config.butterfly.yml的inject配置项中引入该css文件:inject: head: + - <link rel="stylesheet" href="/css/custom.css"> -
重启项目即可看见效果:
hexo cl; hexo s
引入iconfont自定义图标
详见:Iconfont Inject
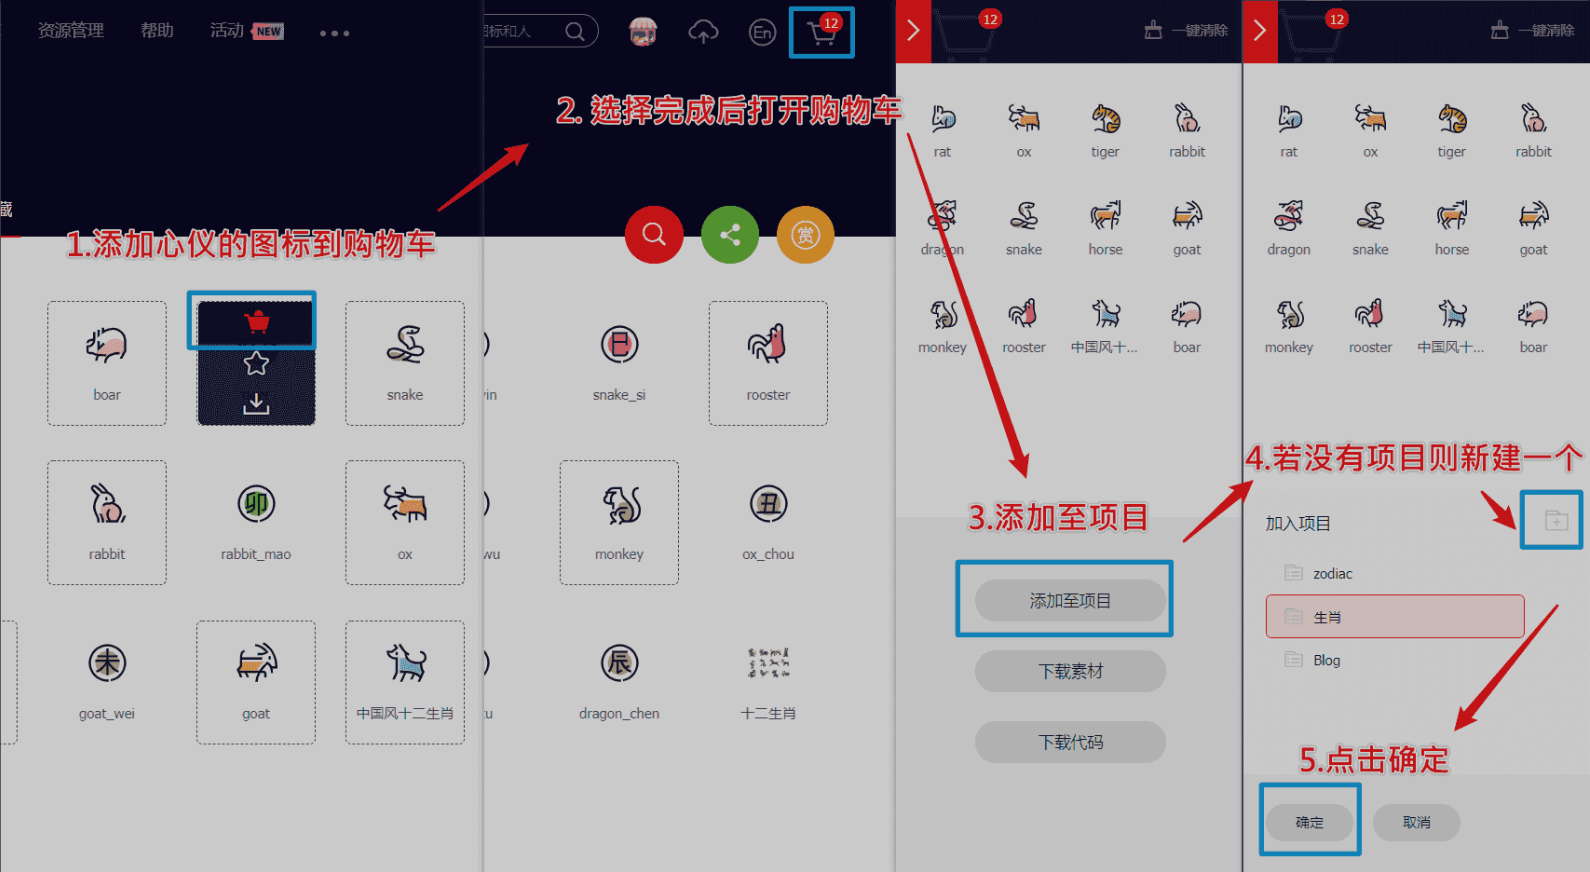
新建图标项目
-
访问阿里巴巴矢量图标库,注册登录。
-
搜索自己心仪的图标,然后选择添加入库,加到购物车。
-
选择完毕后点击右上角的购物车图标,打开侧栏,选择添加到项目,如果没有项目就新建一个。
-
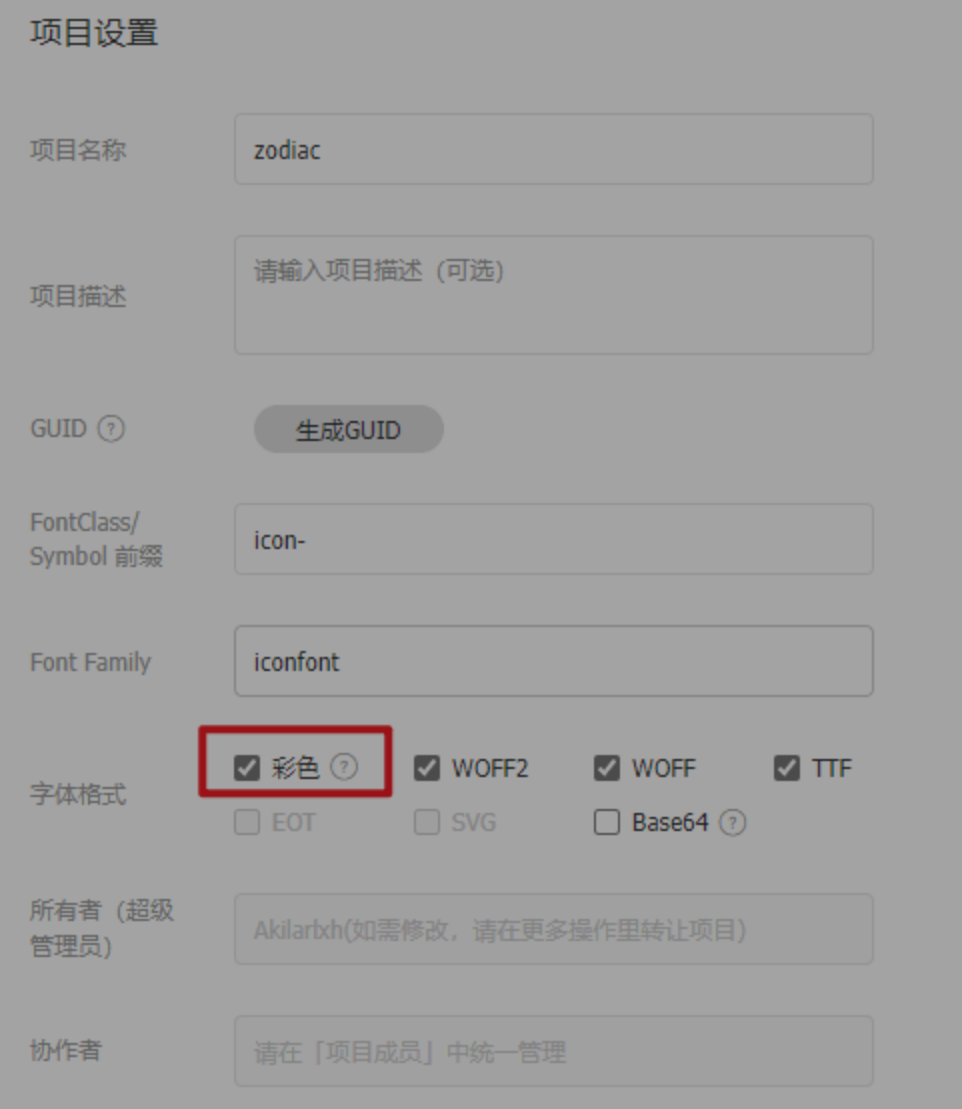
可以通过上方顶栏菜单->资源管理->我的项目,找到之前添加的图标项目。(现在的iconfont可以在图标库的项目设置里直接打开彩色设置,然后采用fontclass的引用方式即可使用多彩图标。但是单一项目彩色图标上限是40个图标,酌情采用。)

引入图标
线上引入方案,我使用的是官方文档中最便捷的font-class方案。这一方案偶尔会出现图标加载不出的情况。但是便于随时对图标库进行升级,换一下在线链接即可,适合新手使用。最新版本的iconfont支持直接在项目设置中开启彩色图标,从而实现直接用class添加多彩色图标。(推荐直接用这个即可)
-
在
[BlogRoot]\themes\butterfly\source\css\custom.css中填写如下内容,引入Unicode和Font-class的线上资源:@import "//at.alicdn.com/t/font_2264842_b004iy0kk2b.css";更推荐在在主题配置文件
inject配置项进行全局引入:inject:head:- <link rel="stylesheet" href="//at.alicdn.com/t/font_2264842_b004iy0kk2b.css" media="defer" οnlοad="this.media='all'">bottom: - <script async src="//at.alicdn.com/t/font_2264842_b004iy0kk2b.js"></script> -
同时可以在自定义
CSS中添加如下样式来控制图标默认大小和颜色等属性(若已经在项目设置中勾选了彩色选项,则无需再定义图标颜色),写法与字体样式类似,这恐怕也是它被称为iconfont(图标字体)的原因 :.iconfont {font-family: "iconfont" !important;/* 这里可以自定义图标大小 */font-size: 3em;font-style: normal;-webkit-font-smoothing: antialiased;-moz-osx-font-smoothing: grayscale; } -
可以通过自己的阿里图标库的font-class方案查询复制相应的
icon-xxxx。<i class="iconfont icon-rat"></i> <i class="iconfont icon-ox"></i> <i class="iconfont icon-tiger"></i> <i class="iconfont icon-rabbit"></i> <i class="iconfont icon-dragon"></i> <i class="iconfont icon-snake"></i> <i class="iconfont icon-horse"></i> <i class="iconfont icon-goat"></i> <i class="iconfont icon-monkey"></i> <i class="iconfont icon-rooster"></i>
渐变色版权美化
详见:(二创)Copyright-beautify
效果预览
-
修改
[BlogRoot]\themes\butterfly\layout\includes\post\post-copyright.pug,直接复制以下内容替换原文件内容。此处多次用到了三元运算符作为默认项设置,在确保有主题配置文件的默认项的情况下,也可以在相应文章的front-matter中重新定义作者,原文链接,开源许可协议等内容。if theme.post_copyright.enable && page.copyright !== false- let author = page.copyright_author ? page.copyright_author : config.author- let url = page.copyright_url ? page.copyright_url : page.permalink- let license = page.license ? page.license : theme.post_copyright.license- let license_url = page.license_url ? page.license_url : theme.post_copyright.license_url.post-copyright.post-copyright__titlespan.post-copyright-infoh #[=page.title].post-copyright__typespan.post-copyright-infoa(href=url_for(url))= theme.post_copyright.decode ? decodeURI(url) : url.post-copyright-m.post-copyright-m-info.post-copyright-ah 作者.post-copyright-cc-infoh=author.post-copyright-ch 发布于.post-copyright-cc-infoh=date(page.date, config.date_format).post-copyright-uh 更新于.post-copyright-cc-infoh=date(page.updated, config.date_format).post-copyright-ch 许可协议.post-copyright-cc-infoa.icon(rel='noopener' target='_blank' title='Creative Commons' href='https://creativecommons.org/')i.fab.fa-creative-commonsa(rel='noopener' target='_blank' title=license href=url_for(license_url))=license -
修改
[BlogRoot]\themes\butterfly\source\css\_layout\post.styl,直接复制以下内容,替换原文件,这个文件就是自己调节样式的。其中,184行是白天模式的背景色,这里默认是我网站的渐变色,大家可以根据自己的喜好调节;253行是夜间模式的发光光圈颜色,大家也可以自行替换成自己喜欢的颜色:beautify()headStyle(fontsize)padding-left: unit(fontsize + 12, 'px')&:beforemargin-left: unit((-(fontsize + 6)), 'px')font-size: unit(fontsize, 'px')&:hoverpadding-left: unit(fontsize + 18, 'px')h1,h2,h3,h4,h5,h6transition: all .2s ease-out&:beforeposition: absolutetop: calc(50% - 7px)color: $title-prefix-icon-colorcontent: $title-prefix-iconline-height: 1transition: all .2s ease-out@extend .fontawesomeIcon&:hover&:beforecolor: $light-blueh1headStyle(20)h2headStyle(18)h3headStyle(16)h4headStyle(14)h5headStyle(12)h6headStyle(12)ol,ulpmargin: 0 0 8pxli&::markercolor: $light-bluefont-weight: 600font-size: 1.05em&:hover&::markercolor: var(--pseudo-hover)ul > lilist-style-type: circle#article-containerword-wrap: break-wordoverflow-wrap: break-wordacolor: $theme-link-color&:hovertext-decoration: underlineimgdisplay: blockmargin: 0 auto 20pxmax-width: 100%transition: filter 375ms ease-in .2spmargin: 0 0 16pxiframemargin: 0 0 20pxif hexo-config('anchor')a.headerlink&:after@extend .fontawesomeIconfloat: rightcolor: var(--headline-presudo)content: '\f0c1'font-size: .95emopacity: 0transition: all .3s&:hover&:aftercolor: var(--pseudo-hover)h1,h2,h3,h4,h5,h6&:hovera.headerlink&:afteropacity: 1ol,ulol,ulpadding-left: 20pxlimargin: 4px 0pmargin: 0 0 8pxif hexo-config('beautify.enable')if hexo-config('beautify.field') == 'site'beautify()else if hexo-config('beautify.field') == 'post'&.post-contentbeautify()> :last-childmargin-bottom: 0 !important#post.tag_share.post-meta&__tag-listdisplay: inline-block&__tagsdisplay: inline-blockmargin: 8px 8px 8px 0padding: 0 12pxwidth: fit-contentborder: 1px solid $light-blueborder-radius: 12pxcolor: $light-bluefont-size: .85emtransition: all .2s ease-in-out&:hoverbackground: $light-bluecolor: var(--white).post_sharedisplay: inline-blockfloat: rightmargin: 8px 0width: fit-content.social-sharefont-size: .85em.social-share-iconmargin: 0 4pxwidth: w = 1.85emheight: wfont-size: 1.2emline-height: w.post-copyrightposition: relativemargin: 40px 0 10pxpadding: 10px 16pxborder: 1px solid var(--light-grey)transition: box-shadow .3s ease-in-outoverflow: hiddenborder-radius: 12px!importantbackground: linear-gradient(45deg, #f6d8f5, #c2f1f0, #f0debf);&:beforebackground var(--heo-post-blockquote-bg)position absoluteright -26pxtop -120pxcontent '\f25e'font-size 200pxfont-family 'Font Awesome 5 Brands'opacity .2&:hoverbox-shadow: 0 0 8px 0 rgba(232, 237, 250, .6), 0 2px 4px 0 rgba(232, 237, 250, .5).post-copyright&-metacolor: $light-bluefont-weight: bold&-infopadding-left: 6pxatext-decoration: noneword-break: break-word&:hovertext-decoration: none.post-copyright-cc-infocolor: $theme-color;.post-outdate-noticeposition: relativemargin: 0 0 20pxpadding: .5em 1.2emborder-radius: 3pxbackground-color: $noticeOutdate-bgcolor: $noticeOutdate-colorif hexo-config('noticeOutdate.style') == 'flat'padding: .5em 1em .5em 2.6emborder-left: 5px solid $noticeOutdate-border&:before@extend .fontawesomeIconposition: absolutetop: 50%left: .9emcolor: $noticeOutdate-bordercontent: '\f071'transform: translateY(-50%).ads-wrapmargin: 40px 0 .post-copyright-m-info.post-copyright-a,.post-copyright-c,.post-copyright-udisplay inline-blockwidth fit-contentpadding 2px 5px [data-theme="dark"]#post.post-copyrightbackground #07080atext-shadow #bfbeb8 0 0 2pxborder 1px solid rgb(19 18 18 / 35%)box-shadow 0 0 5px var(--theme-color)animation flashlight 1s linear infinite alternate.post-copyright-infocolor #e0e0e4#post.post-copyright__titlefont-size 22px.post-copyright__noticefont-size 15px.post-copyrightbox-shadow 2px 2px 5px -
默认项的配置
-
作者:
[BlogRoot]\_config.yml中的author配置项# Site title: Akilarの糖果屋 subtitle: Akilar.top description: keywords: author: Akilar #默认作者 language: zh-CN timezone: '' -
许可协议:
[BlogRoot]\_config.butterfly.yml中的license和license_url配置项post_copyright:enable: truedecode: truelicense: CC BY-NC-SA 4.0license_url: https://creativecommons.org/licenses/by-nc-sa/4.0/
-
-
页面覆写配置项,修改对应文章的
front-matter--- title: Copyright-beautify # 文章名称 date: 2021-03-02 13:52:46 # 文章发布日期 updated: 2021-03-02 13:52:46 # 文章更新日期 copyright_author: Nesxc # 作者覆写 copyright_url: https://www.nesxc.com/post/hexocc.html # 原文链接覆写 license: # 许可协议名称覆写 license_url: # 许可协议链接覆写 ---
aplayer音乐播放器
详见:Butterfly添加全局吸底Aplayer教程
效果预览
注意:我这里只在某个页面引入音乐播放器,如果要引入全局吸底的播放器,请见上面的链接。
-
在博客根目录
[BlogRoot]下打开终端,运行以下指令:npm install hexo-tag-aplayer --save -
在网站配置文件
_config.yml中修改aplayer配置项为:# 音乐插件 aplayer: meting: trueasset_inject: false -
在主题配置文件
_config.butterfly.yml中修改aplayerInject配置项为:# Inject the css and script (aplayer/meting) aplayerInject:enable: trueper_page: false -
在你想要加入音乐播放器的页面加入以下语句:
<div id="aplayer-oSEOhviA" class="aplayer aplayer-tag-marker meting-tag-marker" data-id="4895239160" data-server="netease" data-type="playlist" data-mode="random" data-autoplay="false" data-listmaxheight="340px" data-preload="auto" data-theme="#e3f2f5" data-volume="0.4" mutex="true"></div>其中
data-id为歌单ID可以换为你喜欢的歌曲,其他参数见详情页这里不再赘述!
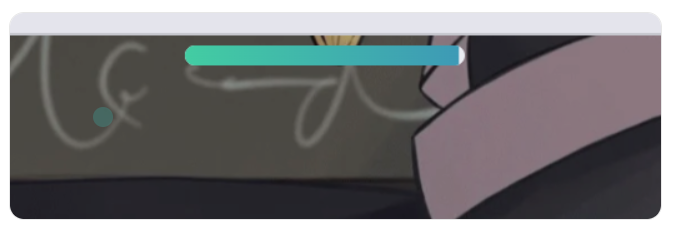
顶部渐变条色加载条
效果预览 :
-
新建
[BlogRoot]\source\css\progress_bar.css文件,写入以下内容(或者你在[BlogRoot]\source\css\custom.css直接加也行,最后在配置文件记得引入即可).pace {-webkit-pointer-events: none;pointer-events: none;-webkit-user-select: none;-moz-user-select: none;user-select: none;z-index: 2000;position: fixed;margin: auto;top: 4px;left: 0;right: 0;height: 8px;border-radius: 8px;width: 7rem;background: #eaecf2;border: 1px #e3e8f7;overflow: hidden }.pace-inactive .pace-progress {opacity: 0;transition: .3s ease-in }.pace .pace-progress {-webkit-box-sizing: border-box;-moz-box-sizing: border-box;-ms-box-sizing: border-box;-o-box-sizing: border-box;box-sizing: border-box;-webkit-transform: translate3d(0, 0, 0);-moz-transform: translate3d(0, 0, 0);-ms-transform: translate3d(0, 0, 0);-o-transform: translate3d(0, 0, 0);transform: translate3d(0, 0, 0);max-width: 200px;position: absolute;z-index: 2000;display: block;top: 0;right: 100%;height: 100%;width: 100%;/* linear-gradient(to right, #3494e6, #ec6ead) */background: linear-gradient(to right, #43cea2, #3866ca);animation: gradient 2s ease infinite;background-size: 200% }.pace.pace-inactive {opacity: 0;transition: .3s;top: -8px } -
在主题配置文件
_config.butterfly.yml的inject配置项加入刚刚的css样式和必须的js依赖:inject:head:- xxx- <link rel="stylesheet" href="/css/progress_bar.css" media="defer" οnlοad="this.media='all'"> bottom: - xxx- <script async src="//npm.elemecdn.com/pace-js@1.2.4/pace.min.js"></script>
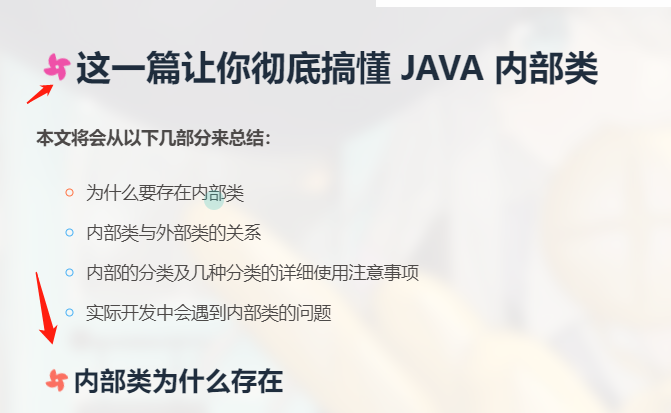
文章H1~H6标题小风车转动效果
效果预览 :
-
修改主题配置文件
_config.butterfly.yml文件的beautify配置项:beautify:enable: truefield: post # site/post# title-prefix-icon: '\f0c1' 原内容title-prefix-icon: '\f863'title-prefix-icon-color: "#F47466" -
在
[BlogRoot]\source\css\custom.css中加入以下代码,可以自己调节一下转速:/* 文章页H1-H6图标样式效果 */ /* 控制风车转动速度 4s那里可以自己调节快慢 */ h1::before, h2::before, h3::before, h4::before, h5::before, h6::before {-webkit-animation: ccc 4s linear infinite;animation: ccc 4s linear infinite; } /* 控制风车转动方向 -1turn 为逆时针转动,1turn 为顺时针转动,相同数字部分记得统一修改 */ @-webkit-keyframes ccc {0% {-webkit-transform: rotate(0deg);transform: rotate(0deg);}to {-webkit-transform: rotate(-1turn);transform: rotate(-1turn);} } @keyframes ccc {0% {-webkit-transform: rotate(0deg);transform: rotate(0deg);}to {-webkit-transform: rotate(-1turn);transform: rotate(-1turn);} } /* 设置风车颜色 */ #content-inner.layout h1::before {color: #ef50a8;margin-left: -1.55rem;font-size: 1.3rem;margin-top: -0.23rem; } #content-inner.layout h2::before {color: #fb7061;margin-left: -1.35rem;font-size: 1.1rem;margin-top: -0.12rem; } #content-inner.layout h3::before {color: #ffbf00;margin-left: -1.22rem;font-size: 0.95rem;margin-top: -0.09rem; } #content-inner.layout h4::before {color: #a9e000;margin-left: -1.05rem;font-size: 0.8rem;margin-top: -0.09rem; } #content-inner.layout h5::before {color: #57c850;margin-left: -0.9rem;font-size: 0.7rem;margin-top: 0rem; } #content-inner.layout h6::before {color: #5ec1e0;margin-left: -0.9rem;font-size: 0.66rem;margin-top: 0rem; } /* s设置风车hover动效 6s那里可以自己调节快慢*/ #content-inner.layout h1:hover, #content-inner.layout h2:hover, #content-inner.layout h3:hover, #content-inner.layout h4:hover, #content-inner.layout h5:hover, #content-inner.layout h6:hover {color: var(--theme-color); } #content-inner.layout h1:hover::before, #content-inner.layout h2:hover::before, #content-inner.layout h3:hover::before, #content-inner.layout h4:hover::before, #content-inner.layout h5:hover::before, #content-inner.layout h6:hover::before {color: var(--theme-color);-webkit-animation: ccc 6s linear infinite;animation: ccc 6s linear infinite; }
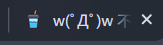
网站恶搞标题
效果预览 :
-
新建文件
[BlogRoot]\source\js\title.js,写入以下内容://动态标题 var OriginTitile = document.title; var titleTime; document.addEventListener('visibilitychange', function () {if (document.hidden) {//离开当前页面时标签显示内容document.title = '👀跑哪里去了~';clearTimeout(titleTime);} else {//返回当前页面时标签显示内容document.title = '🐖抓到你啦~';//两秒后变回正常标题titleTime = setTimeout(function () {document.title = OriginTitile;}, 2000);} }); -
在主题配置文件
_config.butterfly.yml引入该文件:inject: bottom: + - <script async src="/js/title.js"></script> -
重启项目:
hexo cl; hexo s
右边滚动栏样式
效果预览 :
- 在
custom.css中加入以下代码,其中var(--theme-color)换成你自己的主题色:
/* 滚动条样式 */
::-webkit-scrollbar {width: 8px;height: 8px;
}::-webkit-scrollbar-track {background-color: rgba(73, 177, 245, 0.2);border-radius: 2em;
}::-webkit-scrollbar-thumb {background-color: var(--theme-color);background-image: -webkit-linear-gradient(45deg,rgba(255, 255, 255, 0.4) 25%,transparent 25%,transparent 50%,rgba(255, 255, 255, 0.4) 50%,rgba(255, 255, 255, 0.4) 75%,transparent 75%,transparent);border-radius: 2em;
}::-webkit-scrollbar-corner {background-color: transparent;
}::-moz-selection {color: #fff;background-color: var(--theme-color);
}
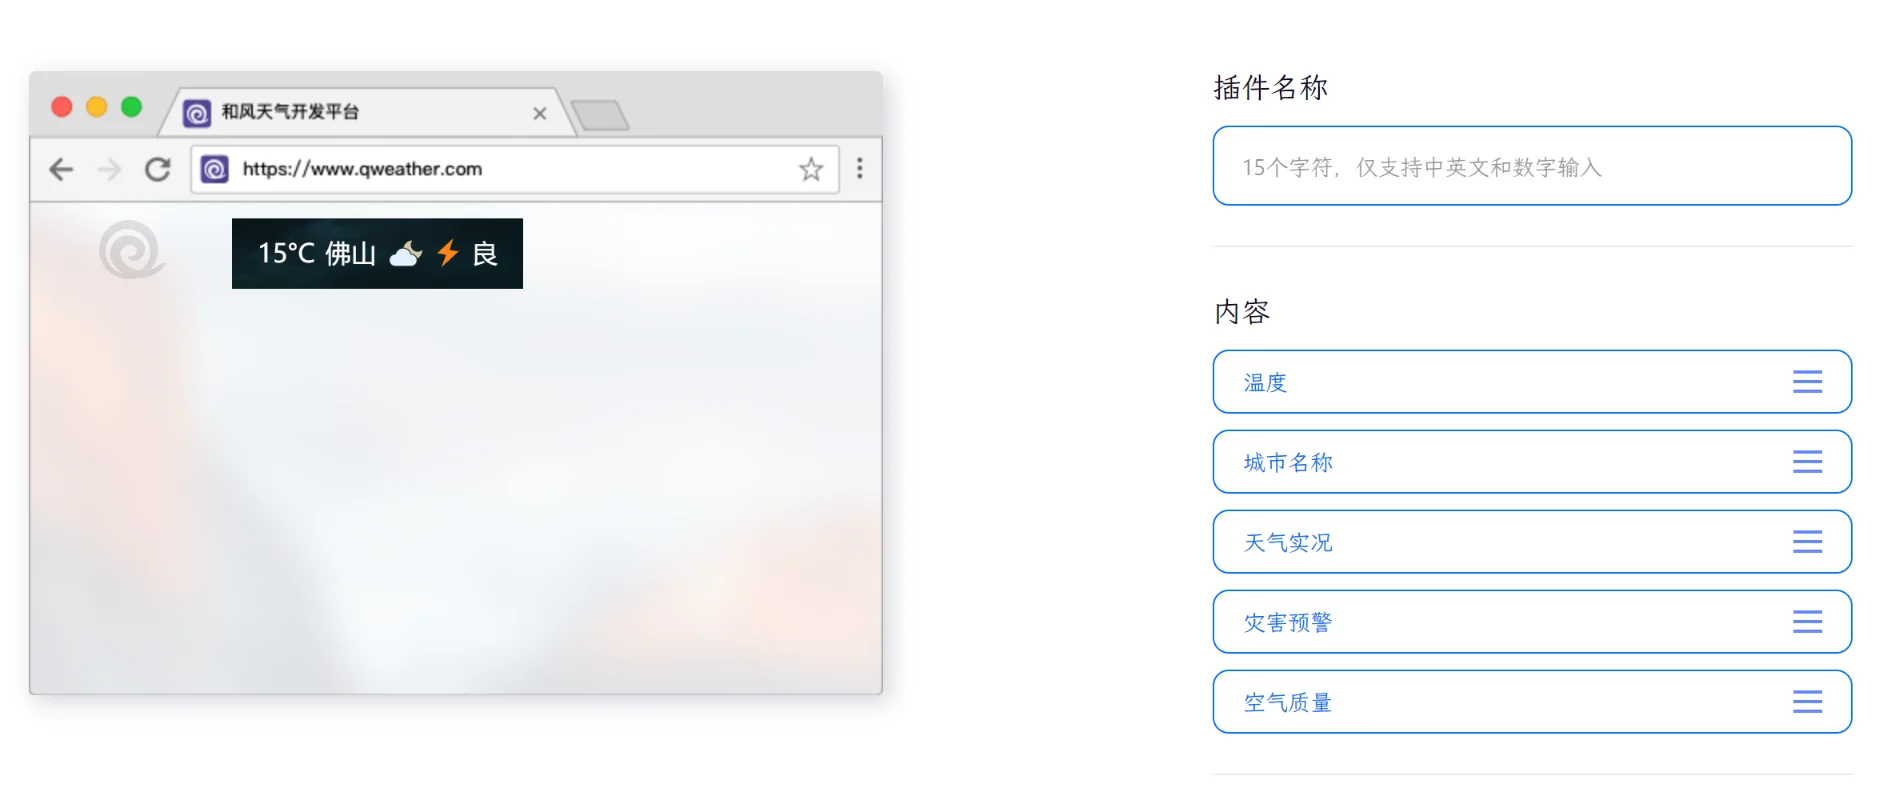
导航栏和风天气
效果预览 :

详见:Hexo在顶部增加天气小部件
效果预览
-
在和风天气插件中创建一个模板,点击生成代码:
-
创建文件
[BlogRoot]\source\js\weather.js,将生成的代码写入,例如:WIDGET = {"CONFIG": {"modules": "01234","background": "5","tmpColor": "FF9900","tmpSize": "16","cityColor": "CCCCCC","citySize": "16","aqiColor": "D9D9D9","aqiSize": "16","weatherIconSize": "24","alertIconSize": "18","padding": "15px 10px 10px 20px","shadow": "0","language": "auto","borderRadius": "5","fixed": "false","vertical": "top","horizontal": "left","key": "...."} } -
在主题配置文件
_config.butterfly.yml的inject的bottom处引入:inject: bottom: + - <script src="https://widget.qweather.net/simple/static/js/he-simple-common.js?v=2.0"></script> + - <script src="/js/weather.js"></script> -
接下来要挂载到导航栏:在
[BlogRoot]\themes\butterfly\layout\includes\header\nav.pug中加入一个元素,这个元素就是用来放天气组件的:nav#navspan#blog_namea#site-name(href=url_for('/')) #[=config.title] + #he-plugin-simple -
上述操作可以将天气组件成功展示在导航栏中间,如果想要调整该组件位置到
blog_name旁,可以直接修改weather.js中的padding项(不推荐),当然推荐在nav.pug中添加一个占位组件:nav#navspan#blog_namea#site-name(href=url_for('/')) #[=config.title]#he-plugin-simple + #none_space -
然后在
[BlogRoot]\themes\butterfly\source\css\_layout\head.styl中将#blog_name替换为#none_space:- #blog_name + #none_spaceflex: 1 -
重启项目即可看到效果:
hexo cl; hexo s
Hexo博客如何迁移到新电脑
参考教程:CSDN:Hexo博客迁移到新电脑
-
在新电脑行进行环境准备工作,具体的步骤和Hexo博客搭建基础教程(一)的第1-7步一模一样,大家在新电脑上跟着做即可(注意千万不要做第8步,
hexo init blog-demo这一步会覆盖并还原你原本的的源码文件) -
这时候新建一个文件夹
new-blog,用来装你的新博客源码的,进入这个文件夹,准备复制我们旧的博客源码进来,我们可以看到旧的博客项目结构是如下样子的:
这里红框内的都是需要复制迁移到新的博客的,具体的要不要保留见下表:
需要复制的 需要删除的 _config.yml:站点配置文件 .git:无论是在站点根目录下,还是主题目录下的.git文件,都可以删掉 _config.butterfly.yml:主题配置文件,为了方便主题升级剥离出来的配置文件 node_modules: npm install会根据package.json生成package.json:说明使用哪些依赖包 public: hexo g会重新编译生成scaffolds:文章的模板 .deploy_git:在使用 hexo d时也会重新生成source:自己写的博客源码 db.json文件: hexo s快速启动所需的数据库themes:主题文件夹(魔改都在里面啦) package-lock.json:记录依赖之间的内部依赖关系,可以根据 package.json重新生成.gitignore:说明在提交时哪些文件可以忽略 -
复制所需的文件到新电脑的文件夹之后,在
git bash中切换目录到新拷贝的文件夹里,使用npm install命令,进行模块安装。这里绝对不能使用hexo init初始化,因为有的文件我们已经拷贝生成过来了,所以不必用hexo init去整体初始化,如果不慎用了,则站点的配置文件_config.yml里面内容会被重置,所以这一步一定要慎重:npm i -
执行以下命令情况并启动项目,进入
localhost:4000进行验证:hexo cl; hexo g; hexo s -
当本地能成功启动,之后就可以部署到Github,执行以下代码:
hexo d如果出现
Deploy done,则说明部署成功,稍等两分钟,打开浏览器访问之前的域名就可以看到之前的博客,以后你可以在这台新电脑上魔改和写文章了~
gulp压缩全局资源(店长)
参考教程:使用gulp压缩博客静态资源
Github Action自动部署(店长)
参考教程:使用Github Action实现全自动部署
Live2D教程
效果预览 :

目前只推荐这个(因为消耗资源较少),这是博客自带的看板娘,这孩子不会说话也不能换装,只会跟着你的鼠标晃动脑袋,不过有几款超可爱。
安装
-
在Hexo根目录
[BlogRoot]下打开终端,输入以下指令安装必要插件:npm install --save hexo-helper-live2d -
打开站点配置文件
[BlogRoot]\config.yml
搜索live2d,按照如下注释内容指示进行操作。
如果没有搜到live2d的配置项,就直接把以下内容复制到最底部。# Live2D ## https://github.com/EYHN/hexo-helper-live2d live2d:enable: true #开关插件版看板娘scriptFrom: local # 默认pluginRootPath: live2dw/ # 插件在站点上的根目录(相对路径)pluginJsPath: lib/ # 脚本文件相对与插件根目录路径pluginModelPath: assets/ # 模型文件相对与插件根目录路径# scriptFrom: jsdelivr # jsdelivr CDN# scriptFrom: unpkg # unpkg CDN# scriptFrom: https://npm.elemecdn.com/live2d-widget@3.x/lib/L2Dwidget.min.js # 你的自定义 urltagMode: false # 标签模式, 是否仅替换 live2d tag标签而非插入到所有页面中debug: false # 调试, 是否在控制台输出日志model:use: live2d-widget-model-wanko # npm-module package name# use: wanko # 博客根目录/live2d_models/ 下的目录名# use: ./wives/wanko # 相对于博客根目录的路径# use: https://npm.elemecdn.com/live2d-widget-model-wanko@1.0.5/assets/wanko.model.json # 你的自定义 urldisplay:position: right #控制看板娘位置width: 150 #控制看板娘大小height: 300 #控制看板娘大小mobile:show: true # 手机中是否展示 -
完成后保存修改,在Hexo根目录下运行指令。
hexo clean
hexo g
hexo s
之所以必须要使用
hexo clean是因为我们需要清空缓存重新生成静态页面,不然看板娘没被加入生成的静态页面里,是不会出现的。
更换
-
同样是在Hexo根目录
[BlogRoot]下,打开终端,选择想要的看板娘进行安装,例如我这里用到的是live2d-widget-model-koharu,一个Q版小正太。其他的模型也可以在模型预览里查看以供选择。 -
输入指令
npm install --save live2d-widget-model-koharu -
然后在站点配置文件
[BlogRoot]\_config.yml里找到model项修改为期望的模型model:use: live2d-widget-model-koharu# 默认为live2d-widget-model-wanko -
之后按部就班的运行
hexo clean
hexo g
hexo s
就能在
localhost:4000上查看效果了。
卸载看板娘
卸载插件和卸载模型的指令都是通过npm进行操作的。在博客根目录[BlogRoot]打开终端,输入:
npm uninstall hexo-helper-live2d #卸载看板娘插件
npm uninstall live2d-widget-model-modelname #卸载看板娘模型。记得替换modelname为看板娘名称
卸载后为了保证配置项不出错,记得把[BlogRoot]\_config.yml里的配置项给注释或者删除掉。
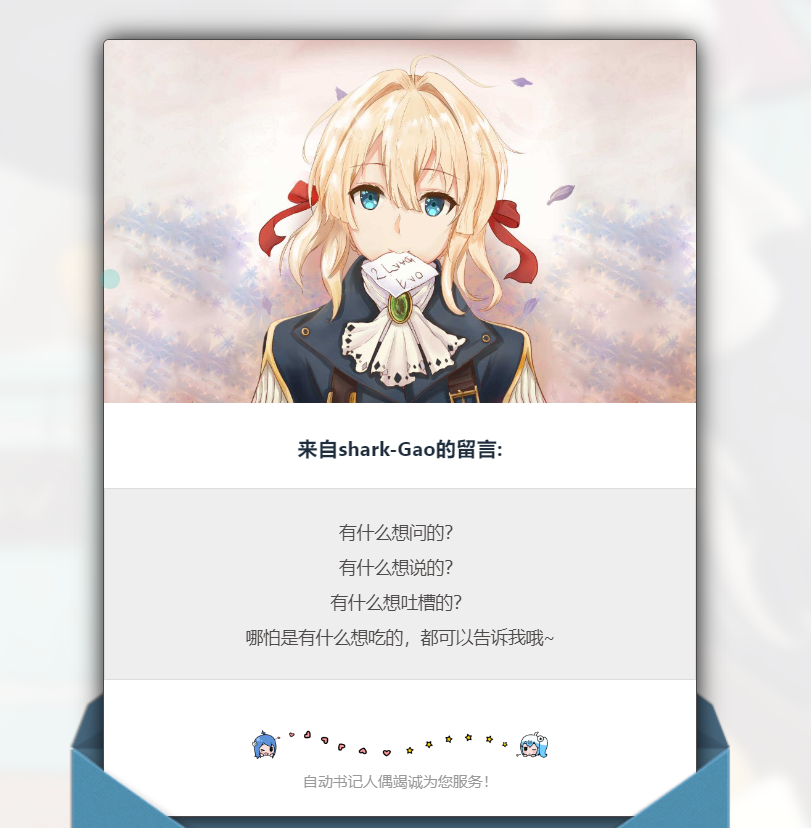
violet留言板(店长)
效果预览 :
-
在
[BlogRoot]运行指令npm install hexo-butterfly-envelope --save -
在站点配置文件
_config.yml或主题配置文件_config.butterfly.yml添加以下配置项# envelope_comment # see https://akilar.top/posts/e2d3c450/ envelope_comment:enable: true #控制开关custom_pic: cover: https://npm.elemecdn.com/hexo-butterfly-envelope/lib/violet.jpg #信笺头部图片line: https://npm.elemecdn.com/hexo-butterfly-envelope/lib/line.png #信笺底部图片beforeimg: https://npm.elemecdn.com/hexo-butterfly-envelope/lib/before.png # 信封前半部分afterimg: https://npm.elemecdn.com/hexo-butterfly-envelope/lib/after.png # 信封后半部分message: #信笺正文,多行文本,写法如下- 有什么想问的?- 有什么想说的?- 有什么想吐槽的?- 哪怕是有什么想吃的,都可以告诉我哦~bottom: 自动书记人偶竭诚为您服务! #仅支持单行文本height: #1050px,信封划出的高度path: #【可选】comments 的路径名称。默认为 comments,生成的页面为 comments/index.htmlfront_matter: #【可选】comments页面的 front_matter 配置title: 留言板comments: true
一图流教程
效果预览 :
-
在
[BlogRoot]\source文件夹下新建一个文件夹css,该文件夹用于存放自定义的css样式,再新建一个名为custom.css,在里面写入以下代码:/* 页脚与头图透明 */ #footer {background: transparent !important; } #page-header {background: transparent !important; }/* 白天模式遮罩透明 */ #footer::before {background: transparent !important; } #page-header::before {background: transparent !important; }/* 夜间模式遮罩透明 */ [data-theme="dark"] #footer::before {background: transparent !important; } [data-theme="dark"] #page-header::before {background: transparent !important; } -
在主题配置文件
[BlogRoot]\_config.butterfly.yml文件中的inject配置项的head子项加入以下代码,代表引入刚刚创建的custom.css文件(这是相对路径的写法)inject:head:- <link rel="stylesheet" href="/css/custom.css" media="defer" οnlοad="this.media='all'"> -
在主题配置文件
[BlogRoot]\_config.butterfly.yml文件中的index_img和footer_bg配置项取消头图与页脚图的加载项避免冗余加载# The banner image of home page index_img: # Footer Background footer_bg: false -
部分人反映一图流改完了背景图也没了,那大概率是你之前没设置背景图。在主题配置文件
[BlogRoot]\_config.butterfly.yml文件中的background配置项设置背景图background: url(https://source.fomal.cc/img/home_bg.webp)
页脚Github徽标(店长)
效果预览 :

-
安装插件,在博客根目录
[BlogRoot]下打开终端,运行以下指令:npm install hexo-butterfly-footer-beautify --save -
添加配置信息,以下为写法示例
在站点配置文件_config.yml或者主题配置文件_config.butterfly.yml中添加(这是我的配置)# footer_beautify # 页脚计时器:[Native JS Timer](https://akilar.top/posts/b941af/) # 页脚徽标:[Add Github Badge](https://akilar.top/posts/e87ad7f8/) footer_beautify:enable:timer: true # 计时器开关bdage: true # 徽标开关priority: 5 #过滤器优先权enable_page: all # 应用页面exclude: #屏蔽页面# - /posts/# - /about/layout: # 挂载容器类型type: idname: footer-wrapindex: 0# 计时器部分配置项(看你喜欢哪个,最好下载下来放到自己的项目中不然会增加我网站的负载)# 这是我的 # runtime_js: https://www.fomal.cc/static/js/runtime.js# runtime_css: https://www.fomal.cc/static/css/runtime.min.css # 这是店长的 runtime_js: https://npm.elemecdn.com/hexo-butterfly-footer-beautify@1.0.0/lib/runtime.jsruntime_css: https://npm.elemecdn.com/hexo-butterfly-footer-beautify@1.0.0/lib/runtime.css# 徽标部分配置项swiperpara: 0 #若非0,则开启轮播功能,每行徽标个数bdageitem:- link: https://hexo.io/ #徽标指向网站链接shields: https://img.shields.io/badge/Frame-Hexo-blue?style=flat&logo=hexo #徽标APImessage: 博客框架为Hexo_v6.2.0 #徽标提示语- link: https://butterfly.js.org/shields: https://img.shields.io/badge/Theme-Butterfly-6513df?style=flat&logo=bitdefendermessage: 主题版本Butterfly_v4.3.1- link: https://vercel.com/shields: https://img.shields.io/badge/Hosted-Vercel-brightgreen?style=flat&logo=Vercelmessage: 本站采用多线部署,主线路托管于Vercel- link: https://dashboard.4everland.org/# https://img.shields.io/badge/Hosted-4EVERLAND-3FE2C1?style=flat&logo=IPFSshields: https://img.shields.io/badge/Hosted-4EVERLAND-22DDDD?style=flat&logo=IPFSmessage: 本站采用多线部署,备用线路托管于4EVERLAND- link: https://github.com/shields: https://img.shields.io/badge/Source-Github-d021d6?style=flat&logo=GitHubmessage: 本站项目由Github托管- link: http://creativecommons.org/licenses/by-nc-sa/4.0/shields: https://img.shields.io/badge/Copyright-BY--NC--SA%204.0-d42328?style=flat&logo=Clarismessage: 本站采用知识共享署名-非商业性使用-相同方式共享4.0国际许可协议进行许可swiper_css: https://npm.elemecdn.com/hexo-butterfly-swiper/lib/swiper.min.cssswiper_js: https://npm.elemecdn.com/hexo-butterfly-swiper/lib/swiper.min.jsswiperbdage_init_js: https://npm.elemecdn.com/hexo-butterfly-footer-beautify/lib/swiperbdage_init.min.js -
参数释义
| 参数 | 备选值/类型 | 释义 |
|---|---|---|
| priority | number | 【可选】过滤器优先级,数值越小,执行越早,默认为10,选填 |
| enable.timer | true/false | 【必选】计时器控制开关 |
| enable.bdage | true/false | 【必选】徽标控制开关 |
| enable_page | path | 【可选】填写想要应用的页面,如根目录就填’/‘,分类页面就填’/categories/‘。若要应用于所有页面,就填all,默认为all |
| exclude | path | 【可选】填写想要屏蔽的页面,可以多个。仅当enable_page为’all’时生效。写法见示例。原理是将屏蔽项的内容逐个放到当前路径去匹配,若当前路径包含任一屏蔽项,则不会挂载。 |
| layout.type | id/class | 【可选】挂载容器类型,填写id或class,不填则默认为id |
| layout.name | text | 【必选】挂载容器名称 |
| layout.index | 0和正整数 | 【可选】前提是layout.type为class,因为同一页面可能有多个class,此项用来确认究竟排在第几个顺位 |
| runtime_js | url | 【必选】页脚计时器脚本,可以下载上文填写示例的链接,参照注释和教程:Native JS Timer自行修改。 |
| runtime_css | url | 【可选】自定义样式,预留开发者接口,可自行下载。 |
| swiperpara | number | 【可选】若非零,则开启轮播功能,此项表示每行最多容纳徽标个数,用来应对徽标过多显得页脚拥挤的问题 |
| bdageitem.link | url | 【可选】页脚徽标指向的网站链接 |
| bdageitem.shields | url | 【必选】页脚徽标对应的API,API具体写法示例参照教程Add Github Badge |
| bdageitem.message | text | 【可选】页脚徽标悬停时显示的信息 |
| swiper_css | url | 【可选】swiper的依赖 |
| swiper_js | url | 【可选】swiper的依赖 |
| swiperbdage_init_js | url | 【可选】swiper初始化方法 |
首页分类磁贴新版(店长)
-
安装插件,在博客根目录
[BlogRoot]下打开终端,运行以下指令:npm install hexo-butterfly-categories-card --save -
添加配置信息,以下为写法示例
在站点配置文件_config.yml或者主题配置文件_config.butterfly.yml中添加以下代码,注意要根据他的默认描述排序改为你自己对应的分类名字:# hexo-butterfly-categories-card # see https://akilar.top/posts/a9131002/ categoryBar:enable: true # 开关priority: 5 #过滤器优先权enable_page: / # 应用页面layout: # 挂载容器类型type: idname: recent-postsindex: 0column: odd # odd:3列 | even:4列row: 1 #显示行数,默认两行,超过行数切换为滚动显示message:- descr: Ubuntu指南cover: https://assets.akilar.top/image/cover1.webp- descr: 玩转Win10cover: https://assets.akilar.top/image/cover2.webp- descr: 长篇小说连载cover: https://assets.akilar.top/image/cover3.webp- descr: 个人日记cover: https://assets.akilar.top/image/cover4.webp- descr: 诗词歌赋cover: https://assets.akilar.top/image/cover5.webp- descr: 杂谈教程cover: https://assets.akilar.top/image/cover6.webpcustom_css: https://npm.elemecdn.com/hexo-butterfly-categories-card@1.0.0/lib/categorybar.css -
参数释义
| 参数 | 备选值/类型 | 释义 |
|---|---|---|
| priority | number | 【可选】过滤器优先级,数值越小,执行越早,默认为10,选填 |
| enable | true/false | 【必选】控制开关 |
| enable_page | path/all | 【可选】填写想要应用的页面的相对路径(即路由地址),如根目录就填’/‘,分类页面就填’/categories/‘。若要应用于所有页面,就填’all’,默认为’/‘ |
| layout.type | id/class | 【可选】挂载容器类型,填写id或class,不填则默认为id |
| layout.name | text | 【必选】挂载容器名称 |
| layout.index | 0和正整数 | 【可选】前提是layout.type为class,因为同一页面可能有多个class,此项用来确认究竟排在第几个顺位 |
| column | odd/even | 【可选】显示列数,考虑到比例问题,只提供3列和4列,odd为3列, even为4列 |
| row | number | 【可选】显示行数,默认两行,超过行数切换为滚动显示 |
| message.descr | text | 分类描述,需要和你自己的文章分类一一对应。 |
| message.cover | url | 分类背景,需要和你自己的文章分类一一对应。 |
| custom_css | url | 【可选】自定义样式,会替换默认的css链接,可以下载文档给出的cdn链接后自主修改 |
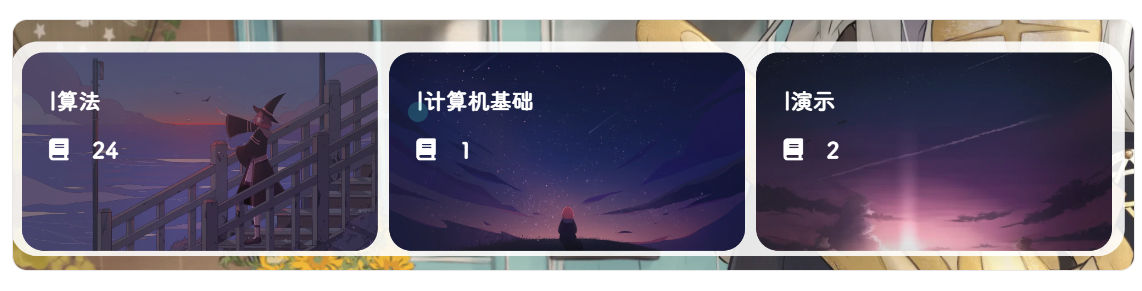
首页分类磁贴1.0(小冰)
效果预览 :
这个插件主要实现了以下功能:
- 自定义 tags 或 categories 的排列和展示
- 自定义 tags 或 categories 的展示图标,名称
- 自定义排列的行数,默认 2 行
教程:
-
在博客根目录
[BlogRoot]下打开终端,运行以下指令:npm i hexo-magnet --save注意,一定要加
--save,不然本地预览的时候可能不会显示!!! -
在网站配置文件
_config.yml新增以下项 (注意不是主题配置文件),这里的分类名字必须和你文章的分类名字一一对应:magnet:enable: truepriority: 1enable_page: /type: categoriesdevide: 2display:- name: 教程display_name: 小冰の魔改教程icon: 📚- name: 游戏评测display_name: 小冰の游戏评测icon: 🎮- name: 生活趣闻display_name: 小冰の生活趣闻icon: 🐱👓- name: vuedisplay_name: 小冰の编程学习icon: 👩💻- name: 学习display_name: 小冰の读书笔记icon: 📒- name: 随想display_name: 小冰の胡思乱想icon: 💡color_setting:text_color: blacktext_hover_color: whitebackground_color: "#f2f2f2"background_hover_color: "#b30070"layout:type: idname: recent-postsindex: 0temple_html: '<div class="recent-post-item" style="width:100%;height: auto"><div id="catalog_magnet">${temple_html_item}</div></div>'plus_style: "" -
配置项的含义:
-
enable
参数:true/false
含义:是否开启插件 -
enable_page
参数:/
含义:路由地址,如 / 代表主页。/me/ 代表自我介绍页等等 -
priority
参数:1
含义:插件的叠放顺序,数字越大,叠放约靠前。 -
type
参数:categories/tags
含义:选择筛选分类还是标签 -
devide
参数:2
含义:表示分隔的列数,2 表示分为两列展示 -
display
参数:
- name: 教程 # 这里是tags或者categories的名称display_name: 小冰の魔改教程 # 这里是替换的名称icon: 📚 # 这里是展示的图标含义:配置项,可自行设置,按照设置的顺序展示
-
color_setting
参数:
text_color: black # 文字默认颜色
text_hover_color: white # 文字鼠标悬浮颜色
background_color: "#f2f2f2" # 文字背景默认颜色
background_hover_color: "#b30070" # 文字背景悬浮颜色
含义:颜色配置项,可自行设置
-
layout
参数:type; (class&id)
参数:name;
参数:index;(数字)
含义:如果说 magnet 是一幅画,那么这个 layout 就是指定了哪面墙来挂画
而在 HTML 的是世界里有两种墙分别 type 为 id 和 class。
其中在定义 class 的时候会出现多个 class 的情况,这时就需要使用 index,确定是哪一个。
最后墙的名字即是 name;<div name="我是墙" id="recent-posts"><!-- id=>type recent-posts=>name --><div name="我是画框"><div name="我是纸"><!--这里通过js挂载magnet,也就是画画--></div></div> </div> -
temple_html
参数:html 模板字段
含义:包含挂载容器<div class="recent-post-item" style="width:100%;height: auto"> <!--文章容器--><div id="catalog_magnet"> <!--挂载容器-->${temple_html_item}</div> </div> -
plus_style
参数:“”
含义:提供可自定义的 style,如加入黑夜模式。
-
-
执行 hexo 三连
hexo clean hexo g hexo s -
我们可以看到黑夜模式看起来特别的别扭,因此还要做一下黑夜模式的颜色适配,在
custom.css文件中添加以下代码适配黑夜模式(具体颜色可以自己调节):/* 小冰分类分类磁铁黑夜模式适配 */ /* 一般状态 */ [data-theme="dark"] .magnet_link_context {background: #1e1e1e;color: antiquewhite; } /* 鼠标悬浮状态 */ [data-theme="dark"] .magnet_link_context:hover {background: #3ecdf1;color: #f2f2f2; }
文章置顶滚动栏(店长)
效果预览 :
-
安装插件,在博客根目录
[BlogRoot]下打开终端,运行以下指令:npm install hexo-butterfly-swiper --save -
添加配置信息,以下为写法示例
在站点配置文件_config.yml或者主题配置文件_config.butterfly.yml中添加# hexo-butterfly-swiper # see https://akilar.top/posts/8e1264d1/ swiper:enable: true # 开关priority: 5 #过滤器优先权enable_page: all # 应用页面timemode: date #date/updatedlayout: # 挂载容器类型type: idname: recent-postsindex: 0default_descr: 再怎么看我也不知道怎么描述它的啦!swiper_css: https://npm.elemecdn.com/hexo-butterfly-swiper/lib/swiper.min.css #swiper css依赖swiper_js: https://npm.elemecdn.com/hexo-butterfly-swiper/lib/swiper.min.js #swiper js依赖custom_css: https://npm.elemecdn.com/hexo-butterfly-swiper/lib/swiperstyle.css # 适配主题样式补丁custom_js: https://npm.elemecdn.com/hexo-butterfly-swiper/lib/swiper_init.js # swiper初始化方法 -
参数释义
| 参数 | 备选值/类型 | 释义 |
|---|---|---|
| priority | number | 【可选】过滤器优先级,数值越小,执行越早,默认为10,选填 |
| enable | true/false | 【必选】控制开关 |
| enable_page | path/all | 【可选】填写想要应用的页面的相对路径(即路由地址),如根目录就填’/‘,分类页面就填’/categories/‘。若要应用于所有页面,就填’all’,默认为all |
| timemode | date/updated | 【可选】时间显示,date为显示创建日期,updated为显示更新日期,默认为date |
| layout.type | id/class | 【可选】挂载容器类型,填写id或class,不填则默认为id |
| layout.name | text | 【必选】挂载容器名称 |
| layout.index | 0和正整数 | 【可选】前提是layout.type为class,因为同一页面可能有多个class,此项用来确认究竟排在第几个顺位 |
| default_descr | text | 默认文章描述 |
| swiper_css | url | 【可选】自定义的swiper依赖项css链接 |
| swiper_js | url | 【可选】自定义的swiper依赖项加js链接 |
| custom_css | url | 【可选】适配主题样式补丁 |
| custom_js | url | 【可选】swiper初始化方法 |
使用方法:在文章的front_matter中添加swiper_index配置项即可。
---
title: 文章标题
date: 创建日期
updated: 更新日期
cover: 文章封面
description: 文章描述
swiper_index: 1 #置顶轮播图顺序,非负整数,数字越大越靠前
---
文章双侧栏显示(小冰)
效果预览 :
-
在博客根目录
[BlogRoot]下打开终端,运行以下指令:BASH npm i hexo-butterfly-article-double-row --save -
在网站配置文件
_config.yml新增以下项 (注意不是主题配置文件):YML butterfly_article_double_row:enable: true -
这时候插件有个bug,就是最后一页文章数目为奇数的时候,会出现这种情况
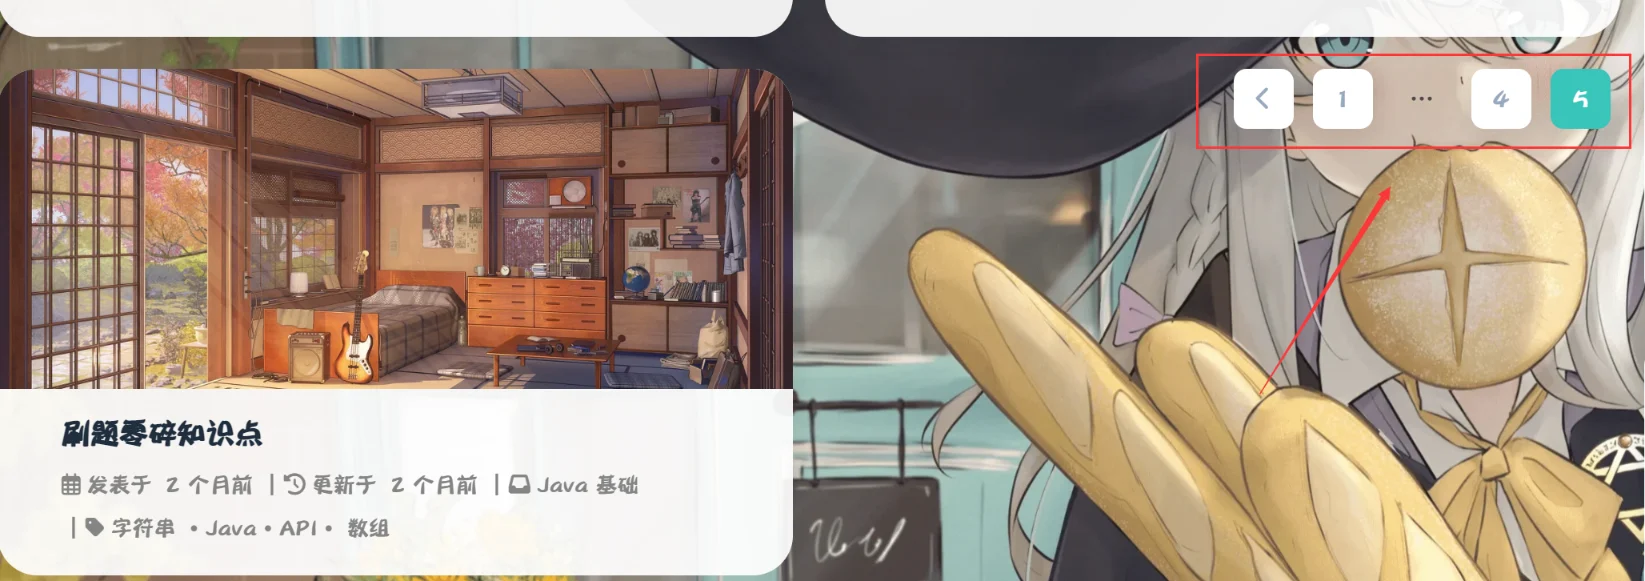
会显得很不舒服,感谢唐志远大佬修复了这个bug,只需要在
custom.css文件添加以下代码即可:
/* 翻页按钮居中 */
#pagination {width: 100%;margin: auto;
}
执行 hexo 三连:
hexo clean
hexo g
hexo s
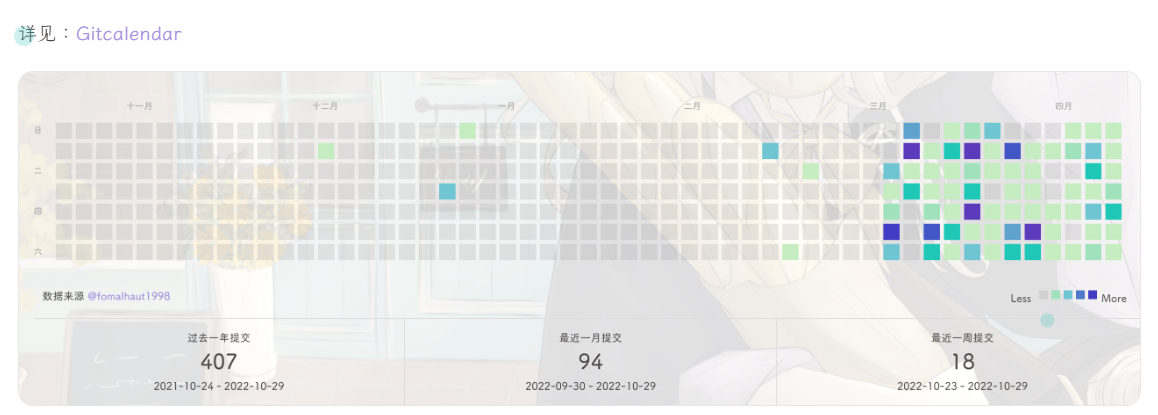
GitCalendar(店长)
效果预览 :
安装
-
安装插件,在博客根目录
[BlogRoot]下打开终端,运行以下指令:BASH npm install hexo-filter-gitcalendar --save -
添加配置信息,以下为写法示例
在站点配置文件_config.yml或者主题配置文件如_config.butterfly.yml中添加YML# hexo-filter-gitcalendar gitcalendar:enable: true # 开关priority: 5 #过滤器优先权enable_page: / # 应用页面# butterfly挂载容器layout: # 挂载容器类型type: idname: recent-postsindex: 0user: Fomalhaut-Blog #git用户名apiurl: 'https://gitcalendar.fomal.cc' # 这是我的API,最好自己弄一个minheight:pc: 280px #桌面端最小高度mibile: 0px #移动端最小高度color: "['#d9e0df', '#c6e0dc', '#a8dcd4', '#9adcd2', '#89ded1', '#77e0d0', '#5fdecb', '#47dcc6', '#39dcc3', '#1fdabe', '#00dab9']" # 目前我在用的# "['#e4dfd7', '#f9f4dc', '#f7e8aa', '#f7e8aa', '#f8df72', '#fcd217', '#fcc515', '#f28e16', '#fb8b05', '#d85916', '#f43e06']" #橘黄色调# color: "['#ebedf0', '#fdcdec', '#fc9bd9', '#fa6ac5', '#f838b2', '#f5089f', '#c4067e', '#92055e', '#540336', '#48022f', '#30021f']" #浅紫色调# color: "['#ebedf0', '#f0fff4', '#dcffe4', '#bef5cb', '#85e89d', '#34d058', '#28a745', '#22863a', '#176f2c', '#165c26', '#144620']" #翠绿色调# color: "['#ebedf0', '#f1f8ff', '#dbedff', '#c8e1ff', '#79b8ff', '#2188ff', '#0366d6', '#005cc5', '#044289', '#032f62', '#05264c']" #天青色调container: .recent-post-item(style='width:100%;height:auto;padding:10px;') #父元素容器,需要使用pug语法gitcalendar_css: https://npm.elemecdn.com/hexo-filter-gitcalendar/lib/gitcalendar.cssgitcalendar_js: https://npm.elemecdn.com/hexo-filter-gitcalendar/lib/gitcalendar.js -
参数释义
| 参数 | 备选值/类型 | 释义 |
|---|---|---|
| priority | number | 【可选】过滤器优先级,数值越小,执行越早,默认为10,选填 |
| enable | true/false | 【必选】控制开关 |
| enable_page | path/all | 【可选】填写想要应用的页面的相对路径(即路由地址),如根目录就填’/‘,分类页面就填’/categories/‘。若要应用于所有页面,就填’all’,默认为’/‘ |
| layout.type | id/class | 【可选】挂载容器类型,填写id或class,不填则默认为id |
| layout.name | text | 【必选】挂载容器名称 |
| layout.index | 0和正整数 | 【可选】前提是layout.type为class,因为同一页面可能有多个class,此项用来确认究竟排在第几个顺位 |
| user | text | 【必选】git用户名 |
| apiurl | url | 【可选】默认使用提供文档提供的api,但还是建议自建api,参考教程:自建API部署 |
| minheight.pc | 280px | 【可选】桌面端最小高度,默认为280px |
| minheight.mobile | 0px | 【可选】移动端最小高度,默认为0px |
| color | list | 【可选】一个包含11个色值的数组,文档给出了四款预设值 |
| container | pug | 【可选】预留的父元素容器,用以适配多主题,需要用pug语法填写,目前已适配butterfly,volantis,matery,mengd主题,这四个主题,插件会自自动识别_config.yml内填写的theme配置项。其余主题需要自己填写父元素容器。 |
| gitcalendar_css | URL | 【可选】自定义CSS样式链接 |
| gitcalendar_js | URL | 【可选】自定义js链接 |
自定义挂载容器
很多人反映不想挂在首页,想挂在关于或者统计等页面,只需要做2步:
-
在对应页面创建一个DOM让插件有地方挂载,例如演示的就是在关于页面(
/about/)的文件中直接写入一个div块<!-- GitCalendar容器 --> <div id="gitZone"></div> -
在对应配置项改为与你容器
id以创建页面路径相关的(是改不是加!!!)enable_page: /about/ # 应用页面(记住最后带/)layout: # 挂载容器类型type: idname: gitZoneindex: 0 -
重启项目就会看见
hexo cl; hexo s
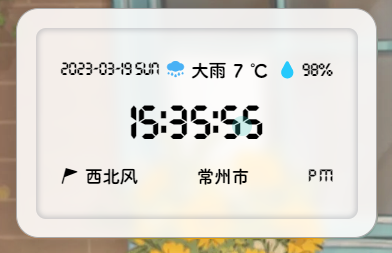
侧边栏电子时钟(安知鱼)
效果预览 :
-
如果有安装店长的插件版侧边栏电子钟(与店长的电子钟冲突),在博客根目录
[BlogRoot]下打开终端,运行以下指令# 卸载原版电子钟 npm uninstall hexo-butterfly-clock -
安装插件,在博客根目录
[BlogRoot]下打开终端,运行以下指令:npm install hexo-butterfly-clock-anzhiyu --save -
添加配置信息,以下为写法示例
在主题配置文件_config.butterfly.yml(注意一定要主题配置文件)中添加:# electric_clock (安知鱼电子钟) # see https://anzhiy.cn/posts/fc18.html electric_clock:enable: true # 开关priority: 5 #过滤器优先权enable_page: / # 应用页面exclude:# - /posts/# - /about/layout: # 挂载容器类型type: classname: sticky_layoutindex: 0loading: https://cdn.cbd.int/hexo-butterfly-clock-anzhiyu/lib/loading.gif #加载动画自定义clock_css: https://cdn.cbd.int/hexo-butterfly-clock-anzhiyu/lib/clock.min.cssclock_js: https://cdn.cbd.int/hexo-butterfly-clock-anzhiyu/lib/clock.min.jsip_api: https://widget.qweather.net/simple/static/js/he-simple-common.js?v=2.0qweather_key: # 和风天气keygaud_map_key: # 高得地图web服务keydefault_rectangle: false # 开启后将一直显示rectangle位置的天气,否则将获取访问者的地理位置与天气rectangle: 113.34532,23.15624 # 获取访问者位置失败时会显示该位置的天气,同时该位置为开启default_rectangle后的位置其中qweather_key 和gaud_map_key 最好自己去申请对应的 api key,默认使用
鱼的,可能会被限制,不保证可靠性。 -
参数释义
| 参数 | 备选值/类型 | 释义 |
|---|---|---|
| priority | number | 【可选】过滤器优先级,数值越小,执行越早,默认为 10,选填 |
| enable | true/false | 【必选】控制开关 |
| enable_page | path/all | 【可选】填写想要应用的页面的相对路径(即路由地址),如根目录就填’/‘,分类页面就填’/categories/‘。若要应用于所有页面,就填’all’,默认为 all |
| exclude | path | 【可选】填写想要屏蔽的页面,可以多个。写法见示例。原理是将屏蔽项的内容逐个放到当前路径去匹配,若当前路径包含任一屏蔽项,则不会挂载。 |
| layout.type | id/class | 【可选】挂载容器类型,填写 id 或 class,不填则默认为 id |
| layout.name | text | 【必选】挂载容器名称 |
| layout.index | 0和正整数 | 【可选】前提是 layout.type 为 class,因为同一页面可能有多个 class,此项用来确认究竟排在第几个顺位 |
| loading | URL | 【可选】电子钟加载动画的图片 |
| clock_css | URL | 【可选】电子钟样式 CDN 资源 |
| clock_js | URL | 【可选】电子钟执行脚本 CDN 资源 |
| ip_api | URL | 【可选】获取时钟 IP 的 API |
| qweather_key | text | 【可选】和风天气 key |
| gaud_map_key | text | 【可选】高得地图 web 服务 key |
| default_rectangle | text | 【可选】开启后将一直显示 rectangle 位置的天气,否则将获取访问者的地理位置与天气 |
| rectangle | text | 【可选】获取访问者位置失败时会显示该位置的天气,同时该位置为开启 default_rectangle 后的位置 |
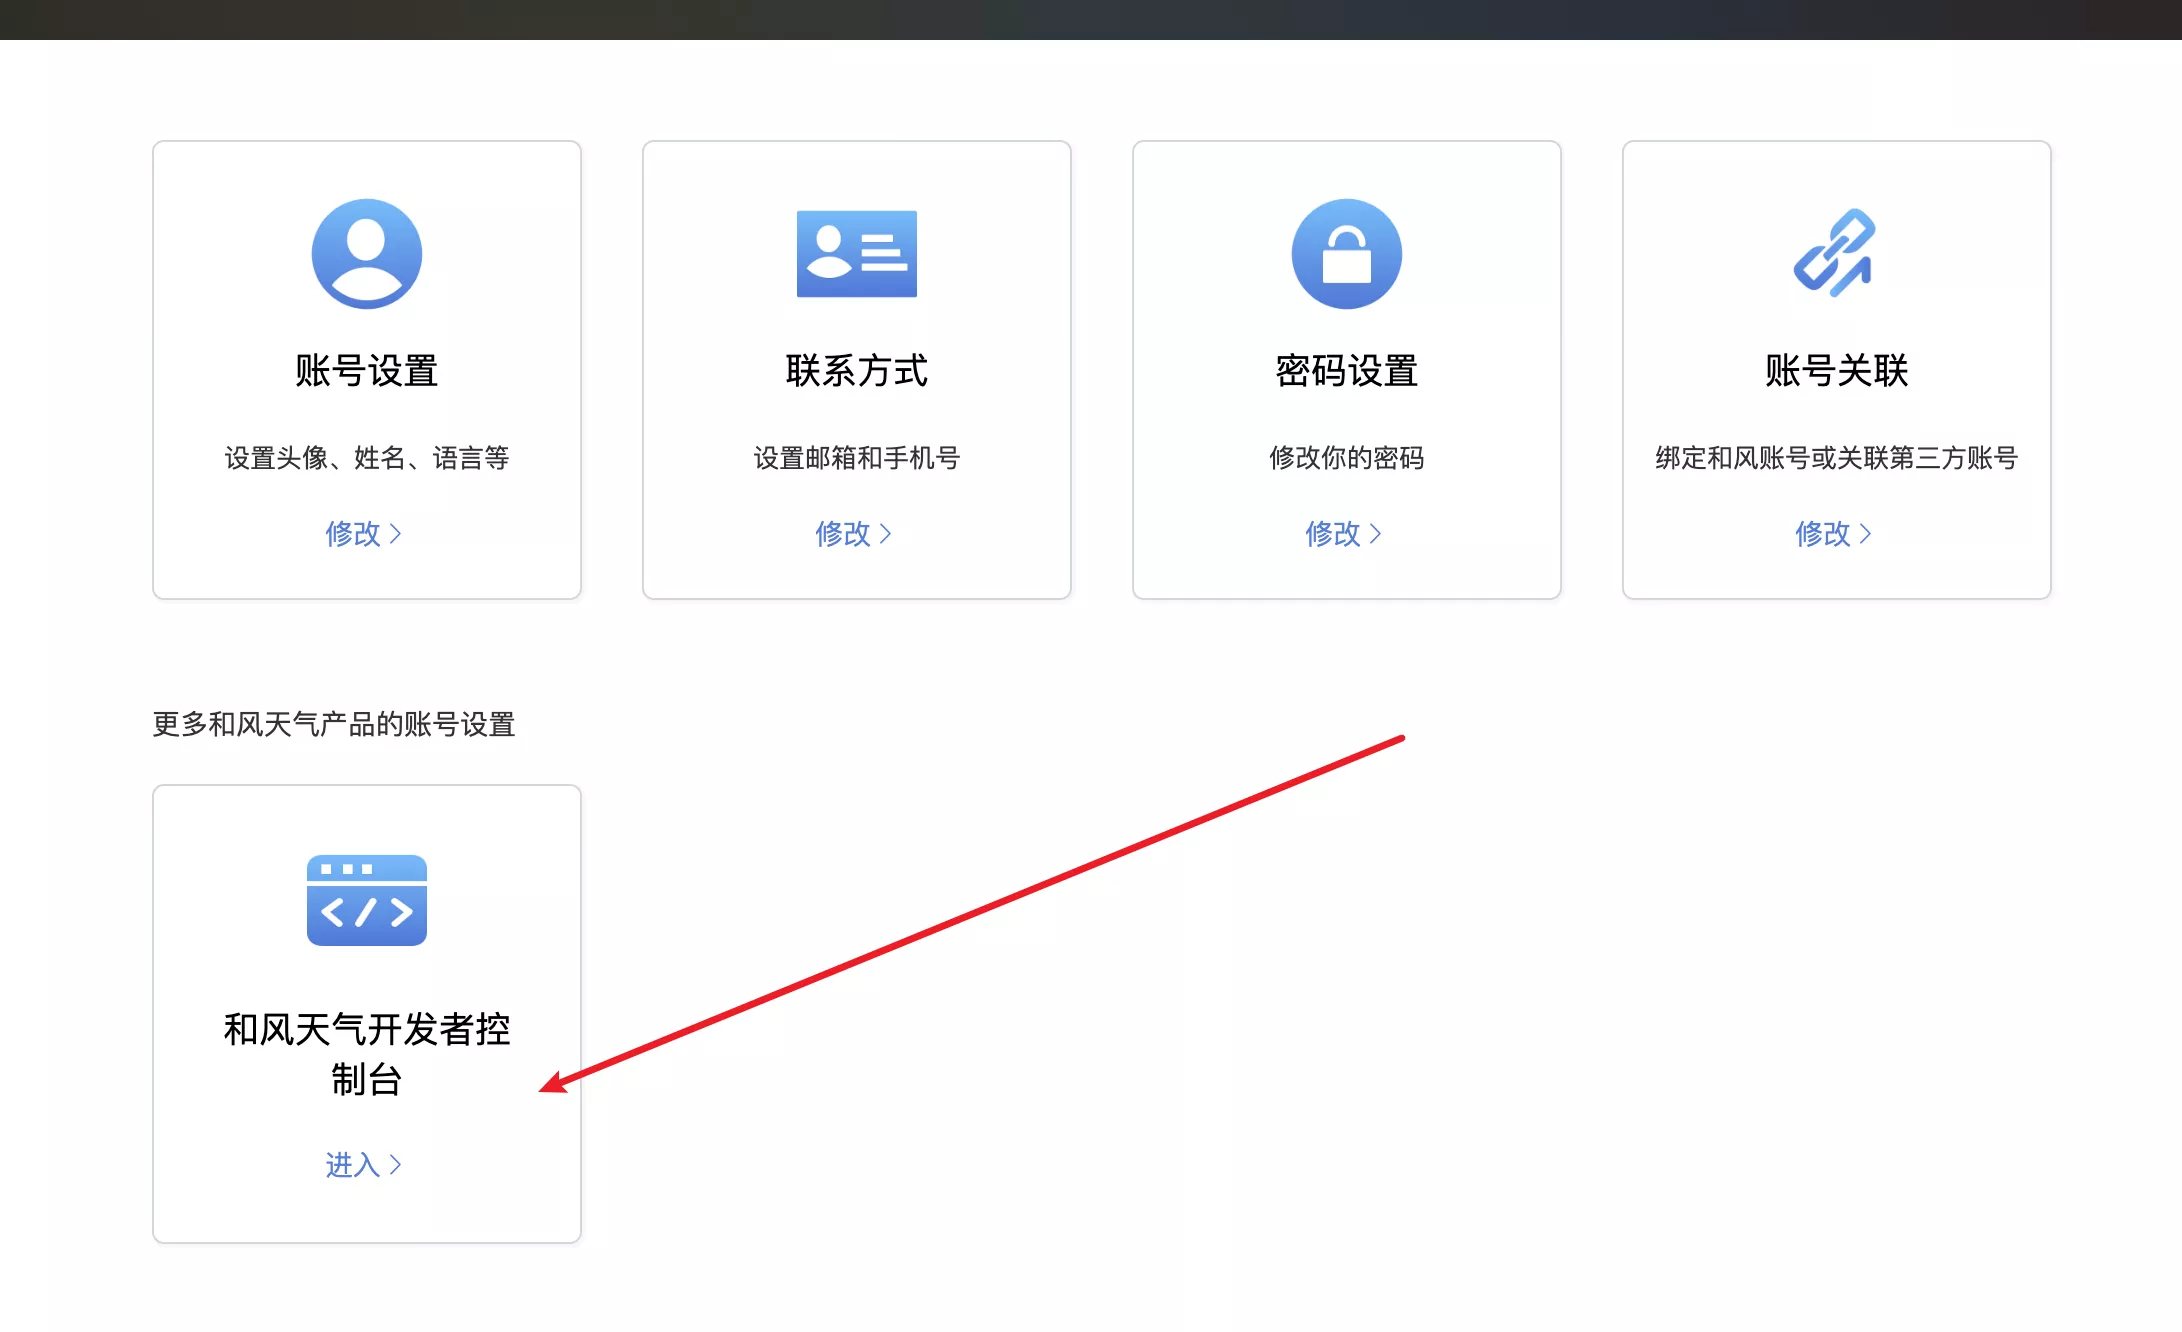
API申请教程
一、qweather_key申请地址: https://id.qweather.com/#/login
-
登录后进入控制台
-
创建应用

-
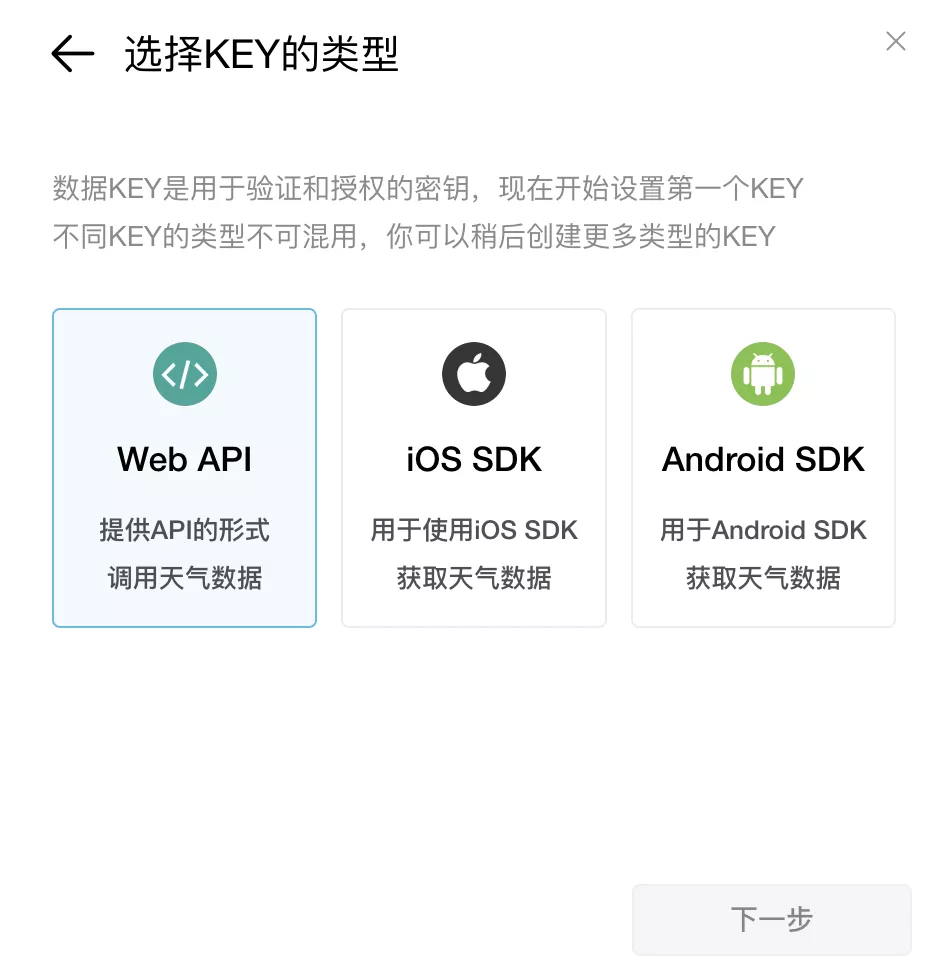
填写应用名称和 key 名称随意
-
选择 WebApi
-
复制 key

二、gaud_map_key 申请地址: https://lbs.amap.com/
-
登录后进入控制台
-
创建应用,名称随意,类型选其他

-
点击添加,
key名称随意,服务平台选择Web服务,点击提交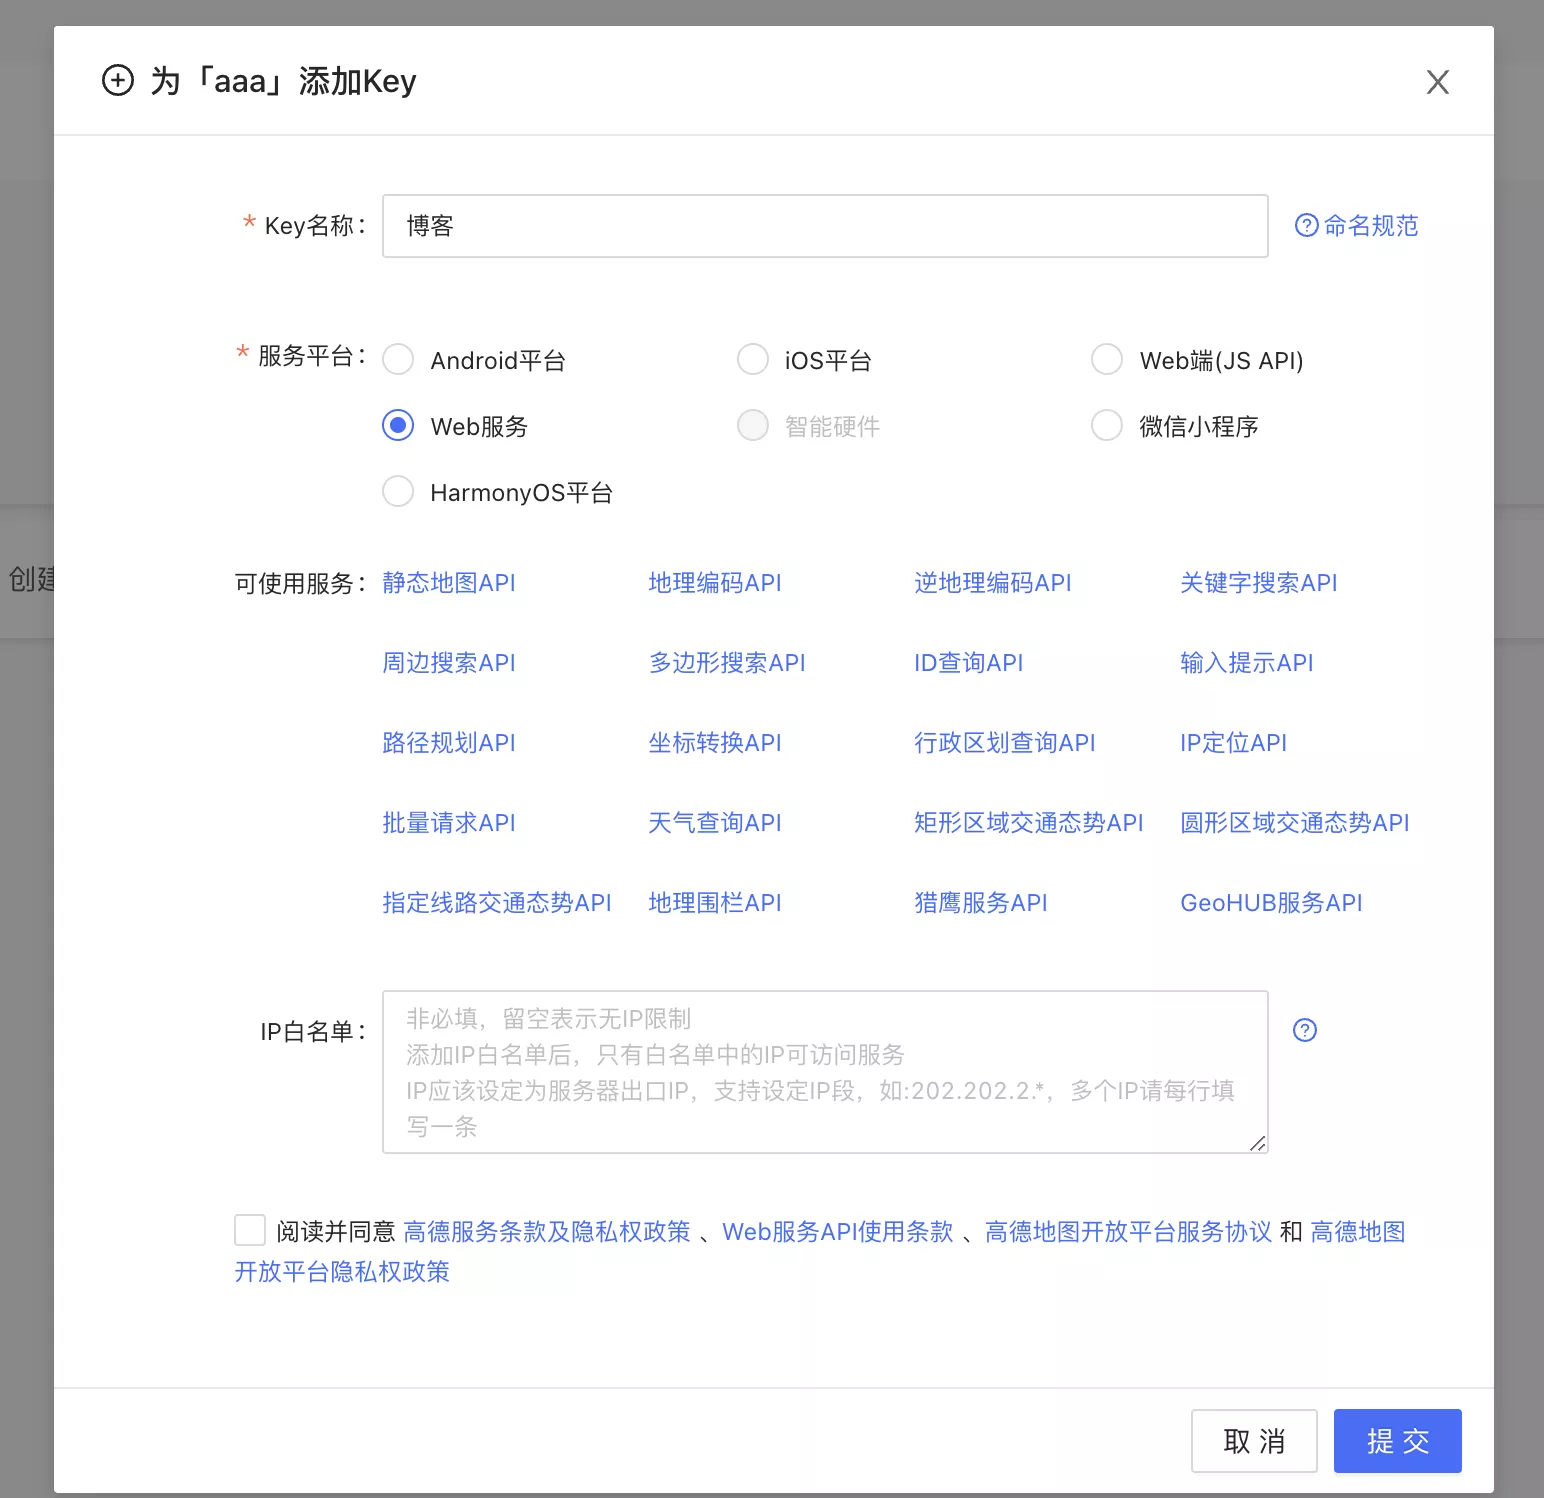
-
复制 key

结尾
本次的教程就到这里结束了,希望能给大家带来帮助,欢迎大家评论区留言!!!
相关文章:
个人小站折腾后记
个人小站折腾后记 🏠个人主页:shark-Gao 🧑个人简介:大家好,我是shark-Gao,一个想要与大家共同进步的男人😉😉 🎉目前状况:23届毕业生,目前在某…...
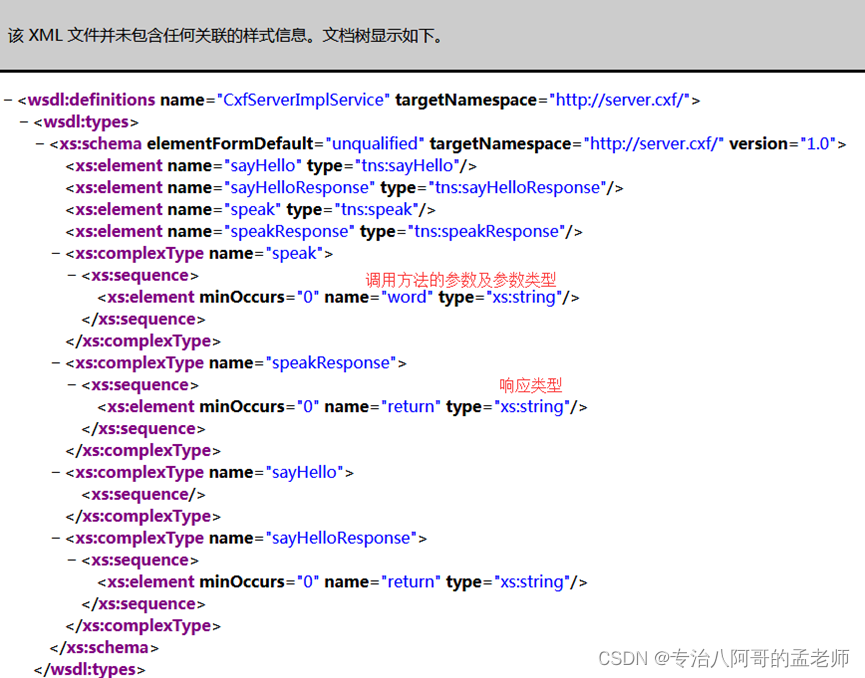
WebService简单入门
1. JAX-WS发布WebService 创建web工程 创建simple包,和server、client两个子包。正常情况下server和client应该是两个项目,这里我们只是演示效果,所以简化写到一个项目中: 1.1 创建服务类Server package simple.server;import ja…...
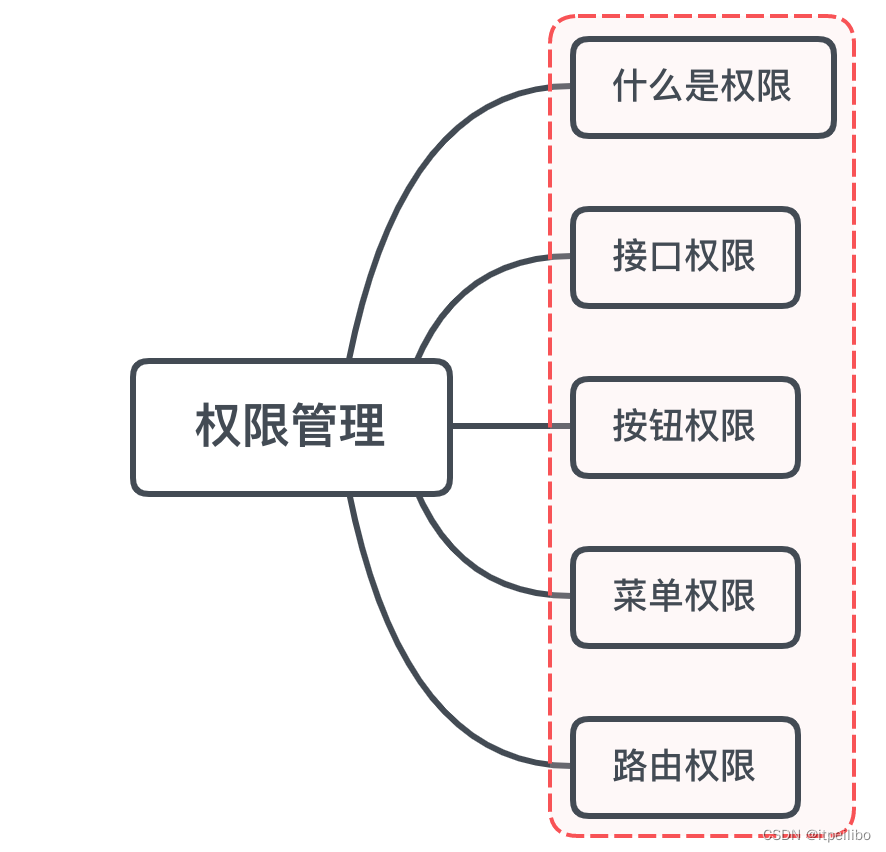
「Vue面试题」vue要做权限管理该怎么做?如果控制到按钮级别的权限怎么做?
文章目录一、是什么二、如何做接口权限路由权限控制菜单权限方案一方案二按钮权限方案一方案二小结参考文章一、是什么 权限是对特定资源的访问许可,所谓权限控制,也就是确保用户只能访问到被分配的资源 而前端权限归根结底是请求的发起权,…...
Docker部署springcloud项目(清晰明了)
概述 最近在想做个cloud项目,gitee上找了个模板项目,后端使用到 Nacos、Gateway、Security等技术,需要到 Docker 容器部署,在此总结一下,若有不足之处,望大佬们可以指出。 什么是 Docker Docker 使用 Google 公司推…...
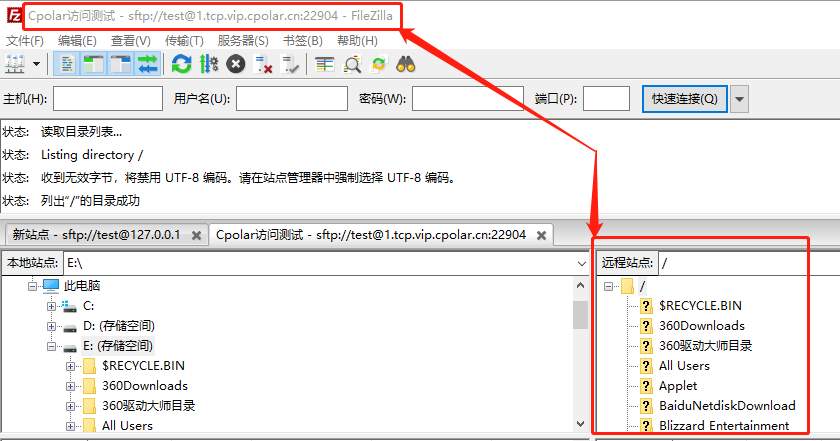
搭建SFTP服务安全共享文件,实现在外远程访问「内网穿透」
文章目录1.前言2.本地SFTP服务器搭建2.1.SFTP软件的下载和安装2.2.配置SFTP站点2.3.Cpolar下载和安装3.SFTP服务器的发布3.1.Cpolar云端设置3.2.Cpolar本地设置4.公网访问测试5.结语1.前言 现在的网络发达,个人电脑容量快速上升,想要保存的数据资料也越…...
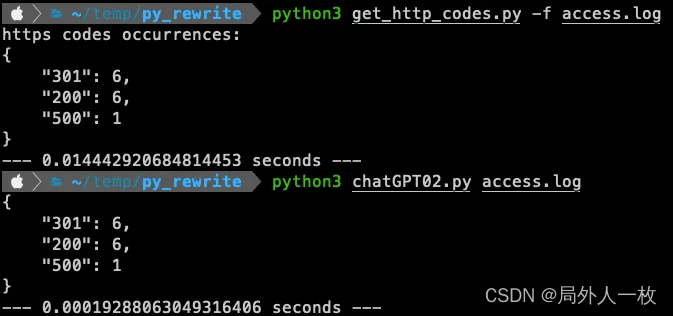
ChatGPT优化Python代码的小技巧
使用 chatGPT 优化代码并降低运行时的云成本 许多开发人员说“过早的优化是万恶之源”。 这句话的来源归功于Donald Knuth。在他的书《计算机编程的艺术》中,他写道: “真正的问题是,程序员在错误的时间和错误的地方花费了太多时间来担心效率…...
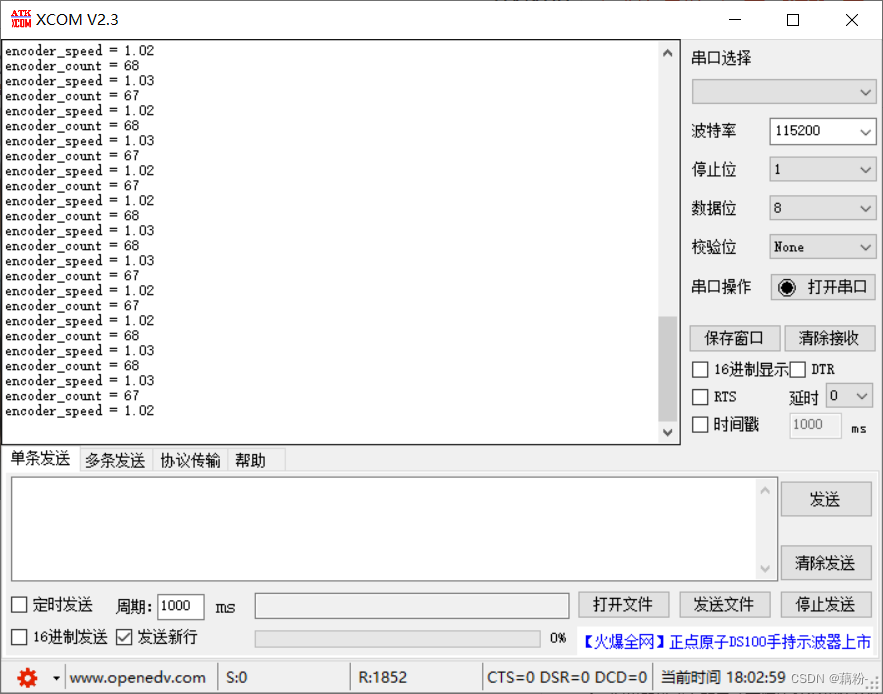
Stm32-使用TB6612驱动电机及编码器测速
这里写目录标题起因一、电机及编码器的参数二、硬件三、接线四、驱动电机1、TB6612电机驱动2、定时器的PWM模式驱动电机五、编码器测速1、定时器的编码器接口模式2、定时器编码器模式测速的原理3、编码器模式的配置4、编码器模式相关代码5、测速方法六、相关问题以及解答1、编码…...

【JS】常用js方法
1、判断是否是数组、字符串等方法a instanceof ba是你需要判断的数据b是判断的类型//直接判断原型 var a [1,5,8] var b 123456console.log(a instanceof Array)//true console.log(a instanceof String)//falseconsole.log(b instanceof String)//true2、分割字符串a.split(…...
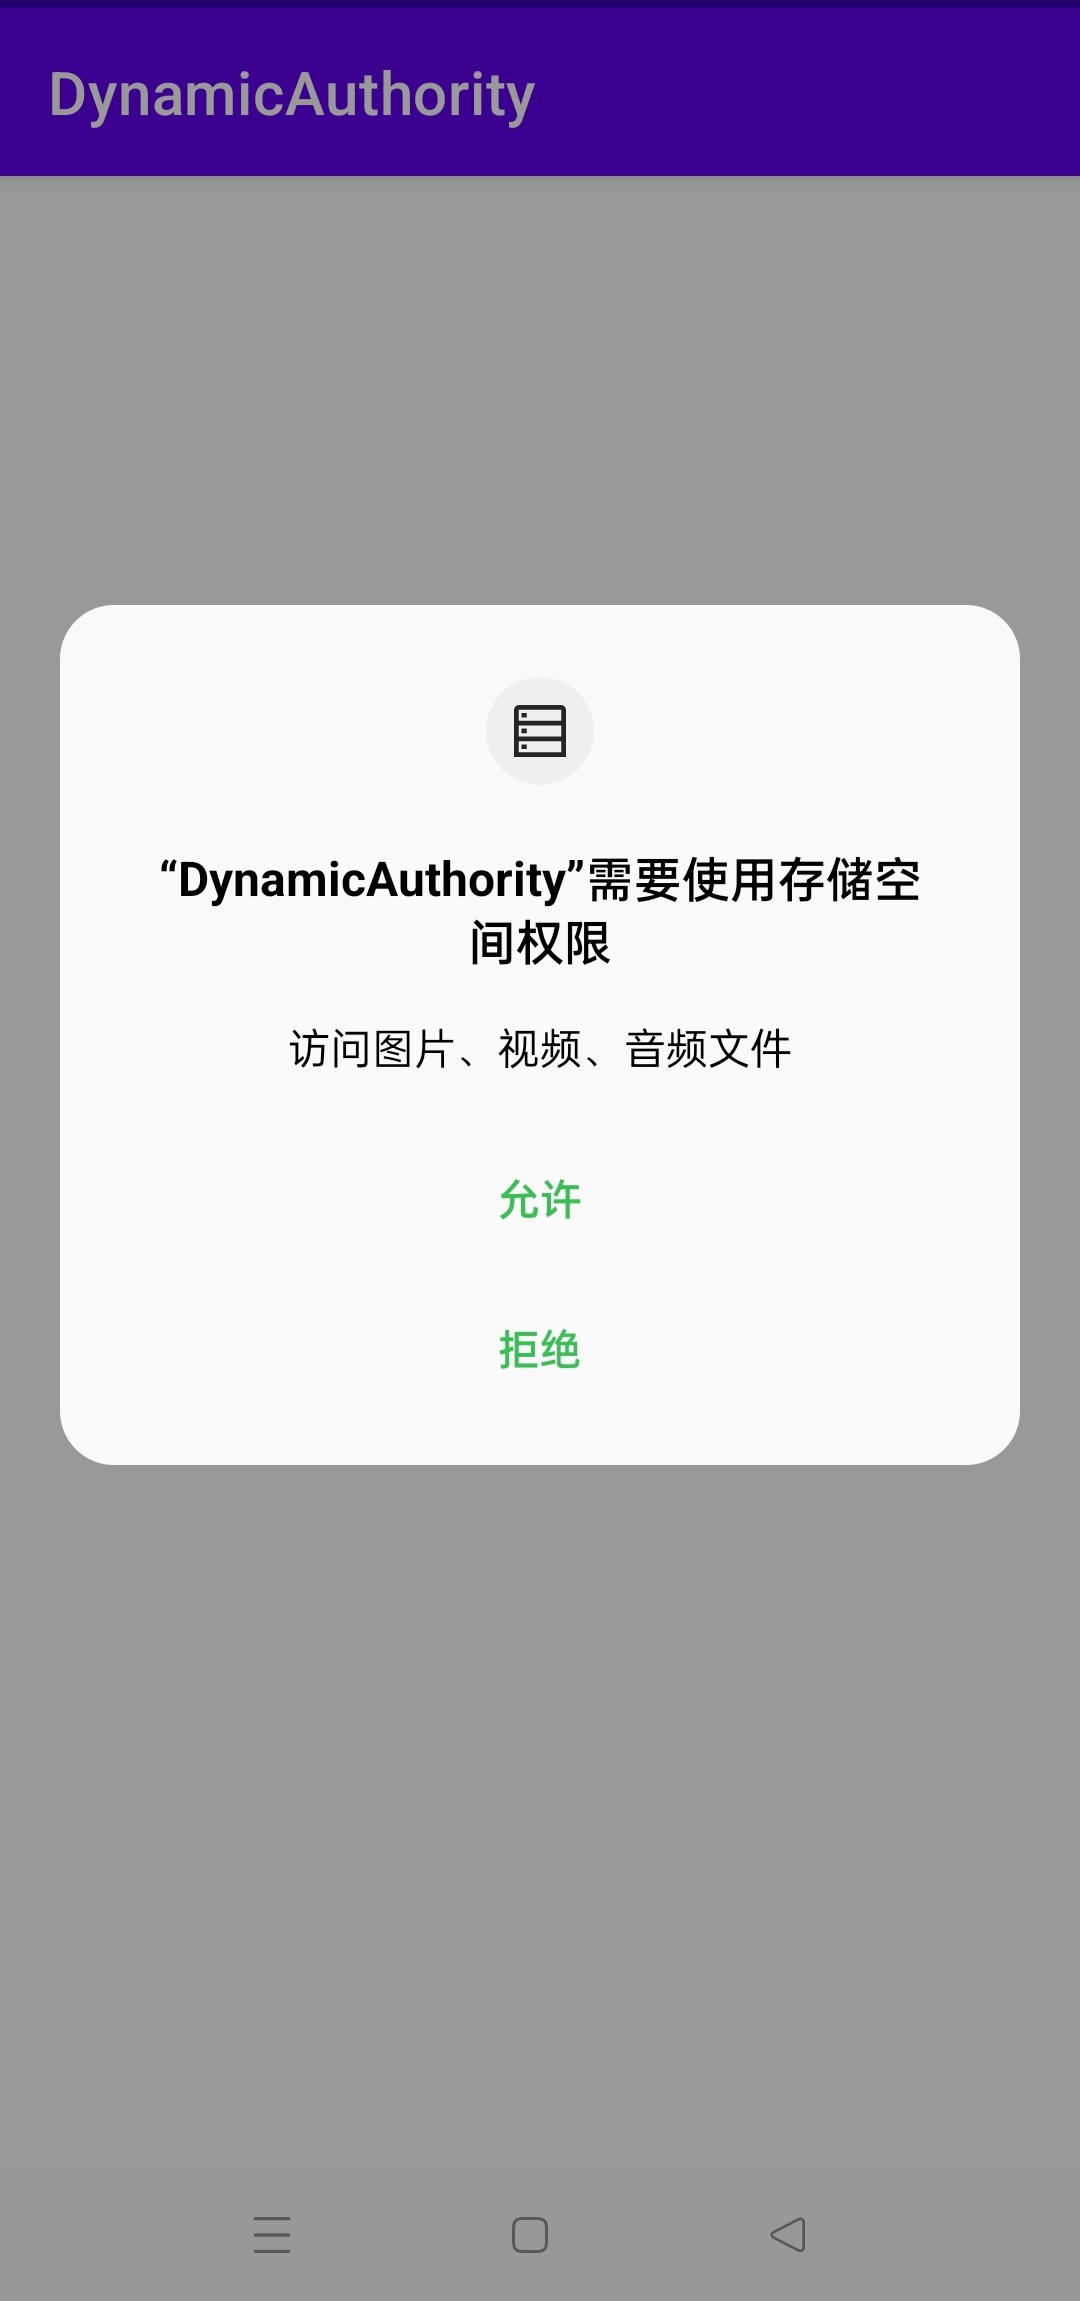
Android---动态权限申请
目录 权限分类 动态权限核心函数 简易实现案例 完整代码 Google 在 Android 6.0 开始引入了权限申请机制,将所有权限分成了正常权限和危险权限。App 每次在使用危险权限时需要动态的申请并得到用户的授权才能使用。 权限分类 系统权限分为两类:正常…...

【Linux】环境变量(基本概念 常见环境变量 测试PATH 环境变量相关命令)
文章目录环境变量基本概念常见环境变量测试PATH别的环境变量通过系统调用获取或设置环境变量环境变量相关命令export: 设置一个新的环境变量set: 显示本地定义的shell变量和环境变量unset: 清除环境变量通过代码如何获取环境变量环境变量 基本概念 环境变量(environment vari…...
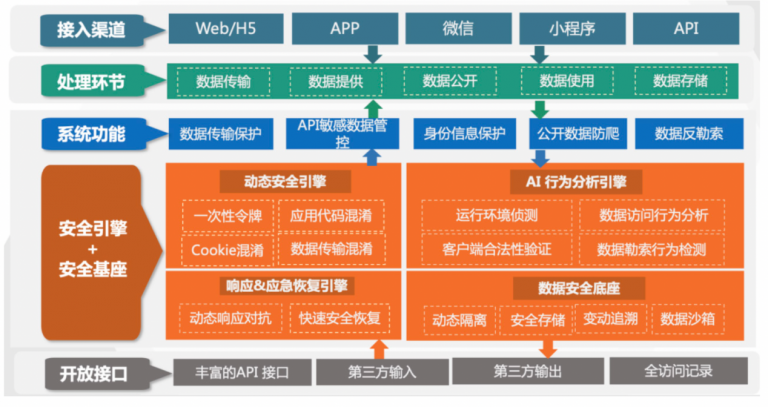
安全牛+瑞数信息:《数据安全管控平台应用指南》报告共同发布
随着《中华人民共和国网络安全法》《中华人民共和国数据安全法》《中华人民共和国个人信息保护法》和《关键信息基础设施安全保护条例》“三法一条例”的陆续发布,从国家、社会与个人已经逐步形成了加强数据安全保护的态势。 2023年1月中旬,工业和信息化…...
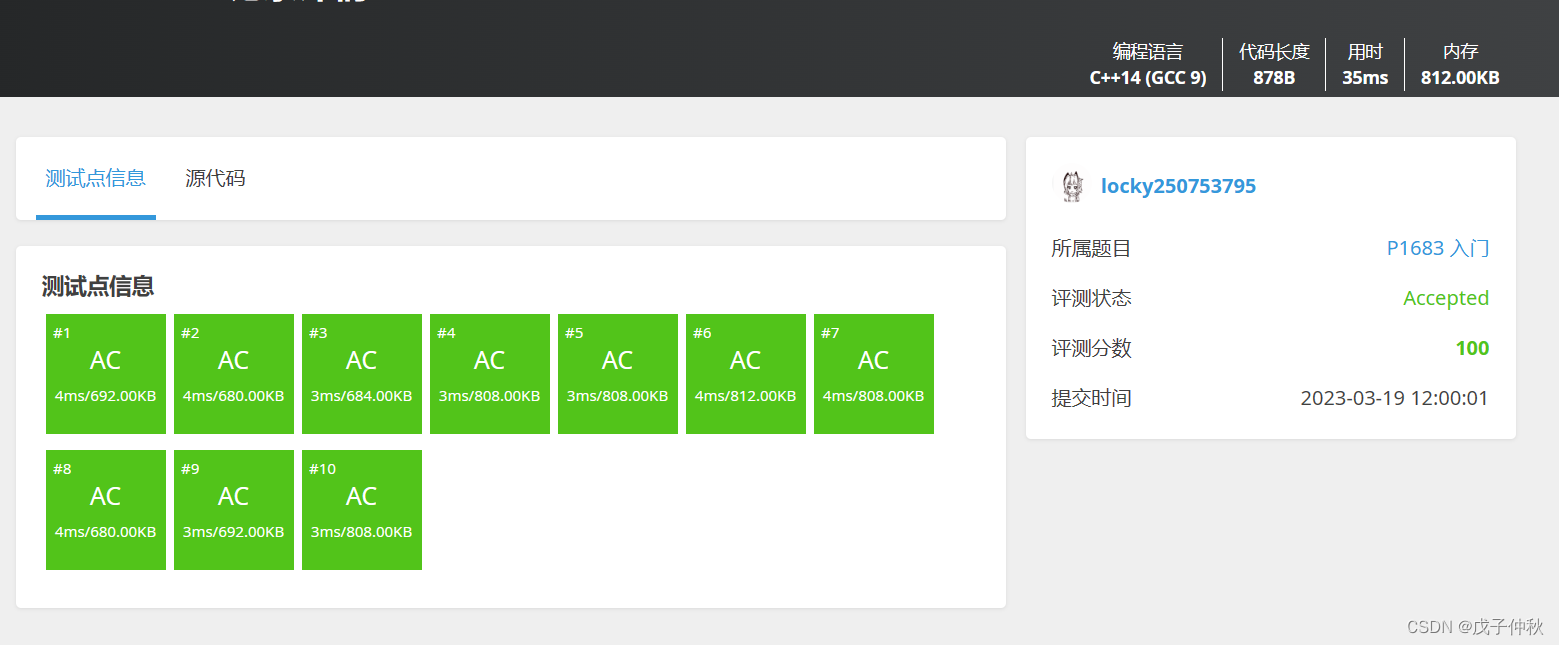
【洛谷刷题】蓝桥杯专题突破-深度优先搜索-dfs(6)
目录 写在前面: 题目:P1683 入门 - 洛谷 | 计算机科学教育新生态 (luogu.com.cn) 题目描述: 输入格式: 输出格式: 输入样例: 输出样例: 解题思路: 代码: AC &a…...
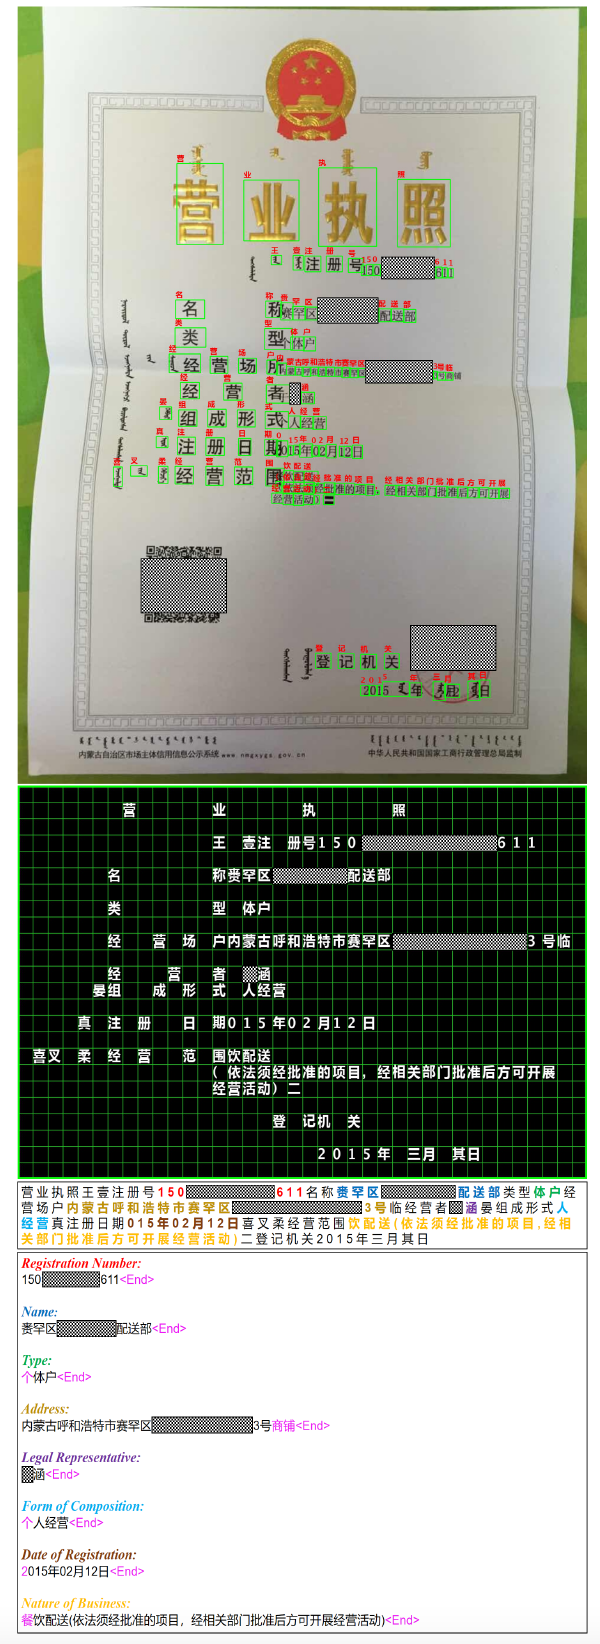
论文解读TCPN
一、简要介绍视觉信息提取(VIE)近年来受到了越来越多的关注。现有的方法通常首先将光学字符识别(OCR)结果组织成纯文本,然后利用标记级实体注释作为监督来训练序列标记模型。但是,它花费大量的注释成本&…...

性能优化之防抖与节流
(一)防抖 (1)定义:单位事件内,频繁触发,只执行最后一次(像王者荣耀的回城操作) (2)使用场景:搜索输入框、手机号邮箱输入检测 &…...

数组模拟单链表
实现一个单链表,链表初始为空,支持三种操作: 向链表头插入一个数; 删除第 k个插入的数后面的数; 在第 k个插入的数后插入一个数。 现在要对该链表进行 M次操作,进行完所有操作后,从头到尾输出整…...

蓝桥杯刷题第十四天
第二题:不同子串题目描述本题为填空题,只需要算出结果后,在代码中使用输出语句将所填结果输出即可。一个字符串的非空子串是指字符串中长度至少为 1 的连续的一段字符组成的串。例如,字符串aaab 有非空子串 a, b, aa, ab, aaa, aa…...

面试了8家软件公司测试岗位,面试题大盘点,我真的尽力了
包含的模块:本文分为十九个模块,分别是:软件测试 基础、liunx、MySQL、web测试、接口测试、APP测试 、管理工具、Python、性能测试、selenium、lordrunner、计算机网络、组成原理、数据结构与算法、逻辑题、人力资源需要的可以看文末获取方式…...
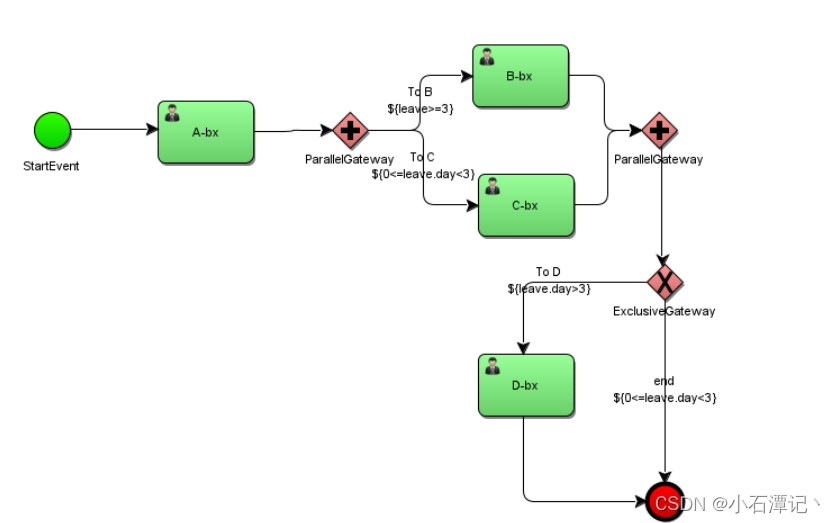
Activiti 工作流简介
1、什么是工作流 工作流(Workflow),就是通过计算机对业务流程自动化执行管理。它主要解决的是“使在多个参与者之间按照某种预定义的规则自动进行传递文档、信息或任务的过程,从而实现某个预期的业务目标,或者促使此目标的实现”。 1.2、工作…...
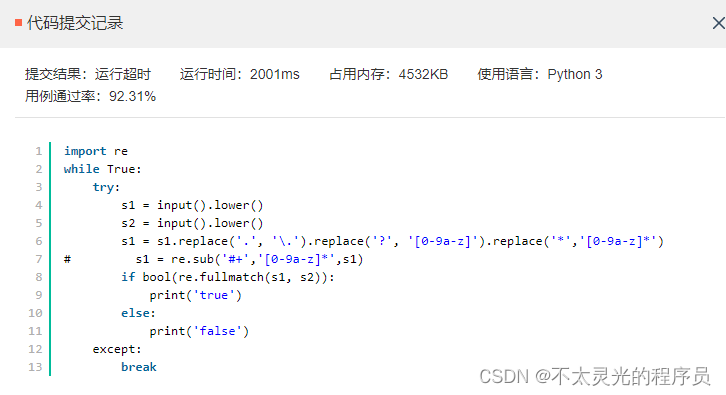
【华为机试真题详解 Python实现】统计差异值大于相似值二元组个数【2023 Q1 | 100分】
文章目录 前言题目描述输入描述输出描述题目解析参考代码前言 《华为机试真题详解》专栏含牛客网华为专栏、华为面经试题、华为OD机试真题。 如果您在准备华为的面试,期间有想了解的可以私信我,我会尽可能帮您解答,也可以给您一些建议! 本文解法非最优解(即非性能最优)…...
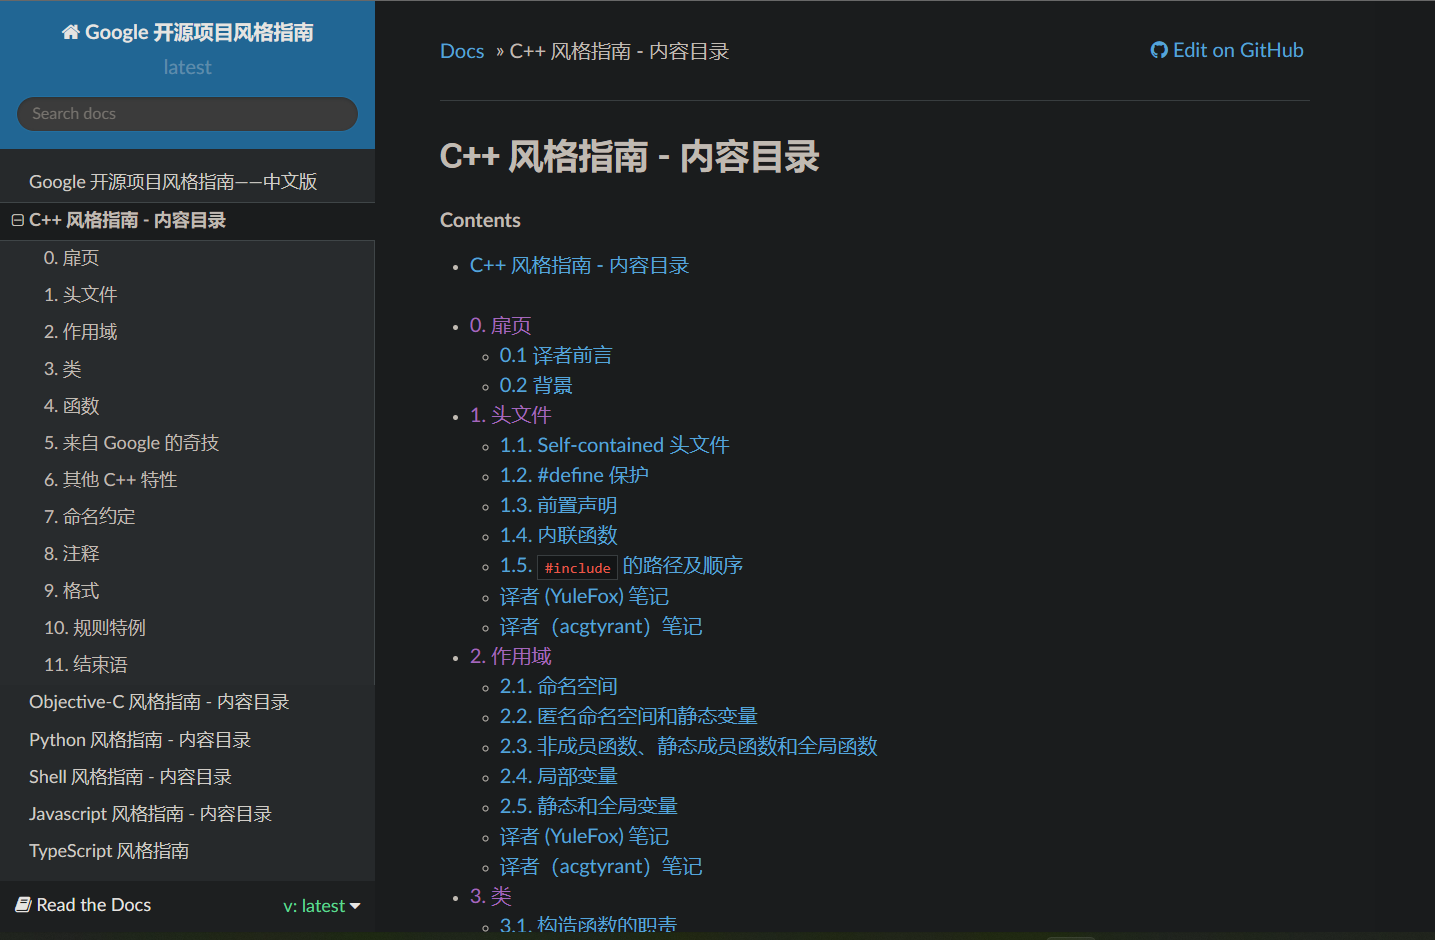
【C++】Google编码风格学习
Google规范线上地址:https://zh-google-styleguide.readthedocs.io/en/latest/ 文章目录1. 头文件2. 作用域3. 类4. 函数5. 其他C特性6. 命名约定7. 注释8. 格式1. 头文件 每个cpp/cc文件都对应一个h头文件,除单元测试代码和只包含main()的文件外。 所…...

GIL移除≠自动线程安全!揭秘Python 3.13+中asyncio+shared_memory+numpy.ndarray三者交汇处的5个未公开竞态漏洞
第一章:Python无锁GIL环境下的并发安全本质重构当Python脱离CPython解释器的全局解释器锁(GIL)约束——例如在PyPy的STM模式、Jython、Cython多线程扩展,或新兴的Rust-Python绑定(如PyO3 async-std)中运行…...
)
Unity UGUI实战:手把手教你打造一个可拖拽、可弯曲的UI连线组件(附完整源码)
Unity UGUI实战:打造可拖拽、可弯曲的智能连线系统 在游戏开发中,可视化连接系统是构建技能树、流程图、科技树等复杂UI结构的核心组件。传统实现往往局限于静态线条或简单的直线连接,缺乏交互性和动态美感。本文将带你从零构建一个支持实时拖…...

快手直播推流码获取新方法:个人用户如何绕过限制使用OBS推流
1. 快手直播推流码获取现状解析 去年快手平台对个人用户关闭云直播功能后,很多主播突然发现没法用OBS这类专业推流工具了。这事儿确实挺让人头疼的,毕竟用OBS推流能实现多场景切换、添加专业特效,直播效果直接上几个档次。我实测发现…...
)
SMR实战:如何将GWAS数据快速转换为BESD格式(附常见错误排查)
SMR实战:GWAS数据高效转换为BESD格式的完整指南与深度排错手册 在生物信息学研究中,基于汇总数据的孟德尔随机化(Summary-data-based Mendelian Randomization, SMR)已成为探索基因表达数量性状位点(eQTL)与…...

DDA直线插补算法在MATLAB中的优化实现与性能分析
1. DDA直线插补算法基础与MATLAB实现 DDA(Digital Differential Analyzer)算法是计算机图形学中最基础的直线生成算法之一,它的核心思想是利用直线的微分方程来递推计算像素点位置。我第一次接触这个算法是在大学计算机图形学课程上ÿ…...

别再自己写驱动了!用STM32CubeMX HAL库5分钟搞定TM1637数码管显示
5分钟用STM32CubeMX HAL库驱动TM1637数码管:告别底层代码的终极方案 每次面对数码管驱动时,那些繁琐的GPIO初始化、时序控制和寄存器配置是否让你头疼不已?传统开发方式需要手动编写大量底层代码,不仅耗时耗力,还容易因…...
)
零成本玩转千问大模型!OpenClaw 配置秘籍(附每日500 Token福利)
🚀零成本玩转千问大模型!OpenClaw 配置秘籍(附每日500 Token福利) 这份教程将带你完成从环境准备到成功验证的全过程,让你手中的工具“活”起来。 前期准备:搭建基石 在开始代码操作之前,我们需…...

如何彻底解决ComfyUI ControlNet Aux预处理功能异常的5个专业策略
如何彻底解决ComfyUI ControlNet Aux预处理功能异常的5个专业策略 【免费下载链接】comfyui_controlnet_aux ComfyUIs ControlNet Auxiliary Preprocessors 项目地址: https://gitcode.com/gh_mirrors/co/comfyui_controlnet_aux ComfyUI ControlNet Aux作为ComfyUI的辅…...
)
在AirSim里用Python实现LQR控制:让无人机自动跟踪预设轨迹(附完整代码)
用Python实现AirSim无人机LQR轨迹跟踪:从理论到代码落地 1. 环境准备与基础概念 在开始编写代码之前,我们需要先搭建好开发环境并理解几个核心概念。AirSim是微软开源的无人机/车辆仿真平台,基于Unreal Engine构建,提供了高度逼真…...

MaxKB:企业级AI知识库部署实战指南
MaxKB:企业级AI知识库部署实战指南 【免费下载链接】MaxKB 🔥 MaxKB is an open-source platform for building enterprise-grade agents. 强大易用的开源企业级智能体平台。 项目地址: https://gitcode.com/GitHub_Trending/ma/MaxKB 面对企业AI…...