【开源移植】MultiButton_小型按键驱动模块移植
MultiButton
简介
MultiButton 是一个小巧简单易用的事件驱动型按键驱动模块,可无限量扩展按键,按键事件的回调异步处理方式可以简化你的程序结构,去除冗余的按键处理硬编码,让你的按键业务逻辑更清晰。
使用方法
1.先申请一个按键结构
struct Button button1;
2.初始化按键对象,绑定按键的GPIO电平读取接口read_button_pin() ,后一个参数设置有效触发电平
button_init(&button1, read_button_pin, 0, 0);
3.注册按键事件
button_attach(&button1, SINGLE_CLICK, Callback_SINGLE_CLICK_Handler);
button_attach(&button1, DOUBLE_CLICK, Callback_DOUBLE_Click_Handler);
...
4.启动按键
button_start(&button1);
5.设置一个5ms间隔的定时器循环调用后台处理函数
while(1) {...if(timer_ticks == 5) {timer_ticks = 0;button_ticks();}
}
特性
MultiButton 使用C语言实现,基于面向对象方式设计思路,每个按键对象单独用一份数据结构管理:
struct Button {uint16_t ticks;uint8_t  repeat: 4;uint8_t  event : 4;uint8_t  state : 3;uint8_t  debounce_cnt : 3;uint8_t  active_level : 1;uint8_t  button_level : 1;uint8_t  button_id;uint8_t  (*hal_button_Level)(uint8_t  button_id_);BtnCallback  cb[number_of_event];struct Button* next;
};
这样每个按键使用单向链表相连,依次进入 button_handler(struct Button* handle) 状态机处理,所以每个按键的状态彼此独立。
按键事件
| 事件 | 说明 |
|---|---|
| PRESS_DOWN | 按键按下,每次按下都触发 |
| PRESS_UP | 按键弹起,每次松开都触发 |
| PRESS_REPEAT | 重复按下触发,变量repeat计数连击次数 |
| SINGLE_CLICK | 单击按键事件 |
| DOUBLE_CLICK | 双击按键事件 |
| LONG_PRESS_START | 达到长按时间阈值时触发一次 |
| LONG_PRESS_HOLD | 长按期间一直触发 |
Examples
#include "button.h"unit8_t btn1_id = 0;struct Button btn1;uint8_t read_button_GPIO(uint8_t button_id)
{// you can share the GPIO read function with multiple Buttonsswitch(button_id){case btn1_id:return HAL_GPIO_ReadPin(B1_GPIO_Port, B1_Pin);break;default:return 0;break;}
}
void BTN1_PRESS_DOWN_Handler(void* btn)
{//do something...
}void BTN1_PRESS_UP_Handler(void* btn)
{//do something...
}...int main()
{button_init(&btn1, read_button_GPIO, 0, btn1_id);button_attach(&btn1, PRESS_DOWN,       BTN1_PRESS_DOWN_Handler);button_attach(&btn1, PRESS_UP,         BTN1_PRESS_UP_Handler);button_attach(&btn1, PRESS_REPEAT,     BTN1_PRESS_REPEAT_Handler);button_attach(&btn1, SINGLE_CLICK,     BTN1_SINGLE_Click_Handler);button_attach(&btn1, DOUBLE_CLICK,     BTN1_DOUBLE_Click_Handler);button_attach(&btn1, LONG_PRESS_START, BTN1_LONG_PRESS_START_Handler);button_attach(&btn1, LONG_PRESS_HOLD,  BTN1_LONG_PRESS_HOLD_Handler);button_start(&btn1);//make the timer invoking the button_ticks() interval 5ms.//This function is implemented by yourself.__timer_start(button_ticks, 0, 5);while(1){}
}
开源移植 STM32
源文件 main.c
#include "stm32f10x.h"
#include "Delay.h"
#include "LED.h"
#include "KEY.h"
#include "multi_button.h"int main()
{LED_Init(); // LED初始化KEY_Init(); // 按键初始化while (1){Delay_ms(5);button_ticks();// 按键运行}
}源文件multi_button.c
/** Copyright (c) 2016 Zibin Zheng <znbin@qq.com>* All rights reserved*/#include "multi_button.h"#define EVENT_CB(ev)   if(handle->cb[ev])handle->cb[ev]((void*)handle)
#define PRESS_REPEAT_MAX_NUM  15 /*!< The maximum value of the repeat counter *///button handle list head.
static struct Button* head_handle = NULL;static void button_handler(struct Button* handle);/*** @brief  Initializes the button struct handle.* @param  handle: the button handle struct.* @param  pin_level: read the HAL GPIO of the connected button level.* @param  active_level: pressed GPIO level.* @param  button_id: the button id.* @retval None*/
void button_init(struct Button* handle, u8(*pin_level)(u8), u8 active_level, u8 button_id)
{memset(handle, 0, sizeof(struct Button));handle->event = (u8)NONE_PRESS;handle->hal_button_Level = pin_level;handle->button_level = handle->hal_button_Level(button_id);handle->active_level = active_level;handle->button_id = button_id;
}//  /*button1 init*/
//  button_init(&btn1, read_button_GPIO, 0, KEY1_id);                      // 初始化按键结构体
//  button_attach(&btn1, SINGLE_CLICK, BTN1_SINGLE_CLICK_Handler);         // 添加单击事件
//  button_attach(&btn1, DOUBLE_CLICK, BTN1_DOUBLE_CLICK_Handler);         // 添加双击事件
//  button_attach(&btn1, LONG_PRESS_START, BTN1_LONG_PRESS_START_Handler); // 添加长按事件
//  button_start(&btn1);                                                   // 启动按键  /*** @brief  Attach the button event callback function.* @param  handle: the button handle struct.* @param  event: trigger event type.* @param  cb: callback function.* @retval None*/
void button_attach(struct Button* handle, PressEvent event, BtnCallback7 cb)
{handle->cb[event] = cb;
}/*** @brief  Inquire the button event happen.* @param  handle: the button handle struct.* @retval button event.*/
PressEvent get_button_event(struct Button* handle)
{return (PressEvent)(handle->event);
}/*** @brief  Button driver core function, driver state machine.* @param  handle: the button handle struct.* @retval None*/
static void button_handler(struct Button* handle)
{u8 read_gpio_level = handle->hal_button_Level(handle->button_id);//ticks counter working..4if((handle->state) > 0) handle->ticks++;/*------------button debounce handle---------------*/if(read_gpio_level != handle->button_level) { //not equal to prev one//continue read 3 times same new level changeif(++(handle->debounce_cnt) >= DEBOUNCE_TICKS) {handle->button_level = read_gpio_level;handle->debounce_cnt = 0;}} else { //level not change ,counter reset.handle->debounce_cnt = 0;}/*-----------------State machine-------------------*/switch (handle->state) {case 0:if(handle->button_level == handle->active_level) {	//start press downhandle->event = (u8)PRESS_DOWN;EVENT_CB(PRESS_DOWN);handle->ticks = 0;handle->repeat = 1;handle->state = 1;} else {handle->event = (u8)NONE_PRESS;}break;case 1:if(handle->button_level != handle->active_level) { //released press uphandle->event = (u8)PRESS_UP;EVENT_CB(PRESS_UP);handle->ticks = 0;handle->state = 2;} else if(handle->ticks > LONG_TICKS) {handle->event = (u8)LONG_PRESS_START;EVENT_CB(LONG_PRESS_START);handle->state = 5;}break;case 2:if(handle->button_level == handle->active_level) { //press down againhandle->event = (u8)PRESS_DOWN;EVENT_CB(PRESS_DOWN);if(handle->repeat != PRESS_REPEAT_MAX_NUM) {handle->repeat++;}EVENT_CB(PRESS_REPEAT); // repeat hithandle->ticks = 0;handle->state = 3;} else if(handle->ticks > SHORT_TICKS) { //released timeoutif(handle->repeat == 1) {handle->event = (u8)SINGLE_CLICK;EVENT_CB(SINGLE_CLICK);} else if(handle->repeat == 2) {handle->event = (u8)DOUBLE_CLICK;EVENT_CB(DOUBLE_CLICK); // repeat hit}handle->state = 0;}break;case 3:if(handle->button_level != handle->active_level) { //released press uphandle->event = (u8)PRESS_UP;EVENT_CB(PRESS_UP);if(handle->ticks < SHORT_TICKS) {handle->ticks = 0;handle->state = 2; //repeat press} else {handle->state = 0;}} else if(handle->ticks > SHORT_TICKS) { // SHORT_TICKS < press down hold time < LONG_TICKShandle->state = 1;}break;case 5:if(handle->button_level == handle->active_level) {//continue hold triggerhandle->event = (u8)LONG_PRESS_HOLD;EVENT_CB(LONG_PRESS_HOLD);} else { //releasedhandle->event = (u8)PRESS_UP;EVENT_CB(PRESS_UP);handle->state = 0; //reset}break;default:handle->state = 0; //resetbreak;}
}/*** @brief  Start the button work, add the handle into work list.* @param  handle: target handle struct.* @retval 0: succeed. -1: already exist.*/
int button_start(struct Button* handle)
{struct Button* target = head_handle;while(target) {if(target == handle) return -1;	//already exist.target = target->next;}handle->next = head_handle;head_handle = handle;return 0;
}/*** @brief  Stop the button work, remove the handle off work list.* @param  handle: target handle struct.* @retval None*/
void button_stop(struct Button* handle)
{struct Button** curr;for(curr = &head_handle; *curr; ) {struct Button* entry = *curr;if(entry == handle) {*curr = entry->next;
//			free(entry);return;//glacier add 2021-8-18} else {curr = &entry->next;}}
}/*** @brief  background ticks, timer repeat invoking interval 5ms.* @param  None.* @retval None*/
void button_ticks(void)
{struct Button* target;for(target=head_handle; target; target=target->next) {button_handler(target);}
}头文件multi_button.h
/** Copyright (c) 2016 Zibin Zheng <znbin@qq.com>* All rights reserved*/#ifndef _MULTI_BUTTON_H_
#define _MULTI_BUTTON_H_#include <string.h>
#include "stm32f10x.h"//According to your need to modify the constants.
#define TICKS_INTERVAL    5	//ms
#define DEBOUNCE_TICKS    3	//MAX 7 (0 ~ 7)
#define SHORT_TICKS       (300 /TICKS_INTERVAL)
#define LONG_TICKS        (1000 /TICKS_INTERVAL)typedef void (*BtnCallback)(void*);typedef enum {PRESS_DOWN = 0,PRESS_UP,PRESS_REPEAT,SINGLE_CLICK,DOUBLE_CLICK,LONG_PRESS_START,LONG_PRESS_HOLD,number_of_event,NONE_PRESS
}PressEvent;typedef struct Button {u16 ticks;u8  repeat;u8  event;u8  state;u8  debounce_cnt;u8  active_level;u8  button_level;u8  button_id;u8  (*hal_button_Level)(u8 button_id_);BtnCallback  cb[number_of_event];struct Button* next;
}Button;void button_init(struct Button* handle, u8(*pin_level)(u8), u8 active_level, u8 button_id);
void button_attach(struct Button* handle, PressEvent event, BtnCallback cb);
PressEvent get_button_event(struct Button* handle);
int  button_start(struct Button* handle);
void button_stop(struct Button* handle);
void button_ticks(void);#endif源文件KEY2.C
/********************************************************************************* @file    KEY2.c* @author  LQ* @version* @date    2024-4-29* @brief   multi_button******************************************************************************* @attention********************************************************************************/#include "stm32f10x.h"
#include "KEY.h"
#include "LED.h"#ifdef USE_KEY2struct Button btn1;
struct Button btn2;// GPIO读取回调函数
u8 read_button_GPIO(u8 button_id)
{u8 read_v;switch (button_id){case KEY1_id:read_v = GPIO_ReadInputDataBit(KEY1_GPIO_PORT, KEY1_GPIO_PIN);break;case KEY2_id:read_v = GPIO_ReadInputDataBit(KEY2_GPIO_PORT, KEY2_GPIO_PIN);break;default:break;}return read_v;
}// 单击事件
void BTN1_SINGLE_CLICK_Handler(void *btn)
{switch (((Button *)btn)->button_id){case KEY1_id:LED_ON(LED1);break;case KEY2_id:LED_OFF(LED1);break;default:break;}
}
// 双击事件
void BTN1_DOUBLE_CLICK_Handler(void *btn)
{LED_Toggle(LED1);
}// 长按事件
void BTN1_LONG_PRESS_START_Handler(void *btn)
{LED_OFF(LED1);
}/*** @brief  KEY初始化* @param  None* @retval None*/
void KEY_Init(void)
{/* GPIO_KEY Clock */RCC_APB2PeriphClockCmd(KEY1_GPIO_CLK, ENABLE);RCC_APB2PeriphClockCmd(KEY2_GPIO_CLK, ENABLE);/* GPIO_KEY Pin */GPIO_InitTypeDef GPIO_InitStructure;GPIO_InitStructure.GPIO_Mode = GPIO_Mode_IPU;GPIO_InitStructure.GPIO_Speed = GPIO_Speed_50MHz;GPIO_InitStructure.GPIO_Pin = KEY1_GPIO_PIN;GPIO_Init(KEY1_GPIO_PORT, &GPIO_InitStructure);GPIO_InitStructure.GPIO_Pin = KEY2_GPIO_PIN;GPIO_Init(KEY2_GPIO_PORT, &GPIO_InitStructure);/*button1 init*/button_init(&btn1, read_button_GPIO, 0, KEY1_id);                      // 初始化按键结构体button_attach(&btn1, SINGLE_CLICK, BTN1_SINGLE_CLICK_Handler);         // 添加单击事件button_attach(&btn1, DOUBLE_CLICK, BTN1_DOUBLE_CLICK_Handler);         // 添加双击事件button_attach(&btn1, LONG_PRESS_START, BTN1_LONG_PRESS_START_Handler); // 添加长按事件button_start(&btn1);                                                   // 启动按键                                                ///*button2 init*/button_init(&btn2, read_button_GPIO, 0, KEY2_id);button_attach(&btn2, SINGLE_CLICK, BTN1_SINGLE_CLICK_Handler);button_attach(&btn2, DOUBLE_CLICK, BTN1_DOUBLE_CLICK_Handler);button_start(&btn2);
}#endif头文件KEY.h
/********************************************************************************* @file    KEY.h* @author  LQ* @version V1.0* @date    2023-4-29* @brief   multi_button******************************************************************************* @attention********************************************************************************/#ifndef _KEY_H
#define _KEY_H#define USE_KEY2 // 定义使用KEY2.c,注释则使用KEY1.c#ifndef USE_KEY2  // 如果USE_KEY2没有被定义就定义名为USE_KEY1的宏
#define USE_KEY1
#endif#include "multi_button.h"/*GPIO宏定义*/
#define KEY1_GPIO_PORT GPIOA
#define KEY1_GPIO_PIN GPIO_Pin_8
#define KEY1_GPIO_CLK RCC_APB2Periph_GPIOA#ifdef USE_KEY2  // 如果USE_KEY2被定定义
#define KEY2_GPIO_PORT GPIOA
#define KEY2_GPIO_PIN GPIO_Pin_9
#define KEY2_GPIO_CLK RCC_APB2Periph_GPIOAenum Button_IDs
{KEY1_id,KEY2_id,
};
#endifvoid KEY_Init(void);#endif源文件KEY1.C
/********************************************************************************* @file    KEY1.c* @author  LQ* @version* @date    2024-4-29* @brief   multi_button******************************************************************************* @attention********************************************************************************/#include "stm32f10x.h"
#include "KEY.h"
#include "LED.h"#ifdef USE_KEY1struct Button btn1;// GPIO读取回调函数
u8 read_button_GPIO(u8 button_id)
{u8 led_sta;led_sta = GPIO_ReadInputDataBit(KEY1_GPIO_PORT, KEY1_GPIO_PIN);return led_sta;
}// 单击事件
void BTN1_SINGLE_CLICK_Handler(void *btn)
{LED_ON(LED1);
}// 双击事件
void BTN1_DOUBLE_CLICK_Handler(void *btn)
{LED_Toggle(LED1);
}// 长按事件
void BTN1_LONG_PRESS_START_Handler(void *btn)
{LED_OFF(LED1);
}/*** @brief  KEY初始化* @param  None* @retval None*/
void KEY_Init(void)
{/* GPIO_KEY Clock */RCC_APB2PeriphClockCmd(KEY1_GPIO_CLK, ENABLE);/* GPIO_KEY pin */GPIO_InitTypeDef GPIO_InitStructure;GPIO_InitStructure.GPIO_Pin = KEY1_GPIO_PIN;GPIO_InitStructure.GPIO_Mode = GPIO_Mode_IPU;GPIO_InitStructure.GPIO_Speed = GPIO_Speed_50MHz;GPIO_Init(KEY1_GPIO_PORT, &GPIO_InitStructure);/*button init*/button_init(&btn1, read_button_GPIO, 0, 0);                            // 初始化按键结构体button_attach(&btn1, SINGLE_CLICK, BTN1_SINGLE_CLICK_Handler);         // 添加单击事件button_attach(&btn1, DOUBLE_CLICK, BTN1_DOUBLE_CLICK_Handler);         // 添加双击事件button_attach(&btn1, LONG_PRESS_START, BTN1_LONG_PRESS_START_Handler); // 添加长按事件button_start(&btn1);                                                   // 启动按键
}#endif
参考资料
- [1] 【B@落子叶初LQ】MultiButton_小型按键驱动模块
- [2] 【GitHub】https://github.com/0x1abin/MultiButton/tree/master
相关文章:

【开源移植】MultiButton_小型按键驱动模块移植
MultiButton 简介 MultiButton 是一个小巧简单易用的事件驱动型按键驱动模块,可无限量扩展按键,按键事件的回调异步处理方式可以简化你的程序结构,去除冗余的按键处理硬编码,让你的按键业务逻辑更清晰。 使用方法 1.先申请一个…...

【Python系列】Python 字典合并
💝💝💝欢迎来到我的博客,很高兴能够在这里和您见面!希望您在这里可以感受到一份轻松愉快的氛围,不仅可以获得有趣的内容和知识,也可以畅所欲言、分享您的想法和见解。 推荐:kwan 的首页,持续学…...

C# 设计模式之装饰器模式
总目录 前言 装饰器模式的主要作用就是扩展一个类的功能,或给一个类添加多个变化的情况。学习面向对象的都知道,如果想单纯的给某个类增加一些功能,可以直接继承该类生成一个子类就可以。应对一些简单的业务场景继承也就够了,但是…...

【uniapp离线打包】(基于Android studio)
文章目录 uniapp打包官方教程入口一、准备工作(工具三大件)Android Studio版本推荐 二、准备工作(Android壳和uniapp包)导入Android壳生成uniapp包将uniapp包导入android壳降低jdk版本 三、准备工作(证书)准备Android平台离线签名…...
稳稳的年化10%,多任务时序动量策略——基于pytorch的深度学习策略(附python代码)
原创文章第608篇,专注“AI量化投资、世界运行的规律、个人成长与财富自由"。 做因子挖掘这段时间,有一个观感。 传统的因子挖掘,尤其是手工构造因子,到遗传算法因子挖掘。——本身也是一种”拟合“,或者说试图”…...

C++分析AVL树
目录 AVL树介绍 AVL树平衡因子更新分析 AVL树插入时旋转与平衡因子更新 左单旋 右单旋 左右单旋 右左单旋 AVL旋转可行性 AVL树节点删除(待补充) AVL树分析 AVL树介绍 二叉搜索树在某些极端情况下可能会退化,为了解决这个问题&…...

aurora8b10b ip的使用(framing接口下的数据回环测试)
文章目录 一、Aurora8B/10B协议二、时钟、复位与状态指示1、时钟2、复位3、状态指示 三、数据发送、接受接口(1)AXI4-Stream位排序(2)Streaming接口(3)Framing接口(帧传输接口) 四、…...

如何通过OpenCV判断图片是否包含在视频内?
要判断图片是否包含在视频内,可以使用计算机视觉技术和图像处理方法。这通常涉及特征匹配或模板匹配。以下是一个基于OpenCV的解决方案,通过特征匹配的方法来实现这一目标。 步骤概述 读取视频和图片: 使用OpenCV读取视频文件和图片文件。 …...

大数据基础:Spark重要知识汇总
文章目录 Spark重要知识汇总 一、Spark 是什么 二、Spark 四大特点 三、Spark框架模块介绍 3.1、Spark Core的RDD详解 3.1.1、什么是RDD 3.1.2、RDD是怎么理解的 四、Spark 运行模式 4.1、Spark本地模式介绍 4.2、Spark集群模式 Standalone 4.3、Spark集群模式 Stan…...
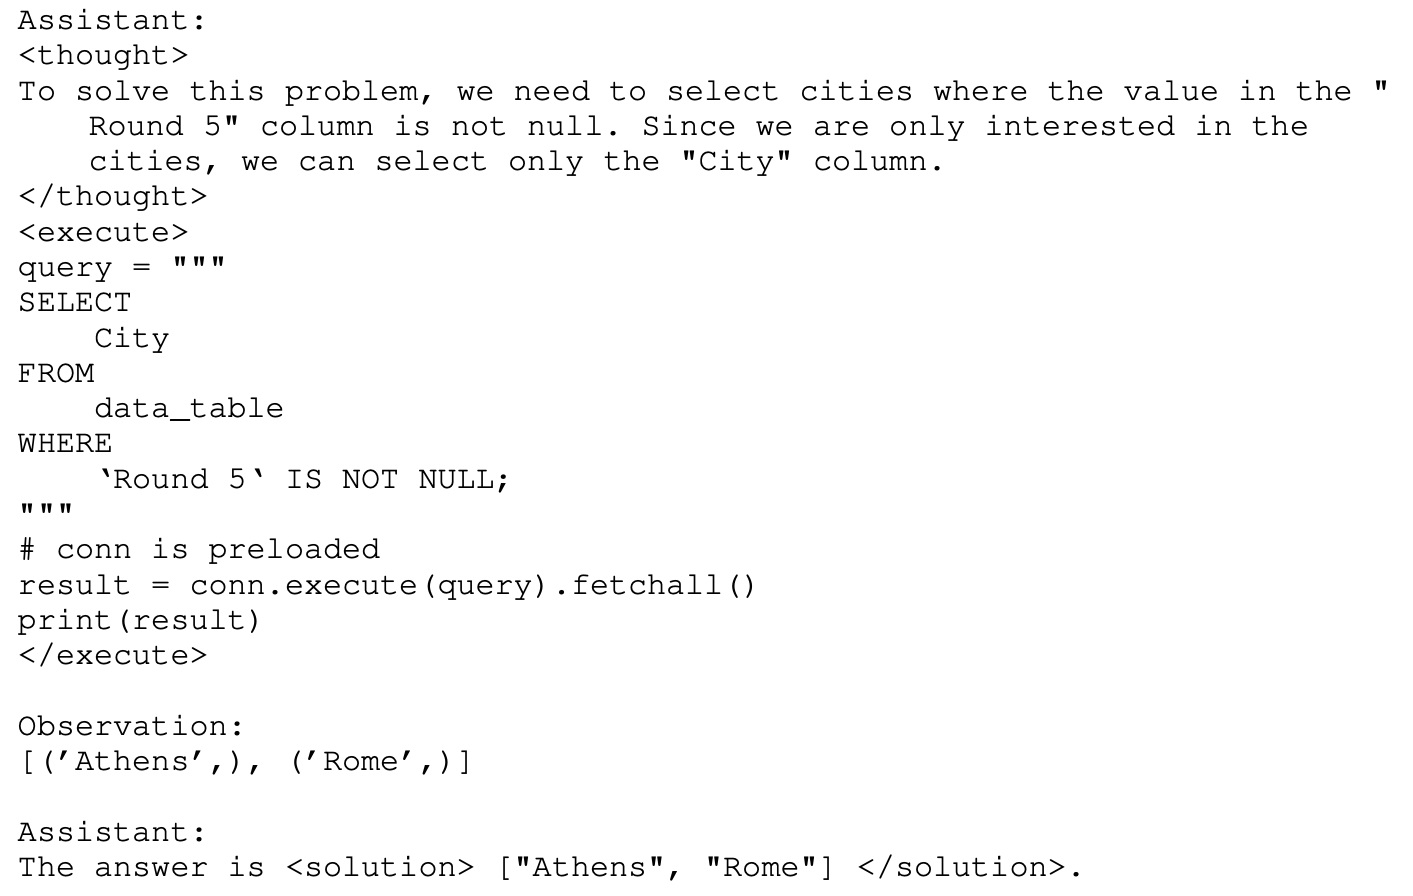
Executable Code Actions Elicit Better LLM Agents
Executable Code Actions Elicit Better LLM Agents Github: https://github.com/xingyaoww/code-act 一、动机 大语言模型展现出很强的推理能力。但是现如今大模型作为Agent的时候,在执行Action时依然还是通过text-based(文本模态)后者JSO…...

循环结构(三)——do-while语句
目录 🍁引言 🍁一、语句格式 🚀格式1 🚀格式2 🍁二、语句执行过程 🍁三、实例 🚀【例1】 🚀【例2】 🚀【例3】 🍁总结 🍁备注 &am…...

pandas 或筛选
pandas 或筛选 在Pandas中,可以使用DataFrame.loc方法结合逻辑运算符来实现或筛选。这里提供一个简单的例子: import pandas as pd 创建示例DataFrame df pd.DataFrame({ ‘A’: [1, 2, 3, 4], ‘B’: [5, 6, 7, 8], ‘C’: [9, 10, 11, 12] }) 设定…...

工具(1)—截屏和贴图工具snipaste
演示和写代码文档的时候,总是需要用到截图。在之前的流程里面,一般是打开WX或者QQ,找到截图工具。但是尴尬的是,有时候,微信没登录,而你这个时候就在写文档。为了截个图,还需要启动微信…...

【从零开始一步步学习VSOA开发】快速体验SylixOS
快速体验SylixOS 安装完毕RealEvo-IDE 后,同时也安装了RealEvo-Simulator。RealEvo-Simulator 是一个虚拟运行环境,可以模拟各种体系结构并在其上运行 SylixOS。相比于物理板卡,在 RealEvo-Simulator 进行运行调测更加的方便快捷且成本低廉。…...

Ansible自动化:简化IT基础设施管理的艺术
目录 一.前言 二.Ansible简介 2.1什么是Ansible? 2.2Ansible的主要特点 2.3Ansible的应用场景 三.探索Ansible的高级功能 3.1 高级Playbook特性 3.2 Ansible Vault 3.3 动态Inventory 3.4Ansible Tower(AWX) 3.5模块开发 3.6 Ans…...

【Rust光年纪】探索Rust语言中的WebSocket库和框架:优劣一览
Rust语言中的实时通信利器:WebSocket库与框架全面解析 前言 随着Rust语言的不断发展,其在Web开发领域也变得越来越受欢迎。WebSocket作为实现实时通信的重要技术,在Rust的生态系统中也有多个库和框架提供了支持。本文将介绍几个主流的Rust …...

HTML 基础结构
目录 1. 文档声明 2. 根标签 3. 头部元素 4. 主题元素 5. 注释 6. 演示 1. 文档声明 <!DOCTYPE html>:声明文档类型,表示该文档是 html 文档, 2. 根标签 (1)所有的其他标签都要放在一对根标签中&#…...

多页合同怎么盖骑缝章_电子合同怎么盖骑缝章?
多页合同怎么盖骑缝章?电子合同怎么盖骑缝章? 对于纸质多页合同,盖骑缝章是一种常见的做法,用于确保合同的完整性,防止任何页面被替换或篡改。以下是盖骑缝章的基本步骤: 将所有合同页面平铺在桌面上。用…...

GD 32 IIC通信协议
前言: ... 通信方式 通信方式分为串行通信和并行通信。常见的串口就是串行通信的方式 常用的串行通信接口 常用的串行通信方式有USART,IIC,USB,CAN总线 同步与异步 同步通信:IIC是同步通信,有两个线一个是时钟信号线,一个数数据…...

Spring Task初学
介绍 Spring Task 是Spring框架提供的任务调度工具,可以按照约定的时间自动执行某个代码逻辑 为什么要在Java程序中使用Spring Task? 运行效果 cron表达式:一般日和周不会同时出现 入门案例 启动类添加注解EnableScheduling开始任务调度 创建MyTask类…...

同花顺问财数据获取终极指南:Python量化分析的高效解决方案
同花顺问财数据获取终极指南:Python量化分析的高效解决方案 【免费下载链接】pywencai 获取同花顺问财数据 项目地址: https://gitcode.com/gh_mirrors/py/pywencai 在金融数据分析和量化投资领域,获取实时、准确的股票数据是每个分析师面临的核心…...

基于PSoC 6的BLE低功耗蓝牙射频系统设计与深度优化实践
1. 项目概述与核心价值最近在做一个智能穿戴设备的原型,核心需求是极致的低功耗和稳定的无线连接。市面上现成的蓝牙模块方案虽然多,但要么功耗不够理想,要么外围电路复杂,要么成本控制不下来。折腾了一圈,最后还是把目…...
)
Kafka 核心组件及其作用(全解)
Kafka 是一个分布式、高吞吐量、高可用的消息队列与流处理平台,其架构设计围绕"水平扩展、持久化存储、低延迟"三大核心目标展开。以下是 Kafka 所有核心组件的详细解析,包含原理、作用、关键特性和生产级最佳实践。 一、Kafka 整体架构概览 K…...

氧气设备市场深度解读:从生命支持到全场景氧疗的千亿赛道
一、市场规模稳步攀升,氧气设备进入增长快车道根据QYResearch(北京恒州博智国际信息咨询有限公司)最新统计数据,2025年全球氧气设备市场销售额已达152.0亿美元,预计到2032年将增长至234.9亿美元,年复合增长…...

大模型没有灵魂,但欺骗性极强——写在 AI 情感幻觉爆发的时代
大模型没有灵魂,但欺骗性极强 从一次「塔罗灵异事件」说起 最近 Reddit 上有个帖子刷屏了。 一位用户长期把 DeepSeek 当心理倾诉对象,向它输入私密日记、情绪碎片,偶尔用它解塔罗牌。某天,她问 DeepSeek「塔罗怎么看我」&…...

LyricsX:macOS歌词同步的终极解决方案
LyricsX:macOS歌词同步的终极解决方案 【免费下载链接】LyricsX 🎶 Ultimate lyrics app for macOS. 项目地址: https://gitcode.com/gh_mirrors/ly/LyricsX 还在为macOS上找不到好用的歌词应用而烦恼吗?LyricsX为你带来了一站式的智能…...

GNSS数据处理新手避坑:用GAMP_GOOD下载IGS/MGEX数据,从配置.cfg到成功运行的完整流程
GNSS数据处理实战:从GAMP_GOOD配置到IGS/MGEX数据高效下载全解析 当第一次打开GAMP_GOOD软件包时,很多GNSS领域的研究者都会感到既兴奋又困惑——这个被广泛推荐的下载工具确实能一站式获取IGS和MGEX数据,但配置文件的复杂性和报错信息的晦涩…...

API中转站接入到知识库问答时,怎么做平台对比
知识库问答是很多团队接入大模型的第一站。 它看起来简单:用户提问,检索文档,把上下文发给模型,再返回答案。但真正上线后,问题会多很多。上下文太长怎么办?模型乱答怎么办?图片和 PDF 怎么处理…...

3步高效解决方案:Calibre电子书元数据自动化管理
3步高效解决方案:Calibre电子书元数据自动化管理 【免费下载链接】calibre-douban Calibre new douban metadata source plugin. Douban no longer provides book APIs to the public, so it can only use web crawling to obtain data. This is a calibre Douban p…...

从AD到嘉立创:一个嵌入式工程师的紫色PCB打样与SMT贴片全记录
从AD到嘉立创:一个嵌入式工程师的紫色PCB打样与SMT贴片全记录 作为一名嵌入式开发者,我们往往更熟悉代码和算法,但当需要将设计转化为实体电路板时,硬件生产流程却可能让人望而生畏。本文将分享我使用Altium Designer设计电路并通…...