Android生成Java AIDL
AIDL:Android Interface Definition Language
AIDL是为了实现进程间通信而设计的Android接口语言
Android进程间通信有多种方式,Binder机制是其中最常见的一种
AIDL的本质就是基于对Binder的运用从而实现进程间通信
这篇博文从实战出发,用一个尽可能精简的Demo,实现两个App(也是两个进程:服务端mainapp、客户端otherapp)通过AIDL的跨进程通信
一.创建两个App
按照下列步骤先创建两个App:
(1).新建一个开发文件夹(本Demo中命名为aidl-test)

(2).使用AndroidStudio在aidl-test文件夹下创建第一个Empty Activity的空App:mainapp
为了后续方便起见
创建完成后,把Studio默认创建的MainActivity.java名字改一下,改成MainAppActivty.java

(3).创建第二个Empty Activity的空App:otherapp

两个空App创建完成了:

二.在mainapp中创建一个Service
上一节中新建了两个空App:mainapp和otherapp
现在就先在mainapp中实现一个service
使用方便又快捷的studio创建MainAppService.java


可以看到新建的MainAppService会自动实现一个onBind(Intent intent)方法,这个方法后续我会在其中进行代码实现,它需要在其他进程连接到Service时,返回一个继承了android.os.Binder的对象
先在 MainAppActivity 和 MainAppService 中添加一些必要的生命周期函数代码
再在 MainAppService 中添加:
onBind(Intent intent):被客户端绑定时执行
onUnbind(Intent intent):被客户端解绑时执行
@com/android/mainapp/MainAppActivity.javapackage com.android.mainapp;import androidx.appcompat.app.AppCompatActivity;import android.content.Intent;
import android.os.Bundle;
import android.util.Log;public class MainAppActivity extends AppCompatActivity {private String TAG = "AIDL-MainAppActivity";@Overrideprotected void onCreate(Bundle savedInstanceState) {super.onCreate(savedInstanceState);Log.v(TAG, "onCreate()");setContentView(R.layout.activity_main);}@Overrideprotected void onDestroy() {super.onDestroy();Log.v(TAG, "onDestroy()");}
}
@com/android/mainapp/MainAppService.java package com.android.mainapp;import android.app.Service;
import android.content.Intent;
import android.os.IBinder;
import android.util.Log;public class MainAppService extends Service {private String TAG = "AIDL-MainAppService";public MainAppService() {}@Overridepublic void onCreate() {super.onCreate();}@Overridepublic void onStart(Intent intent, int startId) {Log.v(TAG, "onStart()");}@Overridepublic IBinder onBind(Intent intent) {// TODO: Return the communication channel to the service.throw new UnsupportedOperationException("Not yet implemented");}@Overridepublic boolean onUnbind(Intent intent) {Log.v(TAG, "onUnbind()");return true;}@Overridepublic void onDestroy() {super.onDestroy();Log.v(TAG, "onDestroy()");}
}三.mainapp中实现AIDL
依然使用方便又快捷的AndroidStudio在mainapp的main目录下创建一个名为IAppAidlInterface.aidl 的AIDL文件


AndroidStudio创建 IAppAidlInterface.aidl 会自动实现一个默认的可用于进程间传参通信的void basicTypes(...)函数,其参数是java的几种基础数据类型
除此之外,AIDL还支持多种其他数据类型:byte、short、char、charSequence、 List、 Map等
除了AndroidStudio自动创建的basicTypes(...)函数,我在AIDL文件里面再新增一个setData(..)函数,用于后面跨进程的数据传输,虽然使用AndroidStudio自动生成的basicTypes(...)也是可以的,但是自己创建一个函数会更具有代表性.

在本篇博文最开始就阐述过,AIDL的本质是对Binder的运用,从而实现进程间通信
那么现在Binder在哪呢?
IAppAidlInterface.aidl文件创建之后,build一下工程,AndroidStudio会在build目录下创建一个aidl_source_output_dir文件夹,同时在这个文件夹下创建与IAppAidlInterface.aidl包名、文件名相同的文件夹目录和java文件

IAppAidlInterface.java文件中通过继承android.os.Binder创建一个抽象的代理类stub,这个stub抽象代理类主要做如下几件事:
通过stub自身实例实现进程内部的通信
通过实现一个内部代理类Porxy用于跨进程通信
重写Binder中的onTransact()函数,实现AIDL接口文件中声明的函数进行数据传输
传输的数据必须是序列化的android.os.Parcel类型数据

当然,如果项目需要对AIDL的Binder实现过程进行自定义封装,方便项目中对进程间通信机制进行定制化,那么,完全可以不采用AndroidStudio自动生成的IAppAidlInterface.java,只须要按照自己的需要实现IAppAidlInterface.java中对Binder进程间通信的实现过程就行了
因为归根结底,AIDL实现进程间通信的基础就是Binder机制,只要使用Binder实现AIDL进程间通信的目的就可以了
IAppAidlInterface.java就先讨论到这里,这篇博文主要是对AIDL的使用进行研究,其对Binder机制的实现与封装不在此做深入探讨
后续会专门开一篇博文讲解AIDL对Binder机制的内部实现,以及用户如何自定义封装
四.otherapp中也实现AIDL
上一节中,作为服务端的mainapp里创建了一个AIDL文件,客户端的otherapp中也需要实现一份相同的AIDL,要不然客户端就无法引用到了对应的函数和stub等了
很简单,把mainapp中的AIDL文件整个包名目录直接拷贝到otherapp中即可,然后再build一下工程

接下来,需要添加一些代码,实现客户端otherapp与服务端mainapp的相连
五.mainapp中添加代码
前文中已经展示过,MainAppService会随着MainAppActivity的onCreate()和onDestroy()生命周期startService()和stopService()
mainapp中要添加的代码在MainAppService.java中,需要在MainAppService中做下面一些事情:
- 使用匿名内部类实现IAppAidlInterface.Stub抽象类,用于实现IAppAidlInterface.aidl中的接口函数和onBinder()时返回匿名内部类实例
 onBinder()中启动一个线程,每1秒轮循接收客户端发送过来的数据

这里提到个题外的知识点,Service中除了onBinder()函数外还有个onRebind()函数
如果同一客户端每次unBindService()之后再bindService()并且发送的Intent也一样,那么onBind()就只会在服务端第一次被这个客户端连接时才执行,后续重连时都不会再执行了。
而onRebind()在服务端第一次被连接时不会被执行,但是之后每次重连都会执行,不论Intent是否一样。
如果想要onBind()在同一客户端连接时都能执行,客户端在每次bindService()时,改变发送Intent的type或其他成员变量就行了
定义一个string变量用于接收客户端传过来的字符串,定义一个boolean变量用于控制线程

AndroidMainfest.xml中为MainAppService添加Service标签

六.otherapp中添加代码
otherapp里面主要需要做如下几件事:
- 新建一个Intent,用于连接服务端mainapp
Intent的Component设置为Sevice的包名和类名 
- 新建两个button,用于控制bindService()绑定和unbindService()解绑

- 重写Service连接和断开的两个基础函数onServiceConnected()和onServiceDisconnected()

- AndroidMainfest.xml中添加查询包名权限,以便otherapp可以查询到mainapp,或者直接指定查询mainapp的包名

七.运行、验证
到此,一个最基础的使用AIDL实现两个App(服务端mainapp、客户端otherapp)之间通信的demo代码就完成了,下面我们来验证一下。
编译、安装apk:
项目build Apk后会生成两个apk,两个都install上


运行验证:
注:本demo中代码的所有日志TAG都加上了AIDL前缀,方便日志打印验证
先启动一下mainapp,MainAppService不会被启动但是会被注册到系统,因为在mainapp的AndroidMainfest.xml中对MainAppService进行了Service标签添加。

退出mainapp后,再打开otherapp:

现在执行几次"Bind Service"和"Unbind Service",就会看到如下日志打印:

好,通过这个精简Demo,初步实现了两个App通过AIDL的跨进程通信
八.源代码
接下来逐一展示实现的源码
mainapp源码:

D:\Codes\aidl-test\app\src\main\aidl\com\android\mainapp\IAppAidlInterface.aidl
// IAppAidlInterface.aidl
package com.android.mainapp;// Declare any non-default types here with import statementsinterface IAppAidlInterface {/*** Demonstrates some basic types that you can use as parameters* and return values in AIDL.*/void basicTypes(int anInt, long aLong, boolean aBoolean, float aFloat,double aDouble, String aString);void setStringData(String strData);
}
D:\Codes\aidl-test\app\src\main\java\com\android\mainapp\MainAppActivity.java
package com.android.mainapp;import androidx.appcompat.app.AppCompatActivity;import android.content.Intent;
import android.os.Bundle;
import android.util.Log;public class MainAppActivity extends AppCompatActivity {private String TAG = "AIDL-MainAppActivity";@Overrideprotected void onCreate(Bundle savedInstanceState) {super.onCreate(savedInstanceState);Log.v(TAG, "onCreate()");setContentView(R.layout.activity_main);}@Overrideprotected void onDestroy() {super.onDestroy();Log.v(TAG, "onDestroy()");}
}
D:\Codes\aidl-test\app\src\main\java\com\android\mainapp\MainAppService.java
package com.android.mainapp;import android.app.Service;
import android.content.Intent;
import android.os.IBinder;
import android.os.RemoteException;
import android.util.Log;public class MainAppService extends Service {private String TAG = "AIDL-MainAppService";private String mStrData;private boolean mSetServiceRunning = true;public MainAppService() {}@Overridepublic void onCreate() {super.onCreate();Log.v(TAG, "onStart()");}@Overridepublic void onStart(Intent intent, int startId) {Log.v(TAG, "onStart()");}IAppAidlInterface.Stub mStub = new IAppAidlInterface.Stub() {@Overridepublic void basicTypes(int anInt, long aLong, boolean aBoolean, float aFloat, double aDouble, String aString) throws RemoteException {}@Overridepublic void setStringData(String strData) {mStrData = strData;}};@Overridepublic IBinder onBind(Intent intent) {Log.v(TAG, "onBind()");mSetServiceRunning = true;new Thread() {@Overridepublic void run() {super.run();while (mSetServiceRunning) {try {Thread.sleep(1000);Log.v(TAG, "mStrData:"+mStrData);} catch (InterruptedException e) {e.printStackTrace();}}}}.start();return mStub;}@Overridepublic boolean onUnbind(Intent intent) {Log.v(TAG, "onUnbind()");mSetServiceRunning = false;return true;}@Overridepublic void onDestroy() {super.onDestroy();Log.v(TAG, "onDestroy()");}
}
D:\Codes\aidl-test\app\src\main\AndroidManifest.xml
<?xml version="1.0" encoding="utf-8"?>
<manifest xmlns:android="http://schemas.android.com/apk/res/android"xmlns:tools="http://schemas.android.com/tools"><applicationandroid:allowBackup="true"android:dataExtractionRules="@xml/data_extraction_rules"android:fullBackupContent="@xml/backup_rules"android:icon="@mipmap/ic_launcher"android:label="@string/app_name"android:roundIcon="@mipmap/ic_launcher_round"android:supportsRtl="true"android:theme="@style/Theme.Mainapp"tools:targetApi="31"><serviceandroid:name=".MainAppService"android:enabled="true"android:exported="true"></service><activityandroid:name=".MainAppActivity"android:exported="true"><intent-filter><action android:name="android.intent.action.MAIN" /><category android:name="android.intent.category.LAUNCHER" /></intent-filter><meta-dataandroid:name="android.app.lib_name"android:value="" /></activity></application></manifest>
otherapp源码:

D:\Codes\aidl-test\otherapp\src\main\aidl\com\android\mainapp\IAppAidlInterface.aidl
// IAppAidlInterface.aidl
package com.android.mainapp;// Declare any non-default types here with import statementsinterface IAppAidlInterface {/*** Demonstrates some basic types that you can use as parameters* and return values in AIDL.*/void basicTypes(int anInt, long aLong, boolean aBoolean, float aFloat,double aDouble, String aString);void setStringData(String strData);
}
D:\Codes\aidl-test\otherapp\src\main\java\com\android\otherapp\OtherAppMainActivity.java
package com.android.otherapp;import androidx.appcompat.app.AppCompatActivity;import android.content.ComponentName;
import android.content.Context;
import android.content.Intent;
import android.content.ServiceConnection;
import android.os.Bundle;
import android.os.IBinder;
import android.os.RemoteException;
import android.util.Log;
import android.view.View;import com.android.mainapp.IAppAidlInterface;public class OtherAppMainActivity extends AppCompatActivity implements View.OnClickListener, ServiceConnection {private String TAG = "AIDL-OtherAppActivity";private int mICount = 0;private Intent mServiceIntent;private IAppAidlInterface mBinder;@Overrideprotected void onCreate(Bundle savedInstanceState) {super.onCreate(savedInstanceState);setContentView(R.layout.activity_other_app_main);mServiceIntent = new Intent();mServiceIntent.setComponent(new ComponentName("com.android.mainapp", "com.android.mainapp.MainAppService"));findViewById(R.id.btnBindMainAppService).setOnClickListener(this);findViewById(R.id.btnUnBindMainAppService).setOnClickListener(this);}@Overridepublic void onClick(View view) {switch (view.getId()) {case R.id.btnBindMainAppService: {Log.v(TAG, "onClick():btnBindMainAppService");bindService(mServiceIntent, this, Context.BIND_AUTO_CREATE);}break;case R.id.btnUnBindMainAppService: {Log.v(TAG, "onClick():btnUnBindMainAppService");unbindService(this);mBinder = null;}break;}}@Overridepublic void onServiceConnected(ComponentName componentName, IBinder iBinder) {if (mBinder == null) {mBinder = IAppAidlInterface.Stub.asInterface(iBinder);mICount++;Log.v(TAG, "onServiceConnected() 第 " + mICount + " 次");try {String strData = "第" + mICount + "次连接Service成功!";mBinder.setStringData(strData);} catch (RemoteException e) {e.printStackTrace();}}}@Overridepublic void onServiceDisconnected(ComponentName componentName) {Log.v(TAG, "onServiceDisconnected");}
}
D:\Codes\aidl-test\otherapp\src\main\res\layout\activity_other_app_main.xml
<?xml version="1.0" encoding="utf-8"?>
<LinearLayoutxmlns:android="http://schemas.android.com/apk/res/android"xmlns:app="http://schemas.android.com/apk/res-auto"xmlns:tools="http://schemas.android.com/tools"android:layout_width="match_parent"android:layout_height="match_parent"android:orientation="vertical"tools:context=".OtherAppActivity"><TextViewandroid:layout_width="wrap_content"android:layout_height="wrap_content"android:textAllCaps="false"android:text="OtherApp"/><Buttonandroid:id="@+id/btnBindMainAppService"android:layout_width="wrap_content"android:layout_height="wrap_content"android:textAllCaps="false"android:text="Bind  Service" /><Buttonandroid:id="@+id/btnUnBindMainAppService"android:layout_width="wrap_content"android:layout_height="wrap_content"android:textAllCaps="false"android:text="UnBind Service" /></LinearLayout>
D:\Codes\aidl-test\otherapp\src\main\AndroidManifest.xml
<?xml version="1.0" encoding="utf-8"?>
<manifest xmlns:android="http://schemas.android.com/apk/res/android"><!--<uses-permission android:name="android.permission.QUERY_ALL_PACKAGES"/>--><queries><package android:name="com.android.mainapp"/></queries><applicationandroid:allowBackup="true"android:icon="@mipmap/ic_launcher"android:label="@string/app_name"android:roundIcon="@mipmap/ic_launcher_round"android:supportsRtl="true"android:theme="@style/Theme.Mainapp"><activityandroid:name=".OtherAppMainActivity"android:exported="true"><intent-filter><action android:name="android.intent.action.MAIN" /><category android:name="android.intent.category.LAUNCHER" /></intent-filter><meta-dataandroid:name="android.app.lib_name"android:value="" /></activity></application></manifest>
相关文章:
Android生成Java AIDL
AIDL:Android Interface Definition Language AIDL是为了实现进程间通信而设计的Android接口语言 Android进程间通信有多种方式,Binder机制是其中最常见的一种 AIDL的本质就是基于对Binder的运用从而实现进程间通信 这篇博文从实战出发,用一个尽可能…...

嵌入式数据库sqlite和rocksdb的介绍以及对比
SQLite 和 RocksDB 都是非常流行的嵌入式数据库系统,但它们的设计理念和应用场景有所不同。下面是对这两个数据库系统的详细介绍以及它们之间的主要区别。 SQLite 简介 SQLite 是一个轻量级的关系数据库管理系统,完全由 C 语言编写而成。它以单一文件…...
)
数据结构之抽象数据类型(c语言版)
抽象数据类型的定义格式如下: ADT 抽象数据类型名{数据对象:<数据对象的定义>数据关系:<数据关系的定义>基本操作:<基本操作的定义> }ADT 抽象数据类型名 下面以复数为例给出完整的抽象数据类型的定义 ADT C…...
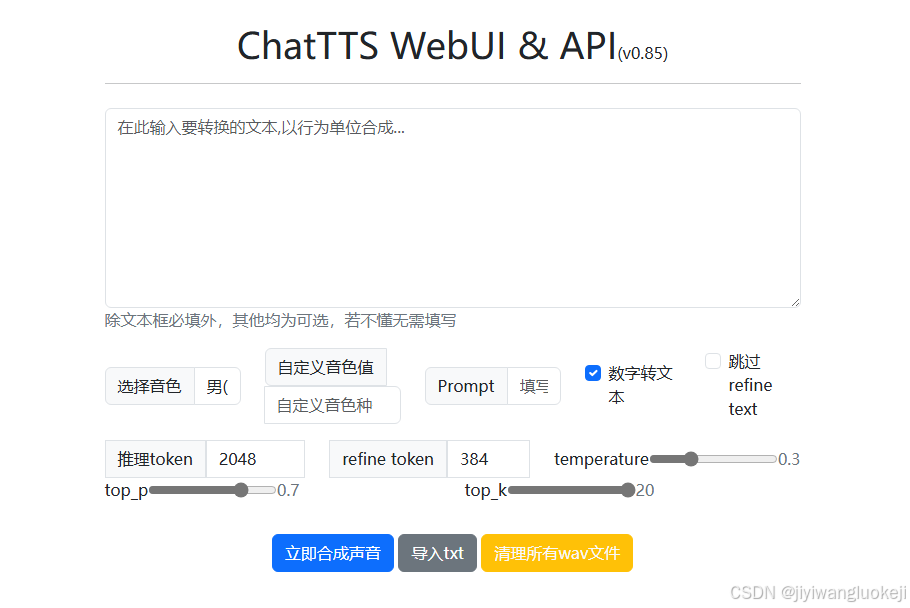
《ChatTTS一键安装详细教程》
ChatTTS 属于一种依托深度学习的文本转语音技术,能够把文本内容转换成自然且流畅,宛如真人发声的语音。ChatTTS 可以更出色地领会,理解文本所蕴含的情感、语调和语义,进而在语音输出时展现出更为精准和鲜活的各种情感。借助对大规…...

物联网之ESP32配网方式、蓝牙、WiFi
MENU 前言SmartConfig(智能配网)AP模式(Access Point模式)蓝牙配网Web Server模式WPS配网(Wi-Fi Protected Setup)Provisioning(配网服务)静态配置(硬编码)总结 前言 ESP32配网(Wi-Fi配置)的方式有多种,每种方式都有各自的优缺点。 根据具体项目需求,可以…...
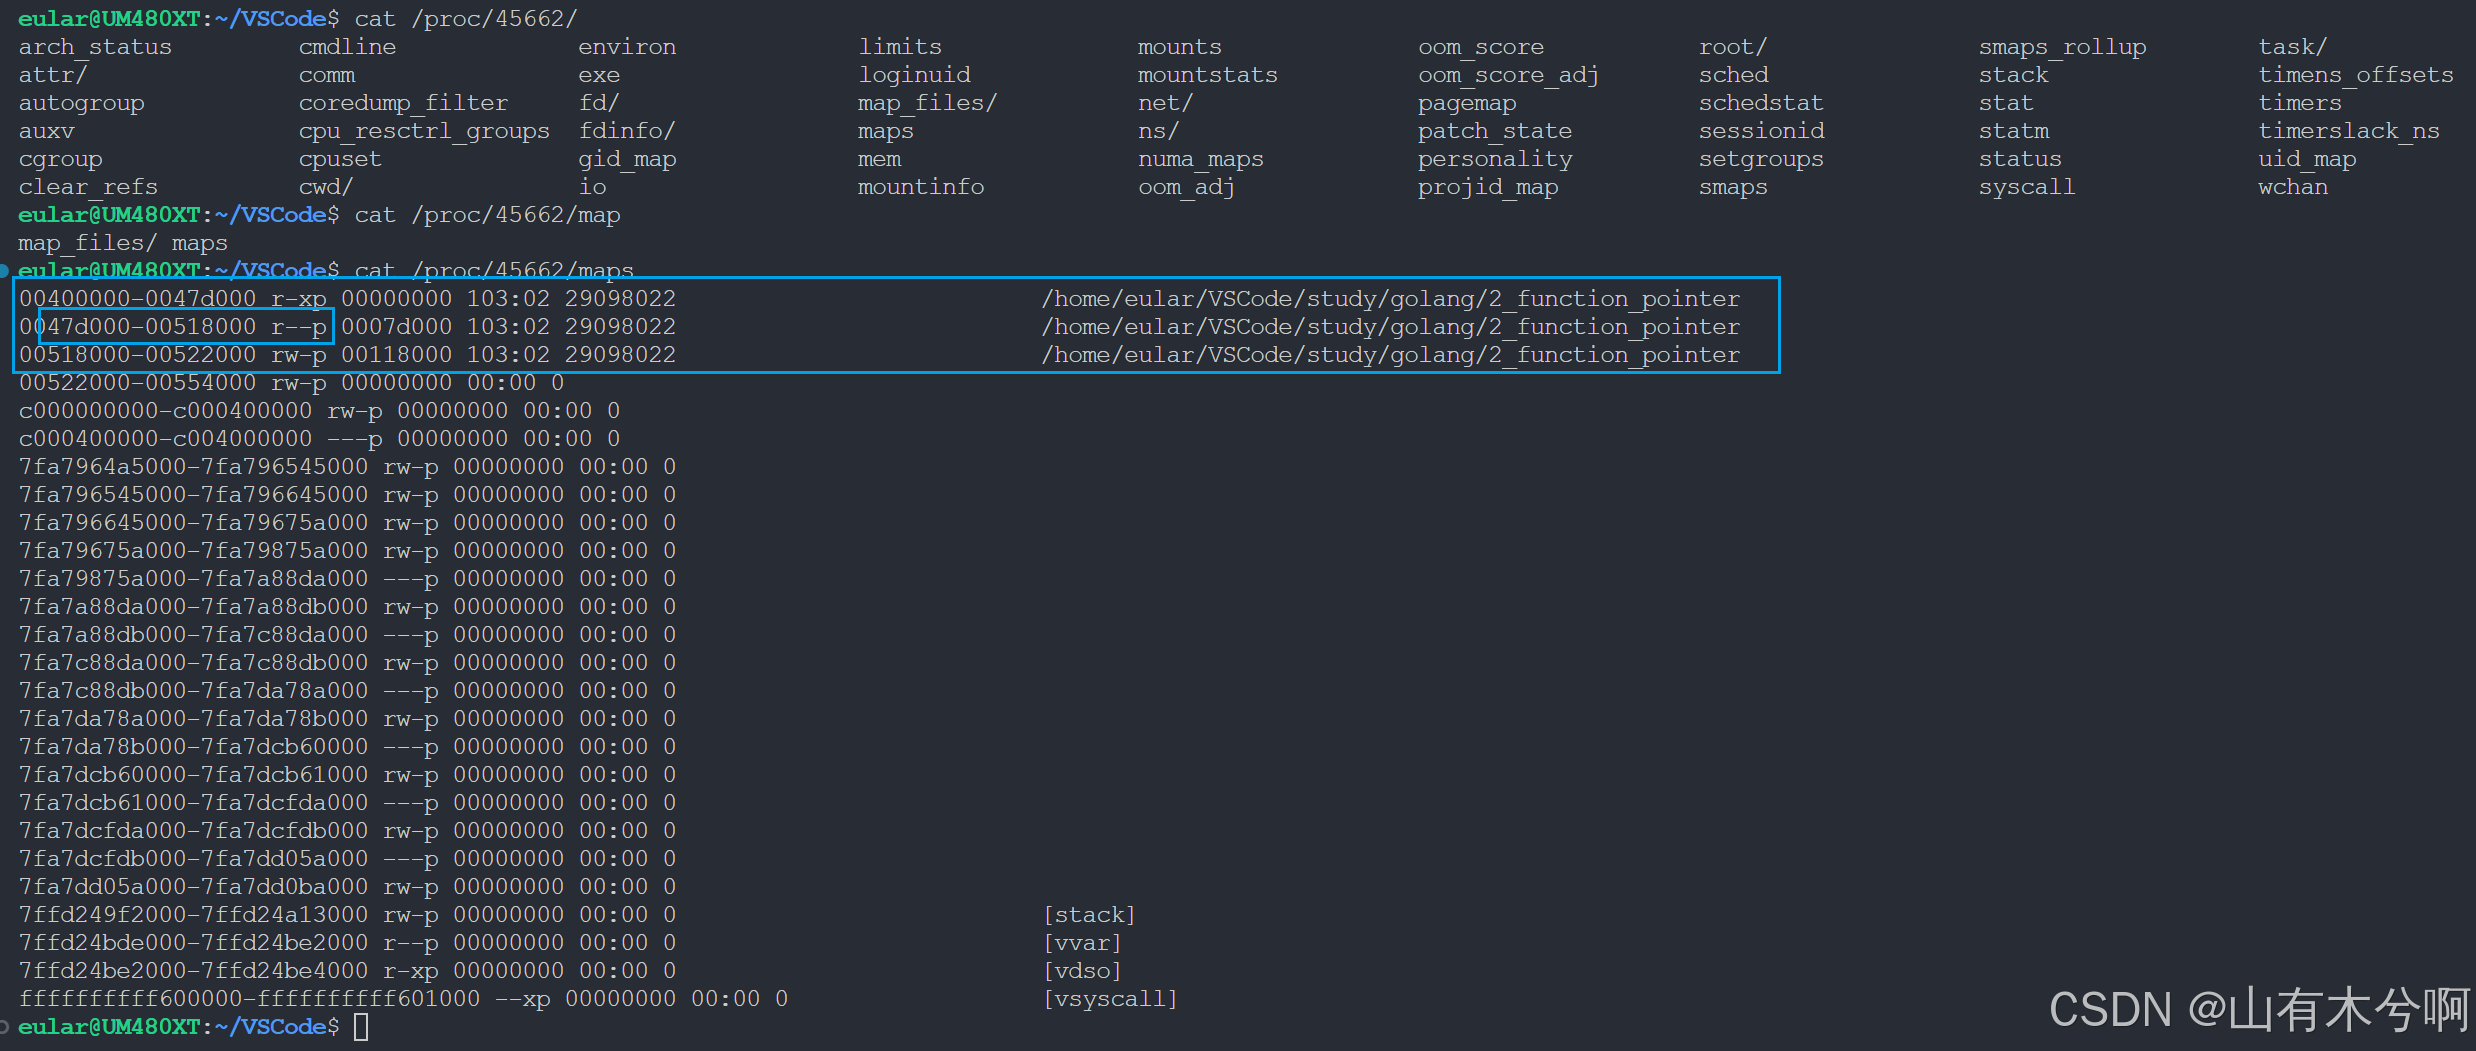
golang 字符串浅析
go的字符串是只读的 测试源代码 package mainimport ("fmt""unsafe" )func swap(x, y string) (string, string) {return y, x }func print_string(obj *string, msg string) {string_ptr : (*[2]uintptr)(unsafe.Pointer(obj))first_obj_addr : string_…...
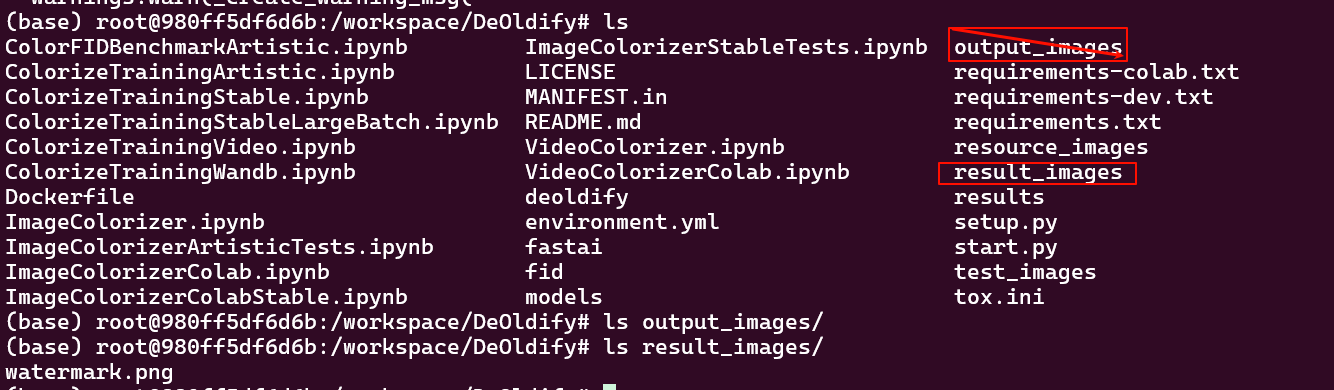
jantic/DeOldify部署(图片上色)附带Dockerfile和镜像
1. 克隆代码到DeOldify git clone https://github.com/jantic/DeOldify.git DeOldifyDeOldify源码 2. 安装依赖 这里会安装python以及创建deoldify环境 cd DeOldify conda env create -f environment.yml(base) rootDESKTOP-1FOD6A8:~/DeOldify# conda env create -f environm…...
)
2024年9月9日--9月15日(freex源码抄写+ue5肉鸽视频一节调节)
现在以工作为中心,其他可以不做硬性要求。周一到周四,晚上每天300行freex源码抄写,周六日每天1000行。每周3200行,每天完成该完成的即可,早上有时间时进行一小节独立游戏相关的视频教程作为调节即可,不影响…...

CLIP官方github代码详解
系列文章目录 文章目录 系列文章目录一、Usage1、conda install --yes -c pytorch pytorch1.7.1 torchvision cudatoolkit11.02、代码3、 二、1、2、3、 三、1、2、3、 四、1、2、3、 五、1、2、3、 六、1、2、3、 七、1、2、3、 八、1、2、3、 一、Usage 1、conda install --…...

ElementUI 布局——行与列的灵活运用
ElementUI 布局——行与列的灵活运用 一 . 使用 Layout 组件1.1 注册路由1.2 使用 Layout 组件 二 . 行属性2.1 栅格的间隔2.2 自定义元素标签 三 . 列属性3.1 列的偏移3.2 列的移动 在现代网页设计中,布局是构建用户界面的基石。Element UI 框架通过其强大的 <e…...

Docker快速部署Apache Guacamole
Docker快速部署Apache Guacamole ,实现远程访问 git clone "https://github.com/boschkundendienst/guacamole-docker-compose.git" cd guacamole-docker-compose ./prepare.sh docker-compose up -dhttps://IP地址:8443/ 用户名:guacadmin 密码:guacadmin docker …...
---- 书写类(1))
C++学习笔记----7、使用类与对象获得高性能(一)---- 书写类(1)
1、表格处理程序示例 表格处理程序是一个二维的“细胞”网格,每个格子包含了一个数字或者字符串。专业的表格处理程序比如微软的Excel提供了执行数学运算的能力,比如计算格子中的值的和。表格处理程序示例无意挑战微软的市场地位,但是对于演示…...

es6中set和map的区别
在ES6(ECMAScript 2015)中,Set 和 Map 是两种新的集合类型,它们提供了更高级的数据结构来存储唯一值或键值对集合。尽管它们在功能上有些相似,但它们在用途和内部机制上存在一些关键区别。 1. 基本概念 Set࿱…...

高级实时通信:基于 Python 的 WebSocket 实现与异步推送解决方案
高级实时通信:基于 Python 的 WebSocket 实现与异步推送解决方案 目录 🟢 WebSocket 协议概述🔵 在 FastAPI 中实现 WebSocket🟣 Django Channels 实现异步实时通信🔴 使用 Redis 实现实时推送 🟢 1. WebS…...

大二上学期详细学习计划
本学习完成目标: 项目: 书籍:《mysql必知必会》《java核心技术卷》(暂时)加强JavaSE的学习,掌握Java核心Mysqlsql(把牛客上的那50道sql语句题写完)gitmaven完成springboot项目&…...
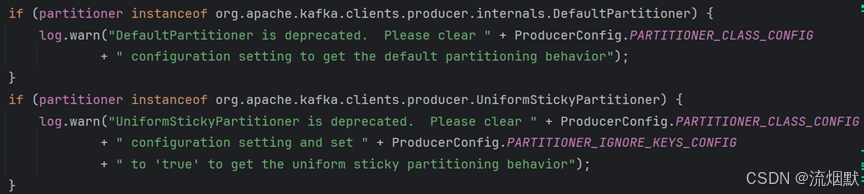
Kafka【十四】生产者发送消息时的消息分区策略
【1】分区策略 Kafka中Topic是对数据逻辑上的分类,而Partition才是数据真正存储的物理位置。所以在生产数据时,如果只是指定Topic的名称,其实Kafka是不知道将数据发送到哪一个Broker节点的。我们可以在构建数据传递Topic参数的同时ÿ…...

SQL优化:执行计划详细分析
视频讲解:SQL优化:SQL执行计划详细分析_哔哩哔哩_bilibili 1.1 执行计划详解 id select_type table partitions type possible_keys key key_len ref rows filtered Extra 1.1.1 ID 【概…...

Android Studio -> Android Studio 获取release模式和debug模式的APK
Android Studio上鼠标修改构建类型 Release版本 激活路径:More tool windows->Build Variants->Active Build Variant->releaseAPK路径:Project\app\build\intermediates\apk\app-release.apk Debug版本 激活路径:More tool w…...

基于 SpringBoot 的实习管理系统
专业团队,咨询送免费开题报告,大家可以来留言。 摘 要 随着信息化时代的到来,管理系统都趋向于智能化、系统化,实习管理也不例外,但目前国内仍都使用人工管理,市场规模越来越大,同时信息量也越…...

vmware workstation 17 linux版
链接: https://pan.baidu.com/s/1F3kpNEi_2GZW0FHUO-8p-g?pwd6666 提取码: 6666 1 先安装虚拟机 不管什么错误 先安装vmware workstation 17 2 编译 覆盖安装vmware-host-modules-workstation-17.5.1 只需这样就可以 # sudo apt install dkms build-essential bc iw…...

2026生鲜店收银软件特点功能对比
每天傍晚高峰期,生鲜店门口排起的长队总是让店主心头一紧。顾客手里拿着刚挑好的蔬菜水果,眼神里透着急切,而收银台前的店员却还在手忙脚乱地查找商品代码、手动输入重量,甚至因为系统卡顿导致支付失败。这种场景不仅流失了潜在客…...

【Canvas动画录制实战】从WebM到MP4:MediaRecorder全流程解析与避坑指南
1. Canvas动画录制基础与准备工作 如果你正在开发一个数据可视化项目或者HTML5小游戏,可能会遇到需要将动态内容保存为视频的需求。Canvas动画录制就是解决这个问题的关键技术方案。相比传统的录屏软件,直接通过代码录制能获得更清晰的画质,还…...

从零部署开源语音助手:OpenClaw项目实战与二次开发指南
1. 项目概述:从开源代码到可用的语音助手看到leilei926524-tech/openclaw-voice-assistant这个项目标题,我的第一反应是:又一个基于开源代码的语音助手项目。在GitHub上,类似的项目多如牛毛,但真正能让一个普通开发者&…...

ESP32接入ChatGPT API:构建本地化AIoT智能交互终端
1. 项目概述:当ESP32遇见ChatGPT,开启本地化智能交互新玩法最近在捣鼓ESP32开发板,总想着给它加点“智能”的料。传统的物联网项目,比如温湿度监测、远程控制开关,虽然实用,但总觉得少了点“灵魂”。直到我…...

Godot游戏引擎与强化学习结合:从零构建AI智能体的实战指南
1. 项目概述:当游戏开发遇上强化学习如果你是一名游戏开发者,或者对游戏AI的实现抱有浓厚兴趣,那么“edbeeching/godot_rl_agents”这个项目绝对值得你花时间深入研究。简单来说,这是一个将当下最热门的强化学习技术与免费、开源的…...

基于Python/Flask的洗车店业务管理系统设计与实现
1. 项目概述:从“洗车”到“洗车服务”的数字化重构最近在GitHub上看到一个挺有意思的项目,叫“washing-cars”。光看名字,你可能会觉得这只是一个关于洗车的小工具或者记录表。但当我深入进去,才发现它远不止于此。这个项目本质上…...

开源机械臂技能化控制:从硬件驱动到应用集成的实践指南
1. 项目概述:从开源机械臂到技能控制台最近在机器人控制领域,一个名为esmatcm/openclaw-control-console-skill的项目引起了我的注意。乍一看,这像是一个围绕开源机械臂OpenClaw的控制台技能项目。作为一名长期混迹于硬件开源社区和机器人应用…...

如何用Kafka-King轻松管理Kafka集群:5分钟上手完整指南
如何用Kafka-King轻松管理Kafka集群:5分钟上手完整指南 【免费下载链接】Kafka-King A modern and practical kafka GUI client 💕🎉Kafka-King 是一款现代化、实用的 Kafka GUI 客户端,旨在通过直观的桌面界面简化 Apache Kafka …...

小红书自动化工具xhs-skill:接口逆向与数据采集实战指南
1. 项目概述:一个面向小红书内容创作的效率工具箱最近在逛GitHub的时候,发现了一个挺有意思的项目,叫PengJiyuan/xhs-skill。光看名字,你大概能猜到它和小红书有关,但具体是做什么的,可能有点模糊。作为一个…...

ASPICE汽车软件开发标准:V模型、能力等级与核心过程实战解析
1. 项目概述:为什么我们需要ASPICE这张“汽车软件地图”如果你在汽车行业,尤其是涉及软件、电子电气或系统开发的岗位待过一阵子,大概率会频繁听到一个词:ASPICE。它可能出现在项目启动会上,出现在供应商审核清单里&am…...