AutoML-sklearn and torch
一、auto-sklearn
1.1 环境依赖
-
额外安装swig 第三方库
-
linux 支持, mac,windows不支持
1.2 示例代码
time_left_for_this_task 设定任务最大时间
per_run_time_limit 每个子任务最大训练时间
include 可以限制任务训练的模型
import autosklearn.classification
import sklearn.model_selection
from sklearn import datasets
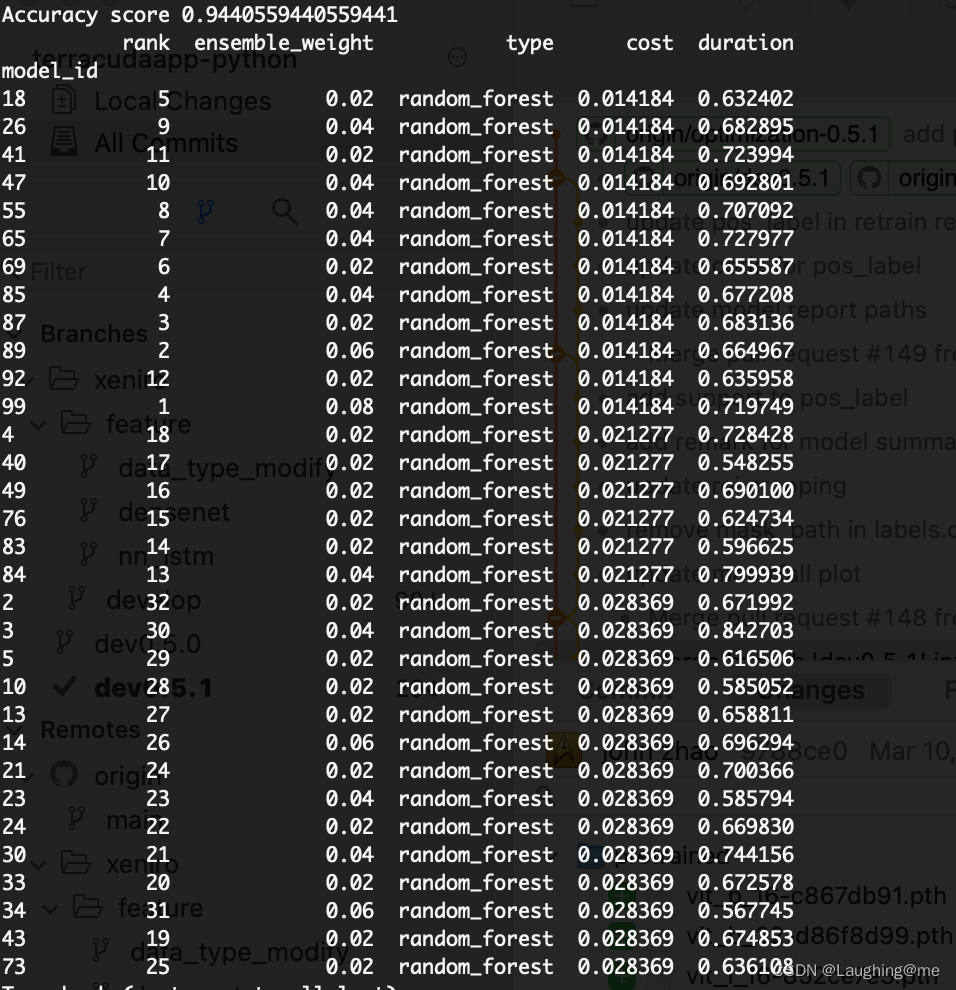
import sklearn.metricsif __name__ == "__main__":X, y = datasets.load_breast_cancer(return_X_y=True)X_train, X_test, y_train, y_test = \sklearn.model_selection.train_test_split(X, y, random_state=1)automl = autosklearn.classification.AutoSklearnClassifier(time_left_for_this_task=120,per_run_time_limit=30,tmp_folder="/tmp/autosklearn_classification_example_tmp",include={'classifier': ["random_forest"],'feature_preprocessor': ["no_preprocessing"]})automl.fit(X_train, y_train)y_hat = automl.predict(X_test)automl.get_models_with_weights()print("Accuracy score", sklearn.metrics.accuracy_score(y_test, y_hat))print(automl.leaderboard())models_with_weights = automl.get_models_with_weights()with open('../../preprocess/models_report.txt', 'w') as f:for model in models_with_weights:f.write(str(model) + '\n')
结果展示:
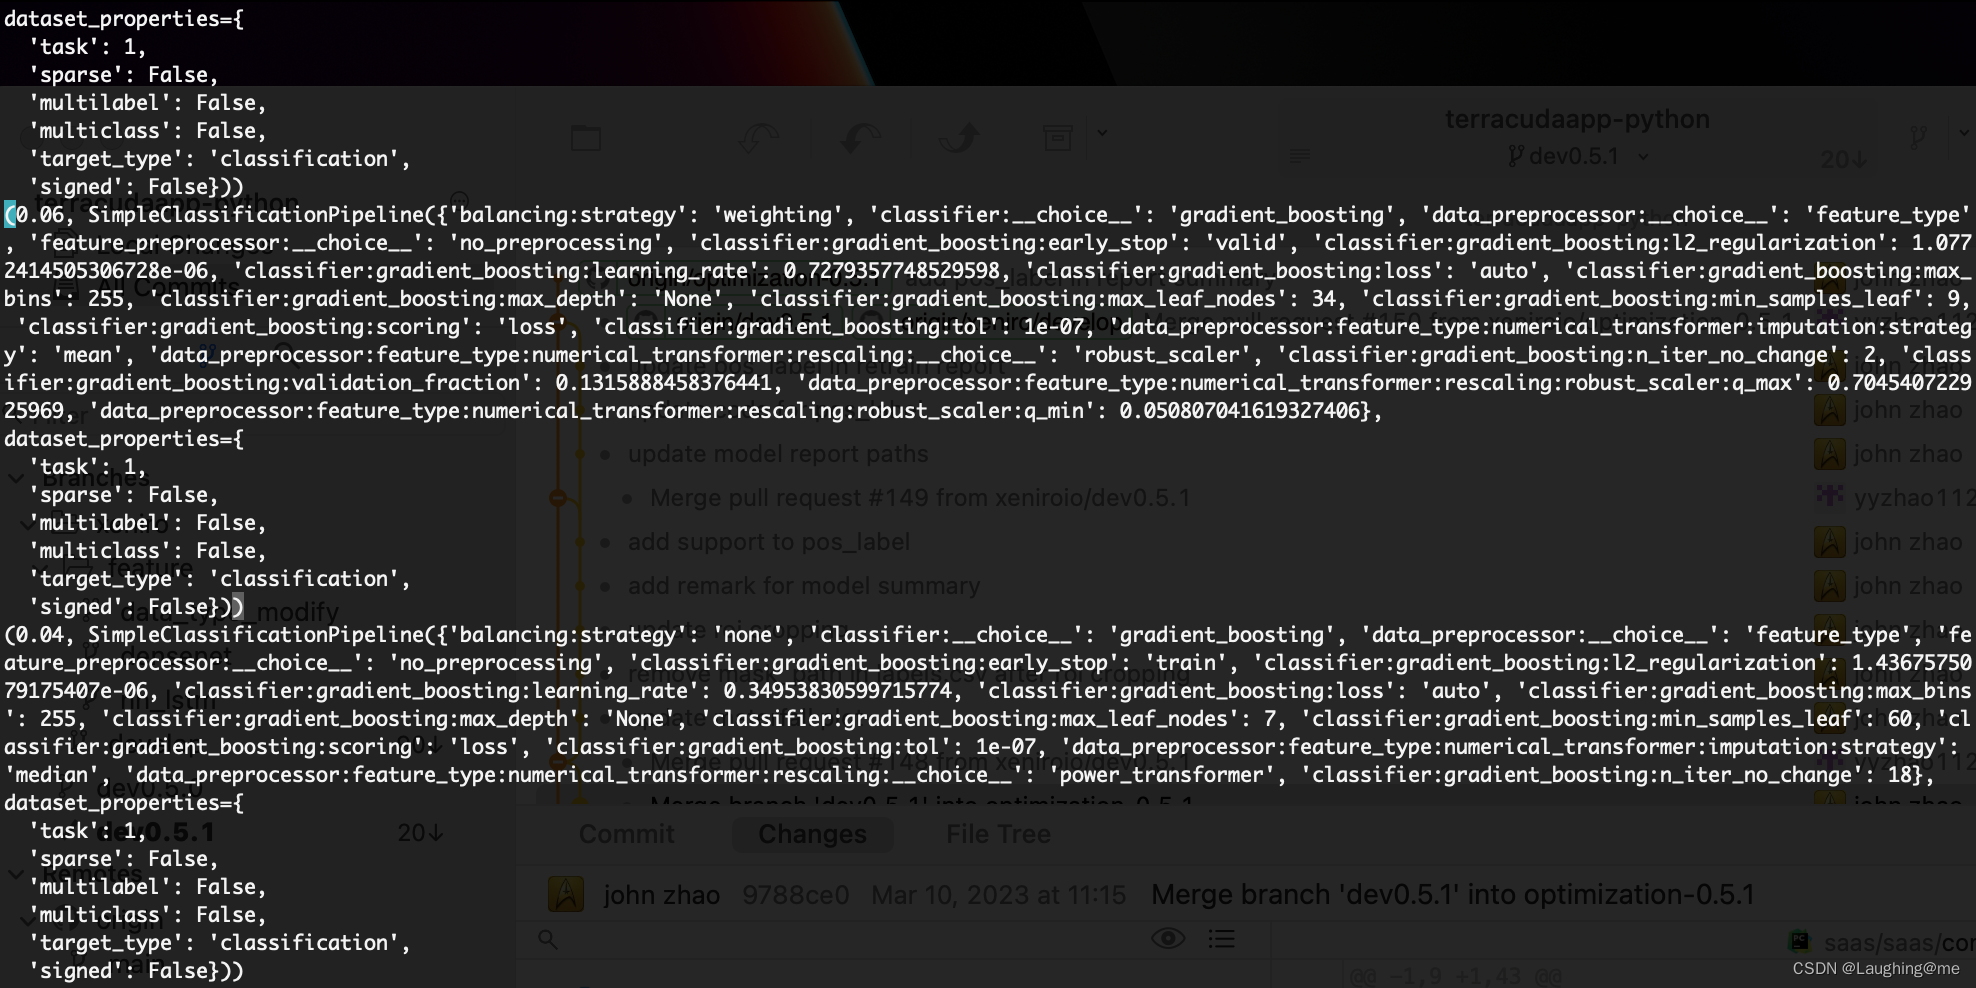
可以展示参数任务cost值排列顺序
以及训练参数配置:
1.3 模块扩展
在不支持的训练模块,可以扩展及自定义模型进行自动调参
代码示例:
继承AutoSklearnClassificationAlgorithm 并重写子方法
autosklearn.pipeline.components.classification.add_classifier(MLPClassifier) 将自定义模块注册至模块中
include 参数添加既可调用
"""
====================================================
Extending Auto-Sklearn with Classification Component
====================================================The following example demonstrates how to create a new classification
component for using in auto-sklearn.
"""
from typing import Optional
from pprint import pprintfrom ConfigSpace.configuration_space import ConfigurationSpace
from ConfigSpace.hyperparameters import (CategoricalHyperparameter,UniformIntegerHyperparameter,UniformFloatHyperparameter,
)import sklearn.metricsfrom autosklearn.askl_typing import FEAT_TYPE_TYPE
import autosklearn.classification
import autosklearn.pipeline.components.classification
from autosklearn.pipeline.components.base import AutoSklearnClassificationAlgorithm
from autosklearn.pipeline.constants import (DENSE,SIGNED_DATA,UNSIGNED_DATA,PREDICTIONS,
)from sklearn.datasets import load_breast_cancer
from sklearn.model_selection import train_test_split############################################################################
# Create MLP classifier component for auto-sklearn
# ================================================class MLPClassifier(AutoSklearnClassificationAlgorithm):def __init__(self,hidden_layer_depth,num_nodes_per_layer,activation,alpha,solver,random_state=None,):self.hidden_layer_depth = hidden_layer_depthself.num_nodes_per_layer = num_nodes_per_layerself.activation = activationself.alpha = alphaself.solver = solverself.random_state = random_statedef fit(self, X, y):self.num_nodes_per_layer = int(self.num_nodes_per_layer)self.hidden_layer_depth = int(self.hidden_layer_depth)self.alpha = float(self.alpha)from sklearn.neural_network import MLPClassifierhidden_layer_sizes = tuple(self.num_nodes_per_layer for i in range(self.hidden_layer_depth))self.estimator = MLPClassifier(hidden_layer_sizes=hidden_layer_sizes,activation=self.activation,alpha=self.alpha,solver=self.solver,random_state=self.random_state,)self.estimator.fit(X, y)return selfdef predict(self, X):if self.estimator is None:raise NotImplementedError()return self.estimator.predict(X)def predict_proba(self, X):if self.estimator is None:raise NotImplementedError()return self.estimator.predict_proba(X)@staticmethoddef get_properties(dataset_properties=None):return {"shortname": "MLP Classifier","name": "MLP CLassifier","handles_regression": False,"handles_classification": True,"handles_multiclass": True,"handles_multilabel": False,"handles_multioutput": False,"is_deterministic": False,# Both input and output must be tuple(iterable)"input": [DENSE, SIGNED_DATA, UNSIGNED_DATA],"output": [PREDICTIONS],}@staticmethoddef get_hyperparameter_search_space(feat_type: Optional[FEAT_TYPE_TYPE] = None, dataset_properties=None):cs = ConfigurationSpace()hidden_layer_depth = UniformIntegerHyperparameter(name="hidden_layer_depth", lower=1, upper=3, default_value=1)num_nodes_per_layer = UniformIntegerHyperparameter(name="num_nodes_per_layer", lower=16, upper=216, default_value=32)activation = CategoricalHyperparameter(name="activation",choices=["identity", "logistic", "tanh", "relu"],default_value="relu",)alpha = UniformFloatHyperparameter(name="alpha", lower=0.0001, upper=1.0, default_value=0.0001)solver = CategoricalHyperparameter(name="solver", choices=["lbfgs", "sgd", "adam"], default_value="adam")cs.add_hyperparameters([hidden_layer_depth,num_nodes_per_layer,activation,alpha,solver,])return cs# Add MLP classifier component to auto-sklearn.
autosklearn.pipeline.components.classification.add_classifier(MLPClassifier)
cs = MLPClassifier.get_hyperparameter_search_space()
print(cs)############################################################################
# Data Loading
# ============
def get_local_csv():import pandas as pdimport numpy as npdf = pd.read_csv("/data/projects/example/auto_ml/Radiomics-2D/features.csv")label = pd.read_csv("/data/projects/example/auto_ml/Radiomics-2D/labels.csv")["label"]label = np.array([1 if l == "Positive" else 0 for l in label])return df.to_numpy(), label# local
X, y = get_local_csv()# breast cancer
# X, y = load_breast_cancer(return_X_y=True)X_train, X_test, y_train, y_test = train_test_split(X, y)############################################################################
# Fit MLP classifier to the data
# ==============================clf = autosklearn.classification.AutoSklearnClassifier(time_left_for_this_task=60,per_run_time_limit=30,include={"classifier": ["gradient_boosting", "adaboost", "MLPClassifier"],'feature_preprocessor': ["no_preprocessing"]},
)
clf.fit(X_train, y_train)############################################################################
# Print test accuracy and statistics
# ==================================y_pred = clf.predict(X_test)
print("accuracy: ", sklearn.metrics.accuracy_score(y_pred, y_test))
print(clf.sprint_statistics())
print(clf.leaderboard(detailed=False,top_k=30))
pprint(clf.show_models(), indent=4)models_with_weights = clf.get_models_with_weights()
with open('./models_report.txt', 'w') as f:for model in models_with_weights:f.write(str(model) + '\n')
二、auto-pytorch
1. 1 环境依赖
额外安装brew install cmake
lightgbm 库依赖第三方库 pip install lightgbm
brew install libomp
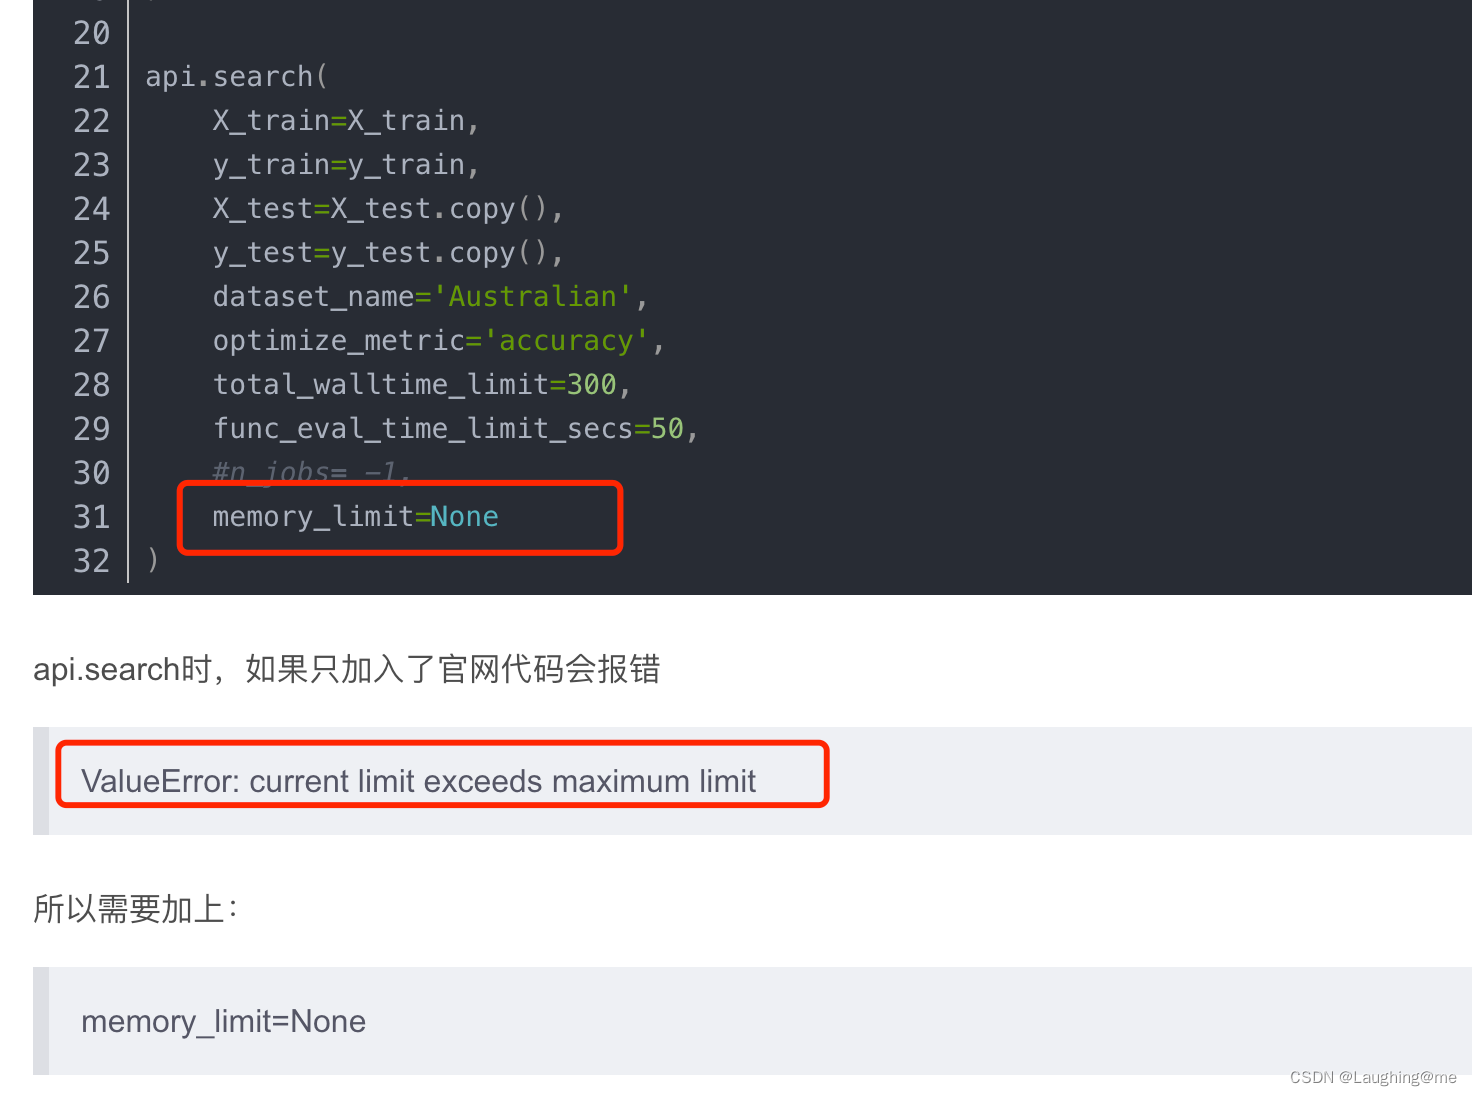
pip install autoPyTorch
mac 允许不限制memory, M1 芯片对内容限制的操作目前还有bug
1.2 支持用法
支持大量的表格型数据,图片数据支持少,且不支持扩展
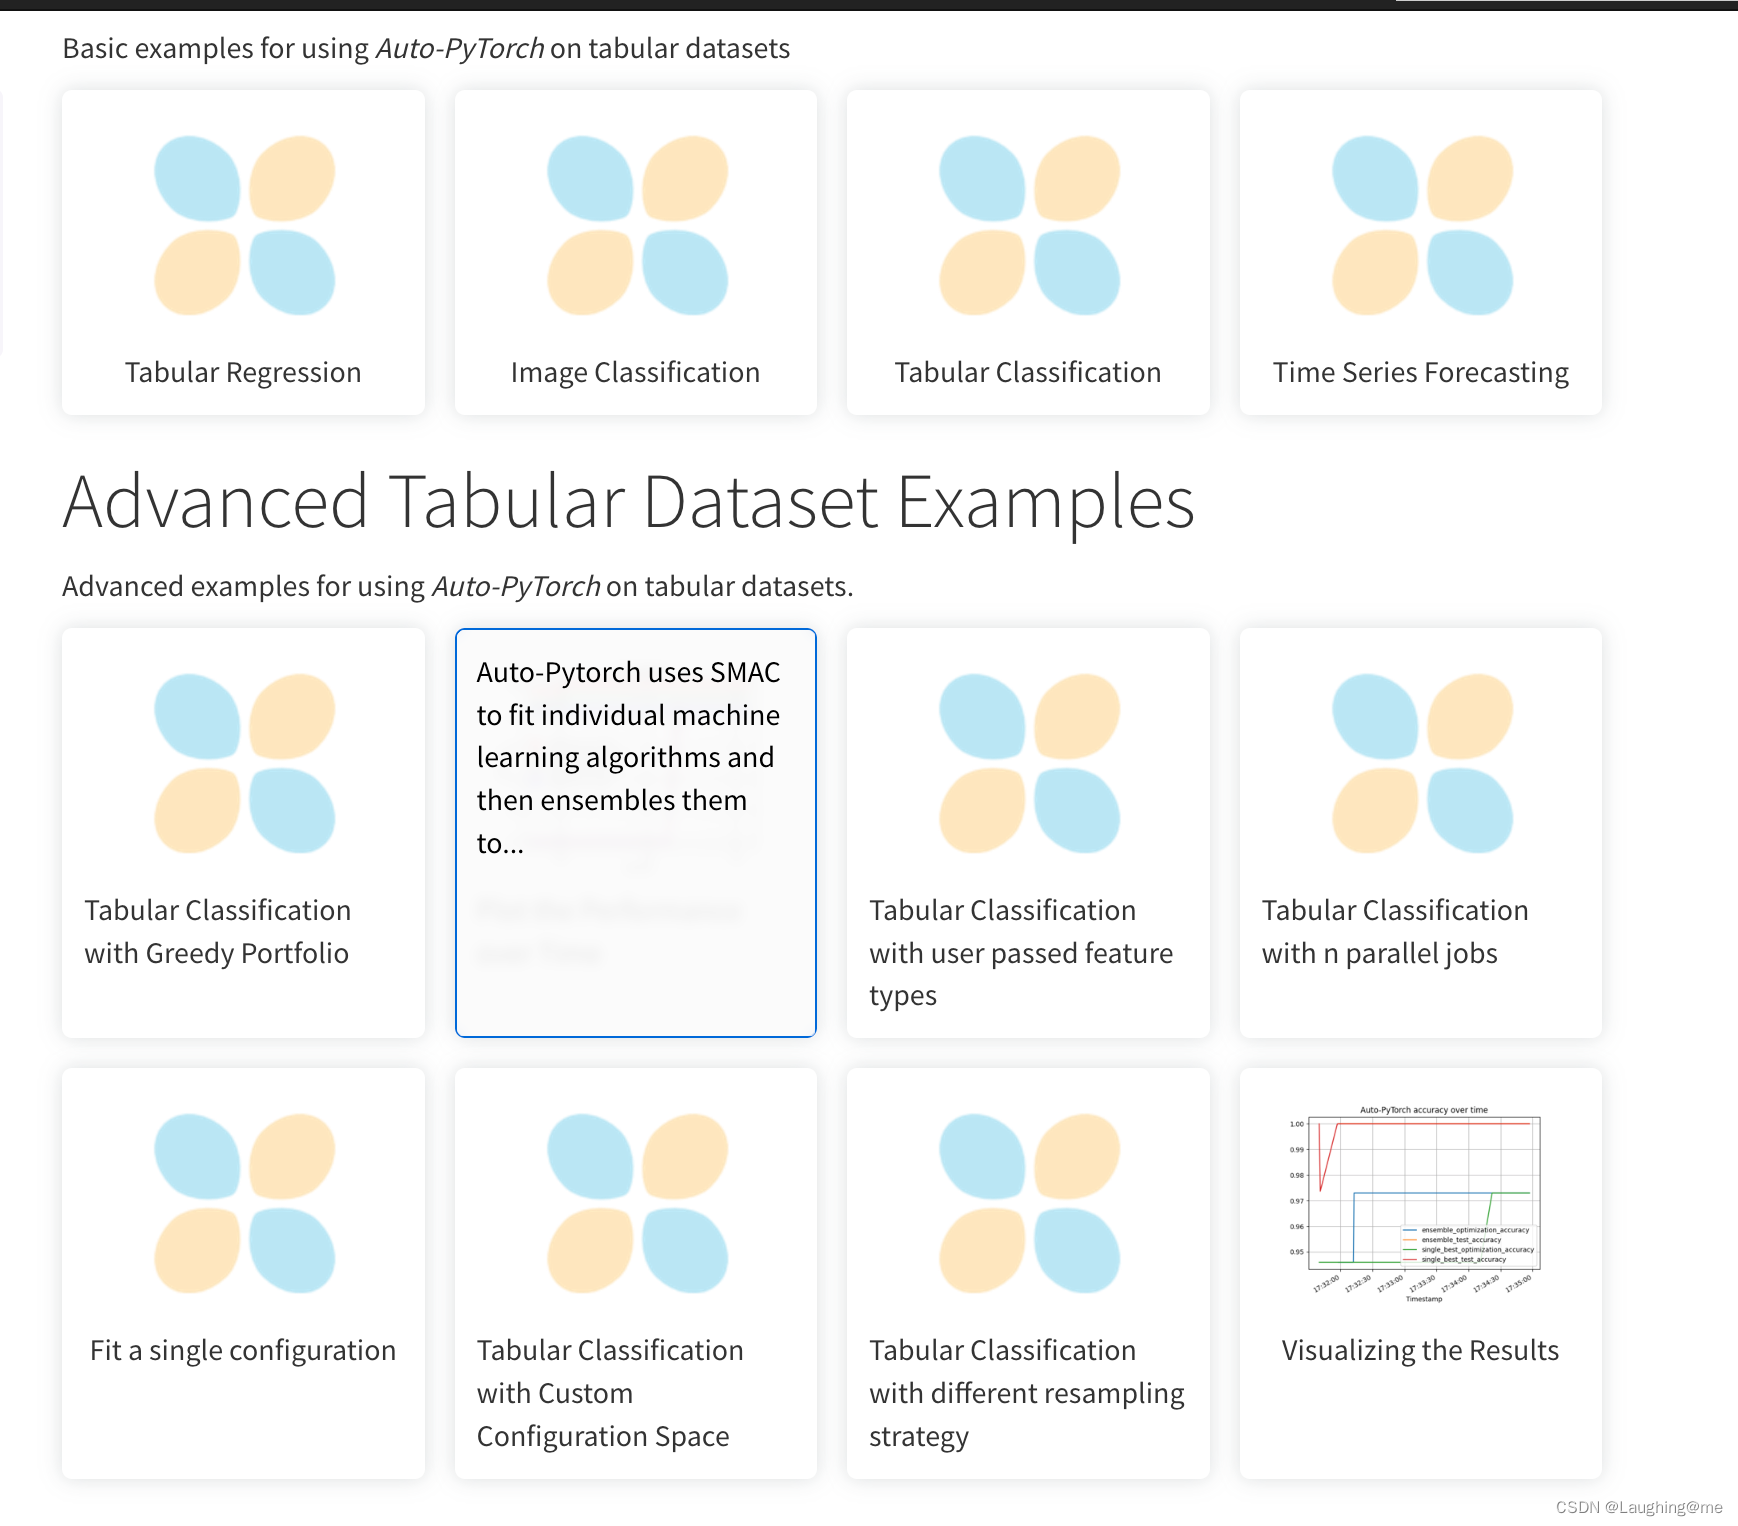
代码示例:
用法比较固定,没有更多的文档来作为参考,且无法扩展。
import numpy as npimport sklearn.model_selectionimport torchvision.datasetsfrom autoPyTorch.pipeline.image_classification import ImageClassificationPipeline# Get the training data for tabular classification
trainset = torchvision.datasets.FashionMNIST(root='../datasets/', train=True, download=True)
data = trainset.data.numpy()
data = np.expand_dims(data, axis=3)
# Create a proof of concept pipeline!
dataset_properties = dict()
pipeline = ImageClassificationPipeline(dataset_properties=dataset_properties)# Train and test split
train_indices, val_indices = sklearn.model_selection.train_test_split(list(range(data.shape[0])),random_state=1,test_size=0.25,
)# Configuration space
pipeline_cs = pipeline.get_hyperparameter_search_space()
print("Pipeline CS:\n", '_' * 40, f"\n{pipeline_cs}")
config = pipeline_cs.sample_configuration()
print("Pipeline Random Config:\n", '_' * 40, f"\n{config}")
pipeline.set_hyperparameters(config)# Fit the pipeline
print("Fitting the pipeline...")pipeline.fit(X=dict(X_train=data,is_small_preprocess=True,dataset_properties=dict(mean=np.array([np.mean(data[:, :, :, i]) for i in range(1)]),std=np.array([np.std(data[:, :, :, i]) for i in range(1)]),num_classes=10,num_features=data.shape[1] * data.shape[2],image_height=data.shape[1],image_width=data.shape[2],is_small_preprocess=True),train_indices=train_indices,val_indices=val_indices,))# Showcase some components of the pipeline
print(pipeline)
相关文章:
AutoML-sklearn and torch
一、auto-sklearn 1.1 环境依赖 额外安装swig 第三方库 linux 支持, mac,windows不支持 1.2 示例代码 time_left_for_this_task 设定任务最大时间 per_run_time_limit 每个子任务最大训练时间 include 可以限制任务训练的模型 import autosklearn.classific…...

《扬帆优配》算力概念股大爆发,主力资金大扫货
3月22日,9股封单金额超亿元,工业富联、鸿博股份、鹏鼎控股分别为3.01亿元、2.78亿元、2.37亿元。 今日三大指数团体收涨,收盘共34股涨停,首要集中于数字经济方向,其间云核算、CPO大迸发。除去5只ST股,算计2…...
机械臂+底盘三维模型从solidworks到moveit配置功能包
文章目录 导出底盘STEP加载机械臂模型组合机械臂和底盘三维模型导出URDF在moveit中进行配置新建工作目录设置ROS工作空间的环境变量进入moveit setup加载URDF文件self-CollisionsPlanning groupsRobot posesControllersSimulationAuthor information生成配置包在rviz中进行可视…...
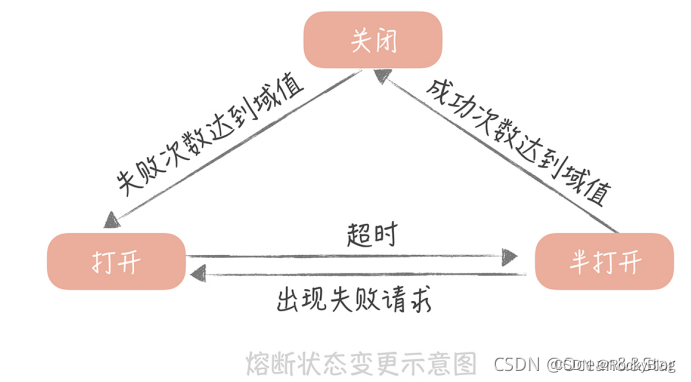
高并发系统设计:缓存、降级、限流、(熔断)
高并发系统设计:缓存、降级、限流、(熔断) 在开发高并发系统时有三把利器用来保护系统:缓存、降级和限流。 非核心服务可以采用降级、熔断,核心服务采用缓存和限流(隔离流量可以最大限度的保障业务无损)。 缓存 缓…...

《辉煌优配》放量大涨,A股成交额重回万亿!PCB板块继续领跑
多只绩优PCB概念股超跌。 今日A股放量反弹,成交额从头站上万亿关口。芯片板块掀涨停潮,景嘉微、芯原股份20cm涨停,紫光国微、兆易创新、跃岭股份等封板;AI算力、存储器、光模块、云核算等板块全线拉升,板块内个股再度批…...
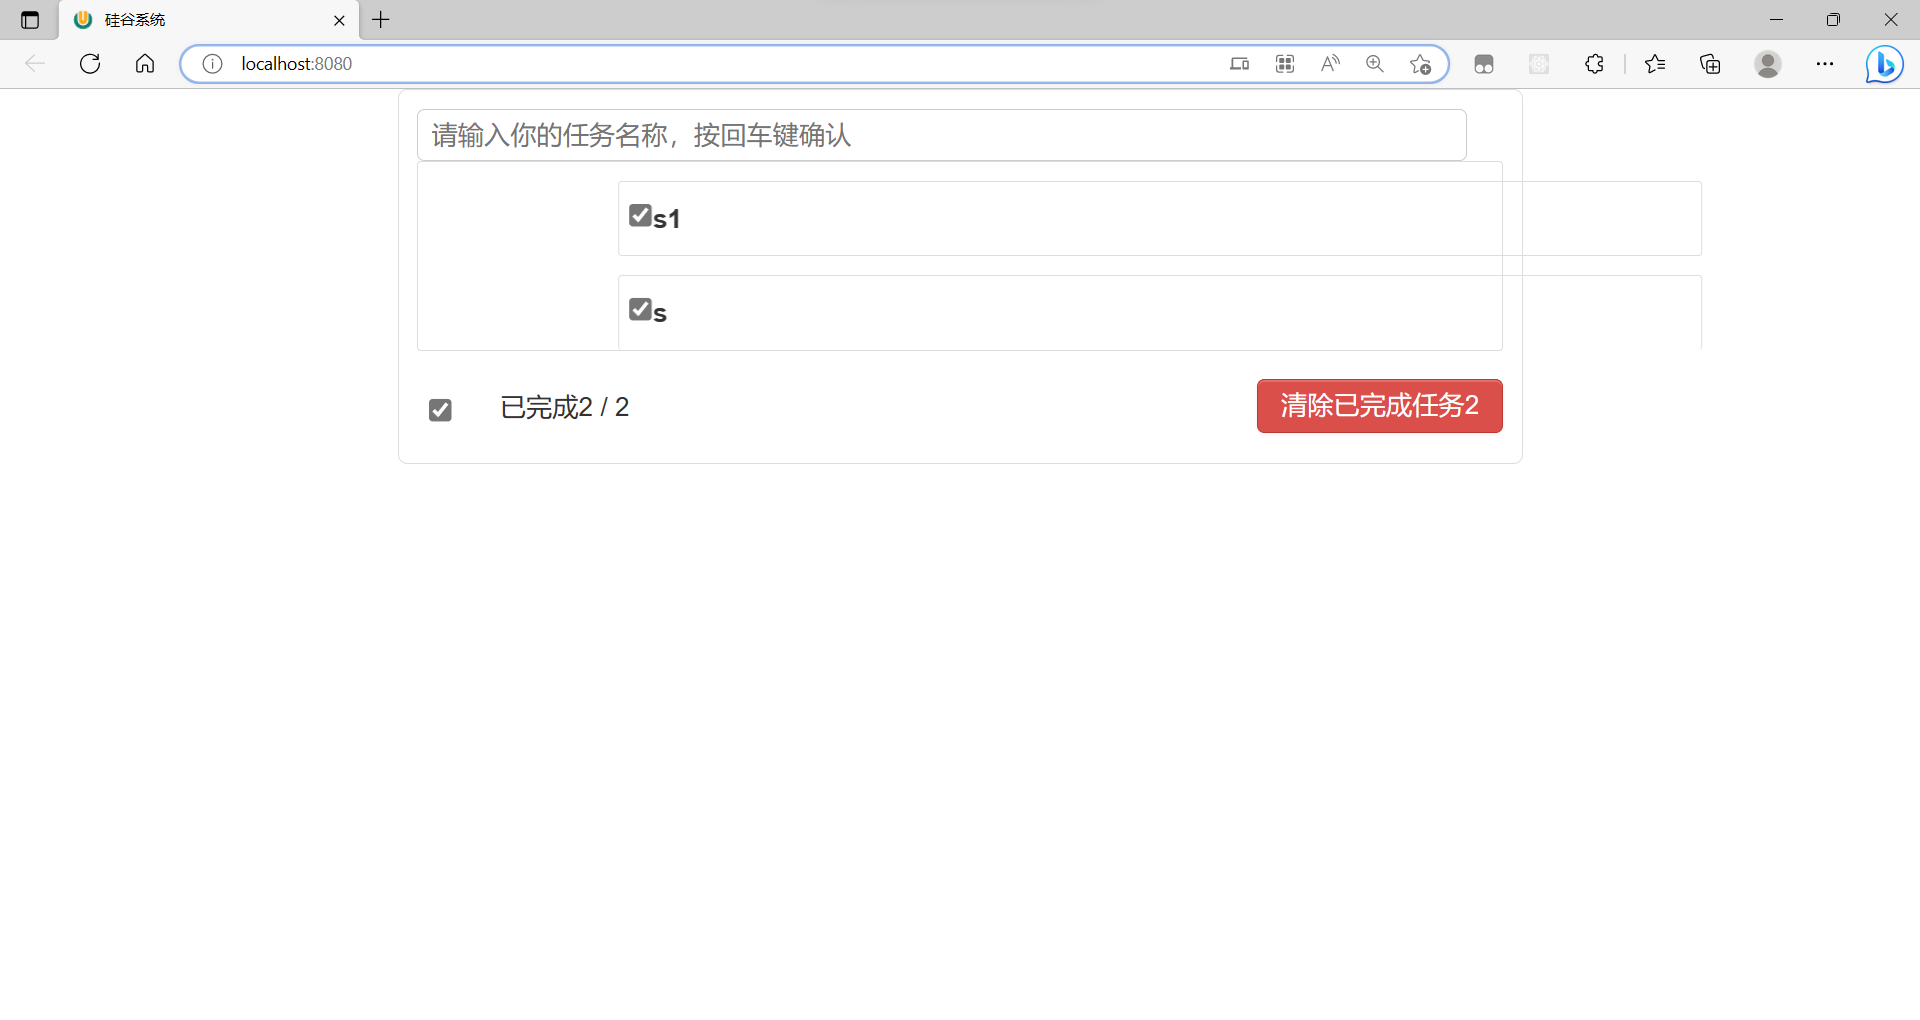
Vue封装的过度与动画
动画效果 先把样式封装好,然后设置一个动画 不需要vue也能实现的动画的效果,我们只需要判断一下,然后动态的添加和删除类名即可 那能不能不自己写动态,就靠vue 首先我们要靠<transition>标签把需要动画的包裹起来 vue中…...
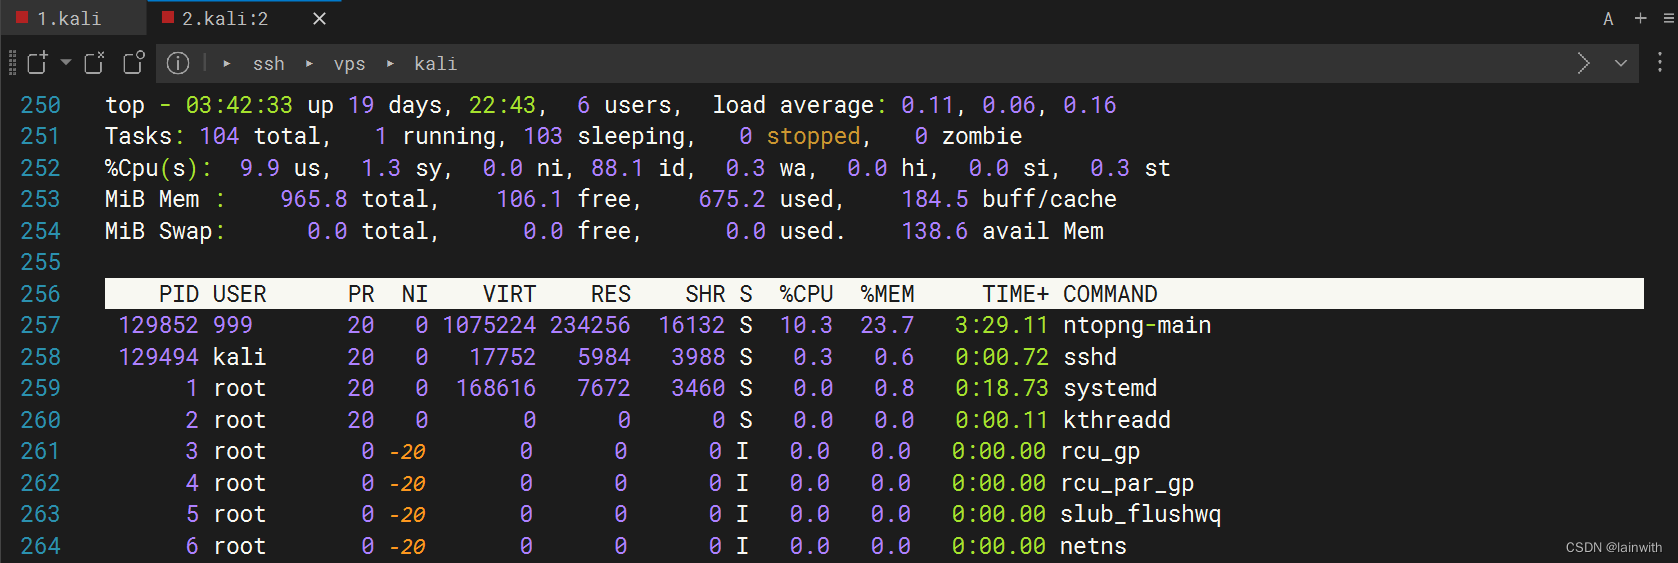
流量监控-ntopng
目录介绍安装使用介绍 ntopng是原始ntop的下一代版本,ntop是监视网络使用情况的网络流量探测器。ntopng基于libpcap,并且以可移植的方式编写,以便实际上可以在每个Unix平台,MacOSX和Windows上运行。 ntopng(是的&…...

C++ 21 set容器
目录 一、set容器 1.1 简介 1.2 构造和赋值 1.3 大小和交换 1.4 插入和删除 1.5 查找和统计 1.6 set和multiset区别 1.7 内置类型指定排序规则 1.8 自定义数据类型指定排序规则 一、set容器 1.1 简介 ① set容器中所有元素在插入时自动被排序。 ② set容器和multise…...
什么是JWT
JSON Web Token(缩写 JWT)是目前最流行的跨域认证解决方案。 传统的session认证 http协议本身是一种无状态的协议,而这就意味着如果用户向我们的应用提供了用户名和密码来进行用户认证,那么下一次请求时,用户还要再一…...
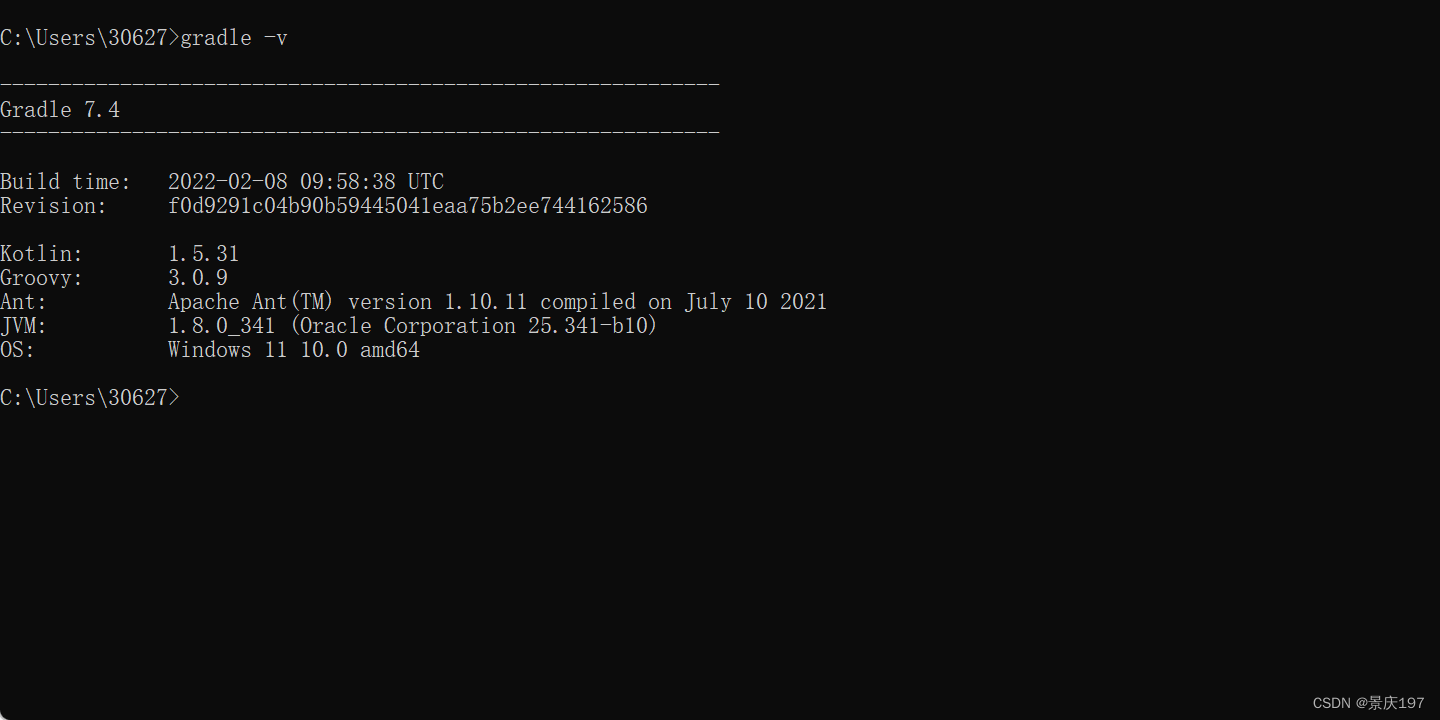
Gradle7.4安装
前置:本文基于IntelliJ IDEA 2022.2.1 、jdk1.8进行安装 目录 1.挑选Gradle版本 2.系统变量设置 1.挑选Gradle版本 gradle兼容性差, 1.跟idea会有版本问题。 2.跟springboot也有兼容问题Spring Boot Gradle Plugin Reference Guide 首先查询版本&…...
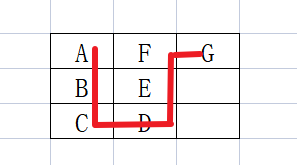
【华为OD机试 2023最新 】 箱子之字形摆放(C++ 100%)
文章目录 题目描述输入描述输出描述备注用例题目解析C++题目描述 有一批箱子(形式为字符串,设为str), 要求将这批箱子按从上到下以之字形的顺序摆放在宽度为 n 的空地,请输出箱子的摆放位置。 例如:箱子ABCDEFG,空地宽度为3,摆放结果如图: 则输出结果为: AFG BE CD …...

Matplotlib库入门
Matplotlib库的介绍 什么是Matplotlib库? Matplotlib是一个Python的数据可视化库,用于绘制各种类型的图表,包括线图、散点图、条形图、等高线图、3D图等等。它是一个非常强大和灵活的库,被广泛用于数据科学、机器学习、工程学、…...

学生党用什么蓝牙耳机比较好?300内高性价比蓝牙耳机排行
随着蓝牙技术的发展,蓝牙耳机越来越普及,不同价位、不同性能的蓝牙耳机数不胜数。那么,学生党用什么蓝牙耳机比较好?下面,我来给大家推荐几款三百内高性价比蓝牙耳机,一起来看看吧。 一、南卡小音舱蓝牙耳…...

Lambda 表达式与函数式接口
函数式接口 如果一个接口,只有一个抽象方法,该接口即为函数式接口。函数式接口,即可使用 Lambda 表达式。 如下面的接口 public interface Translate {void translate();}目前该接口的抽象方法为无参数无返回值 Lambda 表达式 无参无返回值…...

后端代码规范
1、报文入参尽量避免使用实体类(如果用实体类接受参数,一定要写好注解,具体用到了实体类的哪一个属性) /*** * Description: 新增玉米观测记录主表信息* param param params* param return 参数* return Result 返回类型* author…...

web自动化测试:Selenium+Python基础方法封装(建议收藏)
01、目的 web自动化测试作为软件自动化测试领域中绕不过去的一个“香饽饽”,通常都会作为广大测试从业者的首选学习对象,相较于C/S架构的自动化来说,B/S有着其无法忽视的诸多优势,从行业发展趋、研发模式特点、测试工具支持&…...
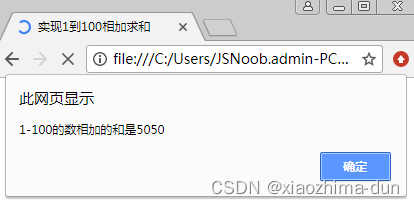
while实现1到100相加求和-课后程序(JavaScript前端开发案例教程-黑马程序员编著-第2章-课后作业)
【案例2-7】while实现1到100相加求和 一、案例描述 考核知识点 while循环语句 练习目标 掌握while循环语句。 需求分析 1-100之间的数相加求和,本案例通过while循环语句来实现。 案例分析 效果如图2-10所示。1-100所有数的和 具体实现步骤如下: 在&l…...
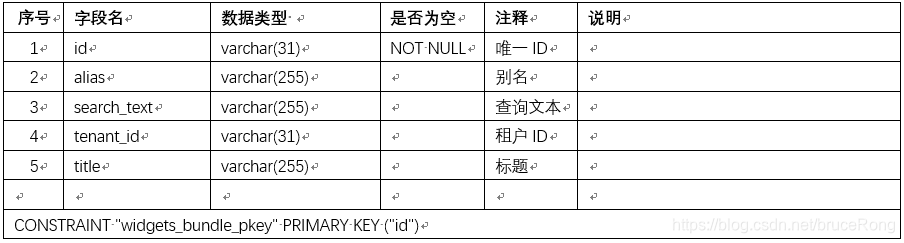
Thingsboard(2.4 postgresql版)数据库表结构说明
本文描述的表结构是根据thingsboard2.4(postgresql版)数据库中整理出来的,不一定完整,后续有新的发现再补充文档。 一、数据库E-R关系 Thingsboard2.4社区版共22个表,主要包括实体信息表、关系信息表、字典表和系统配…...
IDS反病毒与APT的具体介绍
文章目录一,IDS1. 什么是IDS?2. IDS和防火墙有什么不同?3. IDS工作原理?4. IDS的主要检测方法有哪些详细说明?5. IDS的部署方式有哪些?6. IDS的签名是什么意思?签名过滤器有什么作用?…...
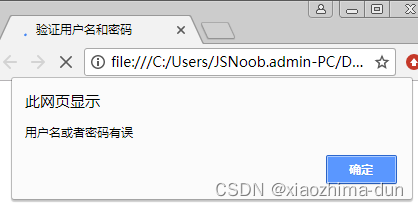
while do..while验证用户名和密码-课后程序(JavaScript前端开发案例教程-黑马程序员编著-第2章-课后作业)
【案例2-8】while do..while验证用户名和密码 一、案例描述 考核知识点 while、do…while循环语句 练习目标 掌握while语句。do…while循环语句。 需求分析 在网站上登录时会用到表单,让用户属于用户名和密码,输入正确才可以进入,本案例将…...

为AI应用构建低成本实时搜索能力:gpt-search开源项目实战指南
1. 项目概述与核心价值最近在折腾一些AI应用开发,发现一个挺有意思的现象:很多开发者想给自己的GPT应用加上联网搜索能力,但往往卡在第一步——如何高效、稳定且低成本地获取实时网络信息。自己从零搭建一个搜索引擎爬虫?光是处理…...

蓝牙广播帧实战解析:从ADV_IND到AUX_CHAIN_IND的报文拆解
1. 蓝牙广播帧入门:为什么需要这么多类型? 刚接触蓝牙协议栈的开发者,第一次看到ADV_IND、ADV_DIRECT_IND这些缩写时,往往会感到一头雾水。我自己最初调试蓝牙设备时,就曾经对着抓包工具里密密麻麻的广播数据发愣——为…...

基于Swift与AppKit的macOS菜单栏AI工具聚合器开发实践
1. 项目概述:一个为Mac用户打造的AI助手集成工具如果你是一名Mac用户,同时又对当前层出不穷的AI工具感到眼花缭乱,那么你很可能和我一样,经历过这样的困扰:ChatGPT的对话窗口、Midjourney的Discord频道、Claude的网页界…...

虎牙转型:游戏内容生态初显成效,能否通过外部市场“成年礼”考验?
游戏直播幻梦破碎,虎牙走向游戏生意很多时候,一段老录屏能让人瞬间穿越回游戏直播最浮夸的年代。最先扑面而来的是满屏乱飞的礼物特效,如游艇、火箭、藏宝图,好似电子烟花秀,透着经济上行的美。那时的虎牙、斗鱼堪称互…...

5个ReoGrid图表集成技巧:打造专业级数据报表
5个ReoGrid图表集成技巧:打造专业级数据报表 【免费下载链接】ReoGrid Fast and powerful .NET spreadsheet component, support data format, freeze, outline, formula calculation, chart, script execution and etc. Compatible with Excel 2007 (.xlsx) format…...

杰理之先开广播再切换SPDIF光纤输入,会打印‘a’,无法播放和广播【篇】
具体参考git链接对应demo修改。...

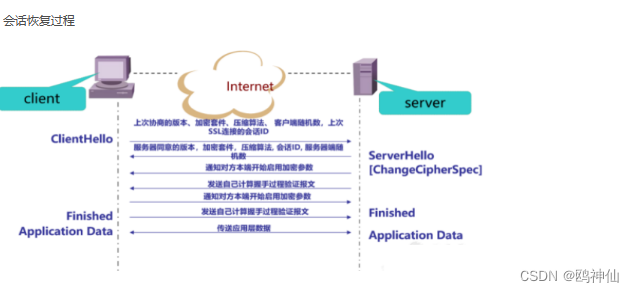
系统架构设计师必知:数字签名、加密算法、公钥私钥详解
一、先搞清楚三个基础概念 在进入“数字签名”之前,必须先理解加密和哈希。 1.1 加密(Encryption) 加密是将明文通过某种算法转换成密文的过程,目的是保密。只有拥有正确密钥的人才能解密还原明文。对称加密:加密和解密…...

YuukiPS启动器:动漫游戏玩家的智能启动解决方案终极指南
YuukiPS启动器:动漫游戏玩家的智能启动解决方案终极指南 【免费下载链接】Launcher-PC 项目地址: https://gitcode.com/gh_mirrors/la/Launcher-PC 你是否厌倦了每次启动游戏都要重复繁琐的配置步骤?是否希望有一个工具能够智能管理多个游戏账号…...

ArcGIS Server 10.8.1 要素服务发布实战:从PostgreSQL数据库到Web地图的完整链路
ArcGIS Server 10.8.1 要素服务全链路实战:PostgreSQL数据发布与Web集成深度指南 当空间数据从静态文件走向动态服务,要素服务(Feature Service)正在重塑现代GIS应用的交互范式。本文将带您深入探索如何将PostgreSQL中的空间数据转…...

构建数字情绪护盾:基于情感分析与规则引擎的个性化内容过滤系统
1. 项目概述:构建你的数字情绪护盾在数字生活的洪流中,我们每天都被海量的信息、社交互动和网络噪音所包围。你有没有过这样的感觉:刷了半小时手机,不仅没放松,反而感到莫名的焦虑和疲惫?或者,在…...