springboot揭秘00-基于java配置的spring容器
文章目录
- 【README】
- 【1】基本概念:@Configuration与@Bean
- 【2】使用AnnotationConfigApplicationContext实例化spring容器
- 【2.1】使用java配置简单构建spring容器
- 【2.1.1】AnnotationConfigApplicationContext与@Component及JSR-330注解类一起使用
- 【2.2】使用register(Class<?>)以编程方式构建容器
- 【2.2.1】AnnotationConfigApplicationContext#refresh()源码
- 【2.3】启用AnnotationConfigApplicationContext扫描功能
- 【2.3.1】补充:@Configuration注解
- 【2.4】支持使用AnnotationConfigWebApplicationContext构建springweb容器
- 【3】组合基于java的配置
- 【3.1】使用 @Import注解组合多个配置类
- 【3.1.1】对@Import引入的BeanDefinition注入依赖(装配@Import注解引入的bean)
- 【3.1.2】全限定导入bean以便导航
- 【3.2】以xml配置为中心并使用component-scan元素扫描java配置类(配置spring容器的2种方式)
- 【3.2.1】代码实践
- 【3.3】以java配置为中心并使用@ImportResoure注解引入xml配置
- 【3.3.1】代码实践
- 【3.4】使用@PropertySource加载属性文件
- 【4】使用@Bean注解
- 【4.1】声明@Bean
- 【4.2】@Bean标注方法返回的bean的装配(注入依赖)
- 【4.3】接收生命周期回调
- 【4.3.1】@Bean注册的bean生命周期回调代码实践
- 【4.4】指定bean作用范围
- 【4.4.1】使用@Scope注解
- 【4.4.2】查找方法注入Lookup method injection(仅了解,本文不展开)
- 【4.4.3】自定义bean的名称
- 【5】所有@Configuration类使用CGLIB进行子类化
- 【5.1】java配置类内部运行原理(重要)
【README】
本文内容总结自spring官方文档 spring-framework-reference 章节4.12【Java-based container configuration】, 墙裂推荐;
代码参见: github: springbootDiscover chapter00
1)新增maven依赖:(因为 @Configuration 与 @Bean注解定义在org.springframework.context.annotation包下)
<dependencies><dependency><groupId>org.springframework</groupId><artifactId>spring-context</artifactId><version>6.1.10</version></dependency></dependencies>
【1】基本概念:@Configuration与@Bean
1)java配置支持spirng容器的 核心组件是@Configuration标注的类 。这些类主要包含@Bean标注的方法,这些方法定义springIOC容器管理对象的初始化,配置,以及实例化逻辑。
2)使用@Configuration标注的类表明这些类可以被spring IOC容器作为bean定义的数据源。
import org.springframework.context.annotation.Bean;
import org.springframework.context.annotation.Configuration;@Configuration
public class AppConfig {@Beanpublic MyService myService() {return new MyServiceImpl();}
}
AppConfig等价于下面的xml配置;
<beans><bean id="myService" class="com.acme.services.MyServiceImpl"/>
</beans>
3)@Bean的角色: 如上述代码所示, @Bean扮演了 <bean>元素的角色 ; 接下来,我们介绍使用java配置创建spring容器的多种方法;
【2】使用AnnotationConfigApplicationContext实例化spring容器
1)下面章节描述spring的AnnotationConfigApplicationContext,它是spring3引入的;
2)作为ApplicationContext的实现类,AnnotationConfigApplicationContext不仅接收@Configuration类作为输入,也可以接受@Component类,以及被JSR-330注解标注的类; (JSR, Java Specification Request, java规范请求 )
- JSR-330注解介绍(JSR-330注解,就是支持java实现依赖注入的注解;如 @Inject ,@Qualilfier;),参见spirng 使用JSR-330标准注解 ,github JSR-330: Dependency Injection for Java. , Java Community Process: JSR 330: Dependency Injection for Java

3)当@Configuration类作为输入,@Configuration类本身会被注册为bean定义,该类中所有被@Bean标注的方法返回的bean也会注册为bean定义 ;
- 当@Component与JSR-330注解标注的类作为输入,这些类也会被注册为bean定义;并且假定在必要时,这些类中使用依赖注入元注解如@Autowired or @Inject;
【2.1】使用java配置简单构建spring容器
1)与使用spring xml文件作为输入数据源实例化ClassPathXmlApplicationContext容器类似,@Configuration也可以作为输入数据源,实例化AnnotationConfigApplicationContext容器(即注解配置的spring容器);(基于注解实例化容器可以完全不使用xml文件) ;其实 ClassPathXmlApplicationContext 与 AnnotationConfigApplicationContext 是兄弟,它们都是spring容器ApplicationContext的子类,只不过配置信息加载的方式不同,一个是xml文件,一个是注解;
【JavaBasedContainerMain】基于java配置的spring容器构建
public class JavaBasedContainerMain {public static void main(String[] args) {AnnotationConfigApplicationContext context = new AnnotationConfigApplicationContext(AppConfig00.class);HelloService helloService = context.getBean(HelloService.class);helloService.sayHello("tom");}
}
【运行结果】
hello tom
【AppConfig00】 @Configuration类(配置类)
@Configuration
public class AppConfig00 {@Beanpublic HelloService helloService() {return new HelloService();}
}
【HelloService】服务类
public class HelloService {public void sayHello(String user) {System.out.println("hello " + user);}
}
【2.1.1】AnnotationConfigApplicationContext与@Component及JSR-330注解类一起使用
1)AnnotationConfigApplicationContext不局限于与@Configuration类一起使用,任何 @Component或 JSR330注解类也可以作为其构造参数传入。
【JavaBasedContainerUsingJsr330Main】 基于java的使用Jsr-330注解的容器
public class JavaBasedContainerUsingJsr330Main {public static void main(String[] args) {AnnotationConfigApplicationContext context = new AnnotationConfigApplicationContext(Jsr330Service.class, Jsr330Depository.class);context.getBean(Jsr330Service.class).saveUser("zhangsan");}
}
注意: 上述代码中, Jsr330Service与Jsr330Depository需要使用spring的依赖注入注解@Autowire进行装配;(如果使用JSR-330注解如@Qualifier,会报错)
【Jsr330Service】
package com.tom.chapter00.classwithjsr330;import org.springframework.beans.factory.annotation.Autowired;
import org.springframework.stereotype.Component;@Component
public class Jsr330Service {// @Autowired是spring注解 ,这里不能使用 @Qualifier (JSR-330注解)@Autowiredprivate Jsr330Depository jsr330Depository;public void saveUser(String userName) {jsr330Depository.saveUser(userName);}
}
【Jsr330Depository】
package com.tom.chapter00.classwithjsr330;import org.springframework.stereotype.Component;@Component
public class Jsr330Depository {public void saveUser(String userName) {System.out.println("saveUser() name=" + userName + " 成功");}
}
【2.2】使用register(Class<?>)以编程方式构建容器
1)AnnotationConfigApplicationContext可以通过使用无参构造器进行实例化,实例化后使用register方法进行配置 ;当使用编程方式构建容器时,这个方法特别有用;
【SpringContainerUsingAnnotationConfigApplicationContextNoArgConstructor】 使用AnnotationConfigApplicationContext无参构造器实例化注解配置spring容器 ;
package com.tom.chapter00;import com.tom.chapter00.service.HelloService;
import com.tom.chapter00.service.HelloService02;
import org.springframework.context.annotation.AnnotationConfigApplicationContext;public class SpringContainerUsingAnnotationConfigApplicationContextNoArgConstructor {public static void main(String[] args) {AnnotationConfigApplicationContext context = new AnnotationConfigApplicationContext();context.register(AppConfig00.class, AppConfig02.class); // 调用register()方法注册配置context.refresh(); // 注册完成后,调用 refresh方法刷新 context.getBean(HelloService.class).sayHello("Musk");context.getBean(HelloService02.class).sayHello("Trump");}
}
【步骤】 使用register(Class<?>)以编程方式构建容器步骤 ;
- 步骤1:首先使用AnnotationConfigApplicationContext无参构造器实例化spring容器;
- 步骤2:调用register()方法注册配置(查看源码可知,这是在收集BeanDefinition);
- 步骤3:注册完成后,调用 refresh方法刷新(查看源码可知,根据BeanDefinition实例化bean) ;
【运行效果】
HelloService#sayHell(): hello Musk
HelloService2#sayHell():  hello Trump
【AppConfig00】
@Configuration
public class AppConfig00 {@Beanpublic HelloService helloService() {return new HelloService();}
}
【HelloService】
public class HelloService { public void sayHello(String user) {System.out.println("HelloService#sayHell(): hello " + user);}
}
【2.2.1】AnnotationConfigApplicationContext#refresh()源码
public void refresh() throws BeansException, IllegalStateException {this.startupShutdownLock.lock();try {this.startupShutdownThread = Thread.currentThread();StartupStep contextRefresh = this.applicationStartup.start("spring.context.refresh");this.prepareRefresh();ConfigurableListableBeanFactory beanFactory = this.obtainFreshBeanFactory();this.prepareBeanFactory(beanFactory);try {this.postProcessBeanFactory(beanFactory);StartupStep beanPostProcess = this.applicationStartup.start("spring.context.beans.post-process");this.invokeBeanFactoryPostProcessors(beanFactory);this.registerBeanPostProcessors(beanFactory);beanPostProcess.end();this.initMessageSource();this.initApplicationEventMulticaster();this.onRefresh();this.registerListeners();this.finishBeanFactoryInitialization(beanFactory);this.finishRefresh();} catch (Error | RuntimeException var12) {if (this.logger.isWarnEnabled()) {this.logger.warn("Exception encountered during context initialization - cancelling refresh attempt: " + var12);}this.destroyBeans();this.cancelRefresh(var12);throw var12;} finally {contextRefresh.end();}} finally {this.startupShutdownThread = null;this.startupShutdownLock.unlock();}}
【2.3】启用AnnotationConfigApplicationContext扫描功能
1)使用xml配置扫描注解标注的bean,如下:
<beans><context:component-scan base-package="com.acme"/>
</beans>
上述xml配置,spring将会扫描com.acme包中@Component标注的类,这些类被作为spring beanDefinition在容器中注册;
2)AnnotationConfigApplicationContext公开了scan()方法,支持相同的组件扫描功能 ;
【SpringContainerUsingAnnotationConfigApplicationContextScan】
package com.tom.chapter00;import com.tom.chapter00.service.HelloService02WithComponentAnnotation;
import com.tom.chapter00.service.HelloServiceWithComponentAnnotation;
import org.springframework.context.annotation.AnnotationConfigApplicationContext;public class SpringContainerUsingAnnotationConfigApplicationContextScan {public static void main(String[] args) {AnnotationConfigApplicationContext context = new AnnotationConfigApplicationContext();context.scan("com.tom.chapter00.service"); // 调用scan()方法收集BeanDefinitioncontext.refresh(); // 根据BeanDefinition实例化bean context.getBean(HelloServiceWithComponentAnnotation.class).sayHello("Musk");context.getBean(HelloService02WithComponentAnnotation.class).sayHello("Trump");}
}
【步骤】 AnnotationConfigApplicationContext使用组件扫描实例化bean:
- 步骤1:首先使用AnnotationConfigApplicationContext无参构造器实例化注解配置spring容器;
- 步骤2:调用scan()方法扫描指定包下BeanDefinition(查看源码可知,这是在收集BeanDefinition);
- 步骤3:注册完成后,调用 refresh方法刷新(查看源码可知,根据BeanDefinition实例化bean) ;
【执行效果】
HelloServiceWithComponentAnnotation#sayHello: hello Musk
HelloService02WithComponentAnnotation#sayHello: 02 hello Trump
【HelloServiceWithComponentAnnotation】
package com.tom.chapter00.service;import org.springframework.stereotype.Component;@Component
public class HelloServiceWithComponentAnnotation {public void sayHello(String user) {System.out.println("HelloServiceWithComponentAnnotation#sayHello: hello " + user);}
}
【2.3.1】补充:@Configuration注解
1)@Configuration:使用@Component注解的注解(而@Component称为元注解,因为它是标注其他注解的注解); 因此@Configuration类可以被scan()扫描到;
- 假设@Configuration类声明在com.a.b.c包下(及任意子包下),AnnotationConfigApplicationContext容器在调用scan()方法时,会扫描到该@Configuration类;而调用refresh()方法时,@Configuration类中被@Bean标注的方法会被处理,把方法返回值注册为容器中的bean;
【SpringContainerUsingAnnotationConfigApplicationContextScanConfiguration】 扫描@Configuration类 (扫描com.tom.chapter00包及其子包下@Component及@Configuration类)
public class SpringContainerUsingAnnotationConfigApplicationContextScanConfiguration {public static void main(String[] args) {AnnotationConfigApplicationContext context = new AnnotationConfigApplicationContext();System.out.println("before scan()");context.scan("com.tom.chapter00");System.out.println("after scan()");System.out.println("before refresh()");context.refresh();System.out.println("after refresh()");context.getBean(HelloService02.class).sayHello("Musk");}
}
【执行效果】
before scan()
after scan()
before refresh()
AppConfig00 构造器
AppConfig02 构造器
after refresh()
HelloService2#sayHell():  hello Musk
【AppConfig02】 @Configuration类,包名为com.tom.chapter00.config,是com.tom.chapter00的子包 ;
package com.tom.chapter00.config;import com.tom.chapter00.service.HelloService02;
import org.springframework.context.annotation.Bean;
import org.springframework.context.annotation.Configuration;@Configuration
public class AppConfig02 {public AppConfig02() {System.out.println("AppConfig02 构造器");}@Beanpublic HelloService02 helloService02() {return new HelloService02();}
}
【HelloService02】
public class HelloService02 {public void sayHello(String user) {System.out.println("HelloService2#sayHell():  hello " + user);}
}
【2.4】支持使用AnnotationConfigWebApplicationContext构建springweb容器
1)AnnotationConfigApplicationContext的WebApplicationContext变体可以与AnnotationConfigWebApplicationContext一起使用;
- 当配置spring ContextLoaderListener servlet监听器,springmvc DispatcherServlet等,可以使用AnnotationConfigWebApplicationContext作为参数 ;
2)以下web.xml代码片段配置了一个典型的springmvc web容器;
<web-app><!-- Configure ContextLoaderListener to use AnnotationConfigWebApplicationContextinstead of the default XmlWebApplicationContext --><context-param><param-name>contextClass</param-name><param-value>org.springframework.web.context.support.AnnotationConfigWebApplicationContext</param-value></context-param><!-- Configuration locations must consist of one or more comma- or space-delimitedfully-qualified @Configuration classes. Fully-qualified packages may also bespecified for component-scanning --><context-param><param-name>contextConfigLocation</param-name><param-value>com.acme.AppConfig</param-value></context-param><!-- Bootstrap the root application context as usual using ContextLoaderListener --><listener><listener-class>org.springframework.web.context.ContextLoaderListener</listener-class></listener><!-- Declare a Spring MVC DispatcherServlet as usual --><servlet><servlet-name>dispatcher</servlet-name><servlet-class>org.springframework.web.servlet.DispatcherServlet</servlet-class><!-- Configure DispatcherServlet to use AnnotationConfigWebApplicationContextinstead of the default XmlWebApplicationContext --><init-param><param-name>contextClass</param-name><param-value>org.springframework.web.context.support.AnnotationConfigWebApplicationContext</param-value></init-param><!-- Again, config locations must consist of one or more comma- or space-delimitedand fully-qualified @Configuration classes --><init-param><param-name>contextConfigLocation</param-name><param-value>com.acme.web.MvcConfig</param-value></init-param></servlet><!-- map all requests for /app/* to the dispatcher servlet --><servlet-mapping><servlet-name>dispatcher</servlet-name><url-pattern>/app/*</url-pattern></servlet-mapping>
</web-app>
【3】组合基于java的配置
【3.1】使用 @Import注解组合多个配置类
1)@Import注解支持从其他配置类加载bean Definition,就像在xml文件中使用 <import>元素来帮助模块化配置一样;
【ImportAnnotationMain】@Import注解测试main
package com.tom.chapter00.config.importannotation;import org.springframework.context.annotation.AnnotationConfigApplicationContext;public class ImportAnnotationMain {public static void main(String[] args) {AnnotationConfigApplicationContext context = new AnnotationConfigApplicationContext(AppConfigB.class);context.getBean(DiyA.class).print();}
}
代码说明: 在实例化AnnotationConfigApplicationContext容器时,无需指定AppConfigA.class与AppConfigB.class, 而仅需要指定AppConfigB.class即可; 因为AppConfigB 通过@Import注解引入了 AppConfigA中的BeanDefinition ;
【AppConfigA】
package com.tom.chapter00.config.importannotation;import org.springframework.context.annotation.Bean;
import org.springframework.context.annotation.Configuration;@Configuration
public class AppConfigA { @Beanpublic DiyA diyA() {return new DiyA();}
}public class DiyA {public void print() {System.out.println("this is diy a");}
}
【AppConfigB】
@Configuration
@Import(AppConfigA.class) // AppConfigB使用@Import引入或导入AppConfigA
public class AppConfigB {@Beanpublic DiyB diyB() {return new DiyB();}
}public class DiyB {public void print() {System.out.println("this is diy b");}
}
【3.1.1】对@Import引入的BeanDefinition注入依赖(装配@Import注解引入的bean)
1)大多数场景中,一个@Configuration配置类A中的Bean依赖另一个@Configuration配置类B中的bean;
- 这在xml配置文件中很好解决,只需要配置类A中的bean元素使用ref元素引入配置类B的bean即可;
2)通过java配置的容器中,需要使用类似于ref元素的语法对@Import引入的bean进行装配;
- 注意: @Configuration标注的配置类始终是一个bean;这意味着我们可以使用 @Autowire注入元数据,即装配@Configuration类 ;
【ImportAnnotationInjectDependencyMain】
public class ImportAnnotationInjectDependencyMain {public static void main(String[] args) {AnnotationConfigApplicationContext context = new AnnotationConfigApplicationContext(SystemConfig01.class);context.getBean(UserService.class).saveUser("Trump");}
}
【配置类】
@Configuration
@Import({UserServiceConfig.class, UserRepositoryConfig.class})
public class SystemConfig01 {
}@Configuration
public class UserServiceConfig {private @Autowired UserRepository userRepository; // 这个repository依赖于另一个配置类UserRepositoryConfig中的bean public @Bean UserService userService() {return new UserService(userRepository);}
}@Configuration
public class UserRepositoryConfig {public @Bean UserRepository userRepository() {return new UserRepository(); }
}
【业务bean】
public class UserService {private UserRepository userRepository;public UserService(UserRepository userRepository) {this.userRepository = userRepository;}public void saveUser(String name) {userRepository.saveUser(name);}
}
public class UserRepository {public void saveUser(String name) {System.out.println("UserRepository#saveUser(): 保存用户成功, name=" + name);}
}
【3.1.2】全限定导入bean以便导航
1)3.1.1中的问题: UserServiceConfig使用@Autowired装配UserRepository,但这个UserRepository具体定义在哪个@Configuration类是不清楚的;这不利于类的导航查找;
- 解决方法:明确装配的bean所属的配置类;考虑装配另一个配置类B本身到当前配置类A;
【UserServiceConfig2】 修改后的版本,使用另一个配置类本身装配当前配置类 ;
@Configuration
public class UserServiceConfig2 {// 装配的是@Configuration类的bean,而不是具体的Repository beanprivate @Autowired UserRepositoryConfig userRepositoryConfig; public @Bean UserService userService() {return new UserService(userRepositoryConfig.userRepository());}
}
【UserServiceConfig】之前的版本,使用具体bean装配当前配置类;
@Configuration
public class UserServiceConfig {private @Autowired UserRepository userRepository;public @Bean UserService userService() {return new UserService(userRepository);}
}
2) UserServiceConfig2中的代码还有点问题: UserServiceConfig2 与 UserRepositoryConfig高度耦合了;
- 解决方法:@Autowired UserRepositoryConfig userRepositoryConfig,修改 UserRepositoryConfig 为抽象定义,如接口或抽象类 ;
【ImportAnnotationInjectDependencyMain03】
public class ImportAnnotationInjectDependencyMain03 {public static void main(String[] args) {AnnotationConfigApplicationContext context = new AnnotationConfigApplicationContext(SystemConfig03.class);context.getBean(UserService.class).saveUser("Trump");}
}
【总配置类-SystemConfig03】 引入的UserRepositoryConfigImpl是IUserRepositoryConfig接口的实现类 ;
@Configuration
// 导入的是用户仓库配置接口的实现类的class(而非其接口IUserRepositoryConfig的class)
@Import({UserServiceConfig3.class, UserRepositoryConfigImpl.class})
public class SystemConfig03 {
}
【其他配置类】
@Configuration
public class UserServiceConfig3 {// 这里的属性类型为接口,非具体实现,以解耦private @Autowired IUserRepositoryConfig userRepositoryConfig; public @Bean UserService userService() { return new UserService(userRepositoryConfig.userRepository());}
}
// 用户仓库配置接口定义
public interface IUserRepositoryConfig { public UserRepository userRepository();
}
// 用户仓库配置接口的实现类
public class UserRepositoryConfigImpl implements IUserRepositoryConfig { @Overridepublic UserRepository userRepository() {return new UserRepository();}
}
【3.2】以xml配置为中心并使用component-scan元素扫描java配置类(配置spring容器的2种方式)
1)spring提供的@Configuration配置类的支持并不是100%替换xml配置;xml配置也有一些优点,如xml命名空间就是一种完美的配置容器的方式;
2)配置spring容器有2种方式:
- 使用xml文件方式,且spring容器使用ClassPathXmlApplicationContext类;
- 使用java配置方式,且spring容器使用AnnotationConfigApplicationContext 类,且可以按需使用@ImportResource注解引入xml配置文件 ;
【3.2.1】代码实践
【ComposeJavaAndXmlMain】
public class ComposeJavaAndXmlMain {public static void main(String[] args) {ApplicationContext container = new ClassPathXmlApplicationContext("chapter00/beans00.xml");container.getBean(ComposeJavaAndXmlService.class).saveUser("Trump");}
}
【执行效果】
ComposeJavaAndXmlRepository#saveUser(): name=Trump, url=www.baidu.com
【beans00.xml】
<?xml version="1.0" encoding="UTF-8"?>
<beans xmlns="http://www.springframework.org/schema/beans"xmlns:xsi="http://www.w3.org/2001/XMLSchema-instance"xmlns:context="http://www.springframework.org/schema/context"xsi:schemaLocation="http://www.springframework.org/schema/beans http://www.springframework.org/schema/beans/spring-beans.xsdhttp://www.springframework.org/schema/context http://www.springframework.org/schema/context/spring-context.xsd"><beans><!-- 扫描@Component注解标注的类(包括@Configuration),注册到spring容器 --><context:component-scan base-package="com.tom.chapter00.composejavaandxml"/><context:property-placeholder location="classpath:/chapter00/jdbc.properties"/><bean class="com.tom.chapter00.composejavaandxml.ComposeJavaAndXmlRepository"><property name="url" value="${jdbc.url}"/></bean></beans>
</beans>
【/chapter00/jdbc.properties】 属性文件
jdbc.url=www.baidu.com
【ComposeJavaAndXmlService】
public class ComposeJavaAndXmlService {private ComposeJavaAndXmlRepository composeJavaAndXmlRepository;public ComposeJavaAndXmlService(ComposeJavaAndXmlRepository composeJavaAndXmlRepository) {this.composeJavaAndXmlRepository = composeJavaAndXmlRepository;}public void saveUser(String name) {composeJavaAndXmlRepository.saveUser(name);}
}
【ComposeJavaAndXmlRepository】
public class ComposeJavaAndXmlRepository {private String url;public void saveUser(String name) {System.out.println("ComposeJavaAndXmlRepository#saveUser(): name=" + name + ", url=" + url);}public String getUrl() {return url;}public void setUrl(String url) {this.url = url;}
}
【补充】文件目录结构

【3.3】以java配置为中心并使用@ImportResoure注解引入xml配置
1)在spring应用中, @Configuration注解配置spring容器是主要方式,但仍然有可能使用到xml配置,可以通过@ImportResoure注解引入xml配置;
【3.3.1】代码实践
【ImportResourceComposeJavaAndXmlMain】
public class ImportResourceComposeJavaAndXmlMain {public static void main(String[] args) {AnnotationConfigApplicationContext container = new AnnotationConfigApplicationContext(UserRepositoryConfigUsingImportResource.class);container.getBean(ComposeJavaAndXmlRepository.class).saveUser("Trump");}
}
【执行效果】
ComposeJavaAndXmlRepository#saveUser(): name=Trump, url=www.baidu.com
【UserRepositoryConfigUsingImportResource】 使用 @ImportResource引入xml配置的配置类
@Configuration
@ImportResource("classpath:/chapter00/beans01.xml")
public class UserRepositoryConfigUsingImportResource {private @Value("${jdbc.url}") String url;public @Bean ComposeJavaAndXmlRepository composeJavaAndXmlRepository() {ComposeJavaAndXmlRepository composeJavaAndXmlRepository = new ComposeJavaAndXmlRepository();composeJavaAndXmlRepository.setUrl(url);return composeJavaAndXmlRepository;}
}
【beans01.xml】
<?xml version="1.0" encoding="UTF-8"?>
<beans xmlns="http://www.springframework.org/schema/beans"xmlns:xsi="http://www.w3.org/2001/XMLSchema-instance"xmlns:context="http://www.springframework.org/schema/context"xsi:schemaLocation="http://www.springframework.org/schema/beans http://www.springframework.org/schema/beans/spring-beans.xsdhttp://www.springframework.org/schema/context http://www.springframework.org/schema/context/spring-context.xsd"><beans><context:property-placeholder location="classpath:/chapter00/jdbc.properties"/></beans>
</beans>
【jdbc.properties】
jdbc.url=www.baidu.com
【3.4】使用@PropertySource加载属性文件
1)使用@PropertySource加载属性文件,以访问所有定义的属性;
【属性文件】
// kafka.properties
kafka.cluster.url=192.168.1.1
kafka.cluster.name=TomKafka// redis.properties
redis.cluster.url=192.168.1.2
redis.cluster.name=TomRedis
【属性文件路径】

【PropertySourceMain】
public class PropertySourceMain {public static void main(String[] args) {AnnotationConfigApplicationContext context = new AnnotationConfigApplicationContext(PropertySourceConfig.class);// 获取beanTomCluster tomCluster = context.getBean(TomCluster.class);System.out.println(tomCluster);System.out.println(tomCluster.getKafkaClusterUrl());// 通过Environment获取属性ConfigurableEnvironment env = context.getEnvironment();System.out.println(env.getProperty("kafka.cluster.name"));System.out.println(env.getProperty("kafka.cluster.url"));System.out.println(env.getProperty("redis.cluster.name"));System.out.println(env.getProperty("redis.cluster.url"));}
}
【运行效果】
TomCluster{kafkaClusterUrl='192.168.1.1', kafkaClusterName='TomKafka', redisClusterUrl='192.168.1.2', redisClusterName='TomRedis'}
192.168.1.1
TomKafka
192.168.1.1
TomRedis
192.168.1.2
【PropertySourceConfig】
package com.tom.chapter00.propertysource;import org.springframework.context.annotation.Bean;
import org.springframework.context.annotation.Configuration;
import org.springframework.context.annotation.PropertySource;@Configuration
@PropertySource(value = {"classpath:chapter00/kafka.properties", "classpath:chapter00/redis.properties"})
public class PropertySourceConfig {@Beanpublic TomCluster tomCluster() {return new TomCluster();}
}
【TomCluster】
package com.tom.chapter00.propertysource;import org.springframework.beans.factory.annotation.Value;public class TomCluster {@Value("${kafka.cluster.url}") private String kafkaClusterUrl;@Value("${kafka.cluster.name}")private String kafkaClusterName;@Value("${redis.cluster.url}")private String redisClusterUrl;@Value("${redis.cluster.name}")private String redisClusterName;public String getKafkaClusterUrl() {return kafkaClusterUrl;}public String getKafkaClusterName() {return kafkaClusterName;}public String getRedisClusterUrl() {return redisClusterUrl;}public String getRedisClusterName() {return redisClusterName;}@Overridepublic String toString() {return "TomCluster{" +"kafkaClusterUrl='" + kafkaClusterUrl + '\'' +", kafkaClusterName='" + kafkaClusterName + '\'' +", redisClusterUrl='" + redisClusterUrl + '\'' +", redisClusterName='" + redisClusterName + '\'' +'}';}
}
【4】使用@Bean注解
1)@Bean注解定义: @Bean注解类似于xml文件中的bean元素,该注解支持bean元素的一些属性,如inin-method , destory-method, autowiring ,name 等。你可以在 @Configuration类或@Component类中使用 @Bean注解;
【4.1】声明@Bean
1)可以使用@Bean标注一个方法以此来定义bean; 你使用这个方法在ApplicationContext中注册bean的定义; bean类型指定为方法返回类型; 默认情况下,方法名称就是bean名称 ;
【BeanAnnotationMain】
public class BeanAnnotationMain {public static void main(String[] args) {AnnotationConfigApplicationContext container = new AnnotationConfigApplicationContext(BeanAnnotationConfig.class);System.out.println(container.getBean(UserService.class));System.out.println(container.getBean("userService"));}
}
// com.tom.chapter00.config.importannotation.injectdependency.UserService@6aeb35e6
// com.tom.chapter00.config.importannotation.injectdependency.UserService@6aeb35e6
container.getBean(“userService”) 与 container.getBean(UserService.class) 获取的是同一个bean,所以UserService userService()方法注册的bean的名称就是方法名称userService;
【BeanAnnotationConfig】
package com.tom.chapter00.beanannotation;import com.tom.chapter00.config.importannotation.injectdependency.UserService;
import org.springframework.context.annotation.Bean;
import org.springframework.context.annotation.Configuration;@Configuration
public class BeanAnnotationConfig {@Beanpublic UserService userService() {return new UserService();}
}
【4.2】@Bean标注方法返回的bean的装配(注入依赖)
1)当@Bean注册的bean依赖另一个bean时,仅需要调用另一个bean的注册方法即可注入依赖;如下;
【BeanAnnotationMain2】
public class BeanAnnotationMain2 {public static void main(String[] args) {AnnotationConfigApplicationContext container = new AnnotationConfigApplicationContext(BeanAnnotationConfig2.class);System.out.println(container.getBean("repositoryA"));container.getBean(ServiceA.class).printRepository();}
}
【执行效果】 显然, 容器中名为repositoryA的bean,与ServiceA中装配的类型为RepositoryA的bean,是同一个bean;
com.tom.chapter00.beanannotation.repository.RepositoryA@4c583ecf
repositoryA=com.tom.chapter00.beanannotation.repository.RepositoryA@4c583ecf
【BeanAnnotationConfig2】配置类 (调用方法即可注入依赖)
@Configuration
public class BeanAnnotationConfig2 {public @Bean RepositoryA repositoryA() {return new RepositoryA();}public @Bean ServiceA serviceA() {return new ServiceA(repositoryA()); // 调用方法即可注入依赖}
}
【ServiceA】
public class ServiceA {private RepositoryA repositoryA;public ServiceA(RepositoryA repositoryA) {this.repositoryA = repositoryA;}public void printRepository() {System.out.println("repositoryA=" + repositoryA);}
}
【4.3】接收生命周期回调
1)任何使用@Bean定义的类都可以使用 来自JSR-250的@PostConstruct 与 @PreDestory注解;
- 参见: JSR-250的@PostConstruct 与 @PreDestory注解
2)spring支持bean的生命周期回调;如果bean实现了InitializingBean, DisposableBean或者 Lifecycle, 它们对应的方法就会被容器调用;
- 以Aware为后缀的标准接口集合也支持生命周期回调,如BeanFactoryAware, BeanNameAware, MessageSourceAware, ApplicationContextAware;
3)@Bean注解支持指定任意初始化与销毁的回调方法,这类似于xml配置文件中 <bean>元素中 init-method 与 destroy-method属性 ;
【@Bean注解定义】
package org.springframework.context.annotation;import java.lang.annotation.Documented;
import java.lang.annotation.ElementType;
import java.lang.annotation.Retention;
import java.lang.annotation.RetentionPolicy;
import java.lang.annotation.Target;
import org.springframework.core.annotation.AliasFor;@Target({ElementType.METHOD, ElementType.ANNOTATION_TYPE})
@Retention(RetentionPolicy.RUNTIME)
@Documented
public @interface Bean {@AliasFor("name")String[] value() default {};@AliasFor("value")String[] name() default {};boolean autowireCandidate() default true;String initMethod() default "";String destroyMethod() default "(inferred)";
}
【4.3.1】@Bean注册的bean生命周期回调代码实践
【BeanAnnotationLifeCycleMain】
public class BeanAnnotationLifeCycleMain {public static void main(String[] args) {AnnotationConfigApplicationContext container = new AnnotationConfigApplicationContext(BeanAnnotationLifeCycleConfig.class);// 注册了关闭钩子,当容器销毁bean时才会调用 destory()方法container.registerShutdownHook();}
}
【执行效果】
BeanWithLifeCycleCallback init()
BeanWithLifeCycleCallback destory()
【BeanAnnotationLifeCycleConfig】 @Bean注解指定bean初始时方法与销毁方法
@Configuration
public class BeanAnnotationLifeCycleConfig {@Bean(initMethod = "init", destroyMethod = "destory")public BeanWithLifeCycleCallback beanWithInitMethod() {return new BeanWithLifeCycleCallback();}
}
【BeanWithLifeCycleCallback】带有生命周期回调的Bean
public class BeanWithLifeCycleCallback {public void init() {System.out.println("BeanWithLifeCycleCallback init()");}public void destory() {System.out.println("BeanWithLifeCycleCallback destory()");}}
【补充】上述注册生命周期初始化回调方法init,等同于在构造器中执行init()方法;
@Configuration
public class BeanAnnotationLifeCycleConfig2 {@Beanpublic BeanWithLifeCycleCallback beanWithInitMethod() {BeanWithLifeCycleCallback beanWithLifeCycleCallback = new BeanWithLifeCycleCallback();beanWithLifeCycleCallback.init(); // 类似与显式调用 init() 方法 return beanWithLifeCycleCallback;}
}
【提示】如果我们直接使用java配置容器,我们可以直接对目标对象或bean执行任何操作,而并不是总是依赖spring的生命周期回调, 如BeanAnnotationLifeCycleConfig2那样 ;
【4.4】指定bean作用范围
【4.4.1】使用@Scope注解
1)你可以指定使用@Bean定义的bean的作用范围。你可以使用任何一种标准的作用范围。beans-factory-scopes

2)默认scope作用范围是singleton-单例,可以使用@Scope注解重写scope;
【ScopeOverwriteMain】重写bean的作用域main入口
public class ScopeOverwriteMain {public static void main(String[] args) {AnnotationConfigApplicationContext container = new AnnotationConfigApplicationContext(ScopeOverrideConfig.class);// 获取 RepositoryA实例,每次获取都会创建一个新实例,因为其scope为prototypeSystem.out.println(container.getBean(RepositoryA.class));System.out.println(container.getBean(RepositoryA.class));// 获取 RepositoryB实例,每次获取都会返回同一个实例,因为其scope为singletonSystem.out.println(container.getBean(RepositoryB.class));System.out.println(container.getBean(RepositoryB.class));}
//    com.tom.chapter00.beanannotation.repository.RepositoryA@59474f18
//    com.tom.chapter00.beanannotation.repository.RepositoryA@65fb9ffc
//    com.tom.chapter00.beanannotation.repository.RepositoryB@3e694b3f
//    com.tom.chapter00.beanannotation.repository.RepositoryB@3e694b3f
}
【ScopeOverrideConfig】
package com.tom.chapter00.beanannotation.scope.scopeoverride;import com.tom.chapter00.beanannotation.repository.RepositoryA;
import com.tom.chapter00.beanannotation.repository.RepositoryB;
import org.springframework.context.annotation.Bean;
import org.springframework.context.annotation.Configuration;
import org.springframework.context.annotation.Scope;@Configuration
public class ScopeOverrideConfig {@Bean@Scope("prototype") // 原型作用域,每次获取bean都会创建1个新实例 public RepositoryA repositoryA() {return new RepositoryA();}@Bean@Scope("singleton") // 单例作用域,自始至终都只有1个实例 public RepositoryB repositoryB() {return new RepositoryB();}
}
【4.4.2】查找方法注入Lookup method injection(仅了解,本文不展开)
1)查找方法注入是你很少使用到的高级功能; 查找方法注入在单例范围bean依赖原型范围bean场景下有用 ;
public abstract class CommandManager {public Object process(Object commandState) {// grab a new instance of the appropriate Command interfaceCommand command = createCommand();// set the state on the (hopefully brand new) Command instancecommand.setState(commandState);return command.execute();}// okay... but where is the implementation of this method?protected abstract Command createCommand();
}
2)使用java配置支持,你可以创建CommandManager子类,其抽象方法createCommand()被重写,以便查找新的原型command对象;
@Bean
@Scope("prototype")
public AsyncCommand asyncCommand() {AsyncCommand command = new AsyncCommand();// inject dependencies here as requiredreturn command;
}@Bean
public CommandManager commandManager() {// return new anonymous implementation of CommandManager with command() overridden// to return a new prototype Command objectreturn new CommandManager() {protected Command createCommand() {return asyncCommand();}}
}
解说:CommandManager是单例的,但其createCommand()方法返回的Command对象是原型的;
【4.4.3】自定义bean的名称
1)默认情况下,@Bean注解的方法名作为实例化bean的名称,即bean名称=repositoryA1(参见下文的BeanNameConfig);但若代码指定了@Bean注解的name属性=userRepo,所以bean名称=userRepo;
2)@Bean注解的name属性接收一个string数组,以便为一个bean指定多个别名;
【BeanNameConfigMain】bean名称配置测试main
public class BeanNameConfigMain {public static void main(String[] args) {AnnotationConfigApplicationContext container = new AnnotationConfigApplicationContext(BeanNameConfig.class);System.out.println(container.getBean("repositoryA1"));System.out.println(container.getBean("userRepo"));System.out.println(container.getBean("userRepo1"));System.out.println(container.getBean("userRepo2"));System.out.println(container.getBean("userRepo3"));}
}
【执行结果】
com.tom.chapter00.beanannotation.repository.RepositoryA@692f203f
com.tom.chapter00.beanannotation.repository.RepositoryA@48f2bd5b
com.tom.chapter00.beanannotation.repository.RepositoryA@7b2bbc3 // 相同
com.tom.chapter00.beanannotation.repository.RepositoryA@7b2bbc3// 相同
com.tom.chapter00.beanannotation.repository.RepositoryA@7b2bbc3// 相同
【BeanNameConfig】
@Configuration
public class BeanNameConfig {@Beanpublic RepositoryA repositoryA1() {return new RepositoryA();}@Bean("userRepo") // 为bean指定1个别名 public RepositoryA repositoryA2() {return new RepositoryA();}@Bean(name = {"userRepo1", "userRepo2", "userRepo3"}) // 为bean指定3个别名public RepositoryA repositoryAWithMultipleName() {return new RepositoryA();}
}
【@Bean注解源码】
@Target({ElementType.METHOD, ElementType.ANNOTATION_TYPE})
@Retention(RetentionPolicy.RUNTIME)
@Documented
public @interface Bean {@AliasFor("name")String[] value() default {};@AliasFor("value")String[] name() default {};boolean autowireCandidate() default true;String initMethod() default "";String destroyMethod() default "(inferred)";
}
【5】所有@Configuration类使用CGLIB进行子类化
1)@Bean标注的方法被调用2次,会有什么效果?
【BeanMoreInfoConfigMain】
public class BeanMoreInfoConfigMain {public static void main(String[] args) {AnnotationConfigApplicationContext container = new AnnotationConfigApplicationContext(BeanMoreInfoConfig.class);System.out.println(container.getBean("userService1", UserService.class).getUserRepository());System.out.println(container.getBean("userService2", UserService.class).getUserRepository());}
}
【打印效果】 调用2次userRepository(), 获取的是同一个UserRepository bean; 为什么? ;
// com.tom.chapter00.config.importannotation.injectdependency.UserRepository@4c583ecf
// com.tom.chapter00.config.importannotation.injectdependency.UserRepository@4c583ecf
【BeanMoreInfoConfig】
@Configuration
public class BeanMoreInfoConfig {@Beanpublic UserService userService1() {return new UserService(userRepository()); // 第1次调用userRepository()}@Beanpublic UserService userService2() {return new UserService(userRepository()); // 第2次调用userRepository()}@Beanpublic UserRepository userRepository() {return new UserRepository();}
}
【5.1】java配置类内部运行原理(重要)
1)由上述可知:调用2次userRepository(), 获取的是同一个UserRepository bean;
- 原理解说:所有 @Configuration类在启动时使用CGLIB子类化。 简单理解是: @Configuration类作为父类,CGLIB通过字节码增强产生一个子类; 在获取bean时,首先子类中子方法会校验缓存中是否存在该bean;若有则直接返回,否则再调用父方法并创建新实例 ;
2)本例的注意点:
- 本例演示的场景是基于单例bean,若bean范围不是单例,则运行原理不同;
- 注意到,为了让java配置的容器可以正常运行,你必须在依赖清单中包含CGLIB jar;
- 由于CGLIB在启动时动态增强了一些功能,所以有一些限制条件;
- @Configuration类不应该是final,否则不能被继承;
- @Configuration类应该有一个无参构造器;
相关文章:
springboot揭秘00-基于java配置的spring容器
文章目录 【README】【1】基本概念:Configuration与Bean【2】使用AnnotationConfigApplicationContext实例化spring容器【2.1】使用java配置简单构建spring容器【2.1.1】AnnotationConfigApplicationContext与Component及JSR-330注解类一起使用 【2.2】使用register…...

docker配置mysql
手动拉取 MySQL 镜像 docker pull mysql 创建并运行 MySQL 容器(docker run) docker run -d \--name mysql \-p 3306:3306 \-e TZAsia/shanghai \-e MYSQL_ROOT_PASSWORD123 \mysql -d:以守护进程(daemon)模式运行…...

说说Dubbo有哪些核心组件?
说说Dubbo有哪些核心组件? 简单来说,就是服务提供者Provider,服务消费者Consumer,服务注册中心Registry,服务监控器Monitor,通信协议Protocol Dubbo 是一款高性能、轻量级的开源 Java RPC 框架࿰…...
视频文件损坏无法播放怎么办?有什么办法可以修复视频吗?
人人都是自媒体的时代,我们已不再满足单纯的图片及声音传播,拍摄短视频的需求日渐增高。但随之也带来了许多问题,比如:拍摄的视频在保存或转移拷贝过程出现问题导致视频文件损坏无法播放。遇到这种情况时怎么办?有什么…...

flutter ios ffi 调试 .a文件 debug可以 release 不行
在 Flutter 中使用 FFI(Foreign Function Interface)时,如果你在调试模式下能够正常工作,而在发布模式下却遇到问题,使用Object-c原生调用可以使用,开启去掉优化也可以,可能的原因在发布模式下&…...

ADB指定进程名称kill进程
adb shell ps | grep <process_name> | awk {print $2} | xargs adb shell killadb shell ps:列出所有正在运行的进程。grep <process_name>:筛选出包含指定进程名称的行。awk ‘{print $2}’:提取输出中的第二列(通常…...
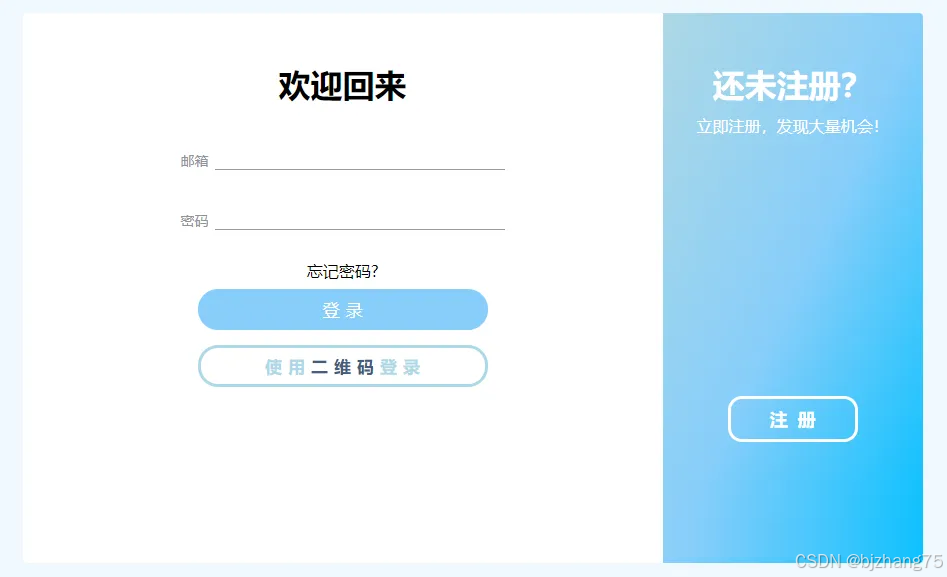
巨好看的登录注册界面源码
展示效果 源码 <!DOCTYPE html> <html lang"en"><head><meta charset"UTF-8" /><meta http-equiv"X-UA-Compatible" content"IEedge" /><meta name"viewport" content"widthdevic…...
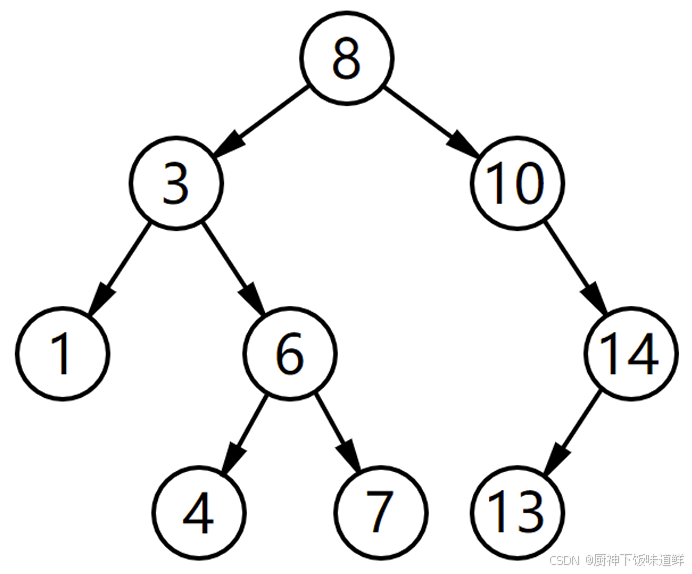
Python 数据结构
1.概念 数据结构是计算机科学中的一个核心概念,它是指数据的组织、管理和存储方式,以及数据元素之间的关系。数据结构通常用于允许高效的数据插入、删除和搜索操作。 数据结构大致分为几大类: 线性结构:数组、链表、栈、队列等…...

计算机网络八股文个人总结
1.TCP/IP模型和OSI模型的区别 在计算机网络中,TCP/IP 模型和 OSI 模型是两个重要的网络协议模型。它们帮助我们理解计算机通信的工作原理。以下是它们的主要区别,以通俗易懂的方式进行解释: 1. 模型层数 OSI 模型:有 7 层&#…...
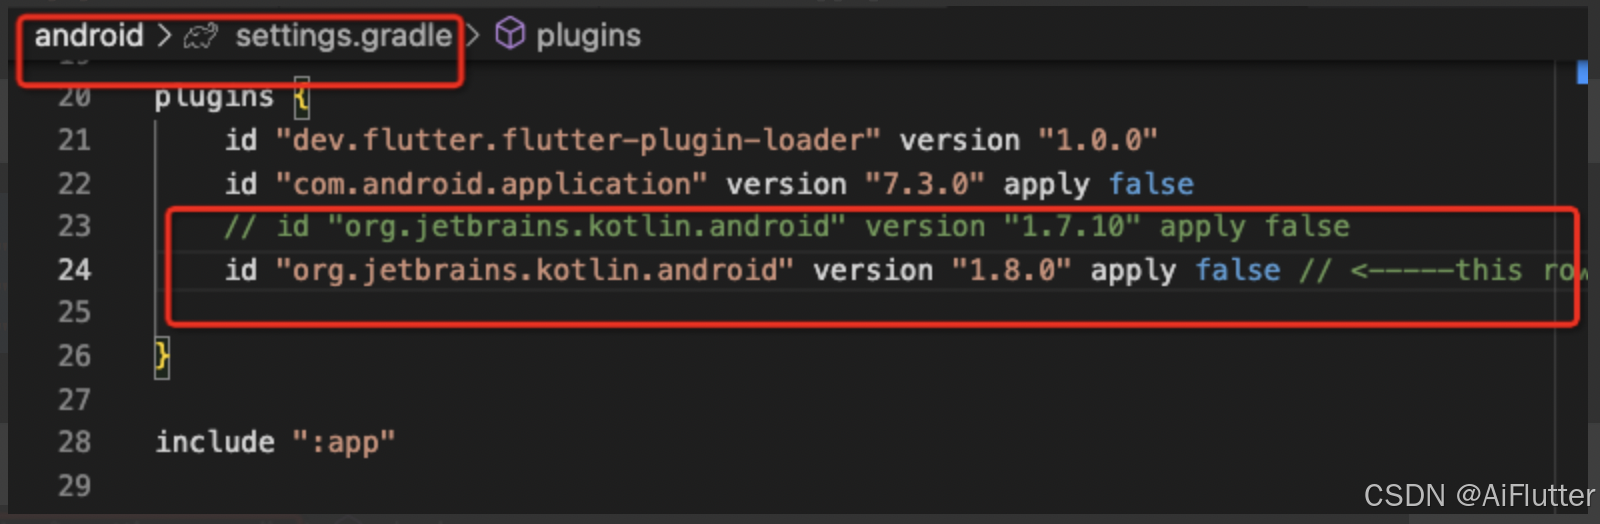
Flutter使用share_plus是提示发现了重复的类
问题描述 我现在下载了share_plus包后发现代码编译不通过,并提示Duplicate class kotlin.collections.jdk8.CollectionsJDK8Kt found in modules jetified-kotlin-stdlib-1.8.22 (org.jetbrains.kotlin:kotlin-stdlib:1.8.22) and jetified-kotlin-stdlib-jdk8-1.7…...

【Linux】编辑器vim 与 编译器gcc/g++
目录 一、编辑器vim: 1、对vim初步理解: 2、vim的模式: 3、进入与退出: 4、vim命令模式下的指令集: 移动光标: 删除: cv: 撤销: 其他: 5、vim底行模…...
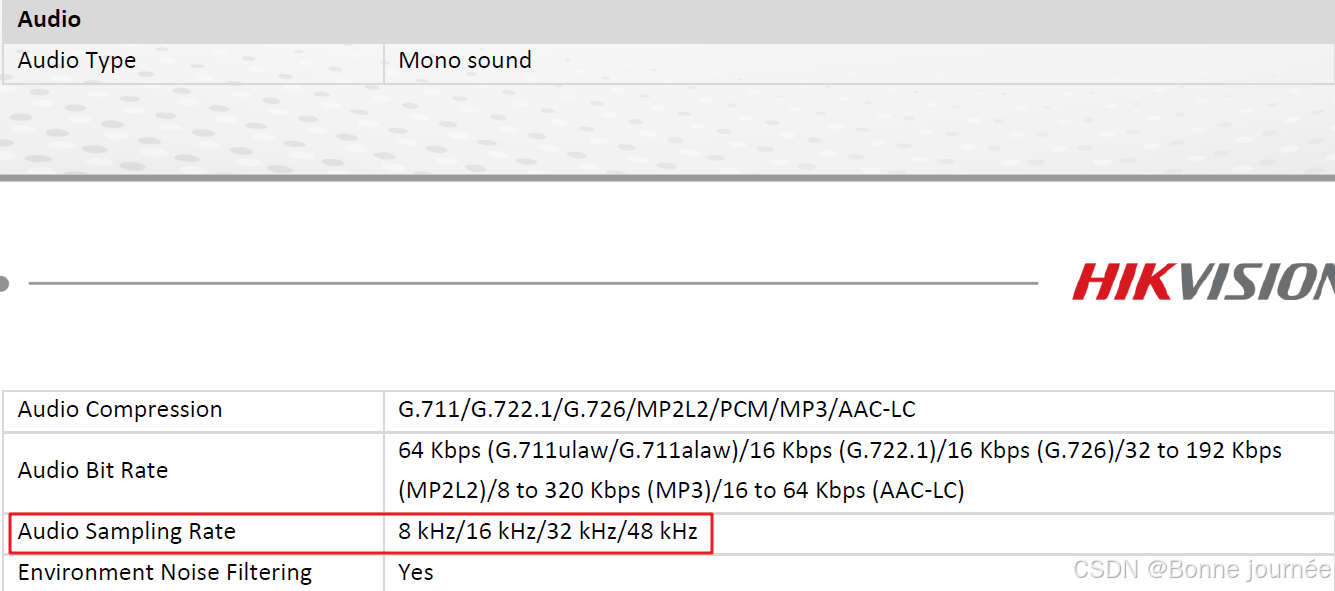
音频中sample rate是什么意思?
sample rate在数字信号处理中,指的是采样频率,即每秒钟从连续信号中抽取的样本数量。采样频率越高,信号的还原度越高,但同时也会增加计算负担和存储需求。 实际应用场景 在音频处理中,设置合适的采样率可以…...
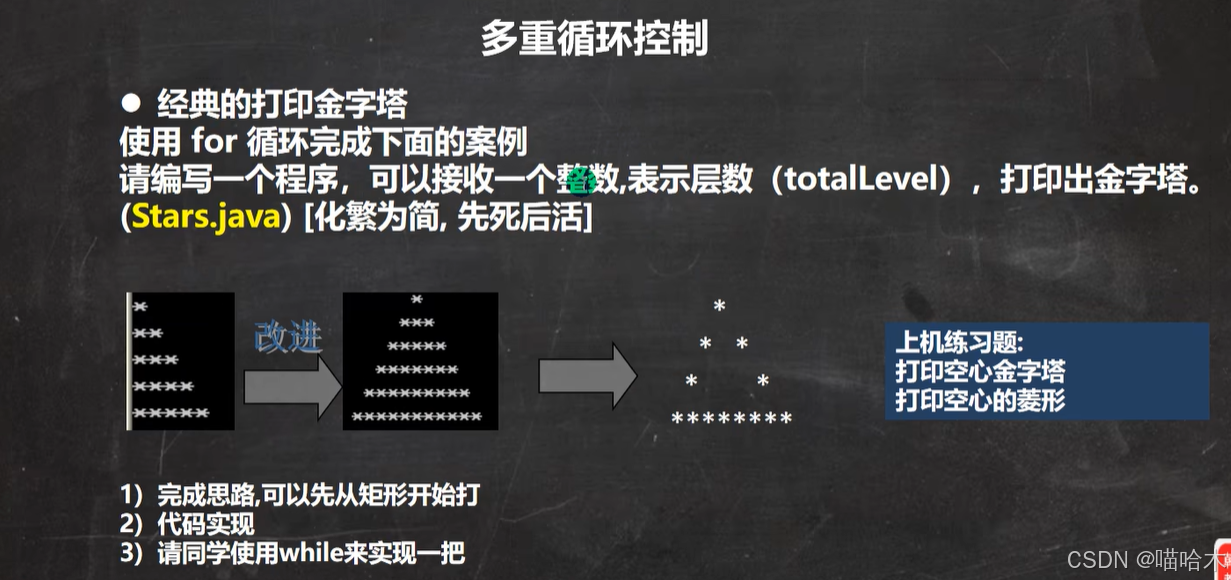
Java思想
学习韩老师的java课程 一步一步拆解需求,先写死的再写活的 首先我只是写了个输出一个*的程序 然后写了输出靠墙的1到n,n排n个的*符号输出程序 再写了加入空格的实心金字塔程序,最后写了这个镂空的金字塔 一下就是成品 import java.util.Sc…...

演练纪实丨 同创永益圆满完成10月份灾备切换演练支持
2024年10月,同创永益共支持5家客户圆满完成灾备切换演练,共涉及70多套核心系统总切换与回切步骤6000余个,成功率100%,RTO时长均达到客户要求。 其中耗时最短的一次演练仅花费约3个小时,共涉及32套系统的灾备切换演练&a…...
:网络概述)
UE Mutiplayer(1):网络概述
文章目录 一、Replication二、基本网络概念2.1 网络模式和服务器类型2.2 Actor复制2.3 网络角色和授权2.4 客户端拥有权2.5 相关性和优先级 三、变量复制四、远程过程调用(RPC) 一、Replication 在虚幻引擎中,在客户端与服务器间同步数据和调用程序的过程被称为复制…...

【SQL Server】中关于 COUNT 的一些使用方式区别
前言 使用 SQL Server时,对表或查询结果计算行数是一种常见的操作。了解一些使用 COUNT(*)、COUNT(1) 和 DISTINCT COUNT等的区别对于编写经过优化的高效查询至关重要。本文我们一起探讨这些使用COUNT方式,了解它们的差异与使用。 方式差异 1、COUNT(…...

第5关:主合取范式
任务描述 编程要求 输入 输出 输入样例 输出样例 任务描述 本关任务:求公式(p∨q)→r的主合取范式。 编程要求 根据提示,在右侧编辑器补充代码,计算并输出公式(p∨q)→r的主合取范式 输入 本题无输入。 输出 在单独的一行中输出公式的主合…...

vscode摸鱼学习插件开发
不知道大家在摸鱼的时候,会不会想要学习? 或者有没有考公人,下班要学习的? 上班时间摸鱼,下班时间不够学习? 为此,我决定开发一个vscode插件,来刷粉笔题 粉笔插件名称:…...

多线程编程与并发控制缓存策略负载均衡数据库优化
本人详解 作者:王文峰,参加过 CSDN 2020年度博客之星,《Java王大师王天师》 公众号:JAVA开发王大师,专注于天道酬勤的 Java 开发问题中国国学、传统文化和代码爱好者的程序人生,期待你的关注和支持!本人外号:神秘小峯 山峯 转载说明:务必注明来源(注明:作者:王文峰…...

Gradio DataFrame分页功能详解:从入门到实战
Gradio DataFrame分页功能详解:从入门到实战 1. 引言2. 为什么需要分页?3. 环境准备4. 基础知识准备5. 代码实现5.1 创建示例数据5.2 分页状态管理5.3 分页核心逻辑5.4 创建Gradio界面 6. 关键功能解析6.1 页码计算6.2 数据切片 7. 使用示例8. 实用技巧9…...

日志分析 Elasticsearch 和 logstach.filebeat.
一、Elasticsearch 到底是啥?简单说,ES 就是一个能飞速搜索和分析海量数据的搜索引擎。类似百度、谷歌,但它是给你公司内部的数据用的。比如:淘宝搜商品,输入“手机 拍照好”,毫秒级给你结果——背后就是 E…...

避坑指南:STM32 HAL库SPI读写W25Q64时,你可能遇到的时序问题和调试技巧
STM32 HAL库SPI驱动W25Q64实战:时序陷阱与波形诊断全解析 当你的SPI Flash突然开始"装聋作哑",返回的不是预期数据而是清一色的0xFF或0x00时,这往往不是芯片的罢工抗议,而是时序对话中的"鸡同鸭讲"。本文将带…...
Pixelle-Video:AI短视频创作革命,零基础也能成为视频制作达人
Pixelle-Video:AI短视频创作革命,零基础也能成为视频制作达人 【免费下载链接】Pixelle-Video 🚀 AI 全自动短视频引擎 | AI Fully Automated Short Video Engine 项目地址: https://gitcode.com/GitHub_Trending/pi/Pixelle-Video 还…...

嵌入式存储优化实战:如何为你的AUTOSAR FEE模块选择合适的FeeMainFunctionPeriod与FeeMaxBytesPerCycle?
嵌入式存储优化实战:AUTOSAR FEE模块参数配置与性能调优 在汽车电子控制单元(ECU)的开发中,存储管理一直是影响系统性能和可靠性的关键因素。AUTOSAR的Flash EEPROM Emulation(FEE)模块作为非易失性数据存储…...

租房避坑|在成都,我从“凑合住”到“安心住”经历了什么
姐妹们,千万别被“凤凰大街包租”几个字骗了!我的真实租房血泪史是不是最近总刷到那种“凤凰大街包租”“拎包入住”的宣传?说实话,刚来成都那会儿,我也被这些词儿晃花了眼。想着省心省力,结果踩的坑一个接…...

北京UPS不间断电源经销商推荐名录
一、推荐公司概览中伟博信(北京)电子科技有限公司山特电子(深圳)有限公司北京办事处施耐德电气(中国)有限公司北京分公司科华数据股份有限公司北京分公司深圳科士达科技股份有限公司北京子公司二、北京地区…...

BepInEx:为你的游戏开启无限可能的插件框架指南
BepInEx:为你的游戏开启无限可能的插件框架指南 【免费下载链接】BepInEx Unity / XNA game patcher and plugin framework 项目地址: https://gitcode.com/GitHub_Trending/be/BepInEx 你是否曾经想过为心爱的游戏添加新功能,或者修改一些游戏机…...
)
定义查询≠复制粘贴:Perplexity定义功能的稀缺性使用手册(仅限前500名深度用户验证的6条黄金规则)
更多请点击: https://intelliparadigm.com 第一章:定义查询≠复制粘贴:Perplexity定义功能的本质再认知 Perplexity 的“定义查询”(Define Query)并非对搜索引擎结果的简单抓取与拼接,而是一种基于语义理…...
)
别再只抄datasheet了!TPS5430降压电路PCB布局的5个实战避坑点(附15V转12V/负压案例)
TPS5430降压电路PCB布局的5个实战避坑指南:从理论到15V转12V/负压案例 在硬件设计领域,TPS5430作为一款经典的Buck型DC-DC转换芯片,其性能表现与PCB布局质量密切相关。许多工程师虽然能正确绘制原理图,却在PCB实现阶段因忽视关键…...

5分钟掌握FanControl:Windows风扇控制终极指南,告别噪音与过热烦恼
5分钟掌握FanControl:Windows风扇控制终极指南,告别噪音与过热烦恼 【免费下载链接】FanControl.Releases This is the release repository for Fan Control, a highly customizable fan controlling software for Windows. 项目地址: https://gitcode…...